Download Cookshack 360 Operator`s manual
Transcript
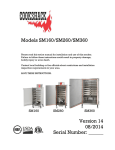
Models SM160/SM260/SM360 Fixed Shelf Smoker Ovens Please read this entire manual for installation and use of these smokers. Failure to follow these instructions could result in property damage, bodily injury or even death. Contact local building or fire officials about restrictions and installation inspection requirements in your area. SAVE THESE INSTRUCTIONS. SM160 SM260 SM360 Version 15.3 03/2015 Serial Number: ______ Purchase Date: ______ 2 Dear Cookshack Customer, Your Cookshack electric smoker will produce great barbecue and smoked foods. It is easy to operate, clean, and maintain. Use this operator’s manual to familiarize yourself with the smoker and its operation. If you have a question or problem not covered in the manual, call us at 1.800.423.0698 Monday through Friday, 9:00 a.m. to 4:00 p.m CST or email us at [email protected]. You can also join the Cookshack Barbecue Forum on our website at www.cookshack.com which has participation by both Cookshack customers and employees. These units are NSF and USDA approved and ETL Listed Commercial Cooking Equipment in both the USA and Canada. You must observe safe operating practices when using these smokers. Cookshack, Inc. assumes no responsibility for results of careless and dangerous operation of Cookshack smokers or other products. All warranties are null and void if the practices described in the Operator’s Manual are not observed. Read the following instructions thoroughly and completely before using your smoker! Observe the instructions carefully. Be certain that you understand completely how it functions before attempting to operate it. This smoker oven is intended for use as a food smoker. It is not intended for any use not specifically described in this manual. Misuse of this smoker can result in serious injury and a fire hazard. With these precautions in mind, enjoy your smoker and the delicious foods it will produce. Stuart Powell President and CEO Cookshack Inc. 2304 N Ash Street Ponca City, OK 74601 Find Cookshack on all your favorite Social Media! Cookshack SM160, SM260 & SM360 Operator’s Manual, V. 15.3 3 Table of Contents General Safety Instructions .................................................................................. 4 Included Equipment................................................................................................. 5 Installation Instructions ........................................................................................ 5 Electrical Specifications ....................................................................................... 6 Location ...................................................................................................................... 6 Venting ........................................................................................................................ 7 Season Your Smoker ............................................................................................... 7 Wood Selection ......................................................................................................... 8 Operating Instructions ........................................................................................... 8 Product Loading Instructions ............................................................................... 9 Control Panel Operation ......................................................................................... 9 Smoke/Cook Mode (3 stage cooking) ........................................................................10 Cook Mode (2 stage cooking) ....................................................................................10 Probe Mode (3 or 2 stage cooking) ............................................................................11 Preset Buttons ...........................................................................................................12 USB Download Instructions .......................................................................................13 Shut Down and Maintenance Procedures ........................................................13 Troubleshooting Guide ..........................................................................................15 Limited Warranty Policy ........................................................................................16 Return Merchandise Policy ..................................................................................17 SM160 Illustration ...................................................................................................19 SM260 Illustration...................................................................................................20 SM360 Illustration ...................................................................................................21 SM160 Wiring Diagram (US) ................................................................................ 22 SM260 Wiring Diagram (US) ................................................................................ 23 SM360 Wiring Diagram (US) ................................................................................ 24 SM160 Wiring Diagram (Export) ......................................................................... 25 SM260 Wiring Diagram (Export) ......................................................................... 26 SM360 Wiring Diagram (Export) ......................................................................... 27 Cookshack SM160, SM260 & SM360 Operator’s Manual, V. 15.3 4 General Safety Instructions This equipment is designed and sold for commercial use only. Only licensed professionals should work on or service this equipment. A MAJOR CAUSE OF OVEN-RELATED FIRES IS FAILURE TO MAINTAIN REQUIRED CLEARANCES (AIR SPACES) TO COMBUSTIBLE MATERIALS. IT IS OF UTMOST IMPORTANCE THAT THIS OVEN BE INSTALLED ONLY IN ACCORDANCE WITH THESE INSTRUCTIONS. Keep the oven free from combustible materials. Never store or use gasoline in the vicinity of this oven. All switches should be in the “OFF” position before plugging into receptacle. Whenever working on, or servicing this unit ALWAYS disconnect the power. This oven is equipped with a 3-prong plug for your protection from shock hazard. Always plug this unit directly into a properly grounded 3-prong receptacle. WARNING! Exterior surfaces may be HOT! Make sure all operating personnel are instructed on the proper use of the oven. Never leave the oven door open while the oven is running. Never use a high-pressure washer around electrical components. Cookshack SM160, SM260 & SM360 Operator’s Manual, V. 15.3 5 Included Equipment Once you have unpackaged your smoker, you should find the following standard equipment: Cookbook Operator’s Manual Wood box and wood box handle Grills o SM160 – 5 grills o SM260 – 6 grills o SM360 – 28 grills Side Racks (set of 2) Spare Heating Element Drip Pan (SM160 and SM260 only) Wood Chunks o SM160 & SM260 – 10 lb. box o SM360 – 20 lb. box Casters (pre-installed) Spice Kit o 1 gal. Spicy Barbecue Sauce o 1 gal. Mild Barbecue Sauce o 5 lbs. Brisket Rub o 5 lbs. Rib Rub o 5 lbs. Spicy Chicken Rub o 10 oz. Chili Mix o 10 oz. Spicy Barbecue Sauce Mix Installation Instructions Local Code Officials and a Commercial Kitchen Ventilation Contractor should be consulted prior to installation to determine the need to obtain a permit. Unit must be installed per state and local fire codes and NFPA 96. WARNING! Unit is very HEAVY, and extra care must be taken when unloading and moving. Stationary installation should be on a level surface. Cookshack SM160, SM260 & SM360 Operator’s Manual, V. 15.3 6 Electrical Specifications SM160 SM260 Single burner system using 120VAC power. Protect with a breaker or fuse rated at 15 amps. Dual burner system using 208/220VAC power. Protect with a receptacle with a NEMA L14-20R pin configuration receptacle with a 208/220 VAC single-phase power supply protected by a 20 amp fuse or circuit breaker. SM360 Four-burner system using 208/220VAC power. Protect with a Hubbell CS369 Receptacle with a 208/220VAC singlephase power supply protected by a 50 amp fuse or circuit breaker. Location Ventilation is required for the proper operation of this unit. Keep the oven free from combustible materials. A good rule of thumb is to allow an 18” clearance space around unit. Minimum spacing from combustible material is 6”; these clearances must be maintained unless materials used are non-combustible. Following is the recommended service spacing: Front - Must have enough room to open door for loading and unloading of product. o SM160- 21” o SM260- 27” o SM360- 48” Side - Must have at least 1” clearance around all sides. Cookshack SM160, SM260 & SM360 Operator’s Manual, V. 15.3 7 Venting A small amount of smoke will escape from the top of the oven and from around the door. Three methods of venting can be used, consult your local authorities to determine which method meets your local codes: 1. The oven can be placed under a Class 2 hood. 2. The oven can be direct vented by suspending a 4” diameter pipe at least 3” above the vent hole on top of the smoker that runs outdoors or to an existing hood. 3. The unit can also be vented by an optional Smokehood from Cookshack. The stainless steel Smokehood incorporates a removable grease filter and an exhaust fan. It mounts directly on top of the smoker and removes the smoke vented during normal cooking. SM160 Smokehood-Cookshack Part Number PA001 SM260 Smokehood-Cookshack Part Number PA002 SM360 Smokehood-Cookshack Part Number PA003 Season Your Smoker The interior of your smoker needs to be “broken in” or seasoned before you cook your first load of meat. Put 2 ounces (1-2 pieces) of your wood chunks inside each wood box and then insert between the heating elements. Never place more than 6 ounces of wood in the SM160 Never place more than 12 ounces of wood in the SM260 Never place more than 48 ounces of wood in the SM360 Do not use your smoker without the wood box inserted in the proper position. Once in the proper position, let the smoker run without meat for a minimum of 4 hours at 225ºF. Cookshack SM160, SM260 & SM360 Operator’s Manual, V. 15.3 8 Wood Selection As you progressively learn how to use your smoker, you will become more comfortable with choosing the amount of wood to place in your smoker. It is wise to start with a small amount of wood at first and then increase as necessary until you have the smoky flavor you prefer. Personal taste dictates the amount of wood you use, and this varies from person to person. Try starting with two ounces of wood on your first smoke and adjust upward if you want more smoke flavor on your next cook. Remember, normally one chunk of wood can weigh anywhere from 2 to 4 ounces. Wood should be used dry. You may use any fruit or nut hardwood in your smoker, as long as it has good flavoring abilities. The most popular woods for smoking are hickory, mesquite, apple and cherry. All of these are available from Cookshack at (800)423-0698. Other regional favorites are alder, beech, pecan, maple, oak, buttonwood and mangrove. Use local woods only if logs are selected and sized properly. Operating Instructions 1. Line the bottom of your smoker with heavy duty aluminum foil. 2. Press through the foil to create a hole corresponding with the drain hole located on the floor of the smoker. 3. Cover the heat shield with heavy duty aluminum foil for easy cleaning. 4. Position the pan (provided with the SM160 and SM260) beneath the drain hole under the smoker as well as under the trough drain hole located at the front of the smoker. 5. Insert the wood-filled wood box into its proper position. 6. Do not change the wood box’s position during the cooking cycle. The wood box covers the burner and protects it from grease dripping onto the heat source. Cookshack SM160, SM260 & SM360 Operator’s Manual, V. 15.3 9 Product Loading Instructions 1. The maximum cooking capacity per load of your electric smoker is as follows: SM160 SM260 SM360 Pork Butts 120 lbs. 240 lbs. 550 lbs. Briskets 100 lbs. 200 lbs. 500 lbs. Ribs 50 lbs. 100 lbs. 270 lbs. Chickens 20 whole 40 whole 100 whole 2. Keep meat approximately 1’’ from all oven walls at all times. 3. Load less meat on the bottom grill to ensure air flow to the top of the cabinet. 4. Close door and latch securely and ensure all latches are closed. Do not overload your smoker. We recommend that on your first smoke you only fill your smoker half full and monitor periodically until you have a better idea of how long it will take to cook the meat properly. Control Panel Operation Recommended cooking times and temperatures are based on full loads with no holding cycle. Larger or smaller loads or the addition of holding time may require adjustment of cooking time and temperature. When you think the product is finished, turn the Master Switch to the OFF position. Wait ten minutes before opening the oven door to check the product for doneness. Cookshack SM160, SM260 & SM360 Operator’s Manual, V. 15.3 10 When the product is done to your satisfaction, remove from the smoker. An audible signal indicates that the cook cycle is complete and that the oven is going to the Hold Temperature Mode. In order to see the set smoking temperature, cooking temperature, probe temperature or holding temperature, briefly press the corresponding button, set temperature and press “OK.” Smoke/Cook Mode (3 stage cooking) SMOKE/COOK MODE is for standard operation and is the default mode. In SMOKE/COOK MODE the oven will cook at the set smoking temperature for the set smoking time, then will cook at the set cooking temperature for the set cooking time. At that point, the controller will change to the set holding temperature and remain there until the unit is manually shut down. 1. Press the Power Button on the oven control panel. 2. Set smoking time by pressing the SMOKE button and use the UP or DOWN arrows to change smoke time setting. 3. Press OK. 4. Set smoking temperature by using the UP or DOWN arrows to change smoke temperature setting. 5. Press OK. 6. Set cooking time by pressing the COOK button and use the UP or DOWN arrows to change cook time setting. 7. Press OK. 8. Set cooking temperature by using the UP or DOWN arrows to change cook temperature setting. 9. Press OK. 10. Set holding temperature by pressing and holding the HOLD button and use the UP or DOWN arrows to change hold temperature setting. 11. Press OK. 12. Press START. PLEASE NOTE: The oven temperature displayed while the oven is running is the actual air temperature inside the oven. Cook Mode (2 stage cooking) In COOK MODE the oven will cook at the set cooking temperature for the set cooking time. At that point, the controller will change to the set holding temperature and remain there until the unit is manually shut down. 1. Press the Power Button on the oven control panel. Cookshack SM160, SM260 & SM360 Operator’s Manual, V. 15.3 11 2. Set smoking time by pressing the SMOKE button and use the UP or DOWN arrows to change smoke time to 00:00. 3. Press OK. 4. Set cooking time by pressing the COOK button and use the UP or DOWN arrows to change cook time setting. 5. Press OK. 6. Set cooking temperature by using the UP or DOWN arrows to change cook temperature setting. 7. Press OK. 8. Set holding temperature by pressing and holding the HOLD button and use the UP or DOWN arrows to change hold temperature setting. 9. Press OK. 10. Press START. PLEASE NOTE: The oven temperature displayed while the oven is running is the actual air temperature inside the oven. Probe Mode (3 or 2 stage cooking) PROBE MODE is used when cooking with the optional meat probe. In PROBE MODE the oven will cook at the set smoking time and temperature then cook at the cooking temperature until the internal temperature of the meat reaches the temperature at which the probe is set. At that point, the controller will change to the set holding temperature and remain there until the unit is manually shut down. 1. Connect the two-pin plug with twist lock into the meat probe connector on the control panel. 2. Place the probe end through the door seal and insert probe into the largest piece of meat in the smoker oven. 3. Turn on the Power Button. 4. Choose PROBE MODE by pressing the PROBE button and use the UP or DOWN arrows until the digital controller says “YES.” 5. Press OK. 6. Set PROBE meat temperature using the UP or DOWN arrows. 7. Press OK. 8. If desired, set smoking time by pressing the COOK button and use the UP or DOWN arrows to change settings or use the UP or DOWN arrows until the time reads 00:00. 9. Press OK. 10. If desired, set smoking temperature by using the UP or DOWN arrows to change settings or use the UP or DOWN arrows to set the smoke temperature to 0. Cookshack SM160, SM260 & SM360 Operator’s Manual, V. 15.3 12 11. Press OK. 12. Set cooking time by pressing the COOK button and use the UP or DOWN arrows to change settings. 13. Press OK. 14. Set cooking temperature by using the UP or DOWN arrows to change settings. 15. Press OK. 16. Set holding temperature by pressing and holding the HOLD button and use the UP or DOWN arrows to change settings. 17. Press OK. 18. Press START. PLEASE NOTES: The probe temperature displayed is the internal temperature of the product. Preset Buttons The IQ5 controller is equipped with 8 “PRESET BUTTONS” for easy selection of common settings for popular foods. Pressing each of the pre-set buttons will put the smoker in the following cycles: Pre-Set # 1 Description Brisket Hours 4 10 Cycle Smoke Cook Hold Temp 180°F 225°F 140°F 2 Pulled Pork 6 8 Smoke Cook Hold 180°F 250°F 140°F 3 Slab Ribs 1 4 Smoke Cook Hold 180°F 250°F 140°F 4 St. Louis Ribs 1 3 Smoke Cook Hold 180°F 250°F 140°F 5 Baby Back Ribs 1 2 Smoke Cook Hold 180°F 250°F 140°F 6 Sides of Salmon 1 Smoke 140°F Cookshack SM160, SM260 & SM360 Operator’s Manual, V. 15.3 13 2 Cook Hold 190°F 140°F Smoke Cook Hold 140°F 180°F 140°F 7 Sausage 1” Casing 1 2 8 Prime Rib 2 2 Smoke 180°F Cook 250°F Hold 140°F Once one of these preset buttons has been pushed you may start a cook cycle using these settings by simply pressing “START.” All pre-sets are also programmable. To set a preset button to your own preferences, make all settings as desired following the steps listed for each Mode Setting. Once your settings have been made hold the pre-set button down for 5 seconds to save the settings. USB Download Instructions With the IQ5 controller, you have the option to download your smoking, cooking and holding logs to a FAT formatted USB flash drive. The IQ5 Controller will hold 1023 cycles which is 512 hours of cook time. To use this feature, while the smoker is on: Plug in your flash drive to the USB port. Press and hold the USB DATA button until the digital controller reads “Filed Saved.” It will then ask “Do you want to clear log?” Press the UP or DOWN arrow until the controller reads “Yes” (The smoker will clear your log as it runs out of memory. Clearing your log will stop the accidental loss of data). Press OK. See Figure 2 for example download. Figure 2 – This is what your download of information will look like. Column A is the current Cook Cycle. Column B is Oven Temperature. Column C is Probe Temperature. Cookshack SM160, SM260 & SM360 Operator’s Manual, V. 15.3 14 Shut Down and Maintenance Procedures Follow the list of shut down procedures listed: 1. Turn oven to the off position and then unplug smoker from the outlet. 2. Allow oven to cool. 3. After allowing the oven to cool, carefully remove the wood box from the oven and douse the contents with water. NOTE: Failure to follow the shutdown procedure instructions may result in a fire hazard! Follow the list of cleanup procedures listed: ALWAYS DISCONNECT THE OVEN FROM ITS ELECTRICAL SUPPLY BEFORE CLEANING OR SERVICING. 1. Disconnect oven from power supply. 2. Allow the oven to cool. 3. Remove the grills and racks; Scrape and wash with soap and water (the racks and grills can go into the dishwasher, however do not use any caustic oven cleaners as they will destroy the plating on the grills). 4. Remove wood and ash remnants by discarding the aluminum foil covering (douse wood with water before discarding). 5. Remove all grease from interior of oven, using paper towel or cloths (once again, do not use caustic cleaners on the inside of smoker as this will damage the heating element, but if you use oven cleaners, make sure liquid does not come into contact with the heating element). 6. Empty or remove drippings from drip pan. 7. Scrape loose grease and scale from walls with a plastic flat edge scraper. 8. Replace racks and grills. o Bottom of oven must be kept clean. Change foil in bottom of oven and from top of wood box after each cooking and remove all excess grease from interior of oven. Be sure that drain hole is open at all times. If drain becomes plugged, oven bottom can fill with grease and a fire hazard may occur. Follow these maintenance procedures: 1. Periodically check electrical plug and wire for any wear or damage. 2. Twice annually put two drops of lightweight oil on the hinge pins to prevent binding. 3. Check casters for free movement. Cookshack SM160, SM260 & SM360 Operator’s Manual, V. 15.3 15 Troubleshooting Guide This is an initial guide for troubleshooting. If any of the following steps do not correct your issue, contact Cookshack Customer Service at 1.800.423.0698. Trouble Uneven Cooking Probable Cause Improper meat loading Solution See Loading Instructions Strong grease fume or “charcoal” flavor Excessively dirty oven See Shut Down and Maintenance Instructions Meat sticks to lower grill Heavy “blanket” loading Load with ample room for upward passage of heat Smoke is coming from the top of the door This is normal No need to change Product gets too done on the bottom grill; product on top grills is raw or underdone Improper loading Load lighter at the bottom for efficient heat and smoke circulation Door alarm sounds when door is closed Door Closed Switch Dirty Clean door switch. Poultry is too dark or skin is bitter; Fish is too dark Dry product Too much wood Use less wood Oven humidity is too low Increase, heat decrease time Cook with fattier product Use a Cookshack Flavor Reservoir (Part PM015) Cookshack SM160, SM260 & SM360 Operator’s Manual, V. 15.3 16 Limited Warranty Policy Cookshack Smoker Ovens are guaranteed to be free from defects in material and workmanship under normal use and when installed in accordance with factory recommendations. This limited warranty includes parts and labor for the first 90 days. Following the 90 day period, the two (2) year limited warranty is for parts only. Cookshack, Inc.’s obligation under this warranty shall be to repair or replace at its option any part deemed defective upon examination by Cookshack, Inc., or its authorized agent, for a period of two (2) years from the date of sale. Customer must obtain approval from Cookshack, Inc. before performing any service. Cookshack, Inc. is not responsible for any unauthorized service work. 1. The Limited Warranty extends to the original purchaser only. 2. To make claim or request for the Limited Warranty, the original purchaser must notify Cookshack, Inc. Customer Service for instructions as to the repair or replacement of the defective merchandise prior to attempting or contracting for repair of the oven. (See following page for Return Merchandise Policies). 3. The model number and serial number of the Cookshack Smoker Oven must accompany any request for service to the oven. 4. The Limited Warranty shall not apply if the merchandise has been improperly installed; damaged due to abuse, misuse, misapplication, accident; or as a result of service or modification by any other than an authorized Cookshack, Inc. service agent. There are no express warranties other than the limited warranty stated herein above. No warranties whether express or implied, including, but not limited to, any implied warranties of merchantability of fitness for a particular purpose, shall extend beyond the respective warranty periods described above. Cookshack, Inc. shall not be liable for any direct, indirect, special, consequential, incidental, or punitive damages; lost profits or loss of use or interruption of business regardless of the form of action or theory of liability resulting from any defect in or use of the Cookshack smoker oven, accessories and/or heating elements. Additional information on obtaining service under this Limited Warranty is available on the following page or by contacting a Cookshack, Inc. Customer Service Representative directly at (800)423-0698. Cookshack SM160, SM260 & SM360 Operator’s Manual, V. 15.3 17 Return Merchandise Policy If you have merchandise that you believe is defective and requires repair or replacement: 1. Call Cookshack, Inc. at (800)423-0698. Ask to speak to a Customer Service Representative. Have your Smoker Oven model number and serial number ready. If you are advised to return the merchandise to the factory for repair or replacement, please observe the following procedures. 2. You will be issued a return number. A Customer Service Representative will issue you a return number and/or mail you an instruction form (called a Return Merchandise Authorization) for returning the merchandise with the return number on it. All return merchandise must have a return number. Do not return merchandise without a return number. 3. Attach the return number to the merchandise. If you were sent a Return Merchandise Authorization, attach it to the merchandise you are returning. If you were issued an RETURN NUMBER by phone and not sent a Return Merchandise Authorization, attach a note to the merchandise with your name, address and RETURN NUMBER. Print the RETURN NUMBER on the outside of the return packaging. 4. Ship the merchandise back to Cookshack. Return the merchandise to Cookshack, Inc., shipping prepaid, F.O.B. destination, in the original container or equivalent. All return merchandise must be shipped to: Cookshack, Inc., 2304 N. Ash St., Ponca City, OK, 74601. You assume the risk of any loss or damage that occurs during transit due to improper packaging of the returned merchandise. Use the original container that the merchandise was shipped in or equivalent. 5. Repair or replacement of merchandise under warranty. Replacement or repairing defective merchandise is at Cookshack, Inc.'s option. Cookshack SM160, SM260 & SM360 Operator’s Manual, V. 15.3 18 If repair of merchandise is deemed necessary by Cookshack, Inc. you will be instructed as to the necessary arrangements in order to affect the repair of the merchandise. If replacement merchandise is deemed necessary by Cookshack, Inc. you will be invoiced for the replacement merchandise upon shipment. Credit for merchandise under warranty deemed to be defective by Cookshack, Inc. will be issued upon return of the defective merchandise. Credit may be denied if the returned merchandise is not found to be defective by Cookshack, Inc.; if it is not under warranty; if it is not received at Cookshack, Inc. 30 days after your RETURN NUMBER is issued; if it is damaged due to abuse, misuse, misapplication or accident; if it has been serviced or modified by any other than an authorized Cookshack, Inc. service agent; is not returned with an RETURN NUMBER; is not in clean condition; is not complete; is damaged or lost in transit. Replacement merchandise is sent to you via UPS Ground or common carrier. If you request replacement merchandise to be sent by faster service than UPS Ground or common carrier you shall incur the cost of shipping. Cookshack SM160, SM260 & SM360 Operator’s Manual, V. 15.3 19 SM160 Illustration Inside panel Control board PV693 Meat Probe Jack PV521 Meat Probe Jack Cover PV523 Keypad Label LA153 Power Cord PV461 Probe PV718 Limit Switch PV551 Vent Assy. PV146 Door Switch PV366 Latch PV169 Side Rack PM024 Grill PV012 (1) Woodbox PM305 Seal Kit PA220 (1) Element PV320 (4) Casters Front PV171 Drip Pan PV701 Cookshack SM160, SM260 & SM360 Operator’s Manual, V. 15.3 20 SM260 Illustration Inside Back Panel Power Cord PV462 5ft Plug PV482 Probe PV718 Keypad Label LA153 Switch PV696 Probe Jack PV521 Probe Jack Cover PV523 Door Switch PV366 Latch PV169 Grill PV013 Limit Switch PV551 Side Rack PM025 (2) Woodbox PM305 (2) Element PV325 Seal Kit PA230 (4) Casters Front PV175 Drip Pan PV702 Cookshack SM160, SM260 & SM360 Operator’s Manual, V. 15.3 21 SM360 Illustration Keypad label LA153 Probe Jack PV521 Probe Jack Cover PV523 Transformer PV625 Limit Switch PV551 Latch PV169 Probe PV718 Grill PV012 Side Racks PM026 (2) Woodbox PM306 Seal Kit PA232 (4) Element PV325 (4) Casters Front PV175 Cookshack SM160, SM260 & SM360 Operator’s Manual, V. 15.3 MODELSM2 6 0I Q52 2 0 VOLTWI RI NGDI AGRAM MODELSM360I Q5220VOLTWI RI NGDI AGRAM


