1
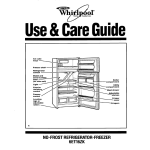
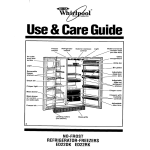
Use& CareGuide
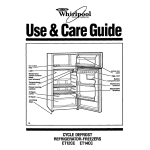
Ice cube
trays and
shelves
number
Removable
freezer
shelf
Freezer light
(3ET22DK and
3ET22RK)
Freezer
shelf
label
Adjustable
door bins
II I III1
Deep door
bin “bit
adjustable
3ET22FfK)
Leveling rollers
(behind base grille)
Base grille
IX
NO-FROST
REFRIGERATOR-FREEZERS
3ET22DK 3ET22RK 6ET20RK
s-sa
Contents
Page
Important Safety Instructions.. ........................ .3
Before Using Your Refrigerator.. ..................... .4
Using Your Refrigerator .................................. 5
.5
Setting the controls ........................................
Changing the control settings.. ....................... .5
Exterior moisture control ................................ .6
Adjusting the refrigerator shelves.. ................. .6
Removing the freezer shelf ............................. 6
Adjusting the shelf and bin glides .................. .6
Adjusting the door bins .................................. .7
Removing the crispers and crisper cover ....... .
Adjusting the crisper humidity control ........... .7
Removing the meat drawer and cover .......... .8
Changing the light bulbs ................................ .8
Removing the base grille ............................... .9
Reversing the door swing ............................... 9
Ice compartment door .................................... 9
.9
Ice cube trays ................................................
Sounds you may hear ................................... 10
10
Energy saving tips .........................................
Cleaning Your Refrigerator ............................. 1 1
Food Storage Guide ...................................... 12
Storing fresh food ..........................................
Storing frozen food .......................................
12
.I2
Caring For Your Refrigerator.. ....................... .I3
Holiday and moving care ...............................
Power interruptions .......................................
13
13
If You Need Service Or Assistance ............. .14
Whirlpool Refrigerator Warranty .................. 16
0 1992 Whirlpool Corporation
Remove the consumer Buy Guide Label, tape
and any inside labels (except model and serial
number label) before using the refrigerator.
To remove any remaining glue:
l
Rub briskly with thumb to make a ball, then
remove.
OR
Soak area with liquid hand dishwashing
detergent before removing glue as described
above. Do not use sharp instruments, rubbing
alcohol, flammable fluids or abrasive cleaners.
These can damage the material. See “Important
Safety Instructions” on page 3.
NOTE: Do not remove any permanent instruction
labels inside your refrigerator. Do not remove the
Tech Sheet fastened under the refrigerator at the
front.
l
Thank you for buying a Whirlpool appliance.
Please complete the form below. Have this
information ready if you need service or call with
a question.
l Copy model and serial numbers from label (see
diagram on front cover) and purchase date from
sales slip.
l Keep this book and sales slip together
in a
handy place.
Model Number
Serial Number
Purchase Date
Service Company Phone Number
-8
ImportantSafetyInstructions
To reduce the risk of fire, electrical shock or injury when using your
refrigerator, follow basic precautions including the following:
Read all instructions before using the
refrigerator.
l Child entrapment
and suffocation are not
problems of the past. Junked or abandoned refrigerators are still dangerous ...
even if they will “just sit in the garage a
few days.”
If you are getting rid of your old refrigerator, do it safely. Please read the enclosed
safety booklet from the Association of
Home Appliance Manufacturers. Help
prevent accidents.
l Never allow children
to operate, play with,
or crawl inside the refrigerator.
l Never clean refrigerator
parts with flammable fluids. The fumes can create a fire
hazard or explosion.
l FOR YOUR SAFETY l
DO NOT STORE OR USE GASOLINE OR
OTHER FLAMMABLE VAPORS AND
LIQUIDS IN THE VICINITY OF THIS OR ANY
OTHER APPLIANCE. THE FUMES CAN
CREATE A FIRE HAZARD OR EXPLOSION.
l
It is your responsibility
refrigerator:
to be sure your
. is installed and leveled on a floor that will
hold the weight, and in an area suitable for its
size and use.
l is connected
only to the proper kind of outlet,
with the correct electrical supply and grounding.
l is used only to do what home refrigerators
are designed to do.
l is not near an oven, radiator or other heat
source.
l is properly
maintained.
l is out of the weather.
l is used in an area where the room temperature will not fall below 13°C (55°F).
l is not used by anyone
unable to operate it
properly.
l is not loaded with food before it has time to
get properly cold.
- SAVE THESE INSTRUCTIONS -
-.
BeforeUsingYourRefrigerator
Clean
it
Clean your refrigerator before using it. See
cleaning instructions on page 11.
Plug
it in
Recommended
Grounding
Method
A 220 or 240 Volt, 50 Hz., AC only 15 or 20
ampere fused and properly grounded electrical
supply is required. It is recommended that a
separate circuit serving only this appliance be
provided. Use a receptacle which cannot be
turned off with a switch or pull chain. Do not use
an extension cord.
Install
properly
1. Allow 1.25 cm (% inch) space on each side
and at the top of the refrigerator for ease of
installation.
2. If the refrigerator is to be against a wall, you
might want to leave extra space on the hinge
side closest to the wall so the door can be
opened wider.
3. The refrigerator back can be flush against the
wall.
Level
Right to raise;
left to lower
Use screwdriver
Front
Leveling
kxrew
1.
2.
3.
4.
5.
refrigerator-freezer
Remove the base grille. (See page 9.)
To raise front, turn screw in direction shown.
To lower front, turn screw in direction shown.
Check with level.
Replace base grille. (See page 9.)
UsingYourRefrigerator
Setting the controls
Controls for the refrigerator and freezer are in
the refrigerator. To adjust a control, turn knob.
When the refrigerator is plugged in for the first
time:
1. Set the refrigerator Control to 4.
2. Set the Freezer Control to C.
Give the refrigerator time to cool down completely before adding food. (This may take
several hours.)
These settings should be right for normal
household refrigerator usage.
The controls will be set about right when milk
or juice is as cold as you like and when ice
cream is firm.
Refrigerator Control adjustments range from
1 to 8. Freezer Control adjustments range from
Ato D.
Changing the control settings
If you need to adjust temperatures in refrigerator
or freezer, use the settings listed in the chart
below as a guide.
. Adjust the Refrigerator Control first.
l Wait at least 24 hours between
adjustments.
l Then adjust the Freezer Control if needed.
RECOMMENDED
CONTROL SElTINGS:
CONDITION:
REASON:
If Refrigerator
Section is
TOO WARM
Door opened often
Large amount of food added
Room temperature too warm
Refrigerator
Freezer
6
D
If Freezer
Section is
TOO WARM
Door opened often
Large amount of food added
Very cold room temperature
(can’t cycle often enough)
Refrigerator
Freezer
4
A
If Refrigerator
Section is
TOO COLD
Controls not set correctly
for your conditions
Refrigerator
Freezer
If ICE isn’t
MADE FAST
ENOUGH
Heavy ice usage
Very cold room temperature
(can’t cycle often enough)
Refrigerator
Freezer
If BOTH
SECTIONS
are TOO WARM
Door opened often
Large amount of food added
Very warm or very cold room
temperatures
Refrigerator
Freezer
6
C
Using Your Refrigerator
Continued
Exterior moisture control
The Exterior Moisture Control on the Control
Console operates electric heaters around the
door openings. These heaters help keep
moisture from forming on the outside of the
refrigerator.
1. Use the OFF setting when humidity is low.
2. Use the ON setting if moisture forms on the
outside of the refrigerator.
Adjusting the refrigerator shelves
Shelves can be adjusted to match the way you
use your refrigerator. Glass shelves are strong
enough to hold bottles, milk and other heavy
food items.
Glass shelves
careful.
To remove shelves:
1. Remove items from shelf.
2. Tilt up at front.
3. Lift up at back.
4. Pull shelf straight out.
To replace shelves:
1. Guide the rear hooks into the slots in the shelf
supports.
2. Tilt up front of shelf until hooks drop into slots.
Lower front of shelf to level position.
Removing the freezer shelf
To remove shelf:
1. Lift front slightly.
I
Lift the front,
then the back.
2. Lift back off supports.
3. Replace in reverse order.
Adjusting the shelf and bin glides
Slide glide
along track.
6
The shelf or bin glides can be used to secure odd
shaped items or to separate other items.
1. Grasp glide.
2. Slide glide along track.
Shelf glides cannot be removed.
SUPPO
button
Adjusting the door bins
To remove:
1. Lift bin up.
2. Pull bin straight out.
To replace:
1. Slide bin in above desired support button.
2. Push bin down until it stops.
Pull out to the
stop, liff the
front and
pull again.
Lift the cover
front, then
the back.
Removing the crispers and crisper cover
To remove the crispers:
1. Slide crisper straight out to the stop.
2. Lift the front.
3. Slide out the rest of the way.
4. Replace in reverse order.
To remove the cover:
1. Push up glass insert from bottom, then slide
out with both hands.
2. Lift front of cover frame.
3. Lift out cover frame by pulling up and out.
4. Remove metal cover support.
To replace the cover:
1. Replace metal cover support on wall supports
in front section of cabinet.
2. Fit back of cover frame into notch supports on
walls of refrigerator, then lower into place.
3. Slide back of glass insert into place, then
lower front.
Adjusting the crisper humidity control
You can control the amount of humidity in the
moisture-sealed crisper.
. The control can be adjusted to any setting
between LOW and HIGH.
. LOW (open) lets moist air out of the crisper for
best storage of fruits and vegetables with skins.
l
HIGH (closed) keeps moist air in the crisper for
best storage of fresh, leafy vegetables.
-.
Using Your Refrigerator
Contmued
Pull out to the stop, lift
the front and pull again.
Glass is heavy.
Be careful.
Removing the meat drawer and cover
remove the meat drawer:
To
1. Slide the meat drawer out to the stop.
2. Lift the front.
3. Slide the drawer out the rest of the way.
4. Replace in reverse order.
remove the cover:
1. Tilt front of cover up, lift at back, and pull
To
straight out.
2. Replace in reverse order.
Changing the light bulbs
Electrical Shock Hazard
Before removing a light bulb, either unplug
the refrigerator or disconnect the electricity
leading to the refrigerator at the main
power supply. Failure to do so could result
in electrical shock or personal injury.
To change refrigerator light:
1.
2.
3.
4.
5.
Disconnect refrigerator from power supply.
Reach behind Control Console to find bulbs.
Remove bulb.
Replace with a 40-watt appliance bulb.
Reconnect power supply.
To change freezer light:
1. Disconnect refrigerator from power supply.
2.
3.
4.
5.
Push in sides of light shield
Replace bulb with a 25-watt
Replace light shield.
Reconnect power supply.
NOTE: Not all appliance bulbs
refrigerator. Be sure to replace
the same size and shape.
until it snaps free.
appliance bulb.
will fit your
bulb with one of
Removing the base grille
To remove the grille:
1. Open the freezer door.
ondenser coils
2. Pull grille out.
3. Do not remove Tech Sheet fastened behind
grille.
To replace grille:
1. Line up grille support tabs with metal clips.
2. Push firmly to snap into place.
3. Close the door.
See cleaning instructions for defrost pan and
condenser coils on page 11.
Reversing the door swing
You can change the hinges on your refrigerator
so the doors open the other way. Refer to the
instruction sheet included with your refrigerator.
Ice compartment door
Pull the ice compartment door panel out from the
bottom and slide it to the rear.
Ice cube trays
If cubes are not used, they may shrink. The
moving cold air starts a slow evaporation. The
longer cubes are stored, the smaller they get.
To remove ice:
1. Hold tray at both ends.
2. Twist slightly.
9
Using Your Refrigerator
Continued
Sounds you may hear
Energy saving tips
Your new refrigerator may make sounds that your
old one didn’t. Because the sounds are new to
you, you might be concerned about them. Don’t
be. Most of the new sounds are normal. Hard
surfaces like the floor, walls and cabinets can
make the sounds seem louder.
The following describes the kinds of sounds
that might be new to you, and what may be
making them.
You can help your refrigerator use less electricity.
l Check door gaskets
for a tight seal. Level the
cabinet to be sure of a good seal.
l Clean the condenser
coils regularly.
l Open the door as few times as possible.
Think
about what you need before you open the door.
Get everything out at one time. Keep food
organized so you won’t have to search for what
you want. Close door as soon as food is
removed.
l Go ahead and fill up the refrigerator,
but don’t
overcrowd it so air movement is blocked.
l It is a waste of electricity
to set the refrigerator
and freezer to temperatures colder than they
need to be. If ice cream is firm in the freezer and
drinks are as cold as your family likes them,
that’s cold enough.
l Keep the Exterior
Moisture Control in the OFF
position unless moisture forms on refrigerator
exterior.
l Make sure your refrigerator
is not next to a heat
source such as a range, water heater, furnace,
radiator or in direct sunlight.
Slight hum, soft hiss:
You may hear the refrigerator’s
moving air.
fan motor and
Clicking or snapping sounds:
The thermostat makes a definite click when the
refrigerator stops running. It also makes a sound
when the refrigerator starts running. The defrost
timer will click when the defrost cycle starts.
Water sounds:
When the refrigerator stops running, you may
hear gurgling in the tubing for a few minutes after
it stops. You may also hear defrost water running
into the defrost water pan.
Running sounds:
Your refrigerator has a high-efficiency compressor and motor. It will run longer than older
designs. It may even seem to run most of the
time.
10
-,
CleaningYourRefrigerator
Both the refrigerator and freezer sections defrost
automatically. But both should be cleaned about
once a month to help prevent odors from building
up. Spills should be wiped up right away.
PART
WHAT TO USE
Removable parts
l
(shelves, crispers,
meat drawer, etc.)
Outside
l
l
l
l
l
l
Inside walls
Door liners and
gaskets
Plastic parts
l
l
l
l
l
Condenser coils
Floor under refrigerator
Sponge, cloth
or paper towel
Mild detergent
Warm water
Appliance wax (or
good auto paste wax)
l
8 Sponge, soft cloth or
paper towel
l Mild detergent
l Warm water
l
Defrost pan
l
Sponge, soft cloth
or paper towel
l Baking soda or mild
detergent
. Warm water
(covers and panels)
l
l
HOW TO CLEAN
Sponge or cloth
Mild detergent
Warm water
l
(freezer should be
allowed to warm up so
cloth won’t stick)
To clean your refrigerator, turn the Refrigerator
Control to OFF, unplug it, take out all removable
parts and clean the refrigerator according to the
following directions.
Soft, clean sponge
or soft, clean cloth
Mild detergent
Warm water
l
l
l
Wash removable parts by hand.
Rinse and dry thoroughly.
Wash outside of cabinet. Do not use
abrasive or harsh cleaners.
Rinse and dry thoroughly.
Wax painted metal surfaces at least twice
a year. Apply wax with a clean, soft cloth.
Waxing painted metal surfaces provides rust protection.
Do not wax plastic parts.
l
l
l
l
Wash with mixture of warm water and
-mild detergent, or
-baking soda (26 g [2 tablespoons] to
0.95 L [I quart] of water).
Rinse and drv thorouahlv.
Wash.
Rinse and dry thoroughly.
DO NOT USE cleaning waxes, concentrated detergents, bleaches or cleaners
containing petroleum on plastic parts.
l
l
Wash
Rinse and dry thoroughly.
DO NOT USE paper towels, window
sprays, scouring cleansers or flammable
fluids. These can scratch or damage
material. See “Important Safety Instructions” on page 3.
Sponge or cloth
Mild detergent
Warm water
Remove base grille. (See page 9.)
To remove defrost pan, lift pan over wire
brace (remove tape, if any).
. Wash defrost pan.
l Rinse and dry thoroughly.
. Replace with notched corner to the rear.
Push it in all the way.
l Make sure defrost drain tube is pointing
into pan.
. Reolace base arille.
Vacuum cleaner with
extended narrow
attachment
l
Floor cleaners
l
l
l
l
l
l
l
l
Remove base grille.
Vacuum coils (at least every other month).
Replace base grille.
Roll refrigerator out away from the wall.
Clean floor.
Roll refrigerator back into place.
Check to see if the refrigerator is level.
11
FoodStorageGuide
There is a correct way to package and store
refrigerated or frozen food. To keep food fresher,
longer, take the time to study these recommended steps.
Storing fresh food
Food placed in the refrigerator should be
wrapped or stored in air and moisture proof
material. This prevents food odor and taste
transfer throughout the refrigerator. For dated
products, check code date to ensure freshness.
Leafy vegetables
Remove store wrapping and trim or tear off
bruised and discolored areas. Wash in cold water
and drain. Place in plastic bag or plastic container and store in crisper.
Cheese
Store in the original wrapping until you are ready
to use it. Once opened, rewrap tightly in plastic
wrap or aluminum foil.
Leftovers
Cover leftovers with plastic wrap or aluminum
foil. Plastic containers with tight lids can also be
used.
Storing frozen food
The freezer section is designed for storage of
commercially frozen food and for freezing food at
home. For further information about preparing
food for freezing, contact your local Cooperative
Extension Service or check a freezer guide or
cookbook.
Vegetables with skins (carrots, peppers)
Packaging
Store in crisper, plastic bags or plastic container.
The secret of successful freezing is in the
packaging. The way you close and seal the
package must not allow air or moisture in or out.
Packaging done in any other way could cause
food odor and taste transfer throughout the
refrigerator and drying of frozen food.
Rigid polyethylene (plastic) containers with
tight fitting lids, straight-sided canning/freezing
jars, heavy-duty aluminum foil, plastic-coated
paper and nonpermeable plastic wraps (made
from a Saran film) are recommended. Follow
package or container instructions for proper
freezing methods.
Fruit
Wash, let dry and store in refrigerator in plastic
bags or crisper. Do not wash or hull berries until
they are ready to use. Sot-t and keep berries in
their store container in a crisper, or store in a
loosely closed paper bag on a refrigerator shelf.
Meat
Most meat can be stored in original wrapping as
long as it is air and moisture proof. Rewrap if
necessary. See the following chart for storage
times.
Storage chat-l for fresh and cured meat*
APPROXIMATE TIME
TYPE
(DAYS)
Chicken ... .. .. ... ... .. ...._...................... 1 to2
Ground beef .. .. .. ... .. .. ... .. .. .. .. .. .. .. . 1 to 2
Steaks and roasts . ... .. . .. ... .. .. .. . . . 3 to 5
Cured meats . ... ... . ... .. ... .. ... .. .. ... .. ... ... 7 to 10
Bacon .. ... .. .. .. .. ... .. .. . .. .. .. ... ... . .. . . 5 to 7
Cold cuts ... .. .. ... .. .. .. .. .. .. ... .. .. .. .. .. .. 3 to 5
Variety meats .,.....____......_.___.,........_.
1 to 2
‘If meat is to be stored longer than the times
given, follow the directions for freezing.
NOTE: Fresh fish and shellfish should be used
the same day as purchased.
Eggs
Store without washing in the original carton on
interior shelf.
Milk
Wipe milk cartons. For best storage, place milk
on interior shelf.
Butter or margarine
Keep opened butter in covered dish or closed
compartment. When storing an extra supply,
wrap in freezer packaging and freeze.
12
Do not use:
Bread wrappers
Non-polyethylene
plastic containers
. Containers without tight lids
l Waxed paper
l Waxed-coated
freezer wrap
l Thin, semi-permeable
wrap
The use of these wrappings could cause food
odor, taste transfer and drying of frozen food.
l
l
Freezing
Do not expect your freezer to quick-freeze any
large quantity of food. Put no more unfrozen food
into the freezer than will freeze within 24 hours.
(No more than 0.9 to 1.4 kg [2 to 3 pounds] of
food per cubic foot of freezer space.) Leave
enough space for air to circulate around packages. Be careful to leave enough room at the
front so the door can close tightly.
Storage times will vary according to the quality
of the food, the type of packaging or wrap used
(air and moisture proof), and the storage temperature which should be -17.8”C (0°F). For
further information about food storage times,
contact your local Cooperative Extension Service
or check a freezer guide or cookbook.
-I
CaringForYourRefrigerator
Holiday and moving care
Power interruptions
Short holidays
If electricity goes off, call the power company. Ask
how long power will be off.
1. If service is to be interrupted 24 hours or less,
keep both doors closed. This will help foods
stay frozen.
2. If service is to be interrupted longer than
24 hours:
(a) Remove all frozen food and store in a
frozen food locker.
OR
(b) Place 0.9 kg (2 Ibs.) of dry ice in freezer for
every cubic foot of freezer space. This will
keep food frozen for 2 to 4 days. Wear
gloves to protect your hands from dry ice
burns.
(c) If neither a food locker or dry ice is available, use or can perishable food at once.
3. A full freezer will stay cold longer than a partly
filled one. A freezer full of meat will stay cold
longer than a freezer full of baked goods. If
food contains ice crystals, it may be safely
refrozen, although the quality and flavor may
be affected. If the condition of the food is poor
or if you feel it is unsafe, dispose of it.
No need to shut off the refrigerator if you will be
away for less than four weeks. Use up perishables; freeze other items.
Long holidays
Remove all the food if you are going for a month
or more.
Unplug the refrigerator and clean it
rinse
well and dry. Tape rubber or wood blocks to the
tops of both doors . keeping them open far
enough for air to get in. This will keep odor and
mold from building up.
Personal Injury Hazard
Do not allow children to climb on, play
near or climb inside the refrigerator when
the doors are blocked open. They may
become injured or trapped.
To restart refrigerator,
tor” on page 5.
see “Using Your Refrigera-
Moving
Remove all food. Pack frozen food in dry ice.
Unplug the refrigerator and clean it thoroughly.
Take out all removable parts. Wrap all parts
well and tape them together so they don’t shift
and rattle. Screw in the leveling rollers; tape the
doors shut; and tape the electric cord to the
cabinet.
When you get to your new home, put everything back and refer to page 4.
13
If YouNeedServiceOrAssistance
We suggestyou follow these
steps:
1. Before calling for assistance . . .
Performance problems often result from little
things you can find and fix yourself without tools
of any kind.
If your refrigerator will not operate:
Is the
circuit
Have
circuit
Is the
l
l
l
power supply cord plugged into a live
with proper voltage? (See page 4.)
you checked your home’s main fuses or
breaker box?
Refrigerator Control ON?
If there is a rattling or jingling noise or unfamiliar sounds:
Is something on top of or behind the refrigerator
making noise when the refrigerator is running?
New features on your new refrigerator make
new sounds. You may be hearing air flowing
from the fans, timer clicks for the defrost cycle,
or defrost water draining in the defrost pan.
l
l
If there is water in the defrost pan:
This is normal in hot, muggy weather. The pan
can even be half full. Make sure the refrigerator
is level so the pan does not overflow.
l
If the lights do not work:
Have
circuit
Is the
circuit
l
l
you checked your home’s main fuses or
breaker box?
power supply cord plugged in to a live
with the proper voltage? (See page 4.)
If a bulb is burned out:
See instructions for changing light bulbs on
page 8. Use appliance bulbs only.
l
If the motor seems to run too much:
l
l
l
Is the condenser free of dust and lint?
On hot days, or if the room is warm, the motor
naturally runs longer.
If the door has been opened a lot, or if a large
amount of food has been put in, the motor will
run longer to cool down the interior.
14
Remember:
Motor running time depends on different things:
number of door openings, amount of food stored,
temperature of the room, setting of the controls.
Your new refrigerator may be larger than your
old one so it has more space to be cooled. It also
has a regular freezer instead of a frozen food
compartment. All this means better refrigeration
and may require more running time than your old
one.
2. If the problem is not due to one of the
above items* . . .
Contact the dealer from whom you purchased
the unit or an authorized WhirlpoolSM service
company.
3. If you need FSP” replacement parts* . . .
FSP is a registered trademark of Whirlpool
Corporation for quality parts. Look for this symbol
of quality whenever you need a replacement part
for your Whirlpool appliance. FSP replacement
parts will fit right and work right, because they are
made to the same exacting specifications used to
build every new Whirlpool appliance.
To locate FSP replacement parts in your area,
contact the dealer from whom you purchased the
unit or an authorized WhirlpoolSM service company.
l
When requesting assistance, please provide:
model number, serial number, date of purchase,
and a complete description of the problem. This
information is needed in order to respond to
your request properly.
Notes
15
-.
WHIRLPOOLE
Refrigerator
Warranty
LENGTH OF WARRANTY
FULL ONE-YEAR WARRANTY
From Date of Purchase
FULL FIVE-YEAR WARRANTY
From Date of Purchase
WHIRLPOOL WILL PAY FOR
FSP@ replacement parts and repair labor to correct defects in
materials or workmanship. Service must be provided by an
authorized WhirlooolSM service comoany.
FSP replacement parts and repair labor to correct defects in
materials or workmanship in the sealed refrigeration system.
These parts are:
1. Compressor
2. Evaporator
1 3. Condenser
4. Drier
5. Connecting tubing
Service must be provided by an authorized WhirlpoolSM service
company.
WHIRLPOOL WILL NOT PAY FOR
A. Service calls to:
1. Correct the installation of the refrigerator.
2. Instruct you how to use the refrigerator.
3. Replace house fuses or correct house wiring or plumbing.
4. Replace light bulbs.
B. Repairs when refrigerator is used in other than normal, single-family household use.
C. Pickup and delivery. This product is designed to be repaired in the home.
D. Damage to refrigerator caused by accident, misuse, fire, flood, acts of God or use of products not
approved by Whirlpool.
E. Any labor costs during the limited warranty.
F. Any food loss due to product failure.
G. Repairs to parts or systems caused by unauthorized modifications made to the appliance.
WHIRLPOOL CORPORATION SHALL NOT BE LIABLE FOR INCIDENTAL OR CONSEQUENTIAL
DAMAGES.
Outside the United States, a different warranty may apply. For details, please contact your authorized
Whirlpool distributor or military exchange.
@ Registered Trademark
Part No. 2158649
0 1992 Whirlpool Corporation
/ SM Service Mark of Whirlpool Corporation
Printed in U.S.A.