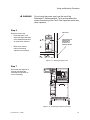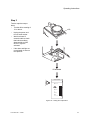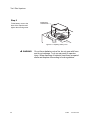
1
Tec 6 Plus Vaporizer
Operation and Maintenance Manual
User Responsibility
This Product will perform in conformity with the description thereof contained in
this operating manual and accompanying labels and/or inserts, when
assembled, operated, maintained, and repaired in accordance with the
instructions provided. This Product must be checked periodically. A defective
Product should not be used. Parts that are broken, missing plainly worn,
distorted, or contaminated should be replaced immediately. Should repair or
replacement become necessary, Datex-Ohmeda recommends that a telephonic
or written request for service advice be made to the nearest Datex-Ohmeda
Field Service Support center. This Product or any of its parts should not be
repaired other than in accordance with written instructions provided by DatexOhmeda and by Datex-Ohmeda trained personnel. The Product must not be
altered without the prior written approval of Datex-Ohmeda’s Quality Assurance
Department. The user of this Product shall have the sole responsibility for any
malfunction which results from improper use, faulty maintenance, improper
repair, damage, or alteration by anyone other than Datex-Ohmeda.
w Caution
U.S. Federal and Canadian law restrict this device to sale by or on the order of
a licensed medical practitioner. Outside the U.S.A. and Canada, check local
laws for any restriction that may apply
Datex-Ohmeda products have unit serial numbers with coded logic which
indicates a product group code. The year of manufacture and a sequential unit
number for identification.
AAA A 12345
This alpha character indicates the year of product
manufacture and when the serial number was
assigned; “C” = 1999, “D” = 2000, “E” = 2001, etc. “I”
and “O” are not used.
1107-0641-000
2/26/01
1
Introduction
In this section
1107-0641-000
2/16/01
What this manual includes ..............................................................1-2
Precautions...............................................................................1-3
Symbols ..........................................................................................1-4
1-1
Tec 6 Plus Vaporizer
What this manual includes
Important
This manual contains the information required to install, operate and
maintain both the Datex-Ohmeda and the North American Dräger variants of the Tec 6 Plus Vaporizer. All of the graphics illustrated in this
manual show the Datex-Ohmeda variant, unless the procedure differs
for the North American Dräger variant.
Section 1 tells you how to use this manual and supplies information
about the symbols used on the equipment.
Section 2 provides functional descriptions and theory of operation for
the major components.
Section 3 describes all the controls and indicators on the vaporizer.
Section 4 tells you how to mount the vaporizer on a manifold.
Section 5 provides operating instructions, including a preoperative
checkout and instructions for filling the vaporizer.
Section 6 provides maintenance instructions, including cleaning the
vaporizer and a list of spare parts. Maintenance procedures are restricted to those detailed in this manual.
Section 7 provides the theory of operation for the alarm and indicator
display and vaporizer delivery system.
Section 8 provides information for troubleshooting the vaporizer.
Section 9 contains specifications for the vaporizer.
Section 10 contains the warranty.
Section 11 contains Datex-Ohmeda’s servicing policy.
Requests for servicing facilities, advice or assistance must be addressed either to a local Datex-Ohmeda office or to a Datex-Ohmeda
Authorized Distributor.
Datex-Ohmeda strongly recommends that you keep all relevant documentation, including this manual and accompanying labels, immediately available to all users.
1-2
2/16/01
1107-0641-000
Introduction
Precautions
w WARNING
Do not fill the vaporizer with any substance other than
Suprane™ (desflurane) as specified on the front label. If
any substance other than Suprane™ (desflurane) is used,
patient injury could occur.
U.S. Federal and Canadian law restrict this device to sale
by or on the order of a licensed medical practitioner.
Outside the U.S.A. and Canada, check local laws for any
restrictions that may apply.
Before using the Tec 6 Plus Vaporizer, you must be
familiar with the Suprane™ (desflurane) package insert.
Failure to conform to the recommendations on the insert
can result in patient injury.
Do not attempt to use a vaporizer that has been dropped.
A dropped vaporizer MUST be sent to the nearest DatexOhmeda Field Operations Unit for servicing. See
Section 11 for complete shipping instructions.
Do not use malfunctioning equipment. Make all necessary
repairs or have the equipment serviced by an authorized
Datex-Ohmeda service center. After repair, test the
equipment to ensure that it is functioning properly, in
accordance with the manufacturer’s published
specifications.
Important:
European Standard EN 740 - Anesthetic Workstations and Their Modules requires that an appropriate gas monitor is used to monitor the
concentration of anesthetic agent vapor in the inspiratory gas when
the vaporizer is in operation in order to provide protection against hazardous output in the event of a device malfunction.
Datex-Ohmeda strongly recommends the use of anesthesia gas monitoring with this equipment. Refer to local standards for mandatory
monitoring.
1107-0641-000
2/26/01
1-3
Tec 6 Plus Vaporizer
Symbols
Warnings and Cautions tell you about dangerous conditions that can
occur if you do not follow all instructions in this manual.
w WARNING
Warnings tell about a condition that can cause injury to the
operator or the patient.
w CAUTION
Cautions tell about a condition that can cause damage to
the equipment. Read and follow all warnings and cautions.
Symbol
Location
Meaning
Control Dial
Standby setting
Interlock Block
Setting mark - dial marking alignment point for required setting
Interlock Block
Equi-potential stud - connection for minimizing electrical potential difference
Front Panel
Auditory alarm mute button
Display Panel
240 ml refill mark - indicates that an additional 240 ml of agent can be added
Display Panel
Symbolizes nominal agent level display when 390 ml of agent in sump (max.)
Display Panel
Symbolizes agent level display when 60 ml or more of agent in sump (min.)
Rear Label
AC electrical supply must be single phase sinusoidal alternating current.
The voltage requirement for the vaporizer appears on this label.
Rear Label
The degree of protection against electric shock is Type B
Top Plate Label
Direction of flow
Various
Warning
Various
Caution
Systems with this mark agree with the European
Council Directive (93/42/EEC) for Medical Devices
when they are used as specified in their Operation
and Maintenance manuals. The xxxx is the certification number of the Notified Body used by
Datex-Ohmeda's Quality Systems.
1-4
2/16/01
1107-0641-000
1Description
In this section
1107-0641-000
2/16/01
What is a Tec 6 Plus Vaporizer? .....................................................2-2
Components ....................................................................................2-6
Power supply unit .....................................................................2-6
Filler assembly..........................................................................2-6
Drain plug .................................................................................2-7
Power cord and battery.............................................................2-7
Equi-potential stud ....................................................................2-8
Sump ........................................................................................2-8
Heater elements .......................................................................2-8
Sensors.....................................................................................2-8
Agent level sensor ....................................................................2-9
Tilt switch ..................................................................................2-9
2-1
Tec 6 Plus Vaporizer
What is a Tec 6 Plus Vaporizer?
The Tec 6 Plus Vaporizer adds Suprane™ (desflurane) inhalant anesthetic vapor to the medical gasses supplied to a patient. The DatexOhmeda vaporizer should be used in anesthesia systems equipped
with a Selectatec® Series Manifold only.
The North American Dräger vaporizer should be used in anesthesia
systems equipped with an exclusion manifold. Both variants of the Tec
6 Plus Vaporizer must be supplied with dry medical gas and be connected to a suitable AC power supply.
The Tec 6 Plus Vaporizer is designed to meet UL 2601-1, EN 606011 and IEC 601-2-13.
of .
es.
nce nts
ing ll tim
rn t at ave. presctiec agenction
Waprighto
cla the sthe conlu
.
in ae in
p u au
nce
s.
ee ot use an d or.
ion rma
• K Do n t for able e use onit
• No mm to b O m for structperfo ance
l
• fla ly an ua
In ing ten
n
n
al
• O with e ma tion ffect mainons.
Se pera ors a and dati
• O Fact rvice men te
da
• Se
m
• reco rvice
g mes.
e of .
rnin all ti
cenc ents n
Waright atclave. e preshetic agunctio
to in th st conl
up
.
eep t au use anae in .
• K Do no for able used itor
ns. mance
• Not m be mon r
ctio
• flam y to O l fo stru perforance
an ua In g
nl
• O with man onal fectin aintens.
See perati rs af and m tion
• O Facto vice menda
• Ser
m
te
da
co
• re
ice
k
Locefore
b se
u
xt
xt
serv
Ne
18
16
14
12
10
8 7
6
5
4
3
2
se
Ne
18
16
14
12
10
8 7
6
5
4
3
2
1
ay
smg
f
flowathinuse o
as
w g e bres the
th nd
1
h lo
wit hin me
ing ings s witrecom
rn
tt
re
Wa zer semixtuongly
and .
in. 3mb
L/m 101
ri ic
tr
.
apo ox a s .
use to 100C at
re
h v hyp med ring
efo f 0.2 to 3
Higad to . Oh onito
al b s o 8C
le cuit n m
anut flows of 1
cir yge
m
re
to e a
ox
fer us ratu
Re d for mpe
te t te
libra ien
Ca amb
at
ay
sm
ow g of
as fl reathine use
b
wg
th
e
lo
g
ith in th ends
rnin ttings rews withcomm
Wa
r se ixtu gly re
and b.
n
rize m
in.
apo xic stro
.
L/m 13m
h v ypo eda g.
use to 10 at 10
Higad to h Ohm itorin
C
ore
bef f 0.2 30
le rcuit. mon
ual s o C to
ci ygen
manat flows of 18
ox
to
re
er
se
Ref for u peratu
m
ted
ibra nt te
Cal ambie
at
lus
Tec
6P
lus
c
Te
6P
ONLY
DES
E
RAN
FLU
USE
YD
ONL
ANE
LUR
ESF
USE
NAL
ATIO
OPER
UT
OPER
ATIO
NAL
NO
OUTP
T
LOW
NO
OUTP
LOW
UT
AGEN
WARM
AGEN
–UP
M
WAR
T
M W
ALARERY LO
BATT
UP
M W
ALARERY LO
BATT
nly e
eo
Us uran
sfl
De
nly e
eo
Us uran
sfl
De
Figure 1-1 • Tec 6 Plus Vaporizer, Datex-Ohmeda variant (left), and North American Dräger variant (right)
2-2
2/16/01
1107-0641-000
Description
Mechanical and electrical interlocks incorporated into the vaporizer
help to ensure that:
•
•
•
•
Important:
The vaporizer dial can only be turned from n (Standby) when
the vaporizer is locked onto the manifold and the green
OPERATIONAL light is illuminated to indicate that the
vaporizer has attained the correct operating temperature.
Only one vaporizer can be operated at a time.
The gas flow only enters the selected vaporizer.
Unwanted anesthetic trace vapor is minimized after the
vaporizer is turned to n (Standby).
European Standard EN 740 - Anesthetic Workstations and Their Modules requires that an appropriate gas monitor is used to monitor the
concentration of anesthetic agent vapor in the inspiratory gas when
the vaporizer is in operation in order to provide protection against hazardous output in the event of a device malfunction.
Datex-Ohmeda strongly recommends the use of anesthesia gas monitoring with this equipment. Refer to local standards for mandatory
monitoring.
1107-0641-000
2/16/01
2-3
Tec 6 Plus Vaporizer
w WARNING
This manual and its associated documentation must be
studied before any attempt is made to install, operate or
clean any part of the Tec 6 Plus Vaporizer.
The performance of the anesthesia machine and vaporizer
can be degraded if the machine and vaporizer are mismatched.
To avoid explosive hazards, flammable anesthetic agents
such as Ether and Cyclopropane must not be used in this
vaporizer. Only anesthetic agents which comply with the
requirements for non-flammable anesthetic agents in the
IEC 601-2-13 Standard, particular requirements for the
safety of anesthesia machines, are suitable for use in the
presence of this vaporizer.
As this vaporizer is not suitable for use with flammable
anesthetic agents such as Ether or Cyclopropane, the use
of antistatic breathing tubes and face masks is not
necessary. The use of antistatic or electrically conductive
breathing tubes when utilizing high frequency electric
surgery equipment may cause burns and is therefore not
recommended in any application of this vaporizer.
The functioning of this vaporizer can be adversely effected
by the operation of equipment such as high frequency
surgical apparatus or short-wave therapy equipment in the
vicinity.
Do not operate the vaporizer other than with dry medical
gases.
The Tec 6 Plus Vaporizer must not be used in a Magnetic
Resonance Imaging environment.
The functioning of this Tec 6 Plus Vaporizer can be
adversely affected by electromagnetic interference
exceeding the levels specified in EN 60601-1-2.
This product contains a small quantity of Mercury in the tilt
switch mechanism and should be disposed of according to
local regulations.
Do not attempt to use a vaporizer that has been dropped.
A dropped vaporizer MUST be sent to the nearest DatexOhmeda Field Operations Unit for servicing. See
Section 11 for complete shipping instructions.
2-4
2/16/01
1107-0641-000
Description
w CAUTION
If the vaporizer is not likely to be used for a period of 12
months, remove the battery. Failure to do so can result in
damage to the vaporizer. The battery must be placed back
into the vaporizer before use.
A 'No Output' alarm could be caused by downstream high
frequency ventilation at greater than 60 breaths/min with
an airway pressure of 100cm H2O or pulsing the O2 flush
faster than 1 pulse/sec over a time period of greater than
10 seconds.
1107-0641-000
2/16/01
2-5
Tec 6 Plus Vaporizer
Components
Power supply unit
The Tec 6 Plus Vaporizer operates from a 100 to 120VAC 50/60 Hz or
220 to 240V AC 50/60 Hz electrical supply. A label on the rear panel
of the vaporizer states the voltage requirement for the vaporizer.
The integral power supply unit consists of a transformer and an AC to
DC converter that provides the 12VDC and 5VDC supplies for the
electrical system.
Filler assembly
The filler assembly uses an agent specific fitting to ensure that only a
Suprane™ (desflurane) specific bottle equipped with a Saf-T-Fill™
valve can be inserted to fill the vaporizer.
FILLER
PORT
Use Only
Desflurane
AA.43.037
FILLER
ASSEMBLY
FILLER
Figure 1-2 • Filler assembly
2-6
2/16/01
1107-0641-000
Description
Drain plug
The drain plug is located at the base of the vaporizer (see Figure 2-3).
w CAUTION
Do not remove the drain plug. Draining the vaporizer can
result in rapid loss of pressure and/or agent, which could
lead to injury to the operator. It must only be removed at a
Datex-Ohmeda Authorized Service Center.
DRAIN
PLUG
Figure 1-3 • Vaporizer base
Power cord and
battery
If the AC power supply fails, a Duracell MN1604 or VARTA Energy
2000 battery incorporated in the base of the vaporizer provides power
for the auditory and visual alarms only. The battery must be replaced
annually.
D
POWER CORD
mn A C E
6
ghc 23r L L
hjv
U
D
R
E
C
A
L
L
DUR
DURACELL MN 1604 OR
VARTA ENERGY 2000 BATTERY
Figure 1-4 • Power cord and battery
1107-0641-000
2/16/01
2-7
Tec 6 Plus Vaporizer
Equi-potential stud
The equi-potential stud Y is located on the top of the vaporizer. When
connected, it minimizes any electrical potential difference between the
vaporizer casing and the anesthesia system.
EQUI-POTENTIAL
STUD
Figure 1-5 • Equi-potential stud
Sump
The sump contains the agent and includes the agent filling port, the
drain, the heaters and the agent level sensor.
The sump has a total nominal capacity of 390 milliliters (ml) which consists of a nominal 330 ml indicated volume and a nominal 60 ml
reserve.
Heater elements
Two 100W heater elements, located in the base of the sump, heat the
agent to a nominal 39 °C (102 °F) to generate the working pressure.
Two 100W heater elements located in the upper part of the vaporizer
help prevent condensation of the anesthetic agent in the vaporizer.
The current supplied to power the heaters alternates between the two
heaters in the sump and the two heaters in the upper part of the vaporizer. This minimizes the current requirement.
While it is connected to the electrical supply, the casing of the vaporizer is normally warm to the touch.
Sensors
Internal electro/mechanical sensors monitor and maintain the fresh
gas/agent vapor pressure balance and the agent volume.
The internal sensors monitor and display operational status and activate the appropriate alarm indication.
2-8
2/16/01
1107-0641-000
Description
Agent level sensor
An agent level sensing probe measures the agent level. The power
must be on for the agent level sensor to activate. If the sump contains
between 60 and 390 ml of agent, the LCD level displays the agent level in the sump. For more information, see section 3, Controls and Indicators.
Tilt switch
If the vaporizer is tilted for 10 seconds while the dial is on and it is in
operational mode and delivering vapor, vapor delivery will be stopped,
as indicated by the flashing NO OUTPUT light and auditory alarm.
DESFLURANE
OPERATIONAL
NO OUTPUT
WARM-UP
AA.43.042
LOW AGENT
ALARM
BATTERY LOW
Figure 1-6 • Tilt indicator (NO OUTPUT light)
1107-0641-000
2/16/01
2-9
Tec 6 Plus Vaporizer
This page left blank intentionally.
2-10
2/16/01
1107-0641-000
1Controls and Indicators
In this section
1107-0641-000
2/16/01
Controls ...........................................................................................3-2
Dial and dial release .................................................................3-3
Lock lever .................................................................................3-4
Auditory alarm mute button.......................................................3-4
Auditory and visual indicators ...................................................3-5
Alarm priority.............................................................................3-6
Status display ..................................................................................3-7
Warm-up ...................................................................................3-7
Operational ...............................................................................3-8
Agent level display....................................................................3-8
Low agent level.........................................................................3-9
No output ................................................................................3-10
Alarm battery low ....................................................................3-11
3-1
Tec 6 Plus Vaporizer
Controls
Note that only the Datex-Ohmeda vaporizer has the lock lever as
shown.
LOCK
LEVER
EQUI-POTENTIAL STUD
DIAL RELEASE
g mes.
of .
rnin all ti
ence ents n
Waright atclave. e prehscetic aglunctio
to in th st con
up
.
eep ot au use anae in
• K Do n t for able used nitor.
ns. ance
o
• No
m be
ctio rm
• flam ly to O mal for stru perfo ance
In g
n
an u
n
• O with man ional fectin ainte s.
See perat rs af and m ation
• O Facto vice mend
• Ser
m
date
• reco
ice
serv
k
Locefore
b se
u
STANDBY SETTING
xt
Ne
18
16
14
12
10
8 7
6
5
4
3
2
1
CONCENTRATION DIAL
ay
sm
ow g
of
as fl reathine use
b
th
wg
e
s
lo
g
ith hin th mend
rnin ttings rews witre
com
Wa
se tu
zer mix ngly
d
. an b.
ri
ro
/min 3m
apo xic st
se. 0 L 101
h v ypo eda g.
re u to 1 at
Higad to h. Ohm itorin
efo 0.2 to 30C
le rcuit mon
al b of
ci ygen
anu flows f 18C
m
x
o
o
er to se at res
Ref for u peratu
m
ted
ibra nt te
Cal ambie
at
lus
Tec
6P
AUDITORY ALARM
MUTE BUTTON
Y DE
ONL
NE
URA
SFL
USE
NAL
ATIO
OPER
TPUT
NO
OU
T
POWER CORD
LOW
AGEN
WARM
UP
M LOW
ALARERY
BATT
nly e
eo
Us uran
sfl
De
INDICATORS
D
FILLER PORT CONTROLS
BATTERY
COVER
POWER CORD
RETAINING PLATE
POWER CORD
CHANNEL
Figure 3-1 • Tec 6 Plus Vaporizer controls (Datex-Ohmeda variant shown)
3-2
2/16/01
1107-0641-000
Controls and Indicators
Dial and dial release
When the operational light is on, push the dial release and turn the dial
to set the agent concentration. The dial cannot be turned from the
(standby) setting as long as the WARM-UP light is on.
n
Åbe
16
14
12
10 9
8 7
6
5
4
3
2
1
D
Tec
6
Figure 3-2 • Concentration dial
You can select the level of agent concentration from 1% to 18%. The
dial is marked at intervals of 1% from 1% to 10% and at intervals of 2%
from 10% to 18%.
Use the dial release again to turn the dial from the (standby) setting
and to turn the dial from 12% to a higher percent setting. All other settings can be made without operating the dial release.
A solenoid interlock mechanism ensures that the dial can be turned
from the
(standby) setting only when the green OPERATIONAL
light is illuminated.
DESFLURANE
OPERATIONAL
NO OUTPUT
LOW AGENT
ALARM
BATTERY LOW
AA.43.040
WARM-UP
Figure 3-3 • Operational light
1107-0641-000
2/16/01
3-3
Tec 6 Plus Vaporizer
Lock lever
Only the Datex-Ohmeda vaporizer has a lock lever. Turn the lever fully
clockwise to lock the vaporizer in position
Figure 3-4 • Lock lever
Auditory alarm mute
button
Push to silence alarms. Hold for three seconds to start the alarm test
(speaker sounds and indicators light up).
> 3 sec = Alarm test
< 3 sec = Alarm silence
Figure 3-5 • Mute button
3-4
2/16/01
1107-0641-000
Controls and Indicators
Auditory and visual indicators
The status of the vaporizer is indicated by both visual and auditory
alarms (see Status display).
Press the auditory alarm mute button
, located above the display
panel, to mute an alarm (see Agent level display and Alarm battery
low).
The LCD agent level display indicates the level of agent. The range is
between 60 ml and 390 ml. When the indicator is below the 240 ml refill
mark , you can add an additional 240 ml of agent.
AA.43.038
AUDITORY ALARM
MUTE BUTTON
GREEN
DESFLURANE
390 ml
NOMINAL
OPERATIONAL
AMBER/RED
AMBER
NO OUTPUT
LCD AGENT
LEVEL
DISPLAY
LOW AGENT
AMBER
WARM-UP
AMBER
ALARM
BATTERY LOW
240 ml
REFILL
MARK
60 ml
NOMINAL
Figure 3-6 • Front panel display
1107-0641-000
2/16/01
3-5
Tec 6 Plus Vaporizer
Alarm Priority
The Tec 6 Plus Vaporizer has three distinct alarm priorities. For each
priority there is a different set of visual and auditory signals:
Alarm Priority
Visual Signal
Auditory Signal
High
Rapid red flashing
light
Two sets of five
audio beeps every
10 seconds
Medium
Amber flashing light
One set of three audio beeps every 25
seconds.
Low
Continuous amber
light
One audio beep
only
Note:
An internal processor failure may also present an intermittent red No
Output LED and alarm tone.
Vap. Condition
Low Battery
Low Agent
No Output
Dial ON
Medium
Priority
Medium
Priority
High Priority
Dial ON,
Alarm Silence
Pressed
Low Priority
Audio
silenced for
120 seconds,
then audio
active
High Priority
(pressing Silence
has
no effect)
Dial turned
to
Low Priority
Low Priority
(dial locked
until condition
corrected)
Low Priority
(dial locked
until condition
corrected)
Figure 3-7 • Alarm priorities
3-6
2/16/01
1107-0641-000
Controls and Indicators
Status display
If the dial is at
repeat.
Warm-up
when an alarm occurs, the auditory alarm does not
The amber WARM-UP light is continuously illuminated when the vaporizer is in warm-up mode. The dial cannot be turned from
when
the vaporizer is warming up.
DESFLURANE
OPERATIONAL
NO OUTPUT
LOW AGENT
ALARM
BATTERY LOW
AA.43.039
WARM-UP
Figure 3-8 • Warm-up
1107-0641-000
2/16/01
3-7
Tec 6 Plus Vaporizer
Operational
The green OPERATIONAL light is continuously illuminated when the
vaporizer is in operational mode. The dial can be turned from when
the vaporizer is operational.
DESFLURANE
OPERATIONAL
NO OUTPUT
LOW AGENT
ALARM
BATTERY LOW
AA.43.040
WARM-UP
Figure 3-9 • Operational
Agent level display
The LCD agent level display consists of a series of bars that indicate
the nominal volume of agent in the vaporizer sump.
The
symbol means there is approximately 390 ml of agent in the
sump. The
symbol means there is 60 ml or more of agent in the
sump. No bar displayed means there is 60 ml or less of agent in the
sump.
As the sump fills, the first agent level indicating bar appears in the LCD
volume display when there is between 60 and 80 ml of agent in the
sump. As the level increases, more bars are displayed, as illustrated
in Figure 3-9, and as the level decreases, fewer bars are displayed.
When the bars are either level with or below the symbol, the sump
can accommodate 240 ml of agent, which is one full bottle. When there
are no bars visible, as illustrated in Figure 3-10, the LOW AGENT level
alarm is activated (see Low agent level).
Note:
The agent level display is calibrated to be most accurate when the
vaporizer is in a perfectly level position. Deviations from a level position affect the accuracy of the agent level display and may activate the LOW AGENT level alarm.
3-8
2/16/01
1107-0641-000
Controls and Indicators
Low agent level
This alarm indicates that there is less than 60 ml of agent remaining in
the sump and agent should be added.
Pressing
mutes the auditory alarm for a period of 120 seconds to
allow time to fill the vaporizer to above 60 ml.
If a LOW AGENT condition occurs during normal operation, the alarm
is activated but the green OPERATIONAL light remains illuminated.
DESFLURANE
OPERATIONAL
NO OUTPUT
LOW AGENT
ALARM
BATTERY LOW
AA.43.041
WARM-UP
Figure 3-10 • Low agent level
1107-0641-000
2/16/01
3-9
Tec 6 Plus Vaporizer
No output
This alarm indicates that the vaporizer has shut down and is no longer
delivering vapor.
The NO OUTPUT alarm is activated if the dial is in the ON position and
any one of the following occurs:
•
•
•
•
The agent level decreases to below 20 ml.
The vaporizer is tilted for more than 10 seconds.
A power failure of longer than 10 seconds duration occurs.
An internal malfunction is detected.
DESFLURANE
OPERATIONAL
NO OUTPUT
WARM-UP
AA.43.042
LOW AGENT
ALARM
BATTERY LOW
Figure 3-11 • No output
If the NO OUTPUT alarm occurs while the vaporizer is in use, the vaporizer dial must be turned to .
This action de-escalates the alarm to a low priority and illuminates the
amber light continuously. Either an alternative vaporizer or an alternative method of anesthesia must be used.
If the NO OUTPUT alarm is activated as a result of a power failure and
the dial is at
when the power supply is restored, the alarm and display test is activated and the vaporizer returns to either the WARM-UP
or the OPERATIONAL mode.
If the dial is not at when the power supply is restored, the NO OUTPUT alarm continues and can only be cancelled by turning the dial
to . In this condition, the alarm and display test is not activated and
the vaporizer returns to either the WARM-UP or the OPERATIONAL
mode.
3-10
2/16/01
1107-0641-000
Controls and Indicators
Alarm battery low
This alarm indicates that the alarm battery voltage is low. A new battery must be installed as soon as practical to support the NO OUTPUT
alarm in the event of a subsequent external power failure.
If an ALARM BATTERY LOW condition occurs during normal operation, the alarm is activated but the green OPERATIONAL light remains
illuminated.
DESFLURANE
OPERATIONAL
NO OUTPUT
LOW AGENT
ALARM
BATTERY LOW
AA.43.043
WARM-UP
Figure 3-12 • Alarm battery low
1107-0641-000
2/16/01
3-11
Tec 6 Plus Vaporizer
This page left blank intentionally.
3-12
2/16/01
1107-0641-000
1Setup and Mounting
Procedure
In this section
1107-0641-000
2/16/01
Vaporizer setup procedure ..............................................................4-2
Installing the battery and the power cord..................................4-2
Vaporizer mounting Procedure .......................................................4-5
Mounting the Datex-Ohmeda vaporizer....................................4-6
Checking the vaporizer for correct mounting ................................4-10
Removing the vaporizer from a manifold ......................................4-11
4-1
Tec 6 Plus Vaporizer
Vaporizer setup procedure
w WARNING
The battery terminals must be firmly clipped onto the
battery to help prevent a possible disconnection when the
vaporizer is moved.
Use only a Datex-Ohmeda power cord to connect the
vaporizer to the electrical supply.
When routing the power cord to the electrical supply,
ensure that it does not interfere with the correct functioning
of other equipment.
w CAUTION
Do not support the vaporizer by holding the control dial
and/or locking lever. Hold the main body of the vaporizer
with both hands and keep the vaporizer in an upright
position. Failure to do so may cause the vaporizer to
malfunction.
Install only a Duracell MN1604 or VARTA Energy 2000
nine volt battery in the vaporizer. If any other battery is
installed, it can damage the vaporizer.
Installing the battery
and the power cord
Step 1
Remove the battery cover.
Invert the vaporizer.
•
Unscrew the battery cover
securing screw.
•
Remove the battery cover.
BATTERY COVER
SECURING SCREW
VAPORIZER
INVERTED
L
L
E
C
A
R
U
D
•
A new battery and the power cord supplied with the vaporizer must be
fitted during initial installation if they are not already installed.
Figure 1-1 • Removing the battery cover
4-2
2/16/01
1107-0641-000
Setup and Mounting Procedure
Step 2
Install the battery.
•
Clip the battery terminals
firmly onto the new battery,
observing the correct
polarity.
D
U
R
A
C
L
L
DUR
E
•
BATTERY
TERMINALS
mn A C E
6
ghc 23r L L
hjv
DURACELL MN 1604 OR
VARTA ENERGY 2000
BATTERY
Insert the battery into the
vaporizer.
Figure 1-2 • Installing the battery
Step 3
Fit the battery cover to the
base of the vaporizer and
tighten the securing screw.
BATTERY COVER
SECURING SCREW
L
L
E
C
A
R
U
D
L
L
E
C
A
R
U
D
DUR
mn A C E
6
ghc 23r L L
hjv
Figure 1-3 • Replacing the battery cover
1107-0641-000
2/16/01
4-3
Tec 6 Plus Vaporizer
Step 4
POWER CORD
•
Remove the power cord
retaining plate.
•
Fit the power cord firmly
into the socket of the
vaporizer.
•
Feed the power cord into
the power cord channel.
•
Clip the power cord
retaining plate back into
the base.
•
On the North American
Dräger vaporizer, feed the
lead around the back of the
vaporizer and secure the
lead by means of the ’P’
clip.
D
Install the power cord.
POWER CORD
CHANNEL
POWER CORD
RETAINING PLATE
Figure 1-4 • Installing the Datex-Ohmeda power cord
‘P’ CLIP
POWER CORD
RETAINING PLATE
POWER CORD
POWER CORD
CHANNEL
Figure 1-5 • Installing the North American Dräger power cord
4-4
2/16/01
1107-0641-000
Setup and Mounting Procedure
Vaporizer mounting Procedure
w WARNING
The Tec 6 Plus vaporizer for North American Dräger
(NAD) must be installed on a NAD anesthesia machine
equipped with an exclusion manifold. The installation must
be performed by an individual trained in the servicing of
NAD anesthesia equipment. Each vaporizer is supplied
with O-rings and screws for the service person to install the
vaporizer onto the manifold.
Do not mount the vaporizer downstream of the common
gas outlet. Mounting the vaporizer in any position other
than that recommended in this manual can cause patient
injury.
Do not connect any vaporizer other than a Tec 6 Plus,
Tec 6, Tec 5, or Tec 4 onto a Selectatec™ Series Manifold.
Connecting any other vaporizer onto the manifold may
make the interlock system ineffective and can result in the
ability to administer anesthetic agent mixtures, possibly
causing patient injury.
Before mounting a vaporizer onto the Selectatec™ Series
manifold, ensure that each manifold port valve O-ring is
intact and that there is no foreign matter around the mating
surfaces. A damaged O-ring and/or foreign matter around
the mating surfaces can cause leaks.
Some versions of the Selectatec™ Series Mounted
Manifold provide mounting positions for three vaporizers.
These versions require the center position to be occupied
even if only two vaporizers are fitted. If the center position
is not occupied, the interlock which helps to ensure that
only one vaporizer at a time can be turned on is ineffective.
1107-0641-000
2/16/01
4-5
Tec 6 Plus Vaporizer
Mounting the DatexOhmeda vaporizer
Later versions of the Selectatec™ Series Mounted Manifold that provide mounting positions for three vaporizers incorporate an additional
interlock which ensures that only one vaporizer at a time can be turned
on even if the center position is not occupied.
Step 1
Set the dial to
.
18
16
14
12
10
8 7
6
5
4
3
2
1
Figure 1-6 • Setting the concentration dial
Step 2
Unlock the locking lever.
•
Turn the lever
counterclockwise.
•
Make sure the lever
releases.
Figure 1-7 • Unlocking the locking lever
4-6
2/16/01
1107-0641-000
Setup and Mounting Procedure
Step 3
Ready the manifold.
•
Remove any plugs fitted to
the vaporizer interlock
block ports.
•
Verify that each manifold
port valve O-ring is intact.
If necessary, remove the
existing O-rings and fit one
new O-ring to each port
valve, as described in the
relevant anesthesia
system O & M Manual.
Replacement O-rings are
supplied with each
vaporizer.
VAPORIZER INTERLOCK
BLOCK PORT - ENSURE
PLUGS REMOVED
VAPORIZER INTERLOCK
BLOCK PORT - ENSURE
PLUGS REMOVED
RENEW MANIFOLD
PORT VALVE O-RING,
IF NECESSARY
RENEW MANIFOLD
PORT VALVE O-RING,
IF NECESSARY
Figure 1-8 • Readying the manifold
w CAUTION
To ease the routing of the power cord, the Tec 6 Plus
Vaporizer must be mounted onto the far right-hand side of
the manifold for Excel and Modulus machines. For other
machines, refer to their manuals.
Step 4
Install the vaporizer into the
manifold.
es.
of
ningall tim
nce nts.
Waright at ave. presceic agelunction
upr autocl in the esthet con
ep
.
use ana in
• KeDo nott for able used nitor.
ns. mance
• No mm be mo
ctio
• fla ly to O l for tru perfor nce
Ins
an
• Onwith manua nal ecting intena
See eratio s affand ma tions.
• OpFactorvice menda
• Ser om
date
• rec
k
Loc fore
be e
us
ice
t serv
Nex
18
16
•
Hold the main body of the
vaporizer in an upright
position with both hands.
14
12
10
8 7
6
5
4
3
2
1
y
ma
flows ing of
gas breath use
the
th lown the nds
ning gs wi withi omme
War
settinxturesgly rec
and .
in.
orizer mi on
.
L/m 13mb
vap poxic da str .
use to 10 at 10
Highd to hy Ohme oring
C
ore
bef of 0.2 to 30
lea cuit. monit
nual ws 18C
cir ygen
ma
ox
at flores of
to
Referfor useperatu
ratednt tem
Calibambie
at
us
Te
•
Lower the vaporizer onto
the manifold, ensuring that
the vaporizer interlock
block ports engage
correctly with the manifold
port valves.
c
6
Pl
NE
LURA
USE
ONLY
OPE
NO
DESF
RAT
OUT
LOW
WAR
IONA
L
PUT
AGE
NT
M UP
RM
ALATERY LOW
BAT
ly
on ne
e
Us lura
Desf
Figure 1-9 • Installing the vaporizer
1107-0641-000
2/16/01
4-7
Tec 6 Plus Vaporizer
w CAUTION
Push the locking lever down all the way before attempting
to turn it. The mechanism can be damaged if an attempt is
made to turn the lever before it is at the full extent of its
vertical travel.
Step 5
Lock the vaporizer onto the
manifold.
•
Push the locking lever ①
down all the way.
•
Turn it clockwise ➁ to the
locked position ➂ to lock
the vaporizer onto the
manifold.
PUSH DOWN
TO FULL EXTENT
①
➁ TURN CLOCKWISE
LOCKING
LEVER
➂ LOCKED
LOCKING
LEVER
Figure 1-10 • Locking the vaporizer
4-8
2/16/01
1107-0641-000
Setup and Mounting Procedure
w WARNING
Do not route the power cord over the top of the
Selectatec™ Series manifold. To do so may affect the
correct functioning of the Tec 6 Plus Vaporizer and/or any
other vaporizer.
Step 6
Route the power cord.
•
*
Route the power cord
around the right-hand side
of the anesthesia machine
as viewed from the front.
SIDE SUPPORT
POWER CORD ROUTED
AROUND THE SIDE
SUPPORT AND TO
THE REAR OF THE
ANESTHESIA MACHINE*
Refer to the Aestiva
manual if mounting
vaporizer on an Aestiva.
Figure 1-11 • Routing the power cord
Step 7
Ensure that the vaporizer is
correctly mounted (see
Checking the vaporizer for
correct mounting).
Figure 1-12 • Checking the vaporizer mounting
1107-0641-000
2/16/01
4-9
Tec 6 Plus Vaporizer
Checking the vaporizer for correct mounting
w WARNING
To help to ensure correct operation, do not use a vaporizer
that is either visibly out of line on the manifold or that can
be lifted off the manifold when the locking lever is in the
locked position.
If more than one vaporizer is fitted, visually check to make sure that
the tops of the vaporizers are horizontal. If the vaporizer is visibly out
of line, perform steps 3 and 4 as described in Removing the vaporizer
from a manifold and remount it correctly.
When the vaporizer appears to be level and the locking lever is in the
locked position, attempt to lift the vaporizer straight up from the manifold. If the vaporizer can be lifted off the manifold, it is not correctly
mounted. Remount the vaporizer (see Vaporizer mounting Procedure).
4-10
2/16/01
1107-0641-000
Setup and Mounting Procedure
Removing the vaporizer from a manifold
w WARNING
Only an individual trained in the servicing of NAD
anesthesia equipment can remove a vaporizer from a
North American DrŠger (NAD) machine.
This procedure applies only to the Datex-Ohmeda vaporizer.
Step 1
Set the dial to
.
18
16
14
12
10
8 7
6
5
4
3
2
1
Figure 1-13 • Setting the dial
Step 2
Disconnect the vaporizer from
the AC power supply.
1107-0641-000
2/16/01
4-11
Tec 6 Plus Vaporizer
Step 3
➁ RELEASE
Unlock the locking lever.
•
Turn the locking lever
counter-clockwise ➀.
•
Release the locking lever
➁ and check that the
locking lever springs up to
the unlocked position ➂ to
release the vaporizer from
the manifold.
TURN
COUNTERCLOCKWISE
LOCKING
LEVER
①
DIAL
➂ UNLOCKED
LOCKING
LEVER
DIAL
Figure 1-14 • Unlocking the locking lever
Step 4
Carefully lift the vaporizer up
from the manifold.
es.
of
ningall tim
nce nts. n
Waright at ave. presceic agelunctio
upr autocl in the esthet con
ep
.
use ana in
• KeDo nott for able used nitor.
ns. mance
• No mm be mo
ctio
• fla ly to O l for tru perfor nce
Ins
an
• Onwith manua nal ecting intena
ma ns.
See eratio s aff
tio
and
• OpFactorvice menda
• Ser om
date
• rec
ice
serv
k
Loc fore
be e
us
t
Nex
18
16
14
12
10
8 7
6
5
4
3
2
1
y
ma
flows ing of
gas breath use
the
th lown the nds
ning gs wi withi omme
War
settinxturesgly rec
and .
in.
orizer mi on
.
L/m 13mb
vap poxic da str .
use to 10 at 10
Highd to hy Ohme oring
C
ore
bef of 0.2 to 30
lea cuit. monit
nual ws 18C
cir ygen
ox
to ma at flores of
Referfor useperatu
ratednt tem
Calibambie
at
us
Te
c
6
Pl
NE
LURA
USE
ONLY
OPE
NO
DESF
RAT
OUT
LOW
WAR
IONA
L
PUT
AGE
NT
M UP
RM
ALATERY LOW
BAT
ly
on ne
e
Us lura
Desf
Figure 1-15 • Lifting the vaporizer
4-12
2/16/01
1107-0641-000
1Operating Instructions
In this section
1107-0641-000
2/16/01
Alarm and display test .....................................................................5-2
Preoperative checkout. ...................................................................5-5
Setting the dial ..............................................................................5-10
Filling the vaporizer .......................................................................5-13
Filling procedure .....................................................................5-14
5-1
Tec 6 Plus Vaporizer
Alarm and display test
w WARNING
Only use vaporizers that are in a serviceable condition.
w CAUTION
Before connecting the vaporizer to an AC power supply,
be sure it is within the ambient operating temperature
range (see Performance in Chapter 9).
Step 1
Connect the power cord from
the vaporizer to an approved
hospital grade outlet socket.
w WARNING
Do not use the vaporizer if during the alarm and display
test any one of the five lights and all the LCD agent level
indicator bars do not flash or the auditory alarm does not
operate for a period of approximately four seconds.
Step 2
DESFLURANE
Verify that the alarm and
display test for a period of
approximately four seconds as
follows:
•
•
Each light and all the LCD
agent level indicator bars
on the front display panel
flash.
The auditory alarm is
activated.
OPERATIONAL
NO OUTPUT
Flashes
LOW AGENT
WARM-UP
ALARM
BATTERY LOW
Figure 1-1 • Verifying the alarm
5-2
2/16/01
1107-0641-000
Operating Instructions
Step 3
If the LOW AGENT light
remains illuminated after the
alarm and display test is
completed, fill the vaporizer as
described in Filling the
vaporizer.
DESFLURANE
OPERATIONAL
NO OUTPUT
LOW AGENT
WARM-UP
ALARM
BATTERY LOW
Figure 1-2 • Filling the vaporizer
1107-0641-000
2/16/01
5-3
Tec 6 Plus Vaporizer
Step 4
DESFLURANE
If there is sufficient agent in the
sump, check that each light is
extinguished, except the
amber WARM-UP light which
indicates that the vaporizer is
in its warm-up condition. If the
vaporizer is warm before it is
connected to the electrical
supply, the green
OPERATIONAL light may
illuminate immediately.
OPERATIONAL
NO OUTPUT
LOW AGENT
WARM-UP
ALARM
BATTERY LOW
Figure 1-3 • Checking Warm-up light
Step 5
After a warm-up period of up to
10 minutes check that the
amber WARM-UP light
extinguishes and the green
OPERATIONAL light
illuminates to indicate that the
vaporizer is ready for use.
If the OPERATIONAL light
does not illuminate within 10
minutes, refer to the
Troubleshooting guide in
Chapter 8.
DESFLURANE
OPERATIONAL
Approx.
ten minutes
NO OUTPUT
LOW AGENT
WARM-UP
ALARM
BATTERY LOW
Figure 1-4 • Checking Operational light
Step 6
The alarm and indicators can
be tested at any time by
pressing A for at least three
seconds to activate the alarm
and display test. Activating the
test does not affect the
operation of the vaporizer.
5-4
> 3 sec = Alarm test
Figure 1-5 • Testing alarm
2/16/01
1107-0641-000
Operating Instructions
Preoperative checkout
Step 1
Test the vaporizer for leaks.
•
•
The Tec 6 Plus Vaporizer
can be positive pressure or
negative pressure leak
tested.
①
Leak test
18
16
14
12
10
8 7
6
5
4
3
2
1
Perform the leak test as
described in the relevant
anesthesia system's
operation and
maintenance manual
initially with the dial at n
(①). Repeat the test with
the vaporizer dial turned to
the 1% setting (➁) and
then turn the dial to the n
setting (➂).
➁
1% Leak test
18 16
1
14 12 10
8 7 6
5
4
3
2
➂
18
16
14
12
10
8 7
6
5
4
3
2
1
Figure 1-6 • Testing for leaks
1107-0641-000
2/16/01
5-5
Tec 6 Plus Vaporizer
Step 2
Check the battery.
•
Check the amber ALARM
BATTERY LOW light.
•
If the light is illuminated, fit
a new battery as described
in Changing the battery in
Chapter 6.
•
Check that the light
extinguishes.
DESFLURANE
OPERATIONAL
NO OUTPUT
LOW AGENT
WARM-UP
ALARM
BATTERY LOW
Figure 1-7 • Checking the battery
5-6
2/16/01
1107-0641-000
Operating Instructions
Step 3
Test the vaporizer output
alarm.
•
Turn the dial to a setting of
1% or above.
•
Unplug the power cord
from its outlet socket.
•
Wait for at least 15
seconds and then check
that both the auditory
alarm and the red NO
OUTPUT light are
activated.
•
If the alarm and light are
not activated, do not use
the vaporizer.
>1%
3
4
5
D
6
8 7
18 16 14 12 10
15 seconds
DESFLURANE
OPERATIONAL
NO OUTPUT
LOW AGENT
WARM-UP
ALARM
BATTERY LOW
Figure 1-8 • Testing the output alarm
1107-0641-000
2/16/01
5-7
Tec 6 Plus Vaporizer
Step 4
Reconnect power to the
vaporizer.
When the alarm and light
are activated, turn the dial
to the n setting.
•
Reconnect the power cord.
•
Check that the alarm and
display test is activated.
18
16
14
12
10
8 7
6
5
4
3
2
1
D
•
DESFLURANE
OPERATIONAL
NO OUTPUT
Flashes
LOW AGENT
WARM-UP
ALARM
BATTERY LOW
Figure 1-9 • Reconnecting the vaporizer
5-8
2/16/01
1107-0641-000
Operating Instructions
Step 5
When the green
OPERATIONAL light
illuminates, the vaporizer is
ready for operation.
DESFLURANE
OPERATIONAL
NO OUTPUT
LOW AGENT
WARM-UP
ALARM
BATTERY LOW
Figure 1-10 • Checking the Operational light
1107-0641-000
2/16/01
5-9
Tec 6 Plus Vaporizer
Setting the dial
w WARNING
High percent dial settings combined with low gas flows
may lead to hypoxic mixtures within the breathing circuit.
Datex-Ohmeda strongly recommends the use of oxygen
monitoring.
The dial release must be operated to turn the dial from the
n setting and also to increase the dial setting to above
12%. Do not operate the dial release when turning the dial
to any other setting, it may result in overriding the 12%
stop and causing an inadvertent delivery in excess of 12%.
The vaporizer has not been calibrated at any dial setting
between n and 1%. Do not use the vaporizer at dial
settings between n and 1%.
Important
It is a requirement of European Standard EN 740 - Anaesthetic Workstations And Their Modules, that the gas monitoring device referred to
in What is a Tec 6 Plus Vaporizer? in Section 2 of this manual is in operating condition, by being enabled and functioning, prior to use of the
vaporizer.
An appropriate anesthetic gas monitor must be used to monitor the
concentration of anesthetic agent vapor in the inspiratory gas when
the vaporizer is in operation, in order to provide protection against hazardous output in the event of a device malfunction.
Datex-Ohmeda strongly recommends the use of anesthesia gas monitoring with this equipment. Refer to local standards for mandatory
monitoring.
5-10
2/16/01
1107-0641-000
Operating Instructions
Step 1
Press the dial release and turn
the dial in a counter-clockwise
direction from the n setting.
n
Åbe
DIAL RELEASE
16
14
12
10 9
8 7
6
5
4
3
1
2
D
lus
Tec
6P
Figure 1-11 • Releasing the dial
Step 2
Release the dial release and
turn the dial to the required
percentage setting.
n
Åbe
12 10
9 8
5
4
3
2
1
D
us
c
Te
6
Pl
Figure 1-12 • Dialing the required percentage
Step 3
Check that when the vaporizer
dial is turned from n, no other
vaporizer mounted on the
same manifold can be turned
on.
1107-0641-000
2/16/01
5-11
Tec 6 Plus Vaporizer
Step 4
Turn the dial to the n setting
and check that the dial release
springs out.
The vaporizer will remain in
standby n, ready for further
use if required, until the
electrical supply is
disconnected.
n
Åbe
16
14
12
10 9
8 7
6
5
4
3
2
1
D
us
c
Te
6
Pl
Figure 1-13 • Setting dial to standby
5-12
2/16/01
1107-0641-000
Operating Instructions
Filling the vaporizer
w WARNING
Do not fill the vaporizer with any substance other than
Suprane™ (desflurane). If any substance other than
Suprane™ (desflurane) is used, patient injury could occur.
When the vaporizer is in use, do not fill the vaporizer if the
following conditions apply:
• The dial setting is more than 8% at flows of 8 liters/minute
or above.
• The vaporizer is subjected to any high back pressure.
• The Suprane™ (desflurane) has been refrigerated or
chilled below 18 °C.
Failure to comply with this warning may result in a
temporary decrease in delivered concentration and
activate the NO OUTPUT alarm.
Only fill the vaporizer when it is in an upright position.
Failure to do so may result in the vaporizer being over
filled.
Only fill the vaporizer when it is connected to the electrical
supply. This enables you to observe the agent level
display. Do not attempt to fill the vaporizer when the level
display indicates that it is full.
To avoid explosive hazards, flammable anesthetic agents
such as Ether and Cyclopropane must not be used in this
vaporizer. Only anesthetic agents which comply with the
requirements for non-flammable anesthetic agents in the
IEC 601-2-13 Standard, Particular Requirements for the
Safety of Anesthesia Machines, are suitable for use in the
presence of this vaporizer.
1107-0641-000
2/16/01
5-13
Tec 6 Plus Vaporizer
As this vaporizer is not suitable for use with flammable
anesthetic agents such as Ether or Cyclopropane, the use
of antistatic breathing tubes and face masks is not
necessary. The use of antistatic or electrically conductive
breathing tubes when utilizing high frequency electric
surgery equipment may cause burns and is therefore not
recommended in any application of this vaporizer.
Filling procedure
When filling the Tec 6 Plus Vaporizer, observe the following:
•
•
•
The vaporizer must only be filled when it is in an upright
position.
The vaporizer sump can be filled when the vaporizer is in its
WARM-UP cycle or at any time the vaporizer is in use except
as noted in the warning. If the vaporizer is in its
OPERATIONAL condition, the time taken for the agent to flow
into the vaporizer may be increased.
Only agent bottles with a Saf-T-Fill™ bottle probe specific to
Suprane™ (desflurane) should be inserted into the filler port.
Step 1
Remove the bottle cap from the
Suprane™ (desflurane) bottle
and ensure that the O-ring is
correctly fitted to the bottle
probe.
BOTTLE CAP
'O' RING
Figure 1-14 • Removing the bottle cap
5-14
2/16/01
1107-0641-000
Operating Instructions
Step 2
Insert the bottle probe into the
filler port and then push the
bottle firmly against the spring
pressure until it is fully
engaged in the filler port.
NE
LURA
DESF
ENSURE BOTTLE IS
FULLY ENGAGED IN
FILLER PORT
D
PUSH BOTTLE
FIRMLY INTO
FILLER PORT
Figure 1-15 • Loading the bottle
w WARNING
Ensure that the bottle probe is fully engaged into the filler
port before attempting to lift the bottle. If the bottle cannot
easily be lifted, do not force it, otherwise the valve can be
broken.
Step 3
Lift the bottle upwards.
If the bottle cannot easily be
lifted, it may be because the
bottle has not been completely
inserted.
Figure 1-16 • Lifting the bottle
1107-0641-000
2/16/01
5-15
Tec 6 Plus Vaporizer
Step 4
Fill the vaporizer.
•
When the bottle moves
easily, lock the bottle in the
upper position.
•
When the bottle reaches
the upper stop, the agent
bubbles for up to 45
seconds before it flows
from the bottle through the
filler port into the vaporizer
sump.
•
5-16
BOTTLE
AT UPPER STOP
Figure 1-17 • Filling the vaporizer
Hold the bottle in position
at the upper stop and fill
until the bottle is empty or
the indicator on the display
panel indicates that the
sump is full.
2/16/01
1107-0641-000
Operating Instructions
w WARNING
Grip the bottle firmly while rotating it downwards from the
upper stop position to the lower stop position and hold the
bottle firmly in the filler port until the small amount of agent
in the system has drained back into the bottle. Failure to do
so may result in spilling agent.
Step 5
Drain the bottle and remove.
•
Grip the bottle firmly and
lower it from the upper stop
position to the lower stop
position.
•
When the bottle reaches
the lower stop position,
hold the bottle firmly in the
filler port for at least five
seconds to allow the small
amount of agent in the filler
system to drain back into
the bottle.
•
To avoid dropping the
bottle, support the bottle as
it is automatically unlocked
from the filler port and
released from the filler.
Note: Do not twist the
bottle as you pull the
bottle out
•
The valve on the bottle
automatically closes to
help avoid loss of agent.
1107-0641-000
2/16/01
5 sec
Figure 1-18 • Removing the bottle
5-17
Tec 6 Plus Vaporizer
This page left blank intentionally.
5-18
2/16/01
1107-0641-000
1Maintenance
In this section
1107-0641-000
2/16/01
Maintenance intervals .....................................................................6-2
Cleaning ..........................................................................................6-2
External cleaning ......................................................................6-2
Internal contamination ..............................................................6-3
Output concentration check ......................................................6-3
Changing the battery .......................................................................6-4
Spare parts......................................................................................6-7
6-1
Tec 6 Plus Vaporizer
User Maintenance
Maintenance
Intervals
Prior to performing any maintenance procedures or returning to a
service center for repairs, clean and disinfect the vaporizer.
Annually:
Battery replacement.
Two years from
purchase date and
every six months
thereafter:
Planned safety inspections together with the
anesthesia system by qualified personnel.
Inspect and perform Output concentration
check.
Cleaning
w WARNING
Do not put any substance other than Suprane™
(desflurane) into the vaporizer sump.
Do not immerse the vaporizer in water or any other liquid.
Do not autoclave the vaporizer.
Do not allow cleaning agents to accumulate in the filler, the
gas inlet and outlet ports or around the control dial.
External cleaning
To clean external surfaces, use a moist cloth and a detergent
(pH 7 to 10.5).
For disinfection purposes, cleaning agents of a surface germicide type
should be used. In terms of material compatibility, cleaning agents
which contain the following active ingredients are suitable for use:
•
•
•
w WARNING
To avoid possible damage to the vaporizer, do not use the
following compounds as cleaning agents:
•
•
•
6-2
Aldehydes,
Alcohol,
Quartenary ammonium compounds.
Halogen hydrolyzing compounds,
Strong organic acids,
Oxygen hydrolyzing compounds.
3/23/01
1107-0641-000
Maintenance
Internal
contamination
If the vaporizer is filled or partly filled with an incorrect volatile agent or
other contaminant, proceed as follows:
1. Remove the vaporizer from service immediately and label the vaporizer stating that it is contaminated.
2. Return the vaporizer to the Datex-Ohmeda Authorized Service
Center stating that the vaporizer is contaminated and, if possible,
the type of contaminant in the vaporizer.
Output concentration
check
Connect the Tec 6 Plus to Anesthesia Machine.
1. Set the oxygen output of the anesthesia machine to a flow of 5 ±
0.5 L/min.
2. Ensure that the fresh gas output is connected to a gas scavenging
system.
3. Measure the concentration at the fresh gas outlet, using an agent
monitor which is calibrated to measure desflurane.
4. Allow the readings to stabilize and check that the readings are
within specified tolerances.
5. Document and maintain the test results, including the date, person
performing the test, and serial number of the unit tested.
The accuracy of the measuring equipment must be considered
when obtaining the readings!
1107-0641-000
2/16/01
Dial Setting
Min Vol %
Max Vol %
1
.5
1.50
6
5.10
6.90
12
10.20
13.80
18
15.30
20.70
6-3
Tec 6 Plus Vaporizer
Changing the battery
Change the battery every 12 months, irrespective of condition.
Step 1
Turn the dial to n
18
16
14
12
10
8 7
6
5
4
3
1
2
Figure 6-1 • Setting the dial to standby
Step 2
Disconnect the power cord
from the electrical supply.
Step 3
Remove the battery cover.
•
L
L
E
C
A
L
L
DUR
E
C
A
R
U
D
Remove the battery cover.
R
U
•
Unscrew the battery cover
securing screw.
VAPORIZER
INVERTED
D
•
Remove the vaporizer
from the manifold of the
anesthesia system as
described in Removing the
vaporizer from a manifold
in Chapter 4 and invert the
vaporizer.
BATTERY COVER
SECURING SCREW
mn A C E
6
ghc 23r L L
hjv
Figure 6-2 • Removing battery cover
6-4
2/16/01
1107-0641-000
Maintenance
Step 4
Remove the battery and
disconnect the terminals.
D
Dispose of the battery
according to local regulations.
U
R
A
C
E
L
L
D
U
R
A
C
E
L
L
DUR
mn A C E
6
ghc 23r L L
hjv
Figure 6-3 • Removing the battery
w CAUTION
w WARNING
Install only a Duracell MN1604 or VARTA Energy 2000
nine volt battery in the vaporizer. If any other battery is
installed, it can damage the vaporizer.
The battery terminals must be firmly clipped onto the
battery to help prevent a possible disconnection when the
vaporizer is moved.
Step 5
Install a new battery.
•
L
L
DUR
E
C
A
R
U
D
•
Clip the battery terminals
firmly onto the new battery,
observing the correct
polarity.
BATTERY
TERMINALS
mn A C E
6
ghc 23r L L
hjv
DURACELL MN 1604 OR
VARTA ENERGY 2000
BATTERY
Insert the battery into the
vaporizer.
Figure 6-4 • Installing new battery
1107-0641-000
2/16/01
6-5
Tec 6 Plus Vaporizer
Step 6
Fit the battery cover to the
base of the vaporizer and
tighten the securing screw.
BATTERY COVER
SECURING SCREW
D
U
R
A
C
E
L
L
D
U
R
A
C
E
L
L
DUR
mn A C E
6
ghc 23r L L
hjv
Figure 6-5 • Replacing battery cover
w WARNING
6-6
Do not throw batteries onto a fire, do not open with force
and do not recharge. To do so may result in operator
injury. When disposing of batteries, treat them as special
waste and dispose of according to local regulations.
2/16/01
1107-0641-000
Maintenance
Spare parts
Description
Part No.
O-ring Kit
1104-3025-000
Battery
1370219
NAD Mounting Kit
1107-7097-000
Power Cords:
Aestiva (universal)
IEC 320
.5 m
1006-3796-000
1.5 m
1107-3191-000
North America
3.5 m
1107-3189-000
North America
1.5 m
1107-3190-000
Continental Europe
1.5 m
1007-3186-000
Continental Europe
3.5 m
1107-3185-000
United Kingdom
3.5 m
1107-3187-000
Australia / New Zealand
1.5 m
1107-4020-000
Australia / New Zealand
3.5 m
1107-4025-000
To order contact your Datex-Ohmeda customer service
representative.
1107-0641-000
2/16/01
6-7
Tec 6 Plus Vaporizer
This page left blank intentionally.
6-8
2/16/01
1107-0641-000
1Principle of Operation
In this section
1107-0641-000
2/16/01
Alarm and indicator display .............................................................7-2
Delivery of gas/agent vapor ............................................................7-2
7-1
Tec 6 Plus Vaporizer
Alarm and indicator display
See Figure 7-1.
1. When the electrical supply is connected, each light and each LCD
agent level display bar on the front display panel (17) flashes and
the auditory alarm activates to indicate that the alarms are operational. After approximately four seconds, each light is extinguished, the LCD bars stop flashing and the auditory alarm is
silenced.
2. The amber WARM-UP light is illuminated to indicate that the vaporizer is in its warm-up cycle and the LCD agent level display
bars indicate the amount of agent in the sump.
3. During the warm-up cycle, the shut-off valve (8) is closed to prevent the supply of vapor to the pressure regulating valve (7), and
the electronics (16) perform the zero check.
4. When the vaporizer attains the required operating temperature,
the amber WARM-UP light is extinguished and the green OPERATIONAL light illuminates to indicate that the vaporizer is ready for
use.
Delivery of gas/agent vapor
1. When the vaporizer is ready for use, a signal from the electronics
(16) operates the solenoid (19) in the interlock mechanism which
allows the dial and rotary valve (1) to be turned.
2. When the dial and rotary valve (1) are turned, a signal from the
electronics (16) opens the shut-off valve (8).
3. The pressure control transducer (3) sends a signal of the difference between the gas inlet pressure and the regulated agent pressure to the electronics (16). The electronics alters the regulated
agent pressure by opening or closing the pressure regulating
valve (7) to balance the pressures.
4. When the regulated agent pressure of the circuit is equal to the
gas inlet pressure, the vaporizer functions correctly.
5. The dial and rotary valve (1) regulates the volume of vapor being
delivered to the fresh gas mixture.
6. The fresh gas mixes with the vapor just prior to the gas/agent outlet in the proportions consistent with the selected dial setting.
7-2
2/16/01
1107-0641-000
Principle of Operation
1
20
19
Gas/Agent Outlet
18
2
Fresh Gas Inlet
Gas Inlet Pressure
3
4
5
Regulated Agent Pressure
DESFLURANE
6
7
Operational
No Output
Low Agent
8
Warm-Up
17
16
Alarm
Battery Low
9
10
15
13
KEY
12 11
FRESH GAS
GAS/AGENT
VAPOR
14
ELECTRICAL
CONNECTIONS
AA.43.072
AGENT
VAPOR
KEY TO COMPONENTS
1
2
3
4
5
6
7
8
9
10
DIAL & ROTARY VALVE
FIXED RESTRICTOR
PRESSURE CONTROL TRANSDUCER
PRESSURE MONITOR TRANSDUCER
HEATER IN VAPOR CONTROL MANIFOLD
VAPOR CONTROL MANIFOLD ASSEMBLY
PRESSURE REGULATING VALVE
SHUT-OFF VALVE
SUMP ASSEMBLY
LIQUID AGENT
11
12
13
14
15
16
17
18
19
20
LEVEL SWITCH
LEVEL SENSOR
SUMP HEATERS
MAINS LEAD
BATTERY
ELECTRONICS
FRONT DISPLAY PANEL
TILT SWITCH
SOLENOID IN THE INTERLOCK BLOCK
HEATER IN THE VALVE PLATE
Figure 1-1 • Vaporizer schematic
1107-0641-000
2/16/01
7-3
Tec 6 Plus Vaporizer
This page left blank intentionally.
7-4
2/16/01
1107-0641-000
1Troubleshooting
In this section
1107-0641-000
2/16/01
Troubleshooting guide.....................................................................8-2
8-1
Tec 6 Plus Vaporizer
Troubleshooting guide
The following table details the alarm condition and the actions which
must be performed to correct the alarm condition and the possible
cause.
If vaporizer fails to function correctly after the appropriate action has
been taken, send the vaporizer to the Datex-Ohmeda Authorized Service Center for repair.
Note:
If the dial is at the
does not repeat.
setting when an alarm occurs, the auditory alarm
Vaporizer Status
Action
The vaporizer dial release can be
depressed, but the dial will not
turn. When more pressure on the
dial release is applied, a click on
the mechanism is detected. The
dial still cannot be turned.
Let go of the dial release, then:
Alarm indication
DESFLURANE
OPERATIONAL
NO OUTPUT
Possible cause
a) Allow the vaporizer to warm up
until the green OPERATIONAL light illuminates.
a) During WARM UP, the
interlock mechanism prevents vaporizer use.
b) If another vaporizer is in use,
turn the other vaporizer to dial
to OFF/ .
b) The interlock mechanism
of another vaporizer is
operative.
Action
Possible cause
Turn the dial to . Restore
external power. The vaporizer
may go to operational or perform
a thorough system check before
going operational, depending on
time of external power restoration,
or permanently red alarm if an
internal power failure is detected.
Power failure.
WARM-UP
ALARM
BATTERY LOW
AA.43.042
LOW AGENT
Note that a power failure causes
the higher pitched audio alarm
tone.
__________________________
Turn the dial to
and level the
vaporizer.
_______________________
Tilt
__________________________
_______________________
Any internal malfunction.
w WARNING
Use an alternative
means of anesthesia.
8-2
2/16/01
1107-0641-000
Troubleshooting Guide
Alarm indication
Action
Possible cause
Fill the sump with Suprane™.
Agent level <60 ml.
DESFLURANE
w WARNING If this
condition persists
until there is less than
20 ml of agent in the
sump, the NO
OUTPUT alarm is
activated and the
output ceases.
OPERATIONAL
NO OUTPUT
LOW AGENT
WARM-UP
ALARM
BATTERY LOW
Turn the dial to
and fill the
sump with Suprane™.
DESFLURANE
OPERATIONAL
Agent level <20 ml.
w WARNING If the NO
OUTPUT alarm persists,
use an alternative means
of anesthesia.
NO OUTPUT
LOW AGENT
ALARM
BATTERY LOW
AA.43.041 R
WARM-UP
Change the battery as soon as
practical (ideally within eight
hours of alarm indication).
DESFLURANE
Alarm battery low.
OPERATIONAL
NO OUTPUT
LOW AGENT
ALARM
BATTERY LOW
1107-0641-000
2/16/01
AA.43.043
WARM-UP
8-3
Tec 6 Plus Vaporizer
Alarm indication
DESFLURANE
OPERATIONAL
Action
Possible cause
w WARNING Do not
attempt to use the
vaporizer.
If the amber WARM-UP light
does not extinguish within ten
minutes after the vaporizer is
connected to an electrical
supply, there may be an
internal malfunction.
NO OUTPUT
LOW AGENT
ALARM
BATTERY LOW
8-4
AA.43.039
WARM-UP
2/16/01
1107-0641-000
1Specifications
In this section
1107-0641-000
2/16/01
Calibration .......................................................................................9-2
Electrical supplies ...........................................................................9-2
Performance....................................................................................9-3
Classification ...................................................................................9-4
Weight and dimensions ...................................................................9-5
Flow characteristics.........................................................................9-6
Effects of output at varied altitudes .................................................9-7
Effects of ambient temperature .......................................................9-7
Effects of back pressure..................................................................9-7
Effects of carrier gas composition ...................................................9-8
9-1
Tec 6 Plus Vaporizer
Note:
All specifications are nominal and subject to change without notice.
Calibration
Check the calibration certificate that is included with your Tec 6 Plus
Vaporizer.
w WARNING
The Tec 6 Plus Vaporizer can only be calibrated at a
Datex-Ohmeda Authorized Service Center.
The Tec 6 Plus Vaporizer is calibrated at 760 torr and at a nominal
21 °C for the following concentrations (v/v percent): 1, 2, 3, 4, 5, 6, 7,
8, 9, 10, 12, 14, 16 and 18, using O2 as the carrier gas flowing at five
liters/minute.
Electrical supplies
.
Voltage requirement
100 to 120V AC 50/60 Hz or
220 to 240V AC 50/60 Hz
Power consumption
250 VA nominal
Current input
Maximum current requirement is 2.0 A
The ~ symbol on the vaporizer rating label denotes that the external
AC power supply must be single phase sinusoidal alternating current.
9-2
2/16/01
1107-0641-000
Specifications
Performance
1107-0641-000
2/16/01
Concentration range
1 to 18%
Scale
1% from 1 to 10%
2% from 10 to 18%
Calibrated flow range
at 21 ± 2 °C
0.2 to 10 liters/minute
Accuracy at 5 liters/
min O2
± 0.5% v/v of delivered agent or ± 15%
dial setting (whichever is greater)
Liquid capacity
390 ml nominal volume (indicated on level
display)
240 ml refill capacity indicator
nominal 60 ml reserve (not indicated on
level display)
Flow resistance
Less than 50 cm H2O at 5 liters/minute of
O2 at 21 °C
Less than 250 cm H2O at 15 liters/minute
of O2 at 21 °C
Battery
Duracell MN 1604 or VARTA Energy 2000
Operating
temperature range
18 °C to 30 °C (64 °F to 86°F)
Operating humidity
range
30% to 75% relative humidity
(non-condensing)
Storage temperature
range
-40 °C to 60 °C (-40 °F to 140°F)
Storage relative
humidity range
0% to 95% relative humidity at 40 °C
(non-condensing)
Storage atmospheric
pressure
70.0 to 106.0 kPa
9-3
Tec 6 Plus Vaporizer
Classification
The vaporizer can be powered indefinitely unless a fault condition occurs, also known as continuous rating.
Type of protection against electric shock is Class 1. Accessible conductive parts of Class 1 equipment are connected to a protective earth
in such a way that they do not become live in the event of a failure of
the basic insulation.
The
symbol on the vaporizer rating label denotes the degree of
protection against electric shock, which is Type B.
The vaporizer is not protected against liquid flowing into the interior of
the unit.
9-4
2/16/01
1107-0641-000
Specifications
Weight and dimensions
Datex-Ohmeda
Weight
9.5 kg
20 lb 15 oz
(empty)
Depth
235 mm
9 1/4 inches
Width
110 mm
4 3/8 inches
Height
250 mm
9 7/8 inches (in
the unlocked
position)
Weight
10 kg
22 lb (empty)
Depth
235 mm
9 1/4 inches
Width
110 mm
4 3/8 inches
Height
235 mm
9 1/4 inches
North American
Dräger
1107-0641-000
2/16/01
9-5
Tec 6 Plus Vaporizer
Flow characteristics
The graph shows the nominal output of the Tec 6 Plus Vaporizer at
760 torr.
Effect Of Flowrate At 21 deg. C.
19
18
18
17
16
16
15
14
12
DIAL SETTING %
% DESFLURANE OUTPUT
14
13
12
11
10
10
9
8
7
7
6
5
5
4
3
3
1
1
0
1
2
3
4
5
6
7
8
9
AA.43.058
2
10
FLOW (LITERS/MINUTE O2)
9-6
2/16/01
1107-0641-000
Specifications
Effects of output at varied altitudes
The Tec 6 Plus Vaporizer is calibrated in percent v/v and the calibration is not affected by ambient pressure changes. The partial pressure
of the delivered agent at any selected dial setting varies directly with
the changes in ambient air pressure. The required dial setting can be
calculated using the following formula:
Required Dial Setting = Normal Dial Setting % v/v x
760 torr
ambient pressure (torr)
The table below shows the dial setting on a Tec 6 Plus Vaporizer at
altitudes of 1000m and 2000m respectively above sea level:
Normal dial
setting
% v/v
Required dial setting percent
At an altitude of
1000m (3282 feet)
At an altitude of
2000m (6564 feet)
5
5.5
6
10
11
12.5
14
17
18
Effects of ambient temperature
The performance of the Tec 6 Plus Vaporizer is not significantly affected by the temperature variations within the operating range specified
in Performance.
Effects of back pressure
Fluctuating back pressure does not significantly affect the output of the
Tec 6 Plus Vaporizer.
Steady back pressure does not significantly affect the concentration of
the agent delivered (v/v), but does increase partial pressure of the
agent. The increase is in the ratio of total back pressure to the vaporizer calibration pressure of 760 torr.
1107-0641-000
2/16/01
9-7
Tec 6 Plus Vaporizer
Effects of carrier gas composition
Small output decreases can occur when the carrier gas composition is
changed from 100% oxygen.
When either air or nitrous oxide is employed as the carrier gas, the output is lowered compared to the output when oxygen is the carrier gas.
This effect is the greatest (up to 20% of setting) at low flows when nitrous oxide is employed, but using nitrous oxide reduces the required
inspired concentrations of volatile agent which can, depending upon
the proportion, mitigate the decreases in output from the vaporizer.
9-8
2/16/01
1107-0641-000
1Warranty
In this section
1107-0641-000
2/16/01
Warranty........................................................................................10-2
10-1
Tec 6 Plus Vaporizer
Warranty
This product is sold by Datex-Ohmeda under the warranties set forth
in the following paragraphs.
Such warranties are extended only with respect to the purchase of this
Product directly from Datex-Ohmeda or Datex-Ohmeda’s Authorized
Dealers as new merchandise and are extended to the first Buyer
thereof, other than for purpose of resale.
For a period of twenty-four (24) months from the date of original delivery to the first Buyer or to Buyer’s order, but in no event for a period of
more than two years from the date of original delivery by Datex-Ohmeda to a Datex-Ohmeda Authorized Dealer, this Product, other than its
expendable parts, is warranted against functional defects in materials
and workmanship and to conform to the description of the Product
contained in the Operation and Maintenance manual and accompanying labels and/or inserts, provided that the same is properly operated
under conditions of normal use, that regular periodic maintenance and
service is performed and that replacements and repairs are made in
accordance with the instructions provided. This same warranty is
made for a period of thirty (30) days with respect to expendable parts.
The foregoing warranties shall not apply if the Product has been repaired other than by Datex-Ohmeda or other than in accordance with
written instructions provided by Datex-Ohmeda, or altered by anyone
other than Datex-Ohmeda, or if the Product has been subject to
abuse, misuse, negligence, or accident.
Datex-Ohmeda’s sole and exclusive obligation and the Buyer’s sole
and exclusive remedy under the above warranty is limited to repairing
or replacing, free of charge, at Datex-Ohmeda’s option, a Product
which is confirmed as being defective by Datex-Ohmeda following the
Buyer's notification to Datex-Ohmeda and, where requested, return of
the Product to Datex-Ohmeda in accordance with the instructions contained in the Servicing Policy section of the O & M Manual, not later
than seven (7) days after the expiration date of the applicable warranty. Datex-Ohmeda shall not be otherwise liable for any damages including but not limited to incidental damages, consequential damages,
or special damages.
There are no express or implied warranties which extend beyond the
warranties herein above set forth. Datex-Ohmeda makes no warranty
of merchantability or fitness for a particular purpose with respect to the
Product or parts thereof.
10-2
2/16/01
1107-0641-000
1Servicing Policy
In this section
1107-0641-000
2/16/01
Servicing policy .............................................................................11-2
11-1
Tec 6 Plus Vaporizer
Servicing policy
Repairs and service procedures must be performed at a Datex-Ohmeda Authorized Service Center. Contact your Datex-Ohmeda Service
Representative or Datex-Ohmeda Authorized Distributor.
If you are shipping the unit to the nearest Datex-Ohmeda Field Operations Unit, package the vaporizer and power cord securely for protection in its original packaging, and ship it prepaid. Provide the following
items:
1. Details of any difficulties experienced with the equipment.
2. Warranty information such as a copy of the invoice or other documentation.
3. Purchase order number to cover repair or service of equipment
not under warranty.
4. Ship to and bill to information.
5. The name and telephone number of the person to contact.
11-2
2/16/01
1107-0641-000
Index
A
C
Accuracy 9-3
Agent concentration 3-3
Agent level display 3-5, 3-8
Agent level indicator 5-2
Agent level sensing probe 2-9
Agent level sensor 2-8, 2-9
LCD 2-9
Alarm and display test 5-2
Alarm and indicators test 5-4
Alarm battery low 3-11
Alarm Levels 3-6
Alarm levels
High 3-6
Low 3-6
Medium 3-6
Ambient operating temperature 5-2
Auditory alarm
No output 2-9
Test 5-2
Auditory alarm mute button 3-4, 3-5
Auditory signals 3-6
Calibrated flow range 9-3
Calibration 9-2
Carrier gas composition 9-8
Concentration range 9-3
Concentration, setting 3-3
Condensation 2-8
Current input 9-2
Cyclopropane 2-4, 5-13
B
Datex-Ohmeda Authorized Distributor 11-2
Datex-Ohmeda Field Operations Unit 11-2
Datex-Ohmeda Service Representative
11-2
Depth 9-5
Desflurane 1-3, 2-2, 2-6, 5-13, 5-14
Refrigeration 5-13
Dial 3-3
Setting 5-10
Dial release 3-3, 5-11
Drain plug 2-7
E
Back pressure 9-7
Battery 2-5, 9-3
Changing 6-4
Disposing 6-6
Frequency of replacement 2-7, 6-4
Installing 4-2, 4-3, 6-5
Removing 6-5
Replacement type 4-2, 6-5
Terminals 4-3, 6-5
Testing 5-6
Battery cover
Removing 4-2, 6-4
Securing screw 4-2, 4-3, 6-4, 6-6
Bottle
Lower stop position 5-17
Upper stop position 5-16
Breathing tubes 2-4, 5-14
1107-0641-000
D
2/16/01
Electrical supplies 9-2
Equi-potential stud 2-8
Ether 2-4, 5-13
F
Face masks 2-4, 5-14
Filler assembly 2-6
Filler port 5-15
Filling the vaporizer 5-14
Flow resistance 9-3
Front panel display 3-5
I-1
Index
H
Mounting procedure 4-5
Heater elements 2-8
Height 9-5
High frequency surgical apparatus 2-4
High frequency ventilation 2-5
Hospital grade outlet 5-2
N
No output 3-10
O
Interlock block ports 4-7
Interlocks 2-3, 3-3, 4-5, 4-6
Operating humidity range 9-3
Operating temperature range 9-3
Output alarm, testing 5-7
Oxygen monitoring 5-10
L
P
Leaks, testing for 5-5
Lights
Alarm battery low 3-5, 5-6
Amber 3-6
Continuous 3-6
Flashing 3-6
Low agent 3-5
No output 2-9, 3-5, 5-7
Operational 3-3, 3-5, 3-8
Red 3-6
Test 5-2
Warm-up 3-5, 3-7
Liquid capacity 9-3
Lock lever 3-4
Locking lever 4-6, 4-8
Locking vaporizer onto manifold 4-8
Unlocking vaporizer from manifold 4-12
Power consumption 9-2
Power cord 2-7
Installing 4-2, 4-4
Routing 4-2, 4-7, 4-9
Power cord channel 4-4
Power cord retaining plate 4-4
Power failure 3-10
Power supply unit 2-6
Preoperative checkout 5-5
Principle of operation 7-1
Alarm and indicator display 7-2
Delivery of gas/agent vapor 7-2
I
R
Refill mark 3-5
Removing the vaporizer from
a manifold 4-11
M
Magnetic Resonance Imaging 2-4
Manifold 4-7
Manifold port valve O-ring 4-5, 4-7
Manifold port valves 4-7
Mercury, use in Tilt switch 2-4
Monitors
Agent volume 2-8
Pressure balance 2-8
Mounting
Checking for correct mounting 4-10
I-2
1107-0641-000 2/16/01
Index
S
V
Saf-T-Fill™ 5-14
Saf-T-Fill™ valve 2-6
Scale 9-3
Schematic, vaporizer 7-3
Selectatec™ Series Manifold 2-2, 4-5, 4-6
Sensors 2-1, 2-8
Servicing policy 11-2
Setup procedure 4-2
Short-wave therapy equipment 2-4
Spare parts 6-7
Specifications
Classification 9-4
Effects of ambient temperature 9-7
Effects of back pressure 9-7
Effects of carrier gas composition 9-8
Effects of output at varied altitudes 9-7
Flow characteristics 9-6
Performance 9-3
Weight and dimensions 9-5
Standards 2-2, 2-4, 5-10, 5-13
Status display 3-7
Storage atmospheric pressure 9-3
Storage relative humidity range 9-3
Storage temperature range 9-3
Sump 2-8
Suprane™ 1-3, 2-2, 2-6, 5-13, 5-14
Refrigeration 5-13
Symbols 1-4
Vaporizer
Placement in manifold 4-7
Visual signals 3-6
Voltage requirement 9-2
W
Warm-up cycle 5-14
Warm-up mode 3-7
Warranty 10-2
Weight 9-5
Width 9-5
T
Temperature variations 9-7
Tilt switch 2-9
Troubleshooting
Alarm battery low alarm 8-3
Continuous warm-up light 8-4
Low agent alarm 8-3
No output alarm 8-2
No output and low agent alarm 8-3
Troubleshooting guide 8-2
1107-0641-000
2/16/01
I-3
Corporate Office
Datex-Ohmeda Division
Instrumentarium Corp.
PO Box 900
FIN-00031 Helsinki
Finland
Tel 358 10 394 11
Fax 358 9 146 3310
North America
United States
Customer Service and Distribution Center
Datex-Ohmeda, Inc.
Ohmeda Drive PO Box 7550
Madison, WI 53707-7550, USA
Tel 1 800 345 2700
Fax 1 608 221 4384
Technical Support
Datex-Ohmeda, Inc.
Three Highwood Drive
Tewksbury, MA 01876, USA
Tel 1 800 345 2755
Sales and Service
Datex-Ohmeda, Inc.
Three Highwood Drive
Tewksbury, MA 01876, USA
Tel 1 800 635 6099
Fax 1 978 640 0469
Equipment Service Center
Datex-Ohmeda, Inc.
1315 West Century Drive
Louisville CO 80027-9560, USA
Tel 1 800 345 2755
Canada
Datex-Ohmeda (Canada) Inc.
1093 Meyerside Drive, Unit 2
Mississauga, Ontario
L5T 1J6
Canada
Tel 1 800 268 1472
Tel 1 905 565 8572
Fax 1 905 565 8592
Asia/Pacific
China
Datex-Ohmeda Pte. Ltd.
Room B416, COFCO Plaza
8 Jianguomennei Avenue
Beijing 100005, PR China
Tel 86 10 6526 9773
Fax 86 10 6526 0653
Datex-Ohmeda, Inc.
Ohmeda Drive
PO Box 7550
Madison WI 53707-7550
USA
Tel 608 221 1551
Fax 608 222 9147
www.datex-ohmeda.com
Datex-Ohmeda Pte. Ltd.
Room 1708, Yunlong Mansion
No. 122 Luoguo Street
Chengdu 610017, PR China
Tel 86 28 661 4424
Fax 86 28 676 2703
Datex-Ohmeda Pte. Ltd.
403 Huan Shi Dong Road
Room 1602, GIE Tower
Guangzhou, 510095, P R China
Tel 86 20 8732 2521
Fax 86 20 8732 2518
Datex-Ohmeda Pte. Ltd.
Room 2509 Lippo Plaza
No. 222 Huaihai Road (M)
Shanghai 200021, P.R. China
Tel 8621 5382 5657
Fax 8621 5382 1691
Datex-Ohmeda Pte. Ltd.
Room 809, Truroll Plaza
Wusheng Road
Wuhan 430033, P R China
Tel 86 27 8571 2536
Fax 86 27 8571 2655
India
Datex-Ohmeda (India) Pvt. Ltd.
Block EP & GP, Sector V
Plot XI-16, Salt Lake City
Calcutta 700091
India
Tel 91 33 3574002
Fax 91 33 3574001
Indonesia
Datex-Ohmeda Pte. Ltd.
Wisma Danamon Aetna Life 19th Floor
Jln. Jend Sudirman Kav. 45-46 Jakarta
12930, Indonesia
Tel 62 21 575 0864
Fax 62 21 575 0865
Japan
Datex-Ohmeda K. K.
TRC Annex 9F
6-1-1 Heiwajima
Ohta-ku, Tokyo 143-0006
Japan
Tel 81 3 5763 6801
Fax 81 3 5763 6838
Datex-Ohmeda K. K.
Technical Center
TRC A Bldg. AE 4-8
6-1-1 Heiwajima
Ohta-ku, Tokyo 143-0006
Japan
Tel 81 3 5763 6850
Fax 81 3 5763 6852
Korea
Datex-Ohmeda Pte. Ltd.
10th Floor, Sam Sung Building
36 - 1, Yoido-Dong, Youngdeungpo-Ku
Seoul, Korea
Tel 82 2 786 7421
Fax 82 2 786 7420
Malaysia
Datex-Ohmeda Pte. Ltd.
Level 2 Bangunan O'Connor
13 Jalan 223
46100 Petaling Jaya
Selangor, West Malaysia
Tel 60 3 754 7872
Fax 60 3 757 6948
Singapore
Datex-Ohmeda Pte. Ltd.
152 Beach Road
#12-05/07 Gateway East
Singapore 189721
Tel 65 391 8618
Fax 65 291 6618
Thailand
Datex-Ohmeda Pte. Ltd.
12th Floor (Unit F) Grand Amarin Tower
1550 New Petchburi Road, Makasan, Rajathevi,
Bangkok 10320, Thailand
Tel 66 2 2071012/13
Fax 66 2 207 1014
Taiwan and Philippines
Datex-Ohmeda Pte. Ltd.
2nd Floor, No. 85, Chien-Kuo North Road,
Sec. 2
Taipei, Taiwan
Republic of China
Tel 886-2 2515-0457
Fax 886-2 2501-9136
Vietnam
Datex-Ohmeda Pte. Ltd.
522G Nguyen Tri Phuong St.
Ho Chi Minh City, Dist. 10 Vietnam
Tel 848 865 5875
Fax 848 862 5501
Australia
Datex-Ohmeda Pty. Ltd.
Units 1 & 2
149 Arthur Street
P O Box 356
Homebush
NSW 2140
Australia
Tel 61 132 229
Fax 61 297 461796
Europe
France
Datex-Ohmeda S.A.S.
Parc de Pissaloup, BP 10
8 Avenue Jean d’Alembert
F-78191 Trappes-Cédex
France
Tel 33 1 30 68 60 00
Fax 33 1 30 68 60 01
Datex-Ohmeda S.A.S.
17 rue Jean-Elysée Dupuy
F-69410 Champagne Au Mont d'Or
France
Tel 33 1 30 68 60 00
Fax 33 4 78 43 26 58
Germany
Datex-Ohmeda GmbH
Auf der Höhe 49
Gewerbehof 49
D-47059 Duisburg
Germany
Tel 49 2065 691 247
Fax 49 2065 691 255
Italy
Datex-Ohmeda S.p.A.
Via Cassanese 100
20090 Segrate, Milan
Italy
Tel 39 2 21693431
Fax 39 2 26926226
Netherlands
Datex-Ohmeda B.V.
Kantemarsweg 18
Post Box 22
3870 CA Hoevelaken
Netherlands
Tel 31 33 253 5404
Fax 31 33 253 7223
Spain
Datex-Ohmeda S.L.
C/Manuel Tovar 26
28034 Madrid
Spain
Tel 34 1 334 26 00
Fax 34 1 358 12 84
United Kingdom
Datex-Ohmeda Ltd.
Ohmeda House
71 Great North Road
Hatfield Hertfordshire
AL9 5EN England
Tel 44 1707 263570
Fax 44 1707 260191
Latin America, Caribbean
Datex-Ohmeda Latin America
10685 North Kendall Drive
Miami, FL 33176, USA
Tel 1 305 273 9940
Fax 1 305 273 4382
Middle East
Datex-Ohmeda
Middle East Operations
P O Box 5527
Dubai, United Arab Emirates
Tel 97 14 822653
Fax 97 14 822659
1107 0641 000
01 01 B
Printed in USA
©2000 Datex-Ohmeda, Inc. All rights reserved