1
MODELS:
LAT9205 •
LAT8305
TABLE OF CONTENTS
• LAT8035
FOR FUTURE REFERENCE
Future Reference ..... Inside Front Cover
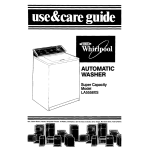
Congratulations on your choice of a Maytag
Safety Instructions .......................... 1
washer! Your satisfactionis very important to L
The information in this USER'SGUIDE will hell:
you understandhow your washer operates.
Additional information is found in the MAYTA(
LAUNDERINGGUIDE on proper washing and
Using the Washer ........................ 2-3
Operating Instructions
SelectWater Level.......... :.......... 4
SelectWater Temperature........... 4
SelectWash Cycle................. 4-5
drying techniques.By following these instructic
carefully, you will be able to achieve excellent
resultswith your washer.
SelectSoak Cycle ..................... 5
Start the Washer ....................... 5
Should you have any questionsabout using yc
Maytag washer, contact us. Pleasehave the
Indicator Light........................... 5
model and serial numbersavailable.
Maintaining
the Washer ................ 6
Storing the Washer ......................... 6
Cycle Descriptions ........................... 7
Water Usage ................................... 7
Before You Call for Service ............ 8
Warranty ......................................... 9
Consumer Publications ................... 9
MAYTAG
CONSUMER EDUCATION
ONE DEPENDABILITY
SQUARE
NEWTON, IOWA 50208
(515) 791-8911
(Mon.-Fri., 8am-5pm CST)
NOTE: For service and warranty information
pages 8-9.
Forfuture referencewe suggestyou retainthis
manual.Recordthe model number and serial
number of this washer in the spaces provided.
the washer changes ownership, be surethis
manual accompanies the washer.)
This information can be found on the data plal
located on top of the control panel cover.
Model
Serial No.
WARNING - Check with installer to m(
sure appliance has been grounded to
avoid possible electrical shock. Be sun
you read the following IMPORTANT
PERSONAL SAFETY INSTRUCTIONS beh
you start to use this washer.
I
IMPORTANT PERSONAL SAFETY INSTRUCTIONS
WARNING m Toreduce the risk of fire, electric shock, or injury to persons using this
appliance, follow basic precautions,including the following:
1. Read all instructionsbefore using the
appliance,
4. Before the appliance is removed from serv
or discarded, remove the door to the
2. To avoid the possibility of fire or explosion:
a. Do not wash itemsthat have been
previously cleaned in, washed in, soaked
in, or spottedwith gasoline, dry-cleaning
solvents,other flammable or explosive
washing compartment.
5. Do not reach into the appliance if the
agitator is moving.
6. Do not install or store this appliance wher_
will be exposed to the weather.
substancesas they give off vapors that
could ignite or explode.
Any material on which you have used a
cleaning solvent,or which is saturated
with flammable liquids or solids, should
not be placed in the washer, until all
traces of theseflammable liquids or solids
and their fumeshave been removed.
There are many highly flammable items
used in homes,suchas: acetone,
denatured alcohol, gasoline, kerosene,
some liquid household cleaners, some
spot removers,turpentine, waxes and wax
removers.
b. Do not add gasoline, dry-cleaning
solvents,or other flammable or explosive
substancesto the wash water. These
substancesgive off vapors that could
ignite or explode.
_
c. Under certain conditions, hydrogen gas
may be produced in a hot water system
that has not been used for 2 weeks or
more. HYDROGENGAS IS EXPLOSIVE.If
the hot water systemhas not been used
for sucha period, before using a washing
machine or combination washer-dryer,
turn on all hot water faucetsand let the
water flow from each for several minutes.
Thiswill releaseany accumulated
hydrogen gas. As the gas is flammable,
do not smokeor usean open flame
during this time.
3. Do not allow children to play on or in the
appliance. Close supervision of children is
necessarywhen the appliance is used near
children.
7. Do not tamper with controls.
8. Do not repair or replace any part of the
appliance or attemptany servicing unless
specifically recommendedin published use
repair instructionsthat you understandand
have the skillsto carry out.
9. Theagitator should not be removed. If the
agitator is removed, it mustbe replaced by
pushing down completely and the locking
screw tightened before the washer is
operated.
10. This appliance mustbe properly grounded.
Never plug the appliance cord into a
receptacle which is not grounded adequat_
and in accordance with local and national
codes. See installation instructionsfor
grounding this appliance.
Save These Instructions
Appliances with the (_ symbol on the data plate
have been listed with Underwriters' Laboratorie_
Inc. Thosewith a CSA Monogram on the data
plate have been certified by the CSA Testing
Laboratoriesas complying with Canadian
Standards Association requirements.
Nevertheless,as with any equipment using
electricity and having moving parts, there are
potential hazards. To use this appliance safely,
the operator should become familiar with the
instructionsfor operation of the Appliance and
always exercisecare when using it.
PAGE
USING THE WASHER
Detergent
Useeither liquid or granular laundry detergent.
Add measuredamount of detergent to washtub
before loading.
Readthe manufacturer'sinstructionsand use the
correct amount. Most instructionsare for washing
an "average" load. If the size of the load is extra
large, the degree of soil is heavier than average
and the water is harder than 6 grains per gallon,
more detergent should be used.
Wipe up any spills of liquid laundry detergent on
the washer.
Loading the Washer
Placedry, unfolded clothes loosely in the tub, up
to the top row of holes for a maximum load. Do
not pack or wrap itemsaround the agitator. See
MAYTAG LAUNDERINGGUIDE for suggestions
on sorting. Be sure to empty all pockets, mend
any holes or tears and pretreat spots, stains and
heavily soiled areas.
PAGE2
I
Fabric Softener
When using rinse-addedfabric softener, add the
recommendedamount to the cup located in top of
the agitator. The cup may be lifted out for filling.
Add warm water to bring liquid level to the
indicated FILLLINEin the cup. Diluted fabric
softenerwill automatically be added to the rinse.
(A_ays dilutefabricsoftenerwith water.)
Do notinterruptthe spinfollowingthe washcycle
becausethe softenerwill go intothewashtubat
thewrong time.
Thearea in and around thedispensercup should
be flushedand cleanedwith hotwater and a soft
brushperiodically.
Bleach
When usingliquidchlorinebleach,carefully
measuretheamountof bleachrecommendedon
the bottlelabel. General recommendations
are
1/8 cupfor each 2 gallonsof washwater.
Amount of wash water in: EX. SMALL- 10
gallons (8 Imperial gallons; 38 liters); SMALL12 gallons (10 Imperial gallons; 45 liters);
MEDIUM- 14 gallons (12 Imperial gallons; 53
liters); LARGE- 17 gallons (14 Imperial gallons;
64 liters);EXTRALARGE- 19 gallons (16
Imperial gallons; 72 liters).
Selectwater level, water temperature,desired
cycle and start washer. Dilutechlorinebleachas
recommendedby the bleachmanufacturer
(generally4 portswater to 1 port bleach).A few
momentsafter the washing action starts,lift the lid
and pour the diluted bleach solutionaround the
agitator. Thenclose the lid immediately and restart the washer.
Becarefulwheneveryou useliquidchlorine
bleach.It isa powerfulchemicaland cancause
fabricdamage, suchas tearsor colorloss,if nat
usedproperly.Do notpourdirecllyon fabrics.
A_ays dilutewith water. Wipe up spillswith a
papertowel.
Non-chlorinebleachmay be added withthe
detergent.Followthe instructions
on the package.
If usedimproperly,fabric damage may occur,
suchas color loss.
PAGE
OPERATING INSTRUCTIONS
Select Water Level
Select Wash/Rinse Water
Turn the selector knob to the settingthat matches
the size of the load.
Thepre-setselectorknob (noton all models_can
be set to four or five distinct settingsdepending
on the model- EX. SMALL,SMALL,MEDIUM,
LARGE,EXTRALARGE.
Temperature
The infinite selectorknob (noton all models)can
be moved to each water level or any point in
between. If more water is needed once the fill is
complete, move the knob to Reset,then to the
desired setting,
setting for heavily soiled whites and colorfas
items.
WARMCOLD - Wash water will be a mixh.
water coming from the hot and cold water
faucets. Rinsewater will be cold. Usethis foi
For best washing results,clothes mustcirculate
freely. If too little water is used, poor cleaning,
linting and excessivewear may result.Use the
following as a guide to selectthe proper water
level:
Ex. Small- 1/4 full of clothes,
itemswith moderate soil )evel and colored it
COLD/COLD - Wash and rinse water will b
temperatureof the water coming from the cc
water faucet. Use this settingto minimize fac
of brightly colored itemsand shrinkage of
washable woolens. NOTE: Water below 6_"
too cold to dissolve and activate granular Ic
detergents.
Small
(not on all models]- T/4 to 1/3 full of
clothes.
Medium- 1/3 to 1/2 full of clothes.
Large- 1/2 to 3/4 fullof clothes.
Ex. Large- 3/4 to full of clothes.
NOTE: When launderingpermanentpressitems
or itemsof delicateconstruction,
washablewoolensor looselyknit items,
never uselessthan the MEDIUMsetting,
Thiswill minimizeshrinkage,wrinkling
and pullingof seams,
PAGE4
Turnthe selector knob to the water temperatu
desired.
HOT/COLD - Wash water will be the
temperature of the water coming from the hc
water faucet. Rinsewater will be cold. Use tl
Select Cycle and Time
Pushin the cycle control knob and turnclocl
to the proper cycle and washtime.
Washing:
TheHEAVYcycleisdesignedto wash very s
loads,the NORMALcycleis for average soil
loadsand the UGHTcycleshouldbe select_
slightlysoiledloads.
cording to model,)
For REGULAR
FABRICloads, turn the control knob
to 12 minutesfor a HEAVYcycle; to 8 minutesfor
a NORMAL cycle; and to 5 minutesfor a LIGHT
cycle.
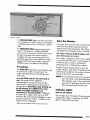
Start the Washer
For PERMANENT
PRESSloads, turn the control
knob to 10 minutesfor a HEAVY/NORMAL
cycle, and to 5 minutesfor a LIGHTcycle. Due to
the extra cooldown rinsewhich minimizes
selectedwash water temperature.After filling, i
will agitate for the selectednumberof minutes.
Thewasherwill pausebriefly throughouteach
cycle.Thesepausesare normal.
wrinkling,thiscycle can also be usedfor nonpermanentpress itemswhen additional rinsing is
needed. NOTE: On some models a separate
NORMAL cycle (7 minutes)can be selected,
Thiswasher is designedso thatit will not agitat
or spin when the lid is open. It will, however, fill
with the lid open so water is available for
pretreating stains or diluting fabric softener.
Presoaking:
Should the lid be opened during a cycle, the
TheSOAKONLYcycle (noton all models)isused
to soakheavilysoiledor staineditems.The
washer does notadvance automatically into a
wash cycle.
washerwill stop;when the lid isclosedand the
control knob is pulledout, thewasher will resum
its cycle at the point it was interrupted.
NOTE: If an unbalancedload occursduring th_
Tousethe SOAKcycleturnthe controlknobto
start. Thewasher will fill, agitate for
approximately3 minutesand soak untilthe
controlknob is advancedintoa washcycle or
spin and drain. Generally, soak periods up
to 30 minutes are sufficient for most
loads (overnight soaking is not
necessary or recommended). If following
the soakwith a regular wash, useup to 50%
morethanthe usualamountof detergentor usea
presoakproductsuchas Biz* in additionto the
regular amount of detergent.
Pullout the cycle control knob to start the washE
It will fill to the selectedwater level with the
spin, the washer will automatically stop.
If thishappens,pushin the controlknob
open the lid, redistributethe load, close
the lid and pull outthe controlknob.
Indicator Lights
(Not on all models)
TheON light stayslit throughouttheentire cycle
indicatingthewasheris operating.The SOAK
light ison duringthe soakcycle.
*Brand names are trademarks of the respective manufacturers.
PAGE
MAINTAINING
THE WASHER
STORING THE WASHER
• Turnoff the water faucets after finishingthe
day's washing. Thiswill shutoff the water
supply to the washer and prevent the unlikely
possibili_/of damage from escaping water,
Washers can be damaged if water is not
removed from hosesand internal components
before storage. Preparethe washer for storag,
follows:
• Clean the control panel with a soft damp cloth
and glass cleaner. Do not useany abrasive
powders or cleaning pads.
• Selectthe NORMAL cycle on Regular Fabric
and add one cup of bleach or white vinegal
a full load of warm or hot water without
• Clean the cabinet with soap and water
followed with an appliance wax, if desired,
• TheSELF-CLEAN
LINT FILTER
is located under
clothes.Runthe washer through a complete
cycle.
• Turnthe water faucetsoff and disconnect the
the agitator on the bottom of the washtub. The
lint filter in this washer cleans itself. During the
wash and rinse portion of the cycle, lint is
collected on the filter. The filter is then flushed
automatically during the spin and drain.
inlet hoses.
• Advance the cycle control knob to the final
of RegularFabrics and lower the drain hose
drain any water that may be in the drain ho
• Disconnectthe washer from the electrical su,
and leave the washer lid open to let air
circulate inside the tub.
PAGE6
CYCLE DESCRIPTIONS
REGULAR FABRICS*
Fit1
WASH
SPIN & DRAIN
SPRAYRINSE
SPIN & DRAIN
Fill
DEEPRINSE& AGITATE
SPIN & DRAIN
PERMANENT PRESS*
Pill
WASH
SPIN & PARTIALDRAIN
Fill with cold water
AGITATE
SPIN & DRAIN
Fill with cold water
DEEPRINSE& AGITATE
SPRAYRINSE
FINALSPIN
SPIN & DRAIN
SPRAYRINSE
FINALSPIN
Special Cycle (not on all models)
SOAK ONLY
Fitl
AGITATE
SOAK (infinite)
*The cycle sequenceis the same ForHEAVY, NORMAL and LIGHT;however, the total cycle time will vary.
NOTE: Thewasherwill pausebriefly throughouteachcycle.Thesepausesare normal.
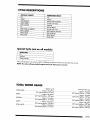
TOTAL WATER USAGE
RegularCycle
PermanentPressCyc
EXTRASMALL........................................... Approx. 24 gallons..............................................................
Approx. 30 gallo
{20 Imperial gallons; 91 liters)
(25 Imperial Gallons; 114 litel
SMALL..................................................... Approx. 28 gallons..............................................................
Approx. 36 gallor
(23 Imperial gallons; 106 liters)
(30 Imperial gallons; 136 liter:
MEDIUM.................................................. Approx. 32 gallons..............................................................
Approx. 42 gallon
(27 Imperial gallons; 121 liters)
(35 Imperial gallons; 159 liter:
LARGE..................................................... Approx. 36 gallons..............................................................
Approx. 48 gallor
(30 Imperial gallons; 136 liters)
(40 Imperial gallons; 182 (iter_
EXTRALARGE........................................... Approx. 40 gallons..............................................................
Approx. 54 gallon
(33 Imperial gallons; 151 liters)
(45 Imperial gallons; 204 liter:
PAGE ;
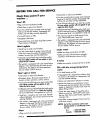
BEFORE YOU CALL FOR SERVICE
Check these points if your
• Check
fuseorreset
circuit breaker.
Won't
• Turnthe controlknob to proper cycle and pull
knob outto startthe washer. If equipped with
buttons,be suretheyare fullydepressed.
washer...
fill
• Plugcord intolive electricaloutlet.
• Check fuseor resetcircuitbreaker,
* Closelid and pull knobout to startthewashel
Foryour safety,washerwill not agitate or splJ
unlessthe lid isclosed.
• Turnthecontrolknob to propercycle and pull
knob outto startthe washer.If equippedwith
buttons,be sure they are fully depressed.
• Off-balanced load. Redistributethe load evenl
closelid and pullknob out.Checkfar levelin_
Be surewater levelis acceptablefor load siz,
• Turnboth _aucetson fully.
• Straighteninlet hoses,
• Disconnecthosesand check hose filter screens.
Clean screens,if plugged,
• Thismay be a pauseor soak period in the
cycle. Wait briefly and it may start.
• Thewasher is equipped with a lid switch faik
detector. In the eventthat the lid switch shouk
malfunction,the detector will stop operations
for your safety.Call for service.
Won't agitate
• Check fuseor resetcircuitbreaker.
• Turnthe controlknob to proper cycle and pull
knoboutto startthewasher.If equipped with
buttons,be surethey are fully depressed.
• Close lid and pull knob out to startthe washer,
Foryour safety,washerwill notagitate or spin
unlessthe lid is closed.
• Thewasher isequippedwith a lid switchfailure
detector.In the eventthatthe lid switchshould
malfunction,the detector will stopoperations
for your safety.Ca))for service.
Leaks water
• Make sure hoseconnectionsare tight.
• Make sureend of drain hoseiscorrectly
insertedin and securedto drain facility.
Is noisy
• Make surewasher is level and firmto the fla,
Fills with
water
the wrong
temperature
Won't spin or drain
• Check fuseor resetcircuitbreaker.
• Straightenhoses.Eliminatekinked hoses.If
there isa drain restriction,call for service,
• Turnbothfaucetsan fully.
• If equippedwith a temperatureselectorknoL
be sureit is setdirectly on a temperatureset
and not betweensettings.
• Close lid and pull knob outto startwasher. Far
your safety, washer will notagitate or spin
unlessthe lid is closed,
• Make suretemperatureselectionis correct.
• Make surehosesare connectedto correct
faucetsand inletconnections.Besurewater
• Off-balanced load. Redistributethe load evenly,
closelid and pull knobout.Checkfor leveling,
Be surewater level isacceptable for load size.
supplyis regulatedcorrectly. Flushwater lint
before tilting washer.
• Check thewater heater.It shouldbe setto
deliver a minimum 120°F (49°C) hot water
the tap. Also check water heater capacity c
• Sudslock - caused by too muchsuds. Rewash
without detergent. Usecorrect amount of a lowsudsingdetergent,
• Thewasher is equipped with a lid switch failure
detector. _nthe event that the lid switchshould
malfunction,the detectorwill stop operations
far your safety.Cal( for service.
Stops
• Plugcord intolive electricaloutlet.
PAGE8
recovery rate.
• Hose filter screensplugged. Disconnecthas
and clean screens.
NOTE: Forfurtherassistancecontactyour
Maytag dealer or call Maytag Custor
Service:
U.S.
Canada
1-800-688-9900
1-800-688-2002
AUTOMATIC WASHER WARRANTY
Full One Year Warranty
For one I1) year fromthe date of original retail purchase,any part which fails in normal home use wifl be repaired or
replaced free of charge.
Limited Parts Warranty
After the first year from the date of origina) retail purchase, through the time periodslisted below, the designated parts wh
fail in normarhome use will be repaired or repJacedfree of charge for the part itself,with the owner paying all other costs
including labor.
Second Year--All parts.
Third through Fifth Year--The drive motor. All parts of the solid state controls (if so equipped).
Third through Tenth Year--AlL parts of the transmissionassembly.
Additional Limited Warranty Against Rust
Should an exterior cabinet, including the top, lid, and baseframe, rust during the five year period starting from the date of
retail purchase, repair or replacementwill be made free of charge during the first year. After the first and through the fifth
year repair or repracementwill be made free of charge for the part itself, with the owner paying air other costs, including
labor.
This full warranty and the limited warranties apply when the appliance is located in the United Statesor Canada. Applianc
located elsewhereare covered by the limited warranties only, which incrudesparts which fail during the first year.
ThisWarranty gives you specific legal rights, and you may also have other rights which vary from stateto state.
TO RECEIVEWARRANTY SERVICE
To locate an authorized servicecompany in your area contact the Maytag dealer from whom your appliance was purchased
call Maytag CustomerService. Should you not receive satisfactorywarranty service, call or write:
Maytag CustomerService
240 Edwards St. S.F.
Cleveland, TN 37311
US
1-800-688-9900
CANADA
1°800-688-2002
When contacting Maytag Customer Service be sure to provide the model and serial numbers of your appliance, the name an,
addressof the dealer from whom you purchasedthe appliance and the date of purchase.
Shouldyou stillhavea probrem,writeto: Major Appriance
ConsumerActionPanel,20 NorthWackerDrive,Chicago,Illinois60606. MACt
isan industrysponsored
butindependent
groupof consumerexpertswhoreceiveand act on complaintsfromapplianceowners.
NOTE: Whenwritingaboutan unsolvedserviceproblem,p(easeincludethefollowinginformation:
(a) Yourname,address,and telephonenumber;
(b) Modelnumberand serialnumber(foundon controlpanelcover)of yourappliance;
(c) Nameand addressof yourdealeraeddatetheappriancewas bought;
(d) A cleardescriptionof theproblemyouarehaving;
(e) Waterhardness,detergentbrandandamount,watertemperature
and cycleused.
Consumer
Publications
Formoreinformationon launderingand purchasing
othermaiorappliances,orderthefollowingbookletsfromMaytagat thepricesindicated
Sendyourname,address,booklettitle,formnumberand payment
to: Consumer
Education,Maytag,One Dependability
Square,Newton,IA
50208. Allow6-8 weeksfordelivery.
StainRemoval
Guide-- 19YG...............................................................................................50¢
TheFactsof Laundry
-- 18IYG..............................................................................................50¢
ChoosingtheRightLaundryAdditives-- t 84YG......................................................................50¢
SpecialBaby,SpeciarClean-up-- 191YG..............................................................................50¢
_netgySa'_ing
Tips-- 392YG................................................................................................50¢
ApplianceBuyingGuides......................................................................................................50¢ EACH
Washer--211YG;Dryer--212YG;Dishwasher--213YG;
ElectricRange-- 214YG;GasRange-- 215YG;Refrigerator
-- 276YG
PAGE