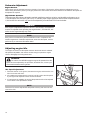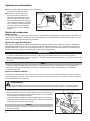
1
SHINDAIWA OWNER / OPERATOR’S MANUAL
HT231 HEDGE TRIMMER
WARNING
Minimize the risk of injury to yourself and others! Read
this manual and familiarize yourself with the contents.
Always wear eye and hearing protection when operating
this unit.
X7502862800
02/10
Introduction
The Shindaiwa 231 series of hand-held power equipment is designed and built to deliver superior performance and
reliability without compromise to quality, comfort, safety or durability. Shindaiwa engines represent the leading edge of highperformance engine technology, delivering exceptionally high power with remarkably low displacement and weight. As an
owner/operator, you’ll soon discover for yourself why Shindaiwa is simply in a class by itself!
IMPORTANT!
The information contained in these instructions describes units available at the time of publication.
Echo, Inc. reserves the right to make changes to products without prior notice, and without obligation to make alterations to
units previously manufactured.
WARNING!
The engine exhaust from this product contains chemicals known to the State of California to cause cancer, birth
defects or other reproductive harm.
Contents
PAGE
Safety ....................................................3
Product Description................................6
Specifications.........................................7
Mixing fuel..............................................8
Filling the fuel tank.................................9
Starting the Engine ..............................10
PAGE
Stopping the engine.............................12
Operation..............................................12
Maintenance.........................................13
Troubleshooting Guide.........................19
Warranty...............................................22
IMPORTANT!
The operational procedures described in this manual are intended to help you get the most from this unit as well as to protect you and others from harm. These procedures are guidelines for safe operation under most conditions, and are not
intended to replace any safety rules and/or laws that may be in force in your area. If you have questions regarding your
series of hand-held power equipment, or if you do not understand something in this manual, contact Shindaiwa at the
address printed on the back of this Manual.
Attention Statements
Throughout this manual are special “attention statements”.
DANGER!
A statement preceded by the triangular attention symbol and
the word “DANGER” contains information that should be acted upon
to prevent serious injury or death.
WARNING!
A statement preceded by the triangular attention symbol and the
word “WARNING” contains information that should be acted upon to prevent serious bodily injury.
IMPORTANT!
A statement preceded by the word “IMPORTANT” is one that possesses
special significance.
2
CAUTION!
A statement preceded by the word
“CAUTION” contains information
that should be acted upon to prevent
mechanical damage.
NOTE:
A statement preceded by the word
“NOTE” contains information that is
handy to know and may make your job
easier.
Safety and operation labels
A hedge trimmer has the potential to cause
serious personal injury to the operator or
bystanders if misused, abused or mishandled.
You must observe all special safety instructions
to reduce the risk of personal injury.
Safety
Read and follow this manual, make sure anyone
using the trimmer does likewise. Failure to do
so could result in serious personal injury or
machine failure. Keep this manual for future
reference.
Always wear a hard hat to reduce the risk of
head injuries during operation of this machine.
In addition, always wear eye and hearing protection. Shindaiwa recommends wearing a face
shield as additional face and eye protection.
The blades are SHARP. Handle with care.
Keep hands clear of the cutter blades when
starting the engine.
WARNING !Surface can be hot. Always wear
gloves when handling this unit.
HOT SURFACE
Work Safely
A hedge trimmer has the potential to cause serious personal injury to the operator or bystanders if misused, abused
or mishandled. To reduce the risk of injury, you must maintain control at all times, and observe all safety precautions
during operation. Never permit a person without training or instruction to operate this machine!
Stay Alert
You must be physically and mentally fit to operate this unit safely.
WARNING!
Hedge Clipper blades are very sharp. Touching them may lead to severe personal injury. Avoid touching
blades whenever possible, and always wear gloves to protect hands
WARNING!
Never make unauthorized attachment installations. Always use genuine Shindaiwa parts and accessories when repairing or maintaining this unit.
WARNING!
Operation of this equipment may create sparks that can start fires around dry vegetation. This unit is
equipped with a spark arrestor and a spark arrestor may be required. The operator should contact local fire
agencies for laws or regulations relating to fire prevention requirements.
WARNING!
Never operate power equipment of any kind if you are tired or if you are under the influence of
alcohol, drugs, medication or any other substance that could affect your ability or judgement.
WARNING!
Moving parts can amputate fingers or cause severe injuries. Keep hands, clothing and loose objects
away from all openings.
•ALWAYS stop engine, disconnect spark plug, and make sure all moving parts have come to a complete stop
before removing obstructions, clearing debris, or servicing unit.
•DO NOT start or operate unit unless all guards and protective covers are properly assembled to unit.
•NEVER reach into any opening while the engine is running. Moving parts may not be visible through openings.
WARNING!
Engine exhaust IS HOT, and contains Carbon Monoxide (CO), a poison gas. Breathing CO can cause unconsciousness, serious injury, or death. Exhaust can cause serious burns. ALWAYS position unit so that exhaust is
directed away from your face and body.
3
WARNING!
Use Good Judgement
NEVER transport the unit or leave it
unattended with the engine running.
An engine that’s running could be accidently accelerated causing the blades
to move.
Make sure that the blade cover is in
place when transporting or storing the
hedge trimmer.
ALWAYS make sure that the cutter
attachment and all handles and guards
are properly installed and firmly tightened before operation.
Inspect for broken, missing or improperly installed parts or attachments.
NEVER use a cracked or warped cutter
or cutter bar: replace it with a serviceable one and make sure it fits properly.
Make sure there are no missing or
loose fasteners, and that the stop
switch and throttle controls are working
properly.
Make sure there is always good ventilation when operating the hedge trimmer.
Fumes from engine exhaust can cause
serious injury or death. NEVER run the
engine indoors!
NEVER smoke or light fires near the hedge
trimmer. Keep the unit away from excessive
heat. Engine fuel is very flammable and
fire could lead to serious personal injury or
property damage.
Do not operate this machine with the muffler removed.
NEVER attempt cutter adjustment with the
engine running!
Before starting the engine, make sure the
cutter is not contacting anything.
ALWAYS confirm safe operation when
using the machine.
Immediately stop the engine with the stop
switch if the machine suddenly begins to
vibrate or shake.
ALWAYS stop the engine immediately and
check for damage if you strike a foreign object
or if the machine becomes tangled. Do not operate with broken or damaged equipment.
When cutting a branch that is under tension, be alert for spring-back so that you will
not be struck by the moving branch.
If a cutter should bind fast in a
cut, shut off the engine immediately. Push the branch or tree to
ease the bind and free the cutter.
ALWAYS stop the engine and
allow it to cool before refuelling.
Avoid overfilling and wipe off
any fuel that may have spilled.
To reduce fire hazard, keep
the engine and muffler free of
debris, leaves, or excessive
grease.
KEEP A SOLID STANCE
Maintain footing and balance
at all times. Do not stand on
slippery, uneven or unstable
surfaces. Do not work in odd
positions or on ladders. Do not
over reach.
Safety devices and labels
Cover
ON-OFF Switch
HOT SURFACE
Throttle
Interlock
Protector
IMPORTANT!
CAUTION
4
READ AND
FOLLOW THE
INSTRUCTIONS
IN THE
OPERATORS
MANUAL.
WEAR EYE
THE BLADES
AND HEARING ARE SHARP!
PROTECTION HANDLE WITH
AT ALL TIMES CARE. DURING
OPERATION. KEEPS HANDS
CLEAR OF
CUTTER
BLADES WHEN
STARING THE
ENGINE. Caution, Danger, Warning, and Operation Information Labels: Make
sure all information labels are undamaged and readable. Immediately
replace damaged or missing information labels. New labels are available from your local authorized Shindaiwa dealer.
Safety (continued)
NEVER allow children to use
the unit. Avoid operating near
bystanders.
Operating the Hedge TrimALWAYS protect yourself from hazards
such as thorny brush and flying debris
by wearing gloves and close fitting
clothing that covers arms and legs.
Never wear shorts. Don’t wear loose
clothing or items such as jewelry that
could get caught in machinery or
underbrush. Secure long hair so it is
above shoulder level.
ALWAYS grip support handle
with right hand and throttle
handle with left hand.
ALWAYS wear eye, ear,
and hand protection while
operating this unit!
NEVER operate this unit if the
safety guard has been removed or
damaged!
ALWAYS stop the engine before
removing branches or debris from
the cutters! Never allow the cutters
to contact buildings or other hard
objects!
AVOID using or storing this unit in a wet
environment. Water on the cutters may
enter the gearcase and damage your unit.
ALWAYS stop the engine and install
the blade cover before moving to
another work site, and maintain a firm
footing while operating or carrying the
trimmer.
NEVER cut metal objects
or wire with the blade.
USE EXTREME CAUTION
when operating near fences
or electric wiring.
AVOID cutting large or extremely
“woody” branches. Doing so can shorten
cutter life, and may also damage the
gearcase.
ALWAYS keep proper footing and do
not overreach. Maintain your balance at
all times during operation.
CAUTION
Always maintain this unit according to this owner’s manual and follow the recommended scheduled
maintenance.
Never modify or disable any of the
unit’s safety devices.
Always use genuine Shindaiwa parts
and accessories when repairing or
maintaining this machine.
Do not make unauthorized modifications to the unit.
Never allow the engine to run at high
RPM without a load. Doing so could
damage the engine.
When transporting the unit in a vehicle, tie it down securely to prevent fuel
spillage or damage to the machine.
Always stop the engine and allow it to
cool before refuelling. Avoid overfilling
and wipe off any fuel that may have
spilled.
Never place flammable material close
to the engine muffler and never run
the engine without the spark arrestor
screen in place.
Keep the cutters sharp and properly
adjusted.
Keep the unit as clean as possible.
Keep it free of loose vegetation, mud,
etc.
5
Product Description
Blade protector
Using the illustration as a
guide, familiarize yourself
with this unit and its various
components. Understanding
your machine helps ensure
top performance, longer service life, and safer operation.
Support handle
Throttle
interlock
Cutter blades
Throttle
handle
Muffler
Throttle
On/Off Switch
Blade
protecter
Recoil
starter
Support
handle
WARNING!
Do not alter this machine or any
of its components!
Guard
Air filter cover
Fuel tank
This unit comes completely assembled. Before using this product, please make sure you have all the components
required for a complete unit. Carefully inspect all components for damage.
• This user manual
• T-wrench
• Blade protecter
IMPORTANT!
The terms “left,” “left-hand,” and “LH”; “right,” “right-hand,” and “RH”; “front” and “rear” refer to directions as
viewed by the operator during normal operation of this product.
6
Specifications
Model
Engine Type
Engine Bore x Stroke
Engine Displacement
Unit Weight, Less Fuel
Unit Dimensions (LxWxH)
Fuel Tank Capacity
Fuel/oil ratio
Carburetor
Ignition
Spark Plug
Electrode Gap
Torque
Air Cleaner
Muffler Type
Starting Method
Stopping Method
Blade Length
Blade Type
Clutch Type
Gear Type
Gear Lubrication
Standard Equipment
HT231-30
HT231-40
2-cycle, horizontal cylinder, air cooled
32 mm x 28 mm (1.26 in x 1.10 in.)
22.5cc (1.37 in3)
5.9 kg (13.0 lb)
6.4 kg (14.1 lb)
990 x 210 x 210 mm (38.98 x 8.17x8.27 in)
1330 x 210 x 210 mm (53.26 x 8.27 x 8.27
0.6 liter/20.3 oz.
50:1 with *ISO-L-EGD or JASO FD class 2-cycle Mixing Oil
Diaphragm type
Fully electronic, transistor controlled
NGK BPMR6A
.65 mm (.026 in)
150-170 kgf • cm / 130-150 in • lbf
Foam element
Spark arrestor muffler or spark arrestor muffler with catalyst
Recoil type
Slide switch,grounding type
740 mm (29.13 in)
1080 mm (42.52 in)
Double-blade cutting action: single-edged blade
Centrifugal clutch, dry-type
Spur gears
Lithium-based grease
Rear handle w/integral controls, anti-vibe mountings, front handle w/guard, tool set, blade scabbard.
Idle Speed (RPM)
Clutch Engagement Speed (RPM)
Wide Open Throttle (RPM)
2,750 - 3,000
4,000
11,000 - 13,000
Specifications are subject to change without
notice.
Emission Control (exhaust & evaporative)
EPA 2010 and Later and/or C.A.R.B. TIER III
The emission control system for the engine is EM/TWC (Engine Modification and 3-way Catalyst) and for the fuel tank
the Control System is EVAP (Evaporative Emissions) or N (for nylon tank). Evaporative emission may be applicable to
California models only.
Emission Control Label (located on Engine) (EXAMPLE ONLY, information on label varies by FAMILY).
PRODUCT EMISSION DURABILITY (EMISSION COMPLIANCE PERIOD)
The 300 hour emission compliance period is the time span selected by the manufacturer certifying the engine
emissions output meets applicable emissions regulations, provided that approved maintenance procedures are
followed as listed in the Maintenance Section of this manual.
7
Mixing Fuel
WARNING!
Alternative fuels, such as E15 (15% ethanol), E-85 (85% ethanol) or any fuels not meeting Shindaiwa
requirements are NOT approved for use in Shindaiwa gasoline engines. Use of alternative fuels may cause
performance problems, loss of power, overheating, fuel vapor lock, and unintended machine operation, including,
but not limited to, improper clutch engagement. Alternative fuels may also cause premature deterioration of fuel
lines, gaskets, carburetors and other engine components.
Fuel Requirements
Gasoline - Use 89 Octane [R+M/2] (mid grade or higher) gasoline known to be good quality. Gasoline may contain
up to 10% Ethanol (grain alcohol) or 15% MTBE (methyl tertiary-butyl ether). Gasoline containing methanol (wood
alcohol) is NOT approved.
2 Stroke Mixture Oil - A 2-stroke engine oil meeting ISO-L-EGD (ISO/CD 13738) and J.A.S.O. M345/FD standards
must be used. Shindaiwa OneTM 2-Stroke Oil is strongly recommended as it meets this standard and is specifically
formulated for use in all Shindaiwa 2-stroke engines. Engine problems due to inadequate lubrication caused by failure to use an ISO-L-EGD (ISO/CD 13738) and J.A.S.O. M345/FD certified oil will void the engine warranty.
For increased engine protection, Shindaiwa recommends using Shindaiwa Red ArmorTM engine oil to protect the
engine from harmful carbon build up, maintain engine performance, and increase engine life. Shindaiwa Red ArmorTM
engine oil exceeds ISO-L-EGD and J.A.S.O. M345/FD performance requirements.
IMPORTANT!
Examples of 50:1 mixing quantities
Shindaiwa OneTM 2-Stroke oil or Red ArmorTM engine oil may be mixed at 50:1
ratio for application in all Shindaiwa engines sold in the past, regardless of ratio
specified in those manuals.
IMPORTANT!
Stored fuel ages. Do not mix more fuel than you expect to use in thirty (30) days, ninety (90) days when a fuel stabilizer is added. Use of unmixed, improperly mixed, or stale fuel, may cause hard starting, poor performance, or severe
engine damage and void the product warranty. Read and follow instructions in
the Long Term Storage section of this manual.
Handling Fuel
DANGER
Fuel is VERY flammable. Use extreme care when mixing, storing or handling or serious personal injury may result.
•Use an approved fuel container.
•DO NOT smoke near fuel.
•DO NOT allow flames or sparks near fuel.
•Fuel tanks/cans may be under pressure. Always loosen fuel caps slowly allowing pressure to equalize.
•NEVER refuel a unit when the engine is HOT or RUNNING!
•DO NOT fill fuel tanks indoors. ALWAYS fill fuel tanks outdoors over bare ground.
• DO NOT overfill fuel tank. Wipe up spills immediately.
•Securely tighten fuel tank cap and close fuel container after refueling.
•Inspect for fuel leakage. If fuel leakage is found, do not start or operate unit until leakage is repaired.
•Move at least 3m (10 ft.) from refueling location before starting the engine.
8
Mixing Instructions
1. Fill an approved fuel container with half of the required amount of gasoline.
2. Add the proper amount of engine oil to gasoline.
3. Close container and shake to mix oil with gasoline.
4. Add remaining gasoline, close fuel container, and
remix.
IMPORTANT!
Storage - Fuel storage laws vary by locality. Contact
your local government for the laws affecting your area.
As a precaution, store fuel in an approved, airtight container. Store in a well-ventilated, unoccupied building,
away from sparks and flames.
IMPORTANT!
Stored fuel may separate. ALWAYS shake fuel container
thoroughly before each use.
Spilled fuel is a leading cause of hydrocarbon emissions.
Some states may require the use of automatic fuel shutoff containers to reduce fuel spillage.
After use
• DO NOT store a unit with fuel in its tank. Leaks can
occur. Return unused fuel to an approved fuel storage
container.
Filling the fuel tank
1. Place the unit on a flat, level surface.
2. Clear any dirt or other debris from around the fuel filler cap.
3. Remove the fuel cap, and fill the tank with clean, fresh fuel.
CAUTION!
Slowly remove the fuel cap only after stopping the
engine
4. Reinstall the fuel filler cap and tighten firmly.
5. Wipe away any spilled fuel before starting engine.
9
Starting the Engine
IMPORTANT!
Engine ignition is controlled by a two position switch mounted on the throttle housing labeled, “I” for ON or START and
“O” for OFF or STOP.
WARNING!
The cutting attachment will operate immediately when the engine starts and could result in loss of control and possible serious injury. Keep movable parts of the cutting attachment away from objects that could
become entangled or thrown.
WARNING!
Never start the engine from the operating position.
The cutting attachment will move when the engine accelerates!
NOTE:
START
On/Off Switch
Throttle
interlock
The blade cover is used for transportation and storage. Remove blade
cover before using the unit.
1. Slide the ignition switch to the “ON” position.
2. Set the throttle lever to the “fast idle”:
a. Depress and hold the throttle lock, then squeeze the throttle lever
toward the handgrip on the shaft tube.
b. Depress and hold the fast idle button.
c. While depressing the fast idle button, release the throttle trigger.
3. Press the primer bulb until fuel can be seen flowing in the transparent
return tube.
4. Set the choke lever to the CLOSED position if engine is cold.
5. Place the unit on the ground. Grip the engine cover with your left hand and
the starter handle with your right hand (shown).
Throttle
trigger
Fast Idle
button
Slide the ignition switch to the ON postion
Choke closed
IMPORTANT!
The primer system only pushes fuel through the carburetor. Repeatedly
pressing the primer bulb will not flood the engine with fuel.
Set the choke lever to the CLOSED position if
engine is cold
10
6. Pull the starter handle slowly toward you until you feel the starter mechanism engage.
7. Start the trimmer by pulling the starting handle rapidly outward.
CAUTION!
Primer bulb
The recoil starter can be easily damaged by abuse! Never pull the starter
cord to its full length.
IMPORTANT!
If the engine fails to start after several attempts with the choke in the
closed position, the engine may be flooded with fuel. Refer to the
“Starting a Flooded Engine” section of this manual.
Return Tube
Press
Press the
the primer
primer bulb
bulb
Hold the unit
firmly...
Make sure the cutters are
clear of obstructions!
.Pull recoil
starter handle
upward
Start the trimmer by pulling the starting
handle rapidly outward
When the motor starts...
1. Open the choke by moving the choke lever backward (toward the
fuel tank).
2. If the engine does not continue to run, repeat the appropriate
cranking procedures for a cold or warm engine.When the engine
starts, clear excess fuel from the combustion chamber by accelerating the engine several times with the throttle lever.
3. Operating the throttle will automatically disengage the fast idle
setting.
If the engine does not start
■■Repeat the appropriate starting procedure
for a cold or warm engine.
■■If the engine still fails to start, use the procedures for “Starting a flooded engine.”
Started a flooded engine
WARNING!
Burn danger from hot engine! Allow engine to cool before
removing cylinder cover.
Starting A Flooded Engine
1. Slide the ignition switch to the “I” (ON) position.
2. Open the choke, put the throttle lever in the full throttle position,
then clear excess fuel from the combustion chamber by cranking the
engine several times.
3. If the engine still fails to start or fire, refer to the troubleshooting flow
chart at the end of this manual.
11
Stopping the engine
1. Cool the engine by allowing it to idle for 2–3 minutes.
2. Move the ignition switch to the “O” or STOP position.
Ignition OFF (O)
Throttle free play adjustment
If the unit does not return to idle speed or doesen’t reach full rpm, the throttle lever free play may need to be adjusted as
follows:
1. Measure free play at the end of the throttle lever. Throttle lever free play should be approximately 5-7 mm (0.2-0.275”).
2. If adjustment is necessary, remove the air cleaner cover by loosening the two thumbscrews. Loosen the cable adjuster lock nut
and turn the cable adjustment fitting in or out until throttle lever free play is approximately 5-7 mm (0.2-0.275”).
3. Replace the air cleaner cover, and tighten the cover retaining screws securely.
Throttle cable
5-7 mm (0.20.275”)
Locknut
Cable adjustor
Throttle lever free play
Operation
■■Always grip support handle with right hand and throttle handle with left hand.
■■Squeezing the throttle increases engine speed, causing the clutch to engage and
operate the cutters.
■■Releasing the throttle decreases engine speed, causing the cutters to slow, and
then stop altogether as the clutch disengages.
■■Use a sweeping motion when cutting, and vary throttle settings often.
■■Avoid cutting material larger than 1.27 cm in diameter.
12
Maintenance
IMPORTANT!
Maintenance, replacement or repair of emission control devices and systems may be performed by any repair establishment
or individual, However, warranty repairs must be performed by a dealer or service center authorized by Echo, Inc. The use
of parts that are not equivalent in performance and durability to authorized parts may impair the effectiveness of the emission control system and may have a bearing on the outcome of a warranty claim.
WARNING!
WARNING!
Before performing any maintenance,
repair or cleaning work on the unit, make
sure the engine is completely stopped.
Disconnect the spark plug wire before
performing service or maintenance work.
Non-standard parts may not operate
properly with your unit and may cause
damage and lead to personal injury.
NOTE:
Using non-standard replacement parts
could invalidate your Shindaiwa warranty.
WARNING!
Always wear gloves
when working around the cutter
assembly.
Maintenance Intervals
COMPONENT/SYSTEM
MAINTENANCE
PROCEDURE
DAILY OR
BEFORE
USE
EVERY
REFUEL
3 MONTHS
YEARLY 600
OR 90
HOURS
HOURS
Air Filter
Inspect/Clean
I/C*
Choke Shutter
Inspect/Clean
I/C
Fuel Filter
Inspect/Replace
I*
I/R*
Fuel Cap Gasket
Inspect/Replace
I *
R*
Fuel System
Inspect/Replace
Spark Plug
Inspect/Clean/Replace
Cooling System
Inspect/Clean
Muffler Spark Arrestor
Inspect/Clean/Replace
Cylinder Exhaust Port
Inspect/Clean/Decarbon
I/C
Gear Housing
Grease
I (1)
Blades
Inspect/Clean
I / C (2)
Recoil Starter Rope
Inspect/Clean
I/C *
I (3) *
R*
I (3) *
I/C/R*
I/C
I/C/R*
Screws/Nuts/Bolts
Inspect/Tighten/Replace
I *
MAINTENANCE PROCEDURE LETTER CODES: I = INSPECT, R = REPLACE, C = CLEAN
IMPORTANT NOTE - Time intervals shown are maximum. Actual use and your experience will
determine the frequency of required maintenance.
MAINTENANCE PROCEDURE NOTES:
(1) Apply Grease every 20 hours of use.
(2) Inspect blade and clean as needed. Lubricate blades periodically during use.
(3) Low evaporative fuel tanks DO NOT require regular maintenance to maintain emission integrity.
* All recommendations to replace are based on the finding of damage or wear during inspection.
13
Air Filter
1. Remove the air filter element, and wash the element in clean, neutral solvent or warm soapy water. Rinse the element thoroughly, and then squeeze
dry before reassembly.
Air filter cover
Air filter element
CAUTION!
Never operate the unit if the air filter assembly is damaged or missing or if the
air filter element is soaked with water!
Fuel Filter
■■Use a wire hook to extract the fuel filter from inside the fuel tank.
Inspect
the fuel filter element. If it shows signs of contamination from debris,
replace it with a genuine Shindaiwa replacement fuel filter element.
Before reinstalling the filter, inspect the fuel line. If you discover damage
or deterioration, the unit should be removed from service unitl it can be
inspected by a Swisher-trained service technician.
Hooked
wire
CAUTION!
Make sure you do not pierce the fuel line with the end of the hooked
wire. The line is delicate and can be damaged easily.
Fuel filter
Spark Plug
Keep the spark plug and wire connections tight and clean.
Adjust the spark plug electrode gap to .026 inch (.65 mm). If the spark plug
must be replaced, use only the spark plug recommended on the Specifications section or an equivalent resistor type spark plug of the correct heat
range.
0.65 mm
(0.026 in.)
CAUTION!
Before removing the spark plug, clean the area around the plug to prevent
dirt and debris from getting into the engine’s internal parts.
Remove the spark plug and adjust the
gap at the electrode
spark plug gap--all mo
14
Exhaust System
WARNING!
This unit must never be operated with a faulty or missing spark arrester or muffler. Make sure the muffler is well
secured and in good condition. A worn or damaged muffler is a fire hazard and may also cause hearing loss.
If the engine becomes sluggish and low on power, check and clean the spark arrester screen.
1. Loosen the knob of the spark plug cover and remove the cover.
2. Remove the spark plug lead from the spark plug.
3. Loosen the four 5 mm bolts located at the top of the recoil starter housing and remove the cover.
4. Loosen the 5 mm bolt located at the top of the cylinder cover and two 4 mm bolts located at the bottom of the cylinder
cover and remove cover.
5. Loosen three 5 mm muffler cover bolts and remove the muffler cover.
6. Remove muffler gasket bolt.
7. Loosen two 4 mm screws from the muffler cover.
8. Remove two 4 mm screws from the top tail plate and remove tail plate.
9. Remove the spark arrester screen and clean with a stiff bristle brush.
10.Remove the muffler from the engine and inspect the cylinder exhaust port for carbon buildup.
11.Reassemble the muffler in the reverse order of disassembly
IMPORTANT!
If you note excessive carbon buildup, consult your servicing dealer.
Muffler plate screws
Top tail plate
Spark arrester screen
Muffler cover
screws
Lower tail plate
Plate
Muffler
cover bolts
Muffler
gasket
Gasket
plate
Muffler gasket bolt
Muffler
Muffler
cover
Cooling System
■■Remove any compacted debris from
around the fuel tank and/or muffler.
■■Inspect cooling system. Check cooling
air intake area at base of crankcase.
Remove all debris. Dirt build-up in these
areas can lead to engine overheating,
fire, or premature wear.
■■Remove and clean the cylinder cover and
clean grass and dirt from the cylinder fins.
Keep cooling
fins clean
Keep cooling air
intake passages
clean (Fuel tank
removed for
clarity)
Inspect cooling system
15
Carburetor Adjustment
Engine Break-In
New engines must be operated a minimum duration of two tanks of fuel break-in before carburetor adjustments can be
made. During the break-in period your engine performance will increase and exhaust emissions will stabilize. Idle speed can
be adjusted as required.
High Altitude Operation
This engine has been factory adjusted to maintain satisfactory starting, emission, and durability performance up to
1,100 feet above sea level (ASL) (96.0 kPa). To maintain proper engine operation and emission compliance above
1,100 feet ASL the carburetor may need to be adjusted by an authorized ECHO service dealer.
IMPORTANT!
If the engine is adjusted for operation above 1,100 feet ASL, the carburetor
must be re-adjusted when operating the engine below 1,100 feet ASL, otherwise severe engine damage may result.
NOTE:
Every unit is run at the factory and the carburetor is set in compliance with
emission regulations. Carburetor adjustments, other than idle speed, must be
performed by an authorized Shindaiwa dealer.
Adjusting engine idle
The engine must return to idle speed whenever the throttle lever is released.
Idle speed is adjustable, and must be set low enough to permit the engine
clutch to disengage the cutting attachment.
WARNING!
The cutters must NEVER engage at engine idle speeds! If the idle
speed cannot be adjusted by the procedure, described here, contact your
authorized Shindaiwa servicing dealer.
Idle Speed Adjustment
1. Place the trimmer on the ground, then start the engine, and then allow it to
idle 2-3 minutes until warm.
2. If the attachment rotates when the engine is at idle, reduce the idle speed
by turning the idle adjustment screw counter-clockwise.
3. If a tachometer is available, the engine idle speed should be final adjusted
to the values in the Specification section.
NOTE:
Carburetor fuel mixture adjustments are preset at factory and cannot be serviced in the field.
16
Idle adjustment
screw
Gearcase lubrication
CAUTION!
■■Over-lubricating may cause the gearcase to run slower than normal, and may also cause leakage from excess grease.
■■Do not remove the conrods from the cutters. Conrod bearings can be lost or damaged if disturbed.
Top off gearcase grease level by using a lever-type grease gun to force 1–2 strokes of high quality lithium-based grease
through the gearcase grease fitting.
Every 60 hours
(or before long-term storage)
Grease fitting
Remove the gearcase cover, and
use solvent and a soft brush to
remove all old grease from the
gearcase. To refill, hand-pack
the gearcase with approximately
40–50 grams of high quality
lithium-based grease (50–70% of
capacity). DO NOT OVERFILL!
BOTTOM
VIEW
DO NOTE REMOVE
CONRODS
BOTTOM VIEW
Gearcase cover
Hex screws
Gearcase lubrication
Cutter blade adjustment
WARNING!
The cutter blades are very sharp! Always wear gloves when
working around the cutter assembly.
Locknut
Guide Bar
Cutting performance of your machine depends a great deal on proper cutter
blade adjustment. Properly adjusted blades will oscillate freely yet help prevent binding of cut material between blades. Adjust blades as follows:
1. Loosen all blade locknuts at least one full turn.
2. Tighten each blade shoulder bolt firmly, and then loosen the shoulder bolts
1/4 to 1/2 turn.
CAUTION!
Operating the trimmer with worn or improperly adjusted cutters will reduce
cutter performance and may also damage your machine. Never operate the
machine with damaged or worn cutters.
Cutter
Blades
Shoulder Bolt
Washer
(should turn
freely)
Adjusting cutter blades
3. Working from the gearcase end, lock each bolt in place by firmly tightening
its locknut while preventing the shoulder bolt from turning.
When shoulder bolt adjustment is correct, there should be a gap of 0.25–
0.50 mm between the cutter blades and the flat washers, and the flat washer
beneath each bolt head should turn freely.
17
Long Term Storage
Whenever the unit will not be used for 30 days or longer, use the following procedures to prepare it for storage:
• Clean external parts thoroughly.
• Drain all the fuel from the fuel tank.
IMPORTANT!
Stored fuel ages. Do not mix more fuel than you expect to use in thirty (30) days, ninety (90) days when a fuel stabilizer is added.
CAUTION!
Gasoline stored in the carburetor for extended periods can cause hard starting and could also lead to increased service and maintenance cost.
• Remove the remaining fuel from the fuel lines and carburetor.
1. Prime the primer bulb until no more fuel is passing through.
2. Start and run the engine until it stops running.
3. Repeat steps 1 and 2 until the engine will no longer start.
• Remove the spark plug and pour about 1/4 ounce of 2-cycle mixing oil into the cylinder through the spark plug hole.
Slowly pull the recoil starter 2 or 3 times so oil will evenly coat the interior of the engine. Reinstall the spark plug.
• Before storing the unit, repair or replace any worn or damaged parts.
• Remove the air cleaner element from the carburetor and clean it thoroughly with soap and water. Let dry and reassemble the element.
• Store the unit in a clean, dust-free area.
18
Troubleshooting Guide
What To Check
Does the engine crank?
ENGINE DOES NOT START
Possible Cause
NO
Faulty recoil starter.
Fluid in the crankcase.
Consult with an authorized
servicing dealer.
Internal damage.
YES
Good compression?
Remedy
Loose spark plug.
Tighten and re-test.
Excess wear on cylinder, piston, rings.
Consult with an authorized
servicing dealer.
NO
Fuel incorrect, stale, or contaminated;
mixture incorrect.
Refill with clean, fresh unleaded
gasoline with a pump octane of 89 or
higher, mixed with a 2-stroke air cooled
engine oil that meets or exceeds ISOL-EGD and/or JASO FD classified oils
at 50:1 gasoline/oil ratio.
NO
Check for clogged fuel filter and/or vent.
Replace fuel filter or vent as required.
Re-start.
Priming pump not functioning properly.
Consult with an authorized
servicing dealer.
The ignition switch is in “O” (OFF)
position.
Move switch to “I” (ON) position
and re-start.
NO
YES
Does the tank contain fresh
fuel of the proper grade?
YES
Is fuel visible and moving in
the return line when priming?
YES
Is there spark at the spark
plug wire terminal?
YES
Check the spark plug.
NO
Shorted ignition ground.
Faulty ignition unit.
If the plug is wet, excess fuel may
be in the cylinder.
Consult with an authorized
servicing dealer.
Crank the engine with the plug
removed, re-install the plug and restart.
The plug is fouled or improperly gapped.
Clean and re-gap the plug to
0.6 mm (0.024 in.). Re-start.
The plug is damaged internally or
of the wrong size.
Replace the plug with a NGK CMR5H
or equivalent resistor type spark plug
of the correct heat range. Set spark
plug electrode gap to 0.6mm (0.024
in.).
19
Troubleshooting Guide (continued)
LOW POWER OUTPUT
What To Check
Possible Cause
Remedy
Operator is overworking the unit.
Use a lower throttle setting.
Carburetor mixture is too lean.
Consult with an authorized servicing
dealer.
Improper fuel ratio.
Refill with clean, fresh unleaded
gasoline with a pump octane of 87 or
higher, mixed with a 2-stroke air cooled
engine oil that meets or exceeds ISO-LEGD and/or JASO FD classified oils at
50:1 gasoline/oil ratio.
Fallen leaves or debris on intake cover.
Clean the intake cover.
Fan, fan cover, cylinder fins dirty
or damaged.
Clean, repair or replace as necessary.
Carbon deposits on the piston or
in the muffler.
Consult with an authorized
servicing dealer.
Clogged air cleaner element.
Service the air cleaner element.
Loose or damaged spark plug.
Tighten or replace the spark plug.
See page 11.
Air leakage or clogged fuel line.
Repair or replace fuel filter and/or
fuel line.
Water in the fuel.
Replace the fuel. See page 7.
Is the engine overheating?
Engine is rough at all
speeds. May also have
black smoke and/or
unburned fuel at the
exhaust.
Piston seizure.
Engine is knocking.
20
Faulty carburetor and/or diaphragm.
Consult with an authorized
servicing dealer.
Overheating condition.
See above.
Improper fuel.
Check fuel octane rating; check for
presence of alcohol in the fuel. See
page 7. Refuel as necessary.
Carbon deposits in the
combustion chamber.
Consult with an authorized
servicing dealer.
Troubleshooting Guide (continued)
ADDITIONAL PROBLEMS
Symptom
Poor acceleration.
Engine stops abruptly.
Engine difficult to shut off.
Excessive vibration.
Engine overspeeding.
Possible Cause
Remedy
Clogged air filter.
Clean the air filter.
Clogged fuel filter.
Replace the fuel filter.
Lean fuel/air mixture.
Consult with an authorized
servicing dealer.
Idle speed set too low.
Adjust: 2750-3000 (rpm).
Ignition switch turned off.
Reset the switch and re-start.
Fuel tank empty.
Refuel. See page 7.
Clogged fuel filter.
Replace fuel filter.
Water in the fuel.
Drain; replace with clean fuel.
See page 8.
Shorted spark plug or loose terminal.
Clean or replace spark plug, tighten
the terminal.
Ignition failure.
Replace the ignition unit.
Piston seizure.
Consult with an authorized
servicing dealer.
Ground (stop) wire is disconnected,
or switch is defective.
Test and replace as required.
Overheating due to incorrect spark plug.
Idle engine until cool. Clean and regap
the plug to 0.65 mm (0.026 in.).
Correct plug: NGK BPMR6A or
equivalent resistor type spark plug of
the correct range.
Overheated engine.
Idle engine until cool.
Debris build-up in impeller.
Clean debris from impeller as required.
Loose or damaged impeller.
Inspect and replace impeller as
required.
Loose or damaged engine mounts.
Tighten or replace engine mounts as
required.
Blower intake or discharge ports or
tubes are clogged with debris.
Inspect and remove debris.
Impeller blades are missing or
damaged.
Consult with an authorized
servicing dealer.
21
SHINDAIWA LIMITED WARRANTY STATEMENT FOR
PRODUCT SOLD IN USA AND CANADA BEGINNING 01/01/2010
ECHO, INC'S RESPONSIBILITY
ECHO Incorporated’s (ECHO, INC.) Limited Warranty, provides to the original purchaser that this Shindaiwa product is free from defects
in material and workmanship. Under normal use and maintenance from date of purchase, ECHO, INC. agrees to repair or replace at it’s
discretion, any defective product free of charge at any authorized Shindaiwa servicing dealer within listed below application time periods,
limitations and exclusions. THIS LIMITED WARRANTY IS ONLY APPLICABLE TO SHINDAIWA PRODUCTS SOLD BY AUTHORIZED
SHINDAIWA DEALERS. IT IS EXTENDED TO THE ORIGINAL PURCHASER ONLY, AND IS NOT TRANSFERABLE TO SUBSEQUENT
OWNERS EXCEPT FOR EMISSION RELATED PARTS. Repair parts and accessories replaced under this warranty are warranted only
for the balance of the original unit or accessory warranty period. Any damage caused by improper installation or improper maintenance
is not covered by this warranty. All parts or products replaced under warranty become the property of ECHO, INC. This warranty is
separate from the Emission control warranty statement supplied with your new product. Please consult the Emission Control Warranty
Statement for details regarding emission related parts. For a list of Authorized Shindaiwa Dealers refer to WWW.SHINDAIWA.COM or
call 1-877-986-7783.
OWNER’S RESPONSIBILITY
To ensure trouble free warranty coverage it is important that you register your Shindaiwa equipment on-line at WWW.SHINDAIWA.
COM or by filling out the warranty registration card supplied with your unit. Registering your product confirms your warranty coverage
and provides a direct link if we find it necessary to contact you.
The owner shall demonstrate reasonable care and use, and follow preventative maintenance, storage, fuel and oil usage as prescribed in
the operator’s manual. Should a product difficulty occur, you must, at your expense, deliver or ship your Shindaiwa unit to an authorized
Shindaiwa servicing dealer for warranty repairs (within the applicable warranty period), and arrange for pick-up or return of your unit
after the repairs have been made. For your nearest authorized Shindaiwa servicing dealer, call Shindaiwa’s Dealer Referral Center, at
1-877-986-7783 or you can locate a Shindaiwa servicing dealer at WWW.SHINDAIWA.COM. Should you require assistance or have
questions concerning Shindaiwa’s Warranty Statement, you can contact our Consumer Product Support Department at 1-800-673-1558
or contact us through the web at WWW.SHINDAIWA.COM.
PRODUCT WARRANTY PERIOD
RESIDENTIAL APPLICATION
• 2 YEAR WARRANTY - Units for residential, or non-income producing use will be covered by this limited warranty for two (2) years
from date of purchase.
EXCEPTIONS:
• For engine powered products, the electronic ignition module, flexible drive cable, and solid drive shaft are warranted for the
life* of the product on parts only.
• Cutting attachments such as, but not limited to, bars, chains, sprockets, tines, blades, Power BroomTM, belts, and nylon trimmer
heads for residential or non-income producing use will be covered for failures due to defects in material or workmanship for a
period of 60 days from original product purchase date. Any misuse from contact with concrete, rocks, or other structures is not
covered by this warranty.
• Multipurpose Tool Attachments carry the same warranty duration as the units they are designed to fit.
COMMERCIAL APPLICATION
• 90 DAY WARRANTY - All Chain Saws and Cut-Off Saws for commercial, institutional, agricultural, industrial, or income producing use will be
covered by this limited warranty for 90 Days from the date of purchase.
• 2 YEAR WARRANTY - Units for commercial, institutional, agricultural, industrial, or income producing use will be covered by this
limited warranty for two (2) years from the date of purchase.
EXCEPTIONS:
• For engine powered products, the electronic ignition module, flexible drive cables, and solid drive shafts are warranted for the
life* of the product on parts only.
• Cutting attachments such as, but not limited to, bars, chains, sprockets, tines, blades, Power BroomTM, belts, and nylon trimmer
heads for commercial, institutional, agricultural, industrial, rental, or income producing will be covered for failures due to defects
in material or workmanship for a period of 30 days from original product purchase date. Any misuse from contact with concrete,
rocks, or other structures is not covered by this warranty.
• Multipurpose Tool Attachments carry the same warranty duration as the units they are designed to fit.
RENTAL APPLICATION - 90 DAYS WARRANTY
• Units for rental use will be covered against defects in material and workmanship for a period of 90 days from the date of
purchase.
* ECHO INC’s liability under the “Lifetime” coverage is limited to furnishing parts specified under the PRODUCT WARRANTy PERIOD
section of this warranty statement for “Life” free of charge for a period of ten (10) years after the date of the complete unit’s final
production.
22
PURCHASED REPAIR PARTS AND ACCESSORIES
• 90-day all applications
ATTENTION ENGINE POWERED PRODUCT OWNERS
This Shindaiwa engine powered product is a quality-engineered unit which has been manufactured to exact tolerances to provide superior
performance. To help ensure the performance of the unit, it is required to use engine oil which meets the ISO-L-EGD Standard per
ISO/CD 13738 and JASO M345/FD Standards. Shindaiwa Red ArmorTM and Shindaiwa OneTM are a premium engine oil specifically
formulated to meet ISO-L-EGD (ISO/CD 13738) and JASO M345/FD Standards. The use of engine oils designed for other applications,
such as for outboard motors or lawnmowers can result in severe engine damage, and will void your engine limited warranty.
THIS WARRANTY DOES NOT COVER DAMAGE CAUSED BY:
•
Lack of lubrication or engine failure, due to the use of engine oils that do not meet the ISO-L-EGD (ISO/CD 13738) and JASO
M345/FD Standards. Shindaiwa ONETM Engine Oil meets the ISO-L-EGD and JASO M345/FD Standard. Emission related parts
are covered for 2 years regardless of engine oil used, per the statement listed in the EPA or California Emission Control Warranty
Explanation.
•
Damage caused by use of gasohol, containing methanol (wood alcohol), or gasoline containing less than 89 octane. Only use
gasoline which contains 89 octane or higher. Gasohol which contains a maximum 10% ethanol (grain alcohol) or 15% MTBE (methyl/
tertiary/butyl/ether) is also approved. The prescribed mixing ratio of gasoline to oil is listed on the Shindaiwa oil label and covered
in your operator’s manual.
•
Engine damage caused by use of ether or any starting fluids.
•
Damage caused by tampering with engine speed governor or emission components, or running engines above specified and
recommended engine speeds as listed in your operator’s manual.
•
Operation of the unit with improperly maintained/removed cutting shield or removed/damaged air filter.
•
Damage caused by dirt, pressure or steam cleaning the unit, salt water, corrosion, rust, varnish, abrasives, and moisture.
•
Defects, malfunctions or failures resulting from abuse, misuse, neglect, modifications, alterations, normal wear, improper servicing,
or use of unauthorized attachments.
•
Incorrect storage procedures, stale fuel, including failure to provide or perform required maintenance services as prescribed in the
operator's manual. Preventative maintenance as outlined in the operators manual is the customer’s responsibility.
•
Failures due to improper set-up, pre-delivery service or repair service by anyone other than authorized Shindaiwa servicing dealer
during the warranty period.
•
Certain parts and other items are not warranted, including but not limited to: lubricants, starter cords, and engine tune-ups.
•
Use of spark plugs other than those meeting performance and durability requirements of the OEM spark plug listed in the Operator's
Manuals.
•
Overheating or carbon scoring failures due to restricted, clogged exhaust port or combustion chamber, including damage to spark
arrester screen.
•
Adjustments after the first (30) thirty days and beyond, such as carburetor adjustment and throttle cable adjustment.
•
Damage to gears or gear cases caused by contaminated grease or oil, use of incorrect type or viscosity of lubricants, and/or failure
to comply with recommended grease or oil change intervals.
•
Damage caused by pump or sprayer running dry, pumping or spraying caustic or flammable materials, or lack of or broken
strainers.
•
Additional damage to parts or components due to continued use after operational problem or failure occurs. Should operational
problem or failure occur, the product should not be used, but delivered as is to an authorized Shindaiwa servicing dealer.
It is a dealer’s and/or customer’s responsibility to complete and return the warranty registration card supplied with your Shindaiwa
product or by visiting WWW.SHINDAIWA.COM. your receipt of purchase including date, model and serial number must be maintained
and presented to an authorized Shindaiwa servicing dealer for warranty service. Proof of purchase rests solely with the customer. Some
states do not allow limitations on how long an implied warranty lasts, so the above limitations may not apply to you. Some states do not
allow the exclusion or limitation of incidental or consequential damages, so you may also have other specific legal rights which vary from
state to state. This limited warranty is given by ECHO Incorporated, 400 Oakwood Rd., Lake Zurich, IL 60047.
DISCLAIMER OF IMPLIED WARRANTIES
This limited warranty is in lieu of all other expressed or implied warranties, including any warranty of FITNESS FOR A PARTICULAR
PURPOSE OR USE and any implied warranty of MERCHANTABILITY otherwise applicable to this product. ECHO, INC. and its affiliated
companies shall not be liable for any special incidental or consequential damage, including lost profits. There are no warranties extended
other than as provided herein. This limited warranty may be modified only by ECHO, INC.
99922201031
02/05/2010
23
ECHO INCORPORATED EMISSION CONTROL WARRANTY STATEMENT
FOR ECHO AND SHINDAIWA BRANDS
The Environmental Protection Agency (EPA) and the California Air Resources Board (C.A.R.B.) and ECHO Incorporated (ECHO Inc.) are pleased
to explain the emission control system warranty on your 2010 and later equipment/small off-road engine (SORE). New equipment/SORE must be
designed, built and equipped to meet stringent EPA and C.A.R.B. anti-smog standards. ECHO Inc. must warrant the emission control system on
your equipment/SORE for the periods of time listed below, provided there has been no abuse, neglect or improper maintenance of your equipment/
SORE. Your emission control system may include parts such as: carburetor, fuel-injection system, ignition system, catalytic converter/muffler, fuel
tank, fuel feed lines, fuel cap assembly, spark plug, air filters, and other associated components. Where a warrantable condition exists, ECHO
Inc will repair your equipment/SORE at no cost to you including diagnosis, parts and labor. The Emission Control System warranty is extended
to the original owner including all subsequent owners.
MANUFACTURER'S WARRANTY COVERAGE:
The emission control system is warranted for 2 years or the length of the ECHO Inc. warranty, whichever is longer. If any emission-related part
on your equipment is defective, the part will be repaired or replaced by ECHO Inc. or its Authorized Service Representative.
OWNER'S WARRANTY RESPONSIBILITIES:
As the equipment/SORE owner, you are responsible for the performance of the required maintenance listed in your Operator's Manual. ECHO
Inc. recommends that you retain all receipts covering maintenance on your equipment/SORE however, ECHO Inc. cannot deny warranty solely
for the lack of receipts or for your failure to ensure the performance of all scheduled maintenance. As the equipment/SORE owner, you should be
aware that ECHO Inc. may deny you warranty coverage if your equipment/SORE or a part has failed due to abuse, neglect, improper maintenance
or unapproved modifications.
You are responsible for presenting your equipment/SORE to an ECHO Inc. authorized service representative as soon as a problem exists. The
warranty repairs should be completed in a reasonable amount of time, not to exceed 30 days. If a warrantable condition exists and there is no
Authorized Dealer within 100 miles, ECHO Inc. will pay to ship the unit to the nearest authorized dealer. If you have questions regarding your
warranty coverage, you should contact ECHO Inc. at 1-800-673-1558, web site WWW.ECHO-USA.COM or contact Shindaiwa at 1-877-9867783, web site WWW.SHINDAIWA.COM.
WHAT DOES THIS WARRANTY COVER?
ECHO Inc. warrants that your equipment/SORE was designed, built and equipped to conform with applicable EPA and C.A.R.B. emissions
standards and that your equipment/SORE is free from defects in material and workmanship that would cause it to fail to conform with applicable
requirements for 2 years or the length of the ECHO Inc. warranty, whichever is longer. The warranty period begins on the date the product is
purchased by an end user.
HOW WILL A COVERED PART BE CORRECTED?
If there is a defect in a part covered by this warranty, any ECHO Inc. Authorized Service Dealer will correct the defect. You will not have to pay
anything to have the part adjusted, repaired or replaced. This includes any labor and diagnosis for warranted repairs performed by the dealer. In
addition, engine parts not expressly covered under this warranty but whose failure is a result of a failure of a covered part will be warranted.
WHAT PARTS ARE COVERED?
Any applicable emission related part not scheduled for "required maintenance" will be repaired or replaced within the warranty period. The repaired
or replaced part will be warranted for the remaining ECHO Inc. warranty period.
Any warranted part that is scheduled only for regular inspection in the written instructions supplied is warranted for the warranty period stated
above. Any such part repaired or replaced under warranty will be warranted for the remaining ECHO Inc. warranty period.
Any emission related part scheduled for replacement during "required maintenance" is warranted for the period of time prior to the first scheduled
replacement point for that part. Any such part repaired or replaced under warranty shall be warranted for the remainder of the period prior to the
first scheduled replacement point for that part.
Any manufacturer-approved replacement part may be used in the performance of any warranty maintenance or repairs on emission related parts,
and must be provided without charge if the part is still under warranty.
Any replacement part that is equivalent in performance and durability may be used in non-warranty maintenance or repairs, and shall not reduce
the warranty obligations of the manufacturer.
Throughout the equipment/SORE warranty period, ECHO Inc. will maintain a supply of warranted parts sufficient to meet the expected demand
for such parts.
SPECIFIC EMISSION RELATED WARRANTED PARTS:
• Electronic Ignition System
• Catalytic Converter / Muffler Assembly
• Choke
• Fuel Tank
• Air Filter
• Spark Plug
• Carburetor (complete assembly or replaceable components)
• Fuel-Injection Assembly (or replaceable components)
• Fuel Cap Assembly
• Fuel Feed Line (and associated clamps/connectors as applicable)
WHAT IS NOT COVERED?
Any failure caused by abuse, neglect, improper maintenance, unapproved modifications, use of unapproved add-on parts/modified parts or
unapproved accessories.
This Emission Control Warranty is valid only for the U.S.A., it's Territories, and Canada.
99922201033
01/2010
24
NOTES
25
NOTES
26
NOTES
27
Servicing Information
Parts/Serial Number
Genuine Shindaiwa Parts and Assemblies for your Shindaiwa products are available only from an Authorized Shindaiwa Dealer. When you do need to buy parts always have the Model Number, Type and Serial Number of the unit with
you. You can find these numbers on the engine. For future reference, write them in the space provided below.
Model No. _____________ Type _________SN. ______________
Service
Service of this product during the warranty period must be performed by an Authorized Shindaiwa Service Dealer.
For the name and address of the Authorized Shindaiwa Service Dealer nearest you, ask your retailer or call: 1-877986-7783. Dealer information is also available on WWW.SHINDAIWA.COM. When presenting your unit for Warranty
service/repairs, proof of purchase is required.
Consumer Product Support
If you require assistance or have questions concerning the application, operation or maintenance of this product you
may call the Shindaiwa Consumer Product Support Department at 1-877-986-7783 from 8:30 am to 4:30 pm (Central
Standard Time) Monday through Friday. Before calling, please know the model and serial number of your unit.
Warranty Registration
To ensure trouble free warranty coverage it is important that you register your Shindaiwa equipment by filling out the
warranty registration card supplied with your unit. Registering your product confirms your warranty coverage and provides a direct link if we find it necessary to contact you.
Additional or Replacement Manuals
Replacement Operator and Parts Catalogs are available from your Shindaiwa dealer or at WWW.SHINDAIWA.COM
or by contacting the Consumer Product Support Department (1-877-986-7783). Always check WWW.SHINDAIWA.
COM for updated information.
ECHO Incorporated.
400 Oakwood Road
Lake Zurich, IL 60047-1564 U.S.A.
Telephone: 1-877-986-7783
Fax: 1-847-540-8416
www.shindaiwa.com
Copyright© 2010 By Echo, Incorporated
All Rights Reserved.
Yamabiko Corporation
7-2 Suehirocho 1-Chome, Ohme,
Tokyo, 198-8760, Japan
Phone: 81-428-32-6118
Fax: 81-428-32-6145
(30) T08412001001/T08412999999
(40) T08712001001/T08712999999
C (30) T08511001001/T08511999999
C (40) T08811001001/T08811999999
SHINDAIWA MANUAL DEL PROPIETARIO/OPERADOR
CORTASETOS HT231
¡ADVERTENCIA!
Protéjase los ojos siempre que trabaje con esta unidad. Para reduzca el riesgo de lesiones, lea este manual
y el manual que se entrega junto con el motor multifunción
Shindaiwa y familiarícese con los contenidos.
X7502862800
02/10
Introducción
La serie de 231 Shindaiwa están diseñados y construidos para proporcionar un rendimiento y fiabilidad superiores sin comprometer
su calidad, comodidad, seguridad o durabilidad. Los motores de Shindaiwa representan la tecnología líder en motores de alto rendimiento, desarrollando una potencia excepcionalmente alta con una cilindrada y un peso notablemente bajos. Como propietario o
usuario, pronto descubrirá por qué Shindaiwa es, simplemente mejor.
¡IMPORTANTE!
La información contenida en este manual describe unidades disponibles a la fecha de su publicación.
Echo Inc. se reserva el derecho de realizar cambios a sus productos sin previo aviso, y sin la obligación de hacer modificaciones a máquinas fabricadas previamente
¡ADVERTENCIA!
Las emisiones liberadas por este producto contienen substancias químicas que en el estado de California son
consideradas como causantes de cáncer, defectos congénitos u otros efectos nocivos a la reproducción humana.
Contenido
Página
Seguridad...............................................3
Descripción del Producto.......................6
Especificaciones.....................................7
Mezcla de Combustible..........................8
Página
Página
Llenando el Tanque de Combustible............9 Guia Diagnostico........................... 19
Arranque del motor.................................9 Declaración de Garantía............... 22
Parada del Motor.................................. 11
Operación.............................................12
Mantenimiento......................................12
¡IMPORTANTE!
Los procedimientos descritos en este manual están pensados para ayudarle a sacar el máximo provecho de esta máquina, así
como evitar posibles daños y lesiones. Estos procedimientos deben contemplarse como directrices para un manejo seguro en la
mayoría de las condiciones y no pretenden reemplazar ninguna norma ni legislación sobre seguridad que pueda estar vigente en
su jurisdicción. Si tiene alguna duda acerca de su herramienta mecánica o si no comprende alguna explicación de este manual,
su distribuidor de Shindaiwa estará encantado de atenderle. También puede ponerse en contacto con Shindaiwa Inc. en la dirección impresa en el dorso de este manual.
Declaraciones De Seguridad
A travéz de este manual se encuentran “declaraciones de seguridad”
especiales.
¡PELIGRO!
Toda explicación precedida por el símbolo de atención triangular y la
palabra “PELIGRO” indica una situación potencialmente peligrosa que, en caso
de no evitarse, se causarán lesiones graves o incluso la muerte.
¡PRECAUCIÓN!
Toda explicación precedida por la palabra “PRECAUCIÓN” contiene información de obligado cumplimiento para
evitar que se produzcan daños en la
máquina.
NOTA:
¡ADVERTENCIA!
Toda explicación precedida por el símbolo de atención triangular y la
palabra “ADVERTENCIA” indica una situación potencialmente peligrosa que,
en caso de no evitarse, PODRÁ provocar la muerte o lesiones graves.
¡IMPORTANTE!
Toda explicación precedida por la palabra “IMPORTANTE” tiene especial
trascendencia.
2
Toda explicación precedida por la palabra
“NOTA” contiene información que conviene
conocer y que puede facilitarle su trabajo.
Etiquetas informativas sobre seguridad y funcionamiento
Un cortasetos puede causar graves conjunto de
la cuchilla al operario o transeúntes, si se utiliza
mal o de forma incorrecta. Para reducir el riesgo
de lesiones, debe mantener el control en todo
momento y respetar todas las precauciones de
seguridad durante la utilización
Manipule con mucho cuidado. las cuchillos estan
bien afiladas.
Maintenga ambas manos distanciadas de las cuchillas al encender y operar esta maquina.
Lea y siga las recomendaciones en este manual.
De no hacerlo lo podria sufrir lesiones graves.
¡ADVERTENCIA! Superficie puede estar caliente.
Siempre use guantes al manipular esta unidad
Lea y siga las recomendaciones en este manual.
De no hacerlo lo podria sufrir lesiones graves.
HOT SURFACE
Seguridad
Trabaje con cuidado
Un cortasetos puede causar graves conjunto de la cuchilla al operario o transeúntes, si se utiliza mal o de forma incorrecta.
Para reducir el riesgo de lesiones, debe mantener el control en todo momento y respetar todas las precauciones de seguridad
durante la utilización. No permita bajo ningún concepto que una persona sin la formación o las instrucciones adecuadas utilice
este cortasetos.
Mantengase Alerta
Debe de estar física y mentalmente en optimas condiciones para operar esta máquina con seguridad.
¡ADVERTENCIA!
Las hojas del cortasetos están muy afiladas. Si se tocan se pueden producir lesiones personales
graves. No toque las hojas siempre que sea posible, y lleve siempre guantes para protegerse la manos.
¡ADVERTENCIA!
Nunca instale accesorios no autorizados. No use accesorios no aprobados por Shindaiwa en esta unidad.
¡ADVERTENCIA!
La operación de este equipo puede producir chispas que pueden prender la vegetación seca. Esta unidad está equipada con un apagallamas y es posible que en otras áreas sea necesario instalar un apagallamas si
no hay uno ya instalado. El operador debe ponerse en contacto con las agencias contra incendios locales para
averiguar cuáles son las leyes o los reglamentos relacionados con los requisitos de prevención de incendios.
¡ADVERTENCIA!
Nunca opere ninguna máquinaria motorizada si está cansado o si está bajo la influencia de
alcohol, drogas o medicamentos o cualquier otra substancia que pueda afectar su abilidad y juicio.
¡ADVERTENCIA!
Las piezas móviles pueden amputar dedos o causar lesiones graves. Mantenga las manos, ropa y
objetos sueltos lejos de todas las aberturas.
• Pare SIEMPRE el motor, desconecte la bujía y asegúrese de que todas las piezas móviles se paren por completo antes de eliminar las obstrucciones, eliminar los residuos o efectuar el servicio de la unidad.
• NO arranque ni opere la unidad a menos que todos los protectores y cubiertas protectoras estén debidamente montadas en la unidad.
• No introduzca NUNCA la mano en ninguna abertura mientras el motor esté en marcha. Es posible que las piezas móviles no sean visibles por las aberturas.
3
¡ADVERTENCIA!
El escape del motor está CALIENTE, y contiene monóxido de carbono (CO), un gas venenoso. La inhalación de CO puede causar la pérdida de conocimiento, lesiones graves o la muerte, El gas de escape puede
causar quemaduras graves. Coloque SIEMPRE la unidad de modo que el escape apunte en sentido opuesto a
la cara y al cuerpo.
¡ADVERTENCIA!
Use Buen Juicio
NUNCA transporte o pierda de vista el cortasetos con el motor en marcha. Un motor
en funcionamiento se puede acelerar accidentalmente haciendo que las cuchillas
oscilen.
Asegúrese de que no falta ninguna
sujeción y de que ninguna está floja.
Asimismo, compruebe que el interruptor
de parada y los controles de aceleración
funcionan correctamente.
Al transportar el cortasetos, asegúrese
de que la cubierta de la cuchilla de corte
esté bien colocada.
Asegúrese de que siempre dispone de una
buena ventilación al utilizar el cortasetos
articulado. El humo o los gases de escape
del motor pueden causar lesiones graves
o la muerte. NUNCA haga funcionar el
motor en espacios cerrados.
Asegúrese siempre de que el accesorio
de corte esté instalado correctamente y
ajustado firmemente antes de utilizarlo.
Compruebe que no faltan piezas ni componentes, ni que estén dañados o instalados incorrectamente.
NUNCA utilice una barra de cuchilla que
esté rota o torcida: reemplácela por una
en buenas condiciones y asegúrese de
que queda correctamente ajustada.
NUNCA maneje esta unidad sin un
silenciador.
NUNCA intente ajustar una cuchilla con
el motor en funcionamiento.
NUNCA fume o encienda fuego cerca
del cortasetos. Mantenga el cortasetos
protegido de temperaturas extremas. El
combustible del motor es muy inflamable
y un incendio podría causar graves conjunto de la cuchilla o daños materiales.
Si golpea algún objeto extraño o si la
máquina se enreda con algo, detenga
siempre la máquina de inmediato y compruebe si se ha producido algún daño.
No trabaje con el equipo dañado o roto.
Al cortar una rama sometida a tensión,
esté atento al rebote de la rama para no
resultar golpeado.
Si una cuchilla se atasca en el corte,
detenga el motor de inmediato. Empuje
la rama o arbusto para desatascar la
cuchilla.
SIEMPRE sujete la máquina firmemente con ambas manos cuando corte
o recorte, y mantenga el control en todo
momento.
SIEMPRE mantenga los mangos
limpios.
MANTENGA UNA BUENA POSTURA
Mantenga un buen pie y el equilibrio en
todo momento. No se que de pie sobre
superficies resbaladizas, desiguales o
inestables. No trabaje en posiciones
raras o escaleras. No trate de alcanzar
lugares alejados.
Etiquetas de seguridad
Cubierta de
cuchillas
Interruptor
de marcha
HOT SURFACE
Seguro del
gatillo de
aceleración
Protector
IMPORTANTE
CAUTION
4
READ AND
FOLLOW THE
INSTRUCTIONS
IN THE
OPERATORS
MANUAL.
WEAR EYE
THE BLADES
AND HEARING ARE SHARP!
PROTECTION HANDLE WITH
AT ALL TIMES CARE. DURING
OPERATION. KEEPS HANDS
CLEAR OF
CUTTER
BLADES WHEN
STARING THE
ENGINE. En cuanto a las etiquetas de precaución, peligro, advertencia y de funcionamiento, asegúrese de que todas las
etiquetas informativas sean legibles y no estén dañadas.
Reemplace inmediatamente cualquier etiqueta que esté
dañada o que falte. Su distribuidor autorizado habitual de
Shindaiwa le proporcionará etiquetas nuevas.
Seguridad (continuación)
NUNCA permita que niños usen está máquina.
Evite usarla cerca de transeúntes.
Precauciones de operaciones
Use SIEMPRE ropa ceñida al cuerpo. Use guantes
de trabajo para incrementar el nivel de protección.
No use ropa o joyas que pudieran enredarse en la
máquina. Cerciórese de que el cabello no le pase de
los hombros.
SIEMPRE agarre la empuñadura de
soporte con la mano derecha y la
palanca del regulador con la izquierda.
SIEMPRE use protección para los
ojos, los oídos y las manos cuando
trabaja con esta máquina.
NUNCA opere esta máquina si
el protector para la mano está
quebrado.
SIEMPRE detenga la marcha del
motor antes de retirar ramas o
residuos de las cuchillas. Nunca
permita que las cuchillas hagan
contacto con edificaciones u otros
objetos sólidos.
EVITE usar o guardar esta máquina en
sitios húmedos. El depósito de agua en
las cuchillas podría penetrar en la caja de
engranaje y dañar su máquina.
SIEMPRE detenga la marcha del motor e instale la vaina
protectora en las cuchillas antes de llevarla a otra área de
trabajo y mantenga su balance sobre el suelo mientras
trabaje o lleva la recortadora a mano.
SIEMPRE manténgase parado sobre
tierra firme y no sobre extienda el cuerpo.
Mantenga su equilibrio en todo momento
que esté operando la máquina.
NUNCA corte objetos metálicos
o alambre.
EJERCER EXTREMA CAUTELA
cuando trabaje en la próximidad de
cercas o alambrados electricos.
EVITE cortar ramas grandes o demasiado “leñosas”. De lo
contrario, podría acortar la vida útil de las cuchillas y/o dañar la
caja de engranajes.
¡PRECAUCIÓN!
Realice siempre el mantenimiento de la unidad de acuerdo con las instrucciones del
manual y siga el programa de
mantenimiento recomendado.
Nunca modifique o desactive
ninguno de los dispositivos
de seguridad del cortasetos
articulado.
Utilice siempre piezas y accesorios de Shindaiwa al realizar
reparaciones o tareas de mantenimiento en esta máquina.
No realice modificaciones no
autorizadas en este cortasetos
articulado.
Limpie siempre su área de
trabajo de basura o residuos
ocultos para lograr un buen
apoyo de los pies.
Mantenga las cuchillas afiladas
y bien ajustadas.
Mantenga el cortasetos articulado lo más limpio posible. Limpie
los restos de hierba, barro, etc.
5
Descripción del Producto
Empuñadura de soporte con
Bastidor de
cuchillas
Use las ilustraciones como
guía, familiarícese con esta
unidad y sus varios componentes. Conociendo la unidad le ayudará a obtener
alto rendimiento, vida útil
más prolongada y operación
con seguridad.
protector
Palanca de
seguridad
Cuchillas
Empuñadura
acelerador
Silenciador
Acelerador
Interruptor de
marcha
Protector
para las
cuchillas
Arrancador
Empuñadura de soporte con
¡ADVERTENCIA!
No modifique o altere
esta máquina, los componentes o accesorios sin autorización previa.
Protector
protector
Cubierta del filtro
de aire
Tanque de
combustible
Antes de comenzar el ensamblaje de este producto, cerciórese de tener todos los componentes necesarios para ensamblar
una máquina completa: Inspeccione detenidamente todos los componentes para detectar posibles daños
■■Este manual
■■Kit con caja de herramientas para el mantenimiento rutinario
■■Cubierta de las cuchillas de corte
¡IMPORTANTE!
Los términos “izquierda”, “a mano izquierda” y “IZQUIERDA”, “derecha”,”a mano derecha” y “DERECHA”, “delantera” y
“trasera”, indican direcciones desde el punto de vista del operador durante la operación.
6
Especificaciones
Modelo
Tipo de motor
Diámetro x carrera
Cilindrada
Peso neto, unidad completa sin combustible
Dimensiones (longitud x ancho x altura)
Proporción de combustible/aceite
Capacidad del tanque de combustible
Carburador
Sistema de encendido
Bujía:
Separación del electrodo
Momento de torsión
Filtro de aire
Tipo de Silenciador
Método de arranque
Método de parada
Cuchillas Longitud
Cuchillas Tipo
Enbrague
Engranajes
Lubricación
Equipo estándard
HT231-30
HT231-40
2-tiempos, cilindro horizontal, enfriado por aire
32mm x 28mm
22.5cc (1.37 in3)
5.9 kg (13.0 lb)
6.4 kg (14.1 lb)
1330 x 210 x 210 mm (53.26 x 8.27 x 8.27 in)
990 x 210 x 210 mm (38.98 x 8.17x8.27 in)
50:1 con aceite de mezclar para motores de2-tiempos ISO-L-EGD o JASO FD
0.6 l./20.3 oz.
tipo Diafragma
Electrónico, controlado por transistores
NGK BPMR6A
.65 mm (.026 in)
150-170 kgf • cm / 130-150 in • lbf
Esponjosa
Silenciador apagachispas o silenciador apagachispas con catalizador
Arrancador manual de resorte recular
Interruptor deslizante de puesta a tierra
740 mm (29.13 in)
1080 mm (42.52 in)
Doble diente, doble filo
centrífugo, tipo seco de dos zapatas
Cilíndricos de dientes rectos
Grasa a base de litio
Mango delantero/protector la mano, mango trasero/control de aceleración, amortiguadores, juego de
herramientas, cubierta
Velocidad en vacío (rpm)
Velocidad de embragado (rpm)
Acelerador completamente abierto (rpm)
2,750 - 3,000
4,000
11,000 - 13,000
Las especificaciones están sujetas a cambios sin previo aviso.
Control de emisiones (escape y evaporativo)
EPA 2010 y posterior o CARB TIER III
El sistema de control de emisiones para el motor es EM/TWC (modificación del motor y catalizador de 3 vías) y para
el depósito de combustible es el sistema de control es EVAP (emisiones evaporativas) o N (para el tanque de nylon).
Las emisiones evaporativas pueden aplicarse a modelos de California solamente.
Hay una etiqueta de control de emisiones ubicada en el motor. (Éste es un EJEMPLO SOLAMENTE, la
información de la etiqueta varía por FAMILIA de motores).
DURABILIDAD DE LAS EMISIONES DEL PRODUCTO (PERIODO DE LA CONFORMIDAD PARA LA EMISIONES)
El período de comformidad para la emisiones de 300 horas es el tiempo seleccionado por el fabricante certificando que las emisiones de salida del motor cumplen con las regulaciones de emisiones aplicables, siempre que se
sigan los procedimientos de mantenimiento aprobados según se indican en la sección de mantenimiento de este
manual.
7
Mezcla de Combustible
ADVERTENCIA
Los combustibles alternativos, como el E-15 (15% de etanol), el E-85 (85% de etanol) o cualquier combustible que
no cumpla con los requisitos de ECHO no están aprobados para su uso en los motores de gasolina de 2 tiempos de
ECHO. El uso de combustibles alternativos puede causar problemas de rendimiento, pérdida de potencia, recalentamiento, obstrucción de vapores de combustible y la operación no intencionada de la máquina, incluida la conexión
indebida del embrague, pero sin limitarse a ello. Los combustibles alternativos también pueden causar un deterioro
prematuro de tuberías de combustible, empaquetaduras, carburadores y otros componentes del motor.
Requisitos del combustible
Gasolina - Use gasolina de número de octano 89 [R + M/2] (grado medio o superior) que sea de buena calidad. La gasolina puede contener hasta un 10% de alcohol etílico (grano) o 15% de MTBE (metilterc-butil éter). NO se aprueba el uso de
gasolina que contenga alcohol metílico (madera).
Aceite de dos tiempos - Se debe usar un aceite de motor de dos tiempos que cumpla con las normas ISO-L-EGD (ISO/
CD 13738) y J.A.S.O. M345/FD. El aceite universal de calidad óptima para motores de dos tiempos Shindaiwa OneTM
cumple con estas normas. Los problemas del motor debidos a lubricación inadecuada por no usar un aceite certificado
ISO-L-EGD (ISO/CD 13738) y J.A.S.O. M345/FD, tal como aceite de óptima calidad, anulará la garantía del motor de dos
tiempos.
Shindaiwa recomienda especialmente el uso de aceite de motor Shindaiwa Red ArmorTM en todos los motores Shindaiwa para proteger el motor contra la dañina acumulación de carbón, mantener el rendimiento del motor y prolongar
la duración del motor. El aceite de motor Red ArmorTM supera los requisitos de rendimiento de ISO-L-EGD y J.A.S.O.
M345/FD.
Ejemplos de cantidades de
mezcla a proporción de 50:1
IMPORTANTE!
El aceite universal de calidad óptima de 2 tiempos Shindaiwa OneTM y Shindaiwa Red ArmorTM puede mezclarse en una relación 50:1 para su aplicación
en todos los motores Shindaiwa vendidos en el pasado sea cual sea la relación especificada en esos manuales.
Tabla de mez ccla del combustible 50: 1
(EE.UU.)
(METRICO)
GAS
ACEITE
GAS
ACEITE
Galones
Onzas Fluides
Litros
cc.
1
2
5
2.6
5.2
113
2.8
4
8
20
80
160
400
IMPORTANTE!
El combustible guardado envejece. No mezcle más combustible del que espere usar en treinta (30) días, noventa
(90) días si se añade estabilizador al combustible. El uso de combustible sin mezclar, indebidamente mezclado o de más
de 90 días, (combustible deteriorado) puede causar dificultades en el arranque, un mal rendimiento o daños importantes en
el motor y anular la garantía del producto. Lea y siga las instrucciones de la sección de Almacenamiento de este manual.
Manipulación del combustible
peligro
El combustible es MUY inflamable. Tenga mucho cuidado al mezclar, guardar o manipular combustible, ya que de lo contrario
se pueden producir lesiones personales graves.
•Use un recipiente de combustible aprobado.
•NO fume cerca del combustible.
•NO deje que haya llamas o se produzcan chispas cerca del combustible.
•Los tanques/latas de combustible pueden estar a presión. Afloje siempre lentamente las tapas de combustible
dejando que se iguale la presión.
•¡No reabastezca NUNCA de combustible una unidad cuando el motor esté CALIENTE o esté en marcha!
•NO llene los tanques de combustible en recintos interiores. Llene SIEMPRE los tanques de combustible al aire
libre sobre un terreno descubierto.
•No sobrellene el tanque. Limpie el combustible derramado inmediatamente.
•Apriete bien la tapa de tanque y cierre el recipiente de combustible después de reabastecer de combustible.
•Inspeccione para ver si hay fugas de combustible. Si se descubren fugas de combustible, no arranque ni opere
la unidad hasta que no se reparen las fugas.
•Muévase al menos a 3 metros (10 pies) del sitio de recarga antes de arrancar.
8
1. Llene un recipiente de combustible aprobado con la mitad
de la cantidad requerida de gasolina.
2. Añada la cantidad appropiada de aceite de motor a la
gasolina.
3. Cierre el recipiente y agite para mezclar el aceite con la
gasolina.
4. Agregue el resto de la gasolina y cierre el recipiente de
combustible vuelva a mezclar.
Después de usar
• NO guarde la unidad con combustible en el tanque. Se
pueden producir fugas. Eche el combustible sin usar en un
recipiente de almacenamiento de combustible aprobado.
Almacenamiento
Las leyes de almacenamiento de combustible
varían de uno a otro lugar. Comuníquese con su
gobierno local para obtener las leyes que afectan a
su área. Como precaución, guarde el combustible
en un recipiente aprobado estanco al aire. Guarde
en un edificio deshabitado bien ventilado, lejos de
las chispas o llamas.
¡IMPORTANTE!
¡IMPORTANTE!
Los derrames de combustible son una de las causas principales de las emisiones de hidrocarburos. Algunos estados
pueden requerir el uso de recipientes de corte automático de
combustible para reducir los derrames de combustible.
El combustible guardado puede separarse. Agite
SIEMPRE completamente el recipiente de combustible antes de usarlo.
Llenando el Tanque de Combustible
1. Posicione la maquina sobre una superficie plana y nivelada.
2. Retire cualquier suciedad o despojos alrededor de la tapa de
combustible.
PRECAUCIÓN!
Para repostar, retire lentamente el tapón de combustible sólo
después de haber apagado el motor.
3. Retire la tapa de combustible y llene el tanque con combustible fresco y limpio.
4. Reinstale la tapa de combustible y apriete firmemente.
5. Limpie todo el combustible derramado antes de volver a
arrancar el motor.
Arranque del motor
¡IMPORTANTE!
El encendido del motor está controlado por un interruptor de dos posiciones montado en el mango del acelerador indicado “I”
(encendido o arranque) y “O” (apagado o pare).
¡ADVERTENCIA!
El accesorio de corte funcionará inmediatamente cuando el motor comienza y podría dar lugar a la pérdida de
control y de lesión seria posible. Mantenga las piezas movibles accesorias de corte clara de los objetos que podrían
enredarse o lanzarse.
9
¡ADVERTENCIA!
encendido
Las cuchillas se mueven al acelerar el motor.
Nunca arranque el motor de la posición de funcionamiento.
NOTA:
La tapa de la hoja se usa para transporte y almacenamiento. Quite la tapa de
la hoja antes de usar la unidad.
1. Deslice el botón del interruptor (hacia la mango) hacia la posición I
(encendido).
2. Trabe el gatillo de aceleración en la posición de marcha acelerada.
a.Deprima y sostenga la palanca del acelerador.
b.Apriete y sostenga la palanca del acelerador (hacia el manubrio)
c.Deprima y sostenga el botón de la palanca del acelerador.
3. Presione la bombilla de cebado hasta que vea pasar combustible por el
tubo de retorno transparente.
Botón del
Interruptor
Seguro del
gatillo de
aceleración
Botón
trabador
Gatillo de
aceleración
Deslice el botón del interruptor hacia la
posición “ON:
estrangulador en la
posición “O” (cerrado)
¡IMPORTANTE!
La bombilla de cebado solamente empuja combustible a travéz del carburador. Presionando repetidamente la bombilla de cebado no ahogará el motor con
combustible.
4. Posicione la palanca del estrangulador en la posición CLOSED (cerrado)
si el motor está frío.
5. Ponga la máquina en el suelo. Sujete el motor por la cubierta con la mano
izquierda y con la mano derecha, empuñe el mango del arrancador.
6. Jale el mango del arrancador lentamente hacia afuera hasta que sienta el
mecanismo de arranque engranar
7. Jale el mango del arrancador rápidamente hacia afuera para arrancar el
motor.
¡PRECAUCIÓN!
No jale el arrancador recular hasta el final de la cuerda. De lo contrario,
puede dañar el arrancador.
¡IMPORTANTE!
Si el motor falla en arrancar después de varios intentos con la palanca del
estrangulador en posicion cerrada, puede que el motor esté ahogado con
combustible. Consulte la seccion “Arranque de un Motor Ahogado” de este
manual.
Posicione la palanca del estrangulador en la
posición “O” (cerrado)
Bomba de
cebado
Tubo de
retorno
Presione la bombilla de cebado...
Mientras sostiene la
unidad firmemente...
Cerciórese de que
las cuchillas libre de
obstrucciones!
...y jale la
cuerda del
arrancador
recular
Jale el mango del arrancador rápidamente
10
Cuando el motor enciende...
1. Mueva la palanca del estrangulador hacia atrás para abrir el
estrangulador.
2. Después que el motor arranca accione el acelerador varias veces para
eliminar el exceso de combustible de la cámara de combustión.
3. Si el motor se para, repita los procedimientos aplicables para el arranque
de un motor frío o un motor caliente.
4. Operando el acelerador automáticamente desenganchará la marcha
mínima.
Siel motor no enciende...
■■Repita las instrucciones aplicables para el arranque de un motor frío o
caliente.
■■Consulte las instrucciones “Arranque de un motor ahogado.”
Arranque de un Motor Ahogado
¡ADVERTENCIA!
¡Riesgo de quemadura por el motor caliente! Permita que el
motor enfrie antes de retirar la cubierta del cilindro.
1. Deslice el interruptor de encendido hasta la posición “I” (ENCENDIDO).
2. Lleve la palanca del acelerador a la posición de máxima aceleración y
vacíe el exceso de combustible de la cámara de combustión arrancando
con la manivela varias veces.
3. Si aun así el motor sigue sin arrancar, consulte el diagrama de localización
y repara-ción de fallas ubicado al final de este manual.
Parada del Motor
1. Permita que el opere en marcha mínima por dos o tres minutos para que
la temperatura del motor se estabilice.
2. Mueva el botón del interruptor a la posición O (apagado).
Parada OFF
Interruptor de
marcha
11
Holgura del Gatillo de Aceleración
Mida la holgura del gatillo de aceleración. El gatillo debe de tener una holgura de aproximadamente 5 a 7 mm (0,2 a 0,275
pulg.). Si es necesario, ajuste la holgura de acuerdo a las siguientes instrucciones.
1. Afloje la tuerca de fijación del adaptador de ajuste.
2. Enrosque o desenrosque el adaptador para obtener 5 a 7 mm (0,2 a 0,275 pulg.) de holgura en el gatillo de aceleración.
3. Reinstale la cubierta del filtro de aire y apriete el tornillo de sujeción a mano.
Cable de
aceleración
5-7 mm (0.20.275”)
Tuerca de
seguridad
Ajustador del cable
de aceleración
Holgura del gatillo de aceleración
Operación
■■Siempre agarre la empuñadura de soporte con la mano derecha y la palanca del regulador con la izquierda.
■■Al instante que el operario oprime el gatillo de acelera-
cion, la marcha del motor se acelera. La aceleración de
la marcha del motor causa que el embrague acople con
la caja de engranajes, la cual acciona el movimiento de
las cuchillas.
■■La desaceleración de la marcha del motor es inmediata al instante que el operario libera el gatillo de aceleración. La marcha del motor vuelve a caer en marcha
mínima y causa que el embrague se desacople de la
caja de engranajes, la cual detiene el movimiento de las
cuchillas.
Mantenimiento
■■Los cortes se deben de llevar a cabo con movimientos
de lado a lado (cortes laterales) o de arriba abajo (cortes
verticales) variando la marcha del motor de acuerdo a la
clase de seto que corta.
■■Siempre se debe de evitar cortar setos que tienen más
de 1,3 cm de diámetro
¡IMPORTANTE!
El mantenimiento, reemplazo o reparación de los sistemas y disposi-tivos para el control de emisiones lo puede realizar cualquier persona o establecimiento dedicado a las reparaciones. sin embargo, las reparaciones cubiertas por la garantía deben ser llevadas a cabo por un distribuidor o
centro de servicio autorizado por corporación de Echo Inc. el empleo de piezas que no son equivalentes en rendimiento y durabilidad a las piezas
autorizadas puede reducir la efectividad del sistema de control de emisiones y puede afectar el resultado de una reclamación de garantía.
12
¡ADVERTENCIA!
¡ADVERTENCIA!
Antes de realizar cualquier trabajo de
mantenimiento, reparación o limpieza en
el equipo, asegúrese de que el motor esté
totalmente detenido. Desconecte el cable de la
bujía antes de realizar trabajos de inspección o
mantenimiento.
Las piezas no estándar pueden no operar correctamente en
su equipo y pueden ocasionar daños y lesiones personales.
NOTA:
El empleo de repuestos que no sean estándar podría invalidar
su garantía Shindaiwa.
¡ADVERTENCIA!
Las cuchillas de corte están muy afiladas. Siempre que trabaje alrededor del montaje de cuchilla lleve guantes.
Intervalos de mantenimiento
Componente/
Sistema
Procedimiento de
Mantenimiento
Diaiamente
o Antes de
usar
Al cargar
combustible
3 meses o Anualmente
90 horas o 600 horas
Estrangulador
Inspeccionar/ Limpiar/
Reemplazar
Inspeccionar/Limpiar
Filtro de combustible
Inspeccionar/Reemplazar
I*
I /R*
Inspeccionar/Reemplazar
I *
R*
Filtro de aire
I/L*
R*
I/L
Empaquetadura de la
Cubierta del Combustible
Sistema de combustible
Inspeccionar/Reemplazar
Bujía
Inspeccionar/Limpiar
Sistema de enfriamiento
Apagachispas del
silenciador
Orificio de escape del
cilindro
Caja de engranajes
Inspeccionar/Limpiar
Inspeccionar/Limpiar/
Descarbonizar
Engrasar
Hojas
Inspeccionar/Limpiar
I / L (2)
Cuerda del motor de
arranque
Inspeccionar/Limpiar
I/L *
I (3) *
I (3) *
I/L/R*
I/L
Inspeccionar/Reemplazar
I/L/R*
I/L
I (1)
Inspeccionar/Apretar/
I *
Reemplazar
CÓDIGOS DE LETRAS DEL PROCEDIMIENTO DE M MANTENIMIENTO: I = INSPECCIONAR,
R = REEMPLAZAR, L = LIMPIAR
Tornillos/Tuercas/ Pernos
NOTA IMPORTANTE - Los intervalos indicados son máximos. El uso real y su experiencia
determinarán la frecuencia del mantenimiento requerido.
NOTAS DE PROCEDIMIENTOS DE MANTENIMIENTO:
(1) Aplique el engrasar cada 20 horas de uso.
(2) Examine la hoja y limpie y afile según lo necesitado. Lubrique las hojas periódicamente durante uso.
(3) Los depósitos de combustible evaporativo NO requieren un mantenimiento normal para mantener la integridad de
las emisiones.
* Todas las recomendaciones de reemplazo se basan en encontrar piezas dañadas o desgastadas durante la
inspeccion.
13
Filtro de aire
1. Retire el elemento del filtro de aire y lávelo con agua y detergente.
Enjuáguelo bien, exprímalo y déjelo secar antes de reinstalar.
Cubierto del filtro
de aire
Elemento del
filtro
¡PRECAUCIÓN!
No ponga la unidad en funcionamiento si el filtro de aire está dañado o si el
elemento está húmedo.
Filtro de combustible
Retire y reemplace el elemento del filtro.
■■Use un gancho de alambre para extraer el filtro de combustible del
tanque de combustible. Retire y reemplace el elemento del filtro. Antes
de reinstalar el filtro, inspeccione la condición de todo los componentes
del sistema de combustible (manguera de combustible, manguera del
ventilador, ventilador, tapa y tanque). Si descubre daños, que braduras o
deteriorización, retire la unidad de operación hasta que pueda ser inspeccion ada o reparadapor un técnico de servicio entrenado por Shindaiwa.
Gancho de
alambre
¡PRECAUCIÓN!
Asegure de no perforar la tuberia decombustible con la punta del ganchode alambre, pués esta línea esdelicada y se puede dañar fácilmente.
Elemento del
filtro
Bujía
Mantenga la bujía y las conexiones de cable apretadas y limpias.
Retire y limpie la bujía.
Ajuste la distancia del electrodo a 0.65 mm (0.026 pulgadas). Si la bujía
necesita ser reemplazada, use solamente una bujía NGK BPMR6A o una
bujía equivalente con resistencia al calor correcta.
(0.65 mm)
0.026 inch
¡PRECAUCIÓN!
Antes de retirar la bujía, limpie alrededor de la misma para evitar que
entre polvo o suciedad a las partes internas del motor.
Limpie la bujía y revise la distancia del
electrodo.
spark plug gap--all
14
Système de escape
¡ADVERTENCIA!
Esta máquina nunca debe ser operada con un guardachispas o silenciador defectuoso o faltante. Cerciórese de que el silenciador esté bien asegurado y en buena condición. Un silenciador usado o dañado es un
riesgo de incendio y puede causar la perdida de audición..
Si el motor se pone peresoso o tiene baja potencia, revise y limpie la maya del guardachispas.
1. Afloje el tornillo de la bujía cubierta y retire la cubierta.
2. Retire el cable de la bujía.
3. Afloje los cuatro tornillos de 5 mm en la parte superior de el cubierta del carter y retire la cubierta.
4. Afloje el tornillo de 5 mm en la parte superior de la cubierta del cilindro y dos tornillos de 4 mm situado en la parte inferior del cubierto del cilindro y retirar el cubierto.
5. Afloje los tres tornillos de 5 mm del cubierto del silenciador y retire la cubierto del silenciador.
6. Retire el perno de la junta del silenciador.
7. Afloje dos tornillos de 4 mm del cubierto del silenciador.
8. Quite dos tornillos de 4 mm de la parte superior de la placa de escape y retire.
9. Extraiga la pantalla y límpiela con un cepillo de cerdas duras.
10.Inspeccione el puerto de escape del cilindro para evitar la acumulación de carbón.
11.Vuelva a montar el guardachispas, el silenciador y la cubierta del motor en el orden contrario al del desmontaje.
¡IMPORTANTE!
Si observa exceso de carbono acumulado, consulte con su agente de servicio.
Tornillos de
los placa del
escape
Placa del
escape
Guardachispas
Tornillos del
silenciador
Placa del escape
(baja)
Plate
Pernos del
silenciador
Juntas
Empaque
placa
Junta del
silenciador
Empaque silenciador
Mantenimiento de la silenciador y la guardachispas
Silenciador
Cubierta del
silenciador
15
Systema de enfriamiento
■■Retire y limpie la tapa del cilindro y limpie la maleza y la
suciedad en las aletas del cilindro.
■■Extraiga con cuidado toda acumu-
lación de suciedad o residuos del
silenciador y del depósito de combustible. Compruebe la zona de la toma
de aire de refrigeración de la base del
cárter. Retire la suciedad. La suciedad
que se acumula en estas áreas puede
hacer que el motor se sobrecaliente,
se prenda fuego o sufra un desgaste
prematur.
Mantenga limpia las
aletas del cilindro
Mantenga a
entrada de arl
limpa (Depósito
quitó para la
claridad)
Inspeccione las aletas de
enfriamiento
Ajuste del carburador
Rodaje del motor
Los motores nuevos se deben operar una mínima de dos tanques de combustible antes de ajustar el carburador. Durante el período de rodaje el rendimiento del motor aumentará y se estabilizarán las emisiones de escape. La velocidad en vacío puede ajustarse según sea necesario.
Operación a grandes altitudes
Este motor se ha ajustado en fábrica para mantener un arranque, producir unas emisiones y tener un rendimiento
de durabilidad satisfactorios hasta 1,100 pies por encima del nivel del mar (96.0 kPa). Para mantener la operación
apropiada del motor y cumplir con las emisiones a más de 1,100 pies por encima del nivel del mar, puede que sea
necesario que sea ajustado por un distribuidor de servicio ECHO autorizado.
¡IMPORTANTE!
Si el motor se ajusta para funcionar a más de 1,100 pies por encima del nivel del mar, se debe reajustar el
carburador antes de operar el motor a menos de 1,100 pies por encima del nivel del mar, ya que de lo contrario se
pueden producir daños importante
ien el motor.
NOTA :
Todas las unidades se hacen funcionar en fábrica y el carburador se ajusta en cumplimiento con las regulaciones de
emisiones. Los ajustes del carburador, aparte de la velocidad de ralentí, deben ser efectuados por un distribuidor
Shindaiwa autorizado.
Ajuste de la Marcha Mínima
La velocidad del motor debe de volver a marcha mínima en todo momento que el gatillo de aceleración se libera. La marcha
mínima es regulable y se ajusta, de acuerdo a las especificaciones del motor, para que el motor permita que el embrague centrífugo se desacople de los engranajes.
¡ADVERTENCIA!
Las cuchillas NUNCA deben moverse cuando el motor esta operando en marcha mínima. Si la marcha mínima no
se puede ajustar de acuardo a las instrucciones proveidas, consulte con su distribuidor Swisher o centro de reparación.
1. Arranque el motor y permita que opere por dos o tres minutos para que alcance la temperatura normal de operación.
2. Si las cuchillas se mueven con el motor operando en marcha mínima, gire el
tornillo de ajuste de marcha mínima en sentido contrario a la manecillas del
reloj hasta que las cuchillas de detengan.
Tornillo para
3. Si tiene disponible un medidor de revoluciones para motores de dos tiempos
ajustar la
(tacómetro), ajuste la velocidad de marcha mínima. Consulte la sección “Espemarcha mínima
cificaciones” para el régimen de giro al ralentí.
NOTA :
Los tornillos de ajustar la mezcla del carburador tienen calibración de fábrica
y no se pueden ajustar.
16
Lubricación de la caja de engranaje
¡PRECAUCIÓN!
■■Cerciórese que al limpiar la grasa de la tapa la arandela espaciadora del rodamiento no se pierda. ¡No quite las bielas! Los
rodillos en los rodamientos de las bielas se podrian dañar o perder.
■■¡El exceso de grasa puede causar que los engranajes giren más despacio y también causar fugas de grasa!.
Lubrique la caja de engranajes con una pistola de engrase. Inyecte grasa de alta calidad a base de litio por el accesorio de
engrase activando la palanca de la pistola de engrase entre dos y tres veces.
Cada 60 horas
(o antes de almacenaje por largo
tiempo)
Limpie la superficie exterior de la
caja de engranajes. Retire la tapa de
la caja de engranaje y con solvente
y una brocha de celdas finas, limpie
toda la grasa en la caja de engranaje.
Después de limpiar, lubrique a mano,
con aproximadamente 40 a 50 gramos de grasa a base de litio (50-70%
de la capacidad). NO SE EXCEDA AL
LLENAR. Reinstale la tapa en la caja
de engranajes y apriete los tornillos
firmemente
Engrasadera
Vista
inferior
¡No retire las
bielas!
Vista inferior
Tapa de la caja de
engranajes
Tornillos allen
Lubricación de la caja de engranaje
Cuchillas
¡ADVERTENCIA!
Las cuchillas de corte están muy afiladas. Siempre que trabaje
alrededor del montaje de cuchilla lleve guantes.
El rendimiento de las cuchillas de su unidad depende en gran medida del
espacio libre entre las cuchillas de corte. Si las cuchillas están ajustadas correctamente oscilarán libremente, lo cual evitará que el material cortado se
atasque entre ellas.
Tuerca
Barra Guía
1. Afloje todas las tuercas de seguridad con una llave de 10mm.
2. Apriete los pernos de reborde y luego aflójelos entre 1/4 y 1/2 vueltas.
¡PRECAUCIÓN!
Si opera la cortadora con cuchillas desgastadas o incorrectamente ajustadas, reducirá el rendimiento y podría dañar su máquina.
Cuchillas
Perno de
reborde
Arandelas (deben de
girar fácil)
3. Comenzando por el perno más cerca al motor, bloquee cada perno y apriete las tuercas de seguridad con la llave de 10mm sin dejar que los pernos giren.
Cuando los pernos de reborde están ajustados correctamente, las arandelas
deben de girar libremente y debe de haber entre 0,25 a 0,50 mm. de holgura
entre las arandelas y las cuchillas.
17
Almacenamiento Prolongado
Cada vez que la máquina no va a ser usada por 30 días o más, siga los siguientes procedimientos para preparar su
almacenamiento:
• Limpie las partes externas.
• Drene todo combustible en el tanque.
¡IMPORTANTE!
El combustible guardado envejece. No mezcle más combustible del que espere usar en treinta (30) días, noventa
(90) días si se añade estabilizador al combustible.
¡PRECAUCIÓN!
Gasolina almacenada en el carburador por periódos largos puede causar un arranque duro y puede conducir a un
aumento en costo de servicio y mantenimiento.
• Retire el resto del combustible en las tuberias de combustible y carburador.
1. Empuje la bombilla de cebado hasta que el combustible deje de pasar.
2. Arranque y mantenga prendido el motor hasta que pare de funcionar.
3. Repita los pasos 1 y 2 hasta que el motor ya no arranque.
• Retire la bujía y vierta aproximadamente 1/4 de onza de aceite de mezcla para motores de 2 tiempos en el cilindro
a través del agujero de la bujía. Lentamente jale el arrancador 2 ó 3 veces para que el aceite se aplique uniformemente en el interior del motor. Reínstale la bujía.
• Antes de almacenar la máquina, repare o cambie cualquier pieza dañada o gastada.
• Retire el elemento del filtro de aire y limpielo minuciosamente con agua y jabón. Deje que seque y vuelva a ensamblar el elemento.
• Almacene la máquina en un sitio limpio y libre de polvo.
18
Guia Diagnostico
EL MOTOR NO ARRANCA
Qué revisar
¿Arranca el motor?
Posible causa
NO
Español
NO
SÍ
¿Contiene el tanque
combustible fresco y con
el octanaje correcto?
Líquido en el cárter.
NO
Bujía suelta.
Apriete y pruebe otra vez. Consulte con un
agente de servicio autorizado.
Desgaste excesivo en el cilindro, el
pistón o los anillos.
Consulte a un agente de servicio de
Shindaiwa.
Combustible incorrecto, viejo o
contaminado; mezcla incorrecta.
SÍ
¿Puede verse combustible
moviéndose en la línea de
retorno al cebar?
Rellene con gasolina sin plomo, reciente
y limpia con un octanaje de 89 o superior,
mezclada 50:1 con aceite para motores enfriados
por aire esto encuentra o excede ISOL-EGD y/o JASO FD aceites clasificados
NO
Revise el filtro de combustible y el
ventilador en busca de obstrucciones.
Reemplace el filtro de combustible o la
válvula de presión según sea necesario.
Vuelva a arrancar.
NO
El interruptor de encendido está en
posición de apagado “O”.
Lleve el interruptor a la posición de
encendido “I” y reinicie.
Conexión a tierra defectuosa.
Unidad de encendido defectuosa.
Consulte a un agente de servicio de
Shindaiwa.
Si la bujía está húmeda, puede
habe exceso de combustible en el
cilindro.
Retire la bujía y arranque el motor, vuelva
a colocar la bujía y arranque de nuevo.
La bujía está obstruida o tiene una
separación de electrodos incorrecta.
Limpie y vuelva a calibrar la bujía.
Consulte la sección “Especificaciones”
para la correcta separación del electrodo
de la bujía. Vuelva a arrancar.
La bujía puede tener daños internos o
es del tamaño equivocado.
Reemplace la bujía. Consulte la sección
"Especificaciones" para la bujía correcta.
Vuelva a arrancar.
SÍ
¿Hay chispas en el
terminal del cable de la
bujía?
Consulte a un agente de servicio de
Shindaiwa.
Daños internos.
SÍ
¿Hay buena compresión?
Arrancador autorretráctil defectuoso.
Remedio
SÍ
Compruebe la bujía.
19
Guia Diagnostico (continuación)
Qué revisar
¿Se sobrecalienta el
motor?
El motor funciona
bruscamente a cualquier
velocidad. También
puede que salga humo
negro o combustible no
quemado por el escape.
BAJA POTENCIA
Posible causa
Unidad sobrecargada por el usuario.
Corte más despacio.
La mezcla del carburador es muy
pobre.
Consulte con un agente de servicio
autorizado.
Proporción de combustible
inapropiada.
Rellene con gasolina sin plomo, reciente
y limpia con un octanaje de 89 o superior,
mezclada 50:1 con aceite para motores
enfriados por aire esto encuentra o excede
ISO-L-EGD y/o JASO FD aceites clasificados
Ventilador, tapa del ventilador o aletas
del cilindro sucios o dañados.
Limpiar, reparar o sustituir en caso
necesario.
Depósitos de carbonilla en el pistón o
el silenciador.
Consulte con un agente de servicio
autorizado.
Filtro de aire obstruido.
Limpie o reemplace el filtro de aire.
Bujía suelta o dañada.
Apriete o cambie la bujía. Consulte la
sección "Especificaciones" para la bujía
correcta. Vuelva a arrancar.
Fuga de aire o conducto de
combustible obstruido.
Repare o cambie el filtro o el conducto
de combustible.
Agua en el combustible.
Vuelva a llenar de mezcla reciente de
combustible y aceite.
Pistón gripado.
Consulte con un agente de servicio
autorizado
Carburador y/o diafragma defectuoso.
Sobrecalentamiento.
Consulte con un agente de servicio
autorizado
Combustible inadecuado.
Revise el índice de octanaje del
combustible; revise si el combustible
contiene alcohol. Reposte cuando sea
necesario.
El motor golpea.
Depósitos de carbonilla en la cámara
de combustión.
20
Remedio
Consulte con un agente de servicio
autorizado.
Guia Diagnostico (continuación)
Qué revisar
Deficiente aceleración.
El motor se detiene
abruptamente.
Difícil apagado del motor.
El accesorio de corte
se mueve al ralentí del
motor.
OTROS PROBLEMAS
Posible causa
Filtro de aire obstruido.
Limpie o reemplace el filtro de aire.
Filtro de combustible obstruido.
Cambie el filtro de combustible.
Mezcla de combustible/aire muy pobre.
Consulte con un agente de servicio
autorizado.
Ralentí ajustado muy bajo.
Consulte la sección “Especificaciones” para
el régimen de giro al ralentí .
Interruptor en posición de apagado.
Restablezca el interruptor y vuelva a
arrancar.
Tanque de combustible vacío.
Reposte combustible. Consulte la sección
"Llenando el Tanque de Combustible".
Filtro de combustible obstruido.
Cambie el filtro de combustible.
Agua en el combustible.
Drene; cambie con combustible limpio.
Consulte la sección "Llenando el Tanque de
Combustible".
Bujía defectuosa o terminal flojo.
Limpie o reemplace la bujía. Consulte
la sección "Especificaciones" para la
bujía correcta. Apriete el terminal. .
Fallo en el sistema de encendido.
Reemplace el sistema de encendido.
Pistón gripado
Consulte con un agente de servicio
autorizado.
Cable de conexión a tierra (detenido)
desconectado o llave defectuosa.
Pruebe y reemplace según sea necesario.
Sobrecalentamiento debido a bujía
incorrecta.
Reemplace la bujía. Consulte la sección
“Especificaciones” para la bujía correcta .
Motor sobrecalentado.
Deje el motor al ralentí hasta que se enfríe.
Ralentí demasiado alto.
Consulte la sección “Especificaciones” para
el régimen de giro al ralentí .
Resorte del embrague roto o resalte
desgastado.
Reemplace muelle/zapatas según sea
necesario; compruebe el ralentí.
Soporte del accesorio suelto.
IInspeccione y vuelva a apretar los soportes
con firmeza.
Accesorio torcido o dañado.
Examine y cambie el accesorio según
sea necesario.
Caja de engranajes suelta.
Apriete la caja de engranajes con firmeza.
Eje central doblado, cojinetes
desgastados o dañados.
Examine y cambie según sea necesario.
Excesiva vibración.
El motor no volverá para
funcionar en ralenti.
El accesorio no se mueve.
Remedio
El ralenti del motor es demasiado alto
Consulte la sección “Especificaciones” para
el régimen de giro al ralentí .
El motor tiene una fuga de aire
Consulte con un agente de
servicio autorizado.
Eje no instalado en el bloque motor o la
caja de engranajes.
Examine y vuelva a instalar según sea
necesario.
Eje roto.
Consulte con un agente de servicio
autorizado.
Caja de engranajes dañada.
21
DECLARACIÓN DE GARANTÍA LIMITADA DE SHINDAIWA
VIGENTE PARA PRODUCTOS VENDIDOS EN ESTADOS UNIDOS Y CANADÁ COMENZAR
1° DE ENERO DE 2010
RESPONSABILIDAD DE ECHO
La garantía limitada de ECHO Incorporated (ECHO, INC.) indica al comprador original que este producto Shindaiwa carece de defectos de
materiales y fabricación. En condiciones de uso y mantenimiento normales a partir de la fecha de compra, ECHO, INC. acuerda reparar o
reemplazar, a su discreción, cualquier producto defectuoso de forma gratuita en cualquier distribuidor de servicio autorizado de ECHO en los
períodos de aplicación, limitaciones y exclusiones indicados abajo. ESTA GARANTÍA LIMITADA SE APLICA SOLAMENTE A PRODUCTOS
SHINDAIWA VENDIDOS POR DISTRIBUIDORES ECHO AUTORIZADOS. SE EXTIENDE AL COMPRADOR ORIGINAL SOLAMENTE, Y
NO SE PUEDE TRANSFERIR A PROPIETARIOS SUBSIGUIENTES EXCEPTO EN LO QUE SE REFIERE A PIEZAS RELACIONADAS CON
LAS EMISIONES. Las piezas de reparación y los accesorios reemplazados según esta garantía están garantizados solamente para el resto del
período de garantía de la unidad original o del accesorio. Cualquier daño causado por la instalación o el mantenimiento indebidos no está cubierto
por esta garantía. Todas las piezas o productos con garantía se convierten en propiedad de ECHO, INC. Esta garantía es independiente de la
declaración de garantía de control de emisiones incluida con su nuevo producto. Consulte la declaración de garantía de control de emisiones
para obtener detalles sobre piezas relacionadas con emisiones. Para obtener una lista de distribuidores autorizados Shindaiwa, consulte WWW.
SHINDAIWA.COM o llame al 1-877-986-7783.
RESPONSABILIDAD DEL PROPIETARIO
Para asegurar una cobertura de la garantía sin problemas es importante que registre sus equipos Shindaiwa en línea en WWW.SHINDAIWA.
COM o rellenando la tarjeta de registro de garantía suministrada con su unidad. El registro de su producto confirma su cobertura de garantía
y proporciona un enlace directo entre usted si es necesario que nos pongamos en contacto con usted.
El propietario debe demostrar un cuidado y uso razonables, y seguir el mantenimiento preventivo, almacenamiento, uso de combustible y
aceite según se indica en el manual del operador. Si se producen dificultades en un producto, usted debe, por su cuenta, entregar o enviar
su unidad Shindaiwa a un distribuidor de servicio autorizado para las reparaciones cubiertas por la garantía (dentro del período de garantía
correspondiente), y hacer los arreglos para la recogida o devolución de su unidad después de haberse efectuado las reparaciones. Para localizar
a su distribuidor de servicio autorizado más cercano, llame al centro de distribuidores de Shindaiwa, al 1-877-986-7783, o también puede visitar
WWW.SHINDAIWA.COM. Si necesita asistencia o tiene dudas referentes a la declaración de garantía de Shindaiwa, puede ponerse en contacto
con el Departamento de Respaldo de Productos del Consumidor llamando al 1-800-673-1558 o puede ponerse en contacto con nosotros a
través de la web visitando WWW.SHINDAIWA.COM.
PERÍODO DE GARANTÍA DEL PRODUCTO
APLICACIÓN RESIDENCIAL
• GARANTÍA DE 2 AÑOS - Los unidads para aplicaciones residenciales, o que no producen ingresos, estará cubierta por esta garantía limitada
durante dos (2) años contados a partir de la fecha de compra.
EXCEPCIONES
• Para productos impulsados por motores, el módulo de encendido electrónico, cables de mando flexibles, ejes de impulsión sólido están
garantizados durante la vida útil* del producto en lo que se refiere a piezas solamente.
• Los accesorios de corte como barras, cadenas, ruedas dentadas, hojas y cabezas recortadoras de nilón para aplicaciones residenciales o
que no producen ingresos estarán cubiertos por fallas debido a defectos de materiales y fabricación durante un período de 60 días contados
a partir de la fecha de compra del producto original. Cualquier uso indebido por contacto con hormigón, rocas u otras estructuras no está
cubierto por esta garantía.
• Accesorios para la herramienta multiusos tienen una garantía de la misma duración que las unidades para las que están diseñadas.
APLICACIÓN COMERCIAL
• GARANTÍA DE DIA 90 - Todos los motorsierra y motorsierra de trocear para aplicaciones comerciales, institucionales, agrícolas, industriales
o para producir ingresos estará cubierta por esta garantía limitada durante un período de 90 dias contado a partir de la fecha de compra.
• GARANTÍA DE 2 AÑOS - Los unidads para aplicaciones comerciales, institucionales, agrícolas, industriales o para producir ingresos estará
cubierta por esta garantía limitada durante un período de dos (2) años contado a partir de la fecha de compra.
EXCEPCIONES
• Para productos impulsados por motores, el módulo de encendido electrónico, cables de mando flexibles, ejes de impulsión sólido están
garantizados durante la vida útil* del producto en lo que se refiere a piezas solamente.
• Los accesorios de corte como barras, cadenas, ruedas dentadas, hojas y cabezas recortadoras de nilón para aplicaciones residenciales o
que no producen ingresos, pero sin limitarse a lo anterior, estarán cubiertos por fallas debido a defectos de materiales y fabricación durante
un período de 30 días contados a partir dela fecha de compra del producto original. Cualquier uso indebido por contacto con hormigón,
rocas u otras estructuras no está cubierto por esta garantía.
• Accesorios para la herramienta multiusos tienen una garantía de la misma duración que las unidades para las que están diseñadas.
APLICACIONES DE ALQUILER – GARANTÍA DE 90 DÍAS
• Los unidads completa para uso de alquiler estará completa contra defectos de materiales y fabricación durante un período de 90 días contados
a partir de la fecha de compra.
* La responsabilidad de ECHO, INC. según la garantía “durante la vida útil” se limita a proveer piezas especificadas en la sección de PERÍODO
DE GARANTÍA DEL PRODUCTO de esta declaración de garantía durante la “vida útil” de forma gratuita durante un período de diez (10)
años después de la fecha de producción final de la unidad completa.
22
PIEZAS DE REPARACIÓN COMPRADAS, BLOQUES CORTOS Y ACCESORIOS
• Garantía de 90 días para aplicaciones.
ATENCIÓN PROPIETARIOS DE PRODUCTOS IMPULSADOS POR MOTORES
Este producto Shindaiwa impulsado por motor es una unidad diseñada de calidad que se ha fabricado según unas tolerancias exactas para
proporcionar un rendimiento superior. Para contribuir a asegurar el rendimiento de la unidad, se requiere usar aceite de motores que cumpla con
la norma ISO-L-EGD según las normas ISO/CD 13738 y JASO M345/FD. El aceite de motores Shindaiwa Red ArmorTM y Shindaiwa OneTM es un
aceite de motores de calidad óptima formulado específicamente para cumplir con las normas ISO-L-EGD (ISO/CD 13738) y JASO M345/FD. El uso
de aceites de motores diseñados para otras aplicaciones, como motores fuera borda o cortacéspedes puede producir daños importantes en el motor,
y anulará su garantía limitada de motores.
ESTA GARANTÍA NO CUBRE LOS DAÑOS CAUSADOS POR LO SIGUIENTE:
•
Falta de lubricación o avería del motor debido al uso de aceites de motores que no cumplan con las normas ISO-L-EGD (ISO/CD 13738) y JASO
M345/FD. El aceite de motores Shindaiwa OneTM cumple con las normas ISO-L-EGD y JASO M345/FD. Las piezas relacionadas con emisiones
están cubiertas por una garantía residencial de 5 años o comercial de 2 años sea cual sea el aceite de motores usado, según la declaración
indicada en la Explicación de la Garantía de Control de Emisiones de la EPA o California.
•
Los daños causados por el uso de gasohol, que contenga metanol (alcohol de madera), o gasolina que tenga un número de octano menor
que 89. Use solamente gasolina con un número de octano mayor o igual que 89. También está aprobado el uso de gasohol que contenga un
máximo de etanol del 10% (alcohol de grano) o un máximo de MTBE (éter metil tercbutílico) del 15%. Las relaciones de mezcla prescritas de
gasolina a aceite se indican en la etiqueta del aceite Shindaiwa y están cubiertas en su manual del operador.
•
Daños causados en el motor por el uso de éter u otros fluidos de arranque.
•
Los daños causados por alterar indebidamente el regulador de velocidad del motor o los componentes de las emisiones, o por hacer funcionar
los motores por encima de las velocidades especificadas y recomendadas según se indica en el manual del operador.
•
Operación de la unidad con un protector de corte indebidamente mantenido o quitado o con un filtro de aire quitado o dañado.
•
Los daños causados por suciedad, agua salada, corrosión óxido, barniz, abrasivos, humedad o limpieza de la unidad a presión o con vapor de
agua.
•
Los defectos, funcionamientos defectuosos o fallas producidas por el abuso, uso indebido, negligencia, modificaciones, alteraciones, desgaste
normal, servicio indebido o uso de accesorios no autorizados.
•
Los procedimientos de almacenamiento incorrectos, combustible rancio, incluido no proporcionar o realizar los servicios de mantenimiento
requeridos según se indica en el manual del operador. El mantenimiento preventivo según se indica en el manual del operador es responsabilidad
del cliente.
•
Las fallas debidas a la configuración indebida, servicio anterior a la entrega o servicio de reparación por otros que no sean un distribuidor de
servicio autorizado de Shindaiwa durante el período de garantía.
•
Ciertas piezas y otros componentes no están garantizados, incluidos los siguientes:lubricantes, cordones del motor de arranque, afinaciones
de motor, y pero sin limitarse a éstos.
•
Uso de bujías que no sean las que cumplen con los requisitos de rendimiento y durabilidad de los fabricantes originales citados en los manuales del operador.
•
Las fallas por recalentamiento o las rayaduras por depósitos de carbón debidas a orificio de escape o cámara de combustión restringidos o
taponados, incluidos los daños en la rejilla del apagallamas.
•
Ajustes después de los primeros treinta (30) días y más, como ajuste del carburador y ajuste del cable del regulador.
•
Daños en engranajes o cajas de engranajes causados por grasa o aceite contaminados, uso del tipo o viscosidad incorrectos de lubricantes y
no cumplir con los intervalos de cambio de grasa o aceite recomendados.
•
Daños causados por bomba o rociador funcionando en seco, bombeo o rociado de materiales cáusticos o inflamables, o coladores rotos o que
faltan.
•
Daños adicionales a piezas o componentes debido al uso continuado después de problemas de operación o se produzcan fallas. En caso de
problema de operación o de que se produzca una falla, el producto no se debe usar, sino que se debe entregar tal como está a un distribuidor
de servicio autorizado de Shindaiwa.
El distribuidor y cliente tiene la responsabilidad de completar y devolver la tarjeta de registro de la garantía entregada con su producto Shindaiwa
o visitando el sitio web de WWW.SHINDAIWA.COM. Su recibo de compra incluidos la fecha, el modelo y el número de serie deben mantenerse y
presentarse a un distribuidor de servicio autorizado de Shindaiwa para el servicio de garantía. La prueba de compra es responsabilidad exclusiva del
cliente. Algunos estados no permiten limitaciones sobre cuánto tiempo dura la garantía implícita, por lo que es posible que las limitaciones anteriores
no se apliquen a usted. Algunos estados no permiten la exclusión o la limitación de daños concomitantes o emergentes, por lo que también usted
puede tener otros derechos legales específicos que varían de un estado a otro. Es garantía limitada da el ECHO, Incorporated, 400 Oakwood Rd.,
Lake Zurich, IL 60047.
RENUNCIA DE GARANTÍAS IMPLÍCITAS
Esta garantía limitada es en lugar de las demás garantías explícitas o implícitas, incluida cualquier garantía de IDONEIDAD PARA UN CIERTO
FIN O USO y cualquier garantía implícita de COMERCIALIZACIÓN que se aplique a este producto. ECHO y sus compañías afiliadas no deben ser
responsables de ningún daño concomitante o emergente, incluidos los beneficios perdidos. No se extiende ninguna garantía que no sea la aquí
aprobada. Solamente ECHO puede modificar esta garantía limitada.
99922201031
02/05/2010
23
DECLARACIÓN DE GARANTÍA DE CONTROL DE EMISIONES DE ECHO INCORPORATED
PARA LAS MARCAS ECHO Y SHINDAIWA
La Agencia de Protección Medioambiental (EPA) y la Junta de Recursos de Aire de California (C.A.R.B.) y ECHO Incorporated (ECHO Inc.) tienen el
placer de explicar la garantía del sistema de control de emisiones en su equipo o motor pequeño que no sea para desplazamiento por carretera (SORE)
de 2010 o posteriores. Los nuevos equipos/SORE deben diseñarse, fabricarse y equiparse de modo que cumplan con las estrictas normas anticontaminación de EPA y CARB. ECHO Inc debe garantizar el sistema de control de emisiones en su equpo/SORE para los períodos citados a continuación,
siempre que no haya habido ningún abuso, negligencia o mantenimiento indebido de su equipo/SORE. El sistema de control de emisiones puede incluir
piezas tales como: carburador, sistema de inyección de combustible, sistema de encendido, convertidor catalítico/silenciador, depósito de combustible,
líneas de alimentación de combustible, conjunto de tapa de combustible, bujías, filtros de aire y otros componentes relacionados. Donde exista una
condición cubierta por la garantía, ECHO Inc reparará su equipo/SORE de forma gratuita, incluido el diagnóstico, las piezas y la mano de obra. La
garantía del sistema de control de emisiones se extiende al propietario original incluidos todos los propietarios subsiguientes.
COBERTURA DE GARANTÍA DEL FABRICANTE:
El sistema de control de emisiones está garantizado durante 2 años o mientras dure la garantía de ECHO Inc, lo que sea más largo. Si cualquier pieza
relacionada con las emisiones de su equipo es defectuosa, la pieza será reparada o reemplazada por ECHO Inc. o su representante de servicio autorizado.
RESPONSABILIDADES DEL PROPIETARIO RELACIONADAS CON LA GARANTÍA:
Como propietario del equipo/SORE, usted es responsable de llevar a cabo el mantenimiento requerido indicado en el manual del operador. ECHO Inc.
recomienda que guarde todos los recibos de mantenimiento de su equipo/SORE, no obstante ECHO Inc. no puede negar la garantía solamente por
falta de recibos o por no asegurarse de llevar a cabo todo el mantenimiento programado. Como propietario del equipo/SORE debe ser consciente de
que ECHO Inc. puede rechazar su cobertura de garantía si su equipo/SORE o una pieza ha fallado debido abuso, negligencia, mantenimiento indebido
o modificaciones no aprobadas.
Usted es responsable de llevar a su equipo/SORE a un representante de servicio autorizado por ECHO Inc. tan pronto como surja un problema. Las
reparaciones de garantía deben completarse en un período razonable, que no debe sobrepasar los 30 días. Si existe una condición cubierta por la
garantía y no hay un distribuidor autorizado en un radio de 100 millas, ECHO Inc. pagará el envío de la unidad al distribuidor autorizado más cercano.
Si tiene dudas sobre la cobertura de la garantía, debe ponerse en contacto con ECHO Inc. llamando al 1-800-673-1558, sitio web WWW.ECHO-USA.
COM o ponerse en contacto con Shindaiwa al 1-877-986-7783, visitando el sitio web WWW.SHINDAIWA.COM.
¿QUE CUBRE ESTA GARANTÍA?
ECHO Inc. garantiza que su equipo/SORE fue diseñado, fabricado y equipado para cumplir con las normas de emisiones de EPA y CARB correspondientes y que su equipo/SORE no tiene defectos ni de material ni de elaboración que haga que no cumpla con los requisitos correspondientes durante
2 años o mientras dure la garantía de ECHO Inc., lo que sea más largo. El periodo de garantía empieza en la fecha en que el usuario final compre el
producto.
¿CÓMO SE CORREGIRÁ UNA PIEZA CUBIERTA?
Si hay un defecto en una pieza cubierta por esta garantía, cualquier Distribuidor de servicio autorizado de ECHO Inc. corregirá el defecto. No tendrá
que pagar nada para ajustar, reparar o reemplazar la pieza. Esto incluye cualquier mano de obra y diagnóstico para reparaciones garantizadas por el
distribuidor. Además estarán garantizadas las piezas de motor que no estén expresamente cubiertas por esta garantía pero cuya falla sea consecuencia
de la falla de una pieza cubierta.
¿QUÉ PIEZAS ESTÁN CUBIERTAS?
Cualquier pieza correspondiente relacionada con emisiones que no esté programada para el “mantenimiento requerido” será reparada o reemplazada
en el período de garantía. La pieza reparada o reemplazada estará garantizada durante el resto del período de garantía de ECHO Inc.
Cualquier pieza garantizada que esté programada solamente para su inspección regular en las instrucciones escritas proporcionadas está garantizada
durante el período de garantía indicado arriba. Cualquier pieza reparada o reemplazada estará garantizada durante el resto del período de garantía de
ECHO Inc.
Cualquier pieza relacionada con emisiones programada para sustituirse durante el “mantenimiento requerido” estará garantizada durante el período
antes del primer punto de sustitución programada para esa pieza. Cualquier pieza reparada o reemplazada cubierta por la garantía debe garantizarse
durante el resto del período antes del primer punto de reemplazo programado para esa pieza.
Cualquier pieza de repuesto aprobada por el fabricante puede usarse para llevar a cabo cualquier mantenimiento o reparaciones cubiertos por la garantía en las piezas relacionadas con las emisiones, y deben proveerse de forma gratuita si la pieza sigue cubierta por la garantía.
Se puede usar cualquier pieza de repuesto que sea equivalente en rendimiento y durabilidad en el mantenimiento o reparaciones no cubiertos por la
garantía y no debe reducir las obligaciones de la garantía del fabricante.
Durante el peróodo de garantía del equipo/SORE, ECHO Inc. mantendrá un inventario de piezas garantizadas suficiente para cumplir con la demanda
esperada de las mismas.
PIEZAS GARANTIZADAS RELACIONADAS CON EMISIONES ESPECÍFICAS:
• Sistema de encendido electrónico
• Bujía
• Conjunto de convertidor catalítico/silenciador
• Carburador (conjunto completo o componentes de repuesto)
• Estrangulado
• Conjunto de inyección de combustible (o componentes de repuesto)
• Depósito de combustible
• Conjunto de tapa de combustible
• Filtro de aire
• Línea de alimentación de combustible (y abrazaderas/conectores relacionados
correspondientes)
¿QUÉ NO ESTÁ CUBIERTO?
Cualquier falla ocasionada por abuso, negligencia, mantenimiento indebido, modificaciones no aprobadas, uso de piezas agregadas no aprobadas/
piezas modificadas o accesorios no aprobados.
Esta garantía de control de emisiones es válida solamente en EE.UU., sus territorios y Canadá.
24
99922201033
01/2010
NOTAS
25
NOTAS
26
NOTAS
27
Información de servicio
Piezas/número de serie
Las piezas y conjuntos originales Shindaiwa para sus productos Shindaiwa pueden conseguirse solamente en su
distribuidor Shindaiwa autorizado. Cuando necesite comprar piezas, tenga siempre a mano el número de modelo y el
número de serie de la unidad. Estos números están en el motor. Como futura referencia, escríbalos en el espacio de
abajo.
Modelo No. _____________ N/S ____________
Servicio
El servicio de este producto durante el período de garantía debe ser realizado por un distribuidor de servicio autorizado de Shindaiwa. Para obtener el nombre y dirección del distribuidor de servicio autorizado de Shindaiwa más
próximo, pregunte en el almacén donde lo compró o llame al: 1-877-986-7783. En nuestra página web (WWW.
SHINDAIWA.COM) también disponemos de información sobre los distribuidores. Cuando presente su unidad para
servicio/reparaciones de garantía, se requiere una prueba de compra.
Asistencia para productos del consumidor
Si necesita asistencia o tiene dudas referentes a la aplicación, operación o mantenimiento de este producto puede
llamar al Departamento de Asistencia de Productos del Consumidor de Shindaiwa, 1-877-986-7783 de 8:30 de la
mañana a 4:30 de la tarde (hora central estándar) de lunes a viernes. Antes de llamar, tenga a mano el número de
modelo y serie de su unidad.
Registro de la garantía
Para asegurar una cobertura de la garantía sin problemas es importante que registre sus equipos Shindaiwa rellenando la tarjeta de registro de garantía suministrada con su unidad. El registro de su producto confirma su cobertura de garantía y proporciona un enlace directo si es necesario que nos pongamos en contacto con usted.
Manuales adicionales o de repuesto
Puede obtener manuales del operador, de seguridad y de piezas a traves su distribuidor Shindaiwa, en WWW.SHINDAIWA.COM o poniéndose en contacto con el departamento de asistencia de productos del consumidor
(1-877-986-7783). Siempre consulte el sitio web el Shindaiwa para obtener información actualizada.
ECHO Incorporated.
400 Oakwood Road
Lake Zurich, IL 60047-1564 U.S.A.
Telephone: 1-877-986-7783
Fax: 1-847-540-8416
www.shindaiwa.com
Copyright© 2010 por Echo, Incorporated
Todos los derechos reservados
Yamabiko Corporation
7-2 Suehirocho 1-Chome, Ohme,
Tokyo, 198-8760, Japan
Phone: 81-428-32-6118
Fax: 81-428-32-6145
(30) T08412001001/T08412999999
(40) T08712001001/T08712999999
C (30) T08511001001/T08511999999
C (40) T08811001001/T08811999999