1
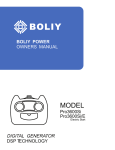
BOLIY MODEL Pro3600Si Pro3600Si/E Electric Start Pro3600Si/ER Remote Start DIGITAL GENERATOR DSP TECHNOLOGY TABLE OF CONTENTS PLEASE READ ENTIRE MANUAL BEFORE OPERATING Introduction...................................................................... 1 Warranty ...........................................................................2-3 Safety Information ...........................................................4 Exhaust Fumes are Poisonous Never Run Generators Indoors Fuel is Highly Flammable and Poisonous Engine and Muffler May be Hot Electric Shock Prevention Connection Notes Extension Cord Notes Control Function..............................................................5-6 Description and Control Panel Key Oil Warning System Engine Switch DC Protector Handle Function ..............................................................7 Remote Start Function ....................................................8 Pre-Operation Check .......................................................9 Fuel System Refueling and Fuel Level Gauge Engine Oil Ground (Earth) Operation..........................................................................10-13 Starting the Engine Economy Control Switch Application Range Connection Stopping the Engine Periodic Maintenance......................................................14 Maintenance Chart Spark Plug Inspection .....................................................15 Engine Oil Replacement Fuel Filter Fuel Tank Filter Troubleshooting ..............................................................16 Engine Won’t Start Generator Won’t Produce Power Storage Draining Fuel Engine Specifications ..................................................................17 Wiring Diagram ................................................................18 Grounding Information ...................................................19 Portable Generator Hazards ...........................................20 High Altitude Jetting (4,000 Feet and Over) ..................21 INTRODUCTION Congratulations on your new BOLIY Generator. This manual covers operation and maintenance of the Pro3600Si/E generator, as well as basic troubleshooting. If you have any questions regarding your machine, please consult your BOLIY dealer. xxx-xxxxx MACHINE IDENTIFICATION MODEL SERIAL NO. Record your generator model and serial number in the spaces provided to assist you in ordering spare parts from a BOLIY dealer. Record and keep these I.D. numbers in a separate place in case your machine is lost or stolen. Pro3600 SI & Si/E OWNER’S MANUAL All rights reserved. www.boliyusa.com 1 BOLIY 1 YEAR FULL FUNCTIONALITY & 2 YEAR EMISSIONS COVERAGE BOLIY USA WARRANTY POLICY This warranty is limited to Boliy products when distributed by Boliy USA. The warranty is effective from the date of retail purchase and applies only to products used in recreational applications. Warranty Contact Information: Boliy USA 6800 Otter Lake Road Lino Lakes, MN 55038-4428 www.boliyusa.com - [email protected] - Nat. 1-877-407-1457, Local 651-407-1457 To Qualify for This Warranty: The product must be purchased in the United States from Boliy USA or a Boliy dealer authorized to sell these products. This warranty applies to first retail purchaser and each subsequent owner during the applicable warranty time period. Coverage: Boliy USA will repair or replace, at its option, any part or unit that is proven to be defective in material or workmanship under normal use during the applicable warranty time period . Warranty repairs and replacements will be made without charge for parts or labor. Anything replaced under warranty becomes the property of Boliy USA. All parts replaced under warranty will be considered as part of the original product, and any warranty on those parts will expire coincident with the original product warranty. To Obtain Warranty Service: 1) Contact Boliy USA with date of purchase information and description of problem to obtain warranty authorization. 2) After warranty authorization has been established at our option, the unit is to be sent to the National Service Center (see address below) or an authorized service center. Boliy USA Service 6800 Otter Lake Road Lino Lakes, MN 55038 1-877-407-1457 or 651-407-1457 8:00 am - 5:00 pm Central www.boliyusa.com - [email protected] To Obtain Emissions Warranty: 2 After the potential of an emissions problem has been established and warranty has been authorized at our option, the generator will be picked up, repaired, and sent back at no charge to the customer or the unit may be brought to a qualified repair facility for emissions repair at no charge to the customer. Boliy USA Service 6800 Otter Lake Road Lino Lakes, MN 55038 1-877-407-1457 or 651-407-1457 www.boliyusa.com - [email protected] Exclusions: This warranty does not extend to parts affected or damaged by collision, normal wear, fuel contamination or deterioration, use in an application for which the product was not designed or any other misuse, neglect, incorporation or use of unsuitable attachments or parts, unauthorized alteration, or any causes other than defects in material or workmanship of the product. Any product that has ever been declared a total loss or sold for salvage by a financial institution or insurer. Disclaimer of Conseqential Damage and Limitation of Implied Warranties: Boliy USA disclaims any responsibility for loss of time or use of the product, transportation , commercial loss, or any other incidental or consequential damage. Any implied warranties are limited to the duration of this written limited warranty. Some states do not allow limitations on how long an implied warranty lasts and/or do not allow the exclusion or limitation of incidental or consequential damages, so the above exclusions and limitations may not apply to you . This warranty gives you specific legal rights, and you may also have other rights which vary from state to state. WARRANTY FAQ Q. What costs are my responsibilities during the warranty period? A. The customer’s responsibility includes nonwarranty repairs, accident damages, and all costs of normal maintenance service such as oil and spark plugs. Q. What are some examples of “abnormal” strain, neglect, or abuse? A. These terms are general, as it would be impossible to provide a complete list. Some specific examples include: Running the machine out of oil; lack of proper maintenance; or operating the machine with a broken or damaged part which causes another part to fail. If you have any specific questions on operation or maintenance, please contact your dealer for advice. Q. Does the warranty cover incidental costs such as transportation due to a failure? A. If it is determined that it is an emmissions related problem the warranty will cover this cost. However, if the warranty claim is not emissions related, these costs are not covered. Q. May I perform any or all of the recommended maintenance shown in the Owner’s Manual instead of having the dealer do them? A. Yes, if you are a qualified mechanic and follow the procedures specified in the Owner’s and Service Manual. We do recommend, that items requiring special tools or equipment be done by a BOLIY generator dealer. Q. Will the warranty be void or cancelled if I do not operate or maintain my new BOLIY exactly as specified in the Owner’s Manual? A. Yes. The warranty on a new BOLIY can be “voided” or “cancelled”. If a particular failure is caused by operation or maintenance other than as shown in the Owner’s Manual, that failure will not be covered under warranty. Q. What responsibility does my dealer have under this warranty? A. Each BOLIY generator dealer is expected to: 1. Check the operation of the generator before sale. 2. Explain the operation, maintenance, and warranty requirements to your satisfaction at the time of sale, and upon your request at any later date. CUSTOMER SERVICE If your generator isn’t functioning or encounter technical problems, our authorized team of technicians is available to help you get your Boliy Generator back up and running as quickly as possible. To take full advantage of our service center please choose one of the following options for your repair: 1) For the fastest service, you may exchange your unit for a ready-to-go unit of equal age and condition. A $500 deposit will be required and will be refunded when the defective unit is returned. All replacement units will be shipped within 24 hours. 2) Return your defective unit and it will be repaired within 10 days and returned to you at no charge. CHANGE OF ADDRESS The federal government requires each manufacturer to maintain a complete, up-to-date list of all first purchasers against the possibility of a safety-related defect and recall. This list is compiled from the purchase registrations sent to BOLIY. If you should move after you have purchased your new generator, please advise us of your new address by sending a post-card listing your BOLIY model name, engine number, and dealer name as it is shown on your warranty identification, your name and new mailing address. Mail to: BOLIY USA 6800 Otter Lake Road Lino Lakes, MN 55038-4428 Contact Number: 651-407-1457 This will ensure that BOLIY has an up-to-date registration record in accordance with federal law. 3 SAFETY INFORMATION WARNING EXHAUST FUMES ARE POISONOUS. Never operate the engine in an enclosed area. Unconsciousness and death will result. Always operate the engine in a well ventilated area. NEVER RUN GENERATORS INDOORS OR IN CONFINED SPACES. • Never sleep near a running generator due to the emission of carbon monoxide. • When working with a generator, keep at least 20 feet away from where it is running. • Keep generators clear of all fresh air inlets (houses, buildings, campers, or tents) to avoid possible carbon monoxide poisoning. Failure to follow these precautions could result in POISONING or DEATH. FUEL IS HIGHLY FLAMMABLE AND POISONOUS • Always turn off the engine when refueling. • Never refuel while smoking or in the vicinity of an open flame. • Take care not to spill any fuel on the engine or muffler when refueling. • If you swallow any fuel, inhale fuel vapor, or allow any to get in your eyes, see your doctor immediately. If any fuel spills on your skin or clothing, immediately wash with soap and water and change your clothes. • When operating or transporting the machine, be sure it is kept upright. If it tilts, fuel may leak from the carburetor or fuel tank. ENGINE AND MUFFLER MAY BE HOT • Place the machine in a place where pedestrians are not likely to touch the machine and away from children. • Avoid placing any flammable materials near the exhaust outlet during operation. • Keep the machine at least 1 meter/3 feet from buildings or other equipment, or the engine may overheat. • Never operate the engine with the dust cover. ELECTRIC SHOCK PREVENTION • Never operate the engine in rain or snow. • Never touch the machine with wet hands. • Be sure to ground (Earth) the generator NOTE: USE A GROUND (Earth) LEAD OF SUFFICIENT CAPACITY. (SEE PAGE 17) CONNECTION NOTES Avoid connecting the generator to a commercial power outlet. Never connect the generator in parallel with any other generator. WARNING Before the generator can be connected to a building’s electrical system, a licensed electrician must install an isolation (transfer) switch in the building’s main fuse box. The switch is the connection point for generator power and allows selection of generator or main line power to the building. This will prevent the generator from charging the main power line (backfeeding) when the main power supply has failed or has been turned off for line repair. Backfeeding can electrocute or injure line maintenance personnel. Also, generator and building electrical system damage can occur when normal operating power returns if unit is used without an isolation switch. 4 EXTENSION CORD NOTES • When using an extension cord, total cord length should not exceed 50 feet of 12 gauge wire or 100 feet of 10 gauge wire. • Extension cord should be protected by a tough, flexible rubber sheath (IEC 245) or the equivalent to withstand mechanical stresses. CONTROL FUNCTION 1 1 3 2 16 D IG ITA L ON STOP ENG INE STA RT ECO N TE CH 14 ON 10 OFF ON OFF O N O FF (P US H) T OR PR O T E C TO RESE T AC INE RESTART ENG AC 12 15 11 13 4 5 6 7 8 9 Description and Control Panel Key 1. 2. 3. 4. 5. 6. 7. 8. Carrying Handles Fuel Level Gauge Fuel Cap Fuel On/Off Switch AC Ready Pilot Light Oil Warning Light Ground (Earth) Terminal 30 Amp RV Receptacle 9. 20 Amp Receptacle 10. Engine On/Off Switch 11. Choke Knob 12. Economy Control Switch (SMART throttle switch) 13. Recoil Starter 14. DC Outlet and Reset Button 15. Oil Fill Access Door Panel 16. Engine Start button 5 CONTROL FUNCTION CONTINUED OIL LIGHT & WARNING SYSTEM If the oil level falls below the safe operating level, the engine will stop automatically. Unless you refill with oil, the engine will not start again. NOTE: If the engine stalls or does not start, turn the engine switch to “ON” position and then pull the recoil starter. If the oil warning light flickers for a few seconds, the engine oil is low. Add oil and restart. ENGINE SWITCH The engine switch controls the ignition system. A. Ignition circuit is switched on. The engine can be started. B. Ignition circuit is switched off. The engine will not run. 12 Volt Charger The DC Protector turns off automatically when the load exceeds the generator’s rated 12 volt charging output. ON OFF (PUSH) PROTECTOR NOTE: If the DC Protector trips to the OFF position, press to reset. Reduce the load to the specified 8 amp 12-volt generator output. If it turns off again, consult the authorized dealer. 6 HANDLE FUNCTION Pin location when the handle is stowed. Pin location to lock the handle. 7 REMOTE START/STOP FUNCTION 1) Turn the fuel knob to “On”. 2) Turn the engine kill switch to “On”. D IG ITA L ON STOP ENG INE STA RT ECO N 3) Turn the key switch to “On”. Remote start will not work if key switch is not in the “On” position. TE CH ON OFF ON OFF O N O FF (P US H) T OR PR O T E C TO RESE T AC INE RESTART ENG AC START ON E N G IN E S TA R T D I G I TA L TEC O N O FF (P US H ) T OR PR O T E C 4) To start the engine remotely, push unlock button twice on the remote. If the first attempt fails, push the unlock button again. 5) To shut off the generator, push the lock button on the remote. 6) If the generator will not be used again for more than a day, turn the key switch to the “Off ” position. Failure to turn the key switch off after use will drain the battery. 8 PRE-OPERATION CHECKLIST NOTE: Pre-operation checks should be made prior to each use. FUEL SYSTEM Make sure there is sufficient fuel in the tank. Recommended fuel: Unleaded gasoline Fuel tank capacity: Total 1.9 US Gallons The engine must use regular unleaded gasoline with a pump octane number ((R + M)/2) of 86 or higher, or research octane number of 91 or higher. E-85 is NOT recommended. E REFUELING AND FUEL LEVEL GAUGE “F” Full “E” Empty F Fuel Level Gauge E F To refuel, remove cap and add fuel slowly until fuel gauge indicates full. Apply fuel cap and turn fuel vent to the ON position. WARNING • Fuel is highly flammable and poisonous. Read “SAFETY INFORMATION” before refueling. • Do not fill above the top of fuel filler or it may overflow when the fuel heats and expands • Wipe up any spilled fuel immediately • After refueling, make sure the tank cap is tightened ENGINE OIL Make sure the engine oil is at the upper level of the oil filler hole. Add oil as necessary. Recommended oil for most climates: 10W30 For extremely cold conditions the oil viscosity may be lowered to ease starting: 5W30 Engine Oil Quantity: 0.63 US qt NOTE: Recommended engine oil classification: API Service “SE” or “SF”; if not available, “SD”. CAUTION The generator has been shipped without engine oil. Fill with oil or it will not start. GROUND (EARTH) Make sure to ground (Earth) the generator. SEE PAGE 19. 9 OPERATION STARTING THE ENGINE NOTE: Before starting the engine, do not connect any electric devices. 1. Turn the fuel switch lever to the “ON” position. 2. Turn the engine switch to the “ON” position. 1. 2. ON OFF 3. Hold the choke knob fully out for a cold start. Note: Sometimes the choke is required to start a warm engine. 4. Pull slowly on the recoil starter until it is engaged, then pull it briskly. (Electric start model press engine start button to start.) 5. After the engine starts, warm up the engine until the engine does not stop when the choke knob is returned to the original position. 6. Push the choke knob back to the original position. 3. 6. D I G I TA L T E C H KE KE CHO ON OFF F OF CHO F OF (PUSH) NO PROTECTOR F OF NO NO NOTE: When starting the engine in areas where the ambient temperature is below 0°/32° F run the engine for one to three minutes to warm up the engine. ECONOMY CONTROL SWITCH Engine speed is kept at idle automatically when the electrical device is disconnected and is returned to the proper speed by the electrical load when the electrical device is reconnected. The economy control switch in “ON” position is recommended to minimize the fuel consumption while in normal operation. NOTE: When high electrical load devices are connected simultaneously, turn the economy control switch to the “OFF” position, the engine speed will increase to reduce voltage changes. Otherwise the generator will not operate sufficiently to run high demand electrical devices. 10 OPERATION CONTINUED AC CONNECTION ALTERNATING CURRENT (AC) CAUTION • Be sure electric devices including the lines and plug connections are in good condition before connection to the generator • Be sure any electric devices are turned off before plugging it in • Be sure the total load is within generator rated output • Be sure the receptacle load current is within receptacle rated current 1. 2. 3. 4. 5. Wind the power lead 2 or 3 turns around the carrying handle. Start the engine. Plug in to the AC receptacle. Make sure the AC indicator light is on. Turn on any electric devices. Note: The highest peak load on this model is 3600 watts, the short term peak load is 3300 watts and the max operating load is 3,000 watts. High temperatures or high elevations will reduce the expected performance of this generator. OVERLOAD INDICATOR LIGHT The overload indicator light (the AC pilot light) will flash when an overload of connected electrical device is detected or the inverter control unit overheats. The electronic breaker will then activate, stopping power generation in order to protect the generator and any connected electric devices, but the engine will not stop running. When the overload indicator light comes on and power generation stops, proceed as directed: 1. Turn off any connected electric devices and stop the engine. 2. Reduce the total wattage of connected electric devices within the application range. 3. Check for blockages in the cooling air inlet and around the control unit. If any blockages are found, remove. 4. After checking, restart the engine. NOTE: The generator AC output automatically resets when the engine is stopped and restarted. USING THE GENERATOR FOR BATTERY CHARGING CAUTION Do not use AC and DC power at the same time or the generator may be damaged. NOTE: The generator DC rated voltage is 8 Amps at 12 Volts. 1. Start Engine 2. Plug in battery charge wires to D.C. receptacle- #14 on CONTROL FUNCTION DIAGRAM NOTE: • Make connections to the battery after starting the engine • Clamp the red wire to the positive (+) terminal and the black wire to the negative (-) terminal of the battery. Do not reverse these positions. 11 OPERATION CONTINUED CAUTION • Be sure the battery leads are properly connected and are not damaged or obstructed. • Reduce the load to the specified generator rated output if the DC protector turns off. If it turns off again, consult the authorized dealer. NOTE: • If a short or overdraw should occur in the system, it will cause the DC Protector to trip. Press to reset the DC protector. NOTE: • At full charge, electrolyte specific gravity is between 1.26 and 1.28 • Check specific gravity hourly. WARNING Never smoke near the battery while charging. Do not make or break connections while the battery is charging. This may cause sparks to ignite the battery gas. Battery acid is poisonous and dangerous; it contains sulfuric acid. Avoid contact with skin, eyes, and clothing as it will cause severe burns. If contact occurs: EXTERNAL – Flush with water. INTERNAL – Drink large quantities of water or milk, then drink milk of magnesia, beaten egg or vegetable oil. Call physician immediately. EYES – Flush with water for 15 minutes and get prompt medical attention. Batteries produce explosive gases. Keep sparks, flame, cigarettes, etc., away from the generator. Ventilate when charging or using in closed space. Always wear eye protection when working near batteries. KEEP OUT OF REACH OF CHILDREN. STOPPING THE ENGINE NOTE: 1. Disconnect any electric devices. 2. Turn the engine switch to the “STOP” position. 3. Turn the fuel lever to “OFF” 1. 2. ON STOP 12 OFF 3. OPERATION CONTINUED APPLICATION RANGE: APPROXIMATE WATTAGE REQUIRED FOR STARTING Coffee Maker Dishwasher - Cool Dry Electric Fry Pan Electric Range - 8 - inch element Microwave Oven 20” Box Fan or Table Fan Electric Blanket Refrigerator Automatic Washer Clothes Dryer - Electric Furnace Fan, gas or fuel oil 1/8 Horsepower 1/4 Horsepower 1/2 Horsepower Lights (as indicated on bulb) Radio Sump Pump 1/3 Horsepower 1/2 Horsepower Television - Color RV Air Conditioner 13,500 BTU Room Air Conditioner 10,000 BTU Contractor Air Compressor - 1 Horsepower Bench Grinder - 8 inches Hand Drill - 1/2 inch High-Pressure Washer - 1 Horsepower Circular Saw, Heavy Duty - 7 1/4 inches Household 1750 RV 1750 700 1300 1400 1300 2100 1000 120 150 192 1150 2100 2100 180 150 1200 2300 5750 1800 300 600 875 500 1000 2350 50-200 50 800 1050 1300 2150 300 300 1800 2800 1500 2200 1500 4500 1400 2500 600 600 1200 3600 1400 2300 Electric Chain Saw - 14 inches, 2 HP Table Saw - 10 inches Drills - 3/8 inch, 4 amps - 1/2 inch, 5.4 amps Capacitor Start Induction Run - 1/3 Horsepower - 1 Horsepower Capacitor Start Capacitor Run - 1 1/2 Horsepower Fan Duty - 1/6 Horsepower Farm Equipment Electric Fence, 25 miles Milk Cooler Milker (vacuum pump) - 2 Horsepower Portable Heater (kerosene, diesel fuel) - 50,000 BTU - 90,000 BTU -150,000 BTU Battery Charger - 15 amp - 60 amp/250-amp boost - 100 amp/300-amp boost Electric Welder - 200 amp AC - 230 amp AC, at 100 amp Air Compressors - 1/2 Horsepower - 1 Horsepower Computers - Desktop - Laptop - Monitor Fax Printer Household RV 1100 1000 1800 4500 440 600 600 900 720 1600 1300 4500 2000 6100 550 850 250 1100 230 1800 1000 2300 400 500 625 600 725 1000 380 1500/5750 2400/7800 380 1500 2400 9000 7800 9000 7800 975 1600 1600 4500 600 to 800 200 to 250 200 to 250 600 to 800 400 to 600 600 200 200 600 400 NOTE: • Application wattage indicates when each device is used by itself CAUTION • Be sure the total load is within generator rated output otherwise generator damage may occur. • Do not use AC and DC power at the same time or the generator may be damaged. NOTE: Some precision equipment is voltage sensitive and may require a more uniform voltage supply than portable generators provide. Examples include some medical equipment, personal computers, and some inverters that sense peak and RMS voltage values. Consult the precision-equipment vendor before relying on any portable generator to provide power to such equipment. 13 PERIODIC MAINTENANCE MAINTENANCE CHART Regular maintenance is most important for the best performance and safe operation. WARNING Stop the engine before starting maintenance work. Pre-Operation Check (Daily) Item Remarks Spark Plug Check condition. Adjust gap and clean. Replace if necessary. Engine Oil Check oil level/ Replace Air Filter Clean/Replace if necessary. Fuel Filter Clean fuel cock and fuel tank filter. Replace if necessary. Value Clearance Check and adjust when engine is cold. Fuel Line Check fuel hose for crack or damage. Replace if necessary. X Exhaust System Check for leakage. Retighten or replace gasket if necessary. X Check choke’s operation. Cooling System Check fan damage. Starting System Check recoil starter operation. Decarburization More frequently if necessary. Generation Check the pilot light comes on. Check all fittings and Fittings/Fasteners fasteners. Correct if necessary. Every 3 Months Every 6 Months / 50 Hours / 100 Hours Every 12 Months / 300 Hours X X X X X X Check muffler screen. Clean/ replace if necessary. Choke Handle First Month / 20 Hours X X X X X X X X CAUTION Use only genuine BOLIY replacement parts. If you have questions, contact your dealer or Boliy USA (651-407-1457) 14 SPARK PLUG INSPECTION You should periodically remove and inspect the spark plug. 1. Check for discoloration and remove the carbon. 2. Check the spark plug type and gap. Standard electrode color: Tan Color Standard Spark Plug: BPR4ES (NGK) (F7RTC) Gap: (0.028 – 0.031 inches) 3. Install the spark plug. Spark Plug Torque: 14 lbs. – Ft. (0.028-0.031 inch) ENGINE OIL REPLACEMENT 1. Place the machine on a level surface and warm up the engine. Then stop the engine. 2. Remove the rubber cap on the bottom. 3. Place an oil pan under the engine. Remove the drain bolt. 4. Open the oil filler cover as shown and remove the oil filler cap so that the oil can be completely drained. 5. Check the drain bolt, gasket, oil filler gap and O-ring. 6. Reinstall the oil drain bolt. - Drain Bolt Torque: 12 Ft. lbs. 7. Add engine oil to the upper level. • Recommended oil for most climates: 10W30 • For extremely cold conditions the oil viscosity may be lowered to ease starting: 5W30 • Engine Oil Quantity: 0.63 US qt NOTE: Recommended engine oil classification: API Service “SE” or “SF” CAUTION Be sure no foreign material enters the crankcase. 8. Install the oil filler cap. 9. Install the rubber cap on the bottom. CAUTION Be sure to install securely to prevent from falling off during operation. 10. Close the oil filler cover. FUEL FILTER WARNING Do not smoke or have an open flame in the vicinity of the fuel and solvent. 1. Stop the engine. 2. Clamp the fuel line with the clip. 3. Replace the fuel filter. FUEL TANK FILTER 1. Remove the fuel tank cap and filter. 2. Clean the filter with solvent, if damaged, replace. 3. Wipe the filter and insert it. WARNING Be sure the tank cap is securely tightened. 15 TROUBLESHOOTING ENGINE WON’T START 1. Fuel system, engine is not getting fuel.. • No fuel in tank… Supply fuel. • Clogged fuel line… Clean fuel line. • Foreign matter in fuel filter… Replace fuel filter. • Clogged carburetor … Clean carburetor. 2. Engine oil light flashes • Oil level is low… Add engine oil. 3. Electrical system • Engine switch to “ON”. Poor or no spark. • Spark plug is dirty… Replace spark plug. • Faulty ignition system… Consult dealer. 4. Compression Insufficient • Worn out piston and cylinder… Consult dealer. GENERATOR WON’T PRODUCE POWER Stop the engine, then restart. If A/C lights continue to flash consult your dealer. STORAGE GUIDELINES Long term storage of your machine will require some preventive procedures to guard against deterioration. The following steps are necessary to protect your generator during long periods of storage. DRAIN THE FUEL 1. Add fuel stabilizer to tank and run generator. 2. Remove the fuel tank cap. Drain the fuel from the fuel tank into an approved gasoline container using a commercially available hand siphon. Then, install the fuel tank cap. WARNING • Fuel is highly flammable and poisonous. • Wipe up any spilled fuel immediately. 3. Drain fuel from the carburetor by loosening the drain screw on the carburetor float chamber. 4. Turn the fuel cock lever to “OFF”. Start the engine and leave it run until it stops. This will burn any remaining fuel in the carburetor. ENGINE 1. Remove the spark plug, pour about one tablespoon of SAE 10W30 or 20W40 motor oil into the spark plug hole and reinstall the spark plug. Turn over engine several times (with ignition off) to coat the cylinder walls with oil. 2. Pull the recoil starter until you feel compression. Then stop pulling. (This prevents the cylinder and valves from rusting). 3. Clean exterior of the generator and apply a rust inhibitor. 4. Store the generator in a dry, well-ventilated place, with the cover placed over it. 5. The generator must remain in a vertical position when stored, carried or operated. 16 BOLIY Pro 3600Si/ Pro3600Si/E Pro3600Si/ER DSP INVERTER GENERATOR SPECIFICATIONS & DIMENSIONS OVERALL LENGTH (in) 23 OVERALL WIDTH (in) 16.5 OVERALL HEIGHT (in) 18.5 (lb..) 3600 SI - 68 lbs, 3600 SI/E - 74 lbs DRY WEIGHT SHIPPING WEIGHT (lb.) SI - 72lbs, SI/E -78lbs FUEL TANK CAPACITY (US gal.) NOISE LEVEL 1.9 (1/4 load at 7m) 53-58 dB GENERATOR TYPE AC OUTPUT, Multistage permanent-magnet generator RATED OUTPUT (WATTS) MAX OUTPUT (WATTS) FULL TANK OUTPUT 3000 3300 (WATTS) 13500 RUN TIME AT 1/2 RATED LOAD 7.5 hours RUN TIME AT RATED LOAD 4 hours POWER CONVERSION RATE 85-92% RATED VOLTAGE (V) RATED FREQUENCY (Hz) 60 50 RATED CURRENT (A) 25 13 DC OUTPUT 120 North America / 230 Europe (12V/8A) YES ENGINE TYPE 166F, OHV, AIR-COOLED, 4 - STROKE STARTING SYSTEM RECOIL START / ELECTRIC START CYLINDER ARRANGEMENT INCLINED, SINGLE CYLINDER BORE X STROKE (mm) 66 X 50 IGNITION SYSTEM CDI SPARK PLUG TYPE BPR4ES (NGK) / F7RTC GAP (in) 0.8 (0.028 - 0.031) DISPLACEMENT RATED OUTPUT 171CC (HP) r/min (4.9) / 3600 FUEL UNLEADED GASOLINE ENGINE OIL QUANTITY (US qt) 0.63 THE FLUCTUATION OF VOLTAGE & FREQUENCY INSTANTANEOUS 25% STABLE STATE 0% STABLE TIME (second) 3 FREQUENCY 0.2% CHARACTERISTIC AUTOMATIC RELEASE PRESSURE YES ELECTRO-BREAKER YES FUEL LEVEL GAUGE YES ENGINE OIL WARNING LIGHT YES OVERLOAD INDICATOR LIGHT NO AC INDICATOR LIGHT YES ENERGY CONSERVATION CURRENT IDLING YES INSULATION CLASS F 17 BOLIY Pro 3600Si & 3600Si/E DSP INVERTER GENERATOR WIRING DIAGRAM Color code B - Black G - Green L - Blue O - Orange R - Red W - White Y - Yellow P - Pink B/W - Black/White G/Y - Green/Yellow W/L - White/Blue 18 1 - Main coil 2 - Sub coil 3 - Control unit 4 - AC indicator light/ Overload indicator light 5 - AC receptacle 6 - Ground (Earth) terminal 7 - Economy Control Switch 8 - Step Motor controller 9 - Engine switch 10 - Oil warning light 11 - Oil warning unit 12 - Oil level gauge 13 - Ignition coil 14 - Spark plug 15 - AC-CDI unit 16 - Pulsar coil 17 - Stepping motor 18 - Charge coil 19 - DC receptacle 20 - Ballast ADDITIONAL GROUNDING INFORMATION & SAFETY TIPS POSSIBLE CAUSES OF INJURY OR FATALITY • Shocks & electrocution to users from improper use – improper connection to structures, such as residences, offices, shops and trailers. SAFE WORK PRACTICES • Maintain and operate portable generators in accordance with the manufacturer’s use and safety instructions • Do not attach a portable generator directly to the electrical system of a structure (home, office or trailer) unless the generator has a properly installed open-transition transfer switch. • Always plug electrical appliances and tools directly into the generator using manufacturers supplied cords. Use heavyduty extension cords that contain a grounding conductor (3-wire flexible cord and 3-pronged cord connectors). • Proper grounding and bonding prevent shocks and electrocutions • Use ground-fault circuit interrupters (GFCIs) as per the manufacturer’s instructions. • Visually inspect the equipment before use; remove defective equipment from service; mark or tag it as unsafe for use. GROUNDING REQUIREMENTS (Portable and Vehicle-mounted Generators) Under the following conditions, OSHA directs that the frame of a portable generator need not be grounded (connected to earth) and that the frame may serve as the ground (in place of the earth): • The generator supplies only equipment mounted on the generator and/or cord- and plug-connected equipment through receptacles mounted on the generator. • The noncurrent-carrying metal parts of equipment (such as the fuel tank, the internal combustion engine, and the generator’s housing) are bonded to the generator frame, and the equipment grounding conductor terminals are bonded to the generator frame. Thus, rather than connect to a grounding electrode system, such as a driven ground rod, the generator’s frame replaces the grounding electrode. If these conditions do not exist, then a grounding electrode, such as a ground rod, is required. If the portable generator is providing electric power to a structure by connection via a transfer switch to a structure (home, office, shop, trailer, or similar) it must be connected to a grounding electrode system, such as a driven ground rod. The transfer switch must be approved for the use and installed in accordance with the manufacturer’s installation instructions by a qualified electrician. SAFE WORK PRACTICES FOR PORTABLE TOOLS • Do not use underrated cords—replace them with appropriately rated cords that use heavier gauge wires. • Never use electrical tools or appliances with frayed cords, missing grounding prongs, or damaged or cracked housings. • Use double-insulated tools and equipment distinctively marked as such. • Use battery-operated tools where possible. BONDING VERSUS GROUNDING Bonding and grounding are separate requirements for generators and other electrical distribution systems. Grounding means the connection, or the establishment of a connection, of an electric circuit or equipment to reference ground, which includes the generator’s frame. Bonding is the intentional connection between the grounded circuit conductor (neutral) and the grounding means for the generator, which includes the generator’s frame. Thus, effective bonding of the neutral conductor to the generator’s frame is also a concern for the safe use of the equipment. As with grounding terminal connections, proper bonding of the neutral terminal of a power receptacle may be confirmed via testing by a competent electrician with the correct equipment, and the ohmic resistance should measure near zero and must not be intermittent, which indicates a loose connection. 19 PORTABLE GENERATOR HAZARDS Portable generators are useful when temporary or remote electric power is needed, but they can be hazardous. The primary hazards to avoid during use are carbon monoxide poisoning, electric shock or electrocution, and fire. TO AVOID CARBON MONOXIDE HAZARDS: • Always use generators outdoors, away from doors, windows, and vents. • NEVER use generators in homes, garages, basements, crawl spaces, or other enclosed or partially enclosed areas, even with ventilation. • Follow manufacturer’s instructions. • Install battery-operated or plug-in (with battery backup) carbon monoxide (CO) alarms in your home, following manufacturer’s instructions. • Test CO alarms often and replace batteries when needed. TO AVOID ELECTRICAL HAZARDS: • Keep the generator dry. Operate on a dry surface under an open, canopy-like structure. • Dry your hands before touching the generator. • Plug appliances directly into generator or use a heavy-duty outdoor-rated extension cord that is free of cuts or tears and the plug has all 3 prongs, especially a grounding pin. • NEVER plug the generator into a wall outlet. This practice, known as backfeeding, can cause an electrocution risk to utility workers and others served by the same utility transformer. • If necessary to connect generator to house wiring in order to power appliances, have a qualified electrician install appropriate equipment. Your utility company may also be able to install an appropriate transfer switch. TO AVOID FIRE HAZARDS: • Before refueling the generator, turn it off and let it cool. Fuel spilled on hot engine parts could ignite. • Always store fuel outside of living areas in properly labeled, non-glass containers. • Store fuel away from any fuel-burning appliance. For more information contact: The U.S. Fire Administration 16825 South Seton Avenue Emmitsburg, MD 21727 Or Visit the USFA Web Site: www.usfa.fema.gov 20 High Altitude Jetting 4,000 Feet and Over Changing Nozzle Jet for High Altitude Applications Modification Procedure: On the bottom of the carburetor bowl, there is a large hex nut. Unscrew the nut and pull off the bowl. Where the nut was unscrewed, the nozzle jet will be visible. Take the proper flat head screwdriver and carefully insert up the hole and unscrew the jet. The best screwdriver to remove the jet is a multi type screwdriver. Use a small pair of vise grips to remove the loosened jet. Be careful as the jet is brass. Carefully remove only the jet as other parts above the jet might fall out. Insert the new jet and screw it back into bottom of the hole. Do not over-tighten the jet, only get it seated snugly. Replace the fuel bowl and the nut in the bottom center and tighten. Part number: BOLYE17 Note: Use a small mirror and place it under the carburetor to see the jet and also make sure that the fuel bowl is aligned properly. The fuel bowl may hang up on the flange of the aluminum carburetor casting and not properly seat on the gasket that sits between the fuel bowl and carburetor casting. When everything is properly positioned, turn on the gas and check for leaks. If there are leaks it is likely that the fuel bowl is not aligned properly to seat on the gasket. Recheck the fuel bowl alignment with gasket to avoid carburetor casting. Loosen the center nut and move fuel bowl around to seat properly on the gasket only and retighten nut. Note: there is also a small gasket between the fuel bowl and the large hex nut. Don’t misplace it and make sure it’s in place when you reinstall the nut or it will leak. Boliy USA 6800 Otter Lake Road Lino Lakes, MN 55038-4428 651-407-1457 21 www.boliyusa.com BOLIY 0213ex1758 REV.1