1
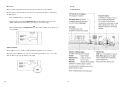
abcdef
UNIVERSITY OF LONDON
HOUSING SERVICES
Electrical Appliance
Manual Clandon House
PROPERTY MANAGEMENT UNIT, UNIVERSITY OF LONDON UNION, 4TH FLOOR,
MALET STREET, LONDON, WC1E 7HY
T E L E P H O N E 020 - 7862 8881 FAX 020 - 7862 8084
E-Mail [email protected] : Internet HTTP://www.housing.lon.ac.uk
Property Management Unit
52
2
51
CONTENTS PAGE
Pages
50
Boilers
Danfloss Randall 103
Grasslin Digi 20
Drayton Lifesyle
Worcester Greenstar 24i Junior/28iJunioir
Potterton EP 4000
Potterton Mini Minder ES
Danfloss 103E5
4—6
6—9
9—12
12—17
17—18
18—20
21– 25
Vacuum cleaners
Orb
Progress Stutgart
26—28
29– 31
Washing machines
Zanussi
Bosch
Bendix BIW 103 W
Bendix BIW 1000W/1200W
Indesit 1060W
Gorenjie
32—36
37—39
39—40
41—42
43—44
44—46
Cooker
General information
47
Fridge freezer
General information
47
3
BOILERS
Clandon House has a number of different boilers, please check which make and model
your is in order to establish which of the following instructions is relevant to you.
Danfloss-Randall 103:
Your time switch The times switch can control your heating and hot water at the same time. You can choose
whether the time switch control your hot water and heating at the programmed times, constantly on or constantly off.
The dial at the
plays the
day using the
clock. You
the dial clock-
front dishours of the
24 hour
can only turn
wise.
Setting the time of day –
Remove dial cover (turn slightly to the left and pull off). Turn the dial clockwise until the
correct time is aligned to the time mark.
4
49
Notes:
Setting the programme –
1.
In not already done so, remove the dial cover (turn slightly to the left and pull)
Decide when you want your hot water and heating to come on and go off. While gripping
the dial
2.
knob slide the red tappets to the required ON times and the blue tappets to the
required OFF times (the tappets might be quite stiff to move)
Selecting operating mode –
The Rocker Switch on the side of the unit is used to select how your boiler controls your
hot water and heating system. You can manually select either:
o
o
o
48
5
Hot water and heating follow set programme
Hot water and heating constantly on
Hot water and heating constantly off
Overriding the programme using the Pre-selector wheel-
OVENS
The pre-selector wheel can be used to override the ser programme on occasions when you
need to change from your normal heating routine.
By turning the wheel anti-clockwise you can turn the unit ON when it is OFF and vice
versa
There are a few different ovens at Clandon House, but each of them will be quite similar.
You will notice that on the oven there will be six knobs, four which are for the cooker
hobs on the top, one for the main oven and one for the variable grill.
Grasslin Digi 20:
On each of the knobs for the grill there will be a diagram showing you which hob the
knob is connected to. To turn the hob on, turn the knob to any number from one to six,
note that six is the highest setting. It takes a while for the hob to heat up and also to cool
down between settings as well at the end of cooking when you should have set the dial
back to zero.
The temperature of the oven is measured in degrees centigrade, most recipes or packaged
food will tell you what temperature you will need to cook your food at. Again, you will
need to turn the dial to the correct temperature, leaving it time to heat up before you use it.
Before proceeding with setting the time and programming the unit, press the reset key to
clear all data from the memory.
The variable grill has settings; low, medium and high. You need to turn the dial to the
appropriate setting, and wait for it to heat up. Please note that not all ovens will have a
grill.
FRIDGE/FREEZERS
You should find your fridge/freezer already turned on, should you find that this is not the
case, check to see if it is plugged in and switched on.
We recommend that you set your fridge to number three. So that you get the most out of
your fridge/freezer you should defrost it regularly and avoid leaving the door open for
longer than necessary and remember not to put warm food into the fridge.
6
47
Selecting AM/PM or the 24 hour clockAfter pressing reset, the display may show AM. The numbered day symbols will be flashing on and off. If the display does not show AM it is set for the 24 hour clock. To change
to AM/PM mode, press and hold the ‘h’ key and press the ‘+1h’ key once, AM will appear in display.
If display is in AM mode and the 24 hour clock mode is desired, press and hold the ‘h’
key, press the ‘+1h’ key once.
Switch – shortened program
Setting the timeis intended for use with less soiled laundry. Reduce consumption of detergents,
water and time.
Press and hold the
key during the following:
(If daylight saving time is in effect, press ‘+1h’ first)
Lower RPM
Press and hold the
key during the following:
(If daylight saving time is in effect, press ‘+1h’ first)
With this switch you reduce the number of revolutions, which is especially
recommended for washing delicates. If the switch is off, the number of revolutions during
the spin cycle is higher.
The max number of revolutions varies according to model.
Half programme Switch
1.
Press ‘h’ to advance the current hour (while holding down the
key
2.
Press ‘m’ to advance the current minute ( while holding down the
3.
Press ‘Day’ repeatedly to advance to current day ( while holding down the
key
key
If the days are flashing, it indicates the day of the week was not set when setting the time.
The timer cannot be programmed unless the day of the week is entered.
If the amount of laundry you intend to wash is smaller, use the half programme. This will help you save energy and water. Don’t forget to use less washing powder as well.
Manual daylight time changeoverEach year, in the spring, press ‘+1h’ to advance the time and hour. In the autumn, press
‘+1h@ to set back an hour.
46
7
Programming 24 hour or 7 day schedules-
Washing programmes are divided into three groups:
A-G programmes for non-delicate laundry
H-N programmes for fine and delicate laundry
P-T programmes for woollens
Temperature selection knob:
Turn the knob clockwise.
Washing temperature may be optionally selected up to 95 degrees.
Programmes from A- B may be used as economic programme, if the selected temperature
is lower than 95 degrees centigrade. This feature will help you save up to 40%
energy.
On the position marked with a snow flake, the heater are switched off and you can select
cold wash on all programmes. The duration of the programme is the same as if the heaters
are on.
Spin speed selection knob:
If 24 hour time control (same schedule every day of the week) is desired, ignored ‘Day’
key.
If an ON or OFF symbol is not entered, the ON symbol will flash, and programme will
not be accepted.
8
Spin speed (rpm) is selected by turning the knob clockwise, step by step, from 0 up to the
highest number of revolutions and backwards . Numbers on the knob are revolutions per
minute and intermediate settings are marked with dots.
45
Reviewing programs-
1 90˚C with Prewash
4 No fast Coloured 40 ˚C
To review the programs at any time, press ‘Prog’ key. Programs will appear in the order
they were entered with repeated presses of the ‘Prog’ key. After all programs have been
reviewed, the blank display will appear to allow entering another programme. Another
press of the ‘Prog’ key will display the number of free programs available, such as FR 16
if 4 programs have been entered.
5 Cold Wash
Changing a program –
2 White Cotton 90˚C
3 Fast coloured 60 ˚C
6 Extra rinsing
7 Fab Cond/Spin
8 White Nylon 60 ˚C
9 Minimum Iron 50 ˚C
Select the program to be changed with the ‘prog’ key. A new set of days may be selected
with the ‘Day’ key just as in initial programming. Hour and minute can be changed with
the ‘h’ and ‘m’ keys.
Press ‘Prog’ or
key to store the new program.
10 Delicates 40 ˚C
11 Silk-Acetate 30 ˚C
Deleting a program-
12 Rinsing
To delete only one or a few programs: press ‘prog’ key until the desired program is displayed.
13 Fabric Conditioner
14 Drain No Spin
Press ‘m’ key to :59 and press once more to blank out.
Press ‘h’ key to 11pm and press once more to blank out.
15 Woollens
16 Fabric Conditioner
Press
key, display will flash for several seconds and then enter the Run Mode.
17 Delicate Spin
Using the reset key will delete ALL programs, the time of day and the day of the week.
Gorenje WA1287:
Please note that the instructions below are for a number of Gorenje machines, you may
find that your model does not have some of the functions.
The control light is lit when the washing machine is switched on. Select suitable washing
programme, prepare the laundry for washing and press the ON/OFF switch to switch the
machine on.
Drayton LifestyleLifestyle time switches will automatically control your system by switching it on and off at times that suit you. The red light on the front of the time
switch shows when it’s on.
LP111: Timeswitches
Programme selection knob:
This knob is used to select washing programmes. All the 17 programmes are marked from
A to T. To select various programmes, simply turn the knob clockwise. Don’t forget,
when turning the knob, the machine should be switched off.
44
24 Hour program, up to 3 heating periods each day, and every day the
same.
Want to leave a timing as it is? Just press SET and move on to the next
one.
9
If you need to reset your timings to the standard program and start again, press SET and +
together to go back to the pre-set program.
The standard programThe system will come on for up to 3 heating periods every 24hrs. ON1 starts the first one.
OFF1 finishes it, and so on. Notice that ON2 and OFF2 are set to the same time. This
means that your system won’t respond, but if you want to activate that middle period or
any change any other timing – read on.
Indesit 1060W:
Select suitable washing programme, prepare the laundry for washing and press the ON/
OFF switch to switch the machine on.
If the amount of laundry you intend to wash is smaller, use the half programme. This will help you save energy and water. Don’t forget to use less washing powder as well.
Changing the timings•
•
•
•
10
Press the SET? button and you’ll see the SET PROG?
Press the YES button, and you’ll see ON1, the start of your first heating period.
Adjust it in 1 minute steps using the – and + buttons. If the – and + buttons are
held down, the time changes in 10 minute steps.
Press SET?, and you’ll see OFF1, the end of your first heating period. Adjust this
in the same way, press SET?, then repeat the procedure for ON2, OFF2, ON3
and OFF3.
When you press SET? after setting OFF3, the timeswitch will return to the normal operation.
For an economy wash at 60˚ press the ‘e/60˚’ button. This program can be used to
reduce running costs by using less water and electricity for smaller wash loads and should
be used on items that are less soiled.
Please note to select a half wash, an economy wash of to turn the machine on you should
decompress the button, when the machine is off the on/off button will be compressed.
The program settings for the Indesit are as follows:
43
LP711:Timeswitches
The control panel –
A 7 day program, allowing for different timings on each day of the week, up to 3 heating
periods each day.
Want to leave a timing as it is? Just press SET and move on to the next one.
If you need to reset your timings to the standard program and start again, press SET and +
together to go back to the pre-set program.
The system will come on for up to 3 heating periods every 24hrs. ON1 starts the first one.
OFF1 finishes it, and so on. Notice that ON2 and OFF2 are set to the same time. This
means that your system won’t respond, but if you want to activate that middle period or
any change any other timing – read on.
1.
2.
Programme guide
Mains-on light: The light illuminates when the machine stars working and goes
out when the on/off button is released.
3. On/off button: By depressing this button the machine starts operating. When depressed again, the machine stops.
Rinse hold button: Press this button to make the machine stop with
water in
the drum after the cotton, synthetic or delicate wash cycles.
This prevents any creasing which may take place if the clothes are
left damp in the drum. When it is convenient for you to empty the
machine, simply press this button again so that the
machine can proceed to drain and spin, or turn the dial to the drail
4. programme “13”.
5. Half load button: Select this button to reduce water consumption on the rinse
cycle when washing a smaller load of cottons or linens.
6. Programme selector dial: Turn the dial clockwise to select the required wash
programme. Before setting the dial to any position the machine must be switched
off by depressing the on/off button again.
Changing the timings•
Operating sequence•
•
•
•
•
42
Load the laundry
Measure out the detergent
Measure out the fabric softener
Select the required option i.e. rinse hold or half load
Select the required programme
Press the SET? button and you’ll see SET PROG?
Set all weekdaysFirst you set the times that are going to be the same for each weekday, then you can select
each day individually and make any further adjustments. If you want each day to be quite
different, go straight to Set each day.
11
•
•
•
Press the YES button, and the display will ask SET MON to FRI PROG?
Press YES and you’ll see ON1, the start of your first heating period. Adjust it in
1 minute steps using the – and +. If the – and + buttons are held down, the time
changes in 10 minute steps.
Press SET, and you’ll see OFF1, the end of your first heating period. Adjust this
in the same way, press SET?, then repeat the procedure for ON2, OFF2, ON3
and OFF3.
Bendix BIW 1000W/1200W:
Description of the appliance-
Set each dayIf, after you’ve set OFF 3 you want to fine –tune one or more weekdays, press
SET? until you find the first day you want to adjust – then go through the procedure, altering any time you wish. Press SET? to move on to the next day. When
you’ve finished, press SET? until you see SET SAT SUN PROG?
• If you don’t want to alter any individual days, keep pressing SET? until you see
SET SAT SUN PROG?
Set Weekend –
•
•
Press YES and alter ON1, OFF1, ON2, OFF2, ON3 and OFF3 times in the
same way.
Set each day –
If, after you’ve set OFF3 for both SAT and SUN you want to fine-tune Saturday or Sunday, press
• SET? until you find the first day you want to adjust – then go through the
procedure, altering any time you wish. Press SET? to move on to the next
day. When you press SET after setting your hot water for Sunday’s the programmer will go back to normal operation
• If you don’t want to alter either day, keep pressing SET? until the programmer goes back to the normal operation.
Worcester Greenstar 24i Junior/28i JuniorControls 1.
2.
3.
4.
5.
6.
7.
8.
12
Master switch for
Central heating temperature control
Mains on/off indicator + fault diagnostic light
Burner on indicator light (green)
Eco button (domestic hot water pre-heat on/off
Fault reset button
System pressure gauge
Position for optional programmer
41
The control panel –
1.
2.
Programme guide
Rinse hold button: Press this button to make the machine stop with water in the
drum after the wash cycle. This prevents any creasing which may take place if
the clothes are left damp in the drum. When it is convenient for you to empty the
machine, simply press this button again so that the machine can proceed to drain
and short spin, or turn the dial to the drain programme.
3. Half load button: Select this button to reduce
4. On/Off button: By depressing this button the machine starts operating. When
depressed again, the machine stops.
5. Mains light on: This light illuminates when the machine starts working and goes
out when the machine is switched off.
Operating the appliance –
Switching the appliances on/off
Switching On:
Switch the appliance on by pressing the master switch, the indicator light shows blue
Switching Off:
Switch the appliance by pressing the master switch, the blue indicator light goes out
Programme selector dial: To select the required program turn the control clockwise until
the marker on the top coincides with the number of the required program. Never turn the
control anti-clockwise
40
13
Setting the central heating temperatureTurn the central heating temperature control to the desired level, between 40 degree C and 82 degrees C.
In the even that residual detergents or additives have accumulated:
•
•
•
•
•
•
•
When the burner is lit, the green indicator light underneath the on/off switch is
illuminated.
Setting the Time—
Press out the detergent drawer, all the way.
Press down the insert
Remove the detergent drawer
Lift out insert
Clean the detergent drawer and insert under running water and dry
Attach the insert and lock into position
Slide in the detergent drawer
Bendix BIW 103 W:
Description of the appliance –
14
39
Controlling central heatingSet the timer to the correct time
Set the room temperature to the desired room temperature
Set the thermostatic radiator valves to the desired settings
Washing –
•
•
•
•
Turn the programme selector to the desired programme
If required, select the desired spin speed or rinse hold
If required, press the button for additional option(s). The indicator light of the
selected button is on.
Press the start button to start the programme
Changing the programme –
If you have accidentally selected the wrong programme
•
•
•
Turn the programme selector to a newly selected programme. If prewash is
selected subsequently, set the programme selector to off and reselect the
programme
If required, change the other settings
Press the start button.
Frost Protection-
Cleaning the detergent dispenser -
•
Leave the master switch on
Turn the central heating temperature control to
If the temperature falls to 5 degrees C within the boiler it will fire to avoid possibility of
freezing.
38
15
Hot water-
Bosch:
The hot water temperature is fixed at 55 degrees C and can not be adjusted.
Control Panel –
Pre-heat reduces the time taken to produce hot water at the tap and is controlled by
the ECO button.
Press the ECO button to select either:
When the ECO button is not illuminated the boiler will be in pre-heat mode
(which will reduce the time taken to produce hot water at the tap).
OR
When the ECO button is illuminated the boiler will be in ECO mode with no pre
-heat available.
Fault ConditionIn the unlikely even of a fault occurring while the appliance is in operation:
The reset button will flash once per second and the main indicator (blue light) will
flash at different speeds dependant on the fault.
16
37
Operating sequence –
1 . Load the laundry
2 . Measure out the detergent
3. Measure out the fabric softner
4. Switch the machine on
5. Select the desired programme/fabric
6. Select the temperature
7. Select the spin speed or the rinse hold option
8. Select the desired options i.e. quick wash
9. Start the programme
The reset button will no longer be illuminated and the mains indicator will stop flashing.
The boiler should now function normally.
If the fault remains and cannot be cleared by pressing the reset button please report the
fault to the warden or Property Management Unit.
Potterton EP 4000:
You can set the central heating to come on for two time periods a day.
How to set your programmer-
Cleaning the filter
•
Open door (from top edge). Normal Operation, display time.
•
To set the clock – move slider to clock, adjust displayed time, using – and +
buttons
•
Setting the on/off times – Move slider to set. Adjust ON1 time using – and +
buttons.
•
Press step button. Adjust OFF1 time, using – and + buttons. Repeat for ON2
and OFF2.
A clean filter is important for the correct operating of the machine, and should therefore be cleaned after every washing programme.
Open the filter door and place a containter underneath to catch any spillage. Unscrew
and remove the filter and clean under a fast running tap.
36
17
To select rinse and spin, press the skip button once,
•
the wash LED goes out.
When complete, move slider to run and close door.
To select spin only, press the skip button twice. The was and rinse LED’s go out.
Using the extend button –
The extend button allows you to extend a current ON period or switch your central heating on, during an off period for 1, 2 or 3 hours. If you press the button a fourth time, the
programmer will run at the original set times.
Operation Notes –
It does take time for the boiler to produce the required heating and
To deselect drain, press the skip button three times, the wash-rinse-spin LED’s go out.
Potterton Mini Minder ES:
Removing the coverSqueeze the finger grip in the direction of the arrows and pull. Always replace the cover
after setting on and off times.
Programme phase indicator lights – When you select a programme, the lights relevant
to the phases that form the programme light up.
18
35
Setting the correct time –
Start – after you have selected the desired programme and options, press this button to
The current time of day is shown on the digital time display.
start the washing machine. The light above the button will stop flashing and remain
lit.
Pause – when you press this button again, the programme in progress is interrupted.
The light above the button will start flashing. To restart the programme, press the
button again.
When you pause the cycle, the door locked light goes out, and it is possible to open
the door, provided
•
•
•
8.
To change the time, press the + or – buttons until the correct time is displayed. Each press
of the button will adjust the time by 1 minute. Holding the button down will adjust the
time quickly.
Setting the on and off times-
The washing machine is not in the heating phase beyond 40 degrees C
The level of water is not high
The drum is not turning
Skip/reset button: The button performs two functions
•
•
Clears the memory
Selects special programmes
At the end of every programme the reset button must be pressed once or
repeatedly to clear the programme memory. All the programme phase indicator lights must be off.
If the previous programme is not cleared, an audible signal will sound, when
you switch the machine on.
The red tappets set the on times
The blue tappets set the off times
A normal wash cycle consists of the following phases, wash-rinses-spin and
is confirmed by the illumination of the cor
responding LED’s
34
19
•
These tappets set the time periods for the central heating at 15 minute intervals.
The control panel –
•
To set a tappet, slide it gently in either direction to the required time on the
outer dial face.
•
The system will switch on at the first red tappet after midnight, off at the
next blue tappet and on and off again at the second red and blue tappets.
Operating your mini minder EsThe heater slider has 4 positions and is used to set how the heating is controlled.
Off – heating will remain off
Twice – heating will be switched on and off at the times set by the tappets
Once – heating will be switched on at the first red tappet after midnight and off
at the last blue tappet.
On – heating will remain on permanently.
1.
2.
3.
The heating indicator lights up when the heating is on.
When the Mini Minder Es is in a timed mode i.e. twice or once, it is possible
to advance the next time period as follows:
4.
The advance buttons (ADV) allow you to go forward to the next on or off time.
Simply press the ADV button and your central heating will come on if it was off,
of go off it was on. The operator returns to normal when the next on or off time
is reached.
On/off button: Press this button to switch the washing machine on. Press the ON/OFF
button again to switch the machine off.
Mains light on: The light is connected to the ON/OFF button. It lights up when you press
the button, and goes out when you press it again.
Fabrics Button: Press this button repeatedly to select the programme on the basis of the
type of laundry to be washed. The light relevant to the selected programme will light up.
The washing machine will propose a temperature and automatically select the maximum
spin value provided for the programme you have chosen. You can change these values by
operating buttons 4 and 5.
Temperature button: Press this button repeatedly to increase or decrease the temperature,
if you want your laundry to be washed at a temperature different from the one proposed
by the washing machine. The relevant light will light up. Maximum temperatures are 90
degrees C for cotton, 60cdegrees C for synthetic fabrics, 40 degrees C for delicate fabrics
and wool.
By pressing the temperature and spin speed buttons simultaneously, the acoustic signal at
the end of the cycle is deactivated. By pressing these 2 buttons again the acoustic signal is
reactivated.
Other controls in your system (such as thermostats) may switch your boiler on
and off. So although the heating indicator may be on, the boiler itself could be
off.
5.
6.
Spin speed button: Press this button repeatedly to change the spin speed, if you want your
laundry to be spun at a speed different from the one proposed by the washing machine.
The relevant light will light up.
Options button: Press this button to select the following options:
Prewash – select this option if you wish your laundry to be prewashed before the
main wash (not available for wool)
Super rinse – this option can be selected with all programmes except the wool programme. The machine performs 4 rinses instead of 3. This option is recommended for
people who are allergic to detergents.
Quick wash – For laundry that is only slightly soiled (again, not for wool).
7.
20
33
Start/pause button: This button has three functions
Danfloss 103E5
WASHING MACHINES
Your 103E5 time switch controls your hot water and heating together, turning them on
and off at the same times.
Zanussi:
Description of the appliance –
1.
2.
3.
4.
5.
6.
Detergent dispenser drawer
Control panel
Door locked light
Door opening handle
Filter
Adjustable feet
The 103E5 can provide 3 ON periods and 3 OFF periods each day and can offer either 24
hour control (same programme for each day of the week) or 5/2 day control (one set of
programmes for weekdays and a different set for weekends)
Before you start
Open the flap on the front of the unit
Press all four buttons (Select/advance/ + / - ) at the same time. This will reset the unit,
reinstate the preset programmes and set the time to 12.00pm on Monday
Door locked light –
Setting the clock
It stays on during the whole programme indicating that the door is locked. When the
light goes out, the door can be opened.
Press programme once
Use + and—buttons to set the correct time
When the programme is correct press programme
again
Detergent dispenser drawer –
In 24 hour mode this will take you straight to programming mode, where you can select your own On
and Off times.
In 5/2 day mode this will allow you to programme
the correct day. To do this:
Use the + or—buttons to select the correct day
Press programme again to enter run mode
32
21
Factory Presets
The unit is supplied with the following preset programme which will be active after the
unit has been reset.
Press the On/off button to switch the appliance on. On initial start up full power is reached
after approximately 1-2 seconds
To rewind the power cable, press the rewind button with foot, and guide the cable with
hand to ensure that it does not whip causing damage
Rotate suction control knob clockwise to increase suction and anticlockwise to reduce
suction
Maintenance
Removing the contents of the dustbin
Always operate the cleaner with the dustbin installed. The dustbin must be emptied when
visibly full.
NB: 2nd ON and 2nd Off are set to the same time. These two times are ignored by the
programme and therefore the heating will just come on once in the morning and once in
the evening. If you want the heating to come on in the middle of the day set the 2nd on
and 2nd off to the times you require.
Remove the dustbin by pushing the button at the end of the carrying handle
Remove the dustbin filter from the dustbin
Remove the dust from the dustbin
Insert the dustbin filter back into the filter
Insert the dustbin back into the cleaner by pushing it until it clicks
If suction appears to be reduced when cleaning, please check filters as this is an indication
that they require cleaning. Filters should be changed at least twice a year.
Accepting the preset times
Cleaning the dustbin filter
If you are happy to use the setting above, you don’t need to do anything else.
To accept the presets press the programme button until the colon in the display begins to
flash.
Your unit is now in Run more
Remove the dustbin by pushing the button at the end of the carrying handle
If filter is lightly soiled, remove the dirt by tapping the filter into a bin, if heavily soiled,
tap the filter and then rinse under tap water
Let the filter dry. Avoid direct sunlight and extreme drying circumstances e.g. hair dryer
Insert the dustbin filter back into the dustbin
Insert the dustbin filter back into the cleaner by pushing until it clicks
Programming event times in 24 hour mode
Dustbin filter reference number ANC 407 136 316/4
You can programme your timeswitch to come on and go off up to 3 times a day, to suit
your requirements.
Press programme until 1 shows along the top of
display
Use the + and - buttons to set the time you want
your system to first come on in the morning
Cleaning the motor filter
the
Remove the dustbin by pushing the button at the end of the carrying handle
If filter is lightly soiled, remove the dirt by tapping the filter into a bin, tap the filter and
then rinse under tap water
Let the filter dry. Avoid direct sunlight and extreme drying circumstances e.g. hair dryer
Put the filter back into its place
Close the filter cover
Press programme again to move to the next step
Use the + and - buttons to set the time you want your system to first go off
22
Recommended filters
Menaluz Motor Filer D24
Menalux Exhaust filter D09
31
Description of Parts
1.
2.
3.
4.
5.
6.
7.
8.
9.
10.
11.
12.
13.
14.
15.
16.
17.
18.
Suction inlet
Suction power regulator
On/off switch
Cable rewind button
Wheel
Dustin
Carrying handle
Dustbin open button
Hose
Telescopic tube
Metal extension tubes
Plastic tubes
Dual purpose floor nozzle
Crevice nozzle
Upholstery nozzle
Dustbin filter
Vertical parking
Horizontal parking
Important Safeguards
Do not switch the appliance on if it appears faulty in any way
Always remove the plug from the power socket when the appliance is not in use and before carrying out any cleaning or maintenance operations
Never leave the appliance unattended when it is switched on
Do not pull the appliance by the cord.
Do not unplug by pulling on the cord
Do not use the cleaner with a damaged cable
Do not use the appliance of wet surfaces or to vacuum liquids, mud, ash and burning cigarette buds.
Do not vacuum any highly flammable or explosive substances or gasses.
Do not vacuum fine dust from plaster, concrete, flour or ash
Do not unplug the vacuum cleaner with wet hands
Do not operate the vacuum cleaner too close to heaters and radiators, stoves etc
Before you start using the vacuum cleaner, please remove large or sharp objects from the
floor to prevent damage to the dust bin and hose
Continue using the programme and +/- buttons in this way to set the on/off times for
events 3-6 (2nd on/off and 3rd on/off)
NB it is not possible to programme times out of sequence
If you do not press and button at all for 3 or 4 minutes the unit will automatically return to
run mode.
Programming event times in 5/2 day mode
You can programme your timeswitch to come on and go off up to 3 times each day, to suit
your requirements, with one set of programmes for weekdays and a different set of programmes for the weekend.
Weekdays (MOTUWETHFR)
Press programme unit 1 shows along the top of the
display and MONTUWETHFR shows along the
bottom
Use the + and - buttons to set the time you want
your system to first come on in the morning
Press programme again to move to event 2
Use the + and - buttons to set the time you want your system to first go off
Continue using the programme and +/- buttons in this way to set the on/off times for
events 3-6 for weekdays.
Weekend (SASU)
Press programme again until 1 (event 1) shows along the top of the display and SASU
shows along the bottom of the display.
If at any time you wish to return to the
Factory preset programme, press
Select/advance/+/- buttons together at
The same time to reset the unit
NB it is not possible to programme times out of sequence
Running your programme
Instructions for Use
Before placing into operation make certain that the filters and the dustbin are in the proper
position
Unwind a sufficient length of cable and insert the plug into the power socket. A YELLO
mark on the power cable shows the ideal cable length. Do not extend the cable beyond the
RED mark.
30
The 103E5 controls your heating and hot water together, turning them on and off at the
same times.
To run the central heating and hot water programme press the select button.
23
Progress Stuttgart
As you press select a bar on the display will move between on, off, allday and auto
Select the option you require, depending on your circumstances, time of year etc.
Temporary User Overrides
Sometimes you may need to change the way you use your timeswitch temporarily, i.e. due
to unusually cold weather. The 103E5 has two overrides which can be selected without
Affecting the set programme.
24
29
•
1 hour
Press + 1 hour once if you need an extra hour of operation.
If the system is off it will come on for an hour. If it is already on it will add an extra hour
so the system stays on for an extra hour.
To cancel the override press +1hour again.
The exhaust filter is located at the back of the cleaner. To remove, press down the catch
and pull the cover away to remove the holder.
•
Advance (only during auto mode)
Press the advance button once to advance to the next programme event.
If the system is on it will go off. If it is off it will come on. The set programme will resume at the next programmed On/Off time.
To cancel the override press advance again.
Battery Backup
In the event of a power cut, the built-in lithium battery will keep your time and programme settings for up to 15 days.
Remove the filter from the holder and shake to clean. The filter can be washed in warm
water but do not use detergent. Allow to dry naturally and ensure it is totally dry before
replacing it.
IMPORTANT: Do not operate without the micro filters fitted.
After 15 days without mains power the unit will switch off and two dots will show in the
display. However, all you programmed on/off times will be remembered.
When the mains power is restored, the unit will need to be reactivated by pressing the
programme button, and the time and day will need to be set.
Storage Position –
When finished, you can store accessories by locating the tube storage club into the slot on
the underside of the cleaner.
28
25
VACUUM CLEANERS
Orb Vacuum cleaner:
If your cleaner isn’t picking up as well as it should please check:
Filter It is important to clean it every time you empty the dust container; otherwise the
performance of the cleaner will be impaired.
Blockages Check the nozzle, tubes and hose for blockages.
3.
Replace the filter and replace the dust container.
IMPORTANT: Do not operate your cleaner without the dust container fitted.
Cleaning the filter –
Controls –
•
•
The on/off control is operated by the foot pedal.
A rotating dial varies the suction power as required. For example, maximum suction can be used for cleaning carpets, hard floors etc and reduced suction for
cleaning upholstery and curtains. Suction can also be controlled using the airflow
control on the handle. Closed for maximum suction, open for reduced suction.
Every time the dust container is emptied, the filter should be cleaned. Lift the tap at the
bottom of the filter to remove the cover. Use the brush attached at the rear of the filter
folds. Refit the front cover and re-install the filter into the cleaner.
The filter should also be washed regularly in warm water, but do not use detergent. Allow
to dry naturally and ensure it is totally dry before replacing it.
Dust Disposal –
To obtain the best results from your cleaner empty the dust container regularly, otherwise
the airflow and cleaning power will be reduced.
1.
With the hose removed, lift out the dust container using the handle
Cleaning the motor protection filterThe micro-filters must be cleaned every time the dust container is emptied to remove the
fine dust particles collected. This can be done by shaking them.
2.
26
Holding the dust container over a dustbin, pull out the filter to empty out the
dust.
The motor protection filter is the dust container compartment. With the dust container
removed, lift out the filter holder and remove the filter and shake to clean.
27