1
®
Quick start guide (Canada version)
LS6475-2/LS6475-3
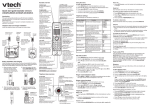
Headset charging
Handset overview
After installing the telephone base, charge the headset as shown
below. The headset is fully charged after three hours of continuous
charging. If the light does not turn on while charging, you need
to charge the headset without interruption for at least 15 minutes to
give the headset enough charge to use for a short time.
CHARGE light
On when the handset is
charging.
1. Place the tip of the headset in the small cradle on the
telephone base.
Introduction
This quick start guide provides you with the basic installation
and use instructions. A limited set of features are described in
abbreviated form.
Please refer to the user’s manual for complete installation and
operation instructions.
Telephone base and charger installation
Electrical
outlet not
controlled by
a wall switch
Electrical outlet
not controlled
by a wall switch
If you have
DSL high
speed Internet
service, a
DSL filter (not
included) is
required.
Charger
adapter
2. The magnet holds the top of the headset in place. The
turns on when charging.
light
The
Telephone
line cord
/ /VOLUME
Review the directory
when the telephone is not
in use.
Scroll up while in a menu.
Increase the listening
volume during a call or
message playback.
Move the cursor to the
right when entering
numbers or names in the
directory.
MENU/SELECT
Show the menu.
Choose an item, or save an
entry or setting while in a menu.
PUSH TO TALK (PTT)
Begin a one-to-one or
one-to-group broadcast.
MUTE/DELETE
Mute the microphone
during a call.
Delete the displayed entry
while in the directory,
caller ID log or redial list.
Silence the ringer
temporarily while the
handset is ringing.
Delete digits or characters
while using the dialing keys.
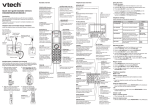
Install the telephone base and charger as shown below.
Telephone base Telephone
power adapter
wall jack
CID/ /VOLUME
Review the caller ID log when
the telephone is not in use.
Scroll down while in a menu.
Decrease the listening volume
during a call or message
playback.
Move the cursor to the left when
entering numbers or names in
the directory.
light
OFF/CANCEL
Hang up a call.
Silence the ringer
temporarily while the
handset is ringing.
Press and hold to delete
the missed call indicator
while the telephone is
not in use.
Press to return to the
previous menu, or
press and hold to return
to idle mode without
making changes.
/FLASH
Make or answer a call.
Answer a call waiting call
during a call.
Dialing keys
Enter numbers or
characters.
1
Press repeatedly to add
or remove 1 in front of the
caller ID log entry before
dialing or saving it to the
directory.
Charger
Handset battery installation and charging
Install the battery as shown below. Once you have installed the battery,
you may be able to make and receive short calls. For best performance,
charge the handset battery continuously for at least 10 hours.
1. Plug the battery connector
securely into the socket
inside the handset battery
compartment, matching the
color-coded label.
2. Place the battery with the
label THIS SIDE UP facing
up and the wires inside the
battery compartment.
Telephone base overview
IN USE light
Flashes when there is an
incoming call, or another
telephone sharing the
same line is in use.
Flashes when the
handsets/headsets are
being deregistered.
On when the phone is
in use, or the answering
system is answering a call.
On when a handset/
headset is being
registered.
3. Slide the battery compartment
cover towards the center of the
handset until it clicks into place.
X/DELETE
Delete the message currently playing.
Press twice to delete all old messages
when the telephone is not in use.
Message window
Shows the number
of messages and
other answering
system information.
/VOL/
Adjust the
base ringer
volume or
the speaker
volume.
4. Place the handset in the
telephone base or charger
to charge.
CHARGE light
remains on when
charging.
/FIND HANDSET
Page all handsets
and the headset.
/REPEAT
Repeat a message or press
twice to play the previous
message.
/SKIP
Skip to the next
message.
/ANS ON/OFF
Turn the answering
system on or off.
/PLAY/STOP
Play massages or stop
message playback.
/SPEAKER
Make or answer a call using the
handset speakerphone.
Switch between the speakerphone
and the handset during a call.
REDIAL/PAUSE
Review the redial list.
Press and hold to insert a dialing pause
while dialing or entering numbers in the
directory.
Headset overview
Press repeatedly to
show other dialing
options when reviewing
a caller ID log entry.
Switch the name order
when saving the caller
ID log entries to the
directory.
EQ
Change the audio quality to
best suit your hearing during
an outside call, intercom call,
message or announcement
playback.
• To return to the previous menu, press OFF/CANCEL.
• To return to idle mode, press and hold OFF/CANCEL.
Telephone settings
Default settings are indicated by asterisks (*).
Screen display
Function
+/-/VOLUME
Rotating clip
Adjust the
listening volume
while on a call.
Connect the
ear hook or
head band.
RESET inset
button
Insert a paper
clip or similar
object to reset
the headset when
deregistration fails.
Options
LCD language
Set the screen display language.
English*
Français
Espaňol
Voice language
Set the language to be used for the
voice prompts in your answering
system and voice announce caller ID.
English*
Français
Annc Caller ID
Enable the telephone base and/or
the handset to announce the
incoming caller ID information.
On*
Off
Clr voicemail
Turn off the
voicemail indicators.
Turn off
indicator?
Rename handset
Change the name of each
registered handset.
HANDSET____
Key tone
Adjust the key tone volume whenever
a key is pressed, or turn it off.
Off
CID time sync
Enable the date and time to be set
by incoming caller ID information.
On*
Off
Home area code
Enter your home area code if you dial
only seven digits for local calls.
___
Dial mode
Set the telephone to be tone or
pulse dialing.
Tone*
Pulse
*
Set date and time
1. Press MENU/SELECT when the handset is not in use.
2. Scroll to >Set date/time, then press MENU /SELECT.
3. Press or to set the month, then press MENU/ SELECT.
-ORUse the dialing keys (0-9) to enter the current month.
4. Repeat Step 3 to set the correct date and year and then press
MENU/ SELECT to advance to set the time.
5. Repeat Step 3 until the time is set. Press or to select AM or
PM, or press 2 for AM or 7 for PM.
6. Press MENU /SELECT to save.
Ringer volume (telephone base)
(on/off)
Press and hold two seconds
to power on or off.
Earpiece
Adjust the
ringer volume
when the
headset is not
in use.
To enter the handset menu:
1. Press MENU/SELECT when the telephone is not in use.
2. Press or until the screen displays the desired feature menu.
3. Press MENU/ SELECT to enter that menu.
# (pound key)
Switch to tone dialing
temporarily while on a call.
Telephone base
Using the menu
Answer, end or join a call.
MUTE/FLASH
Mute the microphone while
on a call.
Press and hold to answer
an incoming call when you
receive a call waiting alert
during a call.
Silence the ringer in the
earpiece temporarily when
the headset is ringing.
Microphone
• Press /VOL or /VOL on the side of the telephone base to adjust
the ringer volume when the telephone is not in use.
Ringer volume (handset)
1.
2.
3.
4.
Press MENU/SELECT when the handset is not in use.
Scroll to >Ringers, then press MENU /SELECT.
Press MENU /SELECT to select >Ringer volume.
Press or to sample each volume level, then press
MENU /SELECT to save your selection.
Ringer volume (headset)
Press +/-/VOLUME on the side of the headset when it is not in use.
Telephone operation
Make a call
1. Press /FLASH or /SPEAKER, then dial the telephone number.
2. Press on the headset to join the call.
-OR1. Predial by first dialing the telephone number and then press
/FLASH or
/SPEAKER.
2. Press on the headset to join the call.
Answer a call
• Press on the headset.
• Press /FLASH, /SPEAKER or any dialing key (0-9, # or
the handset.
) on
End a call
• Press on the headset or place the headset in the
telephone base.
• Press OFF/CANCEL or put the handset to the telephone base
or charger.
Redial list
Each handset stores the last 10 telephone numbers dialed.
To review and dial numbers from the redial list:
1. Press REDIAL/PAUSE when the handset is not in use.
2. Press , or
��� REDIAL/PAUSE repeatedly until the desired
entry displays.
3. Press /FLASH or /SPEAKER to dial.
To delete a redial entry:
When the desired redial entry displays, press MUTE /DELETE.
Intercom
Use the intercom feature for conversations between two handsets,
or a handset and a headset.
• Only one intercom call can be established with two handsets, or
one handset and one headset at a time.
• If there is an incoming call while the originating handset is making
an intercom request, the intercom request will be stopped.
To initiate an intercom call:
When the handset is not in use, press MENU/SELECT. Scroll to
>Intercom, then press MENU /SELECT.
• If you have more than two handsets, scroll to select a destination
handset, or use the dialing keys to enter a handset number.
To answer an intercom call:
Press /FLASH, /SPEAKER or any of the dialing keys on the
destination handset or press on the headset.
To end an intercom call:
• Press OFF/CANCEL or place the handset back in the telephone
base or charger.
• Press or place the headset in the telephone base.
Push-to-talk (PTT)
You can directly broadcast messages from one handset to the
speakerphone of one or multiple handsets. Press and hold
PUSH TO TALK to begin two-way communication.
When the connection is made, both the initiating and the destination
handsets display Press and hold [PTT] to talk and beep once.
Only one handset can talk at a time. To do so, press and hold
PUSH TO TALK.
Directory
The directory can store up to 50 entries, which are shared by all
system handsets.
To add a directory entry:
1. Press MENU/SELECT when the handset is not in use.
2. Scroll to >Directory, then press MENU /SELECT.
3. Scroll to >Add contact, then press MENU /SELECT.
4. Use the dialing keys to enter the phone number (up to 30 digits).
-ORCopy a number from the redial list by pressing REDIAL/PAUSE
and then press , or REDIAL/PAUSE repeatedly to select a
number. Press MENU/ SELECT.
5. Press MENU /SELECT to move to the name.
6. Use the dialing keys to enter the name (up to 15 characters).
Additional key presses show other characters of that particular key.
7. Press MENU /SELECT to store the entry.
While entering names and numbers, you can:
• Press MUTE/DELETE to backspace and erase a digit or character.
• Press and hold MUTE /DELETE to erase the entire entry.
• Press and hold REDIAL /PAUSE to insert a dialing pause (for
entering phone numbers only).
• Press or to move the cursor to the left or right.
• Press 0 to add a space (for entering names only).
To review and dial from the directory:
Entries are sorted alphabetically.
1. Press / when the handset is not in use.
2. Scroll to browse through the directory, or use the dialing keys to
start a name search.
3. When the desired entry appears, press /FLASH or /SPEAKER
to dial.
To edit a directory entry:
1. When the desired entry displays, press MENU /SELECT.
2. Use the dialing keys to edit the number.
3. Press MENU /SELECT.
4. Use the dialing keys to edit the name.
5. Press MENU /SELECT to save.
To delete a directory entry:
1. When the desired entry displays, press MUTE/DELETE.
2. When the handset displays Delete contact?, press MENU/SELECT.
Speed dial
You can copy up to 10 directory entries into the speed dial locations
so that you can dial these numbers using fewer keys than usual.
To store a speed dial entry:
1. Press MENU/SELECT when the handset is not in use.
2. Scroll to >Directory, then press MENU /SELECT.
3. Scroll to >Speed dial, then press MENU /SELECT.
4. Scroll to a desired speed dial location, then press MENU/SELECT.
5. Scroll to a desired directory entry, then press MENU /SELECT
to save.
To dial a speed dial entry:
• Press and hold a speed dial key (0-9) of the desired entry when
the handset is not in use.
To delete a speed dial entry:
• When the desired entry displays, press MUTE /DELETE.
To delete the caller ID log entries:
• Delete one entry: When the desired caller ID log entry displays,
press MUTE /DELETE.
• Delete all entries: Press MENU/SELECT when the handset is not
in use. Scroll to >Caller ID log and then press MENU /SELECT.
Scroll to >Del all calls and then press MENU /SELECT twice.
About answering system and voicemail
Your telephone has separate indicators for two different types of
voice messages: those left on the built-in answering system and
those left at your telephone service provider’s voicemail. Each alerts
you to new messages separately.
• If XX New messages and
display on the handset and the
message window on the telephone base flashes, there are
messages recorded on the built-in answering system.
The total recording time is approximately 11 minutes. The answering
system can record and store up to 99 messages and the recording
time of each message depends on the message length you set.
• If New Voicemail and
display on the handset, your telephone
service provider is indicating that it has new voicemail for you.
Contact your telephone service provider for more information on
how to access your voicemail.
Default settings are indicated by asterisks (*).
Screen display
Function
This product supports caller ID services provided by most telephone
service providers. Depending on your service subscription, you may
see the caller’s name, number, date and time of calls that are sent
by your telephone service provider after the first or second ring.
Caller ID log
The caller ID log stores up to 50 entries. If you answer a call before
the caller information appears, it will not be saved in the caller ID log.
• The handset displays XX Missed calls when there are calls that
have not been reviewed in the caller ID log.
• If you want to erase the missed call indicator, press and hold
OFF/ CANCEL on the idle handset.
To review and dial a number in the caller ID log:
1. Press CID/ when the handset is not in use.
2. Scroll to browse through the call log. When the desired entry appears:
• Press # (pound key) repeatedly to show different dialing options.
• Press 1 repeatedly to add or remove 1 in front of the
telephone number.
/FLASH or
/SPEAKER to dial the displayed number.
Message playback
To play messages at the telephone base:
Press
/PLAY/STOP when the telephone is not in use.
Options during playback:
• Press /VOL or /VOL to adjust the speaker volume.
• Press /SKIP to skip to the next message.
• Press /REPEAT to repeat the message currently playing.
Press /REPEAT twice to listen to the previous message.
• Press X/DELETE to delete the current message. The system advances to the next message.
/PLAY/STOP to stop.
• Press
Delete all old messages
To delete all old messages at the telephone base:
Press X/DELETE twice when the telephone is not in use.
Call screening
To screen at the telephone base:
If the answering system and call screening are on, the announcement
and the incoming message broadcast at the telephone base when a
call is answered by the answering system.
Options while a message is being recorded:
• Press /VOL or /VOL on the telephone base to adjust the call
screening volume.
• Press /PLAY/STOP to temporarily silence the call screening.
Call intercept
If you want to talk to the person whose message is being recorded,
press /FLASH or /SPEAKER on the handset.
Answering system settings
Options
Call screening
Set whether you hear the callers while they
are leaving messages to you.
# of rings
Set the number of times the telephone rings 6; 5; 4*; 3;
before the answering system answers.
2; Toll saver
Remote code
Set a two-digit security code to access the
answering system remotely from any touchtone telephone.
19*
Msg alert tone
Set to alert you when you have
new messages.
On
Off*
Recording time Set the recording time for each incoming
message.
Caller ID
3. Press
To save a caller ID log entry to the directory:
1. When the desired caller ID log entry displays, press MENU/SELECT.
2. Use the dialing keys to modify the number if necessary.
3. Press MENU /SELECT.
4. Use the dialing keys to modify the name if necessary.
5. Press MENU /SELECT to save.
On*
Off
3 minutes*
2 minutes
1 minute
Access the answering system remotely
1. Dial your telephone number from any touch-tone telephone.
2. When the system plays your announcement, enter the two-digit
remote code. The preset code is 19.
3. You can enter one of the following remote commands.
Command
Function
1
Play all messages.
2
Play new messages.
3
Delete a message (during playback).
33
Delete all old messages.
4
Repeat the current message (during playback).
44
Listen to the previous message (during playback).
5
Stop.
*5
Hear a list of remote commands.
Answering system operation
6
Skip to the next message (during playback).
Turn the answering system on or off
The answering system must be turned on
to answer and record messages. When it
is turned on, the /ANS ON/OFF light on
the telephone base turns on and ANS ON
displays on the handset.
• Press /ANS ON/OFF on the telephone
base to turn the built-in answering
system on or off.
*7
Record a new announcement.
8
End the call.
0
Turn the answering system on or off.
Record your own announcement
You can use the preset announcement to answer calls, or replace it
with your own recorded announcement. The announcement can be
up to 90 seconds in length.
1. Press MENU/SELECT when the handset is not in use.
2. Scroll to >Answering sys. Press MENU/SELECT twice.
3. Scroll to >Record annc. Press MENU/SELECT. The system
announces, “Record after the tone. Press 5 when you are done.”
4. After the tone, speak towards the handset microphone. Press 5
when done.
5. The answering system automatically plays back the newly
recorded announcement, then returns to the previous menu.
4. Hang up or press 8 to end the call.
IMPORTANT!
If you have difficulty with your telephone, please refer to the user’s
manual for a full set of installation and operation instructions. For
customer service, visit our website at www.vtechcanada.com or call
1 (800) 267-7377.
Copyright © 2011 for VTECH TELECOMMUNICATIONS LTD.
Printed in China.
96-008064-030-100