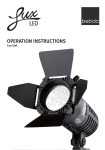
1
OPERATION INSTRUCTIONS
Lux-Led-dv
CONTENTS
I. Safety information . . . . . . . . . . . . . . . . . . . . . . . . . . . . . . . . 3
II. Features of the Lux-Led-dv . . . . . . . . . . . . . . . . . . . . . . . . . 4
III. Set-up and operation . . . . . . . . . . . . . . . . . . . . . . . . . . . . . 5
IV. Cleaning, maintenance and care . . . . . . . . . . . . . . . . . . . . 8
VI. Available accessories, replacement parts . . . . . . . . . . . . . 9
VII. Technical specification and connections . . . . . . . . . . . . . 10
VIII. Troubleshooting . . . . . . . . . . . . . . . . . . . . . . . . . . . . . . . . 11
VIII. Warranty information . . . . . . . . . . . . . . . . . . . . . . . . . . . . 11
To get the most out of your system, please read these
operation instructions carefully before setting it up.
SAFETY INFORMATION
Before using this product with your camera, please note the following
I.
general safety information.
All persons installing, operating or servicing this product should familiarize
themselves with the following information:
•
It is mandatory to follow the instructions in this manual.
•
All users must be trained to work with this product.
•
The operation instructions form part of the product and should be handed
over to any future owner in the event of sale/transfer of the product.
•
This manual should be retained for the life of the product.
•
If you have any questions about this product, please ask only authorized
specialist personnel for advice.
•
Subsequent updates should be kept with this manual.
Please note the following:
•
Use the device according to the specification only [see Technical specification].
•
The light must only be used when level! Operation in a vertical state
does not correspond with the specification.
•
Do not bypass connections.
•
The casing may become hot. Caution: possible danger of burning!
•
Do not operate the light when the barn doors are closed.
Caution: danger of overheating!
•
Ensure that the light is used at an adequate distance from combustible
materials and that heat dissipates effectively.
3
SAFETY INFORMATION
To avoid damage, allow the light to cool before packing it away.
•
Damaged cables must be replaced immediately by an authorized
I.
•
II.
service provider.
•
Treat this product with care. Do not throw it or allow it to fall!
•
Do not immerse the system in water!
•
A slight odor may arise on the first use or if the system is used
for a long time. This is normal and not dangerous.
If you disregard this information, the system or your camera may incur damage!
FEATURES OF THE LUX-LED-DV
When using shoulder and handheld cameras, head lights are indispensable. The latest
development from bebob is the Lux-Led-dv, a stepless focusable LED camera light.
A completely new concept makes this light unique!
With a sophisticated arrangement of five integrated LEDs, the illumination angle
can be adjusted anywhere between 40° and 60°. At full modulation, the color
temperature is in the daylight range.
The LEDs are now so efficient that the Lux-Led emits significantly more light than
our conventional halogen lights, while consuming considerably less power.
Thanks to its shockproof design and long service life, the light is ideal for news
reporting and outdoor sports.
4
FEATURES OF THE LUX-LED-DV
The LUX-Led-dv is designed for mini HD/SD cameras [handheld camcorders;
MiniDV, HDV, DVCPROHD]. It is however also suitable for all camcorders with
a mounting attachment.
Standard Lux-Led-dv package:
II.
•
Lux-Led-dv [incl. connection cable]
•
Operation instructions
III.
Lux-Led-dv on Camera
SET-UP AND OPERATION
Unpack the parts supplied and check the delivery is complete.
1. PREPARATION
Attach barn door system [optional]
Attach the barn doors to the light with the filter levers upwards, push on and click
into position with a right-turn. You will feel it lock into place.
To remove, follow the same instructions in the reverse order.
5
SET-UP AND OPERATION
2. CONNECTING TO THE CAMERA
Mounting options
a)
To attach to a male photo shoe, remove the slot nut.
Slide the light forwards until its reaches the base of your camera
III.
and lock it with the knurled screw.
b)
To attach to a female photo shoe, screw the slot nut in loosely
with the knurled screw.
Slide the light forwards until its
reaches the base of your camera
and lock it with the knurled screw.
Articulation allows the desired
angle to be set.
Please maintain an adequate distance
from heat-sensitive materials.
Lux-Led-dv on photo shoe
Power supply
Connect the D-Tap plug to a suitable
power supply. The illustration shows an
AB plug connection on a Sony camera
as an example.
Ensure that the cable does not touch
parts of the light that become hot.
6
Lux-Led-dv [connection to D-Tap e.g. Coco or
other voltage adapter]
SET-UP AND OPERATION
Switching on
When the Lux-Led-dv is switched on
using the switch on the underside of
the light, it can be dimmed to any level
with the dimmer.
Lux-Led-dv ON/OFF
III.
Dimmer
If a head light is connected and the
dimmer is switched on, the brightness is
controlled by the dimmer wheel on the
side of the Lux-Led-dv. Turning the dimmer up will make the head light brighter,
while turning the wheel downwards
reduces the intensity of the light.
At full modulation, the color tempera-
Lux-Led-dv dimmer
ture is in the daylight range. Note: The
color temperature changes when dimming.
Focus
With the focus slide mechanism, the
illumination angle can be adjusted
anywhere between 40° and 60°.
Please note:
The flood position is optimized for
Lux-Led-dv focus
applictaions with the diffusion filter!
7
SET-UP AND OPERATION
Barn door system
To avoid overheating, the light must never be operated when the barn doors are closed.
The barn doors enable the illumination angle to be adjusted as desired.
Caution: The barn doors may
III.
become hot during use!
Filter
Lux-Led-dv-ft [2-leaf barn doors]
IV.
The 2-leaf barn doors come with an integrated diffuser as standard.
The 4-leaf barn doors come with a diffuser and artificial light filter as standard.
CLEANING, MAINTENANCE, AND CARE
All system parts require zero maintenance.
The casing must not be opened!
A dry, lint-free cloth is recommended for cleaning.
Do not use any cleaning agents.
Damaged cables must be replaced immediately by an authorized service provider.
The light may only be cleaned when cold.
Check from time to time that the light is mounted correctly.
If applicable, loose screws on the barn door or articulation system should be
retightened carefully. Overtightening may damage the mechanism.
8
AVAILABLE ACCESSORIES, REPLACEMENT PARTS
With the new voltage supply adapters, the light can be connected directly to all
current models of the following manufacturers:
•
Canon [XH-A1, XH-G1]
•
Panasonic [DVX100, HVX200]
•
Sony [V1, Z1, FX1, FX7, PD170, VX2100]
For these models, a camera-specific adapter and a 2-leaf barn door system is
supplied. For JVC models and other ENG cameras, the light is available with a
4-leaf barn door system.
Lux-Led-dv – by bebob
V.
Canon Adapter
Lux-Led-BP
Lux-Led-ft-dv
2-leaf barn doors
with 1 diffuser
Sony Adapter
Lux-Led-NPF
Panasonic Adapter*
Lux-Led-CGA
Lux-Led-dv
Lux-Led-ft
4-leaf barn doors
with 1 diffuser and
1 artificial light
* für HVX200 und DVX100/ DVX100A
DVX100B on request!
9
AVAILABLE ACCESSORIES, REPLACEMENT PARTS
Other accessories:
LUX-LED-FT-DV
2-leaf barn doors with 1 diffuser
LUX-LED-FT
4-leaf barn doors with 1 diffuser
and 1 artificial light filter [3200K]
Voltage transformer for Sony cameras
Coco II-dvl
Voltage transformer for Sony cameras
Box VM
Holder for Endura 7S batteries
V.
Coco I-dvl
VI.
For prices and further accessories, visit www.bebob.de or call + 49 [0] 89/27 81 82 82
TECHNICAL SPECIFICATION AND CONNECTIONS
Input voltage
6.5 – 28V
Power
12W
Ambient temperature
20°C normal
max. 50°C,
min. - 20°C
Humidity [condensed]
- 80% rel. humidity
Focus [median range of light]
40° – 60°
Dimmer range [internal]
10 – 100%
Weight
270g; 398g (incl. 2-leaf barn doors)
Connector
AB-DTAP, XLR on request
Mounting
Universal camera mounting
Subject to technical change.
Only use the light when level! Operation in a vertical state does not correspond with
the specification.
10
TROUBLESHOOTING
The product does not include any parts requiring maintenance.
If there is a problem, please check the following items first:
Trouble
Cause
Does not light up
Switch not switched on
Incorrect input voltage
Cable damaged
Too dark
Input voltage too low
Filter blocking light
Cuts out
Cable damaged
Dirty contacts
If this does not solve the problem, please do not hesitate to contact us on
+ 49 [0] 89/27 81 82 82.
WARRANTY INFORMATION
VII.
In the event of damage caused by not following these operation instructions,
incorrect set-up, incorrect handling or unauthorized interference, warranty
claims are void. We assume no liability for injury to property or persons cauand conformity (CE), you are not permitted to modify and/or alter the light. In
VIII.
sed by incorrect handling, or for consequential losses. For reasons of safety
this case, warranty claims are void.
Last updated 08/07
© bebob GmbH 2007
11