1
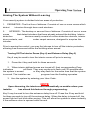
THESE SYSTEMS HAVE BEEN DISCONTINUED
Table Of Contents
1.
1.1
1.2
1.3
1.4
1.5
1.6
Z900 and Z950
Operating Your System
System Orientation . . . . . . . . . . . . . . . . . . . . . . . . . . . . . ..1-1
Arming . . . . . . . . . . . . . . . . . . . . . . . . . . . . . . . . . . . . . . . . .1-3
Timing The System Prior To Leaving . . . . . . . . . . . . . . . ..1-3
Arming The System Without Leaving . . . . . . . . . . . . . . . . .1-4
Turning Off The Interior Zones and Entrance Delay . . 1-4
Automatic Interior Off/Delay Off . . . . . . . . . . . . . . . . . . 1-5
Two Digit Arming. . . . . . . . . . .. . . . . . . . . . . . . . . . . . . .1-5
System Will Not Arm (READY Light Off). . . . . . . . . . . . . . 1-5
Disarming . . . . . . . . . . . . . . . . . . . . . . . . . . . . . . . . . . . . .1-6
Disarming Upon Entering The Premises . . . . . . . . . . . . . .1-6
Alarm Conditions . . . . . . . . . . . . . . . . . . . . . . . . . . . . . . . . . 1-7
What To Do If An Alarm Occurs . . . . . . . . . . . . . . . . . . . . . . .1-7
To reset the alarm: . .. . . . . . . . . . . . . . . . . . . . . . . . . . . .1-7
False Alarms. . . . . . . . . . . . . . . . . . . . . . . . . . . . . . . . . . . . . . 1-7
The Keypad Panic Alarms . . . . . . . . . . . . . . . . . . . . . . . . . . 1-8
Alarm Activation . . . . . . . . . . . . . . . . . . . . . . . . . . . . . . . . . . . 1-8
Resetting the Alarm . . . . . . . . . . . . . . . . . . . . . . . . . . . . . . . . 1-8
Special Features . . . . . . . . . . . . . . . . . . . . . . . . . . . . . . . . . .1-9
Chime Mode Operation . . . . . . . . . . . . . . . . . . . . . . . . . . . . . 1-9
To Turn CHIME On . . . . . . . . . . . . . . . . . . . . . . . . . . . . .1-9
To Turn CHIME Off . . . . . . . . . . . . . . . . . . . . . . . . . . . . .1-9
Force Arming. . . . . . . . . . . . . . . . . . . . . . . . . . . . . . . . . . . . . .1-9
Bypassing Zones . . . . . . . . . . . . . . . . . . . . . . . . . . . . . . . . .1-10
To Bypass A Zone. . . . . . . . . . . . . . . . . . . . . . . . . . . . . 1-10
To Cancel A Zone Bypass. . . . . . . . . . . . . . . . . . . . . . .1-10
To Cancel All Zone Bypasses . . . . . . . . . . . . . . . . . . . .1-11
To Bypass All Faulted Zones Simultaneously . . . . . . . .1-11
User Manual
i
Key Switch Operation . . . . . . . . . . . . . . . . . . . . . . . . . . . . .1-11
Arming . . . . . . . . . . . . . . . . . . . . . . . . . . . . . . . . . . . .. . 1-11
Disarming . . . . . . . . . . . . . . . . . . . . . . . . . . . . . . . . . . . .1-11
Access . . . . . . . . . . . . . . . . . . . . . . . . . . . . . . . . . . . . . . . 1-12
The Reset Key . . . . . . . . . . . . . . . . . . . . . . . . . . . . . . . . . 1-12
Remote Programming . . . . . . . . . . . . . . . . . . . . . . . . .. . . 1-12
Alarm Memory . . . . . . . . . . . . . . . . . . . . . . . . . . . . . . . . . 1-12
Audible Zone Testing With Bell Test and Dialer Test . . . . 1-13
1.7 Fire Detection . . . . . . . . . . . . . . . . . . . . . . . . . . . . . . . . . . 1-15
What To Do If The Fire Alarm Sounds . . . . . . . . . . . . . . . .1-15
Fire Supervisory/Trouble (Resetting Smoke Detectors) . . 1-16
2.
Evacuation Plan
2.1 Developing An Evacuation Plan . . . . . . . . . . . . . . . . . . . . 2-1
2.2 Fire Prevention And Escape. . . . . . . . . . . . . . . . . . . . . . . . 2-2
Know Fire Hazards. . . . . . . . . . . . . . . . . . . . . . . . . . . . . . 2-2
In Case Of Fire . . . . . . . . . . . . . . . . . . . . . . . . . . . . . . . . . . 2-2
Be Prepared . . . . . . . . . . . . . . . . . . . . . . . . . . . . . . . . . . . . 2-3
3.
Programming
3.1 User Codes . . . . . . . . . . . . . . . . . . . . . . . . . . . . . . . . . . . . . 3-1
Changing User Codes . . . . . . . . . . . . . . . . . . . . . . . . . . . . .. 3-2
To Change A User Code . . . . . . . . . . . . . . . . . . . . . . . . 3-2
Deleting a Code . . . . . . . . . . . . . . . . . . . . . . . . . . . . . . . . . . 3-3
Programming A Temporary Code (User Code 6 / 8) . . . . . . .3-3
Glossary
Index
ii
User's Manual
Operating Your System
1
1.1 System Orientation
NOTE
Your security system may consist of either 8 zones, 8 users
or 6 zones, 6 users. Please verify the number of zones and
users with your Security Company Representative.
The keypad for your security system is illustrated in FIGURE 1-1 on Page 1-2.
The keypad is the most important and most used component in your security
system. It is important that you carefully review the information presented on
Pages 1-1 and 1-2, and become familiar with all features and functions of your
keypad.
The primary components of the keypad are as follows:
*
Numeric User keys, Reset (*) key, and Bypass (#) key
The numeric User keys are used to enter your user code when arming
or dis
arming the security system. They are also used in
programming the security
system.
The Reset (*) key is used to silence the keypad sounder or exit audible
test
mode. It cannot reset the alarm or cancel the reporting of an
alarm. See Page
1-12.
The Bypass (#) key is used to bypass selected zones in your security
system.
See Page 1-10.
*
Ready Status Indicator
The Ready Status Indicator (green), when illuminated, indicates that
your
security system is ready to be armed. If the indicator is not
illuminated, one or
more protection zones are not ready (faulted) for
arming.
* Armed Status Indicator
The Armed Status Indicator (red), when illuminated, indicates that your
se
curity system is armed. If the indicator is not illuminated, your
system is dis
armed. If the indicator is blinking, the system has
delayed arming to enable
you time to leave the building. After a preprogrammed exit delay time, the
system will fully arm. During the
last 10 seconds of exit delay, the beep accel
erates to fast beep,
warning that arming is about to occur.
* Panic Keys
The Panic keys are keys used in specific situations. The function of
each key
User's Manual
and its programming are explained on Page 1-8.
1-1
1.2 Arming
Arming The System Prior To Leaving
Before your security system can be armed, all of the intrusion zones
must be secure as indicated by the green READY indicator. If the
READY indicator is off, one or more zones are faulted. The
indicator(s) corresponding to the faulted zone(s) will light. Determine
the areas of protection which are assigned to each of the zones, then
check the appropriate doors and windows to see that they are closed.
1.
Verify that the READY indicator is on.
2.
Enter your User Code.
3.
The keypad will begin beeping and the red ARMED indicator will blink
to indicate that arming will take place after the exit time expires. (The
ARMED indicator will light steady after the system arms).
4.
Leave the building immediately.
The control is programmed with an exit delay time which allows a specific
amount of time to leave through any delay defined intrusion detection zone
without causing an alarm. Be sure that you have been informed on routes to
enter and exit from without causing an alarm.
On the Z950/Z880 only, the beeping tone will become more rapid for the last 10
seconds, warning you that arming is about to occur. If the exit door is not
secure during the last 10 seconds of the exit delay, then the exit delay will be
restarted for one full exit delay period. This exit delay restart is only performed
once.
User's Manual
1-3
Arming The System Without Le aving
Your security system is divided into two areas of protection:
1. PERIMETER - The first line of defense. Consists of one or more zones which
detect
intrusion through doors and windows.
2.
INTERIOR - The backup or second line of defense. Consists of one or more
zones
that detect intruders that have already entered the building. Interior
detection
devices usually consist of motion detection devices, interior
door contacts, and
under carpet sensors, designed to surprise the
intruder.
Prior to arming the control, you may first choose to turn off the interior protection,
allowing free movement within the building when armed.
Turning Off The Interior Zones (Key 4) and Entrance Delay (Key 5)
Key 4 may be used to turn the interior zones off prior to arming.
1.
Press the 4 key and hold for three seconds.
2. When interior defined zones are turned off, their corresponding Zone
indicators
will flash. They may continue to flash until 30 seconds after
the system is armed
or they may flash for the entire time that the system
is armed. The installer can
program how the flashing operates.
3. Arm the system by entering your User Code.
NOTE
Upon disarming, the interior zones automatically re-enable unless your
installer
has altered this feature through programming.
Key 5 may be used to turn the entrance delay time off. Press the 5 key and hold
for three seconds to turn off the entrance delay. When the delay is turned off, the
armed light will not blink after arming. This will allow the system to alarm instantly
if the entrance door is opened while armed.
1-4
User's Manual
Automatic Interior Off/Delay Off
Your system may have been programmed to automatically turn the
interior zones off if you arm and do not leave the premises before the exit
delay time expires. The entrance delay may also be programmed to
automatically turn off at this time. When the system is disarmed, the
interior and delay will return to their normal on or off state. See your
security company representative for details.
Two Digit Arming
Your system may have been programmed with an abbreviated arming
feature. When this feature is enabled, only the first two digits of your
User Code will be required to arm the system and perform other features.
Disarming however, will still require the entire code sequence.
System Will Not Arm (READY Light Off)
If the READY indicator is off, one or more detection devices such as a
door or window has been left open. The system cannot be armed. One
or more of the ZONE indicators will also be lit indicating the area of
protection that is at fault.
If an attempt is made to arm the system with the READY light off, a
three second error tone will be emitted to alert you that the system did
not arm.
User's Manual
1-5
1.3 Disarming
Disarming Upon Entering The Premises
Your system is programmed with one or more entrance delay zones which allow
time to enter the premises without causing an alarm. Each delay door may have one
of two different entry times. Be sure to check with your installer.
If your system has the "Interior Follower" feature enabled, all interior designated
zones automatically become delay zones whenever you first enter through a delay
zone. This allows you to walk in front of motion detectors on the way to the keypad
after you enter.
1.
After entering the premises through a delay zone, the keypad will
sound a continuous tone to remind you to disarm the system.
WARNING
IF THE ALARM INDICATOR IS LIT AND THE KEYPAD IS BEEPING, AN ALARM HAS
OCCURRED. LEAVE THE PREMISES IMMEDIATELY AND GO TO THE NEAREST
PHONE TO CONTACT THE APPROPRIATE AUTHORITIES. DO NOT ENTER THE
PREMISES.
2.
Enter your User Code.
3.
The red armed light should turn off indicating that the system is
disarmed.
1-6
User's Manual
1.4 Alarm Conditions
What To Do If An Alarm Occurs
Whenever an alarm occurs, the ALARM indicator will light, the audible alarm will
sound (if applicable), and the control will communicate with the Central Station
(if this option was purchased).
WARNING
IF UPON RETURNING TO THE PREMISES, IT IS DISCOVERED THAT AN
ALARM HAS OCCURRED, DO NOT ENTER THE PREMISES. GO TO THE
NEAREST TELEPHONE AND CONTACT THE APPROPRIATE
AUTHORITIES.
To reset the alarm:
1.
Enter your User Code to reset the alarm.
2.
The ALARM indicator will remain lit.
If the alarm was activated through one of the "hardwire" zones, the corresponding ZONE indicator(s) will also be lit, identifying the specific area that was
violated. If the alarm was activated manually by pressing one of the keys, no
zone indicators will be lit. Press the Reset (*) key to extinguish the ALARM
indicator after determining the type of alarm that occurred and area of protection
involved.
A history of the alarm condition will be stored in the control's memory and may
be recalled at any time. See "Special Features" for more information.
False Alarms
If for
1.
2.
3.
any reason a false alarm occurs, perform the following steps:
Enter your User Code. The armed light should turn off.
Notify the appropriate authorities of the alarm immediately.
Press the Reset (*) key to extinguish the ALARM light.
User's Manual
1-7
1.5 The Keypad Panic Alarms
Your system may have been purchased with up to three keypad panic alarms. These
may be used to activate an alarm in the event of a Fire, Hold-up, or other condition,
as programmed by your installer. Each alarm is activated by pressing the
appropriate panic key (located below the numeric keys). Each alarm may be
programmed to report the condition to a central monitoring station. Check with your
security company representative to determine the characteristics of your sys tem.
Alarm Activation
Each of the three panic keys (See FIGURE 1-1) can initiate a specific type of alarm
as programmed and labeled by your installer.
To activate an alarm, press the appropriate panic key and hold for three seconds.
The alarm will activate.
Your installer may have programmed the panic zones to ignore momentary key
presses and to activate only by pressing and holding pressed for three seconds (or
pressing at least twice within three seconds). Check with your security company
representative for the specific characteristics of your system.
Resetting The Alarm
When an Alarm is activated, the ALARM indicator will be lit (unless your installer has
programmed the alarm for silent or no keypad indication).
To reset the alarm, enter your user code. Pressing the Reset (*) key will extinguish
the ALARM indicator, if lit.
A history of the last alarm will be stored in the control's memory and may be recalled
if desired. (See Alarm Memory on page 1-12.)
1-8
User's Manual
1.6 Special Features
Chime Mode Operation
The CHIME mode allows audible monitoring of zones while the system is dis armed. When the CHIME mode is active, the keypad sounder will beep when ever
a perimeter burglar defined zone (door, window, etc.) indicator is opened.
For example, the CHIME feature will cause the keypad to beep two times whenever the front door has been opened. Many businesses use this type of signal to
announce that a customer has entered. In a residential application, the CHIME is
useful for monitoring opening of doors by children.
The CHIME feature does not annunciate interior zones.
To Turn CHIME On
I
.The system must be disarmed.
2.
Press the "6" key and hold for three seconds. The keypad will
beep three times to signify that the CHIME has been turned on.
3.
The keypad will now beep two times when any burglar zone is
opened.
To Turn CHIME Off
Press the "6" key and hold for three seconds. The keypad will beep two times to
signify that the CHIME has been turned off.
Force Arming (This feature is disabled in U.L. Listed systems)
Your system may be programmed for quick arming even with one or more zones
faulted. In this condition, when an attempt is made to arm the system with faulted
zones (READY light off), the keypad will emit a three second error tone, indicating
that the system refused to arm. If a second attempt to arm is made within eight
seconds after the tone quits, all faulted zones will automatically be bypassed and the
system will Force Arm. Depending upon how your system was programmed at the
time of installation, force armed zones will either be per-manently bypassed until
disarming or may return to operation when or if they become operable.
User's Manual
1-9
Bypassing Zones
The Bypass (#) key is used to bypass selected zones in your system. A bypassed
zone will NOT be capable of activating an alarm as it is temporarily removed from
your system. Bypassing (also referred to as shunting) is most commonly used to
allow free movement of an area (zone or group of zones) while arming the rest of the
system or to temporarily remove a zone or zones that require service, allowing partial
use of the system until repaired. When a zone is bypassed, its corresponding Zone
indicator will flash to indicate that is has been removed from operation. It may
continue to flash until 30 seconds after the system is armed or it may flash for entire
time that the system is armed. The installer can program how the flashing operates.
WARNING
WHEN ZONES ARE BYPASSED, SECURITY IS COMPROMISED. DO NOT
INSTRUCT TEMPORARY USERS ON USE OF THE BYPASS FEATURE.
To Bypass A Zone
1.
The system must be disarmed.
2.
Press the Bypass (#) key, then enter the number of the zone to
be bypassed.
3.
The corresponding ZONE indicators will blink to indicate the
zones that have been bypassed. The blinking will cease after
the system is armed and the exit delay has expired. If Permanent Force-Arming has been enabled, then the ZONE indica
tors for the bypassed zones will continue to blink during the
ARMED period.
4.
Repeat steps 2 and 3 to bypass other zones.
To Cancel A Zone Bypass
1.
The system must be disarmed.
2.
Press the Bypass (#) key followed by the number of the zone to
be restored to service.
3.
The ZONE indicator of the previously bypassed zone will stop
blinking.
1-10
User's Manual
To Cancel All Zone Bypasses
I.
2.
Press the Bypass (#) key followed by key “9"
All ZONE indicators will stop flashing. The zones are returned to operation.
To Bypass All Faulted Zones Simultaneously (Not available in U.L. Listed
Systems)
1.
The system must be disarmed.
2.
Press the Bypass (#) key, then press the "0" key.
3. All faulted zones will simultaneously be bypassed. The corresponding
ZONE
indicators will blink to indicate zones that have been bypassed.
The blinking will
cease 30 seconds after the system is armed.
Key Switch Operation
Your system may utilize a conventional key switch for arming and disarming the
system. Arming and disarming with a key switch is performed as follows:
Arming
1.
Verify that the READY light is on.
2.
Insert your key into the key switch and turn. Hold for one second and release.
3.
steady
The red ARMED light will blink during the exit delay cycle then light
when the system arms.
Disarming
1.
release.
2.
Insert your key into the key switch and turn. Hold for one second and
The red ARMED light will go out, indicating that the system is
disarmed.
User's Manual
1-11
Access (U.L. Note: The control is not listed to Standard U.L. 294 Access Control
Units.)
If your system was purchased with the ACCESS feature, the keypad can be used
to switch other devices on and off or as a timed switch. This feature is most
commonly used to activate an electric door release or switch lights on and off.
Consult your security company representative for more information.
The Reset Key
The Reset (*) key may be used to:
*
Silence the keypad sounder and the audible output during
Auxiliary "A" (Fire) and Auxiliary "C" alarms.
*
Silence keypad sounder during Burglar alarms.
*
Exit the audible test mode.
*
Pressing the Reset (*) key does not reset alarms or cancel
reporting to the central station.
Remote Programming
Your system is capable of being serviced remotely from the alarm company's service office providing that the sys tem is set up for Remote Programming. The sys tem provides a means of verifying that this feature is enabled. Contact your security company representative for more information.
Alarm Memory
To View The Last Alarm That Occurred:
I . The system must be disarmed.
2. Press the "3" key and hold for three seconds. The keypad will beep three
times.
3. The corresponding zone indicator(s) indicate the zone(s) that caused the last
alarm.
1-12
User's Manual
Audible Zone Testing With Bell Test and Dialer Test
NOTE
The bell test and dialer test are not available on the Z900.
The TEST mode commands the keypad to beep continuously and light the
corresponding zone indicator, each time a zone is violated. The zone indicator
of each tested zone will remain lighted while each succeeding zone is tested.
Testing can be performed only while the system is disarmed. Testing the
system should be performed in both ELECTRICAL POWER AC ON and
STANDBY BATTERY modes. Your neighbors' understanding and cooperation is
very important. When you are away from your residence (or commercial
business), neighbors play an important role. Advise them that you have a
security system and ask them to notify the proper authorities if your system is
sounding. The burglar alarm typically has a pulsing bell and a fire alarm has a
steady horn sound.
NOTE
A lit zone indicator means that at least one sensor of that particular zone has
been tested. It does not necessarily mean that all sensors of that zone were
tested. It is recommended that you test your system on a weekly basis.
I.
2.
3.
4.
5.
6.
The system must be disarmed.
Determine the area of protection which corresponds to each zone.
To simplify testing, all zones should first be secured (READY light
ON). If it is not possible to secure all zones prior to beginning the
walk test mode, please note that the keypad will beep continuously as a
result of the non-secure zones. This will eliminate the advantages of
the audible walk test mode, although the zone indicator lights may still
be relied upon for testing.
Press key 8 and hold for three seconds. The keypad will beep three times
to signify entry into the TEST mode.
To test the Bell for one second, press the "I" key and the Reset (*) key.
This feature allows you to test the system audible without having a
signal transmitted to the central station.
To test the dialer, press the "T' key and the Reset (*) key. A dialer test
signal will be performed with the central station (monitored systems
User's Manual
1-13
7.
Violate a detection zone (open a door, window, etc.). The keypad will
beep continuously and the indicator of the corresponding zone will
light.
8.
Secure the zone (close the door, window, etc.). The keypad
beeping will cease.
9. The interior detection devices will also cause the keypad to
beep if
entering those protected areas when testing unless the
INTERIOR is
first turned OFF. You may also want to walk test motion
detection
devices to check whether the pattern is covering the areas
of concern.
10.
Begin at step five to test the remaining sensors.
11.
Press the Reset (*) key when finished testing.
NOTE
Your system should be regularly tested at least once per week to insure proper
operation. For UL Listed Burglar systems, the Bell Test should be included as part
of the weekly test. Contact your security company representative for complete
instructions on regular system maintenance and testing procedures. If the wall
mounted transformer which powers the system is removed for any reason, test
the system to see if the standby battery is adequately powering the system.
Reconnect the transformer, secure to the wall plate with the restraining tab
machine screw, and test the system again to assure it is receiving AC power.
1-14
User's Manual
1.7 Fire Detection
Your system may or may not include fire detection, depending upon the options
purchased and the local codes and regulations for your area. Fire alarm systems
are active 24 hours a day and cannot be turned off. All fire systems require regular
testing and maintenance. Common household dust build-up in smoke detectors
can cause them to false alarm or fail in a time of need. Consult your security
company representative for a scheduled maintenance program.
What To Do If The Fire Alarm Sounds
1.
The red ALARM indicator will light, and the alarm sounder will sound
steadily. The ZONE indicator(s) corresponding to the violated Fire
Zone(s) will also be lighted. If the alarm was activated manually
through the keypad panic zone, no ZONE indicators will be lit.
2.
Press the Reset (*) key to silence the keypad and the audible alarm.
3.
Notify the alarm monitoring service or the proper authorities immediately if the alarm was unintentional.
4.
The red ALARM light will remain on. To clear the alarm, enter a
valid User Code.
WARNING
IF THE TROUBLE INDICATOR LIGHTS, A FIRE SUPERVISORY /TROUBLE
CONDITION MAY EXIST. CONSULT YOUR SECURITY COMPANY
REPRESENTATIVE.
User's Manual
1-15
Fire Supervisory/Trouble (Resetting Smoke Detectors)
Many smoke detectors "latch on" and illuminate a built-in indicator when triggered. This feature allows you to determine which detector caused the alarm. If a
smoke detector remains latched after resetting a fire alarm activation, the yellow
TROUBLE indicator will be lit.
1.
Check all smoke detectors for the presence of a latched condition to
determine which detector triggered the alarm. If all detectors appear
normal, a wire may be broken or shorted. Call for service.
2.
Press Key 7 and hold for three seconds. The system will attempt to reset
the smoke detectors. If the smoke detector(s) did not reset, the keypad will
continue to indicate the TROUBLE condition. Call your security company
representative for service.
NOTE
If a fire alarm is active, smoke detectors cannot be manually reset until the
fire alarm is reset.
Testing The Fire System
All devices in a Fire Alarm system should be tested monthly except as described
in NFPA 72 chapter 7-3-2. If the Bell Test on page 1-13 does not test the fire
alarm bell, then follow these steps:
1. Notify the Central Station or the appropriate authorities that you are about to
perform a fire system test.
2. Press and hold for three seconds the Keypad Panic Key
(see FIGURE 1-1) that is designated as the Fire Panic Key. The Fire
Alarm should go off.
3. Enter your passcode and press Reset (*) to silence th e alarm.
1-16
User's Manual
Evacuation Plan
2
2.1 Developing An Evacuation Plan
Preparation and education are of prime importance in the prevention of fire. An
evacuation plan should be established BEFORE a severe situation arises. Your
security system may or may not contain fire detection and notification equipment.
Make sure your security company representative fully explains the configuration of
your system. Make sure you fully understand these limitations of your system.
Use the following steps in establishing an evacuation plan:
I.
Evaluate all possible escape routes from your home and draw a floor
plan.
2.
Select two exit escape routes from each room.
3. Provide escape ladders for rooms above the first floor. Check the ladders to
be sure
that they will reach the ground.
4.
Draw a rough sketch of your escape plan so that everyone is familiar
with it.
5.
Practice your escape plan to assure that everybody knows what they
have to do in a severe situation.
6.
Establish a meeting place outside where your family is to report.
7.
Advise the local fire authority if you have installed a fire alarm system.
Discuss the following will all residents:
1.
Familiarity with alarm signals.
2.
Status of bedroom doors.
3.
Testing of door during a fire and use of alternate escape routes if HOT
to touch.
4.
Crawling and holding breath techniques d uring a fire.
5.
Escape, FAST, DO NOT STOP for packing.
6.
Emphasize that no one is to return to a burning building.
User's Manual
2-1
2.2 Fire Prevention And Escape
The purpose of heat and smoke detectors is to detect a fire in its earliest stages and
sound an alarm, giving you more time to exit the premises before smoke reaches a
dangerous level.
Know Fire Hazards
No detection device can protect life in all situations; therefore, safeguards should be
taken to avoid such potentially dangerous situations as smoking in bed, leaving
children home alone, and cleaning with flammable liquids such as gasoline.
The best fire protection is minimizing fire hazards through proper storage of
materials and good housekeeping practices. Careless use of combustible materials and electrical appliances or overloading of electrical outlets are major causes of
fire. Explosive and fast burning materials must be eliminated from the home.
In Case Of Fire
Leave immediately! Do not stop to pack or search for valuables. Inheavysmoke, hold
your breath and stay low - crawl if necessary. The clearest air usually is at the floor. If
you have to go through a closed door, carefully feel the door and door knob to see if
undue heat is present. If relatively cool, brace your foot against the bottom of the door
with your hip against the middle, and one hand against the top edge. Open slightly. If
there is a rush of hot air, slam the door quickly and latch it. Unvented fire will build up
considerable pressure. Be sure that all the household realizes this danger.
Use your neighbor's phone or street fire alarm box. The job of extinguishing the fire
should be left to the professionals. Too many unforeseen things can occur when
inexperienced people try to extinguish a fire.
2-2
User's Manual
Be Prepared
Perform fire drills regularly. Use them to assure recognition of an alarm signal. For
your protection, simulate different circumstances (smoke the hall, living room, etc.).
Then have everyone react to the situation. Draw a floor plan and show two exists
from each room. It is important that children be instructed carefully. Their tendency is
to hide in a crisis.
It is imperative that one meeting place outside the home be established. You should
insist that everyone meet there during an alarm. This will eliminate the tragedy of
someone re-entering the house for a missing member who is actually safe.
If you have small children and/or invalids residing in your household, you can help
your fire department by placing decals on bedroom windows. Most fire departments
supply the decals.
Become familiar with the distinctive sounds of your Fire alarm and Burglar alarm
signals.
NOTES
User's Manual
2-3
SYSTEM USER REFERENCE
User Code #1 __________
User Code #2 __________
User Code #3 ___________
User Code #4 __________
User Code #5 __________
User Code #6 ___________
User Code #7 __________
User Code #8 __________
Code #6/8 Usage ?
?
Permanent
? Temporary (Check One)
Duress Code - - - - (Check if used)
AUXILIARY PANICS
? Auxiliary A ? Auxiliary B ? Auxiliary C (Check if enabled)
Zone Type
Location
1.
2.
3.
4.
5.
6.
7.
8.
Important Telephone Numbers
Alarm Company ____________________
_____________________
Ambulance ___________________________
________________________
Other _________________________________
________________________
Fire Dept.
Police
Other
Entry I Time _____Sec (Maximum allowable time for UL. Listed systems is 45
Sec.)
Entry 2 Time _____Sec (Maximum allowable time for U.L. Listed systems is 45
Sec.)
Exit Time _____Sec (Maximum allowable time for UL. Listed systems is 60
Sec.)
NOTE: Once every minute the Z900ST performs a self diagnostic test which
causes the LCD display to momentarily blink. This is normal operation and
should not cause concern.
2-4
User's Manual
Programming
3
Certain features of your system are programmable through the keypad. The programming mode is entered by pressing key 9 and holding for three seconds, then
entering the Master User Code. Other programming functions may be possible that
are not detailed in this section. Consult your security company representative for a
list of the user programmable features of your system.
WARNING
DO NOT ATTEMPT TO PROGRAM THE SYSTEM UNLESS YOU HAVE BEEN
PROPERLY TRAINED ON PROGRAMMING PROCEDURES, AND YOU ARE SURE
THAT YOU FULLY UNDERSTAND THIS OPERATION.
NOTE
Regarding Remote Programming:
If the alarm or Zone 8 indicator lights steady after entering the programming
mode, your installer has enabled the Remote Programming option. This feature
enables the installing company (or someone assigned by them) to remotely
service and control your system.
3.1 User Codes
Your system may be programmed to accept up to seven regular User Codes and
one Master User Code. Each code may be comprised of any four digit sequence.
(Do not program 1234 or 1111 as User Codes). Codes may be added, deleted,
or changed as necessary.
The Master User Code (code 1) performs all of the User Code functions plus
allows access to the programming mode.
User's Manual
3-1
Changing User Codes
Determine your desired new User Code or Master User Code sequence. If you
make an error while programming, press the Reset (*) key five times and start
over from step 1.
Pressing the Bypass (#) or Reset (*) key while programming a code may result in
improper code operation, therefore you MUST return to step I when an error is
made.
To Change A User Code
1.
2.
times.
3.
The system must be disarmed.
Press key 9 and hold for three seconds. The keypad will beep three
Enter the Master User Code. The keypad will beep two times.
The READY and ARMED indicators will blink alternately, and
the other indicators will blink repeatedly when the programming mode is
successfully entered (see remote programming note on Page 3 -
1).
4.
Press a key (2-8) for Z950/Z880 or (2-6) for Z900 which corresponds to
the User
Code you wish to program, or press key 1 to change the Master
User Code. Then
press the Bypass (#) key. The keypad will beep three
times to signify
acceptance.
5.
Enter the desired new 4 digit code sequence. After the fourth digit is
entered, the
keypad will emit one short beep followed by one long beep;
then the system will
exit the programming mode automatically. To
program another code, return to
step 2.
CAUTION
USE EXTREME CARE WHEN CHANGING OR DELETING CODES. DO NOT DELETE
MASTER USER CODE 1.
3-2
User's Manual
Deleting A Code
1.
The system must be disarmed.
2.
Press key 9 and hold for three seconds. The keypad will beep three
times.
3.
Enter the Master User Code. The keypad will beep two times. The
READY and ARMED indicators will blink alternately, and the other
indicators will blink in sequence with each other when the program
ming mode is successfully entered (see remote programming note on
Page 3-1).
4.
Press key 1, then, for the Z950/Z880, press key 2 or, for the Z900,
press key 0. Next, press the Bypass (#) key which instructs the
control
that you wish to delete a code. The keypad will beep three times to
signify acceptance.
5. Enter the number of the code to be deleted (2-8) for Z950/Z880 or (2-6)
for Z900.
6.
The code is now deleted. The system will automatically exit the
programming mode.
Programming A Temporary Code
An optional feature of your system allows you to assign a certain number of
valid
uses to temporary code. User Code 6 of the 6 zone control or User Code 8 of
the 8 zone control may be programmed as a Temporary User Code with a
limited number of valid uses, after which it becomes inoperable. After the code
has been used the programmed amount of times, it automatically becomes
disabled. This code may be assigned to a maintenance person, a maid, or
anyone who you would like to be able to arm and disarm the system for a
selected number of times without having to give out your regular code. After the
uses have expired, the code will cease to function. It can be re-enabled by
programming in another number indicating how many times that it can be used.
It will not be necessary to re-program the actual code unless changing the code
itself is desired.
I .The system must be disarmed.
Press key 9 and hold for three seconds. The keypad will beep three
times.
3.
Enter the Master User Code. The keypad will beep two times. The
READY and ARMED indicators will blink alternately, and the other
indicators will blink in sequence with each other when the program
ming mode is successfully entered (see remote programming note on
Page 3-1 ).
User's Manual
3-3
4.
Press key 6 or key 8, then Bypass (#) key to instruct the control that you
wish to
program the desired code sequence for User Code. The keypad
will beep three
times.
5.
Enter the desired four digit code sequence. After the fourth digit is entered,
the
keypad will emit one short beep followed by one long beep; then, the
system
will exit the programming mode automatically.
6.
Repeat steps 2 and 3 to re-enter the programming mode.
7.
Press key 7 for the Z900 control or key 9 for the Z950/Z880 control plus the
Bypass (#) key to instruct the control that you wish to program the number
of
valid uses for User Code 8. 'Me keypad will beep two times.
8.
Enter the number of uses desired, 1 -254, then press the Reset (*) key.
The keypad will beep two times.
9.
Press the Reset (*) key again to exit the programming mode.
NOTE
The temporary code may perform all of the functions of your regular User
Codes. Only the Master User Code (Code 1) will permit entry into the
programming mode of operation. Remote Programming is not available in U.L.
Listed Systems.
3-4
User's Manual
Glossary
Alarm Memory: A history of the alarm that last occurred.
Arm: To turn the intrusion detection system on.
Bypass: To temporarily remove a zone from operation. To Shunt a zone.
Control Station: The remote station used to enter instructions to the control panel
such as to arm, disarm and bypass. Also called a keypad.
Delay Zone: Zone which allows a program mable amount of time to enter and disarm
the system without activating an alarm. Also provides an exit time to leave the
premises after arming. "Delay" may be assigned to any number of zones.
Disarm: To turn the intrusion detection system off.
Entrance Delay: Time permitted to enter the armed premises through a delay defined zone.
Faulted: A detection area which is not secure, such as a protected door or window
which has been left open causing the control to loose its "Ready" status.
Force Arm: To override. To force the system to arm when one or more zones are not
ready.
Hardwire Zones: The areas of protection referred to as zones on the control station.
Indicator Lights: The lights (LEDs) on the control station.
Interior: 'Me backup or second line of defense. Consists of one or more zones that
detect intruders that have already entered the building. Interior detection devices
usually consist of motion detection devices, interior door contacts, and under carpet
sensors, designed to surpris e the intruder.
Interior Follower Feature: Converts interior zones to delay zones upon entry through
a delay door. Interior follower provides passage through interior detection zones to
the control station in order to disarm the system.
Keypad: A generic term for the control station.
User's Manual
1
Master User Code (Master User Authorization Code): A code which functions
identically to the User Codes; also may be used to enter the programming mode.
Perimeter: The first line of defense. Consists of one or more zones which detect
intrusion through doors and windows.
Program: To set the operating characteristics of the main system electronics such
as the code which is used to arm and disarm.
Ready: The system is ready to be armed.
Remote Programming: The ability to service the system from a remote location
(specified by your security company representative) with the aid of a computer.
Reset Key: The (*) key. Used to clear improper numeric entries and to silence the
control station sounder.
Sensors: Devices that detect violations and report such conditions to the control
panel. Sensors include door a nd window contacts or any device used to inform the
control of a particular condition.
Shunt: See "Bypass."
Supervisory Trouble: Your installer may have defined one or more of your controls'
zones for supervisory/trouble condition indication. (All Fire zones are automatically
supervisory/trouble zones). If a wire breaks on supervisory/trouble Fire zone, the
control station sounder will beep continuously to alert you of the problem. Pressing
the Reset (*) key will silence the control station sounder. In some cases, burglar
zones may be also defined as such to indicate a broken wire when the system is
disarmed. An example of this would be for a store with alarm foil protecting the
glass. If the foil is cut during store hours, the owner will be alerted and not have to
wait until closing time to find out that service is required.
Twenty Four (24) Hour Zone: A zone that is permanently active 24 hours a day such
as a FIRE zone.
User Code (User Authorization Code): A code which is used to arm and disarm the
system.
Zone: The areas of protection represented by zone indicators.
2
User's Manual
Index
A
H
Access ..................................... 1-12
Alarm Conditions ......................1-7
Alarm Indicator .........................1-7
Armed Status Indicator . . . 1-1, 1-2
Arming ........................................1-3
Automatic Interior Off ................1-5
Hardwire .................................... 1-7
B
Bypass Key ........................1-1, 1-2
Bypassing Zones .................. 1-10
C
Chime Mode ..............................1-9
I
Interior ........................................ 1-4
Interior Follower ....................... 1-6
K
Key Switch Operation ............1-11
L
Leaving . . . . . . . . . . . . . . . . . 1-3, 1-4
M
D
Delay . . . . . . . . . . . . . . . . . . . . . 1-5
Disarming . . . . . . . . . . . . . . . . . 1-6
Monitoring Of Zones ...................... 1-3,
1-4,1-7,1-13
Motion Detection ............................ 1-4
E
P
Entrance Delay . . . . . . . . . . . . . 1-4
Evacuation Plan . . . . . . . . . . . . .2-1
Panic Alarms ..................... 1-1,1-8
Perimeter .................................. 1-4
Programming . ......................... 3-1
F
False Alarms .............................1-7
Fire
Be Prepared ..............................2-3
Hazards ......................................2-2
Prevention and Escape ...........2-2
What To Do ................................2-2
Fire Alarm .......................1-15,1-16
Fire Supervisory/Trouble ... 1-16
Force Arming ............................ 1-9
User's Manual
R
Ready Status Indicator . . . 1- 1, 1-2
Remote Programming .........1-12
Reset Key ..................1-1,1-2,1-12
1
S
Shunting .................................. 1-10
Smoke Detectors
Resetting . . . . . . . . . . . . . .1-16
Supervisory/Trouble . . . . . . . .1-16
T
Testing . . . . . . . . . . . . . . 1-13, 1-16
Trouble Indicator . . . . . . . . . . 1-15, 1-16
Two Digit Arming . . . . . . . . . . .1-5
U
User Codes . . . . . . . . . . . . . . . . .3-1
Changing. . . . . . . . . . . . . . . . 3-2
Deleting . . . . . . . . . . . . . . . . 3-3
Temporary . . . . . . . . . . . . . . 3-3
NOTES
2
User's Manual