1
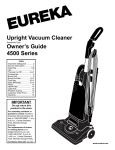
Upright Vacuum Cleaner
Household Type
Owner’s Guide
4500 Series
Index
Important Safeguards ........... 2
Service Information ............... 4
Assembly ........................... 5-6
Use ........................................ 7
Thermal Cut Off .............. 4 & 7
Accessories ........................... 8
Cyclonic Cassette ................. 9
Brush Roll ........................... 10
Brush Roll Belt ............... 10-11
Hose Blockage ............... 12-13
Filters .................................. 14
HEPA Filter .......................... 14
Light Bulb ............................ 15
Problem Solving .................. 16
Customer Order Form ......... 17
Warranty .............................. 19
IMPORTANT
Do not return this
product to the store.
For assembly problems or
questions contact: Eureka’s
Customer Service Division toll
free at 1-800-282-2886*, 7 a.m.
to 8 p.m., Central Standard
Time, Monday through
Saturday.
For replacement of broken
or missing items to be
shipped direct to you, call
1-800-438-7352*, 8 a.m. to
4:45 p.m., Central Standard
Time, Monday through Friday.
*En Mexico llame al 5670-6169
www.eureka.com
IMPORTANT SAFEGUARDS
When using an electrical appliance, basic precautions should always be followed, including the following:
READ ALL INSTRUCTIONS BEFORE USING THIS VACUUM CLEANER.
WARNING
To reduce the risk of fire, electric shock, or injury:
• Do not use outdoors or on wet surfaces.
• Do not leave vacuum cleaner when plugged in. Turn off the switch and unplug the electrical cord when not in use and
before servicing.
• Do not allow to be used as a toy. Close attention is necessary when used by or near children.
• Use only as described in this manual. Use only manufacturer’s recommended attachments.
• Do not use with damaged cord or plug. If vacuum cleaner is not working as it should, has been dropped, damaged, left
outdoors, or dropped into water, return it to a service center before using.
• Do not pull or carry by cord, use cord as a handle, close a door on cord, or pull cord around sharp edges or corners. Do
not run vacuum cleaner over cord. Keep cord away from heated surfaces.
• Do not use extension cords or outlets with inadequate current carrying capacity.
• Turn off all controls before unplugging.
• Do not unplug by pulling on cord. To unplug, grasp the plug, not the cord.
• Do not handle plug or vacuum cleaner with wet hands.
• Do not put any object into openings. Do not use with any opening blocked; keep free of dust, lint, hair, and anything that
may reduce airflow.
• This vacuum cleaner creates suction and contains a revolving brush roll. Keep hair, loose clothing, fingers, and all parts
of body away from openings and moving parts.
• Do not place cleaner on furniture or stairs as the brush roll may cause damage. Place cleaner on floor with the handle in
storage position while using attachments.
• Do not pick up anything that is burning or smoking, such as cigarettes, matches, or hot ashes.
• Do not use without cyclonic cassette and all filters in place.
• Belt pulleys can become hot during normal use. To prevent burns, avoid touching the belt pulley when servicing the drive
belt.
• Use extra care when cleaning on stairs.
• Do not use to pick up flammable or combustible liquids such as gasoline, or use in areas where they may be present.
• Store your cleaner indoors in a cool, dry area.
• Keep your work area well lighted.
• Unplug electrical appliances before vacuuming them.
SAVE THESE INSTRUCTIONS
2
CONSEILS DE SÉCURITÉ
Lors de l’utilisation d’un appareil électrique, quelques précautions élémentaires doivent être observées, incluant les suivantes:
LISEZ TOUTES LES INSTRUCTIONS AVANT D’UTILISER VOTRE ASPIRATEUR.
AVERTISSEMENT
Pour réduire le risque de feu, de choc électrique, ou de blessure:
• Ne pas utiliser à l’extérieur ou sur des surfaces mouillées.
• Fermez le commutateur et débranchez l’appareil lorsque vous ne l’utilisez pas ou avant le nettoyage ou l’entretien.
• Ne permettez pas qu’il soit utilisé comme jouet. Une attention particulière est nécessaire lorsque utilisé par ou prés d’un
enfant.
• Suivez les recommandations d’utilisation de ce manuel. Utilisez uniquement les accessoires recommandés par le fabriquant.
• Ne pas utiliser si le cordon ou la fiche sont endommagés. Si l’aspirateur ne fonctionne pas comme il le devrait, s’il a été
échappé, s’il est endommagé, s’il a été laissé à l’extérieur ou échappé dans l’eau, retournez-le à un centre de service
avant d’utiliser.
• Ne pas le tirer ou le transporter par le cordon, ne pas utiliser le cordon en guise de poignée. Ne pas fermer une porte sur
le cordon ou tirer le cordon sur des coins ou bordures pointus. Ne pas circuler sur le cordon avec l’aspirateur. Tenir le
cordon à distance des surfaces chauffantes.
• Ne pas utiliser des rallonges ou des prises qui n’ont pas de capacité suffisante pour transporter le courant.
• Fermer tous les contrôles avant de débrancher.
• Ne pas débrancher en tirant sur le cordon. Pour débrancher, tenez la fiche et non le cordon.
• Ne pas manipuler la fiche ou l’aspirateur avec les mains mouillées.
• Ne pas rien insérer dans les ouvertures. Ne pas utiliser si des ouvertures sont bloquées; assurez-vous qu’elles soient
dégagées de poussière, mousse, cheveux ou toute autre chose qui pourrait réduire le passage de l’air.
• Cet aspirateur créé de la succion et contient un rouleau-brosse tournant. Tenir les parties mobiles et les ouvertures loin
des cheveux, du linge, des doigts et de toute partie du corps.
• Ne pas mettre l’aspirateur sur les meubles ou sur les escaliers car le rouleau-brosse peut faire des dommages. Placer
l’aspirateur sur le plancher avec le manche en entreposage position temps que les accessoires sont en usage.
• Ne pas ramasser des objets qui brûlent ou fument comme les cigarettes, allumettes ou cendres chaudes.
• N’utilisez pas sans le sac de poussière en place.
• Les poulies du courroie peuvent devenir chaudes pendant l’utilisation normale. Pour prévenir des brûlures, évitez de
touché la poulie du courroie lorsque vous réparez la courroie.
• Portez une attention particulière lorsque vous nettoyez les escaliers.
• Ne pas utiliser pour ramasser des liquides inflammables ou combustibles comme de l’essence: Ne pas utiliser dans les
endroits où ces liquides pourraient être présents.
• Entreposez votre aspirateur à l’intérieur dans un endroit propre et sec.
• Maintenez un bon éclairage à l’endroit où vous travaillez.
• Débrancher les appareils électrique avant de les balayer.
CONSERVEZ CES INSTRUCTIONS
3
To reduce the risk of electric shock, this appliance has a polarized plug (one blade wider than the other). This plug will fit
in a polarized outlet only one way. If the plug does not fit fully in the outlet, reverse the plug. If it still does not fit, contact a
qualified electrician to install the proper outlet. Do not change the plug in any way.
Afin de réduire le risque de choc électrique, cet appareil est muni d’une fiche polarisée (une des lames est plus large).
Cette fiche ne peut être insérée dans une prise polarisée que d’une seule façon. Si la fiche ne peut être insérée dans la prise,
retourner la fiche. Si la fiche ne peut toujours pas être insérée dans la prise, faire installer une prise adéquate par un
électricien qualifié. Ne pas modifier la fiche.
GENERAL INFORMATION
The cleaner is designed to pick up dirt and dust particles. Avoid picking up hard or sharp objects with the cleaner to prevent
hose clogs and possible motor damage.
Service Information
The instructions in this booklet serve as a guide to routine maintenance. For additional service information telephone our toll
free number for the nearest Eureka Authorized Warranty Station. You should know the model, type and serial numbers
when you call:
USA: 1-800-282-2886
Mexico: 5670-6169
Canada: 1-800-282-2886
If you prefer, you can write to The Eureka Company, Service Division, 807 North Main Street, Bloomington, Illinois 61701,
USA. In Canada write to The Eureka Company, 866 Langs Drive, Cambridge, Ontario N3H 2N7. Refer to The Eureka Limited
Warranty for complete service information.
DO NOT OIL the motor or the brush roll at any time. The bearings are permanently lubricated and sealed.
Rating Plate
The model, type, and serial numbers are indicated on the
rating plate located on the back of the cleaner. For prompt
and complete service information, always refer to these
numbers when inquiring about service.
MODEL
VOLTS
TYPE
SERIAL NO.
AMPS.
HERTZ
SERVICE INFORMATION: 1-800-282-2886
Model & Type__________________________
THE EUREKA COMPANY
Serial No. _____________________________
BLOOMINGTON, ILLINOIS 61701
Thermal Cut Off
This vacuum cleaner has a special thermostat that protects the cleaner in case of motor overheating. If the cleaner suddenly
shuts off, push power switch off and unplug the cleaner. Check the cleaner for a possible source of overheating such as a full
cyclonic cassette, a blocked hose or clogged filter. If these conditions are found, fix them and wait at least 30 minutes before
attempting to use the cleaner. After the 30 minute period, plug the cleaner back in and turn on the switch. If the cleaner still
does not run, then take it to a Eureka Authorized Service Center for repair.
4
HOW TO ASSEMBLE
CAUTION: Moving parts, make sure on/off switch is in off position before plugging in.
CAUTION: Assemble the cleaner before using.
NOTE: Features may vary by model yet all parts assemble the same.
Step B Attach Hose
Step A Attach Handle
CAUTION: Do not catch cord under handle.
2
Tab
3
Ledge
1
Groove
1
Groove
2
Electrical
Cord
3
1. From rear of cleaner, align handle with groove and slide
onto cleaner. If necessary, use thumb and finger
pressure to slide handle into position.
2. Once handle is in place, check that the electrical cord
is not pinched between the unit and the handle. Push
excess cord back into the hole provided in the back of
the handle.
3. Attach handle with two 5/8 inch screws in the assembly
packet. Use a Phillips® head screwdriver.
1. Install the hose. Locate the tab on the hose adapter
(shortest end).
2. Look at the opening on the top of the cleaner and locate
the ledge. The tab on the hose adapter will be under
the ledge in the opening when hose is installed properly.
3. Push hose adapter into opening and rotate until tab is
under ledge. If installed properly, the hose cannot be
lifted out of the hose opening.
5
Step C Check Cyclonic Cassette
Step D Store Hose and Accessories
Dusting
Brush
Upholstery
Tool
Crevice
Tool
Carrying
Handle
Make sure that the cyclonic cassette is fully seated in the
vacuum. Place thumbs on cyclonic cassette (marked by
arrows above) and push firmly.
NOTE: Do not lift cleaner by cassette handle, use
carrying handle on the back of cleaner. See
illustration in Step D.
Telescoping
Wand
Hose
Retainer
Step E Store Electrical Cord
1
Cord
Hook
1. Wind the cord around the two cord hooks on the left
side of cleaner. Turn the upper cord hook down to release
the cord. Turn the hook up to store the cord.
2. Secure the plug to the cord to prevent unwinding.
1
Cord
Hook
6
Motor Filter
Check the motor filter each time you empty the
cyclonic cassette. Clean or replace as needed.
To Clean Motor Filter
1. Remove cyclonic cassette from unit.
4
Filter Retainer
2. Remove filter from inside compartment, lower
left side.
Back
Ledge
3. Shake filter or vacuum with another cleaner
to remove excess dust.
4. Reinstall filter. Slide under back ledge and
filter retainer. Install with colored/smooth side
down.
y
,
z
{|{,yz|
4
2 and 4
HEPA Filter
Check the HEPA filter frequently. Replace twice a year or
as needed.
Latch
To remove HEPA Filter
1. Push down latch and pull HEPA filter back.
2. Then lift filter up and remove.
To replace HEPA Filter
1. Place bottom tabs of filter into slots.
2. Rotate filter toward cleaner.
3. Push upward on the latch to secure into place.
A Note on Filters
Obtain replacement filters from a local dealer or order
them from The Eureka Company, Bloomington, IL.
14
When vacuuming carpet fresheners or cleaners, powder,
plaster dust, or similar fine substances, the cyclonic
cassette and filters may require more frequent
maintenance.
How To Use Accessories
Crevice tool cleans corners, baseboards, between
NOTE: Do not place cleaner on furniture or steps as
the brush roll may cause damage. Place
cleaner on floor with the handle in storage
position while using accessories.
cushions, sliding door tracks.
.
1. Remove hose from rear of cleaner.
2. Place desired accessory onto end of hose or wand.
Dusting brush is for furniture, blinds, books, lamp shades,
shelves.
.
Upholstery nozzle is for curtains, draperies, cushions,
fabrics.
.
Telescoping wand
To use the telescoping wand, push button and pull out wand
until you have the desired length. Release button.
Button
8
How to Maintain
The instructions in this booklet serve as a guide to routine maintenance. To avoid unnecessary service calls, check the
cyclonic cassette, belt, and brush roll often.
How To Empty Cyclonic Cassette
NOTE: Turn off the switch and unplug the electrical cord before emptying cyclonic cassette. Never operate the
vacuum cleaner without the cyclonic cassette or the filter.
Emptying the Cyclonic Cassette:
It is clearly visible when the dust compartment is full and needs emptying. Lift
screen as shown (3) to completely empty cyclonic cassette. It is possible to clean
out the cyclonic cassette by using another vacuum.
3
CAUTION: The cyclonic cassette can be washed in warm water, if desired, but
strong detergents should not be used. Dry thoroughly before using
again.
NOTE: The compartment with the screen (a) will fill much faster with larger
dirt particles than the compartment with the cone (b). This is normal,
empty the cyclonic cassette when the side with the screen is full, do
not wait for the side with the cone to fill completely.
a
b
An over full cyclonic cassette will allow dirt to pass directly into the
micron filter. Empty cyclonic cassette often.
To Change Cassette Micron Filter:
NOTE: Turn off the switch and unplug the electrical cord before changing the Cassette Micron Filter. Never operate
the vacuum cleaner without the cyclonic cassette or the filter.
2
Remove cyclonic cassette by pushing up lever (1), unhooking (2) by swinging
outward from vacuum body. When replacing cyclonic cassette, hook at top
where shown (2), and swing back into place until lever (1) snaps into place.
|
To change the Cassette Micron Filter:
|
|
||
|
Check and clean the Cassette Micron Filter once a month to maintain
good performance. The filter can be cleaned by vacuuming with another
cleaner or brushing dust off into the trash. Recommended changing of
the Cassette Micron Filter is once every three months.
1
1. Remove the filter frame by grasping the handle on the back of the filter
frame and pulling firmly. The filter frame will drop down staying connected
at the hinges on the bottom.
2. Remove old filter from filter frame and replace with a new filter.
3. Reconnect filter frame to cassette body by swinging filter frame up and
pushing against cassette body until it snaps into place.
2
1
1. Filter Frame
2. Filter
Use GENUINE EUREKA replacement
filter, 28115A. Look for the GENUINE
EUREKA product symbol.
3. Cassette Body
3
9
HOW TO MAINTAIN (continued)
Brush Roll
The brush roll turns as it sweeps and combs the carpet nap. Remove hair and threads from the brush roll so it continues
brushing the carpet. To maintain the most efficient cleaning, the bristles must touch the carpet. To test the bristle length,
hold a ruler against the underneath side of the cleaner. If the bristles no longer touch the ruler, replace the brush roll.
Brush Roll Belt
The brush roll belt turns the brush roll to agitate, sweep, and comb the carpet nap. Check the belt regularly to be sure it is
in good condition. Replace the belt if it stretches, cracks or loses tension. Cut away any hair or threads wound around the
brush roll or the belt pulley because the buildup could cause the belt to rotate unevenly.
How To Replace Brush Roll Belt
NOTE: Turn off the switch and unplug the electrical cord before replacing belt. Belt pulleys can become hot
during normal use. To prevent injury, avoid touching the motor pulley when checking the belt.
4
Motor
Pulley
Belt
2
1
2
Brush
Roll
3
1. Lower handle to floor to change belt.
3. Lift left end of brush roll.
2. Loosen the two fasteners located on the top of the
hood and lift upward. These fasteners need only a
quarter turn to lock or unlock the hood.
4. Remove and discard belt.
10
How To Replace Brush Roll Belt (continued)
5
8
5. Place new belt around motor pulley.
8. Pull right side of brush roll to stretch belt. Secure right
end cap into base.
7
6
9
Left side view
9. Rotate brush roll to seat belt.
6. Place belt around brush roll.
7. Align left end cap with square in base. Push end cap
into place; see left side view.
10. Replace the hood. Make sure hood front is behind
furniture guard. Hood should seat onto self-locating
fastener tabs.
11. Turn fasteners 1/4 turn to lock.
Use GENUINE EUREKA replacement belt, 54312.
Look for the
product symbol.
11
How to Check and Clear Hose Blockages
Low suction or poor pickup may be due to a blockage in the vacuum cleaner.
1. Remove hose and check suction at end of hose - if little or
no suction, check cyclonic cassette. Empty if needed. If no
improvement proceed to Step 2.
NOTE: Turn off the switch and unplug the electrical cord
before clearing hose.
2. Remove hose adapter from opening, twist hose adapter
clockwise and lift upward.
Once the hose is removed from the cleaner check for any
obstructions that may be in the hose. Any obstructions can
be removed by using a blunt instrument to clear the hose.
Flexing the hose may help loosen the clog.
1
3. Reinstall the hose after clearing the clog. Make sure the
hose is inserted into the top of the vacuum cleaner.
NOTE: If no improvement in performance on carpet, proceed
to following page.
1. Remove hose and check suction at end of
hose.
Hose Adapter
3
2
2. Remove hose adapter by twisting clockwise and lifting
upward. Check hose for blockages.
3. Reinstall the hose.
12
How to Check and Clear Blockages in Base
1. Remove the attachment hose from the lower hose
retainer and look into the hose retainer for any
obstructions. Proceed to Step 2 to check for any other
blockages.
2. Remove the hood by loosening the two fasteners
located on the top of the hood and lifting upward.
These fasteners need only a quarter turn to lock or
unlock the hood. (See padlock graphics on the hood.)
Upright Position
Operating Position
Handle
Release
Lowest Position
for cleaning
under furniture
3. Step on the handle release and lower the handle all
the way to the floor.
4. Check for blockages in the brush roll area and remove
any obstructions found there. The base hose can be
cleared of any blockage by using a blunt instrument.
5. After the blockage is removed, replace the hood and
tighten the two hood screws (see Figure 2). Raise the
handle to the upright position (see Figure 3) and replace
the hose into the lower hose retainer.
13
Motor Filter
Check the motor filter each time you empty the
cyclonic cassette. Clean or replace as needed.
To Clean Motor Filter
1. Remove cyclonic cassette from unit.
4
Filter Retainer
2. Remove filter from inside compartment, lower
left side.
Back
Ledge
3. Shake filter or vacuum with another cleaner
to remove excess dust.
4. Reinstall filter. Slide under back ledge and
filter retainer. Install with colored/smooth side
down.
y
,
z
{|{,yz|
4
2 and 4
HEPA Filter
Check the HEPA filter frequently. Replace twice a year or
as needed.
Latch
To remove HEPA Filter
1. Push down latch and pull HEPA filter back.
2. Then lift filter up and remove.
To replace HEPA Filter
1. Place bottom tabs of filter into slots.
2. Rotate filter toward cleaner.
3. Push upward on the latch to secure into place.
A Note on Filters
Obtain replacement filters from a local dealer or order
them from The Eureka Company, Bloomington, IL.
14
When vacuuming carpet fresheners or cleaners, powder,
plaster dust, or similar fine substances, the cyclonic
cassette and filters may require more frequent
maintenance.
How To Change Light Bulb (only for models with a headlight)
NOTE: Turn off the power switch and
disconnect the electrical cord
before changing light bulb.
1. Remove two screws from lens cover.
1
2. Pull lens cover from cleaner.
3. Support socket with one hand and push light bulb into
socket; turn to release.
4. Place new light bulb into socket; turn to secure.
5. Push light bulb and socket back so bulb will not touch
lens cover.
6. Replace lens cover.
4
7. Secure with two screws.
2
5
3
Use 15 watt replacement light bulb, part
number 48815.
15
PROBLEM SOLVING
NOTE: Turn off the switch and unplug the electrical cord before servicing.
PROBLEM
CAUSE
SOLUTION
Motor will not start.
3 Electric Plug
Push plug securely into outlet.
Try another outlet.
Check circuit breaker.
Motor suddenly stops.
3 Thermal Cut Off
Refer to page 7.
Does not clean the carpet
or floor.
3 Filters
Clean or replace the filter(s). Hint: If picking up fine
dust, the cyclonic cassette may not look full but a fine
substance tends to reduce suction when it blocks the
airflow through the filter(s).
Be sure hose adapter inserts into cyclonic cassette.
Be sure the cyclonic cassette is properly seated into
the cassette body. See page 6.
Empty cyclonic cassette. Note: There are two
chambers in the cyclonic cassette. The chamber with
the screen will fill much faster than the chamber with
the cone. This is normal. When the chamber with the
screen is full, empty cyclonic cassette. Do not wait till
the chamber with the cone is full. See page 9.
Replace a cut, loose or out of shape belt.
Snap the belt cover inside the hood if it comes loose.
Clean hair and thread from bristles and end cap area.
Replace brush roll if bristles are worn.
Remove any clogs from the hose that restrict the
airflow. Check short hose in the base and long hose.
Refer to page 12 & 13.
3 Cyclonic Cassette
3 Belt
3 Belt Cover
3 Brush Roll
3 Hose
No suction at the end of
the hose.
3 Hose Adapter
3 Filter(s)
3 Hose
Hose adapter has to seat inside the cyclonic cassette.
Clean or replace the filter(s). Hint: If picking up fine
dust, the cyclonic cassette may not look full, but a fine
substance tends to reduce suction when it blocks the
airflow through the cyclonic cassette and filter(s).
Remove any clogs from the hose that restrict the
airflow. Check short hose in the base and long hose.
Refer to page 12 & 13.
Headlight not working.
3 Light Bulb
Replace light bulb. Refer to page 15.
Noise from the brush roll
area.
3 Brush Roll
Remove hood and clean debris or items from the
brush roll area.
Replace a cut, loose or out of shape belt.
3 Belt
Cleaner is hard to push.
3 Cleaner Height
Setting
3 Belt
Cleaner height knob will
not turn.
16
3 Cleaner Height
Setting
Put handle in operating position. Tilt the cleaner back
to raise the front wheels off floor. Then turn the knob
to a higher setting.
Replace a cut, loose or out of shape belt.
Hint: Put handle in operating position. Tilt the
cleaner back to raise the front wheels off floor.
Then turn the knob.
VACUUM CLEANERS
2/01
The Eureka Company
P.O. Box 2799
Bloomington, IL 61702-2799
ORDER FORM
(Not applicable in Canada)
Name
S
O
L
D
Name
Address (street address needed for UPS)
City
T
O
Telephone
(Day)
State
Zip
(Eve)
(Fax)
S
H
I
P
Address (street address needed for UPS)
T
O
Telephone
City
(Day)
IMPORTANT:
Be sure to include
your model, type,
and serial numbers.
These numbers
may be found on
the rating plate.
State
Zip
(Eve)
(Fax)
Part No.
Qty.
Price (USD)
Total
Genuine Eureka Belts and Filters
Belts (style U) - Extended Life, package of 2
61120
2.99
Motor Filter, package of 2
61333
1.99
60285B
19.99
Cyclonic Cassette Micron Filters, package of 2
60696
3.99
Pet Stain & Odor Remover
60933
3.99
Stain Remover for Carpet & Upholstery
60914
3.99
60424
23.39
Dusting Brush
60290-1
5.59
Upholstery Nozzle
38284-3
3.29
26708-119N
2.69
Deluxe Floor & Wall Brush
54779
11.99
Micro Tool Set for Keyboards
54002
12.99
61040-1
17.39
Headlight
48815
1.69
Brush Roll
60909-2
16.29
Dirt Cup Assembly
60706-1
25.59
Model Number:
HEPA Filter
Type:
Serial Number:
To Order
By Phone
1-800438-7352*
Accessories/Tools
Telescopic Wand
#
HOURS:
Call between 8 a.m.
and 4:45 p.m.,
central standard time
Monday through Friday.
By FAX
1-309823-5789
Crevice Tool
To Answer Problems
or Questions for U.S.A.
and Canada call:
1-800282-2886*
7 a.m. to 8 p.m.
central standard time
Monday through Saturday.
*En Mexico llame al
5670-6169
Hose Assembly
Miscellaneous Parts
By Mail
Simply fill out
this Order Form.
Please be sure to
include day
and evening
phone numbers.
Total (prices subject to change without notice)
Tax (add state tax & local taxes as required by law)
www.eureka.com
Postage & Handling Charge (within U.S.A.)
Method of payment (no C.O.D. orders)
Check or money order (payable to The Eureka Company). Do not send currency.
Charge to my
Visa (13/15 digits)
MasterCard (13 digits)
Amer. Express (15 digits)
5.50
TOTAL
TOTAL ENCLOSED
Acct. number
Expiration Date
Signature (full name as shown on acct.)
70484
© 2001 White Consolidated Industries, Inc.
Printed in U.S.A.
THE EUREKA LIMITED WARRANTY
What This Warranty Covers
Your Eureka cleaner is warranted to be free from all defects in material and workmanship in normal household use for a period of two years. The warranty is granted only to the
original purchaser and members of his or her immediate household. The warranty is subject to the following provisions.
What This Warranty Does Not Cover
• Parts of the cleaner that require replacement under normal use, such as disposable dust bags, filters, drive belts, light bulbs, and brush roll bristles.
• Damages or malfunctions caused by negligence, abuse, or use not in accordance with the Owner’s Guide.
• Defects or damages caused by unauthorized service or the use of other than Genuine Eureka parts.
What The Eureka Company Will Do
The Eureka Company will, at its option, repair or replace a defective cleaner or cleaner part that is covered by this warranty. As a matter of warranty policy, the Eureka Company
will not refund the consumer’s purchase price.
Warranty Registration
Please fill out and return the warranty registration card accompanying your cleaner.
Obtaining Warranty Service
To obtain warranty service you must return the defective cleaner or cleaner part along with proof of purchase to any Eureka Authorized Warranty Station.
You will find the nearest location in the Yellow Pages, under “Vacuum Cleaners–Service and Repair.” Be certain that the Warranty Station is “Eureka Authorized.”
For the location of the nearest Eureka Authorized Warranty Station or for service information, telephone toll free:
USA: 1-800-282-2886
Mexico: 5670-6169
Canada: 1-800-282-2886
If you prefer, you can write to The Eureka Company, Service Division, 807 North Main Street, Bloomington, Illinois 61701, USA. In Canada write to The Eureka Company, 866
Langs Drive, Cambridge, Ontario N3H 2N7.
If it is necessary to ship the cleaner outside your community to obtain warranty repair, you must pay the shipping charges to the Eureka Authorized Warranty Station.
Return shipping charges will be paid by the Warranty Station. When returning parts for repair, please include the model, type, and serial number from the data plate on the cleaner.
Further Limitations and Exclusions
Any warranty that may be implied in connection with your purchase or use of the cleaner, including any warranty of Merchantability or any warranty for Fitness For A Particular
Purpose is limited to the duration of this warranty. Some states do not allow limitations on how long an implied warranty lasts, so the above limitations may not apply to you.
Your relief for the breach of this warranty is limited to the relief expressly provided above. In no event shall Eureka be liable for any consequential or incidental damages you
may incur in connection with your purchase or use of the cleaner. Some states do not allow the exclusion or limitation of incidental or consequential damages, so the above
limitation or exclusion may not apply to you.
This warranty gives you specific legal rights. You may also have other rights which vary by state.
GENUINE
EUREKA PRODUCT
Questions & Answers about Genuine Eureka Products
Q: Why should I use only Genuine Eureka paper bags, belts, and parts in my Eureka vacuum cleaner?
A: Using Genuine Eureka Products, which are made to our exacting specifications and engineered with emphasis on quality, performance, and customer satisfaction,
ensures the long life and cleaning efficiency of your vacuum cleaner. Overall, this saves you money and helps to keep your home clean.
Q: How can I be sure I am using only genuine Eureka products in my vacuum cleaner?
A: Typically, packaged products and paper bags can be identified by a “Genuine Eureka Product” symbol (see illustration above). For further identification assistance,
you may call our toll-free number, 1-800-282-2886, for the location of a nearby Eureka Authorized Warranty Station.
Q: Are there any differences between “made to fit” or “imitation” and Genuine Eureka paper bags, belts, and parts?
A: Yes, there are some very important differences in materials, quality, and reliability. Many customers have mistakenly purchased “imitation” paper bags and parts
while thinking they purchased genuine. Unfortunately, many of these customers discovered the differences after they experienced related difficulties.
For Genuine Eureka Value, Accept No Imitations!
THE EUREKA COMPANY
Bloomington, Illinois 61701
Household Warranty
abs 190
19
Assembly Items in This Carton
1 hardware
package (2 screws)
1 crevice tool
1 telescoping wand
1 dusting brush
1 cleaner connected
to handle by cord
1 hose adapter w/hose
1 upholstery brush
Thank you for selecting a Eureka cleaner.
Don’t Forget to Use
Genuine Eureka
Filters and Belts
Part No. 70483A (2/01)
©1999 White Consolidated Industries, Inc.
Printed in U.S.A.