1
CF300
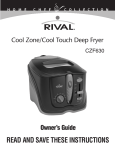
Deep Fryer
Owner’s Guide
READ AND SAVE THESE INSTRUCTIONS
IMPORTANT SAFEGUARDS
When using electrical appliances, basic safety precautions should always
be followed, including the following:
1. Read all instructions before using.
2. Do not touch hot surfaces. use handles or knobs.
3. To protect against electric shock, do not immerse unit, cord or plugs
in water or other liquid.
4. Close supervision is necessary when any appliance is used near children. This appliance is not to be used by children.
5. Unplug from outlet when not in use and before cleaning. Allow to
cool before putting on or taking off parts, and before cleaning the
appliance.
6. Do not operate any appliance with a damaged cord or plug or after
the appliance malfunctions, or has been damaged in any manner.
Return appliance to Rival® (see warranty) for examination, repair, or
adjustment.
7. The use of accessory attachments not recommended by Rival® may
cause injuries.
8. Do not use outdoors.
9. Do not let cord hang over the edge of table or counter, or touch hot
surfaces.
10. Do not place on or near a hot gas or electric burner, or in a heated
oven.
11. Extreme caution must be used when moving fryer containing hot oil.
12. Always attach plug to appliance first, then plug cord in the wall outlet. To disconnect, turn control to “OFF,” then remove plug
from wall outlet.
13. Do not use appliance for other than intended use.
14. Be sure handles are properly assembled to basket and locked in place.
-2-
SAVE THESE INSTRUCTIONS
This appliance is for HOUSEHOLD USE ONLY. No user-serviceable parts inside.
Power Unit never needs lubrication. Do not attempt to service this product. A
short power supply cord is provided to reduce the risk resulting from becoming
entangled in or tripping over a longer cord. WARNING: Do not use an extension
cord.
POLARIZED PLUG
This appliance has a polarized plug (one blade is wider than the
other). As a safety feature, this plug will fit in a polarized outlet
only one way. If the plug does not fit fully in the outlet, reverse
the plug. If it still does not fit, contact a qualified electrician. Do not
attempt to defeat this safety feature.
Congratulations on the purchase of your New Rival Deep Fryer. This
Deep Fryer is equipped with Rival’s exclusive SureRELEASE™ Power Cord
System, which includes a detachable magnetic cord designed to separate from the unit when certain amounts of force are applied (See details
on pg. 4 for instructions on the proper usage of the SureRELEASE™
magnetic cord.)
NOTE: This cord meets revised Underwriter’s Laboratories (UL) Standard
1083 requirements effective May 30, 2001.
-3-
KNOW YOUR DEEP FRYER
On
Off
5
10
15
20
30 25
removable lid
view window
removable filter cover
washable grease filter
charcoal odor filter
frying basket
plastic exterior
side carrying handles
removable oil reservoir / bowl
lid release button
handle lock release
30-minute rotary timer
with signal bell
handle
adjustable thermostat/
power switch
power light
ready light
On
Off
5
10
15
20
30 25
PREPARING YOUR FRYER FOR USE
Make sure fryer is unplugged. Wash the FRYING BASKET in hot soapy water and
wipe dry thoroughly. Wipe the interior, exterior surfaces and LID with a damp
soapy cloth. Towel dry thoroughly. Your fryer is now ready to use.
CAUTION: Do not immerse fryer, cord, or plugs in water.
CAUTION: Please remove plastic from fryer basket before using.
-4-
HOW TO USE YOUR DEEP FRYER
NOTE: Never turn on the fryer with an empty OIL RESERVOIR. Always
use your fryer on a flat, heat resistant surface.
1. Attach magnetic
end of
SureRELEASE™ cord assembly
directly to the fryer socket
(See figure A). This
should be done prior to
plugging the cord into
the wall outlet. The
magnetic end of the cord
is designed to only go on
one way. Be sure the side
stating "THIS SIDE UP" is
Figure A
facing up.
2. Unlock LID by depressing
LID RELEASE BUTTON.
3. To remove FRYING BASKET, pull HANDLE up until it clicks into
horizontal position (Fig. 1). Pour approximately 8 cups cooking oil into
OIL CONTAINER, making sure oil level is filled to the ”MAX” mark as
indicated.
4. Smear a little oil on the
inside of the VIEWING
WINDOW. This prevents
condensation, which
impedes the view.
5. Place FRYING BASKET into
fryer and lower into oil. To
unlock HANDLE, slide
HANDLE LOCK RELEASE
Figure 2
towards you and fold
HANDLE back towards
Figure 1
fryer exterior (Fig. 2).
Close LID.
On
Off
5
10
15
20
30 25
On
Off
5
10
15
20
30 25
CAUTION: Keep the handle in the locked position while removing food.
-5-
HOW TO USE YOUR DEEP FRYER (CONTINUED)
6. Make sure that fryer is off and insert plug into 120 volt AC outlet. To
turn fryer on, slide ADJUSTABLE THERMOSTAT to the desired temperature. The READY LIGHT will come on when the set temperature is
reached.
7. Raise FRYING BASKET, then open LID.
8. Place food to be cooked in FRYING BASKET, close LID and lower
handle.
CAUTION: Remove any excess ice crystals on frozen foods before placing
in basket.
9. Cook according to the Frying Chart or your favorite recipe. Turn the
ROTARY TIMER to the desired cooking time. The SIGNAL BELL will
sound when the selected cooking time has elapsed.
NOTE: This timer will not shut the unit off.
10.Raise FRYING BASKET and open LID. To remove excess grease and
retain crispness, let food drain in FRYING BASKET, then lift FRYING
BASKET by HANDLE and pour contents onto plate covered with paper
towels before serving.
WARNING: DO NOT USE THE SureRELEASE™ POWER CORD SYSTEM TO
DISCONNECT THE FRYER. ALWAYS DISCONNECT PLUG FROM WALL
OUTLET FIRST TO DISCONNECT FRYER. Use only Model MDP-1 magnetic
cord set with this product. The use of any other magnetic cord set may cause
fire, electric shock, or injury.
CAUTION: The SureRELEASE™ power cord is only for accidental disconnection
and not to be removed during normal operation. If the cord becomes disconnected, the user should immediately unplug the cord set from the wall outlet,
then reconnect the magnetic cord to the socket.
-6-
HOW TO CLEAN YOUR FRYER
WARNING: ALWAYS TURN CONTROL TO “OFF” THEN DISCONNECT PLUG
FROM WALL OUTLET BEFORE DISCONNECTING SureRELEASE™ CORD.
CAUTION:
• Do not immerse cord sets in water or any liquid.
• Do not attempt to defeat the detachable
magnetic SureRELEASE™
cord system by trying to permanently attach cord set
to product.
• Do not stick pins or other sharp objects in holes on
magnetic cord set
• Do not use any type of steel wool to clean magnetic
contacts.
1. Unplug from outlet and allow unit to cool
Figure A
completely.
2. Remove SureRELEASE™ magnetic cord from the fryer socket.
3. Clean the outside of the fryer and LID with a damp cloth.
CAUTION: Do not use abrasive pads or alcohol.
4. Remove FRYING BASKET. Wash the FRYING BASKET in hot soapy water. Rinse
and towel dry carefully.
5. Store your fryer with the LID closed to preserve the oil.
6. When changing the oil, take the opportunity to clean the inside of the fryer.
Remove LID, pour out oil and discard properly.
7. The removable oil reservoir/bowl is immersible and dishwasher safe. To clean ,
first remove from unit by lifting bowl straight up out of the plastic exterior (See
figure A). Wipe the inside with paper towels to absorb excess grease. Wash the
inside of the bowl with hot soapy water and rinse or place in dishwasher.
Dry thoroughly.
On
Off
5
10
15
20
30 25
-7-
HOW TO CLEAN YOUR FRYER (CONTINUED)
8. To replace oil reservoir/bowl, be sure the chrome
guide post (between the 2 electric prongs) is aligned
properly with the center hole of the receptacle at the
rear of the unit (See figure B). The chrome guide post
should guide the electric prongs into the correct position. Firmly press on reservoir/bowl to ensure it is positioned properly. Lid should close tightly.
NOTE: If the unit does not heat up after plugging in,
try re-positioning the reservoir/bowl, ensuring the rim
Figure B
of bowl sits flat inside the exterior housing.
WARNING: Do not remove oil reservoir/bowl until the unit has cooled and
is unplugged.
CAUTION: Never immerse the plastic exterior of the fryer in water, or wash in
running water.
TO REMOVE AND REPLACE LID
• To remove lid, depress LID RELEASE BUTTON
and lift LID to a vertical position. Remove LID
by pulling firmly upwards. Reverse the
sequence to secure lid back into position. Be
On
Off
5
10
15
20
30 25
-8-
HOW TO CLEAN YOUR FRYER (CONTINUED)
sure to push down firmly on lid from the vertical position to secure back in
place. When replacing LID, the spring on LID must be inserted down in front
of the metal clip that is located on the fryer housing.
NOTE: Always remove LID before emptying the OIL RESERVOIR or cleaning.
CAUTION: Ensure that lid is in place and secure prior to operation of unit.
REPLACING AND CLEANING FILTERS
1. Open the FILTER COVER.
2. FOAM GREASE FILTER may be washed in hot soapy water. Allow to air dry.
3. Clean the inside of the cover with a damp soapy sponge. Rinse and dry
thoroughly.
4. Insert CHARCOAL ODOR FILTER on the bottom of LID, followed by clean
GREASE FILTER, then replace FILTER COVER.
NOTE: For replacement charcoal odor or grease filters, order through our
website at www.rivalproducts.com or by mailing a check for $7.99 plus $6.00
for shipping and handling (MA add 5% sales tax and TX add appropriate sales tax)
payable to:
Rival
P.O Box 769
Milford, MA 01757-0769
FRYING TIME AND TEMPERATURE
The frying times in this chart are a guide and should be adjusted to suit the different quantities or thickness of food and to suit your own taste.
FOOD
CHICKEN STRIPS
CHICKEN PIECES, BONE-IN
FISH, BATTERED
FRENCH FRIES, FROZEN
FRITTERS
ONION RINGS
SHRIMP, BREADED
TEMP. SETTING
TIME (MINUTES)
375° F
360° F
375° F
Follow directions on package
375° F
375° F
360° F
5 to 8
15 to 20
4 to 5
-9-
2 to 4
3 to 5
2 to 4
RECIPES
APPLE FRITTERS
3 cups all-purpose flour
2 teaspoons baking powder
1
⁄2 teaspoon salt
1 cup sugar
1 egg, lightly beaten
4 tablespoons cooking oil
1 teaspoon vanilla extract
juice of 1 orange (1⁄3 cup)
1 cup chopped apple
Preheat oil to 375° F. Combine flour, baking powder, salt and sugar; set aside.
Combine egg, cooking oil and vanilla. Combine dry and liquid ingredients and stir to
blend thoroughly. Add orange juice and apple and mix well. Drop from teaspoon into
hot oil. (Basket should already by lowered into oil.) Fry about 2 minutes or until crisp
and very brown. Remove from fat and drain. Dust with powdered sugar or a mixture
of granulated sugar and cinnamon; serve at once.
BEER BATTER FOR FISH OR CHICKEN
2 eggs (separated)
1 tablespoon oil or butter
1 teaspoon salt
⁄4 teaspoon ground black pepper
11⁄3 cup all-purpose flour
⁄4 cup flat beer
1
3
Preheat oil to 360° F. Beat egg yolks with oil/butter, salt and pepper. Alternately add
the beer and flour to mixture. Beat ingredients well and refrigerate for 3 to 12 hours.
When you are ready to use mixture, carefully fold in 2 stiffly beaten egg whites. Pat
fish or boneless chicken breasts. Coat lightly with flour then dip into beer batter. Place
fish in hot oil (basket should already by lowered) and fry for 3 minutes or until golden
brown. Fry chicken 5 to 8 minutes or until brown and fully cooked.
DEEP FRIED CHICKEN
1 fryer chicken (21⁄2-lbs.), cut up
11⁄2 cup all-purpose flour
1 teaspoon seasoned salt
⁄4 teaspoon salt
11⁄4 cup milk
1
Preheat oil to 360° F. Combine flour and seasonings. Dip chicken pieces in flour, then
milk, then flour again. Fry for 20 minutes or until golden brown and done.
-10-
CHICKEN KIEV
4 whole boneless, skinless chicken breasts
1 tablespoon chopped onion
1 tablespoon chopped parsley
11⁄2 teaspoon salt
1 stick butter or margarine
1
⁄2 cup flour
1 egg, beaten
1 cup fine, dry bread crumbs
Preheat oil to 360° F. Place chicken breasts between two pieces of plastic wrap. Pound
with wooden mallet to flatten to 1⁄4-inch thick. Remove plastic. Combine onion, parsley
and salt and sprinkle on chicken. Cut butter into 8 pieces. Place a piece of butter on
seasoned chicken toward one end. Roll as jelly roll, starting at end with butter, tucking
in sides of meat. Press to seal well. Secure with toothpicks. Dust with flour, dip in beaten egg, then roll in bread crumbs. Chill rolls of chicken thoroughly (at least one hour).
Place rolled chicken in a single layer in fry basket. Lower and cook 5 minutes or until
brown. To test for doneness, remove a piece of chicken from the oil. When fork can be
inserted with ease, chicken is done.
HUSH PUPPIES
13⁄4 cup cornmeal
1
⁄2 cup all purpose flour
3
⁄4 teaspoon baking soda
1
⁄2 teaspoon salt
1 teaspoon sugar
⁄2 teaspoon garlic salt
⁄2 cup chopped onion
1 cup buttermilk
1 egg
1
1
Preheat oil to 375° F. Sift together cornmeal, flour, baking soda, salt, sugar and garlic
salt. Add onions. Combine egg and buttermilk, then add to dry ingredients, stirring
until mixture is moist. Drop batter by teaspoonfuls into deep hot oil, (basket should
already be lowered) frying only a few at a time. Turn hush puppies once and cook
until golden brown. Remove and drain on paper towels.
QUICK DOUGHNUTS
refrigerated can of biscuits
2 tablespoons ground cinnamon
⁄2 cup sugar
1
Preheat oil to 375° F.
Take each biscuit and flatten slightly with palm of hand. With finger, punch holes in
center of each biscuit to shape into doughnuts. Fry 2 minutes, turning once. Remove
from fat and drain on paper towels. Roll doughnut in mixture of cinnamon and sugar.
Serve warm.
-11-
LIMITED ONE-YEAR WARRANTY
Rival® warrants this product to be free from defects in materials or workmanship for one (1) year from date of
original purchase. If you have a claim under this warranty please follow these procedures:
1) Within the first 45 days from date of original purchase, defective product should be returned to original
place of purchase for replacement (with proof-of-purchase).
2) Within the first 12 months from date of purchase Rival will repair or replace (at no charge) the defective
product if it is delivered freight prepaid during that period to an authorized service station. To obtain warranty
service visit:
www.rivalproducts.com
Or, you may write to Rival c/o The Holmes Group, attention: Customer Service Department, P.O. Box 769,
Milford, MA 01757. Proof of purchase is required when requesting warranty service - SAVE YOUR SALES
RECEIPT. This warranty is extended only to the original purchaser and does not apply to commercial use,
unreasonable use, or to damage to the product (not resulting from defect or malfunction) while in the
possession of the consumer. Rival disclaims all responsibility for consequential, incidental, or
commercial losses caused by the use of this product. Some states do not allow this exclusion or limitation
of incidental or consequential losses, so the foregoing disclaimer may not apply to you. This warranty gives
you specific legal rights, and you may also have other legal rights which vary from state to state.
©2001, Rival
A Division of The Holmes Group
Printed in China
CF300/428-0216