1
Part No. 217316-A Rev 00
March 2005
4655 Great America Parkway
Santa Clara, CA 95054
Release Notes for the
Passport 8600 Release 3.7.6
*217316-A Rev 00*
2
Copyright © Nortel Networks Limited 2005. All rights reserved.
The information in this document is subject to change without notice. The statements, configurations, technical data, and
recommendations in this document are believed to be accurate and reliable, but are presented without express or implied
warranty. Users must take full responsibility for their applications of any products specified in this document. The
information in this document is proprietary to Nortel Networks Inc.
The software described in this document is furnished under a license agreement and may be used only in accordance
with the terms of that license.
Trademarks
Nortel Networks, the Nortel Networks logo, the Globemark, Unified Networks, PASSPORT, and Alteon are trademarks
of Nortel Networks.
Microsoft, Windows, and Windows NT are trademarks of Microsoft Corporation.
Adobe and Acrobat Reader are trademarks of Adobe Systems Incorporated.
SSH is a registered trademark and SSH Secure Shell is a registered trademark of SSH Communications Security Corp
(www.ssh.com). The use of these trademarks is permitted to describe a product that conforms to the SSH standard and
protocol.
Cisco and Cisco Systems are trademarks of Cisco Technology, Inc.
The asterisk after a name denotes a trademarked item.
217316-A Rev 00
3
Contents
About this document . . . . . . . . . . . . . . . . . . . . . . . . . . . . . . . . . . . . . . . . . . . . 5
Text conventions . . . . . . . . . . . . . . . . . . . . . . . . . . . . . . . . . . . . . . . . . . . . . . . . . . . . . . . 5
Hard-copy technical manuals . . . . . . . . . . . . . . . . . . . . . . . . . . . . . . . . . . . . . . . . . . . . . 7
How to get help . . . . . . . . . . . . . . . . . . . . . . . . . . . . . . . . . . . . . . . . . . . . . . . . . . . . . . . 8
Release notes. . . . . . . . . . . . . . . . . . . . . . . . . . . . . . . . . . . . . . . . . . . . . . . . . . 9
Introduction . . . . . . . . . . . . . . . . . . . . . . . . . . . . . . . . . . . . . . . . . . . . . . . . . . . . . . . . . . 9
Non-supported software capabilities in Release 3.7.6 . . . . . . . . . . . . . . . . . . . . . . . . . 10
File names for this release . . . . . . . . . . . . . . . . . . . . . . . . . . . . . . . . . . . . . . . . . . . . . . 11
New hardware supported in Release 3.7.6 . . . . . . . . . . . . . . . . . . . . . . . . . . . . . . . . . 13
8660 SDM (FW1, FW2, FW4) overview . . . . . . . . . . . . . . . . . . . . . . . . . . . . . . . . 13
Supported software and hardware capabilities . . . . . . . . . . . . . . . . . . . . . . . . . . . . . . 14
SMLT-on-single-CP functionality . . . . . . . . . . . . . . . . . . . . . . . . . . . . . . . . . . . . . . 16
Supported standards, RFCs, and MIBs . . . . . . . . . . . . . . . . . . . . . . . . . . . . . . . . . . . . 17
Upgrading SNMP . . . . . . . . . . . . . . . . . . . . . . . . . . . . . . . . . . . . . . . . . . . . . . . . . . . . . 21
SNMP upgrade considerations . . . . . . . . . . . . . . . . . . . . . . . . . . . . . . . . . . . . . . . 21
Upgrading SNMP from Release 3.3 to Release 3.7 . . . . . . . . . . . . . . . . . . . . . . . 22
Upgrading SNMP from Release 3.5 to Release 3.7 . . . . . . . . . . . . . . . . . . . . . . . 23
Configuring SNMP traps . . . . . . . . . . . . . . . . . . . . . . . . . . . . . . . . . . . . . . . . . . . . . . . 25
Upgrading SDM Firewall iSD software . . . . . . . . . . . . . . . . . . . . . . . . . . . . . . . . . . . . . 27
Alteon Firewall software reinstall options . . . . . . . . . . . . . . . . . . . . . . . . . . . . . . . . 27
Password encryption . . . . . . . . . . . . . . . . . . . . . . . . . . . . . . . . . . . . . . . . . . . . . . . . . . 27
Extended CP Limit . . . . . . . . . . . . . . . . . . . . . . . . . . . . . . . . . . . . . . . . . . . . . . . . . . . . 28
Extended CP Limit Chassis Configuration . . . . . . . . . . . . . . . . . . . . . . . . . . . . . . . 29
Extended CP Limit Port Configuration . . . . . . . . . . . . . . . . . . . . . . . . . . . . . . . . . . 29
High Availability Layer 3 considerations . . . . . . . . . . . . . . . . . . . . . . . . . . . . . . . . . . . . 30
SMLT network design considerations . . . . . . . . . . . . . . . . . . . . . . . . . . . . . . . . . . . . . . 30
Bugs fixed in this release . . . . . . . . . . . . . . . . . . . . . . . . . . . . . . . . . . . . . . . . . . . . . . . 32
Known limitations and considerations in this release . . . . . . . . . . . . . . . . . . . . . . . . . . 32
SDM limitations . . . . . . . . . . . . . . . . . . . . . . . . . . . . . . . . . . . . . . . . . . . . . . . . . . . 33
Hardware and platform limitations (for Passport 3.7.x) . . . . . . . . . . . . . . . . . . . . . 40
Switch management
. . . . . . . . . . . . . . . . . . . . . . . . . . . . . . . . . . . . . . . . . . . . . . 42
Release Notes for the Passport 8600 Release 3.7.6
4
Bandwidth management . . . . . . . . . . . . . . . . . . . . . . . . . . . . . . . . . . . . . . . . . . . . 44
ATM . . . . . . . . . . . . . . . . . . . . . . . . . . . . . . . . . . . . . . . . . . . . . . . . . . . . . . . . . . . . 44
Layer 2 . . . . . . . . . . . . . . . . . . . . . . . . . . . . . . . . . . . . . . . . . . . . . . . . . . . . . . . . . . 45
Layer 3 . . . . . . . . . . . . . . . . . . . . . . . . . . . . . . . . . . . . . . . . . . . . . . . . . . . . . . . . . . 46
High Availability (HA) mode . . . . . . . . . . . . . . . . . . . . . . . . . . . . . . . . . . . . . . . . . . 47
Link Aggregation Group (MLT/IEEE 802.3ad) . . . . . . . . . . . . . . . . . . . . . . . . . . . . 48
RSMLT . . . . . . . . . . . . . . . . . . . . . . . . . . . . . . . . . . . . . . . . . . . . . . . . . . . . . . . . . . 50
IPX . . . . . . . . . . . . . . . . . . . . . . . . . . . . . . . . . . . . . . . . . . . . . . . . . . . . . . . . . . . . . 50
VRRP . . . . . . . . . . . . . . . . . . . . . . . . . . . . . . . . . . . . . . . . . . . . . . . . . . . . . . . . . . . 51
Multicast . . . . . . . . . . . . . . . . . . . . . . . . . . . . . . . . . . . . . . . . . . . . . . . . . . . . . . . . 51
Reading path . . . . . . . . . . . . . . . . . . . . . . . . . . . . . . . . . . . . . . . . . . . . . . . . . . . . . . . . 54
Related publications . . . . . . . . . . . . . . . . . . . . . . . . . . . . . . . . . . . . . . . . . . . . . . . 55
217316-A Rev 00
5
About this document
The Nortel Networks* Passport* 8000 Series switch is a flexible and
multifunctional switch that supports a wide range of network architectures and
protocols. These release notes provide procedures for setting up and starting the
Passport 8600 switch.
Text conventions
These release notes use the following text conventions:
angle brackets (< >)
Indicate that you choose the text to enter based on the
description inside the brackets. Do not type the brackets
when entering the command.
Example: If the command syntax is
ping <ip_address>, you enter
ping 192.32.10.12
bold Courier
text
Indicates command names and options and text that you
need to enter.
Example: Enter show ip {alerts|routes}.
braces ({})
Indicate required elements in syntax descriptions where
there is more than one option. You must choose only one
of the options. Do not type the braces when entering the
command.
Example: If the command syntax is
show ip {alerts|routes}, you must enter either
show ip alerts or show ip routes, but not both.
Release Notes for the Passport 8600 Release 3.7.6
6 Text conventions
brackets ([ ])
Indicate optional elements in syntax descriptions. Do not
type the brackets when entering the command.
Example: If the command syntax is
show ports info config [<ports>], you can
enter either:
show ports info config <ports> or
show ports info config.
ellipsis points (. . . )
Indicates that you repeat the last element of the
command as needed.
Example: If the command syntax is
ethernet/2/1 [<parameter> <value>]... ,
you enter ethernet/2/1 and as many
parameter-value pairs as needed.
italic text
Indicates new terms, book titles, and variables in
command syntax descriptions. Where a variable is two or
more words, the words are connected by a hyphen.
Example: If the command syntax is
config bootconfig master <cpu-slot>,
cpu-slot is one variable, and you substitute one
value for it.
plain Courier
text
Indicates command syntax and system output, for
example, prompts and system messages.
Example: 8600# show cli
separator ( > )
Shows menu paths.
Example: Edit > Chassis identifies the Chassis option on
the Edit menu.
vertical line ( | )
Separates choices for command keywords and
arguments. Enter only one of the choices. Do not type the
vertical line when entering the command.
Example: If the command syntax is
show ip {alerts | routes}, you enter either:
show ip alerts or show ip routes, but not both.
217316-A Rev 00
Hard-copy technical manuals
7
Hard-copy technical manuals
You can print selected technical manuals and release notes free, directly from the
Internet. Go to the www.nortel.com/support URL. Find the product for which you
need documentation. Then locate the specific category and model or version for
your hardware or software product. Use Adobe* Acrobat Reader* to open the
m0anuals and release notes, search for the sections you need, and print them on
most standard printers. Go to Adobe Systems at the www.adobe.com URL to
download a free copy of the Adobe Acrobat Reader.
Release Notes for the Passport 8600 Release 3.7.6
8 How to get help
How to get help
If you purchased a service contract for your Nortel Networks product from a
distributor or authorized reseller contact the technical support staff for that
distributor or reseller, for assistance.
If you purchased a Nortel Networks service program, contact Nortel Networks
Technical Support. To obtain contact information online, go to the
www.nortel.com/contactus URL, then click Technical Support.
Additional information about the Nortel Networks Technical Solutions Centers is
available from the www.nortel.com/callus URL.
An Express Routing Code (ERC) is available for many Nortel Networks products
and services. When you use an ERC, your call is routed to a technical support
person who specializes in supporting that product or service. To locate an ERC for
your product or service, go to the www.nortel.com/erc URL.
217316-A Rev 00
9
Release notes
Introduction
These release notes describe the hardware and software capabilities for the Nortel
Networks* 8600 Series Switch Software Release 3.7.6. Limitations for
Release 3.7.6 are integrated with the Firewall iSD limitations in this document.
Nortel Networks 8600 Series Switch Software Release 3.7.6 introduces a new
Hardware platform for the 8600 Series Switch named the Service Delivery
Module (SDM). The SDM is a new blade that fits in one of the I/O blade slots,
offering a new flexible architecture that will allow a variety of services to be
offered on any port of the 8600. The first application to be released on this SDM is
the Firewall application common to the Nortel Firewall products as well, allowing
an 8600 user to Firewall any of the ports on the 8600 Series Switch, useful in Data
Center environments, as well as when wanting to segment different parts of the
network from each other.
This document contains information about the following topics:
Topic
Page
File names for this release
11
New hardware supported in Release 3.7.6
13
Supported software and hardware capabilities
14
Supported standards, RFCs, and MIBs
17
Upgrading SNMP
21
Configuring SNMP traps
25
Upgrading SDM Firewall iSD software
27
Password encryption
27
Extended CP Limit
28
High Availability Layer 3 considerations
30
Release Notes for the Passport 8600 Release 3.7.6
10 Non-supported software capabilities in Release 3.7.6
Topic
Page
SMLT network design considerations
30
Bugs fixed in this release
32
Known limitations and considerations in this release
32
Reading path
54
For information on how to upgrade your switch, see Upgrading to Passport 8000
Series Switch Software Release 3.7.6 (318843-A).
For information on how to upgrade your version of Device Manager, see
Installing and Using Device Manager (320096-A).
For information on preparing the Passport 8600 series switch and firewall
modules for initial configuration, see Getting Started (320095-A).
A list of related publications can be found on page 54. The Passport 8600 Series
Switch Software Release 3.7.6 documentation suite can be found on the Nortel
Networks technical documentation Web site, www.nortel.com/support. For more
information, see “Reading path” on page 54.
The information in these release notes supersedes applicable information in other
documentation.
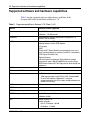
Non-supported software capabilities in Release 3.7.6
This section identifies software capabilities that are no longer supported in
Passport Release 3.7.6.
•
•
•
217316-A Rev 00
The SDM 8660 module is not supported in the Passport 8100 switch.
The Web Switching Module is not supported in the Passport 8100 switch, nor
in the 8100 module configurations.
Passport 8000 Series Software Release 3.7.X does not support configurations
of Passport 8100 modules and Passport 8600 modules simultaneously within
the same chassis.
File names for this release
11
File names for this release
Table 1 describes the Passport 8600 Series Switch Software Release 3.7.6
software files.
Table 1 Passport 8600 Series Switch Software Release 3.7.6 files (Sheet 1 of 2)
Module or file type
Description
File name
File size
(bytes)
Passport 8000 series switch files
Boot monitor image
CPU and switch fabric firmware for the p80b3760.img
Passport 8600 routing switch.
Run-time image
The Passport 8600 image.
747377
p80a3760.img
5740175
Run-time image for ATM Passport 8600 ATM Ethernet Code.
modules
p80t3760.dld
906024
Run-time image for POS Passport 8600 POS Ethernet Code.
modules
p80p3760.dld
701771
Run-time image for 8100 Passport 8100 image.
Ethernet modules
p80e3760.dld
263720
3DES
Encryption module for Passport 8600.
Required for Secure Shell (SSH).
p80c3760.img
49996
DES
Encryption module for Passport 8600.
Required for SNMPv3.
p80c3760.des
8581
MIB
MIB file for Passport 8600.
p80a3760.mib
2591047
SSL cluster upgrade
SSL Accelerator clustered
self-installing run-time image/upgrade
for Passport 8600 Release 3.7.6.
p80s3760.pkg
5988896
SSL boot monitor
SSL Accelerator module boot monitor
for Passport 8600 Release 3.7.6.
p80s3760.img
7528448
SSL upgrade
instructions
SSL Accelerator upgrade instructions
for Passport 8600 Release 3.7.6.
p80s3760.upgrade
1481
SSL installation
instructions
SSL Accelerator complete software
package for Passport 8600
Release 3.7.6.
p80s3760.install
2895
SSL diagnostics
SSL Accelerator diagnostics for
Passport 8600 Release 3.7.6.
p80s3760.diag
8661 SAM files
19460381
Release Notes for the Passport 8600 Release 3.7.6
12 File names for this release
Table 1 Passport 8600 Series Switch Software Release 3.7.6 files (Sheet 2 of 2)
Module or file type
Description
File name
File size
(bytes)
Web Switching Module (WSM) files
WebOS binary
WSM WebOS binary image.
wsm1003210_bin.img
1376256
WebOS firmware image
WSM WebOS firmware image.
wsm 1003210_mp.img
808668
WebOS boot image
WSM WebOS boot image.
wsm1003210_boot.img
43004
Device Manager v5.8.8.0 software
image for Windows NT, Windows 98,
and Windows 95.
jdm_5880.exe
117781559
Device Manager
Device Manager v5.8.8.0 software
software image for UNIX image for Solaris.
Device Manager v5.8.8.0 software
image for HP-UX.
jdm_5880_solaris_
sparc.sh
jdm_5880_hpux_pa_
risc.sh
139749286
Device Manager
Device Manager v5.8.8.0 software
software image for Linux image for Linux.
jdm_5880_linux.sh
142469030
SDM Firewall iSD
Software image
ASF5100_2.2.7.0_
SDM_R55.img
113851130
Device Manager files
Device Manager
software image for
Windows
217316-A Rev 00
SDM Firewall iSD v2.2.7.0 software
image for 8660.
164784038
New hardware supported in Release 3.7.6
13
New hardware supported in Release 3.7.6
Table 2 describes the new Service Delivery Module (SDM) hardware in this
release.
Table 2 New hardware in Release 3.7.6
New hardware
Module part
number
8660 SDM – FW1
DS1404104
The 8660 SDM is a combination of dedicated hardware
and software that addresses the needs for security,
performance, and ease of use.
8660 SDM – FW2
DS1404081
The 8660 SDM is a combination of dedicated hardware
and software that addresses the needs for security,
performance, and ease of use.
8660 SDM – FW4
DS1404080
The 8660 SDM is a combination of dedicated hardware
and software that addresses the needs for security,
performance, and ease of use.
8660 SDM spare disk drive
DS1411023
Field replaceable spare disk drive for Passport 8660
SDM. Pre-loaded with software.
8660 SDM spare PrPMC
DS1411024
Field replaceable spare PrPMC for Passport 8660
SDM.
Description
8660 SDM (FW1, FW2, FW4) overview
Each 8660 SDM is an 8-port Gig card from the 8600 backplane perspective. The
module has four slots (each with interfaces to two GIG Ethernet channels) for
standard PMC cards. The firewall application uses between one and four PrPMC
cards.
Note: The 8660 SDM is equivalent to an Intelligent Passport M-class
I/O module. You can install the SDM in a single slot of an 8003, 8006,
8010, or 8010co chassis without any modification.
Release Notes for the Passport 8600 Release 3.7.6
14 Supported software and hardware capabilities
Supported software and hardware capabilities
Table 3 lists the supported software and hardware capabilities of the
Passport 8600 Series Switch Software Release 3.7.6.
Table 3
Supported capabilities in Release 3.7.6 (Sheet 1 of 2)
Feature
Maximum number supported
Hardware records
Non E / E Modules: 25 000 records
M Modules : 125 000 records1
M Modules
Nortel Networks strongly recommends using 8691SFs or
8692SFs with M Modules
10GE
Release 3.7.6 does NOT support the combination of the
following features and the 10GE Module:
- IPX routing
- SMLT
- External MLT (Nortel Networks recommends that you use a
Layer 3 routing protocol for resiliency, like OSPF, associated to
ECMP, Equal Cost Multi Path)
- Egress Mirroring
Due to the internal architecture, Nortel Networks strongly
recommends using 2 8691SFs/8692SFs per system using a
10GE Module (internal MLT of 8 Gig ports) for load sharing and
redundancy.
VLANs
4094
IP subnet based VLANs
200
IP Interfaces
•
•
RIP Routes
2500
OSPF Areas per Switch
5
OSPF Adjacencies per switch
80
OSPF Routes per switch
Non E / E modules: 15 000
M Module: 20 000
BGP
Number of peers: 10
Number of routes:
• Non E / E Modules : 20 000
• M Modules : 119 000
217316-A Rev 00
500 (default)
1980 (requires order number DS1411015: Passport 8000
Chassis MAC Address Upgrade Kit. License for
reprogramming the chassis to a block of 4096 addresses for
routed VLAN scaling)
Supported software and hardware capabilities
Table 3
15
Supported capabilities in Release 3.7.6 (Sheet 2 of 2)
Feature
Maximum number supported
DVMRP Interfaces
500
DVMRP Routes
2500
PIM Interfaces
500
Multicast source subnet trees
500
Multicast (S,G) DVMRP
1980
Multicast (S,G) PIM
500
IPX Interfaces
100
IPX RIP
5000
IPX SAP
7500
VRRP Interfaces
255
Spanning Tree Groups
252
Aggregation Groups
- IEEE 802.3ad aggregation groups
- Multi Link Trunking group (MLT)
Passport 8600: 323
Redirection: 3
Ports per MLT
Note: all the ports MUST be of the same
type (no mix of technology will be
supported)
Passport 8600: up to 8
Permanent virtual circuits scaling (ATM)
Passport 8600: up to 500 permanent virtual circuits (PVCs) per
chassis.
•
•
•
•
256 RFC1483 bridged/routed ELANs per MDA
500 RFC1483 bridged/routed ELANs per switch (12 more
RFC1483 bridged ELANs per switch can be configured)
64 PVCs per RFC1483 bridged ELAN
1 PVC per RFC 1483 routed ELAN
1 The exact number is 125838. 2162 records are used by the system. With the record reservation feature, 8K records are
pre allocated (see the documentation for more information) for some specific types of traffic (for example, MAC and
ARP).
2 Nortel Networks supports only 25 STGs with Release 3.7.6. You can configure up to 64 (63 with the WSM Module)
STGs, but configurations including more than 25 STGs will not be supported. If you do need more than 25 STGs,
contact your Nortel Networks Sales Representative for more information about the support of this feature. With
Release 3.7.6 (8600) and 10.0 (WSM), the WSM Module supports the tagged BPDU from the 8600 only with the
default STG (STG ID 1).
3 The number of aggregation groups decreases when you install a WSM module into the chassis. Refer to the WSM
configuration manual for more information about how to connect through the backplane and the logical configuration
(VLAN/STGs).
Release Notes for the Passport 8600 Release 3.7.6
16 Supported software and hardware capabilities
SMLT-on-single-CP functionality
Release 3.7.6 provides Split MultiLink Trunking (SMLT) support of a switch that
has a single CPU/Switch Fabric 869x module installed. This enhancement, also
referred to as SMLT-on-single-CP functionality, is provided through a
combination of new Ethernet I/O module revisions and a new control plane
functionality. It requires that the switch contain specific hardware revision levels
of E or M series I/O modules; these modules are listed in Table 10.
To verify the BackHwVersion HW revision of I/O modules, use the Command
Line Interface (CLI) command show sys info card. Compare the revisions
against those in Table 4. You will need a revision number equal to or greater than
the ones in this table.
Table 4 Hardware revision requirements for SMLT on single CPU
Part No.
Revision
Description
DS140411
11
Passport 8616SXE Routing Switch Module. 16-port
1000BASE-SX Gigabit Ethernet
DS1404024
7
Passport 8632TXE Routing Switch Module. 32 10/100TX
plus 2 GBIC interface module
DS1404034
5
Passport 8616GTE Routing Switch Module. 16 port
1000BASE-T Gigabit Ethernet
DS1404035
7
Passport 8648TXE Routing Switch Module. 48 10BASE-T/
100BASE-TX Ethernet
DS1404037
7
Passport 8624FXE Routing Switch Module. 24 port
100BASE-FX Ethernet Layer 3
DS1404038
7
Passport 8608GBE Routing Switch Module. 8-port 1000
Base GBIC
DS1404044
7
Passport 8608GTE Routing Switch Module. 8 port
1000BASE-T Gigabit Ethernet
DS1404055
2
Passport 8632TXM Routing Switch Module. 32 10/100TX
plus 2 GBIC Expanded Memory
DS1404056
2
Passport 8648TXM Routing Switch Module. 48 port
10BASE-T/100BASE-TX Expanded memory
DS1404059
2
Passport 8608GBM Routing Switch Module. 8-port 1000
Base GBIC Expanded memory
DS1404061
2
Passport 8608GTM Routing Switch Module. 8 port
1000BASE-T Gigabit Ethernet Expanded memory
217316-A Rev 00
Supported standards, RFCs, and MIBs
17
Note: The Passport 8608SXE Routing Switch Module - 8 port
1000BASE-SX Gigabit Ethernet (part number DS1404036) is not
supported with this feature.
If the I/O modules you have are not of the required hardware revision level and
you want to use the new SMLT-on-single-CP functionality, you can order an
upgrade for your existing hardware using the part number A0537499.
(Q00854986, Q00815081-01) You can enable or disable the SMLT-on-single-CP
functionality by using the following CLI command:
config sys set smlt-on-single-cp <enable|disable>
[timer <value>]
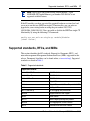
Supported standards, RFCs, and MIBs
This section identifies the 802 standards, Request for Comments (RFCs), and
network management Management Information Bases (MIBs) supported in this
release. Documents listed here can be found online, at www.ietf.org/. Supported
standards are listed in Table 5.
Table 5 Supported standards
Supported standards
802.3 CSMA/CD Ethernet
ISO/IEC 8802-3
802.3i 10BaseT
ISO/IEC 8802-3
802.3u 100BaseT
ISO/IEC 8802-3
802.3z
Gigabit Ethernet
802.3ab
Gigabit Ethernet 1000BaseT 4 pair Cat5 UTP
802.3ae
10 Gigabit Ethernet
802.1Q and 802.1p
VLAN tagging and prioritization
802.3ab
Gigabit Ethernet Over Copper
802.3x
Flow Control
802.1D
MAC bridges/spanning tree protocol
802.3ad
Link Aggregation Control Protocol
802.1x
Extended Authentication Protocol
Release Notes for the Passport 8600 Release 3.7.6
18 Supported standards, RFCs, and MIBs
Table 6 lists the protocol RFCs supported in this release.
Table 6 Supported protocol RFCs (Sheet 1 of 2)
Supported protocol RFCs
RFC 768
UDP protocol
RFC 783
TFTP protocol
RFC 791
IP protocol
RFC 792
ICMP
RFC 793
TCP protocol
RFC 826
ARP protocol
RFC 854
Telnet protocol
RFC 903
Reverse ARP
RFC 1541 and 1542
BootP and DHCP
RFC 1542
BootP
RFC 1058
RIP version 1
RFC 1075
DVMRP
RFC 1112
IGMPv1
RFC 2236
IGMPv2
RFC 3376
IGMPv3
draft-holbrook-idmr-igmpv3-ssm-08.txt
IGMPv3 for SSM
RFC 2178
OSPFv2
RFC 1723
RIPv2
RFC 1771 and 1772
BGP-4
RFC 1745
BGP-4 and OSPF interaction
RFC 1812
Router requirements
RFC1965
BGP-4 Confederations
RFC1966
BGP-4 Route Reflectors
RFC 1997
BGP-4 Community Attributes
RFC 2270
BGP-4 Dedicated AS for sites/single provider
RFC 2385
BGP-4 MD5 authentication
RFC 2439
BGP-4 Route Flap Dampening
RFC 1866
Hypertext Markup Language v2.0
RFC 2068
Hypertext Transfer Protocol
217316-A Rev 00
Supported standards, RFCs, and MIBs
19
Table 6 Supported protocol RFCs (Sheet 2 of 2)
Supported protocol RFCs
RFC 2131
Dynamic Host Control Protocol (DHCP)
RFC 2338
Virtual Router Redundancy Protocol
RFC 2362
PIM-SM
RFC 3208
(draft-speakman-pgm-spec-04)
PGM
RFC 3569 (draft-ietf-ssm-arch-03.txt)
PIM-SSM
RFC 2474 and 2475
DiffServ
RFC 2597 and 2598
DiffServ per hop behavior
RFC 2138
RADIUS Authentication
RFC 2139
RADIUS Accounting
RFC 1591
DNS Client
Table 7 lists the ATM POS module RFCs supported in this release.
Table 7 Supported ATM POS module RFCs
Supported ATM POS module RFCs
RFC 1332
IPCP
RFC 1471
LCP
RFC 1473
NCP
RFC 1474
Bridge NCP
RFC 1552
IPXCP
RFC 1661
PPP
RFC 1638
BCP
RFC 1989
PPP Link Quality Monitoring
RFC 2558
SONET/SDH
RFC 2615
PPP over SONET/SDH
Release Notes for the Passport 8600 Release 3.7.6
20 Supported standards, RFCs, and MIBs
Table 8 lists the network management MIBs and standards supported in this
release.
Table 8 Supported network management MIBs
Supported MIBs
RFC 1155.mib
SMI
RFC 1157
SNMP
RFC1213.mib
MIB for networks management of TCP/IP-based
internets MIB2
RFC 1215.mib
A convention for defining traps for use with the SNMP
RFC 1493.mib
Definitions of management objects for bridges
RFC 1573.mib
Interface MIB
RFC 1643.mib
Definitions of managed objects for the Ethernet-like
interface types
RFC 1724.mib
RIPv2 MIB extension
RFC 1757.mib
Remote network monitoring MIB (support of alarms,
events, statistics, and history groups)
RFC 1389.mib
OSPFv2 MIB
RFC 1907
SNMPv2
RFC 2021
RMON MIB using SMIv2
RFC 2096.mib
IP forwarding table MIB
RFC 2233.mib
The interfaces group MIB using SMIv2
RFC 2674.mib
Definitions of management objects for bridges with
traffic classes, multicast filtering and virtual LAN
extensions
RFC 2932.mib
IPv4 multicast routing MIB
RFC 2933.mib
Internet Group Management Protocol MIB
RFC 2934.mib
PIM MIB
RFC 2571, 2572, 2573, 2574,
2575, 2576
SNMPv3
RFC 2674
Definitions of Managed Object for bridges with Traffic
Classes, Multicast Filtering, and Virtual LAN extensions
RFC 2925.mib
Ping and Traceroute MIBs
217316-A Rev 00
Upgrading SNMP
21
Upgrading SNMP
Note: Systems using Simple Network Management Protocol (SNMP)
from Release 3.3 or 3.5 must upgrade to Release 3.7 before moving to
3.7.6.
When upgrading SNMP from Release 3.3 or 3.5 to Release 3.7, note the following
SNMP upgrade considerations.
Note: Windows users should always select Save when prompted to
open or save installation or upgrade files from the Nortel website.
SNMP upgrade considerations
•
•
•
•
•
Starting with Release 3.7, the CLI command save config file creates a
hidden and encrypted file that contains community table information. For
security purposes, the save config file command also removes
references to the existing SNMP community strings in the newly created
configuration file.
If you have one CPU only and a pre-3.7 configuration file, and if you swap
the CPU, all the password files, including the hidden file, will be lost. You
must reconfigure your trap receivers and community strings every time you
change the CPU module. (Q00878458)
With Release 3.7, changes within the SNMP agent prevent Java Device
Manager (JDM) from registering for traps. (Q00880590)
With Release 3.7, the trap receiver concept has been replaced by the
notification originator application. This application monitors a system for
specific events or conditions, and generates Notification-Class messages,
based on these events or conditions. For more information about configuring
the notification originator application, see Configuring Network Management
(314723-C) or Configuring and Managing Security (314724-C).
The ability to edit certain SNMP parameters, such as community strings,
using the CLI command config sys set snmp is no longer available. For
instructions on creating an SNMPv1, SNMPv2, or SNMPv3 user, or changing
the default community strings, see Configuring and Managing Security
(314724-C).
Release Notes for the Passport 8600 Release 3.7.6
22 Upgrading SNMP
•
•
When upgrading from Release 3.5 to Release 3.7, read-only (ro) user is
mapped into ReadView with read-only access. (Q00889700)
After performing the upgrade, Nortel Networks strongly recommends that
you set a password for the initial USM.
Upgrading SNMP from Release 3.3 to Release 3.7
In the Passport 8000 Series Switch Release 3.3, you set SNMP community strings
by using the following command (this command is now obsolete):
config sys set snmp community rwa <commstring>
After you save the configuration, this command appears in the configuration file.
This behavior has changed in Release 3.7. The upgrade procedure follows.
Non-High Availability
1
Change and save the bootconfig options to the appropriate Release 3.7 image
by entering the following commands:
config bootconfig primary choice /flash/p80a3760.img
save bootconfig
2
Boot up the chassis and upgrade the Boot Monitor by entering the following
command:
boot /flash/p80b3760.img
The SNMP upgrade procedure loads the SNMP configuration into the
run-time configuration.
3
Save the configuration by entering the following command:
save config file /flash/config1.cfg
When you enter this command, the following activities occur:
— Configurations related to SNMP trap receivers are automatically mapped
into Release 3.7-compatible commands in config1.cfg.
— Configurations related to SNMP community strings are ported to a hidden
and encrypted file. This file must exist for you to access the chassis using
SNMP. From this point forward, information regarding SNMP
community strings will be stored ONLY in this hidden file and WILL
217316-A Rev 00
Upgrading SNMP
23
NOT be found in configuration files. If you choose to swap the existing
CPU Module with a new CPU Module, you must copy all hidden files to
the new module, in addition to the regular files, in order for the SNMP
strings to work correctly.
— Default strings such as “public” and “private” are translated as is.
— The default string “secret” for rwa is no longer applicable in Release 3.7.
— All “l1”, “l2”, “l3”, and “rwa” SNMP strings will now be “rw.”
(Q00894703)
High Availability
Follow the standard procedure for the HA upgrade. Refer to Upgrading to
Passport 8000 Series Switch Software Release 3.7.6 (318843-A) for more
information. The upgrade process creates identical hidden files on both CPUs.
Failover between CPUs should appear hitless with respect to SNMP connectivity.
Upgrading SNMP from Release 3.5 to Release 3.7
In the Passport 8000 Series Switch Release 3.5, you set SNMP community strings
by using the following command (this command is now obsolete):
config sys set snmp community rwa <commstring>
After you save the configuration, this command will NOT appear in the
configuration file, as community strings are stored in a hidden file instead. This
behavior has changed in Release 3.7. The upgrade procedure is detailed below.
Non-High Availability
1
In CLI mode, before performing the upgrade, change and save the bootconfig
options to the appropriate Release 3.7 image by entering the following
commands:
config bootconfig primary choice /flash/p80a3760.img
save bootconfig
Release Notes for the Passport 8600 Release 3.7.6
24 Upgrading SNMP
2
Boot up the chassis and upgrade the boot-monitor by entering the following
command:
boot /flash/p80b3760.img
The SNMP upgrade procedure loads the SNMP configuration into run-time
configuration.
3
After the reboot, save the configuration by entering the following command:
save config file /flash/config1.cfg
When you enter this command, the following activities occur:
— Configurations related to SNMP trap receivers are automatically mapped
into Release 3.7-compatible commands in config1.cfg.
— Configurations related to SNMP community strings are ported from a
hidden file to another hidden and encrypted file. This file must exist for
you to access the chassis using SNMP. From this point forward,
information regarding SNMP community strings will be stored ONLY in
this hidden file and WILL NOT be found in configuration files. If you
choose to swap the existing CPU Module with a new CPU Module, you
must copy all hidden files to the new module, in addition to the regular
files, in order for the SNMP strings to work correctly.
— Default strings such as “public” and “private” are translated as is.
— The default string “secret” for rwa is no longer applicable in Release 3.7.
— All “l1”, “l2”, “l3”, and “rwa” SNMP strings will now be “rw.”
(Q00894703)
High Availability
The standard procedure for HA upgrade needs to be followed. Refer to Upgrading
to Passport 8000 Series Switch Software Release 3.7.6 (318843-A) for more
information. The upgrade process creates identical hidden files on both CPUs.
Failover between CPUs should appear hitless with respect to SNMP connectivity.
217316-A Rev 00
Configuring SNMP traps
25
Configuring SNMP traps
In the Passport 8000 Series Switch Release 3.3 or 3.5, you configured traps by
using the following command (which is now obsolete):
config sys set snmp trap-recv <ipaddr> v2c public
where ipaddr is the IP address of the trap receiver.
With Release 3.7.6, you configure traps by creating SNMPv3 trap notifications,
creating a target address to which you want to send the notifications, and
specifying target parameters. Nortel Networks provides two default entries in the
notify table: Inform and Trap. The tag values for these entries are informTag and
trapTag, respectively. For more information about configuring SNMP traps in
Release 3.7.6, see Configuring Network Management (314723-C) or Configuring
and Managing Security (314724-C).
1
Configure an SNMP notification, using the following command:
config snmp-v3 notify create <Notify Name> [tag <value>]
[type <value>]
In this example, the DefNotify identifies the notification and DefTag
identifies the tag value that will be to used to select entries in the
snmpTargetAddrTable:
config snmp-v3 notify create DefNotify tag DefTag type
trap
2
Configure an SNMP target address, using the following command:
config snmp-v3 target-addr create <Target Name> <Ip
addr:port> <Target parm> [timeout <value>] [retry
<value>] [taglist <value>] [mask <value>] [mms <value>]
In this example, you create the target parameter ID (TparamV2) along with
the target address ID (TAddr1), link them with the taglist (DefTag) that you
created in step 1, and define the trap receiver’s IP address (198.202.188.207).
You also specify 162 as the default UDP port used to send traps, a timeout of
1500, a retry of 3, a mask value of ff:ff:00:00:00:00, and specify a maximum
message size (MMS) of 484.
Release Notes for the Passport 8600 Release 3.7.6
26 Configuring SNMP traps
config snmp-v3 target-addr create TAddr1
198.202.188.207:162 TparamV2 timeout 1500 retry 3 taglist
DefTag mask ff:ff:00:00:00:00 mms 484
3
Specify SNMP target parameters, using the following command:
config snmp-v3 target-param create <target param name>
mp-model <value> sec-level <value> sec-name <value>
In this example, you first specify the settings for target parameter ID
TparamV1. This ID is linked to the user name “readview”, the model is
defined as SNMPv1, and a security level of noAuthNoPriv is specified.
Next, you specify the settings for target parameter ID TparamV2. This ID is
also linked to the user name “readview”, the model is defined as SNMPv2c,
and a security level of noAuthNoPriv is specified.
config snmp-v3 target-param create TparamV1
mp-model snmpv1 sec-level noAuthNoPriv sec-name readview
config snmp-v3 target-param create TparamV2
mp-model snmpv2c sec-level noAuthNoPriv sec-name readview
Note: Because Release 3.3 and Release 3.5 support only
SNMPv1/SNMPv2c trap configurations, when you upgrade to Release
3.7.6, the trap configurations are in SNMPv1/SNMPv2c.
217316-A Rev 00
Upgrading SDM Firewall iSD software
27
Upgrading SDM Firewall iSD software
The SDM Firewall iSD software is pre-installed on new Firewall iSDs, so no
upgrades are required.
Alteon Firewall software reinstall options
The Alteon Firewall software image is available as an .img file, installed from an
ftp or tftp server using the boot user login with the ForgetMe password. The .img
image overwrites the current software version.
Note: For .img installations, all configuration parameters, logs, etc. are
lost. Be sure to save your configuration to an ftp or tftp server using the
/cfg/ptcfg command before reinstallation, and restore the
configuration after using the /cfg/gtcfg command.
If you need to upgrade or reinstall your Firewall iSD software image, then please
refer to Firewall User’s Guide and Command Reference (217315-A) for full
instructions.
Password encryption
In the Passport 8600 Software Release 3.7.6 or higher, passwords are now stored
in encrypted format and are no longer stored in the configuration file. If a
configuration file saved prior to Release 3.7.6 is loaded, saved passwords from the
configuration file are not recognized. If the switch is booted for the first time with
the software Release 3.7.6 or higher image, the password is reset to default values
and a log is generated, indicating any changes.
Note: For security reasons, Nortel Networks recommends setting the
passwords to values other than the factory defaults.
Release Notes for the Passport 8600 Release 3.7.6
28 Extended CP Limit
To reset the passwords, enter the following command at the boot monitor prompt:
reset-passwd
To change the passwords, enter the following commands:
config cli password <access-level> <username>
Enter the old password:
Enter the new password:
Re-enter the new password:
Note: All passwords are case-sensitive.
Extended CP Limit
Note: The Extended CP-limit features differs from the rate-limit feature
by monitoring only packets that are sent to the CPU (control plane),
instead of all packets that are forwarded through the switch (data plane).
The CP Limit function protects the CPU by shutting down any ports that send
traffic to the CPU at a rate greater than desired through one or more ports. The
Extended CP Limit functionality is configurable and can be used to protect the
switch from being overwhelmed by any kind of traffic. To make use of the
Extended CP Limit functionality, configuration must take place at the chassis and
port level.
The set of ports to check for a high rate of traffic must be predetermined, and
configured as either SoftDown or HardDown.
•
•
217316-A Rev 00
HardDown ports are disabled immediately once the CPU is congested for a
certain period of time.
SoftDown ports are monitored for a specified time interval, and are only
disabled if the traffic does not subside. The maximum number of SoftDown
ports to be monitored at one time is configured by the user.
Extended CP Limit
29
Extended CP Limit Chassis Configuration
To enable this functionality and set its general parameters, configuration must
take place at the chassis level first. Select Edit > Chassis > Ext. CP Limit from
the JDM menu.
Enter the appropriate information in the fields provided and click Apply. For an
explanation of the fields on this tab, see Table 9.
Table 9 Chassis Ext. CP Limit Tab Fields
Field name
Description
Enable
Select this checkbox to enable the Extended CP Limit functionality.
De-select it to disable.
MinCongTime
Sets the minimum time the system octapid has to remain in a
congested state before triggering the congestion algorithm.
Default value is 3000 ms.
MaxPorts
Sets the total number of ports that need to be analyzed from the
may-go-down port list.
Default value is 0
PortCongTime
Sets the time duration after which a port is disabled, if it remains at the
congestion threshold.
Default value is 5 s.
TrapLevel
Sets the manner in which a SNMP trap is sent if a port becomes
disabled. The three values are:
• None - no traps are sent (default value).
• Normal - sends a single trap if ports are disabled.
• Verbose - sends a trap for each port that becomes disabled.
Extended CP Limit Port Configuration
Once this functionality has been generally enabled at the chassis level, each port
must then be individually configured to make use of it. Select
Edit > Port > Ext. CP Limit from the JDM menu, and select the Port Extended
CP Limit tab.
Release Notes for the Passport 8600 Release 3.7.6
30 High Availability Layer 3 considerations
Enter the appropriate information in the fields provided and click Apply. For an
explanation of the fields on this tab, see Table 10.
Table 10 Port Ext. CP Limit Tab Fields
Field name
Description
CplimitConf
Sets the manner in which the individual port participates in the
Extended CP limit functionality. Select one of the following values for
the port:
• None - port is not checked (default value).
• SoftDown - port belongs to "may-go-down" port list.
• HardDown - port belongs to "must-go-down" port list.
CplimitUtilRate
Sets the threshold percentage at which bandwidth utilization triggers
the monitoring algorithm.
High Availability Layer 3 considerations
•
If you want to use High Availability (HA) mode, verify that the link speed/
duplex mode for the CPU module are 100Mb/s and Full Duplex. Use the
following CLI commands to configure the link speed and duplex mode:
config bootconfig net cpu2cpu speed 100
config bootconfig net cpu2cpu fullduplex true
•
•
If the link is not configured in 100Mb/s and Full Duplex mode, either you
cannot synchronize the two CPUs or the synchronization may take a long
time. Error messages may appear on the console. (Q00839619)
In HA mode, Nortel Networks recommends that you not configure the OSPF
hello timers less than a second, and the dead router interval less than 15
seconds.
SMLT network design considerations
•
217316-A Rev 00
If you use LACP in an SMLT/Square configuration, the LACP must have the
same keys for that SMLT/LAG; otherwise, the aggregation may fail if a
switch failure occurs. (Q00789437)
SMLT network design considerations
•
31
Use the following procedure when designing an SMLT network. For more
information, refer to Network Design Guidelines (313197-D).
1
To ensure proper IST connectivity, define a separate VLAN for the IST
protocol:
config mlt 1 ist create ip <value> vlan-id <value>
Note: Do not enable a routing protocol on this VLAN.
2
To ensure that IST is not disabled inadvertently, disable CP-limit on the
IST ports:
config ethernet <slot|port> cp-limit disable
3
Keep CP-limit enabled on the SMLT ports and change multicast-limit
value to 6000:
config ethernet <slot|port> cp-limit enable
multicast-limit 6000
Note: Nortel Networks recommends that you keep CP limit enabled on
SMLT ports to protect the SMLT aggregation switches against
unforeseen DOS attacks.
4
Disable loop detect on SMLT ports:
config ethernet <slot|port> loop-detect disable
Note: For Release 3.7.6, Nortel Networks recommends that you disable
loop detect; this recommendation is in direct contrast to that made for
earlier releases.
5
Enable tagging on SMLT links:
config ethernet <slot|port> perform-tagging enable
Note: Nortel Networks recommends that you enable tagging on SMLT
ports and drop untagged frames to ensure that SMLT client switches with
default configurations do not adversely affect SMLT aggregation switch
behavior.
6
Enable drop untagged frames on SMLT links:
config ethernet <slot|port> untagged-frames-discard
enable
Release Notes for the Passport 8600 Release 3.7.6
32 Bugs fixed in this release
Bugs fixed in this release
This section describes the bugs fixed from Release 3.7 to 3.7.6. If upgrading from
a release below 3.7, check Release Notes for the Passport 8000 Series Switch
Software Release 3.7 (317177-A) to see a complete list of fixes in Release 3.7.
All bug fixes from Release 3.7.5 are also included in this release. For details,
check Release Notes for the Passport 8000 Series Switch Software Release 3.7.5.0
(p80rn3750) from www.nortel.com/support.
•
The traceroute feature is supported in Release 3.7.1 and higher. (Q00912303)
Known limitations and considerations in this release
The following topics describe issues known to exist in the Passport 8600 Series
Switch Software Release 3.7.6:
Topic
Page
SDM limitations
33
Hardware and platform limitations (for Passport 3.7.x)
40
Switch management
42
Bandwidth management
44
ATM
44
Layer 2
45
Layer 3
46
High Availability (HA) mode
47
Link Aggregation Group (MLT/IEEE 802.3ad)
48
RSMLT
50
IPX
50
VRRP
51
Multicast
51
217316-A Rev 00
Known limitations and considerations in this release
33
SDM limitations
Passport 8660
•
•
•
•
NAAP Peer numbers are not automatically reassigned after removing
intermediate NAAP Peers. If you want to reassign NAAP Peer numbers, the
assignment command must be entered manually. (Q00972344)
Each management VLAN is associated with exactly one cluster ID, and
cannot be shared between multiple clusters. (Q01043094)
To manage two clusters using the same Check Point management station, use
PP8600 as the route among the two clusters' SSI management vlans and the
vlan that is connected to the Check Point management station. Note that in
this scheme, the Firewall iSDs are managed through the SSI vlan on Port 1,
instead of a firewall vlan on Port 2. (Q01009624)
When under high stress, the Passport 8600 can miss NAAP pings, causing the
Firewall iSD to unregister from the Passport 8600. When the stress is
removed, the Firewall iSD should automatically re-register without affecting
Firewall functionality. (Q01046009, Q01074704)
If the Firewall iSD returns to a “registering/up” state, enter the following CLI
commands to re-register the Firewall iSD:
config naap disable
config naap enable
•
All firewall VLANs must use default STG. (Q01055532)
Firewall iSD
•
•
•
•
The Check Point management station can be on either the management vlan
or on a firewall vlan. If it is configured on the management vlan, then Port 1
(eth0) is used. If it is configured on a firewall vlan, then Port 2 (eth1) is used.
Never configure a firewall vlan on Port 1 (eth0). (Q00989600)
WebUI does not verify firewall licenses, and allows invalid entries to be
saved. (Q00987245)
Firewall iSDs with OSPF enabled do not relearn routes correctly after the
firewall policy is changed. Reboot the Passport 8600 to fix this issue.
(Q00982922)
Nortel recommends using Windows 2000 Server FTP/TFTP application when
transferring files to and from the SDM. Other FTP/TFTP applications may
cause a slow or incomplete transfer for files larger than 32 MB. (Q01081009)
Release Notes for the Passport 8600 Release 3.7.6
34 Known limitations and considerations in this release
•
•
•
If all policies are unloaded from a Firewall iSD enabled with HA and SYNC,
the /maint/diag/fw/ldplcy command does not work correctly and
generates a time out error. (Q01033794)
When using SmartDefense, some FTP commands restricted by the FTP
Security Server feature are still accessible by the user. Examples include:
type, help, pwd, and byte. (Q01025374)
A second Firewall iSD added to a cluster may fail to be deleted from the
cluster, despite a successful boot delete message. If the Firewall iSD is not
deleted from the cluster, it cannot be joined to another cluster. (Q01001182)
The following steps provide an example of this issue on the Passport 8600:
1
Configure NAAP VLAN.
2
Configure cluster 1 (create the firewall, sync VLAN, and management
VLAN for cluster 1).
3
Add Firewall iSDs 1 and 2 to cluster 1, and create the firewall VLAN for
cluster 1.
4
Configure NAAP ENA.
5
On the Passport 8600 iSD, join the 2nd Firewall iSD to a cluster and
configure the VRRP firewall interfaces.
6
Enable HA, CP sync, and push CP policies.
7
Enter the following command from the cluster:
/boot/delete iSD 10.10.1.2
The boot delete appears to be successful.
8
Enter the following command on Firewall iSD 1 to see that the second
Firewall iSD is still in the cluster:
/cfg/sys/cluster/host
•
At least one interface must be configured before enabling HA. If no interfaces
are configured, the following error message is returned:
[root@a10-10-1-2 root]# <10>Dec 1 12:12:09 a10-10-1-2
vrrpd: CRITICAL: Configuration file open problem...
<10>Dec 1 12:12:19 a10-10-1-2 vrrpd: CRITICAL:
Configuration file open problem.
(Q01039776)
217316-A Rev 00
Known limitations and considerations in this release
•
35
Before removing a card, ensure that all ports from that card have been
removed from the NAAP VLAN.
Adding non-Firewall iSD ports to the NAAP VLAN makes those ports
Inter-Chassis-Link (ICL) members. Removing the card without removing
ports from the NAAP VLAN leaves invalid port entries in the ICL list.
(Q01028606)
•
•
The VRRP sleeps if the system is left running for a long time without traffic.
In the case scenario, the system ran for over two days without traffic (one
cluster with two Firewall iSDs in HA mode and sync enabled). In this case,
when the VRRP status (using the /i/n/v/s command) is checked, the
message “Error: operation failed” is returned. Continue to input the command
to verify status, and the system eventually returns to normal status.
(Q01007597)
Deleted host from BBI causes a port configuration error (shown below) on the
remaining Firewall iSD. The error raised does not affect functionality because
the Firewall iSD must be reconfigured after it is removed from the cluster.
(Q00994834)
CRITICAL:Failed to apply port configuration [no such node /
Network/Hosts/1/Networks/2]
•
•
VRRP must be configured after joining a new iSD. If the VRRP is not
configured, then the interface IP configuration does not work properly.
(Q00994895)
After removing a Firewall iSD from a cluster, reboot the Firewall iSD to
prevent port configuration errors like those shown below. (Q01063352)
CRITICAL: Failed to apply port configuration [no such node
/Network/Hosts/1/Networks/2]
•
Currently, the CLI command /c/n/port accepts any speed setting without
verification. Valid setting to be entered are: 10, 100, or 1000. (Q00995517)
Release Notes for the Passport 8600 Release 3.7.6
36 Known limitations and considerations in this release
General limitations (based on ASF 5100 release 2.2.7.0)
Note: When a Firewall iSD is deleted from a cluster, an error message is
generated by the BBI for the port configuration on the remaining
Firewall iSD. Since you must reconfigure the Firewall iSD once it is
deleted from the cluster anyway, this error message does not affect
functionality. (Q00994834)
•
•
•
•
•
•
•
•
217316-A Rev 00
The following features are not supported in this release:
— Check Point FloodGate
— VRRP Active-Active
— VPN
— VSX
— Check Point Cluster XL
ClusterXL configuration is not supported even though the menu
/cfg/net/vrrp/clusterxl exists.
SNMP v3 target addresses on the CLI and JDM must include a prefix value of
'0x'. (Q01067472)
If you are using SmartDefence Fingerprint Scrambling (TTL) feature, make
sure that the default TTL is set to 255. Otherwise, VRRP Active-Hot Standby
does not work properly.
Nortel suggests not enabling worm catcher on SDM platforms where the total
concurrent connections are less than 50,000.
Check Point HTTP Security server vulnerability. Check Point Hot fix is
available in R55.
TCP Reset vulnerability. Check Point Hot fix/patch is available in R55.
Executing some CLI commands after long period of inactivity (more than 12
hours) may give an error. Ignore this error, and continue entering the
command until it works properly. (The command should work within three
retries.)
Known limitations and considerations in this release
•
37
To join a cluster after a /boot/delete process, use the following steps:
1
Before you use /boot/delete, make sure all the HA options (ha, aa,
and clusterxl in the /cfg/sys/net/vrrp/ menu) are disabled.
2
After the /boot/delete, make sure that you do not see the deleted host
in the /cfg/sys/cluster/cur menu.
3
If you see the deleted host in the above step, then enter the CLI command:
/cfg/sys/cluster/host#/delete/apply
4
•
•
•
If you have already used join on the first host (the host that used the new
command during initial configuration) after using /boot/delete to
remove it, then you must follow the procedure below:
a
Ensure that your configuration is intact.
b
Disable all HA options (ha, aa, and clusterxl in /cfg/sys/net/vrrp/
menu).
c
boot/delete the second host (the host that used the join command
during initial configuration).
d
Repeat step 3.
e
Join the second host back to the cluster.
f
Make sure configuration is intact.
g
Enable whatever HA options you want.
Check Point Radius Authentication in Active-Standby configuration. In the
Active-Standby configuration, change the Radius Server configuration to
accept the request from all Virtual IP and Real IP addresses of the interface in
which the Radius Server is connected.
If you already have an SDM firewall with traffic running through it, traffic is
disrupted when you join a new SDM firewall to the cluster until you complete
the entire network configuration.
When you enable the SmartUpdate Mode, all the disk partitions must become
read-write. In some instances, this may not happen.
Please verify that all disk partitions are read-write/read-only by executing the
command from Figure 1 at the root prompt.
Release Notes for the Passport 8600 Release 3.7.6
38 Known limitations and considerations in this release
Figure 1 Checking for read-only partitions
mount |grep "(ro)"
You should not see any partitions. If some partitions are read-only, please
disable and enable the SmartUpdate Mode again.
•
When you disable the SmartUpdate Mode, all the disk partitions must become
read-only. In some instances, this may not happen.
Please verify that all disk partitions are read-only by executing the command
from Figure 2 at the root prompt.
Figure 2 Checking for read-only partitions
mount |grep "(ro)"
You should see three partitions (/ , /isd and /usr/local). If some partitions are
read-write, please enable and disable the SmartUpdate Mode again.
•
•
The SmartUpdate “Get Check Point gateway data” retrieves the SmartView
Monitor, Policy Server, FloodGate-1, and UserAuthority packages. This may
automatically update the object settings. Change these settings as needed.
During the SmartView policy install, the SmartView Tracker log records the
following messages:
The <ethx> interface is not protected by the anti-spoofing
feature. Your network may be at risk.
uaa_info: opsec_session_id=NO_SESSION
Both of these warning messages can be safely ignored, if the network
topology is defined as explained in Firewall User’s Guide and Command
Reference (217315-A).
•
•
217316-A Rev 00
Memory utilization is reported incorrectly using the CLI command
/info/summary. Use /info/cluster instead to show the correct value.
Also run the top command at root prompt.
After updating SmartDefense, you can no longer use push policy. The
workaround is to make the partition read-write on the appliance before using
SmartUpdate or SmartDefense update. Use the following process to do this:
— Enter the command: make-part-rw /usr/local on.
— (Complete the SmartUpdate or SmartDefense update.)
— Enter the command: make-part-rw /usr/local off.
Known limitations and considerations in this release
•
•
•
•
•
39
If you have Hide NAT enabled on a network connected to one of the VRRP
interfaces, you must add special manual NAT rules to avoid VRRP packets
being affected by NAT. Please contact technical support for a document
(5100_nat_plus_vrrp.doc) which explains how to do this.
OSPF does not work in an Active-Standby setup.
If the Firewall does not restart automatically after installation, reboot the
SDM module.
The /boot/delete is not supported when the SmartCenter Server is
installed on the Firewall iSD host. This means you cannot remove the Check
Point SmartCenter Server from the Firewall using the /boot/delete
command. To uninstall the Check Point SmartCenter Server from the
Firewall, you must re-install the entire Firewall OS software package.
Deleted interfaces are still being advertised by OSPF. To circumvent this
limitation, issue the following command from the root login:
service zebra restart
•
•
•
•
When enabling OSPF authentication, do not use spaces in the authentication
key, even though the CLI allows the operation.
OSPF can be enabled for interfaces that have already been disabled.
Validation is missing for this invalid configuration.
Logs are not generated when using Check Point's User Authentication with a
location restriction.
If the port state is toggled for a port that is part of an MLT/multiple spanning
tree group and blocking for one spanning tree group and forwarding for all
others, then the port routing operational status displays as disabled even if you
have enabled routing on the switch.
Hot-swapping
•
Ensure the Firewall iSD processes are halted before a soft reboot of the
Passport 8600 switch, or before removing the 8660 SDM from the chassis.
(Q01011888)
Release Notes for the Passport 8600 Release 3.7.6
40 Known limitations and considerations in this release
To halt the Firewall iSD processes:
1
From Passport console, select a Firewall iSD to work using the command:
Set_console <slot#> <mini slot#>
For example: Set_console 3 1
2
From the SDM console, use the following commands:
Main# /boot/halt
Confirm action 'halt'? [y/n]:
Power down
3
y
Repeat step 1 and step 2 to halt the Firewall iSD process for each hard
disk on the SDM board.
Once the disk drives have powered down, the CPU LEDs are off. Port LEDs
and the Online LED stay solid green.
To reboot a Firewall iSD on which you have halted the disk drive processes:
1
From the iSD console, enter the command:
PP8600:5/config/naap# minislot-state disable 10 4
The CPU LEDs are off. Port LEDs and the Online LED stay solid amber.
2
From the iSD console, enter the command:
PP8600:5/config/naap# minislot-state enable 10 4
The Firewall iSD restarts, and all LEDs are normal again.
Hardware and platform limitations (for Passport 3.7.x)
•
•
217316-A Rev 00
You cannot configure more than five static routes on the network
management interface. (Q00694618)
A minimum of 128MB is required to support the Passport 8600 Series switch
software Release 3.7.6. An upgrade kit of 256MB is provided in the Nortel
price list; this upgrade kit is not required for the 8691SF. However, because
different memory sizes (for example, 256MB for the 8690SF and 8692SF;
128MB for the 8691SF) in the same chassis can cause unpredictable
behaviors, Nortel Networks does not recommend nor support a mixed
configuration (8690/8691/8692) in a chassis. (Q00723245)
Known limitations and considerations in this release
•
•
•
•
•
41
Nortel Networks does not recommend using the CLI command
trace level 4 4. This command, which provides some very low-level
information about chassis manager tasks, can impact the overall behavior of
the system. (Q00896409)
Any I/O Module that comes up as faulty on the master CPU is not
synchronized to the backup CPU. All configurations associated with this I/O
board are also not synchronized between the master and the backup CPU.
(Q00890882)
Nortel Networks does not support the 8691omSF with the Passport 8600
Series Switch Software Release 3.7.6. (Q00909840-01)
When a POS port is disabled and then enabled, STP is disabled or enabled
according to the BCP state. If BCP was enabled and STP was disabled, then
STP becomes enabled after a port is reset (because BCP was enabled). In this
scenario, you need to manually disable STP. (Q00281408)
On bootup or after a CPU failover, the following error message may appear:
ERROR Task=tChasServ RTC update on standby CPU failed!
It has no negative impact on your switch. (Q00527144)
•
•
•
•
•
•
After setting the max-mac-count command for a port, the switch incorrectly
allows you to change this value to one that is less than the current mac count.
(Q00850159-01)
Although the copy and cp commands perform the same function, there are
some minor differences: the copy command does not allow wildcard
characters and does not display acknowledgement that the copy was
successful; the cp command allows wildcard characters and displays
acknowledgement that the copy was successful. (Q00785080)
8608 Gigabit ports may not initialize if there is an ASF 5112 Firewall
connected to any of the ports. This same issue may occur if there is a port
connected to other Alteon products, such as the Alteon 184 or 180e. The
workaround is to disable AutoNegotiation on the Gigabit ports of both the
Passport 8600 and the Alteon switch. (Q00538075)
Disabling the Telnet daemon prevents any connection between the master and
backup CPUs using the Telnet peer command. (Q00595763-04)
Do not enter illegal or illogical IP addresses in the /etc/hosts filename.
The existence of illegal IPs causes problems with address and hostname
resolution. (Q00914252)
Even if VLAN tagging is not enabled, the copper gigabit Ethernet ports accept
and respond to VLAN tagged packets.
Release Notes for the Passport 8600 Release 3.7.6
42 Known limitations and considerations in this release
•
If a copper gigabit port is connected to a fast Ethernet port, then the link light
on the appliance does not light up. The /info/host/link command shows
the actual status of the port.
Switch management
Caution: SNMP community Index length of up to 10 characters and
SNMP community string length of up to 30 characters are currently
supported. (Q00899521)
Caution: The default community string “secret” for rwa user in Release
3.5 is no longer valid in Release 3.7.6. The default on Release 3.7.6 is
“public” and “private.”. (Q00895834)
Caution: If you connect to Device Manager and then remove or add a
management route before you close Device Manager, the connection to
the switch is lost. Nortel Networks strongly recommends closing Device
Manager before deleting or adding a route. (Q00907359)
General
•
When you save the configuration file to the backup file, the primary
configuration file is also saved. (Q00915233)
SNMP
•
Because the SysOR MIB is not currently supported, a specific test to verify
that the agent properly handles unknown contextEngineID values fails when
executed. The following messages appear:
[FAILED] Remarks: get-request operation failed or had
errors
Received unexpected noSuchObject exception on get
operation.
(Q00486049)
•
217316-A Rev 00
Using some specific tests related to SNMPv3 compliance, you may
experience some issues. (Q00788702, Q00788718, Q00788728, Q00788722,
Q00788723)
Known limitations and considerations in this release
•
•
•
•
•
43
The usmUserStorageType object is not supported in Release 3.7.6.
(Q00799662)
The MIB mib-2.80.1.1.0 is not supported in Release 3.7.6; consequently, the
snmp walk reply shows “noSuchInstance” for this MIB. (Q00849687,
Q00849691)
Because of security concerns, community strings in the community table are
now shown as ********* strings. Community strings are translated into the
community table, using the new format, during the upgrade from Release 3.5
to 3.7.6. Because community strings are no longer displayed, you must
remember their community strings. (Q00883778)
The trap notify table is based on the IP address of the target station and not the
type of user. All users, whether they have trap tags defined or not, will receive
traps as long as they are on the same workstation as a user that is configured
to receive traps. (Q00905161)
SNMP default strings displace non-default strings in the original indices.
(Q00889713)
Device Manager
•
•
•
•
•
•
SNMP inform messages cannot be sent to a Device Manager session because
Device Manager does not have an SNMP engine ID assigned to it.
(Q00851264)
When using Device Manager, you cannot graph a port that is a member of
VLAN running OSPF. (Q00897049)
When the trap option in RMON is set to toOwner (RMON > Options), no
traps are received at the Owner. The workaround for this is to set the option to
toAll. (Q00908256)
Device Manager and the CLI incorrectly allow you to configure a large IPX
tick value (up to 2147483647). The actual maximum tick value that can be
used is 65535. Do not enter a value higher than this. (Q00538439)
You cannot modify the following values on the Insert Target Table dialog
box: TAddress, TagList, TMask, and MMS. If you must change these
parameters, use the CLI. Or, using JDM, you can remove the Target Table
entry and recreate it with the new values. (Q00914179)
Nortel Networks recommends against using VLAN IDs from 4000 to 4095.
These values should be reserved for spanning tree group (STG) IDs (Nortel
multiple STGs implementation). The CLI allows you to create a VLAN ID of
4094, although the Device Manager prevents this. (Q00912868)
Release Notes for the Passport 8600 Release 3.7.6
44 Known limitations and considerations in this release
Bandwidth management
Filters
•
When you enable filters on ports, the filters may affect ports other than those
on which the filters were configured. This problem exists when the Filter
Mode is set to Forward and the Port DefaultAction is set to Drop. For
example, if you enable a filter set on port 9/12, the PC that connects to port
10/12 [8648TX(E)] can no longer send data to networks through which the
default gateway for unknown destinations must be used. However, paths
known locally or through OSPF work correctly. (Q00912316)
ATM
Caution: For a default VLAN when the aging-timer is set from the CLI,
the VLAN is reflected correctly on Device Manager. When the VLAN is
set from Device Manager, it is reflected correctly in CLI. But for a
non-default VLAN, this is not the case. For example, a change from the
CLI is not reflected in Device Manager, and a change in Device Manager
is not reflected in the CLI.
Since the aging-timer functionality works correctly in the CLI, use the
CLI to change the aging-time field. (Q00915466)
•
When you apply filters to an ATM port and set the default port action to drop,
if an ARP entry for the next hop out of an ATM interface times out, the entry
is never relearned and all outbound traffic will be dropped from that interface.
However, if you set the action to forward, the ARP entry never ages and no
connectivity problems occur.
The problem can be fixed by bouncing the ATM port or when ingress packets
are received on the ATM interface or PVC. (Q00818603-01)
•
The ATM card becomes disabled after receiving the following error message:
SW ERROR smMsgSend: failed take the wait Semaphore.
(Q00859608)
217316-A Rev 00
Known limitations and considerations in this release
•
45
If a DS3 ATM MDA is not seated properly on the ATM module baseboard,
DS3 port status, port administrative status and port LED status may appear in
an “up” states, however, the PVCs may remain in a down state.
For troubleshooting purposes, use these suggested steps to verify if the MDA
is properly seated (once the F5-OAM loopback feature is enabled, it can be
used to detect such conditions):
1
Create an STG on the switch or use an existing group.
2
Create a VLAN under this STG group.
3
Add ATM ports to this STG and VLAN.
4
Create a PVC executing the CLI command:
5
config atm <slot|port> pvc create 0.1.
6
Enable F5-OAM on this PVC (0.1) by executing the CLI command:
config atm <slot|port> pvc f5-oam 0.1 enable
7
Create an ELAN by executing the CLI command:
config atm <slot|port> pvc 1483 bridged create vlan-id
0.1
8
Configure the other end of the link and then execute the CLI command:
sh ports info atm f5 <slot|port>
This verifies that the PVC is up. If the PVC is not up, remove the MDA,
and then reseat and refasten it. (Q00539342)
Layer 2
LACP limitations
Caution: The fast periodic time value of 200 ms is not supported for
this software release. The minimum supported fast periodic time value is
400 ms. (Q00834573)
STP limitations
•
In some rare cases, when you enable the perform-tag flag on a MLT, the
status reported by the CLI command show STP status is incorrect.
Release Notes for the Passport 8600 Release 3.7.6
46 Known limitations and considerations in this release
SMLT limitations
•
•
Multicast routing with PIM and DVMRP enabled is not supported on the edge
switch of a Triangle SMLT configuration. In addition, IP multicast routing is
not supported on SMLT square and cross configurations. However, IGMP
snooping is supported and queries for a given VLAN must be placed on one
switch only. (Q00072438)
End-to-end multicast traffic stops after reconnecting the broken half of a
square/cross SMLT. (Q00075866)
Layer 3
IP limitations
ARP
•
If an MLT port with an associated static ARP is moved out of the MLT, the
static ARP does not remain with the MLT, but is moved out with the port.
(Q00647998-02)
BGP
•
•
•
•
•
•
217316-A Rev 00
Nortel Networks recommends using an 8691SF or an 8692SF in a BGP
configuration.
BGP is not supported in HA Layer 3 mode.
The FlapPenalty value does not get refreshed in a BGP route dampened
window. (Q00804187)
The Remain field is not visible from the BGP dampened Routes window in
JDM. There is currently no MIB support for this parameter. (Q00804182)
The BGP CLI command config ip bgp redistribute direct is not
in compliance with the CLI nomenclature and should be config ip bgp
redistribute local. (Q00528995)
Disabling BGP does not remove redistributed BGP routes in the OSPF LSDB.
Routers running OSPF continue to receive the redistributed BGP routes. To
exit this condition, either reset OSPF or reset the OSPF redistribution with
BGP disabled. (Q00683022)
Known limitations and considerations in this release
•
•
47
Match Community/AS Path only works in OSPF redistribution when the
same route policy is coupled with BGP. If you do not need this BGP
redistribution, you may choose to mark its state as disabled. (Q00693853,
Q00173743-01)
The maximum limit of “Max-prefix” from the command:
config ip bgp neighbor <neighbor IP>
is shown as 2147483647, but the actual value is 999999. (Q00915249)
High Availability (HA) mode
•
The following protocols are NOT currently supported in HA mode:
— ATM and POS modules
— WSM; however, WSM incorrectly stays online when HA-CPU is
enabled. (Q00495703)
— BGP; therefore, all redistribution parameters (policies) related to BGP are
not synchronized in HA mode. (Q00786353)
— Multicast dynamic routing protocols (DVMRP, PIM-SM, PIM-SSM,
PGM)
— VRRP Fast Advertisement Interval feature; a consistency check prevents
the feature from being enabled
— IPX routing
— SSL Acceleration module
— SDM firewall
OSPFf
•
Occasionally, you may see the following message when sending link state
updates:
OSPF ERROR ospfAddToReqList
This message has no impact on the switch. (Q00861942)
•
•
Currently, there is no alarm or trap sent if the synchronization between the 2
CPUs cannot be done. (Q00781173)
The backup CPU does not display the correct information about the I/O
module types if the initialization of the I/O fails. (Q00799826)
Release Notes for the Passport 8600 Release 3.7.6
48 Known limitations and considerations in this release
•
•
•
•
•
•
•
•
Nortel Networks recommends that you do not enable or disable I/O slots
during an HA failover. Wait for the system ready message on the master
CPU before enabling or disabling an I/O slot. (Q00885940)
If you change the ha-cpu flag, the switch saves the change to /flash/boot.cfg
only on both the master and backup CPUs, even though both CPUs were
booted up using pcmboot.cfg. Because the flag’s status has been changed, the
backup CPU immediately boots up with pcmboot.cfg. However, because the
change to the ha-cpu flag was saved to boot.cfg, the HA status of the switch
does not change. (Q00911908)
No error message is displayed if you do not have matching software versions
on the primary and secondary CPU and are in HA mode. (Q00248522)
The robustness value may incorrectly display in the show ip igmp
mrdisc-nei CLI output on the receiving switch. The incorrect value is then
copied to the standby CPU. This value is for informational purposes only and
does not affect the operation of your switch. (Q00536682-01)
After a failover (HA enabled), if the new master CPU does not complete table
synchronization prior to another failover, then the new master CPU reboots.
(Q00157504)
The bootconfig flag, verify-config, changes from true to false if you
reboot a High Availability (HA) chassis with incompatible protocols. This
behavior allows the switch to boot properly if the previous configuration
contains features not supported by HA. (Q00883779)
In HA mode, when you reset ECMP multiple times, and you perform HA
failover, the switch displays the following message on the backup CPU:
“wrong updateFDB.” This condition has no effect on the switch.
(Q00912709)
When you remove a module during CPU failover, the switch resets.
(Q00790435)
Link Aggregation Group (MLT/IEEE 802.3ad)
•
•
217316-A Rev 00
When you add a port to an aggregation group, the values of the rate-limiting
parameters on the port remain the same (that is, they are not updated, based on
the values configured for the other aggregation group ports). To work around
this limitation, first add all the ports to the aggregation group, and then change
the rate limiting values of any port. (Q00805119)
When the timer expires, the LACP Partner operation is not removed.
(Q00762380)
Known limitations and considerations in this release
•
•
•
•
•
•
•
•
•
49
If you use LACP in an SMLT/Square configuration, LACP must have the
same keys for that SMLT/LAG (Link Aggregation Group). Otherwise, the
aggregation may fail if a switch failure occurs. Nortel Networks recommends
that the same key be used for the two devices participating in the SMLT/LAG.
Also, the two devices participating in the SMLT/LAG must have the same
LACP port configuration values for system-priority, timeout, and mode.
(Q00789437)
If OSPF is enabled, do not set the LACP periodic transmission timer to less
than one second. (Q00787821)
If you have two switches, A in Active mode and B in Passive mode, when you
change the status of the Active switch to Passive, re-convergence takes
approximately 90 seconds. During this time, traffic from switch B to switch A
is sent for up to 90 seconds, but is not received by switch A. No traffic is sent
from switch A to switch B. (Q00821166)
In a core full meshed environment using RSMLT, HA, LACP, and VRRP
(edge), if a HA transition occurs (CPU transition from master to backup) or if
the IST link goes down, then all the LACP ports transition. (Q00836591)
To correctly enable tagging in LACP applications, you disable LACP on the
port, enable tagging on the port, and then re-enable LACP. (Q00859567)
When more than 2000 ARP entries are learned on a single port, port link
changes (either up or down) may cause time-sensitive protocols, such as
VRRP or LACP, to change states on other ports. (Q00890785)
If an SMLT aggregation switch has LACP enabled on some of its MLTs, do
not change LACP system priority after LACP is enabled on ports. If some
ports do not get into desired MLT after dynamic configuration change, enter
the CLI command clear-link-aggregation on the MLT. (Q00822182)
LACP-enabled ports with the same key must have the same VLAN
membership. On LACP-disabled ports with the same key, VLAN
membership can be different. This usually happens when you add VLANs to
or delete VLANs from these ports. But before LACP is re-enabled on these
ports, VLAN membership must be the same for ports with the same key.
(Q00857570)
If you set the broadcast rate limit value on a disabled MLT port, the value is
reflected on the other MLT ports, but the rate limiting of the active link is still
done based on the older value. For example, if you have two ports with a rate
limit value of 10, then the active link limits broadcast to 10. If one of the MLT
ports is disabled, the other one becomes the active link and continues to limit
Release Notes for the Passport 8600 Release 3.7.6
50 Known limitations and considerations in this release
•
the broadcast to 10. If the rate limit value is changed to 500 on the disabled
port of the MLT, the rate limit value of the active port changes to 500, but this
port still limits the broadcasts to 10 rather than allowing 500. This behavior
continues even if the disabled port is later enabled. (Q00805123)
While copying a large file from the PCMCIA to flash, the SMLT/LACP ports
may transition. (Q00906148)
RSMLT
•
•
•
If you are using RSMLT instead of VRRP, you need to configure the RSMLT
holdup-timer to 9999 in order to provide indefinite peer backup. (Q00789564)
When peer switches configured to use RSMLT do not have the same DHCP
configuration, unexpected results can occur. If there is a discrepancy in the
DHCP configuration, RSMLT reroutes the traffic. If the DHCP lease expires
while traffic is being rerouted and DHCP is not properly configured on both
core switches, then users could lose the connectivity. (Q00787428)
IPX RSMLT failover time may be greater than 30 seconds. This is due to the
RIP/SAP learning process. (Q00745690)
IPX
•
•
Occasionally, a client cannot establish a session with the server. The problem
may be a network latency issue with the Windows XP NetWare client version
4.90.0.0 for Windows XP. The problem is caused by setting the Auto_Frame
detection parameter, which is found under the NwLink settings. Nortel
Networks recommends not using this parameter. (Q00812779)
Using Device Manager, the IPX encapsulation type of an interface cannot be
changed, whereas the CLI allows you to do so using the following CLI
command:
config vlan <vid> ipx encapsulation <IPX-network-number>
<encapsulation>
(Q00910444)
•
Because of some Device Manager inconsistencies, Nortel Networks highly
recommends that you enter the CLI command, after enabling RSMLT using
Device Manager:
config vlan <vid> ipx rsmlt enable
(Q00915467)
217316-A Rev 00
Known limitations and considerations in this release
51
VRRP
Caution: Do not perform management using the VRRP interface. Use
actual IP addresses for management purposes. (Q00971864)
•
•
VRRP hotstandby (with WebOS software version 10.0.29.0) is not supported
in this release. (Q00249554)
Nortel Networks does not recommend using the same IP address for the
VRRP logical IP interface and the physical IP interface. (Q00812854)
Multicast
General
•
•
The Multicast Router Discovery protocol could cause interoperability issues
on a Passport 8600 connected to other devices implementing this protocol,
because the Passport 8600 implementation sends Multicast Router Discovery
messages to the all routers address (224.0.0.2). Newer drafts define the
destination address as the all hosts address of 224.0.0.1. Devices
implementing Multicast Router Discovery protocol based on the latest drafts
interoperate with the Passport 8600 only if they are able to send and receive
Multicast Router Discovery messages using the 224.0.0.2 address.
(Q00309216)
When you enter the CLI command query max response, the switch sets
the wrong parameter value for an IGMPv3 interface. (Q00912706)
IGMP
•
In an SMLT configuration, when multicast traffic ingresses on an IGMP
snoop-enabled edge switch from a PIM or a DVMRP-enabled IST switch,
show ip igmp sender CLI output always displays the IGMP Querier port
as the sender port even though data is actually ingressing on a different port of
the MLT. There is no traffic loss due to this issue. (Q00668314)
Release Notes for the Passport 8600 Release 3.7.6
52 Known limitations and considerations in this release
DVMRP
•
•
Scaling with 500 DVMRP interfaces and 1980 VLANs with 512 neighbors or
more results in a high CPU utilization that could reach 100%. If you need to
configure a large number of interfaces with DVMRP neighbors, the interfaces
cannot be attached to LANs without routers running DVMRP. (Q00646615)
Before configuring DVMRP on an interface using Device Manager, please be
sure that DVMRP has been globally and successfully configured.
(Q00912792)
PIM
•
•
•
•
A non-DR switch receives double traffic when a receiver is connected to a
non-DR switch and the unicast route (shortest path) towards the source is not
through a DR switch. Both non-DR and DR switches create (*,G) and (S,G)
records. (Q0086744)
On a VLAN spanning more than two switches, SPT path joins are received on
one port of the spanning VLAN. The messages on the VLAN port on which
RP-to-source prune messages are received are not properly pruned and stay in
a prune pending state (because of overriding joins received on the port in the
SPT path). (Q00421566)
The PIM MRtable incorrectly shows incoming traffic port when there is an
SMLT failover. (Q00664751)
R1 and R2 are running PIM, as shown below:
(non-DR) R1
R2 (DR)
1/2
1/1
BPS
S
If the BPS is at the edge, then the BPS always forwards traffic on the lowest
link of the MLT. Rebooting the DR switch when traffic is flowing
through 1/1, forces traffic to recover through 1/2.
217316-A Rev 00
Known limitations and considerations in this release
53
The source->upstream on R1 becomes NULL, because it is getting data
locally through 1/2. When R2 comes back up, traffic starts flowing on 1/1 to
R2. However, if the unicast route to the source subnet still lies through R1
(since R2 rebooted), any joins to the source go to R1 instead of R2. To receive
traffic, R1 must send a join to R2, but because the source->upstream is NULL
the join is never sent.
To avoid this issue, always connect the lowest IP address (non-DR) to the
lowest MLT port on the BPS. For example, in the above diagram, 1/1 should
go to R1. Always use FWD_TO_DR on R1 so that both R1 and R2 will
receive traffic. In this case, whichever switch receives the join after a reboot
can receive and forward traffic. (Q00658544)
Release Notes for the Passport 8600 Release 3.7.6
54 Reading path
Reading path
This section lists the documentation related to the Passport 8600 Switch Series
platform. You can find your documentation on the Nortel Networks customer
support Web site, www.nortel.com/support.
Select the Browse product support tab, and use the Product Finder selection
screen. In Step 1, ensure Product Families is selected from the Select from
drop-down menu, and then select Passport from the list of available products. In
Step 2 (...choose a product...), select Ethernet Routing Switch 8600. In Step 3
(...and get the content), select Documentation. Click Go.
If, for any reason, you cannot find a document using the above method, use the
Search function in the top right-hand side of the web site. Ensure the Support tab
is selected, and enter the title or part number of the document you are looking for
in the search field, then click Search >>.
You can print the listed technical manuals and release notes free, directly from the
Internet. Use Adobe* Acrobat Reader* to open the manuals and release notes,
search for the sections you need, and print them on most standard printers. Go to
Adobe Systems at the www.adobe.com website to download a free copy of the
Adobe Acrobat Reader.
217316-A Rev 00
Reading path
55
Related publications
This section lists common documentation related to the Passport 8600 switch.
For a list of documents specific to the Passport 3.7.6 release, refer to Getting
Started (320095-A). For additional configuration examples and information,
Technical Configuration Guide Service Delivery Module Firewall v1.0 is also
available from the Nortel website.
Release notes and Important Information documents
These guides provide late-breaking information for installing, configuring, and
managing your Passport 8600 switch.
Release Notes for the Passport 8600 Release 3.7.6
217316-A
Important Information about the 8600 Series Switch Modules
316340-C
Important Security Information for the 8000 Series Switch
314997-C
Installation and User Guides (Sheet 1 of 2)
These guides provide instructions for installing the chassis and its components,
installing and using the Device Manager software, and configuring various protocols on
the Passport 8600 switch.
Getting Started
320095-A
Adding MAC Addresses to the 8000 Series Chassis
212486-B
Installing and Maintaining the 8600 Series Chassis and Components
316314-D
Installing 8600 Switch Modules
312749-H
Installing a CPU Memory Upgrade
314832-B
Installing GBIC and Gigabit SFP Transceivers
318034-A
Installing and Using Device Manager
320096-A
Installing the Breaker Interface Panel for the 8010co Chassis
312755-E
Installing Media Dependent Adapters for the 8683POSM Module
313072-B
Installing Media Dependent Adapters for the 8672ATME and
8672ATMM Modules
313071-B
Installing a DC Power Supply in an 8000 Series Switch
313070-C
Release Notes for the Passport 8600 Release 3.7.6
56 Reading path
Installation and User Guides (Sheet 2 of 2)
Installing an AC Power Supply in an 8000 Series Switch
312751-C
Installing a Fan Tray in an 8000 Series Switch
312752-C
Installing Gigabit Interface Converters
316342-A
Installing Media Dependent Adapters (MDAs)
302403-G
Installation and Networking Guidelines for Optical Routing
212257-B
Installing the 8661 SSL Acceleration Module (SAM) for the 8600
Series Switch
316315-A
Installing the Web Switching Module for Passport 8600 Series
Switch
314969-B
Installing the 8660 Service Delivery Module (SDM) for the Passport
8600 Series Switch
217314-A
Managing Platform Operations
315545-C
Replacing an Air Filter in the 8010co Chassis
313592-C
Firewall User’s Guide and Command Reference
217315-A
Using Diagnostics Tools
317359-A
Using the Packet Capture Tool (PCAP)
315023-C
Using the 10 Gigabit Ethernet Modules: 8681XLR and 8681XLW
315893-C
Using the 8672ATME/ATMM Modules
209195-E
Using the 8683POSM Module
209564-B
Using the SSL acceleration module with the Web switching module
for the 8600 Series switch
316350-A
Firewall iSD Guides
These guides provide reference information for the Firewall iSDs.
Alteon Firewall 5100 Series 2.2.5 User’s Guide and Command
Reference
213455-J
Alteon Firewall 5100 Series User’s Hardware Installation Guide
216382-B
Alteon Firewall 5100 Series BBI Quick Guide
216383-B
217316-A Rev 00
Reading path
57
Reference and Configuration Guides
These guides provide reference and configuration information for the Passport 8660
SDM.
System Messaging Platform Reference Guide
315015-D
(Alteon) Web OS Switch Software 10.0 Command Reference
212778-A
(Alteon) Web OS Switch Software 10.0 Application Guide
212777-A
Understanding the Passport 8600 & Web Switching Module (WSM)
316437-A
Network Design Guidelines
313197-D
Upgrading to Passport 8000 Switch Series Software Release 3.7.6
318843-A
Getting Started with a Web Switching Module for the Passport 8600
316435-A
Deviating from the Passport 8600 and Web Switching Module
(WSM) Factory Defaults
316436-A
Configuring Basic Server Load Balancing (SLB) with a Passport
8600 Web Switching Module (WSM)
316434-A
Configuring the Web Switching Module using Device Manager
(Passport 8000 Series Software Release 3.7)
314995-B
Configuring the 8661 SSL Acceleration Module for the 8600 Series
Switch
316351-A
Configuring Internet Membership Group Authentication Protocol
(IGAP).
316343-B
Configuring QoS and IP Filtering
316433-C
Configuring IP Routing Operations
314720-D
Configuring IP Multicast Routing Protocols
314719-C
Configuring BGP Services
314721-C
Configuring Network Management
314723-C
Configuring IPX Routing Operations
314722-B
Configuring and Managing Security
314724-C
Configuring VLANs, Spanning Tree, and Link Aggregation
314725-C
Release Notes for the Passport 8600 Release 3.7.6
58 Reading path
217316-A Rev 00