1
Preface
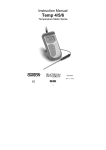
This manual serves to explain the use of the EcoScan Temp JKT
temperature meter. This manual functions in two ways: first, as a step by
step guide to help you operate the meter; second, it serves as a handy
reference guide.
This manual is written to cover as many anticipated applications of the
EcoScan Temp JKT meter as possible. If there are doubts in the use of
the EcoScan Temp JKT meter, do not hesitate to contact the nearest
Eutech Instruments Authorized Distributor.
Eutech Instruments cannot accept any responsibility for damage or
malfunction to the meter caused by improper use of the instrument.
Remember to fill in the guarantee card and mail it back to your authorized
distributor or Eutech Instruments Pte Ltd.
The information presented in this manual is subjected to change without
notice as improvements are made, and does not represent a commitment
on the part of Eutech Instruments Pte Ltd.
Copyright
©
2001 Eutech Instruments Pte Ltd. All rights reserved.
Table of Contents
1. INTRODUCTION
1
1.1 Introducing the EcoScan Series
1
2. GETTING STARTED
2.1
2.2
2.3
2.4
2.5
2.6
2.7
2
Description of Keypad Functions
Description of LCD Annunciators
Inserting & Removing the Rubber Boot
Inserting New Batteries
Battery Replacement
Connecting the Temperature Sensor
Switching the Meter On
2
2
3
3
4
4
4
3. CALIBRATION
5
3.1 Temperature Calibration
3.1.1 Temperature Calibration using Offset Adjustment
5
5
4. MEASUREMENT
4.1
4.2
4.3
4.4
4.5
Taking Measurements
Displaying Maximum and Minimum Readings
Holding a Reading
Releasing a Held Reading
Maximum and Minimum Hold Mode
6
6
6
6
6
7
5. PROBE CARE AND MAINTENANCE
8
6. TROUBLESHOOTING
8
7. SPECIFICATIONS OF ECOSCAN TEMP JKT METER
9
8. ACCESSORIES
10
9. WARRANTY & RETURN OF ITEMS
11
1. INTRODUCTION
1.1 Introducing the EcoScan Series
Thank you for purchasing Eutech Instruments’ EcoScan Temp JKT meter. This
economical microprocessor-based handheld meter works with type J, type K and
type T probes for a wide temperature measurement range:
•
Type J probes (iron-constantan) offer a wide range of –200 to 1000 °C / 328 to 1832 °F; use in reducing environments
•
Type K probes (chromel-alumel) offer the widest range of –250 to 1372 °C
/ -418 to 2502 °F; use in oxidizing environments
•
Type T probes (copper-constantan) of range of –250 to 400 °C / -418 to
752 °F; good for ambient and sub-freezing measurements
The EcoScan Temp JKT meter features:
•
Large LCD for clear and easy reading
•
Readings in oC and oF (selectable)
•
Minimum and maximum temperature display
•
Minimum and maximum hold mode
•
Low battery indicator
•
Hold function, freezes measured reading
•
User calibration - offset adjustment
•
Built-in memory backup; calibration and other information remain if battery
is disconnected
This instruction manual is organized for quick reference with step-by-step
procedures that give you thorough review of the various features and meter
operations.
Included with your meter are a rubber boot, 4 alkaline “AAA” batteries, an
instruction manual and a warranty card. To order different type of thermocouple
probes, please refer to Section on Accessories for more information.
1
2. GETTING STARTED
2.1 Description of Keypad Functions
EcoScan Temp JKT meter has seven keys on its splash-proof keypad. These keys
include ON / OFF, CAL, HOLD / ENTER, oC/oF, MAX / s (UP), MIN / t (DOWN)
and J-K-T keys.
ON/OFF: Powers meter on and shuts the unit off.
Meter directly enters measurement mode when
you turn it on.
CAL: Allows temperature calibration of the
meter.
HOLD/ENTER: Freezes the measured reading;
confirm calibration value.
MAX/s
s (UP) and MIN/t
t (DOWN): Momentarily
displays meter’s maximum and minimum
temperature; enter maximum or minimum hold
mode; scroll up and down in calibration mode.
o
C/oF: Switches between
measurement mode.
o
C
o
F
in
and
T
and
J-K-T: Switches between J, K
thermocouple measurement mode.
Figure 1: Keypad
2.2 Description of LCD Annunciators
The EcoScan Temp JKT meter has a large custom LCD that consists of 4-digit
segments and operation annunciators for oC and oF. Other indicators include “MIN’,
“MAX”, “HO” (when the HOLD function is activated), “LO” (low battery condition)
and “J”/”K”/”T”.
JKT HO LO MAX
MIN pH %
o
C oF
m
pp mv
Figure 2: Full segment LCD
2
2.3 Inserting & Removing the Rubber Boot
1. To remove meter from rubber boot, push out from the bottom edges of meter
until it is completely out of boot. Ensure that the connector of
temperature sensor is not connected.
2. To insert meter into rubber boot, slide in from the top of meter before pushing
the bottom edges of meter down to set it into position. Lift up the stand at the
back of meter for bench top applications if necessary.
Figure 3: Inserting meter into the rubber boot
2.4 Inserting New Batteries
The battery compartment is found at the back of instrument. To open the battery
compartment, push in the direction of arrow and lift up the cover. Note the polarity
of battery before inserting into position. After replacement, place cover back and
press down until it locks tight.
Figure 4: Battery compartment at the back of the meter
3
2.5 Battery Replacement
A “LO” annunciator in the LCD alerts you when battery power is running low.
Replace with the same type as recommended by the manufacturer.
K
LO
o
C
Figure 5: Low battery indicator
Caution: Power off the meter when changing battery.
2.6 Connecting the Temperature Sensor
Insert the 2-pin mini connector plug of the temperature sensor into the connector
socket on the side of the meter.
NOTE: The negative pin is larger than the positive pin, be sure to properly align the
pins. Unplug the sensor when not in use.
Figure 6: Connecting the temperature sensor
2.7 Switching the Meter On
1. Press ON/OFF key to power up your meter. All
the LCD segments display momentarily as the
meter performs a self-diagnostic test, per shown
in section 2.2. The LCD then switches into
measurement mode.
Figure 7: "Open" annunciator
2. The LCD displays “oPEn” if the temperature sensor is faulty, or there is an
open circuit. Please refer to section on Troubleshooting if in doubt.
4
3. CALIBRATION
3.1 Temperature Calibration
The temperature sensor included with your meter is factory calibrated. Over time,
the temperature calibration may drift and the probe requires re-calibration. The
EcoScan Temp JKT meter allows you to have a 1-point calibration as fine
adjustment by changing its offset value. This is useful if you replace the probe. If
you replace the probe, you should recalibrate.
3.1.1 Temperature Calibration using Offset
Adjustment
CAL
1. Connect your temperature probe to the meter.
Turn meter on. Meter enters measurement
mode.
2. Dip the probe in a constant temperature bath or
liquid of which temperature can be checked with
a thermometer known to be accurate. For best
accuracy, place the probe and thermometer in a
constant temperature bath.
3. Make sure that the meter is in the measurement
mode. Press CAL key to enter temperature
calibration mode. The LCD shows “CA”
momentarily and the displayed reading flashes.
4. Press s and t keys to adjust the displayed value
until it matches the correct desired temperature.
The s and t key will scroll to the maximum
allowable value (maximum adjustment is ±10 oC /
±18 °F from factory default).
MAX
o
C
o
C
MIN
HOLD
ENTER
5. Press ENTER key to confirm calibration. The
LCD displays “CO” momentarily, and the meter
then reverts to measurement mode.
o
C
Figure 8: Temperature calibration
5
4. MEASUREMENT
4.1 Taking Measurements
1. Power on the meter. The meter automatically
enters Temperature mode. The “J”, “K” or “T”
annunciator will display, depending on what
probe type was selected the last time the meter
was used. The oC or oF annunciator display in
your LCD indicate which mode you are taking
measurements in.
J
o
o
C F
Figure 9: J/K/T and temperature
annunciators
2. Press the J-K-T key to toggle between type J, K or T mode, until the mode
matches probe type selected. Note reading.
3. Press the °C/°°F key to toggle between each measurement mode.
4.2 Displaying Maximum and Minimum
Readings
The EcoScan Temp JKT meter can momentarily
display the maximum and minimum temperature
measured since you switched the meter on. Simply
press MAX/s
s or MIN/t
t key. The “MAX” or “MIN”
annunicator displays in the LCD and the maximum
or minimum temperature momentarily displays.
Meter then returns to measurement mode.
MAX
K
o
C
Figure 10: Viewing the maximum
& minimum value
4.3 Holding a Reading
To freeze or hold your reading, press HOLD key
once. The LCD displays ”HO” annunciator to indicate
the HOLD function is activated.
4.4
Releasing a Held Reading
K
HO
o
F
Figure 11: HOLD annunciator
Press HOLD key again to deactivate HOLD function or to release your frozen
reading. The meter returns to measurement mode, and the “HO” annunciator
disappears from the LCD.
6
4.5 Maximum and Minimum Hold Mode
With the Maximum and Minimum Hold mode, the EcoScan Temp JKT meter can
be used as a maximum registering (or minimum registering) thermometer. The
meter displays the lowest or highest temperature measured since entering the
Maximum or Minimum Hold mode.
1. Power on the meter. The meter automatically enters temperature mode. Use
°C/°°F key to switch between Celcius and Fahrenheit reading if desired.
2. Press HOLD key. The reading freezes and the annunicator “HO” displays in
the LCD.
3. Press MAX/s
s or MIN/t
t key. Meter enters the Maximum or Minimum Hold
mode. “HO” and “MAX” or “MIN” annunciator displays in the LCD.
J
HO
MIN
o
F
Figure 12: Maximum & minimum HOLD mode
Meter will now continuously display the lowest or highest temperature measured
since you entered this mode. It will update the display when new highs or lows are
reached.
Press HOLD key again to leave MIN/MAX Hold mode and meter returns to its
measurement mode.
7
5. PROBE CARE AND MAINTENANCE
For best results, always clean the temperature probe with clean tissue paper after
measurement to keep the probe in good working condition. Wash the probe
thoroughly with tap water if necessary to wash off any residue. Should there be any
thin oil film sticking on the probe, wash with mild detergent or soap and warm
water. Rinse probe thoroughly under running water. Blot it dry and clean off with
clean tissue.
To remove the probe, simply hold firmly onto the probe’s plastic holder and pull the
connector out of the meter’s socket. Store both the probe and meter into its original
packaging when not in use.
6. TROUBLESHOOTING
Problem
Cause
Solution
Power on but no
display
a) Batteries not in
place.
a) Insert batteries.
“oPEn” display on
LCD
a) Probe not connected
a) Make sure probe is firmly
connected.
“Ur” or “Or” display
on LCD
a) Measurement over
(Or) or Under (Ur)
range
a) Ensure temperature taken is
within meter’s specification.
“LO” annunicator in
the LCD
a) Low battery
a) Replace batteries with fresh
ones.
Unstable reading
a) Electrode not deep
enough in sample
a) Place probe deeper in
sample.
b) Dirty probe
b) Clean probe.
c) Broken probe
c) Replace electrode.
d) External “noises” or
induction caused by
nearby electrical
motor
d) Remove or switch off
interfering motor.
a) Dirty probe
a) Clean probe
Slow response
b) Re-insert batteries in correct
polarity.
8
7. SPECIFICATIONS OF ECOSCAN TEMP JKT METER
Temperature Range
Type J
-200 to 1000 °C (-328 to 1832 °F)
Type K
-250 to 1372 °C (-418 to 2502 °F)
Type T
-250 to 400 °C (-418 to 752 °F)
Resolution
t<-99.0 °C
1 °C (1 °F)
-99.9 °C<t<299.9 °C
0.1 °C (0.1 °F)
t>299.9 °C
1 °C (1 °F)
Accuracy
t<-99.9 °C
± 0.25% of reading + 1 °C (2 °F)
t>-99.9 °C
±0.2% of reading + 0.5 °C (0.9 °F)
Offset Adjustment
±10 °C (±18 °F)
Auto Power-Off
17 minutes after last key-press
Hold Function
Yes
Display
Custom LCD
Low Battery Indicator
Yes
Input
2-pin ANSI mini connector
Power Requirement
4 ‘AAA’ Batteries
Battery Life
>200 hours
Operating Temperature
-10 to +50 °C
Dimension / Weight
Meter: 14 x 7 x 3.5 cm / 200 g
Boxed: 24 x 17 x 8 cm / 550 g
9
8. ACCESSORIES
Replacement Meter and Meter accessories
Ordering Code No.
Item
Replacement Meter
EC-TEMPJKT
EcoScan Temp JKT meter only
Type J Thermocouple Probes
EC-TPGLPJ-01M
General purpose probe (immersion into liquids)
EC-TPPENJ-01M
Penetration probe (meat, semi-soft materials)
EC-TPSURJ-01M
Surface probe (direct contact on hot surface)
EC-TPCLPJ-01M
Clip-on probe (surface contacts – electronics)
Type K Thermocouple Probes
EC-TPGLPK-01M
General purpose probe (immersion into liquids)
EC-TPPENK-01M
Penetration probe (meat, semi-soft materials)
EC-TPSURK-01M
Surface probe (direct contact on hot surface)
EC-TPCLPK-01M
Clip-on probe (surface contacts – electronics)
10
9. WARRANTY & RETURN OF ITEMS
Eutech Instruments warrants this meter to be free from significant
deviations in material and workmanship for a period of three years from
date of purchase. Eutech Instruments warrants this probe to be free from
significant deviations in material and workmanship for a period of six
months from date of purchase. Each instrument will have a warranty card
with a specific serial number. The warranty card must be endorsed by the
Authorized Distributor at the point of sale.
If repair or adjustment is necessary and has not been the result of abuse
or misuse within the designated period, please return – freight pre-paid –
and correction will be made without charge. Eutech Instruments alone will
determine if the product problem is due to deviations or customer misuse.
Out of warranty products will be repaired on a charged basis.
Exclusions
The warranty on your instrument shall not apply to defects resulting from:
•
Improper or inadequate maintenance by customer
•
Unauthorized modification or misuse
•
Operation outside of the environment specifications of the products
Return of items
Authorization must be obtained form our Customer Service Department or
authorized distributor before returning items for any reason. A “Return
Goods Authorization” (RGA) form is available through our authorized
distributor. Please include data regarding the reason the items are to be
returned. For your protection, items must be carefully packed to prevent
damage in shipment and insured against possible damage or loss. Eutech
Instruments will not be responsible for damage resulting from careless or
insufficient packing. A restocking charge will be made on all unauthorized
returns.
NOTE: Eutech Instruments Pte Ltd reserves the right to make improvements in
design, construction and appearance of products without notice.
11
NOTES
12
For more information on Eutech Instruments products, contact your nearest Eutech
Instruments distributor or visit our website listed below:
Manufactured by:
Eutech Instruments Pte Ltd.
Blk 55, Ayer Rajah Crescent,
#04-14/24 Singapore 139949
Tel: (65) 778 6876
Fax: (65) 773 0863
E-mail: [email protected]
Web-site: http://www.eutechinst.com
Distributed by: