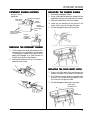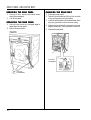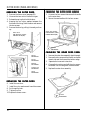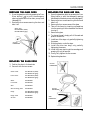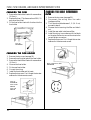
1
ASKO
W6OO - SERIES WASHERS
SERVICE MANUAL
CONTENTS
Introduction and Safety Regulations ........ 2
I n s t a l l a t i o n ......................................................... 3
M o t o r O p e r a t i o n s ............................................. 7
W a s h e r F e a t u r e s ............................................... 9
F a u l t TTrr a c i n gg.....................................................
..................................................... 1 0
Common Laundry Problems ......................... 1 2
Components and Measurement VValues
alues .. 1 3
Test PPrograms
rograms and FFault
ault Indications ...... 1 5
Consumption VValues
alues ....................................... 1 7
T o o l s ..................................................................... 1 8
S e r v i c e I n f o r m a t i o n ....................................... 2 0
I n d e x .................................................................... 6 4
1
INTRODUCTION AND SAFETY REGULATIONS
INTRODUCTION
SAFETY REGULA
TIONS
REGULATIONS
You have in your hand the ASKO Service Manual
for our new generation of washing machines that
are friendly to the environment in both their
manufacture and their use.
GENERAL
The electrical and plumbing installations should be
carried out by a qualified electrician and plumber.
Be sure to follow all/any Federal, State, County,
City or Local codes in your area.
This new generation of washing machines has been
designed for ease of servicing. By this we mean that
it’s a simple job, for example, to replace a damaged
side panel. That’s why we’ve changed the design
from a one-piece casing to a split casing.
To secure parts, we have replaced many of the screws
by plastic snap fasteners. We have also designed the
machines so that you can perform as much servicing
as possible from the front, all for simplifying service.
We have also integrated service aids, such as hooks
to hang parts on, i.e., the glass door, so that you can
use both hands for installation.
We hope this Service Manual will be a positive tool
in your daily work. If you have any questions
concerning servicing ASKO products, to contact the
ASKO Advisory Center at:
1161 Executive Drive West
Richardson, Texas 75081
972-238-0846
THE DIFFERENT MODELS
The table below shows the Model numbers and the
correlating model type:
Model
W600
W620
W640
W660
Type
WM 33 (600–1000 rpm)
WM 44 (600–1200 rpm)
WM 55 (600–1400 rpm)
WM 55 (600–1600 rpm)
W600 and W620 are mechanical, programmercontrolled washing machines. W640 and W660 are
electronically-controlled washing machines.
The W620 has a five-hour delay start feature. The
W640 and W660 can be set to delay starting the
washing program for up to 12 hours. On the W640
and W660 you can choose from eleven different
languages on the display, and you can program them
to display the temperature in Celsius or Fahrenheit.
NOTE:
It is important that you put the Model Number on
all NARDA claim forms to expedite your payment.
2
WARNING
Always switch off the main electrical power supply
when dismantling and assembling the washing
machine.
WARNING
Always use a grounded EMC wristband when
working with electrical components, such as panel
and program control printed circuit boards.
TRANSPORT/WINTER STORAGE
If the machine is to be transported or stored for the
winter in unheated premises, empty the pin trap
and drain pump of water. (See "Cleaning and
Maintenance" on page 55.)
DISPOSAL
When the machine comes to end of its useful life
and is to be scrapped, it must be immediately
rendered unusable.
The machine is manufactured and labelled for
recycling. Contact your local refuge authority to find
out how the machine should be scrapped and
recycled properly. This number is normally found
in the “City of ” numbers provided in your
telephone book.
WARNING
To prevent children from being accidentally
locked in the tub, the locking washer door must
be removed when discarding the washer.
INSTALLATION
Read these instructions carefully and completely
before you install the machine. The installation
should be carried out by a qualified person who is
familiar with all local codes and ordinances for
electrical and plumbing connections.
NOTE:
Cosmetic damage must be reported to your dealer
within five days from the date of purchase. After
unpacking the washer, thoroughly check the unit
for cosmetic damage.
SPECIFICATIONS
33-1/2”–34-1/2 (850–876 mm)
23-7/16” (595 mm)
W640/W660: 23-7/16" (595 mm)
W600/W620: 24-7/16” (620 mm)
With door open:
W640/W660: 36-3/8" (923 mm)
W600/W620: 42-3/8” (1075 mm)
Weight
167 lbs. (73 kg)
Rated load
See data plate
Supply voltage
Single-phase 208–240 V, 60 Hz
Heating element
2000 W
Fuses (2)
15 A in line
Drum and Barrel
Stainless steel
Outer casing
Stove-enamelled hot-dipped
galvanized steel
Mounting
Four adjustable rubber-covered
feet
Inlet supply hose
5 ft. (1.5 m) PEX tubing with
brass ferrules
Supply pressure
15–142 PSI
Outlet hose
5.5 ft. (1.7 m) polypropylene hose,
3/4” ID
Power cord supplied 220V, 20A
REMOVING THE SHIPPING SUPPORTS
Before the machine can be used, the three shipping
supports must be removed. Each support consists
of a bolt, a screw, a washer and a shipping sleeve.
The sleeves are used after the supports have been
removed, to plug the holes in the transport beam.
IMPORT
ANT
IMPORTANT
Keep the screws and washers in a safe place in
case the machine has to be transported again later
on.
Height
Width
Depth
SHIPPING SUPPORTS
The machine is transported with three shipping
supports, as illustrated to the right. These supports
hold the tub in place during shipment. When you
unpack the machine, you must remove these
supports before you run the washer.
WARNING
Failure to remove the shipping supports before
you run the washer could damage the unit.
You must remove the
shipping supports
before you install the
washer.
WARNING
Be careful of sharp edges.
To remove the shipping supports, follow the
instructions below:
1. Unscrew the 5/8” (13
mm) bolts holding
the supports in place
and remove the bolts.
2. Push the rubber spacer
up then pull it out of
the slot.
3. Rotate the spacer so that the
extruded end points toward
the machine. Insert it into the
slot and push down to lock it
into position.
4. Repeat procedures 1, 2, and 3 for the two
remaining shipping supports.
3
INSTALLATION
ASKO washers can be installed either freestanding,
built in, or with an ASKO dryer stacked on top of
it.
A . FFrr e e s t a n d i n g I n s t a l l a t i o n
The washing machine can be located as a freestanding
unit. It is essential that the machine is leveled and
the locknuts are tight to prevent excessive vibration
during the spin cycles. Also be sure to leave a
minimum of 1/2” (12.5 mm) of space between the
washer and the dryer.
ADJUSTING THE FEET
It is important that the machine is level so it won’t
vibrate excessively during the spinning cycles. Each
foot on the washer is adjustable, so you can level
the washer on any surface. Once it is level, securely
tighten the lock nuts on the feet to prevent excessive
vibration during the spin cycles.
5/8” nut
(16 mm)
WARNING
ASKO washers should never be stacked on a
counter or a dryer. You can, however, stack an
ASKO dryer on an ASKO washer. Refer to page
6 for instructions on how to do this.
WA
TER CONNECTION
WATER
47 1/2”
When installing the unit next to a wall, be sure to
leave at least 1/2” (12.5 mm) of space between the
unit and the wall. Never push the washer flush
against the wall because it may damage the machine
casing or the wall.
Built-in Installation
ASKO washers can be installed beneath a cabinet or
worktop with a minimum height of 34” (863.6
mm). There must be a gap of at least 1/4” (.64 mm)
all around the machine, including between the rear
edge of the machine top panel and the back wall.
The opening width must be at least 24” (600 mm).
Space must also be available for the inlet and drain
hoses. See the diagram below for measurements and
positions.
Because ASKO washers have their own heating
element, you only need to have a cold water inlet.
The machine is plumbed with the connection hose
that comes with it. The water pressure should be in
the range of 15–146 PSI.
WARNING
Do not plumb to hot water because all rinses will
then be hot and wrinkling will occur.
The water supply must have a shut-off valve. If the
piping is new, the line should be flushed thoroughly
to remove any foreign particles that might clog the
strainer in the water inlet valve.
Fill hose:
Machine Connection:
Length:
3/4” garden hose
3/4” metric thread
5 ft. (1.5 m)
Tap
Cold water
supply
NOTE: The metric end attaches to the washer.
If the drain outlet is higher than 24”, you
will need to recess the connections.
4
INSTALLATION
DRAIN CONNECTION
GROUNDING INSTRUCTIONS
The machine is supplied with the outlet hose already
attached. The hose should be extended over a suitable
sink edge or drain pipe at a minimum height of 24” to
a maximum height of 60” (610 mm to 1524 mm)
above the floor. (The lower height is preferable.)
Make sure that the hose is not kinked.
This appliance must be grounded. In the event
of malfunction or breakdown, grounding will
reduce the risk of electric shock by providing a
path of least resistance for electric current. This
appliance is equipped with a cord having an
equipment-grounding conductor and a
grounding plug. The plug must be plugged into
an appropriate outlet that is properly installed
and grounded in accordance with all local codes
and ordinances.
WARNING! Improper connection of the
equipment-grounding conductor can result
in a risk of electric shock. Check with a
qualified electrician or serviceman if you are
in doubt as to whether the appliance is
properly grounded.
Drain hose:
3/4” (18.9 mm) ID
5.5 feet (1.7 m) long
Should you require an extension for the drain line,
the coupling must not be less than 1/2” ID. The
stand pipe for the drain should be 1-1/2” or larger
to prevent a vacuum from occurring.
Do not modify the plug provided with the
appliance. If it will not fit the outlet, have a
proper outlet installed by a qualified electrician.
ELECTRICAL INST
ALLA
TION
INSTALLA
ALLATION
The electrical installation must be carried out by a
qualified electrician. The machine is delivered readyfitted with a 220V, 20A plug and is intended for
connection to an ASKO Dryer, which is equipped
with a matching receptacle. The plug supplied with
the washer can only be used with an ASKO Dryer.
If the washer is used separately or with another dryer,
it must be on a separate 220 V, 60 Hz single-phase
circuit.
If the machine is to be used in a wet area, the supply
must be protected by a residual current device.
As supplied:
208–230 V, 60 Hz
220V, 20A cord
2000 W heating element
5
INSTALLATION
S TTACKED
ACKED INST
ALLA
TION
INSTALLA
ALLATION
ASKO dryers can be mounted on top of any
matching ASKO washer. Mounts are supplied with
the machine.
Two metal brackets for
securing the dryer to
the washer
Two plastic cups to
secure the dryer legs.
To install the dryer on top of the washer, follow the
steps below:
1. Remove the two outside screws (20 torx) from
the back of the washer and use them to secure
the metal brackets, as illustrated.
the tabs to position the cups (as illustrated) then
press them firmly into place.
4. Once the cups are in place, break off the
remaining plastic tabs on the outside edge and
front of the cup.
5. Lift the dryer into
position. Raising the
front edge, push the
dryer backwards until it
engages with the
brackets on the back of
the washer.
6. Carefully lower the
front of the dryer,
making sure the feet
fit into the plastic
cups.
IMPORTANT
Don’t forget the lock washers.
Washer
back
Metal brackets
Stacked Installation
2. To ensure the dryer is correctly positioned on
top of the washer, align the plastic cups with
the front top edge of the washer.
Tumble dryer
Plastic cups
To position the plastic cups, break off the left
tab (A) on the cup to be placed on the right
side of the washer and break off the right tab
(B) on the cup to be placed on the left side of
the washer.
3. Remove the protective
paper from the selfadhesive surface beneath
the cups. Being careful
not to press the adhesive
surface against the top of
the washing machine, use
6
Washer
Total height 67”.
Adjustable to 69”.
WARNING!
Never stack a washer on top of a dryer!
MOTOR OPERATIONS
WASH PROGRAM ACTION
The paragraphs below explain the motor operations
for the various wash programs.
speed on the way up and down. This checks for
out-of-balance. During this cycle the tub may make
violent movements although there is nothing
wrong.
Presoak
No tub action while filling. After filling, clockwise
3 seconds on, 27 seconds off, counterclockwise 3
seconds on, 27 seconds off. Then 10 minutes of no
tub action.
There are three different limit values for out-ofbalance that permit different spin drying speeds.
Prewash
Clockwise 9 seconds on, 6 seconds off,
counterclockwise 9 seconds on, 6 seconds off, and
so on.
Preliminary spin (long and short)
A preliminary spin dry is performed so that the
machine will have a smoother start for its main spin
dry cycle. It does this by removing over half the
weight in water by spinning at 900 rpm for
approximately one to two seconds.
Normal wash
Clockwise 12 seconds on, 3 seconds off,
counterclockwise 12 seconds on, 3 seconds off, and
so on.
Synthetic wash
Clockwise 3 seconds on, 27 seconds off,
counterclockwise 3 seconds on, 27 seconds off, and
so on.
W ool/Hand wash
Clockwise 3 seconds on, 57 seconds off,
counterclockwise 3 seconds on, 57 seconds off, and
so on.
Fluff (at end of program)
Clockwise 12 seconds on, 3 seconds off,
counterclockwise 12 seconds on, 3 seconds off, and
so on.
Wa s h i n g c y c l e
40 ± 1 rpm Presoak, prewash.
49 ± 1 rpm Main wash, rinses.
SPIN SPEEDS
W600:
W620:
W640:
W660:
800 or 1000 rpm
600–1200 rpm *
600–1400 rpm *
600–1600 rpm *
* Selectable in 100 rpm steps.
OUT
OUT-- OF-BALANCE CHECK
There are two spin sequences, long and short. Both consist
of a preliminary spin, the washing cycle and a main spin.
Before the preliminary spin, the machine runs a
separating cycle at 100 rpm and measures the drum
Limit value 1: 1300 – 1600 rpm
Limit value 2: 1000 – 1299 rpm
Limit value 3: – 999 rpm
A maximum of ten restarts are made at limit value
3 to reach 500 rpm. If the out-of-balance is still too
great in the final (tenth) attempt, the program will
continue without the preliminary spin or main spin
dry cycles. This is indicated on the display after the
program has finished.
Selected spin speed 1300–1600 (long and
short)
A maximum of five restarts at limit value 1 are made
to try to achieve the selected spin drying speed.
If the out-of-balance is too great, a maximum of three
restarts will be made at limit value 2 to try to achieve
1200 rpm. If limit value 1 is achieved during any of
these three restarts, the selected spin speed will be run.
If the out-of-balance is still too great, a maximum
of two restarts at limit value 3 will be made to try
to reach 900 rpm. If limit value 2 or limit value 1
is achieved during either of these two restarts, 1200
rpm or the selected spin speed will be run.
If the out-of-balance is still too great in the final
(tenth) attempt, the program will continue without
spin drying. This is indicated on the display after
the program has finished.
Selected spin speed 1000–1300 rpm (long
and short)
A maximum of eight restarts at limit value 2 are
made to try to reach the selected spin drying speed.
If the out-of-balance is too great, a maximum of
two restarts will be made at limit value 3 to try to
achieve 900 rpm. If limit value 2 is achieved during
either of these restarts, the selected spin drying speed
will run.
7
MOTOR OPERATIONS AND THE GLASS DOOR
If the out-of-balance is still too great in the final
(tenth) attempt, the program will continue without
spin drying.
Selected spin speed 600–900 rpm (long
and short)
A maximum of ten restarts at limit value 3 are made
to try to reach the selected spin drying speed.
If the out-of-balance is still too great in the final
(tenth) attempt, the program will continue without
spin drying. This is indicated on the display after
the program has finished.
Should clothes or other items come out of the
washer not spun properly, check the following:
Size of load. It’s hard to balance loads if only one
item or a few small items are in the drum.
Throw rugs are also hard to balance.
Mixing different materials, such as lightweight
permanent press items with terry cloth, towels, or
denim jeans.
Restart point after interrupted start
attempt
If a start has been interrupted due to excessive outof-balance, the motor runs for one cycle
counterclockwise, and then another attempt is
made.
DRAIN PUMP OPERA TION
During long spin dry
The drain pump runs continuously for the first 6
minutes and then 50 seconds off, 10 seconds on,
50 seconds off, and so on for the remainder of the
respective cycle. If a restart takes place due to
excessive out-of-balance, the drain pump operating
time is reset to zero.
During short spin dry
The drain pump runs continuously for the whole
cycle.
8
OPENING THE GLASS DOOR
To open the glass door on an ASKO washer, the
power must be on and you must press the Door
Open button ( ). There will be a few seconds
delay before the door opens.
W600 and W620: On these models the Program
Control knob must be at the end of a program (at
the 12:00 or zero position) to open the glass door.
If you need to stop or interrupt a program after you
start the machine, turn the Program Control knob
to 10 (Drain). Any water in the machine will be
pumped out and you can then press the Door Open
button ( ) to open the door. To restart the washer,
close the door and turn the controls to the desired
settings.
W640 and W660: On these models, if you need
to open the glass door during a wash or rinse cycle,
press and hold the Door Open button ( ) for
three seconds. The machine will stop and
automatically drain enough water so the door can
be opened safely. The program will resume when
you close the door. The inlet valve will come on to
ensure the proper water level.
In case of mechanical failure, you can use the
Emergency Door Opener located by the drain
pump. (See page 10.) To use the Emergency Door
Opener, remove the screw holding the cord handle
(loop) and pull the cord down.
WASHER FEATURES
FRONT VIEW
Top
Cover
Detergent
drawer
Front
panel
Control
panel
Front
cover
plate
Side
panel
Glass
door
Drain pump
cover (closed)
Emergency
drain hose
Lower
cover
Outer door
(W620 and W660)
Pin
trap
20 torx screw
securing door
opener
Emergency
door
opener
Drain pump
cover (open)
REAR VIEW
Top
Cover
Fuses
Drain
hose
PEX fill line
Shipping
Supports (3)
Tap
Cold
water
supply
Electrical
cord
Rear
Panel
9
FAULT TRACING
The machine will not start.
1. Check the house breaker switch/fuses.
2. Check that the glass door is closed securely.
3. Make sure the power switch is turned on and
the indicator lamp is lit.
4. If the power switch is on and the indicator lamp
is not lit, there is no power supply. Make sure
the machine is properly plugged into the electrical
outlet at the wall or on the back of the dryer.
5. If washer power cord is plugged into the back
of the dryer, turn the power to the dryer on and
see if the indicator light is lit. If it is not lit,
unplug the dryer power cord and replace it
firmly into the wall receptacle.
6. W620: Check that the Delay Start button is
not pressed in.
W640 and W660: Check that the Delay Start
symbol ( ) is not shown on the display.
The machine will not work.
1. Check the main power switch.
2. Check the door switch.
3. Measure the voltage between PF1 and PF3
(W600/W620) also between E1-1 and E1-2
(W640/W660). The value should be the same
as the main power supply voltage (208–230V).
(See page 13 for values.)
4. Check the machine and house fuses. If it’s
necessary to change the fuses, investigate why
they have blown.
The washer door is difficult to close or
will not close.
1. Make sure nothing is caught in the door, such
as apron strings, shoe laces, etc.
2. Make sure the power to the machine is on.
3. Check that the door seal fits securely.
4. Check the door switch. (See page 14.)
The washer door leaks.
1. Check that the door seal is in good condition
and fits securely.
2. Make sure nothing is caught in the door, such
as apron strings, shoe laces, etc.
The washer door will not open.
1. Make sure the power to the machine is on.
2. Be sure the washer is not still in a cycle.
3. W600/W620: Make sure the Program Control
knob is in the proper position (at a red mark).
10
4.
5.
6.
7.
Make sure the Door Open button was pressed.
Check the machine and house fuses.
Check the door lock. (See page 14.)
If there is no water in the machine and the door
won’t open in the normal manner, you should
be able to open it manually, as follows:
a. Make sure the power is turned off.
b. Using a flathead screwdriver, gently pry open
the drain pump cover.
c. Empty out any water that may be in the
machine by disconnecting the drain hose
from the door pin (A).
IMPORT
ANT
IMPORTANT
If there is still water in the drum, make sure you
have a large container ready to catch the water.
d. Unscrew the emergency
door opener handle (B)
and pull it out (C) to open
the door.
e. Replace the emergency
door opener handle.
A
B
C
Temperature and speed cannot be selected (W600 and W620).
1. Check the selector knobs. (See the schematic
diagrams to find the measuring points.)
The machine does not perform washing
rotation or does not reverse the direction of washing rotation.
1. Check that the drive belt is secure.
2. Check the programmer (W600/W620) or the
motor control board (W640/W660). (See the
schematic diagrams for measuring points.)
3. Check the motor. (See page 13.)
4. Check the level switch. (See page 13.)
The washer doesn’t spin dry (W640/W660).
If “0000” is flashing in the top right corner of the
display, the machine did not spin. The machine has
a built-in out-of-balance sensor that will reduce the
spin drying speed or stop spin drying altogether if
the load is too unbalanced.
1. Open the washer and redistribute the laundry.
2. Run a Spin program to check that the problem
has been solved.
FAULT TRACING
The drum turns slowly during washing
rotation.
1. Check that the drive belt is tight and that the
adjustment screw for motor suspension is
screwed tight.
The washer does not empty
empty..
1. Be sure the drain hose is not blocked or kinked.
2. Check the drain pump and pin trap.
3. Check the level switch. (See page 13.)
4. Check the programmer (W600/W620) or the
motor control board (W640/W660). (See the
schematic diagrams for measuring points.)
Metallic sounds are heard from the rear
of the machine.
1. This could be the brushes in the main motor.
Remove the rear cover plate and investigate the
cause.
The programmer does not work (W600
and W620).
1. Make sure the power to the machine is on.
2. Check the fuses.
3. Check that the programmer motor runs.
The machine does not fill with water
water..
1. Make sure the power to the machine is on.
2. Check that the water valve is open.
3. Be sure the Delay Start has not been engaged.
4. Check for error messages (W640/W660).
5. Measure the voltage at the inlet valve and the
outputs from the program control board. (See
page 14.)
6. The maximum fill time is five minutes. If the
unit hasn’t filled in five minutes, W600/W620
will advance to “C” on the Program Control
knob. W640/W660 will display an error
message.
7. Check the level switch and its hose. (See page 13.)
8. Check the level sensor. (See page 13.)
The machine continues to fill up with
water and the program stands still.
1. Switch off the power to the machine. If the
washer still continues to fill, the valve is stuck.
In this case, turn the water off immediately.
Remove and clean the valve. Be sure to flush
the water feed line. Also, clean the filter
thoroughly. Before reassembling, inspect the
washers in the fill hose.
2. Check the level switch and its hose. Be sure the
small hose to and from the “Y” pipe is not
blocked or cracked.
3. Check the level sensor (See page 13.)
The machine does not pump water out.
1. Make sure the power to the machine is on.
2. Be sure the drain hose is not blocked or kinked.
3. Check the voltage and continuity (see page 13
for these values).
4. Make sure the pump rotor in the drain pump
moves freely. (See page 55 for instructions on
emptying water from the drain pump.)
The machine vibrates more than usual
during spin drying.
1. Make sure the shipping supports have been
removed. (See page 3.)
2. Make sure the machine is level and the locking
nuts on the feet are secure.
3. Make sure the flooring beneath the unit is solid.
If it isn’t, place a 3/4” to 1” thick piece of plywood
under the washer to strengthen the floor.
4. Check the shock absorbers for signs of corrosion.
Foam in the last rinse, water remains in
the machine.
1. Check the type of detergent used and the
amount. (See the ASKO Use and Care Guide.)
2. Check that the drain hose is not blocked or
kinked.
3. Check to see if the drain pump is blocked.
Wa t e r l e a k s
1. Too much foam can cause a small puddle on
the front left side of the machine.
2. Check the hoses and door seal for signs of wear.
3. Make sure nothing is caught in the door, such as
apron strings, shoe laces, etc.
Too much foam
1. Use only low-sudsing detergent.
2. Try using less detergent. Use only one to three
tablespoons (as stated in the ASKO Use and Care
Guide.)
Unit stops in the middle of a program
It is normal for the machine to "pause" during a
program, especially between cycles and during the
Wool wash program.
11
COMMON LAUNDRY PROBLEMS
Ye l l o w l a u n d r y
1. Can be caused by body fluids that were not
entirely washed out. Use the highest possible
wash temperature.
2. Try adding a little more detergent than usual.
3. Also can be caused by iron or magnesium in the
water. If this is the case, the customer should
consider installing a water purifier.
4. Pretreating some stains and washing at high
temperatures can cause a yellowing effect.
Grey laundry
1. If the laundry is very dirty, has oil stains or the
water is very hard, put in a little more detergent
than usual.
2. Choose the correct temperature for each washing
load. Synthetics washed at high temperatures can
become gray.
3. Sort the laundry according to fabric. Most fabrics
require different water temperatures for washing.
4. Sort the laundry according to its color. Never
mix light and dark materials in the same load.
5. Use detergent with whitener for white fabrics
and detergent without whitener for colors.
Fluff, stains on the laundry
1. Detergent that does not contain phosphates can,
when combined with minerals in hard water,
build up a substance that can cause "deposits."
If possible, install a water purifier.
2. Use a detergent that contains phosphates.
3. Stains on laundry can occur if it comes into
contact with undiluted rinsing agent. Put the
rinsing agent dose into the compartment for
rinsing agents. Never add rinsing agent directly
to the washing.
4. Pilling normally occurs on cotton/polyester
material. For the best results, turn the garment
inside out and use the Wool/Hand wash program.
5. Do not use “stain removing” chemicals on the
laundry because it may leave a residue and/or
yellowing at the stain.
Wrinkled laundry
1. Follow the care label instructions.
2. Do not overstuff the machine.
3. Do not let the laundry stay for a long time in
the machine after the program has finished.
4. Certain materials such as linen and cotton wrinkle
naturally, regardless of how they are washed.
5. Make sure the unit is hooked up to cold water.
T orn or damaged material
Material can be damaged by sharp objects, such as
metal parts on clothes or objects in pockets.
1. Empty pockets and turn the garment inside out.
12
2. Close hooks and zippers.
3. Turn inside out for washing.
Chemicals
Textiles that have been in contact with chemicals,
such as battery acid, solution for perming hair,
bleach, lavatory cleaner or acne-removing agent,
must be rinsed as quickly as possible to prevent holes
or stains. Do not let these unrinsed items come into
contact with other clothing. These items should also
be washed separately.
P ermanent press garments
Wash these items in a half-full machine. These
garments should not be mixed in with heavier
washing such jeans or large bath towels.
Overloading or mixing with heavy garments will
cause excessive wrinkling.
Fading, discoloration
1. Follow the care instructions on the garment.
2. Dark cotton textiles should be washed for the
first time with like colors at 140° F (60° C) to
remove any surplus dye.
3. Garments should be sorted according to color
and fabric type, i.e., dark with dark, cottons with
cottons, etc.
4. Empty all pockets. It’s also a good idea to turn
pockets inside out.
Stains remaining after washing
1. Stains should be dealt with as quickly as possible.
The longer a stain remains, the harder it is to
remove.
2. Oil stains are removed by washing in the hottest
water the fabric can take. These items should be
washed separately.
OTHER COMMON QUESTIONS
Which detergent should I use?
Any low-sudsing detergent of good quality. Most
powder detergents have a shelf life. If powder
detergents should cake or start to lump, it has usually
lost the effectiveness for cleaning.
Should I use a fabric softener?
Yes, if you use a good quality liquid fabric softener.
Too much fabric softener can cause some garments
to feel greasy or slick. Always use the proper amount.
Should I use bleach?
Bleach is not necessary in an ASKO washer. For
white cottons, higher water temperatures should be
used for the best results. Use detergent with whitener
for white fabrics and detergent without whitener
for colored fabrics.
COMPONENTS AND MEASUREMENT VALUES
WASHER MOTOR
DRAIN PUMP
PUMP,, 60 HZ
W600/W620, 60 Hz
Part no.:
80 617 72
Resistances:
Pins 6-7
69.4 Ω
Pins 4-5
5.4 Ω*
Pins 2-3
1.7 Ω
Pins 1-3
0.7 Ω
* 1.7 Ω measured diagonally across the collector
Part no.:
8801167
Resistance:
76 Ω
Current:
0.3 A, 28 W on load
The drain pump is combined with an integrated
needle trap, which can be cleaned by the user.
W640/W660, 60 Hz
Part no.:
80 617 74
Resistances:
Pins 1-2
68.7 Ω
Pins 3-4
1.65 Ω
Pins 5-6
1.52 Ω*
Pins 5-7
0.58 Ω
* 1.9 Ω measured diagonally across the collector.
The motor is a universal motor controlled by an
external motor control board.
The rotation speed is stepless and controlled by a
tachogenerator on the motor. The maximum speed
is 1600 rpm.
MOTOR CONTROL BOARD (W640/W660)
Part no.:
80 613 99
The motor control board is via an external unit
located in the base and connected to the program
control unit (PCU), see the electrical schematic
diagram.
HEA
TING ELEMENT
HEATING
ELEMENT,, 2000 W
Part no.:
Resistance:
80 617 06
28.4 W
If the drain pump has run for 180 seconds during
emptying, the program is stopped, reset to zero and
a fault code is indicated on the display. On models
W620/W600, this will be indicated by “S” on the
Program Control Knob. On models W640/W660,
it will display on the LED window.
LEVEL SWITCH
Part no.:
80 617 47
An electromechanical level switch operates at two
levels, see the electrical schematic diagram. It checks
the water level and starts the drain pump if overfilling
is indicated.
LEVEL SENSOR
Part no.:
80 616 64
ASKO Level sensor type 1166.
Voltage:
To sensor in W620: 0.5 V out from the sensor at
zero pressure and 230 V mains voltage
To sensor in W640/W660: 0.5 V out from the
sensor at zero pressure and 230 V mains voltage
Measurement at program/control unit
The level sensor is located on the electrical
component bridge and connected to the PCU, see
the electrical schematic diagram.
THERMISTOR
RADIO INTERFERENCE FIL
TER
FILTER
Part no.:
80 616 63
Resistance:
40-60 kW
Room temperature: 68°–86° F (20–30° C)
The thermistor for temperature measurement is
located between the motor cradle and the holder.
50/60 Hz
Part no.:
80 585 58
Leakage Current: 230 V/ 50 Hz 0.3-0.4 mA
Leakage Current: 240 V/ 60 Hz 0.3-0.4 mA
The thermistor measures and controls the water
temperature. The heating element is switched out
if the thermistor short-circuits or is disconnected
from the program control board or programmer.
13
COMPONENTS AND MEASUREMENT VALUES
THREE- W A Y INLET VVAA LLVES
VES
Part no.:
Resistance:
Current:
80 617 57
3.7 kW ± 0.5 kW
0.02 A, 5 W
INDICA T OR LAMP
(W600/W620)
Part no.:
80 070 73
(W640/W620)
Part no.:
80 070 73
Current:
1.7 mA
230 V, 50 Hz
The lamp indicates that the main power switch is
set to on.
DOOR LOCK
Part no.:
80 616 79
Resistance:
122 Ω
Current:
approx. 2 A
The door lock is mechanical and equipped with a
pull magnet. This function is controlled by the door
opening button and various safety devices.
14
W600 AND W620 TEST PROGRAM AND FAULT INDICATIONS
W600 AND W620 TEST PROGRAM
1. Insert a jumper into E10 on the programmer.
2. Start program 3 (Fast wash).
3. EV2 (inlet valve for main wash water) allows
water into the machine up to the washing level.
4. Press the Super Rinse ( ) button.
5. Heat up for 10 minutes or by 50° F (10° C).
6. Press the Economy (E2) button.
7. Add more water to the wool level, about 1-1/2”
up the door.
8. Wash for 4 minutes.
9. Wash for 16 minutes, or until the # button is
pressed in again.
10. Run a long spin.
W600 AND W620 FAUL
TIONS
FAULTT INDICA
INDICATIONS
If a fault occurs during a program cycle, this is
indicated by the program knob stopping in position
C or S after the program has finished or been
interrupted.
P osition C
If the program knob stops in position ” after the
program has finished or been interrupted, this
indicates that one of the following problems has
occurred during the program cycle:
Wa t e r i n l e t f a u l t
Indicates a fault in the water supply.
1. Make sure the water supply to the machine has
been turned on (cold fill only)
2. Check that the filter in the machine water inlet
is not blocked.
Draining fault
Draining has taken too long. Check the drain hose
and the drain pump as follows:
1. Make sure an object is not stuck in the drain
hose outlet. Clean out the hose.
2. Make sure the drain pump isn’t blocked by
foreign objects. Clean out the pump.
3. Make sure the drain hose isn’t kinked.
4. After solving the problem, run program 10
(Drain).
P osition S
If the program knob stops in position “S” after the
program has finished or been interrupted, this
indicates that a motor fault, a level sensor fault, or a
program fault has occurred during the program
cycle.
Thermistor fault
The washing program has finished without heating.
1. Check the fuses.
2. Measure the Ohms (see page 12).
Heating element fault
The washing program has finished without heating.
1. Check the fuses.
2. Measure the thermistor Ohms.
3. Measure the heater relay Ohms.
Programmer fault
The washing program has been interrupted. Check
the fuses.
15
W640 AND W660 TEST PROGRAM AND FAULT INDICATIONS
W640 AND W660 TEST PROGRAM
To run a test program, press P1 five times then
press the button for the test program you wish to
run (as listed below). This must be done within 15
seconds.
Press:
P1
P2
Menu
To t e s t :
Inlet valve 1 (prewash compartment)
Inlet valve 2 (main wash compartment)
Inlet valve 4 (softenercompartment)
Door pull magnet
Heater relay (separate or under
control)
To advance to level 2, press Enter. You can then
run the test programs listed below:
Press:
To t e s t :
P2
Drain pump
P3
Motor, normal operation
P4
Motor, delicate operation
Menu
Long spin
Press Enter to return to level 1.
Press Start/Stop to end the test program.
W640 AND W660 FAUL
TIONS
FAULTT INDICA
INDICATIONS
If a fault occurs during a program cycle, this is
indicated on the display after the program has
finished or been interrupted.
Foaming
Indicated after the program has finished. Via the
level sensor the machine has "felt" that there is a lot
of foam left after the main wash. Run the Rinse
program once.
Overflow
Too much water in the drum due to a fault in the
level sensing system or the inlet valve.
Pressure sensor fault
A drop in pressure has been detected in the first rinse.
This could be due to leakage in the level sensor or
in the hose leading to it. The washing program has
been interrupted.
16
Te m p e r a t u r e s t o p
The washing program has finished without heating.
Check the fuses and the heating element.
Thermistor
The washing program has finished without heating.
The thermistor is faulty or short-circuited.
W ash motor
Wiring open-circuit or motor fault has been
indicated and the washing program has been
interrupted.
Wa t e r i n l e t
Indicates a fault in the water supply.
1. Make sure the water supply to the machine has
been turned on (cold fill only)
2. Check that the filter in the machine water inlet
is not blocked.
Wa t e r o u t l e t
Draining has taken too long. Check the drain hose
and the drain pump as follows:
1. Make sure an object is not stuck in the drain
hose outlet. Clean out the hose.
2. Make sure the drain pump isn’t blocked by
foreign objects. Clean out the pump.
3. Make sure the drain hose isn’t kinked.
4. After solving the problem, run the Drain
program.
CONSUMPTION VALUES
The following conditions apply for the consumption
values stated in the charts below:
! Incoming water temperature: 60° F (15° C)
! Heating element power: 2000 Watts
! Options: None
W600 AND W620 CONSUMPTION VALUES
WASH
PROGRAM
1
2
3
6
Heavy
Normal
Fast
Synthetic
7 Super quick
9 Wool/Hand
FABRIC
Cotton, linen
Cotton, linen
Cotton, linen
Polyester, cotton/
polyester, nylon
Permanent press,
Polyester, cotton
Washable wool,
rayon, acrylics
WASH
TEMP
LOAD
SIZE
WATER
NUMBER CONSUMPTION
OF RINSES
(Gallons) (1)
140° F (60° C)
140° F (60° C)
140° F (60° C)
105° F (40° C)
Full
Full
Full
Half
5
5
5
3
16.60
15.30
15.30
7.28
105° F (40° C)
Half
2
5.72
85° F (30° C)
Third
3
13.78
(1) The water consumption can vary, depending on load size, tolerance of fill valve, and water pressure (PSI).
W640 AND W660 CONSUMPTION VALUES
WASH
PROGRAM
P1 Normal
P2 Normal
P3 Super quick
P4 Wool/Hand
FABRIC
Cotton, linen
Cotton, linen
Permanent press,
Polyester, cotton
Washable wool,
rayon, acrylics
WASH
TEMP
LOAD
SIZE
WATER
NUMBER CONSUMPTION
OF RINSES
(Gallons) (1)
140° F (60° C)
140° F (60° C)
105° F (40° C)
Full
Full
Half
5
5
2
15.30
15.30
5.72
85° F (30° C)
Third
3
13.78
(1) The water consumption can vary, depending on load size, tolerance of fill valve, and water pressure (PSI).
17
TOOLS
Listed below are the tools you will need to service
ASKO washers:
Detergent compartment
• torx T20
"Torx" screwdrivers:
• T25
• T20
• T10
Door (removing/installing)
• torx T25
Socket wrenches
• 11/16"
• 16 mm
• 13 mm
• 10 mm
Socket screwdriver
• 10 mm
24 mm extended socket + locking handle
5 mm socket head cap screwdriver + small locking
handle
Star socket head screwdriver
APPLICA
TION AREAS
APPLICATION
Listed below are the various parts of ASKO washers
and the tools you will need to service each.
T op lid:
• torx T20
Pa n e l
• torx T20
• 1/2” wide-blade screwdriver
Front panel (model without front-loading
door)
• torx T20
Bottom cover (model without front-loading door)
• 6.5-7 mm wide blade screwdriver
• torx T20
Front door removing/installing
• torx T20
• torx T10
• socket wrench 10 mm
Front panel (model with front-loading
door)
• torx T20
• socket wrench 10 mm
18
Door seal/glass (changing)
• torx T25
• torx T20
• socket wrench 10 mm
Cover plate
• torx T20
• socket wrench 10 mm
Lock
• torx T20
• socket wrench 10 mm
Front end plate and inner cover plate
• torx T20
• socket wrench 10 mm
Drum
• torx T25
• torx T20
• socket wrench 16 mm
• socket wrench 10 mm
• special tool (Part no. 88 011 52)
• special tool (Part no. 88 011 53)
Drain pump
• torx T20
• Star socket head screwdriver
Change of complete holder
• torx T25
• torx T20
• 7/8” extended socket + locking handle
• 1/2” wide-blade screwdriver
• socket wrench 16 mm
• socket wrench 13 mm
• Socket screwdriver 10 mm
• 5 mm socket head cap screwdriver + small
locking handle
• special tool (Part no. 88 011 52)
• special tool (Part no. 88 011 53)
Electrical component bridge piece
• torx T20
Crossmember
• torx T20
• socket wrench 11/16"
• socket wrench 13 mm
Side panel
• torx T20
TOOLS
Bottom
• torx T25
• torx T20
• 24 mm extended socket + locking handle
• 1/2” wide-blade screwdriver
• socket wrench 16 mm
• socket wrench 13 mm
• Socket screwdriver 10 mm
• 5 mm socket head cap screwdriver + small
SPECIAL TOOLS
Drum installation
Part no.: 88 011 52
This tool is used for
centering and is fastened
to the drum edge when
removing and installing
the front end plate.
The hook is fitted
between the holder and
the bottom to facilitate
removal and installation
of the front end plate.
B e a r i n g a n d VV-ring
-ring Cassette
Part no.: 88 011 53
Installing the Bearing
The inner bearing is
fitted to the tool,
which is then put
into the bearing
housing.
The bolt is then
loaded with the
outer
bearing,
washer and nut,
which are put on to
the bolt behind the
bearing housing.
Installing the V-ring Cassette
The tool is first put into the bearing housing from
the rear of the machine. Then the white side of the
v-ring cassette is placed facing the flat side of the
washer, and they are put on the tool, inside the
holder. The v-ring cassette is then forced into place
by putting the nut on to the bolt and tightening it.
Be careful not to overtighten it.
19
TOP COVER
REMOVING THE TOP COVER
REPLACING THE TOP COVER GUIDES
1. Remove the three T20 screws at the rear of the
top cover. Keep the two star washers for the outer
screws.
2. Lift the cover and pull it backwards.
1. Remove the top cover.
2. Squeeze the latches together and push the guide
upwards.
3. Push the new guide into place. (You should hear
it snap into place.)
4. Secure the top cover.
P/N 8900338
P/N 8061817-0 white
P/N 8061817-95 SS
P/N 8061763
NOTE:
Be sure to keep the rubber strip with the top. It
helps to reduce vibration.
REPLACING THE TOP COVER
3. Ensure that the sealing strip is positioned along
the edge of the top cover.
4. Push the front edge of the top cover under the
panel and lower the cover.
5. Make sure the cover is inside the guides.
6. Replace the three screws at the rear, being careful
no to overtighten and strip the screws. Don’t
forget the two star washers for the outer screws.
P/N 8061854
20
NOISE OR VIBRA
TION
VIBRATION
If excessive noise or vibration occurs during
operation, check the following items:
1.
2.
3.
4.
Make sure the top is positioned correctly.
Check that the sealing strip is into place.
Make sure the guides are snapped into place.
Make sure the screws are securely tightened.
DETERGENT DRAWER
DETERGENT DRA WER FEA
TURES
FEATURES
Detergent drawer
P/N 8061630
Prewash detergent
Main wash
detergent
Fabric
softener
Siphon
P/N 8061634
REPLACING THE DRAWER HANDLE
1. Remove the detergent drawer.
2. Using a flat-blade screwdriver, release the two
snap fasteners from the underside of the insert.
3. Slide the handle down from the drawer.
4. Insert the new handle into the groove in the
insert. Slide it up until it snaps into place.
5. Put the detergent drawer back into place.
Child-safety
catch
Pullout handle
(comes complete
with panel)
Liquid
detergent
partition
P/N 8061633
REMOVING THE DETERGENT DRAWER
1. Pull the drawer out as far as it goes then lift it
up and pull it out completely, as illustrated.
(The detergent drawer may have the child
safety latch engaged. If so, hold the latch to
the left as you pull out the drawer.)
2. Replace the drawer by tilting it into position
and pushing it closed.
REPLACING THE CHILD SAFETY LA
LATT CH
1. Press in the child safety latch and remove the
drawer. Be careful not to break off the latches.
2. Don’t forget to install the spring together with
the latch. Fit the new latch by pressing it into
the hole until it snaps into place.
3. Put the detergent drawer back into place.
Safety latch
P/N 8061621-34
Spring
P/N 8061622
21
CONTROL PANEL
REMOVING THE CONTROL PPANEL
ANEL
1. Remove the top cover (see page 20).
2. Pull out the detergent drawer (see page 21).
3. Remove the three screws for the detergent drawer
in the panel and the screw above the drawer.
4. W600 and W620: Make sure the knobs are at
the 12:00 or zero position and pull them off.
(If you use a polygrip (mole wrench), remember
to put some soft material in the jaws so you
won’t scratch the plastic.)
5. Being careful not to break the fasteners, remove
the four fasteners behind the panel by spreading
the clips open with a 1/2” (12.5 mm) wideblade screwdriver and lifting off the panel.
IMPORT
ANT
IMPORTANT
Do not pry the knobs off.
REPLACING THE CONTROL PPANEL
ANEL
6. Make sure the indicator lamp is in position.
7. Line up the panel at the top edge and press it
into place at the bottom edge. Press a screwdriver
behind the beam when pressing the middle of
the panel into place.
8. W600 and W620: Holding the knobs in the
12:00 or zero position, push them back on.
9. Replace the three screws for the detergent
drawer.
10. Replace the detergent drawer.
11. Replace the top cover.
Screws
P/N 8902072
Knobs - white
P/N 8061892-0
22
INDICATOR LAMP AND PUSHBUTTON SWITCHES
CHANGING THE INDICA T OR LAMP
1. Remove the control panel (see page 22).
2. Change the indicator lamp/symbol lens. Be
careful when placing the indicator lamp into the
lens. Slide it up into position; do not snap it
into place.
3. Replace the control panel.
CHANGING THE PUSHBUTTON
SWITCHES
1. Remove the control panel (see page 22).
2. Grasp the switch from inside the machine and
pull it as you bend the wings at the front of the
switch inward with a screwdriver.
IMPORT
ANT
IMPORTANT
Don’t pull on the wires. The button might come
apart.
Lamp
P/N 8063757
Lens (red)
P/N 8061822
3. Press in the new pushbutton and check that the
wings open out.
4. Connect the wires to the correct connector pins.
5. Replace the control panel.
Pushbutton switch
P/N 8063717
CHANGING THE MAIN POWER
BUTTON
1. Remove the control panel (see page 22).
2. Press in the latches with a screwdriver and pull
out the button.
3. Make sure the spring is in place in the new button
and install it.
4. Replace the control panel.
Power Button
W600/W620
P/N 8061711-0
W640/W660 white
P/N 8061902-0
Spring
P/N 8061857
W660 SS
P/N 8061902-69
23
CONTROL PANEL KNOBS (W600 AND W620)
CHANGING THE KNOBS
CHANGING THE RO
ROTT ARY SELECT OR
1. Turn the knob to the 12:00 or zero position
and pull it off. (If you use a polygrip (mole
wrench), remember to put some soft material
in the jaws so you won’t scratch the plastic. Do
not pry the knob off.)
1. Remove the top cover (see page 20).
2. Turn the knob to the 12:00 or zero position
and pull it off. (If you use a polygrip (mole
wrench), remember to put some soft material
in the jaws so you won’t scratch the plastic. Do
not pry the knob off.)
3. Disconnect the terminal block.
4. Slide a thin screwdriver through the hole in the
panel to release the snap fasteners.
5. Move the selector to the left and lift it out.
6. Install a new selector and reconnect the terminal
block.
7. Refit the knob and replace the top cover. Don’t
forget the two star washers for the outer screws.
Knobs
P/N 8061892-0
2. Install the new knob by holding it in the 12:00
or zero position and pushing it into place.
CHANGING THE TEMPERA
TURE
TEMPERATURE
SELECTOR
1. Remove the top cover (see page 20).
2. Turn the knob to the 12:00 or zero position
and pull it off. (If you use a polygrip (mole
wrench), remember to put some soft material
in the jaws so as not to scratch the plastic. Do
not pry the knob off.)
3. Disconnect the terminal block.
4. Slide a thin flat-blade screwdriver through the
hole in the panel to release the snap fasteners.
5. Move the selector to the left and lift it out.
6. Install a new selector and reconnect the terminal
block.
7. Refit the knob and replace the top cover. Don’t
forget the two star washers for the outer screws.
Temperature selector
P/N 8061665
Rotary selector
P/N 8061728
CHANGING THE PUSHBUTTONS
1. Remove the control panel (see page 22).
2. The pushbuttons sit free on the pushbutton
switches. Pull off the buttons and replace them.
3. Replace the control panel.
4. Check all the buttons to make sure there is no
bind.
Pushbuttons
P/N 8061711-0
24
DCU PANEL BOARD AND PUSHBUTTON PAD (W640 AND W660)
CHANGING THE DISPLAY CONTROL
UNIT (DCU) PPANEL
ANEL BOARD
CHANGING THE PUSH BUTT
ON PPAD
AD
BUTTON
WARNING
A grounded EMC wristband must be worn at all
times when working with electronic components
to prevent damage to them.
A grounded EMC wristband must be worn at all
times when working with electronic components
to prevent damage to them.
1. Remove the top cover (see page 20).
2. Remove the control panel (see page 22).
3. Being careful not to break the fasteners, remove
the panel board from the snap fasteners with
the aid of a flat-blade screwdriver on the bottom.
4. Lift it out.
5. Make sure the silicon buttons are in place then
press the new panel board into place. You should
hear it snap into place.
6. Replace the control panel.
7. Replace the top cover. Don’t forget the two star
washers for the outer screws.
WARNING
1. Remove the top cover (see page 20).
2. Remove the control panel (see page 22).
3. Being careful not to break the fasteners, remove
the panel board from the snap fasteners with
the aid of a flat-blade screwdriver.
4. Lift out the button sheet with the pushbuttons.
5. Being careful to get the pushbuttons in the
correct locations, install the pushbuttons and the
panel board.
6. Replace the control panel.
7. Replace the top cover. Don’t forget the two star
washers for the outer screws.
DCU Panel Board
P/N 8063875
Pushbutton pad
W640/W660: P/N 8061765-0 (white)
W660 SS: P/N 8061765-33 (black)
25
REAR PANEL AND DRIVE BELT
REMOVING THE REAR PPANEL
ANEL
CHANGING THE DRIVE BEL
BELTT
1. Using a 20 torx, remove the twelve screws
around the rear panel.
2. Lift off the panel.
1. Remove the rear panel.
2. Take off the drive belt by lifting it off one side
of the pulley and turning the pulley.
3. Install a new drive belt in the reverse order. Start
by putting the belt under the motor pulley.
4. Make sure the drive belt is centered on the top
edge of the pulley. Turn the pulley to check this.
5. Replace the rear panel.
REPLACING THE REAR PPANEL
ANEL
3. Using the two hooks on the upper edge to
assist, align the rear panel.
4. Refit the twelve screws.
Rear panel
P/N 8061737
Drive belt
P/N 8061682
Screws
P/N 8900338
26
MOTOR AND MOTOR CONTROL BOARD
REMOVING THE MOTOR
1. Remove the rear panel (see page 26).
2. Take off the drive belt by lifting it off one side
of the pulley and turning the pulley.
3. Remove the terminal block from the motor.
4. Mark the locations of the nuts on the adjustable
side of the motor bracket.
5. Remove the nuts from the motor suspension
bolts.
6. Hold the motor as you pull out the bolts out
of the spacing tubes.
7. Take out the motor.
Drive belt
P/N 8061682
CHANGING THE MOTOR CONTROL
BOARD (W640 AND W660)
1. Remove the rear panel (see page 26).
2. Remove the securing screw for the motor control
board holder and lift it out.
3. Cut the cable-tie and remove the terminal block.
4. Remove the motor control board by pressing
in the two plastic clips that secure the board.
5. Remove the other terminal block and change
the board.
6. Connect the wiring and the two terminal blocks.
7. Line up the board to the holder and press it into
place.
8. Refit the holder and secure it with the screw.
9. Secure the cable clamp.
10. Replace the rear panel.
Motor
W600/W620: P/N 8061772
W640/W660: P/N 8061774
REPLACING THE MOTOR
8. Move the rubber buffers, spacing tubes,
suspension bolts and nuts to the new motor.
9. Line up the motor and insert the motor
suspension bolts.
10. Tighten the nuts.
11. Fit the terminal block.
12. Install a new drive belt in the reverse order. Start
by putting the belt under the motor pulley.
13. Replace the rear panel.
Motor control board
W640/W660: P/N 8061399
27
FRONT PANEL (W600 AND W640)
REMOVING THE FRONT PPANEL
ANEL
(W600 AND W640)
1. Remove the detergent drawer (see page 21).
2. Open the drain pump cover. (Use the partition
from the detergent drawer or a flat-blade
screwdriver.)
3. Being careful not to break off the drain plug,
disconnect the drain hose.
Front panel
W600/W640
P/N 8063925
NOTE
There may be water left in the machine that will
run out through the drain hose. It’s a good idea to
place a towel or shallow bowl underneath the drain
hose to catch the water.
4. Unscrew the emergency opening handle.
5. Remove the lower right screw from the panel,
and the two screws beneath.
6. Remove the panel by moving its lower edge
outwards and then pulling it down.
REPLACING THE FRONT PPANEL
ANEL
7. Transfer the securing clips from the side panels
to the front panel.
8. Press the panel into place.
9. Replace the screws at the detergent drawer and
on the lower edge. Don’t forget the two star
washers for the screws at the lower edge.
10. Screw back the emergency door opening handle
and reconnect the drain hose to the drain plug.
11. Replace the detergent drawer.
CHANGING THE PLASTIC LOCKING
CLIPS ON THE FRONT PPANEL
ANEL
CHANGING THE FRONT PPANEL
ANEL
SECURING CLIPS
1. Remove the front panel.
2. Squeeze the clip together and pull it out.
3. Push the new clip in
Plastic lockings
until it snaps into place.
P/N 8061763
4. Replace the front panel.
1. Remove the front panel.
2. Squeeze the securing clip and
pull it out.
3. Insert the new clip into the
hole in the front panel and
push down until it snaps into
place.
4. Replace the front panel.
28
Securing clips
P/N 8061658
LOWER COVER (W620/W660) AND DRAIN PUMP COVER
REMOVING THE LOWER COVER
CHANG
ING THE DRAIN PUMP COVER
CHANGING
1. Open the drain pump cover. (Use the partition
from the detergent drawer or a screwdriver.)
2. Being careful not to break off the drain plug,
disconnect the drain hose from the plug.
1. Open the drain pump cover. (Use the partition
from the detergent drawer or a screwdriver.)
2. Being careful not to break off the drain plug,
disconnect the drain hose.
3. Insert a screwdriver into the fixing on the upper
or lower edge and carefully pry off the cover.
4. Align the new cover and carefully press until it
snaps into place.
NOTE
There may be water left in the machine that will
run out through the drain hose. It’s a good idea to
place a towel or shallow bowl underneath the drain
hose to catch the water.
3. Unscrew the emergency opening handle.
4. Remove the two screws at the bottom.
5. Remove the cover, starting at the lower edge.
3
2
Drain hose
P/N 8061725
Drain pump cover
P/N 8061657-0 (white)
P/N 8061657-33 (black)
Lower cover
P/N 8063926-0 (white)
P/N 8063926-45 (SS)
REPLACING THE LOWER COVER
6. Align both guides with the top of the cover.
7. Lift the cover into place and press the lower edge
in.
8. Secure the cover with the two screws at the
bottom. Don’t forget the two star washers.
9. Screw back the emergency opening handle
10. Reconnect the drain hose and close the cover.
29
OUTER DOOR (W620 AND W660)
REMOVING THE OUTER DOOR
CHANGING THE OUTER DOOR HANDLE
1.
2.
3.
4.
1. Unscrew the four screws that secure the handle
to the outer door.
2. Secure the new handle with the four screws.
Remove the lower cover (see page 29).
Unscrew the two nuts in the door hinges.
Release the spring that holds the door.
Keeping the two nylon washers between the
fixture and the hinge, hold the door and remove
the two screws.
5. Remove the door by pulling it toward you then
up.
Outer door handle
P/N 8061656-0 (white)
P/N 8061656-29 (SS)
Outer door
P/N 8061733-0 (white)
P/N 8061733-95 (SS)
Screws
P/N 8900395
CHANGING THE INNER DOOR PPANEL
ANEL
Spring
P/N 8061742
Screw
P/N 8901004
Washer
P/N 7382628
Locking nut
P/N 8901192
1. Remove the outer door assembly (see this page).
2. Remove the four screws at the handle, one screw
at each side and the three at the bottom edge.
3. Separate the inner and outer door.
4. Change the inner door and refit the nine screws.
Be careful not to overtighten the side screws.
5. Replace the outer door assembly.
Hinge
P/N 8061906
REPLACING THE OUTER DOOR
6. Install the new door.
7. Install the nylon washers and insert the screws.
8. Put the spring back.
9. Tighten the nuts.
10. Replace the lower cover .
Screws
P/N 8900395
30
OUTER DOOR HINGE AND HINGE BEARING GUIDE (W620 AND W660)
CHANGING THE HINGE
CHANGING THE HINGE BEARING GUIDE
1. Remove the outer door (see page 30).
2. Remove the for screws at the handle, one screw
at each side and the three at the bottom edge.
3. Remove the inner door.
4. Remove the two screws that secure the hinge to
the inner door.
5. Secure the new hinge with the two screws.
6. Reassemble the inner and outer door and secure
the nine screws.
7. Replace the outer door assembly.
1. Remove the front panel (see page 32).
2. Remove the hinge bearing guide by pushing the
latches at the rear inwards with the aid of a flatblade screwdriver.
3. Carefully remove the bearing guide.
4. Align the new bearing guide and press it into
place.
5. Replace the front panel.
Hinge
P/N 8061906
Hinge bearing guide
P/N 8061777-33 (black for SS)
P/N 8061777-0 (white)
31
FRONT PANEL (W620 AND W660)
REMOVING THE FRONT PPANEL
ANEL
(W620 AND W660)
1. Remove the detergent drawer (see page 21).
2. Remove the lower cover (see page 29).
3. Remove the outer door (see page 30) and the
control panel (see page 22).
4. Remove the lower right screw from the control
panel.
5. Remove the two screws behind the rubber
dampers and the two screws beneath.
Screws
P/N 8901970
Screws
P/N 8900327
Front panel
P/N 8061732-0
Screws
P/N 8900327
6. Remove the front panel.
REPLACING THE FRONT PPANEL
ANEL
7. Align the front panel and secure it with the two
screws at the bottom and the two at the top.
8. Refit the rubber dampers.
9. Secure the front panel screws.
10. Replace the control panel.
11. Replace the outer door.
12. Replace the lower cover.
13. Replace the detergent drawer.
32
DETERGENT COMPARTMENT
REMOVING THE DETERGENT
C O M PA R T M E N T
REPLACING THE DETERGENT
C O M PA R T M E N T
1. Remove the detergent drawer (see page 21).
2. Remove the top cover (see page 20).
3. Remove the two upper screws from the
control panel and the screw on the upper side
panel.
4. Remove the hose clip and detach the
corrugated detergent hose from the detergent
drawer.
5. Detach the wires from the underside of the
compartment by cutting the cable tie.
6. Detach the inlet hoses by cutting the cable tie.
Detach the air hose by releasing the hose clip.
7. Secure the wiring under the detergent drawer
with a cable tie. The wires must not be pulled
tight.
8. Put a hose clip on the corrugated hose.
9. Put one hand into the detergent compartment
and grasp the corrugated detergent hose. Position
the hose, making sure it’s secure. (Soapy water
can be used to lubricate the hose connection to
the detergent compartment.)
10. Tighten the hose clip.
11. Secure the three inlet hoses with cable ties and
the air hose with a hose clip.
12. Secure the compartment with the three screws.
13. Replace the detergent drawer.
14. Replace the top cover. Don’t forget the two star
washers for the outer screws.
Detergent compartment
P/N 8061661
Cable tie
P/N 8056656
Hoses
P/N 8061702
Cable tie
P/N 8050219
Screws
P/N 8902072
33
DETERGENT HOSE
CHANGING THE CORRUGA
TED
CORRUGATED
DETERGENT HOSE
1. Remove the detergent drawer (see page 21.)
2. Remove the top cover (see page 20).
3. Remove the two upper screws from the control
panel and the screw on the upper side panel.
4. Remove the hose clamp and detach the
corrugated detergent hose from the detergent
drawer.
5. Unhook the door lock protection from the hose.
6. Remove the hose.
7. Install the new hose on the drum holder. Make
sure the corrugated detergent hose is installed
with the hose marking facing the drum holder
marking.
8. Hook the door lock protection on to the hose.
Hose
P/N 8061628
Clamp to detergent
compartment
P/N 8063607
34
To make sure the hose has been replaced properly,
follow the steps below:
1. Remove a washer paddle by inserting a
screwdriver (or similar thin tool) into the center
ridge hole and angling it carefully to the left.
2. Pull the ridge towards the drum opening and
lift it up.
3. Check that the hose is fitted correctly.
4. Place the ridge in the securing hole with the “F”
marking facing the drum opening. Push the
ridge inwards until is secured in place.
5. Replace the detergent compartment.
GLASS DOOR
REMOVING THE GLASS DOOR
REPLACING THE GLASS AND SEAL
1. Open the glass door either by pressing the Door
Open button ( ) or with the emergency
opening handle behind the drain pump cover
(see page 10).
2. Remove the two screws securing the door and
take it off.
1. Open the glass door either by pressing the Door
Open button or with the emergency opening
handle behind the drain pump cover (see page 9).
2. Remove the two screws securing the door and
take it off.
3. Remove the four screws around the glass.
4. Take off the frame by inserting a screwdriver
into the opening of the underside of the lid and
turning it.
5. Remove the glass.
6. To change the seal, simply pull off the seal and
press on a new one.
7. Install two of the stays, only partially tightening
the screws.
8. Slide the glass in under the stays.
9. Install the other two stays, only partially
tightening the screws.
10. Install the frame, starting at the rear edge, and
pressing it firmly all around.
11. Finally, fully tighten the four screws.
12. Replace the glass door.
Glass door
P/N 8061650-0 (white)
P/N 8061650-42 (grey)
Screws
P/N 8901969
REPLACING THE GLASS DOOR
3. Position the door in the brackets.
4. Secure it with the two screws.
Outer frame
P/N 8061651-0 (white)
P/N 8061651-96 (grey)
Inner frame
P/N 8061652-0 (white)
P/N 8061652-42 (grey)
Glass
P/N 8061685
Lock hook
P/N 8061798
Seal
P/N 8061653
Seal securing plate
P/N 8061624
Hinge
P/N 8061686-0 (white)
P/N 8061686-42 (grey)
Hinge shaft
P/N 8061687
Screws
P/N 8901969
Screws
P/N 8901969
Screws
P/N 8901969
Seal
P/N 8061653
35
GLASS DOOR CATCH AND FRONT COVER PLATE
CHANGING THE DOOR CA
CATT CH
REMOVING THE FRONT COVER PLA
TE
PLATE
1. Open the glass door (see page 8).
2. Remove the two screws securing the door and
take it off.
3. Remove the four screws around the glass.
4. To take off the frame, inserting a screwdriver
into the opening at the side and twist it.
5. Pull the catch straight out.
6. Push in the new catch.
7. Install the frame, starting at the rear edge, and
press it in.
8. Install the glass door.
1. Open the glass door (see page 8).
2. Remove the glass door (see page 35).
3. Unhook the four springs and the door catch
screw.
4. Lift off the cover plate.
Screws
P/N 8901969
Springs
P/N 8061879-2
REPLACING THE COVER PLA
TE
PLATE
Screws
P/N 8901969
5. Align the plate and secure it with the screw at
the door catch.
6. Hook on the four springs.
7. Replace the glass door.
Door Catch
P/N 8061798
36
EMERGENCY DOOR OPENER AND DOOR LOCK
CHANGING THE EMERGENCY DOOR OPENER
1. Open the drain pump cover and detach the drain
hose.
2. Remove the screw holding the loop on the
emergency door in place.
3. Remove the lower cover (see page 29).
Emergency
drain hose
P/N 8061725
2
Emergency door
handle
P/N 8061780
11. Replace the front cover plate.
12. Replace the glass door and the lower cover.
REMOVING THE DOOR LOCK
1.
2.
3.
4.
5.
6.
7.
Remove the glass door (see page 35).
Remove the front cover plate.
Release the door latch assembly.
Disconnect the wires from the lock.
Remove the door lock screws.
Pull out the lock.
Remove the emergency opening cord.
1
4.
5.
6.
7.
Remove the glass door (see page 35).
Remove the front cover plate (see page 36).
Remove the door catch assembly.
Detach the emergency opening cord from the
door catch.
8. Take out the handle from the pump housing
and detach the cord from its eye.
9. Make a loop in the new cord and secure it to
the catch.
10. Hook the cord on the eye in the pump housing
and resecure the handle.
IMPORT
ANT
IMPORTANT
Make sure the cord is free from any obstructions all
the way from the catch to the pump housing, and
that it is free through the eye in the pump housing.
Emergency
opener cord
P/N 8061780
Emergency
opener cord
P/N 8061780
7
5
4
Door lock
P/N 8061679
REPLACING THE DOOR LOCK
8. Make a loop in the cord and hang it on the hook.
Pull the loop.
9. Put the lock back and secure it.
10. Reconnect the wiring to the lock.
11. Refit the door latch assembly, being careful not
to let the emergency opening cord get trapped
between the protection and the holder.
12. Replace the front cover plate.
13. Replace the glass door.
37
FRONT END PLATE AND INNER COVER PLATE
REMOVING THE FRONT END PLA
TE
PLATE
AND INNER COVER PLA
TE
PLATE
1. Remove the door latch assembly and glass door
catch (see page 37).
2. Fit the special centering tool (part no. 88 011 52).
3. Unhook the rear balancing spring from the top
side of the holder.
4. Install the hook at the bottom, between the
cradle and the bottom panel. First put the small
hook in the cradle and then push the holder
down to hook the other end in the bottom.
5. Undo the tension ring and remove it. Do not
pry the tension ring off. Undo one end and turn
it round the holder to remove it.
6. Lift off the front end plate. If the end plate is
stuck, a screwdriver can be used to pry it away
from the inner cover plate.
7. Remove the special tool.
Centering tool
P/N 8801152
Tension ring
P/N 8061669
Front end plate
P/N 8061670
(will include
counterweights)
38
8. Remove the inner cover plate. If the inner cover
plate is stuck, a screwdriver can be used to pry it
away from the drum holder. Be careful not to
damage the rubber strip.
REPLACING THE FRONT END PLA
TE
PLATE
AND INNER COVER PLA
TE
PLATE
9. Install the inner cover plate and the special tool
(part no. 88 011 52). Make sure the cover plate
is positioned with the marking UP in line with
the center bulge on the holder.
10. Install the
front end
plate and
tension the
special tool’s
two lower
parts to it.
Use
the
special tool’s
upper stay to
hang the end
plate on.
Make sure
the front
plate
is
located in the
groove in the
holder panel.
11. Install the
tension ring
by turning
it to the
right place
and then securing the screw. Be sure that the
tension ring is properly located over the edges
of the end plate.
12. Tighten the screw fully.
13. Use a rubber mallet to knock the tension ring
into place on the upper edge and sides. Also
move it to the edge of the end plate with pliers.
14. Tightly secure the tension ring.
15. Remove the lower hook.
16. Hook the balancing spring to the top side of
the holder.
17. Remove the special tool.
18. Refit the door latch assembly and glass door
catch (see page 37).
INNER DRUM AND WASH PADDLES
REMOVING THE INNER DRUM
REPLACING THE INNER DRUM
1. Remove the end plate and inner cover plate (see
page 38).
2. Remove the rear panel (see page 26).
3. Take off the drive belt by lifting it off one side
of the pulley and turning the pulley.
4. Remove the pulley screw and remove the pulley
and the wavy washer.
5. Pull out the inner drum.
6. Install an O-ring on the drum shaft.
O-ring
P/N 8058497
7. Install the inner drum.
8. Install the wavy washer on the drum shaft.
Drive belt
P/N 8061682
WARNING
A missing wavy washer can lead to leakage, drum
shaft failure, and bearing failure.
9. Install the pulley and tighten the screw.
10. Install the drive belt by first putting the belt
under the motor pulley. Turn the pulley to make
sure the drive belt is centered on the top edge of
the pulley.
11. Install the rear panel (see page 26).
12. Replace the end plate and inner cover plate (see
page 38).
Pulley P/N 8056376
Pulley screw P/N 8901052
Wavy washer P/N 8056810
Inner drum
P/N 8061600
CHANGING THE W
ASH PPADDLE
ADDLE
WASH
1. Insert a flathead screwdriver (or similar thin tool)
into the center paddle hole and angle it carefully
to the left.
2. Pull the paddle toward the drum opening.
3. Lift up the paddle.
4. Place the new paddle in the securing hole with
the “F” marking facing the drum opening.
5. Push the paddle inward until it
is securely in place.
Wash paddle
P/N 8061604
39
DRAIN PUMP
REMOVING THE DRAIN PUMP AND
PUMP HOUSING
1. W620 and W660: Remove the lower cover (see
page 29).
W600 and W640: Remove the front panel (see
page 28).
2. Remove the pump and pump housing from the
rubber buffers in the bottom plate. (Remember,
there is always water in the drain pump.)
3. Release the three hose clips and remove the
hoses. Also remove the hose clip for the drain
hose and remove the hose.
4. Disconnect the terminal block.
5. Detach the Emergency Door Opener handle.
Drain pump
P/N 8801167
Clamps
P/Ns 8052731, 8056491,
8054196, 8056471
Rubber
buffers
P/N 8061649
REPLACING THE DRAIN PUMP AND
PUMP HOUSING
6. Secure the emergency opening cord. It is
important for the emergency opening cord to
be securely fastened to the pump housing and
that the cord is free from obstructions.
7. Secure the terminal block.
8. Connect the three hoses and secure them with
hose clips. Also connect the drain hose and secure
it with a hose clip.
9. Secure the pump housing to the rubber buffers
on the bottom plate.
10. W620 and W660: Replace the lower cover.
W600 and W640: Replace the front panel.
40
CHANGING THE DRAIN PUMP
1. W620 and W660: Remove the lower cover (see
page 29).
W600 and W640: Remove the front panel (see
page 28).
2. Remove the pump and pump housing from the
rubber buffers in the bottom plate. (Remember,
there is always water in the drain pump.)
3. Disconnect one hose by removing the hose clip,
and then turn it to remove it from the rear of
the pump.
4. Disconnect the terminal block and the three
screws that secure the pump to the pump
housing.
5. Take out the pump.
6. Secure the terminal block to the new pump.
7. Secure the pump in the pump housing with the
three screws.
8. Fit the hose and secure it with the hose clip.
9. Secure the pump and pump housing to the
rubber buffers in the bottom plate.
10. W620 and W660: Replace the lower cover.
W600 and W640: Replace the front panel.
DRAIN PUMP RUBBER RING AND OUTER TUB ASSEMBLY
CHANGING THE DRAIN PUMP
RUBBER RING
1. Open the drain pump cover using the partition
from the detergent drawer or a screwdriver.
2. Disconnect the drain hose, being careful not to
break off the drain plug.
NOTE
There may be water left in the machine that will
run out through the drain hose.
3. Remove the screw to detach the emergency
opening handle.
4. Pull the rubber ring from the pump housing.
5. Put the new ring on to the pump housing. The
tab on the ring must be upwards and in line
with the tab on the pump housing.
6. Secure the emergency opening handle with the
screw and refit the drain hose.
7. Close the cover.
CHANGING THE OUTER TUB ASSEMBLY
1. Remove the detergent drawer (see page 21).
2. Remove the electrical component bridge piece
(see page 45).
3. Remove the drum (see page 39).
4. Remove the motor (see page 27).
NOTE
The motor can stay in place while dismantling the
holder. Remember to put the holder down gently
to prevent the motor being damaged.
5. Remove all the necessary hoses and wiring.
6. Remove the holder and cradle.
7. Lift the holder straight up.
Outer tub
P/N 8801165
Drain hose
P/N 8061725
Rubber ring
P/N 8061796
8. Transfer the piston rods and rubber dampers to
the shock absorbers.
9. Lower the new holder into the machine and the
piston rods and rubber dampers to the shock
absorbers. (Soapy water can be used to make it
easier to fit the rubber dampers.)
10. Refit the hoses and wiring.
11. Replace the motor.
12. Replace the drum.
13. Replace the electrical component bridge piece.
14. Replace the detergent drawer.
41
BEARINGS AND V-RING CASSETTE
CHANGING THE BEARINGS
CHANGING THE VV-RING
-RING CASSETTE
1.
2.
3.
4.
1. Remove the drum (see page 39).
2. Remove the v-ring cassette with a screwdriver.
3. Put the tool into the bearing housing from the
rear of the machine.
4. Put the new v-ring cassette onto the special tool
(see page 19) and place it inside the holder with
the white side facing out.
5. Put the washer on the tool with the flat side
facing the cassette.
6. Fit the nut and force the v-ring cassette into place
by tightening the nut.
Remove the drum (see page 39).
Remove the V-ring cassette with a screwdriver.
Knock out both bearings and discard them.
Place the inner bearing on the special tool (part
no. 88 011 53) and put it inside the holder.
(See page 19.)
IMPORT
ANT
IMPORTANT
Position the special tool support between the
heating element loops.
5. Put the outer bearing and washer onto the tool
at the rear of the bearing housing.
6. Tighten the nut.
7. Insert the bearing into place with the special tool.
8. Remove the nut and remove the special tool.
9. Replace the drum.
V-ring cassette
P/N 8061638
IMPORT
ANT
IMPORTANT
To prevent leakage or squeaking, the v-ring
cassette must be pressed in securely.
7. Remove the nut and the special tool.
8. Replace the drum.
V-ring cassette
P/N 8061638
Bearings
P/N 8056314
Special tool
P/N 8801153
42
HEATING ELEMENT AND THERMISTOR
CHANGING THE HEA
TING ELEMENT
HEATING
CHANGING THE THERMISTOR
1. Remove the rear panel (see page 26).
2. Disconnect the wiring and unscrew the nut as
far as possible.
3. Tap the screw so that the seal on the inside is
separated from its flat washer.
4. Let the seal shrink and then pull out the element.
5. Install the element by pushing it in as far as
possible.
6. Tighten the nut and connect the wiring.
7. Replace the rear panel.
1. Remove the top cover (see page 20).
2. Remove the rear panel (see page 26).
3. Remove the thermistor by pulling it out to the
left.
4. W600 and W620: Remove the thermistor
header connector from the temperature selector.
W640 and W660: Remove the thermistor header
connector from the program control board.
5. Install the new thermistor by threading it through
the hole between the cradle and holder.
6. W600 and W620: Connect the thermistor to
the temperature selector.
W640 and W660: Connect the thermistor to
the program control board.
7. Replace the rear panel.
8. Replace the top cover. (Don't forget the two
star washers for the outer screws.)
Heating element
P/N 8061706
Holder
P/N 8061738
Thermistor
P/N 8061663
43
TENSION RING AND BALANCING SPRING
CHANGING THE TENSION RING
CHANGING THE BALANCING SPRING
1. Remove the front panel (see page 32.)
2. Remove the front cover plate (see page 36).
3. Install the special tool (part no. 8801152).
Fasten the special tool's three stays in the drum
end.
4. Slacken the tension ring and remove it. Do not
pry the tension ring off. Undo one end and turn
it round the holder to remove it.
5. Install the new tension ring by turning it to the
right place and then securing the screw.
6. Tighten the screw fully. Use a rubber mallet to
knock the tension ring into place on the upper
edge. Also move it to the edge of the end plate
with pliers.
7. Tighten the tension ring more.
8. Remove the special tool.
9. Replace the cover plate.
1. Remove the top cover (see page 20).
2. Use pliers to unhook the balancing spring from
the holder.
3. Front spring: Unhook the spring from the front
rail.
Rear spring: Unhook the spring from the cross
member.
4. Install a new spring by first hooking it to the
member and then to the holder.
5. Replace the top cover. (Don't forget the two
star washers for the outermost screws.)
Balancing spring
P/N 8061923
Special tool
P/N 8801152
Tension ring
P/N 8061699
Bolt
P/N 8061116
Washer
P/N 8901335
Nut
8901154
44
ELECTRICAL COMPONENT BRIDGE PIECE AND LEVEL SWITCH
REMOVING THE ELECTRICAL
COMPONENT BRIDGE PIECE
1. Remove the top cover (see page 20).
2. Remove the control panel (see page 22).
3. Remove the two screws at the rear from the cross
member.
4. Remove the two screws in the front rail.
5. Remove the wiring as necessary.
6. Lift out the bridge piece.
CHANGING THE LEVEL SWITCH
1. Remove the top cover (see page 20).
2. Squeeze the level switch securing clips, if
necessary with pliers, and remove it from the
bridge piece.
3. Remove the wiring and connector pins.
4. Remove the rubber hose from the underside.
5. Put the rubber hose onto the new level switch.
6. Connect the wiring and connector pins.
7. Insert and push the level switch to secure it on
the bridge piece.
8. Replace the top cover. Don't forget the two star
washers for the outermost screws.
Level switch
P/N 8061747
Electrical component
bridge piece
P/N 8061692
Front beam
P/N 8061690
REPLACING THE ELECTRICAL
COMPONENT BRIDGE PIECE
7. Lay the bridge piece in place.
8. Secure the two screws to the cross member and
the two to the front rail.
9. Reconnect the wiring, being careful that it is
correctly connected.
10. Replace the front panel.
11. Replace the top cover. (Don't forget the two
star washers for the outermost screws.)
45
LEVEL SENSOR AND PROGRAMMER (W600 AND W620)
CHANGING THE LEVEL SENSOR
1. Remove the top cover (see page 20).
2. Squeeze the level sensor securing clips, if
necessary with pliers, and remove it from the
bridge piece.
3. Remove the connector pins.
4. Remove the rubber hose from the underside.
5. Put the rubber hose on to the new level sensor.
6. Reconnect the terminal block.
7. Insert and push the level sensor to secure it on
the bridge piece.
8. Replace the top cover. Don't forget the two star
washers for the outermost screws.
Level sensor
P/N 8061664
CHANGING THE PROGRAMMER
(W600 AND W620)
1. Remove the top cover (see page 20).
2. Turn the knob to the 12:00 or zero position
and remove it from the panel. (If you use a
polygrip (mole wrench), remember to put some
soft material in the jaws so as not to scratch the
plastic. Do not pry the knob off.)
3. Insert a flathead screwdriver through the knob
hole and release the two clips that secure the
programmer.
4. Move the programmer to one side and lift it
out.
5. Align the new programmer and press it in.
6. Holding the knob at the 12:00 or zero position,
push it back into place.
7. Replace the top cover. Don't forget the two star
washers for the outermost screws.
Programmer (W600/W620)
P/N 8061756
46
PROCESSOR CONTROL UNIT (W640/W660) AND INPUT TERMINAL BLOCK
CHANGING THE PROCESSOR CONTROL
UNIT (PCU) (W640 AND W660)
WARNING
A grounded EMC wristband must be worn at all
times when working with electronic components
to prevent damage to them.
1. Remove the top cover (see page 20.
2. Remove the PCU by pressing in the two plastic
clips.
3. Remove the terminal block.
4. Lift up the PCU and remove the two plastic
clips on the underside of the bridge piece and
lift up the holder.
5. Install the holder by pushing it in until it snaps
into place.
6. Align the new PCU and press it into place.
7. Connect the wiring and terminal block.
8. Replace the top cover. Don't forget the two star
washers for the outermost screws.
CHANGING THE INPUT TERMINAL
BLOCK
1.
2.
3.
4.
5.
6.
7.
8.
Remove the top cover (see page 20).
Remove the grounding screw.
Disconnect all the wiring.
Press the latches in with a screwdriver and pull
out the input terminal block.
Install the new input terminal block, the latches
must clip on to the edge of the plate.
Install the wiring in accordance with the
electrical schematic diagram. Make sure that the
wires are connected correctly.
Replace the grounding screw.
Replace the top cover. Don't forget the two star
washers for the outermost screws.
Input terminal block
P/N 8061660
PCU
P/N 8061759
47
FUSE, FUSE HOLDER, AND RADIO INTERFERENCE FILTER
CHANGING THE FUSE
1. Remove the fuse holder insert with a screwdriver
(1/4 turn).
2. Replace the fuse. (The fuse must be a 250V, 15
amp slow-blow fuse.)
3. Fit the fuse holder insert with the fuse into the
fuse holder.
CHANGING THE RADIO INTERFERENCE
FIL
TER
FILTER
1. Remove the top cover (see page 20).
2. Disconnect the wiring from the radio
interference filter.
3. The Ohms should be between 1, 3–3,4. If not,
proceed to step 4.
4. Unscrew the nut securing the filter and take it
out.
5. Install the new radio interference filter.
6. Install the wiring in accordance with the labels
on the wires. Be sure to connect the wires to the
correct flat pin connectors.
7. Replace the top cover. Don't forget the two star
washers for the outermost screws.
Fuse (2)
P/N 8058140
CHANGING THE FUSE HOLDER
1. Remove the top cover (see page 20).
2. Remove the wiring that goes to the fuse holder.
3. Remove the fuse holder insert with a screwdriver
(1/4 turn).
4. Unscrew the fuse holder.
5. Fit the new fuse holder.
6. Connect the wiring.
7. Install the fuse holder and its insert.
8. Replace the top cover. Don't forget the two star
washers for the outermost screws.
Fuse (2)
P/N 8058140
Fuse holder
8054613
Fuse hub
8055725
48
Radio interference filter
P/N 8058558
CABLE STAND AND INLET VALVE
CHANGING THE CABLE ST AND
CHANGING THE INLET VVAA LLVE
VE
1. Remove the top cover (see page 20).
2. Remove the wiring.
3. Route the new wiring and secure it. Make sure
that the wires are connected correctly.
4. Replace the top cover. Don't forget the two star
washers for the outermost screws.
1. Remove the top cover (see page 20).
2. Disconnect the water supply connection from
the inlet valve.
3. Remove the two screws under the cross member
and lift up the valve.
4. Remove the hoses and wiring.
5. Install the wiring in accordance with the
electrical schematic diagram and secure the hoses.
6. Install the inlet valve in the cross member and
secure it with the two screws. The wiring to the
lock assembly must run between the inlet valve
and the cross member.
7. Install the water supply connection.
8. Check for leaks.
9. Replace the top cover. Don't forget the two star
washers for the outermost screws.
Cable stand
P/N 8060956
Inlet valve
P/N 8061757
49
SIDE PANELS
CHANGING THE SIDE PPANELS
ANELS
1. Remove the top cover (see page 20).
2. Remove the rear panel (see page 26).
3. W620 and W660: Remove the front panel (see
page 32).
W600 and W640: Remove the front panel (see
page 28).
4. Remove the control panel (see page 22).
5. Early models: the hole is marked out on the
bottom.
Early models: the hole is marked out on the
front rail.
6. Using a narrow chisel, cut off the rivet heads
and break those on the front rail off with a
screwdriver.
7. Lift away the side panel.
8. File or grind smooth the places where the rivets
were in the bottom and use a polygrip to flatten
the front rail.
WARNING
The edges of the bottom and the front rail where
the rivets were placed must be completely flat and
smooth.
9. Early models: Drill a 1/2” diameter hole in the
bottom at the marking.
Early models: Drill a 3/16” diameter hole in
the front rail at the marking.
10. Install three clips at the bottom of the side
panels.
11. Lift the side panel into place.
12. Secure the cross member, transport beam and
the front rail to the side panels.
13. Secure the side panels to the bottom.
14. Replace the front panel.
15. Replace the rear panel.
16. Replace the control panel.
50
Side panels
P/N 8801174-0 (white)
P/N 8801174-95 (SS)
BASE PAN AND SHOCK ABSORBERS
CHANGING THE BASE PPAN
AN
CHANGING THE SHOCK ABSORBERS
1. Remove the holder assembly (see page 42).
2. Dismantle the shock absorbers (see this page).
3. W640 and W660: Dismantle the motor control
board (see page 27).
W660: Dismantle the overflow protection in
accordance with steps 1 to 3 on page 53.
4. Early models: the hole is marked out on the
bottom.
5. Cut off the rivets between the bottom and side
panels.
6. Remove the two screws that secure the lower
cover or the front plate in the bottom.
7. Lift the side panels with the front plate, etc.
8. Install 6 clips on the side panel bottom edges.
9. Early models: Drill a 1/2” diameter hole in the
bottom at the marking.
10. Secure the side panels to the new bottom.
11. W660: Replace the overflow protection.
W640 and W660: Replace the motor control
board.
12. Replace the shock absorbers .
13. Replace the holder complete.
1. Front shock absorbers: Remove the front panel
(see page 28) or the lower cover (see page 29).
Rear shock absorbers: Remove the rear panel
(see page 26).
2. Remove the shock absorber nuts under the
bottom plate.
3. Support the holder from underneath or secure
it with a hook from above.
4. Compress the shock absorber. Angle it outwards
and pull it off downwards.
5. Take off the piston rods.
6. Remove the rubber buffers.
7. Install new rubber buffers, piston rods and shock
absorbers.
8. Compress the shock absorber and put it into
position in the bottom plate.
9. Fit the nut on the underside and tighten it.
10. Front shock absorbers: Replace the front panel
or the lower cover.
Rear shock absorbers: Replace the rear panel.
Shock absorber
P/N 8801171
(includes washers, nuts
and rubber buffers)
Base pan
P/N 8061618
51
OVERFLOW PROTECTION DEVICE (W660) AND PRESSURE CHAMBER
CHANGING THE OVERFLOW
PROTECTION DEVICE (W660)
1. From the rear: Remove the rear panel (see page
26).
From the front: Remove the lower cover (see
page 29).
2. Remove the protection device by squeezing the
two plastic clips that secure it to the bottom
plate.
3. Remove the wiring.
4. Connect the wiring to the new overfilling
protection device.
5. Align the device and press it into the clips.
6. From the rear: Replace the rear panel.
From the front: Replace the lower cover.
CHANGING THE PRESSURE CHAMBER
1. W620 and W660: Remove the lower cover (see
page 29).
W600 and W640: Remove the front panel (see
page 28).
2. Remove the hose clip securing the pressure
chamber to the corrugated hose and remove the
chamber.
3. Remove the rubber hose that leads to the level
switch and level sensor.
4. Twist the pressure chamber 1/4 turn and take it
out of the bracket.
5. Secure the new chamber by inserting it into the
bracket and twisting it 1/4 turn.
6. Join the rubber hose and the corrugated hose
together with a hose clip. Tighten the hose clip.
7. W620 and W660: Replace the lower cover.
W600 and W640: Replace the front panel.
Overflow protection device
P/N 8061620
Clamp
P/N 8052083
Hose
P/N 7382670
Pressure chamber
P/N 8061924
52
FRONT RAIL
CHANGING THE FRONT RAIL
1. Remove the control panel (see page 22).
2. Early models: the hole is marked out on the
front rail.
3. Remove the rivets with a screwdriver and flatten
with a polygrip.
4. Early models: Drill a 3/15” diameter hole in
the front rail at the marking.
5. Secure the new front rail.
6. Replace the control panel.
Front rail
P/N 8061690
53
CLEANING AND MAINTENANCE
CLEANING THE DETERGENT DRAWER
1. Pull the drawer out as
far as it goes then lift it
up and pull it out
completely,
as
illustrated.
2. Clean the drawer with
a soft brush under warm
running water. Do not
put the drawer in a
dishwasher.
3. Replace the drawer by tilting it into position.
CLEANING THE PIN TRAP
The washing machine has a pin trap designed to
trap pins, hairpins, buttons, coins and similar items.
This trap should be cleaned occasionally. To do this,
follow the steps below:
1. Turn off the power to the machine.
2. Using a flathead screwdriver or similar item,
gently pry open the
drain pump cover, as
illustrated.
3. There is always a small amount of water in
the drain pump area. Before you open the drain
cover, place a shallow container, such as a pie pan,
on the floor below the drain to catch the water.
4. Pull the small black drain
hose loose from its position
on the door cover and let
the water drain into the pan.
5. Twist the pin trap cover
counterclockwise and lift it
out.
6. You can now clean out
any grit or small
objects. You should
also clean the pump
rotor at the back of the
pump housing.
7. Replace the drain cover and return the drain hose
to its position on the door.
54
CLEANING THE CONTROL PPANEL
ANEL
To clean the control panel, use only a warm, damp
rag. To prevent penetration of water into the door
lock and electrical components, never use a spray
of any kind. Also, never use abrasive cleaners or
scouring pads on the outer surfaces because they will
scratch the finish and they could remove the writing
on the control panel. Some paper towels may also
scratch the finish.
WARNING!
Never spray clean the control panel. You could
damage the electrical components. Also, never
use abrasive cleaners, scouring pads or paper
towels on the outer surfaces because they will
scratch the finish and they could remove the
writing on the control panel.
REMOVING AN OBJECT FROM
BETWEEN THE DRUM AND OUTER
CONTAINER
Occasionally, a small item may fall between the
drum and the outer container. Such items should
be removed because they could corrode and cause
rust stains on the laundry. To remove the item,
follow the instructions below:
1. Insert a flathead screwdriver in the center hole in
the paddle and carefully
push it to the left.
2. Grip the paddle with your
other hand and pull it
toward you.
3. Lift up the paddle and remove the object.
4. Replace the paddle in its fixing hole with the
F-mark toward you. Check that the paddle
clips are properly located in the slots and slide
the paddle toward the back as far as it will go.
W600 CONTROL PANEL
Power
Indicator
Light
Power
Button
Super
Rinse
Button
E2
No Spin
Button
Temperature
Control Knob
Program
Control Knob
800
o
F
C
65
1
S
2
3
10
85
205
105
170
120
160
Door Open
Button
Economy
Button
The Power button turns the power to the machine
on and off. When the power is on, the power
indicator light glows red. The power must be on
before you can open the door, set the programs or
start the machine.
DOOR OPEN BUTTON
The power must be on and you must press this
button to open the door. There will be a few
seconds delay before the door opens. Please note
that the Program Control knob must be at the
Program
White cotton w/prewash
White cotton w/short prewash
Normal
Rinse
Long spin
Permanent Press/Synthetics
Super quick wash
Short spin
Wool/Hand wash
Drain
CAUTION!
140
5
7 6
4
800 RPM
Spin Button
POWER BUTTON
Program
Number
1
2
3
4
5
6
7
8
9
10
9
8
end of a program (at the 12:00 o’clock or zero
position) to open the glass door. (See also,
“Interrupting or Changing a Program” on page 58.)
For instructions on how to open the door manually
in case of power failure, refer to page 10.
PROGRAMS AND OPTIONS
Your ASKO washer has several programs and options
specifically designed to give you the cleanest laundry
possible. The table below defines each program. The
C and S on the Program Control are fault codes,
which are explained on page 15.
Recommended
Types of Laundry
Temp. Range (° F)
For heavily soiled cotton
140–205
For normally soiled cotton
140–205
For lightly soiled cottons and colorfast
105–140
For acrylic, polyester
For lightly soiled fabrics
105–140
85–105
For silk, nylon, washable wool
85–105
Some fabrics may not be able to withstand extremely hot temperatures. Please refer
to the Recommended Wash Temperatures chart in the Use and Care Guide.
Option Definition
E2
800
Super Rinse – Provides two additional rinses. Recommended for persons with sensitive skin or allergies.
Economy – Extends the main wash time by 22 minutes. When used with low wash temperatures
(85°–100° F), this program conserves energy but gives the same high level of cleaning. Note: You
can only use this option with programs 1, 2, and 3.
Reduces the spin speed from 1000 rpm to 800 rpm.
No Spin – Omits the spin cycles in all programs. Programs 1–4 will drain the water after the last
rinse. Programs 6, 7, and 9 will stop with water still in the machine. Set the Program Control knob
to 10 to drain the water.
55
W620 CONTROL PANEL
Power
Indicator
Light
Super
Rinse
Button
Power
Button
E2
No Spin/
No Drain
option
Delay
Start
Button
Temperature
Control Knob
No Spin
option
Program
Control Knob
5h
o
F
C
65
1
S
2
3
10
85
1200
205
1100
1000
700
900
Door Open
Button
Economy
Button
800
The Power button turns the power to the machine
on and off. When the power is on, the power
indicator light glows red. The power must be on
before you can open the door, set the programs or
start the machine.
DOOR OPEN BUTTON
The power must be on and you must press this
button to open the door. There will be a few seconds
delay before the door opens. Please note that the
Program Control knob must be at the end of a
program (at the 12:00 o’clock or zero position) to
open the glass door. (See also, “Interrupting or
Changing a Program” on page 58.)
Program
White cotton w/prewash
White cotton w/short prewash
Normal
Rinse
Long spin
Permanent Press/Synthetics
Super quick wash
Short spin
Wool/Hand wash
Drain
CAUTION!
170
9
8
120
160
140
7 6
5
4
Spin Speed
Control Knob
POWER BUTTON
Program
Number
1
2
3
4
5
6
7
8
9
10
105
600
For instructions on how to open the door manually
in case of power failure, refer to page 10.
SPIN SPEED CONTROL KNOB
In addition to the 600 rpm to 1200 rpm spin speed
options, the Spin Speed Control has a No Spin/No
Drain option ( ) and a No Spin ( ) option. These
are for delicate fabrics that should not be spun dry.
PROGRAMS AND OPTIONS
Your ASKO washer has several programs and options
specifically designed to give you the cleanest laundry
possible. The table below defines each program. The
C and S on the Program Control are fault codes,
which are explained on page 15.
Recommended
Types of Laundry
Temp. Range (° F)
For heavily soiled cotton
140–205
For normally soiled cotton
140–205
For lightly soiled cottons and colorfast
105–140
For acrylic, polyester
For lightly soiled fabrics
105–140
85–105
For silk, nylon, washable wool
85–105
Some fabrics may not be able to withstand extremely hot temperatures. Please refer
to the Recommended Wash Temperatures chart in the Use and Care Guide.
Option Definition
Super Rinse – Provides two additional rinses. Recommended for persons with sensitive skin or allergies.
Economy – Extends the main wash time by 22 minutes. When used with low wash temperatures (85°–100° F),
E2
this program conserves energy but gives the same high level of cleaning. Note: You can only use this option with
programs 1, 2 and 3.
5h
56
Delay Start – Automatically delays starting the program for five hours.
W600 AND W620 FAULT CODES
F AUL
AULTT CODES
The Program Control knob has two fault codes: C
and S. If the knob stops on one of these, the machine
detected a problem.
C – This indicates a problem that can probably be
taken care of without calling a service technician.
S – This usually indicates a mechanical problem and
a service call will be required.
Refer to page 15 for more detailed information.
INTERRUPTING OR CHANGING A
PROGRAM
If you need to stop or interrupt a program after you
start the machine, turn the Program Control knob
to 10 (Drain). Any water in the machine will be
pumped out. Press the Door Open button to open
the door. (It won’t open until the water is out.) To
restart the washer, close the door, add detergent (if
needed), and turn the controls to the desired settings.
57
W640 AND W660 CONTROL PANEL
Models W660 and W640 have ASKO’s state-of-the-art EasyControl™ panel, as illustrated below. To select
a wash program, simply press one of the preset program buttons then press Start. Refer to “Preset Programs”
below for a definition of these programs.
Preset Programs
LED Window
Power Button
Power
Indicator
Light
P 1
P 2
P 3
P 4
Start/Stop
M enu
Start/Stop Button
Door Open Button
POWER BUTTON
E n te r
Program Selection Controls
The Power button turns the power to the machine
on and off. When the power is on, the power
indicator light glows red. The power must be on
before you can open the glass door, set the programs
or start the machine.
open the door during a wash or rinse cycle, press
and hold Door Open for a few seconds. The machine
will stop and automatically drain enough water so
the door can be opened safely. The program will
resume when you close the door. For instructions
on how to open the door manually in case of power
failure, refer to page 10.
S TTART/ST
ART/ST OP BUTT
ON
BUTTON
PRESET PROGRAMS
Start/Stop
This button starts or stops a program. To stop a
program, press and hold this button for a few
seconds. If you stop a program using the Start/Stop
button, you will have to reselect a program and press
Start/Stop to restart the machine.
DOOR OPEN BUTTON
This model has four preset programs, as defined in
the table below. To select a program, simply press
one of the program buttons and press Start.
You can easily customize the preset programs to best
fit your laundry needs. See “Customizing the Preset
Programs” on page 60.
The power must be on and you must press this
button to open the glass door. There will be a few
seconds delay before the door opens. If you need to
Preset
Program
P1
P2
P3
P4
Normal
Normal
Super Quick
Wool/Hand
NOTES: (1)
(2)
(3)
58
Wash
Cycle
Types of Laundry
White cotton
Normal/Perm Press
Lightly soiled fabrics
Washable wool, silk, nylon
Wash
Temp
(° F) (1)
Spin
Speed
(rpm) (1) (2)
140°
105°
105°
85°
1600
1600
800
800
(3)
(3)
# of
Rinses
Short
Spin
Long
Spin
5
5
2
3
no
no
yes
yes
yes
yes
no
no
You can temporarily adjust the temperature settings and spin speed. (See “Temporary Program
Changes” on page 60.)
These are the maximum spin speed settings allowed for the program (except Super Quick).
Model W640 has a maximum spin speed of 1400 rpm.
W640 AND W660 CONTROL PANEL
UNDERST
ANDING THE LED WINDOW
UNDERSTANDING
The LED window is easy to read and understand. It displays the wash program selection along with the wash
temperature, spin speed, and program run time. The illustration below explains each item on the LED
window.
Temperature
Door Open
Wash temperature for the
selected program.
Displays when you press
the Door Open button.
rpm
Program
When you press the
Power button, the display
toggles between the
program numbers and
the wash program
names, (e.g., Normal,
Super quick, etc.)
P1
P2
P3
P4
rpm
1400
Normal wash
Normal wash
Super quick wash
Wool/hand wash
P 1 P 2 P 3 P 4 Start
Stop 105
43
Preset Programs
Displays the program
that is selected/running.
Start
Stop
Indicates that you
pressed Start and
the program is
running.
Indicates that the
program has ended or
that you pressed Stop.
Spin speed for the selected
program.
Program Time
When you start a program, the
total time the program runs is
displayed. As the program
progresses, the time
remaining displays. The
program time toggles between
the hours (e.g., 1h ) and the
minutes (e.g., 22). ( Note: The
program time displayed is the
time it took the last time it that
program was run.)
TEMPORARY PROGRAM CHANGES
CUSTOMIZING THE PROGRAMS
You can make temporary changes to the wash
temperature and/or spin speed on the preset
programs. Simply press the button for the preset
program you want to use then follow the
instructions below. The settings will revert to
normal at the end of the program.
Below are the basic instructions for changing a preset
wash program. The following page explains the
menus and options and how to navigate through
them.
until the desired
Temperature – Press
temperature displays in the LED window. If you
also want to change the spin speed, read the
following paragraph, otherwise, press Start.
Spin Speed – Press
until the desired spin speed
displays in the LED window then press Start.
1. Press the button for the preset program (P1–
P4) you want to change. The program you select
will display in the lower left corner of the LED
window.
2. Press MENU to display different program and
option settings.
3. Press the Arrows to move forward or backward
through the menu settings.
4. Press ENTER to choose your selection.
RESTORING A PRESET PROGRAM
To restore a preset program to its original settings,
simply press the button for the preset program you
want to restore and hold it down while you press
ENTER. The program will revert to its original
settings.
59
CUSTOMIZING THE PRESET PROGRAMS ON W640 AND W660
NA VIGA
TING THE MENUS
VIGATING
The following paragraphs explain how to navigate
through the menus and change the preset programs.
If you don’t want to make changes in all of the
menus, continue to press Menu until the one you
do want to change displays.
To restore a preset program to its original settings,
simply press the button for the preset program you
want to restore and hold it down while your press
Enter. The program will revert to its original
settings.
We recommend that you make two or three trial
changes to understand how easy it is to customize
these program.
Remember, the first step to customizing a
preset program is to press the button for
the program you want to customize.
The Program Menu
The Program menu lets you select the wash program
you prefer. You would also use this menu to set the
machine for a rinse, spin, or drain program.
Select
P rogra m
N orm al
<
N ext
>
E n te r
1. Use the Arrow buttons to move through the
program choices (Heavy, Normal, Light, etc.)
2. When your preference displays, press Enter. The
LED will display the new program setting.
Press Menu to advance to the next menu.
The Programs
The following paragraphs define the programs as
set by the factory. You can adapt these programs to
best suit your needs by changing the options.
Heavy Wash: Presoak – main wash – five rinses –
short spin after main wash and first two rinses –
long spin after last rinse.
Normal Wash: Short presoak – main wash – five
rinses – short spin after main wash and first two
rinses – long spin after last rinse.
Light Wash: Short main wash – three rinses – short
spin after main wash and first two rinses – long spin
after last rinse.
60
Synthetic Wash: Main wash – three rinses - short
spin after last rinse.
Wool/Hand wash: Gentle action main wash – high
water level – three rinses – short spin after last rinse.
Rinse: One rinse – long spin.
Spin: One long spin.
Short Spin: One short spin.
Drain: Draining only.
The TTee m p e r a t u r e M e n u
This menu lets you set the wash temperature. Only
the temperatures available for the wash program you
selected will display.
Select
tem perature
< -
+ >
140 o
P1
M e n u
P1
M e n u
Super Quick Wash: Short main wash – two rinses
– 800 rpm short spin after last rinse.
E n te r
1. Use the Arrow buttons to raise or lower the
temperature setting.
2. When the temperature you prefer displays, press
Enter. The LED will display the new
temperature setting.
Press Menu to advance to the next menu.
The Spin Speed Menu
This menu lets you set the spin speed. Only the
spin speeds available for the wash program you
selected will display.
Select
spin speed
< -
rpm
1600
+ >
P1
M e n u
E n te r
1. Use the Arrow buttons to raise or lower the
spin speed setting.
2. When the spin speed you prefer displays, press
Enter. The LED will display the new spin speed.
Press Menu to advance to the next menu.
CUSTOMIZING THE PRESET PROGRAMS ON W640 AND W660
The Delay Start Menu
This menu lets you set a delay start for up to 12
hours. This feature is useful in areas where utility
companies offer discount rates during certain hours.
Select tim e
for delayed start
< -
The Options Menu
This menu lets you set several options. The table below defines which options are available with each program. Only the options available with the specific wash
program you select will display. The table on the next
page lists the options available with each program.
Select
rpm
option
1600s
P re-soak
<
Off
+ >
0
P1
M e n u
E n te r
P1
1. Use the Arrow buttons to increase or decrease
the delay time. (The numbers indicate hours.)
2. When the number of hours you want to delay
starting the machine displays, press Enter. The
LED will display the delay start time.
Press Menu to advance to the next menu.
OPTION
DESCRIPTION
Presoak
Quick Wash
Eco (Economy)
Super Rinse
Short spin
Spin (on/off )
Drain
>
0
M e n u
E n te r
1. On this menu, you press Enter (instead of
Menu) to advance through the options.
2. When the option you want displays, press an
Arrow button to toggle between Off and On.
3. When your preference displays, press Enter. The
LED will display the new options.
The table below define each option and which
options are available with each program.
THE OPTIONS
Soaks the laundry for two hours before the wash program begins.
Shortens main wash time by about 31 minutes. Recommended for lightly soiled loads.
Lengthens main wash time by 21 minutes. When used with low wash temperatures, this
program conserves energy but gives the same high level of cleaning. Also removes heavy stains
when used with higher wash temperatures.
Adds two rinses. Recommended for people with sensitive skin or allergies to detergent.
Shortens the spin time.
Setting this option to Off eliminates the spin cycles entirely.
Setting this option to Off omits the drain cycles in all programs. You must run a Drain
program to empty the water.
OPTIONS AVAILABLE WITH EACH PROGRAM
NOTE: When you advance through the Options menu, only the options available with the program you
selected will display. The table below lists the options available with each program.
PROGRAMS
AVAILABLE OPTIONS
Heavy wash
Normal wash
Light wash
Super quick wash
Synthetic wash
Wool/hand wash
Rinse
Spin
Drain
Presoak, Quick wash, Eco, Super rinse, Short spin, Spin On/Off
Presoak, Quick wash, Eco, Super rinse, Short spin, Spin On/Off
Presoak, Eco, Super rinse, Short spin, Spin On/Off
Presoak, Super rinse, Short spin, Spin On/Off
Presoak, Super rinse, Spin On/Off
Presoak, Super rinse, Spin On/Off
Short spin, Spin On/Off
Short spin, Spin On/Off
(none)
61
CUSTOMIZING THE PRESET PROGRAMS ON W640 AND W660
CHANGING THE LANGUAGE ON THE
LED WINDOW
There are eleven languages available for the LED
window:
! English
! Swedish
! French
! Danish
! Spanish
! Norwegian
! Portuguese
! Netherlands
! Italian
! Finnish
! German
To change the language, follow the steps below:
1. Turn the machine off then on again.
2. Press Enter five times in succession then press
P1 five times. (This must be done within 15
seconds.)
3. When the Language menu displays, press an
Arrow button to advance through the menu to
the desired language.
4. Once the correct language displays, press
ENTER to program the LED window to
display the language you selected.
CHANGING THE TEMPERA
TURE READOUT
TEMPERATURE
FROM CELSIUS TO FAHRENHEIT
You can change the temperature readout on the LED
window from Fahrenheit to Celsius and vice versa.
To do this follow the steps below:
1. Turn the machine off then on again.
2. Press ENTER five times in succession then press
P2 five times. (This must be done within 15
seconds.)
3. When the Temperature menu displays, press an
Arrow button to toggle between Fahrenheit and
Celsius.
4. When your preference displays, press ENTER
to program the LED window to display the
temperature reading you selected.
62
CHILD- SAFE ST ART (W640/W660)
As a safety measure, you can program the W640
and W660 not to start unless the Start button is
held down for three seconds. To do this, follow the
steps below:
1. Turn the machine off then on.
2. Press Enter five times, then press P3 five times.
(This must be done within 15 seconds.)
3. “Delay Start” displays with “0” flashing in the
lower right corner. Press the Right Arrow
button to toggle the display to “3.”
Child-Safe Menu Button
Please note that when you set the child-safe Start
button, the Menu button is automatically
programmed to delay for three seconds before it
becomes active. This prevents a child from
accidentally changing the program settings.
When you want to change a program, press the
Menu button for three seconds to activate the
menus. The Menu button will work normally
(without the 3-second delay) until you have
completed your changes. If it is not pressed for two
minutes, it will automatically revert back to the
child-safe mode.
INDEX
B
E
Base pan ..................................................... 51
Bearing tool ............................................... 19
Bridge piece, electrical component .............. 45
Built-in installation ...................................... 4
Economy wash .................................... 55, 57
Electrical installation ..................................... 5
Emergency door opener .............................. 10
C
Fault Codes (W600 and W620) ................. 57
Fault indications
W600 and W620 ................................. 15
W640 and W660 ................................. 16
Fault tracing ........................................ 10, 11
Freestanding installation ............................... 4
Front cover plate for glass door ................... 36
Front end plate ........................................... 38
Front panel (W600 and W640) .................. 28
Front panel (W620 and W660) .................. 32
Front rail .................................................... 53
Care and cleaning ....................................... 54
Catch for glass door .................................... 36
Celsius, changing to Fahrenheit ................... 62
Child safe start, W640 and W660 .............. 62
Child safety latch ........................................ 21
Cleaning and maintenance .......................... 54
Common laundry problems ....................... 12
Components and measurement values . 13, 14
Consumption values ................................... 17
Control buttons ......................................... 23
Control panel ............................................. 22
cleaning ................................................ 54
knobs (W600 and W620) .................... 24
W620 .................................................. 56
W640 and W660 .......................... 58, 59
W660 .................................................. 55
Corrugated hose for detergent compartment .. 34
Cosmetic damage ......................................... 3
Customizing the programs
(W640 and W660) .................. 59, 60, 61
D
DCE panel board (W640 and W660) ......... 25
Delay start
W620 .................................................. 57
W640 and W660 ................................. 61
Detergent compartment ...................... 33, 34
Detergent drawer ........................................ 21
Door
cleaning ................................................ 54
lock ...................................................... 14
opener, emergency ................................ 10
Drain connection .......................................... 5
Drain Pump ............................................... 41
Drain pump ........................................ 13, 40
Drain pump cover ...................................... 29
Drive belt ................................................... 26
Drum ......................................................... 39
installation tool .................................... 19
removing an object ............................... 54
F
G
Glass door
catch .................................................... 36
front cover plate ................................... 36
opening .................................................. 8
seal ....................................................... 35
Grounding instructions ................................ 5
H
Heating element ......................................... 13
I
Indicator lamp ..................................... 14, 23
Inner cover plate ......................................... 38
Installation .................................... 3, 4, 5, 6
K
Knobs (W600 and W620) .......................... 24
L
Language, changing on LED window ......... 62
Laundry Problems ...................................... 12
LED window (W640 and W660) ............... 59
Level sensor ................................................ 13
Level switch ........................................ 13, 46
M
Main power button .................................... 23
Measurement values ............................ 13, 14
Models ......................................................... 2
63
INDEX
B
Balancing spring ......................................... 44
Base pan ..................................................... 51
Bearing tool ............................................... 19
Bearings ..................................................... 42
Bottom (lower) cover ................................. 29
Bridge piece, electrical component .............. 45
Built-in installation ...................................... 4
C
Cable stand ................................................ 49
Care and cleaning ....................................... 54
Catch for glass door .................................... 36
Celsius, changing to Fahrenheit ................... 62
Changing a program (W600/W620) ........... 57
Child safe start, W640/W660 ..................... 62
Child safety latch ........................................ 21
Cleaning and maintenance .......................... 54
Common laundry problems ....................... 12
Components and measurement values . 13, 14
Consumption values ................................... 17
Control buttons ......................................... 23
Control panel ............................................. 22
changing ............................................... 22
W600 .................................................. 55
W620 .................................................. 56
W640/W660 ................................ 58, 59
Control panel, cleaning ............................... 54
Control panel knobs (W600/W620) .......... 24
Corrugated hose for detergent compartment 34
Cosmetic damage ......................................... 3
Customizing the preset programs
(W640/W660) ......................... 59, 60, 61
D
DCU panel board ....................................... 25
Delay Start
W620 .................................................. 57
W640/W660 ....................................... 61
Detergent compartment ...................... 33, 34
Detergent drawer ........................................ 21
cleaning ................................................ 54
Detergent hose ........................................... 34
Display Control Unit (DCU) (W640/W660)25
Door
catch .................................................... 36
cleaning ................................................ 54
64
handle, outer door (W620/W660) ........ 30
hinge, outer door (W620/W660) ......... 31
lock ...................................................... 14
panel, inner (W620/W660) .................. 30
Door open button ................. 10, 56, 57, 58
Door opener, emergency ............................. 10
Drain connection .......................................... 5
Drain Pump ............................................... 41
Drain pump ........................................ 13, 40
Drain pump cover ...................................... 29
Drive belt ................................................... 26
Drum, outer tub assembly .......................... 41
Drum, inner ............................................... 39
installation tool .................................... 19
removing an object ............................... 54
E
Economy wash .................................... 55, 57
Electrical component bridge piece ............... 45
Electrical installation ..................................... 5
Emergency door opener ....................... 10, 37
F
Fahrenheit, changing to Celsius ................... 62
Fault Codes (W600/W620) ........................ 57
Fault indications
W600/W620 ....................................... 15
W640/W660 ....................................... 16
Fault tracing ........................................ 10, 11
Free-standing installation .............................. 4
Front cover plate for glass door ................... 36
Front end plate ........................................... 38
Front panel
(W600/W640) ..................................... 28
(W620/W660) ..................................... 32
plastic lockings and securing clips .......... 28
Front rail .................................................... 53
Fuse and fuse holder ................................... 48
G
Glass door .................................................. 35
catch .................................................... 36
front cover plate ................................... 36
how to open ........................................... 8
replacing glass and seal .......................... 35
Grounding instructions ................................ 5
INDEX
H
Heating element .................................. 13, 43
Hinge bearing guides, outer door
(W620/W660) ...................................... 31
Hinges, outer door (W620/W660) ............. 31
I
Indicator lamp ..................................... 14, 23
Inlet valves .......................................... 14, 49
Inner cover plate ......................................... 38
Inner door panel (W620/W660) ................. 30
Inner drum ................................................. 39
Input terminal block .................................. 47
Installation .................................... 3, 4, 5, 6
Interrupting a program (W600/W620) ....... 57
K
Knobs (W600/W620) ................................ 24
L
Language, changing on LED window ......... 62
Laundry Problems ...................................... 12
LED window (W640/W660) ..................... 59
Level sensor ......................................... 13, 46
Level switch ........................................ 13, 45
Lower cover (W620/W660) ....................... 29
M
Main power button .................................... 23
Measurement values ............................ 13, 14
Menus (W640/W660) ........................ 60, 61
Models ......................................................... 2
Motor ................................................. 13, 27
control board (W640/W660) ........ 13, 27
operations ......................................... 7, 8
Outer door (W620/W660) ................. 30, 31
Outer tub assembly .................................... 41
Overflow protection device (W660) ........... 52
P
Paddles ....................................................... 39
Panels
rear ....................................................... 26
side ...................................................... 50
W600/W640 front ............................... 32
W620/W660 front ............................... 28
W620/W660 lower .............................. 29
PCU board (W640/W660) ........................ 47
Pin trap, cleaning ........................................ 54
Preset programs (W640/W660) .................. 58
customizing .......................................... 60
restoring ............................................... 59
Pressure chamber ........................................ 52
Processor Control Unit (PCU)
(W640/W660) ...................................... 47
Programmer (W600/W620) ....................... 46
Programs
changes (W640/W660) ........................ 59
customizing (W640/W660) ................. 59
W600 .................................................. 55
W620 .................................................. 56
W640 and W660 ................................. 60
Pump housing ............................................ 40
Pushbuttons
pad (W640/W660) .............................. 25
switches ................................................ 23
W600 and W620 ................................. 24
R
No spin option .......................................... 55
No spin/No drain option ........................... 56
Noise or vibration ...................................... 20
Radio interference filter ....................... 13, 48
Rear panel .................................................. 26
Removing object from behind drum .......... 54
Restoring a preset program ......................... 59
Rotary selector (W600/W620) ................... 24
Rubber ring in drain pump ......................... 41
O
S
Options
W600 .................................................. 55
W620 .................................................. 56
W640/W660 ....................................... 60
Out-of-balance check ................................... 7
Safety latch on detergent drawer ................. 21
Safety regulations ......................................... 2
Seal for glass door ....................................... 35
Shipping supports ........................................ 3
Shock absorbers .......................................... 51
N
65
Side panels ................................................. 50
Special tools ............................................... 19
Specifications ............................................... 3
Spin options
W600 .................................................. 55
W620 .................................................. 56
Spin speeds ................................................... 7
changing , W640 and W660 ................. 60
selecting, W600 .................................... 55
selecting, W620 .................................... 56
Spray cleaner warning ................................. 54
Start/Stop button (W640/W660) ............... 58
Storage ......................................................... 2
Super Rinse .......................................... 55, 57
T
Temperature, changing readout from
celsius to farenheit (W640/W660) ........ 62
Temperature selector, W600/W620 ............ 24
Tension ring ............................................... 44
Test program and fault indications
W600 and W620 ................................. 15
W640 and W660 ................................. 16
Thermistor .......................................... 13, 43
Three-way inlet valves ................................ 14
Tools and application areas .................. 18, 19
Top cover ................................................... 20
Transport ..................................................... 2
Transport supports ....................................... 3
Tub assembly (outer) .................................. 41
V
V-ring cassette tool ..................................... 19
Vibration or noise ...................................... 20
W
Wash paddles .............................................. 39
Wash programs (W640 and W660) ............ 60
Washer features ............................................. 9
Water connection ......................................... 4
66
67