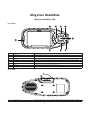
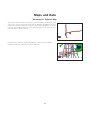
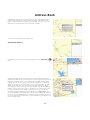
1
Magellan® RoadMate™
Reference Manual
Instructions for Operating the
Magellan RoadMate 300
*** IMPORTANT SAFETY WARNINGS ***
The Magellan RoadMate 300 is a vehicle-navigation aid designed to assist you in arriving at your
selected destinations. When using the Magellan RoadMate, these safety rules must be followed
to prevent accidents that can result in injury or death to yourself or others:
•
When driving, the need to view the display is minimal. Voice prompts will guide you to
your destination. The driver should enter data or program the unit only when the vehicle is
stopped. Only a vehicle passenger should enter data or program the unit while the vehicle
is moving.
•
It is your responsibility to comply with all traffic laws.
•
While every attempt is made to ensure that the database is accurate, roadways, points of
interest, and business and service locations may change over time. The database does not
include, analyze, process, consider, or reflect any of the following: legal restrictions (such
as vehicular type, weight, height, width, load and speed restrictions); road slope or grade;
bridge height, width, weight, or other limits; population density; neighborhood quality or
safety; availability or proximity of law enforcement, emergency rescue, medical, or other
assistance; construction work zones or hazards; road or lane closures; road, traffic, or
traffic facilities’ safety or condition; weather conditions; pavement characteristics or
conditions; special events; traffic congestion. It is your responsibility to disregard any
unsafe, hazardous, or illegal route suggestions.
•
Keep the Magellan RoadMate safe from extreme temperature conditions.
•
Laws in some states prohibit wearing stereo headphones while operating a motor vehicle.
Please contact your state’s Department of Motor Vehicles for information.
•
Take care when mounting the unit in your vehicle, whether using the windshield mount or
other mount or accessories, that it does not obstruct the driver's view of the road, interfere
with the operation of the vehicle's safety devices such as air bags, or present a hazard to
occupants of the vehicle should the unit be dislodged while driving. You assume the risks
associated with damage to your vehicle or vehicle occupants as the result of your choices
in mounting the unit.
•
Please refer to the Read Me First document supplied with your Magellan RoadMate for
installation instructions.
© 2004 Thales Navigation, Inc. All rights reserved. The Magellan Logo, Magellan, RoadMate,
Turn it on and go, TrueView, and QuickSpell are trademarks of Thales Navigation. No part of this
user manual may be reproduced or transmitted in any form or by any means, electronic or
mechanical, including photocopying and recording, for any purpose other than the purchaser’s
personal use, without the prior written permission of Thales Navigation.
631176-01 A
Table of Contents
Magellan RoadMate 1
Magellan RoadMate 300 1
Front View 1
Rear View 1
Left- and Right-Side Views 2
Bottom View 2
Secure Digital (SD) Cards 3
To Insert the SD Card: 3
To remove the SD card: 3
SD Card-Authorization Options 4
Information 5
About Satellite Navigation 5
How Satellite Navigation Works 5
Line of Sight 5
Precision 6
Installation 7
Vehicle Installation 7
Installation with the Windshield Mount 7
Magellan RoadMate Manager Application 9
Installation 9
Maps and Data 11
Basemaps vs. Detailed Map 11
Data Storage and Access 12
Basemap Routing vs. Detailed Map Routing 14
Routing Between Regions 15
Basic Operation 17
Turning the Magellan RoadMate On 17
Inputting Text Characters 17
Additional Characters (More) 18
Numerical Characters (123) 18
Using QuickSpell® 18
What Is QuickSpell? 18
Uploading Maps 20
Map Screen 21
Toolbar 21
Detail Map Window 21
Overview Map Window 21
Saved Regions List 22
Help Window 22
Upload Information Window 22
Uploading Maps to Internal Memory 23
Saving Regions 23
Deleting Maps from Internal Memory 25
Uploading Maps to an SD Card 26
User Settings 28
Settings Screen 29
Setting the User Preferences 31
Saving a Settings File to Your Computer 31
Opening a Settings File from Your Computer 31
Uploading the Settings 31
Address Book 32
Address Book Screen 33
Toolbar 33
Detail Map Window 33
Overview Map Window 33
Saved Addresses List 34
Help Window 34
Table of Contents
Upload Information Window 34
Using the Address Book 34
Adding an Address on the Map 34
Add Custom Address 35
Add a POI as an Address 36
Saving Your Address List to Your Computer 37
Load an Address List from Your Computer 38
Viewing an Address on the Map 39
Deleting an Address from the List 39
Uploading Addresses to your Magellan RoadMate 40
Trip Planner 41
Trip Planner Screen 42
Toolbar 42
Detail Map Window 42
Trip List 42
Address Book 43
Help Window 43
Upload Information Window 43
Using theTrip Planner 43
Adding Points on the Map 43
Adding an Address from the Address List to an Existing Trip 45
Creating a New Trip From the Address Book 47
Creating a New Trip with a Custom Address 48
Renaming a Trip 51
Creating a New Trip with a POI 52
Viewing a Trip 54
Saving a Trip File to Your Computer 54
Load a Trip from Your Computer 55
Uploading Trips to your Magellan RoadMate 56
Track Replay 57
Track Replay Screen 58
Toolbar 58
Track Information 58
Track Points 59
Elevation Profile 59
Help Window 59
Using the Track Replay 59
Loading a Track File from the Unit 59
Track Playback 60
Moving and Adding Track Points 61
Deleting and Viewing Track Points 63
Set the Date and Time of a Track Point 64
Viewing the Current Track 65
Clearing the Current Track. 65
Save a Track to Your Computer 66
Load a Track from Your Computer 67
Selecting Destinations 68
Choosing the Route Method 69
Basemap Routing 70
Selecting a Point on the Map 70
Search BaseMap City 70
Accessing Map Files 72
Switching Map Files 72
Switching SD Cards 73
Selecting a Destination Using “Select Address” 75
Select Address 75
Selecting a Destination Using “Address Book” 77
Address Book: Previous Destinations 77
Table of Contents
Previous Destinations – Save to your Address Book 78
Address Book: List Addresses 79
List All 79
List Favorites 81
Search Address Book 83
Address Book: Create New Entry 86
Select on Map 86
Select Address 87
Dining, ATM, Gas... 89
Intersection 95
Address Book: Trip Planner 98
Guide Me 98
New 99
Edit 101
Delete, Rename 102
Selecting a Destination Using “Dining, ATM, Gas...” 105
Dining, ATM, Gas...: Search POI by Name 105
Dining, ATM, Gas...: Search Nearest POI 106
Current Position 106
By City Center 107
By Airport 109
Dining, ATM, Gas...: Search BaseMap City 111
Selecting a POI on the Map 112
Selecting a Destination Using “Intersection” 113
Traveling 115
Guidance Information Screens 115
Map Screen 116
Changing the Map Zoom Levels 116
Maneuver List Screen 117
TrueView Screen 117
Route Changes 118
Detouring from the Planned Route 118
Excluding a Maneuver in a Planned Route 118
Canceling a Planned Route 119
Changing the Route Method 119
Current Location 121
Displaying Information About Your Current Location 121
Save Location 121
User Options 122
User Option Menu 122
Trip Computer 123
Stopping or Starting the Trip Computer 123
Saving the Current Trip Report 123
Resetting the Trip Computer 124
Viewing a Saved Trip Report 124
Deleting a Trip Report 125
Track Recorder 126
Start Track Recorder 126
Stop Track Recorder 126
Save Track Record 127
View Track 128
Delete, Rename Track 129
Configuration 131
Contrast 131
Brightness 131
Volume 132
Auto Power Off 132
Language 132
Table of Contents
User Settings 133
POI Selection 133
Map Options 134
Select Map Color 134
Route Preferences 135
Split TrueView 135
Menu Colors 136
Tone Options 137
Diagnostics 137
Simulator Mode 139
User - Edit Name 140
Password Settings 140
Magellan RoadMate
Magellan RoadMate
Magellan RoadMate 300
Front View
1
2
3
4
5
6
7
8
9
Power
Zoom In
Zoom Out
View
Locate
Option
Cancel
Enter
Navigation Key
Press to turn the Magellan RoadMate on or off.
While viewing the map, press to enlarge the map view
While viewing the map, press to shrink the map view
Switch between Map, Maneuver List, and TrueView
Show details of your current location and save it to your address book
Access customizable features
Cancel changes and selections
Confirm menu selections and text input
Select menu options, characters, and pan map
Rear View
1
Antenna
Rotate up when in use to receive signals from the GPS satellite network
1
Magellan RoadMate
Left- and Right-Side Views
1
2
3
USB Connection
Power Connection
Headset Connection
Connect to your PC to upload map data or software updates
Plug into your vehicle or at home
Plug in an earpiece for noisy areas
Bottom View
1
SD Card Slot
Secured Digital (SD) Card slot (sold separately)
2
Magellan RoadMate
Secure Digital (SD) Cards
The Secure Digital (SD) card is a small, lightweight flash memory device that allows increased data storage for your
Magellan RoadMate. The compact size is ideal for storing large amounts of data and not taking a lot of physical space.
THe SD card slot on your Magellan RoadMate employs what is called a “push-push” method of locking and releasing. In
other words, when you insert the card you must push it to lock it in, and to release it you must push it also. SD cards
come in a variety of sizes and manufacturers, please visit our web site at www.magellangps.com for a list of compatible
SD cards.
To Insert the SD Card:
Peel back the rubber gasket to expose the SD card slot. Do not
completely remove the rubber gasket.
The SD card can only be inserted in one direction. Do not force
the card into the slot.
Insert the SD card into the slot with the metal contacts going in
first and the beveled edge to the left.
Metal Contacts
Beveled Edge
Push the SD card until you hear a click.
Close the rubber gasket.
To remove the SD card:
Peel back the rubber gasket to expose the SD card slot. Do not
completely remove the rubber gasket.
Push the SD card until you hear a click. Do not attempt to pull the
card out of the slot
Remove the SD card from the slot.
Close the rubber gasket.
3
Magellan RoadMate
SD Card-Authorization Options
The Magellan RoadMate requires an SD card to be “authorized”. A card is authorized by using the serial number of the
card to generate and unlock code specifically for that card. This is so you cannot use faulty or poorly manufactured
cards in the unit and risk corrupting the data on the unit.
To find the serial number of the SD card:
1. Insert the card into the Magellan RoadMate.
2. Connect the unit to the PC using the USB cable and connect the power supply.
3. Start the Magellan RoadMate Manager application.
4. Select Memory Card Setup.
5. A dialog box will appear stating that the card is unauthorized and listing the serial number of the card, followed
by instructions on how to authorize the card.
SD Cards can be authorized for free in two ways:
1. Through the internet. When you connect the unit with an SD card in it, the software will detect that it is an unauthorized card. You will then be given the option of connecting to the internet to receive an unlocking code for the
card. Once you have received the code, simply enter it in the space provided and use the card normally.
2. By calling Customer Service. You can call our customer service department to receive the unlock code. All you
need to provide is the serial number of the unit, and the serial number of the SD card. You will then receive an
unlock code to begin using your card. Our customer service phone representatives are available Monday
through Friday, 6:00 a.m. to 5:00 p.m. P.S.T/P.D.T.
Telephone: +1-866-868-2259 or +1-909-394-5000 (Outside North America)
Print this page, and use the space provided to write down your serial number and unlock code.
SD Card Serial Number: ________________________________________
Unlock Code: _________________________________________________
SD Card Serial Number: ________________________________________
Unlock Code: _________________________________________________
SD Card Serial Number: ________________________________________
Unlock Code: _________________________________________________
4
Information
Information
About Satellite Navigation
Global satellite navigation is an exciting technology, providing enhanced productivity and accuracy in a vast number
of industries. It adds a new level of enjoyment and safety to a wide range of navigation, sports, and recreational
activities.
A Global Navigation Satellite System (GNSS) is a network of satellites that transmit high-frequency radio signals
containing time and distance data that can be picked up by a receiver, allowing users to pinpoint their precise
locations anywhere around the globe.
There are two Global Navigation Satellite Systems in operation: the U.S. Global Positioning System (GPS) and the
Russian GLObal NAvigation Satellite System (GLONASS). These systems are constantly being upgraded to meet
higher standards of reliability. A third GNSS named GALILEO, after the Italian astronomer of the early 1600s, is
being developed in Europe specifically to provide a higher standard of integrity and reliability, required to ensure the
safety of lives during transport by air, land and sea, without the use of additional augmentation systems.
While the GPS and GLONASS satellite networks are being developed to achieve maximum performance, SatelliteBased Augmentation Systems (SBAS) have been established to provide improved accuracy. SBAS provides
differential signal corrections for GPS and GLONASS transmissions with the use of ground stations and
geostationary satellites in specific regions. This is GNSS-1, the first phase in establishing the required integrity for
high-precision satellite navigation.
GNSS-2 requires the launching of new satellites into orbit and a complete upgrade of the existing satellite systems.
This second phase is already well underway. GALILEO, scheduled to begin service in 2008, is being developed to
meet the standards of GNSS-2 for rapid and reliable, certified precision positioning.
How Satellite Navigation Works
Global navigation satellites continuously transmit time and distance information as they orbit the earth in a precise
formation. Navigation satellite receivers use this information to calculate an exact location through triangulation.
Every point on Earth is identified by two sets of numbers called coordinates. These coordinates represent the exact
point where a horizontal line, known as latitude, crosses a vertical line, known as longitude. The receiver locks on to
at least three satellites and uses the information received to determine the coordinates of the receiving device.
By comparing the time the signals were transmitted from the satellites and the time they were recorded, the receiver
calculates how far away each satellite is. The distance of the receiver from three or more satellites reveals its
position on the surface of the planet. With these distance measurements, the receiver might also calculate speed,
bearing, trip time, distance to destination, altitude, and more.
The satellite-navigation device may display its position as longitude/latitude, Universal Transverse Mercator (UTM),
Military Grid (MG), or simply as a point on an electronic map. Many Thales Navigation receivers provide
comprehensive mapping data, making satellite navigation an easy tool to enhance your recreational and industrial
activities.
Line of Sight
Satellite-navigation receivers operate by line of sight with global-positioning satellites. This means that at least three
satellites must be in “view” of a receiver in order to calculate longitude and latitude. A fourth satellite must also be
within line of sight to calculate altitude. On average, eight satellites are continuously within line of sight of every
position on Earth; the more satellites in view, the more accurate the positioning.
Though the radio signals of navigation satellites will pass through clouds, glass, plastic, and other lightweight
materials, satellite-navigation receivers will not work underground or in other enclosed spaces.
5
Information
Precision
On average, a satellite-navigation receiver is accurate to within 15 meters. Thales Navigation employs several
technologies to increase the accuracy of their professional and Magellan®-branded receivers. An accuracy of 3
meters or better is achieved using correction signals from satellite navigation-augmentation systems. In the U.S., an
accuracy of 3 meters is achieved using signal corrections from a network of ground stations and fixed-position
satellites known as WAAS (Wide-Area Augmentation System). Throughout Europe a similar system, EGNOS
(European Geostationary Navigation Overlay System), provides the same accuracy. In Asia, satellite navigationsignal correction is provided by MSAS (Multifunctional Transport Satellite-based Augmentation System). Other ways
to increase the accuracy of satellite navigation include the use of DGPS (Differential Global-Positioning System);
ground relay stations, set at known positions, transmit corrected satellite-navigation signals. Various methods and
applications of DGPS can increase satellite navigation accuracy from a few meters to within a few millimeters. Using
DGPS requires a differential-beacon receiver and antennae in addition to a satellite-navigation device. Accuracy can
also be increased using an RTK (Real-Time Kinematic) satellite-navigation system. This is a receiver capable of
transmitting a phase-corrected signal from a known position to one or more rover receivers.
A number of positioning errors can occur, limiting accuracy to within 15 to 25 meters. These errors are monitored
and compensated for in a number of ways:
Orbiting errors -- Occasionally a satellite's reported position does not match its actual trajectory. In the U.S., the
Department of Defense continuously monitors each satellite, making orbital corrections with onboard booster
rockets.
Poor geometry -- If all of the satellites within line of sight of a receiver are clustered closely together, or lined up
relative to the position of the receiver, the geometric calculations necessary for triangulating a position become
difficult and less reliable. The use of differential-correction signals from satellite-based augmentation systems or
DGPS can compensate for both orbital errors and poor geometry.
Multipath signals -- Signals may be reflected off tall buildings or other obstructions before reaching the receiver,
increasing the distance a signal travels and reducing accuracy.
Thales Navigation receivers make a number of complex mathematical calculations to effectively compensate for
other potential errors in positioning:
Atmospheric delay -- Satellite-navigation signals slow as they pass through the Earth's atmosphere. Thales
Navigation receivers calculate the average delay in nanoseconds to compensate.
Clock errors -- The clock built into a receiver is not as accurate as the atomic clock on a navigation satellite, which
is accurate to one second every million years. Each Thales Navigation receiver compensates for time differentials by
comparing the time signals of several satellites and adjusting its calculations and its clock to match.
6
Installation
Installation
Vehicle Installation
Take care when mounting the Magellan RoadMate in your vehicle, whether using the windshield mount, the vent mount,
or another mount, that it does not obstruct the driver’s view of the road. Make sure that the placement of the Magellan
RoadMate and cable does not interfere with the operation of vehicle safety devices, such as air bags. You assume the
risks associated with damage to your vehicle or your vehicle’s occupants as a result of how you choose to mount the
Magellan RoadMate.
Installation with the Windshield Mount
Using a Phillips screwdriver, attach the mounting plate to the back of the Magellan
RoadMate with four screws until the screws are flush with the plate.
Slide the mount assembly onto the windshield mount bracket attached to the back
of the unit.
Press the windshield mount to the glass and rotate the locking dial until it clicks
into place.
Plug the power cable into the unit.
7
Installation
Plug the cigarette lighter connector into an appropriate 12V receptacle in your car.
Rotate the antenna upward.
Installation is complete. You are ready to turn the Magellan RoadMate on and go.
8
Installation
Magellan RoadMate Manager Application
The Magellan RoadMate Manager is used to configure your personal settings, select and store detailed map regions,
and upload everything to your Magellan RoadMate.
This Application will guide you step by step through the installation process. Simply insert the CD into your computer’s
CD drive and the process will begin automatically. Follow the on-screen instructions to install the Magellan RoadMate
Manager Applications.
Installation
Insert Disk #1 into you computer’s CD drive. The installation process will begin
automatically. If it does not start, go to your Windows Start menu and select Run, click
on the “Browse” button, select your CD drive, and select the setup.exe file.
Next, you will need to choose a default language and choose between a Full or Typical
installation. The full installation requires about 1.4 gigabytes of disk space and will run
faster. The Typical installation requires about 700 megabytes of disk space and
requires the data CD (CD-ROM #2) to be in the computer’s CD drive to run.
Choose the destination for your software. This will tell the installation where to place the
files on your hard drive. Typically, it will create a Magellan directory under the Program
Files directory on your C drive.
Choose a program folder. This tells the installation under which group of programs to
place the program icon. Typically, it will create a Magellan group and store the program
icon there.
The installation will begin.
9
Installation
When the installation has finished, the Magellan RoadMate Manager
will begin automatically. At this point it is important that you register
your Software and your Magellan RoadMate. By registering your
Magellan RoadMate, you will receive news about important product
updates and offers. Use the “Click Here to Register” link on the main
screen, or go to www.magellangps.com to register.
10
Maps and Data
Maps and Data
Basemaps vs. Detailed Map
A basemap contains major map features such as highways, major roads, and
city centers. The basemap that is built into the Magellan RoadMate has basic
detail sufficient for generally orienting oneself to a broad geographic area. The
basemap is used when routing between detailed regions, or to a point on the
map (this will be explained later).
Detailed maps include all roads and highways, points of interest (POIs),
geographic features, railroads, and street addresses.
11
Maps and Data
Data Storage and Access
Before we get into detail about how to upload maps to the Magellan RoadMate, it is important to understand how the
RoadMate stores and accesses the data. The unit stores the basemap and other files in it’s internal memory. After these
files, it still has about 80 megabytes left over to store map files. Additionally, the Magellan RoadMate can use SD (Secure
Digital) cards to increase the capacity for storing map data. The Magellan RoadMate RoadMate Manager (MRMM)
software is used to transfer the data via the USB cable to the unit’s internal memory or the SD card
Detailed
Region 1
Internal Memory
Detailed
Region 2
Detailed
Region 3
SD Card
Map File
12
Maps and Data
You can save up to three detailed regions per map file, regardless of the size of the regions, and any number of map files
to your unit or SD Card, depending on the unit’s available built-in memory or the size of the SD Card. For example, if you
have 80 megabytes of built-in memory available you can create one 80-megabyte region and save it to one map file, or
you can save two 40 megabyte regions to one map file, or you can save four 20-megabyte regions to two map files. You
are however, limited to region sizes of not more than 240 megabytes.
Detailed
Region 1
(80 MB)
= 80 MB
Map File
Detailed
Region 1
(40 MB)
Detailed
Region 2
(40 MB)
80 MB
Available
= 80 MB
Map File
Detailed
Region 1
(20 MB)
Detailed
Region 3
(20 MB)
Detailed
Region 2
(20 MB)
Detailed
Region 4
(20 MB)
Map File 1
= 80 MB
Map File 2
This works the same for an SD Card. You can have data on the unit and on an SD Card at the same time, too. As you can
see, the combinations are almost limitless.
The Magellan RoadMate 300 cannot route between map files, only between detailed regions contained within the same
map file. And, the Magellan RoadMate can have only one map file active at a time, so it is important to have a plan in
mind when creating your regions and map files.
Before we talk about creating regions, let’s see how the Magellan RoadMate handles routing.
13
Maps and Data
Basemap Routing vs. Detailed Map Routing
The Magellan RoadMate comes with a built-in basemap. The basemap
contains highways, major roads, and city centers. The basemap does not
contain street address information, points of interest, or other map data (such
as waterways, railroads, or parks). The Magellan RoadMate can route via the
basemap to a city center or point selected on the screen. It will use any
available road data; where there is no data, a straight dotted line from point to
point will be used. You will be routed from your current position via a straight
line to the nearest major road or freeway on-ramp, along the freeway to the offramp closest to your destination, and then via straight line to your destination.
With the detailed map, you are routed using turn-by-turn guidance on all city
streets and highways. Also, you have access to detailed map data and points of
interest. As you can see, with the detailed map the route becomes more direct
using the surface streets.
Destination
Current Position
Destination Selected fr
detailed map database
With this information in mind, let’s find out how the Magellan RoadMate routes
between regions.
Current Position
14
Maps and Data
Routing Between Regions
Detailed regions can occupy any space on the map. They can be side by side (non-overlapping), or they can have space
between them. Regardless of how the maps are arranged or what size they are, the Magellan RoadMate treats the
detailed maps as an “overlay” on the basemap. Think of the basemap as a frame to a puzzle. The detailed map regions
represent the individual pieces to the overall puzzle and fill in information where the basemap is lacking.
210
10
THIRD ST.
HOLT BL.
605
605
MAIN ST.
10
210
BASEMAP
JAMES AVE.
210
10
THIRD ST.
HOLT BL.
605
605
MARILYN LN.
FOURTH ST.
210
MAIN ST.
10
JASON CT.
BASEMAP WITH DETAILED MAP OVERLAY
15
Maps and Data
Say that you want to drive from Los Angeles to San Francisco. First, you need to know how much space you have
available (which the Magellan RoadMate Manager software will show you). You can draw one region that has both Los
Angeles and San Francisco contained within it, but it may be too large to store in the unit or on an SD Card. Consider
creating two regions: one for Los Angeles and one for San Francisco. So, what you would end up with would be detailed
information for Los Angeles, detailed information for San Francisco, and the space in between is the basemap. Starting
in Los Angeles you would have all of the detailed information to get you on the freeway and start you toward San
Francisco. Once you leave your detailed region of Los Angeles, the basemap takes over and routes you all the way to
your San Francisco region, where the detailed region assumes routing. While in the basemap, you are routed on the
freeways and major highways.
101
5
580
SAN FRANCISCO
5
101
101
5
101
LOS ANGELES
BASEMAP
16
Basic Operation
Basic Operation
Turning the Magellan RoadMate On
Press the Power button.
If power is properly connected, a logo screen is displayed.
Next, you will need to select the language you wish to use for your Magellan
RoadMate.
The Warning screen will appear. At the bottom of the screen, select your preferred
user. The Magellan RoadMate can be personalized for three different users.
Inputting Text Characters
Whenever you need to input names, street addresses, etc., the Magellan RoadMate will display a key pad. Touch the
screen or use the navigation key to input text.
Cancel
Space Bar
Backspace
Alphabetic Characters
Numerical Character Menu
Accept Entry
Additional Characters Menu
17
Basic Operation
Additional Characters (More)
When you are entering information, you may need to add punctuation or other special
characters. When available, select the “More” button to bring up the additional
characters.
Numerical Characters (123)
You may also need to add numbers to your text. When available, select “123” to bring up
the numeric keypad.
Using QuickSpell®
What Is QuickSpell?
The Magellan RoadMate uses QuickSpell technology to provide you with the fastest method possible to enter characters.
QuickSpell eliminates the possibility of a misspelled word or looking for a city or street that is not loaded. As you begin
entering characters, the QuickSpell feature of the Magellan RoadMate dims out those characters that are not available,
thereby speeding up the process of entering data.
Example:
Suppose that you need to input the name of a city, in this case, San Francisco.
Select “S”.
Select “A”.
18
Basic Operation
Select “N”.
Select the space bar.
When you feel that enough characters have been entered so that the list of cities is
short enough to find “San Francisco”, select OK.
Scroll up or down the list and select “San Francisco, CA”.
If the list is still too long, press Cancel to return to the keyboard and continue entering
characters. The list of items found in the database is limited to 100 items. When over
100 items have been found, “Matches: > 100” will be displayed in the bottom right
corner of the display; you may need to press Cancel and enter additional characters.
19
Uploading Maps
Uploading Maps
Select Unit Setup.
Make sure you remove any SD card in your unit. Connect your
Magellan RoadMate to your PC using the USB cable, and connect the
power supply. Turn the unit on and select Next.
Select the User you want to configure. Select Finish.
Select Maps.
20
Uploading Maps
Map Screen
The Map screen is where you will define the detailed regions you wish to use in your Magellan RoadMate. The Map
screen is divided into six main sections:
Toolbar
Overview Window
Map Window
Saved Regions List
Upload Information
Help Window
Toolbar
Zoom In: Enlarge the Detail Map by clicking on an area, or by clicking and dragging a rectangle over an area
you wish to enlarge.
Zoom Out: Shrink the Detail Map.
Set Scale: Select from predefined zoom levels.
Pan: Move the Detail map by clicking and dragging in any direction.
Search By POI: Find a selected POI on the map.
Search By Address: Find a selected address on the map.
Help: Toggle the Help Window on or off.
Detail Map Window
Shows street-level detail to a scale of 1:3,000
Overview Map Window
Shows the general area of where you are on the Detail Map.
21
Uploading Maps
Saved Regions List
Shows the region you have saved and their size.
Load Existing Regions: Adds previously drawn regions to the list.
Draw New Region: Creates a new region and adds it to the list.
View Selected Region: Snaps the Detail Map to the selected region.
Delete Selected Region: Completely removes the selected region.
Help Window
Shows definitions of the different tools, along with instructions on performing tasks. The Help Window can be shown or
hidden by pressing the Help button or F1.
Upload Information Window
Shows you the total size of the region(s) you have selected to upload, and the available size of the unit’s built-in memory.
Save: Saves the selected regions to a Map File and uploads the selected regions to your Magellan
RoadMate’s internal memory.
Return: Returns to the main menu.
22
Uploading Maps
Uploading Maps to Internal Memory
Saving Regions
Select the Zoom In tool
to enlarge the Map window by either
clicking on an area, or clicking and dragging a rectangle over the area
you want to enlarge.
Select the Draw Region tool
. Click and drag a rectangle over the
area you wish to define as a region. The size of the region cannot
exceed 240 megabytes.
Give your region a name (names cannot exceed 20 characters) and
select OK. You can create as many regions as you like.
Continue drawing regions. After you draw and name each region it will
be activated.
23
Uploading Maps
Once you have finished creating regions, select the regions you want to
upload to your Magellan RoadMate. In this case, you will deselect the
regions you do not want to include. You can create as many map files
as you wish; however, you can save only up to three regions per map
file. Also, the size of the map file is limited to the amount of space
available on the unit.
Select Save to begin the upload. If the size of you file exceeds the
available space you will be notified. You will be prompted to give your
map file a name (names of map files cannot exceed 40 characters*).
Select OK.
The upload will begin. When the maps have finished uploading, you
can turn the unit off and disconnect the USB cable and power supply
from your Magellan RoadMate.
24
Uploading Maps
Deleting Maps from Internal Memory
You can delete a map from internal memory only if the current map you are trying to upload requires more space than is
available.
Select the regions you wish to upload. The application will calculate the
size of the regions and the available space. Select Save.
Give your map a name and select OK.
A dialog box will appear, telling you there is not enough space available,
along with a list of maps currently in the unit’s memory. Select which
map or maps you wish to delete and select Delete.
After the maps have been deleted, the application will start uploading
your new maps to the unit’s internal memory.
25
Uploading Maps
Uploading Maps to an SD Card
Your Magellan RoadMate includes a Secure Digital (SD) Card port for increased expandability (SD Card not included).
Please visit our web site at www.magellangps.com for a list of compatible SD cards.
Make sure that you have an authorized Card in your unit. If your Card is not authorized, you will be prompted to go to the
Magellan Web site to authorize your Card (See “SD Card-Authorization Options” on page 4).
From the main menu, click on Card Setup.
Make sure that the Card is inserted. Connect your Magellan RoadMate
to your PC using the USB cable and power supply. Turn the unit on
and select Next.
Select Maps.
26
Uploading Maps
The Map Window and process for drawing regions and uploading them
to an SD Card vs. an internal memory are identical. The upload
information reflects the SD Card only. The Magellan RoadMate
Manager software limits the size of map files to 240 MB. This is to
reduce the amount of time it takes to process and upload the data.
When you have finished uploading, you can turn the unit off and
disconnect the USB cable and power supply from the Magellan
RoadMate.
27
User Settings
User Settings
Select Unit Setup.
Make sure you remove any SD card in your unit. Connect your
Magellan RoadMate to your PC using the USB cable and connect the
power supply. Turn the unit on and select Next.
Select the User you want to configure. Select Finish.
Select Settings. Any setting you have made on your unit will be read by
the application and entered in the applicable field.
28
User Settings
Settings Screen
The settings on the Magellan RoadMate can be configured for each of the three users. These settings can be configured
on the PC and uploaded to the Magellan RoadMate. They can also be saved to the computer’s hard drive for further
adjustment. The only exceptions are the language and voice options, which are set for all users.
Language: Select from English, French, German, Dutch, Spanish, Italian, and UK English. Press the speaker button
to hear an example.
User: Enter the name you wish to assign the current user.
Select Map Color: You can change the color scheme of the map to one of nine options.
Default
High Contrast
Night
Black and White
Paper Map
Wild
Pretty
Cool Blue
Fire
29
User Settings
Map Options: Heading Up – Changes the orientation of the map to keep your direction of travel toward the top of the
screen; North Up – Changes the orientation of your Current Location Icon to keep North at the top of the screen; Miles –
Sets the unit of measure to miles; Kilometers – Changes the unit of measure to kilometers; Map Smart – Automatically
switches between the Map Screen, TrueView or split TrueView Screen, and Maneuver List when necessary; Map
Manual – Switches between screens only when the View button is pressed; Map Always – Stays on the current Guidance
screen.
Voice Options: Changes the selected language to be spoken in either a male or a female voice. Press the speaker button
to hear an example.
Password: Sets a password for the selected user to enter when the unit is turned on.
Menu Colors: Changes the color scheme of the menus to one of four options:
Default
Pastel
Forest
Desert
Route Preferences: When you check “Automatic Re-Route,” the Magellan RoadMate will recalculate your route if you
detour from the previously calculated route.
Tone Options: Changes the alert sound to a bell, a chime, or a beep. Press the speaker button
to hear an example.
Points of Interest: By selecting one of the options, you can choose which POI icons to display on the map screen:
Show All Available: This option will show all of the POI icons in the list on the Map screen.
Remove All: This option removes all POI icons from the Map screen.
Show Selected: This option is available when one or more POI icons is not displayed. When selected, a window
appears, showing all POI icons not currently in the list. Click to select an icon from the list, or Control-Click to
select multiple icons from the list.
Remove Selected: This option removes only the icons you select from the list. Click to select an icon from the
list, or Control-Click to select multiple icons from the list.
Load Saved Settings: Lets you load a settings file that was saved to the computer’s hard drive.
Save Settings: Lets you save your settings to a file on the computer’s hard drive.
Save: Uploads your settings to your Magellan RoadMate.
Return: Takes you back to the Main Menu.
30
User Settings
Setting the User Preferences
Saving a Settings File to Your Computer
You can save the settings to a file stored on your computer’s hard drive,
select Save Settings
. A dialog box will appear, prompting you to give
your settings file a name. By default, it will name the field by the user
name.
Opening a Settings File from Your Computer
To open a previously saved settings file, click on Load Settings
.A
dialog box will appear, prompting you to select a settings file. Select a
file and click on Open. Your settings are displayed.
Uploading the Settings
When you have finished making changes to the settings, you can then upload the changes to your Magellan RoadMate.
Select Save. The application will upload the settings to your unit. Next time you turn it on, your personal settings will be
active.
31
Address Book
Address Book
Select Unit Setup.
Make sure you remove any SD card in your unit. Connect your
Magellan RoadMate to your PC using the USB cable and connect the
power supply. Turn the unit on and select Next.
Select the User you want to configure. Select Finish.
Select Address Book. The address book will be automatically read from
the unit.
32
Address Book
Address Book Screen
With the Address Book, you can create entries on your computer and upload them to your Magellan RoadMate. Entries
can be added by marking a point on the map, by searching for an address, or by searching for a POI. These addresses
can then be used to route to on the unit, or they can be used in planning a trip both on the unit and the application. A
maximum of 200 addresses can be saved per user.
Toolbar
Overview Window
Map Window
Address Book
Upload Information
Help Window
Toolbar
Zoom In: Enlarge the Detail Map by clicking on an area, or by clicking and dragging a rectangle over an area
you wish to enlarge.
Zoom Out: Shrink the Detail Map.
Set Scale: Select from predefined zoom levels.
Pan: Move the Detail Map by clicking and dragging in any direction.
Search By POI: Find a selected POI on the map.
Search By Address: Find a selected address on the map.
Help: Toggle the Help Window on or off.
Detail Map Window
Shows street-level detail to a scale of 1:3,000.
Overview Map Window
Shows the general area of where you are on the Detail Map.
33
Address Book
Saved Addresses List
Shows the addresses you have saved.
Load Address File: Loads a previously saved address book file from your computer’s hard drive.
Save Address File: Saves the current list of addresses to an address book file on your computers hard drive.
Add Address on Map: Click on the map to add an address at that point.
Add Address: Enter a street address and add it to your address book.
Add POI: Select a POI and add it to your address book.
View Address: Show the location of the selected address on the map.
Delete Address: Delete the selected address from the list.
Help Window
Shows definitions of the different tools, along with instructions on performing tasks. The Help Window can be shown or
hidden by pressing the Help button or F1.
Upload Information Window
Save: Uploads the address book (and trip list; See “Trip Planner” on page 41) to your Magellan
RoadMate’s internal memory.
Return: Returns to the main menu.
Using the Address Book
Adding an Address on the Map
Select the Zoom In tool
to enlarge the Map Window either by
clicking on an area or by clicking and dragging a rectangle over the
area you want to enlarge. Select the Pan
tool to move the map
and find the area of the map that shows the location of the address to
add to your address book.
Select the Add Address on Map tool
. Click on an area of the map.
34
Address Book
A dialog box will appear, prompting you to enter information for this
address. By default, the street name is entered in the Name field.
Enter a new name for the address and click OK. The city, state, and
ZIP code are automatically entered and not editable.
The address is stored in your address list.
Add Custom Address
An address can also be entered manually. Select the Add Address
tool.
A dialog box will appear, prompting you to enter information for the
address you wish to enter. The state can be either typed in or selected
from the pull-down menu. The city field uses autofill to assist you in
finding the city. As you type, the list of matching cities is narrowed
down. You can type the entire name or select the city from the pulldown menu after you have entered the first few characters. When
entering street names, do not enter any prefixes (e.g. N, or North) or
suffixes such as road type (e.g. St., or Street). The street name must
be entered exactly as it is written to find the street (e.g. if you are
searching for Overland Heights, you would enter “OVERLAND” and
the street would be found, but not if you entered “HEIGHTS” only). If
the street you are looking for has a hyphen, replace it with a space. If
the street name begins with “Rue” (e.g. Rue Andrée), you would need
to enter “RUE” first.
35
Address Book
When you are finished, select OK. A list of possible addresses is
displayed. Confirm your selection by pressing OK.
The address is added to your address list.
Add a POI as an Address
Along with entering favorite spots and business addresses to your list,
you can also add POIs to your list. Select the Add POI
tool.
A dialog box will appear, prompting you to enter information about the
POI you wish to add. By default, North America is selected in the state
field. You can choose to search all of North America, or you can select
the State you wish to search from the pull-down menu.
36
Address Book
Next, select the category of POI you wish to search for from the pulldown menu.
Enter a word that might be part of the name of the POI, such as “san.”
As you type, the list of possible POIs is narrowed down. You can
continue to type the name or select from the list.
When you are finished, click OK. Your POI is added to your
address list.
Saving Your Address List to Your Computer
When you have finished adding addresses, you can save the list to an
address file on your computer’s hard drive. Select Save Address File
.
37
Address Book
A dialog box will appear, prompting you to enter the name you wish to
give your file. By default, the file name is the user name followed by
the “.trp” extension. You may change the location of the file if you
wish, but doing so may take longer to locate it later. Enter a new name
and click on OK.
It is a good idea, whenever you make changes to your address list, to
save the address file to your computer’s hard drive. You can save as
many address files as you wish. Each file can have a different set of
addresses for different purposes.
Load an Address List from Your Computer
You can load a previously saved address list from your computer’s
hard drive. Loading a file from the computer will replace the list
currently displayed. Please make sure to save the current list before
loading a new address book list. Select Load Address File
.A
dialog box will appear, asking you to choose an address file.
Select the file you wish to load and select OK.
The address list is shown in the Address List Window.
38
Address Book
Viewing an Address on the Map
You can view any of the entries in your address book on the Map
screen. Select the address you wish to view and click on View Address
on Map
.
If you are at a scale greater than 1:100,000, the map will zoom in
automatically to 1:100,000.
If you are at a scale of less than 1:100,000, the map scale will remain
unchanged. The map will pan to the address and center it in the Map
Window.
Deleting an Address from the List
Select the address you wish to delete (only one address at a time can
be selected). Addresses used in trips cannot be deleted. First, you
must delete the trip containing the address or remove it from the trip.
39
Address Book
Select Delete Address
.
The address is removed from your address list.
Uploading Addresses to your Magellan RoadMate
When you have finished making changes to your address book, you can then upload the list to your Magellan RoadMate.
Select Save. The address file on your unit will be overwritten with the new file. The addresses have been uploaded.
40
Trip Planner
Trip Planner
Select Unit Setup.
Make sure you remove any SD card in your unit. Connect your
Magellan RoadMate to your PC using the USB cable and connect the
power supply. Turn the unit on and select Next.
Select the User you want to configure. Select Finish.
Select Trip Planner.
41
Trip Planner
Trip Planner Screen
The Trip Planner enables you to plot multiple destinations and save them as a trip. This feature is useful when planning
a vacation, making deliveries, or running errands. You can plot destinations by marking a point on a map, selecting a
street address, or selecting a POI. Once completed, you can easily upload the trip to your Magellan RoadMate and begin
your trip. Each user can define 20 trips with 20 destinations each. Each different destination will be saved in the address
book. Note however, that only 200 addresses can be saved per user.
Toolbar
Trip Window
Map Window
Address List
Upload Information
Help Window
Toolbar
Zoom In: Enlarge the Detail Map by clicking on an area, or by clicking and dragging a rectangle over an area
you wish to enlarge.
Zoom Out: Shrink the Detail Map.
Set Scale: Select from predefined zoom levels.
Pan: Move the Detail Map by clicking and dragging in any direction.
Search By POI: Find a selected POI on the map.
Search By Address: Find a selected address on the map.
Help: Toggle the Help Window on or off.
Detail Map Window
Shows street-level detail to a scale of 1:3,000.
Trip List
Shows the trips you have created.
42
Trip Planner
Load Trip File: Loads a previously saved trip file from your computer’s hard drive.
Save Trip File: Saves the current trip list to a file on your computers hard drive.
Add Point to Trip: Selects a point on the map as a starting point. The flag turns red to choose next point on the
map.
Add Address: Enter a street address and add it to your trip.
Add POI: Select a POI and add it to your trip.
Add Address from Address Book: Select an address from your address book to add to your trip.
Calculate Trip: Draws a route including all points on your trip.
View Trip: Shows the entire trip in the Map Window.
Delete Trip/Delete Point: Delete the selected trip or point on a trip.
Address Book
Shows the addresses you have saved. Addresses and POIs added to trips are automatically saved to your Address Book.
Help Window
Shows definitions of the different tools, along with instructions on performing tasks. The Help Window can be shown or
hidden by pressing the Help button or F1.
Upload Information Window
Save: Uploads the trips (and addresses; See “Address Book” on page 32.) to your Magellan
RoadMate’s internal memory.
Return: Returns to the main menu.
Using theTrip Planner
Adding Points on the Map
Select the Zoom In
tool to enlarge the Map Window either by
clicking on an area or by clicking and dragging a rectangle over the
area you want to enlarge. Select the Pan
tool to move the map
and find the area of the map that shows your starting point.
43
Trip Planner
Select the Add Point on Map
tool.
Click on the map. The point is marked on the map, is shown in the
trip list, and is also added to the address book. Notice also that the
flag cursor has now turned red. This indicates that you have selected
your starting point and may continue adding points.
Find the end point of your trip. You can switch to the Zoom tool or the
Pan
tool to get to another area. Then, reselect the Add Point on
Map
tool to continue. Click on the map. The point is marked on
the map, and a straight line has been drawn from the first point you
marked to the new point. This is to show the connection of the two
points contained in the trip. Also, the new point is added to the
address book.
Select Calculate Route
.
44
Trip Planner
A route is drawn between the two points you have marked. The map
automatically zooms out to show you the entire route.
Adding an Address from the Address List to an Existing Trip
You can easily add an address from the address book to the trip by dragging it from the Address Book Window onto the
trip tree. This works only with existing trips; you cannot drag an address into the empty portion of the Trip Window.
Select the address from the address book.
Drag the address onto the trip.
45
Trip Planner
Release the mouse button, and the address is added to the end of the
trip. Now that the trip has been altered, the previously calculated
route changes to straight lines.
By dragging a point onto another point, you can change the order.
Click the point you wish to move and drag it on top of another point.
That point is now placed before the other in the sequence.
Select Calculate Route
the trip.
to draw a new route among the points of
This method can also be used to drag points between trips.
Selecting the address and clicking on Add Address from List
will
create a new trip. Although you can still drag the address from trip to
trip, dragging the address out of the address list is easier.
46
Trip Planner
Creating a New Trip From the Address Book
Select an address from your address list. You do not have to select
addresses in any order; you can rearrange them later.
Select Add Address from List
.
A new trip is created, and your address is added to it.
Select the next address to add to your trip and click on Add Address
from List
.
47
Trip Planner
Select Calculate Route
. A route is drawn between the two points.
Creating a New Trip with a Custom Address
You can add a specific address to a trip. Select the Add Address
tool.
A dialog box will appear, prompting you to enter information for the
address you wish to enter. The State can be either typed in or selected
from the pull-down menu. The City field uses autofill to assist you in
finding the city. As you type, the list of matching cities is narrowed
down. Once you have entered enough characters, select the city from
the pull-down menu after you have entered the first few characters.
When entering street names, do not enter any prefixes (e.g. N, or
North) or suffixes such as road type (e.g. St., or Street). The street
name must be entered exactly as it is written to find the street (e.g. if
you are searching for Overland Heights, you would enter
“OVERLAND” and the street would be found, but not if you entered
“HEIGHTS” only). If the street you are looking for has a hyphen,
replace it with a space. If the street name begins with “Rue” (e.g. Rue
Andrée), you would need to enter “RUE” first.
Continue entering the required information. When you are finished,
click on OK. A list of possible addresses is displayed. Confirm your
selection by clicking on OK.
48
Trip Planner
A new trip has been created with the address.
Add a second point to your trip. Select an address from your address
list and click on Address from List
Select Calculate Route
Select the Add Address
.
. A route is drawn between the two points.
tool.
49
Trip Planner
A dialog box will appear, prompting you to enter information for the
address you wish to enter. The State can be either typed in or selected
from the pull-down menu. The City field uses autofill to assist you in
finding the city. As you type, the list of matching cities is narrowed
down. Once you have entered enough characters, select the city from
the pull-down menu after you have entered the first few characters.
Continue entering the required information. When you are finished,
select OK. A list of possible addresses is displayed. Confirm your
selection by selecting OK.
A new trip has been created with the address. This is because a trip
who’s route has already been calculated must be altered manually.
Click on the new point and drag it onto the previous trip. The point is
added to the end of the trip.
50
Trip Planner
To complete this trip, rearrange the points in the trip so that your
“home” address is at the top. Notice on the map that the green flag has
moved to indicate the new starting point of the trip. Then, add the
“home” address to the list again by dragging it onto the trip. This
completes the round trip.
Select Calculate Route
. A route is drawn among the four points
Renaming a Trip
Click on the name of the trip. The name becomes highlighted.
Type in the new trip name.
51
Trip Planner
When you are finished, press the Return or Enter key on your keyboard.
Your trip is renamed.
Creating a New Trip with a POI
POIs can be added to a trip, just like adding an address. Select Add POI
.
A dialog box will appear, prompting you to enter information about the
POI you wish to add. By default, North America is selected in the
State field. You can choose to search all of North America, or you can
select the state you wish to search from the pull-down menu.
Next, select the category of POI you wish to search for from the pulldown menu.
52
Trip Planner
Enter a word that might be part of the name of the POI, such as
“calif”. As you type, the list of possible POIs is narrowed down. You
can continue to type the name or select from the list.
When you are finished, click on OK. A new trip has been created with
the POI you selected. Also, the POI has been added to the address list.
To complete this trip, drag an address from your address list. Then,
rearrange the points in the trip so that your “home” address is at the
top. Notice on the map that the green flag has moved to indicate the
new starting point of the trip.
Select Calculate Route
. A route is drawn between the two points.
53
Trip Planner
You can also rename the trip, as described previously.
Viewing a Trip
At any time you can show the entire route. Select the trip you wish to
view and select View Trip
.
No matter what the current map scale, the Map Window is sized to
show the entire trip.
Saving a Trip File to Your Computer
Once you have finished creating your trips, it is a good idea to save
them to your computer’s hard drive. Select Save Trip File
.
54
Trip Planner
A dialog box will appear, prompting you to enter the name you wish to
give your file. The address list and the trip list are saved to the same
file. You can choose to overwrite the existing file or to create a new
one. Enter a new name and select Save.
It is a good idea, whenever you make change to your trip list or
address list, to save the trip/address file to your computer’s hard drive.
Trips and addresses are not saved automatically. You can save as
many trip/address files as you wish. Each file can have a different set
of addresses for different purposes.
Load a Trip from Your Computer
You can load a previously saved trip/address list from your computer’s
hard drive. Select Load Trip File
.
A dialog box will appear, asking you to choose a trip/address file. Select
the file you wish to load and select Open.
The Trip list and address list have been loaded.
55
Trip Planner
Uploading Trips to your Magellan RoadMate
When you have finished creating trips, you can then upload the list to your Magellan RoadMate. Select Save. A
dialog box will appear warning you that the trips and addresses file on your unit will be overwritten with the new file.
Select OK to proceed. The trips and addresses have been uploaded.
56
Track Replay
Track Replay
Select Unit Setup.
Make sure you remove any SD card in your unit. Connect your
Magellan RoadMate to your PC using the USB cable and connect the
power supply. Turn the unit on and select Next.
Select the User you want to configure. Select Finish.
Select Track Replay. Tracks saved on your unit are loaded
automatically.
57
Track Replay
Track Replay Screen
The Track Replay feature lets you see a graphical representation of any track you have recorded. The replay also shows
the date and time of each recorded track point, along with it’s coordinates and elevation. These tracks can be edited or
fine tuned to use in simulations.
Toolbar
Track Information
Track Points
Map Window
Elevation Profile
Help Window
Toolbar
Zoom In: Enlarge the Detail Map by clicking on an area, or by clicking and dragging a rectangle over an area
you wish to enlarge.
Zoom Out: Shrink the Detail Map.
Set Scale: Select from predefined zoom levels.
Pan: Move the Detail map by clicking and dragging in any direction.
Search By POI: Find a selected POI on the map.
Search By Address: Find a selected address on the map.
Help: Toggle the Help Window on or off.
Track Information
The Track information window shows you the information about your track along with the editing tools and playback
controls.
58
Track Replay
Load Track File: Loads a previously saved track file.
Save Track File: Saves the current track to a track file.
Delete Track: Delete the current track.
Edit Track Point: Lets you change the position of, or add a track point.
View Track: Shows the entire track in the Map window.
Step Back: Rewinds the track replay one point.
Play Track: Starts playback of the current track.
Stop Track: Stops playback of the current track.
Step Forward: Advances the track replay one point.
Track Speed: Sets the playback speed of the current track.
Track Points
Shows information on each point of the selected track.
Elevation Profile
The Elevation Profile shows you a horizontal representation of the elevation of each point on your track.
Help Window
Shows definitions of the different tools along with instruction on performing tasks. The Help Window can be shown or
hidden by pressing the Help button or F1.
Return: Returns to the main menu.
Using the Track Replay
Loading a Track File from the Unit
Tracks are loaded automatically and listed in the pull-down list. Select
the track you wish to view.
59
Track Replay
Track Playback
Press Play. The track will begin playback. The cursor in the map
window indicates the current position on the track.
Press Pause. The playback is suspended.
Press Step Back or Step Forward to move the cursor one point at a
time. Press Play again to continue normal playback.
You can adjust the playback speed. Normal payback speed is “1X”.
You can select to playback the track at up to 50 times faster than
normal speed.
60
Track Replay
Press Stop. At any time during playback you can use the navigation
tools to zoom in and scroll the map to follow the track replay.
Moving and Adding Track Points
Use the Zoom In tool
to enlarge the map and the Pan tool
scroll to the desired point.
Select the Edit Track Points tool
.
Move the cursor over a track point. The cursor changes to indicate
that you can move the point in any direction.
61
to
Track Replay
Click on the point and drag it to a new location. Notice when as you
move the point, the information in the Track Points window changes
to correspond to the new location. When you have finished, release
the mouse button.
Move your cursor over an open area on the track, that is the bare line.
The cursor changes to indicate that you can add a track point at any
position along the track.
Click on the track line to add the new point. The cursor then changes
to indicate that you can move the point.
Drag the point to a new location.
62
Track Replay
The Track point window has been updated to include your new point.
Deleting and Viewing Track Points
To delete a track point, right-click on the point in the Track Point
Window. Select Delete. The track point is deleted
To view the location of a track point on the map, right-click on the
point in the Track Window. Select View.
The map window is centered on the selected track point at the current
zoom level.
63
Track Replay
Set the Date and Time of a Track Point
To adjust the date and time of a track point, select the point in the
track point window.
Right-click on the point in the Track Point window. Select Set Date and
Time.
Enter the new values. When you ar finished, select OK.
The date and time is changed and the following track point are
automatically adjusted.
64
Track Replay
Viewing the Current Track
Select View.
The map window is scaled to show the entire track.
Clearing the Current Track.
While the track is active, select Clear Track
.
A dialog box will appear listing all the available tracks. Select the track
you wish to clear and select OK.
65
Track Replay
If you have made any changes to the track since it was active, you will
be notified and give the option not to clear the track. Select Yes.
The track has been cleared from the map.
Save a Track to Your Computer
Once you have finished editing the track it is a good idea to save them
to your computer’s hard drive. Select Save Track File
.
A dialog box will appear prompting you to enter the name you wish to
give your file. Enter a new name and select Save.
66
Track Replay
The track file has been saved and made active.
Load a Track from Your Computer
You can load a previously saved track file from your computer’s hard
drive. Select Load Track File
.
A dialog box will appear asking you to choose an trip/address file. Select
the file you wish to load and select Open.
The track has been loaded.
67
Selecting Destinations
Selecting Destinations
Select Region†
Select Address
Previous Destinations
List Addresses
Address Book
Create New Entry
Trip Planner
Search POI by
Name
Select Region†
Dining, ATM, Gas...
Search Nearest
POI
Search BaseMap
City
Intersection
Select Region†
68
† If your map file contains only one region, this
screen will not appear.
Selecting Destinations
Choosing the Route Method
Every route is calculated based on the Route Method criteria selected. Every time a new destination is selected, the
Magellan RoadMate prompts you for the method that will be used to calculate the route.
Shortest Time: This selection calculates a route that should take the least amount of
time using known speed limits, streets, and other information in the database. Other
factors such as traffic conditions, road closures, and emergency activity are not
factors in the calculation of shortest time.
Avoid Toll Roads: This option calculates the route by excluding known toll roads from
the calculation whenever possible. This option may not reflect the shortest time.
Least Use of Freeways: This selection calculates the route by avoiding freeways
whenever possible.
Most Use of Freeways: This selection calculates the route by using freeways as much
as possible.
69
Selecting Destinations
Basemap Routing
If you have not uploaded any detailed maps to your Magellan RoadMate or an SD card, you will only be able to route to
a point on the map or basemap city centers.
Selecting a Point on the Map
Touch the screen and drag the map to the point you wish to route to. Press Enter.
Select the desired Route Method.
The Magellan RoadMate will calculate the route. When the calculations are complete,
the Map screen will be displayed
Search BaseMap City
This function enables you to route to one of over 34,000 city centers on the basemap.
From the Select Destination screen, select Dining, ATM, Gas....
Select Search Basemap City.
70
Selecting Destinations
Enter the first few characters for the city. After you have selected the characters,
select OK. If you wish, you may enter the entire city name.
Use the navigation key to scroll the list up or down and select the desired city.
Select the desired Route Method.
The Magellan RoadMate will calculate the route. When the calculations are complete,
the Map screen will be displayed. The represents distance traveled on roads as well as
the straight lines where no road data is present.
The conditions for basemap routing apply. Where there is no road data, a straight line
will connect your current position with the nearest highway onramp, and from the
highway offramp to the city center (See page 14).
71
Selecting Destinations
Accessing Map Files
The Magellan RoadMate has the capability of storing detailed map files in it’s internal memory, or on an SD card. The
files are accessed in the same way. If however, you have only one map file stored, this file will be active by default.
Select the Globe.
The Magellan RoadMate will list all available map files and also where they are stored
(unit or card). Select the map file you wish to use.
The unit will power off. Turn the unit back on. The map file is now loaded and you can
now route to addresses and POI’s covered by the active map file.
Switching Map Files
At any time you can switch map files to load information on another region contained in another map file.
Select the Globe.
If you currently have a map file loaded the unit will prompt you to confirm the switch.
72
Selecting Destinations
The Magellan RoadMate will list all available map files and also where they are stored
(unit or card).
Select the map file you wish to use.
The unit will prompt you to confirm your selection.
The unit will power off. Turn the unit back on. The map file is now loaded and you can
now route to addresses and POI’s covered by the map file.
Switching SD Cards
You may also need to access data stored on another SD Card. Turn the unit off and remove the SD card, insert the
required SD card (See page 4). Turn the unit on.
Select the Globe.
73
Selecting Destinations
By removing the card with the current map file on it, the unit will default to the map
file stored in memory.
The Magellan RoadMate will list all available map files and also where they are stored
(unit or card). Select the map file you wish to use.
The unit will prompt you to confirm your selection.
The unit will power off. Turn the unit back on. The map file is now loaded and you can
now route to addresses and POI’s covered by the map file.
74
Selecting Destinations
Selecting a Destination Using “Select Address”
Select Address
A destination can be created by entering the street address that you want to go to. This address is not automatically
added to your Address Book but is saved to your Previous Destination list (which is part of the address book menu) if
you have routed to it.
From the Select Destination screen, select Select Address.
Select the detailed region you wish to search from.
Enter the first few characters for the street name. Do not enter any prefixes (e.g. N, or
North) or suffixes such as road type (e.g. St., or Street). The street name must be
entered exactly as it is written to find the street (e.g. if you are searching for Overland
Heights, you would enter “OVERLAND” and the street would be found, but not if you
entered “HEIGHTS” only). If the street you are looking for has a hyphen, replace it
with a space. If the street name begins with “Rue” (e.g. Rue Andrée), you would need
to enter “RUE” first. After you have selected the characters, select OK.
Use the navigation key to scroll the list up or down and select the desired street from
the list.
The Magellan RoadMate will list all the cities the street is in based on the selected
region. If this list does not appear, the street is only in one city. Select the desired city
from the list.
75
Selecting Destinations
Enter the street address. The acceptable range of numbers is displayed at the top of
the screen. If you do not know the exact address, just select Done and the Magellan
RoadMate will route you to the lowest number in the range. Select Done to continue.
Select the desired Route Method.
The Magellan RoadMate will calculate the route. When the calculations are complete,
the Map screen will be displayed
76
Selecting Destinations
Selecting a Destination Using “Address Book”
The Address Book can store up to 200 addresses for each of the three users. When you select “Address Book” you are
given four options. Selecting “Previous Destinations” lets you select from a list of the last 50 destinations you have
routed to with the option of saving them to your address book. “List Addresses” displays a list of all the addresses you
have stored in your Address Book. “Create New Entry” lets you create a new address and store it in your address book.
“Trip Planner” lets you select two or more addresses from your Address Book to route to in sequence.
Address Book: Previous Destinations
From the Select Destination screen, select Address Book.
Select Previous Destinations.
Select from the list of previous destinations.
Select Route to be routed to the selected city.
Select the desired Route Method.
77
Selecting Destinations
The Magellan RoadMate will calculate the route. When the calculations are complete,
the Map screen will be displayed
Previous Destinations – Save to your Address Book
From the Select Destination screen, select Address Book.
Select Previous Destinations.
Select the address that you wish to save.
To save this destination to the Address Book, select Edit.
The top line (Name) and the bottom line (Information) can be edited. The address
cannot be changed. Select the line you want to modify.
78
Selecting Destinations
Enter the desired text. Select OK.
You can also add this address to your Favorites list. Select Favorites.
When you are satisfied with the information, select Save.
The address is saved to the Address Book. You can choose to route to this address, or
press Cancel to return to the Previous Destinations screen.
Address Book: List Addresses
List All
From the Select Destination screen, select Address Book.
Select List Addresses.
79
Selecting Destinations
Select List All.
Select the destination from the list of addresses in the Address Book and press Enter.
You will then have the option of routing to, editing, or deleting this address.
Route
Select Route.
Select the desired Route Method.
The Magellan RoadMate will calculate the route. When the calculations are complete,
the Map screen will be displayed.
Edit
Select Edit.
80
Selecting Destinations
Click on either the top line (name) or the bottom line (information) and enter the
desired text.
Select Save to save the changes and return to the Address Book screen.
Delete
Select Delete.
A dialog box will appear prompting you to confirm the deletion. Select Yes.
The address has been deleted from your address book and you are returned to the
Select Destination screen.
List Favorites
From the Select Destination screen, select Address Book.
81
Selecting Destinations
Select List Addresses.
Select List Favorites.
All of the addresses marked as favorites will be displayed.
Route
Select Route.
Select the desired Route Method.
The Magellan RoadMate will calculate the route. When the calculations are complete,
the Map screen will be displayed.
Edit
Select Edit.
82
Selecting Destinations
Click on either the top line (name) or the bottom line (information) and the desired
text.
Select Save to save the changes and return to the address screen.
Delete
Select Delete.
A dialog box will appear prompting you to confirm the deletion. Select Yes.
The address has been deleted from your address book and you are returned to the
Select Destination screen.
Search Address Book
From the Select Destination screen, select Address Book.
83
Selecting Destinations
Select List Addresses.
Select Search Address Book.
Enter the characters that may be part of the name you are searching for in your
address book. When you have finished, select OK
A list of addresses matching your criteria is shown. Select the address you wish to use.
You will then have the option of routing to, editing, or deleting this address.
Route
Select Route.
Select the desired Route Method.
84
Selecting Destinations
The Magellan RoadMate will calculate the route. When the calculations are complete,
the Map screen will be displayed.
Edit
Select Edit.
Click on either the top line (name) or the bottom line (information) and the desired
text.
Select Save to save the changes and return to the address screen.
Delete
Select Delete.
A dialog box will appear prompting you to confirm the deletion. Select Yes. The
address has been deleted and you are returned to the Address Book screen.
85
Selecting Destinations
Address Book: Create New Entry
Select on Map
From the Select Destination screen, select Address Book.
Select Create New Entry.
Select Select on Map.
Touch the screen and drag the map to a point near to the desired address. Press the
Enter key.
A dialog box will appear prompting you to edit the information. Select Edit Name.
Enter a name for the address. When you are finished, select OK.
86
Selecting Destinations
Select Save.
The location is saved to your address book and you are returned to the map screen.
Press Cancel to resume normal routing.
Select Address
From the Select Destination screen, select Address Book.
Select Create New Entry
Select Select Address.
87
Selecting Destinations
Select the detailed region you wish to search from.
Enter the first few characters for the street name. After you have selected the
characters, select OK.
Use the navigation key to scroll the list up or down and select the desired street from
the list.
Select the city that the street is in.
Enter the street address. The acceptable range of numbers is displayed at the top of
the screen. Select Done to continue.
A dialog box will appear prompting you to edit the information. Select Edit Name.
88
Selecting Destinations
Enter a name for the address. When you are finished, select OK.
If you wish, you can select Favorite to add this address to your Favorites list. Select
Save.
You are returned to the Address Book screen.
Dining, ATM, Gas...
From the Select Destination screen, select Address Book.
Select Create New Entry
Select Dining, ATM, Gas....
89
Selecting Destinations
Search POI by Name
This function allows you to search for a specific point of interest and save it to your
address book. Select Search POI by Name.
Select the detailed region you wish to search from.
Select the POI category (if available, select the sub-category).
Enter the first few characters for the POI name. After you have selected the
characters, select OK.
Use the navigation key to scroll the list up or down and select the desired POI.
A dialog box will appear prompting you to edit the information. You can choose to
keep the default name. If you wish, you can select Favorite to add this address to your
Favorites list. Select Save.
90
Selecting Destinations
You are returned to the Address Book screen.
Search Nearest POI
This function lets you search for a point of interest from three criteria and save it to
your address book: Current Position, By City Center, and By Airport. Select Search
Nearest POI.
Select the detailed region you wish to search from.
Current Position
This option lets you find a specific point of interest based on where you are at the
time. Select Current Position.
Select the POI category (if available, select the sub-category).
Use the navigation key to scroll the list up or down and select the desired POI.
91
Selecting Destinations
A dialog box will appear prompting you to edit the information. You can choose to
keep the default name. If you wish, you can select Favorite to add this address to your
Favorites list. Select Save.
You are returned to the Address Book screen.
By City Center
This option lets you find a specific point of interest closest to a chosen city center.
Select By City Center.
Enter the first few characters for the city name. After you have selected the
characters, select OK.
Use the navigation key to scroll the list up or down and select the desired city.
Select the POI category (if available, select the sub-category).
92
Selecting Destinations
Use the navigation key to scroll the list up or down and select the desired POI.
A dialog box will appear prompting you to edit the information. You can choose to
keep the default name. If you wish, you can select Favorite to add this address to your
Favorites list. Select Save.
You are returned to the Address Book screen.
By Airport
This option lets you find a specific point of interest closest to a chosen airport. Select
By Airport.
Enter the first few characters for the Airport name. After you have selected the
characters, select OK.
Use the navigation key to scroll the list up or down and select the desired Airport.
93
Selecting Destinations
Select the POI category (if available, select the sub-category).
A list of available POIs that match your criteria is shown. Use the navigation key to
scroll the list up or down and select the desired POI.
A dialog box will appear prompting you to edit the information. You can choose to
keep the default name. If you wish, you can select Favorite to add this address to your
Favorites list. Select Save.
You are returned to the Address Book screen.
Search BaseMap City
You can select a city center on the basemap and add it to your address book. Select
Search Basemap City.
Enter the first few characters for the city. After you have selected the characters,
select OK.
94
Selecting Destinations
Use the navigation key to scroll the list up or down and select the desired city.
A dialog box will appear prompting you to edit the information. Select Edit Name.
Enter a name for the address. When you are finished, select OK.
If you wish, you can select Favorite to add this address to your Favorites list. Select
Save.
You are returned to the Address Book screen.
Intersection
From the Select Destination screen, select Address Book.
95
Selecting Destinations
Select Create New Entry
Select Intersection.
Select the detailed region you wish to search from.
Enter the first few characters for the first street. After you have selected the
characters, select OK. It is possible to select a non-intersecting street. In that case, a
warning screen will appear. Press the Cancel ket to go back and re-enter the street
name.
Use the navigation key to scroll the list up or down and select the desired street.
Select the city that the street is in. If the selected street is located in only one city, this
screen will not appear.
96
Selecting Destinations
Enter the first few characters for the second street. After you have selected the
characters, select OK.
Use the navigation key to scroll the list up or down and select the desired street.
Click on either the top line (name) or the bottom line (information) and enter the
desired text.
Select Save to save the changes and return to the Address Book screen.
97
Selecting Destinations
Address Book: Trip Planner
The Trip Planner enables you to plot multiple destinations and save them as a trip. This feature is useful when planning
a vacation, making deliveries, or running errands. You can plot destinations by marking a point on a map, selecting a
street address, or selecting a POI. Once completed, you can easily upload the trip to your Magellan RoadMate and begin
your trip. Each user can define 20 trips with 20 destinations each. Each different destination will be saved in the address
book. Note however, that only 200 addresses can be saved per user.
Guide Me
Use this option to route to trips previously created on your unit or from trips uploaded to your unit from the Magellan
RoadMate Manager application.
From the Select Destination screen, select Address Book.
Select Trip Planner
Select Guide Me.
Select the Trip you wish to use and select OK.
Select the first point on your trip you wish to route to. If you press the second point on
the trip, you will skip point one. Pressing point three will skip point one and two, and
so on.
98
Selecting Destinations
Select the desired Route Method.
The Magellan RoadMate will calculate the route. When the calculations are complete,
the Map screen will be displayed
You will be routed to the first point selected. When you arrive, the Magellan RoadMate
will notify you.
Selecting Cancel or, if you turn off your car and turn it back on, the Magellan
RoadMate will ask you to resume trip guidance. Select Resume to be routed to the next
address in your trip. Select Cancel to stop trip guidance.
New
You can create trips from addresses stored in your address book.
From the Select Destination screen, select Address Book.
Select Trip Planner
99
Selecting Destinations
Select New.
Enter a name for the trip and select OK
Your trip name will be displayed, followed by your address list.
Select the addresses you wish to use in your trip in the order you wish them to be
listed. When you have finished, select Done: [trip name].
You will be taken back to the Trip Planner screen. At this point you can choose to
route to your new trip.
Press Guide Me.
100
Selecting Destinations
Select the trip you created.
Select the first point of the trip you wish to route to.
Select the desired Route Method.
The Magellan RoadMate will calculate the route. When the calculations are complete,
the Map screen will be displayed. When you arrive at your first point the Magellan
RoadMate will notify you. Selecting Cancel or, if you turn off your car and turn it back
on, the Magellan RoadMate will ask you to resume trip guidance. Select Resume to be
routed to the next address in your trip. Select Cancel to stop trip guidance.
Edit
Editing your trip allows you to add, delete, or change the order of the points in your trip.
From the Select Destination screen, select Address Book.
Select Trip Planner
101
Selecting Destinations
Select Edit.
Select the Trip you wish to edit.
Select any of the points of the trip. A submenu will appear giving you the option of
adding another point to your trip, moving the selected point up or down, or deleting
the selected point.
When you are finished making changes, press the Cancel button to return to the Trip
Planner screen.
Delete, Rename
From the Select Destination screen, select Address Book.
Select Trip Planner.
102
Selecting Destinations
Select Delete, Rename.
Delete
Select Delete.
Select the trip you wish to delete.
A dialog box will appear prompting you to confirm your selection. Select Yes.
The trip has been deleted.
Rename
Select Rename.
103
Selecting Destinations
Select the trip you wish to rename.
Use the backspace key to erase the name, then enter the new name. When you are
finished, select OK.
The trip has been renamed.
104
Selecting Destinations
Selecting a Destination Using “Dining, ATM, Gas...”
Points of Interest (commonly referred to as POIs), include businesses, recreation areas, landmarks, or other services.
These range from restaurants, parks, and gas stations, to hotels and city centers. The purpose of the POI database
(accessed through the “Dining, ATM, Gas...” menu option) is to provide you a list of popular destinations that you might
be interested in going to, without having to add them to your address book manually. These POIs are very useful while
traveling in an unfamiliar city.
Dining, ATM, Gas...: Search POI by Name
From the Select Destination screen, select Dining, ATM, Gas....
Select Search POI by Name.
Select the detailed region you wish to search from.
Select the POI category.
Enter the first few characters for the POI name. After you have selected the
characters, select OK. If you wish, you may enter the entire POI name.
105
Selecting Destinations
Use the navigation key to scroll the list up or down and select the desired POI.
Select the desired Route Method.
The Magellan RoadMate will calculate the route. When the calculations are complete,
the Map screen will be displayed.
Dining, ATM, Gas...: Search Nearest POI
Current Position
This option lets you route to a specific point of interest based on where you are at the
time. From the Select Destination screen, select Dining, ATM, Gas....
Select Search Nearest POI.
Select the detailed region you wish to search from.
106
Selecting Destinations
Select Current Position.
Select the POI category (if available, select the sub-category).
Use the navigation key to scroll the list up or down and select the desired POI.
Select the desired Route Method.
The Magellan RoadMate will calculate the route. When the calculations are complete,
the Map screen will be displayed
By City Center
This option lets you route to a specific point of interest closest to a chosen city center.
From the Select Destination screen, select Dining, ATM, Gas....
107
Selecting Destinations
Select Search Nearest POI.
Select the detailed region you wish to search from.
Select By City Center.
Enter the first few characters for the city name. After you have selected the
characters, select OK. If you wish, you may enter the entire city name.
Use the navigation key to scroll the list up or down and select the desired city.
Select the POI category (if available, select the sub-category).
108
Selecting Destinations
Use the navigation key to scroll the list up or down and select the desired POI.
Select the desired Route Method.
The Magellan RoadMate will calculate the route. When the calculations are complete,
the Map screen will be displayed
By Airport
This option lets you route to a specific point of interest closest to a chosen airport.
From the Select Destination screen, select Dining, ATM, Gas....
Select Search Nearest POI.
Select the detailed region you wish to search from.
109
Selecting Destinations
Select By Airport.
Enter the first few characters for the Airport name. After you have selected the
characters, select OK. If you wish, you may enter the entire Airport name.
Use the navigation key to scroll the list up or down and select the desired Airport.
Select the POI category (if available, select the sub-category).
A list of available POIs that match your criteria is shown. Use the navigation key to
scroll the list up or down and select the desired POI.
Select the desired Route Method.
110
Selecting Destinations
The Magellan RoadMate will calculate the route. When the calculations are complete,
the Map screen will be displayed
Dining, ATM, Gas...: Search BaseMap City
From the Select Destination screen, select Dining, ATM, Gas....
Select Search Basemap City.
Enter the first few characters for the city. After you have selected the characters,
select OK. If you wish, you may enter the entire city name.
Use the navigation key to scroll the list up or down and select the desired city.
Select the desired Route Method.
111
Selecting Destinations
The Magellan RoadMate will calculate the route. When the calculations are complete,
the Map screen will be displayed
Selecting a POI on the Map
While viewing the Map screen, you can select a POI icon and be routed to it, or save it to you address book.
Touch the POI on the screen.
A dialog box will appear giving you information on the POI. Select Route.
Select the desired Route Method.
The Magellan RoadMate will calculate the route. When the calculations are complete,
the Map screen will be displayed
112
Selecting Destinations
Selecting a Destination Using “Intersection”
Intersections are very common markers for routing when you don’t know the actual address. The Magellan RoadMate
can route you to an intersection of two streets contained within the active detailed map.
From the Select Destination screen, select Intersection.
Select the detailed region you wish to search from.
Enter the first few characters for the first street. After you have selected the
characters, select OK. If you wish, you may enter the entire street name.
Use the navigation key to scroll the list up or down and select the desired street.
Select the city that the street is in. If the street is in only one city, this screen will not
appear.
Enter the first few characters for the second street. After you have selected the
characters, select OK. It is possible to enter an non-intersecting street. In that case, a
warning screen will appear. Press the Cancel key to go back and re-enter the street
name.
113
Selecting Destinations
Use the navigation key to scroll the list up or down and select the desired street.
Select the desired Route Method.
The Magellan RoadMate will calculate the route. When the calculations are complete,
the Map screen will be displayed
114
Traveling
Traveling
Guidance Information Screens
The Magellan RoadMate has three screens you can use to assist you in traveling to your destination: the Map screen, the
Maneuver List screen, and the TrueView (or Split TrueView) screen.
Map: When a new destination is selected and calculated, the Map screen is displayed. This screen displays a map of
your surrounding area, along with the planned route and information about the route. This screen can also be accessed
when you have no route by selecting the Map button or by pressing the View button while viewing the Select Destination
screen. It can also be selected by pressing the View button while viewing the TrueView screen.
Maneuver List: This screen is available only when you are being routed to a destination. This screen displays a list of the
maneuvers you will need to follow in order to arrive at the destination. It can also be used to exclude a maneuver and reroute you to your destination. To access the Maneuver List screen, press the View button while viewing the Map screen.
TrueView/Split TrueView: This screen displays the next maneuver as a graphic. To access the TrueView screen, press the
View button while viewing the Maneuver List.
VIE
W
EW
VI
Map
Maneuver
List
TrueView
View Button
VIEW
115
Traveling
Map Screen
The Map screen is the most commonly used screen in the Magellan RoadMate. It provides you with detailed information
about where you are and where you are going.
Planned Route (pink)
POI Icon
Position Cursor
Next Maneuver
Direction of Travel and
GPS Signal Strength
Distance to Next Maneuver
Estimated Time to Destination
Direction of Destination
Distance to Destination
As you travel, the Map screen constantly updates your location. It provides you with not only a map but also a visual
indication of where you are on the map.
If the Magellan RoadMate loses the satellite signal for more than 15 seconds and is unable to compute your location, the
display will automatically switch to the Maneuver List screen. This will give you the information needed for your next
maneuver. While viewing the map screen, touching a POI icon will give you the option of routing to that point (see See
“Selecting a POI on the Map” on page 112).
Changing the Map Zoom Levels
While in the Map screen, you can zoom in on (enlarge) the map or zoom out from (shrink) the map. The zoom levels
range from 130 ft. to 1665 mi.
Zoom In Button
Zoom Out Button
116
Traveling
Maneuver List Screen
Next Maneuver
Direction of Travel and
GPS Signal Strength
Distance to Next Maneuver
1/10 Mile Countdown
Distance to Destination
Estimated Time to Destination
Direction of Destination
TrueView Screen
Direction of Travel and
GPS Signal Strength
Distance to Next Maneuver
1/10 Mile Countdown
Distance to Destination
Estimated Time to Destination
Direction of Destination
117
Traveling
Route Changes
Detouring from the Planned Route
If you detour from the calculated route, the Magellan RoadMate will get you back on course in one of two ways:
1. If you detour from the calculated route to stop at a gas station or a convenience store, and the unit shuts off
as you turn off the car, or you turn off the unit manually, when you return to your vehicle and the unit is
turned back on, you are presented with a screen asking if you wanted to resume your route. Selecting
“Resume” causes the Magellan RoadMate to recalculate the route using the same destination as before,
selecting “Cancel” clears the route and displays the Select Destination screen.
2. If you detoured from the calculated route due to a traffic jam or construction, the Magellan RoadMate will
automatically recalculate the route to your destination based on your new location.
By default, the Magellan RoadMate will continue to recalculate the route as long as you choose to keep it active.
Excluding a Maneuver in a Planned Route
While traveling or setting up your destination, you may find it necessary to exclude one of the maneuvers in the
Maneuver List. This could be due to an accident or street maintenance you want to avoid. The Magellan RoadMate
provides you tools to select a specific maneuver, exclude it from the planned route, and re-route the trip when
reasonably possible.
Within an active planned route and while viewing the Guidance screen, press View.
Select the maneuver instruction to be excluded.
The details for the maneuver are displayed. Select Exclude.
The trip will be re-calculated, excluding the maneuver selected. This calculation is done
using the same Route Method that was chosen when the destination was selected. After
the route is recalculated, the Map screen is displayed.
118
Traveling
Canceling a Planned Route
Every route is calculated based on the Route Method criteria selected (see page 69). Every time a new destination is
selected, the Magellan RoadMate prompts you for the method that will be used to calculate the route.
While viewing the Map screen, the Maneuver List screen, or the
TrueView screen, press the Cancel button.
Select Route to select a different route method.
Select Yes to cancel the route and display the Select Destination
screen.
Selecting No returns the display to the last viewed screen.
Select Trip to view the current trip list (during active trip only).
Changing the Route Method
When you selected the destination for the first time, you indicated what route method you wanted the Magellan
RoadMate to use to calculate the route. The Magellan RoadMate provides a way of letting you change the Route Method
during the trip.
While viewing the Map screen, the Maneuver List screen, or the
TrueView screen, press the Cancel button.
Select Route.
119
Traveling
Select the new Route Method.
The route will be re-calculated using the new Route Method chosen, and the Map
screen will be displayed.
120
Traveling
Current Location
Displaying Information About Your Current Location
Whenever you want to view information about your present location you can press the
Locate button.
This screen displays your the street you currently traveling are on, the city and state, your
current heading, speed and latitude and longitude coordinates.
Save Location
If you are traveling and you wish to save a location that is not in the database, say a photo spot or a fishing spot, you can
save it to your address book. Press the Locate button.
Select Save Location.
Select Edit Name.
Edit the name of the location. Select OK.
Select Save. The address is saved to your address book and you are returned to the last
viewed screen.
121
User Options
User Options
User Option Menu
User Options enable you to customize the Magellan RoadMate and take advantage of its
data recording capabilities. User Options can be accessed from any screen by pressing
the Options button.
The User Options section of Magellan RoadMate provides you with four options:
Trip Computer – Displays useful information about your trip such as mileage, that can be saved for future reference.
Ideal for the business traveler who needs to record mileage and time spent on the road.
Track Recorder – Records a graphical representation of where you’ve been that you can save and playback on your
computer using the Magellan RoadMate Manager application.
Configuration – Lets you change the audio, video, language, and power option settings of the Magellan RoadMate.
User Settings – Lets you further customize the Magellan RoadMate.
122
User Options
Trip Computer
The Trip Computer is a valuable tool for recording the mileage and time spent driving while on vacation or on a business
trip. The information for the trip can be saved to the Magellan RoadMate as a report and viewed at any time, giving you
easy access to previous and current trip information.
When you begin a new trip and you need to record the information, access the Trip Computer. There, you can save the
information displayed for the current trip (if needed) and reset the Trip Computer to zero in preparation for your new trip.
Press the Option button and select Trip Computer.
Select Current.
The data for the current trip is displayed. By default, the trip will be running and
recording data from the first time it is turned on. From this screen, the Trip Computer
can be started, stopped, reset or saved.
Stopping or Starting the Trip Computer
Select Stop to stop the current trip.
Select Start to resume the current trip.
The top of the display will show “Running...” or “Stopped,” depending on the current
status of the Trip Computer.
Saving the Current Trip Report
Select Save.
123
User Options
Use the keypad to enter a name for the saved Trip Report and select OK.
Your trip is saved and you are returned to the current trip screen.
Resetting the Trip Computer
Select Reset. The values for the Trip Computer will be set to zero. Resetting the Trip
Computer will also set the status of the computer to “Running...” if it had been
stopped previously.
Viewing a Saved Trip Report
From any screen, press the Option button. Select Trip Computer.
Select the Trip Report to be viewed.
The saved Trip Report is displayed. When you are done viewing the saved Trip Report,
you can press Cancel twice to be returned to the User Options screen.
124
User Options
Deleting a Trip Report
From any screen, press the Option button. Select Trip Computer.
Select the Trip Report to be deleted.
The details of the Trip Report are displayed.Select Delete.
Select Yes to confirm.
The Trip Report is displayed. Select Delete. The Trip Report is deleted, and you are
returned to the Trip Computer screen.
125
User Options
Track Recorder
The Track Recorder is useful if you wish to keep a record of a route you have taken to a particular place. You can record
up to 30 tracks on your unit with 2,000 track points each.
Start Track Recorder
From any screen, press the Option button and select Track Recorder.
Select Start to begin recording a new track.
The Magellan RoadMate will begin recording. At this point you can return to the Map
screen by pressing the Cancel button and continue driving normally.
Stop Track Recorder
From any screen press the Option button and select Track Recorder.
Select Stop.
126
User Options
A dialog box will appear asking you if you wish to stop the track and save it, stop the
track and not save it, or resume recording the track. Select No.
The track recorder is stopped and you are returned to the Track Recorder screen.
Save Track Record
From any screen press the Option button and select Track Recorder.
Select Stop.
A dialog box will appear asking you if you wish to stop the track and save it, stop the
track and not save it, or resume recording the track. Select Yes.
You will be prompted to enter a name for your track. When you are finished, select OK.
127
User Options
You are returned to the Track Recorder screen.
View Track
From any screen press the Option button and select Track Recorder.
Select View.
Select the track you wish to view from the list.
The track will be displayed. When you are finished viewing the track, press the Cancel
button.
You are returned to the Track Recorder screen.
128
User Options
Delete, Rename Track
From any screen press the Option button and select Track Recorder.
Select Delete, Rename.
Delete
Select Delete.
Select the track you wish to delete.
A dialog box swill appear asking you to confirm your request. Select Yes.
The track is deleted.
129
User Options
Rename
Select Rename.
Select the name of the track you wish to rename.
Use the backspace key to erase the old name and enter the new name. Select OK.
The track has been renamed.
130
User Options
Configuration
The Configuration menu lets you adjust the visual and audio settings of the Magellan RoadMate.
From any screen, press the Option button. Select Configuration.
Contrast
Select Contrast.
Press the right arrow for a higher contrast, press the left arrow for a lower contrast.
When you are finished, select Save.
Brightness
Select “Brightness”.
Press right arrow to increase the brightness, press the left arrow to decrease the
brightness. When you are finished, select Save.
131
User Options
Volume
Select Volume.
Press the right arrow to increase the volume, press the left arrow to decrease the
volume. When you are finished, select Save.
Auto Power Off
The Magellan RoadMate can be set to automatically shut itself off after 20 minutes of
inactivity. Select Auto power off.
Select Auto Power Off. The box is checked indicating that the feature is active. Select
Save.
If after 20 minutes it has not received any input or changed location, an audible alert
will sound and a screen will appear notifying you that the unit will shut down in 60
seconds. Pressing any key will disable this warning.
Language
The first time you use your Magellan RoadMate you will be asked to select a language to use. When you connect the unit
to the Magellan RoadMate Manager, the software will disable the remaining languages. After that, switching languages is
done from the Magellan RoadMate Manager application.
132
User Options
User Settings
The Magellan RoadMate can be further configured to each user’s preferences. With the exception of Diagnostics, these
settings can also be configured using the Magellan RoadMate Manager Software.
From any screen, press the Option button. Select User Settings.
POI Selection
You can customize the Map screen to display all, none, or individual POIs. Select POI
Selection.
Select Mark All to show all available POI icons on the Map screen.
Select Clear All to remove all POI icons from the Map screen.
Or, you can individually select which icons to remove or show on the map screen.
133
User Options
Map Options
You can customize how the data is displayed on the Map screen. Select Map Options.
Select the options you wish to change. When you are finished, select Save.
Map Orientation
Units of Measure
Map Guidance Option
Heading Up sets the map display so that the direction of travel is always at the top of the screen.
North Up sets the map so that the top of the screen always displays North.
Select miles or kilometers as the unit of measure for distance.
Map Smart automatically changes the display from the Map screen to the TrueView
screen before the maneuver. Map Always shows only the Map screen and the highlighted route. Map Manual allows the TrueView screen to be displayed only when the
View button is pressed.
Select Map Color
You can change the color scheme of the map. Select Select Map Color.
134
User Options
Select the desired color scheme. When you are finished, select Save.
Route Preferences
Route references is where you activate or deactivate Automatic Re-Route. Automatic
Re-Route enables the Magellan RoadMate to automatically re-calculate the route to
the destination when it has detected that the vehicle is not on the previously
calculated route. Select Route Preferences.
Select Automatic Re-Route. The box is checked indicating that the feature is active.
Select Save.
Split TrueView
With Split TrueView active, the normal TrueView screen is shown simultaneously with
the map screen. Select Split TrueView.
135
User Options
Select Split TrueView. The box is checked indicating that the feature is active. Select
Save.
The TrueView screen is now split with one half showing TrueView, and the other half
showing the map.
Menu Colors
Select Menu Colors.
Select the preferred color scheme and select Save.
Default
Pastel
Forest
Desert
136
User Options
Tone Options
You can have the Magellan RoadMate alert you by one of three tones. Select Tone
Options.
Select the desired sound you want the Magellan RoadMate to alert you with. When
you are finished, select Save.
Diagnostics
The Magellan RoadMate has a number of diagnostic features that enable you to check
the condition of the unit. Select Diagnostics.
Video Test displays random colors to ensure that your display is working properly.
Touch Screen Test checks that the touch screen is calibrated and accurate.
Keypad Test verifies proper operation of the keypad.
137
User Options
Audio Test checks that the speaker is working correctly.
Headphone Test checks that sound is transmitted to the headphone jack correctly.
GPS Status monitors the satellite signal.
Initialize GPS resets the unit and reacquires the satellite signal.
Set GPS Position enables you to manually set the location of the current position icon.
Product Information tells you the different version numbers of the unit.
.
138
User Options
Simulator Mode
In Simulator Mode, you can demonstrate the capabilities of the Magellan RoadMate
without actually driving. In order for the simulation to work, you must set a route first.
Select Simulator Mode.
The Propose simulator when calculating route option will ask you if you want to activate
the simulator after you select a location to route to.
After you select your destination and select Route, a dialog box will appear asking you
if you would like to simulate driving the route. Select Yes. The simulation will begin.
You can control the playback of the simulation by selecting Restart to start the
simulation again, Step Back to go back along the route a distance of one mile, Step
Forward to advance along the route a distance of one mile, or Stop to stop the
simulation.
You can also control the speed coefficient at which the simulator runs. Where 1X is
typical speed for the current road, 1.5X is one and one half times typical speed, and
2X is twice the typical speed.
Press Cancel to return to the map screen to view your route in progress.
139
User Options
System Messages gives you information on errors that you can relay to Technical
Support.
.
User - Edit Name
You can change the default user name. Select User - Edit Name.
Use the backspace key to erase the default name and enter the name you wish to use
for that user. When you have finished, select OK.
The user name is enabled.
.
Password Settings
You can set a password for your user profile to protect your settings and to prevent
unauthorized usage. Select Password Settings.
140
User Options
Select Set Password.
Enter the password you wish to use for your profile and select OK.
Select Activate. The box is checked indicating that the feature is active. Select Save.
Confirm password protection activation by selecting Yes.
Password protection is now active. When you select your User profile at startup, you
will be asked for your password in order to continue.
141