1
INSTALLATION
Manual Type 115
INSTRUCTIONS
Viking W-1000, C-1000B
with Essex 265 controller
For Models
101-VIK
103-VIK
107-VIK
201-VIK
203-VIK
301-VIK
302-VIK
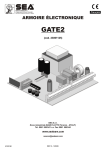
304-E265-VIK
305-E265-VIK
400-E265-VIK
401-E265-VIK
Specifications
Communication
Access Control
Viking W-1000 Doorbox uses “half-duplex”
communication, allowing for high speaker and
microphone volume, witout the possibility of
feedback
Essex “stand-alone” 5 button keypad
1 relay
5-6 users
16.5 VAC power supply included
501 E. Goetz Ave.
Santa Ana, Ca 92707
www.eholovision.com
Ph. 714-434-6904
Fax 800-362-0002
HOLOVISION
NOTE: See “Doorphone Adjustments and Programming” for volume
adjustments and DIP switch settings.
Viking W-1000 Wiring
Wiring 2 Doorboxes into Unused CO Port on KSU
DOOR STRIKE 2
DOOR STRIKE 1
DOOR BOX 2
DOOR BOX POWER
DOOR BOX 1
When used w/o CO line KSU,
“Talk Battery” is ON
ON
1 2 3 4 5 6 7 8 9 10 11 12 13 14 15 16 17 18 19
1
C
O
M
DO NOT CONNECT CO LINE IN
KEYLESS CONTACT
LINE OUT TO PHONES
EARTH GND
PHONE LINE INPUT
13.5 VAC IN
VIKING Model C-1000B
N. N.
O. C.
1 2 3
TALK
OFF
OFF
BATT
ON
AUX OUTPUT N.C.
AUX OUTPUT N.O.
AUX OUTPUT COMMON
KSU
Holovision Face Plates shown
with W-1000 installed
13.8 VAC
1.25A
NOTE: See “Doorphone Adjustments and Programming” for volume
adjustments and DIP switch settings on the doorphone.
See “C-1000B Adjustments and Programming” for settings on
the doorphone controller
Page 2
TYPE 115
Viking W-1000 Wiring
Wiring Using Standard Phones - Doorboxes Share CO Line with Phones
DOOR STRIKE 2
DOOR STRIKE 1
DOOR BOX 2
DOOR BOX POWER
DOOR BOX 1
When used with standard phones
“Talk Battery” is OFF
ON
1 2 3 4 5 6 7 8 9 10 11 12 13 14 15 16 17 18 19
1
C
O
M
CO LINE IN
KEYLESS CONTACT
LINE OUT TO PHONES
EARTH GND
PHONE LINE INPUT
13.5 VAC IN
VIKING Model C-1000B
N. N.
O. C.
1 2 3
TALK
OFF
OFF
BATT
ON
AUX OUTPUT N.C.
AUX OUTPUT N.O.
AUX OUTPUT COMMON
TO STANDARD
PHONES
Holovision Face Plates shown
with W-1000 installed
13.8 VAC
1.25A
NOTE: See “Doorphone Adjustments and Programming” for volume
adjustments and DIP switch settings on the doorphone.
See “C-1000B Adjustments and Programming” for settings on
the doorphone controller
TYPE 115
Page 3
Viking W-1000 Wiring
Wiring into Unused CO Port on KSU - with Essex Gate Control System AC Out For Strike
DOOR STRIKE 2
DOOR STRIKE 1
DOOR BOX 2
DOOR BOX POWER
DOOR BOX 1
KEYLESS CONTACT
LINE OUT TO PHONES
EARTH GND
PHONE LINE INPUT
13.5 VAC IN
VIKING Model C-1000B
When used w/o CO line
“Talk Battery” is ON
ON
1 2 3 4 5 6 7 8 9 10 11 12 13 14 15 16 17 18 19
1
C
O
M
N. N.
O. C.
1 2 3
TALK
OFF
OFF
BATT
ON
NC 2
NO 2
COM 2
NC 1
NO 1
COM 1
DC
OUT
Essex Model 265
AC
IN
Earth
Keypad Cable
13.8 VAC
1.25A
Gate Strike with MOV
Monitor
KSU
MOV is recommended
Remote
DO NOT CONNECT CO
LINE IN
Relay Out to Essex Controller
Remote Bypass Button
16.5 VAC
40 VA
Holovision Face Plate shown
with W-1000 installed
NOTE 1: Remove the jumper wire & MOVs from left side terminal strip. Wire right side terminal strip
“color for color”.
NOTE 2: MOV (metal oxide varistor) is the small red component which is included. Its purpose is to
absorb “inductive kick back” which can be created when power is removed from the strike.
Page 4
TYPE 115
Viking W-1000 Wiring
Wiring Using Standard Phones - with Essex Gate Control System Contact Closure for Gate Operation
DOOR STRIKE 2
DOOR STRIKE 1
DOOR BOX 2
When used with standard phones,
“Talk Battery” is OFF
ON
1 2 3 4 5 6 7 8 9 10 11 12 13 14 15 16 17 18 19
1
1 2 3
TALK
OFF
“Open”
Terminals
on Gate
Motor
CO LINE IN
TO STANDARD
PHONES
NC 2
NO 2
COM 2
NC 1
NO 1
COM 1
Essex Model 265
DC
OUT
13.8 VAC
1.25A
OFF
BAT
ON
AC
IN
Earth
Keypad Cable
N. N.
O. C.
Remote
C
O
M
Monitor
DOOR BOX POWER
DOOR BOX 1
KEYLESS CONTACT
LINE OUT TO PHONES
EARTH GND
PHONE LINE INPUT
13.5 VAC IN
VIKING Model C-1000B
16.5 VAC
40 VA
Holovision Face Plate shown
with W-1000 installed
NOTE : Remove the jumper wire & MOVs from left side terminal strip. Wire right side terminal strip
“color for color”.
TYPE 115
Page 5
Doorphone Adjustments and Programming
Microphone Volume
In certain noisy locations (traffic or wind), the microphone volume may need to be decreased. A symptom
of this is one-way talk path, in which the distant party cannot be heard over the speaker. A “MIC VOL”
adjustment is provided on the doorphone for increasing or decreasing the microphone volume.
Speaker Volume
The “SPKR VOL” pot can be adjusted to increase or decrease the speaker volume to the desired level.
Maximum Number of Rings
The “maximum number of rings can be adjusted using the DIP switches.
Sw 1
Sw 2
Max Rings
OFF
OFF
2
ON
OFF
3
OFF
ON
10
ON
ON
30
Access Programming Mode (Local Access)
Step
Action
1
Disconnect the PHONE LINE INPUT.
2
Slide the TALK BATTERY switch to the ON position.
3
Move DIP SWITCH 2 from OFF to ON.
4
Connect a phone to terminals 4 & 5 - LINE OUT TO PHONES.
5
Pick up the phone (you will hear a double beep - indicating that you have accessed the PROGRAMMING MODE).
6
You can now Touch Tone program the features listed below
Program Gate Strike Relays
Step
Action
1
Make sure C-1000B is in Programmin Mode - See above
2
Program Strike 1 activation time as follows:
3
Enter time (seconds) followed by #01
4
Program Strike 2 activation time as follows:
5
Enter time (seconds) followed by #02
EXAMPLE: 05#01 programs Strike 1 for 5 seoncds
03#02 programs Strike 2 for 3 seconds
NOTE: Entering a time “00” sets time = 1/2 second Maximum time through programming = 9 seconds
Page 6
TYPE 115
C-1000B Door Controller Programming
Program Auxilliary Contacts*
Step
Action
1
Make sure C-1000B is in Programmin Mode - See Page 8
2
Program Aux Contact activation time as follows:
3
Enter time (seconds) follwed by #03
EXAMPLE: 01#03 programs Aux Contact for 1 seoncd.
NOTE: Entering a time “00” sets time = 1/2 second
*In this mode, Auxiliary contacts can be activated (closed) whenever Doorbox 1 or Doorbox 2 is activated.
See page 2 or 6 of this document for the location of the terminals on the C-1000B
The steps above are for “timed activations” (0.5 to 10 seconds). See page 8 (Section 6) of the C-1000B manual for a
description of other Auxiliary Contact Modes.
Return to normal use mode
Step
Action
1
Slide the TALK BATTERY switch to the OFF position.
2
Move DIP SWITCH 2 from ON to OFF.
3
Re-connect the PHONE LINE INPUT and LINE OUT TO PHONES.
ADDITIONAL C-1000B MODES:
Doorbell Mode- phones will not ring when doorbell is pushed. This is useful when
conventional door chimes are desired. In order to use this feature, the
Auxiliary Contacts must be programmed. (see above)
Custom Ring Mode - Distinguishes doorbox ring from CO ring when connected to KSU.
CCTV Video Control Mode - The C-1000B can switch 2 CCTV cameras, displaying the
camera at the doorbox which initiates the call. This mode
cannot be used when the “Auxiliary Contacts” are being used.
REFER TO C-1000B MANUAL FOR MORE INFORMATION ON THESE, AND OTHER MODES OF OPERATION.
TYPE 115
Page 7
Viking Operation
OPERATION
ANSWER A CALL FROM DOORBOX
When the phones ring, pick up a phone to be connected to the visitor.
When the C-1000B controller is used, you will hear a beep tone when
the phone is answered - one beep for doorbox 1, and 2 beeps for
doorbox 2.
PLACING CO LINE CALLS ON HOLD (CALL WAITING)
If a phone call is in progress, and a door box is activated, a single or
double “call waiting “ tone will be heard. To place the call in progress on
hold and speak to the visitor, push #. When you want to return to the
original phone call, push #.
ACTIVATING A DOORSTRIKE OR OPENING A GATE
To open the gate, you must first be connected to the doorbox.
Push ** . You will then hear a confirmation tone, and the relay will be
activated for the programmed time. If a call was already in progress,
pressing ** will open the gate, and return the system to the original
phone call.
LATCH / UNLATCH A GATE
To use this feature, you must first be connected to the doorbox.
Latch relay 1 or 2 * 1
Unlatch relay 1 or 2 * 0
Page 8
TYPE 115
Set Essex Relay Options
GOAL: To use jumper pins on circuit board to configure standard
relay options. In this configuation, Codes 1 and 2
operate Relay 1. Codes 3, 4, 5 operate Relay 2.
Step
1
Code
Action
Relay 1 and 2 activate. Only Relay 1 latch*
Relay 1
Open
Latch
Relay 2
Open
Relay 1
Latch
Master Unlock
Master Code
No
No
No
1, 2 Unlock
No
3,4,5 Unlock
1,2 Latch
Code 1,2
Yes
Yes
No
No
3, 4,5 Latch
CCTV
Doorbell
Code 3, 4, 5
No
No
Yes
o
o
o
o
o
o
o
o
o
o
o
o
o
o
o
o
o
o
o
o
o
No
Relay 2
Step
2
Code
Action
Relay 1 and 2 activate and latch*
Relay 1
Open
Latch
Relay 2
Open
Relay 1
Latch
Master Unlock
Master Code
No
No
No
No
1, 2 Unlock
3,4,5 Unlock
1,2 Latch
Code 1,2
Yes
Yes
No
No
3, 4,5 Latch
CCTV
Doorbell
Code 3, 4, 5
No
No
Yes
o
o
o
o
o
o
o
o
o
o
o
o
o
o
o
o
o
o
o
o
o
Yes
Relay 2
*LATCHING RELAY: In order to latch either relay, simply enter the code,
followed by “7”. Repeat (code, 7) in order to unlatch the relay.
The top example would be used where the driveway gate was connected to
Relay 1 (and could be locked open), and the pedestrian gate was connected
to Relay 2. (No latching possible).
TYPE 115
Page 9
Programming of Essex Keypad
GOAL: Set-up master and user codes
Set Master Code
Step
Action
1
Press “Program” switch once. (keypad will beep 4 times)
2
Once “Program” switch is pressed, you have 2 minutes to complete Step 5.
3
Press “1119”. (you will hear 3 beeps)
4
Step 5 must be completed within 5 seconds of Step 3.
5
Enter “Master Code” *
6
Wait 5 seconds for 3 beeps to confirm new “Master Code”.
Set User Code 1
Step
Action
1
Enter “Master Code”
2
Enter 111 (3 beeps).
3
Enter User Code 1.
4
Wait 5 seconds for 3 reset beeps.
Set User Code 2
Step
Action
1
Enter “Master Code”
2
Enter 113 (3 beeps).
3
Enter User Code 2.
4
Wait 5 seconds for 3 reset beeps.
* MASTER CODE: The default Master Code is 13579. This should be replaced by a unique code to be used only by
your company. The Master Code can be 3 to 8 digits long.
Set User Code 3
Step
Action
1
Enter “Master Code”.
2
Enter 115 (3 beeps).
3
Enter User Code 3.
4
Wait 5 seconds for 3 reset beeps.
Page 10
TYPE 115
Programming of Essex Keypad
Set User Code 4
Step
Action
1
Enter “Master Code”.
2
Enter 117 (3 beeps).
3
Enter User Code 4.
4
Wait 5 seconds for 3 reset beeps.
Set User Code 5
Step
Action
1
Enter “Master Code”.
2
Enter 119 (3 beeps).
3
Enter User Code 5.
4
Wait 5 seconds for 3 reset beeps.
Delete Any Code
Step
Action
1
Enter Master Code .
2
Enter address of code to be deleted (111, 113, etc.).
3
Do not enter any code until you hear 3 reset beeps.
4
Wait 5 seconds for 3 reset beeps.
Note: User codes can be 3 to 8 digits
Latch a Relay
Step
Action
1
Enter any User Code (1 -5).
2
Enter “7”. This will cause the relay to latch (subject to the jumper pin settings - see Page 5).
3
To unlatch the relay, re-enter the user Code, followed by “7”.
TYPE 115
Page 11
Programming of Essex Keypad
Set Activation Time Of Relay 1 (User codes 1 & 2 - see note below)
Step
Action
1
Press “Program” switch (keypad will beep 4 times).
2
Enter 1117 (3 beeps).
3
Enter 1 for every 1 second latch time, and 5 for every 5 seconds.
Examples:
6 seconds = 5, 1
8 seconds = 5, 1, 1, 1
12 seconds = 5, 5, 1, 1
4
Wait 5 seconds for 4 reset beeps.
Set Activation Time Of Relay 2 (User codes 3, 4& 5 - see note below)
Step
Action
1
Press “Program” switch (keypad will beep 4 times).
2
Enter 1115 (3 beeps).
3
Enter 1 for every 1 second latch time, and 5 for every 5 seconds.
Examples:
6 seconds = 5, 1
8 seconds = 5, 1, 1, 1
12 seconds = 5, 5, 1, 1
4
Wait 5 seconds for 4 reset beeps.
Note: The above 2 steps are actually setting the activation times for user code 1, 2 and user code 3, 4, 5. Using the
jumper pin setting as shown in “Set Essex Relay Options”, this will set activaiton time of Relays 1 & 2.
Page 12
TYPE 115