1
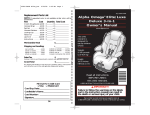
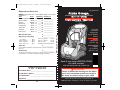
4358-5356 US All in One
7/26/10
4:16 PM
Page 1
Eng. 4358-5356
Replacement Parts List
Alpha Omega,
All in One
Instruction Manual
NOTE: If requested color is not available, similar color will be
substituted.
Part
Cost
Quantity Total Cost
Crotch Strap/Buckle $4.99 X ____= $ ____________
Harness Strap . . . . .$2.00 X ____= $ ____________
Pad Set . . . . . . . . . .$42.00 X ____= $ ____________
Chest Clip . . . . . . . .$1.50 X ____= $ ____________
Locking Clip . . . . . . .$2.50 X ____= $ ____________
Tether Kit . . . . . . . .$9.99 X ____= $ ____________
Latch Kit . . . . . . . .$24.99 X ____= $ ____________
Instructions . . . . . . .$0.00 X ____= $ ____________
Merchandise Total
www.djgusa.com
$______________
$ ____________
$100.01 to $150.00 . . . . .$10.95
$150.01 to $200.00 . . . . .$11.95
$200.01 and up . . . . . . . .$13.95
Outside Continental USA $10.00
Up to $25.00 . . . . . . . . . .$5.95
$25.01 to $50.00 . . . . . . .$6.95
$50.01 to $75.00 . . . . . . .$8.95
$75.01 to $100.00 . . . . . .$9.95
Sales Tax
$ ____________
(Indiana, California, Arkansas, and Massachusetts residents add applicable
sales tax.)
Grand Total
$ ______________
No shipping and handling on instructions for quantities under 6. Add $.50 for
each instruction over 6, then add applicable shipping and handling.
CUT ON DOTTED LINE
Shipping and handling:
This child
restraint is
designed for
use by children
whose:
Weight:
5-80 pounds
(2.3-36.3 kg)
Height:
19-52 inches
(48-132.1 cm)
Read all instructions BEFORE USING
this child restraint.
Fill Out For Credit Card
Visa Mastercard
Card Exp. Date: ______________________________
Cardholder’s Name: __________________________
Card Number: ______________________________
Signature____________________________________
58
KEEP INSTRUCTIONS FOR FUTURE USE.
IMPORTANT!
Failure to follow the warnings on the labels
and in the instruction manual can result in
the death or serious injury of your child.
Para recibir las instrucciones en español, llame al
1-800-544-1108 o solicitarse por escrito al dirección por arriba.
4358-5356 US All in One
7/26/10
4:16 PM
Page 3
Before You Begin...
Table of Contents
Thank you for choosing this car seat, referred to
throughout this manual as a child restraint.The DJG
family is committed to creating a child restraint with the
most comfort and convenience available today.
Warnings..........................................................................................2-4
General and Warm Weather Use..................................................5
Registration and Recall ....................................................................5
Aircraft Installation ..........................................................................5
Understanding Your Vehicle ........................................................6-7
Child Restraint Parts ....................................................................8-9
Choosing Restraint and Position ................................................10
Preparing Child Restraint to Fit Your Child ............................11
Check Harness/Headrest Height ........................................12
Accessories (on select models) ..................................................13
Securing Your Child in Child Restraint ................................14-15
Removing Child from Child Restraint ......................................16
Reclining the Child Restraint ......................................................17
Choosing LATCH or Vehicle Belts..............................................18
Knowing Your Vehicle Belts ....................................................19-20
Locking Clip ..............................................................................21-22
Rear-Facing Use ..............................................................................23
Rear-Facing Installation ..................................................................24
Vehicle Belt ........................................................................25-26
LATCH ................................................................................27-30
Forward-Facing Use ......................................................................31
Forward-Facing Installation ..........................................................32
Vehicle Belt ........................................................................33-34
LATCH ................................................................................35-37
Adjusting the Tether Strap ......................................................38-39
Belt-Positioning Booster Use ....................................................40
Removal of Harness ................................................................41-42
Belt-Positioning Booster Installation ....................................43-44
Reinstall Harness ......................................................................45-48
Removing Seat Pad for Cleaning ..........................................49-51
Troubleshooting ..............................................................................52
Warranty ..........................................................................................53
Replacement Parts Order Form ..........................................57-58
Remember, parents are a child’s first teachers and
examples. If you always buckle your seat belt, your child
will think it is the natural thing to do. Make it a firm rule
that the vehicle does not go until everyone is buckled
up. Make no exceptions.
No one can predict if use of a child restraint will
prevent injury or death in a particular crash. However,
combined with careful driving, proper use of a child
restraint can lower a child’s risk of injury or death in
most crashes.
Your child’s safety is worth the time it will take to read
and follow these instructions. After reading, if you still
have questions or have any problems with this child
restraint, please contact our Consumer Relations
Department at:
Dorel Juvenile Group, Inc.
Website:
www.djgusa.com
Fax:
1-800-207-8182
Mailing Address:
Dorel Juvenile Group, Inc.
P.O. Box 2609
Columbus, IN 47202-2609
Telephone:
1-800-544-1108
7 A.M. to 6 P.M. EST M-TH
7 A.M. to 4:30 P.M. EST FRI
On the back of the shell there is an expiration date for
use of this child restraint. Do not use this seat after
the expiration date.
1
4358-5356 US All in One
7/26/10
4:16 PM
Page 5
! WARNING
!
WARNING
Failure to follow these warnings can result in
the serious injury or death of your child. To
help you recognize those instructions which
are most critical for your child’s safety, we
use this symbol :
The vehicle or LATCH belt must stay
tight at the belt path.When you switch from
one mode to the next, review the sections of
this instruction manual that apply to that
mode. If you don’t, your child could be
seriously injured or killed.
According to accident statistics, children
are safer when properly restrained in the
rear seating positions than in the front
seating positions.
Never take your child out of the child
restraint or try to tend to your child’s needs
while the vehicle is moving. Never leave
child unattended.
Never place a child rear-facing in a
seating position with an active frontal
airbag.
This child restraint must always face the
rear of the vehicle and be in the fully
reclined position when the child weighs
between 5-35 lbs. (2.3-16 kg) and is less than
one year old.
Never place a child less than one year old
forward facing.
Check vehicle instructions for more
information about air bag/child restraint use.
Make sure the harness height is correct
for your child’s size.
The harness must be snug.
Do not lubricate buckles and fasteners.
2
Do not use a child restraint with damaged
or missing parts.
Do not use cut, frayed or damaged
harnesses.
Do not substitute parts or try to modify
the child restraint in any way.
Do not use a child restraint that has been
in a crash.You must get a new child
restraint.
Use the child restraint only on vehicle
seats that face forward. Do not use on seats
that face the sides or rear of the vehicle.
Check the vehicle or LATCH belt before
each use. Use only if the belt can be
tightened properly and securely.
This child restraint should be securely
belted in the vehicle even when not in use. In
a crash or sudden stop, an unsecured child
restraint could injure other occupants.
3
4358-5356 US All in One
!
7/26/10
4:16 PM
Page 7
WARNING
Do not use this child restraint if the
midpoint of your child’s head is above the
top of the child restraint’s headrest.
Dorel Juvenile Group does not recommend
the use of any child restraint accessories
except those provided by DJG.
Never allow any child to play with this
child restraint; it is not a toy.
Secure the top anchorage strap (tether)
provided with this child restraint as specified
in both the vehicle and child restraint
manufacturer's instructions.
Do not remove any of the warning labels
or other labels on the child restraint.
Placing your child in a hot child restraint
may result in burns.
Do not use this child restraint without the
seat pad.
Read instructions for other warnings.
General and Warm Weather Use
To help protect your vehicle seat’s upholstery from
damage, use a towel underneath and behind child restraint.
To avoid your child being seriously burned, take the
following precautions:
1. Park in the shade or where sun does not directly hit the
child restraint.
2. Cover the child restraint with a sheet or blanket when
not in use.
3. Check for hot seat and buckles before placing child in
child restraint.
Registration and Recall Information
Child restraints could be recalled for safety reasons.You
must register this restraint to be reached in a recall.
Send your name, address and the restraint’s model
number and manufacturing date to:
Dorel Juvenile Group, Inc.
PO Box 2609, Columbus, IN 47202-2609
Attn: Consumer Relations or
register online at www.djgusa.com/registration/carseat/us
or call 1-800-544-1108
For recall information, call the U.S. Government's
Vehicle Safety Hotline at 1-888-327-4236 (TTY: 1-800424-9153), or go to http://www.NHTSA.gov.
Aircraft Installation
4
This child restraint is certified for aircraft use only when
used with the internal harness. Do not use as a beltpositioning seat because aircraft seats do not have
shoulder belts. Use on forward-facing aircraft seats only
and in a position where the lap belt can be tightened
securely.This child restraint is installed in an aircraft seat
the same way it is installed in a vehicle.
Use the child restraint only with F.A.A. certified equipment.
Contact the airline prior to taking a child restraint on
board in order to comply with their specific regulations.
5
4358-5356 US All in One
7/26/10
4:16 PM
Page 9
Understanding Your Vehicle
Your vehicle’s features may be considerably different than
those pictured here. Consult your vehicle owner’s manual
to help identify your vehicle’s specific features.
A
B
D
C
E
A.Anchor Bracket
D.Air Bag
For Top Anchorage Strap
(Forward-facing only)
(Consult your vehicle
owner’s manual for all air
bag locations)
B. LATCH Anchors
E. Seat Bight
(In seat bight)
(Where seat cushions
meet)
C. Seat Buckles
6
7
4358-5356 US All in One
7/26/10
4:16 PM
Page 11
Child Restraint Parts
A
Front
Back
C
D
C
M
C
B
E
F
G
H
N
R
R
I
K
L
J
A. Harness/Headrest
Adjuster
B. Pillow
(on select models)
L. Base
G. Buckle Plate
M. Top Anchorage
(Tether) Strap &
Hook
I. Harness Release
Lever
(under flap)
D. Adjustable
Headrest
J. Recline Lever
E. Harness Covers
(on select models)
K. Harness
Adjustment Strap
8
Q
F. Chest Clip
H. Buckle
C. Shoulder Belt
Positioning Guide
O
P
L
(may be between
pad and shell)
R. Cup Holder
(on select models)
N. Locking Clip
(behind harness)
O. Splitter Plate
P. Instructions
Q. LATCH Belt
9
4358-5356 US All in One
7/26/10
4:16 PM
Page 13
Choosing Restraint and Position
Your child’s height, weight and age determine how your
child restraint should be placed in the vehicle and which
restraint should be used.
5-35 lbs (2.3-16 kg)
19-36 in. (48-91 cm)
Rear-Facing using
5-point harness
Child and child restraint face
the back of the vehicle and
are placed in the back seat.
Preparing Child Restraint to Fit
Your Child
You MUST make these adjustments with your child
before you install the child restraint in the vehicle.
Make sure LATCH belt
1
packaging is pulled free of
child restraint shell.
2
Loosen harness by pushing
down on the harness
release lever (under the
flap in front of the
restraint) while pulling out
on the harness straps just
above the buckle.
3
Press on chest clip release
button and pull apart.
4
Press red button on the
buckle to release the
buckle plates. Place
harness over sides of child
restraint.
5
Place the child’s bottom
and back flat against the
child restraint.This will
increase comfort and allow
the harness to properly
tighten.
22-50 lbs (10.1-22.6 kg)
34-45 in. (85.1-114.3 cm)
and Over 1 Year Old
Forward-Facing using
5-point harness
Child and child restraint face
the front of the vehicle and
are placed in the back seat.
40-80 lbs (18.1-36.3 kg)
43-52 in. (110.1-132.1 cm)
and Over 1 Year Old
Belt-Positioning Booster
using vehicle
lap/shoulder belt
combination
Child and child restraint face
the front of the vehicle and
are placed in the back seat.
5-point harness is removed.
10
11
continued on next page.
4358-5356 US All in One
7/26/10
4:16 PM
Page 15
Check Harness/Headrest Height
Rear-Facing Position:
6
Harness guide must be
Harness
even with or just below
Guide
the shoulders.
Accessories (on select models)
Infant Pillow (on select
models):
The pillow provides extra
comfort for your child.
If the harness guide is
above the child’s shoulders
with the headrest in the
lowest position, do not
use this child restraint.
Use an infant child
restraint instead.
To remove the pillow,
from the back of the
pillow, undo both fastening
strips that attach the
pillow to the harness
straps.
Forward-Facing Position: Harness guide must be
even with or just above the shoulders.
To replace the pillow,
thread the fastening strips
behind each harness strap.
Attach the fastening strips
to the pillow.
If the harness guide is below the child’s shoulders with
the headrest in the 4th highest position, the child
weighs at least 40 lbs. (18.1 kg) and is over 1 year old,
convert the seat to a belt-positioning booster.
Rotate headrest/harness
adjusting levers in. Move
headrest up or down to
adjust. Make sure headrest
is locked into place.
7
NOTE: The highest
position is for beltpositioning use only.
!
Cup Holder (on select
models):
Pull pad off corner. Hook
bottom of cup holder to
edge of shell. Rotate cup
holder up until tab on cup
holder snaps into hole on
shell. Replace pad.
WARNING:
Make sure metal bar
is locked into
position. Failure to
do this can result in
serious injury or
death.
12
13
4358-5356 US All in One
7/26/10
4:16 PM
Page 17
Securing Your Child in the Child
Restraint
1
Pull on harness adjustment
strap to tighten harness
snugly.
4
NOTE: A snug strap
should not allow any slack.
It lies in a relatively
straight line without
sagging. It does not press
on the child’s flesh or push
the child’s body into an
unnatural position.
Position harness straps
over the child’s shoulders.
Position the chest clip at
mid-chest (even with
armpits), away from the
child’s neck.
5
2
Push each buckle plate
into buckle until you hear
a “click”. Remember to
always pull up on harness
straps to make sure buckle
is locked tightly.
NOTE: Make sure that
the harness covers are
pulled out all the way and
positioned as shown.
3
Snap the chest clip
together.
!
WARNING:
Failure to fasten and tighten the harness
system correctly can result in serious injury
or death.
14
15
4358-5356 US All in One
7/26/10
4:16 PM
Page 19
Removing Your Child from the
Child Restraint
Loosen harness by pushing
down on the harness
release lever that is under
the flap while pulling out
on the harness.
1
Reclining the Child Restraint
This child restraint has 3
recline positions: upright,
semi-reclined (Forwardfacing only) and reclined.
Rear-Facing - Must be
fully reclined.
Forward-Facing - Semireclined or upright.
Belt-Positioning
Booster - Must be fullyupright.
1
To fully recline, pull out on
handle and push top of
child restraint back.
2
Press on release button
and pull apart.
2
For upright position, pull
out on handle and pull
child restraint up.
Press red button on
buckle to release the
buckle plates. Place
harness over sides of child
restraint. Remove child.
3
16
17
4358-5356 US All in One
7/26/10
4:16 PM
Page 21
Choosing LATCH or Vehicle Belts
Knowing Your Vehicle Belts
The LATCH System
Not all vehicle belts will work with this child restraint.
You must determine if your vehicles belts are compatible
with this child restraint. If you will use the LATCH
system, refer to the LATCH section.
ELR - Emergency Locking Retractor Belts
Definition:These belts only lock in a sudden stop or
crash.To see if you have this type of belt, pull on the lap
belt, let it return part way, then pull on it again. If it
moves freely, it is an ELR belt and the child restraint
could work loose during normal driving. Refer to your
vehicle owner’s manual.
Some ELR belts will convert to Automatic Locking
Retractor (ALR) belts if you pull the belt all the way out.
Refer to your vehicle owner’s manual.
ELR shoulder belts either require a locking clip or cannot
be used with any child restraint. Note: You may use an
ELR lap and shoulder belt when using this seat as beltpositioning booster; no locking clip is required.
ELR lap-only belts must be replaced with a manual belt;
contact your vehicle dealer. A locking clip will not
correct this problem.
Automatic/Passive vehicle seat belts
An automatic (passive) 2-point belt has no lap belt.You
must install a lap belt to secure a car seat.You may also
need to install an extra lap belt for an automatic 3-point
belt. Refer to the vehicle owner’s manual. A locking clip
will not correct this problem.
Vehicle belt too short
Contact your vehicle dealer for a seat belt extender.
Belts in center of the door or side panel (A) or
middle of the vehicle
A
B
seat cushion (B).
You must move the child
restraint to another seating
location.A locking clip will
not fix this problem. See
“Locking Clip” section.
Anchor bars
LATCH means Lower
Anchors and Tethers for
CHildren. Not all vehicles
manufactured before
September 2002 were
equipped with LATCH.
The LATCH system allows
a child restraint to be
secured in the vehicle
without using the vehicle
belt system and can ONLY
be used in vehicles that
have the anchor bars
installed.
Check your vehicle owner’s
manual to see which seating
positions may be equipped
with the LATCH system.
Vehicle Belts
If LATCH is not an option,
you will use your vehicle’s
belts. There are some
vehicle belts that will not
work with a child restraint
or will require special
attention. See next page
for specific instructions.
18
19
continued on next page.
4358-5356 US All in One
7/26/10
4:16 PM
Page 23
Manual Belts
1
Manual lap belts are
common in the center
rear seat and can allow
the child restraint to
loosen when it is tilted or
jarred. After tightening the
lap belt securely, tilt and
push the child restraint
forward and to both sides.
If no loosening occurs,
your child restraint should
be secure.
2
If loosening does occur, try
the following: If the buckle
plate slides on the belt,
turn the buckle plate over.
If the buckle slides, turn
the buckle. Refasten the
vehicle lap belt.The
release button should face
out after twisting so that
it is easy to reach in an
emergency.
Latch plate
Buckle
NOTE: The locking clip is located on the back of the seat.
You do not need a locking clip when using this seat as a
belt-positioning booster.
Remove the locking clip when the seat belt is not being
used with a child restraint. A locking clip will not fix all
types of seat belt problems.
Before you put your child restraint in the vehicle, buckle the
lap/shoulder belt. Pull on the lap belt portion. If it loosens or
slips, you must either use a locking clip to hold the seat belt
tight or move the child restraint to another seating location.
1
Thread both vehicle lap
and shoulder belts through
the slot (as shown) and
out other side. Buckle.
Pull up on shoulder belt
until all slack is out and lap
belt is tight.
2
Grasp both vehicle belts
together just behind the
buckle plate and unbuckle.
NOTE: If the buckle plate
ends up behind the child
restraint, grasp the belts to
the outside of the child
restraint, as close to the
buckle plate as possible.
3
Thread both portions of
the vehicle belt onto the
locking clip, as close to the
buckle plate as possible.
If the lap belt continues
to loosen, the child
restraint must be moved
to another location in the
vehicle. A locking clip will
not correct this problem;
see your vehicle owner’s
manual.
Twist vehicle seat belt and
latch plate (or buckle)
!
Locking Clip
WARNING
Failure to check and adjust the manual belt
as described above could result in serious
injury or death.
20
21
continued on next page.
4358-5356 US All in One
7/26/10
4:16 PM
Page 25
Position locking clip about
1 in. (2.5 cm) from vehicle
belt’s buckle plate.
5
Rebuckle belt. Lap belt
portion should now be
tight. If not, remove
locking clip and repeat all
steps.
Rear-Facing Use
Lap/Shoulder Belt
Lap Belt
Refer to the “Choosing
Restraint and Position”
section to determine if
your child should be in
the rear-facing position.
LATCH Belt
!
WARNING:
This child restraint must always face the
rear of the vehicle and be in the fully
reclined position when the child weighs
between 5-35 lbs. (2.3-16 kg) and is less
than one year old.
Never place a child rear-facing in a
seating position with an active
frontal airbag. This can result in
serious injury or death.
22
23
Rear-Facing Use: 5-35 lbs. (2.3-16 kg), 19-36” (48-91 cm)
4
4358-5356 US All in One
7/26/10
4:16 PM
Page 27
After deciding whether to use your Vehicle Belts or
LATCH, be sure to read the warnings below as they
pertain to both systems.
Rear-Facing Installation with
Vehicle Belt:
1
LEVEL
TO GROUND
When LATCH is not
available, fasten belt hooks
together behind the child
restraint as shown.
NOTE: Do not use the
top anchorage strap
(tether) in the rear-facing
position.The top
anchorage strap and hook
should be placed under
the child restraint.
!
Place child restraint rearfacing in the back seat.
With child restraint in
the most reclined
position, make sure level
lines on shoulder belt
positioning guide are level
with ground. Adjust child
restraint if needed.
NOTE: Tuck top
anchorage strap and
hook under the base.
2
Thread the vehicle lap or
lap/shoulder belt
combination through the
rear-facing belt slot.
3
Thread UNDER seat pad
between buckle strap and
rear slots and out
opposite side. Buckle
vehicle belt.
Do not place vehicle
belt over child’s legs.
WARNING:
A loose top anchorage (tether) strap can
result in serious injury or death.
A loose LATCH system can result in
serious injury or death.
24
25
continued on next page.
Rear-Facing Use: 5-35 lbs. (2.3-16 kg), 19-36” (48-91 cm)
Rear-Facing Installation
4358-5356 US All in One
7/26/10
4:16 PM
Page 29
Rear-Facing Installation with
LATCH: Install LATCH Belt
1
Do not use the LATCH
system along with the
adult lap or lap/shoulder
belt.
To thread LATCH belts:
Pull the seat pad off the
front corners of shell.
With weakest hand at belt
path, tilt and push the child
restraint forward and
back, and from side to
side. If the seat belts do
not loosen, your child
restraint should be secure.
NOTE: Some “play” from
front to back or about an
inch from side to side is
acceptable. If it moves
more, review “Knowing
Your Vehicle Belts” and
“The Locking Clip”
sections.
After checking for hot seat and buckles, secure child as
described in “Securing Your Child in the Child Restraint”
section.
5
!
WARNING
2
LATCH adjuster can be
on either side, but belt
should not be twisted.
Route entire LATCH
belt through the upper
slot in side of shell.
3
Reach under pad, pull
one LATCH hook
between rear harness
slot and buckle strap.
Using this child restraint in any vehicle seat
where the lap belt cannot be tightened
securely and properly or where it can be
loosened by pulling on it, can result in
serious injury or death.
26
27
continued on next page.
Rear-Facing Use: 5-35 lbs. (2.3-16 kg), 19-36” (48-91 cm)
Push down firmly on the
child restraint and pull up
on belt to tighten. For a
manual belt, refer to
“Knowing Your Vehicle
Belts” section. Pull up on
shoulder strap to remove
any slack.
4
4358-5356 US All in One
4:16 PM
Page 31
Push LATCH hook
through the rear-facing
belt path slot.
Rear-Facing Installation with
LATCH: Install in Vehicle
Place child restraint rearfacing in the back seat.
With child restraint in
the most reclined
position, make sure level
lines on shoulder belt
positioning guide are
level with ground. Adjust
child restraint if needed.
NOTE: Tuck top
anchorage strap and
hook under the base.
1
LEVEL
TO GROUND
Pull other end of LATCH
hook between buckle
strap and rear harness
slot.
5
2
Fasten one LATCH belt
hook to the anchor in
the vehicle seat located
in the vehicle seat bight.
Repeat for other side of
child restraint. See your
vehicle owner’s manual
for more information.
3
Push down firmly on the
child restraint and pull up
on the loop to tighten
belt.
Push LATCH hook
through the other rearfacing belt path slot.
6
Put seat pad back over
corners of shell.
7
Completed threading of
the LATCH system rearfacing is shown.
28
29
continued on next page.
Rear-Facing Use: 5-35 lbs. (2.3-16 kg), 19-36” (48-91 cm)
4
7/26/10
4358-5356 US All in One
7/26/10
4:16 PM
Page 33
NOTE: Some “play” from front to back or about an
inch from side to side is acceptable.
If you cannot get the child restraint to remain tight, do
not use the child restraint in this seating location with
this LATCH system.
After checking for hot seat
5
and buckles, place child in
child restraint. See
“Securing Your Child in the
Child Restraint” section.
To remove LATCH: Push
in on release button and pull
LATCH adjuster away from
child restraint to loosen.
Unhook LATCH hooks.
6
Forward-Facing Use
Lap Belt
Lap/Shoulder Belt
Refer to the “Choosing
Restraint and Position”
section to make sure your
child is at the proper
weight and height to face
forward.
LATCH Belt
!
WARNING:
LATCH hooks MUST be securely fastened.
Failure to do this can result in injury or
death.
Using this child restraint in any vehicle
seat where the lap or LATCH belts cannot
be tightened securely and properly or
where it can be loosened by pulling on it,
can result in serious injury or death.
For vehicles with an airbag, but without a
back seat, refer to your vehicle owner’s
manual.
30
31
!
WARNING
Forward-Facing Use: 22-50 lbs. (10.1-22.6 kg), 34-45” (85.1-114.3 cm), Over 1 year of age.
With weakest hand at belt
path, tilt and push the child
restraint forward and back,
and from side to side. If
the LATCH belts do not
loosen, your child restraint
should be secure.
4
4358-5356 US All in One
7/26/10
4:16 PM
Page 35
After deciding whether to use your Vehicle Belts or
LATCH, be sure to read the warning below as they
pertain to both systems.
Forward-Facing Installation with
Vehicle Belts:
1
Place child restraint flush
against the back of the
vehicle seat forwardfacing in the back seat.
The recline position is to
be used only to install
the child restraint flush
against the back of the
vehicle seat back, if
needed.
Thread the vehicle lap
belt or lap/shoulder belt
combination through the
belt path and out other
side. Buckle.
2
Place one knee in the
child restraint and push
down firmly while
pulling up on belt to
tighten. For a manual
belt, refer to “Knowing
Your Vehicle Belt”
section.
When LATCH is not being
used, fasten belt hooks
together behind the child
restraint as shown.
!
WARNING:
A loose LATCH system can result in
serious injury or death.
With knee still in child
restraint, attach hook to
anchor in vehicle. Push
down firmly and tighten
top anchorage strap.
3
To adjust top anchorage strap: See “Adjusting Top
Anchorage Strap” section.
NOTE: If your vehicle does not have an anchor
bracket, tuck the top anchorage strap’s hook under
the child restraint.
32
33
continued on next page.
Forward-Facing Use: 22-50 lbs. (10.1-22.6 kg), 34-45” (85.1-114.3 cm), Over 1 year of age.
Forward-Facing Installation
4358-5356 US All in One
7/26/10
4:16 PM
Page 37
!
Forward-Facing Installation with
LATCH Belt: Install LATCH Belts
NOTE: Do not use
LATCH system along
with the adult lap or
lap/shoulder belt.
1
Route LATCH belt
through upper slot in
side of shell.
Pull one LATCH hook
across the back and out
the other side.
2
The LATCH adjuster
can be on either side,
but the belt should not
be twisted.
WARNING
Using this child restraint in any vehicle seat
where the lap belt cannot be tightened
securely and properly or where it can be
loosened by pulling on it, can result in
serious injury or death.
After checking for hot seat
and buckles, place your
child in the child restraint
as described in the
“Securing Your Child in the
Child Restraint” section.
5
34
Place child restraint flush
against the back of the
vehicle seat forwardfacing in the back seat.
The recline position is to
be used only to install the
child restraint flush against
the back of the vehicle
seat back, if needed.
Fasten one LATCH belt
hook to the anchor in the
vehicle seat located in the
vehicle seat bight. Repeat
for other side of child
restraint. See your vehicle
owner’s manual for
locations and more
information.
3
4
35
continued on next page.
Forward-Facing Use: 22-50 lbs. (10.1-22.6 kg), 34-45” (85.1-114.3 cm), Over 1 year of age.
With weakest hand at belt
path, tilt and push the
child restraint forward
and back, and from side to
side. If the seat belts do
not loosen, your child
restraint should be
secure.
NOTE: Some “play” from
front to back or about an
inch from side to side is
acceptable. If it moves
more, review “Knowing
Your Vehicle Belts” and
“The Locking Clip”
sections.
4
4358-5356 US All in One
7/26/10
4:16 PM
Page 39
8
After checking for hot
seat and buckles, place
your child in the child
restraint as described in
the “Securing Your Child
in the Child Restraint”
section.
9
To remove LATCH:
Push in on release button
and pull LATCH adjuster
away from child restraint
to loosen. Unhook
LATCH hooks.
With knee still in child
restraint, attach hook to
anchor in vehicle. Push
down firmly and tighten
top anchorage strap.
6
To adjust top anchorage
strap: See “Adjusting Top Anchorage Strap” section.
With weakest hand at belt
path, tilt and push the
child restraint forward
and back, and from side to
side. If the LATCH belts
do not loosen, your child
restraint should be
secure.
NOTE: Some “play” from
front to back or about an
inch from side to side is
acceptable.
If the child restraint does not remain tight, do not use
the child restraint in this seating location with this
LATCH system.
7
!
WARNING
LATCH hooks MUST be securely fastened.
Failure to do this can result in serious injury
or death.
36
37
Forward-Facing Use: 22-50 lbs. (10.1-22.6 kg), 34-45” (85.1-114.3 cm), Over 1 year of age.
Place one knee in the child
restraint and push down
firmly while pulling up on
the loop to tighten belt.
5
4358-5356 US All in One
7/26/10
4:16 PM
Page 41
The top anchorage strap (tether) is used for the forwardfacing position only.
Most vehicles made after 9/1/99 already have the anchor
hardware for a top anchorage strap. Refer to your
owner’s manual or call your dealer.
Storage of Top Anchorage Strap:
Rear-Facing position: Place top anchorage
strap over the back of the child restraint with
the anchor hook secured under the base.
Belt-Positioning Booster position: Place
top anchorage strap behind the seat with the
anchor hook under the seat.
See pictures below and on next page to determine
which tether model you have. Follow applicable steps.
To Attach Top
Anchorage Strap:
Put knee in child restraint
and push down; attach
hook to anchor in vehicle.
A
Pull loose
end to
tighten
To Adjust Top
Anchorage Strap:
To tighten; pull on free
end of top anchorage
strap.
Lift up to
loosen
To loosen; lift up on top
anchorage lock and push
lock toward top
anchorage hook.
38
To Attach Top
Anchorage Strap: Put
knee in child restraint
and push down; attach
hook to anchor in
vehicle to estimate how
much adjustment you
need, then unhook.
B
To Adjust Top
Anchorage Strap:
Loosen top anchorage
strap into “loops” at
adjuster slide as shown.
Tighten
A
D
To tighten top anchorage
strap: Pull on free end
(A) of top anchorage
strap while holding hook
(B).
B
C
Loosen
To loosen top anchorage strap: Pull on lower top
anchorage strap (C) while holding adjusting slide (D)
with your other hand.
Pull on free end of top anchorage strap until the
“loops” are flush against the adjuster. Reattach hook to
anchor to check fit, repeat steps if needed.
!
WARNING
You must follow the threading diagram
exactly. Failure to follow these steps could
cause the strap to loosen in a crash, which
can result in serious injury or death.
39
continued on next page.
Forward-Facing Use: 22-50 lbs. (10.1-22.6 kg), 34-45” (85.1-114.3 cm), Over 1 year of age.
Adjusting the Top Anchorage
Strap
4358-5356 US All in One
7/26/10
4:16 PM
Page 43
Refer to the “Choosing
Restraint and Position”
section to make sure your
child is at the proper
weight and height to use
the belt-positioning
booster.
Removal of Harness
Harness must be removed for use as a
belt-positioning booster.
1
From the back of the
seat, unfasten harness
straps from splitter plate.
2
Store splitter plate by
pushing it through one
opening and out the
other.
3
Pull harness through the
slots and harness covers
from the front.
Lap/Shoulder Belt
Do not use LATCH
when using the beltpositioning booster.
You MUST fasten the
LATCH belt hooks
together behind seat.
When your child is over
40 lbs. (18.1 kg) or 43”
(110.1 cm) and over 1
year old, you must
remove the harness
system and use this seat
as a belt-positioning
booster.
!
Unthread harness from
the chest clip.
WARNING
Unthread harness from
the buckle plates.
A loose LATCH system can result in
serious injury or death.
Pull harness out of shell.
40
41
continued on next page.
Belt-Positioning Booster Use: 40-80 lbs. (18.1-36.3 kg), 43-52” (110.1-132.1 cm), Over 1 year of age.
Belt-Positioning Booster Use
4358-5356 US All in One
5
6
4:16 PM
Page 45
From the back of the child
restraint, pull the harness
covers out of the shell.
Belt-Positioning Booster
Installation
1
Place booster seat
against the back of the
vehicle seat.Tuck the top
anchorage hook under
the child restraint. Have
child sit in seat with his
back and bottom fully in
the seat.
2
Place lap belt across
child’s thighs. Lock buckle.
Fully recline the child
restaint. Reach under the
seat between base and
shell. Locate the buckle’s
metal retainer.
Rotate the metal retainer
and then insert the
retainer up through the
shell and pad.
3
7
From the front, pull buckle
free from shell and pad.
Lock buckle plates into
buckle for future use.
42
Secure the shoulder belt
through one of the
notches in the shoulder
belt positioning guide.
The belt should cross the
base of the child's neck
and lie across the chest
(not the face or neck).
Pull up on the shoulder
belt to tighten.
Check periodically to ensure that your child has not
moved out of position and loosened the shoulder belt.
continued on next page.
43
Belt-Positioning Booster Use: 40-80 lbs. (18.1-36.3 kg), 43-52” (110.1-132.1 cm), Over 1 year of age.
4
7/26/10
4358-5356 US All in One
!
7/26/10
4:16 PM
Page 47
WARNING
1
Fit the buckle strap down
through the slot in the
seat. Make sure buckle
faces out. From the
bottom of seat, pull
buckle's metal clip
completely through pad
and shell.
2
From the bottom of seat,
pull buckle's metal clip
completely through pad
and shell.
3
Pull up on buckle to
make sure buckle’s metal
plate is completely
through the pad and
shell.
!
WARNING
Failure to place buckle’s metal plate
completely through pad and shell can result
in serious injury or death to the child.
44
45
continued on next page.
Belt-Positioning Booster Use: 40-80 lbs. (18.1-36.3 kg), 43-52” (110.1-132.1 cm), Over 1 year of age.
For vehicles with an air bag, but without a
back seat, refer to your vehicle owner’s
manual.
Do Not Use only the lap
belt when using this seat as
a belt-positioning booster
without the internal
harness.
The shoulder belt must
always be adjusted snugly
across the child’s chest.
NEVER place the shoulder
belt under the child’s arms.
Use only the vehicle’s lap
and shoulder belt system
when restraining the child in this booster
seat.
Failure to follow these warnings can result
in serious injury or death to your child.
Reinstall Harness
4358-5356 US All in One
4
5
7/26/10
4:16 PM
Page 49
With the sewn end of the
harness strap facing the
buckle, thread the harness
down through the slot on
the left side of shell.
Pull harness across the
bottom of the seat and up
through the slot on the
right side. Make sure
the harness is not
twisted.
Take both ends of the
harness strap and make
them even in length.
Thread the harness straps
through each buckle
tongue from the bottom
up. Thread the chest clip.
7
DO NOT twist the
harness strap.
8
Thread harness strap into
the harness cover.
9
Push harness ends through
slot in headrest. Repeat
for other harness strap.
NOTE: Make sure the
harness adjustment strap
is between the harness
strap and shell as shown.
Harness adjustment
strap should not be
twisted.
6
From the back of the shell,
insert the harness covers
into the shell and head
rest cover. From the
front, pull the harness
covers completely through
the headrest.
46
DO NOT twist the
harness strap.
47
4358-5356 US All in One
7/26/10
4:16 PM
Page 51
From the back, pull
harness through the back.
Make sure the harness
goes OVER the metal
bar.
10
Removing Seat Pad for Cleaning
Remove harness as described in the “Belt-Positioning
Booster” section.
!
!
WARNING
Failure to place harness over the metal bar
can result in serious injury or death.
WARNING
Do not use this child restraint without the
seat pad. Failure to do this can result in
serious injury.
1
From back of shell, release
the elastic straps.
2
From the front, fully
recline the child restraint
and reach under the front
of the shell, between shell
and base, and release the
front elastic straps.
Fit loops on harness ends
onto the splitter plate.
11
NOTE: Make sure
harness is completely on
splitter plate and it does
not twist.
!
WARNING
Failure to reattach the harness system
correctly can result in serious injury or
death.
48
49
continued on next page.
4358-5356 US All in One
3
Lower Harness Guides
7/26/10
4:16 PM
Page 53
Remove harness guides in
bottom of seat.
From the back, use a
screwdriver to press in on
lip of harness guide and
pop guides through the
front. Pull cover off
headrest.
Hand wash with warm
sudsy water, rinse clean
and air dry. Do not use
bleach or other harsh
cleaners. Do not dry clean.
Spot clean harness straps.
Do not machine wash.
6
From the back of the seat,
locate the lower harness
guides that are between
the bottom of the seat and
base. Remove both lower
harness guides in bottom
of seat.
Push harness guide lip
toward outside of shell
with one hand while
pulling harness guide from
the front with the other.
4
5
Adjust backrest to lowest
position. Work pad off
shoulder belt positioning
guides and off of headrest.
Replace seat pad by
reversing order:
Put pad on headrest and
replace harness guides.
Make sure harness
guide’s tab goes over
metal bar.
Starting from bottom of
child restraint, slip pad on
shell; tuck in pad around
harness adjuster and over
upper belt guides. Make
sure pad is under headrest
and replace lower harness
guides. Rethread harness
(see belt-positioning
booster section).
Pull pad out from under
buckle cover and work it
off the shell.
Metal Bar
50
51
4358-5356 US All in One
7/26/10
4:16 PM
Page 55
Troubleshooting
Warranty
1. If your child restraint is not held securely
by the belt:
Press down firmly on the child restraint and remove all the
slack in the belt. Make sure the belt buckle is not up against
the child restraint where the belt cannot be tightened.
Review “Locking Clip” and “Adjusting the Top Anchorage
Strap” sections. If you cannot secure the child restraint
tightly, move it to another seating location.
2. If the child restraint buckle or harness
adjustment lever sticks or you cannot get the straps
tight enough around child:
DO NOT LUBRICATE. Check around buckle and harness
release lever for dropped food, sticky spilled drinks, dirt,
leaves, etc. Clean with warm water and/or remove object
with tweezers. If you cannot get the harness to adjust and
remain tight with the buckle securely locked, do not use the
child restraint.
3. If your harness twists or ropes:
Straighten the harness each time you put your child in the
seat to help prevent twisting. Lock the buckle and tighten
harness and it will be ready for next use.
4. If your infant sits too upright in the rear-facing
position:
If your vehicle seat slopes so
much that your infant is sitting
upright, you may place a rolled
towel under the front of the child
restraint so that the level line on
the shoulder belt positioning
guide is level (horizontal). Check
often to be sure padding is still in
place and the vehicle belt is tight.
Dorel Juvenile Group, Inc. (DJG) warrants this product to the
original retail purchaser as follows:
This product is warranted against defective materials or
workmanship for seven years from the date of original
purchase. An original receipt is required to validate
your warranty. DJG will, at its option, provide replacement
parts or replace this product. DJG reserves the right to
substitute if the part or model has been discontinued.
To make a claim under this warranty you may contact us at
www.djgusa.com, fax us at 1-800-207-8182 24 hours a day,
write to DJG, Consumer Relations Department, P. O. Box
2609, Columbus, IN 47202-2609, or call 1-800-544-1108 from
7:00 a.m. to 6:00 p.m. EST Monday through Thursday and from
7:00 a.m. to 4:30 p.m. on Friday. Proof of purchase is
required and shipping charges are the responsibility of
the consumer.
Warranty Limitations:
This warranty does not include damages which arise from
misuse or abuse of this product.
Limitation of Damages:
The warranty and remedies as set forth are exclusive and in
lieu of all others, oral or written, expressed or implied. In no
event will DJG or the dealer selling this product be liable to
you for any damages, including incidental or consequential
damages, arising out of the use or inability to use this product.
Limitation of warranties and other warranty terms
and state law rights:
Any implied warranties, including implied warranties of the
merchantability and fitness for a particular purpose, shall be
limited to the duration and terms of the express written
warranty. Some states do not allow limitations as to how long
an implied warranty lasts or the exclusion or limitation of
incidental or consequential damages, so the above limitations
may not apply to you. This warranty gives you specific legal
rights, and you may have other rights, which vary from state to
state. Neither DJG nor the dealer selling this product
authorized any person to create for it any other warranty,
obligation, or liability in connection with this product.
PLEASE COMPLETE AND MAIL THE PRE-ADDRESSED
OWNER REGISTRATION CARD WITHIN (30) DAYS OF
PURCHASE TO EXPEDITE WARRANTY CLAIMS AND TO
VERIFY THE ORIGINAL DATE OF PURCHASE.
53
LEVEL
TO GROUND
!
WARNING
Using padding that tilts the base of the child
restraint farther back than the level-toground line can result in serious injury or
death.
52
4358-5356 US All in One
7/26/10
54
4:16 PM
Page 57
55
4358-5356 US All in One
7/26/10
4:16 PM
Page 59
Replacement Parts Order Form
Complete the form below. Your model number with color
code and manufacturer date code MUST be included on the
form to ensure proper replacement parts. Your model number
with color code and the date code can be found on a sticker
on the side of child restraint. Payment in U.S. dollars must
accompany your order. Choose parts needed from the list on
next page.
Return the form with payment to:
Dorel Juvenile Group, Inc.
Consumer Relations Department
P.O. Box 2609
Columbus, IN 47202-2609
Fax orders to: 1-800-207-8182
Please make money orders payable to Dorel Juvenile Group,
Inc. Fill in the area below to charge to Visa or Mastercard. We
do not accept personal checks or Discover Card. All outside
of U.S. and Canada MUST use credit card.
Ship To (Please Print): ____________________________
Name: ________________________________________
Address: ______________________________________
City: ________________________________________
State/Province:
____________________Zip
________
Telephone: ____________________________________
Email Address: __________________________________
We MUST have this information to process your
order:
Model Number (5 digits & 3 letters): ______________
Manufacture Date (mm/dd/yyyy): ________________
56
57