1
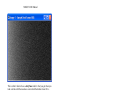
Model ST-8300M/C
CCD Camera
Operating Manual
Santa Barbara Instrument Group
147A Castilian Drive
Santa Barbara, CA 93117
Phone (805) 571-7244 • Fax (805) 571-1147
Email sbig @ sbig . com • Web www . sbig . com
Very Important:
Before you attach the ST-8300 to your computer for the first
time you MUST install the software as described Section 2.
Note: This equipment has been tested and found to comply with the limits
for a Class B digital device pursuant to Part 15 of the FCC Rules. These
limits are designed to provide reasonable protection against harmful
interference in a residential installation. This equipment generates,
uses, and can radiate radio frequency energy and if not installed and used in
accordance with the instructions, may cause harmful interference to radio
communications. However, there is no guarantee that interference will not
occur in a particular installation. If this equipment does cause harmful
interference to radio or television reception, which can be determined by
turning the equipment off and on, the user is encouraged to try to correct the
interference by one or more of the following measures:
• Reorient or relocate the receiving antenna.
• Increase the separation between the receiver and the equipment.
• Connect the equipment into an outlet on a circuit different from
that to which the receiver is connected.
• Consult the dealer or an experienced radio/TV technician for help.
• Shielded I/O cables must be used when operating this equipment.
• You are also warned, that any changes to this certified device will
void your legal right to operate it.
ST-8300 Operating Manual v. 1.4
August 2010
Table of Contents
1.
Introduction ..................................................................................................... 1
Getting Started.............................................................................................. 1
Overview and Connections........................................................................... 3
2.
Installing the Software..................................................................................... 4
Installing the Software on 32-bit Windows Systems .................................... 4
Installing the Software on 64-bit Windows Systems .................................... 7
Migrating Old Drivers from 32-bit to newer 64-bit Systems...................... 10
3.
Using the Camera Inside ............................................................................... 13
Running CCDOps....................................................................................... 13
Getting Help ............................................................................................... 13
Brightness and Contrast.............................................................................. 16
Establishing a Link ..................................................................................... 17
Camera Info................................................................................................ 18
Camera Setup ............................................................................................. 19
Grab Command .......................................................................................... 20
Focus Command......................................................................................... 21
4.
At the Telescope ............................................................................................. 24
Finding and Centering the Object............................................................... 25
Taking an Image......................................................................................... 26
Further Adventures..................................................................................... 26
5.
Accessories for your CCD Camera............................................................... 27
Color Filter Wheel...................................................................................... 27
Battery Adapter .......................................................................................... 27
Camera Lens Adapters................................................................................ 27
Electromechanical Relay Adapter Box....................................................... 27
6.
Glossary .......................................................................................................... 29
Appendix A – Connector and Cables ................................................................... 33
Power Jack.................................................................................................. 33
Telescope Jack............................................................................................ 33
Appendix B – Maintenance................................................................................... 34
Cleaning the Window and Filters ............................................................... 34
Replacing the Desiccant ............................................................................. 34
Appendix C – Camera Specifications................................................................... 36
Appendix D – ST-8300CM Color Camera Supplement...................................... 37
Page i
SBIG ST-8300 Manual
1.
Introduction
Congratulations and thank you for buying one of our ST-8300 cooled CCD
cameras. The ST-8300 has the following features:
•
•
•
•
•
•
•
•
•
•
Uses Kodak’s microlensed, blue enhanced KAF-8300 CCD with
3326 x 2504 pixels, 5.4 micron square pixels.
16-bit A/D converter with correlated double sampling running at
1.7 megahertz.
Temperature regulated Thermo-Electric (TE) cooling with 35C
delta for reduction in CCD dark current.
Single board, small, compact design with internal shutter allowing
exposures down to 0.1 seconds that makes taking dark frames a
trivial task.
USB 2 interface yielding up to 1.7 megapixels per second
digitization rates but full backward compatibility with USB 1.1
computers at 400 kilopixels per second.
Input power requirements of 10.0 – 14.5 Volts DC at 3 Amps
through the new locking style center-positive power jack.
Telescope interface with four optically isolated normally open
signals on the industry standard RJ-11 jack.
T-Thread based mechanical interface that supports a variety of
nosepieces and adapters.
Optional external filter wheels with choice of filters.
Powerful yet intuitive CCDOps software for image acquisition and
processing.
Getting Started
In addition to this truly fine Operating Manual, the ST-8300 package
includes the following items:
ST-8300 Camera – The camera body is approximately 4 x 5 x 2 inches
with a T-Thread adapter on the front cover.
2 Inch T-Thread Nosepiece – This screws into the front of the camera for
telescope work and includes a soft rubber cap for keeping out the
dust when not in use. Optional Visual Back adapters are available
from SBIG. In addition a screw-in T-to-C adapter is available for
use with C-Mount camera lenses or C-Mount adapters.
Power Supply – The camera come with a 12V/3 Amp DC power supply
Outside the US the camera may be supplied with a Battery Clip
adapter.
1
SBIG ST-8300 Manual
Extremely Important! In the past SBIG has shipped products like
the STV, ST-5C and ST-237/A that used a 12-Volt, CenterNegative power supply. Starting with the ST-402 series of
cameras we switched to Center-Positive 12-Volt power supplies.
How do you know the difference?
All 12-Volt, Center-Positive power jacks and receptacles are
locking with a threaded collar. Don’t ever try to mate an
unthreaded power supply to a threaded camera or vice-versa.
USB Cable – Included is a 15-foot, USB 2 certified, A-to-B type, USB
cable. USB has a limit of 15-feet but the range can be extended
with active boosters. Relatively low-cost (~$30) 15-foot boosters
that can be strung together are available from such sources such as
<www.usbgear.com>. Long haul boosters (more expensive) are
available from <www.icron.com>. Also note that putting a hub at
15 feet will allow you to go another 15 feet.
Tracking Cable – This cable looks like a simple “RJ-11 telephone cable”
but in fact is a “6-pin reversed RJ-11 telephone cable”. Telescopes
require 6-pin autoguider cables and reversed means that unlike
ordinary phone cables, this one flips the order of the wires. You
can tell a tracking cable from an ordinary cable by noting that with
tracking cables the tines that lock the RJ-11 jack into the receptacle
are both on the same flat side of the cable or when the ends are put
side by side the colored wires inside are in opposite order on the
two connectors.
Rack Handles and Attachment Screws – Rack handles are provided to
give a more steady grip when wearing gloves or for attaching a
safety strap to prevent damage to the camera if it should fall from
the scope. Not everyone wants or needs these handles, however,
so installation is left to the owner's discretion. To install the
handles, remove the back cover and pass the 4 socket-head screws
through the cover into the base of the handles and tighten with the
9/16 in hex wrench provided.
Software – We include several CD-ROMs with the ST-8300 but the most
important one is labeled “SBIG Software and Catalog”. This
disc contains the drivers and CCDOps software you’ll need to use
the camera.
Very Important:
Before you attach the ST-8300 to your computer for the first
time you MUST install the software as described below
2
SBIG ST-8300 Manual
Overview and Connections
GUIDE PORT: This is where you connect the supplied 6 conductor
modular phone style cable to the Autoguider (sometimes labeled "CCD")
input port on your mount when using the ST-8300 as an autoguider, or
when using Track & Accumulate with mount corrections (see the CCDOPS
Manual for details of this mode
POWER: Plug in the power supply here, or attach any 12VDC power
source (10 - 14V) that provides 3 amps minimum. The power supply that
comes with the camera will operate from 100 - 240VAC and provides 3.5A
at 12VDC. (Note that while an ST-402 power supply will fit, it does not
provide the current required by the ST-8300 to operate properly)
USB: Attach the 15 foot USB cable to any USB port on your computer
AFTER you have installed the drivers and software for the ST-8300.
I2C: This special port is for connection of an SBIG filter wheel. The filter
wheel will get its power and commands through this port. No other cables
are needed for the filter wheel to function. (Note: This is NOT an RS-232
port. Connecting serial devices or your PC to this port may damage them or
the camera.)
3
SBIG ST-8300 Manual
2.
Installing the Software
Installing the Software on 32-bit Windows Systems
This section describes how to install drivers on a 32-bit Windows system.
Note: If you are installing the camera drivers on a 64-bit Windows
System, skip this section and follow the instructions in the next section.
Don’t plug the camera into the computer until instructed to do so below and
please follow the instructions carefully.
1.
Disable Driver Signing – Windows XP adds an extra level of security
to installing drivers that will complicate our installation. To disable it
open the Control Panel in the Start Menu, select System and then select
the Hardware tab. Click the Driver Signing button and in the dialog
that appears select Ignore then click OK. Click OK one more time to
close the Control Panel.
2.
Insert the SBIG Catalog and Software CD-ROM in your computer
and on most systems the installer program will automatically start. If it
doesn’t, explore the CD-ROM drive and double-click on the
autorun.exe icon. Then click on the Setup a New Camera button.
3.
Install CCDOps – Click on the Install CCDOps button to install it on
your computer, and then follow the on-screen instructions. CCDOps is
our powerful yet simple-to-use image acquisition and image processing
software and we’ll use it extensively throughout this manual.
4.
Install the Driver Checker – Click on the Install Driver Checker
button to install it on your computer and then follow the on-screen
instructions. The Driver Checker is a utility program that installs and
maintains the drivers that are required for operating the ST-8300 under
the Windows Operating System. At the end of the install when you are
given the option to launch the Driver Checker. Check that option.
5.
When the Driver Checker starts it will ask you if you have an Internet
Connection on this machine. If you do then answer Yes otherwise
answer No. The Driver Checker will install the camera drivers and at
this point all your drivers should all be current:
4
SBIG ST-8300 Manual
6.
We’ve finished installing the drivers but now we need to bind them to
the ST-8300. Quit the Driver Checker by clicking the X in the
upper-right hand corner. If you’re running Windows XP then continue
with step 7 below. Users of older versions of Windows should now
look for instructions particular to their version of Windows in the
“Installing USB Drivers” Application Note that can be found on the
CD-ROM or our web site.
7.
Now’s the moment you’ve been waiting for. We’re going to plug the
camera into the computer, but not so fast!
First plug the camera into the power source and note that the Fan
comes on but the Red LED does not. The ST-8300 actually has its
internal firmware downloaded to it by the PC at startup. If the LED is
off the camera has not been booted. Please remember that.
Now plug the camera into the USB port on the computer with the
supplied USB cable. Remember which port you’re using because
you’ll want to use the same port again next time or you’ll have to go
through this process of binding the drivers all over again. Windows
will crunch for a while and then present you with the Found New
Hardware Wizard (Wizard) dialog.
8.
If you’re asked if it should connect to Windows Update to search for
software click “No, not this time”, then click Next.
9.
Now the Wizard will ask you if you want to install the software
automatically. Select to do so then click Next.
10. Windows will grind for a while copying the SBIG ST-402 Loader
driver then show you the Completing the Found New Hardware
Wizard page (The ST-8300 and ST402 use the same drivers, so this
message is OK). Click Finish. At
this point the Red LED on the back of the camera should be on, and if
you had been watching it you would have seen it blink several times
while the PC was booting the camera.
5
SBIG ST-8300 Manual
11. After booting the camera Windows will bring up another copy of the
Wizard. The ST-8300 actually uses two drivers. One to boot the
camera and one to talk to it after it’s booted. We now need to walk
Windows through installing the second driver.
12. Repeat steps 8 and 9, again telling the FNHW to not check for updates
and to install automatically. At this point windows will show you the
Select the best match page:
13. Select the oem file not the sbig file (the second item above) by clicking
on it then click the Next button.
14. Windows will grind one last time copying the SBIG USB Camera
driver then show you the Completing the Found New Hardware
Wizard page.
Click the Finish button and pat your
self on the back. You’re done!
If you ever doubt that the camera is actually connected you can open the
Device Manager from the Hardware tab of the System control panel and
expand the Universal Serial Bus controllers section. You should see a
SBIG USB Camera listed there:
While you’ve got the System Control Panel open, if you want to restore the
Windows Driver Signing security check, click the Hardware tab, click the
Driver Signing button and select:
If Windows can not automatically find the drivers , tell it to Install from a
Specific Location and then browse to the folder:
C:\Program Files\SBIG\Driver Checker\SBIG Drivers
6
SBIG ST-8300 Manual
Installing the Software on 64-bit Windows Systems
This section tells you how to do a fresh install of 64-bit drivers for SBIG
Cameras on your 64-bit Versions of Windows XP, Vista or Windows 7.
1.
Make sure no SBIG cameras are attached to your system.
2.
Make sure your account has Administrator privileges then run the
SetupBitDriverChecker64.exe program to install the 64 Bit compatible
SBIG Driver Checker application on your system.
3.
On Vista based systems, find the icon for the SBIG Driver Checker by
opening the Start menu and typing SBIGDriver in the search box. The
icon should appear above the search box. Right click the icon and
select Properties then click the Compatibility tab. Click the “Run this
program as an administrator” as shown below and then hit the OK
button.
Note: Under Vista there are 2 levels of administrator privileges: one at
the account level and one at the program level. To properly install the
drivers the Driver Checker application requires both.
7
SBIG ST-8300 Manual
4.
Run the Driver Checker application and it will ask you about any ST
Series Cameras (ST-7/8/9/10/2K) you may plan on using. Prior to
2006 the ST Series cameras had only an internal Tracking CCD. We
call this the Classic Model. In 2006 we added the Remote Guide Head
capability to the ST Series and we call it the Pro Model. The Driver
Checker needs to know whether your ST Series camera is a Classic
Model or a Pro model.
5.
After answering the Classic/Pro question above you'll see the following
dialog. The list of drivers shown may be different on your system but
it will generally indicate that no Installed Drivers were found and that
they all need to be updated.
6.
Click the Update button and the Driver Checker will start to install the
SBIG drivers into your system.
7.
Once the drivers have finished installing, the Driver Checker will show
the following. At this point you can quit the Driver Checker.
8
SBIG ST-8300 Manual
8. Now it's time to try out the new drivers. With your camera
disconnected from the PC, power it up and then plug it into the PC with
the USB Cable. In the lower-right hand corner of the screen you see
something like:
Followed by:
9
SBIG ST-8300 Manual
9.
If for some reason the Add New Hardware Wizard asks you to
manually locate the drivers then navigate to the proper directory under
the Driver Checker directory in the Program Files or Program Files
(X86) directory. There are 4 possibilities and you must choose the
correct set of drivers. There are directories for 32 Bit and 64 Bit
drivers, based upon you version of Windows and under them
directories for Classic and Pro model cameras.
10. At this point the fan in the camera should come on and the camera
should show up in the Device Manager as shown below:
11. Run CCDOps and verify that you can establish a link to the camera.
Note: If you previously installed SBIG 32-bit drivers using the old 32bit Driver Checker program and now want to install 64-bit drivers
over the old installation, follow the procedure outlined below:
Migrating Old Drivers from 32-bit to newer 64-bit Systems
This section describes how to migrate drivers from the old 32-bit only
DriverChecker to the new 32/64-Bit Compatible DriverChecker64.
1.
Uninstall the old DriverChecker software.
a. Run the Add or Remove Programs Control Panel in the
Start menu.
b. Click on the SBIG Driver Checker entry and then click
on the Change/Remove button.
2.
Manually delete the old drivers files from the disk.
a. Delete the following files from the
C:\Windows\System32\Drivers directory:
sbigfldr.sys, sbiguldr.sys, sbiglldr.sys, sbigusbe.sys,
sbigusbi.sys
Some of these may not exist on your system but delete the
ones that do.
10
SBIG ST-8300 Manual
3.
Manually delete the old drivers files from the Device Manager.
a. In the Start menu, point to All Programs, point to
Accessories, and then click Command Prompt.
b. At the command prompt, type the following command ,
and then press ENTER:
set devmgr_show_nonpresent_devices=1
c. Type the following command a command prompt, and
then press ENTER:
start devmgmt.msc
d. In the View menu select the Show hidden devices
command.
e. Expand the Universal Serial Bus controllers section by
click on the adjacent “+”
f.
g.
For each of the items listed below, right click on the item
then select Uninstall:
”SBIG USB Camera", ”SBIG ST-402 Camera", “SBIG
USB Loader", “SBIG ST-L Loader", “SBIG ST-402
Loader"
Quit the Device Manager.
4.
Install the new DriverChecker64 software.
a. Use the installer that came with your camera or download
it from our web site:
<www.sbig com>
5.
Run the DriverChecker64 software.
a. From the Start menu select the DriverChecker64 item in
the SBIG folder.
b. Answer the question about your ST cameras.
6.
Click the Update button to copy the new drivers to your system.
Link your old cameras to the new drivers.
a. For each type of SBIG Camera you own (ST, STL, ST402), power up the camera one at a time and then attach it
to the PC with the USB cable.
b. When the Add New Hardware Wizard comes up select
“No, not this time” when it asks if it can connect to
Windows Update then click Next.
c. Select “Install the software automatically” and click
Next.
d. If Windows asks you for the best match select any of the
entries with Version 2.41.0.0 then click Next.
11
SBIG ST-8300 Manual
e.
f.
Click Finish and then you’ll have to go through steps b
through d one more time for this camera.
Repeats steps a through f for each SBIG camera.
When you’re all done your camera should show up in the Device Manager
in the SBIG USB Devices section as shown below:
Updating CCDOps and Drivers
We are constantly adding new features and fixing software bugs in our
software, which is available for free download from our web site. You
should periodically visit our website to check for updated versions of the
CCDOps software and you should also periodically run the Driver Checker
to download and update your drivers. To find the latest software and
drivers, go to:
http://www.sbig.com -> Software Downloads
12
SBIG ST-8300 Manual
3.
Using the Camera Inside
When you first receive the ST-8300 it’s wise to get acquainted with its
operation inside the house where it’s warm and not to try to fight the
telescope operation in the dark. We’ve included a brief tutorial below to get
you acquainted with the ST-8300 and the CCDOps software.
Running CCDOps
Once installed, it’s easy to run CCDOps from the Windows Start menu.
Click the Start Menu, then find the SBIG Folder, which under Windows
XP is under the All Programs section. Finally click the CCDOps Icon to
start the program. You’ll be presented with the startup About Dialog that
shows the SBIG logo and the version of CCDOps. To dispense with it click
anywhere in the dialog other than the two blue fields or simply wait and the
dialog will close itself.
Getting Help
CCDOps includes an extensive help file that can be accessed through the
Help Topics item in the Help menu. In addition many of the
dialogs have an embedded Help button that will take you to the
Help Topic for that specific command. Just remember, help is
always just a click away.
Opening and Inspecting Dark Frames
We’ve included some sample images on the SBIG Software and Catalog
CD-ROM to get you acquainted with what you should expect from your
camera.
First, let’s look at what is called a dark frame. In the File menu use
the Open command and then navigate to the CD-ROM’s Images directory.
Double-click on the ST-8300 Tutorial folder to show its contents. Finally
double-click on the Image 1 – Sample Dark Frame icon to open the image.
CCDOps will present you with a dialog listing all the parameters
associated with the image such as the Exposure Time, the Date and Time
the image was acquired, etc. Note that the Exposure Time was 1.0 second.
Spend some time inspecting the data then click in the dialog to close it.
Data like this is always attached to saved images and you can show it
using the Parameters command in the Display menu. After the Image
Parameters dialog has gone you’ll see the image displayed in its own
window and the Contrast dialog will appear. The image is shown below:
13
SBIG ST-8300 Manual
This is what’s referred to as a dark frame and it’s what you get when you
take a picture with the nosepiece covered and the shutter closed. It’s a
picture in the dark. Although there’s not much interesting to look at in this
image there are some very important features that you need to understand.
The first thing you’ll see is that while the image looks mostly like salt
and pepper there are hundreds of bright specks. These are called hot pixels.
They are present in every CCD image to one extent or another, even in
images from our most expensive cameras. If your digital snappy camera
didn’t automatically remove them for you, they would be seen in those
images too.
What causes hot pixels? It’s an attribute of CCD sensors called dark
current. A pixel in an ideal CCD, in the absence of light, would maintain a
steady value. When exposed to light the pixel’s value would increase in
response to the light but then as soon as the light went away the pixel would
maintain its value again.
In the real world CCD pixels suffer from the affects of dark current
whereby the pixel’s value slowly increases (brightens) over time. All the
pixels in the image shown above have some component of their signal due
to the build up of dark current.
Dark current builds up over time in a linear fashion but cooling the
CCD can reduced the rate at which it accumulates. For example, cooling
the CCD by 25°C reduces the dark current 16-fold. That’s why
Astronomical CCD cameras are cooled – to reduce the dark current when
imaging very faint objects.
14
SBIG ST-8300 Manual
Hot pixels are simply the pixels where the dark current is higher than
the average and thus they show up as white specs against the salt and
pepper background. Again, this is completely normal for CCD images.
The second effect you’ll notice is a brightening on the left of the image,
as if something bright was just outside the field of view. This is called the
readout glow and is caused by the electronics in the CCD, in particular by a
very small but ever present glow emanating from in the on-chip amplifier
that conditions the weak signals in the CCD so that they may be digitized.
The readout (or digitization) of images from CCDs is a sequential
process whereby every pixel is digitized one-after-another until the whole
image has been digitized. The readout starts at pixel (1,1) in the top-left
corner and proceeds to pixel (3326, 2504) in the lower-right hand corner.
As each pixel in a row is readout the pixels to the right of it within the same
row are shifted to the left one position in preparation for the next pixel
readout. The next pixel is then readout and the process repeated until every
pixel in the first row has been digitized.
At this point the whole CCD is shifted up one row and digitization
starts with the left-most pixel of the second row. The readout glow on the
left of the images is a buildup of light from a glow from the preamplifier
structures in the upper-left hand corner of the CCD while rows are queuing
up for readout.
The final effect you’ll notice is the salt-and-pepper look of the
background. What you’re seeing here is the ultimate noise floor of the
CCD whereby adjacent pixels have slightly different values due to noise in
the CCD and readout electronics. The noise in dark frames that have a zero
exposure time is referred to as the read noise of the camera.
Fortunately for us there are very simple image processing techniques
we can use to eliminate the effects of dark current and readout glow.
Let’s open another image. Close the first image by clicking the X in
the upper-right corner then use the Open command in the File menu again
but, this time double-click on Image 2. Note in the Image Parameters
dialog that this image had an Exposure Time of 10 seconds. Click in the
dialog to close it.
Now this image has a whole lot more hot pixels! That’s because this
exposure was 10 times as long and the pixels built up 10 times the dark
current. It’s hard to even see the background through all the hot pixels.
About this time you’re probably asking yourself “How can I ever take
deep sky images with all these hot pixels?” The answer is simple. Because
the build up of dark current at a given CCD temperature is a repeatable
effect you can remove the effects of dark current by taking two images, one
with the shutter open (light frame) and another of equal exposure with the
shutter closed (dark frame). You then subtract the dark frame from the
light frame, and because the hot pixels and the readout glow repeat from
one image to another they are removed by the subtraction.
Let’s see how this works. Close Image 2 and Open Image 3, which is
a 10-second light frame where you can get a hint of the object but the hot
15
SBIG ST-8300 Manual
pixels are definitely obscuring it. Now use the Dark Subtract command in
the Utility menu. This brings up the Open File dialog where CCDOps
wants you to select which image to subtract. Double-click on Image 2, the
10-second dark frame. The displayed image turns completely black! What
did we do? Did we destroy the image by dark subtracting? No we didn’t
but it’s time to learn something else regarding CCD images.
Brightness and Contrast
Images from the ST-8300 are 16-bit images meaning any pixel can have
values from 0 to 65,535 ADU where ADU is short for A/D Converter Units.
Said another way this means there are 65,536 possible brightness or gray
scale values that each pixel can have. In CCD lingo this is referred to as the
dynamic range. But computer monitors and our eyes can typically only
distinguish a hundred or so different gray scale values. How do we
accommodate the large dynamic range of CCD images with our computer?
The answer is through Brightness and Contrast adjustments of the
displayed image.
Getting back to our dark subtracted image and why it’s completely
black. Find the Contrast dialog shown
to the right and then click the Auto
checkbox. Magically our object
appears, and as promised, the hot pixels
and the readout glow are gone, replaced
by the object and the salt-and-pepper
noise. What did we do?
By clicking the Auto checkbox we
told CCDOps to adjust the image
display to match the actual image’s
pixel values. Auto Contrast is a very
handy tool to have in your bag of tricks.
Just for fun click the Smooth checkbox in the Contrast dialog. The
noise in the image is greatly reduced. The Smooth option is handy when
for reducing the noise in underexposed images like Image 3.
Let’s explore the Contrast dialog further. Close the dark subtracted
Image 3 and when CCDOps asks you if you want to save the changes
you’ve made click No. Use the Open command again to open Image 4,
which is just like Image 3, but with a proper exposure.
The first thing to notice is that in the Contrast dialog the Back is set to
8,000 and the Range is set to 20,000. What does that mean? In short it
means that pixel values from 8,000 (Back) to 8,000+20,000 (Back +
Range) have been displayed using the monitor’s available gray scale.
Pixels with values 8,000 ADU or below are completely black. Pixels with
values 8,000+20,000=28,000 ADU or above are completely white. Finally,
pixels with values between 8,000 and 28,000 are shades of gray.
Click the small up and down buttons adjacent to the Back setting
several times and you’ll see the overall image brightness increase
16
SBIG ST-8300 Manual
and decrease. Click the ones adjacent to the Range setting and you’ll see
the image contrast increase and decrease. Here’s a summary of how this
works:
Increasing the Back decreases the image brightness and vice-versa.
Increasing the Range decreases the image contrast and vice-versa.
Set the Back to 8,000 and the Range to 20,000 by typing in the fields
(without the comma) and then hit the Apply button to get us back to where
we started. When you manually enter values in the Back and Range you
must hit Apply to see the effect.
Let’s learn a little more about the controls in the Contrast dialog. Click
the Invert checkbox and notice that the image now looks like a negative.
For images of faint objects, viewing the image as a negative by clicking
Invert can reveal faint structure.
Unclick Invert and then click Sharpen on and off several times while
looking at the fine detail in the image. With the Sharpen checked it’s
almost as if the focus improves. That’s the effect of Sharpen. It works
great on well-exposed images but tends to increase the noise in faint areas.
The last thing to try in the Contrast dialog is the Mag popup. It’s set to
1:1 but selecting 2:1 or 4:1 zooms in on the image, enlarging the image
display. Selecting 1:2 or 1:4 zooms out on the image. Try the 1:2 and 2:1
settings. You may wonder if all these changes to the Contrast dialog are
destructive to the image data. They are not.
Changes to the settings in the Contrast dialog only affect the way the image
is displayed. They do not modify the actual pixel values.
In Summary
• Clicking Auto is a good place to start with most images.
• Back controls image brightness and Range controls contrast.
• Clicking Invert can help reveal faint detail in images.
• Clicking Smooth can reduce the noise in underexposed images.
• Clicking Sharpen reveals additional detail in well-exposed images.
Establishing a Link
It’s time to actually connect up to your camera and take some images. If
you haven’t installed the drivers already go back to Section 2 and do so
now.
If you’ve taken a break from the tutorial and the camera isn’t powered
up and attached to the computer do so now by plugging in the power source
and then connecting the camera to the computer. At this point the Fan and
LED on the back of the camera should be on.
17
SBIG ST-8300 Manual
Use the Graphics/Comm Setup command in the Misc menu to make
sure USB is selected for the Interface. Click OK to set/confirm that and
then use the Establish COM Link command in the Camera menu.
CCDOps will try to connect to your camera, which can take several
seconds to complete. If successful you’ll hear the shutter emit a series of
clicking sounds as it finds home and you’ll see updated information in the
Link Status fields show in the lower-right corner of the CCDOps window
as shown here:
This shows the link has been established to your camera. It says ST-402 in
the status bar because the ST-402 uses the same drivers as the ST-8300.
However, if you click on Camera Info (below) the ST-8300 will be
correctly identified. This box also indicates that the Temperature of the
CCD is 18.48°C and that the TE cooling is disabled (0%). The clicking is
not a death rattle – it is simply the shutter homing against a stop.
Camera Info
After establishing a link to the ST-8300 use the Information command in
the Camera menu and you’ll see a dialog box similar to the one below:
The Camera Information command shows you the capabilities of your
camera. There are a few key items here that you should be aware of should
you ever need technical support:
Firmware Version/Driver Info – Over time we revise the camera firmware
and drivers to add new capabilities and fix software bugs. The ST8300 actually has its firmware downloaded to it every time it
connects to the PC after a power-up sequence, which makes it very
18
SBIG ST-8300 Manual
easy for us to update the ST-8300 in the field. To make sure you
have the latest firmware periodically run the Driver Checker,
which checks our servers for later drivers and updates your system
accordingly.
Serial Number – If you ever need to know this, here it is. It’s on the label
on the back of the camera as well.
Readout Mode Table – This shows the various readout modes the ST-8300
supports. The High-resolution mode offers the full 3326 x 2504
resolution with 5.4 micron square pixels. The ST-8300 also
supports binning whereby groups of pixels are combined to form a
single larger pixel. This reduces the resolution but increases the
sensitivity as larger pixels capture more light. The Medium and
Low-resolution modes utilize 2x2 and 3x3 binning as you can see
by the Image Height/Width and Pixel Size entries.
Finally, review the information presented, then close the dialog by clicking
in it.
Camera Setup
Use the Setup command in the Camera menu to see the ST-8300 Camera
Setup dialog shown below.
The key items in this dialog are described individually below.
Temperature Regulation – This allows you to turn the TE cooling on and
off. Typically at the start of an imaging session you’ll turn the
cooling on and then back off at the end of the night. For now let’s
just leave it off.
19
SBIG ST-8300 Manual
Setpoint – When the Temperature Regulation is on, set this to the absolute
temperature in degrees C to which the CCD should be cooled.
We know that cooling reduces dark current but there is a limit as to
how much the CCD can be cooled by the TE cooler.
We recommend choosing a temperature that is 30 to 35 degrees
below the ambient temperature. Choosing a lower temperature
won’t hurt the camera but you’ll notice in the Link Status field
(bottom of screen) that the CCD never attains the temperature and
the TE stays at 100%. It can take several minutes for the
temperature to settle in, but if you see the TE stuck at 100% simply
increase the Setpoint Temperature so it can regulate.
Resolution mode – This popup controls the readout mode discussed in the
Camera Information section above. You can select the High,
Medium or Low resolutions modes directly but we recommend
you start with the Auto resolution mode. In Auto mode the camera
uses the high-resolution mode everywhere except in the Full
Frame Focus mode (discussed below) where it uses the lowresolution mode to speed up the image throughput.
Reuse dark frames – This is a handy feature and you should set it to Yes.
What that means is that when you’re taking images where you
want to subtract dark frames the software will reuse a previously
captured dark frame if it’s the same exposure time and at the same
CCD temperature.
You can read about the other items in the Help but for now just leave them
set the way they are. Click OK to register your changes.
Grab Command
Let’s take a dark frame with your new camera. If you haven’t done so
already, screw in the nosepiece and put the rubber cap on it. While the
shutter was designed to block light from the telescope for dark frames, it
can’t block flooding room light from leaking around the edges of the shutter
blade. That’s why you should cover it under bright light illumination.
Now, use the Grab command in the Camera menu and set the dialog as
shown below:
20
SBIG ST-8300 Manual
Here we’re asking for a 1.0-second dark frame of the full CCD. Click the
OK button and in a few seconds you’ll see an image that looks a lot like the
Image 1 from the tutorial. Hot pixels, readout glow and salt-and-pepper
noise, they’re all there. Congratulations: You’ve just taken your first dark
frame! That wasn’t so hard was it?
Let’s experiment with the settings in the Grab dialog. Try changing the
Exposure Time to 10 seconds and grabbing another image but this time
watch the LED on the back of the camera. It blinks while the camera is
exposing the image. That’s a handy thing to remember when you’re in the
observatory. Don’t bump the telescope when the LED is blinking.
Anyway, the new image should look just like Image 2. Try setting the
Exposure Time back to 1.0 and the Dark frame to Also. What happens
here is the camera takes a dark frame first, and then takes a light frame,
subtracting the dark frame from it. The result should be uniform noise
without hot pixels and without readout glow.
Had we had the camera on the telescope we would have seen the object
but because we had the nosepiece covered we took a dark subtracted image
of the dark. If you take enough of these, and stare at them long enough
you’ll see all kinds of patterns in the random noise, including even pictures
of Elvis!
You can read about the other items in the Grab dialog by clicking the
Help button, but in general the Grab command is used to take a single
image and optionally do an automatic dark subtraction.
Note: Dark subtracted images have an offset of 100 ADU added to them to
ensure values near zero are not clipped.
Focus Command
Using the Grab command to focus your telescope would drive you crazy,
taking a single image at a time, tweaking the telescope etc. Instead we use
the Focus command, which is like Grab but it takes image after image
21
SBIG ST-8300 Manual
automatically. Use the Focus command in the Camera menu and set it up
in the Focus Setup dialog as shown below:
Click OK and the camera will go into Focus mode. You’ll see image after
image appear in a single window with a new image about every second.
The images will vary slightly from image to image, mostly in the random
background noise but in general they’ll all look a lot like Image 1. You’ll
also notice a new Focus Mode dialog appeared.
Here’s a brief description of the key items in the Focus Setup and Focus
Mode dialogs.
Exposure Time – You’ll be able to see most objects in a 1 second
exposure. Use shorter exposures (down to 0.10 seconds) for faster
rep rates when focusing on bright stars or longer exposures when
trying to center dim objects.
Frame Size – Planet mode allows you to select a portion of the CCD’s
field of view (FOV) for faster rep rates due to smaller downloads.
It’s great for focusing the telescope on a star. The other three Full
settings all show the FOV of the CCD but are slower than Planet
mode because there’s more data to download.
Full-High uses high-resolution mode to show you all 3326 x
2504 pixels. Full-Low uses low resolution (3x3 binning) which is
faster and more sensitive since there are fewer pixels to download
and the pixels are larger. Finally Full works in conjunction with
Planet mode and the Camera Setup such that when the camera is
set to Auto resolution mode Full uses the low-resolution mode for
faster downloads then switches to high-resolution for Planet mode.
Dark Frames – For most objects you won’t need to take dark frames in
Focus mode to frame and focus the object because the exposures
tend to be short and the build up of dark current minimal. On
some dim objects though, checking this item, which uses dark
subtracted images for Focus mode can help to pull the object out
22
SBIG ST-8300 Manual
of the noise. It’s slightly slower when using dark frames so only
use this when you need to.
Update Mode – Sometimes you want to tweak the focus, look at an image,
tweak it again, etc. Setting this to Manual causes the Focus mode
to pause between images until the Space Bar is hit or you click the
Pause/Resume button.
Peak – This shows the position and brightness of the brightest pixel in the
Focus mode image. We’ll use this later to get the best focus by
maximizing the Peak on a star.
Pause/Resume – Click this button at any time to pause or resume the focus
mode. This can be handy for going back and forth between the
telescope and the computer or for studying the images.
You can read more about the other items in the Help but we now know
enough for basic operation. Exit Focus Mode by closing the Focus Mode
dialog or closing the image window.
You’ve come a long way in this brief tutorial. If you want to spend
some time reading the Help file or the CCDOPs Manual, which is included
on the CD-ROM that would be useful. Otherwise it’s time for trying it out
at the telescope.
23
SBIG ST-8300 Manual
4.
At the Telescope
Connect the camera to the computer and start CCDOps. Establish a link to
the camera and run the Camera Setup command. Enable the cooling to ~30
degrees below ambient and then watch the Link Status field to see the
temperature come down. Once the temperature reaches the Setpoint it will
jump back and forth by about 0.5 degrees. This is normal. The ST-8300
regulates the CCD temperature by dithering back and forth across the
Setpoint and while the readout of the temperature has a half-degree
resolution, the actual temperature is regulated to 0.1 degree. At this point
we’re ready to hook up to the telescope.
Focusing a CCD camera at the telescope can be a tedious operation, so
a few hints should be followed. Before using the software to focus the
camera the first time you should place a diffuser (such as scotch tape or
ground glass) at the approximate location of the CCD's sensitive surface
behind the eyepiece tube and focus the telescope on the moon, a bright
planet or a distant street lamp. This preliminary step will save you much
time in initially finding focus. The distance behind the eyepiece tube for
the ST-8300 is approximately 0.7 inches (backfocus).
To achieve fine focus, first center a bright star then insert the CCD head
into the eyepiece tube, taking care to seat it, and then enter the CCDOps
Focus Mode. Do not initially try to focus on the moon or planet – they are
harder. As we learned in the tutorial, the Focus Mode automatically
displays successive images on the screen as well as the peak brightness
value of the brightest object in the field of view. Using the telescope
controls, center the star image in the CCD, and adjust the focus until the star
image is a small as can be discerned. Next, shift the telescope to fainter
stars so the CCD is not saturated. Further adjust the focus to maximize the
displayed star brightness in counts and minimize the star diameter. This can
be tedious. It helps considerably if a pointer or marker is affixed to the
focus knob so you can rapidly return to the best focus once you've gone
through it.
An exposure of 1 to 3 seconds is recommended to smooth out some of
the atmospheric effects. While you can use the Full frame mode to focus,
24
SBIG ST-8300 Manual
the frame rate or screen update rate can be increased significantly by using
Planet mode. In Planet mode the Focus command takes a full image and
then lets you position a variable sized rectangle around the star. On
subsequent images the Planet mode only digitizes, downloads, and displays
the small area you selected. The increase in frame rate is roughly
proportional to the decrease in frame size, assuming you are using a short
exposure.
The telescope focus is best achieved by maximizing the peak value of
the star image. You should be careful to move to a dimmer star if the peak
brightness causes saturation. The saturation levels of the various resolution
modes are shown in Table 3.2 below. Another point you should also be
aware of is that as you approach a good focus, the peak reading can vary by
30% or so. This is due to the fact that as the star image gets small, where an
appreciable percentage of the light is confined to a single pixel, shifting the
image a half a pixel reduces the peak brightness as the star's image is split
between the two pixels. The Kodak CCD pixels are so small that this is not
likely to be a problem.
Resolution
High Res
Med/Low Res
Saturation Counts
~65,000
~65,000
Once the best focus is found, the focusing operation can be greatly
shortened the second time by removing the camera, being careful not to
touch the focus knob, and inserting a high power eyepiece. Slide it back and
forth to find the best visual focus (don’t touch the focus knob), and then
scribe the outside of the eyepiece barrel. The next time the camera is used
the eyepiece should be first inserted into the tube to the scribe mark, and the
telescope visually focused and centered on the object. At f/6 the depth of
focus is only 0.005 inch, so focus is critical. An adapter may be necessary
to allow the eyepiece to be held at the proper focus position. SBIG sells
extenders for this purpose.
Finding and Centering the Object
Once best focus is achieved, we suggest using Full-Low mode to help
center objects. This mode gives a full field of view, but reduces resolution
in order to increase the sensitivity, and digitization and download rate. If
you have difficulty finding an object after obtaining good focus, check to be
sure that the head is seated at best focus, then remove the head and insert a
medium or low power eyepiece. Being careful not to adjust the focus knob
on the telescope, slide the eyepiece in or out until the image appears in good
focus. Then visually find and center the object, if it is visible to the eye. If
not, use your setting circles carefully. Then, re-insert the camera and use
the Focus Mode with an exposure time of about ten seconds, if the object is
quite dim. Center the object using the telescope hand controls.
25
SBIG ST-8300 Manual
Note: With a 10 second exposure, objects like M51 or the ring-nebula are
easily detected with modest amateur telescopes. The cores of most galactic
NGC objects can also be seen.
Taking an Image
Take an image of the object by selecting the Grab command and setting the
exposure time. Start out with the Image size set to full. The camera will
expose the CCD for the correct time, and digitize and download the image.
One can also take a dark frame immediately before the light image using
the Grab command by selecting the Dark Also option.
Because the ST-8300 has regulated temperature control, you may
prefer to take and save separate dark frames, building up a library at
different temperatures and exposure times, and reusing them on successive
nights. At the start it's probably easiest to just take the dark frames when
you are taking the image. Later, as you get a feel for the types of exposures
and Setpoint temperatures you use, you may wish to build this library of
dark frames. Fresh darks seem to work better, so it is not recommended to
build a huge dark library. The dark library should be taken at a comparable
ambient temperature.
Saving Images
Save the images using the Save command in the File menu. We strongly
recommend you save images in the SBIG Compressed format as it is the
most compatible. Use the TIFF and JPEG formats only when you are done
with the image as you won’t be able to reopen it with CCDOps. Those
formats are useful for export to photo programs.
Further Adventures
At this point we refer you to the CCDOps Manual that can be found on the
SBIG Software and Catalog CD-ROM. It has an extensive tutorial section
and detailed information about the software and its capabilities.
26
SBIG ST-8300 Manual
5.
Acessories for your CCD Camera
This section describes several of the common Accessories designed to work
with the ST-8300.
Color Filter Wheel
The CFW-8300 enables collection of LRGB color images, narrowband and
photometric images with the ST-8300. The CFW-8300 is a 5-position filter
wheel that holds 36mm diameter filters for unvignetted images at fast focal
ratios. It can be added at any time. Check our web site for new filter
wheels holding more than 5 filters for this model camera.
Camera Lens Adapters
T-to-C adapter screws into the T-Thread on the front of the camera
and enables use of the ST-8300 with standard C-Mount camera lenses.
CLA-5, 35mm camera lens adapters. This adapter includes a T-to-C
adapter and a brand specific lens adapter for Nikon, Canon FD, and Minolta
35mm camera lenses (manual lenses only - specify when ordering).
12V Battery Cable
This power cable enables the use of the ST-8300 in the field from a car
cigarette lighter plug or direct from a battery. The cable has a locking
power plug at one end and a cigarette lighter plug at the other. A separate
section adds battery clips for direct attachment to battery terminals.
Extension Power Cable
This low loss extension cable lets you put the universal power supply well
away from the camera and mount. It is 8 feet long and has locking plugs on
both ends.
Relay Adapter Box
Older telescopes may not be compatible with our optically isolated
telescope driver. We also sell a Relay Adapter Box that contains four
electromechanical relays with Normally-Open, Normally-Closed and
Common connections for each of the four directions.
27
SBIG ST-8300 Manual
Options:
A. T-thread to c-mount adapter
B. C-mount lens (user supplied)
C. CLA7-8300 35mm camera lens adapter for use without filter wheel
D. Nikon 35mm camera lens (user supplied)
E. 2" T-thread nosepiece (supplied with the camera)
F. T-thread visual back for SCT
G. FW5-8300 5-position, or FW8-8300 8-position filter wheel
H. Adapter 10064, 35mm Nikon lens adapter for use with (G) above.
28
SBIG ST-8300 Manual
6.
Glossary
Antiblooming- When a CCD pixel has reached its full well capacity,
electrons can effectively spill over into an adjoining pixel. This is
referred to as blooming. Kodak CCDs like the KAF-0402LE with
the antiblooming option can be used to help stop or at least reduce
blooming when the brighter parts of the image saturate.
Astrometry - Astrometry is the study of stellar positions with respect to a
given coordinate system.
Autoguider - All SBIG CCD cameras have auto guiding or "Star Tracker"
functions. This is accomplished by using the telescope drive
motors to force a guide star to stay precisely centered on a single
pixel of the CCD array. The camera has four relays to control the
drive corrector system of the telescope. The CCD camera head is
installed at the guide scope or off axis guider in place of a guiding
eyepiece.
CCD - The CCD (Charged Coupled Device) is a flat, two dimensional array
of very small light detectors referred to as pixels. Each pixel acts
like a bucket for electrons. The electrons are created by photons
(light) absorbed in the pixel. During an exposure, each pixel fills
up with electrons in proportion to the amount of light entering the
pixel. After the exposure is complete, the electron charge buildup
in each pixel is measured. When a pixel is displayed at the
computer screen, its displayed brightness is proportional to the
number of electrons that had accumulated in the pixel during the
exposure.
Correlated Double Sampling - Correlated Double Sampling (CDS) is
employed to lower the digitization errors due to residual charge in
the readout capacitors. This results in lower readout noise.
Dark Current - Dark Noise or Dark Current is the result of thermally
generated electrons building up in the CCD pixels during an
exposure. The number of electrons due to Dark Noise is related to
just two parameters; integration time and temperature of the CCD.
The longer the integration time, the greater the dark current
buildup. Conversely, the lower the operating temperature, the
lower the dark current. This is why the CCD is cooled for long
integration times. Dark noise is a mostly repeatable noise source,
therefore it can be subtracted from the image by taking a "Dark
Frame" exposure and subtracting it from the light image. This can
usually be done with very little loss of dynamic range.
Dark Frame - The user will need to routinely create image files called
Dark Frames. A Dark Frame is an image taken completely in the
29
SBIG ST-8300 Manual
dark. The shutter covers the CCD. Dark Frames are subtracted
from normal exposures (light frames) to eliminate fixed pattern
and dark current noise from the image. Dark Frames must be of the
same integration time and temperature as the light frame being
processed.
FITS Image File Format - The FITS image file format (which stands for
Flexible Image Transport System) is a common format supported
by professional astronomical image processing programs such as
IRAF and PC Vista.
Flat Field - A Flat Field is a image with a uniform distribution of light
entering the telescope. An image taken this way is called a flat
field image and is used with CCDOPS to correct images for
vignetting.
Focal Reducer - A Focal Reducer reduces the effective focal length of an
optical system. It consists of a lens mounted in a cell and is usually
placed in front of an eyepiece or camera. With the relatively small
size of CCDs compared to film, focal reducers are often used in
CCD imaging.
Full Well Capacity - Full Well Capacity refers to the maximum number of
electrons a CCD pixel can hold. This number is usually directly
proportional to the area of the pixel.
Histogram - The Histogram is a table of the number of pixels having a
given intensity for each of the possible pixel locations of the image
file.
Light Frame - The Light Frame is the image of an object before a Dark
Frame has been subtracted.
Photometry - Photometry is the study of stellar magnitudes at a given
wavelength or bandpass.
Pixel Size - The smallest resolution element of a CCD camera is the CCD
pixel.
Planet Mode - Planet Mode is the most useful way to achieve focus. When
you select Planet mode, a full frame is exposed, downloaded, and
displayed on the computer monitor. A small window can be placed
anywhere in the image area and the size of the window can be
changed. Subsequent downloads will be of the area inside the box
resulting in a much faster update rate.
Quantum Efficiency - Quantum Efficiency refers to the fractional number
of electrons formed in the CCD pixel for a given number of
photons. Quantum Efficiency is usually plotted as a function of
wavelength.
30
SBIG ST-8300 Manual
Readout Noise - Readout noise is associated with errors generated by the
actual interrogation and readout of each of the CCD pixels at the
end of an exposure. This is the result of fixed pattern noise in the
CCD, residual charge in the readout capacitors and to a small
extent the noise from the A/D converter and preamplifier.
Resolution Mode - The resolution of a CCD camera is determined by pixel
size. Pixel size can be increased by combining or binning more
than one pixel and displaying it as one pixel. Doing so decreases
the effective resolution but speeds up the download time of the
image. Maximum resolution is determined by the size of the
individual CCD pixel. The ST-8300 can run in High, Medium,
Low and Auto resolution modes.
Response Factor - Response Factor is a multiplier used by CCDOps to
calibrate CCDOps to a given telescope for photometric
calculations.
Saturation - Saturation refers to the full well capacity of a CCD pixel as
well as the maximum counts available in the A/D converter. The
pixel is saturated when the number of electrons accumulated in the
pixel reaches its full well capacity. The A/D is saturated when the
input voltage exceeds the maximum.
Sky Background - The sky background illumination or brightness is the
number of counts in the image in areas free of stars or nebulosity
and is due to city lights and sky glow. High levels of sky
background can increase the noise in images just like dark current.
For some objects deep sky filters can be used to reduce the sky
background level.
Seeing - Seeing refers to the steadiness and the clarity of the atmosphere
during an observing session.
TE Cooler - The TE Cooler is a Thermal Electric cooling device used to
cool the CCD down to operating temperature. The CCD is
mounted to the TE Cooler which is mounted to a heat sink, usually
the camera head housing.
TIFF Image File Format - The TIFF image file format (which stands for
Tagged Interchange File Format) was developed jointly by
Microsoft and Aldus Corporations to allow easy interchange of
graphics images between programs in areas such as presentation
and desktop publishing. CCDOps can save image files in this
format but unless they’re color images it can not read them.
Track and Accumulate - The Track and Accumulate function is a SBIG
patented feature of CCDOps that allows the user to automatically
co-register and co-add (including dark frame subtraction) a series
31
SBIG ST-8300 Manual
of images of an object. These exposures can be taken unguided as
long as the "Snapshot time" does not exceed the length of time
before tracking errors of your clock drive become apparent. This
allows you to image and track without guiding or the need to
connect the CCD Relay port to your drive motors.
Track List - The Track List is an ASCII file generated by CCDOPS during
a Track and Accumulate session. The Track List logs all the
corrections made by CCDOPS for each of the images. Track lists
are required when flat fielding Track and Accumulate images.
Tri-Color - Tri-Color refers to color images created using three different
colors mixed into a balanced color image using red, green and blue
filters. An object is imaged three times, once with each color filter.
The three images are then co-added and color balanced with the
appropriate software.
Vignetting - Vignetting is obstruction of the light paths by parts of the
instrument. It results in an uneven illumination of the image plane.
The effects of vignetting can be corrected using flat field images.
32
SBIG ST-8300 Manual
Appendix A – Connector and Cables
Power Jack
The Power Jack is used to supply 10.0 – 14.5 Volts DC at 3 amps to
the camera. The jack is locking and center-positive. The mating plug
is the locking model Switchcraft S760K with 0.218 inch outer diameter
and 0.080 inch inner diameter (5.5/2.0 mm).
Telescope Jack
The Telescope Jack is used to provide tracking signals to the telescope drive. Viewed from outside the camera, looking in, it has the
following pin-out:
The Left, Down, Up and Right
signals are driven from optically
isolated photo transistors that
conduct when telescope movement
is desired. They can sink up to
25ma and can hold off up to 25V.
If what you are plugging into is
voltage based you’ll need an external pull-up resistor. The Common
signal is connected to the common on the four photo- transistors. The
Special signal is discussed below.
Jumper Options
By removing the back of the camera you’ll find two jumpers adjacent
to the Telescope Jack that have the following affect:
J9 Pin 1 to 2 – When in place
connects the Common signal to the
minus side of the power source,
effectively grounding the Common.
2
4
1
3
J9
Telescope
Jack
LED
J9 Pin 3 to 4 – When in place makes
the raw positive power source (~12V)
available on the Special signal. You
can use this for powering an external
relay box. Do not connect to your telescope with this jumper in place
as you will damage the telescope or camera.
33
SBIG ST-8300 Manual
Appendix B – Maintenance
This Appendix describes the periodic maintenance items you need to
perform on your camera to keep it in optimal condition.
Cleaning the Window and Filters
1) Get a can of compressed air from a photo store, as well as a small
camera hair brush
2) Thoroughly clean and dry the brush using isopropyl alcohol
3) Remove the front cover of the camera. If you want to clean the
Window remove the Filter Wheel. While the camera is open be very
careful to avoid activities that could spark the inside of the camera with
static, just sit in your chair. If you have to get up and get something,
discharge your body to a metal surface (not the camera) after sitting
back down.
4) Tilt the camera up to face horizontally and blow out the entire chamber
with the compressed air. Finish with a blast right on the Window from
a half inch away. Be VERY careful not to tip the can of compressed air
past 45 degrees as often an oily liquid will come out that is hard to
clean off.
5) If you have a dust particle that will not blow off, poke it loose with the
brush. They cling to the surface due to static, so you may end up just
pushing them out of the way. The static forces are quite strong!
6) The outside of the window is easily cleaned with a cotton swab or Q-tip
and a little isopropyl alcohol. Use one end of the Q-tip to swab it with
alcohol and the other to dry it. Never re-use a Q-tip and do not scrub –
use gentle pressure
7) Replace the front lid.
8) If you have a few small dust specs, don't worry. it is almost impossible
to get them all and a flat field will take care of them well.
9) Filters are cleaned the same way.
Replacing the Desiccant
The ST-8300 contains a small packet of desiccant that keeps the CCD from
frosting when it’s cooled. This desiccant should last for several years but it
won’t last forever. If you start seeing things appear in your images that
look like shadowed tendrils you should suspect frost on the CCD and it may
be time to replace the desiccant. You can get the replacement
desiccant from us and it’s easy to replace with the following
procedure:
1.
Remove the camera’s front cover by loosening the four
socket-head cap screws (SHCS) that hold it in place.
34
SBIG ST-8300 Manual
2.
Remove the shutter or filter wheel by unscrewing the small
Philips head screw and washer that holds it in place. Make
sure you know which side goes up. With filter wheels it the
side with the filters but with shutters you’ll have to keep
track of it as they won’t work right if flipped.
3.
Remove the CCD Cover/Window Plate by loosening the four
SHCS that hold it in place.
4.
Pull out the old desiccant pack and replace it with the fresh
one. You may have to wedge it in there or fold the bag
slightly to get it to fit.
5.
If the CCD cover glass is spotted it is easily cleaned with a
cotton swab and isopropyl (rubbing) alcohol. Dust here is
very critical, so take care.
6.
Replace the CCD Cover/Window plate, shutter and front
cover.
7.
Let the camera sit for 24 hours before cooling to give the
desiccant time to equilibrate the CCD chamber.
35
SBIG ST-8300 Manual
Appendix C – Camera Specifications
The table below lists the specifications for the ST-8300 camera.
Specifications are typical and can vary from camera to camera and are
subject to change without notice.
CCD
Pixel Array
Total Pixels
Pixel Size
Full Well Capacity
Dark Current
Shutter
Exposure
A/D Converter
Read Noise
Binning Modes
Full Frame Download
USB 2
USB 1.1
Cooling
Temperature Regulation
Power Requirements
Backfocus
Dimensions
Kodak KAF-8300
3326 x 2504 pixels
8.3 Megapixels
5.4 x 5.4 microns
25,500 electrons
< 0.5e- at 0°C
Electromechanical
0.1 to 3600 seconds, 10ms resolution
16-bit with Correlated Double Sampling
~10e- RMS
1x1, 2x2, 3x3
Up to 1,200,000 pixels per second
Up to 400,000 pixels per second
Single Stage TE, Active Fan, ~35C Delta
Closed Loop, ±0.1°C
10 – 14.5 Volts DC at 3 Amp, Center-Positive
Same as C-Mount, 0.690 inches
4 x 5 x 2 inches
36
SBIG ST-8300 Manual
Appendix D – ST-8300CM Color Camera Supplement
The raw single-shot color image:
The first thing you notice about the raw images from your single-shot color
camera is that they are not in color! This is normal - the color data is being
displayed as greyscale values in a raw single-shot color image You might
also notice a grid or “screen door” pattern covering the raw image as well.
This effect is also normal, and is caused by the RGB color mask that is
covering the CCD.
Single-Shot Color (SSC) cameras like the ST-8300C produce raw images
that CCDOps displays as monochrome until they are color processed. The
Color Process command in the Single Shot Color menu of the Utility menu
convents these raw images into color as shown in the dialog box shown
below.
Note: Note that any adjustments made using the
controls in the “Contrast” dialog box ONLY
affect how image data is being displayed on
screen – you are not making any permanent
changes to your raw images.
You can perform the CCDOPS Dark Subtract,
Flat Field, Flip, Rotate and Crop functions on
single-shot color images, but do not use any of
the other Utility menu functions. These can make changes to the raw image
that will affect the final color balance. If you are using any other CCD
37
SBIG ST-8300 Manual
camera control software to acquire your single-shot color images, make sure
to save them in either SBIG or 16-bit FITS file format. You should not
crop, resize, or flip the image (using 3rd party software) before importing it
into CCDOPS for one-shot color processing.
Tip: CCDOPS will display a warning message if you try to perform any
processing steps that might affect the integrity of the color data
Care must also be taken when manually co-adding images to preserve the
color data - do not use the X and Y offset functions in the Co-Add dialog
box. Because a single-shot color camera uses a color mask placed directly
over the CCD surface, the software expects certain pixels to match up to
specific color positions on the mask. If the image has been cropped or
rotated (outside of CCDOPS) the software will no longer be able to
associate the pixels with the correct red, green or blue values. During
processing, this can cause an unusual color shift to appear. This situation is
most likely to occur if the raw image has been cropped or rotated before
CCDOPS is used for color combination. This alignment problem is also the
reason why precise registration of manually co-added images is so critical.
If this problem does occur, the X and Y offset boxes located in the Single
Shot Color Processing dialog box can correct the misalignment. Try
selecting one checkbox (X or Y) at a time, then click on “Process” until the
color balance looks normal.
Make sure to save a copy of your raw images. If you make any mistakes or
want to re-process the image later on, you will always want to have the raw
image available to start over.
38
SBIG ST-8300 Manual
Easy Processing of Single-shot Color Images with CCDOPS
Once you have captured the image, from the Utility drop-down menu in
CCDOPS select Single Shot Color --> Color Process and you are ready to
go. Processing of Single-Shot Color Camera images is easy. Start by
clicking the Defaults button and selecting RGB or DDP for the Method
(DDP works great on galaxies with bright cores). Click on “Process.” Now
a full-color image will finally appear! Experiment using the sliders to adjust
the color balance, brightness and contrast. Each time you click on “Process”
the image will update and display your changes. The single-shot color
combination methods available are:
RGB: Standard three channel (R, G, B) color combination.
RGBs:
DDP: Applies a DDP filter to each channel (R, G, B) before combination.
The image below is a screen captures of the single step process and the
dialog box shows the settings in their default positions using DDP as the
method:
Step 1: Capture the image and save the raw data
Step 2: Click the "PROCESS" button to create the color image
39
SBIG ST-8300 Manual
If you don't like the color balance of the result, simply modify the color
balance pointers and click the "process" button again. For more in-depth
color image processing, you can extract the RGB color channels and
perform more traditional tri-color image processing techniques (see
Processing Separate RGB Images, below).
Tip: While in the Single Shot Color Processing dialog box, click on any
slider, then use the keyboard right and left arrow keys to make fine
adjustments.
You can save the final color image as a TIFF file at any time by selecting
File -> Save As. Note that once the image is saved as a TIFF you won’t be
able to process it any further with CCDOPS. (You will still be able to open
and view the image, however.)
Color Balance
Any color image, even those from monochrome camera with external filter
wheels or from consumer digital cameras, may require minor corrections to
achieve the best color balance. This is done in CCDOPS buy simply sliding
the Color Balance Sliders at the top of the dialog box. To make the image
more Red (or less Cyan) move the top slider towards Red then hit the
Process button again. If there's a star or an area of the image you know is
White you can White Balance on it by positioning the Crosshair over that
area then right-click the mouse and select Set White Balance. It is a very
simple process.
40
SBIG ST-8300 Manual
Brightness and Contrast
Use the Brightness and Contrast sliders to adjust the image and then hit the
Process button to see the results.
Enhancements
Images of galaxies tend to have a lot of dynamic range and you may find it
difficult to reveal the faint details in the arms without causing the core to
saturate. Try selecting the DDP instead of RGB in the "Method" drop down
box. Hit the Process button. DDP compresses the dynamic range of the
image. This may not look natural on all images but don't be afraid to try it.
An example is shown below.
RGB Processed
DDP Processed
The initial color processing doesn't have to be difficult or complicated.
Once you have saved the original B&W image you can experiment over and
over with different settings until you achieve the results you like. Of course,
if you want more control over the image you may wish to process the R,G
and B frames separately and combine them just as you would if the three
frames were taken separately though RG and B filters as they are with
monochrome cameras. See below for more about extracting, processing
and combining RGB frames.
Easy Processing of Separate R,G and B Images
Monochrome cameras with filter wheels are used to make color images by
shooting separate red, green and blue frames through color filters. Separate
Red, Green and Blue frames may also be extracted from a Single Shot
Color Camera image for more control during the processing stages.
Advanced users may desire the additional control this gives them over the
color processing steps. CCDOPS also offers you the option to extract
individual color channels from the raw frame.
If you want follow along with this example, a copy of the M33 raw image is
available on the SBIG software CD-ROM in the Images folder.
41
SBIG ST-8300 Manual
To do this using CCDOPS select Utility --> Single Shot Color --> Extract
Color Channel(s)... The Color Extraction dialog box will open and give
you the option to extract any (or all) of the individual color channels (Red,
Green, Blue) and a synthesized Luminance (greyscale) channel:
Once extracted, the R,G and B frames from a Single Shot Color Camera are
treated the same as RGB frames shot with a monochrome camera and color
filter wheel. The individual color channels are extracted at full resolution
by interpolating the data from the neighboring pixels. Once the individual
color channel images are saved to disk, you can combine them using any
image processing software.
The RGB Combine dialog box will still remain open after the color image is
displayed, allowing you to adjust the color balance of the final image. Each
time you click on “Do It” the image will update and display your changes.
Select File -> Save As to save the final color image as a TIFF file.
Processing separate RGB images to create a color image involves the
following steps:
1. Co-aligning the images
2. Normalizing the Sky Background
3. Setting the White Balance.
CCDOps makes this relatively easy. Here's a step-by-step procedure for
quick and easy RGB Processing:
1. Co-align the images - Open the Red, Green and Blue images and then
open the Crosshairs.Visually identify a common star or feature in the
images to serve as an alignment reference. Starting with the Red image,
position the Crosshair on the reference position, using the peak pixel
brightness on a star for example, then right-click the mouse. Select the Set
RGB Red Position item to mark the reference position. Do the same in the
Green and Blue images, selecting the Set RGB Green Position and Set RGB
Blue Position respectively. This tells CCDOps how it will co-align the
images
42
SBIG ST-8300 Manual
2. Normalize the Sky Background - Normalizing the Sky Background
means making sure it comes out a neutral gray in the final image, not
having a subtle color tint. Bring the Red image to the foreground and then
position the Crosshair on an area of the image that represents the Sky
Background, free of any stars or faint nebulosity. Right-click the mouse and
select the Set RGB Black Level. This tells CCDOps how to normalize the
sky background.
3. Set the White
Balance - Again, bring
the Red image to the
foreground and then
position the Crosshair
over a star or area of the
image that you feel
represents the White
Balance. If you get it
wrong it's easy to adjust
so don't worry about it.
Once the Crosshair is
positioned, right-click
and select the Set RGB
White Level. This tells
CCDOps two things:
how to set the color
balance and how to set the contrast of the RGB image such that the star you
identified comes out white (neutral color) and just saturates in the RGB
image. Now that the hard work is done you can close the Red, Green and
Blue images and then invoke the RGB Combine command in the Utility
menu. You'll be shown the dialog at right. If the Advanced Setting section is
not visible, click the green triangle to reveal it. To finish the color
processing do the following:
4. Identify the images - Click the Set Name button to the right of the Red
and navigate through your folders on your hard drive to find the Red image.
Double-click the Red Image or select it and hit Open.
If you used CCDOps to acquire the images they will be named XXXX.r,
XXXX.g and XXXX.b and at this point CCDOps will fill in the names of
the Green and Blue images for you. If not then click the Set Name button to
the right of the Green and Blue and identify those images.
5. Initial RGB image - Click the “Do It” button to see the results of
merging the Red, Green and Blue images into a single RGB image. 6.
Tweak the parameters – [a] Co-alignment - Modify the Horizontal and
Vertical adjustments edit fields to the right of each image to tweak the coalignment. The easiest way to do this is to look at the outer fringes of stars
my zooming in on the RGB image. If the stars have a Red tint to the right
43
SBIG ST-8300 Manual
then you would reduce the Red Horizontal item by 1. After each adjustment
hit the “Do It” button to see the results. [b] Color Balance – Raise or lower
the Factors column to adjust the Color Balance. For example, to make the
image redder, raise the Red factor. Hit the Do It button to see the results. [c]
Brightness and Contrast - Raise or lower Grey Level item to adjust the
Brightness and raise or lower the Contrast Boost item to adjust the image
contrast. Hit the Do It button to see the results.
6. Exporting to Other Image Processing Programs - If you have a
favorite image processing program like PhotoShop that you would rather
use to process and combine the RGB frames into a color image, then simply
save the extracted R,G, and B images in a format of your choice such as
TIFF or FITS and use any other image processing program to manipulate
and combine the images. It is recommended however that you keep your
original data file in SBIG format in the event that some step along the way
results in an irreversible change to your image file(s) that is not to your
liking. You can always extract the raw RGB channels again from the
original.
Special CCDOPS Functions for Single Shot Color Cameras
Filter Routines Specific to Single Shot Color Images
The raw images (monochrome, prior to conversion to color) from Single
Shot Color cameras like the ST-2000XCM require special handling when it
comes to filtering the images so that
you don't co-mingle the color data in
the filtering process. CCDOps has
enhanced filtering routines in the
Smooth, Sharpen, Column/Row
Repair, Kill Warm Pixels and
Remove Cool Pixels commands from
the Filter sub-menu of the Utility menu. As shown in the dialog below,
these commands allow you to check a Single Shot Color Image checkbox
that applies those enhancements to Single Shot Color images.
Track & Accumulate Single Shot Color Cameras
You didn’t used to be able to do this and many people don’t realize that
now you can use SBIG patented Track and Accumulate with Single Shot
Color (SSC) cameras like the ST-8300CM. CCDOps has been updated to
recognize SSC cameras and Track and Accumulate will then make sure it
co-aligns images correctly, taking into account the Bayer filter arrangement.
44
SBIG ST-8300 Manual
45