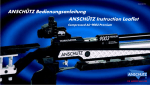
1
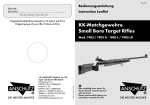
Stand 02/05
ANSCHÜTZ Bedienungsanleitung
ANSCHÜTZ Instruction Leaflet
Compressed Air 9003 Premium
Index
Definitions ..................................................... p. 03
Preface .......................................................... p. 18
Safety instructions ........................................ p. 18
General handling of rifles
and firearms .................................................. p. 19
Ear and eye protection ................................ p. 20
Laws .............................................................. p. 20
Product related safety instructions .............. p. 20
Liability .......................................................... p. 21
Technical data .............................................. p. 21
Soft-Link® ....................................................... p. 22
Cocking, loading and safety operation ..... p. 22
Unloading ..................................................... p. 23
Ammunition tests ........................................... p. 23
Trigger ........................................................... p. 25
Dry firing device ........................................... p. 26
Compressed air cylinder ............................. p. 26
Stock adjustment .......................................... p. 28
Sight set ......................................................... p. 29
Cleaning, maintenance, care, lubrication .. p. 29
Accessories ................................................... p. 30
Special accessories ..................................... p. 30
Warranty ....................................................... p. 30
Copyright ...................................................... p. 31
Drawings / Spare parts .............................. p. 32
Appendix ...................................................... p. 52
Warranty card .............................................. p. 55
2
Attention
Please read carefully before you
assemble or operate this rifle!
Do you already know the ANSCHÜTZ
Newsletter? Simply subscribe to it under
www.anschuetz-sport.com
Begriffsbestimmungen / Definition
2
1
3
9
12
15
16
1
2
3
4
5
6
7
8
9
10
11
12
13
14
15
16
11
7
6
4 5
8
10
14 13
Schaftbacke
Diopter
Stabilisator
Sicherung
Spannhebel
Laufgewicht
Korntunnel
Pressluftkartusche
Soft-Link® Loslager
Schaft
Soft-Link® Festlager
Abzug
Pistolengriff
Alu-Systemträger
Gewinde für Gewichtsträger
Schaftkappe
1
2
3
4
5
6
7
8
9
10
11
12
13
14
15
16
Cheek piece
Rear sight
Stabilizer (Stabilisator)
Safety
Cocking lever
Barrel weight
Front sight
Compressed air cylinder
Soft-Link® flexible bearing
Stock
Soft-Link® fix bearing
Trigger
Pistol grip
Barreled action carrier
Thread for weight carrier
Butt plate
3
Preface
Dear Friends of ANSCHÜTZ,
You have made a good choice, now that you
have decided to buy an ANSCHÜTZ product.
The many great results obtained with ANSCHÜTZ rifles by shooters, participants in the
Olympic Games as well as in World and
European championships throughout the world
made your choice easy, as your rifle has
benefited from our great experience of making
fine sporting and target rifles since 1856.
World-wide, ANSCHÜTZ rifles are respected
because of their fine accuracy, impeccable
design and immaculate workmanship. Should
you still be unaware, they include:
The famous ANSCHÜTZ small bore target
rifles, target air rifles and target air pistols, small
bore biathlon rifles, hunting rifles and shotguns
in diverse calibers, small bore single loaders
and repeaters, Flobert rifles, silhouette pistols,
silhouette rifles and Varmint rifles.
We wish you a lot of fun and success with
your new ANSCHÜTZ product.
Yours ANSCHÜTZ Team
18
Safety instructions
Attention
Please read carefully the following articles
before using this rifle. It is extremely important
that you become thoroughly familiar with this
rifle and its operating characteristics by
carefully reading and understanding the
instructions in this booklet before you attempt
any use of it with ammunition. Always
remember the sequence of disassembly.
Should you still have problems with the safe
usage and correct handling of your rifle or
should you have additional questions, please
do not hesitate to contact a competent
gunsmith or dealer or our factory directly. This
instruction leaflet is extraordinarily important.
Make sure that it is always with the rifle
especially when it is sold, lent or otherwise
given to a third person.
Only use as follows
ANSCHÜTZ manufactures precision products
which, depending on the model type, are
exclusively meant for civilian target shooting
and hunting.
Combat and defense shooting and
competitions in which the shooter moves while
shooting, must not be shot with ANSCHÜTZ
rifles and pistols. It is especially not allowed
to aim and shoot at people. The rifle, pistol
or the stock must not be used to beat
somebody. Please also see the chapter „The
Ten Commandments of Firearms Safety“ as
well as the chapter „General Handling of
Rifles and Firearms“.
Additional copies of this booklet can be
ordered.
This ANSCHÜTZ firearm has been carefully
test fired and inspected before shipment from
the factory. The mechanism of this firearm has
been properly designed, tested and fitted with
the utmost attention to safety. However, any
mechanical device can fail and no such
device can prevent accidents caused by
carelessness or thoughtless handling. ANSCHÜTZ cannot control the handling of each
firearm once they have left the factory. Please
take the time to inspect the firearm carefully
before use.
DO NOT USE ANY FIREARM WITHOUT
A COMPLETE KNOWLEDGE AND
UNDERSTANDING OF IT’S SAFE USE AND
PROPER HANDLING CHARACTERISTICS.
Warning:
This rifle can be dangerous if it is not used
correctly or if this instruction leaflet is not
observed. The privilege of ownership and
safe use of your rifle carries a personal
responsibility that no one should take lightly.
Rifle accidents would not occur if the following
rules of shooting safety were observed.
The Ten Commandments of Firearms
Safety
• Learn the mechanical and handling
characteristics of the firearm you are using.
• Always keep the muzzle pointed in a safe
direction.
• Firearms should be unloaded when not in
use.
• Be sure the barrel is clear of obstructions
before using.
• Be sure of your target before you shoot.
• Wear shooting glasses and ear protection
when you shoot.
• Never climb a tree or fence with a loaded
firearm.
• Don’t shoot at a hard surface or at water.
• Never transport a loaded firearm.
• Avoid alcoholic beverages or drugs and
don’t smoke when shooting or handling a
gun or a pistol.
Please note
There is no substitute for personal responsibility
and common sense in the handling, use and
storage of firearms. Securely store your
unloaded guns away from access by children
or unauthorized adults.
General handling of rifles and
firearms
Although it can be assumed that shooters are
familiar with the following rules we would like
to emphasize them once again for reasons
of safety. All firearms are hazardous objects.
Extraordinary care has to be dedicated to
their use and storage.
1. Treat every rifle as though it was loaded. Do
not take anyone’s word or automatically assume
it is not loaded. Check your rifle personally each
time you handle it. The safe and courteous way
to carry a rifle when you are with others is to
leave the bolt open so that they can easily see
that the rifle cannot be fired. Make sure that the
rifle is not loaded when you stop shooting. Make
sure your rifle is unloaded before every transport.
Never pick up your rifle with your finger on the
trigger or the trigger guard.
2. Whenever you pick up your rifle, point the
muzzle at the ground. Always point the
muzzle of the barrel in a safe direction. Never
pull a rifle towards you by the muzzle.
3. Only use your rifle in approved shooting
ranges. Shoot your rifle only under good
visibility and daylight conditions. If you use
your rifle in an indoors range, make sure it is
adequately ventilated. Make sure that there
is a safe bullet trap which can be seen from
all sides and that there is no one in the vicinity
of your target. Be absolutely sure of a safe
backstop and target. Never fire at a hard,
smooth surface or water. Never shoot at a
skyline target or into the air. Do not shoot at
anything from which a bullet might ricochet.
Never fire your rifle with the muzzle in the
water or against any other material to avoid
an accident or damage of your rifle.
4. Be sure that you use the correct ammunition. The correct caliber can be seen on
your rifle. Load your rifle only when you are
at the range and ready to shoot. Use only
genuine ANSCHÜTZ magazines. Do not
exceed the stated magazine capacity. Alterations to the rifle or the use of non-ANSCHÜTZ magazines and accessories may
cause malfunctions.
19
5. Always keep your rifle clean. Be sure the
bore is not obstructed by dirt, water, grease
or any other foreign materials. Never try to
shoot out any obstruction. If a shot has not
been released when the trigger has been
pulled, direct the barrel in a safe direction,
activate the safety, open the action and
carefully remove the bullet.
6. Serious injury and damage can result from
the use of the wrong ammunition,
bore obstructions, or incorrect cartridge
components.
7. Place the safety fully into „S“ or „F“ position
- never inbetween. Always keep safety in full
„safe“ position until ready to fire. Do not put
your finger on the trigger when operating the
safety or whenever you are not ready to
shoot.
8. When not in use your rifle should be stored
in a locked and secure place accessible only
to you. Check first to make sure it is unloaded.
Store the rifle with uncocked trigger. Store
ammunition in a separate and secure place.
It is your special responsibility to make sure
that at all times and especially when you are
not present your rifle is well secured, out of
any reach of children and other unauthorized
20
persons and in no way accessible to them.
For the safe storage of your rifle even in a
locked cabinet or safe the use of an additional trigger lock is recommended. Even if you
use such a device, your rifle always must be
unloaded when not being used.
Only give your rifle to authorized persons.
Never let your rifle be used by anyone who
is not familiar with the safe handling of a rifle
and these instructions. This rifle must only be
used by a responsible adult or under his or
her supervision.
9. Watch for any change in the operation of
your rifle which might impair its safety.The
safety is only guaranteed as long as the
firearm is in faultless condition. If you suspect
or note a defect or malfunction, stop using it
immediately, unload the rifle, make sure that
it is not under pressure and send it to a
competent gunsmith, the factory or its
recommended repair station for inspection.
Note: Apart from normal cleaning the rifle
must only be disassembled by an authorized
gunsmith.Please note that your firearm must
also be checked by an authorized gunsmith
when it has been impaired by external
conditions such as corrosion etc. or when it
dropped. When you assemble or disassemble your firearm, never try to do it by
force. Unqualified handling, modifications of
the mechanism or disassembly can cause
injuries or irreparable damage of the rifle.
10. Your rifle should always be handled with
extreme care. Make sure that it is never
dropped or placed in such a way that it can
fall. For transport purposes your rifle should
be dry and clean. We recommend an
approved protective gun case.
11. You must be in good physical condition
and mental health and not under the influence
of any substance (drugs, alcohol) which might
impair vision, dexterity or judgement. Do not
use your rifle when you are tired. Tiredness
may result in a loss of control.
12. Clean your hands carefully after shooting
and cleaning your ANSCHÜTZ product.
Residues of bullets, powder or oil might impair
the health of your skin.
13. Your ANSCHÜTZ rifle has been carefully
built and inspected by skilled technicians to
provide maximum efficiency. The service life
depends on the owner’s care and on
cleaning following this instruction leaflet.
Ear and eye protection
You should always use approved hearing
protection and approved shatterproof eye
protection while shooting. Please remember
persons near you to also wear hearing
protection and approved shatterproof eye
protection.
Laws
Please observe the corresponding
regulations and laws for the use of firearms
in your country. Please also observe the
corresponding safety rules of sports shooting.
Product related safety
instructions
Important note for the handling of
compressed air cylinders
1. Only check the manometer level of the
compressed air cylinder when the rifle is
unloaded and uncocked. Never check it
while filling the compressed air cylinder. Due
to its design the manometer works with an
accuracy of +/- 10 %. Temperature variations
can also impair the accuracy of the manometer.
2. Filled compressed air cylinders must not
be exposed to temperatures of more than 50°
Celsius/120° Fahrenheit. Therefore make
sure during transport or storage that the rifle
is protected against heat, for example by
storing it in the Styrofoam packing or by using
a gun case. In planes, for mail despatch, etc.
compressed air cylinders are only transported
when they are not filled.
3. To empty the compressed air cylinder we
recommend to use our air release screw
(Order-No. 711.3408). After approximately
20 refills of the compressed air cylinder it
should be emptied completely to get rid off
possible condensed water.
4. Compressed air cylinders which are leaky,
defective or older than 10 years must be
emptied and must not be used and filled
anymore. After 10 years from the date of
manufacture the compressed air cylinder must
be checked by the manufacturer for a fee.
The date of manufacture can be seen from
the compressed air cylinder.
5. Compressed air cylinders and refill bottles
must be stored in a dry, dust and grease/oil
free place. The refill adapter is additionally
equipped with an air filter against pollution
and dust particles.
6. Protect valves and threads with the
corresponding caps when you have removed
the compressed air cylinder. Never grease
or oil the valves or threads of the compressed
air cylinder. Danger of explosion!
7. Compressed air cylinders must not be filled
with more than 200 bar (2,790 psi) at room
temperature. This maximum filling quantity must
not be exceeded at no circumstances. Only
use compressed air free of oil or water
(DIN EN 12021 - inhaled air). According to
legal regulations we only deliver unfilled
compressed air cylinders.
8. Never try to open a compressed air
cylinder yourself or to carry out mechanic
modifications. Protect your compressed air
cylinder against external force.
9. Apart from the notes above the technical
rules of your country with regard to the filling
of compressed air cylinders must be
observed. The compressed air cylinders are
not suitable for the transport of gases of any
kind.
Liability
1. ANSCHÜTZ does not assume any
responsibility, guarantee or payment of
damage claims for damages of any kind
resulting from the disregard of these instructions, non-qualified treatment or repair,
modification of parts, the use of non-original
ANSCHÜTZ spare parts, incorrect handling
or care, negligence, removal of the knot
varnish or unauthorized modifications.
2. The wood of the stock or grip as well as
the PRO grip equipment have been very carefully checked by factory inspectors prior to
shipment and has been determined to be free
of defects. Certain kinds of abuse, such as a
dropping or falling down can cause damage
to the wood or the PRO grip equipment, for
which the owner is solely responsible. We
also assume no responsibility for defects
resulting from inappropriate transportation
(mail, plane, etc.). Please immediately contact
your forwarder without delay in such a case
and make your claims in written form.
changes or alterations can significantly impair
the safe use of our product and can lead to
accidents involving severe or even fatal bodily
injuries. Any product warranty will
automatically lapse in case changes or
alterations are implemented. Users are
requested to carefully inspect the product with
regard to possible changes and alterations
before use. In case of doubt you should
contact us for further information.
Target Air Rifle
9003 Premium Compressed Air
Technical data:
Caliber:
Barrel length:
Rifling:
Total length:
Sighting line:
Weight approx.:
Version:
Propellant:
4.5 mm / .177
64 cm/25.2"
42 cm/16.5"
108 cm/42.5"
77 cm/30.3"
4.5 kg/9,9 lbs
Single loader
Compressed air
3. Changes, alterations or manipulations to
this product or any of its parts are prohibited
and might infringe firearms regulations. Such
21
The technology of the 9003 Premium
7 patents and patent pending
• Tension and vibration free connection (no
direct connection) of barreled action and
carrier through Soft-Link® shockabsorbers.
Patent pending.
• Absolutely maintenance-free stabilizer.
Patented.
• Ultra short locktime due to new firing pin
(patent pending), optimized with regard
to mass and inertia and completely new
mechanic trigger.
• New and innovative safety concept for the
loading process. The rifle is cocked just
an instant before shooting. Patent pending.
• Dry firing device with active safety.
• Adjustable forend stock (height, length,
tiltable). Patent pending.
• Complete PRO grip equipment (Synthetic,
anti-allergic technical plastic material. Can
be shaped like wood).
• Patented butt plate and cheek piece adjustment.
• Patented air filter against pollution.
• Various decorations for barreled action
carrier.
22
Soft-Link®
The barreled action and the barreled action
carrier are connected via the unique and
patent pending Soft-Link ® connecting
system. This new fixing system consists of a
vibration damping fix bearing (in the area of
the housing of the barreled action) and a
vibration damping flexible bearing (in the
area of the support block). Tensions which
occur due to the different materials of barreled
action and barreled action carrier and their
various temperature longitudinal expansion
coefficients are eliminated this way (tension
compensating heat expansion joint).
In addition the integrated Soft-Link® shock
absorber pads are responsible for a tension
free connection of the barreled action and
the barreled action carrier. Vibrations
occuring in the barreled action during shot
release are thus effectively absorbed and no
longer perceptible by the shooter.
The air rifle is equipped with a hard Soft-Link®
shock absorber pad. An additional soft SoftLink® shock absorber pad is added as an
accessory as well. To change the shock
absorber pads procede as follows:
• Unscrew both screws at No. 1.
• Loosen threaded pins on both sides
(approx. 4 turns) at No. 2.
• Pull the support block No. 3 off the
barreled action carrier in the direction of
the muzzle.
• Remove barreled action No. 4 from the
barreled action carrier (5).
• Fixing at aluminum barreled action carrier:
Insert/change round (C) Sof t-Link ®
elements (hard or soft) on both sides.
• Fixing at the support block Insert/change
long (A) Soft-Link® elements (hard or soft)
on both sides (2 pieces).
•Assemble again in reversed sequence.
Note
When inserting the soft Soft-Link® elements
the sleeves (B) must be installed at pos. 1 in
the Soft-Link® bearings before assembly.
Subsequently mount the screws at pos. 1 on
both sides and tighten them.
154
2 3
B
C
C
B
A
A
Before first use
• Wipe away excess surface oil.
• Pull a cleaning patch through the barrel
starting from the chamber towards the
muzzle.
Check the tight fit of the screws before every
shooting.
Cocking, loading and safety
operation
• To cock the piston pull the cocking lever
slowly backwards to the stop. The action
opens and the barrel chamber becomes
visible.
• To load push the lead diabolo pellet with
its flat head flush with the front of the
loading platform.
• To lock the breech press the lever slowly
forward until you feel and hear that it
locked into position. The action is now
closed.
• The rifle now is ready for shooting (loaded
and cocked). The compressed air cylinder
must be filled.
”S“ position and must never be situated
between the two.
Do not store the rifle when it is cocked.
Remove the compressed air cylinder before
storing your rifle (also see chapter
”Compressed Air Cylinder/Handling”!). Only
use diabolo pellets in the caliber of your air
rifle, no bolts or other foreign materials.
2
1
To change the cocking lever from the
right to the left side:
•
•
•
•
Pull the safety disc (1) off the bolt.
Remove the bolt (2).
Loosen the screws (3).
Remove the complete cocking lever unit
(4) and install it on the opposite side in
reversed sequence.
The change of the cocking lever from the left
to the right side is carried out in the same
way.
Unloading
It is only possible to remove a pellet from the
action by firing it off which should only be
done by firing it into a bullet trap. Observe
the safety regulations with regard to the safe
handling of rifles.
2
1
4
33
Ammunition tests
To carry out ammunition tests, please
clamp the barreled action without stock
into a vice.
The lateral safety lever can be operated when
the rifle is cocked.
The rifle is
• safe, when the ”S“ (safe) is pressed in.
• ready for shooting when the ”F“ (fire) is
pressed in.
Please note
Sicherungshebel
The safety lever must latch properly the ”F“ or
23
1 1
T
7
2
L
3 4
5
1 1
T
7
2
L
3 4
5
side view
6
6
1
2
3
4
5
6
7
24
Tension spring
Sear
View window
Release latch
Trigger housing
Trigger blade
Trigger support
F1
F2
T
L
B
C
First stage weight
Trigger weight
Trigger stop
First stage
Company adjusted / sealed
Company adjusted / sealed
view from below
Trigger
Warning!
Your ANSCHÜTZ target rifle offers you a
versatility of individual adjusting properties.
Please make sure that your rifle always is
unloaded when carrying out adjustments. The
trigger was attached to the sports device and
adjusted in this condition to guarantee utmost
safety. The trigger adjusted by the factory
guarantees utmost safety. Please observe the
general safety use when using your rifle.
Trigger adjustments
• if you turn it to the right (clockwise):
trigger weight is increased (+)
• if you turn it to the left (counter-clockwise):
trigger weight is decreased (-)
2. First stage weight (only for two stage
triggers)
Adjust first stage weight with set screw F1:
• if you turn it to the right (clockwise):
first stage weight is increased (+)
• if you turn it to the left (counter-clockwise):
first stage weight is decreased (-)
The trigger model 5065 is delivered with the
following adjustments: two stage trigger with
trigger weight adjusted to approx. 100 g.
Trigger weight and first stage weight depend
on each other with regard to the mechanic
mechanism. If one of them is changed there
will always be a corresponding change of
the other as well.
Note!
3. Sear engagement
Screws B and C have been adjusted in the
factory and are sealed. These screws must
not be adjusted or modified.
The sear engagement is the distance between
the second stage and the release of the
trigger. The sear engagement has been
adjusted to an optimum by the factory.
1. Trigger weight
Adjust the trigger weight with set screw F2,
adjustable from 30 g to 170 g:
Important note!
To protect your precise trigger and to
guarantee perfect operation you should
always close the cocking lever carefully. If
the trigger weight is too low or if the first stage
is too short, the trigger might release
inadvertently by a sudden impact or too
powerful closing of the cocking lever if the
rifle is loaded and not in the ”safe“ position.
4. First stage (only for two stage
triggers)
The single stage is the distance between the
trigger blade from zero position to the second
stage.
Adjust first stage with set screw L:
• if you turn it to the right (clockwise)
first stage is shortened (-)
• if you turn it to the left (counter-clockwise):
first stage is extended (+)
• if you turn it to the left (counter-clockwise):
overtravel is extended (+)
Attention!
The trigger stop set screw T can be turned
over the second stage or first stage function.
Malfunction (the trigger does not release)!
6. Adjustment of the trigger blade
Loosen clamping screws as desired. The
trigger blade can be moved in the
longitudinal guide, can be tilted
laterally and can be adjusted in height. The
trigger blade can also be pulled out
completely and turned by 180°. The longer
part of the trigger blade now is directed
downwards. The trigger blade holder is
asymmetric and can be mounted in opposite
direction (180°). The lateral trigger blade
adjustment can be varied this way.
5. Trigger-Stop
The trigger stop is the distance from the second stage to the stop of the trigger blade.
Adjust trigger stop with set screw T:
• if you turn it to the right (clockwise):
overtravel is shortened (-)
7. Change of two stage trigger into single stage trigger
Adjustment via set screw L. Turn set screw L to
the right (clockwise) until there is no first stage
anymore.
25
Warning
Single stage triggers are very sensitive and
must be operated with special care. In case
of a minimum trigger weight there might be a
malfunction and an increased risk (inadvertent shot release). If the sear engagement
is adjusted is too tight and adjusted with a
too low first stage pull or if the first stage is
too short in the case of single stage triggers
the trigger might be released inadvertently if
the cocking lever is closed or if the sports
device is put down with too much force. This
might lead to an inadvertent shot release in
loaded and unsaved condition of the firearm.
8. Change of single stage trigger into
two stage trigger
Adjustment via set screw L. Turn set screw L to
the left (counter-clockwise) until the desired
first stage is reached.
9. Malfunction of the trigger due to
wrong adjustment procedure
If the trigger is not adjusted correctly, malfunctions may occur. Tampering with the
trigger adjustments will not result in any
success. Therefore proceed as follows:
After every change the function of the trigger
26
must be checked. When the malfunction is
removed check the desired trigger values and
adjust them again if necessary.
The trigger catches the cocking piston or firing
pin, but the trigger does not release when it
is actuated:
• Make sure that the safety of the trigger is
released.
• The trigger stop set screw T is screwed in
too much. Turn it a few turns to the left
(counter-clockwise) until the cocking piston
or firing pin will release again when the
trigger is actuated.
The trigger does not catch the cocking piston
or firing pin:
• The set screw L (first stage) is screwed in
too much. Turn it a few turns to the left
(counter-clockwise) until the trigger catches
the cocking piston or firing pin again.
• Check to see if the spring (1) is correctly
attached and not defective.
After every change the function of the trigger
must be checked. When the malfunction is
removed check the desired trigger values and
adjust them again if necessary.
Basic adjustment of the trigger
With this procedure all adjustments at the
trigger are zeroed. From this zero position it
is possible to adjust the trigger to your
indiviudal requirements. To zero the trigger
proceed as follows:
• Remove the barreled action from the stock.
• Adjust set screw T in a way that the screw
head lies flush with the external surface of
the trigger housing (5).
• Adjust set screw L in a way that the trigger
support (7) is horizontal.
• Cock the barreled action.
• Adjust the trigger via the referring screws
to your individual requirements.
Dry firing device
The safety lever can also be used as dry firing
device.
• Open the cocking lever and pull it slowly
backwards to the stop.
• Press in safety lever at the “S“ potition. The
dry firing device can now be used.
• Close the cocking lever.
• Release the trigger.
Note
The safety/dry firing device can only be
activated, when the air rifle is cocked.
10. Maintenance
Compressed Air Cylinder
Please see chapter „Cleaning, maintenance,
care, lubrication“.
Handling
The rifle is equipped with an interchangeable
compressed air cylinder. The compressed air
cylinder can be changed whether it is filled
or not. The compressed air cylinder is not
screwed in all the way when it comes from
the factory. To protect the thread of the
compressed air cylinder against dust and
damage please always use the cap.
Warning
Only original ANSCHÜTZ compressed air
cylinders (max. 200 bar) must be used!
Repair of compressed air cylinders must only
be carried out by the manufacturer. Original
spare parts must be used. If this is not
observed we will not assume any liability or
warranty.
To attach the compressed air cylinder
The compressed air cylinder must be screwed
in horizontally, slowly an carefully to avoid
any damage.
the compressed air cylinder when you do not
use your compressed air rifle.
• Screw the compressed air cylinder 2 turns
out.
• Cock the rifle and release the trigger so
that the remaining air can escape.
• Repeat this process once or twice.
• Screw out the compressed air cylinder
completely by 3-4 further turns.
• Thus the compressed air cylinder can be
screwed out without any pressure on the
o-ring.
To change the compressed air cylinder
Attention
• Fill the compressed air cylinder before use
and screw it in manually.
• You feel a resistance before you reach
the stop, the valve thus opens automatically.
• Screw the compressed air cylinder in for
approx. one more turn until there is an
airtight connection at the stop.
• Screw out the compressed air cylinder by
turning it counter-clockwise either
manually or with a key. Attention: Screw
out the compressed air cylinder until you
hear the air escape (at least four turns).
Then screw in the compressed air cylinder
again. Thus a damage to the seals will
be avoided.
To fill the compressed air cylinder
To remove the compressed air cylinder
To protect the housing, valves, seals and
springs we recommend you always remove
Before you fill the compressed air cylinder,
please check all components which are used
in this process such as refill bottle, refill adapter
and compressed air cylinder for defects (e.g.
at the threads).
Warning
• Only use refill bottles with a maximum
pressure of 200 bar (2,790 psi)
• Only use compressed air free of oil and
water (DIN EN 12021).
• Make sure that there is no oil or grease
on the connecting threads.
• Only use the original ANSCHÜTZ refill
adapter(Order No. 711.3409), which is
delivered with your rifle.
• To refill the compressed air cylinder we
recommend the use of diving bottles.
Filling process
• Screw the adapter on the refill bottle.
• Screw the compressed air cylinder onto
the adapter.
• Tighten the hexagon screw of the adapter
by hand to prevent air escape.
• Open the valve of the bottle very slowly
until no more flow noise is audible.
• Close the valve of the compressed air
bottle after approx. 5 seconds (The compressed air cylinder will heat up slightly).
• Empty the adapter by releasing the hex
screw.
• Screw the hex screw into the adapter
again.
• Remove the compressed air cylinder and
screw it on the rifle by hand.
With a full cylinder (max. 200 bar/2790 psi)
approx. 300 shots (remaining pressure 65 bar
/ 943 psi) can be fired. With a Junior
compressed air cylinder 175 shots can be
fired. We recommend to never empty the
compressed air cylinder completely.
Compressed air bottles (Order No.
711.3510) are available in specialized gun
shops. The refilling of compressed air cylinders
is also possible in specialized gun shops or
in shops for diving equipment.
Warning
Compressed air refill bottles with an allowed
filling pressure of 300 bar (4,185 psi) are
offered as well. These bottles have the same
thread as the bottles with a filling pressure of
200 bar (2,790 psi). In case you use a bottle
with a filling pressure of 300 bar (4,185 psi)
it is absolutely necessary to use a pressure
reducer which is adapted to 200 bar /2,790
psi). For reasons of safety it is not allowed to
fill the compressed air cylinder with more than
the maximum pressure of 200 bar (2,790 psi).
27
It is also not allowed to use such a
compressed air cylinder or to store it. Please
therefore strictly observe the instructions for
the filling of the compressed air cylinder and
the corresponding technical rules of your
country.
3
8
1
6
2
Stock adjustment
11
Stock
The stock can be adjusted in the following
ways:
- in height via screw No. 1
- horizontally via screw No. 2
- in length via screw No. 3
Each adjustment is carried out by seperate
clamping device.
3 2
1
2 3
28
910 11 12
Stock
Subsequently tighten the screw again. You
can adapt the PRO grip parts according to
your requirements. The PRO grip material can
be shaped like wood. If you do not agree
with the surface of the cheek piece you can
smoothen it with the help of fine abrasive
paper (grain 200).
Cheek piece butt plate and adjustment
The cheek piece and butt plate adjustment
offers many adjusting possibilities to adjust the
air rifle to your individual requirements. To do
this loosen the screw in the guide and move
the carrier into the desired height and length.
The nut serves as a stop to fix the position.
7
Adjustment of grip
By loosening the grip screws the pistol grip
can be turned and tilted in all directions and
it can be adjusted in length. After the
adjustment of the grip the screws must be
tightened again.
Butt plate
1
2
3
4
5
6
7
8
3
4
5
Upper slope at shoulder
Height and angle adjustment of butt plate
Horizontal adjustment of butt plate
Height adjustment of hook
Thread for weight carrier
Vertical adjustment of butt plate
Stop nut
Length adjustment of butt plate
Cheek piece
9
10
11
12
13
13
Horizontal adjustment cheek piece
Slope cheek piece
Height adjustment of cheek piece
Stop nut
Adjustment of pistol grip:
The grip can be turned, pushed and tilted
in all directions
Sight Set
Assembly
The rear sight is pushed onto the rail of 11
mm width and fixed with the 2 screws (tighten
manually).
Vertical and horizontal adjustment
The screws for vertical and horizontal
adjustment have clicks. The impact point
changes from click to click.
• Shots are too high:
Turn knob into „H“ direction.
• Shots are too low:
Turn knob into „T“ direction.
• Shots are too far at the right:
Turn knob into „R“ direction.
• Shots are too far at the left:
Turn knob into „L“ direction.
Zeroing
After test firing of the rifle both screws should
be brought into the „0“ position.
• Loosen threaded pins in the knob.
• Bring knobs into the „0“ position.
• Tighten threaded pins in the knob manually.
Cleaning and care
Your ANSCHÜTZ rear sight is a highly
accurate device of utmost quality and
therefore needs special handling. Good care
and maintenance guarantee perfect
functionning. Protect your rear sight from dust
and dirt. Guides and spindles must not be
oiled or greased.
Exchange of inserts:
Loosen the rear knurled screw until the slot
opens. Grip the insert at the two studs and
pull it backwards to remove it. When inserting
another insert be aware that the different sizes
of the studs fit into the corresponding gaps.
For plastic apertures we reccomend the use
of our clamping screw 6822-12, Order No.
700.1320.
Attention:
Your ANSCHÜTZ rear sight has been
adjusted carefully and without play with the
help of special tools. It has been checked
several times and therefore does not require
any additional adjustments. Therefore only
operate the screws for vertical and horizontal adjustments as described above. Do not
turn the screws beyond their stop as this would
cause a permanent damage to the screw
and thread. In order not to endanger your
right of warranty, please contact your dealer
or our repair service in case any malfunctions
might occur.
Front sight
The front sight 6832 combines the
advantages of several sighting aids in only
one small and light device.
Cleaning, Maintenance, Care,
Lubrication
Even after considerable use, your
ANSCHÜTZ rifle will not require much
attention - a tribute to its solid design, first class
materials, well proven ANSCHÜTZ
workmanship and precision. All mechanic
components, however, are subject to a
certain kind of wear as all technically
demanding products. ANSCHÜTZ therefore
recommends an annual check-up to find out
whether any repair or adjustment works are
necessary. Regular care and maintenance,
however, does not replace repair works
which must be carried out immediately in the
case of any defects, malfunctions or sudden
safety problems.
If you follow the recommendations below, you
will help maintain the excellent performance
of your rifle for a long time.
Regular care after every shooting
• Please only use resin and acid free oils
(no salad or cooking oils). We recommend
our special grease 4425 (Order No.
710.6310)
• Clean the cone of the barrel and all steel
parts with a slightly oiled, lint-free cloth to
avoid corrosion which might occur as a
result of humid hands or condensed water.
• To avoid corrosion you also should clean
your barrel with a slightly oiled, lint-free
cloth or cleaning cords pulling them
through the barrel from the chamber to the
muzzle. Please use no other means
for cleaning especially no felt pellets and
grease.
• Remove the oil film with a dry cloth or
cleaning cords before you shoot again.
Careful cleaning after approx. 2,000
to 3,000 shots
• The barrel is cleaned with a brass brush
form the chamber to the muzzle (in
shooting direction. Never move the brush
29
back and forth in the barrel.
• Then pull cleaning cords in dry condition
through the barres until the last one shows
no considerable dirt.
• After cleaning or before shooting the next
time fire 10 to 20 shots to get back to the
former shooting performance (oil shots).
• Clean external parts with a slightly oiled
cloth.
Maintenance of the trigger
• Lubricate the bearings slightly with cold
resistant molybdenum disulphide grease
(no salad or cooking oil!) once a year.
• Spot a small amount of oil into the bearing
parts using a needle.
• The internal parts should not be washed
with spray or oil to avoid resin or other
residues in the trigger.
Attention
When cleaning the rifle no dirt, residues of
solvents, grease or non-suitable oils must get
into the trigger mechanism. We therefore
recommend either to clean your gun in a way
that it is horizontal or even with the stock up
to avoid any contamination of the valve unit
and trigger mechanism.
30
Protect your rifle against dust, sand, humidity,
heat and other harmful influences. Vacuum
clean your gun case or soft gun case once
a month to remove dust and lint. Gun cases
and soft gun cases should have a smooth
and dust rejecting inner lining.
Be aware that condensed water might occur
as a result of temperature variations. In such
a case it has to be removed at once. Only
use gun and soft cases for transport purposes.
Do not store your rifle there. Do not use
containers which might attract humidity to store
your sports device.
Be aware of other possible changes or
damage. In such a case take your rifle to an
authorized gunsmith for checking or send it
to our factory.
To reduce the risk of damage in transit
we recommend the disassembly of the
barreled action from the stock.
When you use your rifle frequently we
recommend having the seals and the piston
checked once a year.
Accessories
Please ask for our catalog or take a look at
our websites under www.anschuetz-sport.com
or www.anschutz-sporters.com. You will find
the latest information there and have the
possibility to subscribe to our free-of-charge
newsletter.
4. Heavy steel columns:
Approx. 100 g. For cheek piece adjustment
(Order No. 700.6337). For butt plate
adjustment (Order No. 700.6338).
Stickers
Your rifle is delivered with a sheet of various
stickers which can be attached to the barreled
action carrier as desired.
Special accessories
Additional weights
The air rifle can be adapted to your individual
requirements among others in four easy ways:
1. Barrel weights:
By pushing, adding or removing the additional weight.
2. Counter weight carriers:
They can be installed at the butt plate and
cheek piece. Weight rings can be added to
the counter weight carriers.
3. Weight rings:
By adding them to the columns of the cheek
piece and butt plate adjustment (Order No.
711.3805).
Warranty
A warranty of 2 years will be issued. Parts
which are subjected to wear are not part of
this warranty. In the case of warranty we
substitute the defective parts free of charge.
Cases of warranty will only be accepted if
the article in question and the corresponding
purchase receipt plus filled-in warranty card
are presented. Warranty will not be accepted
if changes or repair works have been carried
out by persons who are not authorized, if the
ANSCHÜTZ product is not used correctly, if
unlawful modifications or manipulations have
been carried out, if any knotting has been
damaged or if non-ANSCHÜTZ original
parts were used. Additional components must
only be used if they have been checked by
ANSCHÜTZ before and if they do not impair
the safety of the product.
In addition a damage to your ANSCHÜTZ
product is not subject to warranty if it is due
to an ignorance of this instruction leaflet or
improper care or treatment. When
dispatching your ANSCHÜTZ product,
please follow the referring legal regulations.
We wish you much pleasure and success with
your ANSCHÜTZ product and would be
pleased if you could let us have your ideas
on our products and the design of this
instruction leaflet.
Copyright
Product specifications, design and model
changes are subject to change without prior
notice. Dimensions and colors are subject to
change. With reservation of misprints and
errors. Goods are subject to prior sale.
Delivery subject to the presentation of the
referring license for the purchase of firearms.
ANSCHÜTZ, the ANSCHÜTZ logo and the
ANSCHÜTZ logo in connection with the
slogan „Die Meister Macher“ (also in
modified spelling) and „Soft-Link®“ are
protected brands of J.G. ANSCHÜTZ GmbH
& Co. KG, Ulm, Germany. The unauthorized
use of this brand name is not allowed and
punishable.
All rights of this instruction leaflet reserved.
The use of the instruction leaflet, also in
excerpts, is not allowed without the permission
of J.G. ANSCHÜTZ GmbH & Co. KG and
otherwise is punishable. This is especially
applicable for unauthorized copying,
translations and read-ins in electronic systems.
31
atmospheric pressure must be in line with the
values of the chart.
Typical composition of natural air
(ISO 2533)
3. Smell and taste
The air must be without significant smell or
taste.
Chart 1
Chart 2
4. Content of carbon dioxide
The content of carbon dioxide must not
exceed 500 ml/m3 (500 ppm).
Nominal
pressure
bar
Max. contents of water in the
air at atmospheric pressure
mg/m3
40 - 200
50
> 200
35
Argon (Ar)
1, 288
Carbon dioxide (CO2)
0, 048
0, 0314
Hydrogen (H2)
0, 000003
0, 00005
Appendix
lubricants 1) is to be applied.
Requirements for Compressed Air
Oxygen
The content of oxigen must be within the range
of (21 +/- 1) Vol. % (dry air).
Impurities
1. General information
Compressed air for respiratory equipment
must not contain impurities in a concentration
which might have toxic or harmful effects. In
any case there must be as little impurities as
possible and they must be far below the national limit of exposition. Combined effects
of more than one impurity must be considered.
If there are no national restricting requirements
the values of 2 to 3 must be applied.
Note: The limit concentration for every
impurity should be deducted from the national limit of exposition. The influences of
pressure and exposition time should be
considered as much as possible.
2. Lubricants
The content of lubricants (drops or mist) must
not exceed 0.5 mg/m3. In case of synthetic
34
5. Content of carbon monoxide
The content of carbon monoxide must not
exceed 15 ml/m3 (15 ppm).
Content of water
1. There must be no liquid water.
2. The air for compressed air respirators must
have a dew point which is low enough to
avoid condensing and freezing. If the
equipment is used and stored under a known
temperature the dew point under pressure
must be at least 5°C below the assummably
lowest temperature. If the conditions for use
and storage of the compressed air reservoir
are not known, the dew point under pressure
must not exceed -11°C.
3. The maximum content of water in the air at
Note:
The contents of water of the air which is
delivered from the compressor to fill 200 bar
or 300 bar compressed air containers should
not exceed 25 mg/m3.
Checks
Any suitable method is allowed as far as it
corresponds to the following general
requirements:
• to measure and judge the results the
accuracy of the method must be
considered and
• the proof limit of the applied method must
be below the required limit.
Components
Oxygen (O2)
Mass-%
(dry air)
23, 14
Volume-%
(dry air)
20, 9476
Nitrogen (N2)
75, 5
78, 084
0, 934
Neon (NE)
0, 00127
0, 001818
Helium (HE)
0, 000073
0, 000524
Krypton (Kr)
0, 00033
0, 000114
Xenon (Xe)
0, 000039
0, 0000087
Labelling of the Compressed Air
Cylinder
Marking:
D / ANSCHÜTZ - WALTER HENRICH
GMBH / Serie No. 001234
PW 200 BAR - PH 300 BAR - 0,32 KG - UN
1002
Zul.-Nr.: 01 202 322 - B - 0043 / T - D - π
0035 - 2005 / 06 - 15
Mod. 1 / AL
READ INSTRUCTIONS BEFORE USE
Descriction:
• D:
Country of manufacture.
• ANSCHÜTZ-WALTER HENRICH GMBH:
Name of manufacturer.
• Serie No. 001234:
Serial number/ counting number.
• PW 200 BAR:
Max. allowed filling pressure at 15 °C.
• PH 300 BAR:
Test pressure.
• 0,32 KG:
Weight of the compressed air cylinder
tube without valves.
• UN 1002:
International sign for compressed air.
• 01 202 322 - B - 0043 / T:
Number of admission.
• π:
Mark of conformitiy according to rule
1999/36/EG.
• 0035:
Number of the referring authority (TÜV
Rheinland).
• 2005 / 06:
Year of manufacture/ Month of
manufacture.
• 15:
Last two digits of the year in which the
compressed air cylinder must be checked
again.
• Mod. 1 / AL:
Aluminum compressed air cylinder.
• Read INSTRUCTIONS BEFORE USE:
General note.
Declaration of
conformity of
compressed air
cylinder
35
✄
GARANTIE · WARRANTY · GARANTIE · WARRANTY · GARANTIE · WARRANTY · GARANTIE · WARRANTY · GARANTIE · WARRANTY · GARANTIE · WARRANTY · GARANTIE · WARRANTY · GARANTIE · WARRANTY · GARANTIE ·
WARRANTY · GARANTIE · WARRANTY · GARANTIE · WARRANTY
· GARANTIE · WARRANTY · GARANTIE · WARRANTY
FABRIKATIONS-NR.:
<<<<GARANTIE>>>>
Serial-No.
/ Numéro de série:
· GARANTIEDieser
· WARRANTY
GARANTIE
WARRANTY
· GARANTIE
· WARRANTY
· GARANTIE · WARRANTY · GARANArtikel wurde zum ·Verkauf
freigegeben, ·nachdem
er
selbst, seine Materialien und Einzelteile strenge Kontrollen
TIE · WARRANTY
GARANTIE
· WARRANTY
WARRANTY
· GARANTIE · WARRANTY · GARANTIE ·
durchlaufen·haben,
oder das Gewehr
beim Beschuss seine · GARANTIE ·DATUM
DES VERKAUFS:
Haltbarkeit und Funktion unter Beweis gestellt hat. Wir überDate / Date d‘achat:
WARRANTYnehmen
· GARANTIE
· GARANTIE
· WARRANTY · GARANTIE · WARRANTY · GARANTIE · WARRANTY
für zwei Jahre· WARRANTY
volle Garantie auf Materialoder
Bearbeitungsfehler (ausgenommen Schaft- und Federbrüche),
GEKAUFT
BEI:
· GARANTIEsofern
· WARRANTY
· GARANTIE
· WARRANTY
· GARANTIE
· WARRANTY
· GARANTIE · WARRANTY · GARANein Mangel nachweisbar
bereits im Zeitpunkt
der
This item was bought from / Détaillant:
Übergabe des Artikels vorlag. Für Mängel, die auf unsachTIE · WARRANTY
· GARANTIE
· WARRANTY
gemäße Behandlung
oder auf Reparaturen
zurückzuführen · GARANTIE · WARRANTY · GARANTIE · WARRANTY · GARANTIE ·
sind, stehen wir nicht ein. Die Garantieleistung steht in unseWARRANTYrer· GARANTIE
· WARRANTY · GARANTIE · WARRANTY · GARANTIE · WARRANTY · GARANTIE · WARRANTY
Wahl in Nachbesserung oder Neulieferung. Schadensersatzansprüche – aus welchem Rechtsgrund auch immer
· GARANTIEgeltend
· WARRANTY
· GARANTIE · WARRANTY · GARANTIE · WARRANTY · GARANTIE · WARRANTY · GARANgemacht – sind ausgeschlossen. Wir bitten, diese
Karte – von·Ihrem
Waffenfachgeschäft
ausgefüllt und unter- · GARANTIE · WARRANTY · GARANTIE · WARRANTY · GARANTIE ·
TIE · WARRANTY
GARANTIE
· WARRANTY
schrieben – mit dem Artikel an uns einzusenden.
WARRANTY · GARANTIE · WARRANTY · GARANTIE · WARRANTY
WARRANTY
Stempel· GARANTIE
und Unterschrift· des
Fachhändlers · GARANTIE · WARRANTY
J.G. ANSCHÜTZ GmbH & Co. KG · Jagd- und Sportwaffenfarbrik
Postfach
1128
·
D-89001
Ulm/Germany
·
www.anschuetz-sport.com
stamp
of
dealer
/
timbre
du
détaillant
· GARANTIE · WARRANTY · GARANTIE · WARRANTY · GARANTIE · WARRANTY · GARANTIE · WARRANTY · GARANTIE · WARRANTY · GARANTIE · WARRANTY · GARANTIE · WARRANTY · GARANTIE · WARRANTY · GARANTIE ·
WARRANTY · GARANTIE · WARRANTY · GARANTIE · WARRANTY · GARANTIE · WARRANTY · GARANTIE · WARRANTY
· GARANTIE · WARRANTY · GARANTIE · WARRANTY · GARANTIE · WARRANTY · GARANTIE · WARRANTY · GARAN
37
✄
GARANTIE · WARRANTY · GARANTIE · WARRANTY · GARANTIE · WARRANTY · GARANTIE · WARRANTY · GARANTIE · WARRANTY · GARANTIE · WARRANTY · GARANTIE · WARRANTY · GARANTIE · WARRANTY · GARANTIE ·
WARRANTY · GARANTIE
· GARANTIE
· WARRANTY
· WARRANTY
< < <· WARRANTY
<GARAN
T I E > > ·>WARRANTY
>
< < ·<GARANTIE
<WARR
A N T Y > >· GARANTIE
>>
Cet article ·n‘a
été mis en vente·qu‘après
une vérification
After throrough
testing of materials
and finished parts
this
· GARANTIE · WARRANTY
GARANTIE
WARRANTY
· GARANTIE
· WARRANTY
· GARANTIE
· WARRANTY
· GARANminutieuse des pièces et matières à tous les stades de la
item has passed a rigid final inspection as well as proof
fabrication ou après
subi un contrôle ·deGARANTIE
fiabilité et
testing or test shooting.· If,GARANTIE
despite these precautions,
there
TIE · WARRANTY · GARANTIE
· avoir
WARRANTY
· WARRANTY
· WARRANTY
· GARANTIE ·
de bon fonctionnement au banc d‘épreuve. Nous la garanis any failure due to defective materials or workmanship
tissons
pendant
deux
ans
contre
tout
défaut
de
matière
ou
(except
brocken
stocks
and
springs)
within
two
years
the
WARRANTY · GARANTIE · WARRANTY · GARANTIE · WARRANTY · GARANTIE · WARRANTY · GARANTIE · WARRANTY
vice de fabrication (sauf contre les bris de crosse ou de
necessary repairs will be carried out without charge, in so
ressorts) dans
la mesure ou il peut
prouvé qu‘un défaut
far as the
item was evidently· defective
at the time
of
· GARANTIE · WARRANTY
· GARANTIE
· être
WARRANTY
· GARANTIE
· WARRANTY
GARANTIE
· WARRANTY
· GARANéxistait déjà au moment de l‘achat de l‘article. Nous ne
purchase. No claims under warranty can be accepted if
répondons pas des
défauts résultant d‘une
utilisation
the item has been subjected
to improper use or·unauthorized
TIE · WARRANTY · GARANTIE
· WARRANTY
· GARANTIE
· WARRANTY
· GARANTIE
WARRANTY · GARANTIE ·
incorrecte ou de réparations. Nous nous réservons d‘exérepair. The item will be either repaired or replaced at our
WARRANTY · GARANTIE
WARRANTY
GARANTIE
· WARRANTY
· GARANTIE
· WARRANTY
GARANTIE
· WARRANTY
cuter la ·garantie
soit par remise· en
état soit par échange.
discretion.
Claims for compensation
– put forward· for
any
Les demandes en dommages-intérêts sont irrecevables quellegal cause whatsoever – are excluded. This warranty card
· GARANTIE · WARRANTY
· WARRANTY
· GARANTIE
· WARRANTY
· WARRANTY
· GARANle que soit·laGARANTIE
cause mise en avant.
Veuillez faire remplir
– completed
and stamped by· GARANTIE
your dealer – must
be
et signer cette carte par votre armurier et nous l‘adresser
returned with the item for repairs.
TIE · WARRANTY · GARANTIE
· WARRANTY · GARANTIE · WARRANTY · GARANTIE · WARRANTY · GARANTIE ·
avec l‘article.
WARRANTY · GARANTIE
· WARRANTY
GARANTIE
· WARRANTY
· GARANTIE
WARRANTY
· GARANTIE · WARRANTY
J.G. ANSCHÜTZ
GmbH & Co. KG · ·Jagdund Sportwaffenfarbrik
J.G. ANSCHÜTZ
GmbH & Co.·KG
· Jagd- und Sportwaffenfarbrik
Postfach 1128 · D-89001 Ulm/Germany · www.anschuetz-sport.com
Postfach 1128 · D-89001 Ulm/Germany · www.anschuetz-sport.com
· GARANTIE · WARRANTY · GARANTIE · WARRANTY · GARANTIE · WARRANTY · GARANTIE · WARRANTY · GARANTIE · WARRANTY · GARANTIE · WARRANTY · GARANTIE · WARRANTY · GARANTIE · WARRANTY · GARANTIE ·
WARRANTY · GARANTIE · WARRANTY · GARANTIE · WARRANTY · GARANTIE · WARRANTY · GARANTIE · WARRANTY
· GARANTIE · WARRANTY · GARANTIE · WARRANTY · GARANTIE · WARRANTY · GARANTIE · WARRANTY · GARAN
38
Fabr.-Nr.:
Serial No.:...................................................................................
Originalschussbild Ihres Gewehres 5 Schuss auf 10 m
Original group of your rifle 5 shots at 10 m
Bitte hier eintragen · Please fill in here
Ihr Sportgerät wurde mit mehreren Losen Munition eingeschossen. Das beiliegende Schussbild
spiegelt das an diesem Tag am besten erzielte Ergebnis bei optimalsten Bedingungen wider.
Wir verwenden ausschliesslich Markenmunition der Premium Qualität.
J.G. ANSCHÜTZ GmbH & Co. KG
Jagd- und Sportwaffenfabrik
Daimlerstrasse 12
Tel. (++49) - (0) - 7 31 - 40 12-0
D-89079 Ulm / GERMANY Fax (++49) - (0) - 7 31 - 40 12-700
Postfach 1128
anschuetz-sport.com
D-89001 Ulm / GERMANY [email protected]
DSCHI · 02/05/2.000 · www.design-agentur.de
Your ANSCHÜTZ product has been testfired with several lots of ammunition. The enclosed group
mirrors the best result of this day at optimum conditions. We exclusively use renowned ammunition
of premium quality.