1
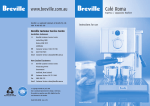
Breville is a registered trademark of Breville Pty. Ltd. ABN 98 000 092 928 Breville Customer Service Centre Australian Customers Breville Customer Service Centre PO Box 22 Botany NSW 2019 AUSTRALIA Customer Service: 1300 139 798 Fax (02) 9384 9601 Email Customer Service: [email protected] New Zealand Customers Breville Customer Service Centre Private Bag 94411 Greenmount Auckland, New Zealand Customer Service: 0800 273 845 Fax 0800 288 513 Email Customer Service: [email protected] www.breville.com.au © Copyright. Breville Pty. Ltd. 2008 Due to continual improvements in design or otherwise, the product you purchase may differ slightly from the one illustrated in this booklet. Model: BES250/BES250S Issue 1/08 Café Venezia Espresso / Cappuccino Machine Instructions BES250 BES250S Contents Page Breville Recommends Safety First 4 Know Your Breville Café Venezia Espresso / Cappuccino Machine 6 Operating Your Breville Café Venezia Espresso / Cappuccino Machine 8 Coffee Making Tips 13 Care and Cleaning 15 Trouble Shooting Chart 17 Coffees to Try 19 Notes 20 Congratulations on the purchase of your new Breville Café Venezia Espresso / Cappuccino Machine Breville recommends safety first Breville recommends safety first continued We at Breville are very safety conscious. We design and manufacture consumer products with the safety of you, our valued customer, foremost in mind. In addition, we ask that you exercise a degree of care when using any electrical appliance and adhere to the following instructions. IMPORTANT SAFEGUARDS FOR YOUR Breville Café Venezia Espresso / Cappuccino Machine IMPORTANT SAFEGUARDS FOR ALL ELECTRICAL APPLIANCES • Carefully read all instructions before operating and save for future reference. • Unwind the cord before use. • Remove any packaging material and promotional labels or stickers before using the Breville Café Venezia Espresso / Cappuccino Machine for the first time. • Do not place the Breville Café Venezia Espresso / Cappuccino Machine near the edge of a bench or table during operation. Ensure the surface is level, clean and free of water and other substances. • Do not place the Breville Café Venezia Espresso / Cappuccino Machine on or near a hot gas or electric burner, or where it could touch a heated oven. • Do not use the Breville Café Venezia Espresso / Cappuccino Machine on a sink drain board. • Always ensure the Breville Café Venezia Espresso / Cappuccino Machine is properly assembled before connecting to power outlet and operating. • The Breville Café Venezia Espresso / Cappuccino Machine is not intended to be operated by means of an external timer or separate remote control system. • Never remove the filter holder during the brewing operation as the machine is under pressure. • Do not leave the Breville Café Venezia Espresso / Cappuccino Machine unattended when in use. • Do not touch hot surfaces. Allow the Breville Café Venezia Espresso / Cappuccino Machine to cool down before moving or cleaning any parts. • Do not place anything, other than cups for warming, on top of the Breville Café Venezia Espresso / Cappuccino Machine. • Always switch off the Breville Café Venezia Espresso / Cappuccino Machine by pressing the POWER button ‘Off’, switch off at the power outlet and unplug if appliance is to be left unattended, if not in use, before cleaning, before attempting to move the appliance, disassembling, assembling and when storing the appliance. • To protect against electric shock, do not immerse cord, plug or appliance in water or any other liquid. • Do not let the cord hang over the edge of a bench or table, touch hot surfaces, or become knotted. • This appliance is not intended for use by persons [including children] with reduced physical sensory or mental capabilities, or lack of experience and knowledge unless they are supervised or have been given instruction concerning use of the appliance by a person responsible for their safety. • Children should be supervised to ensure they do not play with the appliance. • It is recommended to inspect the appliance regularly. Do not use the appliance if power supply cord, plug or appliance becomes damaged in anyway. Return the entire appliance to the nearest authorised Breville service centre for examination and/or repair. • Any maintenance other than cleaning should be performed at an authorised Breville Service Centre. • The installation of a residual current device (safety switch) is recommended to provide additional safety protection when using electrical appliances. It is advisable that a safety switch with a rated residual operating current not exceeding 30mA be installed in the electrical circuit supplying the appliance. See your electrician for professional advice. • This appliance is for household use only. • Do not use this appliance for anything other than its intended use. Do not use in moving vehicles or boats. Do not use outdoors. • Keep the Breville Café Venezia Espresso / Cappuccino Machine and accessories clean. • Follow the cleaning instructions provided in this book refer page 15. • Use only cold tap water in the water tank. • Do no use any other liquid. • Never use the Breville Café Venezia Espresso / Cappuccino Machine without water in the water tank. • Ensure the filter holder is firmly inserted and secured into the brewing head before using the machine. Know your Breville Café Venezia Espresso / Cappuccino Machine Know your Breville Café Venezia Espresso / Cappuccino Machine Die-cast cup warming tray Stainless steel finish Thermocoil heating system Power button Heating light Selector control for espresso or steam function Auto purge system for optimal coffee extraction 1 Advanced dual wall crema system for ideal crema Single axis swivel steam wand with stainless steel frothing attachment 2 3 4 5 Milk frothing jug Filter holder Extra large cup height, ideal for coffee mugs Cleaning tool storage located at the front of the machine under the left of the group head Removable drip tray and stainless steel grid 1. Removable & transparent 2.75L water tank with level indicator. Filled from the back of the machine. 2. 1 and 2 cup dual wall stainless steel filters 3. Filter eject system 4. Italian designed and made 15 bar pump system 5. Combined measuring spoon and coffee press Operating your Breville Café Venezia Espresso / Cappuccino Machine Operating your Breville Café Venezia Espresso / Cappuccino Machine (continued) Before first use Pre-warming Cups Tamping the Ground Coffee The Cup Warming Plate will start to warm as the machine heats. Distribute the ground coffee evenly in the filter and press down firmly with the tamping end of the measuring spoon and ensure that it is level. Remove any packaging material or promotional stickers before using your Breville Café Venezia Espresso / Cappuccino Machine for the first time. Wipe the outer housing with a soft damp cloth and dry thoroughly. Do not immerse the outer housing, power cord or plug in water or any other liquid. The water tank is located at the back of the machine. Remove the water tank. Wash in warm, soapy water using a non-abrasive washing liquid. Rinse and dry thoroughly. Do not clean any of the parts or accessories in the dishwasher. Filling the Water Tank Open up the water tank lid and remove the water tank. Fill with cold water to the maximum mark and replace in the machine. Close the water tank lid. The water tank has an integrated lid /carry handle. The water tank should be filled with fresh cold water before use. Check water level before use and replace the water daily. Pre-warm the cups by placing on the Cup Warming Plate or placing hot water from the group head. This will help maintain the coffee’s optimal temperature when brewed into the cups. Preparing the Coffee Pre-heating the Machine For optimal crema, it is recommended to carry out a complete brewing operation with water but without any coffee grinds before making your first coffee to ensure that the machine has been pre-heated. Ensure the ‘Selector Control’ is in the ‘Standby’ position and plug the power cord into a 230/240V power outlet and switch on. Place the 1 or 2 cup filter basket into the group handle. Use the smaller filter for 1 cup larger filter for 2 cups and the Use 1 level measure of ground espresso coffee for the 1 cup filter basket and 2 level measures for the 2 cup filter basket. It is important to use the correct amount of coffee for each filter as the filter perforations have been constructed to utilise the pressure in the machine to extract optimal flavour with each brewing. Press the ‘POWER’ button ‘On’. The ‘POWER’ button surround will illuminate. The red ‘HEATING’ light will turn off when the machine has reached the correct temperature. As soon as the red ‘heating’ light turns off, set the ‘Selector Control’ to the ‘ESPRESSO’ position and run a small amount of water through the brewing head for a few seconds without the filter holder in place. Priming the Group Head Pre-heat the filter holder by placing underneath the group head. Rinse with hot water from the group head using the ‘ESPRESSO’ pour function. Dry the filter and filter holder thoroughly before use. Before placing the filter holder into position, it is recommended to run a short flow of water through the group head. When brewing for a mug of coffee always use the 2 cup filter. If you require a larger coffee, add the hot water first and then brew the coffee. Clean any excess ground coffee from the rim of the filter holder to ensure a proper fit into the group head. Place a container or empty cup under the group head, or allow water to flow straight into the drip tray. With the filter holder removed, prime the group head by turning the ‘SELECTOR CONTROL’ to the “ESPRESSO’ function for approximately 5 seconds. A pumping noise will be heard during this operation, and water will run through the group head. Operating your Breville Café Venezia Espresso / Cappuccino Machine (continued) Operating your Breville Café Venezia Espresso / Cappuccino Machine (continued) Inserting the Filter Holder Brewing Coffee Emptying the Filter Holder Place the filter holder underneath the group head so that the handle is aligned with the insert graphic. Insert the filter holder up into the group head and rotate the handle to the right until resistance is felt or until it can no longer be rotated. This will be at an approximate 90° angle to the machine. Ensure the ‘Selector Control’ is in the ‘Standby’ position and plug the power cord into a 230/240V power outlet and switch on. Remove the filter holder from the group head by rotating the filter holder to the left until it releases. To empty the used coffee grounds, turn the filter holder upside down in a bin and gently tap out the coffee puck (used coffee grounds should be thrown away with domestic waste and not down the sink which may block drains). Remove the filter by pressing on the ‘EJECT’ button on the underside of the filter holder. Rinse the filter and filter holder with water and allow to dry. Press the ‘POWER’ button ‘On’. The ‘POWER’ button surround will illuminate. The red ‘HEATING’ light will turn off when the machine has reached the correct temperature. As soon as the red ‘heating’ light turns off, the machine is heated up. Ensure the drip tray and filter holder are in place. Place one or two pre-heated cups beneath the filter holder outlet. Set the ‘SELECTOR CONTROL’ to the ‘ESPRESSO’ position. After a few seconds, the extraction of espresso begins. When sufficient coffee has been extracted, set the ‘SELECTOR CONTROL’ to the ‘STANDBY’ position. This will stop the flow of coffee. If you do not need to use the steam function, press the ‘POWER’ button ‘Off’, unplug the power cord and allow the machine to cool. Recommended measurements are 30ml for 1 cup and 60ml for 2 cups. Lock • For improved results allow the water to be released and to start generating steam before immersing into milk. • Hold the milk frothing jug at an angle so that steam wand and/or the frothing attachment sits just below the surface of the heating milk and the steam will move the milk around the inside of the milk frothing jug in a circular motion. The machine remains ready for brewing and maintains a constant heating temperature as long as the ‘POWER’ switch is left ‘On’. If the temperature should drop, the red heating light will illuminate and the machine will automatically heat up to the correct brewing temperature. WARNING: THE METAL PARTS OF THE FILTER HOLDER MAY STILL BE VERY HOT. COOL THESE PARTS IN COLD WATER. How To Texture Milk For A Cappuccino Or Latté • When the desired volume of froth has been achieved, immerse the steam wand and / or frothing attachment deeper into the milk frothing jug to heat the milk. The Breville Café Venezia Espresso / Cappuccino Machine comes complete with a stainless steel frothing attachment for easier texturing of milk. When using the frothing attachment on the steam wand a large amount of textured milk is easily created. The first step in making a cappuccino/latté is to make a short espresso (see “Brewing Coffee”). Then: • Pour the desired amount of cold fresh milk (approx. 1⁄3 full) into the stainless steel milk frothing jug. • Turn the ‘Selector Control’ to the ‘STEAM’ position. The red light will start to flash indicating that the Thermocoil Heating System is heating and preparing to create steam. 10 • Hold the milk frothing jug at an angle with one hand and place your other hand on the outer base of the milk frothing jug. 11 Operating your Breville Café Venezia Espresso / Cappuccino Machine (continued) • When the base of the milk frothing jug becomes too hot to touch, set the ‘Selector Control’ to the ‘STANDBY’ position, stopping the steaming function before removing the milk frothing jug. A pumping noise will sound for a short time; do not be alarmed as there will be a five second delay prior to the machine carrying out the Auto-purge function. • The optimum milk temperature is 60-65ºC. A thermometer could be used to achieve the correct temperature. Milk will begin to boil at around 72ºC. If the milk boils, or becomes too hot, the natural sweetness and texture of the milk will be affected. • To avoid milk build up ensure steam wand is cleaned immediately after use. • To eliminate larger bubbles, tap the milk frothing jug lightly on bench top to combine froth and steamed milk before pouring. If less texture is required, remove the frothing attachment from the steam wand and steam the milk using the steam wand. To remove the frothing attachment, ensure it is cool then simply pull down and remove. • To refit the frothing attachment, ensure it is securely attached to the steam wand by inserting it onto the steam wand and pushing firmly upwards onto the rubber surround. • Pour the steamed milk into each cup of freshly brewed espresso coffee and spoon in the frothing milk, in the following ratios: Cappuccino ⁄3 espresso 1 ⁄3 steamed milk 1 ⁄3 frothed milk 1 Latté 12 ⁄3 espresso topped with steamed milk and about 10mm of frothed milk (traditionally served in a glass) 1 Always ensure that the frothing attachment has been firmly pushed onto the steam wand. For best results use fresh cold milk. Always clean the steam wand and froth enhancer immediately after every use (refer to care and cleaning). Coffee Making Tips Tips On Making The Perfect Espresso Don’t just rely on your coffee machine to do all the work. Making a good cup of coffee is: an art. Warming Your Cup Or Glass For brewing more coffee immediately after using the steam function, this machine features an auto-purge function. This ensures that ground coffee will not be burnt by the initial water flow from the Thermocoil being too hot. Instead this water is automatically released internally into the drip tray ensuring that the internal thermostat is at optimal temperature for extracting coffee. Your coffee will always be extracted at this optimal temperature ensuring only the best flavoured coffee is achieved. WARNING: MILK SHOULD NOT BE ALLOWED TO RUN OVER THE TOP OF THE FROTH ENHANCER, OTHERWISE IT WILL NOT FUNCTION PROPERLY. TO AVOID SPLATTERING OF HOT MILK, DO NOT LIFT THE STEAM NOZZLE ABOVE THE SURFACE OF THE MILK WHILE FROTHING. ENSURE THE SELECTOR CONTROL IS IN THE ‘OFF’ POSITION BEFORE REMOVING THE FROTHING JUG. A warm cup will help maintain the coffee’s optimal temperature. Preheat your cup by storing on the cup warming tray or rinsing with hot water from the group head. Warming The Filter Holder A cold filter holder can drop the extraction temperature enough to significantly affect the quality of your coffee. Always ensure the filter holder is preheated by running hot water through it before tamping it with coffee. Always wipe the filter and filter holder dry before tamping with ground coffee as moisture can encourage ‘drilling’ - this is when water bypasses the ground coffee during extraction. If the grind is too coarse the water will flow through the coffee too quickly. This will result in an under-extracted coffee lacking in flavour and without the thick créma on the top layer of coffee. The Right Measurement A single espresso is made with ¼ ounce or 7g of coffee. A level measure of the tamp / spoon is the correct amount of coffee for a single espresso and 2 level measures for a double espresso. It is important to use the correct filter for the amount of coffee. Tamping Correctly Level the desired amount of coffee by gently tapping the side of the filter holder before pressing down firmly with the tamping end of the measuring spoon. When packing for a double espresso it is important only to tamp after the second measure. Tamping between measures will create a layer in the coffee that can impede full extraction. Purge The Group Head The Grind If using a pre-ground coffee, ensure an espresso grind suitable for espresso/ cappuccino machines is purchased. If grinding coffee beans, the grind should be fine but not too fine or powdery. The grind will affect the rate at which the water flows through the coffee in the filter and therefore the taste of the coffee. Before inserting the filter holder, run some water through the group head. It will ensure that your machine has a last minute ‘clean through’ and stabilises the temperature prior to extracting. Make sure to wipe off any excess coffee from the rim of the filter to ensure a proper seal is achieved under the group head. If the grind is too fine (looks like powder and feels like flour when rubbed between fingers), the water will not flow through the coffee even when under pressure. The resulting coffee will be over extracted, too dark and bitter, with a mottled and uneven créma on top. 13 Coffee Making Tips (continued) Care and Cleaning Brewing Your Espresso Before cleaning, ensure the ‘Selector Control’ is in the ‘STANDBY’ position and press the ‘POWER’ button ‘Off’. Switch off at the power outlet, then unplug the power cord and allow the unit to cool. The most common mistake in brewing is to over extract from your ground coffee. This results in a bitter beverage with visibly bleached crèma. Crèma is the caramel coloured layer that floats on top of the coffee following extraction. Correct Extraction A single espresso is approx 30ml A double espresso is approx 60ml Cleaning The Steam Wand And Froth Enhancer • The steam wand and froth enhancer should always be cleaned after frothing milk. • Remove the froth enhancer and rinse under warm tap water. Cleaning The Filters, Filter Holder And Brewing Head The taste of your coffee will, of course, depend on personal preference and on many other factors such as: • Freshness of the coffee bean • Fineness or coarseness of the grind • Tamping pressure (pressing down) • Quantity of the coffee grind in the filter basket • The stainless steel filters and filter holder should be rinsed under water directly after use to remove all coffee particles. Should the fine holes in the filters become blocked; the fine pin on the cleaning tool can be used to clear the holes. We recommend experimenting by varying these factors to achieve the coffee taste of your preference. • Wipe the steam wand with a damp cloth, and then with the steam wand directed back into the drip tray, briefly set the ‘SELECTOR CONTROL’ to the ‘STEAM’ position. This will clear any remaining milk from inside the steam wand. • If the steam wand becomes blocked, wait for the machine to cool before using the ‘CLEANING TOOL’ to unblock the opening. • If the steam wand continues to be blocked, the tip of the steam wand can be removed by using the spanner in the middle of the cleaning tool. • Soak the tip in hot water before using the pin on the cleaning tool to unblock. Replace the tip back onto the steam wand and secure with the cleaning tool. 14 • The group head interior should be wiped with a damp cloth to remove any ground coffee particles. • Periodically run water through the machine with the filter holder in place, but without any ground coffee, to rinse out any residual coffee particles. 15 Trouble Shooting Guide Care and Cleaning (continued) Cleaning The Housing / Cup Warming Tray Diluted solution • 1 part white vinegar PROBLEM POSSIBLE CAUSES (for softer water) • The outer housing can be wiped with a soft, damp cloth (do not use abrasive agents or cloths which can scratch the surfaces). • 2 parts cold tap water Coffee does not run through • Machine is not turned on or plugged in Concentrated solution • 1 part white vinegar • Water tank is empty • 1 part cold tap water • Selector control not in ‘Espresso’ position WARNING: DO NOT IMMERSE CORD, PLUG OR APPLIANCE IN WATER OR ANY OTHER LIQUID. Cleaning The Drip Tray • The drip tray should be removed, emptied and cleaned at regular intervals, particularly when the drip tray full indicator is showing ‘Empty Me!’ • Remove the stainless steel grid and pull the ‘Empty Me!’ full indicator upwards to dislodge from the drip tray. Wash with warm soapy water, using a non-abrasive washing liquid, rinse and dry thoroughly. To re-insert the ‘Empty Me!’ full indicator back into the drip tray, simply push back into aligning slots. WARNING: THE WATER TANK SHOULD NEVER BE REMOVED OR COMPLETELY EMPTIED DURING DECALCIFYING. (for harder water) • Remove the filter holder and frothing attachment. Pour the mixture of white vinegar and water into the water tank. • Plug the machine into the power outlet and switch on. • Excessive tamping Coffee runs out too quickly • Coffee grind is too coarse • Incorrect quantity of coffee in the filter basket • Not firmly tamped Coffee runs too slowly • The water tank is empty or low • Place a large container under the group head, and steam wand. • Too much coffee in the filter basket. • When the brewing temperature has been reached the red ‘HEATING’ light will switch off. Turn the ‘SELECTOR CONTROL’ to the ‘ESPRESSO’ position to commence pour. • After regular use, hard water can cause mineral build up in and on many of the inner functioning components, reducing the brewing flow, power of the machine, and affecting the quality of coffee. • Set the ‘SELECTOR CONTROL’ to the ‘STEAM’ position and allow the remaining solution to run through the steam wand. When the solution has run through, set the ‘SELECTOR CONTROL’ back to ‘STANDBY’ position. • We advise decalcifying the machine on a regular basis (every 2-3 months) using a mixture of white vinegar and water. • After decalcifying, remove the water tank and rinse thoroughly then re-fill with fresh cold water. To rinse the machine, repeat previous steps. 16 • The filter is blocked (see Care and Cleaning) • Coffee grind is too fine Decalcifying The Machine Do not clean any of the parts or accessories in the dishwasher. • Too much coffee in the filter • Press the ‘POWER’ button to the ‘On’ position and turn the ‘SELECTOR CONTROL’ to the ‘STANDBY’ position. • Once half the mixture of white vinegar and water has run through the group head turn the ‘SELECTOR CONTROL’ to the ‘STANDBY’ position. • Follow the instructions provided or use the following as a guide: • Coffee grind is too fine • Ensure the ‘SELECTOR CONTROL’ is in the ‘STANDBY’ position, the ‘POWER’ button is in the ‘Off’ position and the machine is switched off at the power outlet and unplugged. • Machine is blocked by scale build up (see Care and Cleaning) • Excessive tamping Coffee runs out around the edge of the filter holder • Filter holder is not inserted in the brew head properly Coffee is too weak or watery • Coffee grind is not fine enough (use coffee ground for espresso machines) • There are coffee grounds affecting the sealing around the filter rim • Not enough coffee in the filter • Incorrect quantity of coffee in the filter basket • Not firmly tamped Coffee is too cold • Machine not preheated • Cups not preheated • Milk not heated enough (if making a cappuccino or latte) refer to Milk guide Do not use any other decalcifying agents, other than vinegar. 17 Trouble Shooting Guide (continued) PROBLEM POSSIBLE CAUSES No crema • Coffee grind is too coarse • Not enough coffee in the filter • Incorrect quantity of coffee Coffees To Try CAPPUCCINO A cappuccino has one-third espresso, one-third milk and one-third foam. It is traditionally drunk before noon. For added finesse, dust with chocolate. • Not firmly tamped No steam is generated • Coffee is not fresh ESPRESSO • Machine is not turned on Intense and aromatic, an espresso or short black as it’s also known. It is served in a small cup or glass to a level of approximately 30mL. • Water tank is empty • Selector control not in ‘Steam’ position • Steam wand is blocked (see Care and Cleaning) Milk is not frothing • Not enough steam • Milk is not fresh and cold • Incorrect technique (refer to How to texture Milk) CAFÉ LATTÉ Served in a glass, a café latté consists of onethird espresso, topped with steamed milk and about 10mm of foam. MACCHIATO Traditionally served short, the macchiato is also poured as a long black with a dash of milk or a dollop of foam. LONG BLACK Add hot water first, then a shot of espresso (single or double) is added so that crema is maintained. RISTRETTO Meaning restricted, a ristretto is an extremely short espresso of approximately 15mL, distinguished by its intense flavour and aftertaste. 18 19