1
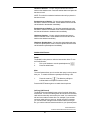
Featuring the Vertical Xcelerator IP Phone System
Owner’s Manual V.1.5-
For Service Purchased After May 1st 2009
May 09
Vertical Xcelerator IP
Xcelerator Owners Manual AccessLine 05-01-09
1
Table of Contents
1
Introduction ............................................................................. 5
Conformance.......................................................................... 5
Important Safety instructions................................................. 5
FCC Information..................................................................... 7
Basic Requirements............................................................... 9
Using this Document.............................................................. 9
2
Getting to know your Vertical Xcelerator IP ....................... 11
Parts Check .......................................................................... 11
Front Panel ........................................................................... 11
3
Connecting your Vertical Xcelerator IP Phone
System............................................................................... 13
Before you begin .................................................................. 13
Assigning Extension Numbers to Phones.......................... 13
Installing the Base Unit ........................................................ 14
Installing the Desk Phones.................................................. 15
Connecting a Fax Machine.................................................. 19
Connecting your Existing Phone Line(s) ............................ 20
Activating the Service .......................................................... 20
Setting up the Stand ............................................................ 21
Wall-mounting a Desk Phone ............................................. 22
4
Using Your Vertical Xcelerator Phone System .................. 24
System Description .............................................................. 24
Introduction to your Vertical Xcelerator Phones ................ 24
Getting Started .............................................................. 24
System Desk Phone ............................................................ 24
Introduction to your system Desk Phone .................... 24
Using the Desk Phone display..................................... 25
Navigate in the Menu.................................................... 26
Using the Speakerphone Key ...................................... 27
Using the Mute Key ...................................................... 28
The Ringing / Message Waiting Light:......................... 28
Using the Function Keys .............................................. 29
Desk Phone– Basic Call Features ...................................... 30
Answering a call ............................................................ 30
Vertical Xcelerator IP
Xcelerator Owners Manual AccessLine 05-01-09
2
Placing a call ................................................................. 30
Handling Multiple Calls ................................................. 31
Answering a second call............................................... 31
Placing a second call .................................................... 31
Call Hold ........................................................................ 31
Call Transfer .................................................................. 32
Call Park ........................................................................ 33
Paging (Intercom) ......................................................... 34
Forwarding Incoming Calls........................................... 35
Enable Forward All Calls on Your Phone.................... 35
Cancel Forward All Calls on Your Phone.................... 35
Conference Calls .......................................................... 36
Using your Desk Phone with a headset ...................... 36
Additional Call Features....................................................... 37
Redial............................................................................. 37
Mute ............................................................................... 37
Call Log (Call Record) .................................................. 37
Speed Dial list ............................................................... 38
Personal Phone Book................................................... 39
Auto Answer .................................................................. 39
Caller Blocking .............................................................. 40
Distinctive Ringing......................................................... 40
Inbound Caller ID .......................................................... 41
Extension Set-Up options .................................................... 42
Do Not Disturb............................................................... 42
Additional Volume Adjustments ................................... 42
Administrator Functions ....................................................... 43
Changing the Administrator Password........................ 43
Phone Lock/Unlock....................................................... 44
Entering a User Name for a Phone ............................. 44
Using Voicemail.................................................................... 45
Record a personal greeting.......................................... 45
Retrieving messages from your Desk Phone ............. 45
Retrieving messages when you are away from
the office..................................................................... 46
Change your Voice Mailbox Password ....................... 46
Forward Voicemail Messages...................................... 46
Vertical Xcelerator IP
Xcelerator Owners Manual AccessLine 05-01-09
3
Change the Number of Rings Before
Voicemail Picks Up.................................................... 46
Using a Fax Machine ........................................................... 47
Vertical Xcelerator IP
Xcelerator Owners Manual AccessLine 05-01-09
4
1
Introduction
Congratulations on purchasing the AccessLine Digital Phone
Service featuring the Vertical Xcelerator phone system. You will
now be able to share your phone connection between fixed &
wireless handsets and access the latest in ‘Voice over IP’ services
while also having the ability to use your existing phone lines.
This User Guide will show you how to setup and use Vertical
Xcelerator phone system.
Conformance
This equipment is designed for use in the United States.
This equipment complies with the following standards:
FCC Part 15, Subparts B, C, D
FCC Part 68
UL60950
Analog extension ports: TNV3
CO port: TNV3
ADSL port: TNV3
Power fail port TNV3
LAN/WAN ports SELV
Important Safety instructions
The following safety information is reprinted from IEC60950.
• When using your telephone equipment, basic safety
precautions should always be followed to reduce the risk of fire,
electric shock, and injury to persons, including the following:
•
•
•
•
•
•
•
Read and understand all instructions.
Follow all warnings and instructions marked on the product.
Unplug this product from the wall outlet before cleaning. Do not
use liquid cleaners or aerosol cleaners. Use a damp cloth for
cleaning.
Do not use this product near water (for example, in a wet
basement).
Do not place this product on an unstable cart, stand, or table.
The product can fall, causing serious damage to the product.
Slots and openings in the cabinet and the back or bottom are
provided for ventilation, to protect it from overheating; these
openings must not be blocked or covered. This product should
never be placed near or over a radiator or heat register. This
product should not be placed in a built-in installation unless
proper ventilation is provided.
This product should be operated only from the type of power
source indicated in the manual. If you are not sure of the type
Vertical Xcelerator IP
Xcelerator Owners Manual AccessLine 05-01-09
5
•
•
•
•
•
•
•
•
of power source to your building, consult your dealer or local
Power Company.
The power socket outlet must be located near the product and
must be easily accessible to allow plugging/unplugging.
Do not allow anything to rest on the power cord. Do not locate
this product where persons walking on it will abuse the cord.
Do not use an extension cord with this product’s AC power
cord. The AC outlet for this product should not be used for any
other electrical equipment.
Never push objects of any kind into this product through cabinet
slots as they can touch dangerous voltage points or short out
parts that could result in a risk of fire or electric shock. Never
spill liquid of any kind on the product.
To reduce the risk of electric shock, do not disassemble this
product, but take it to a qualified serviceman when some
service or repair work is required. Opening or removing covers
can expose you to dangerous voltages or other risks. Incorrect
re-assembly can cause electric shock when the product is
subsequently used.
Unplug this product from the wall outlet and refer servicing to
qualified service personnel under the following conditions:
- When the power supply cord or plug is damaged or frayed.
- If liquid has been spilled into the product.
- If the product has been exposed to rain or water.
- If the product does not operate normally by following the
operating instructions.
- Adjust only those controls that are covered by the operating
instructions because improper adjustment of other controls can
result in damage and will often require extensive work by a
qualified technician to restore the product to normal operation.
- If the product has been dropped or the cabinet has been
damaged.
- If the product exhibits a distinct change in performance.
Avoid using a telephone during an electrical storm. There can
be a remote risk of electric shock from lightning.
Do not use the telephone to report a gas leak in the vicinity of
the leak.
CAUTION
Use only 26 AWG line cord or larger for
Central Office line connections.
Vertical Xcelerator IP
Xcelerator Owners Manual AccessLine 05-01-09
6
FCC Information
This equipment complies with Part 68 of the FCC rules and the
requirements adopted by ACTA.
A FCC compliant telephone cord and modular plug is provided with
this equipment. This equipment is designed to be connected to the
telephone network or premises wiring using a compatible modular
jack that is Part 68 compliant. See Installation Instructions for
details.
The REN is used to determine the quantity of devices that may be
connected to the telephone line. Excessive RENs on the telephone
line may result in the devices not ringing in response to an incoming
call. Typically, the sum of RENs should not exceed five (5.0). To be
certain of the number of devices that may be connected to a line (as
determined by the total RENs) contact the local Telephone
Company.
If this system causes harm to the telephone network, the telephone
company will notify you in advance that temporary discontinuance
of service may be required. But if advance notice isn't practical, the
Telephone Company will notify the customer as soon as possible.
Also, you will be advised of your right to file a complaint with the
FCC if you believe it is necessary.
The Telephone Company may make changes to it's facilities,
equipment, operations or procedures that could affect the operation
of the equipment. If this happens the Telephone Company will
provide advance notice so you can make the necessary
modifications to maintain uninterrupted service.
If the equipment is causing harm to the telephone network, the
Telephone Company may request that you disconnect the
equipment until the problem is resolved.
Connection to party line service is subject to state tariffs. (Contact
the state public utility commission, public service commission or
corporation commission for information.)
This equipment is hearing aid compatible.
Customer Owned Coin/Credit Card Phones
To comply with state tariffs, the Telephone Company must be given
notification prior to connection. In some states, the state public utility
commission, public service commission or corporation commission
must give prior approval of connection.
Data Equipment
The table below shows which jacks are associated with which
modes of operation:
Mode of Operation
Permissive
USOC Jack
RJ11C
Systems
Facility Interface Codes (FIC), Service Order Codes (SOC), USOC
Jack Codes and Ringer Equivalence Numbers (REN) are shown in
the table below for each port where applicable:
Vertical Xcelerator IP
Xcelerator Owners Manual AccessLine 05-01-09
7
Port
Line 1
Line 2
Line 3
Phone
FIC
02LS2
02LS2
02LS2
02LS2
SOC
9.0Y
9.0Y
9.0Y
9.0Y
USOC
RJ11C
RJ11C
RJ11C
RJ11C
REN
0.1B
0.1B
0.1B
0.1B
Automatic Dialers
WHEN PROGRAMMING EMERGENCY NUMBERS AND (OR)
MAKING TEST CALLS TO EMERGENCY NUMBERS:
1. Remain on the line and briefly explain to the dispatcher the
reason for the call.
2. Perform such activities in the off-peak hours, such as early
morning or late evenings.
Toll Restriction and Least Cost Routing Equipment
The software contained in Xcelerator phone system to allow user
access to the network must be upgraded to recognize newly
established network area codes and exchange codes as they are
placed into service.
Failure to upgrade the premises systems or peripheral equipment to
recognize the new codes as they are established will restrict the
customer and the customer's employees from gaining access to the
network and to these codes.
Equal Access Requirements
This equipment is capable of providing users access to interstate
providers of operator services through the use of access codes.
Modification of this equipment by call aggregators to block access
dialing codes is a violation of the Telephone Operator Consumers
Act of 1990.
Electrical Safety Advisory
It is strongly suggested that an AC surge arrestor be installed in the
AC outlet to which this equipment is connected.
Radio Interference
This device complies with Part 15 of the FCC Rules. Operation is
subject to the following two conditions: (1) this device may not
cause harmful interference, and (2) this device must accept any
interference received, including interference that may cause
undesired operation.
This equipment has been tested and found to comply with the limits
for a Class B digital device, pursuant to Part 15 of the FCC Rules.
These limits are designed to provide reasonable protection against
harmful interference in a residential installation. This equipment
generates uses and can radiate radio frequency energy and, if not
installed and used in accordance with the instructions, may cause
harmful interference to radio communications. However, there is no
guarantee that interference will not occur in a particular installation.
If this equipment does cause harmful interference to radio or
television reception, which can be determined by turning the
equipment off and on, the user is encouraged to try to correct the
interference by one or more of the following measures:
Vertical Xcelerator IP
Xcelerator Owners Manual AccessLine 05-01-09
8
•
•
•
•
Reorient or relocate the receiving antenna.
Increase the separation between the equipment and receiver.
Connect the equipment into an outlet on a circuit different from
that to which the receiver is connected.
Consult the dealer or an experienced radio/TV technician for
help.
RF Radiation Exposure
This equipment complies with FCC radiation exposure limits set
forth for an uncontrolled environment. This equipment should be
installed and operated with a minimum distance of 8 inches (20
centimeters) between the radiator and your body.
This transmitter must not be co-located or operated in conjunction
with any other antenna or transmitter.
Modifications
Changes or modifications not expressly approved by the party
responsible for compliance could void the user's authority to operate
the equipment. There are no user-serviceable parts or adjustments
inside this equipment - please do not open the equipment case.
Basic Requirements
In order to use all the features of the AccessLine Digital Phone
Service and the Xcelerator system, you must have the following:
• Broadband Internet access
• At least one free port on your router or modem/router
• Your router must be set to DHCP
Using this Document
Notational conventions
Acronyms are defined the first time they appear in the text.
The term LAN refers to a group of Ethernet-connected computers at
one site.
Typographical conventions
Italic text is used for items you select from menus and drop-down
lists and the names of displayed web pages.
Bold text is used for text strings that you type when prompted by the
program, and to emphasize important points.
Special messages
This document uses the following icons to draw your attention to
specific instructions or explanations.
Note
Provides clarifying or non-essential information on the current
topic.
Vertical Xcelerator IP
Xcelerator Owners Manual AccessLine 05-01-09
9
Definition
Explains terms or acronyms that may be unfamiliar to many
readers. These terms are also included in the Glossary.
Provides messages of high importance, including messages
relating to personal safety or system integrity.
WARNING
Vertical Xcelerator IP
Xcelerator Owners Manual AccessLine 05-01-09
10
2
Getting to know your Vertical Xcelerator IP
Parts Check
Your package should arrive containing the following:
Front Panel
The front panel contains lights called Light Emitting Diodes (LEDs)
that indicate the status of the Xcelerator phone system.
Vertical Xcelerator IP
Xcelerator Owners Manual AccessLine 05-01-09
11
LED Name
Color
POWER
Blue
WIRELESS
Blue
LINE (1-3)
Blue
TEL (Phone)
Blue
ETHERNET(14)
Blue
WAN (Internet)
Blue
Status
Description
On
Power on.
Off
Power off.
On
Wireless LAN initialization success.
Off
Wireless LAN is not present.
On
PSTN Line is busy.
Off
PSTN Line is idle.
On
Phone is busy.
Off
Phone is idle.
On
LAN connection detected.
Off
LAN network connection not present
Flashing
LAN activity present (traffic in either
On
WAN connection detected.
Off
WAN network connection not presen
Vertical Xcelerator IP
Xcelerator Owners Manual AccessLine 05-01-09
12
3
Connecting your Vertical Xcelerator IP Phone
System
These instructions are a guide to the installation and basic
configuration of the Xcelerator phone system.
The Xcelerator phone system is designed to use your existing
broadband data connection as well as the existing data wiring in
your office. Where you don’t have data wiring, you may use the WiFi Adapter to connect Desk Phones to the base unit wirelessly.
Before you begin
The Xcelerator phone system is designed to use your existing
broadband data connection as well as the existing data wiring in
your office. Where you don’t have data wiring, you may use the WiFi Adapter to connect Desk Phones to the base unit wirelessly. In
order to begin using your new phone system and service, you need
to perform the following two steps:
• Install the base unit and phones.
• Go to www.accessline.com/activate to activate your phone
lines.
When selecting the location for the Base Unit please consider the
following:
•
•
Distance from your existing router - You will need to
connect the Base Unit to your router with the 10’ WAN
cable (one is supplied).
The range of the optional wireless adaptors for the Desk
Phones is 40 feet and should be considered to ensure you
have satisfactory coverage.
Assigning Extension Numbers to Phones
Each phone is assigned an extension starting with 100. Each Desk
Phone box has the phones extension number written on the outside
of the box. You should have also received and email from
AccessLine with the phone numbers associated with each
extension.
Vertical Xcelerator IP
Xcelerator Owners Manual AccessLine 05-01-09
13
Installing the Base Unit
1. Assemble the Base Unit
Screw the Wi-Fi antenna (found inside the cardboard tube just
below the hinge of the box) into the top of the base unit and attach
the stand to the bottom of the base unit. Stand the antenna straight
up for optimal coverage.
Antenna
Stand
2. Connect the Base Unit to your Existing router
Use the Blue WAN Cable and connect one end to the To Router
port (located at the top of the base unit). Connect the other end of
the blue WAN cable to an unused LAN port on the back of your
existing router or modem/router.
3. Connect power to the Base Unit
Use the included power cord and plug one end into the Power In
port on the back of the Base Unit and the other end into the wall
outlet. Turn the Base Unit on by using the power switch located at
the bottom. Move the switch in the direction of the SW.
IMPORTANT: Please wait 5 minutes after powering on the Base
Unit before proceeding to install the Desk Phones.
Vertical Xcelerator IP
Xcelerator Owners Manual AccessLine 05-01-09
14
Installing the Desk Phones
1. Assemble the Desk Phones
Use the included coiled handset cord and connect one end into the
base of the handset and the other end into the handset port on the
side of the phone labeled
(there is a handset port and a headset
port)
2. Connect the Desk Phone to the Base Unit
For your convenience, you may connect the Desk Phones to the
Base Unit using one, two, three or all four of the options listed
below:
Vertical Xcelerator IP
Xcelerator Owners Manual AccessLine 05-01-09
15
Note- The following setup options ARE NOT supported:
1- Connecting one phone to another
2- Connecting a phone to the base unit then connecting a PC
3- Connecting a phone to the base unit wirelessly and then
connecting a PC
4- Connecting a PC to the base unit
5- Connecting a phone to a router that is connected to
another router
Option 1: Connect phones to the Base Unit using your existing
data network
Use the included phone cord and connect one end into the port on
the back of the phone labeled
and connect the other end into
any data port on your network (router, switch or wall jack).
To your router or wall jack
Vertical Xcelerator IP
Xcelerator Owners Manual AccessLine 05-01-09
16
Option 2: Connect phones to the Base Unit using your existing
data network then connect the phones to your computer
Follow the steps in option 1 but if you already have a computer
using that wall outlet or router/switch port, unplug the computer,
plug the phone into that port and plug your computer into the
port on the back of the phone.
To your router or
wall jack
To your PC
Vertical Xcelerator IP
Xcelerator Owners Manual AccessLine 05-01-09
17
Option 3: Connect up to 4 phones directly to the Base Unit
Use the included phone cord and connect one end into the port on
the back of the phone labeled
and connect the other end into
one of the four green phone ports on the back of the base unit.
To the Base Unit
From the phone
Note
Up to 4 Desk Phones may be plugged into the base unit. All
other phones must be connected to your existing data network or
use wireless adapters.
Option 4: Connect phones wirelessly within 40’ using the
Wireless Adapter
The wireless adapter allows a desk phone to be used without a cord
connecting it to the base unit. The range of the wireless adapter is
40 feet from the base unit.
The wireless adaptor utilizes the phone’s power cord. Plug the
phone’s power cord into the short “power in” cord on the wireless
adapter and then into the wall outlet. Then, plug the rectangle LAN
plug from the Wireless Adapter into the back of the phone using the
port. Lastly, plug the long power cord with the silver tip coming
from the Wireless Adapter into the power port on the back of the
phone. Note:
Note
To avoid interference or static on the phone, place the Wireless
Adapter away from the phone as shown.
Vertical Xcelerator IP
Xcelerator Owners Manual AccessLine 05-01-09
18
3. Connect Power to the Desk Phone
Use the included power cord and plug one end into the back of the
phone and the other end into the wall outlet. The phone will indicate
that it is configuring its self. Once the phone has finished its
configuration, it is ready to make and receive phone calls.
Connecting a Fax Machine
The Xcelerator phone system allows you to plug in your fax
machine and receive and send faxes without having a separate fax
line. Plug the existing phone cord from your fax machine into the
yellow port on the back of the base unit marked “Fax”.
NOTE- If you are having trouble sending or receiving faxes,
please refer to “Using A Fax Machine” on page 40
Vertical Xcelerator IP
Xcelerator Owners Manual AccessLine 05-01-09
19
Connecting your Existing Phone Line(s)
Skip this section if you do not intend to use existing phone lines
You may connect up to 3 existing phone lines (called CO lines) into
the Xcelerator phone system. This is generally done when you first
receive the system and are in the process of porting the phone
number on that line to AccessLine. This way, you can continue to
use that phone number and phone line with the Xcelerator phone
system until the number has been ported. To do so, plug the
existing phone line (s) into the orange line socket(s) labeled CO
Line 1, CO Line 2 or CO Line 3 on the back of the base unit.
Note
Any call coming in on any CO line will always ring at extension
100
Activating the Service
Go to www.accessline.com/activate
•
Enter the MAC address found on the back of the base unit
•
Enter the ZIP code of your location
Vertical Xcelerator IP
Xcelerator Owners Manual AccessLine 05-01-09
20
Once you have activated your service, you may start making and
receiving calls. This action also starts the billing for your phone
lines.
NOTE- This action only enables the billing for your phone lines.
Billing for installation fees, equipment and enhanced features such
as Automated Attendant or Webfax begin when you purchase the
service.
Setting up the Stand
Setting Up the Stand
Refer to the following steps and the associated illustration to setup
the stand of the Desk phone.
Step A Move the big U-type frame (4) downward.
Step B Move the big U-type frame (4) downward to the flat level.
The small U-type frame (5) will get flat concurrently.
Step C Move the U-type leg (3) upward.
Step D Seat the U-type leg (3) onto the big U-type frame (4) at
about a 30º-angle position.
-OrStep E Pull-in the U-type leg (3) and seat it at about a 45º-angle
position in the big U-type frame (4).
-OrStep F Pull-in the U-type leg (3) and seat it at about 60º-angle
position in the big U-type frame (4).
Vertical Xcelerator IP
Xcelerator Owners Manual AccessLine 05-01-09
21
Wall-mounting a Desk Phone
The IP phone can be used on the desktop or mounted on a wall.
Print the screw alignment template (on the next page) and tape it on
the wall to position the 3 screws provided at the right place for the
mount-holes on the phone.
Before mounting the IP phone to the wall, detach the handset and
curled cord from the IP phone, then perform the following steps:
Step A On the back of the phone, find the latch (3) on the U-type leg
and remove it.
Step B Remove the other latch (4).
Step C Remove the U-type leg (1). Retain the leg (1) and latches
(2) for possible reuse in a desktop mode.
Step D Seat the big U-type frame onto the back of IP phone.
Step E Re-check that the power source switch is in the correct
position.
Connect all cables to the jacks on the phone, and then mount the
phone's holes (5 top, 6 left and 7 right) to the screws on the wall.
Step F Under the hook switch, find and press the cradle latch (8) to
let it down. Then hang up the handset and re-attach the curled cord.
Vertical Xcelerator IP
Xcelerator Owners Manual AccessLine 05-01-09
22
Screw Alignment Template
Vertical Xcelerator IP
Xcelerator Owners Manual AccessLine 05-01-09
23
4
Using Your Vertical Xcelerator Phone System
System Description
•
The Xcelerator phone system comes equipped with up to 8 IP
Trunks
•
The Xcelerator phone system can also accommodate up to 3
CO lines (traditional phone lines).
•
The Xcelerator phone system can accommodate up to 20 Desk
Phones. Up to 4 Desk Phones can be wired to the base unit.
All other phones must use the Desk Phone Wireless Adapter to
connect wirelessly to the base unit.
•
The Xcelerator Desk Phone has a simple-to-use menu-driven
interface.
Introduction to your Vertical Xcelerator Phones
The Vertical Desk Phone is designed to simplify user configuration
and operation of the system and calling features.
Getting Started
This section of your Owner’s Manual is your guide to using the
Xcelerator phone system and its features. It also explains how to
program system settings using your Desk Phone.
System Desk Phone
Introduction to your system Desk Phone
The Desk Phones are highly featured display telephones for use
with your Xcelerator system.
It features a 3-line display that contains prompts and menus with
selectable options. This unique menu-driven interface makes the
system simple to use, and no codes are needed to program and
activate features.
System settings are also programmed via a Desk Phone using the
intuitive menu-driven interface, without the need for special codes.
The Desk Phone is equipped with a speakerphone, so you can
make calls, receive calls and use its features without lifting the
handset.
Vertical Xcelerator IP
Xcelerator Owners Manual AccessLine 05-01-09
24
Using the Desk Phone display
The Desk Phones' display presents various prompts and
information, and provides selectable options to the extension user.
Read this section to learn how to navigate in the menus of your
Desk Phone.
You can use the LCD menus to configure most settings of your
Desk Phone.
Press the LEFT soft key to start the menu selection process.
This is the first display shown when you press the LEFT soft key.
Vertical Xcelerator IP
Xcelerator Owners Manual AccessLine 05-01-09
25
Navigate in the Menu
Use the Navigator Control
Press the checkmark (OK)
key to scroll to the desired item.
key to select the appropriate item.
Pressing the checkmark (OK)
key again will confirm and save
the setting of the item you selected, and cause you to return to the
previous menu. Thereafter, the menu will roll back to the upper level
of the menu tree. You can also press the LEFT arrow of the
Navigator Control key to roll back to the upper level of the menu tree
without causing the system to resave.
Numeric and Alpha Characters
Vertical Xcelerator IP
Xcelerator Owners Manual AccessLine 05-01-09
26
You can enter numeric or alphabetic characters in certain menus,
such as in the Phone Book. When you are on a menu that accepts
characters, you will see "ABC" above the left soft key. Press the
LEFT soft key to cycle through the options of ABC, 123, and abc.
These options represent characters in upper case, numeric digits,
and characters in lower case. While entering an item, you can
switch between the three options to use upper and lower case
characters as well as numbers.
To enter alphabetic characters, select ABC or abc with the LEFT
soft key, then continue to press the dial pad button that has the
character you want until the desired character appears. The display
will cycle through all of the characters associated with that button.
Saving the Configuration
Some changes are saved immediately as you change settings. All
settings will be saved when you leave the Menus. You will see
"Saving change … please wait" on the display.
Using the Speakerphone Key
You can use the Speakerphone Key to have a conversation without
having to lift the handset. Press the Speakerphone Key to go offhook, as if the handset were lifted with the Desk Phone speaker and
microphone replacing the handset. Pressing the key again goes
back on-hook, as if the handset were replaced.
You may also use the Desk Phone with a headset.
The Speakerphone key has a green light, which is lit whenever the
Speakerphone Key has been pressed to go off-hook or to turn on
the speaker.
Vertical Xcelerator IP
Xcelerator Owners Manual AccessLine 05-01-09
27
Volume Adjustment Using the Volume Keys on the Phone
Use the Volume Control button to adjust the volume of calls. The
Volume Control button is used under the following conditions:
When using the handset … use the Volume Control button to adjust
the volume level that you experience when using the handset.
When using speakerphone mode … use the Volume Control button
to adjust the volume level that you experience when using the
speakerphone.
When using a headset … use the Volume Control button to adjust
the volume level that you experience when using the headset..
When the phone is ringing … use the Volume Control button to
adjust the ringing volume.
For more volume adjustment features, see Additional Volume
Adjustments on page 38
Note
The Volume level increases/decreases by one step for every
press of the Volume Key.
Using the Mute Key
The Mute Key can be pressed when you are using the handset or in
Speakerphone Mode. When pressed, the other person on the call
cannot hear you. The Mute Key has a red light, which is lit when
Mute is active.
The Ringing / Message Waiting Light:
There is a red light on the top of the Desk Phone. This light flashes
when there is an incoming call. It also lights up when a voice
message has been left in your Voice Mailbox.
Vertical Xcelerator IP
Xcelerator Owners Manual AccessLine 05-01-09
28
Using the Function Keys
Phone
Button
What it Does
Press this button to setup your voicemail box, enter a
personal greeting for your callers, or to listen to your voice
messages. See the Desk Phone user guide for instructions
on how to use the voicemail system.
Press this button to view your personal phone book. See the
Desk Phone user guide for instructions on how to add, edit,
and use the personal phone book.
Press this button to redial the last number.
Press this button to forward a call to another internal
extension or another phone number outside of the office.
Press this button to conference calls together.
Press this button to turn the speakerphone on or off.
Press this button to mute and unmute the microphone on the
speakerphone and the handset.
Press this button to put an active call on hold; pressing this
button again while the call is on hold will make it active again
Press any of these 4 buttons to park a call. Once the call is
parked, the same button on all other desk phones will start
flashing green. To pick up a parked call, anyone on any
phone will press the flashing button to be connected with the
parked call.
Press this button to use a headset. You need to plug in a
headset to use this feature. There is a headset jack on the
left side of the phone right next to where the curly handset
cord plugs in.
These are the phone navigation buttons.
This is the “accept” button for actions on the phone
navigation keys.
Vertical Xcelerator IP
Xcelerator Owners Manual AccessLine 05-01-09
29
Phone
Button
What it Does
This is the “left” navigation button.
This is the “top” navigation button.
This is the “bottom” navigation button.
This is the volume control; it controls the volume for the
ringer, the speakerphone, and the handset and headset
volume. Pressing the “+” key raises the volume and pressing
the “-” lowers the volume.
Desk Phone– Basic Call Features
Placing and Answering Calls
Answering a call
Each phone has been assigned a phone number from AccessLine.
When that phone number is dialed, the phone associated with that
phone number will ring.
Answer a call that is ringing on the Desk Phone using the handset:
1.
Pick up the handset
Answer a call that is ringing on the Desk Phone using
speakerphone
1.
Press the speakerphone key
under the display
or the “Answer” softkey
Placing a call
You may dial 7, 10, 11-digit phone numbers or international phone
numbers. Additionally, you my call any other 3-digit extension.
Make an external call
1.
Pick up the handset or use the speakerphone button
2.
Dial the number
Make an internal call
1.
Pick up the handset or use the speakerphone button
Vertical Xcelerator IP
Xcelerator Owners Manual AccessLine 05-01-09
30
2.
Dial the extension number
Handling Multiple Calls
You can make or receive two simultaneous phone calls on your
Desk Phone. These can be two different phone calls or the calls can
be joined in a conference. If you are on a call and have another call
on hold, or you are on a conference with two callers, and a third call
comes in, you will hear a short notification beep and have a few
seconds to drop one of the two active calls to pickup the third call. If
you do not drop one of the first two calls, the third call will be sent to
your voicemail.
Answering a second call
If you are on a call and another call comes in to your phone you will
hear a tone from the phone and see the word “calling” on the top
line of the display. To answer the call:
1.
2.
3.
4.
Place the first call on hold by using the hold key
or
use the hold soft key below the display
Press the down arrow to view the second call on the
display screen. The phone will begin ringing
Answer the call by using the answer soft key or by picking
up the handset
You may switch between calls by using the up and down
arrows and using the resume soft key to connect to that call
Placing a second call
While on a call, you may place that call on hold and make s second
call. To do so:
1.
2.
3.
4.
Note
Place the first call on hold by using the hold key
or
use the hold soft key below the display
Press the down arrow to access a second line
Dial the phone number or 3-digit extension number. You
will be connected to that party
You may switch between calls by using the up and down
arrows and using the resume soft key to connect to that call
If a number on an incoming call matches a number in the system
speed dial list, the name in the list will be displayed.
Call Hold
To place a call on hold
When you place a call on hold, the caller will be presented with the
standard phone system hold music.
1.
While on the call press the Hold key or select the “hold’ soft
key the display. When an external call is placed on hold,
the caller is presented with hold music.
Vertical Xcelerator IP
Xcelerator Owners Manual AccessLine 05-01-09
31
2.
Note
To retrieve the call, press the Hold key or the soft key under
the RESUME display.
If an extension has two calls on hold, use the up or down arrow
keys to select the line then press the “resume” soft key to connect
to that party.
Call Transfer
To Transfer a call
You can transfer calls from your Desk Phone to another Desk
Phone in your office or to any other phone number outside your
office. For example, if you receive a call from a coworker in the
office, you can transfer that call to another coworker in the office or
on his cellular phone outside the office. You can make both
supervised and unsupervised call transfers. A supervised call
transfer is when you wait until the other party answers and you tell
them you want to transfer a call to them. An unsupervised call
transfer is when you just transfer the call without waiting to tell the
other party you want to transfer a call to them.
To Do an Unsupervised Call Transfer- Used when you have one
OR two calls on your phone.
Note: The following instructions assume you are on a call and that
your phone only has one call active.
1.
2.
3.
4.
Press TRANSFER key
Your caller will be placed on hold
When you hear the dial tone, dial the desired extension
number or phone number
Once the call has transferred, your line will hang up and
the extension you transferred to will ring and connect to
your caller. Do not hang up the phone until the line has
disconnected.
To Do a Supervised Call Transfer- Used when you have ONLY
ONE call on your phone
Note: The following instructions assume you are on a call and that
your phone only has one call active.
1.
2.
3.
4.
Place the caller on hold by pressing the hold key
to access a second line
Press the down arrow
When you hear the dial tone, dial the desired extension
number or phone number you wish to transfer the call to.
Announce the call to the new party
5.
To initiate the transfer, press TRANSFER key
Vertical Xcelerator IP
Xcelerator Owners Manual AccessLine 05-01-09
32
6.
Note
Your line will hang up and the extension you transferred to
will ring and connect to your caller
Transferring an external call to an external number ties up two
lines. If you wish to avoid tying up two lines, please refer to “If
you phone has 2 calls active, please refer to “Using Networkbased Call Transfer”
Using Network-based Call Transfer
This call transfer method is used when you want to transfer a call
without tying up two lines on your phone system. It uses the
AccessLine network to transfer the call instead of the phone
system.
Note
1.
Receive a call on your Desk Phone
2.
Touch #5 to start the transfer (this will place your caller on
hold)
3.
At the dial tone, enter the extension or phone number you
want to transfer the caller to
4.
When the transfer party picks up the phone, touch #5
again.
5.
All three of you will be connected.
6.
Hang up and the two parties are connected (without tying
up any of your lines)
If the transfer party does not pick up the phone, touch #6 to return
to the original caller.
Call Park
To Park a call
Parking a call is very similar to putting a call on hold. The key
difference is, when you put a call on hold you can only retrieve the
held call from the phone that put the call on hold. With Call Park,
you can put a call on hold and pick it up from ANY phone. Each
phone has 4 park positions located on the far right of the phone,
labeled 1 through 4. Up to 4 calls can be parked system-wide at
any given time. Each phone can park up to 2 calls at a time.
1.
2.
While on a call, press any one of the 4 PARK keys
not
currently in use
The caller will be placed on hold and you will see the word
“HOLD” on your phone (if two phones attempt to park a call
Vertical Xcelerator IP
Xcelerator Owners Manual AccessLine 05-01-09
33
on the same park button, the first phone will be allowed to
park the call, while the second phone will be rejected)
The selected park button will flash on all phones (for
example if you parked a call on Park 1, the Park 1 button
will flash on your phone and all other phones)
To pickup the parked call, press the flashing park button
3.
4.
on any phone
Note
.
When a call is parked on a phone, one of the lines on that phone
is used until the call is picked up by another phone. So, if you
park one call, you may only receive/ place one more call on that
phone until the parked call removed. If you park 2 calls on one
phone, you cannot make or receive calls on that phone until at
least one of the parked calls is picked up.
Paging (Intercom)
To page to all phones
Paging allows you to speak to all phones at the same time through
their speaker phone. If you pick up the handset during a page, you
will hear the message in the handset. Paging is used to make
announcements such as “Jim, you have a visitor in the lobby” or to
let people know about a parked call such as “Susan, you have a call
waiting on Park 2”. Paging will only notify phones not in use or not
set to DND.
1.
2.
3.
Either pickup the handset or uses the speaker phone
Dial 400.
Make your announcement which will be heard on all
phones (except phones set to DND or phones in use).
Hang up the phone when finished
4.
Answering a Page
1.
2.
3.
Either pickup the handset or uses the speaker phone
Press the “Answer” soft key on the phone display
Talk directly back to the person who initiated the page
Rejecting a Page
1.
Note
Note
To ignore a page, press the “Reject” button
NOTE- If you have a call parked or on hold, either use the down
arrow, pick up the handset or press the speaker phone key
before dialing 400. If you have two calls on hold/parked, you
cannot use paging.
NOTE- If you dial 400 and all phones are in use, your phone will
display “Not Acceptable Here” and you will hear a 6 beep
warning to let you know the paging is not currently available.
Vertical Xcelerator IP
Xcelerator Owners Manual AccessLine 05-01-09
34
Forwarding Incoming Calls
To forward all calls from your extension
Your Desk Phone supports three types of call forwarding;
Forward all calls- Forwards all calls to the phone number or
extension of your choice
Forward when busy- Forwards calls to voicemail when your phone
is busy and cannot be changed
Forward when not answered- Forwards calls to voicemail when
your phone is not answered and cannot be changed
Enable Forward All Calls on Your Phone
1.
2.
Press the CONFIG button under the display
Scroll Down using the DOWN arrow on the navigation pad
until “Call Forward" is displayed.
3.
Press the
4.
Select “Always Forward” and press the
5.
6.
key
Select “Toggle” and press the
“Always Forward Toggle” will be displayed. Press the up or
down arrows on the navigation pad to set this option to
“On”
7.
Press the
8.
9.
Select “Forward Number” and press the
Key.
Enter the phone number or extension number
10.
11.
Key.
Press the
Press the LEFT arrow on the navigation pad until the
display “Quit Confirm: Yes” appears.
12.
Press the
Key.
Key.
Key
Key.
Cancel Forward All Calls on Your Phone
1.
2.
Press the CONFIG button under the display
Scroll Down using the DOWN arrow on the navigation pad
until “Call Forward" is displayed.
3.
Press the
4.
5.
6.
Key.
Select “Always Forward” and press the
Select “Toggle”
“Always Forward Toggle” will be displayed. Press the up or
down arrows on the navigation pad to set this option to “Off”
7.
8.
Press the
Key
Press the LEFT arrow on the navigation pad until the
display “Quit Confirm: Yes” appears.
Key.
Vertical Xcelerator IP
Xcelerator Owners Manual AccessLine 05-01-09
35
9.
Press the
Key.
Conference Calls
The Desk Phones will allow you to talk with two different people at
the same time. For example, if you are on a phone call with one
person and want to also talk to another person at the same time on
the same call, you can join these two conversations together in a
conference. If a third call comes in to your phone while you are on a
conference call, you will hear a notification beep and you will have a
few seconds to drop one of the calls and pick up the third call. If you
don’t drop one of the two active calls, the third call will be forwarded
to your voicemail.
To hold an Internal Conference
1.
Pick up the handset or use the speakerphone button
2.
Dial the extension number and wait for the called party to
answer.
3.
Place that party on hold
4.
Use the down arrow to access a second line
5.
Dial the phone number of the next party
6.
Press the Conference key to join the caller and the two
parties together
To hold an External Conference
1.
Pick up the handset or use the speakerphone button
2.
Dial the phone number and wait for the called party to
answer.
3.
Place that party on hold
4.
Use the down arrow to access a second line
5.
Dial the phone number of the next party
6.
Press the Conference key to join the caller and the two
parties together
Using your Desk Phone with a headset
Your Desk Phone is equipped with a socket for a Headset located
on the Desk Phone below the hand set cord. The Desk Phone will
work with any amplified headset.
The following list shows you how to switch between handset,
headset and speakerphone
Handset to speakerphone --You are using the handset and want
to switch to speakerphone mode. Press
handset on hook.
and place the
NOTE: The voice will not switch to speakerphone until you place the
handset on hook.
Vertical Xcelerator IP
Xcelerator Owners Manual AccessLine 05-01-09
36
Handset to Headset -- You are using the handset and want to
switch to the headset mode. Press the headset button and place the
handset on hook.
NOTE: The call will not switch to headset mode until you place the
handset on hook.
Speakerphone to Handset --You are using speakerphone mode
and want to switch to the handset. Lift the handset off hook and the
call will switch to the handset immediately.
Speakerphone to Headset --You are using speakerphone mode
and want to switch to the headset mode. Press the headset button
and the call will switch to headset mode immediately.
Headset to Handset -- You are using the headset and want to
switch to handset mode. Lift the handset off hook and the call will
switch to the handset immediately.
Headset to Speakerphone --You are using the headset and want
to switch to speakerphone mode. Press the speaker button and the
call will switch to speakerphone immediately.
Additional Call Features
Redial
The Redial function places a call to the last number dialed. To use
the Redial function,
1.
2.
Pick up the handset or use the speakerphone key
Press the redial button
Mute
The mute feature allows you to hear the other party, but they cannot
hear you. To mute the handset or speakerphone during a call:
1.
Press the mute key
. The Mute key will light to
indicate that the microphone has been muted.
Press the MUTE button again to re-enable the microphone.
Call Log (Call Record)
The Desk Phone automatically keeps a list of received, dialed and
missed calls. You can scroll through the various lists to review these
calls and see when they were received or made. You can also save,
edit and use numbers on these lists. For example, if you see that
someone called while you were out, but did not leave a message,
you can return their call right from the missed calls list, and if you
like, you can then edit and save that number to your personal phone
Vertical Xcelerator IP
Xcelerator Owners Manual AccessLine 05-01-09
37
book. The Desk Phone stores the last ten numbers received,
missed and dialed.
To Display the Call Log
1.
Press the CONFIG button under the display
2.
Use the DOWN arrow of the navigation pad to scroll to
CALL RECORD.
3.
4.
Press the
Key.
“Call Record Type” will be displayed. Make your choice
from the options for Dialed Calls, Missed Calls, or Received
Calls
5.
6.
7.
Press the
Key.
The calls stored in the chosen option will be displayed.
When done, press the LEFT arrow on the navigation pad
until the display “Quit Confirm: Yes” appears.
8.
Press the
Key.
Speed Dial list
Up to ten Speed Dial Numbers can be programmed per phone.
Program system speed dial list – numbers and names
1.
Press the CONFIG button under the display
2.
Use the DOWN arrow of the navigation pad to scroll to
SPEED DIAL
3.
4.
5.
6.
7.
Press the
Key.
“Speed Dial [0 – 9]:” will be displayed
Press the Up or Down arrow, “Speed Dial Setting” will be
displayed.
Press the UP or Down arrow to select the Speed Dial entry
and select “EDIT”
Enter the appropriate data
8.
9.
Press the
Key
Press the LEFT arrow on the navigation pad until the
display “Quit Confirm: Yes” appears.
10.
Press the
Key
When prompted for an entry, press 2 once for 2, twice for A, three
times for B, four times for C; press 3 once for 3, twice for D, three
times for E, four times for F; and so on.
Wait two seconds for the screen cursor to move on before entering
the next letter or press the “NEXT” key to move to the next
character or numeral.
On completion of the entry, press the
Key.
Press the LEFT arrow on the navigation pad until the display “Quit
Confirm: Yes” appears.
Press the
Key.
Dial a number in the system speed dial list
Vertical Xcelerator IP
Xcelerator Owners Manual AccessLine 05-01-09
38
1.
2.
3.
Pick up the handset or press the speakerphone key
Press the SPD Softkey
Enter the speed dial number
4.
Press the
key
Personal Phone Book
The Desk Phone can store 400 numbers in a Personal Phone Book.
Numbers can be dialed directly from the phone list and you can edit
then save received or missed calls to this personal directory from
the received, missed and dialed call lists. In addition, if you receive a
call on your Desk Phone from a number that is in your personal
phone book, the calling name that you entered in the directory is
displayed.
Program your Phone Book list
Press the Directory key or the DOWN arrow on the navigation pad
to access the Phone Book.
1.
Select the entry you wish to program. Up to 400 entries are
available per Desk Phone
2.
Press the “EDIT” button under the display
3.
Select “Name”, “Number”, or “Ring”
4.
Enter the appropriate data for the selection.
When prompted for an entry, press 2 once for 2, twice for A, three
times for B, four times for C; press 3 once for 3, twice for D, three
times for E, four times for F; and so on.
5.
Wait two seconds for the screen cursor to move on before
entering the next letter or press the “NEXT” key to move to
the next character or numeral.
6.
7.
On completion of the name, press the
Key.
Press the LEFT arrow on the navigation pad until the
display “Quit Confirm: Yes” appears.
8.
Press the
Key
Dial a number from your Phone Book
1.
Press the Directory key or the DOWN arrow on the
navigation pad to access the Personal Directory.
2.
Select the entry you wish to program. Up to 400 entries are
available per Desk Phone.
3.
Press the “DIAL” button under the display.
Auto Answer
Auto Answer, when set, will ring the called station two times and
then automatically answer the call in speakerphone mode using the
speakerphone.
Vertical Xcelerator IP
Xcelerator Owners Manual AccessLine 05-01-09
39
Set Auto Answer
1.
Press the CONFIG button under the display.
2.
Use the DOWN arrow of the navigation pad to scroll to
AUTO ANSWER.
3.
4.
5.
Press the
Key.
“Auto Answer: Off” will be displayed.
Using the Up or Down arrow, select “On”.
6.
7.
Press the
Key.
Press the LEFT arrow on the navigation pad until the
display “Quit Confirm: Yes” appears.
8.
Press the
Key.
Cancel Auto Answer
1.
Press the CONFIG button under the display
2.
Use the DOWN arrow of the navigation pad to scroll to
AUTO ANSWER.
3.
4.
5.
Press the
Key.
“Auto Answer: On” will be displayed
Using the Up or Down arrow, select “Off”
6.
7.
Press the
Key.
Press the LEFT arrow on the navigation pad until the
display “Quit Confirm: Yes” appears.
8.
Press the
Key.
Caller Blocking
Up to ten phone numbers can be blocked from reaching your phone
when a caller attempts to call you from one of these numbers.
To Set Call Blocking from the Desk Phone
1.
Press the CONFIG button under the display
2.
Use the DOWN arrow of the navigation pad to scroll to
BLOCKING LIST.
3.
4.
Press the
Key.
“Blocking List:” will be displayed. Enter a digit from 0 to 9.
5.
6.
7.
Press the
Key.
The options Del (Delete), Edit and Cancel will be displayed.
To enter a number, use the press the left softkey until NUM
(for numeral) appears. Make the entry.
8.
9.
Press the
Key.
When done, press the LEFT arrow on the navigation pad
until the display “Quit Confirm: Yes” appears.
10.
Press the
Key.
Distinctive Ringing
Distinctive ring cadences can be selected allowing adjacent users to
tell which phone is ringing. It also provides different ring tones for
internal and external calls. You can enable or disable this function
through the LCD menus.
Vertical Xcelerator IP
Xcelerator Owners Manual AccessLine 05-01-09
40
To set Distinctive Ringing from the Desk Phone
1.
Press the CONFIG button under the display
2.
Use the DOWN arrow of the navigation pad to scroll to
RING.
3.
4.
Press the
Key.
“Ring Tone:” will be displayed. Scroll to the country tone
you wish to set
5.
6.
Press the
Key.
When done, press the LEFT arrow on the navigation pad
until the display “Quit Confirm: Yes” appears.
7.
Press the
Key
Inbound Caller ID
Two levels of Call ID are available. By default the phone number of
the caller (providing it is not a blocked call) will be displayed on the
ringing desk phone.
Optionally, you may purchase Caller ID Name and Number. If you
have purchased this optional service, the name of the caller and
phone number will scroll across the second line of the Desk
Phone’s LCD screen. The information will continue to scroll until the
phone has been answered.
Note
You must purchase Caller ID with Name as an optional feature in
order to see the callers name displayed on your phone.
Vertical Xcelerator IP
Xcelerator Owners Manual AccessLine 05-01-09
41
Extension Set-Up options
Do Not Disturb
A Desk Phone can be set to Do Not Disturb (DND). When a phone
is set to DND, any internal or external call will immediately route to
that phones voicemail box without ringing the phone.
Set DND
1.
Press the CONFIG button under the display.
2.
Use the DOWN arrow of the navigation pad to scroll to
DND.
3.
4.
5.
Press the
Key.
“Do Not Disturb: Off” will be displayed.
Using the Up or Down arrow, select “On”.
6.
7.
Press the
Key.
Press the LEFT arrow on the navigation pad until the
display “Quit Confirm: Yes” appears.
8.
Press the
Key.
Cancel DND
1.
Press the CONFIG button under the display
2.
Use the DOWN arrow of the navigation pad to scroll to
DND
3.
4.
5.
Press the
Key.
“Do Not Disturb: On” will be displayed
Using the Up or Down arrow, select “Off”
6.
7.
Press the
Key.
Press the LEFT arrow on the navigation pad until the
display “Quit Confirm: Yes” appears.
8.
Press the
Key.
Additional Volume Adjustments
In addition to using the volume keys on the phone you may adjust
the following volume levels though the Config softkey on your
phone:
Volume Control
Ring Tone Volume
Handset Speaker
Handset Mic
Speakerphone
Speakerphone Mic
Function
Controls the volume level of the
phone ring
Controls the volume level to your ear
when using the handset
Controls the volume level to the
other party when using the handset
Controls the volume level coming out
of the speakerphone
Controls the volume level to the
other party when using the
Vertical Xcelerator IP
Xcelerator Owners Manual AccessLine 05-01-09
42
speakerphone
Controls the volume level to your ear
when using a headset
Controls the volume level to the
other party when using a headset
Headset Speaker
Headset Mic
Program the Phone Volume feature from phone:
1. Press the CONFIG button under the display
2. “Volume” will be displayed as the first menu item
3. Press the
Key.
4. Then select the Volume Control option you desire
5. After making your selection, use the UP and Down arrows
to adjust the volume
6. Press the
Key so save your change
Administrator Functions
You may enter the Administrator menus through any desk phone.
Once you have accessed the Administrator menu, you may add
user names for each phone, lock specific phones, change the
Administrator password and reboot the phone
Changing the Administrator Password
The default Administrator Password is 9999. You may change it to
any number between 1 and 9 digits.
Change the Admin Password from the desk phone
1. Press the CONFIG button under the display
2. Scroll Down using the DOWN arrow on the navigation pad
until “Admin" is displayed.
3. Press the
Key.
4. Enter the Admin Code- 9999 is the default
Key.
5. Press the
6. Select Account from the menu
7. The menu will display Account Type: User
8. Press the
Key.
9. Use the down arrow key to select Password
10. Press the
Key.
11. Enter the new numeric password
Key.
12. Press the
13. Reenter the new numeric password when prompted
14. Press the
Key.
Vertical Xcelerator IP
Xcelerator Owners Manual AccessLine 05-01-09
43
Phone Lock/Unlock
The desk phone lock feature is used to prevent calls from being
made from a specific extension. A locked extension will continue to
receive incoming calls. This feature can be enabled from the Desk
Phone keypad within the Admin menu.
Program the Phone Lock feature from a desk phone
1.
2.
Press the CONFIG button under the display
Scroll Down using the DOWN arrow on the navigation pad
until “Admin" is displayed.
3.
4.
Press the
Key.
Enter the Admin Code- 9999 is the default
5.
6.
7.
Press the
Key.
Select Phone Lock from the menu
“Phone lock: Off ” will be displayed. Press the up or down
arrows on the navigation pad to set this option to “On”.
8.
9.
Press the
Key
Press the LEFT arrow on the navigation pad until the
display “Quit Confirm: Yes” appears.
10.
Press the
Key.
Unlocking a Phone
1.
2.
3.
The desk phone will show: Phone Locked… PIN:
Enter the Admin Code-9999 is the default
The phone will unlock
Entering a User Name for a Phone
Each desk phone can display the name of the user on the LCD
screen. The name will display on the phone next to the extension
number. The User Name does not transfer with the call or show
other internal users who is calling. This feature can be enable or
disabled from the Desk Phone keypad within the Admin menu.
Program a name from the desk phone
1.
2.
Press the CONFIG button under the display
Scroll Down using the DOWN arrow on the navigation pad
until “Admin" is displayed.
3.
4.
Press the
Key.
Enter the Admin Code- 9999 is the default
5.
6.
Key.
Press the
Select User Name from the menu
7.
8.
Press the
Key.
Press the 2 key once for 2, twice for A, three times for B
and four times for C. Use all number keys in this fashion.
Use the Next soft key to move the curser or the Backsp key
to move back
9.
Vertical Xcelerator IP
Xcelerator Owners Manual AccessLine 05-01-09
44
10.
Press the
Key when finished
Using Voicemail
The phone system can record up to 20 hours of voicemail, shared
between all users of the system. Each Desk Phone has its own
personal voicemail box on the phone system. Each user can record
his or her own personal greeting for the voicemail box. Voicemail is
not automatically deleted by the system and must be manually
deleted by each user.
Messages can be retrieved from the user’s Desk Phone or by
calling the Voicemail Access Phone number specific to your phone
system. When there is a message left in the user’s voicemail box,
the user’s Desk Phone message waiting indicator will flash until the
user retrieves his or her messages.
Record a personal greeting
1.
Press the fixed key with the envelope graphic, or dial 200.
2.
Enter your password when prompted (0000 by default).
3.
Select “3” from the menu options.
4.
Follow voice prompts to record and check your greeting.
Turn on your voicemail
No Answer Forward to the phones voicemail box is automatically
set when a voice mailbox is allocated to the extension. So, if the
phone does not answer, it will automatically forward calls to
extension 200 (which is the voicemail box for each phone)
Retrieving messages from your Desk Phone
1.
Press the fixed key with the envelope graphic, or dial 200.
2.
Enter your password when prompted (0000 by default).
3.
Press 1 to retrieve voice messages
The system will say, “You have ______ messages”
To listen to voice messages, press 1
To delete all messages, press 2
When finished, press #
After pressing 1 to listen to messages
To replay the message, press 1
To delete this message, press 2
To skip to the next message, press 3
To forward to another mailbox, press 4
When finished, press #
Vertical Xcelerator IP
Xcelerator Owners Manual AccessLine 05-01-09
45
Retrieving messages when you are away from the office
1.
Dial your Voicemail Access Phone Number which was sent
to you via email with all of your other system phone
numbers.
2.
After 3 rings, you will hear “If you are a user on this system,
touch star to continue”
3.
Press the * key
4.
You will then be prompted to enter your mailbox number
(which is the same as your extension number (100, 101
etc) and voicemail box PIN
5.
Once you have entered a valid extension number and PIN,
you will have full access to your voicemail box and all of its
functions.
6.
Press 1 to retrieve voice messages
The system will say, “You have ______ messages”
To listen to voice messages, press 1
To delete all messages, press 2
When finished, press #
After pressing 1 to listen to messages
To replay the message, press 1
To delete this message, press 2
To skip to the next message, press 3
To forward to another mailbox, press 4
When finished, press #
Change your Voice Mailbox Password
1.
Press the fixed key with the envelope graphic, or dial 200.
2.
Enter your password when prompted (0000 by default).
3.
Press 2 to enter the mailbox password.
4.
After each voice message, options for saving, deleting or
forwarding the message will be offered. Follow the voice
prompts.
Forward Voicemail Messages
A user can forward a voicemail from his voicemail box to another
voicemail box on the Xcelerator after listening to it.
• Press the envelope key or dial 200
• Enter your password when prompted (0000 by default)
• Press 1 to listen to your message(s)
• When prompted, press 4 to forward the message to the desired
extension
Change the Number of Rings Before Voicemail Picks Up
1.
2.
Press CONFIG button under the display
Use the DOWN arrow
of the navigation pad to scroll
to “Call Forward"
3.
Press the
Key.
Vertical Xcelerator IP
Xcelerator Owners Manual AccessLine 05-01-09
46
4.
Use the DOWN arrow
to “No Answer Forward"
of the navigation pad to scroll
5.
6.
Press the
Key
Use the DOWN arrow
to “No Answer Time"
7.
8.
Press the
Key
Use the BACKSP softkey to remove the number of
seconds displayed then, enter the number of seconds your
phone should ring before the voicemail answers (one ring is
approximately 4 seconds)
9.
Press the
of the navigation pad to scroll
Key.
Using a Fax Machine
To send and receive faxes, plug the phone cord from your fax
machine into the yellow port marked “Fax” on the back of the
Vertical Xcelerator IP. The fax machine must be plugged directly
into the back of the base unit, and cannot be connected to your
router or LAN.
If you are having problems with faxing, you may need to refer to
your fax machine owner’s manual and adjust the configuration on
your fax machine. For best performance with Digital Phone
Service:
•
If your fax machine has an “ECM” (“Error Correction Mode)
feature, please disable this function,
•
Check your fax machine’s speed (sometimes called “Baud
Rate”), and set it to 9600 or lowest possible speed.
Vertical Xcelerator IP
Xcelerator Owners Manual AccessLine 05-01-09
47