1
CASIO
V-T500/V-N500 Series
Software Manual
(Version 1.07)
CASIO Computer Co., Ltd.
Copyright ©2013. All rights reserved.
June 2013
Table of the Contents
Preface
1.
Basic Specifications
1.1
Android4.0
1.2
Language Support
1.3
Media Format
1.4
Power Control
1.5
Memory Management
1.6
Keys
1.7
Operation mode
1.8
Touch Panel
1.9
LED
1.10
GPS
1.11
Sensor
1.12
Bluetooth
1.13
WLAN
1.14
HDMI
1.15
Speaker
1.16
Microphone
1.17
Terminal specific information
1.18
Cradle specific information
1.19
NFC(Near Field Communication)
1.20
SAM(Secure Application Module)
1.20.1 Basic Specifications
1.20.2 Power Control
1.20.3 Communication Functions
1.20.4 Processing During Suspend and Resume
1.21
Application Launch
1.22
Functional Restriction
2.
Standard Accessories
2.1
Software List
2.2
Camera
2.3
Browser
2.4
Email
2.5
Gallery
2.6
Music
2.7
Clock
2.8
Messaging
2.9
People
2.10
Calendar
2.11
Search
2.12
Calculator
2.13
Key Entry
3.
Additional Accessories
3.1
Software List
3.2
Adobe Reader
3.3
Memo Text
2
5
6
6
8
9
11
12
14
15
17
18
18
19
20
22
22
22
22
23
24
25
26
26
26
26
28
29
30
32
32
33
34
35
36
38
39
40
41
42
44
45
46
47
47
48
49
4.
5.
6.
7.
8.
3.4
Memo Paint
3.5
Job Browser
3.6
Voice Recorder
Settings
4.1
Software List
4.2
Authentication
4.3
WIRELESS & NETWORKS Settings
4.4
DEVICE Settings
4.5
PERSONAL Settings
4.6
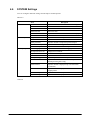
SYSTEM Settings
4.7
Encrypt External Storage
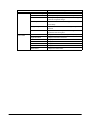
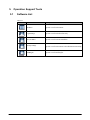
Operation Support Tools
5.1
Software List
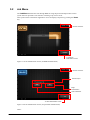
5.2
Job Menu
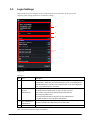
5.3
Login Settings
5.4
Job User Editor
5.5
Security Settings
5.6
AntiBurglar
System Operation Tools
6.1
Software List
6.2
File Manager
6.3
WLAN Tool
6.4
Backup / Restore
6.5
Copy Devices
Demo Tools
7.1
Software List
7.2
NFC Demo
7.3
Barcode Scanner
Paper Writer Accessories
8.1
Software List
8.2
Paper Writer
3
67
86
92
94
94
95
96
99
101
102
104
113
113
114
119
121
126
128
134
134
135
137
143
147
168
168
169
177
179
179
180
No part of this reference manual may be produced or transmitted in any form or by any means,
electronic or mechanical, for any purpose, without the express written permission of CASIO
Computer Co., Ltd. in Tokyo Japan. Information in this reference manual is subject to change
without advance notice. CASIO Computer Co., Ltd. makes no representations or warranties with
respect to the contents or use of this manual and specifically disclaims any express or implied
warranties of merchantability or fitness for any particular purpose.
© 2013 CASIO Computer Co., Ltd. All rights reserved.
4
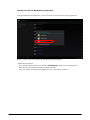
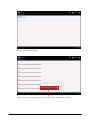
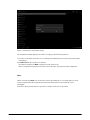
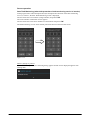
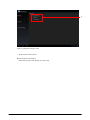
Preface
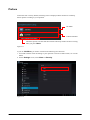
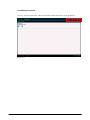
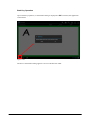
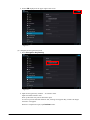
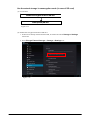
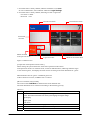
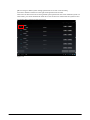
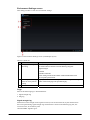
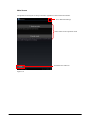
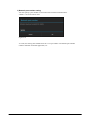
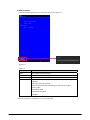
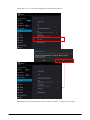
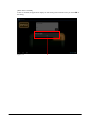
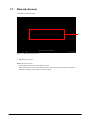
If terminal state is factory default, following menu is displayed when terminal is started up:
Select options according to your operation.
Job Menu
Android standard
Check this option to ensure that the terminal will always follow the above setting
when you press Home.
Figure 0.1
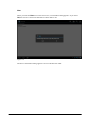
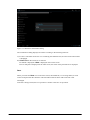
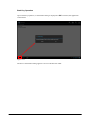
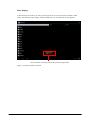
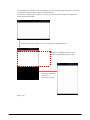
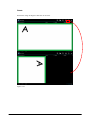
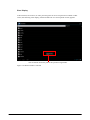
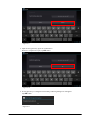
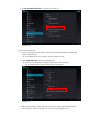
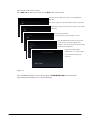
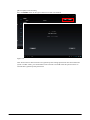
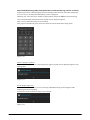
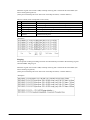
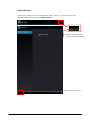
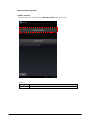
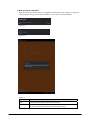
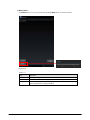
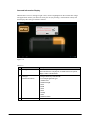
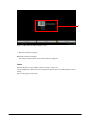
If you use Job Menu, you need to customize the following two functions:
1. You need to build a menu according to your operation. On how to build a menu, see 5.2 Job
Menu.
2. On the Settings screen, select None for Security.
Figure 0.2
5
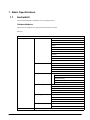
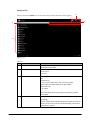
1. Basic Specifications
1.1
Android4.0
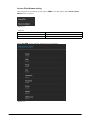
The terminal integrates Android4.0 as its operating system.
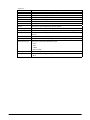
Software Modules
Microsoft core modules are integrated in the terminal as below.
Table 2.1
Software Modules
Application
Standard
Camera
Browser
Email
Gallery
Music
Clock
People
Calendar
Search
Calculator
Key Entry
Additional Accessories
Adobe Reader
Memo Text
Memo Paint
Job Browser
Voice Recorder
Settings
WIRELESS & NETWORKS Settings
DEVICE Settings
PERSONAL Settings
SYSTEM Settings
Job Menu
Login Settings
Job User Editor
Security Settings
AntiBurglar
File Manager
Settings
Operation Support Tools
System Support Tools
WLAN Tool
Backup/Restore
Copy Devices
NFC Demo
Demo Tools
Barcode Scanner
Application Framework
Activitity Manager
6
Window Manager
Content Providers
View System
Package Manager
Telephony Manager
Resource Manager
Location Manager
Android Runtime
Notification Manager
Core Libraries
Libraries
Dalvik Virtual Machine
Surface Manager
Media Framework
SQLite
Open GL ES
FreeType
WebKit
SGL
SSL
libc
Linux Kernel
CASIO Libraries
Standard Driver
CASIO Driver
7
Display driver
Flash memory driver
Binder (IPC) driver
Keypad driver
Wifi driver
Audio driver
Other features
Camera
Security
Maintenance
Power management
Logging
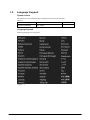
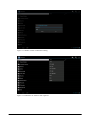
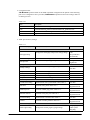
1.2
Language Support
System Locale
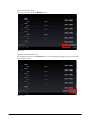
The following is the default settings of language and locale in the terminal.
Table 1.2
Default language
Locale
Remarks
English (United States)
Los Angeles
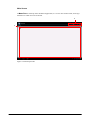
Language Support
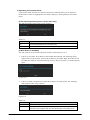
Following languages are supported.
Figure 1-1
8
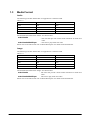
1.3
Media Format
Audio
The followings encoder and decoder are supported in V-T500/V-N500.
Table 1.3
Format
Encoder
Decoder
AAC
Yes
Yes
MP3
Yes
MIDI
Yes
WAVE
Yes
The android API related with “Audio“ are shown below.
android.media
: The class that provide various media interfaces for audio and
video.
android.media.MediaPlayer
: The class to play audio and video.
Please refer to the official web site "Android Developers" for details of the android API.
Image
The followings encoder and decoder are supported in V-T500/V-N500.
Table 1.4
Format
Encoder
Decoder
JPEG
Yes
Yes
GIF
Yes
PNF
Yes
Yes
BMP
Yes
WEBP
Yes
Yes
The android API related with “Image“ are shown below.
android.media
: The class that provide various media interfaces for audio and
video.
android.media.MediaPlayer
: The class to play audio and video.
Please refer to the official web site "Android Developers" for details of the android API.
9
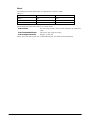
Movie
The followings encoder and decoder are supported in V-T500/V-N500.
Table 1.5
Format
Encoder
Decoder
H263
Yes
Yes
H264
Yes
Yes
MPEG4
Yes
The android API related with “Movie“ are shown below.
android.media
: The class that provide various media interfaces for audio and
video.
android.media.MediaPlayer : The class to play audio and video.
android.widget.VideoView
: Displays a video file
Please refer to the official web site "Android Developers" for details of the android API.
10
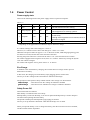
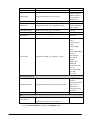
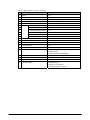
1.4
Power Control
Power supply state
There are the following kinds of the power supply states of a personal computer.
Table 1.6
No
Item
1
ON
Screen
ON
RAM
ON
CPU
ON
Explanation
The state where the terminal is working
The state where only the screen serves as OFF.
2
Early Suspend
OFF
ON
ON
OS and application are continuing operation.
Devices other than RAM are in the state where all serve
as OFF mostly.
3
Suspend *
OFF
ON
OFF
Although OS and application remain on RAM, almost all
operations are stopped.
4
OFF
OFF
OFF
OFF
It is in the state where all the devices serve as OFF.
* Depending on the application on Android, it may be written as "sleep."
It is called "starting" that a state changes to 1 from 4.
Moreover, it is called "resume" that a state changes to 1 from 3 to 1 and 2.
Hold down the power button for approx. 1 sec. in the state of OFF, LED charging lights up green
for about one second, and the state of the terminal will be ON.
Pressing the power button for a moment at the state is 2 or 3, the terminal will be “resume”.
For models equipped with a magnetic sensor, there is a “resume” function by closing the System
Case with a built-in magnet.
For models and magnetic sensor, please refer to "1.11 Sensor”.
Eco-Charge
In addition to the normal battery charging, this terminal has Eco-Charge mode to prevent
deterioration of battery.
In this mode, the charging rate of the battery stops charging when it reaches 80%.
The way to set Eco-Charge mode is described in “DEVICE Settings”.
The functions of the System Library related with the “Eco-Charge“ are shown below.
setEcoCharge : This function sets Eco-Charge to enabled or disabled.
getEcoCharge : This function sets whether Eco-Charge is enabled or disabled.
Safety Power Off
This terminal has two batteries.
Main battery is mounted on the rear of body.
Backup battery is built into the body, it can not be replaced. Backup battery is used to keep the
user data while replacing the main battery.
The period to backup user data depends on the setting of terminal.
The way to set up terminal is described “DEVICE Settings” for its detail.
When you open the battery cover to change the battery, then the micro SD card is un-mounted,
and the terminal will be suspended.
11
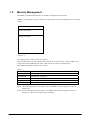
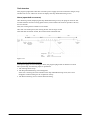
1.5
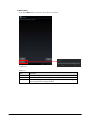
Memory Management
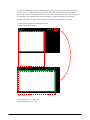
The eMMC (Embedded MultiMediaCard 16GB) are integrated in the terminal.
eMMC is used for Boot area (for system boot), System area (for OS) and Storage area (for internal
storage).
Boot area 100MB
System area 2.8GB
Storage area 13GB
Figure 1-2
The "Storage area" is used as Linux file system.
The terminal has SD card slot and micro SD card slot for external memory. And the USB A port
on the terminal and USB host port on the cradle can be used for as external memory.
Each media is mounted in the Linux file system.
Table 1.7
Directory-path
/mnt/sdcard
/mnt/external1
/mnt/external2
/mnt/usb1_storage
/mnt/usb2_stroage
Storage
Internal storage
micro SD card (See Note1)
SD card (See Note2)
USB storage that is connected to USB A port on the terminal.
USB storage that is connected to USB host port on the cradle.
Note1: The terminal support the “microSD” and “microSDHC”, and also support CLASS 10
transfer rate.
Note2: The terminal support the “SD Card” and “SDHC Card”, and also support CLASS 10
transfer rate. The recommended value is CLASS4.
12
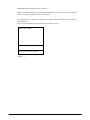
The RAM(1GB) are integrated in the terminal.
RAM is used for System area (for Linux Kernel/Android), reserved area (for Camera) and the
other reserved area for the rest (e.g boot animation).
In a System domain, it becomes an application use domain except the domain which OS uses
(Linux/Android …).
The size of this domain changes with the states of OS or a device.
System area 712MB
Reserved area for Camera 276MB
Reserved area for others 12MB
Figure 1-3
13
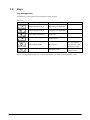
1.6
Keys
Key Assignments
The following is the keyboard layout employed in the terminal.
Table 1.8
KEY
Android key event
Operation
KEYCODE_BUTTON_A
Assigned by user application.
KEYCODE_BUTTON_B
Assigned by user application.
KEYCODE_VOLUME_UP
Volume up
KEYCODE_VOLUME_DOW
N
Volume down
KEYCODE_POWER
Power on/off
Screen lock on/off
Remarks
It is not possible to
control the ON / OFF
of the power supply.
Can not get the
software event.
Please refer to the official web site "Android Developers" for details of the android key event.
14
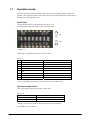
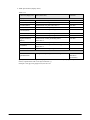
1.7
Operation mode
If the user directly operate the terminal, application on the terminal should be limited the
operation. The operation mode is meant to be used in this situation.Operation mode setting is
basically easy, but difficult to user.
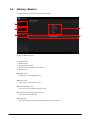
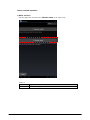
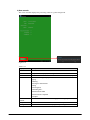
Initial State
Configuration Switch is on the behind of the battery cover.
The upper side means ON, and the lower side means OFF.
ON
OFF
Figure 1-4
Initial state of configuration switches are set as below.
Table 1.9
No.
1
ON
2
ON
3
ON
4
ON
5
ON
6
OFF
7
OFF
8
OFF
Initial switch state
Remarks
Operation mode switch
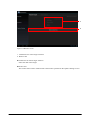
User can change No.7 switch only, otherwise the terminal will not boot.
Operation mode switch
Users can change the operation mode by switch No.7.
Table 1.10
State of switch No.7
ON
OFF
Operation mode
Customer mode
Normal mode
Changing the operation mode can also change the mode of Job Menu.
See Job Menu for its details.
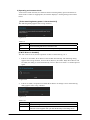
15
Operation mode Notification
When the operation mode is changed, sticky intent (Intent.ACTION_OP_MODE_EVENT) is
send to the applications.
Table 1.11
State of switch No.7
Value of status
ON turns to OFF
0
OFF turns to ON
1
Please refer to the official web site "Android Developers" for details of “sticky intent”.
Retrieve Operation mode Status
The state of the operation mode can be retrieved by the function of System Library.
The functions of the System Library related with the “Operation mode“ are as below.
getOperationModeSwitchState : Retrieve the state of the operation mode switch.
16
1.8
Touch Panel
The terminal is equipped with a capacitive touch panel, and it can be pressed 6 points
simultaneously, and input of finger and the digitizer pen are available.
Due to this, simultaneous finger and pen inputing is possible.
“Tool Type” can be retrieved by using getToolType() method of MotionEvent class. By the "Tool
Type", you can recognise what tools is used for inputing.
Table 1.12
Tool Type
TYPE_FINGER
TYPE_MOUSE
TYPE_STYLUS
TYPE_UNKNOWN
Input type
Finger
Mouse
Digitizer pen
Others
Input button status can be retrieved by using getButtonState() method of MotionEvent class.
Table 1.13
Tool Type
BUTTON_PRIMARY
BUTTON_SECONDARY
BUTTON_TERTIARY
BUTTON_BACK
BUTTON_FORWARD
Input type
Primary button (left mouse button)
Secondary button (right mouse button, stylus
first button).
Tertiary button (middle mouse button, stylus
second button).
Back button pressed (mouse back button).
Forward button pressed (mouse forward
button).
The functions of the android API related with the “Touch Panel“ are as shown below.
android.view.MotionEvent
: The class that operate the motion event of mouse, pen, finger,
trackball.
Please refer to the official web site "Android Developers" for details of android API.
17
1.9
LED
There are two LEDs integrated in the terminal, one is for the user notifications that user and the
other is for charging the battery status notification.
User notification LED can be controlled by Android API.
The functions of the android API related with the “LED“ are as shown below.
android.app.NotificationManager : Class to notify the user of events that happen.
android.app.Notification
: A class that represents how a persistent notification is to be
presented to the user using the NotificationManager.
Please refer to the official web site "Android Developers" for details of the android API.
It’s possible to use 6 color (green, red, orange, blue, cyan, magenta).
The lighting pattern that is set for user notification LED finally is valid, it’s not possible to use
several lighting patterns in the same time.
1.10 GPS
The terminal is equipped with a GPS module
The functions of the android API related with the “GPS” are as shown below.
android.location.GpsStatus
: The class that provides the current state of the GPS engine.
android.location.GpsStatellite
: The class that provides the current state of a GPS satellite.
Please refer to the official web site "Android Developers" for details of the android API.
18
1.11 Sensor
The following sensors are equipped in the terminal.
• ambient light sensor
• acceleration sensor
• angular acceleration sensor
• geomagnetic sensor
• Magnetic Sensor (V-N500 Series only)
The functions of the android API related with the “Sensor“ are as shown below.
android.hardware.Sensor
: The class that provides a sensor.
Android.hardware.SensorManager : The class that enables to access the device's sensors.
Android.hardware.SensorEvent
: The class that provides a Sensor event and holds
informations such as the sensor's type, the time-stamp,
accuracy and of course the sensor's data.
Please refer to the official web site "Android Developers" for details of the android API.
The functions of the System Library related with the “Sensor“ are as shown below.
setWakeOnMagneticSensor
: This function sets terminal resume by magnetic sensor to
enabled or disabled.
getWakeOnMagneticSensor
: This function acquires whether terminal resume by
magnetic sensor is enabled or disabled.
The following functions are supported by each sensor.
• The automatic screen brightness adjustment
• Auto-rotate screen
• Self-contained navigation
• Electronic compass
• Resume from suspend (magnetic sensor only. See “1.4 Power control”.) See note
Note: This function is disabled in default.
19
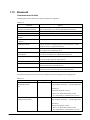
1.12 Bluetooth
Communication Profiles
The Bluetooth profiles described in following table are supported.
Table 2.14
Function
GAP
(General Accessible Profile)
SPP(Serial Port Profile)
HSP(Headset Port Profile)
HID(Human Interface Device
Profile)
AVRCP(Audio/Video Remoto
Control)
OPP(Object Push)
PAN(Personal Area Network)
A2DP(Advanced Audio
Distribution)
FMP(Find Me)
PXP(Proximity)
PASP(Phone Alert Status)
TIP(Time)
Purpose
Used in the substructure segment of Bluetooth communications
such as device discovery, link establishment and security.
Emulates a serial port connection to use Bluetooth device.
Used for Bluetooth Headset.
Provides support for devices such as mice, keyboads.
A/V Remote Control Profile.
A basic profile for sending "objects" such as pictures, virtual
business cards, or appointment details.
To allow the use of Bluetooth Network Encapsulation Protocol
for transport over a Bluetooth link.
For high quality audio (stereo or mono) can be streamed from
one device to another over a Bluetooth connection.
Defines the behavior when a button is pressed on one device to
cause an alerting signal on a peer device.
Enables proximity monitoring between two devices.
Enables a PUID device to alert its user about the alert status of a
phone connected to the PUID device.
Enables the device to get the date, time, time zone, and DST
information and control the functions related the time.
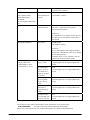
The following table shows the association of Bluetooth device/usage/profile and application.
Table 2.15
Bluetooth device
Bluetooth mobile phone
Bluetooth modem
etc.
Bluetooth access-point that
supports PAN profile
Usage
Dial-up
LAN connection
Profile and application
- DUN Profile
- OS standard “Settings” + TCP/IP application
[Attention]
While DUN profile is used,
- Don’t use WAN/Wi-Fi/LAN cradle
- It’s impossible to communicate via proxy
- PAN Profile
- OS standard “Settings” + TCP/IP application
[Attention]
While PAN profile is used,
- Don’t use WAN/Wi-Fi/LAN cradle
- It’s impossible to communicate via proxy
20
Bluetooth printer
Print to printer
“CopyDevices” application
that is built in tablet,
PDA that supports
Bluetooth,
PC that supports Bluetooth,
etc.
Bluetooth headset
File transfer
among Bluetooth
devices
Bluetooth headphone
G-SHOCK watch that
supports Bluetooth
(“GB-6900AA” series,
“GB-5600AA” series)
Voice
communication
Play music
To make tablet
ring by watch
To make tablet
ring by watch in
case tablet and
watch is far apart
each other.
To notify tablet of
receiving SMS
(and so on) by
watch
To stop ringing of
tablet that is
notified ANP by
watch
Synchronize the
time of tablet with
the time of watch
Note: Please use certified Bluetooth device.
- Serial Profile
- Application for printing
- OBEX Object Push
- OS standard “Gallery”
- HSAG Profile
- BT mono + application that supports
microphone and speaker
[Attention]
It’s impossible to use Skype because the way
that Skype uses microphone and speaker is
not normal.
- A2DP Profile
- OS standard “Music”
[Attention]
In case of headphone that supports Headset
Profile and A2DP Profile, select only “Media
audio” during pairing.
If “Phone audio” is also selected, it may be
played with monaural phone quality.
- FMP
- CASIO application to configure Bluetooth
watch
- PXP
- CASIO application to configure Bluetooth
watch
- ANP
- CASIO application to configure Bluetooth
watch
- PASP
- CASIO application to configure Bluetooth
watch
- TIP
- CASIO application to configure Bluetooth
watch
The functions of the android API related with the “Bluetooth“ are as shown below.
android.bluetooth
: Provides classes that manage Bluetooth functionality.
Please refer to the official web site "Android Developers" for details of the android API.
21
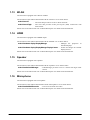
1.13 WLAN
The terminal is equipped with a WLAN module.
The functions of the android API related with the “WLAN“ are as shown below.
android.net.wifi
: The class that provides to access to Wi-Fi network.
android.net.wifi.p2p : The class that provides create peer-to-peer (P2P) connections with
Wi-Fi Direct.
Please refer to the official web site "Android Developers" for details of the android API.
1.14 HDMI
The terminal is equipped with a HDMI output.
The functions of the android API related with the “HDMI “ are as shown below.
android.hardware.display.DisplayManager
: Manages the properties of
attached displays.
android.hardware.display.DisplayManager.DisplayListener : Listens for changes in available
display devices.
Please refer to the official web site "Android Developers" for details of the android API.
1.15 Speaker
The terminal is equipped with a speaker.
The functions of the android API related with the “Speaker“ are as shown below.
android.media.AudioManager
: AudioManager provides access to volume and ringer mode
control.
Please refer to the official web site "Android Developers" for details of the android API.
1.16 Microphone
The terminal is equipped with a microphone.
The functions of the android API related with the “Microphone“ are as shown below.
android.media.MediaRecorder : Used to record audio and video.
Please refer to the official web site "Android Developers" for details of the android API.
22
1.17 Terminal specific information
The terminal has “Device ID” as its specific information.
And “Distributer ID” is a information for application developers to set, as the terminal specific
information.
The "Device ID" and "distributor ID" can be used by the distributor and user to prevent illegal use
of application by unauthorized party at a time of installing or carrying out the illegally copied
application by checking these codes.
These information will not be erased by initializing or OS updating of terminal.
The functions of the System Library related with the “Sensor“ are as shown below.
setDistributerID
: This function sets distributor IDs in order to identify the distributor which
developed the application.
verifyDistributerID : This function verifies distributor IDs in order to identify the distributor
which developed the application.
getDeviceID
: This function acquires device ID in order to identify the terminal.
23
1.18 Cradle specific information
By using a LAN/USB cradle, a terminal is connectable with LAN.
A LAN cable is connected to a LAN/USB cradle and it becomes the form which sets a terminal.
A connection setup to LAN, such as an IP address, is possible for both a cradle unit and a terminal
unit.
Cradle ID
It’s possible to set “Cradle ID” to the cradle.
The functions of the System Library related with the “Cradle ID“ are as shown below.
setCradleID : This function sets cradle ID that identifies the connected cradle.
getCradleID : This function acquires cradle ID in order to identify the connected cradle.
Cradle IP
It’s possible to set IP address, subnet mask, and default gateway of cradle.
When terminal connected to the cradle, terminal can communicate with IP information set in the
cradle. (Default is to use the settings on the terminal side)
Refer to the “4.3 WIRELESS & NETWORK Settings” for the setting method which IP
information on the method, terminal, and cradle which set IP information to a cradle to use.
The functions of the System Library related with the “Cradle IP“ are as shown below.
setCradleIP
: This function sets cradle IP information.
getCradleIP
: This function retrieves cradle IP information.
setCradleIPSetting
: This function sets whether IP setting on the cradle is enabled or
disabled.
getCradleIPSettings
: This function retrieves whether IP information setting on the cradle is
enabled or disabled.
24
1.19 NFC(Near Field Communication)
The following types of smart card can be accessed for reading and writing by the Near Field
Communication (hereafter referred to it as NFC) integrated in the terminal.
• ISO/IEC14443 Type A (MIFARE Standard; Ultralight) See note 1.
• ISO/IEC14443 Type B
• FeliCa See note2.
• ISO15693(ICODE SLI, ICODE SLI-L, ICODE SLI-S, my-d V 10 Plain, my-d Light, Tag-it HF-I
Plus, Tag-it HF-I Pro, Tag-it HF-I Standard) See note 3.
Notes
1.
2.
3.
Verification is required at the time of installation, because some cards may not follow ISO
standard.
The FeliCa security area can be accessed by using a FeliCa SAM card “RC-S251”.
RC-S251 can be accessed from the SAM library.
About Tag-it series, Lock AFI / LockDSFID command is not supported by NFC
controller specification. And it takes time to write data of Tag-it. Some commands are
required on the application verification process.
The functions of the android API related with the “NFC“ are as shown below.
android.nfc : The class that provides access to Near Field Communication (NFC) functionality.
Tag-it Control
Please note in case you develop a software that executes Tag-it command on Android 4.0.
If following Tag-it commands are executed by "android.nfc.tech.NfcV.transceive" method,
IOException will occur even if the result is success.
For that reason, when you develop a software that executes these Tag-it commands, please use
try-catch block that executes Tag-it command in the try block and verify the result in the catch
block.
Table 2.16 Tag-it commands
Tag-it command
Write Single Block
Lock Block
Write AFI
Write DSFID
How to verify
Retrieve data by "Read Single Block" and compare.
Check whether the locked by "Read Single Block".
Check the AFI by “Get System Information”.
Check the DSFID by “Get System Information”.
Please perform retry processing from a command again without considering it as an error
immediately, even when the result of a check is unusual.
Since write-in processing of Tag-it may be set to about 250 msec, as for the number of times of a
retry, 1 to 5 times becomes a standard.
Please keep in mind that there is a possibility that the response at the time of an error may exceed
1 second when it is made more.
25
1.20 SAM(Secure Application Module)
This chapter describes about detailed specifications of the SAM.
1.20.1 Basic Specifications
Access functions are supported for SAM cards inserted in the SAM card slot. Communication can
be performed with SAM cards compliant with ISO7816.
1.20.2 Power Control
SAM card controller power control
When a SAM device is opened, power is supplied to the SAM card controller and the ASIC that
controls the controller. When a SAM device is closed, power to the SAM card controller and the
ASIC that controls the controller is cut off.
The following SAM library functions relate to this function.
open
close
: Turns on power to the SAM card controller
: Turns off power to the SAM card controller
SAM card power control
The power supply for the SAM card can be controlled to switch on and off by executing a SAM
library function while a SAM device is open.
The following SAM library functions relate to this function.
powerUpCard
powerDownCard
: Turns on power to the SAM card in the specified slot
: Turns off power to the SAM card in the specified slot
1.20.3 Communication Functions
Command Send/Receive Functions
APDU (Application Protocol Data Unit *1) format commands can be sent to a SAM card that is
switched on. Information from the SAM card in response to such commands can be acquired.
*1 Refer to the ISO7816-3 standard for details of the APDU format.
The following SAM library functions relate to this function.
exchangeData
: Sends APDU-format commands to the SAM card in the specified slot, and
receives responses
26
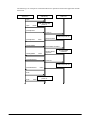
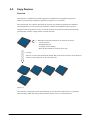
The following is an example of command send/receive operations between the application and the
SAM card.
Application
SAM library
SAM card
open
open
return
SAM card controller
power on
powerUpCard
Power on
SAM card power on
Response data
powerUpCard
return
exchangeData
Send APDU command
exchangeData
return
Receive APDU
response
Process APDU
command
powerDownCard
Power off
SAM card power off
powerDownCard
return
close
close
return
SAM card controller
power off
27
1.20.4 Processing During Suspend and Resume
The SAM control software switches the SAM card controller and the SAM card off when the
terminal is turned off. The actions stated in the table are performed when the terminal resumes.
Table 1-5-3
Mode
Open mode
Card power is on
Closed mode
When terminal is suspended
SAM card controller power off
SAM card power off
SAM card controller power off
SAM card power off
No process
When terminal resumes
SAM card controller power on
SAM card power off
SAM card controller power on
SAM card power on (*1)
No process
*1 When the terminal is suspended by auto power off etc., the content set on the SAM card is
initialized. To restore previous status, it is necessary to make the previous settings again after
resuming.
28
1.21 Application Launch
User application can launch the applications that are installed in V-T500/V-N500.
To launch the applications, Package name is required.
Package name has been mentioned in the list of installed applications shown at the beginning of
each chapter after "2 Standard Accessories". Also you can get package name by
"PackageManager" in Android standard library.
The following is a summary of how to launch application. Please refer to the official web site
"Android Developers" for details.
Getting Activity
We can get the Acntivity name of application by using “PackageManager” from the package
name.
"Activity" can launch only one that "android.intent.action.MAIN"
"android.intent.category.LAUNCHER" in AndroidManifest.xml is defined.
We need to get the name of the activity that corresponds to this condition.
Intent ifind = new Intent();
ifind.setAction(Intent.ACTION_MAIN);
ifind.addCategory(Intent.CATEGORY_LAUNCHER);
ifind.setPackage("jp.casio.vx.util.memo.text"); //Package name
PackageManager pm = this.getPackageManager();
list<ResolveInfo> list = pm.queryIntentActivities(ifind, 0);
if( list != null ) {
ResolveInfo item = list.get(0);
String myClass = item.activityInfo.name; //Activity Class
}
In the above example, the name of the activity enters the myClass.
Launch Activity
When you get an activity, you can launch, as the example below.
Intent irun = new Intent();
irun.setClassName("jp.casio.vx.util.memo.text", myClass);
startActivity(irun);
In addition, if the application that has the intent argument, it is also possible to specify "putExtra"
as follows.
Intent irun = new Intent();
irun.setClassName("jp.casio.vx.util.memo.text", myClass);
irun.putExtra( "FILEPATH", "/mnt/sdcard/xxx.txt" );
startActivity(irun);
29
1.22 Functional Restriction
Some services provided by the Google is not available because V-T500/V-N500 do not make
contract AFA(Anti-Fragmentation Agreement) to Google.
Therefore, following Android applications made by Google are not installed.
However, all of their applications are not installed made by Google.
The list of installed applications are shown at the beginning of each chapter after "2 Standard
Accessories".
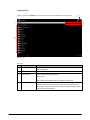
Unusable Application
The following applications are not installed.
• Google Play
• GMail
• YouTube
• Google Earth
• Voice Search
• Voice Dialer
• Maps
• Places
• Talk
• NAVI
• Speech Recognition
• Face Recognition
• BrowserGoogle
• CameraGoogle
• ChromeBookmarksSyncAdapter
• DeskClockGoogle
• ExchangeGoogle
• FaceLock
• GalleryGoogle
• GenieWidget
• GoogleBackupTransport
• GoogleContactsSyncAdapter
• GoogleFeedback
• GooglePackageVerifier
• GooglePackageVerifierUpdater
• GooglePartnerSetup
• GoogleQuickSearchBox
• GoogleServicesFramework
• GoogleTTS
• LatinImeGoogle
• MarketUpdater
• MediaUploader
• NetworkLocation
• NfcGoogle
• OneTimeInitializer
• SetupWizard
30
a
• TagGoogle
• Vending
• VideoEditorGoogle
• Wallet
Unusable Libraries
The following Libraries are not installed.
• libfacelock_ini.so
• libfilterpack_facedetect.so
• libfrsdk.so
• libvoicesearch.so
31
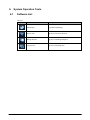
2. Standard Accessories
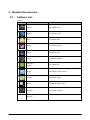
2.1
Software List
Table 2.1
Icon
Software name
Package name
Camera
com.android.camera
Browser
com.android.browser
Email
com.android.email
Gallery
com.android.gallery3d
Music
com.android.music
Clock
com.android.deskclock
Messaging
(Note1)
com.android.mms
People
com.android.providers.contacts
Calendar
com.android.calendar
Search
com.android.quicksearchbox
Calculator
com.android.calculator2
Key entry
Note1: You can use it on a WAN model.
32
2.2
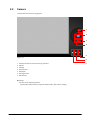
Camera
Camera takes still and moving pictures.
1
2
3
4
5
Figure 2.1
6
1.
2.
3.
4.
5.
6.
7.
Switch between front and rear facing Cameras
Shutter
Settings
Zoom In/Out
Panorama
Moving Picture
Still Picture
■ Settings
You can set the following modes:
Flash mode, White balance, Exposure, Photo mode, and Camera settings
33
7
2.3
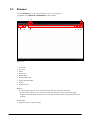
Browser
By using Browser, you can view web pages as if you are using a PC.
In addition to this Browser, Job Browser is also installed.
1
4
5
2
3
6
7
8
Figure 2.2
1.
2.
3.
4.
5.
6.
7.
8.
9.
Close Tab
New Tab
Menu
Turn Page
Reload Page
Display/Enter URL
Add to Bookmark Bar.
Search
Bookmark List
■ Menu
By selecting this option, you can set the following browser operations and others:
Reload (Stop), Advance, New Tab, New Secret Tab, Share the Page, Search in the Page,
Request for the Desktop-version Site, Save the Page to Read It Online, Page Information, and
Settings
■ Turn Page
Displays the next or previous page.
34
9
2.4
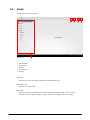
Email
Email sends and receives emails.
2
3
Figure 2.3
1
1.
2.
3.
4.
5.
Email folders
New Email
Search
Send/Receive
Setting
■ Search
Searches the in-box for emails containing the specified keyword.
■ Send/Receive
Sends and receives emails.
■ Settings
Select this option to configure environmental settings relating to emails, such as account
information and reception frequency settings, notification settings, and server settings.
35
4
5
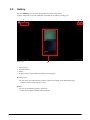
2.5
Gallery
By using Gallery, you can view and arrange still and moving pictures.
Initially, the display is in a tile mode that is suitable for the effective sorting type.
1
2
Figure 2.4
4
1.
2.
3.
4.
Sorting Type
Launch Camera
Menu
Display Groups in Tile Mode According to Sorting Type
■ Sorting Type
You can select one of the following sorting types that will apply to the displayed images:
Album, Location, Time, Person, or Tag
■ Menu
You can set the following gallery operations:
Select album, Make available offline, Refresh
36
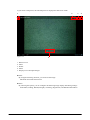
3
If you select a still picture, the selected picture is displayed in full-screen mode.
1
2
Figure 2.5
1.
2.
3.
4.
5.
5
Return to List
Share
Delete
Menu
Display List of Grouped Images
■ Share
By using the following function, you can share the image:
Bluetooth and email transmission
■ Menu
By selecting this option, you can configure the following image display and editing settings:
Slide Show, Editing, Rotate(left/right), Trimming, Registration, and Detailed Information
37
3
4
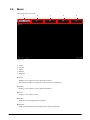
2.6
Music
Music plays back voice data.
1
2
3
Figure 2.6
1.
2.
3.
4.
5.
Artists
Albums
Pieces
Playlist
Playback
■ Artists
Displays a list of pieces saved in the order of artists.
If no artist information is registered, "Unknown artist" is displayed.
■ Albums
Displays a list of pieces saved in individual albums.
■ Pieces
Displays a list of pieces saved.
■ Playlist
Displays a list of grouped pieces (playlist).
■ Playback
Displays the identification of the piece that is being played back.
38
4
5
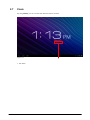
2.7
Clock
By using Clock, you can view the date and time and set an alarm.
Figure 2.7
1
1. Set Alarm
39
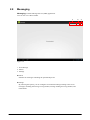
2.8
Messaging
Messaging is a Short Message Service (SMS) application.
You can use it on a WAN model.
1
Figure 2.8
1. New Message
2. Search
3. Settings
■ Search
Searches for messages containing the specified keyword.
■ Settings
By selecting this option, you can configure environmental settings relating to the use of
messages, including the message saving method, message sending/receiving method, and
notifications.
40
2
3
2.9
People
People manages the postal address, email address, and other information of the user.
1
2
3
Figure 2.9
1.
2.
3.
4.
5.
Select Display Target
Search
New
Edit
Menu
■ Select Display Target
Select one of the following display targets:
Group, All, and Favorites
■ Menu
By selecting this option, you can specify the following operations on user information:
Share, Delete, Contact Information Displayed, Import/Export, and Account, Settings
41
4
5
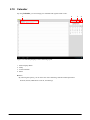
2.10 Calendar
By using Calendar, you can manage your schedule and register/check events.
1
2
Figure 2.10 The daily display is in the following layout
1.
2.
3.
4.
Select Display Mode
Today
Create Schedule
Menu
■ Menu
By selecting this option, you can select one of the following calendar-related operations:
Refresh, Search, Hide/Show Controls, and Settings
42
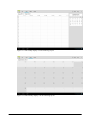
3
4
Figure 2.11 The weekly display is in the following layout
Figure 2.12 The monthly display is in the following layout
43
2.11 Search
The Search application searches the web or the terminal.
Figure 2.13
Figure 2.14
Targets that are checked will be searched.
44
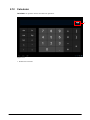
2.12 Calculator
Calculator can perform numeric and function operations.
1
Figure 2.15
1. Delete One Character
45
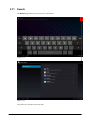
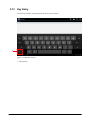
2.13 Key Entry
The terminal includes Android keyboad as the key entry method.
1
Figure 2.16 Keyboard layout
1. Input options
46
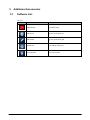
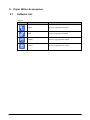
3. Additional Accessories
3.1
Software List
Table 3.1
Icon
Software name
Package name
Adobe Reader
com.adobe.reader
Memo Text
jp.casio.vx.util.memo.text
Memo Paint
jp.casio.vx.util.memo.paint
Job Browser
com.android.minibrowser
Voice Recorder
com.mitac.recorder
47
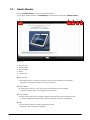
3.2
Adobe Reader
By using Adobe Reader, you can view PDF documents.
If you select a PDF document in File Manager, the document is displayed in Adobe Reader.
1
2
3
Figure 3.1
1.
2.
3.
4.
5.
Home Screen
Display Mode
Draw and Edit
Share
Text Search
■ Home Screen
On the Home Screen, select the document to be viewed. The following menu appears:
What has been viewed recently and a list of documents
■ Display Mode
By selecting this option, you can select one of the following viewing methods:
Continuous, Single Page, Text Wrapping, and Automatic
■ Draw and Edit
You can perform the following editing operation on documents you are permitted to edit:
Comment, Highlight, Strikethrough, Underline, Append, Freehand, and Signature
■ Share
You can share documents using the following functions:
Bluetooth, Mail, and Send for Signature
48
4
5
3.3
Memo Text
Overview
Basic Functions
1) File Input/Output
This function reads and saves files.
In Android, system folders/files and application folders/files are assigned access permissions
individually. Ordinary applications are inhibited from reading or updating files of other
applications. (Security is thus ensured.)
This means that this tool generally acts on folders/files included in the storage.
2) Open as a Text Viewing Application
MemoText can be selected as a text file viewing application in the File Management
Application.
3) Character Code Conversion
A function that converts character codes at the time of file I/O is provided according to the
encoding (UTF8/UTF16LE/UTF16BE/ASCII/SJIS/MS932), BOM presence/absence
(UTF8/UTF16LE/UTF16BE), and line feed code (LF/CRLF) specifications.
The Android standard character set is UTF8 (BOM absent), with LF as the line feed code.
In UTF16-LE and UTF16-BE, LE and BE stand respectively for Little Endian and Big Endian.
MS932 is an SJIS in which foreign characters out of the Windows system are assumed. Since
SJIS operation depends on the Java version, MS932 can also be specified.
4) Cut, Copy, and Paste
The editing functions available as standard in Android can be used.
5) Character Entry
You can enter characters using the soft keyboard, Japanese language conversion, and other
functions provided by Android as standard.
In the text input area, you can enter up to 7000 characters.
Note that if a longer text file is read and saved to overwrite the existing file, the extra data will
be lost.
6) Control According to Tablet Rotation
The landscape or portrait layout is automatically selected according to the tablet orientation.
7) Localization
If Japanese is selected as the language, various kinds of data are displayed in Japanese.
If another language is selected, various kinds of data are displayed in English.
49
8) Linkage with Android Theme
The user interface behavior (such as color assignments) is based on the theme information
specified in the Android device so that unification with various tools is ensured.
50
Operation Specification
Startup
MemoText, the package name of which is jp.casio.vx.util.memo.text, can be started from the
Home Application.
If a text file is selected in the File Management Application, MemoText can also be run as a text
file viewing application. (Startup based on an implicit intent is supported for MIME:text/plain.)
It is also possible to start up MemoText by assigning the file name to the explicit intent
argument.
Table 3.2
Intent name
Value
FILEPATH
Full path of the target text file
If MemoText is started up using an implicit or explicit intent as described above, the target file is
read on the assumption of UTF8, which is a standard Android character set.
51
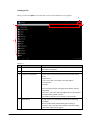
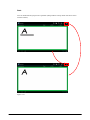
Main Screen
If MemoText is started up from the Home Application, it is in new file creation mode, showing a
blank area in which text can be entered.
3
1
2
Figure 3.2 Landscape mode
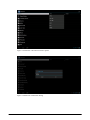
52
3
1
2
Figure 3.3 Portrait mode
53
Table 3.3
No. Item
1
File path information
2
Action bar
3
Text box
Description
New is displayed when a new file is being created.
If a file is being edited, its full path is displayed.
1) New
2) Open
3) Save As
4) Save
View and edit text
In case an icon on the action bar is pressed and held, text message about the processing associated
with the icon appears.
Figure 3.4
54
Startup from the File Management Application
In the File Management Application, you can select this tool as a text file viewing application.
Figure 3.5 If a text file is selected in the File Management Application
<Additional explanation>
The operation of this tool has been verified in File Manager, which is the file management
application that is installed as standard on tablet terminals.
If you use another file management application, prior verification is required.
55
New
When you select the New icon on the main screen, a confirmation dialog appears. If you select
OK, the text box is cleared of edits that have been made so far.
Figure 3.6
The above confirmation dialog appears even if no edit has been made.
56
Loading a File
When you select the Open icon on the main screen, the File Selection screen appears.
2
1
3
4
Figure 3.7
Table 3.4
No. Item
1 Folder information
2
3
4
Action bar
Character set specification
Folder/file list
Description
Displays /mnt/sdcard if a new file is being created or the full path of
the file that is being edited.
1) Cancel
Use the spinner to select the character set to be used when reading
the file.
[Character set]
UTF-8, UTF-16LE, UTF-16BE, ASCII, SJIS, MS932
[Line feed code]
LF/CRLF
Note: The initially selected value applies as the attribute of the file
being edited.
Note: UTF-8, UTF-16LE, and UTF-16BE work correctly regardless
of whether BOM is present or absent.
Note: Both LF and CRLF work correctly as a line feed code.
If a high-order or low-order folder is selected, the list will change
accordingly.
The list includes all files without filtering files according to
extensions. When you select a file, a selection confirmation dialog,
which will be explained later, appears.
57
Figure 3.8 Character code selection with a spinner
Figure 3.9 Selection confirmation dialog
58
Figure 3.10 File content display
Figure 3.11 If a file that exceeds the limit size in the number of characters is loaded
59
Saving a File
When you select the Save icon on the main screen, the File Selection screen appears.
2
3
1
4
Figure 3.12
Table 3.5
No. Item
Folder information
1
2
Action bar
3
Character set specification
4
Folder/file list
Description
Displays /mnt/sdcard if a new file is being created or the full path of
the file that is being edited.
1) Create a Folder
2) Save a File
3) Cancel
Use the spinner to select the character set to be used when reading the
file.
[Character set]
UTF-8, UTF-8+BOM, UTF-16LE, UTF-16LE+BOM,
UTF-16BE, UTF-16BE+BOM,ASCII, SJIS, MS932
[Line feed code]
LF, CRLF
Note: The initially selected value applies as the attribute of the file
being edited.
If a high-order or low-order folder is selected, the list will change
accordingly.
The list includes all files without filtering files according to extensions.
When you select a file, a selection confirmation dialog, which will be
explained later, appears.
60
Figure 3.13 Folder creation confirmation dialog
Figure 3.14 Character set selection with a spinner
61
Figure 3.15 Selection confirmation dialog
The confirmation dialog displays file names according to the following behavior:
A) If a file is selected from the list view containing the folder/file list, the name of the selected file
is displayed.
B) If Save File on the action bar is selected:
B-1 Blank is displayed if New is displayed on the main screen.
B-2 If a full path is displayed on the main screen, the name of the pertinent file is displayed.
Save
When you select the Save icon on the main screen, the loaded file, if it is being edited, is saved
on the assumption that the character code information that has been read for the file is left
unchanged.
If the file is being created, the save operation is similar to the Save As operation.
62
Text Editing Functions
Cut, copy, and paste operations, which are standard Android operations, can be performed.
Figure 3.16
63
Back Key Operation
Upon a back key operation, a confirmation dialog is displayed. If OK is selected, the application
is terminated.
Figure 3.17
The above confirmation dialog appears even if no edit has been made.
64
Error Display
If file selection, file creation, or other processing fails for an access permission related or other
reason, the following toast display (which will fade out in a certain period of time) appears:
The second line shows the path of the operation target folder.
Figure 3.18 When a folder is selected
65
The second line shows the path of the operation target file.
Figure 3.19 When a file is accessed
66
3.4
Memo Paint
Overview
Basic Functions
1) File Input/Output
This function reads files in the PNG/JPG format and saves them.
In Android, system folders/files and application folders/files are assigned access permissions
individually. Ordinary applications are inhibited from reading or updating files of other
applications. (Security is thus ensured.)
This means that this tool generally acts on folders/files included in the storage.
2) Handwriting Entry
Screen touch trajectories are drawn.
3) Drawing Attribute Specification
Line thicknesses (8 options) and line colors (9 options) can be selected.
4) Input Type Control
Digitizer pen input and finger input can be identified.
For each input type, you can specify line colors.
5) Multiple-touch Control
You can draw ten lines at the same time.
(This means that you can touch your ten fingers on the screen at the same time to draw.)
Multiple-touch control works for touches of the same input type (for example, fingers only).
For example, if you touch the screen with the digitizer pen while drawing with fingers, the
touch with the digitizer pen is ignored.
6) Image Rotation
You can rotate the image 90 degrees clockwise while leaving the tablet orientation as is.
7) Redo
You can undo/redo the just previous operation.
8) Localization
If Japanese is selected as the language, various kinds of data are displayed in Japanese.
If another language is selected, various kinds of data are displayed in English.
9) Control According to Tablet Rotation
The landscape or portrait layout is automatically selected according to the tablet orientation.
67
Operation Specification
Startup
MemoPaint, the package name of which is jp.casio.vx.util.memo.paint, can be started up from
the Home Application.
It is also possible to start up MemoPaint by assigning the file name to the explicit intent
argument.
Table 3.6
Intent name
Value
FILEPATH
Full path of the target text file
Main Screen
If MemoPaint is started up from the Home Application, it is in new file creation mode, showing
a full screen size blank area.
2
1
3
4
Figure 3.20 Landscape mode
68
2
3
1
4
Figure 3.21 Portrait mode
69
Table 3.7
No. Item
1
File path information
2
Action bar
3
Drawing attribute
4
Canvas
Description
New is displayed when a new file is being created.
If a file is being edited, its full path is displayed.
1) New
2) Open
3) Save As
4) Save
5) Rotate
6) Redo
1) Line thicknesses [8 options]
1, 2, 4, 6, 8, 10, 20, and 30 pixels
2) Finger touch line colors [9 options]
Black, blue, cyan, gray, green, red, magenta, yellow, and white
3) Digitizer pen line colors [9 options]
Same as 2) above
Paint canvas
In case an icon on the action bar is pressed and held, text message about the processing associated
with the icon appears.
Figure 3.22
70
Figure 3.23 Line thickness selection with a spinner
Figure 3.24 Line color selection with a spinner
71
New
When you select the New icon on the main screen, a confirmation dialog appears. If you select
OK, the current drawing area becomes a white canvas cleared of edits that have been made so far.
Figure 3.25
The above confirmation dialog appears even if no edit has been made.
72
If a terminal that is started to be in the landscape layout is rotated to the portrait layout, the canvas
size does not change so that the data being edited is held.
If a new file is created in this condition, a screen-size canvas will be recreated according to the
current terminal orientation.
Because the layout changes from L to P, some part is expelled from the
Some part is expelled from the screen,
but the corresponding data is not lost.
The newly created file
is shown in a
full-screen size area.
Figure 3.26
73
Loading a File
When you select the Open icon on the main screen, the File Selection screen appears.
2
1
3
4
Figure 3.27
Table 3.8
No. Item
1
Folder information
2
3
4
Action bar
Image format
Folder/file list
Description
Displays the /mnt/sdcard if a new file is being created or the full path of the file
that is being edited.
1) Cancel
Select an image format with a spinner.
PNG or JPG
Note: When a file is loaded, its format is judged by its extension.
If a high-order or low-order folder is selected, the list will change accordingly.
The list includes files that have been filtered to select files with the PNG or
JPG extension. When you select a file, a selection confirmation dialog, which
will be explained later, appears.
74
Figure 3.28 Selection confirmation dialog
Figure 3.29 File content display
75
If a file is loaded in a layout different from the layout as it stood when the file was saved, you can
display the file in full-screen size by rotating the terminal to attain the save-time layout.
Some part is expelled from the screen,
but the corresponding data is not lost.
By rotating the terminal, you can display
the image in full screen size in the same
way as when you saved the image.
Figure 3.30 Loading a landscape image in the portrait layout
76
Saving a File
When you select the Save icon on the main screen, the File Selection screen appears.
2
1
3
4
Figure 3.31
Table 3.9
No. Item
1
Folder information
2
Action bar
3
Image format
4
Folder/file list
Description
Displays /mnt/sdcard if a new file is being created or the full path of the file
that is being edited.
1) Create a Folder
2) Save the File
3) Cancel
Select an image format with a spinner.
PNG or JPG
Note: The initially selected value applies as the format of the file being edited.
If a high-order or low-order folder is selected, the list will change accordingly.
The list includes files that have been filtered to select files with the PNG or
JPG extension. When you select a file, a selection confirmation dialog, which
will be explained later, appears.
77
Figure 3.32 Image format selection with a spinner
Figure 3.33 Folder creation confirmation dialog
78
Figure 3.34 Selection confirmation dialog
The confirmation dialog displays file names according to the following behavior:
A) If a file is selected from the list view containing the folder/file list, the name of the selected file
is displayed.
B) If Save File on the action bar is selected:
B-1 Bland is displayed if New is displayed on the main screen.
B-2 If a full path is displayed on the main screen, the name of the pertinent file is displayed.
Save
When you select the Save icon on the main screen, the loaded file, if it is being edited, is saved
on the assumption that the image format information that has been read for the file is left
unchanged.
If the file is being created, the save operation is similar to the Save As operation.
79
Rotate
Rotates the image 90 degrees clockwise at one time.
Figure 3.35
80
It should be noted that the portrait and landscape layouts include the top part (application icons,
the action bar, etc.) and bottom part (system bar). Therefore, when the following operation is
performed, the full-screen image before the operation does not change to a full-screen image after
the operation. (If you change the terminal orientation, instead of performing the following
operation, you will see a full-screen image that is similar to the image that was saved.)
1) Load a portrait image to a landscape terminal.
2) Rotate the image 90 degrees.
Figure 3.36
Landscape image size: 1280 x 659
Portrait image size: 800 x 1139
81
Redo
You can undo/redo the just previous operation (that produces a freely drawn line from screen
touch to release).
Figure 3.37
82
Back Key Operation
Upon a back key operation, a confirmation dialog is displayed. If OK is selected, the application
is terminated.
Figure 3.38
The above confirmation dialog appears even if no edit has been made.
83
Error Display
If file selection, file creation, or other processing fails for an access permission related or other
reason, the following toast display (which will fade out in a certain period of time) appears:
The second line shows the path of the operation target folder.
Figure 3.39 When a folder is selected
84
The second line shows the path of the operation target file.
Figure 3.40 When a file is accessed
85
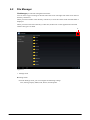
3.5
Job Browser
Job Browser, which is provided as separate from the Android standard browser, allows you to
place limitations on the standard browser functions.
Unlike the standard browser, Job Browser allows you to put the following limitations:
• Limitations on displayed items
You can inhibit users from manipulating displayed buttons or the address bar.
• Specification of browsable domains
You can limit browsable hosts.
• Priority settings
By creating a configuration file, you can let users use their terminals according to the settings in
the configuration file, rather than those made on the Job Browser.
Except for these limitations, Job Browser works in the same way as the Android standard
browser.
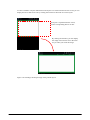
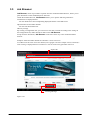
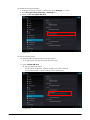
Example: If the browsable domains are limited to "www.casio.com"
If a URL out of the www.casio.com domain (www.google.com in the sample screen) is entered, a
toast warning is displayed and no transition to a site out of the casio.jp domain will occur.
Input URL
Warning Message
Figure 3.41
86
• Configuration file
Job Browser operates based on the XML-formatted configuration file placed in the following
path. If no configuration file is provided, Job Browser operates based on the settings made on
its Settings screen.
Table 3.10
Item
Description
File name
Path
XML declaration
Root element
com.android.minibrowser_preferences.xml
/mnt/sdcard/shared_prefs/com.android.minibrowser_preferences.xml
<?xml version='1.0' encoding='utf-8' standalone='yes' ?>
map
• XML specification (settings)
Table 3.11
Functional (display) item
XML (initial value)
Parameter
<string name="homepage">http://www.casio.jp</string>
URL
(No specification:
"about:blank")
true / false
Not registered: 0
Registered: 1
General
Homepage setting
Auto form filling
Auto input text
<boolean name="autofill_enabled" value="true" />
<int name="autofill_active_profile_id" value="0" />
Privacy and security
Security warnings
Accept Cookies
Save form data
Enable geolocation
Save password
Accessibility
Override zoom setting
<boolean name="show_security_warnings" value="true"
/>
<boolean name="accept_cookies" value="true" />
<boolean name="save_formdata" value="true" />
<boolean name="enable_geolocation" value="true" />
<boolean name="remember_passwords" value="true" />
<boolean name="force_userscalable" value="false" />
Text zoom
<int name="text_zoom" value="10" />
Double tap zoom
<int name="double_tap_zoom" value="5" />
Minimum font size
<int name="min_font_size" value="0" />
Inverted rendering
<boolean name="inverted" value="false" />
Contrast
<int name="inverted_contrast" value="0" />
true / false
true / false
true / false
true / false
true / false
true / false
A number in the
range from 0 to 30
A number in the
range from 0 to 10
A number in the
range from 0 to 20
true / false
A number in the
range from 0 to 20
Advanced settings
Search engine setting
<string name="search_engine">google</string>
87
Google: google
Yahoo: yahoo
Bing: bing
Open in background
Enable JavaScript
<boolean name="open_in_background" value="false" />
<boolean name="enable_javascript" value="true" />
Enable plugins
<string name="plugin_state">ON</string>
Web site setting
Limited
Default zoom
<string name="default_zoom">MEDIUM</string>
Open full-screen page
Autofit pages
<boolean name="load_page" value="true" />
<boolean name="autofit_pages" value="true" />
<boolean name="block_popup_windows" value="true"
/>
Block popups
Text encoding
<string name="default_text_encoding"></string>
true / false
true / false
Always enable: ON
Enable on demand:
ON_DEMAND
Disable: OFF
Low: FAR
Medium: MEDIUM
High: CLOSE
true / false
true / false
true / false
Latin-1 (ISO-8859-1):
Latin-1
Unicode (UTF-8):
UTF-8
Chinese (GBK):
GBK
Chinese (Big5): Big5
Japanese
(ISO-2022-JP):
ISO-2022-JP
Japanese
(SHIFT_JIS):
SHIFT_JIS
Japanese (EUC-JP):
EUC-JP
Korean (EUC-KR):
EUC-KR
(See note1)
Bandwidth management
Preload search results
<string name="preload_when">WIFI_ONLY</string>
Load images
Labs
<boolean name="load_images" value="true" />
Quick controls
<boolean name="enable_quick_controls" value="false"
/>
<boolean name="fullscreen" value="false" />
Not performed:
NEVER
Performed only when
WiFi is in use:
WIFI_ONLY
Always performed:
ALWAYS
true / false
true / false
Note: In Text encoding setting, specify null character and don't override setting value,
because Text encoding is changed by Language setting.
88
• XML specification (display items)
Table 3.12
Functional (display) item
Display
Add Tab (button)
Delete Tab (button)
List Tabs (button)
Back (button)
Forward (button)
Refresh (button)
Address bar
Register Bookmark
(button)
Search (button)
List (button)
Menu (button)
Domain
XML (initial value)
Parameter
<boolean name="add_tab" value="true" />
<boolean name="delete_tab" value="true" />
<boolean name="list_tab" value="true" />
<boolean name="enable_back_button" value="true" />
<boolean name="enable_forward_button" value="true"
/>
<boolean name="enable_refresh_button" value="true" />
<boolean name="enable_address_bar" value="true" />
<boolean name="enable_bookmark_button"
value="true" />
<boolean name="enable_search_button" value="true" />
<boolean name="enable_bookmarkorhistory_button"
value="true" />
<boolean name="enable_menu_button" value="true" />
true / false
true / false
true / false
true / false
true / false
<String name="specified_domain” ></String>
Specified domain
true / false
true / false
true / false
true / false
true / false
true / false
URL*
(Null for no
specification)
Specify the host name string to be displayed in the URL field. When specifying multiple host
names, separate them with a one-byte semicolon (;).
Example: casio.jp;www.google.com;192.168.1.10
89
• Display limitations
Table 3.13
Functional (display) item
Limitation
Display*
Add Tab (button)
Delete Tab (button)
List Tabs (button)
Back (button)
Forward (button)
Refresh (button)
Address bar
Register Bookmark (button)
Search (button)
List (button)
Menu (button)
Domain
The displayed icon will not change.
The displayed icon will not change.
The displayed icon will not change.
The icon color will always be changed to gray.
The icon color will always be changed to gray.
The displayed icon will not change.
The display will not change.
The displayed icon will not change.
The displayed icon will not change.
The displayed icon will not change.
Not displayed
Specified domain
If the domain is not a specified one, no page transition occurs and a
toast notification is displayed.
Note: Nothing occurs at the time of operation. However, a toast notification is displayed.
90
• XML coding sample
<?xml version='1.0' encoding='utf-8' standalone='yes' ?>
<map>
<string name="homepage">http://casio.jp</string>
<boolean name="autofill_enabled" value="true" />
<int name="autofill_active_profile_id" value="0" />
<boolean name="show_security_warnings" value="true" />
<boolean name="accept_cookies" value="true" />
<boolean name="save_formdata" value="true" />
<boolean name="enable_geolocation" value="true" />
<boolean name="remember_passwords" value="true" />
<boolean name="force_userscalable" value="false" />
<int name="text_zoom" value="10" />
<int name="double_tap_zoom" value="5" />
<int name="min_font_size" value="0" />
<boolean name="inverted" value="false" />
<int name="inverted_contrast" value="0" />
<string name="search_engine">google</string>
<boolean name="open_in_background" value="false" />
<boolean name="enable_javascript" value="true" />
<string name="plugin_state">ON</string>
<string name="default_zoom">MEDIUM</string>
<boolean name="load_page" value="true" />
<boolean name="autofit_pages" value="true" />
<boolean name="block_popup_windows" value="true" />
<string name="default_text_encoding"></string>
<string name="preload_when">WIFI_ONLY</string>
<boolean name="load_images" value="true" />
<boolean name="fullscreen" value="false" />
<boolean name="enable_quick_controls" value="false" />
<boolean name="enable_add_tab" value="true" />
<boolean name="enable_delete_tab" value="true" />
<boolean name="enable_list_tab" value="true" />
<boolean name="enable_back_button" value="true" />
<boolean name="enable_forward_button" value="true" />
<boolean name="enable_refresh_button" value="true" />
<boolean name="enable_address_bar" value="true" />
<boolean name="enable_bookmark_button" value="true" />
<boolean name="enable_search_button" value="true" />
<boolean name="enable_bookmarkorhistory_button" value="true" />
<boolean name="enable_menu_button" value="true" />
<string name="specified_domain">casio.jp;www.casio.co.jp;129.1.53.59</string>
</map>
91
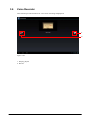
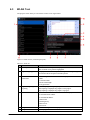
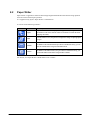
3.6
Voice Recorder
This software provides functions for voice memo recording and playback.
1
2
Figure 3.42
1. Display playlist
2. Record
92
■ Display playlist
A list of data files recorded so far is displayed.
Each data file is saved with a name in the "Recorder_YYMMDD_HHMMSS.amr" format.
During recoding, the Stop button is displayed instead of this button.
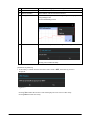
Figure 3.43
■ Record
Recording starts when the button is pressed.
To stop recording, press button 1.
93
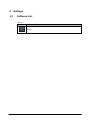
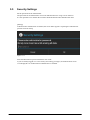
4. Settings
4.1
Software List
Table 4.1
Icon
Software name
Settings
94
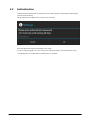
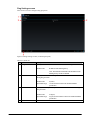
4.2
Authentication
If administrator authentication is enabled, the screen below appears requesting the administrator
password used at startup.
About administrator authentication see Security Settings.
Figure 4.1
Enter the administrator password and then click "OK".
If you are already logged in as a user with system setting privileges, the authentication screen
is not displayed even if administrator authentication is enabled.
95
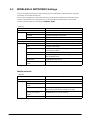
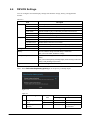
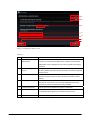
4.3
WIRELESS & NETWORKS Settings
You can configure and manage settings relating to Wi-Fi, Bluetooth, mobile networks, and USB
connections to networks and devices.
You can also configure the connections between your tablet and virtual private networks (VPNs).
connect to the Internet using another device via the tablet data communication, or turn off all
wireless communications by switching to Airplane mode.
Table 4.2
Item
Wi-Fi
Ethernet
Bluetooth
Data Usage
More…
Description
Enable/disable Wi-Fi.
Enable/disable IP setting of the cradle.
Specify the IP address of the cradle.
Specify the IP address of the terminal.
Enable/disable Bluetooth.
Allow you to check data communication settings and usage.
Enable/disable Airplane mode
Configure VPN settings.
Configure tethering settings including the access point and
communication method.
Enable/disable NFC.
Configure settings for data send/receive operations between
NFC-enabled terminals.
Enable/disable Wi-Fi Direct.
Configure mobile network settings.
IP setting from cradle
Cradle IP
Tablet IP
Airplane mode
VPN
Tethering and portable hotspot
NFC
Android beam
Wi-Fi Direct
Mobile networks
(Note)
Note: You can use it on a WAN model.
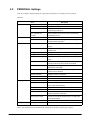
Mobile networks
Table 4.3
Item
Description
Mobile networks
Data enabled
Data roaming
(Note)
Access Point Names
Enable/disable data access over Mobile network.
Enable/disable to connect to data services when roaming.
Edit and select access point.
See “Access Point Names setting” for its detail.
Enable/disable to use only 2G networks.
Use only 2G networks
(Note)
Network operators
Select a network operator.
Note: This setting is enabled on WAN (3G) model.
96
Access Point Names setting
Following menu is selectable at the top right on APNs screen that appears when Access Point
Names menu is selected.
Figure 4.2
Table 4.4
Item
Description
New APN
Reset to default
Register new APN.
Reset APN setting.
When new APN menu is selected, following screen will appear.
Figure 4.3
97
Table 4.5
Item
Name
APN
Proxy
Port
Username
Password
Server
MMSC
MMS proxy
MMS port
MCC
MNC
Authentication type
APN type
APN protocol
Description
Specify the name of this APN setting.
Specify the name of access point name.
Specify the name of proxy host used on data communication.
Specify port number of proxy host used on data communication.
Specify user name for authentication to connect to APN.
Specify password for authentication to connect to APN.
Specify server name designated by network operator.
Specify MMSC (Multimedia Messaging Service Center)
Specify the name of proxy host used to utilize MMS (Multimedia Messaging Service).
Specify port number of proxy host used to utilize MMS (Multimedia Messaging
Service).
Specify mobile country code (3 digit number) to identify network operator.
Specify mobile network code (2-3 digit number) to identify network operator.
Specify one of following authentication types.
- None
- PAP
- CHAP
- PAP or CHAP
Specify APN type designated by network operator.
Specify one of following protocol types.
- IPv4
98
4.4
DEVICE Settings
You can configure sound and display settings and check the storage, battery, and application
statuses.
Table 4.6
Item
Sound
Description
Volumes
Default notification
Vibration and ring
Touch sounds
Screen lock sound
Vibrate on touch
Brightness
Wallpaper
Auto-rotate screen
Sleep
Font size
Display
Storage
Battery
Backup Battery
Sets the speaker, notice, alarm, and other sound volumes.
Sets the default notice sound.
Enables/disables vibration and notification ringtone.
Specifies whether to play a sound when you touch an onscreen item.
Specifies whether to play a sound when the screen is locked or unlocked.
Enables/disables touch vibrating.
Sets the screen brightness.
Sets a wallpaper.
Enables/disables automatic screen rotation.
Sets the time that elapses until the terminal sleeps (Suspend).
Sets the font size.
You can check the used and free storage sizes.
You can check the charge status and battery available time.
Also you can set enable / disable Eco-Charge.
You can check the charge status and battery available time of backup
battery.
Also you can set the priority of backup object (clock /memory) when main
battery is fully discharged. (See Note1)
You can check applications installed in your tablet.
Apps
Note1: Select Select backup battery priority to set the priority of backup object.
Figure 4.4
Table 4.7
No
Setting
1
Priority is given to the
clock
2
Priority is given to the
memory
Terminal
state
Suspend *1
Shut down *2
Suspend *1
99
Backup
Object
Clock / Memory
Clock
Clock / Memory
Period
10 minutes
Max. 72 hours
It depends on operational
environment
*1 In this setting, terminal will be suspended automatically when main battery is fully
discharged.
*2 In this setting, terminal will be shut down automatically when 10 minutes have passed
after main battery is fully discharged.
100
4.5
PERSONAL Settings
You can configure settings relating to usage and user preferences, including security settings.
Table 4.8
Item
Accounts & sync
Location services
Security
Description
Corporate
Email
Local Account
Sync Calender and
Contacts
Google's location service
GPS satelites
Screen lock
Owner info
Encrypt tablet
Encrypt External Storage
Set up SIM card lock
Make passwords visible
Device administrators
Unknown sources
Language & input
Trusted credentials
Install from SD card
Clear credentials
Language
Spelling correnction
Personal dictionary
Keyboard & input methods
No hide screen keyboard
Text-to-speech output
Backup & reset
Pointer speed
Factory data reset
Set up an Exchange account.
Set up an email account.
Sets the “Local Account” to use “Calendar” without
synchronizing with server.
Set up Calender and Contacts to use by synchronizing
with Google service..
It cannot be used.
Specifies whether to allow applications to identify your
current location using GPS.
Sets the authentication method used when unlocking the
screen.
Specifies what to display as the owner information on the
locked screen.
Encrypts the data within the tablet. See Note1.
Configure the encryption settings of external storage.
Specifies whether PIN input is required when the tablet is
used.
Specifies whether to display each password character for
a short period of time when a password is entered.
Displays a list of the applications you are authorized to
administrate on the tablet.
Specifies whether to allow installation of applications
whose source is unknown.
Displays trusted CA certificates.
Installs the certificate from the SD card.
Clears all certificates.
Sets the language to use.
Enables/disables the spell checker and allows you to
select a spell check dictionary.
Registers a user dictionary.
Sets the keyboard and character input method.
Enables/disables to show the screen keyboard even if the
physical keyboard is connected
Allows you to select the speech engine to use and set the
text-to-speech speed.
Sets the mouse pointer speed.
Clears all data within the tablet.
Note1: You should turn OFF the Bluetooth and the Wi-Fi before performing encryption.
101
4.6
SYSTEM Settings
You can configure date/time settings and developer-oriented options.
Table 4.9
Item
Date & time
Accessibility
Developer options
Description
Automatic date & time
Set date
Set time
Select time zone
Use 24-hour format
Select date format
Large text
Auto-rotate screen
Speak passwords
Touch & hold delay
Install web scripts
USB debugging
Development device ID
Stay awake
Allow mock locations
Desktop backup password
Strict mode enabled
Pointer location
Show touches
Show screen updates
Show CPU usage
Continue
102
Specifies whether to use automatic date/time setting.
Sets the date.
Sets the time.
Sets a time zone.
Specifies whether to use the 24-hour format for display.
Sets the date format.
Specifies whether to use large character sizes.
Specifies whether to use automatic screen rotation.
Specifies whether to use phonetic password output.
Specifies the time of a long press.
Specifies whether to allow web script installation.
Specifies whether to use USB debugging.
Displays the terminal ID.
Enables/disables sleep mode.
Specifies whether to allow mock locations.
Specifies a password for full backup.
Specifies whether to blink the screen to notify the user
that the processing time is long.
Specifies whether to display the tap event information
(coordinates).
Specifies whether to display a marker to indicate the
tapped position.
Specifies whether to blink updated areas on the screen.
Specifies whether to display the current CPU utilization.
Item
Description
Force GPU rendering
Window animation scale
Transition animation scale
Don't keep activities
Background process limit
Show all ANRs
About tablet
Status
Legal information
Model number
Android version
Baseband version
Kernel version
Build number
103
Specifies whether to use 2D hardware acceleration.
Allows you to adjust the window animation speed.
Allows you to adjust the speed of the animation displayed
when the component changes.
Specifies whether to terminate the application
immediately.
Specifies the maximum number of background processes
allowed.
Specifies whether to notify the user if a background
application does not respond.
Displays the terminal status (battery, network, etc.).
Displays information on licenses.
Displays the model number.
Displays the Android version.
Displays the baseband version.
Displays the kernel version.
Displays the build number.
4.7
Encrypt External Storage
Overview
This function enables to enhance the security by encrypting the external storage (SD card,
microSD card, USB storage, OTG USB storage).
1. Feature
- Encrypt the external storage by encryption key.
- Allow to use the external storage, encrypted by same encryption key, among terminals.
- Not allow to read/write encrypted external storage in PC/other manufacture terminals.
- Possible to backup and restore the contents in external storage by backup/restore tool.
- Enable to develop the application without considering about the encryption.
2. Usage
[Step1] Configure the encryption key
※ This encryption key will be used in common for all external storage
[Step2] Configure to enable/disable encryption function for each external storage.
[Step3] Format the external storage
- Case to encrypt
: Format the external storage by encryption key.
External storage will be encrypted media.
- Case not to encrypt : Format the external storage to FAT file system.
External storage will be unencrypted media.
※ If the external storage is formatted, all data in the storage will be
deleted.
3. Configuration and Activity
Table 4.10
Terminal
Not to
encrypt
Media
Terminal
To encrypt
Encryption
Encryption
key A
key B
N
N
Y
N
N
Y
PC / Other
manufacture
terminals ..
Unencrypted media
Y
Y
Encrypted Encryption key A
N
N
media
Encryption key B
N
N
Y : Possible to mount and read/write
N : Impossible to mount and read/write (displayed as blank storage at notification bar)
104
Use the exteral storage in encryption mode (in case of SD card)
(1). Overall flow
Turn on the encryption settings of external storage.
Configure the encryption key.
Enable the encryption function of SD card.
Format SD card.
Figure 4.5
(2). Turn on the encryption settings of external storage
1. Select Encrypt External Storage at Security menu in Settings tool.
Figure 4.6
105
2. Switch ON displayed at the upper right of the screen
Figure 4.7
(3). Configure the encryption keyword
3. Select Encryption Key Setting
Figure 4.8
4. Input the encryption key within 4 – 32 character fonts
Input half-width character font.
Some symbol font may not be allowed to input.
In case to input non-allowed character font, message “Encryption Key contains all illegal
character” will appear.
When it’s completed to input, tap Continue button.
106
Figure 4.9
5. Input the encryption key again for confirmation
When it’s completed to input, tap OK button.
Figure 4.10
6. If encryption key is configured successfully, following dialog-box will appear.
Tap OK button.
Figure 4.11
107
(4). Enable the encryption function
7. If SD card is already mounted, un-mount SD card by Settings tool at first
8. Select Encrypt External Storage in Settings tool
9. Check on Use encrypted SD card
Figure 4.12
(5). Format external storage
10. Insert the SD card into SD card slot of the terminal
※ If SD card is already inserted, skip this step.
11. Select Format SD card
※ SD card will be formatted.
If SD card is formatted, all data in SD card will be deleted.
It’s recommended to make backup before formatting.
Figure 4.13
108
12. When formatting is completed, SD card will be encrypted and mounted
automatically. Then it’s possible to use as encrypted SD card
Encrypted SD card allows following terminals to access like unencrypted SD
card, but does not allow PC/other manufacture terminals to read/write.
- Own terminal
- Terminal configured with same encryption key
(6). Caution
※ Above explanation is the sample operation in case of SD card.
In case of other external storage, replace the explanation part of SD card with
other external storage.
※ The configuration of above 9 for the current mounting SD card will be
executed when next SD card will be mounted or formatted.
This means that the configuration for the current mounting SD card is not
executed soon.
109
Use the exteral storage in unencryption mode (in case of SD card)
(1). Overall flow
Disable the encryption function of SD card.
Erase (Format) SD card.
Figure 4.14
(2). Disable the encryption function of SD card
1. If SD card is already inserted and mounted, un-mount SD card at Storage in Settings
tool at first
2. Select Encrypt External Storage at Storage in Settings tool
Figure 4.15
110
3. If Use encrypted SD card is checked on, check off
Figure 4.16
(3). Erase (Format) SD card
4. Insert encrypted SD card into SD card slot of the terminal (then displayed as blank SD
card at notification bar)
※ If encrypted SD card is already inserted, skip this step.
5. Select Erase SD card, format encrypted SD card
※ If SD card is formatted, all data in SD card will be deleted.
It’s recommended to make backup before formatting.
Figure 4.17
6. When formatting is completed, SD card will be unencrypted and mounted
automatically. Then it’s possible to use as unencrypted SD card
(6). Caution
※ Above explanation is the sample operation in case of SD card.
In case of other external storage, replace the explanation part of SD card with
other external storage.
※ The configuration of above 3 for the current mounting SD card will be
executed when next SD card will be mounted or formatted.
This means that the configuration for the current mounting SD card is not
executed soon.
※ If Erase SD card (mentioned in above 5) is executed in encrypted mode when
Use encrypted SD card (mentioned in above 3) is checked on, encrypted SD
card will be formatted.
112
5. Operation Support Tools
5.1
Software List
Table 5.1
Icon
Software name
Package name
Job Menu
jp.casio.vx.util.activemenu
Login Settings
jp.casio.vx.util.activelocalsecurity
Job User Editor
jp.casio.vx.util.useraccounteditor
Security Settings
jp.casio.vx.util.activemenu.activeadministratorsetting
AntiBurglar
jp.casio.vx.util.antiburglar
113
5.2
Job Menu
The Job Menu identifies the user through RFID or using the password and provides a menu
system that can represent a tree structure consisting of up to five levels.
This system works as the Home Application. You can display it anytime by pressing the Home
key.
Number of tries left
To password
authentication screen
Figure 5.1 User authentication screen (for RFID authentication)
Number of tries left
Password input
Begin
authentication
Clear entered text
To RFID authentication screen
Figure 5.2 User authentication screen (for password authentication)
Notes:
114
1. If terminal state is factory default, authentic method is set as none.
In case to authenticate, select authentic method in Login Settings.
2. If terminal state is factory default, following account is registered.
- User name: CASIO
- Password: casio
Current level name
Structured revisions
Structured
revisions
Button for back
to the previous level
Login user name
Menus at the current level
Figure 5.3 Menu screen
[Cooperation with operation mode switch]
When startup, the system checks the status of the operation mode switch.
If the operation mode is in customer mode, avoid user authentication, and doing automatic login
as user named "guest", and display the menu screen according to the menu definition for "guest".
Menu definition file for "guest" is JobMenu.guest.xml.
If above file does not exist, "JobMenu.xml" is refered.
[How to customize menu content]
The content of the Job Menu is defined in the menu definition file.
The menu definition file is referenced according to the following priority:
Table 5.2
Priority File path
1
/mnt/sdcard/MenuXml/JobMenu.[login user name].[culture information].xml
Note: The culture information refers to the system language and region settings.
[Examples]
Japan: ja-JP
US: en-US
2
/mnt/sdcard/MenuXml/JobMenu.[login user name].xml
3
/mnt/sdcard/MenuXml/JobMenu.[culture information].xml
4
/mnt/sdcard/MenuXml/JobMenu.xml
115
Therefore, if you want to display a special menu for customer mode, you will place the following
files.
/mnt/sdcard/MenuXml/JobMenu.guest.xml
If you want to change the content of the menu with culture information, set the following files.
Japan:/mnt/sdcard/MenuXml/JobMenu.guest.ja-JP.xml
US:/mnt/sdcard/MenuXml/JobMenu.guest.en_US.xml
If these files do not exist, the system menu stored in ROM is displayed.
You can customize the menu by adding/placing either of the above files at the indicated location,
according to the status of use.
Note: After files are placed, restart the terminal.
The format of the above files is as follows:
- File format: XML
- Character set: UTF-8
Table 5.3 Menu property block (<Ver> tag)
No.
1
2
Key
Number
TopMenuName
Description
The number of the format version for this definition file (fixed to "2.00").
The name of the top menu. The name must consist of up to 16 one-byte characters
(or 8 two-byte characters) that can be used in file names.
Table 5.4 Menu item block (enclosed by <Menu> tags)
No.
1
Key
Address
Description
The address that represents the location of this item.
The address string is in the following format:
[address-of-the-folder-containing-the-address][serial-number-within-the-same-level].
The figure below shows an example of items that are hierarchically structured and
represented by address strings.
01
0101
010101
010102
010103
0102
02
0201
010103フォルダに属する
The
item belonging to03
the番目の項目
0101 folder
020101
010202
2
BtnTitle
Notes: One level can contain up to 9 items and one folder can contain up to five
levels. Any level specified beyond this limit will not be displayed on the screen even
if defined.
Notes: An error will occur if the same address is used more than once.
The character string to be displayed on the menu button.
The string must consist up to 32 one-byte characters (or 16 two-byte characters) that
can be used in file names.
116
3
4
5
Reading
PackageName
Command
6
Intent
7
8
9
10
Authority
MimeType
Arguments
ArgumentsKey
If the string contains a semicolon (;), a line feed is inserted at this position. In other
words, a semicolon (;) character cannot be displayed in a title string because it is
treated as a control character.
Not used at present.
The package name of the application to be started.
exec: Executes the application identified by packageName.
menu: Displays the next level.
blank: Hides the item.
disable: Disables the item.
Specify this key if you want to start something other than the default activity of the
application identified by PackageName. Generally, you do not need to specify it.
Authority information. Not used at present.
Specify the MIME type if necessary.
Data associated with ArgumentsKey.
Key name specified together with arguments.
117
- Coding sample <?xml version="1.0" standalone="yes"?>
<MenuDataSet>
<Ver Number="2.00" TopMenuName="Top Menu"/>
<Menu>
<Address>01</Address>
<BtnTitle>Folder 1</BtnTitle>
<Reading />
<PackageName />
<Command>menu</Command>
<Intent />
<Authority />
<MimeType />
<Arguments />
<ArgumentsKey />
</Menu>
<Menu>
<Address>0101</Address>
<BtnTitle>Settings</BtnTitle>
<Reading />
<PackageName>com.android.settings</PackageName>
<Command>exec</Command>
<Intent />
<Authority />
<MimeType />
<Arguments />
<ArgumentsKey />
</Menu>
<Menu>
<Address>02</Address>
<BtnTitle>Browser</BtnTitle>
<Reading />
<PackageName>com.android.browser</PackageName>
<Command>exec</Command>
<Intent />
<Authority />
<MimeType>text/html</MimeType>
<Arguments>http://casio.co.jp</Arguments >
<ArgumentsKey />
</Menu>
</MenuDataSet>
Note: It is possible to add 1000 Menu item blocks in above XML file.
118
5.3
Login Settings
This tool allows you to configure the user authentication screen operation. An only user who
assigned system setting permissions can edit this settings.
1
2
3
4
Figure 5.4
Table 5.5
No. Item
1 Authentic method
2
Permitted number of
incorrect
authentications
3
The notification of
authentication
RFID Configuration
4
Description
RFID > PASSWORD: The RFID authentication screen will be displayed first.
PASSWORD > RFID: The password authentication screen will be displayed first.
PASSWORD ONLY: Only the password authentication screen will be displayed.
none : Login authentication is not enabled.
Sets the permitted number of consecutive failures.
A number between 0 and 99 can be set. If 0 is set, there is no limit
on the number of incorrect tries and the number of tries left is not
shown at the top of the screen.
Once the permitted number of consecutive incorrect authentications
is reached, the tablet reverts to the factory default status.
A sound is emitted when authentication is successful or fails.
Specify the RFID device type to be read.
Note: After files are placed, restart the terminal.
119
Followings two ways for authentication is provided.
Table 5.6
Authentication
Description
method
RFID
Authentication by RFID media that has been recorded unique code per user.
The UID of each RFID card is refered.
Password
Authentication by unique password per user. Usable characters in password are the
characters that can be entered by the software keyboard.
120
5.4
Job User Editor
This tool allows you to edit user accounts.
Up to 10,000 user accounts can be managed. You can add, edit, and delete accounts and can
assign system settings permissions to them.
Figure 5.5
121
[How to assign or delete system settings permissions to or from a user account]
Turn ON or OFF the check box to the right of the pertinent user account.
Note however that at least one account granted system permission must exist within the system. In
other words, you cannot uncheck the check box of an account if it would cause the system to have
no account that is granted system permission.
Figure 5.6
122
[How to add or edit a user account]
Press Add new to add a user account or press Edit to edit a user account.
Enter the user ID, which must consist of up to alphanumeric
characters.
You cannot register any user ID that has already been registered.
Enter the user name, which must consist of up to non-symbol
characters.
Enter the job information.
Leave this blank if no job information is used.
Enter the authentication password, which must
consist of up to 99 one-byte alphanumeric
characters. You cannot register any password that
has already been registered.
Register the card for RFID
authentication. You cannot register
any card that has already been
registered.
Figure 5.7
Note: The RFID registration screen will not appear if PASSWORD ONLY is selected as the
login authentication method (see 5.3 Login Settings).
123
[How to delete a user account]
Press the Delete button to the right of the user account to be deleted.
Figure 5.8
Note: Note however that at least one user granted system settings permission must exist within the
system. In other words, you cannot delete a user account if it would cause the system to have no
account that is granted system permission.
124
[How to accept your edits]
To accept your edits, press the Renew button.
Figure 5.9
[How to terminate the Edit tool]
To terminate the tool, press the Close button. A warning dialog will appear if your account edits
have not been saved.
Figure 5.10
125
5.5
Security Settings
Set the password for the administrator.
The password for the administrator is used for authentication for using a secure function.
It is also possible to set whether the user data should be deleted when authentication fails.
[Startup]
If administrator authentication is enabled, the screen below appears requesting the administrator
password used at startup.
Figure 5.11
Enter the administrator password and then click "OK".
If you are already logged in as a user with system setting privileges, the authentication screen
is not displayed even if administrator authentication is enabled.
126
1
2
3
4
5
6
7
Figure 5.12 Security settings screen
Table 5.7
No.
1
Item
Administrator
authentication
2
Local data erasing for
secutiry
3
Number of login failure
4
Enter the password.
5
6
Confirm the password.
Cancel
7
OK
Description
Specify whether to enable or disable administrator authentication.
Note that, even if administrator authentication is enabled, no administrator
authentication screen is displayed for users who are granted system settings
permission.
Specify whether to enable or disable the function that returns the terminal to
the factory defaults when authentication has failed in succession the specified
number of times.
Specify the number of authentication failures allowed, using a one-byte
number in the range from 0 to 99. If 0 is specified, the local data erasure is
disabled.
Enter the password for authentication.
The password must consist of 1 to 32 one-byte alphanumeric characters.
The password will not be changed if this field is left blank.
Enter the password for authentication again for confirmation.
Terminates the security setting tool.
A confirmation dialog appears if your edits have not been saved.
Use this item to accept your edits.
127
5.6
AntiBurglar
Overview
Lock and unlock
A secret number (four-digit number) is used to lock or unlock the terminal.
Theft detection method
This program judges that a theft has occurred when power supply (from the contactless charger)
stops.
Alarm (upon theft occurrence)
The loud warning buzzer sounds for 60 seconds.
Notes
Power failure
When a power failure occurs, this program also behaves as if a theft occurred because power
supply (from the contactless charger) stops.
In other words, the loud warning buzzer also sounds when a power failure occurs.
Battery removal
The program does not work if the battery is removed at the time of theft.
In other words, no loud warning buzzer doesn’t sound if the battery is removed.
After alarm issuance
Once the loud warning buzzer sounds upon theft detection, the terminal enters unlocked state
(theft monitoring is disabled).
In other words, no loud warning buzzer sounds immediately after alarm issuance.
Adaptor
Theft detection monitors only power supply from the contactless charger.
Even if the AC adapter or car adapter is removed, this program will not judge this event as
a theft.
128
Specifications
Package name and apk file name
Package name: jp.casio.vx.util.antiburglar
apk file name: AntiBurglar.apk
Startup method
This AntiBurglar program is called from Job Menu.
On a system that does not use Job Menu, this program can be started from the Android Home
screen or another program.
Configuration
The AntiBurglar program consists of two basic modules.
Theft protection application
This application provides a man-machine interface between the terminal and the user and
handles password and other data inputs.
Theft monitoring service
This service, which has no screen, performs theft monitoring.
Figure 5.13
Internal status
The theft monitoring service holds the internal status that indicates whether the theft protection
function is active or inactive.
129
Screen operation
Start Theft Monitoring (when theft protection of theft monitoring service is inactive)
If this program starts when theft protection (the theft protection function of the theft monitoring
service) is inactive, the Start Theft Monitoring screen is displayed.
The user enters the secret number (4-digit number) and presses OK.
The secret number confirmation screen appears.
The user enters the same secret number for confirmation and presses OK.
The theft monitoring service starts its theft protection function and closes the screen.
Figure 5.14
When CANCEL is pressed
When CANCEL is pressed, the following dialog appears and the screen display disappears with
nothing done.
130
If no power supply is connected:
This program judges that a theft has occurred when power supply stops.
This means that the power must be supplied when theft monitoring starts up.
Otherwise, the Start Theft Monitoring screen disappears after displaying the following dialog.
After checking the power supply and related connections, you need to restart the theft monitoring
start function.
Figure 5.15
131
Stop Theft Monitoring (when theft protection of theft monitoring service is active)
If this program starts when theft protection (the theft protection function of the theft monitoring
service) is active, the Stop Theft Monitoring screen is displayed.
When the user enters the secret number (4-digit number) and presses OK, the theft monitoring
service stops the theft protection function and the screen display disappears.
That is to say, theft monitoring service continues.
This program automatically starts if a theft is detected (see the theft alarm timing chart).
Figure 5.16
When CANCEL is pressed
When CANCEL is pressed, the following dialog appears and the screen display disappears with
nothing done.
Figure 5.17
Secret number input error
If the entered secret number is incorrect, the Stop Theft Monitoring screen disappears after
displaying the following dialog.
You need to restart the theft monitoring stop function.
Figure 5.18
132
Theft detection
This program judges that a theft has occurred if power supply (from the contactless charger) stops
and does not recover within one second. It displays the Stop Theft Monitoring screen.
Alarm (upon theft occurrence)
After detecting a theft (displaying the Stop Theft Monitoring screen), the program waits for four
seconds and then sounds a warning pulse buzzer (with a width of 20 ms and a period of 100 ms)
for five seconds.
Then, the warning buzzer sounds for one minute.
After this one-minute period, the warning buzzer will no longer sound.
Note that after the buzzer sounds, the terminal enters unlocked state.
Figure 5.19
Power recovery during alarm issuance
If the power supply recovers during the alarm, the program judges that no theft has occurred.
More specifically, the following steps are performed:
1. The warning buzzer stops.
2. The Stop Theft Monitoring screen disappears.
If the user is entering the secret number on the Stop Theft Monitoring screen, the screen
disappears without waiting for the completion of entry.
3. The theft monitoring service restarts theft monitoring.
133
6. System Operation Tools
6.1
Software List
Table 6.1
Icon
Software name
Package name
File Manager
com.Mitac.FileManager
WLAN Tool
jp.casio.vx.util.comm.netsearch
Backup / Restore
jp.casio.vx.util.kitting.backuptool
Copy Devices
jp.casio.vx.util.kitting.clone
134
6.2
File Manager
File Manager provides file management functions.
You can select a type of storage in the left side of the screen. The right side of the screen shows a
directory content list.
When you select a folder in the directory content list, a list of the content of the selected folder is
displayed.
When you select a file in the directory content list, the browser or other application associated
with the file type is invoked.
1
Figure 6.1
1. Settings menu
■ Settings menu
From the Settings menu, you can configure the following settings:
New, Sorting, Display Mode, Edit, Search, and Properties
135
When you press and hold an item in the directory content list, an edit menu appears.
Figure 6.2
136
6.3
WLAN Tool
The purpose of this utility is to check the wireless LAN signal status.
Figure 6-1 Main screen (in landscape layout)
Table 6-1 Items list
No. Item
1 Access-point list
2
Signal strength graph
3
Remote station
information
4
Signal Strength Log
capturing
5
Local station information
6
7
Ping execution result
Ping
Description
A list of detected access-points is displayed.
The connected access-points are highlighted.
This graph indicates the time-dependent change of the strength of signals
received from the access-point connected at present.
The following remote station information is displayed.
- SSID
- Connection status
- Electric field strength
- Encryption status
Starts or stops signal strength log output.
Start capturing is displayed if log output is not in progress.
Stop capturing is displayed if log output is in progress.
Detailed IP information of the connected network is displayed.
- Local station MAC address
- Local station IP address
- Subnet mask
- Default gateway
- DHCP server
- DNS server
The result of Ping execution is displayed.
Execute ping.
137
8
9
10
Release IP address
Renew IP address
Setting Menu
11
Exit
Note: Specify the Ping properties on the Ping screen.
The IP address of the local terminal is released.
The IP address of the local terminal is renewed.
When this control is pressed, the following startup menu is displayed.
- Ping Settings screen
- Environment Settings screen
When this control is pressed, the following screen is displayed.
Pressing Yes terminates this utility.
[Additional explanation]
1. If this utility is started when the terminal wireless LAN is OFF, the following screen is
displayed:
Figure 6.3
Pressing Yes enables the wireless LAN and displays the main screen of this utility.
Pressing No terminates this utility.
138
2. The content of the access-point list is refreshed at 10-second intervals.
Note that the access-point list will not be refreshed when signal strength log output is enabled
by pressing the Signal Strength Log Measurement control.
3. In case the screen is rotated and display direction (portrait/landscape) is changed, following
behaviors are occurs.
• Signal strength graph is reset once just after display is changed.
• If ping is running, ping is stopped.
139
Ping Settings screen
This screen is used to configure Ping properties.
Figure 6-2 Ping Settings screen (in landscape layout)
Table 6-2 Items list
No. Item
1 Ping address
Description
Specify the IP address of the remote stations to which the Ping is to be sent.
Default value
2
Number of times
IP address of the default gateway
Note: The field will be left blank if the IP address of the
default gateway cannot be obtained.
Specify the number of times the packet is to be sent to the remote station
during Ping execution.
Default value
Specifiable range
3
Packet size
4 (times)
1 to the maximum value in the Android standard
specification
Specify the size in bytes of the packet to be sent to the remote station during
Ping execution.
Default value
Specifiable range
4
Exit
Closes this screen.
140
32 (bytes)
9 (bytes) to the maximum value in the Android standard
specification
Environment Settings screen
This utility provides a screen for environment settings.
Figure 6-3 Environment Settings screen (in landscape layout)
Table 6-3 Items list
No. Item
1 Category for access-point
list sorting
2
3
Ascending or descending
order for access-point list
sorting
Exit
Description
You can change the order in which the access-point list on the main screen
is sorted so that it is based on one of the following categories:
Signal strength
Channel
Number of channels
Note: Sorting is based on the number of channels detected for each
access-point by the terminal.
Specify whether to sort the access-point list in ascending or descending
order of items belonging to the specified category.
Closes this screen.
Logs
Each of the following logs is described below.
1. Signal strength log
2. Ping log
Signal strength log
Information on the strength of the signal received (at one-second intervals) by the terminal from
the access-point during signal strength log measurement is stored in the following log file, one
record at a time, at an arbitrary time.
/mnt/sdcard/WL.Signal.Log.txt
141
When the log file size exceeds 1 MB, a backup of the log file is created in the same folder (file
name: WL.Signal.Log.bk.txt).
(If the previous backup file exists at the time of backup execution, it will be deleted.)
Table 6-4 Items (each corresponds to one record)
No
Item
Description
1 Date
The date the signal was received from the access-point.
2 Time
The time the signal was received from the access-point.
3 Signal strength (dBm)
The strength (dBm) of the signal received from the access-point.
4 Signal strength (%)
The strength (%) of the signal received from the access-point.
5 MAC address
MAC address of access-point
6 Channel
Channel of access-point
<Example>
Ping log
The responses resulting from Ping execution are automatically recorded in the following log file:
/mnt/sdcard/WL.Ping.Log.txt
When the log file size exceeds 1 MB, a backup of the log file is created in the same folder (file
name: WL.Ping.Log.bk.txt).
(If the previous backup file exists at the time of backup execution, it will be deleted.)
<Example>
142
6.4
Backup / Restore
Use this tool to back up and restore the terminal data.
1
4
2
3
5
Figure 6.4 Backup screen
1.
2.
3.
4.
5.
Backup menu
Restore menu
Options Settings menu
Check boxes for backup target selection
Backup start
■ Backup menu
Used to move to the backup screen.
■ Restore menu
Used to move to the restore screen.
■ Options Settings menu
Use to move to the Options Settings screen.
■ Check boxes for backup target selection
Select the data backup target.
■ Backup start
This control starts backup of the backup target data selected in 4.
143
1
2
Figure 6.5 Restore screen
1. Checkboxes for restore target selection
2. Restore start
■ Checkboxes for restore target selection
Select the data restore target.
■ Restore start
This control starts restore of data stored at the location specified on the Options Settings screen.
144
1
Figure 6.6 Options Settings screen
1. Data location radio buttons
■ Data location radio buttons
Select the location of the backup or restore data.
145
Table 6-5 Backup/Restore target in “Settings”.
No. Item
1 Wi-Fi
2 Ethernet
3 Bluetooth
4 Data Usage
5 More…
6
Airplane mode
7
VPN
8
Tethering & portable hotspot
9
NFC
10
Wi-Fi Direct
11
Mobile networks
12 Sound
13 Display
14 Apps
15 Accounts & sync
16 Location services
17 Security
18
19
20
21
Language & input
Date & time
Accessibility
Developer options
146
Target of Backup/Restore
Yes
Except “Cradle IP”
Except “Pairing list”
Yes
Yes
No
No
Yes
No
No
Yes
Yes
Yes
No
Yes
Except followings
• SIM card lock
• Trusted credentials enable/disable
Except “Pico TTS” settings
Except “Set date” and “Set time”
Yes
Except followings
• Show screen updates
• Background process limit
6.5
Copy Devices
Overview
This software is intended to streamline application installation and configuration operations,
which are performed by distributors when delivering devices to a customer.
More specifically, this software eliminates the necessity for performing application installation
and configuration on each user terminal. With this software, the distributor needs to perform
installation and configuration on only one owner terminal, whose data will then be automatically
and efficiently cloned to a huge number of client terminals.
1. Build the terminal environment to be used on one device
(owner terminal).
Install applications.
Configure various settings.
Back up the terminal environment to be used.
2. Cloning
Receive on each client terminal the backup data of the owner terminal via Wi-Fi Direct.
Perform restore operation on the client terminal.
Figure 6.7
This software is designed to inherit the operability of conventional models because it is generally
used for kitting, rather than being used by ordinary business users, as described above.
147
Operating environment
The operating environment for this software is as follows:
• Each terminal must be configured to enable Wi-Fi Direct.
• The backup data to be transferred must be stored at built-in storage in advance (see note 1).
• Including above backup data, the memory usage of built-in storage (see note 1) should be less
than 2 GB.
• This software should be used when the terminal's remaining battery power is at least 30%. If the
remaining battery power is lower than 30%, a warning dialog appears before execution.
This software uses TCP/IP or HTTP for terminal search and data transfer.
Note: The path of built-in storage is /mnt/sdcard.
148
Basic Functions
1) Cloning of the owner terminal data
The built-in storage of client terminal is copied by receiving the data (including backup data) in
built-in storage of owner terminal.
After the data in built-in storage is copied, the data except in built-in storage is also copied if
restore is executed on client terminal.
The following folders in built-in storage are not applicable.
• LOST.DIR (wreck of files broken by system inconsistent)
• The folder that is not permitted to write (example: android_secure)
2) Efficient and continuous cloning
This software performs cloning using high-speed Wi-Fi Direct communication.
Because the owner terminal performs the following steps continuously, it can treat even client
terminals added after one copy session as cloning targets.
<Owner terminal>
1. Zip the data to transfer.
2. Search for target Wi-Fi Direct devices.
3. In case target Wi-Fi Direct devices are existed, connect with first target Wi-Fi Direct
device.
4. After connecting is completed, receive the pairing notification from client device.
5. Notify the client terminal of the completion of preparation of data transferring.
6. Wait the completion of data reception by the client terminal.
<Client terminal>
1. Search for target Wi-Fi Direct devices.
2. If the Wi-Fi Direct owner terminal exists, check/execute paring.
3. Notify the owner terminal of confirming pairing.
4. After receiving the completion of preparation the data to transfer by owner terminal, start
data reception.
5. After completing of data reception, notify the owner terminal of the completion of data
reception.
Connecting procedures 3 - 5 of owner terminal are sequential behavior to connect with each
client terminal.
After connecting between owner and client terminal, receiving procedure 4 of client terminal is
executed by multiple client terminals in parallel.
3) Time adjustment
After completing of data reception, client terminal time is adjusted by owner terminal time
when to display the restore confirmation dialog.
4) Localization
If Japanese is selected as the language, various kinds of data are displayed in Japanese. If
another language is selected, various kinds of data are displayed in English.
149
Operation Specification
Startup
Copy Devices, the package name of which is “jp.casio.vx.util.kitting.clone”, can be started from
the Home Application.
Procedure
Firstly, perform the full backup on the owner terminal by using the basic utility
Backup/Restore (see note 1).
The owner terminal can search the terminals, Wi-Fi Direct of which is enabled, as client terminals.
For the owner terminal to search client terminals, client terminals must be started before the owner
terminal starts searching.
Therefore, follow the following steps to copy terminals:
1. Start this application of both the owner and client terminals.
2. On the client terminal, select “Receiver mode” and push Start button.
3. On the owner terminal, select “Sender mode” and push Start button.
The owner terminal performs the following procedure consecutively.
A. Receive the requests from client terminals
B. Search client terminals
C. Pair with client terminals
D. Copy to client terminals
If Wi-Fi Direct is enabled in some client terminals during the owner terminal performing, these
client terminals will be copied in the next procedure of the owner terminal.
In case the number of client terminal is five, it will work efficiently.
If there are more terminals, Wi-Fi Direct of which is enabled, as client terminal, it will take time
to search client terminals.
Because of this reason, it is recommended the following steps in case of many client terminals.
(1). Select “Receiver mode” and push Start button at the each five client terminals.
(2). Select “Sender mode” and push start button on the owner terminal.
(3). After owner terminals display as “Connecting(n/N)”, start this application and push Start
button on next five child terminals.
After these steps, please perform above (3) step repeatedly.
And in case the procedure for next client terminals does not start even if 1 minutes has passed
after current client terminals display as "Searching parent device"
are copied, it's recommended to restart procedure by following steps.
A. Quit this software in the parent terminal. (Wi-Fi Direct is disabled automatically.)
B. Start this software in the parent terminal, and enable the "Wi-Fi Direct" and push "Start".
150
State transition diagram
Archive all data under /mnt/sdcard
Zipping…
Terminal bocomes Wi-Fi P2P access point.
Initializing…
Searching client devices…
No
Terminals
detected.
Checking terminal that starting Copy Devices application.
(See Note 2.)
Connecting(1/N)
Connecting(2/N)
:
Connecting (N/N)
データ送信中…
データ送信中…
Sending data…
Connection process performs
sequentially. Wait about 30seconds per
one terminal.
At the time to connect with eight
terminals, stop connecting with other
terminals.
“N” is number of terminals on current
loop.
Retrieve the data from client terminal by
HTTP protocol. (Parallel processing)
Waiting…
If elapsed for about 1 minute after initialization, cancel P2P access
point and re-initialize.
Note1: To perform cloning again in response to some setting change on the owner terminal once
backup data is transferred to a client terminal using this software, be sure to perform full
backup on the owner terminal, rather than partial backup.
Note2: After the owner terminal has became the P2P access point , that owner terminal can not
detect the late added client terminal whose Wi-Fi Direct enabled. In above case, the P2P
access point mode on the owner terminal should be disabled to detect such client terminal.
151
Main Screen
The portrait screen layout is always assumed, regardless of the terminal orientation.
Go to Detailed Settings
Select either as the operation mode
Terminates this software
Figure 6.8
152
Detailed Settings
Generally, this software can be used with default settings. However, you can configure some
operational information in settings of Copy Devices.
Settings and current values
→ To pertinent settings dialog
Return to the caller screen
Figure 6.9
153
1) Network port number setting
You can specify a port number to be used for inter-terminal communication.
"60028" is set as the initial value.
Figure 6.10
As a rule, this setting item should be left as is. It is provided in case that the port number
conflicts with that of another application, etc.
154
Client terminal operation
1) Mode selection
Start the application and then select 1.Receiver mode on the main screen.
Figure 6.11
Table 6.2
Item
Finish
Operation
Terminates the application.
155
2) Operating environment check
At the time of mode selection, the software checks the remaining battery power and Wi-Fi
Direct status. If either is inappropriate, the software displays a warning dialog as described
below.
[If the remaining battery power is lower than 30%]
The following dialog appears after a long vibration:
Figure 6.12
Table 6.3
Item
No
Yes
Operation
Closes the dialog and returns to the main screen.
Proceeds to the next screen and continues processing.
[If Wi-Fi Direct is disabled]
The state value of Wi-Fi, and the operation of either of the following 1 or 2.
1. If Wi-Fi is not enable, Wi-Fi Direct will be enable automatically. The following dialog
appears after a long vibration, and wait Wi-Fi Direct to be enable. When Wi-Fi Direct will
be enable, the dialog is closed automatically. Select “Receiver mode” to continue process
again.
Figure 6.13
2. If Wi-Fi is enable, an operation to enable Wi-Fi Direct on setting screen. The following
dialog appears after a long vibration:
Figure 6.14
Table 6.4
Item
No
Yes
Operation
Closes the dialog and returns to the main screen.
Enters the Wi-Fi Direct settings screen.
The main screen reappears when you select the back key on the settings screen.
156
When select “Yes”, screen enters settings, then check the Wi-Fi Direct.
Push [Back key] to return application, Select “Receiver mode” to continue process again.
157
3) Start check
If you push Start button, it waits for owner device to connect.
Figure 6.15
Table 6.5
Item
Start
<<Back
Finish
Operation
Starts processing. A short sound and vibration are produced three times.
Returns to the main screen. A long sound and vibration are produced once.
Terminates the application after displaying a termination confirmation dialog (to
prevent operation errors during execution).
158
4) Data reception
Client terminals display the processing status in a blue background.
Figure 6.16
Table 6.6
Display item
Name
Role
Owner device
Status
Description
MAC address of the local terminal
"Client" is displayed, indicating that the terminal is a client terminal.
MAC address of the owner terminal connected
One of the following is displayed as the status:
Initializing ...
Searching for the owner terminal ...
Owner terminal already detected. Waiting for connection for reception ...
Receiving data ...
Data reception failed
Data reception completed
Interrupted
Until data reception is completed, it retries automatically .
159
5) Data reception completed
When data reception and data unzip is completed, the background color changes to orange and
a dialog appears, asking you to confirm whether to restore the received backup data.
Figure 6.17
Figure 6.18
Figure 6.19
Table 6.7
Item
Yes
No
Operation
The backup tool is called to execute restore and reset.
The application terminates.
No restore is performed. You need to manually perform restore.
160
Owner terminal operation
1) Mode selection
Start the application and then select 2.Sender mode on the main screen.
Figure 6.20
Table 6.8
Item
Finish
Operation
Terminates the application.
161
2) Operating environment check
At the time of mode selection, the software checks remaining battery power and the Wi-Fi
Direct status. If either is inappropriate, the software displays a warning dialog as described
below.
[If the remaining battery power is lower than 30%]
The following dialog appears after a long vibration:
Figure 6.21
Table 6.9
Item
No
Yes
Operation
Closes the dialog and returns to the main screen.
Proceeds to the next screen and continues processing.
[If Wi-Fi Direct is disabled]
The state value of Wi-Fi, and the operation of either of the following 1 or 2.
1. If Wi-Fi is not enable, Wi-Fi Direct will be enable automatically. The following dialog
appears after a long vibration, and wait Wi-Fi Direct to be enable. When Wi-Fi Direct will
be enable, the dialog is closed automatically. Select “Receiver mode” to continue process
again.
Figure 6.22
2. If Wi-Fi is enable, an operation to enable Wi-Fi Direct on settings screen. The following
dialog appears after a long vibration:
Figure 6.23
Table 6.10
Item
No
Yes
Operation
Closes the dialog and returns to the main screen.
Enters the Wi-Fi Direct settings screen.
The main screen reappears when you select the back key on the settings screen.
162
When select “Yes”, screen enters settings, then check the Wi-Fi Direct.
Push [Back key] to return application, Select “Receiver mode” to continue process again.
163
3) Start check
Push Start button on owner terminal after pushing Start button on client terminals.
Figure 6.24
Table 6.11
Item
Start
Back
Finish
Operation
Starts processing. A short sound and vibration are produced three times.
Returns to the main screen. A long sound and vibration are produced once.
Terminates the application after displaying a termination confirmation dialog (to
prevent operation errors during execution).
164
4) Transferred data check
The following factors about built-in storage (/mnt/sdcard) are checked.
• Existing backup data
• Volume of backup data
If something incorrect is found, the following dialog is displayed.
[In case the backup data does not exist]
The following dialog appears after a long vibration:
Figure 6.25
[In case data volume in built-in storage is over 2GB]
The following dialog appears after a long vibration:
Figure 6.26
165
5) Data transfer
The owner terminal displays the processing status in a green background.
Figure 6.27
Table 6.12
Display item
Name
Role
Client device
Status
Discovered
Number
Completed
In Progress
Description
MAC address of the local terminal
"Group Owner" is displayed, indicating that the terminal is the owner terminal.
MAC address of the client terminal with which communication is in progress
One of the following is displayed as the status:
Zipping…
Initializing...
Searching for client terminal
Waiting
Connecting(n/N)
Transmitting data ...
Data transmission failed
Data transmission completed
Interrupted
Number of detected client terminals belonging to the same group
Number of client terminals to which the data has been copied
Number of client terminals that are in progress of processing
166
After finishing processing on all detected client terminals, the owner terminal checks for
unprocessed client terminals again and continuously repeats the same processing.
(This assumes the case where client terminals are occasionally added as part of kitting work.)
Therefore, on the owner terminal, perform termination processing from this screen after
confirming all processing on client terminals has been completed.
167
7. Demo Tools
7.1
Software List
Table 7.1
Icon
Software name
Package name
NFC Demo
jp.casio.vx.util.demo.nfc
Barcode Scanner
com.google.zxing.client.android
168
7.2
NFC Demo
Overview
Basic Functions
1) Scanned NFC information display
The NFC type and ID are displayed.
2) Localization
If Japanese is selected as the language, various kinds of data are displayed in Japanese.
If another language is selected, various kinds of data are displayed in English.
169
Operation Specification
Startup
NFC Demo, the package name of which is jp.casio.vx.util.demo.nfc, can be started from the
Home Application.
Main Screen
The landscape screen layout is always assumed, regardless of the terminal orientation.
Figure 7.1 Landscape orientation
170
Figure 7.2 Portrait orientation
171
[When NFC is disabled]
If NFC is disabled, the application displays an alert dialog and terminates when you select OK in
the dialog.
Figure 7.3
172
Scanned Information Display
Hold the NFC card over the upper right corner, which is highlighted on the terminal skin image.
The application notifies you that it has read your card (by emitting a confirmation sound), and
then displays the card type and ID as follows:
1
2
3
Figure 7.4
Table 7.2
No. Item
1 Card type
2
Card type
(internal information)
3
ID
Description
Detailed information including the standard name
Information 2 below is displayed in a readable format. The specific
display content is described later.
Card type obtained by Android SDK
List of multiple applicable types
1) MifareClassic
2) MifareUltralight
3) NfcA
4) NfcB
5) NfcF
6) NfcV
7) IsoDep
8) Ndef
9) NdefFormatable
Card ID
173
In 1, any of the following is displayed as the result of reformatting.
Table 7.3
No. Display
1
NFC-A (ISO 14443-3A) [MIFARE Classic]
2
NFC-A (ISO 14443-3A) [MIFARE Ultralight]
3
NFC-A (ISO 14443-3A)
4
NFC-B (ISO 14443-3B)
5
NFC-F (JIS 6319-4) [FeliCa]
6
TAG (ISO 15693)
174
[Clearing the display area]
The Clear button clears the display area.
Figure 7.5
175
Back Key Operation
Upon a back key operation, a confirmation dialog is displayed. If OK is selected, the application
is terminated.
Figure 7.6
176
7.3
Barcode Scanner
This function reads barcodes.
1
Figure 7.7 Barcode reading screen
1. Barcode preview area
■ Barcode preview area
Position the barcode to be read within this area.
When the barcode is read, you will hear a bleep. Then, the screen changes to the barcode
information display screen shown on the next page.
177
1
Figure 7.8 Barcode information display screen
1. Barcode information display
■ Barcode information display
The image and information of the read barcode are displayed.
Notes
Barcode Scanner is using ZXing ("Zebra Crossing") version 4.2.
About readable bar code and for more information, please refer to the following Web site of
ZXing.
http://code.google.com/p/zxing/
178
8. Paper Writer Accessories
8.1
Software List
Table 8.1
Icon
Software name
Package name
Capture
jp.casio.vx.app.paperwriter.capture
Finder
jp.casio.vx.app.paperwriter.finder
Calendar
jp.casio.vx.app.paperwriter.calendar
Contacts
jp.casio.vx.app.paperwriter.contacts
179
8.2
Paper Writer
Paper Writer is application software that manages digitized handwritten documents being captured
from the camera with simple operation.
It is supported only by the “Paper Writer V-N500 Series”.
It consists of the following software.
Icon
Software name
Capture
Summary
Capture the contents written in paper on the paper holder (closing shot mode),
and business cards or the contents written in a notebook or similar document
(flipping shot mode).
Finder
Use the Finder to view, edit, print and configure the settings for photographed
images.
Calendar
In addition to the calendar function provided as a standard accessory, you can
link the calendar data to images and the address book.
Contacts
In addition to the address book (User) provided as a standard accessory, you
can link the address book data to images and the Calendar.
For details, see “Paper Writer V-N500 Series User’s Guide”.
180