1
R
V
E
E
L
R
E
S
A
I
S
O
E
N
N
1
O
T
E
.
6
.
S
5
The information in this document is subject to change without notice and does not represent
a commitment on the part of ArKaos S.A. No part of this publication may be copied,
reproduced or otherwise transmitted or recorded, for any purpose, without prior written
permission by ArKaos S.A.
All product and company names are ™ or © trademarks of their respective owners.
© ArKaos S.A. 1996-2012. All rights reserved.
TABLE OF CONTENTS
1 Introduction ..............................................................................................................1
2 Interface changes ....................................................................................................2
2.1 Dark theme ......................................................................................................2
2.2 Slider enhancement .........................................................................................3
2.3 Cell layer assignment .......................................................................................3
2.4 Master blackout................................................................................................3
2.5 Presets for TripleHead2Go ..............................................................................3
2.6 Audio gain control ............................................................................................3
2.7 Master volume control ......................................................................................4
2.8 Show or hide Tooltips preference ....................................................................4
2.9 Browser preview ..............................................................................................4
3 ArKaos Connect .......................................................................................................5
4 Sources, effects and visuals processing ..................................................................6
4.1 Transitions .......................................................................................................6
4.2 Color Pass Effect .............................................................................................6
4.3 Alternative Live Input service on Mac ..............................................................7
4.4 Quartz Composer (Mac only) ...........................................................................7
4.4.1 Using compositions as sources...............................................................7
4.4.2 Using compositions as effects.................................................................8
5 Enhanced mixer mode ...........................................................................................10
5.1.1 Independent preview .............................................................................10
5.1.2 Mixer state saving .................................................................................10
5.1.3 Mixer pause mode preference ..............................................................10
6 Enhanced playback modes ....................................................................................11
6.1.1 Scratch control ......................................................................................11
6.1.2 Playback position control ......................................................................11
6.1.3 Play once and freeze ............................................................................11
7 Engine improvements ............................................................................................12
7.1 Frame blending and software genlock ...........................................................12
7.2 Improved visual files support .........................................................................13
7.2.1 Alpha channel support ..........................................................................13
7.2.2 Support for FFMpeg H.264 decoding ....................................................13
7.3 Improved support for sound from videos .......................................................13
7.4 Flash Action Script 3 support .........................................................................14
8 Enhanced output options .......................................................................................15
8.1 Improved soft-edge algorithm ........................................................................15
8.2 Syphon (Mac only) .........................................................................................15
8.3 Multi-Monitor support in Windows ..................................................................15
9 Controller mapping ................................................................................................17
9.1 Mapping templates.........................................................................................17
9.1.1 Using custom templates ........................................................................17
9.2 Mapping dialog...............................................................................................18
9.3 Bi-directional controllers & Generic MIDI feedback........................................18
9.4 Dedicated mapping templates for specific controllers ....................................18
9.4.1 Akai APC20 and APC40 .......................................................................18
9.4.2 Elation Midicon ......................................................................................19
9.4.3 Korg Nano .............................................................................................19
9.4.4 Livid Instruments Ohm64 and OhmRGB...............................................19
9.5 Numark NuVJ Video Controller ......................................................................19
9.6 Dedicated mapping templates for DJ-style controllers ...................................20
9.6.1 American Audio VMS2 ..........................................................................20
9.6.2 American Audio VMS4.1 .......................................................................20
9.6.3 Hercules DJ controllers .........................................................................20
9.7 Open sound control mapping .........................................................................21
9.8 MIDI reference for template mapping ............................................................22
9.8.1 Introduction ...........................................................................................22
9.8.2 GrandVJ Full Mixer Mode .....................................................................22
9.8.3 GrandVJ Selected Mixer Mode .............................................................26
10 Tips ......................................................................................................................31
10.1 How to achieve best performances with the new engine .............................31
10.1.1 Monitor Rate Versus Movie Rate ........................................................31
10.1.2 Hardware dependencies .....................................................................31
10.1.3 OS dependencies................................................................................31
10.2 Setting up soft-edge .....................................................................................32
11 Changelogs ..........................................................................................................33
11.1 GrandVJ 1.6.5 ..............................................................................................33
11.2 GrandVJ 1.6 .................................................................................................33
11.3 GrandVJ 1.5 .................................................................................................33
1
1 Introduction
This Release Notes document explains the changes between the previous software version
and the current software version that are not explained in the User Guide.
To get the best out of GrandVJ, please ensure that you are using the latest software version;
you can download it from www.arkaos.net
2
2 Interface changes
2.1 Dark theme
GrandVJ can now be used either with the original “white” skin or with a darker skin to
accommodate darker working conditions.
3
The interface theme can be
switched by accessing the
advanced tab in the
Preferences dialog.
Note that changing the
interface theme will require
restarting the application.
2.2 Slider enhancement
All sliders have been updated to provide better control:
•
•
•
•
•
The tool tip is reflecting the value of the slider and stays on while modifying the
slider's value
Sliders can be modified using the mouse wheel (by 1% steps)
Pressing Alt (Mac) or Shift (Windows) while using the mouse wheel will give
change the value with 0.1% steps
Pressing shift while moving the sliders rounds the value to 0.1% accuracy
Alt + Click (Mac) or Ctrl + Click (Windows) resets the slider to it's default value
2.3 Cell layer assignment
In mixer mode, you can set cells to be triggered directly to a specified layer rather than the
one that is selected. This is allows you to pre-configure movies, masks or effects to be sent
directly to one layer (the topmost for example) without having to switch layers.
This setting is available in the visual tab and is only available for cells.
2.4 Master blackout
There’s now a master blackout button located at in the status bar, next to the full screen
button. When engaged, the master output will be toggled off but the preview will still be
displayed.
2.5 Presets for TripleHead2Go
The position presets now contains preset to facilitate the use of TripleHead2Go. There’s an
entry for both horizontal and vertical setups.
2.6 Audio gain control
The audio gain of each video placed on a cell can be controlled using a dedicated slider that
is in the Visual parameters panel when editing the corresponding cell.
4
2.7 Master volume control
The main volume can now be adjusted with a cursor placed on the
top of the screen.
2.8 Show or hide Tooltips preference
This new preference setting allows to enable / disable the tooltips
showing above a graphical control when the mouse cursor stays
above for more than one second. This makes GrandVJ more user
friendly when controlled from a touchscreen.
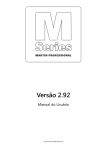
2.9 Browser preview
The browser preview panel allows to preview
files, effects, transitions, sources and visuals
from the browser section.
It will help you to decide which visual, effect,
transition, etc. you will use before applying it to a
cell in GrandVJ.
By default “Auto Preview” is enabled, thus when
an item is selected in the browser section it will
automatically try to preview this item.
The following controls are available for the preview:
•
Start/pause button
•
Stop button
•
Audio mute button
•
Seek bar
The purpose of the browser preview is just to be able to get a quick view of a visual or an
effect, etc. Therefore the preview will automatically stop when the browser section or the
preview panel itself is out of focus. In this way, the preview runs a limited amount of time,
which allows more performance to be dedicated to the full screen output of GrandVJ.
5
3 ArKaos Connect
ArKaos Connect allows GrandVJ to receive sound and MIDI from any audio sequencer that
supports VST plug-ins. The audio host can run on the same machine as GrandVJ or a
different one running on the same local network. The configuration of the connection in
GrandVJ is straightforward: just select the sending VST plug-in in an auto-updated list and
enjoy the new possibilities open by these interactions.
The interface of the VST plug-in is very simple. The top-right indicator shows the connection
status - the led become green if the plug-in is connecter to an instance of GrandVJ. The
bottom-right led blink when midi messages are routed to the plug-in. A knob allows
modifying the gain of the sound sent to GrandVJ.
A tab has been added to the preference menu, allowing configuring ArKaos Connect.
The host drop-down list can be used to choose a running plug-in to connect to. The
parameter “Network Buffer Size” is a tradeoff between latency and sound quality. The lower
is the buffer size, the lower is the latency between the audio sequencer and GrandVJ. The
value “low” or “medium” can be chosen for a vast majority of network configurations (local
machine or a fast LAN). Check the checkbox “Use Audio as Input“ to use the sound of the
audio sequencer as sound input (the selected audio input device in the audio preference is
then automatically deactivated).
You can preview the sound coming from the connected VST plug-in by clicking on the “Test
Audio Input” button.
The toolbar has been updated with an ArKaos Connect section
containing a led that light-up when GrandVJ is connected to a VST
plug-in, and a button allowing to preview the sound coming from the
plug-in.
6
4 Sources, effects and visuals processing
4.1 Transitions
Transitions provide a smooth change between triggered cells or decks. The complete
collection of available transitions can be found in the transition tab of the browser panel.
The transitions are similar to effects as they can have up to 4 controllable parameters.
In Synth mode a transition can be set per cell and can be controlled via the transition tab of
the parameter panel. The transition is triggered when the cell is triggered and stopped.
In Mixer mode transitions are used for changing between deck A and B. You can set up to
10 transition presets to be used in the mixer (c.f. 3.3 Enhanced Mixer mode).
4.2 Color Pass Effect
This effect simply acts as a band-pass color filter
7
4.3 Alternative Live Input service on Mac
Originally, GrandVJ was relying on the QuickTime Sequence Grabber framework to acquire
frames from live input devices.
Since version 1.1, QTKit Capture framework has replaced QuickTime Sequence Grabber in
GrandVJ, in order for the software to support HDV devices.
The problem is that several live input devices still work a lot better when used through
QuickTime Sequence Grabber than QTKit Capture, since the drivers are developed
separately.
Therefore, it’s now possible to switch back to QuickTime Sequence grabber by checking the
corresponding option in Preferences:
4.4 Quartz Composer (Mac only)
Under Mac OS X, GrandVJ now allows to use Quartz Composer .qtz files directly, both as
sources and effects. In older versions it was necessary to save them as QuickTime movies
with the big drawbacks that it was slow and it did not allow to change compositions
variables. Now the compositions are rendered natively through the fastest available
interface.
When using a composition as an effect the application will also scan the published inputs
and map them as effect parameters, if their format is compatible with the engine. GrandVJ
can automatically map parameters that are float values, indexes, colors and booleans and
there’s one visual input of the composition that receive the cell visual.
4.4.1 Using compositions as sources
The quick way to use a composition as source is to import it just like you do with any movie,
by drag and dropping it on a cell or by reaching your .qtz through the file browser.
For your convenience, GrandVJ installs a set of source compositions in
/Users/<username>/Library/Application Support/GrandVJ/Quartz Composer/Visuals. These
are listed in GrandVJ under the “Quartz-Composer (User)” section of the sources browser so
that they are always available when you create a new project. The idea is that you can also
add your favorite source compositions there so that you always have them ready when you
work on your projects.
8
Playing compositions as source does not allow modifying the variables from within GrandVJ,
but the audio input FFT parameters will be sent to the compositions just like for iTunes
visualizers.
As you can see on the picture, if you want to have a specific icon for your qtz, create a png
file that has the same name as the quartz composer file.
4.4.2 Using compositions as effects
For effects, GrandVJ will add all the compositions from your system that are supported. It
does this by automatically scanning the system folder “/System/Library/Compositions”.
These compositions will appear in the application under the “Quartz-Composer (System)”
section of the effects browser. You can use them as starting point to develop new effects.
But you can also add your own compositions as effects: just drop them in the local directory
“/Users/<username>/Library/Application Support/GrandVJ/Quartz Composer/Effects”. They
will appear in the “Quartz-Composer (User)” section of the effect browser.
As a quick example, let’s have a look at the effect parameters from the system composition
9
“Image Hose”. With the Quartz Composer application (found in Developer > Applications),
open the file “/System/Library/Compositions/Image Hose.qtz” (a copy) here’s what you
should see:
Open the inspector (Editor > Show Inspector) and from the menu, look at the Published
Inputs & Outputs, here’s what you have:
When loaded in GrandVJ, the first 4 parameters that can be mapped automatically will be
displayed. In this case it will be PrimaryColor, SecondaryColor, Pace and Size:
As you can see, GrandVJ will only display the meaningful part of the parameter name and
remove all _ProtocolInput strings from parameter names – this allows to easily display the
full parameter name in the panel – it will also make things a little nicer by capitalizing the first
letter of the parameter if necessary.
10
5 Enhanced mixer mode
In mixer mode, GrandVJ has now the possibility of
assigning each layer to either the 'A' or 'B' deck. This is
done by pressing the 'A' or 'B' sign on each side from the
layer preview.
Therefore, the software will run two separate scene
renderings, one being the combination of A and
unassigned layers, and the other the combination of B and
unassigned layers.
The two separated renderings are finally mixed using the
selected transition effect that’s controlled using the crossfader.
When the cross fader is all the way to the left (on the A
side), layers assigned to 'A' will be fully visible while layers
assigned to 'B' will be invisible. On the other hand, when
the cross-fader is all the way to the right, all layer assigned
to B will be fully visible while layers associated to A will be
hidden.
You can also achieve an automatic transition between A
and B scenes by using the A and B buttons that are
located respectively on the left and on the right side of the
cross-fader.
The automatic fade time, as well as parameter of the
selected transition preset, can be configured by deploying
the cross-fader control panel as shown on the image on the left.
5.1.1 Independent preview
When assigning layers to either A or B, you have the possibility to use the master preview to
display the output (as before) but also to preview only the layers assigned to either deck A or
B. Suppose you are outputting the content of deck A (by setting the cross fader all the way to
the left). If you toggle the preview to deck B, you can now set it up without interrupting the
main output. When you are satisfied by what is on deck B, flip back the preview to the main
output (pressing B again) and use the cross fader to go smoothly from A to B.
5.1.2 Mixer state saving
When quitting the application, the state of the mixer is now saved and restored when it is
started again. Note that only the locked parameters are saved, since non-locked parameters
will be overridden by any cell triggered, it doesn’t make sense to include them.
You can activate/deactivate this feature from the Preferences Dialog, in the Advanced tab:
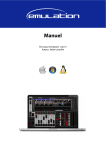
5.1.3 Mixer pause mode preference
This preference (in the Advanced tab) lets you chose between
two different pause modes when in Mixer mode:
•
“Cut” (default, for compatibility reasons): the layer
stops displaying in the Mixer
•
“Freeze”: the layer keeps displaying in the Mixer
11
6 Enhanced playback modes
6.1.1 Scratch control
GrandVJ now support Scratch Control with DJ-style MIDI controllers featuring jog wheels,
bringing DJs another step further into the VJ world. Two new slider widgets have been
added in the Visual parameter panel to control the sensitivity of the scratch and the scratch
itself.
The first slider should be mapped to a MIDI cc that sends circular values. You can also use
one that is incremental but in this case you have to check the “circular” checkbox when
editing the MIDI mapping on this widget (right-click → “Midi Mapping..”).
6.1.2 Playback position control
In the visual parameter panel, the playback widget gains a new mapping target that enables
to control the movie playback position using a MIDI or OSC controller. When you stop
manipulating the controls the software will resume to movie playback as defined for the
layer.
6.1.3 Play once and freeze
Two playback modes have been added:
•
•
“Play once forward and freeze”: the visual plays forward until it reaches the
selected “out” frame and stops on that frame.
“Play once backward and freeze”: the visual plays backward until it reaches the
selected “in” frame and stops on that frame.
12
7 Engine improvements
7.1 Frame blending and software genlock
The graphical engine of GrandVJ has been highly optimized to allow two major features:
•
•
Frame Blending
Software GenLock to the monitor output frequency to guarantee no frame drop.
Frame Blending is a technique that allows the engine to interpolate between movie frames
whenever it needs to. It’s very useful when slowing down videos a lot, since instead of
producing a steppy frame display, the engine will continuously mix from one frame to the
other making the transition a lot smoother. It’s also useful when you display movies that
have a frame rate that is not ‘coherent’ with your output display.
For example, when using a 60hz monitor output, you should ideally use only 60/30 fps
movies to avoid de-synchronization between the timestamps of the movie frames and when
the monitor can display frames. MediaMaster won’t prevent you to play a 25 fps movie, but
you might end up with some jitter in the display. Activating Frame Blending will make the
movies look a lot better in that case.
Software GenLocking is a technique we use to ensure as much as possible a constant
throughput of the engine. Our multi-threaded engine now uses all the ‘idle’ time possible to
pre-compute the frames that will be displayed in the future making sure that they are
available when needed. Using this technique, we can display several HD movies with no
frame drops, resulting in an image quality equivalent to hardware devices.
N.B.: It’s important to note that in order to get the best results out of the synchronization
process, you need to be very careful about your setup and the movies you use. We’ll talk
about this in a later paragraph (see tips)
To reflect these new engine capabilities, we’ve added a new option in the Preferences
Dialog called “Engine Accuracy” in the display tab:
In order to get the best display possible, we also use the main display output as timing
reference. This ensures that frames are delivered in timely fashion, synchronized to the
monitor’s vertical blank. However the timing of graphic cards is not always very accurate:
they might advertise 60Hz while actually running slightly over/under that frequency. In most
case it’s not really an issue but if you need the movie playback to be perfectly in time (if you
synchronize it with some external audio for example) you need to be able to use the more
accurate time reference of the System clock instead. The selection of the time reference is
done through the Combo box under the engine accuracy:
Choose “Display” for a smoother image when exact timing isn’t mandatory or “System Clock”
when the video playback speed is critical.
13
7.2 Improved visual files support
7.2.1 Alpha channel support
GrandVJ now provides support for Alpha channel in images and videos. This means that if
you import videos that have transparency information, this information will be used in the
graphical pipeline for blending and effects. GrandVJ fully supports QuickTime PNG &
QuickTime Animation CODECs as well as transparent PNG & BMP files.
7.2.2 Support for FFMpeg H.264 decoding
GrandVJ is now integrating FFMpeg 0.5 which allows native support for H.264 & AVCHD.
Please be aware that AVCHD is still in very early stages and some files might lead to
memory leaks.
7.3 Improved support for sound from videos
GrandVJ uses FFMPEG to
decode the audio from video
files with extensive support
for
codecs
(wav/mp3/aac/&c3).
This
means a lot more file type
can be played back with
audio
and
not
only
QuickTime’s. For example,
you can directly play mkv’s &
vobs into GrandVJ.
Note that for the audio and
video
to
properly
synchronize, it is very
important that the timing
reference (see “Improved
engine supporting frame
blending” ) is set to “System
clock” as the inaccurate
monitor frequency reported
by the system might cause
the audio to drift.
We also overhauled the preferences dialog to allow the selection of input/output devices and
support ASIO under Windows.
•
•
•
Driver Type selects the class of driver to use. Set to “no audio” to deactivate sound
completely.
Input Device selects the device to use for input (for the audio parameters and beat
related functions). Set to “none” to deactivate the audio input
Output Device selects the device to use for output (sound coming from the
videos). Set to “none” to deactivate the audio input
14
•
•
Buffer size expresses the size of the audio buffers. Bigger values will lead to more
stable output but might lead to latency.
Hardware setup is only available for ASIO and recalls the ASIO control panel.
7.4 Flash Action Script 3 support
GrandVJ now supports a method to transfer variables to/from Flash Action Script 3.
The issue that prevented previous versions to support Action Script 3 was that Adobe has
upgraded their security mechanism preventing global variable declarations to be exposed to
external.
However, in Action Script 3, you can declare functions to act as external interface, allowing
communication with the Flash movie through a specified channel.
So, in order to retrieve/set variables in Action Script 3, you need to create two functions
“arkSetVariable” & “arkGetVariable” and declare them as external interface:
import flash.external.ExternalInterface;
ExternalInterface.addCallback("arkSetVariable",arkSetVariable);
ExternalInterface.addCallback("arkGetVariable",arkGetVariable);
function arkSetVariable(varname:String, varval:String):void {
...
}
function arkGetVariable(varname:String):String {
}
The way you decide to implement these functions is pretty much up to you. Since
ActionScript 3 supports named arrays, an easy implementation would be:
function arkSetVariable(varname:String, varval:String):void {
arkVariable[varname]=varval ;
}
function arkGetVariable(varname:String):String {
return arkVariable[varname] ;
}
As these functions use an array arkVariable using the variable name as index.
You also need to make sure the variables you need are initialized at startup. Failing to do
this, they won’t exist in the array and GrandVJ will think they don’t exist and won’t update
them.
So, something like:
arkSetVariable("text","undefined") ;
will call our function to set the “text” variable to “undefined”, so that it is seen and updated by
GrandVJ.
15
8 Enhanced output options
8.1 Improved soft-edge algorithm
We updated our soft-edge algorithm to allow a better blending when projecting across
multiple projectors. The settings are unchanged but the edge blending is a lot smoother.
Additionally, all changes to the soft-edge settings are now directly reflected on the main
output, making it a lot easier to configure you multiple projector output without having to
leave the Preferences Dialog.
We also included a button in the interface that, when toggled, generates a visual adapted to
the soft-edge setup. The button is located under to the width and curve settings, in the
Display tab:
8.2 Syphon (Mac only)
Syphon is an open source Mac OS X technology that allows applications to share frames –
full frame rate video or stills – with one another in real-time. Until now, Syphon could already
be used in GrandVJ through Quartz Composer, the graphical modular language of Apple.
GrandVJ now natively supports Syphon as an additional (virtual) output. Through Syphon,
you can send the output from GrandVJ to any other application that support Syphon as input,
which makes it possible to use GrandVJ as video mixer module in some more complex
setups!
As usual, we tried to make it as easy as possible: the Syphon output is automatically
activated when a Syphon client is running, there is nothing to configure in GrandVJ.
If you want to use Syphon as input, you can still use Quartz Composer, please refer to the
official Syphon website (http://syphon.v002.info/) for more information.
8.3 Multi-Monitor support in Windows
It is now possible to display the output of GrandVJ across all the monitors connected to a
graphics card without using the "spanning" feature that was only available under windows
XP.
It can be used to avoid going through Matrox DualHead2Go or TrippleHead2Go interfaces if
your video card has 2, 3 or more outputs.
This feature is available under Windows XP, Vista and Seven.
The "Resolution" pop-up menu now proposes multiple-monitor setups (i.e. "1024x768x2" for
a 2048x768 horizontal setup or 1024x1536 vertical setup) in addition to the standard singlemonitor resolutions.
The "Multi-monitor Arrangement" line has been added to the Display tab of the preference
16
dialog to choose the way you want to arrange your monitors. GrandVJ uses this information
in combination with the actual Windows monitor arrangement to determine a correct output.
In addition to that, it is now possible to switch to another application while fullscreen is
activated in "Force Resolution".
As a direct consequence, we've simplified the Display preferences panel by removing the
"Fit to screen":
•
•
When "Force Resolution" is checked, the output will be displayed fullscreen. This
mode guaranties the best performances and screen synchronization.
When "Force Resolution" is unchecked, the output will be displayed within a topleft aligned window.
Remarks:
•
•
Under Mac OS X it is also possible to span the output of GrandVJ over several
monitors simply by selecting the monitor on the top-left and use a custom
resolution that will cover the multi-screen setup area.
As for the previous versions, for performance reason, it's not possible to fullscreen
across outputs that are not on the same graphic card.
17
9 Controller mapping
9.1 Mapping templates
GrandVJ supports the ability to define and save
mapping templates so that you can define various
controller combinations and recall them on the fly.
When starting the program, If you choose “New..”
in the startup dialog, you will be presented with a
dialog allowing you to choose which template to
use.
GrandVJ comes with a handful of templates
allowing working with several controllers from
different vendors as well as various combinations
of blank, keyboard controlled and GrandVJ
specific mappings. For some keyboards and
controllers, we provide files that will allow
uploading the midi configuration corresponding to
the GrandVJ template.
See the 'Template' folder in the installation directory and refer to your MIDI controller
documentation for information on how to upload the configuration to your keyboard.
9.1.1 Using custom templates
From within GrandVJ, it is easy to create new
templates, modify existing ones or share templates
with other people.
To create your own template, simply do all your midi
and keyboard assignment and select the menu
File > Save mapping template.
In the dialog, you can choose to either create a new
template (in which case you will need to specify a
template name and a description) or update an
existing template.
All the saved templates will be available at startup.
To load or manage your template set, choose the
menu File > Load Mapping Template. This will open
the “Choose mapping template” dialog.
To make a mapping active, simply select a template
from the list and click the Ok button.
Alternatively, you can also reset all templates to the
factory settings or import a template that has been
given to you as .vjt file.
You can also right click on any entry to delete it, edit
its name/description or export the template definition
to a separate .vjt file.
18
9.2 Mapping dialog
The keyboard and MIDI mapping dialog now provide
numeric feedback of the slider values. Values can also be
entered directly using the text fields.
9.3 Bi-directional controllers & Generic MIDI feedback
GrandVJ now supports controllers that allow MIDI feedback.
In the preferences/midi tab, you can specify devices that will receive midi feedback from the
application. This means that bi-directional devices can be much better integrated since
switching layer will reflect parameter changes to the units.
You can define up to four different feedback units in the Preferences Dialog / MIDI tab. Once
selected, feedback devices will be restored each time GrandVJ is restarted.
Additionally, we also provide dedicated templates with pre-mapping for specific controllers
(see further below).
To use GrandVJ with these predefined mappings, you first need to create a new project
using the desired template, then go to the preferences/MIDI tab and choose the
corresponding device as feedback unit (if the controller supports MIDI feedback) and MIDI
output.
For other feedback devices that are not listed (i.e. Behringer’s or Livid’s), simply select
“Generic MIDI” as feedback type.
9.4 Dedicated mapping templates for specific controllers
9.4.1 Akai APC20 and APC40
To use GrandVJ with the APC40, you first need to create a new project using one of the
19
APC40 templates, then go to the preferences/Midi tab and choose the APC40 device &
APC40 MIDI output as feedback unit, do the same for the APC20.
9.4.2 Elation Midicon
Don’t forget to load the Elation Midicon MIDI feedback in MIDI preferences to enable the
feedback on the controller.
The two page selectors control the selection of the active bank and active layer. The 8
sliders on the left control the transparency of the layers. The buttons above each slider
control the selection of the layer, the play/pause state of the layer and the kill function. When
a layer is selected, the led above the corresponding slider light up.
The last slider is mapped on the GrandVJ’s A/B cross-fader.
The buttons on the right block trigger the cells.
The touchpads select the transition preset. The touchpad corresponding to the active
transition is lights up. Encoders can be mapped as general-purpose encoder.
9.4.3 Korg Nano
MIDI mapping templates for Korg Nano controllers (no feedback), the following controllers
are supported:
•
•
Nano PAD + Nano KONTROL
Nano KEY + Nano KONTROL
9.4.4 Livid Instruments Ohm64 and OhmRGB
The OhmRGB mapping template is similar to the Ohm64 mapping template but don’t forget
to load the Livid OhmRGB MIDI feedback in GrandVJ’s MIDI preferences to enable the
specific nice colored keys.
9.5 Numark NuVJ Video Controller
Owners of a Numark NuVJ Video controller can now control GrandVJ in a NuVJ style. You
need to load the NuVJ MIDI feedback in MIDI preferences to enable the feedback on the
screen and on the pads.
•
•
•
•
•
The template for this controller is defined as follows:
The first jog wheel controls the GrandVJ scratch parameter on layer 1
The second jog wheel controls the scratch parameter on layer 2
The master FX knob selects an effect on the top layer.
The other knobs in the center control the transparency of the effect layer (the Fx
Level), the parameters of the effect, the contrast and the brightness.
Remarks:
In Grand VJ, to reproduce exactly the behavior of NuVj, assign the 9 pads on the left to the
first layer, and the 9 pads on the right to the second layer.
If you want to use GrandVJ in a more complete mode, use the two top left knobs to control
the bank and layer selection.
20
9.6 Dedicated mapping templates for DJ-style controllers
We have added or updated templates with feedback support for several controllers featuring
jog wheels in order to support the scratch control feature, giving a DJ-style feeling when
mixing video with them.
9.6.1 American Audio VMS2
Don’t forget to load the American Audio VMS2 MIDI feedback in Midi preferences to enable
the feedback on keys.
The template for this controller is defined as follows:
•
Deck A basically controls GrandVJ’s layer 1, and Deck B controls layer 2.
•
The two jog wheels are mapped to the layers scratch parameters.
•
The twelve keys on each deck have been mapped to the 24 cells in the matrix
bank. However, on both decks, the “SHIFT” key doesn’t send any Midi. The
“KEYLOCK” doesn’t send Midi either, but only on Deck A (hardware failure?).
•
The two central faders are mapped to layers transparency.
•
The two pitch faders on the sides control the layers pitch, central position being
default pitch, and lowest value pitch 0.
•
The cross-fader controls GrandVJ’s A/B cross-fader.
•
“TREBLE”, “MID” and “BASS” respectively control layer’s red, green and blue
values.
•
“TONE” controls the audio input level, and “CUE MIX” controls the audio output
level.
9.6.2 American Audio VMS4.1
Don’t forget to load the American Audio VMS4 MIDI feedback in Midi preferences to enable
the feedback on keys.
The template for this controller is defined as follows:
•
Deck A basically controls GrandVJ’s layer 1, and Deck B controls layer 2.
•
The two jog wheels are mapped to the layers scratch parameters.
•
The “Effect”, “Sample”, “Loop” and “Smart” pads on each deck have been mapped
to the 24 cells in the matrix bank. However, on both decks, the “SHIFT” key
doesn’t send any Midi.
•
The right and left column of pads have been mapped to the layer selection. The
correspondent opposite knobs (“Gain”, “Treble”, “Mid” and “Bass”) controls the
transparency of the layer.
•
The two faders next to the jog wheels control the layers pitch.
•
The cross-fader controls GrandVJ’s A/B cross-fader.
9.6.3 Hercules DJ controllers
MIDI mapping templates for Hercules DJ controller series (no feedback), the following
controllers are supported:
•
•
•
•
Hercules DJ Console MP3
Hercules DJ Console MK2
Hercules DJ Control STEEL
Hercules DJ Control RMX
21
9.7 Open sound control mapping
In addition to MIDI and Keyboard
control, GrandVJ can now also be
controlled through Open Sound Control
(or OSC). OSC is a new emerging
protocol that is networked (so it works
through regular wired or wireless tcp/ip)
and a lot more precise than MIDI. There
are more and more applications coming
up that support this protocol, especially
in the mobile field on devices like the
iPhone.
The same way GrandVJ listens to MIDI,
it can also listen to the network for OSC
messages. Any control can be mapped
to any OSC address for remote control.
Since it is a network protocol, you will
have to define on which port GrandVJ
needs to listen. This is done in the
Preferences Dialog, in the OSC tab.
To assign a control to an OSC control, simply toggle the application in OSC mapping (Menu
Options>Edit Osc Mapping), select with the mouse the control you would like to map and
send OSC messages from the remote application.
Once it is mapped, you will see the mapping address looking like a path on the key itself. for
example:
/2/push1
All OSC communication is done using referring path-like addresses. Each address
represents a node that can be controlled. GrandVJ expects the controlling application to
supply values between 0.0 and 1.0.
If your controlling application sends more than one value per address (for example a X-Y
touch pad could send one value for X and on for Y using a single address), you will need to
enter the address by hand.
To do so, right click on the control you would like to map and select OSC Mapping...
You can there enter any address that you would like. If you want to specify the second value
of the address (e.g. for the XY pad example we talked about) specify a comma followed by
the number of the parameter after the address.
Note for iPhone users: if you use an iPhone (with for example mrmr, TouchOSC, ...), please
deactivate the accelerometer during the "OSC learn" phase, otherwise the iPhone will send a
lot of accelerometer values and you won't be able to assign messages other than the
accelerometer controls.
22
9.8 MIDI reference for template mapping
9.8.1 Introduction
Additionally to custom-made templates for existing controllers, the template library contains
two templates that expose all of the controllable parameters available in mixer mode.
The first one, GrandVJ Full Mixer Mode, maps all the layer parameters in full mode (I.e. You
control all layers independently).
The second one, GrandVJ Selected Mixer Mode, maps all the layer parameters in 'selected
mode', i.e. you always control the selected layer (see the Reference Manual for more
information about the difference between the two modes).
The following tables list the MIDI assignment of those two templates
9.8.2 GrandVJ Full Mixer Mode
Layer Parameter
Midi CC
Channel
Visual Next
0
1-8
Visual Previous
1
1-8
Loop Mode
2
1-8
Movie Speed
3
1-8
Loop Start
4
1-8
Loop Length
5
1-8
Transparency
6
1-8
Copy Mode
7
1-8
Mask Mode
8
1-8
Mask Center
9
1-8
Mask Width
10
1-8
Mask Smooth
11
1-8
Red
12
1-8
Green
13
1-8
Blue
14
1-8
Mixing Preset
15
1-8
Effect Next
16
1-8
Effect Previous
17
1-8
Effect Parameter 1
18
1-8
Effect Parameter 2
19
1-8
Effect Parameter 3
20
1-8
Effect Parameter 4
21
1-8
23
Layer Parameter
Midi CC
Channel
Position X
22
1-8
Position Y
23
1-8
Position Z
24
1-8
Size X
25
1-8
Size Y
26
1-8
Rot X
27
1-8
Rot Y
28
1-8
Rot Z
29
1-8
Rotation Mode X
30
1-8
Rotation Mode Y
31
1-8
Rotation Mode Z
32
1-8
Shape
33
1-8
Tiling
34
1-8
Position Preset
35
1-8
Deck A Select
125
1-8
Deck B Select
126
1-8
Layer Control
Midi CC
Channel
Layer Next
36
1
Layer Previous
37
1
Layer Select (continuous)
38
1
Layer 1 Select
39
1
Layer 2 Select
40
1
Layer 3 Select
41
1
Layer 4 Select
42
1
Layer 5 Select
43
1
Layer 6 Select
44
1
Layer 7 Select
45
1
Layer 8 Select
46
1
Layer 1 Pause
48
1
Layer 2 Pause
49
1
Layer 3 Pause
50
1
Layer 4 Pause
51
1
24
Layer Control
Midi CC
Channel
Layer 5 Pause
52
1
Layer 6 Pause
53
1
Layer 7 Pause
54
1
Layer 8 Pause
55
1
Layer 1 Clear
57
1
Layer 2 Clear
58
1
Layer 3 Clear
59
1
Layer 4 Clear
60
1
Layer 5 Clear
61
1
Layer 6 Clear
62
1
Layer 7 Clear
63
1
Layer 8 Clear
64
1
Bank Control
Midi CC
Channel
Matrix Bank Next
65
1
Matrix Bank Previous
66
1
Matrix Bank Select (continuous)
67
1
Matrix Bank 1 Select
68
1
Matrix Bank 2 Select
69
1
Matrix Bank 3 Select
70
1
Matrix Bank 4 Select
71
1
Matrix Bank 5 Select
72
1
Matrix Bank 6 Select
73
1
Matrix Bank 7 Select
74
1
Matrix Bank 8 Select
75
1
Matrix Bank 9 Select
76
1
Matrix Bank 10 Select
77
1
Matrix Bank 11 Select
78
1
Matrix Bank 12 Select
79
1
Matrix Bank 13 Select
80
1
Matrix Bank 14 Select
81
1
Matrix Bank 15 Select
82
1
Matrix Bank 16 Select
83
1
25
Bank Control
Midi CC
Channel
Keyboard Bank Next
84
1
Keyboard Bank Previous
85
1
Keyboard Bank Select (continuous) 86
1
Keyboard Bank 1 Select
87
1
Keyboard Bank 2 Select
88
1
Keyboard Bank 3 Select
89
1
Keyboard Bank 4 Select
90
1
Keyboard Bank 5 Select
91
1
Keyboard Bank 6 Select
92
1
Keyboard Bank 7 Select
93
1
Keyboard Bank 8 Select
94
1
Keyboard Bank 9 Select
95
1
Keyboard Bank 10 Select
96
1
Keyboard Bank 11 Select
97
1
Keyboard Bank 12 Select
98
1
Keyboard Bank 13 Select
99
1
Keyboard Bank 14 Select
100
1
Keyboard Bank 15 Select
101
1
Keyboard Bank 16 Select
102
1
General Controls
Midi CC
Channel
Latch
103
1
Hold
104
1
Clear All Layers
105
1
Input Volume
106
1
Contrast
107
1
Brightness
108
1
Cross fader
120
1
Cross fader Full A
121
1
Cross fader Full B
122
1
Preview Deck A Assign
123
1
Preview Deck B Assign
124
1
26
9.8.3 GrandVJ Selected Mixer Mode
Layer Parameter
Midi CC
Channel
Visual Next
0
1
Visual Previous
1
1
Loop Mode
2
1
Movie Speed
3
1
Loop Start
4
1
Loop Length
5
1
Transparency
6
1
Copy Mode
7
1
Mask Mode
8
1
Mask Center
9
1
Mask Width
10
1
Mask Smooth
11
1
Red
12
1
Green
13
1
Blue
14
1
Mixing Preset
15
1
Effect Next
16
1
Effect Previous
17
1
Effect Parameter 1
18
1
Effect Parameter 2
19
1
Effect Parameter 3
20
1
Effect Parameter 4
21
1
Position X
22
1
Position Y
23
1
Position Z
24
1
Size X
25
1
Size Y
26
1
Rot X
27
1
Rot Y
28
1
Rot Z
29
1
Rotation Mode X
30
1
Rotation Mode Y
31
1
27
Layer Parameter
Midi CC
Channel
Rotation Mode Z
32
1
Shape
33
1
Tiling
34
1
Position Preset
35
1
Deck A Select
118
1
Deck B Select
119
1
Layer Control
Midi CC
Channel
Layer Next
36
1
Layer Previous 38
37
1
Layer Select (continuous)
38
1
Layer 1 Select
39
1
Layer 2 Select
40
1
Layer 3 Select
41
1
Layer 4 Select
42
1
Layer 5 Select
43
1
Layer 6 Select
44
1
Layer 7 Select
45
1
Layer 8 Select
46
1
Pause Selected Layer
47
1
Layer 1 Pause
48
1
Layer 2 Pause
49
1
Layer 3 Pause
50
1
Layer 4 Pause
51
1
Layer 5 Pause
52
1
Layer 6 Pause
53
1
Layer 7 Pause
54
1
Layer 8 Pause
55
1
Clear Selected Layer
56
1
Layer 1 Clear
57
1
Layer 2 Clear
58
1
Layer 3 Clear
59
1
Layer 4 Clear
60
1
28
Layer Control
Midi CC
Channel
Layer 5 Clear
61
1
Layer 6 Clear
62
1
Layer 7 Clear
63
1
Layer 8 Clear
64
1
Layer 1 Transparency
109
1
Layer 2 Transparency
110
1
Layer 3 Transparency
111
1
Layer 4 Transparency
112
1
Layer 5 Transparency
113
1
Layer 6 Transparency
114
1
Layer 7 Transparency
115
1
Layer 8 Transparency
116
1
Layer 1 Deck A Select
125
1
Layer 1 Deck B Select
126
1
Layer 2 Deck A Select
125
2
Layer 2 Deck B Select
126
2
Layer 3 Deck A Select
125
3
Layer 3 Deck B Select
126
3
Layer 4 Deck A Select
125
4
Layer 4 Deck B Select
126
4
Layer 5 Deck A Select
125
5
Layer 5 Deck B Select
126
5
Layer 6 Deck A Select
125
6
Layer 6 Deck B Select
126
6
Layer 7 Deck A Select
125
7
Layer 7 Deck B Select
126
7
Layer 8 Deck A Select
125
8
Layer 8 Deck B Select
126
8
Bank Control
Midi CC
Channel
Matrix Bank Next
65
1
Matrix Bank Previous
66
1
Matrix Bank Select (continuous)
67
1
29
Bank Control
Midi CC
Channel
Matrix Bank 1 Select
68
1
Matrix Bank 2 Select
69
1
Matrix Bank 3 Select
70
1
Matrix Bank 4 Select
71
1
Matrix Bank 5 Select
72
1
Matrix Bank 6 Select
73
1
Matrix Bank 7 Select
74
1
Matrix Bank 8 Select
75
1
Matrix Bank 9 Select
76
1
Matrix Bank 10 Select
77
1
Matrix Bank 11 Select
78
1
Matrix Bank 12 Select
79
1
Matrix Bank 13 Select
80
1
Matrix Bank 14 Select
81
1
Matrix Bank 15 Select
82
1
Matrix Bank 16 Select
83
1
Keyboard Bank Next
84
1
Keyboard Bank Previous
85
1
Keyboard Bank Select (continuous) 86
1
Keyboard Bank 1 Select
87
1
Keyboard Bank 2 Select
88
1
Keyboard Bank 3 Select
89
1
Keyboard Bank 4 Select
90
1
Keyboard Bank 5 Select
91
1
Keyboard Bank 6 Select
92
1
Keyboard Bank 7 Select
93
1
Keyboard Bank 8 Select
94
1
Keyboard Bank 9 Select
95
1
Keyboard Bank 10 Select
96
1
Keyboard Bank 11 Select
97
1
Keyboard Bank 12 Select
98
1
Keyboard Bank 13 Select
99
1
Keyboard Bank 14 Select
100
1
Keyboard Bank 15 Select
101
1
30
Bank Control
Midi CC
Channel
Keyboard Bank 16 Select
102
1
General Controls
Midi CC
Channel
Latch
103
1
Hold
104
1
Clear All Layers
105
1
Input Volume
106
1
Contrast
107
1
Brightness
108
1
Cross fader
120
1
Cross fader Full A
121
1
Cross fader Full B
122
1
Preview Deck A Assign
123
1
Preview Deck B Assign
124
1
31
10 Tips
10.1 How to achieve best performances with the new engine
In order to get the best out of our new engine, you need to be attentive to quite a bit of
details. We’re going to explain here what needs to be checked:
10.1.1 Monitor Rate Versus Movie Rate
If you want your movies to be really smooth, you need them to be in accordance with the
monitor frequency to ensure that each time there is a frame to show, you have a monitor
refresh.
So if your movies are 30 FPS, the monitor needs to be at 60 Hz and if they are at 25 FPS,
you need to use either 50 Hz or 75 Hz.
Be also careful that depending on your chosen resolution, the choice of frequencies might
change so it’s important that once your setup is done, you put MediaMaster in Full Screen
and get the monitor reading from the status panel.
10.1.2 Hardware dependencies
We’ve noticed that some Graphic Cards sometimes react differently depending on the output
resolution. For example we have ATI’s that don’t provide a steady frame rate in 800x600
whilst completely stable under 1024x78.
Also, if you do spans across the two outputs of a graphic card, there’s no guarantee the two
outputs will run at the exact same frequency. This can also produce jitter. It is sometimes
more efficient to make a wide output from one head using Matrox’s doublehead2go /
triplehead2go than to do a span across the two outputs.
10.1.3 OS dependencies
There are some performance issues that are only valid with respect to the operating system.
We’ll examine them separately here.
10.1.3.1 Windows
Windows is pretty ok. The only thing you need to make sure is that you run the software in
Exclusive mode since it’s the only mode that will ensure correct locking to vertical blanks.
To turn on Exclusive mode, make sure the option “Force Resolution” (in
Preferences/Display) is active:
10.1.3.2 Mac OSX
Unfortunately, Mac OSX is a lot more sensitive platform. If you display the full screen on one
Monitor, all system drawing on the other monitor can cause the full screen to glitch. No
matter what application. We adapted the way we do our interface updates so that it won’t be
interfering with the output but any other program updating its GUI will most likely be a
problem.
32
For this reason, in order to achieve the most fluid display under Mac OSX, we recommend to
either quit or hide other visible window. To give you an idea, even the refresh of the clock in
the menu bar can lead to one frame skipping.
10.2 Setting up soft-edge
When setting up soft edge, you have to be absolutely sure that all gamma/exposure of the
graphic card & beamers are off. Otherwise you might have an imbalance between the two
outputs and not be able to connect the projectors.
GrandVJ has now an integrated pattern generator that will help you to set up your screens.
Since it is generated internally, it is pixel accurate no matter what your choice of resolution
you are using.
You can activate it by pressing the button “Display SoftEdge Test Pattern” under the softedge settings.
The following pattern needs to be displayed correctly for the soft-edge to be correctly
configured.
33
11 Changelogs
555555
11.1 GrandVJ 1.6.5
•
•
•
•
•
•
•
•
•
•
•
•
•
added Scratch control
added Playback position control
added “Play Once and Freeze” playback modes
added new Mixer Pause mode
added “Show Tooltips” preference
added NuVJ Mapping template + feedback
added Livid OhmRGB Mapping template + feedback
added American Audio VMS2 Mapping template + feedback
added American Audio VMS4 Mapping template + feedback
added Elation Midicon Mapping template + feedback
updated Hercules DJ Control Steel, DJ Control Rmx, DJ Control MP3, DJ Control
MK2 Mapping templates
fixed Syphon output in Mixer mode [Mac]
fixed a crash when choosing an already bound OSC port
11.2 GrandVJ 1.6
•
•
•
•
•
•
•
•
•
•
added Syphon output [Mac]
added the ability to browse using arrow keys
fixed a potential crash when loading files that are played by QuickTime
fixed a audio/video synchronization problem in FFMpeg player
fixed a problem when using a third party audio device [Mac]
fixed PCM audio playback
fixed a crash when triggering effects
fixed a crash when switching fullscreen off
fixed a crash when previewing a transition
fixed bank rename save
11.3 GrandVJ 1.5
•
•
•
•
•
•
•
•
•
•
•
•
•
•
•
•
added previewer feature
added ArKaos Connect feature
added transitions:
o
transition on a Cell [Synth mode]
o
transition on the cross-fader [Mixer mode]
added main audio output control on main window
added clip audio gain control
added new multiple monitors support [Windows]
added the possibility to rename a bank
added 16 extra banks in matrix and keyboard bank views
added “Color Pass” effect
added support for Akai APC20 (MIDI templates + feedback)
added the possibility to use QuickTime Sequence Grabber live input service [Mac]
changed fullscreen behavior: “Force Resolution” mode doesn’t stop when
switching to another application [Windows]
updated the master preview so it has the same aspect ratio as the engine
fixed major bug causing freeze and crash
fixed crash using ASIO audio [Windows]
fixed crash in FFMpeg audio decoding
34
•
•
•
•
•
•
•
•
•
•
fixed crash when changing video input settings [Windows]
fixed crash when quitting after using video input device [Windows]
fixed possible user-interface redraw problem when using Display time-reference
[Mac]
fixed a problem that prevented the application to save Decklink setup filter settings
properly [Windows]
fixed a possible crash when quitting after using a Decklink card [Windows]
fixed a bug in Machine ID / serial check at startup [Mac]
fixed audio playback problem using latest MacBook Pro (6,2) on-board device
[Mac]
fixed problem using several identical video input devices [Windows]
fixed OSC port preference that wasn’t saved
fixed a crash when changing audio buffer size