Download Electrolux E30WD75GTT Use & care guide
Transcript
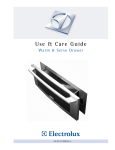
Use & Care Guide
Warm & Serve Drawer
Dishwasher
318 201 018 (0801) Rev. C
2 Finding Information
MAKE A RECORD FOR FUTURE USE
Brand_______________________________________________________________
Purchase
Date______________________________________________________
Model
Number______________________________________________________
Serial Number______________________________________________________
NO
TE
NOTE
The serial and model numbers are available on the serial plate located on the right side of
the drawer frame.
QUESTIONS?
For toll-free telephone support in the U.S. and Canada:
1-877-4ELECTROLUX (1-877-435-3287)
For online support and internet product information:
www.electroluxicon.com
TABLE OF CONTENTS
Safety ................................................................... 4
Important Safety Instructions ........................... 4
Setting Control .................................................... 7
Before Setting Warmer Drawer Control ............ 7
Setting Warmer Drawer Control ....................... 7
Setting Humidity Controller .............................. 9
Setting Bread Proof Control ............................. 9
General Care & Cleaning .................................. 10
To Remove and Replace Warmer Drawer ...... 10
Care & Cleaning Table .................................... 11
©2008 Electrolux Home Products, Inc.
Post Office Box 212378, Augusta, Georgia 30917, USA
All rights reserved. Printed in the USA
Solutions to Common Problems ..................... 12
Drawer is Not Level ........................................ 12
Cannot Move Appliance Easily ....................... 12
Warmer Drawer Does Not Operate ................ 12
Warranty Information ........................................ 13
Safety
IMPORTANT SAFETY INSTRUCTIONS
Please read all safety instructions before using your new Electrolux Warm & Serve Drawer.
!
WARNING
To reduce the risk of fire, electrical shock, or injury when using your Warm & Serve Drawer, follow
basic precaution including the following:
• Remove all tape and packaging wrap before using the appliance. Destroy the
carton and plastic bags after unpacking the appliance. Never allow children to play
with packaging material.
• Proper Installation. Be sure your appliance is properly installed and grounded by
a qualified technician in accordance with the National Electrical Code ANSI/NFPA
No. 70 - latest edition in the United States, or CSA C22.1, Part 1 in Canada, and
local code requirements. Install only per installation instructions provided in the
literature package for this appliance.
Ask your dealer to recommend a qualified technician and an authorized repair service.
Know how to disconnect the electrical power to the drawer at the circuit breaker or fuse box
in case of an emergency.
• User Servicing. Do not repair or replace any part of the appliance unless
specifically recommended in the manuals. All other servicing should be done only by
a qualified technician to reduce the risk of personal injury and damage to the appliance.
• Never modify or alter the construction of the drawer by removing panels, wire covers,
locking plates, or any other part of the product.
!
WARNING
• ALL WARMER
DRAWERS CAN TIP.
• INJURY TO PERSONS
COULD RESULT.
• INSTALL ANTI-TIP
DEVICE PACKED WITH
WARMER DRAWER.
• SEE INSTALLATION
INSTRUCTIONS.
!
TO REDUCE THE RISK OF TIPPING OF THE WARMER
DRAWER, THE DRAWER MUST BE SECURED BY
PROPERLY INSTALLED ANTI-TIP LOCKING PLATES
PROVIDED WITH THE DRAWER. TO CHECK IF THE
LOCKING PLATES ARE INSTALLED PROPERLY,
GRASP THE HANDLE OF THE OPEN DRAWER AND
SEE IF THE DRAWER WILL SLIDE OUT OF THE
OPENING OR TIP OUT. REFER TO THE INSTALLATION
INSTRUCTIONS FOR PROPER LOCKING PLATE
INSTALLATION.
WARNING
Do not use the warmer drawer for storage.
3
4 Safety
!
WARNING
Stepping, leaning or sitting on the door or drawer can result in serious injuries and may also cause
damage to the warmer drawer. Do not allow children to climb or play around the drawer. An open
drawer, when hot, may cause burns.
•
Storage in or on Appliance—Flammable materials should not be stored in the
drawer. This includes paper, plastic and cloth items, such as cookbooks, plasticware
and towels, as well as flammable liquids. Do not store explosives, such as aerosol cans,
on or near the warmer drawer. Flammable materials may explode and result in fire or
property damage.
•
Do not leave children alone. Children should not be left alone or unattended in
the area where an appliance is in use. They should never be allowed to sit or stand
on any part of the appliance.
•
DO NOT TOUCH INTERIOR SURFACES OF THE WARMER DRAWER. Surfaces may
be hot even though they are dark in color. During and after use, do not touch, or let
clothing or other flammable materials touch these areas until they have had sufficient
time to cool.
•
Wear Proper Apparel—Loose-fitting or hanging garments should never be worn
while using the appliance. Do not let clothing or other flammable materials contact hot
surfaces.
•
Use Only Dry Potholders—Moist or damp potholders on hot surfaces may result
in burns from steam. Do not let the potholders touch hot heating elements. Do not use
a towel or other bulky cloth instead of a potholder.
•
Do Not Heat Unopened Food Containers—Build-up of pressure may cause the
container to burst and result in injury.
•
IMPORTANT—Do not attempt to operate the warmer drawer during a power
failure. If the power fails, always turn the control off. If the drawer is not turned off
and the power resumes, the drawer may begin to operate again. Food left unattended
could spoil.
!
WARNING
Never use your appliance for warming or heating the room.
• Protective Liners—Do not use aluminum foil to line warmer drawer. Any other use of
protective liners or aluminum foil may result in poor performance or damage to the
appliance. Only use aluminum foil as recommended for baking if used as a cover placed
on the food.
• Glazed Cooking Utensils—Only certain types of glass, glass/ceramic, ceramic,
earthenware, or other glazed utensils are suitable for use without breaking due to the
sudden change in temperature. Check the manufacturer's recommendations.
• Use Care When Opening Warmer Drawer—Stand to the side of the unit when opening
the door of a hot drawer. Let hot air or steam escape before you remove or replace food
in the warmer drawer.
Safety
• Placement of Warmer Drawer Racks—Always place rack in desired location while
drawer is cool. If rack must be moved while hot, use extreme caution. Use potholders
and grasp the rack with both hands to reposition. Do not let potholders contact the hot
element or interior of the warmer drawer. Remove all utensils from the rack before
removing rack.
• Do Not Use Water on Grease Fires—Smother the fire or flame or use dry chemical
or foam-type extinguisher.
IMPORTANT INSTRUCTIONS FOR CLEANING YOUR WARM & SERVE
DRAWER
• Clean the drawer regularly to keep all parts free of grease that could catch fire. Do
not allow grease to accumulate. Greasy deposits could catch fire.
• Kitchen cleaners/aerosols—Always follow the manufacturer's recommended directions
for use. Be aware that excess residue from cleaners and aerosols may ignite causing
damage and/or injury.
IMPOR
TANT SAFETY NO
TICE
IMPORT
NOTICE
The California Safe Drinking Water and Toxic Enforcement Act requires the Governor of California to
publish a list of substances known to the state to cause cancer, birth defects or other reproductive
harm, and requires businesses to warn customers of potential exposure to such substances.
NO
TE
NOTE
Save these important safety instructions for future reference.
5
6 Setting Control
BEFORE SETTING WARMER DRAWER CONTROL
Arranging Warmer Drawer Rack Positions
Set the warmer drawer rack in the vertical position as shown below.
Upright Position
Downward Position
The rack can be used in 2 ways:
• In the upright position to allow
low profile food items to be placed
both under and on top of the rack
(for example, rolls or biscuits on
top of the rack and a casserole
dish under).
• In the downward position to allow
you to place light weight food items
and empty dishware (for example,
rolls or pastries and dinner plates).
SETTING WARMER DRAWER CONTROL
Use the warmer drawer to keep hot foods hot such as: vegetables, gravies, meats, casseroles,
biscuits and rolls, pastries and heated dinner plates.
The warmer drawer is equipped with a catch which may require extra force when opening and
closing the drawer.
To Operate the Warmer Drawer
The purpose of the warmer drawer is to keep hot cooked foods at serving temperature.
Always start with hot food. It is not recommended to heat cold food in the warmer
drawer.
All food placed in the warmer drawer should be covered with a lid or aluminum foil to
maintain moisture and softness. Do not cover crisp foods. Do not use plastic wrap to
cover food. Plastic may melt onto the drawer and be very difficult to clean.
Use only dishware, utensils and cookware recommended for oven use in the warmer
drawer.
!
CA
UTION
CAUTION
Always use potholders or oven mitts when removing food from the warmer drawer as cookware and
plates will be hot.
Setting Control
7
SETTING WARMER DRAWER CONTROLS
To Set the Controls
The digital controls are used to set the temperature of the warmer drawer. It is
located at the right side of the warmer drawer in the open position.
To Power-Up the Controls
On the first power-up or after a power interruption, the unit will flash “88:88°”
in the display. Press the ON-OFF pad twice. The display will show “----”,
prompting to press another pad. If no other pad is touched, the unit will power
off after a few seconds.
To Set the Target Temperature
To select the lowest (90°F) warming temperature available, press the -lo pad
and wait for the a few seconds for the acceptance delay. A second press of -lo
will lower the temperature to Bread Proof, displayed by a “brPF” in the screen.
The Bread Proof function can also be accessed at any time by pressing the
pad. To select the highest (210°F) warming temperature available,
Warmer Drawer Recommended
press the +hi pad and wait for the few seconds acceptance delay.
Food Settings Chart
For any temperature between the lowest (90°F) and the highest
(210°F), press the +hi or -lo pads until the desired temperature is
Food Item
Setting
displayed. The pads will adjust the target temperature by 10°F steps
each time it is pressed. When the desired temperature is set, wait a
Bacon
190°F
few seconds for the controls to accept the input. The display will show
Biscuits
170°F
the temperature rising to the target temperature and will sound a
Casseroles
170°F
chime when it is reached. It is recommended to let the unit pre-heat
Eggs
170°F
for 10-15 minutes before placing meal in it.
Empty Dinner Plates
140°F
To Warm Serving Bowls and Plates
Heat bowls and plates on the 140°F setting. Place empty dishes on
the rack to raise them off drawer bottom. To further heat dishes or to
heat fine china, check with the manufacturer for maximum heat
tolerance.
Auto-Shutdown
This unit is programmed to automatically shutdown after 4 hours it is
left on. The element will stop warming the drawer, the indicator light
will turn off and the electronic display will show an “OFF” message,
to remind the user that the unit auto-shutted off by itself.
Fish, Seafood
Fried Foods
Gravies, creams, sauces
Ham
Hamburger Patties
Pancakes, Waffles
Pastries
Pies
Pizza
Pork Chops
Potatoes (baked)
Potatoes (mashed)
Poultry
Roasts (Beef, Pork, Lamb)
Rolls, soft
Rolls, hard
Vegetables
170°F
190°F
170°F
170°F
190°F
190°F
170°F
170°F
190°F
190°F
190°F
170°F
190°F
170°F
140°F
170°F
170°F
8 Setting Control
SETTING HUMIDITY CONTROLLER
To Set the Humidity Controller
The humidity controller is located on the inside of the warmer drawer and
used to control humidity in the warmer drawer. The humidity control knob
can be set at any position between Moist (Figure 1) and Crispy (Figure
2) position. To set the humidity controller, slide the humidity control knob to
the desired location.
Figure 1
Figure 2
SETTING BREAD PROOF CONTROL
To Enable the Bread Proof Feature
At anytime when the unit is ON, press the
pad on the warmer drawer digital controls.
The display will show “brPF”, indicating that the warmer drawer is in Bread Proof mode.
Wait a few seconds for the controls to accept the input.
Preparing Bread Dough for the Warmer Drawer
The Warmer Drawer has a Bread Proof feature that can be used to help
prepare bread dough. The recommended length of time to keep bread dough
in the Warmer Drawer is about 45-60 minutes. Be sure however to follow the
recipe’s recommended times.
Figure 3
The unrisen bread dough should be placed in a large bowl since the dough will
nearly double in volume. Place the Warmer Drawer Rack in the downward
position (see Figure 3). Before placing in the Warmer Drawer, cover the bowl
with a moist cloth or use wax paper that has been coated with a non-stick type
cooking spray.
NOTE : The bread proof function uses low warming temperature which could
happen to be lower than your room temperature. The drawer will not work as
a cooling device and will not be able to lower the temperature under the
ambient temperature.
General Care & Cleaning
9
TO REMOVE AND REPLACE WARMER DRAWER
!
WARNING
Lever
Turn the warmer drawer to OFF before removing the drawer. DO NOT touch
the warmer drawer element. The element may still be hot enough to cause
burns, even if it is dark in color.
Pull down lever
with finger
Left glide
To Remove Warmer Drawer:
1. Turn power off before removing the warmer drawer.
2. Open the drawer to the fully opened position.
3. Locate glide lever on each side of drawer, pull up on the
right glide lever and push down on the left glide lever (See
Figure 1).
4. Pull the drawer away from the range.
To Replace Warmer (Warm & Ready™) Drawer:
1. Pull the plastic slider to the front of the glide slots on
each side of the drawer cavity (See Figure 2).
2. Align the glide on each side of the drawer with the drawer
cavity glide slot.
3. Push the drawer into the drawer cavity until glide levers
“click” (approximately 2”). If you do not hear the glide
levers “click” or the drawer does not feel seated
remove the drawer and repeat steps 1 thru 3.
!
Pull up lever
with finger
Lever
Figure 1
WARNING
Electrical Shock Hazard can occur and result in
serious injury or death. Disconnect appliance
from electric power before cleaning and
servicing the warmer drawer.
Figure 2
Right glide
10 General Care & Cleaning
CARE & CLEANING TABLE
Cleaning Various Parts or Your Appliance
Before cleaning any part of the drawer, be sure control is turned OFF and the drawer is
COOL. REMOVE SPILLOVERS AND HEAVY SOILING AS SOON AS POSSIBLE. REGULAR CLEANINGS WILL REDUCE THE NUMBER OF MAJOR CLEANINGS LATER.
Surfaces
How to Clean
Plastic
Membrane Keypad
Clean with a cloth soaked in soapy water. Rinse with a clean water and a
dishcloth.
Note: Humidity controller knob can not be removed .
Stainless Steel
Door & Drawer Body
Cleaners made especially for stainless steel are recommended. Always
follow the manufacturer's instructions. Be sure to rinse the cleaners. DO
NOT clean the door gasket. The door gasket is essential for a good seal.
Care should be taken not to rub, damage or remove the gasket.
Porcelain Enamel
Body Parts and Cavity
Gentle scouring with a soapy scouring pad will remove most spots. Rinse
with a 1:1 solution of clear water and ammonia. If necessary, cover difficult
spots with an ammonia-soaked paper towel for 30 to 40 minutes. Rinse with
clean water and a damp cloth, and then scrub with a soap-filled scouring
pad. Rinse and wipe dry with a clean cloth. Remove all cleaners or the
porcelain may become damaged during future heating. DO NOT use spray
oven cleaners.
Warmer Drawer Rack
The rack may be removed for cleaning. Clean by using a mild, abrasive
cleaner following manufacturer's instructions. Rinse with clean water and dry.
Solutions to Common Problems
IMPOR
TANT
IMPORT
Before calling for service, review this list. It may save you both time and expense. This list
includes common experiences that are not the result of defective workmanship or material
in your Warm & Serve Drawer.
DRAWER IS NOT LEVEL
• Poor installation. Place a level on the cutout bottom. Make sure bottom is
level.
• Be sure cutout bottom is strong and stable enough to adequately support
drawer (and wall oven, if applicable).
CANNOT MOVE APPLIANCE EASILY
• Appliance must be accessible for service.
• Cabinets not square or are built in too tightly. Contact builder or installer to
make appliance accessible.
WARMER DRAWER DOES NOT OPERATE
• Make sure cord/plug is plugged tightly into outlet.
• Service wiring is not complete. Contact your dealer, installing agent or
authorized servicer.
• Power outage. Check house lights to be sure. Call your local electric
company for service.
11
12 Warranty Information
WARMER DRAWER WARRANTY
Your warmer drawer is protected by this warranty
In the U.S.A., your appliance is warranted by Electrolux Home Products North America, a division of White Consolidated Industries, Inc. We authorize
no person to change or add to any of our obligations under this warranty. Our obligations for service and parts under this warranty must be performed
by us or an authorized Electrolux Home Products North America servicer. In Canada, your appliance is warranted by Electrolux Canada Corp.
WARRANTY PERIOD
FULL ONE-YEAR
WARRANTY
One year from original
purchase date
LIMITED
Time periods listed
WARRANTY
above.
(Applicable to the
State of Alaska)
*NORMAL
RESPONSIBILITIES
OF THE CONSUMER
EXCLUSIONS
IF YOU NEED
SERVICE
USA
1•800•944•9044
Electrolux Home Products
North America
P.O. Box 212378
Augusta, GA 30917
THROUGH OUR AUTHORIZED SERVICERS,
THE CONSUMER WILL BE RESPONSIBLE FOR:
WE WILL:
Pay all costs for repairing or replacing any
Costs of service calls that are listed under NORMAL
parts of this appliance which prove to be
RESPONSIBILITIES OF THE CONSUMER. *
defective in materials or workmanship.
All of the provisions of the full and limited
warranties above and the exclusion listed
below apply.
Costs of the technician’s travel to the home and any
costs for pick up and delivery of the appliance required
because of service.
This warranty applies only to products in ordinary household use, and the consumer is responsible for the
items listed below:
1. Proper use of the appliance in accordance with instructions provided with the product.
2. Proper installation by an authorized servicer in accordance with instructions provided with the appliance and in
accordance with all local plumbing, electrical and/or gas codes.
3. Proper connection to a grounded power supply of sufficient voltage, replacement of blown fuses, repair of loose
connections or defects in house wiring.
4. Expenses for making the appliance accessible for servicing, such as removal of trim, cupboards, shelves,etc.,
which are not a part of the appliance when it was shipped from the factory.
5. Damages to finish after installation.
6. Replacement of light bulbs and/or fluorescent tubes (on models with these features).
This warranty does not cover the following:
1. CONSEQUENTIAL OR INCIDENTAL DAMAGES SUCH AS PROPERTY DAMAGE AND INCIDENTAL EXPENSES
RESULTING FROM ANY BREACH OF THIS WRITTEN OR ANY IMPLIED WARRANTY.
NOTE: Some states do not allow the exclusion or limitation of incidental or consequential damages, so this
limitation or exclusion may not apply to you.
2. Service calls which do not involve malfunction or defects in workmanship or material, or for appliances not in
ordinary household use. The consumer shall pay for such service calls.
3. Damages caused by services performed by servicers other than Electrolux Home Products North America or its
authorized servicers; use of parts other than genuine Electrolux Home Products parts; obtained from persons
other than such servicers; or external causes such as abuse, misuse, inadequate power supply or acts of God.
4. Products with original serial numbers that have been removed or altered and cannot be readily determined.
Keep your bill of sale, delivery slip, or some other appropriate payment record. The date on the bill establishes the
warranty period should service be required. If service is performed, it is in your best interest to obtain and keep all
receipts. This written warranty gives you specific legal rights. You may also have other rights that vary from state to
state. Service under this warranty must be obtained by contacting Electrolux Home Products:
Canada
1•866•294•9911
Electrolux Home Products
North America
802, boul. L’Ange-Gardien
L’Assomption, Québec
J5W 1T6
This warranty only applies in the 50 states of the U.S.A., Puerto Rico, and Canada.
Product features or specifications as described or illustrated are subject to change without
notice. All warranties are made by Electrolux Home Products North America, a division
of White Consolidated Industries, Inc. In Canada, your appliance is warranted by
Electrolux Canada Corp.


