1
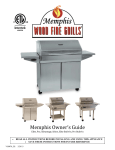
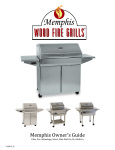
Memphis Owner’s Guide Elite, Pro, Advantage, Select, Elite Built‐In, Pro Built‐In VG0970_D 3/26/12 Congratulations on your purchase of the Memphis Wood Fire Grill. With proper care and maintenance, your grill will give you years of trouble‐free operation. Please review the following information carefully for useful tips and information that will help you utilize your grill’s extensive features and benefits. Keep in mind that your Memphis Wood Fired Grill is so much more than a grill. It’s a 3‐in‐1 outdoor cooking center that provides the convenience, wood‐fire flavors and versatility of three appliances: high temperature grill, low ‘n’ slow smoker, high‐performance convection oven. Fueled by certified 100% natural wood pellets, the Memphis has a digital Intelligent Temperature Control (ITC) that automatically maintains your desired cooking temperatures, just like you indoor oven. The result is a simple "set it and forget it" way to cook, bake, roast, sear or low and slow smoke; just set the desired temperature, sit back and enjoy. We all have our favorite recipes and cooking tricks. We suggest you experiment with your new grill to discover just how many ways it adds to your outdoor cooking experience. With a little time and effort you'll amaze your friends and family with your impressive culinary skills. Like many others, you'll find that your Memphis Wood Fire Grill will become your cooking appliance of choice for barbecuing, smoking, and a secondary oven source for holidays or social gatherings. Please complete the below information for quick and easy reference for your records. Additionally, complete the online Warranty Registration using the below information to validate the Warranty. At the end of this Owner’s Manual is a printed copy of the Warranty Registration if you choose to mail in your form. Your model and serial number are located on the sticker under the hopper lid. Model_________________________________________________ Model Number: VG ________________ Serial Number: (last 4‐5 digits) ____________________ Date of Purchase_________________________________________ Purchased From _______________________________________________________________ Hearthland Products, LLC. 9111 Grand Ave South Bloomington, MN 55420 888‐883‐2260 http://www.memphisgrills.com VG0970_D 3/26/12 Contents General Warning: Read all Safety Informa on Prior to Opera ng Grill ………………………….. 1 How Your Memphis Wood Fired Grill Works…………………………………………………………………... 2 Read Prior to Ligh ng! ……………………………………………………………………………………………………. 3 Intelligent Temperature Control ‐ Overview …………………………………………………………………… 4 Using Your Memphis Wood Fired Grill …………………………………………………………………………… 5 Opera ng Instruc ons ……………………………………………………………………………………………………. 6 Memphis ITC Meat Probe ………………………………………………………………………………………………. 8 Informa on About BBQ Cooking Pellets …………………………………………………………………………. 9 Periodic Grill Maintenance …………………………………………………………………………………………….. 10 Recommended Grilling Accessories ……………………………………………………………………………….. 12 Food Handling and Safety ………………………………………………………………………………………………. 13 Grilling Times and Temperatures ……………………………………………………………………………………. 14 VG0970_D Smoking Guidelines ……………………………………………………………………………………………………….. 16 Smoking Sugges ons …………………………………………………………………………………………………..…. 17 Troubleshoo ng …………………………………..………………………………………………………………………... 18 Limited Warranty ………………………………………………………………………………………………… 20 Warranty Registra on Form …………………………………………………………………………………….. 22 3/26/12 General Warning: Read all Safety Informa on Prior to Opera ng Grill WARNING! For outdoor use only. Do not use in any enclosed area. Keep grill 30” (76cm) or more from any combus ble surface. To prevent grease fires, clean your grill on a regular basis. This includes the flavorizer and grease tray. Should a grease fire occur, turn off the grill, remove food (use your judgment), and leave the hood closed un l the fire is out. DO NOT unplug the grill unless absolutely necessary; fans will con nue to run un l the fire is ex nguished. When cooking excep onally greasy foods, put a foil pan below the food to catch the grease. Do not put anything flammable in the storage area under the grill. Do not leave sealed containers of food on or near the grill. Always operate the grill with the grill hood in the closed posi on. Keep the grill’s rear ven la on slots clear of obstruc ons. It’s recommended that you regularly check your Memphis Grill for burn pot obstruc ons to make sure proper air flow is maintained. See Periodic Grill Maintenance in this manual for correct procedures. Accessible parts of the grill are very hot. Keep young children away while in use. Exercise reasonable care when opera ng your grill. When children are present, adult supervision is recommended. Do not use lava rocks or charcoal in your grill. To avoid the chance of serious burns, never lean over an open grill or place hands or fingers on the front edge of the cooking box. The grill should be plugged into a GFCI (Ground‐Fault Circuit Interrupt) outlet. When not in use the grill should be unplugged. The grill is to remain plugged into a GFCI during the cool down cycle. Use heat‐resistant barbeque mi s or gloves when opera ng this unit. Do not move or clean your Memphis Wood Fired Grill while opera ng or while the grill is hot. Make sure the fire is completely out, and that the grill is completely cooled before transpor ng or cleaning the grill. If the power cord becomes damaged, do not operate the grill. Do not use aerosols, liquids or damp‐materials on or near the grill while it is hot. Do not cover the en rety of the cooking surface when grill is hot. Leave at least 2 inches of clearance from the sides and back of the grill body. Any modifica ons (holes, screws, sheet metal changes) to the grill will void warranty. The grill is never to be operated in an open flame se ng without the op onal Open Flame Flavorizer Insert (VG4407). The grill is only to be operated in an open flame se ng while cooking over an open flame. Open flame cooks should be performed with the hood in the open posi on. A closed hood during longer open flame cooks may result in an ER‐1 error message. This error message means that the grill has reached too high of a temperature causing the grill to shut down avoiding any damage to the unit. Never leave your grill una ended during an open flame cook. WARNING! VG0970_D 3/26/12 1 How Your Memphis Wood Fired Grill Works: Your Memphis Wood Fire Grill represents a new way of outdoor cooking. It is a true high quality convection oven that also has grilling and smoking capability. It combines many unique features with time‐proven pellet‐burning technology. Together they give you controlled, quick, savory and repeatable cooking results. The perfect cooking experience starts with filling your hopper with all‐natural, 100% certified hardwood BBQ pellets. We recommend “Natures Way” flavored BBQ pellets. Simply pushing the ON Button will fully ignite your grill. The grill will reach your desired temperature within minutes of ignition. The ITC convection system and automatic auger feeds the wood pellets from the hopper into the burn pot, where they are ignited using super‐heated air. The Intelligent Temperature Control allows you to set the cooking method and desired temperature, and will adjust for ambient conditions. Convection/circulation fan(s) provide combustion air to the burn pot and provides convective cooking air by distributing the heat evenly throughout the cooking area. The natural smoke flavor produced by the burning pellets, the vapor produced by the juices dripping on the Flavorizer, and the air circulating throughout the cooking area, combine to give you the unique flavor that can only be achieved using a Memphis Wood Fired Convection Grill. A video explaining this procedure is available on our website or YouTube. • • • • • • • • • • • • • • • • • • Grill Features Easy to use Intelligent Temperature Control (ITC) capable of smoking, barbecue, grilling, baking and searing temperatures. Memphis ITC Meat Probe functionality for hands‐off, precision grilling * Extra‐large capacity hopper. Heavy‐duty stainless steel construction. Cooking area is dual‐wall and oven gasket sealed for maximum heat retention**. Attractive craftsmanship and high quality performance. Low CFM Fan causes pellets to burn and produce true convection oven cooking. Auto Start button & electric igniter eliminate the need for matches & lighter fluids. Smoking Mode gives you that savory flavor on demand and is programmable from 180°‐295°F***. Cooking Mode allows for grill temperatures up to 500°F(Select), 600°F(Advantage), 650°F(Pro), and 700°F (Elite). Flavorizer reduces the chance of flare‐ups and assists in even heat distribution. Stainless steel burn pot designed for high performance and longevity. 427 square inch main cooking area that can be increased to 970 (depending on model) square inches with the optional grates. Total cooking volume of nearly 4,000 cubic inches for large roasts and turkeys. Grease drawers with disposable liners make for no fuss cleaning. Large, locking casters that swivel and lock for easy maneuverability. Two stainless steel side shelves (optional on Memphis Select) offer a durable easy to clean surface. Steel cooking grids for years of reliable service. Made in the USA. * Meat probe is standard with Elite, Pro and Built-In models, optional on other models **Gasket seal only on Elite and Pro models *** 180° minimum set point available on Memphis Elite, Pro and Built-In models only. VG0970_D 3/26/12 2 Read Prior to Lighting Initial Burn Off Before cooking for the first time, we recommend that you “burn off” the grill to rid it of any foreign matter used in the manufacturing process. Prior to burn‐off, completely remove the plastic film on all stainless steel surfaces. Failure to do so will cause the film to melt to the metal, and it will be extremely difficult to remove. Remove the cooking grates and wash with a mild soap or detergent. Replace the grates, light and operate the grill at 450F with the hood down for 45 minutes. After burn‐off, turn the grill OFF. Lighting your Grill It is recommended practice to go through the Periodic Grill Maintenance (pg. 10) procedures frequently. This will ensure proper ignition of the pellets and is part of the normal maintenance procedure. Light per instructions found in detail in this manual. If the grill fails to light, it is most likely due to a dirty or plugged burn pot and/or a burn pot obstruction blocking the igniter air passages. (refer to Using Your Memphis Wood Fired Grill on page 5 for cleaning instructions.) Hood Position Always cook with the hood closed. Cooking with the hood closed keeps the temperature even, cooking the food faster while using less fuel. A closed hood also helps to create a smokier flavor. If the hood is left open for an extended period of time, it will cause the ITC to increase the fuel feed rate in an effort to increase the grill temperature. This could result in an overloaded burn pot. Instead of frequent, visual checks of your food, the use of a Memphis ITC Meat Probe is recommended. This tool can be routed through the 5/16” hole in the side of the Memphis Select or Advantage, or under the hood gasket on the Elite, Pro or Built‐In to prevent damage to the wires. See “Memphis ITC Meat Probe” on page 8 for further instructions on the use of a meat probe. VG0970_D 3/26/12 3 Intelligent Temperature Control ‐ Overview About the ITC: The ITC performs similarly to the control on your kitchen oven. The ITC automatically compensates for different ambient conditions, providing year‐round grilling and more accurate temperature control. Setting the control is simple and intuitive, and offers the user a precise and highly‐customizable grilling experience. Control I/O, ON/ OFF Touch Pad This pressure‐ sensitive touch pad is used to turn the grill on and off. LED Display This will display the temperature of the grill, as well as any other pertinent information. Display Touch Pad Pressing this will toggle the display between the set temperature and the actual current temperature of the meat probe, or the grill itself. Pellet Prime Touch Pad This button is used to prime the auger when the hopper is completely empty. In order to prime the auger, fill the hopper with pellets, then press and hold the pellet prime button until you hear pellets fall into the burn pot. At this point the auger is primed and the grill can be operated normally. Temperature Set Touch Pad By pressing either the up or down arrows, the set temperature can be moved in 5 degree increments. VG0970_D 3/26/12 Meat Probe Port Plugging the optional probe into this port will allow the user to access the meat probe functionality of the ITC. Probe Display Pad Pressing this will toggle between the settings for the meat probe and those for the grill itself Indicator Lights These LED’s indicate which mode cooking the grill is in, as well as whether you are setting the temperature or viewing the current temperature. These lights will also blink when the igniter is active, or the grill is in cool‐down. 4 Using Your Memphis Wood Fired Grill Prior to starting your cooking center, inspect the burn area inside the grill. It's a recommended practice to go through this procedure at initial start up and after every few uses to ensure peak performance. Actual necessary frequency varies depending on usage and fuel type. 1. Open the hood and remove the cooking grates. 2. Remove the flavorizer. The flavorizer helps distribute heat, contains fly ash, and keeps the flame from making direct contact with cooking grids. 3. If necessary, check the burn pot area, remove any foreign items to ensure that the air holes in the burn pot 4. 5. 6. 7. 8. 9. are clear. This will allow a quicker and more efficient ignition. Take precautions not to damage the igniter wiring connections or pull the igniter out of the igniter tube. Re‐install the flavorizer. Reinstall the cooking grates. Open the pellet hopper lid, found at the front of your grill on the Select and Advantage, or at the back of the Elite and Pro. Check for any foreign objects Fill your hopper with Nature’s Way cooking pellets. Close the hopper lid. Note: hopper does not need to be absolutely full for every use. Plug your Memphis Wood Fired Convection Grill into the nearest 110 Volt AC outlet*. (Note: Use a GFI Outlet. We strongly recommend that if your home does not have a GFI outlet that you install one, or use a high quality outdoor surge protector. When you are finished using your grill, and the grill has gone through its cool‐down, unplug it. It is also recommended that the grill be covered when not in use. * 230 Volt for European **Note: Your Grill will function best if operated on a level surface.** VG0970_D 3/26/12 5 Operating Instructions: Memphis Wood Fired Grill Automatic Start Up 1. To Start Press the On/Off touch pad. The start up mode will begin; a LED light will blink to indicate startup mode. The startup mode is timed to last 30 minutes or until the appliance reaches a temperature above 170°F. After it reaches this “Warm” state, the blinking LED light will become solid. 2. Set the TEMP DISPLAY Arrows to the desired temperature (Set light will illuminate) If the grill is set to a temperature less than 300° it will run in Smoke Mode. If set to 300° or above it will run in Cook Mode. The meat probe can be set from 68° to 250°. For more information on the use of the meat probe, consult page 8. 3. Set TEMP DISPLAY to Actual. (Actual light will illuminate) Temperature now displayed will be actual temperature in the cooking area. Note: Actual temperature will fluctuate up or down. This is normal and represents the normal fluctuation of any oven. Note: 1: If hopper was just filled; hold Pellet Prime button in until you hear pellets falling onto the burn pot and release. Then restart the grill by pressing the I/O button. This will allow the grill run its complete start‐ up sequence. 2: Your Grill will smoke for a few minutes while the pellets are lighting and coming to full burn. 3: If the fire does not start within 30 minutes, the grill will then automatically shut off. If this happens, some unburned pellets will have built up in the burn pot. Before restarting the fire, clean the excess pellets out of the burn pot and repeat the above steps. Fahrenheit VS. Celsius: Converting Your Grill’s Temperature Units Your Memphis grill is capable of working in both Metric and English units. To switch between Fahrenheit and Celsius on the ITC, simply press and hold the UP and DOWN arrow keys at the same time while the grill is on. VG0970_D 3/26/12 6 Operating Instructions: Memphis Wood Fired Grill 5. To operate: Once the Memphis Grill has started, operate as follows; Pre‐Heat : This is the beginning stage of cooking or smoking in which the fuel is ignited, and the grill is brought to the set temperature as quickly as possible. You may notice in this stage that, initially, the auger will feed fuel almost constantly. This is to prime the burn pot so that it is able to maintain significant heat. When this stage is concluded, the ITC will maintain selected cooking/smoking temperature, regardless of ambient weather conditions. The duration of this stage will vary somewhat due to differing ambient conditions, set temperatures, and grill models. In most Smoke TIP: cases, the grill will be in the pre‐heat stage To vary smoke flavor intensity, experiment with the for 15 to 25 minutes. amount of time you use the smoke mode and the mix of flavored pellets you use along with the all purpose pellets. This is more important if you use stronger Cooking Mode: Temperature will be automatically maintained at your flavored pellets such as Mesquite. Switching to smoke temperature set point. You may notice some mode soon after putting your food on the grill allows fluctuation up and down during this time. the smoke to penetrate the meats before they have This is a normal part of any oven / appliance a chance to sear closed. The smoke mode works best operation. The grill will automatically switch when a longer cooking time is required, such as large to this mode when the grill set temp is 300°F cuts of meat, fish, or poultry. Experiment with the or higher. length of time you leave for smoking before cooking thoroughly. Try different combinations of both modes. Smoke Mode: Smoking is a variation on grilling and is one of the unique advantages of your Memphis Wood Fired Grill. The temperature you choose will largely depend on what is being smoked (see Appendix B‐C) and your personal preferences. The grill will automatically switch to this mode when the grill set temperature is 295° F or lower. Combustion airflow is varied in the smoke mode. You may hear the fan “bellow”, repeatedly turning on and off. This is normal operation. U U U U U U About The ITC The Memphis ITC is a sophisticated controller that monitors your grill and adjusts various systems to maintain your desired cooking temperature. A temperature probe continually monitors the cooking chamber and communicates this data to the ITC. Based on this data, the ITC makes appropriate adjustments to the combustion system. The ITC system, logic and temperature accuracy has been validated with many hours of testing to ensure the highest performance. For optimal performance, cook with the hood closed and keep the probe clean and unobstructed. Allow the ITC adequate time to adjust to any changes in set temperatures. VG0970_D 3/26/12 7 Memphis ITC Meat Probe The Memphis ITC Meat Probe, which comes standard with the Elite, Pro and Built‐In models, and can be purchased separately for other models, is a must‐have accessory for any griller. The ITC Meat Probe conveniently interfaces directly with your grill’s ITC control and gives you an easy way to ensure your food is cooked to your predetermined temperature. This feature ensures convenience and delicious, repeatable results—every time. Using Your Memphis ITC Meat Probe 1. Plug The Meat Probe In The 3.5mm audio‐style plug inserts directly into the jack on the far right side of the ITC, labeled “Meat Probe” . Insert the other end of the meat probe into the thickest portion of your meat item. 2. Turn The Grill ON And Set The Grill Temperature, As Described On Page 6. 3. Toggle The PROBE DISPLAY to “MEAT” (Meat light will illuminate) Without the meat probe inserted, toggling this will be disabled. 4. Set TEMP DISPLAY to “SET” And Set Your Desired Meat Temperature. (Set light will illuminate) This is done much the same as setting the desired temperature of the grill‐ simply by pressing the up and down keys. The meat probe can be set up to 250°F (121°C)1. 5. Route the probe end through the large hole in the grill’s left side, just below the hood. Pull all the metallic interior cable into the grill, stopping at the ferrule. If using an Elite, Pro or Built‐In, simply place the probe and interior cable in the grill, then shut the lid on the longer end of the ferrule. This ferrule separates the meat probe’s interior and exterior cables. The white, weatherproof exterior cable should never be placed inside of the grill. Doing so will damage the cable, and compromise its weatherproofing. 6. Insert The Meat Probe Into Food As Desired. 7. Set TEMP DISPLAY to “ACTUAL”. (Actual light will illuminate) The ITC will display the temperature of the meat in real time. 8. Sit Back and Relax. The grill will cook the meat until the meat reaches the desired set point. The grill then automatically reduces to its lowest setting (180°F (80°C) for Elite, Pro and Built‐In, 200°F (90°C) for Select and Advantage), and displays “Done”. At any point during the cook, you can modify the set temperature of both the meat probe and the grill itself. 3.5mm Plug Meat probe Interior Cable Separator Ferrule Exterior Cable Notes: 1: While setting the meat probe set temperature, if the user presses the up‐arrow until 250°F (121°C) is displayed, and then presses it one more time, the ITC will display “NOPR”. On this setting, the ITC will display the temperature of the meat, but will not enter the “Done” mode at any meat temperature. 2: When not in use DO NOT leave the meat probe inside of the grill 3: Keep the meat probe as clean and dry as possible. Clean with a damp sponge, or a cloth with a small amount of rubbing alcohol. If exposed to liquids for extended periods of time, the meat probe may display an erroneous reading. In extreme cases the ITC will constantly list the actual meat probe temperature as “32°F” or “0°C”. To remedy this, allow the probe cord to dry completely before using it again. Once dry, this accessory will be fully functional. DO NOT submerge the meat probe when cleaning or place in dishwasher. VG0970_D 3/26/12 8 Information About BBQ Cooking Pellets Flavored pellets come in a variety of flavors such as Mesquite, Alder, Apple, Hickory, Maple and Cherry. They contain approximately 8,200 BTU’s of heat per pound and have very little ash and moisture content. Always use Premium BBQ Pellets in your grill. Premium BBQ pellets have a maximum length of 1.5” and are uniform in size and shape. This shorter length and uniformity ensures a higher efficiency and a more consistent, even temperature. Premium pellets are made of certified 100% hardwood. Cooking with pellets made from soft woods, such as pine, should be avoided, as it yields a turpentine‐like taste. Wood pellets have been in existence for many years, and there are currently more than 125 active pellet mill operations in the United States and Canada, producing millions of pounds of pellet each year. "Natures Way" 100% hardwood BBQ pellets are produced in the same manner as wood pellet heating fuel is produced. Sawdust and clean wood chips are pulverized and dried. The dried material is then processed under heat and pressure. This material is forced through a hard steel die rotating against rollers with pressure over 3,000 PSI. Once the pellets are forced through the final die they are cooled, screened, vacuumed, and then bagged or boxed. No extra adhesives or bonding materials are used in the production of these pellets. Hardwoods contain naturally‐occurring compounds called “lignins” that, when heated, act as a bonding material. Store pellets in a dry location for optimal performance. Flavor preference is an individual taste and we suggest you try the different flavors or mixtures of flavors to find the combinations that suit your needs and tastes. (See you local dealer to order individual pellet flavors) CAUTION: some wood pellets produced for heating fuel have a high content of softwood or even recycled wood furniture which can include pitch, chemicals or glues and should not be used for cooking. For optimum performance and to ensure you are using clean burning pellets manufactured for cooking, purchase "Natures Way" certified 100% hardwood BBQ pellets. Using low quality BBQ pellets may also adversely affect your grilling temperature performance – especially at low temperatures. Hearthland Products assumes no responsibility for problems associated with the use of lower quality or heating pellets. Store pellets in a dry location for optimal performance. Flavored Pellet Guidelines • Apple: Sweet, fruity smokey flavor. Strongest of the fruit woods. Ideal for beef, pork, ham, poultry and wild game. • Mesquite: Strong, spicy flavor. Distinctive smokey flavor of Southwest cooking. Ideal for beef, pork, poultry, fish and wild game. • Cherry: Mild, sweet fruity smoke flavor that gives a rosy tint to light meats. Ideal for beef, pork, poultry, fish and wild game. • Oak: Mild, wood‐fire flavor. Ideal for roasting, grilling, smoking and baking. • Pecan: Mild flavor similar to hickory but milder and sweeter with a nut after‐taste. Ideal for beef, pork, poultry, fish, wild game and baking. • Hickory: Strong, bacon‐flavor. Ideal for beef, pork, poultry, fish and wild game. • Maple: Very mild, a sweet light smokey flavor. Ideal for pork, ham, poultry, cheese, game birds and baking. *Please contact your dealer to purchase additional wood pellets, or call us at 888.883.2260* VG0970_D 3/26/12 9 Periodic Grill Maintenance Stainless Steel Surfaces ALWAYS clean dirt and dust off all stainless steel sur‐ faces before you begin to cook. The dirt can cook into the metal and discolor it. Dirt can be easily cleaned with hot, soapy water and a soft cloth. There are also many commercial products made to clean and protect your stainless steel surfaces. If the stainless steel be‐ comes severely discolored, this discoloration can be removed with stainless steel cleaner or mild oven cleaner and an abrasive (non‐metallic) scrub pad. RTD Your grill’s ability to accurately sense temperature and adjust its performance accordingly is what makes it unique and valuable. The RTD, a temperature sensor located towards the rear of the cooking area should be wiped down with water and mild detergent to ensure proper performance. Grill Interior Though BBQ pellets burn efficiently, they do create some amount of ash. The grill’s interior walls and floor Flavorizer don’t need to be spotless, but periodically clearing out It is recommended that you remove any build up of accumulated ash is a good practice. food or grease from the flavorizer before every cook. Airbox A clean flavorizer further reduces flare ups. Brush or scrape any build up off of the flavorizer with a grill Because the Airbox is used to channel the fan‐forced brush or putty knife. Never clean the flavorizer while it air into the burn pot, there is very little maintenance to be done in this area. Occasionally, you may either vac‐ is hot. uum or brush out any build‐up of ash or burn debris that has fallen below the burn pot. Remove any accu‐ mulation of grease or debris on the inside surfaces. Grease Trays Always be sure the grease trays are clean and free of debris. During the warmer months empty any grease build‐up on a more frequent basis to keep it from go‐ ing rancid. Burn Pot and Igniter Periodically check the air holes found in the burn pot for any blockages or build‐ups. Using a wire brush, scrape off any build up or blockage. For thorough cleaning, the burn pot can be removed completely by removing four Phillips head screws and lock‐washers. When reinstalling, confirm the proper positioning in the burn pot. The burn pot should be level from side to side and from front to back and should have a snug but not tight fit. You will also want to visually check the air holes in the igniter tube, as is displayed in the figure to the right. Clean any debris or blockage out of both ar‐ eas to ensure a perfect start. VG0970_D 3/26/12 Grill Cover We recommend that you cover your Memphis Grill when not in use. Ensure that your grill is completely off and cooled before covering. Igniter Hole Cleaning Location 10 Periodic Grill Maintenance Frequency Maintenance Task Every Use Scrape Cooking Grates x Check grease pan/bucket x Wipe down exterior surfaces x Scrape off flavorizer x Clean Grease Trays x Wipe Off RTD x Clear Burn Pot x Clear Igniter Holes x Scrape/Vacuum Ash From Interior x Vacuum fine pellet dust from hopper Wipe down, vacuum out Air Box VG0970_D Every 3 Uses Once A Week 3/26/12 Once A Month Once A Year x x 11 Recommended Grilling Accessories Meat Probe/Thermometer The outside temperature, wind conditions, pellet fuel variety and the altitude at which you live affect cooking times. The best way to ensure your meat has reached the proper temperature and is ready to eat is to utilize a good quality meat thermometer. We recommend the Memphis ITC Meat Probe, which can interface directly with your grill’s ITC. Griddle One of the most used accessories for those grill enthusiasts that enjoy cooking any foods outdoors. Use to grill complete breakfasts, grill sandwiches, and toast fajitas. Griddles allow you to cook all your bacon and sausages outdoors, and they’re great for grilling vegetables, stir‐frying, and searing. Spatulas A must for turning those delicious burgers and fish filets. Again, look for a long, sturdy handle and the widest blade possible. The holes in the blade prevent the build‐ Disposable Grease Trays Your Memphis grill utilizes at least one grease tray that up of steam, which could make your food soggy. has been specially designed to accommodate disposable aluminum pans for easy and convenient clean‐up. The Cooking Racks Select and Advantage trays are compatible with any Nickel‐plated roast racks and rib racks 8”x8” aluminum pan, and the Pro and Built‐In trays are are a great way to increase your cooking designed to hold two of any 9” X 13” aluminum foil pans. pleasure. Roast racks can be used to enhance the convective cooking capabilities of your grill by allowing the Tongs Use tongs rather than a fork for turning and handling smoke flavored air to move around the meats to avoid losing the natural juices. Extra large ones entire roast evenly. Rib racks are a great with long handles allow you to grip a variety of delicate way to increase your capacity of your grill for those large gatherings. They can foods. also be used for chops and chicken pieces. (Additional small grates are available for Grill Baskets Perfect for cooking foods that are difficult to handle on purchase and will allow you to significantly increase your the grill, such as vegetables, seafood, fish and certain total cooking surface.) cuts of meats. Usually made out of nickel‐plated steel these baskets are made of two identical halves being held together with hinges. Not only do they protect food, and make handling easier, but also allow for different foods to be combined and grilled together without piercing the food. Drip / Roast Pans Used to prevent flare‐ups, keep food from drying out, eliminate basting, and catch those flavorful juices that drip from the meat. Various juices can also be added to the pan to impart a desired flavor, such as apple, lemon, cranberry, pineapple, any cola, etc. VG0970_D 3/26/12 12 Recommended Grilling Accessories (Con’t) Basting Brush You may need a selection of these, as you should not use the same brush in two different marinades. Use to apply your favorite sauces and marinades to foods on the grill. Again look for one with a long handle to keep you hands away from the heat. Skewers (wood or metal) When using the wood skewers, remember to soak them in water for at least 30 minutes before using to pre‐ vent them from burning in the heat of the grill. Another way to protect them would be to wrap the exposed ends with aluminum foil. Skewers come in a variety of shapes and materials. Aluminum Foil Extra‐strength foil is always useful for grilling. Used to make foil packages, cover food, or to fold up into a flat dish to act as a drip pan. Also used to speed up cooking, protect bones from burning, and to keep foods warm. Metal Brush It is important to clean your grill thoroughly before each use. A long‐handled brush with metal bristles is the best tool for the job. Skillets and Woks These kitchen favorites allow you to stir‐grill vegetables, seafood, and other small pieces of food the same way you would if you were indoors. Food Handling and Safety • • • • • • • VG0970_D Make sure to wash your hands before and after handling food. Prevent bacteria contamination by using separate platters and utensils for raw and cooked foods. Marinades should never be saved and reused. If you are going to serve a marinade with your food, be sure to bring it to a boil before serving. Keep hot foods hot (above 140ºF) and cold foods cold (below 37ºF). Don't defrost meat at room temperature or on a counter top. Marinate meat in the refrigerator. Use of a meat thermometer to determine the internal temperatures is recommended. 3/26/12 13 Grilling Times and Temperatures Approximate Cooking/Grilling Times for Memphis Wood‐Fired Convection Grill Always use a meat thermometer to be sure meats and poultry are cooked to a safe internal temperature. Serious Health risks may exist with undercooked meat!. Approximate cooking times are from various sources, and are based on meat at refrigerator temperatures. We suggest that when grilling at higher temperatures, you apply barbecue sauce only during the last 15 to 30 min‐ utes of grilling to prevent excess browning or burning. ITEM CONTROL SET POINT SIZE APPROXIMATE GRILLING TIME INTERNAL TEMP = ° F BEEF Steaks 450°‐ 700° 3 to 4 min./side 4 to 5 min./side 5 to 7 min./side Medium rare 145 Medium 160 Med Well 170 450°‐ 700° 3 to 4 min./side 145 to 160 450°‐ 700° 3 min. / side 4 to 5 min./side 5 to 7 min./side Medium 160 Med Well 170 Well Done 180 18 to 22 min./lb. 20 to 25 min./lb. 145 to 160 10 to 12 min./side 12 to 15 min./side Medium rare 145 Medium 160 3/4" thick Kabobs 1‐inch cubes Hamburger patties Roast, rolled rump (indirect heat) sirloin tip (indirect heat) Tenderloin 1/2" thick 4 to 6 lbs. 3 1/2 to 4 lbs. Half, 2 to 3 lbs. Whole, 4 to 6 lbs. 350° 350° HAM Fully cooked (indirect heat) any size 350°‐ 375° 8 to 10 min./lb. 140 Whole, 10 to 14 lbs. Half, 5 to 7 lbs. Portion, 3 to 4 lbs. 350°‐ 375° 10 to 15 min./lb. 12 to 18 min./lb. 30 to 35 min./lb. 160 ‐ 170 Chops, shoulder, loin, or rib 1" thick 350°‐ 375° 5 min./side 145 to 160 Steaks, sirloin, or leg 1" thick 350°‐ 375° 5 min./side 145 to 160 1" cubes 350°‐ 375° 4 min./side 145 to 160 4 oz., 1/2" thick 450°‐ 700° 3 min./side Medium 160 3/4" thick 1 1/2" thick 450°‐ 700° 3 to 4 min./side 7 to 8 min./side Medium 160 1/2 to 1 1/2 lbs. 450°‐ 700° 15 to 25 min. total Medium 160 Cook‐before‐eating (indirect heat) LAMB Kabobs Patties, ground PORK, Fresh Chops, bone‐in or boneless Tenderloin Ribs *See Smoking Guidelines For Pork Ribs* Patties, ground VG0970_D 1/2" thick 3/26/12 450°‐ 700° 4 to 5 min./side Medium 160 14 Grilling Times and Temperatures ITEM CONTROL SET POINT SIZE APPROXIMATE GRILLING TIME INTERNAL TEMP = ° F VEAL Chops, steaks 1" thick 450°‐ 700° 5 to 7 min./side 145 to 160 2 to 3 lbs. 350°‐ 375° 18 to 20 min./lb. 145 to 160 Roast, saddle, or leg 6 to 7 lbs. 350°‐ 375° 25 to 30 min./lb. 145 to 160 Steaks 3/4" thick 450°‐ 700° 4 to 5 min./side 6 to 7 min./side Medium rare 145 Medium 160 60 to 75 min. 18 to 25 min./lb. 15 to 20 min./lb. 45 to 55 min. 180 as measured in the thigh 325°F,160°c 10 to 15 min./side 6 to 8 min./side 170 325°F,160°c c 10 to 15 min./side 8 to 12 min./side 8 to 12 min./side 180 Roast, boneless (indirect heat) VENISON CHICKEN Whole (indirect heat), not stuffed broiler fryer roasting hen Capon Cornish hens Breast halves, bone‐in boneless Other parts: Legs or thighs Drumsticks Wings, wingettes 325°F,160°c 3 to 4 lbs. 5 to 7 lbs. 4 to 8 lbs. 18 to 24 oz. 6 to 8 oz. each 4 oz. each 4 to 8 oz. 4 oz. 2 to 3 oz. DUCK or GOOSE Duckling, whole (indirect heat) Quartered (indirect heat) 4 1/2 lbs. (not stuffed) 325°F,160°c 2 1/2 hrs. 1 hr., 25 min. 180 to 185 8 to 12 lbs. 325°F,160°c 18 to 20 min./lb. 180 to 185 8 to 12 lbs. 12 to 16 lbs. 16 to 24 lbs. 325°F,160°c 2 to 3 hrs. 3 to 4 hrs. Not recommended 180 as measured in the thigh 4 to 7 lbs. 2 3/4 to 3 1/2 lbs. 325°F,160°c 1 to 1 3/4 hrs. Not recommended 170 Thighs, drumsticks (indirect heat) Direct heat (pre‐cook 1 hr.) 8 to 16 oz. 325°F,160°c 1 1/2 to 2 hrs. 8 to 10 min./side 180 Boneless turkey roll (indirect heat) 2 to 5 lbs. 5 to 10 lbs. 325°F,160°c 1 1/2 to 2 hrs. 2 to 3 1/2 hrs. 170 to 175 Goose, whole (indirect heat) TURKEY Whole turkey (indirect heat) Breast, bone‐in boneless VG0970_D 3/26/12 15 Smoking Guidelines Approximate Smoking Times for Memphis Wood‐Fired Grill Always use a meat thermometer to be sure meats and poultry are cooked to a safe internal temperature and doneness. Serious Health risks may exist with undercooked meat!. Approximate cooking times are, from various sources and are based on meat at refrigerator temperatures. Use a good quality temperature probe to assure best results. We suggest that when grilling at higher temperatures, you apply barbecue sauce only during the last 15 to 30 minutes of grilling to prevent excess browning or burning. NOTE: Keep hood closed when using Smoke Mode. Smoking times are largely dependent on personal preference and the quality of the meat being smoked. In general the longer you smoke the meat at a lower temperature the more tender the meat will become. You will also need to consider how much of a smoke taste you want and what flavor of smoke. Oak, Hickory, Apple, Alder, Cherry, Mesquite to name the most common. Here again that is largely a matter of personal preference. For best results we recommend that you smoke at a set point temperature of 225‐275° for most meats. If you wish to have a smokier flavor and have the time, you can go as low as 180°, but you usually don’t gain much by doing that. It should also be noted that, when smoking in a very warm environment (sunny weather in excess of 90°F), it may be difficult for your grill to maintain temperatures lower than 200°F. If necessary, this can be remedied by leaving the hood slightly ajar. The following is a general guide, and we recommend you experiment to find what temperature and flavor best suites your personal taste. If you want to finish faster use higher temperature. Note: this will in most cases result in a less tender product. When you have the time, lower temperature for a longer duration will give you the best results. For additional tips, and to view and share recipes go to www.memphisgrills.com/recipe. ITEM Control Set Point* INTERNAL TEMP = ° F BEEF 180°‐275° 145 to 160 HAM 180°‐275° 140‐170 LAMB 180°‐275° 145 to 160 PORK, Fresh 180°‐275° 160‐180 VEAL 180°‐275° 145 to 160 VENISON 180°‐275° 145 to 160 CHICKEN 180°‐275° 170 to 180 DUCK or GOOSE 180°‐275° 180 to 185 TURKEY 180°‐275° 180 as measured in the thigh *Note that 180° set‐point is only available on the Elite, Pro and Built‐In Models. VG0970_D 3/26/12 16 Smoking Suggestions The following are a few important facts, tips and techniques to achieve great smoking results. There are probably as many theories on the best smoking method as there are chefs using them. With that in mind, consider the following factors when deciding which method best fits your needs. • The Memphis Grill’s smoking mode range is 180° to 295°F. (*minimum temperature varies by model) • Memphis Grills can smoke unattended continually for up to 62 hours, depending upon the model. • If you wish to smoke at lower temperatures both the Memphis Elite and Pro are calibrated to allow you to go as low as 180° F. When smoking at the lower temperatures it’s critical that you use a premium food grade pellet such as Natures Way flavored BBQ Pellets. Nature’s Way premium pellets are specially formulated to allow for more even feeding and temperatures. For best results, always use Natures Way premium pellets. • It is strongly recommended that the burn pot be cleaned before and after smoking for a significant period. Unchecked ash build‐up could eventually prohibit the grill from maintaining smoking temperatures. • Caution: We don’t recommend that you use the lower temperatures when smoking in cool and or windy conditions. At temperatures less than 225° the possibility of creosote* developing from smoke condensation arises. As always use your best judgment, clean your grill often, and proceed on the side of safety and caution. • The best way to determine where you get the best results is to experiment. We all have different tastes and the best way to determine what’s right for you is to try different flavors and techniques. We encourage you to share your cooking experiences with other Memphis owners by going to our web site http://www.memphisgrills.com/recipes, our blog site, or on our facebook page. *Creosote is a gummy, foul smelling, corrosive and flammable substance that, if no precautions are taken, will coat the insides of everything it passes through. It is formed when gases given off in the burning process combine and condense. Typically the gases leave the burn chamber with the smoke. However if restricted too much or If the smoke is cooled below 225°, the gases can liquefy, forming creosote. VG0970_D 3/26/12 17 Troubleshooting And Error Messages In the event that your Memphis grill encounters any kind of issue or problem in operation, please con‐ sult this chart. If the solutions offered here are insufficient to resolve the matter, please contact your dealer, or Hearthland Products directly at the number found at the end of this manual. • The appliance has failed to ignite within the allotted 30 minutes. Received Error Message "ER‐2" • Grill will not stay lit. Received Error Message "ER‐3" • The appliance has experienced power failure during operation. • Grill is not properly plugged in. • A power surge has tripped the circuit board fuse on the ITC. Grill Will Not Turn On Grill Produces Excess or Discolored Smoke • Wood pellets have absorbed excess moisture. • Burn pot is overloaded with ash build‐up. • Grill isn’t receiving sufficient fuel. Grill Will Not Achieve Or Maintain Stable Temperature • Ensure that your grill is securely plugged in. • Check for power‐failures within your home. • Ensure that your grill is plugged into a working GFCI outlet. • Fuse must be manually replaced. See guide at the end of this section. • Clear the hopper and burn pot of moist pellets, replacing them with dry pellets. • Check the burn pot for ash build‐up or other obstructions. • Check the hopper for sufficient fuel. • Ensure both sides of the hopper are filled (Elite, Pro and Built‐In). • Grill isn’t receiving sufficient • Check the burn pot for ash build‐up or other obstructions. air‐flow. • Check to see if fan(s) have been unplugged or have failed. • Contact dealer or Hearthland directly in case of fan failure. • Burn‐pot is overloaded with ash build‐up. Frequent Flare‐ups are experienced Cooking temperatures are uneven ITC Constantly Reads 32 VG0970_D • Check the hopper for sufficient fuel. • Check the burn pot for ash build‐up or other obstructions. • Check igniter to see if it is heating up(igniter may need replacing). • In extreme cold, grill may require additional priming to achieve ignition. • Make sure hood is closed. • Check the hopper for sufficient fuel. • Check the burn pot for ash build‐up or other obstructions. • Make sure hood is closed. • Check the burn pot for ash build‐up or other obstructions. • Check to see if fan(s) have been unplugged or have failed. • Flammable material build‐up. • Check to see if fan(s) have been unplugged or have failed. • Unbalanced airflow throughout the grill. • Ensure that flavorizer is installed correctly • Damaged ITC • Contact your dealer or Hearthland Products 3/26/12 18 Troubleshooting: ITC Circuit Board Fuse Replacement The ITC, or Intelligent Temperature Control system on your Grill is 2 way logic system with microprocessor technology. In the interest of protection from power surges and electrical shorts, the ITC utilizes a 5 Amp, 120 Volt Fast‐Blow fuse*. This simple and inexpensive part can be easily replaced with the following instructions. 1. 2. 3. 4. 5. 6. 7. 8. Ensure that the grill is cool, powered‐down, AND UNPLUGGED. Supporting the electrical box with one hand, remove the two Phillips‐head screws securing the ITC to the front of the grill. If possible, leave all of the connections on the circuit board intact. If it is necessary to remove them to inspect the fuse, take note of their specific location. Marking connections with tape is a convenient way to do this. Inspect the back of the ITC, taking note of the condition of the fuse currently in place. Carefully yet firmly remove the fuse, prying it from underneath using your thumb or a soft instrument. If you have access to a multimeter, check for current flow across the two nodes of the fuse. If you do not, simply inspect the filament of the fuse. If the fuse seems to be blown, replace it with an identical fuse, as is identified in the figure to the right. Restore any unplugged connections. Secure the ITC board and electrical box to the grill using the two Phillips‐head screws. A 1‐1/4 “ x 1/4”, 5 Amp, 120 Volt, Fast‐Blow Cartridge Fuse* *European models use a 1-1/4” x 1/4”, 5 Amp, 230 Volt Fast-Blow Cartridge Fuse VG0970_D 3/26/12 19 Memphis Grills Limited Warranty This Limited Warranty covers Memphis Grill products manufactured by Hearthland Products, LLC. Products carry a five (5) year Limited Warranty from the date of purchase by the original owner against defects in mate‐ rial and workmanship. Electronic and electrical components carry a two (2) year replacement warranty when subjected to normal residential use. Limited Warranty does not apply to burn pot, burn grate, grill cover gas‐ kets or damage caused by corrosion. Conditions of Limited Warranty During the term of the Limited Warranty, Hearthland Products LLC’s (HP) obligation shall be limited of replace‐ ment of covered, failed components, F.O.B. point of shipment. HP will repair or replace parts returned to HP, freight prepaid, if the part(s) are found by HP to be defective upon examination. HP shall not be liable for transportation charges, labor costs, or export duties. Except as provided in this CONDITIONS OF LIMITED WAR‐ RANTY, repair or replacement of parts in the manner and for the period of time stipulated hereunder shall con‐ stitute the fulfillment of all direct and derivate liabilities and obligations from HP to you. The Warranty coverage begins on the original date of purchase as stated on the sales receipt. Warranty Regis‐ tration and proof of original date of purchase is required to validate the Limited Warranty. Repair or replacement of the HP component does not extend the Limited Warranty. Pouring hot liquids on or in your HP product will void this warranty. Any modifications including holes, screws, and any other sheet metal changes to the product will void this warranty. HP takes every precaution to utilize materials that retard rust. Even with these safeguards, the material can be compromised by various substances and conditions beyond HP control. High temperatures, excessive humid‐ ity, chlorine, industrial fumes, fertilizers, lawn pesticides and salt are some of the substances that can affect metals and metal coatings. For these reasons, the Limited Warranty DOES NOT COVER RUST OR OXIDATION, unless there is a loss of structural integrity on the grill component. Should any of the above occur, refer to your Owner’s Manual maintenance section for finish protection. HP recommends that you purchase a HP full length protective cover for your grill when not in use. The Limited Warranty is based on residential use. Warranty coverage does not apply to products used in com‐ mercial applications. Exceptions to the Limited Warranty There is no written or implied performance warranty on HP Products as the manufacturer has no control over the installation, operations, cleaning, maintenance or the type of fuel burned. This Limited Warranty will not apply if your product has not been installed, operated, cleaned and main‐ tained in strict accordance with the manufacturer’s instructions. Burning anything other than Premium Grade BBQ wood pellets may void the Warranty. The Warranty does not cover damage or breakage due to misuse, improper handling or modifications. NEITHER THE MANUFACTURER, NOR THE SUPPLIERS TO THE PURCHASER, ACCEPTS RESPONSIBILITY, LEGAL OR OTHERWISE, FOR THE INCIDENTAL OR CONSEQUENTIAL DAMAGE TO THE PROPERTY OR PERSONS RE‐ SULTING FROM THE USE OF THIS PRODUCT. ANY WARRANTY IMPLIED BY LAW, INCLUDING BUT NOT LIM‐ ITED TO IMPLIED WARRANTIES OF MERCHANT‐ABILITY OR FITNESS, SHALL BE LIMITED TO ONE (1) YEAR FROM THE DATE OF ORIGINAL PURCHASE. WHETHER A CLAIM IS MADE AGAINST THE MANUFACTURER BASED ON THE BREACH OF THIS WARRANTY OR ANY OTHER TYPE OF WARRANTY EXPRESSED OR IMPLIED BY LAW, MANUFACTURER SHALL IN NO EVENT BE LIABLE FOR ANY SPECIAL, INDIRECT, CONSEQUENTIAL OR OTHER DAMAGES OF ANY NATURE WHATSOEVER IN EXCESS OF THE ORIGINAL PURCHASE PRICE OF THIS PRODUCT. ALL WARRANTIES BY MANUFACTURER ARE SET FORTH HEREIN AND NO CLAIM SHALL BE MADE AGAINST MANUFACTURER ON ANY ORAL WARRANTY OR REPRESENTATION. VG0970_D 3/26/12 20 Memphis Grills Limited Warranty (cont’d) Some states do not allow the exclusion or limitation of incidental or consequential damages, or limitations of implied warranties, so the limitations or exclusions set forth in this Limited Warranty may not apply to you. This Limited Warranty gives you specific legal rights and you may have other rights, which vary from state to state. The Limited Warranty for five (5) years is in lieu of all other warranties expressed or implied, at law or other‐ wise, and HP does not authorize any person or representative to assume for HP any obligation or liability in connection with the sale of this product. This means that no warranties, either expressed or implied are ex‐ tended to persons who purchase the product from anyone other than HP or an authorized HP Dealer or Dis‐ tributor. Procedure for Warranty Service 1. Complete Warranty Registration online at www.hearthlandproducts.com under Product Support or mail the Warranty Registration Form at the end of this Owner’s Manual. 2. Contact your nearest Hearthland Products Dealer for service and/or part replacement as stated under the conditions of the Limited Warranty. 3. Be prepared to provide the following: purchaser’s name, date of purchase, copy of dated sales receipt, model and serial number of product and an accurate description of the problem. We strongly recommend you first contact your nearest Hearthland Products Dealer for sales and service. If further assistance is needed call Hearthland Products Customer Service and Technical Support at 1‐888‐883‐2260. VG0970_D 3/26/12 21 WARRANTY REGISTRATION FORM Register online at www.memphisgrills.com under Product Support or complete and return this Warranty Registration Form within 30 days of purchase to register your warranty. Warranty coverage begins on the original date of purchase. Proof of original date of purchase from an authorized Hearthland Products Dealer is required to validate Warranty. Without receipt of Warranty Registration and proof of date of purchase, the warranty will begin from ship date to Dealer or Retailer. *required fields First Name*_________________________________________________________ Last Name*_________________________________________________________ Mailing Address*_____________________________________________________ City*______________________________________________________________ State/Province*_____________________________________________________ Postal Code*_____________________________________________ Country*________________________________________________ Phone Number_____________________________________________ Email______________________________________________________ All product information is located under the pellet hopper lid. Model*__________________________________________ Model Number* VG_______________________________________ Serial Number* (last 4‐5 digits) ____________________________________ Send Warranty Registration and dated sales receipt to: Hearthland Products, LLC. Memphis Grill Warranty Registration 9111 Grand Ave South Bloomington, MN 55420 Contact Hearthland Products Customer Service with any questions. 1‐888‐883‐2260 VG0970_D 3/26/12 22 NOTES: VG0970_D 3/26/12 23 Memphis Pro BuiltIn Model Number VGB0001 Serial Numbers: 1135‐Current Appendixes and Model‐Specific Information Contents VG0974_E Unpacking and Assembly 1 Grill Island Dimensions 2 Grill Clearance to Combustible Materials 3 Grill Exploded View 4 Grill Bill Of Materials 5 Installation Step 1 6 Installation Step 2 7 Installation Step 3 8 Final Assembly 9 Hardware Kit 10 Wiring Diagram (Spade Connectors) 11 5/4/12 Unpacking and Assembling Your Memphis Wood Fired Convection Grill. *Grill requires (2) two people for safe assembly* Please note that during shipping some movement may have taken place, so a complete visual inspection is required. Be sure to inspect entire grill after removing the protective shipping carton. Report any damage to your local dealer immediately. Shipping damage is not covered under warranty. Some surfaces may be sharp so wear gloves when assembling. Do not plug in the grill until it's fully assembled, the plastic protective film is removed from all stainless steel surfaces, and you're ready to cook. See: “start up procedure” for more details. Your carton will contain the following: 1– Pre-assembled grill head assembly 2– Large cooking grates 1– Small cooking grate 1- Integrated flavorizer / flame deflector 1– Hardware bag 1– Right, left and rear mounting brackets (3 total) 1– Prewired Controller assembly Tools Required 1/4” Socket Wrench 3/8” Open end wrench or socket #2 Phillips head screw driver Unpack and Identify Primary Components and Hardware (see “Hardware Kit”) 10- ¼-20 X 5/8” Bolts 2- #10 Self-tapping screws SS 4- #10 Self-tapping screws Black 1 - Power cord 1- Meat Probe 4– Built-In Leveling Feet 2– Controller Mounting Brackets OPTIONAL Memphis Elite/Pro Built In Heat Shield Kit 2– Heat Shields 4- #10 Self-tapping screws Black Procedure for Assembly – See Diagrams on the following pages. VG0974_E 5/4/12 1 Built‐In Grill Island Dimensions WARNING: See clearance to combustible materials, when designing and constructing a built-in island. The owner and/or builder are responsible for consulting local, county and state building codes for securing any necessary building permits before construction. NOTE: Construction codes vary from locality to locality. Controller cable way is to maintain dimensions D and E at a minimum throughout its entire path. The controller cable way may be located either through the back of the island’s cavity, or in the location depicted below. ITC Control Location 110/120v AC* supply required within 5 ft. of the controller. NOTE: The location of the ITC is for illustration purposes only. The grill is equipped with 10 feet of cable, allowing it to be mounted in a variety of locations. *European 230V NOTE: Dimension B is to the finished countertop height. Dimension C is the depth of the grill cavity before the finish materials are applied to the face of the island. A B C D E F G H J K VGB0001 PRO BUILT-IN DIMENSION TOLERANCE 30 ¼” ± 1/8” 16 ¾” ± 1/8” 23 ½” ± 1/8” 8 ¼” ± 1/8” 4" ± 1/8” 3 INCHES 9 FEET 3 ½” MIN 12" MIN 22" STANDARD CABINET HEIGHT ± 1" A B C D E F G H J K VGB0002 ELITE BUILT-IN DIMENSION TOLERANCE 42 5/8” ± 1/8” 16 ¾” ± 1/8” 23 ½” ± 1/8” 8 ¼” ± 1/8” 4" ± 1/8” 3 INCHES 9 FEET 3 ½” MIN 12" MIN 22" STANDARD CABINET HEIGHT ± 1" The Memphis Pro and Elite require a 110/120 V AC* supply. The ITC is supplied with a 3-prong grounding plug. To minimize possible shock hazard, the cord must be plugged into a mating 3-prong ground-type outlet, grounded to conform with the National Electrical Code, ANSI/NFPA latest edition, Canadian Electrical Code (CSA) and all local codes and ordinances. *European units utilize a 230V power supply. VG0974_E 5/4/12 2 Clearance To Combus ble Materials WARNING: The structure and surrounding objects must maintain the minimum clearance to combustible materials as specified below. Built-in structures constructed of wood or other combustible materials may require the use of the OPTIONAL BuiltIn Heat Shield Kit to maintain the required clearance to combustible materials. The grill may be supported by either the three mounting brackets, or the four leveling feet. Please note that there must be at least a 3/8” clearance between the bottom of the grill and the structure. Minimum Clearance to Combus ble Materials STANDARD UNIT UNIT WITH OPTIONAL HEAT SHIELD KIT VGBHSK A 18” 18” B 3/8” 3/8” C 2” 2” D 3.5” 3.5” E 18” 1/8” The Memphis Built‐In Heat Shield Kit (VGBHSK) MUST be used if dimension E is less than 18” to combus ble materials. VG0974_E 5/4/12 3 Pro Built-In Grill Bill Of Materials VG0974_E 5/4/12 4 Built-In Grill Bill of Materials ITEM PART NO. DESCRIPTION QTY ITEM PART NO. DESCRIPTION QTY 1 VG0112 REVERSIBLE HOPPER LID 1 16 VG2125 BURN POT 1 2 VG1101 PRO HOOD ASSEMBLY 1 17 VG0917 4” CURVED RTD 1 3 VG0162 FILL SHIELD 1 18 VG0956 MEAT PROBE 1 4 VG0991 1 RPM AUGER MOTOR (120V) 1 19 VG0911 120V POWER CORD 1 4 VG0991E 1 RPM AUGER MOTOR (230V) 1 19 VG0911E 230V POWER CORD 1 5 DS2186 10-24 X 1/2” PH STAINLESS SCREW 11 20 VG0808 CONTROLLER COVER PLATE 1 6 VG0801 REAR SUPPORT BRACKET 1 21 VG0814 CONTROLLER MOUNTING BRACKET 2 7 VG0115 REAR ACCESS PANEL 1 22 VG1920 CONTROLLER (120V) 1 8 VG0997 COMBUSTION FAN (120V) 2 22 VG1920E CONTROLLER (230V) 1 8 VG0997E COMBUSTION FAN (230V) 2 23 VG0959B BUILT-IN WIRE HARNESS 1 9 DS2187 SHOULDER BOLT 6 24 VG0803 LEFT SUPPORT BRACKET 1 10 DS2311 1/4-20 x .625 SS HEX BOLT 6 25 VG04403 FLAVORIZER ASSEMBLY 1 11 VGBHSK (OPTIONAL) MEMHPIS BUILT IN HEAT SHIELD KIT 2 26 VG4401 LARGE COOK GRATE 2 12 VG0802 RIGHT SUPPORT BRACKET 1 27 VG4402 SMALL COOK GRATE 1 13 DS4668 LEVELING FOOT 4 28 VG0151 PRO FINGER GUARD 1 14 VG1805 ASH DRAWER 1 29 VG0104 HANDLE ASSEMBLY 1 15 VS0955 IGNITER CARTRIDGE (120V) 1 30 DS2185 10-24 X 1/2” PH BLACK SCREW 4 15 VS0955 IGNITER CARTRIDGE (230V) 1 VG0974_E 5/4/12 5 Installation Step 1 BEFORE THE UNIT IS INSTALLED INTO THE ISLAND, SOME ASSEMBLY IS REQUIRED. FOLLOW THE STEPS LISTED BELOW. 1. 2. 3. 4. 5. REMOVE ITEM 14 FROM THE UNIT FASTEN ITEMS 12 AND 24 TO THE UNIT USING ITEM 10 (10X). FASTEN ITEM 6 TO ITEMS 12 AND 24 USING ITEM 5 (2X). THREAD ITEM 13 (4X) INTO THE BOTTOM OF THE UNIT IN FOUR LOCATIONS, THIS STEP IS ONLY TO BE DONE IF THE GRILL IS GOING TO BE SUPPORTED BY THE LEVELING FEET (ITEM 13) AND NOT THE SIDE BRACKETS (ITEMS 12 AND 24). (TO REDUCE THE CLEARANCE TO COMBUSTIBLE MATERIALS, THE OPTIONAL HEAT SHIELD KIT SHOULD BE USED) ATTACH ITEM 11 (2X) TO THE SIDES OF THE UNIT BY ENGAGING ITEM 11 INTO THE SIDE BRACKETS (ITEMS 12 AND 24) AND FASTENING ITEM 11 TO THE UNIT USING ITEM 30 (4X). REFER TO PAGE 5 FOR ITEM PART NUMBERS, DESCRIPTIONS AND QUANTITIES VG0974_E 5/4/12 6 Installation Step 2 FOLLOW THE STEPS BELOW TO PROPERLY INSTALL THE UNIT INTO THE ISLAND. THE UNIT CAN BE SUPPORTED BY EITHER THE SIDE MOUNTING BRACKETS (ITEMS 11 AND 26) OR BY THE FOUR LEVELING FEET (ITEM 13). 1. 2. 3. PLACE THE UNIT INTO THE ISLAND CAVITY, ENSURING THAT THE VENT HOLES IN ITEM 6 REMAIN UNOBSTRUCTED BY THE ISLAND’S COUNTERTOP. SKIP THIS STEP IF GRILL WILL BE SUPPORTED BY THE SIDE BRACKETS (ITEMS 12 AND 24) ADJUST ITEM 13 (FOUND IN FOUR LOCATIONS IN THE BOTTOM OPENING OF THE UNIT) WITH A 1/4” SOCKET ENSURING THAT THE UNIT IS LEVEL, AND THAT THE SIDE BRACKETS (ITEMS 12 AND 24) COME IN CONTACT WITH THE ISLAND’S COUNTERTOP. MOUNT ITEM 21 (2X) IN THE CONTROLLER CABLE WAY TO THE DESIRED DEPTH, USING FASTENERS APPROPRIATE FOR THE STRUCTURE’S MATERIAL, 2 FASTENERS FOR EACH BRACKET. ITEM 21 IS TO MOUNTED IN THE ORIENTATION DEPICTED IN THE ABOVE GRAPHIC. REFER TO PAGE 5 FOR ITEM PART NUMBERS, DESCRIPTIONS AND QUANTITIES VG0974_E 5/4/12 7 Installation Step 3 1. 2. 3. 4. REMOVE THE ITC CONTROLLER (ITEM 22) FROM THE CONTROLLER BOX MOUNT THE CONTROLLER BOX TO ITEM 21 (2X) USING ITEM 30 (4X). FASTEN THE CONTROLLER BOX TO THE DESIRED DEPTH. INSTALL THE CONTROLLER (ITEM 22) BACK INTO THE CONTROLLER BOX, AND FASTEN ITEM 20 AND 22 TO THE CONTROLLER BOX USING ITEM 5 (2X). INSERT ITEM 14 BACK INTO THE UNIT. REFER TO PAGE 5 FOR ITEM PART NUMBERS, DESCRIPTIONS AND QUANTITIES VG0974_E 5/4/12 8 Final Assembly 1. 2. 3. 4. 5. INSERT ITEM 25 ONTO THE LEFT AND RIGHT LOWER BRACKETS FOUND INSIDE THE UNIT. INSERT ITEM 26 (2X) ONTO THE FRONT AND REAR SUPPORTS. INSERT ITEM 27 ONTO THE LEFT AND RIGHT UPPER BRACKETS FOUND INSIDE THE UNIT. VENT HOLES ON THE MOUNTING BRACKETS MUST REMAIN UNOBSTRUCTED. REFER TO THE MANUAL FOR FIRST TIME USE INSTRUCTIONS. REFER TO PAGE 5 FOR ITEM PART NUMBERS, DESCRIPTIONS AND QUANTITIES VG0974_E 5/4/12 9 Hardware Kit ITEM NO. 1 2 3 4 5 6 7 8 9 10 VG0974_E 5/4/12 QTY. PART NUMBER 1 2 10 1 2 1 1 4 4 2 DS4459 DS2186 DS2311 VG0956 DS4219 VG0911 VG0911E DS4668 DS2185 VG0814 DESCRIPTION POLY BAG, 9" X 12" X 2 #10 SELF-TAPPING SCREW SS 1/4-20 x .625" SERRATED HEX SCREW MEAT PROBE CLEAR ZIP-LOC BAG 5" X 8" 120V POWER CORD* 230V POWER CORD* BUILT-IN LEVELING FOOT #10 SELF-TAPPING SCREW BLACK CONTROLLER MOUNTING BRACKET 10 Wiring Diagram CONTROL SIDE GRILL SIDE Spade-End Connectors VG0974_E 5/4/12 11 Intentionally Left Blank www.memphisgrills.com Pelletsmoking.com Pelletheads.com Bbqbrethren.com Scan in, like us on Facebook and subscribe to weekly recipes Follow us on Twitter: twitter.com/#!/memphisgrills.com Post your Memphis grilling experience video on You Tube: youtube.com/memphisgrills Blog your favorite grilling recipe: Like us on Facebook and get the weekly recipe from Memphis: facebook.com/memphisgrills Connect and Share Your Favorite Memphis Grilling Recipes or Videos! MVG0016 - 3.12