1
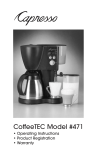
Table of Contents
Important Safeguards / Cord Set Instruction..............................................................2
Product llustrations and Diagrams .......................................................................4 & 5
Welcome and Thank You ............................................................................................6
How to Reach Us ........................................................................................................6
Helpful Hints................................................................................................................6
Before Initial Use .........................................................................................................7
Initial Use.....................................................................................................................7
Guidelines for Fineness Selector Settings ..................................................................7
Grinding.......................................................................................................................8
Cleaning ......................................................................................................................9
Limited Warranty .......................................................................................................10
Othe Fine Capresso Products for the Burr Grinder Sensor......................................11
3.
Fig. 1
E
A
D
D
GRIN
B
D
GRIN
C
GR
IN
D
F
I
0
G
GR
IN
D
H
A Bean Container Lid
B GRIND button
C Ground Coffee Container
(removable) with Lid
D Fineness Selector
E Upper Burr Disk (removable)
4.
F Main On /Off Switch
G Bean Container without Lid
H Grinder Spout
Cleaning Brush (not shown)
Measuring Scoop (not shown)
D
GRIN
D
IN
GR
Fig. 2
GRIN
Fig. 3
D
7
Fig. 4
Tap gently
with lid in place
•6
•
Fig. 5
Fig. 7
Fig. 6
The capital letters behind a phrase refer to Fig. 1
5.
Welcome and Thank You
Thank you for choosing the CAPRESSO Burr Grinder Sensor. The Burr
Grinder Sensor is the only coffee grinder that grinds as long as there are
beans in the bean container then shuts off automatically. This assures that
you will always get the correct amount of ground coffee regardless if you
grind in a very fine or in a very coarse position. (Other grinders use a
"timer" which grinds for a certain time and then shuts off. This will result in
completely different amounts of ground coffee in the various fineness settings, since less coffee beans pass through the burrs per second in the
finer settings than in the coarser settings.) The Burr Grinder Sensor comes
with an extra large ground coffee container, which helps reduce "coffee
static" and makes it easy to scoop out coffee or to pour the ground coffee
directly into your drip coffee filter.
Please ready all of the operating instructions before operating Burr Grinder
Sensor. Understanding and complying with these directions is essential to
ensure that the machine is utilized without risk and to ensure safety during
operation and maintenance.
How To Reach Us
Should you require further information or if particular problems occur that
are not covered in this manual, please
• CALL our toll free HELP LINE: 1-800-767-3554 Mon-Fri 9AM to 8PM,
Sat-9AM to 5PM Eastern Standard Time. If you call at any other time,
please leave a message with your telephone number and when we can
call you back or
• FAX us at 1-201-767-9684 or
• E-MAIL us at [email protected] or
• WRITE to Capresso Inc., Customer Service, P.O.Box 775
CLOSTER, NJ 07624
Helpful Hints
1. Check the bean container (G) for presence of foreign objects before using.
2. Make sure the bean container (G) is completely clean and dry before using.
3. Always operate the appliance with the ground coffee container properly
inserted in the grinder (C) and (Fig. 4).
4. Caution: When grinding make sure the lid of the ground coffee
container (Fig. 4) is secured! If this lid is not securely in place, ground
coffee can blow out of the grinder spout during grinding and create a
mess on your countertop!
5. Do not place your hand in or near the burrs while the grinder is in
operation.
6.
BEFORE INITIAL USE
Before initial use, carefully unpack your Capresso coffee grinder and
remove all packaging materials.
• Wipe the base, lids, containers with a clean, damp cloth.
• Allow to dry completely before use.
Caution:
• Do not place the removable upper burr disk (E), the ground coffee
container (C) and its lid in the dishwasher.
• Do not immerse the upper burr (E) disk in any liquid.
INITIAL USE - IMPORTANT
During manufacturing, the upper burr disk (E) is installed so that it is very
close to the lower burr disk. To make sure the grinder will function properly
proceed as follows:
For first-time grinding:
a. Check to make sure that the bean container (G) is empty, clean, and dry,
and free of any foreign objects.
b. Plug in the grinder.
c. Set the fineness selector (D) to number "9" (Fig. 5).
d. Fill the bean container (G) with 3 to 4 scoops of coffee beans (Fig. 2)
and add the bean container lid (Fig. 3)
e. Turn the main switch (F) on. The red light will illuminate.
f. Make sure the ground coffee container (C) with lid is in place.
g. Push and hold the grind button (B) for two to three seconds, then let go.
The Grinder will now grind all the beans in the container and then stop
automatically.
h. Repeat steps "a" through "h" in a different fineness position (e.g.
number "4") to make sure that the upper burr disk is moving properly.
The grinder is now prepared to be used on a regular basis.
GUIDELINES FOR FINENESS SELECTOR SETTINGS**
The fineness selector (D) allows you to choose the fineness of the grind
from coarse to espresso fine.
Please note:
• The finer you would like the coffee to be, the longer it will take to grind a
pre-selected amount.
• If you grind in the finer settings (settings from 1 to 3) we recommend
cleaning the grinder spout (H) and the upper burr disk (E) after each
grinding session to avoid clogging. For details see chapter about
"CLEANING"
• The finest setting might not be fine enough for some specialty coffees
(e.g. Turkish Mocha).
7.
Fineness Selector Guide
Fineness
Selector (D)
Setting
8 to 9
4.5 to 6
5 to 6
3.5 to 5
3.5 to 5**
2.5 to 4**
1 to 2.5**
For use with the following household coffee equipment:
French Press Coffee Makers* and Percolators
Most Espresso (non-pump) Steam/Boiler Machines
All Capresso Drip Coffee Makers and most other drip
coffee makers, when using GoldTone Filters
All Capresso Drip Coffee Makers and most other drip
coffee makers, when using filter paper
Capresso Pump Espresso Machines model # 101, 111,
112, 351 and most other pump espresso machines, when
using dark, oily beans
Capresso Pump Espresso Machines model # 101, 111,
112, 351 and most other pump espresso machines, when
using medium brown, non oily beans
Semi automatic and fully automatic Capresso coffee
centers, Model # 151, 152, 153, 121 and most other fully
automatic machines with internal pressure brew chambers.
* please follow the instructions of your French press coffee maker (after pouring water over
the ground coffee, stir thoroughly to prevent the ground coffee from clogging)
** The fineness settings are approximate guidelines. NOTE for espresso pump machines and
automatic coffee centers: If your coffee or espresso brews too fast, try a lower number setting
than indicated. If it brews too slowly, try a higher setting than the ones recommended above.
GRINDING
1. Add the required amount of coffee beans directly into the bean container
(Fig. 2). When grinding for drip coffee use 1 to 1 1/2 level scoops per
5 oz. cup of coffee, depending on how strong you like your coffee. When
grinding for espresso use 1 1/2 to 2 level scoops per espresso shot.
2. Do not fill with more than 18 level scoops of coffee. Attention: the longer
you grind the more "static" will build up. Grinding 12 scoops in the finest
position (pos. 1) will take approx. 35 to 40 seconds, in the coarsest
position (pos. 9) approx. 25 seconds. Grinding 18 scoops in the finest
position can take 60 to 70 seconds, creating a lot more static, which
makes small coffee particles "fly" around.
3. After grinding for one minute you must let the grinder cool down for
5 to 10 minutes otherwise the motor can overheat and shut itself off.
4. Place the bean container lid on top before grinding (Fig. 3).
5. Select the fineness setting (Fig. 5).
6. Turn the main switch on (F). The red light will illuminate.
7. Push and hold the GRIND button for 2 to 3 seconds and then release.
8. The Burr Grinder Sensor will grind all the beans in the bean container
and then stop automatically.
9. While in the machine, tap the ground coffee container a few times.
Now, slowly remove the container from the machine (fig. 4). Tap the
container again a few times to release more of the "static" (fig. 6).
8.
10. Clean the grinder spout (H) with the small cleaning brush to avoid
coffee build up.
11. Insert the empty ground coffee container with the lid securely in
place back into the machine (Fig. 4).
12. Turn the main switch (F) off.
13. Let the grinder cool down for 5 to 10 minutes before grinding again.
NOTE:
a. To interrupt the grinding process before grinding is finished, turn the
main switch (F) off.
b. Oily beans may stick together and not feed into the burrs. This can
cause the automatic sensor to turn off the grinding action. Just tap the
housing a few times to loosen up the beans and push the GRIND button
(B) again to resume grinding.
CLEANING
Always unplug your coffee grinder before cleaning.
Daily:
Grinder Spout (H)
• Remove ground coffee build up around the grinder spout with the small
cleaning brush. Make sure the opening is not clogged with ground
coffee. This can lead to malfunction of the grinder.
Upper Burr Disk
1. Turn the fineness selector (D) to the number "1."
2. Turn the roof of the upper grinding burr (E) clockwise until it stops.
3. Lift the upper burr out of the grinder. (E). Clean both burrs with the
cleaning brush. Note: Do not unscrew the upper burr from its housing!
4. Replace the upper burr into the grinder and turn it counterclockwise until
the fineness selector points to the number "9."
Note: The upper burr will eventually wear out. If you use your grinder daily
we recommend replacing the upper burr disk after 12 to 18 months. You
can purchase replacement burrs with the enclosed mail order form or
through our website www.capresso.com.
Occasionally:
When coffee bean oils build up inside the containers it is time to clean them.
• Remove container from grinder. Clean all parts in warm water and mild
liquid soap solution. Do not place these items in the dishwasher.
Base of Grinder
• The base of the grinder and the fixed bean container can be wiped clean
with a damp cloth.
Caution: Never immerse the grinder in water or any other liquid. Do not
use harsh or abrasive materials to clean the coffee grinder.
9.
LIMITED WARRANTY
This warranty covers your CAPRESSO Burr Grinder Sensor Model # 53 and
#554 (see label on bottom of grinder). This warranty is in effect for one year
from the date of the first consumer purchase and is limited to the United
States of America. This warranty covers all defects in materials or
workmanship (parts and labor). Capresso will repair or replace your
grinder or parts thereof within one year from the date of the first consumer purchase. Capresso will pay for the repair or replacement and
the freight back to your destination within the United States (for more
details see below under "Questions? Contact Capresso Customer Service")
The warranty does not cover:
• Any machine not distributed by CAPRESSO within the United States.
• Any machine not purchased from an Authorized CAPRESSO Dealer.
• Commercial use of the machine.
• Damage caused by accident, abuse, negligence, misuse, improper
operation or failure to follow instructions contained in this manual.
• Any service or alteration performed by an unauthorized person, company
or association.
Other limitations and exclusions:
Any implied warranties including fitness for use and merchantability are limited in duration to the period of the express warranty set forth above and
no person is authorized to assume for CAPRESSO any other liability in
connection with the sale of the machine.
CAPRESSO expressly disclaims liability for incidental and consequential
damages caused by the machine. The terms "incidental damages" refers to
the loss of the original purchasers time, loss of the use of the machine or
other costs relating to the care and custody of the machine. The term
"consequential damages" refers to the cost of repairing or replacing other
property which is damaged when this machine does not work properly. The
remedies provided under this warranty are exclusive and in lieu of all others.
This warranty gives you specific legal rights, and you may also have other
rights which vary from state to state.
Capresso Inc.
81 Ruckman Road, PO Box 775
CLOSTER, NJ 07624
Tel 1-800-767-3554
Fax 201-767-9864
email: [email protected]
website: www.capresso.com
10.
Other fine Capresso companion products for your
Burr Grinder Sensor
• Capresso Coffee Makers
"MT 500" (model # 440) and "CoffeeTEC" (model #471) produce
hot coffee in less than 10 minutes and bring out the full aroma of
freshly ground coffee.
• Capresso frothExpress (model # 201)
Fully automatic frother produces hot frothed milk in under 30 seconds
and transforms your coffee into a great American cappuccino or latte.
Makes great hot chocolates, too.
• Capresso Pump Espresso Machines
"Ultima" (model # 121), "EspressoPRO" (model # 112) and
"CapressoBAR" (model # 351) produce crema rich espressos and
wonderful cappuccinos and lattes.
For more information see you local Capresso dealer or visit our website
www.capresso.com
11.