1
Vax V-123 User Guide.qxd
10/8/07
15:43
Page 1
Vax careline
0870 6061248
Vax model number:
V-123
www.vax.co.uk
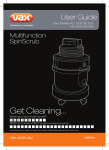
instruction manual
Carpet washer
Please read carefully before using this cleaner.
Always fully extend the mains cable before use.
Retain for future reference.
Vax V-123 User Guide.qxd
10/8/07
15:43
Page 2
www.vax.co.uk
1. Diagram
V-123
1
3
2
4
14
5
13
12
6
16
7
21
8
23
15
22
16
21
17
11
9
20
18
19
10
Fig.1/1
1
2
3
4
5
6
7
8
Handle grip
Solution trigger
Clean Surge button
Upper handle
Upper handle release button
Solution tank cap/measuring cup
Solution tank release button
Solution tank
2 parts overview
9
10
11
12
13
14
15
16
Brush setting selector
Nozzle
Recovery tank
Recovery tank release button
Recovery tank cap
Powered SpinScrub hand tool
Stair/upholstery tool
Cable hooks (tool caddy removed)
17
18
19
20
21
22
23
Hose inlet
Handle release pedal
On/Off pedal
Hose
Cable hooks (tool caddy in place)
Hose connector
Tool caddy
Vax V-123 User Guide.qxd
10/8/07
15:43
Page 3
Vax Careline 0870 606 1248
2. Safety Information
FOR HOUSEHOLD USE ONLY.
When using the carpet washer, basic safety precautions
should always be observed, including the following:
21. Using improper voltage may result in damage to the
motor and possible injury to the user. The correct
voltage is listed on the rating label.
22. A hazard may occur if the carpet washer runs over
the power supply cord.
1.
Do not leave the carpet washer unattended when
plugged in. Unplug it from socket when not in use.
23. To prevent dirty water from running into motor, do
not hold the appliance upside-down or lay on its side.
Use appliance in normal vacuuming position.
2.
To prevent electric shock do not use outdoors.
24. Use extra care when cleaning on stairs.
3.
Not to be used as a toy. Children should be supervised to
ensure that they do not play with the appliance.
25. Do not carry appliance while motor is running.
4.
This appliance is not intended for use by persons
(including children) with reduced physical, sensory or
mental capabilities, or lack of experience and knowledge,
unless they have been given supervision or instruction
concerning the use of the appliance by a person
responsible for their safety.
NOTE: Carpets should be dry vacuumed thoroughly
before washing.
5.
Use only as described in this manual.
6.
Do not use with a damaged cord or plug. If the supply
cord and/or plug is damaged, they must be replaced
by the manufacturer, a Vax Service Agent or similarly
qualified persons in order to avoid hazard.
7.
Do not pull or carry by the cord, use the cord as a
handle, allow the cord to come into contact with hot
or sharp surfaces or close a door on the cord.
8.
Do not unplug by pulling on the cord.
9.
Do not handle the plug or carpet washer with wet
hands.
NOTE: The unit must be unplugged from the mains
socket outlet after use, and before cleaning or
maintaining the unit.
!
IMPORTANT: This unit is not intended for
commercial use.
PLEASE KEEP THESE INSTRUCTIONS
FOR FURTHER USE.
10. Do not put any objects into openings or operate with
openings blocked, keep them free of anything that
may reduce airflow.
11. Keep hair, loose clothing, fingers and all parts of the
body away from openings and moving parts.
12. Do not use the carpet washer on any glowing,
burning or smoking particles.
13. Do not use without the solution tank and dirty water
tank in place.
14. Do not use the carpet washer without the dust bag
in place.
15. Turn off all controls before unplugging.
16. Do not use to pick up flammable or combustible
liquids such as petrol, or use in areas where they may
be present.
17. Keep the unit on the floor.
18. Do not use an extension cord.
19. Do not attempt to remove blockages with sharp
objects as they may cause damage.
20. Store indoors put away after use to prevent tripping
accidents.
safety information
3
Vax V-123 User Guide.qxd
10/8/07
15:43
Page 4
www.vax.co.uk
3. Preparing the Cleaner
Raising the Handle
Your cleaner is fully assembled and ready to start cleaning.
Raise upper handle (A) to upright position until it locks in
place (Fig.3/1).
A
Fig.3/3
Use cap to measure the correct amount of solution
according to the instructions on the bottle (Fig.3/4).
Fig.3/1
To fold handle for storage, press upper handle release
button and fold handle back.
Filling the Solution Tank
!
IMPORTANT: Unplug deep cleaner from electrical
socket before filling or emptying tanks.
Press solution tank release button and remove solution
tank (Fig.3/2)
Fig.3/4
Pour solution into tank. Fill tank to fill line with warm tap
water (max 50°C) (Fig.3/5).
Fig.3/2
Release latches on tank cap and remove (Fig.3/3).
Fig.3/5
Replace cap and secure both latches. Place bottom of tank
onto cleaner. Pivot top of tank and snap in place (Fig.3/6).
4 preparing the cleaner
Vax V-123 User Guide.qxd
10/8/07
15:43
Page 5
Vax Careline 0870 606 1248
Fig.3/6
CAUTION: Solutions contain Anionic and
Nonionic Surfactants. Avoid contact with the
eyes and skin. In case of contact with eyes, flush with
cold water for 15 minutes. In case of contact with skin,
wash with water. If irritation persists, contact your GP.
!
Fig.3/8
Empty tank and replace cap, securing both latches (Fig. 3/9).
Emptying the Recovery Tank
An automatic shut-off device prevents the cleaner from
picking up more dirty water than it can hold in the recovery
tank. You will know the tank needs to be emptied when:
• The amount of dirty water has reached the full line.
• When the motor sound rises in pitch.
• You do not see dirty solution coming up through the
nozzle.
• The float inside the recovery tank has risen to the top of
the tank.
Press recovery tank release button and remove tank from
the cleaner (Fig.3/7).
Fig.3/9
Remove any debris that has collected on lint filter (A) on
cleaner body. Once clear, place bottom of tank onto
cleaner. Pivot top of tank and snap in place (Fig.3/10).
A
Fig.3/7
Release latches on tank cap and remove cap (Fig.3/8).
Fig.3/10
Attach the Hose
Place handle in upright position.
The hose and tool caddy can be removed from the cleaner
if you desire. Remove hose from tool caddy.
Open hose inlet (A) on back of deep cleaner. Align hose
connector with hose and solution ports (B). Push hose into
port and lock in place (Fig.3/11).
preparing the cleaner
5
Vax V-123 User Guide.qxd
10/8/07
15:43
Page 6
www.vax.co.uk
Drain the hose
NOTE: The handle must be in the upright position in
order to get cleaning solution through the hose.
When finished using the hose and tool, remove water from
the hose.
A
B
Turn deep cleaner on and hold end of hose up for several
seconds. Do not press trigger.
Turn deep cleaner off and unplug it.
Hold hose connector in sink and press trigger to remove
solution from hose (Fig.3/14).
Fig.3/11
To remove hose: Squeeze the two locking latches on top
and bottom of hose. Remove hose from port. Close hose
inlet securely (Fig.3/12).
Fig.3/14
Store Hose
Unplug cleaner from electrical outlet.
Hook hose connector into caddyand wrap hose around
caddy in a anticlockwise direction (Fig.3/15).
Fig.3/12
Select Tool
Powered SpinScrub Hand Tool
Has rotating brushes (Fig.3/13(A)).
Use on carpet to clean spots, small areas or stairs.
Stair/Upholstery Nozzle
Has built-in brush (Fig.3/13(B)).
Use on small areas of carpet, stairs and upholstery to
agitate embedded dirt and stains.
Fig.3/15
A
B
Hook tool connector, ‘SpinScrub’ tool and upholstery tool
into caddy.
Hose Caddy
Fig.3/13
Attach Tool
Slide tool onto hose. Snap tool over tab on hose.
To remove tool: Push forward and up on latch and slide tool
off hose.
6 preparing the cleaner
You can either store the hose caddy on the cleaner or
remove it to store separately.
To store caddy on the cleaner, slide tabs on caddy into
slots on back of cleaner. Hook top of caddy to cleaner.
Wrap cable around cable hooks on caddy. Rotate top hook
to release cable.
Vax V-123 User Guide.qxd
10/8/07
15:43
Page 7
Vax Careline 0870 606 1248
To remove caddy from the cleaner, lift caddy off cleaner
and wrap cable around cable hooks on back of cleaner.
Rotate bottom hook to release cable.
Brush Speed Selector
Choose ON for normal cleaning of carpet.
Choose OFF for extraction only. When brushing is not
required.
Clean Surge Button
Push ‘Clean Surge’ button to release extra cleaning
solution (Fig.3/16).
4. Cleaning Carpet
Remove lightweight furniture (tables, lamps, etc.) from
area to be cleaned.
Protect any remaining furniture by pinning up furniture
skirts and placing aluminium foil or plastic under legs.
Vacuum carpet thoroughly to remove loose dirt, hair, lint
and other debris.
Test solution for colourfastness on a hidden area of
carpet. Wet a white cloth or paper towel with some
solution. Gently rub onto a hidden area of carpet. Wait ten
minutes. Blot with white cloth or paper towel and check for
colour transfer.
Fill solution tank with warm tap water (Max 50°C) and
correct amount of Vax cleaning solution as previously
directed (Fig.4/1).
Fig.3/16
Use the ‘Clean Surge’ button when cleaning heavily soiled
areas of carpet (traffic areas, spots, etc.)
Fig.4/1
NOTE: Use only Vax brand solutions in your deep
cleaner. Other brands may damage the deep cleaner.
Plan your cleaning to avoid walking on wet carpet. Start at
the end of the room farthest from the exit and work in
small sections.
Step on handle release pedal and lower handle. Turn
cleaner ON.
Squeeze and hold trigger (A) to release cleaning solution.
Push cleaner forward SLOWLY then pull it back SLOWLY.
Use ‘Clean Surge’ button (B) in heavily soiled areas
(Fig.4/2).
preparing the cleaner / cleaning carpet
7
Vax V-123 User Guide.qxd
10/8/07
15:43
Page 8
www.vax.co.uk
5. Cleaning Upholstery
A
B
Check cleaning instructions on fabric. This indicates
whether it is alright to use your deep cleaner to clean the
upholstery.
Do not use the deep cleaner on upholstery marked ‘Dry
Clean Only’. If you are unsure, please refer to the
manufacturer’s instructions.
Vacuum upholstery thoroughly with your vacuum cleaner’s
attachments.
Fig.4/2
Let go of trigger and push cleaner over same area to pick
up dirty solution without putting down more solution.
Continue using dry strokes until you see only a little
solution coming up through the nozzle (front of cleaner).
Do not make the carpet too wet! Use no more than two
sets of forward and backward strokes while releasing
solution. Always follow with dry strokes - the more the
better.
Listen carefully! When the motor sound changes (rises in
pitch), the recovery tank needs to be emptied.
Test solution for colourfastness on a hidden area of
upholstery. Wet a white cloth or paper towel with some
solution. Gently rub onto a hidden area of upholstery. Wait
ten minutes. Blot with white cloth or paper towel and
check for colour transfer.
Pretreat spots, stains and high traffic areas with Vax stain
treatment spray. Spray spot or area, then proceed with the
next cleaning steps.
For stubborn spots or stains, refer to the stain guide
included with your cleaner.
Fill solution tank with warm tap water (Max 50°C) and
correct amount of Vax cleaning solution (Fig.5/1).
NOTE: When water has reached the full line in the
recovery tank, the cleaner will NOT pick up any more
dirty solution.
Allow carpet to dry. Avoid walking on the carpet until it is
dry. Increased air circulation (open doors, turn on fans, etc.)
will help carpet dry thoroughly.
Vacuum thoroughly after carpet has dried. This will reduce
any shading left by the deep cleaner’s brushes.
Fig.5/1
NOTE: Use only Vax brand solutions in your deep
cleaner. Other brands may damage the deep cleaner.
Attach hose and tool as described in section 3.
Place handle in full upright position. Turn cleaner ON.
Squeeze and hold trigger (A) to release cleaning solution.
Gently press tool into fabric and slowly pull the tool over
the fabric (Fig.5/2).
8 cleaning carpet / cleaning upholstery
Vax V-123 User Guide.qxd
10/8/07
15:43
Page 9
Vax Careline 0870 606 1248
6. Maintenance
Cleaning the Nozzle
Unplug deep cleaner from electrical source.
Remove solution and recovery tanks to prevent possible
leaks.
A
Lift up on top of nozzle and slide off cleaner (Fig.6/1).
Fig.5/2
Let go of trigger and pull tool over same area to pick up
dirty solution without putting down more solution.
Continue using dry strokes until you see only a little
solution coming up through the tool.
Do not make the upholstery too wet! Use no more than
two strokes while releasing solution. Always follow with
dry strokes - the more the better.
Fig.6/1
Listen carefully! When the motor sound changes (rises in
pitch), the recovery tank needs to be emptied.
Wipe debris off nozzle and front of cleaner with a damp
cloth.
NOTE: When water has reached the full line in the
recovery tank, the cleaner will NOT pick up any more
dirty solution.
To replace nozzle, tilt cleaner back, raising front of cleaner
off floor. Slide nozzle up from bottom of cleaner (Fig.6/2).
Allow upholstery to dry. Avoid using upholstery until it is
dry. Increased air circulation (open doors, turn on fans, etc.)
will help upholstery dry thoroughly.
Fig.6/2
Press on upper portion of nozzle to snap in place.
Cleaning the Brushes
Unplug deep cleaner from electrical source.
Remove solution and recovery tanks to prevent possible
leaks.
Tilt cleaner back so handle rests on the floor.
Pull brush assembly firmly to remove (Fig.6/3).
cleaning upholstery / maintenance
9
Vax V-123 User Guide.qxd
10/8/07
15:43
Page 10
www.vax.co.uk
Wipe debris off filter.
Slide filter back into place.
Storing the Cleaner
Empty solution tank and rinse thoroughly.
Place empty solution tank on deep cleaner. Turn deep
cleaner ON. Squeeze trigger and push deep cleaner
forward and back several times. This will clear any solution
remaining inside the cleaner.
Empty recovery tank, rinse thoroughly and let air dry.
Fig.6/3
Rinse brushes under running water.
To replace, align posts on sides of brush assembly with
slots in cleaner. Turn brushes slightly to align square post
in the centre of the brush assebly with the square hole in
cleaner (Fig.6/4).
Fig.6/4
Press brush assembly firmly and snap in place.
Cleaning the Brush Filter
Unplug deep cleaner from electrical source.
Remove solution and recovery tanks to prevent possible
leaks.
Tilt cleaner back so handle rests on the floor.
Squeeze filter frame and pull it out until it stops (Fig.6/5).
Fig.6/5
10 maintenance
Allow brushes and underside of deep cleaner to air dry
thoroughly before storing deep cleaner on a carpeted or
wood surface.
Vax V-123 User Guide.qxd
10/8/07
15:43
Page 11
Vax Careline 0870 606 1248
7. Troubleshooting
WARNING: To reduce the risk of personal injury,
unplug the vacuum cleaner before performing
maintenance or troubleshooting checks.
!
PROBLEM: Vacuum cleaner won't run
Not properly plugged into electrical outlet.
Cause:
Solution: Plug unit in firmly.
Cause:
No electricity in the electrical outlet.
Solution: Check fuse or breaker.
Cause:
Cleaner requires service.
Solution: Take your cleaner to a service centre. Call
0870 606 1248 to find your nearest Vax
approved service agent.
PROBLEM: Cleaner won’t pick up/loss of suction.
Cause:
Recovery tank full - automatic shut-off
engaged.
Solution: Empty recovery tank.
Cause:
Recovery tank not fitted securely.
Solution: Ensure tank is fitted fully and tank cap is
securely latched.
Cause:
Blockage in hose.
Solution: Remove hose and tools, remove obstruction.
PROBLEM: Cleaning solution won’t dispense
Cause:
Solution tank not fitted correctly.
Solution: Ensure tank is fitted securely in place.
Cause:
Solution tank empty.
Solution: Refill solution tank.
8. UK Service & Help
Vax Care 0870 6061248
Monday-Friday
8.00am to 6.00pm.
Saturday-Sunday 9.00am to 5.00pm.
An answerphone will be available out of these hours. Any
queries or concerns about using your Vax, call the Vax
Careline. Calls are charged at the UK national rate.
Please make a not of the model number and serial
number of your Vax before calling. There are over 400
approved Vax Service Agents in the UK. For the nearest
Vax Service Agent, please call the Vax Careline or visit
www.vax.co.uk
9. Technical Specification
Voltage:
Wattage:
Capacity:
Filters:
Cord length:
Weight:
220-240V ~50Hz
1400W
Clean water tank - 3.7 litres
Dirty water tank - 2 litres
Dirty water tank filter
8m
11.3kg
Subject to technical change without notice.
PROBLEM: Brushes won’t rotate.
Brush filter clogged.
Cause:
Solution: Clean brush filter. Refer to page 10.
Cause:
Brush Speed Selector set to OFF.
Solution: Set Brush Speed Selector set to ON.
Cause:
Unit standing in upright position.
Solution: Recline unit.
troubleshooting / uk service & help / technical specification
11
Vax V-123 User Guide.qxd
10/8/07
15:43
Page 12
EEC STATEMENT OF COMPLIANCE
Manufacturer/EEC importer: Vax Limited, hereby on our own responsibility, declare that
the V-123 Agility is manufactured in compliance with the following Directives:
Safety: 2006/95/EC Low Voltage Directive
EMC: 2004/108/EC Electromagnetic Compatibility Directive
Waste electrical products should not be disposed of with household waste. Please recycle where
facilities exist. Check with your Local Authority or retailer for recycling advice.
Vax Ltd., Kingswood Road, Hampton Lovett, Droitwich, Worcestershire, WR9 OQH, UK
email: [email protected] - website: www.vax.co.uk