1
N
ep o
ro t fo
du r
ct
io
n
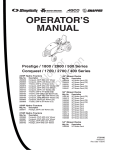
OPERATOR’S
MANUAL
Baron XL / 2400 XL / RD Series
21HP Hydro Tractors
Description
Simplicity Baron XL, 21HP w/ 40” Mower (CE)
Snapper RD21V40, 21HP w/ 40” Mower (CE)
Massey Ferguson 2421 XL, 20HP w/ 40” Mower (CE)
Simplicity Baron XL, 21HP 4WD w/40” Mower (CE)
Snapper RD21V40, 21HP 4WD w/40” Mower (CE)
R
Mfg. No.
2690762
2690763
2690772
2690773
2690774
1735268
Revision G
Original Instructions
N
ep o
ro t fo
du r
ct
io
n
R
Table of Contents
Safety Rules & Information.................................4
Regular Maintenance ........................................20
Identification Numbers ............................................9
Safety Decals ........................................................10
Safety Icons...........................................................11
Maintenance Schedule..........................................20
Check Tire Pressures ............................................20
Safety Interlock System Check..............................21
Blade Brake Check................................................21
Battery Maintenance .............................................21
Engine Maintenance..............................................21
Features & Controls ..........................................12
Operating the Tractor........................................14
Safety Interlock System Tests ...............................15
General Operating Safety......................................15
Adding Fuel ...........................................................15
Starting the Engine ................................................15
Stopping the Tractor & Engine...............................15
Driving the Tractor.................................................16
Mowing..................................................................16
Mowing in Reverse................................................16
Operating an Attachment in Reverse.....................16
Pushing the Tractor by Hand .................................16
Parking Brake Function .........................................17
Emptying the Catcher............................................17
Attaching a Trailer .................................................18
Catcher Installation & Removal .............................18
12 Volt Power Outlet (Some Models) ....................19
Storage..................................................................19
Troubleshooting & Adjustments ......................22
N
ep o
ro t fo
du r
ct
io
n
Troubleshooting the Tractor ..................................22
Troubleshooting the Mower...................................23
Seat Adjustment ....................................................24
Hopper Latch Adjustment......................................24
Catcher-Full Alarm Adjustment..............................24
Mower Lift Adjustment...........................................25
Cutting Height Adjustment.....................................25
Leveling the Mower ...............................................25
Battery Charging ...................................................25
Warranty.............................................................26
Specifications....................................................27
Parts & Accessories..........................................28
R
NOTE: In this manual, “left” and “right” are referred to as
seen from the operating position.
3
Safety Rules & Information
Operating Safety
Congratulations on purchasing a superior-quality piece of lawn and garden
equipment. Our products are designed and manufactured to meet or exceed
all industry standards for safety.
Power equipment is only as safe as the operator. If it is misused, or not
properly maintained, it can be dangerous! Remember, you are responsible
for your safety and that of those around you.
Use common sense, and think through what you are doing. If you are not
sure that the task you are about to perform can be safely done with the
equipment you have chosen, ask a professional: contact your local
authorized dealer.
Read the Manual
N
ep o
ro t fo
du r
ct
io
n
The operator’s manual contains important safety information you need to be aware of
BEFORE you operate your unit as well as DURING operation.
Safe operating techniques, an explanation of the product’s features and controls,
and maintenance information is included to help you get the most out of your
equipment investment.
R
Be sure to completely read the Safety Rules and Information found on the
following pages. Also completely read the Operation section.
Children
Reverse
Tragic accidents can occur with children. Do not allow them
anywhere near the area of operation. Children are often attracted
to the unit and mowing activity. Never assume that children will
remain where you last saw them. If there is a risk that children may
enter the area where you are mowing, have another responsible
adult watch them.
DO NOT GIVE CHILDREN RIDES ON THIS UNIT! This
encourages them to come near the unit in the future while it is
running, and they could be seriously hurt. They may then
approach the unit for a ride when you are not expecting it, and you
may run over them.
4
Do not mow in reverse unless absolutely
necessary. Always look down and behind
before and while traveling in
reverse even with the mower
blades disengaged.
Safety Rules & Information
Slope Operation
You could be seriously injured or even killed if you use this unit on too steep an
incline. Using the unit on a slope that is too steep or where you don’t have
adequate traction can cause you to lose control or roll over.
A good rule of thumb is to not operate on any slope you cannot back up (in 2-wheel
drive mode). You should not operate on inclines with a slope greater than a 3.5 foot
rise over a 20 foot length. Always drive up and down slopes: never cross the face.
Also note that the surface you are driving on can greatly impact stability and control.
Wet grass or icy pavement can seriously affect your ability to control the unit.
If you feel unsure about operating the unit on an incline, don’t do it. It’s not worth
the risk.
Moving Parts
N
ep o
ro t fo
du r
ct
io
n
This equipment has many moving parts that can injure you or someone else. However,
if you are seated in the seat properly, and follow all the rules in this book, the unit is safe
to operate.
The mower deck has spinning mower blades that can amputate hands and feet. Do not
allow anyone near the equipment while it is running!
To help you, the operator, use this equipment safely, it is equipped with an operatorpresent safety system. Do NOT attempt to alter or bypass the system. See your dealer
immediately if the system does not pass all the safety interlock system tests found in
this manual.
Thrown Objects
This unit has spinning mower blades. These blades can pick up and throw debris that
could seriously injure a bystander. Be sure to clean up the area to be mowed
BEFORE you start mowing.
R
Do not operate this unit without the entire grass catcher or discharge guard (deflector)
in place.
Also, do not allow anyone in the area while the unit is running! If someone does enter
the area, shut the unit off immediately until they leave.
Fuel and Maintenance
Gasoline is extremely flammable. Its vapors are also extremely flammable and can
travel to distant ignition sources. Gasoline must only be used as a fuel, not as a
solvent or cleaner. It should never be stored any place where its vapors can build up
or travel to an ignition source like a pilot light. Fuel belongs in an approved, plastic,
sealed gas can, or in the tractor fuel tank with the cap securely closed. Spilled fuel
needs to be cleaned up immediately.
Proper maintenance is critical to the safety and performance of your unit. Be sure to
perform the maintenance procedures listed in this manual, especially periodically
testing the safety system.
5
Safety Rules and Information
Read these safety rules and follow them closely. Failure to obey these rules could result in loss of control of unit, severe
personal injury or death to you, or bystanders, or damage to property or equipment This mowing deck is capable of
amputating hands and feet and throwing objects. The triangle
in text signifies important cautions or warnings which
must be followed.
GENERAL OPERATION
16. Use extra care when loading or unloading the unit into a trailer
or truck.
17. Always wear eye protection when operating this unit.
18. Data indicates that operators, age 60 years and above, are
involved in a large percentage of power equipment-related
injuries. These operators should evaluate their ability to
operate the equipment safely enough to protect themselves
and others from injury.
19. Follow the manufacturer’s recommendations for wheel weights
or counterweights.
20. Keep in mind the operator is responsible for accidents
occurring to other people or property.
21. All drivers should seek and obtain professional and
practical instruction.
22. Always wear substantial footwear and trousers. Never operate
when barefoot or wearing sandals.
23. Before using, always visually check that the blades and blade
hardware are present, intact, and secure. Replace worn or
damaged parts.
24. Disengage attachments before: refueling, removing an
attachment, making adjustments (unless the adjustment can
be made from the operator’s position).
25. When the machine is parked, stored, or left unattended, lower
the cutting means unless a positive mechanical lock is used.
26. Before leaving the operator’s position for any reason, engage
the parking brake (if equipped), disengage the PTO, stop the
engine, and remove the key.
27. To reduce fire hazard, keep the unit free of grass, leaves, &
excess oil. Do not stop or park over dry leaves, grass, or
combustible materials.
R
N
ep o
ro t fo
du r
ct
io
n
1. Read, understand, and follow all instructions in the manual and
on the unit before starting.
2. Do not put hands or feet near rotating parts or under the
machine. Keep clear of the discharge opening at all times.
3. Only allow responsible adults, who are familiar with the
instructions, to operate the unit (local regulations can restrict
operator age).
4. Clear the area of objects such as rocks, toys, wire, etc., which
could be picked up and thrown by the blade(s).
5. Be sure the area is clear of other people before mowing. Stop
the unit if anyone enters the area.
6. Never carry passengers.
7. Do not mow in reverse unless absolutely necessary. Always
look down and behind before and while travelling in reverse.
8. Never direct discharge material toward anyone. Avoid
discharging material against a wall or obstruction. Material
may ricochet back toward the operator. Stop the blade(s)
when crossing gravel surfaces.
9. Do not operate the machine without the entire grass catcher,
discharge guard (deflector), or other safety devices in place.
10. Slow down before turning.
11. Never leave a running unit unattended. Always disengage the
PTO, set parking brake, stop engine, and remove keys before
dismounting.
12. Disengage blades (PTO) when not mowing. Shut off engine
and wait for all parts to come to a complete stop before
cleaning the machine, removing the grass catcher, or
unclogging the discharge guard.
13. Operate the machine only in daylight or good artificial light.
14. Do not operate the unit while under the influence of alcohol
or drugs.
15 Watch for traffic when operating near or crossing roadways.
TRANSPORTING AND STORAGE
1. When transporting the unit on an open trailer, make sure it is
facing forward, in the direction of travel. If the unit is facing
backwards, wind lift could damage the unit.
2. Always observe safe refueling and fuel handling practices
when refueling the unit after transportation or storage.
3. Never store the unit (with fuel) in an enclosed poorly ventilated
structure. Fuel vapors can travel to an ignition source (such as
a furnace, water heater, etc.) and cause an explosion. Fuel
vapor is also toxic to humans and animals.
4. Always follow the engine manual instructions for storage
preparations before storing the unit for both short and long
term periods.
5. Always follow the engine manual instructions for proper startup procedures when returning the unit to service.
6. Never store the unit or fuel container inside where there is an
open flame or pilot light, such as in a water heater. Allow unit to
cool before storing.
6
Safety Rules and Information
WARNING
SLOPE OPERATION
Slopes are a major factor related to loss-of-control and tip-over
accidents, which can result in severe injury or death. Operation on
all slopes requires extra caution. If you cannot back up the slope or
if you feel uneasy on it, do not operate on it.
Control of a walk-behind or ride-on machine sliding on a slope will
not be regained by the application of the brake. The main reasons
for loss of control are: insufficient tire grip on the ground, speed too
fast, inadequate braking, the type of machine is unsuitable for its
task, lack of awareness of the ground conditions, incorrect hitching
and load distribution.
1. Mow up and down slopes, not across.
2. Watch for holes, ruts, or bumps. Uneven terrain could overturn
the unit. Tall grass can hide obstacles.
3. Choose a slow speed so that you will not have to stop or
change speeds while on the slope.
4. Do not mow on wet grass. Tires may loose traction.
5. Always keep unit in gear especially when traveling down
slopes. Do not shift to neutral and coast downhill.
6. Avoid starting, stopping, or turning on a slope. If tires lose
traction, disengage the blade(s) and proceed slowly straight
down the slope.
7. Keep all movement on slopes slow and gradual. Do not make
sudden changes in speed or direction, which could cause the
machine to rollover.
8. Use extra care while operating machines with grass catchers
or other attachments; they can affect the stability of the unit.
Do not use on steeps slopes.
9. Do not try to stabilize the machine by putting your foot on the
ground (ride-on units).
10. Do not mow near drop-offs, ditches, or embankments. The
mower could suddenly turn over if a wheel is over the edge of
a cliff or ditch, or if an edge caves in.
11. Do not use grass catchers on steep slopes.
12. Do not mow slopes you cannot back up them.
13. See your authorized dealer/retailer for recommendations of
wheel weights or counterweights to improve stability.
14. Remove obstacles such as rocks, tree limbs, etc.
15. Use slow speed. Tires may lose traction on slopes even
through the brakes are functioning properly.
16. Do not turn on slopes unless necessary, and then, turn slowly
and gradually downhill, if possible.
17. Four Wheel Drive Models: Four Wheel Drive improves access
to dangerously sloped terrain, increasing the possibility of rollover. If the machine stops while going uphill, stop the blades
and back down slowly. Avoid sudden turns.
Never operate on slopes greater than 17.6 percent
(10°) which is a rise of 3-1/2 feet (106 cm) vertically in
20 feet (607 cm) horizontally.
When operating on slopes use additional wheel
weights or counterweights. See your dealer/retailer to
determine which weights are available and appropriate
for your unit.
Select slow ground speed before driving onto slope. In
addition to front weights, use extra caution when
operating on slopes with rear-mounted grass catchers.
Mow UP and DOWN the slope, never across the face,
use caution when changing directions and DO NOT
START OR STOP ON SLOPE.
CHILDREN
N
ep o
ro t fo
du r
ct
io
n
Tragic accidents can occur if the operator is not alert to the
presence of children. Children are often attracted to the unit and
the mowing activity. Never assume that children will remain where
you last saw them.
1. Keep children out of the mowing area and under the watchful
care of another responsible adult.
2. Be alert and turn unit off if children enter the area.
3. Before and during reverse operation, look behind and down
for small children.
4. Never carry children, even with the blade(s) off. They may fall
off and be seriously injured or interfere with safe unit operation.
Children who have been given rides in the past may suddenly
appear in the mowing area for another ride and be run over or
backed over by the machine.
5. Never allow children to operate the unit.
6. Use extra care when approaching blind corners, shrubs, trees,
or other objects that may obscure vision.
R
EMISSIONS
1. Engine exhaust from this product contains chemicals known,
in certain quantities, to cause cancer, birth defects, or other
reproductive harm.
2. Look for the relevant Emissions Durability Period and Air Index
information on the engine emissions label.
TOWED EQUIPMENT (RIDE-ON UNITS)
IGNITION SYSTEM
1. Tow only with a machine that has a hitch designed for towing.
Do not attach towed equipment except at the hitch point.
2. Follow the manufacturer’s recommendations for weight limit
for towed equipment and towing on slopes.
3. Never allow children or others in or on towed equipment.
4. On slopes, the weight of the towed equipment may cause loss
of traction and loss of control.
5. Travel slowly and allow extra distance to stop.
6. Do not shift to neutral and coast down hill.
1. This spark ignition system complies with Canadian ICES-002.
7
Safety Rules & Information
11. Do not remove the fuel filter when the engine is hot as spilled
gasoline may ignite. Do not spread fuel line clamps further
than necessary. Ensure clamps grip hoses firmly over the filter
after installation.
12. Do not use gasoline containing METHANOL, gasohol
containing more than 10% ETHANOL, gasoline additives, or
white gas because engine/fuel system damage could result.
13. If the fuel tank must be drained, it should be drained outdoors.
14. Replace faulty silencers/mufflers.
15. Use only factory authorized replacement parts when making
repairs.
16. Always comply with factory specifications on all settings and
adjustments.
17. Only authorized service locations should be utilized for major
service and repair requirements.
18. Never attempt to make major repairs on this unit unless you
have been properly trained. Improper service procedures can
result in hazardous operation, equipment damage and voiding
of manufacturer’s warranty.
19. On multiple blade mowers, take care as rotating one blade can
cause other blades to rotate.
20. Do not change engine governor settings or over-speed the
engine. Operating the engine at excessive speed can
increase the hazard of personal injury.
21. Disengage drive attachments, stop the engine, remove the
key, and disconnect the spark plug wire(s) before: clearing
attachment blockages and chutes, performing service work,
striking an object, or if the unit vibrates abnormally. After
striking an object, inspect the machine for damage and make
repairs before restarting and operating the equipment.
22. Never place hands near the moving parts, such as a hydro
pump cooling fan, when the tractor is running. (Hydro pump
cooling fans are typically located on top of the transaxle).
23. Units with hydraulic pumps, hoses, or motors: WARNING:
Hydraulic fluid escaping under pressure may have sufficient
force to penetrate skin and cause serious injury. If foreign fluid
is injected into the skin it must be surgically removed within a
few hours by a doctor familiar with this form of injury or
gangrene may result. Keep body and hands away from pin
holes or nozzles that eject hydraulic fluid under high pressure.
Use paper or cardboard, and not hands, to search for leaks.
Make sure all hydraulic fluid connections are tight and all
hydraulic hoses and lines are in good condition before
applying pressure to the system. If leaks occur, have the unit
serviced immediately by your authorized dealer.
24. WARNING: Stored energy device. Improper release of
springs can result in serious personal injury. Springs should
be removed by an authorized technician.
25. Models equipped with an engine radiator: WARNING: Stored
energy device. To prevent serious bodily injury from hot
coolant or steam blow-out, never attempt to remove the
radiator cap while the engine is running. Stop the engine and
wait until it is cool. Even then, use extreme care when
removing the cap.
SERVICE AND MAINTENANCE
N
ep o
ro t fo
du r
ct
io
n
Safe Handling of Gasoline
1. Extinguish all cigarettes, cigars, pipes, and other sources of
ignition.
2. Use only approved gasoline containers.
3. Never remove the gas cap or add fuel with the engine running.
Allow the engine to cool before refueling.
4. Never fuel the machine indoors.
5. Never store the machine or fuel container where there is an
open flame, spark, or pilot light such as near a water heater or
other appliance.
6. Never fill containers inside a vehicle or on a truck bed with a
plastic bed liner. Always place containers on the ground away
from your vehicle before filling.
7. Remove gas-powered equipment from the truck or trailer and
refuel it on the ground. If this is not possible, then refuel such
equipment on a trailer with a portable container, rather than
from a gasoline dispenser nozzle.
8. Keep nozzle in contact with the rim of the fuel tank or container
opening at all times until fueling is complete. Do not use a
nozzle lock-open device.
9. If fuel is spilled on clothing, change clothing immediately.
10. Never over-fill the fuel tank. Replace gas cap and tighten
securely.
11. Use extra care in handling gasoline and other fuels. They are
flammable and vapors are explosive.
12. If fuel is spilled, do not attempt to start the engine but move the
machine away from the area of spillage and avoid creating any
source of ignition until fuel vapors have dissipated.
13. Replace all fuel tank caps and fuel container caps securely.
R
Service & Maintenance
1. Never run the unit in an enclosed area where carbon
monoxide fumes may collect.
2. Keep nuts and bolts, especially blade attachment bolts, tight
and keep equipment in good condition.
3. Never tamper with safety devices. Check their proper
operation regularly and make necessary repairs if they are not
functioning properly.
4. Keep unit free of grass, leaves, or other debris build-up. Clean
up oil or fuel spillage. and remove any fuel-soaked debris.
Allow machine to cool before storage.
5. If you strike an object, stop and inspect the machine. Repair,
if necessary, before restarting.
6. Never make adjustments or repairs with the engine running.
7. Check grass catcher components and the discharge guard
frequently and replace with manufacturer’s recommended
parts, when necessary.
8. Mower blades are sharp. Wrap the blade or wear gloves, and
use extra caution when servicing them.
9. Check brake operation frequently. Adjust and service as
required.
10. Maintain or replace safety and instructions labels, as
necessary.
8
Identification Numbers
Identification Numbers
CE Identification Tag Markings
When contacting your authorized dealer for replacement
parts, service, or information you MUST have these
numbers.
A. Manufacturer’s Identification Number
B. Manufacturer’s Serial Number
C. Power Rating in Kilowatts
Record your model name/number, manufacturer’s identification
numbers, and engine serial numbers in the space provided for
easy access. These numbers can be found in the locations
shown.
D. Maximum Engine Speed in Rotations per Minute
E. Manufacturer’s Name and Address
F. Year of Manufacture
NOTE: For location of engine identification numbers, refer
to the engine owner’s manual.
G. CE Compliance Logo
H. Mass of Unit in Kilograms
I. Guaranteed Sound Power in Decibels
A
Part No. xxxxxxx
Tractor ID Tag
E
PRODUCT REFERENCE DATA
Model Description Name/Number
Unit MFG Number
Unit SERIAL Number
Mower Deck MFG Number
Mower Deck SERIAL Number
Dealer Name
Date Purchased
Engine Make
Engine Type/Spec
R
ENGINE REFERENCE DATA
Engine Model
Engine Code/Serial Number
9
I
xxxxxxxxxxxxxxx
Serial No. xxxxxxxxxx
N
ep o
ro t fo
du r
ct
io
n
B
xxx
xxxxxxxxxxxxxxxxxxxxxxx
xxxxxxxxxxxxxxxxxxxxxxx
xxxxxxxxxxxxxxxxxxxxxxx
xxxxxxxxxxxxxxxxxxxxxxx
20xx
F
dB
kg: xxx
kW: x.xx
xxxx max
G
H
C
D
Safety Decals
and obeyed. Personal bodily injury can result when these
instructions are not followed. The information is for your safety
and it is important! The safety decals below are on your rider
and mower.
Safety Decals
This unit has been designed and manufactured to provide you
with the safety and reliability you would expect from an industry
leader in outdoor power equipment manufacturing.
If any of these decals are lost or damaged, replace them at
once. See your local dealer for replacements.
Although reading this manual and the safety instructions it
contains will provide you with the necessary basic knowledge to
operate this equipment safely and effectively, we have placed
several safety labels on the unit to remind you of this important
information while you are operating your unit.
These labels are easily applied and will act as a constant visual
reminder to you, and others who may use the equipment, to
follow the safety instructions necessary for safe, effective
operation.
All DANGER, WARNING, CAUTION and instructional
messages on your rider and mower should be carefully read
Decal - Danger,
Thrown Objects
Part No. 1720390
N
ep o
ro t fo
du r
ct
io
n
Decal - Danger,
Thrown Objects
Part No. 1721107
Decal - Danger,
Thrown Objects
Part No. 1720391
Decal - Operating Instructions, CE Models,
Part No. 1734027
1723317
Decal - Hopper Pedal
Part No. 1723317
R
Decal - Danger, Rotating
Blades
Part No. 1720389
Decal - Hopper
Control
Part No. 1723310
Decal - Transmission
Release
Part No. 1723425
Decal - Drawbar
Limits
Part No. 1721141
Decal - Ignition
Positions
Part No. 1722806
10
Decal - Hopper Release
Part No. 1724680
Decal - Cutting
Height
Part No. 1723470
Safety Decals
Safety Icons
Warning: Read Operator’s Manual.
Danger: Fire Hazard.
Read and understand the Operator’s
Manual before using this machine.
Do not add fuel while engine is hot or
running. Stop engine and allow to
cool for 3 minutes prior to adding fuel.
Danger: Dismemberment.
Danger: Hot Surface.
This machine can amputate limbs.
Keep bystanders and children away
when engine is running.
Allow machine to cool before touching
this area.
Danger: Dismemberment.
Danger: Carbon Monoxide
Poisoning.
This mower deck can amputate limbs.
Keep hands and feet away from
blades.
Do not operate the engine in an
unvenilated area.
Danger: Thrown Objects.
N
ep o
ro t fo
du r
ct
io
n
Warning: Remove Key Before
Servicing.
Do not operate without first
connecting the discharge tube.
Remove the key and consult technical
literature before performing repairs or
maintenance.
Danger: Machine Rollover.
Danger: Thrown Objects.
Do not use this machine on slopes
greater than 10°.
Do not operate with hopper open.
Danger: Thrown Objects.
Danger: Thrown Objects.
Do not operate the with the hopper
removed, or without the deflector.
R
This machine is capable of throwing
objects and debris. Keep bystanders
away.
11
R
12V
N
ep o
ro t fo
du r
ct
io
n
Features & Controls
Figure 1. Tractor and Mower Controls
NOTE: Steering wheel removed for clarity.
Control Functions
The information below briefly describes the function of individual controls. Starting, stopping, driving, and mowing
require the combined use of several controls applied in specific sequences. To learn what combination and sequence
of controls to use for various tasks see the OPERATION section.
Throttle/Choke Control
Throttle Control
(Single Lever Models)
The throttle controls engine speed. Move the throttle forward to
increase engine speed and back to decrease engine speed.
Always operate at FULL throttle.
The throttle/choke lever controls engine speed and choke.
Move the throttle forward to increase engine speed and back to
decrease engine speed. Always operate at FULL throttle.
Move the control fully forward (past the detent) to close the
choke. Close the choke for cold starting. Open the choke once
the engine starts. A warm engine may not require choking.
Choke
Close the choke for cold starting. Open the choke once the
engine starts. A warm engine may not require choking. Move
the lever forward to close the choke.
12
Features & Controls
Headlights
Ground Speed Pedals
The light switch turns the tractor headlights on and off.
The tractor’s forward ground speed is controlled by the forward
ground speed control pedal. The tractor’s reverse ground
speed is controlled by the reverse ground speed control pedal.
Brake Pedal
Depressing either pedal will increase ground speed. Note that
the further down the pedal is depressed, the faster the tractor
will travel.
Depressing the brake pedal applies the tractor brake.
Hour Meter (Optional)
The hour meter measures the number of hours the key has
been in the RUN position (A).
Mower Height of Cut Adjustment
The cutting height adjustment knob controls the mower cutting
height. The cutting height is infinitely adjustable between 1” and
3-3/4” (2.5 cm - 9.5 cm).
A
HOURS
Cutting Height Fine Tuning Adjustment
1/10
The cutting height fine tuning adjustment is used to set the
mower cutting height between two of the preset cutting
positions.
N
ep o
ro t fo
du r
ct
io
n
The hour meter will flash an initial oil change indicator at
5 hours, and a lubrication reminder every 50 hours. These
reminders display for approximately two hours and will
automatically reset themselves.
Attachment Lift Control Lever
When using the mower deck, lift the deck off the ground while
transporting to and from the job site. DO NOT cut with the
mower in the raised, transport position.
NOTE: The hour meter will register the passage of time
when the key is in the RUN position, even if the engine is
not running. The hour meter has a self contained power
source so the total hours are always visible.
PTO Switch
The attachment lift control lever raises and lowers attachments
that utilize the tractor’s manual lift linkage. Pushing the lever
forward lowers the attachment while pulling the lever back
raises the attachment. You must pull back slightly on the lever
and depress the release button to change lift positions. Be sure
the lever is fully forward when mowing.
The PTO (Power Take-Off) switch engages and disengages
attachments that use the PTO. To engage the PTO, pull UP on
the switch. Push DOWN to disengage. Note that the operator
must be seated firmly in the tractor seat for the PTO to function.
R
Ignition Switch
Catcher Removal Lock
After depressing the catcher dump lock pedal, pull this
knob forward to release the catcher for removal.
The ignition switch starts and stops the engine, it has three
positions:
OFF
Stops the engine and shuts off the
electrical system.
RUN
Allows the engine to run and powers the
electrical system.
Cruise Control (Optional)
The cruise control is used to lock the ground speed control in
forward. Move the lever forward until the desired ground speed
is reached. To disengage the cruise control move the lever
back. In the event you need to stop quickly, depressing the
brake pedal will also return the cruise control to neutral.
START Cranks the engine for starting.
NOTE: Never leave the ignition switch in the RUN
position with the engine stopped–this drains the battery.
13
Features & Controls
Seat Adjustment Lever
Catcher Dump Lock Pedal
The seat can be adjusted forward and back. Move the lever,
position the seat as desired, and release the lever to lock the
seat into position.
The catcher dump lock pedal unlocks the catcher so that it can
be opened to dump out collected grass.
Catcher Open/Close Lever
Transmission Release Valve Lever
The catcher open/close lever opens the catcher so that it may
be emptied and closes it for mowing. To empty the catcher,
depress the catcher dump lock pedal and pull forward on the
handle. To close, push the lever backward until the catcher
closes and locks.
The transmission release valve lever deactivates the
transmission so that the tractor can be pushed by hand. See
PUSHING THE TRACTOR BY HAND for operational
information.
12V Power Outlet
Catcher Full Alarm
The “catcher full” alarm sounds when the grass catcher has
been filled with cut grass. When the alarm sounds, disengage
the PTO, travel to the area in which you desire to dump the
grass, then empty the catcher. Note: When using the unit for
leaf collection, the alarm may not be activated by dry leaves.
The power outlet is 12V-DC. Accessory must be rated at 14
amps or less.
Reverse Mowing Option (RMO)
The Reverse Mowing Option allows for mowing (or use of other
PTO driven attachments) while traveling in reverse. If you
choose to mow or operate another attachment in reverse, turn
the RMO key after the PTO is engaged. The L.E.D. light will
illuminate, and the operator can then mow in reverse. Each time
the PTO is disengaged the RMO needs to be reactivated if
desired.
N
ep o
ro t fo
du r
ct
io
n
Fuel Tank / Fuel Gauge
The fuel gage indicates the amount of fuel in the fuel tank. To
add fuel, remove the filler cap. Be sure to leave room for heat
expansion.
Parking Brake
R
The parking brake knob is used to lock the parking brake when
the tractor is stopped. Fully depressing the brake pedal and
pulling up on the knob engages the parking brake.
14
Operating the Tractor
WARNING
Safety Interlock System Tests
Gasoline is highly flammable and must be handled with
care. Never fill the tank when the engine is still hot
from recent operation. Do not allow open flame,
smoking or matches in the area. Avoid over-filling and
wipe up any spills.
WARNING
This unit is equipped with safety interlock switches
and other safety devices. These safety systems are
present for your safety. Do not attempt to bypass
safety switches, and never tamper with safety
devices.
Do not use gasoline containing METHANOL, gasohol
containing more than 10% ETHANOL, gasoline
additives, or white gas because engine/fuel system
damage could result.
TEST 1 — ENGINE SHOULD NOT START IF:
• Blade rotation control is in the ENGAGE position, OR
• Brake pedal is NOT fully depressed (parking brake OFF).
TEST 2 — ENGINE SHOULD START IF:
• Operator is sitting in seat, AND
Starting The Engine
N
ep o
ro t fo
du r
ct
io
n
• Blade rotation control is in the DISENGAGE position, AND
1. While sitting in the operator’s seat, fully depress the brake
pedal or set the parking brake.
• Brake pedal is fully depressed (parking brake ON).
2. Make sure that your feet are not depressing the ground
speed control pedals and that the cruise control lever is in
neutral.
TEST 3 — ENGINE SHOULD SHUT OFF IF:
• Operator rises off seat.
TEST 4 — BLADE BRAKE CHECK
3. Disengage the PTO clutch.
Mower blades and mower drive belt should come to a
complete stop within five seconds after blade rotation control is
moved to DISENGAGE position. If the mower drive belt does
not stop within five seconds, see your dealer.
4. Close the choke.
NOTE: A warm engine may not require choking.
5. Insert the ignition key and turn it to START.
WARNING
6. After the engine starts, move the engine throttle control to
SLOW. Warm up the engine by running it for at least a
minute.
If the unit does not pass a safety test, do not operate
it. See your authorized dealer.
7. Set throttle to FULL.
R
NOTE: In the event of an emergency the engine can be
stopped by simply turning the ignition switch to STOP.
Use this method only in emergency situations. For
normal engine shut down follow the procedure given in
STOPPING THE TRACTOR.
General Operating Safety
Be sure to read all information in the Safety and Operation
sections before attempting to operate this unit. Become familiar
with all of the controls and how to stop the unit.
Stopping The Tractor & Engine
1. Return the ground speed control(s) to neutral.
Adding Fuel
2. Disengage the PTO and wait for all moving parts to stop.
To add fuel:
3. Place the throttle control in the position specified in the
engine owner’s manual provided in the operator's packet
shipped with your tractor. Follow any recommended
stopping procedures.
1. Remove the fuel cap (A, Figure 2.1).
2. Fill the tank. Do not overfill. Leave room in the tank for fuel
expansion. Refer to your engine manual for specific fuel
recommendations.
4. Turn the ignition switch to OFF. Remove the key.
3. Install and hand tighten the fuel cap.
15
Operating the Tractor
3. Make sure the PTO switch is disengaged.
If an operator chooses to mow in reverse, the RMO system can
be used. To use the Reverse Mowing Option (RMO) turn the
RMO key after the PTO is engaged. The L.E.D. light will
illuminate, and the operator can then mow in reverse. Each time
the PTO is disengaged the RMO needs to be reactivated if
desired. The key should be removed to restrict access to the
RMO feature.
4. Start the engine (see STARTING THE ENGINE).
Attachment Operation in Reverse
5. Disengage the parking brake and release the brake pedal.
If an operator chooses to operate a PTO driven attachment in
reverse, the RMO system can be used. To use the Reverse
Mowing Option (RMO) turn the RMO key after the PTO is
engaged. The L.E.D. light will illuminate, and the operator can
then operate the attachment in reverse. Each time the PTO is
disengaged the RMO needs to be reactivated if desired. The
key should be removed to restrict access to the RMO feature.
Driving The Tractor
1. Sit in the seat and adjust the seat so that you can
comfortably reach all the controls and see the dashboard
display.
2. Engage the parking brake.
6. Depress the forward ground speed control pedal to travel
forward. Release the pedal to stop. Note that the further
down the pedal is depressed the faster the tractor will travel.
7. Stop the tractor by releasing the ground speed control
pedals, setting the parking brake, and stopping the engine
(see STOPPING THE TRACTOR AND ENGINE).
Pushing The Tractor By Hand
Mowing
DO NOT TOW TRACTOR
1. Set the mower cutting height to the desired level and set the
gauge wheels to the appropriate position (if equipped).
Towing the unit will cause transmission damage.
• Do not use another vehicle to push or pull this unit.
• Do not actuate the transmission release valve lever
while the engine is running.
N
ep o
ro t fo
du r
ct
io
n
2. Engage the parking brake. Make sure the PTO switch is
disengaged.
3. Start the engine (see STARTING THE ENGINE).
4. Fully lower the mower using the attachment lift lever.
Two Wheel Drive Models (2WD)
5. Set the throttle to FULL.
1. Disengage the PTO and turn the engine off.
6. Engage the PTO (Mower Deck).
2. Pull the transmission release back approximately 2-1/2”
(6 cm) to lock into released position (Figure 2.1).
7. Begin mowing. When the “catcher full” alarm sounds, turn
off the PTO immediately to prevent discharge tube plugging.
Travel to the desired location and empty the catcher.
3. The tractor can now be pushed by hand.
8. When finished, shut off the PTO and raise the mower using
the attachment lift control lever.
9. Stop the engine (see STOPPING THE TRACTOR AND
ENGINE).
Mowing in Reverse
R
WARNING
The engine will shut off if the reverse ground speed
pedal is depressed while the PTO is on and the RMO
has not been activated. The operator should always
turn the PTO off prior to driving across on roads, paths
or any area that maybe used by other vehicles. Sudden
loss of drive could create a hazard.
WARNING
A
Mowing in reverse can be hazardous to bystanders.
Tragic accidents can occur if the operator is not alert
to the presence of children. Never activate RMO if
children are present. Children are often attracted to the
unit and the mowing activity.
B
Figure 2.1. Transmission Release Lever (2WD)
A. Fuel Tank Cap
B. Transmission Release Lever
16
Operating the Tractor
Four Wheel Drive Models (4WD)
1. Disengage the PTO and turn the engine off.
C
2. Push the transmission release in approximately 2-1/2”
(6.4 cm) to lock into released position (Figure 2.2).
3. The tractor can now be pushed by hand.
B
A
N
ep o
ro t fo
du r
ct
io
n
Figure 3. Engaging the Parking Brake
A. Ground Speed Pedals
B. Brake Pedal
C. Parking Brake Knob
Emptying the Catcher
To empty the catcher:
A
1. Depress the catcher dump pedal (A, Figure 4).
2. Extend the catcher lever (B) and use it to empty the catcher.
3. Use the lever (B) to close the catcher, and slide it back into
the catcher.
Figure 2.2. Transmission Release Lever (4WD)
A. Transmission Release Lever
B
Parking Brake Function
R
Applying the Parking Brake - See Figure 3. To lock the
parking brake, release the ground speed pedals (A), fully
depress the brake pedal (B), pull UP on the parking brake knob
(C), and then release brake pedal.
Releasing the Parking Brake - See Figure 3. To release the
parking brake, fully depress the brake pedal (B) and push the
parking brake knob (C) DOWN.
A
Figure 4. Emptying the Hopper
A. Catcher Dump Pedal
B. Catcher Lever
17
Operating the Tractor
Attaching a Trailer
Catcher Removal AND Installation
NOTE: Remove the hopper to attach a trailer.
WARNING
The maximum horizontal drawbar force allowed is 444 Newton.
The maximum vertical drawbar force is 222 Newton. This
equates to a 396 lbs (180 kg) trailer on a 10 degree hill. Secure
the trailer with an appropriately sized clevis pin (A, Figure 5) and
clip (B).
Do not operate the unit without the hopper or deflector
in place.
1. Move the catcher removal knob (C, Figure 6) forward to
unlock the catcher from the rear support arms.
2. Depress the catcher dump lock pedal (A).
3. Use the catcher lever (B) to open the catcher slightly.
A
4. Lift the catcher off the rear support arms.
5. Install in reverse order of removal. To assist installing the
catcher, be sure to line up the alignment marks on the
catcher and rear of the tractor.
B
3
3'4"
(1m)
4
N
ep o
ro t fo
du r
ct
io
n
396 Lb
s.
(180kg
)
B
10˚
C
1
20' (6m)
Figure 5. Trailer Weight Recommendations
A. Clevis Pin
B. Clip
R
2
Figure 6. Emptying the Hopper
A. Catcher Dump Pedal
B. Catcher Lever
C. Catcher Lock Knob
18
A
Operating the Tractor
12 Volt Power Outlet
(certain models)
Storage
WARNING
CAUTION
Never store the unit (with fuel) in an enclosed, poorly
ventilated structure. Fuel vapors can travel to an
ignition source (such as a furnace, water heater, etc.)
and cause an explosion.
Fuel vapor is also toxic to humans and animals.
Avoid Injury. Safe operation requires your full
attention. Do not wear radio or music headphones
while operating machine.
The 12-volt accessory plug is located in the left side pod
(Figure 1). It can be used to power small electronic devices.
The accessory must be rated at 14 amps or less.
Before you store your unit for the off-season, read the
Maintenance and Storage instructions in the Safety Rules
section, then perform the following steps:
NOTE: Operating a 12-volt accessory, especially with the
engine at idle, may cause battery discharge. When not
using the accessory plug it must be covered with the
rubber plug to prevent moisture from causing a short
circuit. Entrance of water into plug can cause a short
circuit.
• Disengage the PTO, set the parking brake, & remove the
key.
• Perform engine maintenance and storage measures listed
in the engine owner’s manual. This includes draining the
fuel system, or adding stabilizer to the fuel (do not store a
fueled unit in an enclosed structure - see above).
N
ep o
ro t fo
du r
ct
io
n
• Battery life will be increased if it is removed, put in a cool,
dry place and fully charged about once a month. If the
battery is left in the unit, disconnect the negative cable.
Before starting the unit after it has been stored:
• Check all fluid levels. Check all maintenance items.
• Perform all recommended check and procedures found in
the engine owner’s manual.
R
• Allow the engine to warm up for several minutes before use.
19
Regular
Maintenance
Maintenance Schedule
The following schedule should be followed for normal care of your tractor and mower.
ENGINE
First 5 Hours
Change engine oil - see engine manual
Every 8 Hours or Daily
Check engine oil level - see engine manual
Every 25 Hours or Annually *
Clean engine air filter and pre-cleaner **
Every 50 Hours or Annually *
Change engine oil
Replace oil filter
Annually
Replace air filter
Replace pre-cleaner
See Dealer Annually to
Inspect muffler and spark arrester
Replace spark plug
Replace fuel filter
Clean engine air cooling system
N
ep o
ro t fo
du r
ct
io
n
TRACTOR AND MOWER
Every 8 Hours or Daily
Check safety interlock system
Clean debris off tractor and mower deck
Clean debris from engine compartment
Every 25 Hours or Annually *
Check mower blade stopping time
Check tractor and mower for loose hardware
Check tire pressure
Every 50 Hours or Annually *
Check tractor brakes
Clean battery and cables
See Dealer Annually to
Lubricate tractor and mower
Check mower blades **
* Whichever comes first
** Check blades more often in regions with sandy soils or
high dust conditions.
Check Tire Pressures
R
* Whichever comes first
** Clean more often in dusty conditions or when airborne
debris is present.
Tire Pressure should be checked periodically, and maintained at
the levels shown in the chart (Figure 7). Note that these
pressures may differ slightly from the “Max Inflation” stamped on
the side-wall of the tires. The pressures shown provide proper
traction, improve cut quality, and extend tire life.
Size
PSI
bar
22 x 10,0-8
10
0,68
20 x 8,0-8
10
0,68
15 x 6,0-6
12-14
0,82-0,96
Figure 7. Tire Pressure
20
Regular Maintenance
Safety Interlock System Check
Battery Maintenance
Check the function of the safety interlock system using the test
procedur. If the tractor fails any of the tests, see your dealer.
WARNING
When removing or installing battery cables, disconnect
the negative cable FIRST and reconnect it LAST. If not
done in this order, the positive terminal can be shorted
to the frame by a tool.
Blade Brake Check
Mower blades and mower drive belt should come to a complete
stop within five seconds after the electric PTO switch is
turned off.
Cleaning the Battery and Cables
1. With tractor in neutral, PTO disengaged and operator in
seat, start the engine.
1. Disconnect the cables from the battery, negative cable first
(A, Figure 8).
2. Look over the left-hand footrest at the mower drive belt.
Engage the PTO and wait several seconds. Disengage the
PTO and check the amount of time it takes for the mower
drive belt to stop.
2. Remove the battery hold-down (C) and battery.
3. Clean the battery compartment with a solution of baking
soda and water.
3. If mower drive belt does not stop within five seconds, see
your dealer.
4. Clean the battery terminals and cable ends with a wire brush
and battery terminal cleaner until shiny.
Engine Maintenance
5. Reinstall the battery in the battery compartment, and secure
with the battery hold-down (C).
Refer to the engine owner’s manual for all engine maintenance
procedures and recommendations.
N
ep o
ro t fo
du r
ct
io
n
6. Reattach the battery cables, positive cable first (B).
7. Coat the cable ends and battery terminals with petroleum
jelly or non-conducting grease.
B
R
A
Figure 8. Battery
A. Negative Cable
B. Positive Cable & Cover
C. Rubber Hold-Down Strap
21
C
Troubleshooting &
Adjustments
Troubleshooting
WARNING
While normal care and regular maintenance will extend the life
of your equipment, prolonged or constant use may eventually
require that service be performed to allow it to continue
operating properly.
To avoid serious injury, perform maintenance on the
tractor or mower only when the engine is stopped and
the parking brake engaged.
Always remove the ignition key, disconnect the spark
plug wire and fasten it away from the plug before
beginning the maintenance, to prevent accidental
starting of the engine.
The troubleshooting guide below lists the most common
problems, their causes, and remedies.
See the information on the following pages for instructions on
how to perform most of these minor adjustments and service
repairs yourself. If you prefer, all of these procedures can be
performed for you by your local authorized dealer.
PROBLEM
Engine will not
turnover or start.
N
ep o
ro t fo
du r
ct
io
n
Troubleshooting the Tractor
LOOK FOR
Brake pedal not depressed.
PTO (electric clutch) switch is in ON position.
Cruise control engaged.
REMEDY
Fully depress brake pedal.
Place in OFF position.
Move knob to NEUTRAL/OFF position.
Out of fuel.
If engine is hot, allow it to cool, then refill
the fuel tank.
Engine flooded.
Fuse is blown.
Battery terminals require cleaning.
Battery discharged or dead.
Wiring loose or broken.
R
Solenoid or starter motor faulty.
Safety interlock switch faulty.
Water in fuel.
Gas is old or stale.
Fuel mixture too rich.
Engine has other problem.
Low oil level.
Using wrong grade oil.
Engine running too hot.
Using wrong grade oil.
Too much oil in crankcase.
Engine starts hard or
runs poorly.
Engine knocks.
Excessive oil
consumption.
22
Disengage the choke.
See authorized dealer.
See Cleaning the Battery and Cables.
Recharge or replace battery.
Visually check wiring. If wires are frayed or
broken, see authorized dealer.
See authorized dealer.
See authorized dealer.
See authorized dealer.
See authorized dealer.
Clean air filter.
See authorized dealer.
See engine manual.
See engine manual.
See authorized dealer.
See engine manual.
Drain excess oil.
Troubleshooting & Adjustments
Troubleshooting the Tractor (Continued)
PROBLEM
Brake will not hold.
Tractor steers hard or
handles poorly.
Engine exhaust is
black.
Engine runs, but
tractor will not drive.
LOOK FOR
Internal brake worn.
Steering linkage is loose.
Improper tire inflation.
Front wheel spindle bearings dry.
Dirty air filter.
Choke closed.
Ground speed control pedals not depressed.
Transmission release lever in PUSH position.
Mower drive belt is broken.
Parking brake is engaged.
Traction drive belt is broken or slipping.
REMEDY
See authorized dealer.
See authorized dealer.
See Check Tire Pressure section.
See authorized dealer.
See engine manual.
Open choke.
Depress pedals.
Move into DRIVE position.
See authorized dealer.
Disengage parking brake.
See authorized dealer.
Mower cut is uneven.
Mower cut is rough
looking.
Engine stalls easily
with mower engaged.
Excessive mower
vibration.
Engine runs and
tractor drives, but
mower will not drive.
LOOK FOR
Lift linkage not properly attached or damaged.
Mower not leveled properly.
Tractor tires not properly inflated.
Engine speed too slow.
Ground speed too fast.
Mower has other problem.
Engine speed too slow.
Ground speed to fast.
Dirty or clogged air filter.
Cutting height set too low.
R
PROBLEM
Mower will not raise.
N
ep o
ro t fo
du r
ct
io
n
Troubleshooting the Mower
REMEDY
See authorized dealer.
See authorized dealer.
See Check Tire Pressure.
Set to full throttle.
Slow down.
See authorized dealer.
Set to full throttle.
Slow down.
See engine manual.
Cut tall grass at maximum cutting height
during first pass.
Discharge chute jamming.
Cut grass with discharge pointing toward
previously cut area.
Engine not up to operating temperature.
Run engine for several minutes to
warm up.
Starting mower in tall grass.
Start the mower in a cleared area.
Mower has other problem.
See authorized dealer.
PTO not engaged.
Engage the PTO.
Mower has other problem.
See authorized dealer.
23
Troubleshooting & Adjustments
Seat Adjustment
Catcher-full Alarm Adjustment
Pitch Adjustment
There are two ways to adjust the “catcher full” alarm one for
grass volume and one for sensitivity.
The pitch of the seat can be adjusted to one of three positions.
See your dealer for assistance.
Grass Volume Adjustment
Sliding the paddle bracket (C, Figure 10) up increases the
volume of grass in the collector before the alarm goes off.
Sliding the paddle bracket (C) down decreases the volume of
grass in the collector before the alarm goes off.
Seat Slide Adjustment
The seat can also be adjusted forward and back. Move the lever
(A, Figure 9), position the seat as desired, and release the lever
to lock the seat into position.
1. Loosen bracket hardware (B).
2. Slide paddle bracket (C) up or down.
3. Tighten bracket hardware (B).
C
Sensitivity Adjustment
A
Sliding the carriage bolt, washer and nut (D, Figure 10) up
decreases the sensitivity in the collector before the alarm goes
off. Sliding the carriage bolt, washer and nut (D) down
increases the sensitivity in the collector before the alarm goes
off.
N
ep o
ro t fo
du r
ct
io
n
1. Loosen carriage bolt, washer and nut (D).
2. Slide carriage bolt, washer and nut (D) up or down the alarm
paddle (A).
3. Tighten carriage bolt, washer and nut (D).
NOTE: It may be necessary to change the catcher-full
alarm as turf conditions change. See your dealer for
assistance.
C
Figure 9. Seat Adjustment
A. Seat Adjustment Lever
C. Seat Spring
B
R
Seat Spring Adjustment
The seat springs (C, Figure 9) can be adjusted to provide a
softer or firmer ride. Tilt the seat forward and slide the spring
assembly (C) forward for a softer ride, and back for a firmer ride.
B
D
Hopper Latch Adjustment
A
If the hopper will not latch when the lever is quickly closed, the
latch clearance may need to be adjusted. See your dealer for
assistance.
Figure 10. Catcher Alarm Adjustment
A. Alarm Paddle
C. Paddle Bracket
B. Bracket Hardware
D. Carriage Bolt,
Washer, and Nut
24
Troubleshooting & Adjustments
Leveling The Mower
Mower Lift Adjustment
If the cut is uneven, the mower may need leveling. Unequal or
improper tire pressure may also cause an uneven cut. Make
sure tire pressure is correct as specified in Checking Tire
Pressure. See your dealer for assistance.
WARNING
Before checking mower, shut off PTO and engine,
remove the key, and allow all moving parts to stop.
Mower lift height can be adjusted using the mower lift chains.
For increased mower lift, use the thrid chain link (as shown in
Figure 11). For more below-ground travel, use the fourth link.
Battery Charging
WARNING
Keep open flames and sparks away from the battery;
the gasses coming from it are highly explosive.
Ventilate the battery well during charging.
A
N
ep o
ro t fo
du r
ct
io
n
A dead battery or one too weak to start the engine may be the
result of a defect in the charging system or other electrical
component. If there is any doubt about the cause of the
problem, see your dealer. If you need to replace the battery,
follow the steps under Cleaning the Battery & Cables in the
Regular Maintenance Section.
To charge the battery, follow the instructions provided by the
battery charger manufacturer as well as all warnings included in
the safety rules sections of this book. Charge the battery until
fully charged (until the specific gravity of the electrolyte is
1.250 or higher and the electrolyte temperature is at least
60° F). Do not charge at a rate higher than 10 amps.
Figure 11. Mower Lift Adjust
(viewed from underneath right side of tractor)
A. Mower Lift Chain
Cutting Height Adjustment
R
The cutting height adjustment lever (A, Figure 12) controls the
mower cutting height. Push the button to release the lever.
Move the lever back to raise the deck and forward to lower it.
A
Figure 12. Mower Cutting Height Adjustment
A. Adjustment Lever
25
BRIGGS & STRATTON POWER PRODUCTS GROUP, L.L.C. OWNER WARRANTY POLICY
LIMITED WARRANTY
Briggs & Stratton Power Products Group, LLC will repair and/or replace, free of charge, any part(s) of the equipment that is
defective in material or workmanship or both. Briggs & Stratton Corporation will repair and/or replace, free of charge, any
part(s) of the Briggs and Stratton engine* (if equipped) that is defective in material or workmanship or both. Transportation
charges on product submitted for repair or replacement under this warranty must be borne by purchaser. This warranty is
effective for the time periods and subject to the conditions stated below. For warranty service, find the nearest Authorized
Service Dealer using our dealer locator at www.murray.com.
There is no other express warranty. Implied warranties, including those of merchantability and fitness for a particular
purpose, are limited to one year from purchase or to the extent permitted by law. Liability for incidental or consequential
damages are excluded to the extent exclusion is permitted by law.
Some states or countries do not allow limitations on how long an implied warranty lasts, and some states or countries do
not allow the exclusion or limitation of incidental or consequential damages, so the above limitation and exclusion may not
apply to you. This warranty gives you specific legal rights and you may also have other rights which vary from state to state
or country to country.
WARRANTY PERIOD
Consumer Use
2 Years
2 Years
1 Year
Commercial Use:
90 Days
90 Days
1 Year
N
ep o
ro t fo
du r
ct
io
n
Item
Equipment
Engine*
Battery
The warranty period begins on the date of purchase by the first retail consumer or commercial end user, and continues for the
period of time stated above. “Consumer use” means personal residential household use by a retail consumer. “Commercial
use” means all other uses, including use for commercial, income producing or rental purposes. Once product has experienced
commercial use, it shall thereafter be considered as commercial use for purposes of this warranty.
No warranty registration is necessary to obtain warranty on Briggs & Stratton products. Save your proof of purchase receipt. If you
do not provide proof of the initial purchase date at the time warranty service is requested, the manufacturing date of the product will
be used to determine warranty eligibility.
ABOUT YOUR WARRANTY
We welcome warranty repair and apologize to you for being inconvenienced. Warranty service is available only through servicing
dealers authorized by Briggs & Stratton or BSPPG, LLC.
Most warranty repairs are handled routinely, but sometimes requests for warranty service may not be appropriate. This warranty
only covers defects in materials or workmanship. It does not cover damage caused by improper use or abuse, improper
maintenance or repair, normal wear and tear, or stale or unapproved fuel.
R
Improper Use and Abuse - The proper, intended use of this product is described in the Operator’s Manual. Using the product in
a way not described in the Operator’s Manual or using the product after it has been damaged will void your warranty. Warranty is
not allowed if the serial number on the product has been removed or the product has been altered or modified in any way, or if the
product has evidence of abuse such as impact damage, or water/chemical corrosion damage.
Improper Maintenance or Repair - This product must be maintained according to the procedures and schedules provided in the
Operator’s Manual, and serviced or repaired using genuine Briggs & Stratton parts. Damage caused by lack of maintenance or use
of non-original parts is not covered by warranty.
Normal Wear - Like all mechanical devices, your unit is subject to wear even when properly maintained. This warranty does not
cover repairs when normal use has exhausted the life of a part or the equipment. Maintenance and wear items such as filters,
belts, cutting blades, and brake pads (engine brake pads are covered) are not covered by warranty due to wear characteristics
alone, unless the cause is due to defects in material or workmanship.
Stale Fuel - In order to function correctly, this product requires fresh fuel that conforms to the criteria specified in the Operator’s
Manual. Damage caused by stale fuel (carburetor leaks, clogged fuel tubes, sticking valves, etc) is not covered by warranty.
* Applies to Briggs and Stratton engines only. Warranty coverage of non-Briggs and Stratton engines is provided by the engine manufacturer.
EN
1737660 Rev B
26
Specifications
NOTE: Specifications are correct at time of printing and are subject to change without notice.
ENGINE
TRANSMISSION
21 HP* Briggs & Stratton
K46
Make
Model
Horsepower
Displacement
Electrical System
Type
Hydraulic Fluid
Capacity
Speeds
@ 3400 rpm
Continuous Torque
Output
Drawbar Rating
Maximum Weight
on Axle
Oil Capacity
Briggs & Stratton
Twin Vanguard (385777)
21
38.2 cu in. (627 cc)
Alternator: 12 volt, 16 amp
Battery: 230 CCA
48 oz (1,4 L)
CHASSIS
Front Wheels
Capacity: 2.5 Gallons (9.5 L)
Tire Size: 20 x 10.00-8 (2WD)
Tire Size: 22 x 10.00-10 (4WD)
Inflation Pressure: 6-8 psi (,41-,55 bar)
Tire Size: 15 x 6.00-6 (2WD)
Tire Size: 16 x 6.50-8 (4WD)
Inflation Pressure: 15 psi (,8-1,0 bar)
440 lbs (200 kg)
584 lbs (265 kg)
K464
Type
Hydraulic Fluid
Capacity
Speeds
@ 3400 rpm
Continuous Torque
Output
Drawbar Rating
Maximum Weight
on Axle
Hydrostatic Tuff Torq K464
10w 50 Synthetic Engine Oil
5.4 qt (5,11 L)
Forward: 0-5.5 mph (0-8,8 km/h)
Reverse: 0-3.5 mph (0-5,6 km/h)
215 ft-lbs (291 Nm)
N
ep o
ro t fo
du r
ct
io
n
Fuel Tank Cap
Rear Wheels
Hydrostatic Tuff Torq K46
10w 30 Premium Engine Oil
2.6 qt (2,5 L)
Forward: 0-5.5 mph (0-8,8 km/h)
Reverse: 0-3.5 mph (0-5,6 km/h)
215 ft-lbs (291 Nm)
440 lbs (200 kg)
584 lbs (265 kg)
DIMENSIONS
Overall Length
Length (Tractor Only)
Overall Width
Height
Weight (approx.)
21HP Tractor
109 in. (277 cm)
76 in. (193 cm)
37 in. (94 cm)
At Top of Seat: 44 in. (112 cm)
707.7 lbs (321 kg)
R
The gross power rating for individual gas engine models is labeled in accordance with SAE (Society of Automotive
Engineers) code J1940 (Small Engine Power & Torque Rating Procedure), and rating performance has been obtained
and corrected in accordance with SAE J1995 (Revision 2002-05). Torque values are derived at 3060 RPM;
horsepower values are derived at 3600 RPM. Actual gross engine power will be lower and is affected by, among other
things, ambient operating conditions and engine-to-engine variability. Given both the wide array of products on which
engines are placed and the variety of environmental issues applicable to operating the equipment, the gas engine will
not develop the rated gross power when used in a given piece of power equipment (actual "on-site" or net
horsepower). This difference is due to a variety of factors including, but not limited to, accessories (air cleaner,
exhaust, charging, cooling, carburetor, fuel pump, etc.), application limitations, ambient operating conditions
(temperature, humidity, altitude), and engine-to-engine variability. Due to manufacturing and capacity limitations,
Briggs & Stratton may substitute an engine of higher rated power for this Series engine.
27
Parts &
Accessories
Replacement Parts
Replacement parts are available from your authorized dealer.
Always use genuine Simplicity Service Parts.
Maintenance Items
Many convenient and helpful service and maintenance items
are available from you authorized dealer. Some of these
items include:
Engine Oil
Tire Sealant
Touch-Up Paint
Degrimer/Degreaser
Grease Gun Kit
Gas Stabilizer
R
N
ep o
ro t fo
du r
ct
io
n
8 oz. Grease Tube
28
N
ep o
ro t fo
du r
ct
io
n
R
N
ep o
ro t fo
du r
ct
io
n
R
N
ep o
ro t fo
du r
ct
io
n
R
N
ep o
ro t fo
du r
ct
io
n
R
www.SimplicityMfg.com
Briggs & Stratton Power Products Group, L.L.C.
Copyright © 2010 Briggs & Stratton Corporation
Milwaukee, WI USA. All Rights Reserved
www.BRIGGSandSTRATTON.com
www.snapper.com
www.MasseyLawn.com