1
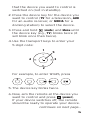
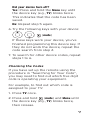
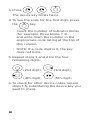
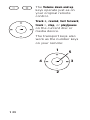
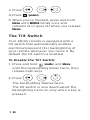
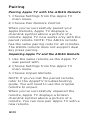
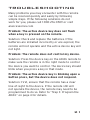
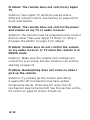
Contents
Introduction.................................................... 2
Getting Started............................................... 3
Step 1: Unpack.............................................. 3
Step 2: Install Batteries............................. 3
Step 3: Program the ARi3G...................... 4
Tour of the Remote....................................... 9
Advanced Operation..................................... 11
Using Learning............................................ 11
Volume Lock...............................................14
Input Lock....................................................16
Using Master Power On/Off.................... 17
The Tilt Switch............................................18
Resetting Your Remote............................19
Pairing............................................................20
12 Month Limited Warranty....................... 23
Introduction
Thank you for purchasing the ARi3G
universal remote control, the remote that
lets you streamline your home theater
experience. Your ARi3G remote offers the
following benefits:
• Integrates media centers or docking
stations into home theater, allowing full
control with one remote
• Compatible with Apple® products
• Controls docking stations, TVs, and
audio devices
Additional Features
Your ARi3G remote has other features,
described later in this manual:
• Code Search
• Backlighting
• Volume Lock
• Master Power
• Input Select
• Tilt-Switch
Backlight On/Off
• Learning
Getting Started
Step 1: Unpack
Your ARi3G remote package contains:
•
•
•
•
The ARi3G Remote Control
The ARi3G User Guide
The ARi3G Code List
2 AAA Batteries
Note: You may need the guide and code
book again in the future, so please be
sure to keep them.
Step 2: Install Batteries
1. Open the battery compartment cover
(located on the back of the remote).
2.Place the two AAA batteries provided in
the compartment and match the + and polarity symbols inside.
3.Replace the cover.
3
Battery Use And Safety
• Use only fresh batteries of the required
size and recommended type.
• Do not mix old and new batteries,
different types of batteries (standard,
alkaline, or rechargeable), or rechargeable
batteries of different capacities.
• If you do not plan to use the remote for
an extended period, remove the battery.
It can leak chemicals that can destroy
electronic parts. WARNING: Dispose of old
batteries promptly and properly. Do not
burn or bury them.
Step 3: Program the ARi3G
IMPORTANT: By default, the MEDIA key
on the ARi3G is set to control an Apple
TV® device. If this is the device you want
to control with the MEDIA key, you don’t
need to program the key. If, however, you
want to use the MEDIA key with a different
device, follow the directions below to
program the ARi03G to control that
device.
Direct Programming
To set up the ARi3G to control your device:
1. Find the code for your brand of device
in the accompanying code list. Codes
are listed by brand name. Make sure
4
that the device you want to control is
switched on (not in standby).
2.Press the device key for the device you
want to control (TV for a television, AUD
for an audio receiver, or MEDIA for a
docking station) to select the device.
3.Press and hold
(mute) and Menu until
the device key (e.g., TV) blinks twice (it
will blink once then twice).
4.Use the transport keys to enter your
5-digit code:
1
4
5
3
2
For example, to enter 12345, press
5.The device key blinks twice.
6.Now, aim the remote at the device you
want to control and press
(power).
If your device switches off, the remote
should be ready to operate your device.
continues on next page...
5
7.Turn your device back on and try all the
remote’s functions to ensure they are
working properly.
If the functions work properly:
Congratulations! You’ve programmed
this key.
If the functions do not work properly:
Repeat steps 1-5 using another code
listed under your brand.
Searching for Your Code
If your device does not respond to the
remote after trying all codes listed for
your brand, or if your brand is not listed,
try searching for your code. Note: Because
it goes through the entire library of codes,
the code search may take a while.
1. Turn on the device you want to control.
2.Press a device key once (e.g., TV) to
select the device.
3.Press and hold
(mute) and Menu until
the device key (e.g., TV) blinks twice (it
will blink once then twice).
4.Press
.
5.Aim the remote at the device and press
the device key (e.g., TV), then press the
(power) key.
6
Did your device turn off?
Yes: Press and hold the Menu key until
the device key (e.g., TV) blinks twice.
This indicates that the code has been
saved.
No: Repeat step 5 again.
6.Try the following keys with your device:
,
,
(mute)
If these keys work your device, you’ve
finished programming this device key. If
they do not work the device, repeat the
code search from step 2.
7.To search for other device codes, repeat
steps 1 to 6.
Checking the Codes
If you have set up the remote using the
procedure in “Searching for Your Code”,
you may need to find out which five-digit
code is operating your equipment.
For example, to find out which code is
assigned to your TV:
1. Press TV once.
2.Press and hold
(mute) and Menu until
the device key (e.g., TV) blinks twice,
then release.
7
3.Press
.
The device key blinks twice.
4.To see the code for the first digit, press
the
key.
Count the number of indicator blinks
(for example, three blinks = 3),
and write down the number in the
appropriate code listing at the top of
this column.
• NOTE: If a code digit is 0, the key
does not blink.
5.Repeat steps 3 and 4 for the four
remaining digits:
(2nd digit),
(3rd digit),
(4th digit),
(5th digit).
6.To check for other device codes, repeat
steps 1–5, substituting the device key you
want to check.
8
Tour of the Remote
The Power key turns your
devices both on and off. The
Active Device Key flashes blue
to show the remote is working.
The MEDIA key allows the
remote to control a docking
station or Apple TV product.
This key is set by default to
control Apple TV or other Apple
remote-controlled products.
The TV and AUD keys select the
home entertainment device
to be controlled. Pressing the
TV key allows the remote to
control the functions of your
television. NOTE: The Volume
keys default to being locked to
the TV while in MEDIA mode.
When in MEDIA operation, the
Menu key controls the same
function as it did on your
original remote.
The Mute key operates the same
function it did on your original
remote.
The Input key operates the
same function it did on your
original remote.
9
The Volume down and up
keys operate just as on
your original remote
control.
Track +, rewind, fast forward,
track –, stop, or play/pause
on the current disc or
media device.
The transport keys also
work as the number keys
on your remote:
1
4
3
2
10
5
ADVANCED
OPERATION
Using Learning
This universal remote control includes
a Learning feature that lets you
add functions unique to your home
entertainment devices.
Before You Start
• Your original remote controls must be
in working order for learning to work
properly.
• For optimum learning, avoid high levels
of ambient light such as natural sunlight
or energy-efficient fluorescent lights.
NOTE: Please have your original remote
controls handy before programming
learning.
Programming a Learned Key
NOTE: If more than 10 seconds pass
between key presses, the remote exits
programming.
1. Place the ARi3G remote head-to-head
(about 2” apart) from your original
remote control. Also locate the key (on
your original remote control) that you
want the ARi3G remote to learn.
11
2.Press and hold
(mute) and Menu until
the device key (e.g., TV) blinks twice (it
will blink once then twice).
3.Press
.
The mode key blinks twice.
4.Press a mode key (e.g., TV) and the
remote key to be used for the learned
function.
5.Hold the teaching remote close to your
ARi3G remote’s IR LED and press the
key to be taught. Continue to press
the teaching key until the ARi3G mode
key blinks twice. The ARi3G will then
illuminate all of its backlighting—this
means the remote has learned the
function.
Note: The remote times out if step 5 is
not completed within 10–15 seconds.
6.Repeat steps 2 through 5 as often as
desired (up to your remote’s memory
limit).
7.Exit learning mode by pressing and
holding Menu until the device key blinks
twice.
Test the learned key on your device. If
your device doesn’t react as expected,
try learning the key again.
12
Deleting a Single Learned Key
This process returns the key to its original
programming for the mode you select. You
can also delete learned programming by
teaching a different function to the key
(see “Programming a Learned Key” ).
NOTE: If more than 10 seconds pass
between key presses, the remote exits
programming.
1. Press and hold
(mute) and Menu until
the device key (e.g., TV) blinks twice (it
will blink once then twice).
2.Press
.
3.Press the mode key that you wish to
remove the learned key from.
4.Press twice on the key containing the
learned function. The remote exits
programming.
Deleting All Learned Keys For a Specific
Mode
NOTE: If more than 10 seconds pass
between key presses, the remote exits
programming.
1. Press and hold
(mute) and Menu until
the device key (e.g., TV) blinks twice (it
will blink once then twice).
13
2.Press
.
3.Press a mode key twice (i.e., TV, AUD,
or MEDIA) to clear all the learned keys
for that mode. The key blinks twice and
exits programming.
Volume Lock
Volume Lock allows you to control the
volume through the device you use to turn
system volume up or down, regardless of
which mode you are using. On the ARi3G
remote, Global Volume Lock is preset to
TV, so you can control TV volume while in
the AUD or MEDIA mode. You can perform
Individual Volume Unlock on a selected
device to set its volume control for
independent operation.
Unlocking Volume Control for a Single
Device (Individual Volume Unlock)
1. Press the mode key for the device whose
volume control you wish to unlock.
2.Press and hold
(mute) and Menu until
the device key (e.g., TV) blinks twice (it
will blink once then twice).
3.Press
4.Press the
14
.
(volume down) key.
5.The light blinks 4 times. Now, after
you select a device that has volume
unlocked (e.g., MEDIA), pressing the
or
(volume up or down) keys, or
(mute), will control only that device’s
volume.
Unlocking All Volume Control (Restoring
Global Unlock)
Performing these instructions will set
independent volume control for all
programmed devices.
1. Press and hold
(mute) and Menu until
the device key (e.g., TV) blinks twice (it
will blink once then twice).
3.Press
4.Press the
.
(volume up) key.
5.The mode key blinks 4 times. Now, when
you press the
or
(volume up or
down) keys, or
(mute), the volume
of the selected device (e.g., TV) is
controlled regardless of mode.
15
Input Lock
The ARi3G’s input lock feature switches
your TV or audio device automatically to
the correct input when you press the Input
key in Media mode. For example, if you have
your media device connected to the HDMI1
input on your TV, the ARi3G tells the TV
to go to the HDMI1 input when you press
the Input key in Media mode. To use this
capability on your ARi3G, your TV or audio
device must have direct input capability. If
your devices’ original remote control has
keys for individual inputs (like ‘Video 1’ or
‘HDMI 1’) you can use this feature.
IMPORTANT: Once you’ve set the input
lock, the Input key no longer toggles
through inputs (unless you reset the remote
following the instructions on page 19).
To go to a specific input:
1. Press the device key for the device you
use to switch inputs (e.g., AUD).
(mute) and Menu until
2.Press and hold
the mode key blinks twice, then release
both keys.
3.Press
.
4.Press Input repeatedly until the device
lands on the correct input signal.
5.When you’re done, press and hold Menu
to store the specific key command to go
directly to this input.
16
Using Master Power On/Off
The ARi3G remote has a unique feature
that allows you to sequentially turn up to 3
of your home entertainment devices on or
off with a single key press.
NOTE: MASTER POWER only works in the
MEDIA mode.
To set the MASTER POWER key:
1. Press the MEDIA key.
2.Press and hold
(mute) and Menu until
the mode key blinks twice, then release
both keys.
3.Press
4.Press
(power).
.
5.For each device you wish to add to the
power sequence, press the mode key
(e.g., TV, AUD, etc.).
6.When you’re finished, press and hold
Menu until the active mode key blinks
once and remains lit (it goes off when
you release Menu).
To clear the MASTER POWER key:
1. Press the MEDIA key.
2.Press and hold
(mute) and Menu until
the mode key blinks twice, then release
both keys.
17
3.Press
4.Press
(power).
.
5.When you’re finished, press and hold
Menu until MEDIA blinks once and
remains lit (it goes off when you release
Menu).
The Tilt Switch
Your ARi3G remote is equipped with a
tilt switch that automatically enables
electroluminescent (EL) backlighting of
your remote whenever you move it. By
default the tilt switch is enabled.
To Disable the Tilt Switch:
1. Press and hold
(mute) and Menu
until the backlighting blinks twice, then
release both keys.
2.Press
.
The backlighting flashes twice.
The tilt switch is now deactivated: the
backlighting turns on only when a key is
pressed.
18
To Enable the Tilt Switch
(mute) and Menu
1. Press and hold
until the backlighting blinks twice, then
release.
2.Press
.
The backlighting flashes four times.
The tilt switch is now activated: the
backlighting will come on when you
move the remote.
Resetting Your Remote
To reset all the functions of the remote
control to the factory defaults (the
original, out-of-the-box settings), follow
these steps:
1. Press and hold the
(mute) and
Menu keys at the same time until the
backlighting flashes twice, then release
both keys.
2.Press
.
The MEDIA key flashes 4 times to
confirm that your remote has been
reset to factory default settings.
19
Pairing
Pairing Apple TV with the ARi3G Remote
1. Choose Settings from the Apple TV
main menu.
2.Choose Pair Remote Control.
When you’ve successfully paired your
Apple Remote, Apple TV displays a
chainlink symbol above a picture of a
remote. Apple TV now works only with the
paired remote. NOTE: The ARi3G remote
has the same pairing code for all remotes.
The ARi3G remote does not support dual
key press pairing.
Unpairing Apple TV and the ARi3G Remote
1. Use the same remote as the Apple TV
was paired with.
2.Choose Settings from the Apple TV
main menu.
3.Choose Unpair Remote.
NOTE: If you’ve lost the paired remote,
refer to the AppleTV troubleshooting
guide. You will need to use the original
remote to unpair.
When you’ve successfully unpaired the
remote, Apple TV displays a broken
chainlink symbol above a picture of a
remote. You can now pair Apple TV with a
new remote.
20
TROUBLESHOOTING
Many problems you may encounter with the remote
can be resolved quickly and easily by following
simple steps. If the following solutions do not
work for you, please call 1-800-276-0509 or visit
araccessories.com
Problem: The active device key does not flash
when a key is pressed on the remote.
Solution: Check and replace the batteries. If the
batteries are installed incorrectly or are expired, the
remote will not operate and the active device key will
not light.
Problem: The remote does not control my device.
Solution: Press the device key on the ARi3G remote to
make sure the remote is in the right mode to control
the device you want to control. The device key should
blink when you press a key in that mode.
Problem: The active device key is blinking upon a
button press, but the device does not respond.
Solution: First, ensure that the remote has a clear
line-of-sight to the device. If the remote still will
not operate the device, the remote may need to be
programmed to do so. Refer to “Step 3: Program the
ARi3G” on page 4 for details.
21
Problem: The remote does not control my Apple
TV.
Solution: Your Apple TV might be paired with a
different remote control. See Pairing on page 20 for
more information.
Problem: The remote does not control the power
and volume on my TV or audio receiver.
Solution: The remote must be programmed to control
devices other than your Apple TV. Refer to “Step 3:
Program the ARi3G” on page 4 for details.
Problem: Volume keys do not control the volume
on my audio receiver or TV when the remote is in
MEDIA mode.
Solution: Make sure the volume lock settings are
correct for your setup. See the Volume Lock section
starting on page 14.
Problem: Backlighting does not come on when I
pick up the remote.
Solution: Try picking up the remote and tilting
it again (the tilt mechanism may have gotten
temporarily stuck). If this doesn’t work, the tilt
mechanism may be turned off. See the section on the
tilt switch on page 18 to turn it back on.
22
12 Month Limited Warranty
Audiovox Electronics Corporation (the “Company”) warrants
to the original retail purchaser of this product that should this
product or any part thereof, under normal use and conditions,
be proven defective in material or workmanship within 12
months from the date of original purchase, such defect(s) will be
repaired or replaced with a new or refurbished product (at the
Company’s option) without charge for parts and repair labor. To
obtain repair or replacement within the terms of this Warranty,
the product along with any accessories included in the original
packaging is to be delivered with proof of warranty coverage
(e.g. dated bill of sale), specification of defect(s), transportation
prepaid, to the Company at the address shown below. Do not
return this product to the Retailer.
This Warranty is not transferable and does not cover product
purchased, serviced or used outside the United States or
Canada. The warranty does not extend to the elimination
of externally generated static or noise, to costs incurred for
the installation, removal or reinstallation of the product. The
warranty does not apply to any product or part thereof which,
in the opinion of the company, has suffered or been damaged
through alteration, improper installation, mishandling, misuse,
neglect, accident or exposure to moisture.
THE EXTENT OF THE COMPANY’S LIABILITY UNDER THIS
WARRANTY IS LIMITED TO THE REPAIR OR REPLACEMENT
PROVIDED ABOVE AND, IN NO EVENT, SHALL THE COMPANY’S
LIABILITY EXCEED THE PURCHASE PRICE PAID BY PURCHASER
FOR THE PRODUCT. This Warranty is in lieu of all other express
warranties or liabilities. ANY IMPLIED WARRANTIES, INCLUDING
ANY IMPLIED WARRANTY OF MERCHANTABILITY OR FITNESS
FOR A PARTICULAR PURPOSE, SHALL BE LIMITED TO DURATION
OF THIS WARRANTY. ANY ACTION FOR BREACH OF ANY
WARRANTY HEREUNDER, INCLUDING ANY IMPLIED WARRANTY,
MUST BE BROUGHT WITHIN A PERIOD OF 24 MONTHS FROM
THE DATE OF ORIGINAL PURCHASE. IN NO CASE SHALL
THE COMPANY BE LIABLE FOR ANY CONSEQUENTIAL
OR INCIDENTAL DAMAGES WHATSOEVER. No person or
representative is authorized to assume for the Company any
liability other than expressed herein in connection with the sale
of this product. Some states/provinces do not allow limitations on
how long an implied warranty lasts or the exclusion or limitation
of incidental or consequential damage so the above limitations or
exclusions may not apply to you. This Warranty gives you specific
legal rights and you may also have other rights which vary from
state/province to state/province.
U.S.A.: Audiovox Electronics Corporation, 150 Marcus Blvd.,
Hauppauge, NY 11788
CANADA: Audiovox Return Center, c/o Genco, 6685 Kennedy
Road, Unit 3, Door 16, Mississauga, Ontario L5T 3A5
23
©2009 Audiovox Accessories Corporation
111 Congressional Blvd., Suite 350
Carmel, IN 46032
Trademark(s) ® Registered
Covered by the following US Patents: 6,097,309;
6,522,262; 6,567,011; 6,330,091; 6,701,091
Apple, AppleTV, and iTunes are registered
trademarks of Apple Inc.
ARRI03G US IB 01