1
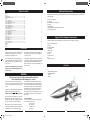
Zenoah G26M Gas-Powered Deep-V Boat
®
™
OWNER'S MANUAL
PRB2686
Overall Length . . . . . . . . . . . . . . . . . . . 611/2 in
Hull Length . . . . . . . . . . . . . . . . . . . . . . . 55 in
Beam . . . . . . . . . . . . . . . . . . . . . . . . . 143/4 in
Weight . . . . . . . . . . . . . . . . . . . . . . . . . 14.5 lb
Speed . . . . . . . . . . . . . . . . . . . . . . . . 39+ mph
Engine. . . . . . . . . . . . . . . . Zenoah G26 Marine
Propeller . . . . . . . . . . . . . . . . . . . . Prather 270
Radio System . . . . . . . . . . . . . . . JR XR3i (FM)
MADE IN CHINA
© 2005 Horizon Hobby, Inc.
www.horizonhobby.com
7672
7672_PRB_shockwave55ss_manual2.indd 16-1
6/23/05 9:28:06 AM
Table of Contents
Introduction ..
Warning ........
Additional Required Items ............................................................................................................�
Suggested Field Equipment and Supplies ....................................................................................�
Contents ......
Section 1: Boat Stand Assembly ..................................................................................................�
Section 2: Removing the Canopy .................................................................................................�
Section 3: Installing the Radio System Batteries .....................................................................�
Section 4: Installing the Wing.......................................................................................................�
Section 5: Installing the Rudders .................................................................................................�
Section 6: Installing the Rudder Stabilizer ....................................................................................�
Section 7: Propeller Balancing .....................................................................................................�
Section 8: Filling the Fuel Tank ....................................................................................................�
Section 9: Range Checking the JR XR3i Radio System.................................................................�
Section 10: Starting the Engine...............................................................................................�
Section 11: Stopping the Engine ..................................................................................................�
Section 12: Handling Adjustments ...............................................................................................�
Section 13: Cooling System .........................................................................................................�
Section 14: Clutch .....................................................................................................................�
Section 15: Troubeshooting Guide ..............................................................................................�
Section 16: Hull Care .................................................................................................................�
Section 17: Maintenance ...........................................................................................................�
Section 18: Flex Shaft Lubrication ......................................................................................�
Section 19: Replacement Parts ..................................................................................................�
Appendix ....
Other Items.
Notes ..........
Additional Required Items
2
2
3
3
3
4
4
4–5
5
6
6
6
7
7
7–8
8
9
9
10
10
11
11
11–12
12
13
14
15
Introduction
Congratulations on the purchase of your Pro Boat™ ShockWave™ 55 Super
Sport Deep-V. You are just minutes from one of the most thrilling
experiences the radio control hobby has to offer.
It is very important that you operate this boat responsibly. With proper
care and maintenance, you will be able to enjoy your ShockWave 55
SS for many years to come.
The Pro Boat ShockWave 55 SS is a professionally built, ready-torun deep-V fiberglass model. Powered by the potent Zenoah G26M
engine, you will be able to race across the water at scale speeds in
excess of 300 mph!
Carefully unpack your ShockWave 55 SS and examine the boat and its
contents. The box should contain the ShockWave 55 SS RTR with radio
installed, a boat stand, and the JR XR3i radio transmitter. If you are
missing any of these items or notice any damage, immediately contact
the place of purchase.
®
Read this owner’s manual thoroughly. You also need to read the
included Zenoah G26 engine manual, along with the JR XR3i
radio system manual.
Although the ShockWave™ 55 SS comes fully assembled and ready for action, you will need a few additional items in order to run your boat. You
will need the following:
Zenoah 2-Cycle Oil (ZEN20001)
CA or epoxy glue
Flex Shaft lubrication (see local hobby store)
Fuel container
Fuel Pump (HAN155)
12 “AA” alkaline batteries (8 for the transmitter and 4 for the receiver)
Gasoline (+87 Octane) ethanol-free
®
Suggested Field Equipment and Supplies
In addition to the items needed to run the ShockWave 55 SS, we recommend that you carry the following in your field box:
Engine Tuning Screwdriver (DYN2775)
Clean towels
Extra Propellers (PRAB270)
2mm hex wrench
2.5mm hex wrench
4mm hex wrench
#1 Phillips
Small crescent wrench
Wax
Screw-locking compound
Contents
®
WARNING
This boat is not a toy! It is a high performance RC model boat.
Do not take risks that could endanger you or others.
Before operating your model, make sure your frequency is clear.
If someone else is operating on the same frequency, both models could
go out of control, possibly causing damage to the models, as well as
to others.
®
Pro Boat ShockWave 55 SS in low wake, low wind conditions. If you
choose to run your ShockWave 55 SS in salt water, thoroughly rinse
the entire boat with fresh water and spray a silicone lubricant over the
metal components to eliminate corrosion. You should also lubricate the
flexshaft at this time (see Section 17 Maintenance for details). If at
any time while operating your ShockWave 55 SS you sense any
abnormal function, end your operation immediately. Do not operate
your ShockWave 55 SS again until you are certain the problem has
been corrected.
Be certain to check all of the hardware, exhaust system, and propeller,
making sure that all are secure before and after each run.
Always stay clear of the propeller when the engine is running!
When you first begin to run your ShockWave 55 SS, place in water
with engine running at approximately 1⁄8 throttle. Slowly increase
throttle until boat accelerates onto plane. Gradually increase throttle to
no more than 1⁄2 until you become more familiar with the boat.
Service Center Information
If you have any questions regarding the Pro Boat ShockWave 55 SS,
please contact the Horizon Service Center:
Horizon Service Center
4105 Fieldstone Rd.
Champaign, IL 61822
1-877-504-0233
When operating this model, stay clear of people, full-sized boats,
stationary objects, and wildlife. Also, watch out for fishing lines that
could get tangled in the propeller. It is preferable to operate the
2
7672_PRB_shockwave55ss_manual2.indd 2-3
• Assembled ShockWave 55 SS RTR
• JR XR3i radio transmitter
• Boat stand
• Rudder (2)
3
6/23/05 9:28:10 AM
Section 1: Boat Stand Assembly
There are 4 plywood boat stand pieces. The 2 short plywood
pieces are the ends of the boat stand.
Section 3: Installing the Radio System Batteries (cont.)
Reinstall the battery holder into the radio compartment.
Secure the radio box cover with the 6 Phillips screws.
Secure the 2 long plywood pieces of the interlocking boat stand to
one end of the short plywood pieces. Repeat with the remaining
short plywood pieces.
Secure the stand together where each piece is joined with epoxy
or CA glue (not included).
Transmitter Batteries
Section 2: Removing the Canopy
Unscrew the 2 knurled hatch-mounting screws from the rear of
the hatch. Slide the front hatch retainer toward the rear of the
boat and lift the hatch from the boat.
Remove the transmitter from the box.
Remove the battery cover on the bottom of the transmitter.
Insert 8 “AA” alkaline batteries into the battery holder.
Note proper polarity.
Turn on the transmitter and confirm that the LCD illuminates,
indicating proper installation of fully charged batteries.
Turn on the receiver switch and move the controls. Confirm that
all controls operate in the proper direction and are controlled by
the proper transmitter input.
Turn the transmitter and the receiver switch off. To keep the boat
from receiving stray signals, the transmitter should be turned on
first, followed by the receiver. Likewise, the receiver should be
turned off first, then the transmitter.
Section 3: Installing the Radio System Batteries
Section 4: Installing the Wing
Receiver Batteries
Install the wing in the direction shown.
Remove the 10 2.5mm hex head screws that secure the clear
Lexan radio box cover.
Install the four 3mm x 20mm hex head screws and secure with
the four 3mm nuts.
Remove the receiver battery holder and install 4 “AA” alkaline
batteries in the battery holder. Note proper polarity.
Apply screw-locking compound to the threads to lock the nuts
in place.
NOTE: The wing is not intended to be a handle.
4
7672_PRB_shockwave55ss_manual2.indd 4-5
5
6/23/05 9:28:13 AM
Section 8: Fueling the Tank
Section 5: Installing the Rudders
Use only Zenoah® 2-Cycle Synthetic Oil and premium gasoline
mixed 32:1 to power the ShockWave™ 55 Super Sport. Fill
the tank completely and secure the fuel cap. Keep fuel in a
moisture-free environment, as stale fuel will cause the Zenoah®
G26M engine to lose performance.
Carefully remove the rubber bands holding the rudder control
arms and the nylon rudder bushings in place.
Slide the rudders into the rudder struts with a bushing above and
below the strut.
Position the rudder control arms at a 90-degree angle to the
rudder as shown and tighten the 3mm x 15mm hex screws,
securing them with 3mm nuts.
Apply screw-locking compound to the threads to lock the nuts
in place.
NOTE: The twin-oversized rudders offer incredible handling
and eliminate the need for skid fins. They also help protect the
propeller from impact with submerged obstacles in the water.
Care must be taken in shallow water to keep the rudders from
becoming damaged.
Section 9: Range Checking the JR XR3i Radio System
Section 6: Installing the Rudder Stabilizer
Turn on the radio system and confirm that the steering trim is
centered.
Position the rudder stabilizer arms as shown with the control arms
pointing away from the transom.
Before the first run of the ShockWave 55 SS, you should check
the radio for proper operation and to ensure proper control
movement of the rudder and throttle. Also ensure that the
antenna on the boat is extended properly and that all batteries
are in working condition.
3. If everything appears to be operating correctly, raise the
antenna and start the engine. Place the boat in the water and run
it (at about 1⁄3 throttle) close to the shoreline. If the radio system is
operating properly, you can begin to run the boat faster and
further away from the shoreline.
1. With the radio system turned on (transmitter and receiver)
and the transmitter antenna down (engine off), walk off
40 to 50 paces from the ShockWave 55 SS.
Tighten the 3mm x 15mm hex screws, securing them with
3mm nuts.
Note: It is a good idea to range check prior to operating
your boat after any repair, installation of new batteries, or
at the beginning of each boating season.
2. Have an assistant remain with the boat to check for proper control
movement of the rudder from your transmitter input.
Apply screw-locking compound to the threads to lock the nuts
in place.
Section 10: Starting the Engine
NOTE: Be sure that the rudders are parallel with one another
and centered.
Section 7: Propeller Balancing
For optimum performance, propeller balancing can add several
mph to top speed and reduce vibration. There are several
different propeller balancing tools available. Read the instructions
that accompany the propeller balancing tool as removing material
from the correct part of the propeller is crucial. Contact a local
hobby retail store for assistance.
Priming the Engine
Press the priming bulb several times until it becomes
filled with fuel. This is not necessary if the engine has
recently been run.
6
7672_PRB_shockwave55ss_manual2.indd 6-7
NOTE: The Zenoah G26M carburetor is factory adjusted to deliver
optimum performance. See the Zenoah Engine manual for fine-tuning
adjustments and other helpful information to make your RC boating
experience trouble-free.
7
6/23/05 9:28:15 AM
Section 12: Handling Adjustments
Section 10: Starting the Engine (cont.)
Choking the Engine
Pull-starting the Engine
Trim Tabs
Close the choke by rotating the small yellow tubing extension.
This is not necessary if the engine is warm.
With an assistant holding the boat to the boat stand and
bracing the engine with one hand, pull the starting cord briskly
several times. Once the engine fires (begins to start), open the
choke. Prolonged choking will flood the engine with fuel. See
Section 15: Troubleshooting Guide to correct the flooding
condition.
Propeller Trim Angle
On smooth water conditions, the trim tabs may be bent up further
or removed to increase top speed performance. Be sure to reinstall
the trim tab mounting bolts to keep water from entering the boat. Be
aware that the boat may become less stable and may “blow over” with
the increased speed.
You may also adjust the propeller strut to add up or down trim to the
propeller by loosening the 2 propeller strut bolts and sliding the
propeller strut up to increase top-end speed (but steering response will
decrease). Lowering the trim angle will increase handling performance
(but may cause the boat to over-steer and decrease speed).
Section 13: Cooling System
Carburetor
Water Pump
NOTE: The engine is water-cooled. Refrain from running the engine without proper cooling water or engine damage will result. Carefully,
place the boat in the water as soon as possible after the engine has been started.
Section 11: Stopping the Engine
Water Pump
The water pump is operated from crankcase pressure. Be sure that
water is exiting the 2 water jackets mounted on the left side of the
boat when the engine is running and the boat is in the water. If water
does not stream out of either the exhaust or cylinder head cooling
ports, immediately stop engine operation and remove obstructions in
the lines or replace broken cooling lines.
Hint: To test each cooling line for obstructions or a leak in the cooling system, place a piece of tubing over the water inlet tube in front
of each rudder and blow into the tube. When testing for obstructions
in the cooling system, be sure to isolate each system by pinching the
appropriate water lines.
Idle the boat near shore and press the kill switch located through
the hole in the hatch as shown.
Water-Cooled
Cylinder Head
Water-Cooled Cylinder Head and Exhaust Manifold
Cooling Jacket
The exhaust system is cooled independently from the cylinder head.
See photo for proper cooling line routing. Do not alter the cooling line
routing method.
Rudder
Pick-Up
Tube
Tuned Pipe Fitting
Tuned Pipe Fitting
Water Pump
Water Outlet
Tuned Pipe
Rudder
Pick-Up
Tube
Water Outlet
Carburetor
Mounting Plate
Water-Cooled
Cylinder Head
Zenoah® G26M Engine
8
7672_PRB_shockwave55ss_manual2.indd 8-9
9
6/23/05 9:28:19 AM
Section 16: Hull Care
Section 14: Clutch
The hull of the ShockWave™ 55 Super Sport is finished using the
highest quality paints and the most advanced painting methods
available. The base coat/clear cote technique delivers an amazing
shine that is as durable as it is beautiful. To keep your ShockWave 55
Super Sport looking new, you should apply a wax coating as used on
automotive finishes to prevent oxidation and to further protect against
damage caused by fuel and other harmful chemicals
The centrifugal clutch automatically engages when the engine rpm is
increased. Be sure that the idle speed adjustment is set low enough so
that the propeller does not rotate at idle.
Periodically disassemble the clutch and clean debris from the clutch
shoes and the inner clutch bell with DYN5505 Dynamite Nitro Force.
®
Section 17: Maintenance
The Pro Boat™ ShockWave 55 SS should provide many hours of
exciting high-speed racing fun with just minor maintenance.
Preventative maintenance is very important. Taking the time to ensure
that all the set screws and bolts are tight before each operation of the
boat will prevent many problems.
Before operating ShockWave 55 SS:
Check that all screws and hardware are securely in place. This is very
important, as the manifold screws will occasionally vibrate loose
during the initial runs.
Check the propeller for damage in the form of chipping or cracking. If
you find any damage, replace the propeller, as the damage will effect
Section 15: Troubleshooting Guide
Problem
Possible Solution
Engine will not start
Improper needle setting: see Zenoah® Engine Manual
Out of fuel: fill fuel tank
Improper fuel: use fresh Gasoline & Zenoah 2-Cycle Oil (mixed 32 parts gas to 1 part oil)
Bad Spark plug: replace
Flooded engine: remove spark plug, invert boat and operate the pull-starter to
remove fuel
Engine starts, then dies
Fuel line blocked or broken: connect or replace fuel line
Reset needles to baseline setting: see Zenoah instructions
Baseline settings for low and hi-speed needle valves is 1–1 1/4 turns out
Engine starts and runs for
several minutes, then dies
Bad fuel: replace
Improper needle settings: see Zenoah Engine Manual
Overheated engine: check for clogged or damaged cooling system
Debris in carburetor: remove, clean and replace
10
7672_PRB_shockwave55ss_manual2.indd 10-11
the performance of the boat and could also cause safety concerns.
When refueling, always wipe away any excess fuel that may have
spilled into or on the boat.
After operating the ShockWave 55 SS:
Wipe off any exhaust residue from the boat. If you operate the
ShockWave 55 SS in salt water, it is suggested that you thoroughly
rinse the deck, hull, and all the metal hardware with fresh water, then
dry them with a clean towel. After cleaning, coat all metal parts with a
silicone spray lubricant. This will help to prevent corrosion.
Ensure that the radio box and equipment inside is dry.
Section 18: Flex Shaft Lubrication
Loosen the 2–1.5mm set screws on the brass ferrule located in
front of the propeller strut and remove the propeller shaft
assembly from the rear. Note that there is a nylon bushing
located on either end of the propeller strut.
Remove the lower propeller strut mounting bolt and loosen the top
bolt. Rotate the propeller strut upwards to access the flex shaft.
11
6/23/05 9:28:22 AM
Appendix
Section 18: Flex Shaft Lubrication (cont.)
Slide the flex shaft out of the boat.
Lubricate the flex shaft with flex shaft grease (see your local
hobby shop). Reinstall in reverse order. Be sure to reinstall the
nylon washers in front and behind the propeller strut.
Photo 1
Photo 4
PRB2661
PRB2657
PRB2660
PRB2666
PRB2659
PRB2665
PRB2679
PRB2662
PRB2658
PRB2655
PRB2664
PRB2693
PRB2663
Photo 2
Photo 4
PRB2669
Section 19: ShockWave 55 SS Replacement Parts
In the event that you need to purchase replacement parts for your engine or the ShockWave™ 55 SS, please see your local hobby store.
You can also purchase them from Horizon Hobby by calling 1-800-338-4639 or shop online @ www.horizonhobby.com
Stock #
PRB2685
PRB2652
PRB2653
PRB2654
PRB2655
PRB2656
PRB2657
PRB2658
PRB2659
PRB2660
PRB2661
PRB2662
PRB2663
PRB2664
PRB2665
PRB2666
Description
Hull Only
Wing
Canopy
Driver
Servo Tray
Boat Stand
Radio Box Cover
Fuel Tank
Kill Switch
Motor Mounting Plates
Manifold Cooling Plate
Manifold
Throttle Cable
Radio Box
Vibration Dampener
Tuned Pipe
PRB2667
PRB2668
PRB2669
PRB2670
PRB2671
PRB2672
PRB2673
PRB2281
PRB2675
PRB2676
PRB2677
PRB2678
PRB2679
PRB2680
PRB2681
PRB2682
Exhaust Port
Canopy Mounting Nut
Pushrod Bellow
Rudder Pushrods
Rx Switch Mount
Flex Shaft
Teflon Liner
Drive Dog
Rudder Strut with Bracket
Rudder Control Arm
Rudder
Windshield
Cooling Tubing
Ball Linkage Set
Trim Tabs
Decal
PRB2683
PRB2651
PRB2684
PRB2686
PRB2687
PRB2688
PRB2689
PRB2690
PRB2691
PRB2692
PRB2693
PRB2694
PRB2674
PRAB270
PRB2008
PRB2068
Water Outlet
Water Outlet
PRB2670
PRB2651
PRB2676
PRB2681
PRB2667
PRB2689
PRB2673
PRB2675
PRB2672
PRB2281
Clutch
Water Pump with Bracket
Instruction Manual
Clutch Shoes
Clutch Springs
Clutch Bearing
Prop Strut with Bracket
Prop Shaft Nylon Bushing
Exhaust Spring
Throttle Cable Mount
Fuel Tank Straps
Stuffing Box
Propeller Nut
Propeller; 2.74x4.2 Bronze
Prop Shaft
Water Outlet
PRB2674
PRB2677
Water Inlet
Water Inlet
Engine Pressure Line
Photo 3
Photo 6
PRB2685
PRB2686
PRB2682
PRB2687
PRB2656
PRB2683
PRB2688
PRB2668
PRB2678
PRB2652
12
7672_PRB_shockwave55ss_manual2.indd 12-13
PRB2653
PRB2654
13
6/23/05 9:28:26 AM
Look for these other fine Pro Boat models at your local hobby dealer.
™
• Prather propeller
• Stainless steel and aluminum running hardware
• JR® Python radio system
• Water-cooled Dynamite® .32 Marine
engine w/ pull-start
• Pre-painted fiberglass hull
• Speeds of up to 35 mph
PRB2050 ShockWave 36 Deep-V RTR
™
• Attractive display stand and decal sheet included
• 2-stick FM radio system with proportional throttle and steering
• Authentic barrel-back design
• Highly detailed hull, dashboard, interior and more
• Real Wood trim layered on a fiberglass hull
• No assembly required
• 29-inch electric-powered boat
PRB2600 Classic Runabout EP RTR
Notes
• Sleek, stylish fiberglass airboat design
• Easy engine access for starting and tuning
• Evolution .46 engine is air-cooled, easy-to-start and
packs plenty of power
• Pro Boat™ 2-channel AM radio included
• Protective shroud offers added safety without
affecting performance
PRB2700 Vortex .46 RTR Nitro Airboat
™
• Preinstalled JR® Beat Gear
2-stick 2-channel system
with sail winch
• Handcrafted fiberglass
composite hull
• Detachable 2-piece mast
of anodized aluminum
• Assembles in under
2 hours
• Length: 36 inches
PRB2400 Sanibel 36-600 RTR Sailboat
™
• Bright yellow color scheme
• Reliable and easy-to-start Dynamite .15 engine
• Fiberglass hull
• Includes a JR Python radio
• Ready to run, right from the box
PRB2500 Miss Llumar 1/12 Hydro RTR
• JR Radio System
• Waterproof ESC
• 550-size motor
PRB2150 ShockWave 26 EP RTR
14
7672_PRB_shockwave55ss_manual2.indd 14-15
6/23/05 9:28:36 AM