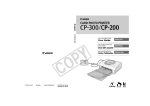
1
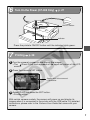
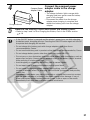
English Contents How to Use the Manuals ............................................................. 2 Symbols Used....................................................................... 2 Package Contents ....................................................................... 3 Quick Start ................................................................................... 4 Introduction ................................................................................. 8 What Can Be Accomplished with this Printer .......................... 9 Read This First .......................................................................... 10 Safety Precautions.............................................................. 10 Proper Usage and Handling ............................................... 14 Components Guide............................................................. 18 Let’s Print................................................................................... 20 Preparing Your Ink Cassette/Paper Sets and Paper Cassette ......................................................................... 20 Loading the Ink Cassette .................................................... 22 Placing the Paper into the Paper Cassette......................... 23 Loading the Paper Cassette ............................................... 25 Connecting a Power Source and the Camera to the Printer ... 26 Printing................................................................................ 28 Battery Usage ............................................................................ 29 Using the Battery Pack (CP-300 Only) ............................... 29 Using the Car Battery Adapter (CP-300/CP-200) ............... 33 Troubleshooting ........................................................................ 34 Error Messages ......................................................................... 36 Specifications ............................................................................ 38 Connecting the Printer to a Computer and Printing .............. 40 Safety Precautions.............................................................. 40 Read Carefully Before Using! ............................................. 41 System Requirements ........................................................ 43 Printing Operations Overview ............................................. 45 Viewing the Printer Driver User Guide (Windows/Macintosh) ...... 46 Viewing the ZoomBrowser EX Software User Guide (Windows)/ImageBrowser Software User Guide (Macintosh) PDF Manuals .............................................. 47 1 How to Use the Manuals Please refer to the following manuals according to your purposes. Printer User Guide (This Guide) • Printer, paper and ink cassettes handling instructions • Camera and printer connection instructions • Printer and computer connection overview Printer Driver User Guide (Bundled on the CP Printer Solution Disk) • Printer driver installation instructions • Printer and computer connection instructions and printing instructions Camera User Guide (Included with the Camera) • Shooting, replaying and erasing images from the camera • Camera and printer connection instructions and printing instructions • Camera and computer connection instructions ZoomBrowser EX Software User Guide (Windows) ImageBrowser Software User Guide (Macintosh) • Instructions on how to use ZoomBrowser EX and ImageBrowser These PDF format manuals are available on the Canon website. Please download them from the following URL: http://www.canon.co.jp/Imaging/information-e.html : Included with the Printer Symbols Used : This mark denotes issues that may affect the printer’s operation. : This mark denotes additional topics that complement the basic operating procedures. 2 Package Contents Card Photo Printer Paper Cassette (Postcard size) Standard Paper (Postcard size, 5 sheets) Battery Pack NB-CP1L*1 *2 Ink Cassette (Postcard size, for 5 sheets) Battery Pack Terminal Cover*1*2 Compact Power Adapter CA-CP100 Paper Cassette (Card size)*1 CP Printer Solution Disk AC Cable Cleaner Stick • User Guide (this booklet) • Warranty Card*2 • Canon Customer Support Leaflet*2 *1 Included with the CP-300 only. *2 Not included in some regions. The following products are sold separately. Paper Cassette PCL-CP100 Paper Cassette PCC-CP100 Color Ink/Paper Set KP-36IP Color Ink/Paper Set KL-36IP Color Ink/Paper Set KC-36IP Color Ink/Full-sized Label Set KC-18IF Color Ink/Label Set KC-18IL Battery Pack NB-CP1L Battery/Charge Adapter Kit BCA-CP100 Car Battery Adapter CBA-CP100 L size* Card size Postcard size, 36 standard sheets L size, 36 standard sheets* Card size, 36 standard sheets Card size, full-size, 18 Label sheets Card size, Multiple (8-screen), 18 Label sheets Spare battery pack. Cannot be used with the CP-200. Set including the Battery Pack NB-CP1L and a battery charger. Cannot be used with the CP-200. Powers the printer from a car’s battery. * Not sold in some regions. 3 Quick Start Let’s start by printing on postcard size paper. This section explains the procedures required to print with the paper and the ink cassette (trial kit) included with your printer. Some steps may vary according to the printer model so be sure to check which printer model you are using (CP-300 or CP-200). If you have trouble understanding certain procedures, please refer to the relevant reference pages for detailed instructions. * General camera descriptions in this guide refer to digital cameras or digital camcorders compatible with the card photo printer (CP-300/CP-200). However, in detailed instructions, “camera” refers to “digital cameras”, and “compact power adapter” refers to “power source” throughout this guide. Things to Prepare Printer (CP-300 or CP-200) Standard Paper (Postcard size, 5 sheets) Ink Cassette (Postcard size, for 5 sheets) Paper Cassette (Postcard size) Compact Power Adapter CA-CP100 AC Cable Canon camera Memory card containing the images you wish to print Camera User Guide USB Cable included with your camera kit : Included with the Printer 1 1 4 Loading the Ink Cassette in the Printer Open the ink cassette compartment cover. 2 p. 22 Load the ink cassette and close the ink cassette compartment cover. 2 Placing the Paper into the Paper Cassette p. 23 Paper (Glossy side up) Top Cover Middle Cover Middle Cover (Address/stamp side next to the middle cover) 1 Open the paper cassette’s top and middle covers. 3 3 2 Place the paper (postcard size, 5 sheets), glossy side up and the address/stamp side next to the middle cover, in the paper cassette. Place the middle cover back to its original position, and leave the top cover open. Loading the Paper Cassette into the Printer 1 Open the paper cassette compartment cover. 2 p. 25 Push the paper cassette all the way into the paper cassette compartment, with its top cover open and its middle cover closed. Continued on the next page. 5 Quick Start (Continued) 4 Connecting the Printer to a Power Source 1 mark facing up 2 DC IN Terminal p. 26 Insert the AC cable into the compact power adapter and plug the other end into a power outlet. Connect the compact power adapter to the printer’s DC IN terminal. To Power Source • At this point, the CP-200’s power will turn on and the printer’s indicator will light green. 5 1 Connecting the Camera to the Printer p. 26 Connect the USB cable (included with the camera) to the camera’s DIGITAL terminal. DIGITAL Terminal Direct Print Connector 2 Connect the other end of the USB cable to the printer’s direct print connector. • If you are using the CP-200, go to step 7. 6 Connect the USB cable with its mark facing down 6 Turn On the Power (CP-300 Only) p. 27 ON/OFF Button Indicator Press the printer’s ON/OFF button until the indicator lights green. 7 Printing p. 28 1 Turn the camera’s power on and display the images. • The (Direct Print) mark appears on the upper left corner of the LCD monitor. 2 Press the camera’s SET button. Screen shot of the camera’s LCD monitor 3 Select [Print] and press the SET button. • Printing starts. With certain camera models, the camera will power up and display its images when it is connected to the printer with the USB cable. For detailed instructions, please refer to the Camera User Guide that came with your camera. 7 Introduction Thank you for your purchase of the Canon Card Photo Printer CP-300/CP200. This User Guide explains the printer’s general flow of operations, from camera print settings to printing and computer connection operations to printing. For information about how to make prints, refer to the Camera User Guide that came with your camera and to the Printer Driver User Guide (bundled on the CP Printer Solution Disk). Before using your printer for the first time, please read through the safety precautions. p. 10 Warning Against Copyright Infringement Please respect all copyrights. Use of images produced by this printer for purposes other than personal entertainment may be prohibited by law. Warranty Limitations This printer’s warranty is only effective in the country of sale. If a problem arises while the printer is in use abroad, please convey it back to the country of sale before proceeding with a warranty claim to a Canon Customer Support Help Desk. For Canon Customer Support contacts, please see the Canon Limited Warranty supplied with your printer. Disclaimer • While every effort has been made to ensure that the information contained in this User Guide is accurate and complete, no liability can be accepted for any errors or omissions. Canon reserves the right to change the specifications for the hardware and software described herein at any time without prior notice. • No part of this User Guide may be reproduced, transmitted, transcribed, stored in a retrieval system, or translated into any language in any form, by any means, without the prior written permission of Canon. • Canon makes no warranties for damages resulting from corrupted or lost data due to a mistaken operation or malfunction of the product, the CompactFlashTM cards (CF card) or use of non-Canon CF cards. Trademark Acknowledgements • Canon is a trademark of Canon, Inc. • Any other company and product names used herein may be trademarks of their respective companies. 8 What Can Be Accomplished with this Printer Connects directly to supporting Canon cameras Allows easy printing from any Canon camera that supports direct printing with the card photo printer (CP-300/CP-200). Just connect the interface cable and you’re ready to go. Connects directly to computers Simply connect the printer to a computer with one commercially available USB cable to perform the following operations. • Print images shot with the camera • Print part of an image (trimming) • Print images with captions and artistic layout (Windows only) • Make your own custom business cards Three paper sizes and two types of labels You can print on standard paper in postcard size, L size or credit-card size. In addition to the standard size paper, you can print full-sized labels or 8-label stickers with the credit-card size paper. High-quality prints, fast paper feeding Offers photo-quality prints. Produces up to 18 prints without reloading. Fast printing Postcard size images can be printed at the high speed of approximately 85 seconds per sheet. Coated prints Applies a protective coating to each print. Borderless prints Can produce borderless images that fill the paper completely. Supports DPOF (Digital Print Order Format) Supports DPOF settings for print selection, number of copies, and shooting date. Easy outdoor printing You can easily print outdoors by attaching the battery pack (CP-300 only). You can also print images using the power of the cigarette lighter socket of a car with the separately sold Car Battery Adapter. • If does not display on the camera’s LCD monitor when you connect your camera to this printer, your camera’s firmware may be incompatible with this printer. Please check the Canon BeBit website (http://www.canon.co.jp/Imaging/ BeBit-e.html) or your regional Canon website, for information or to download compatible firmware. 9 Read This First Safety Precautions • Before using the devices, please ensure that you have read and understood the safety precautions described below. Always ensure that the devices are operated correctly. • The safety precautions noted on the following pages are intended to instruct you in the safe and correct operation of the devices to prevent injuries or damage to yourself and other persons. • “Devices” refers to the “printer, compact power adapter, battery pack (included with the CP300 in some regions or sold separately) or charge adapter (sold separately)” throughout this guide. WARNINGS Devices If the devices emit smoke or a burning odor, or show other signs of significant malfunction, immediately unplug the AC cable from the power outlet. Continued operation under these conditions poses risk of fire or electric shock. Be sure that smoke or burning odor subsides, and then contact your dealer or the nearest Canon Customer Support help desk. If the devices are dropped or the devices casing becomes damaged, unplug the AC cable from the power outlet. Continued operation poses risk of fire or electric shock. Contact your dealer or the nearest canon Customer Support help desk. Never rest small metallic objects or liquid containers on top of the devices. If liquid splashes onto the devices, wipe the devices dry using a soft absorbent cloth. If liquid spills into the devices or an object falls into the devices, immediately unplug the AC cable from the power outlet. Continued operation poses risk of fire or electric shock. Contact your dealer or the nearest Canon Customer Support help desk. Do not use flammable solvents such as alcohol, benzene, or paint thinner to clean the devices. Use of such solvents poses a fire risk. Do not drop or insert metallic or combustible objects into the devices. Entry of foreign objects into the devices may result in fire, electric shock, or equipment failure. Store the devices out of the reach of children. Do not disassemble or modify the devices. The devices contain high-voltage components, and there is risk of electric shock. If your devices need internal adjustments or repair, contact your dealer or a Canon Customer Support help desk. Do not touch metal parts of the devices or the power plug during thunderstorms. Lightning strikes may produce lethal voltages within the devices. Keep clear of the devices while thunderstorms are in progress. 10 Power Do not exceed the cable and power outlet ratings when operating this product. Do not operate this product outside of the specified voltage rating. Connecting too many lines to the same outlet may result in fire. Check that the voltage of the outlet is compatible with the devices before plugging them in. If the AC cable becomes damaged (if internal wiring is exposed, etc.), immediately unplug the cable from the power outlet. Continued use poses risk of fire or electric shock. Do not plug in or unplug the AC cable while your hands are wet, as this may result in electric shock. When unplugging the cable, hold it firmly at the plug area. Do not pull directly on the cable, as this may damage or expose the cable’s internal wiring, resulting in risk of fire or electric shock. Be sure that the AC cable is plugged all the way in. A loose connection may result in heat buildup, fire, or electric shock. Do not damage, modify, or rest heavy objects on the AC cable. Damage to the cable may result in the exposure of live wires, fire, or electric shock. Keep the AC cable free of dust. The presence of dust or metallic debris on the plug poses risk of fire or electric shock. If the plug area is not clean, unplug the AC cable and then wipe the plug area clean using a dry cloth. Check the plug periodically to make sure it is clean. Usage Location Do not place the devices on an unstable or tilted table or desk, as there is risk that the devices may fall and cause injury. 11 CAUTIONS Devices Do not block the air vents on the printer. Blocking the vents may cause the inside of the printer to overheat, resulting in damage to internal components and risk of equipment failure or fire. Use the devices in a well-ventilated area. Do not rest heavy objects on the devices. Objects may fall off the devices and cause injury. Weight placed on the devices may deform the casing, resulting in damage to internal parts and posing risk of fire. Unplug the devices when you are not using them. If the devices remain plugged in, there is risk that accidental contact with the device’s internal parts may cause electric shock. Leaving the devices plugged in during prolonged periods of non-use poses risk of fire. Do not remove the paper cassette from the printer while printing is in progress. Paper moves back and forth in the cassette four times during printing. Placing your hand in the way of moving paper may result in injury. Wait for printing to finish completely before removing the cassette. Never place your hand into the paper cassette slot. Do not reach into internal parts of the devices except as specified in the operating instructions. Reaching into inappropriate parts of the devices may cause your hand to become caught or injured. Power Do not move the devices while they are plugged in. Doing so may damage the AC cable. Continued use of a damaged AC cable poses risk of fire or electric shock. Do not excessively bend or twist the AC cable. Doing so may damage the cable. Continued use of a damaged cable poses risk of fire or equipment failure. Leave about 10 cm (4 in.) of clearance around the devices to ensure adequate ventilation. Do not pull on the AC cable. Doing so may damage the cable. Continued use of a damaged cable poses risk of fire or electric shock. Always hold the cable by the plug area when unplugging it. 12 Usage Location Do not use the devices in locations that are smoky, humid, dusty, or subject to strong vibration. Entry of water or dust into the devices, or internal damage caused by strong vibration, may pose risk of fire or electric shock. Have the devices checked approximately once a year (contact your dealer), preferably before the onset of your area’s humid season. Do not leave the devices exposed to high temperatures. Do not leave in direct sunlight, or close to heating equipment, or in a car with windows closed on a hot day. High temperatures may cause deformation of the devices and pose risk of fire. Do not use the devices near an open flame. Sheets ejected from the printer (onto the top of the paper cassette) may fall into the flame, resulting in fire. Do not use the devices close to TV sets or AM radios. Devices’ operation may adversely affect TV and radio reception. 13 Proper Usage and Handling Usage Location Do not use near strong magnets or near devices that produce strong electromagnetic fields. Electromagnetic radiation from devices such as TVs and game machines, and strong magnetic fields from devices such as speakers and large motors, may cause distortion in printed images. Use in a well-ventilated, level area. Leave about 10 cm (4 in.) of clearance around the printer. Be sure to leave clearance around the paper-handling slot (at the rear) so that paper has sufficient room to jut out from the slot during printing. Handling Precautions Please avoid turning the printer’s power on and off needlessly as the printer initialization consumes ink: There may not be enough ink left for the allotted sheets in the set. When the printer is not in use, please remove the battery pack (CP-300 only). Unplug the printer when you are not using it. But please note that you should plug in and run the printer at least once every six months to ensure that it remains functional. Before transporting the printer, remove the paper and ink cassettes and close the paper cassette cover and the ink cassette cover. If dirt or foreign objects enter the printer, print quality may deteriorate. Pack the printer into an appropriate case for transport. If a case is not available, wrap it with cloth or other protective material to protect against scratches. Never use volatile compounds or insecticides on the printer, and do not allow rubber or vinyl material to remain in prolonged contact with the printer. These materials may cause deformation of the printer’s casing. Overheating If the printer overheats, it will temporarily stop operating. This does not mean that the printer has malfunctioned. The printer will resume normal printing as soon as it cools down. Temporary stoppages are most likely to occur in the following cases: • When printing continuously. • If the room is unusually warm. • If the air vents are blocked or if ventilation is inadequate. To Prevent Damage from Condensation Condensation may form in the printer if you suddenly move it from a cold location to a warm location. To prevent damage that might be caused by condensation, place the printer in a sealed vinyl bag prior to moving it, and allow it to reach room temperature before using it. Stop using the printer immediately if you detect condensation. Continued use may damage the equipment. Wait until the moisture evaporates completely before resuming use. 14 Cleaning the Printer Never use benzene, paint thinner, or other volatile solvents to clean the printer. Volatile solvents may cause deformation or peeling of the printer’s casing. To clean the printer, wipe it with a soft dry cloth. If stronger cleaning is required, wipe first with a cloth moistened with a dilute neutral solvent, then wipe again with a soft dry cloth. If you use a chemical cleaning cloth, read the instructions that come with it and observe all indicated precautions. Keep the air vents clean and free of dust. Clean the vents as necessary. Dust that enters the printer through the vents may land on the ink sheet, resulting in poor print quality and possibly leading to printer breakdown. If the ink sheet becomes dusty, remove the ink cassette and replace it with a new one. Proper Handling of Ink Cassettes Please use only the ink cassettes specified for use by Canon. Do not open the ink cassette cover while printing is in progress, and do not pull the ink cassette out. These actions may damage the printer. Do not touch or pull on the ink sheet. Do not handle the ink cassettes with wet or sweaty hands. Allow ink cassettes to reach room temperature before installing and using them. Condensation may form if you suddenly move ink cassettes from a cold location to a warm location. If there is risk of condensation, leave the cassette in its packaging until it reaches room temperature, and wipe away any moisture before loading it. If you are not planning to use the printer for a while, remove and store the ink cassette. Proper Handling of Paper Cassettes Do not apply excessive force to the paper cassette. Force or impact on the cassette may result in paper jams or equipment damage. Do not bend or deform the spring located at the rear of the middle cover of the paper cassette. Spring Do not place any foreign objects in the print output receptacle (on the top of the paper cassette). This area is for paper only. If you are not planning to use the printer for a while, remove the paper cassette, close the paper cassette’s top cover and store the paper cassette. Also remove the paper from the paper cassette and store it horizontally. 15 Proper Handling of Paper Please use only the paper types specified for use by Canon. Paper must be printed on the glossy side (the side without any printed markings). Always load paper into the cassette with the glossy side up. Loading the paper the wrong way may result in poor print quality, and in some cases may cause damage to the printer. Do not tear or bend the paper’s perforated edges before printing. Tearing the paper’s perforated edges will cause the ink sheet to wind up automatically and waste one print’s worth of ink. If this happens, there will not be enough ink left to print all the paper sheets included in the kit. Do not use label sheets on which labels are partially peeled off. Do not touch the print side of the paper with your fingers. Always hold the paper along the edges (outside the perforated border). Be sure that hands are dry before touching the paper, and do not scratch on the paper surface with a hard object. Keep the paper surface away from dust, water droplets, etc. Do not write on the paper before printing. Writing on paper before printing on it may result in malfunction. Do not touch paper while it is being printed. During printing, the sheet repeatedly moves back and forth along the top of the paper cassette and in and out through the paper-handling slot. Please do not touch the sheet during this process. Do not allow too many prints to accumulate in the print output receptacle. Do not allow more than 9 sheets to accumulate in the print output receptacle. You may write on the back of the paper with an oil-based pen, but to avoid smudging please allow ink time to dry before touching it. Allow the paper to reach room temperature before installing and using it. Condensation may form if you suddenly move the paper from a cold location to a warm location. If there is risk of condensation, leave the paper in its packaging until it reaches room temperature, and wipe away any moisture before loading it. Please avoid the following actions as they may result in color change, color fading or color bleeding. • Sticking any type of adhesive tape onto the print surface. • Allowing print surfaces to come into contact with vinyl materials. • Applying alcohol or other volatile solvents to the print surface. • Leaving print surfaces tightly pressed against any other surfaces or objects for prolonged periods. 16 Paper Storage If you wish to mount prints into an album, select an album with nylon-based sleeves, or with propylene or cellophane sleeves. Other types of sleeves may cause color loss or color bleeding. Color change may occur over time in accordance with conditions of storage. Canon assumes no liability for color changes. To avoid print quality deterioration, do not store your prints in the following types of locations. • Locations that reach temperatures above 40oC (104oF) • Humid or dusty locations • Locations exposed to direct sunlight. Remove unused paper from the paper cassette, return it to its original package, and store the package horizontally. Others When opening a color ink/paper set (full-sized label set, label set), check the contents. If something seems to be missing or appears to be damaged, contact the dealer for assistance. The battery pack can be charged while installed on the printer (CP-300 only), using the printer. • Charge the battery pack using the compact power adapter supplied with the printer. • The battery pack can also be charged using the separately sold the Battery/Charge Adapter Kit. When using the battery pack (Included with the CP-300 in some regions or sold separately), if the battery status is low, the finished print may not be ejected into the print output receptacle completely. If this happens, please pull out the paper. 17 Components Guide Card Photo Printer CP-300 <Front View> Indicator Indicates the printer’s status. Orange: Charging the battery pack Green: Ready to print Blinking green: Printing in progress Blinking orange: Battery depleted Red/Blinking red: Error ON/OFF Button Turns the printer’s power ON and OFF. Ink Cassette Slot The ink cassette loads into this compartment. Paper Cassette Slot The paper cassette loads into this compartment. Ink Cassette Compartment Cover Paper Cassette Compartment Cover <Back View> Battery Cover Lever DC IN Terminal Connects to the Compact Power Adapter. USB Cable Connector Connects commercially available USB cables to a computer. Battery Cover Paper-handling Slot 18 Paper extends out from this slot while printing is in progress. Direct Print Connector Connects the USB cable (included with the camera) to the camera. Card Photo Printer CP-200 <Front View> Indicator Indicates the printer’s status. Green: Ready to print Blinking green: Printing in progress Red/Blinking red: Error Ink Cassette Slot The ink cassette loads into this compartment. Paper Cassette Slot The paper cassette loads into this compartment. Ink Cassette Compartment Cover Paper Cassette Compartment Cover <Back View> DC IN Terminal Connects to the Compact Power Adapter. USB Cable Connector Connects commercially available USB cables to a computer. Direct Print Connector Paper-handling Slot Paper extends out from this slot while printing is in progress. Connects the USB cable (included with the camera) to the camera. 19 Let’s Print Preparing Your Ink Cassette/Paper Sets and Paper Cassette Since there are several kinds of sets (including the separately sold sets), please make sure you are using the right ink cassette, paper and paper cassette. If the set is not correct, your will not be able to print. Please check the sets and the names of their components in the table below. Look here for the paper cassette name Look here for the ink cassette name Checking Your Ink/Paper Sets Printing on Postcard Size Paper (100 × 148 mm (4 × 6 in.)) Paper Number of Sheets Paper Cassette Name Ink Cassette Name The design of the seal on your ink cassette may slightly differ from the examples below. 5 36 • Included in package Printing on L Size Paper (89 × 119 mm (3.5 × 4.7 in.)) Paper Number of Sheets Paper Cassette Name Ink Cassette Name The design of the seal on your ink cassette may slightly differ from the example below. 36 • The paper cassette PCL-CP100 (sold separately) is required to print on L size paper. 20 Printing on Credit Card Size Paper (54 × 86 mm (2.1 × 3.4 in.)) Paper Number of Sheets Paper Cassette Name Ink Cassette Name The design of the seal on your ink cassette may slightly differ from the examples below. 36 Standard Paper 18 Full-sized Label 18 8-sticker Label • The credit card size paper cassette is included with the CP-300. • The paper cassette PCC-CP100 (sold separately) is required when printing on credit card size paper with the CP-200. Separately Sold Ink and Paper Products You can use the following color ink/paper sets (sold separately) with the Canon Card Photo Printer CP-300/CP-200. Paper Size Contents Product Name Postcard size Standard paper (36 sheets) Dedicated ink cassette Color Ink/Paper Set KP-36IP L size Standard paper (36 sheets) Dedicated ink cassette Color Ink/Paper Set KL-36IP Credit card size Standard paper (36 sheets) Dedicated ink cassette Color Ink/Paper Set KC-36IP Full-sized label (18 sheets) Dedicated ink cassette Color Ink/Full-Sized Label Set KC-18IF 8-sticker label (18 sheets) Dedicated ink cassette Color Ink/Label Set KC-18IL • One ink cassette can print to all of the paper included in the ink/paper set. 21 Loading the Ink Cassette 1 Open the ink cassette compartment cover. 2 Remove any slack from the ink sheet. Ink Sheet 3 Round Part Clip • Push in on the round part in the middle of the cassette, and turn it in the indicated direction to take up the slack until the ink sheet straightens out (It will not be possible to print to all of the paper if you overwind the ink sheet). Hold the cassette so that the embossed arrow is at the top, and insert it all the way into the compartment (in the direction of the arrow). • Be careful to avoid touching or pulling on the ink sheet when inserting the cassette. • Push the cassette all the way in, so that it clicks into place. • When you are ready to remove the ink cassette, lift the clip and pull the cassette out. 4 Close the ink cassette compartment cover. • You can check the name of the ink cassette in the printer through the window on the top of the printer. Window • Do not reuse empty ink cassettes. Attempting to reuse an empty ink cassette may result in malfunction or damage to the printer. • Please also refer to the Proper Handling of Ink Cassettes section of Proper Usage and Handling. p. 15 22 Placing the Paper into the Paper Cassette 1 Open the paper cassette’s top cover and middle cover. Top Cover • Open the top cover, then push the middle cover in the direction of the arrow and lift it up. Middle Cover 2 Paper (Glossy side up) Fan the paper stack properly and place the paper into the paper cassette, with the printable side (glossy side) facing up. • Insert the postcard size paper with the glossy side up and the address/stamp side next to the middle cover as shown in the figure. • Insert the credit-card size paper as shown in the figure below. (Address/stamp side next to the middle cover) Credit-Card Size (Standard Paper/Fullsized Label) 3 Credit-Card Size (8-label Sticker) Place the middle cover back to its original position. • After pulling the middle cover down, slide it in the direction of the arrows until it clicks back into place. • Do not close the top cover. 23 • Please use specified paper types only. • Do not insert more than 18 sheets in the paper cassette. • Never print on a sheet of paper more than once, even if the first printing has left the paper completely blank. The coating applied to the paper as it passes through the printer makes it unsuitable for further use. Reused paper may stick to the ink sheet, resulting in damage to the printer. • Please also refer to the Proper Handling of Paper Cassettes and the Proper Handling of Paper sections of Proper Usage and Handling. p. 15, p. 16 24 Loading the Paper Cassette 1 Open the paper cassette compartment cover. 2 Push the paper cassette all the way into the paper cassette slot. • Be sure the paper is set correctly before pushing the cassette in. • Insert the paper cassette evenly so that it slides over the bottom of the slot entrance. Middle Cover closed Top Cover open • Do not remove the paper cassette while feeding, printing, or ejection is in progress. • The printer outputs the finished prints into the receptacle onto the top of the printer cassette (top of the middle cover or inside of the top cover). Be sure to close the middle cover and open the top cover so that output can proceed normally. Print Receptacle 25 Connecting a Power Source and the Camera to the Printer Connect the camera to the printer using the cable (included with the camera) and turn the printer’s power on. For more detailed camera connection instructions, refer to your Camera User Guide. Canon camera compatible with CP-300/CP-200 To DIGITAL Terminal 5 7 1 4 10 cm (4 in.) or more of open space To DC IN Terminal USB cable included with the camera 6 To Power Outlet Camera’s Compact Power Adapter (sold separately or included with the camera) * Please use the camera’s compact power adapter or a fully charged battery pack (or charged batteries). 2 Compact Power Adapter 3 To Power Outlet The numbered steps in the following instructions refer to the numbers in the above illustration. 1 2 26 Place the printer on a flat area. • Be sure to leave about 10 cm (4 in.) of clearance around the paper-handling slot (at the rear) so that paper has sufficient room to jut out from the slot during printing. Connect the supplied AC cable to the supplied Compact Power Adapter CA-CP100. 3 4 5 6 7 Insert the plug in a power outlet. Connect the Compact Power Adapter cable to the printer. • Insert the cable with its mark facing up. • With the CP-200, the power turns on at this point and the indicator lights green. Connect the USB cable to the camera. • Use the USB cable that came with your camera. Connect the USB cable to the printer. • Insert the cable in the left connector, with the down. mark on the cable facing Press the ON/OFF button until the indicator goes on. (CP300 only) • The indicator lights green once the printer powers up. Turning the Printer’s Power Off CP-300 Press the ON/OFF button until the indicator goes off. CP-200 Unplug the cable of the compact power adapter from the printer. (The indicator will go off) • We recommend that you connect the camera’s compact power adapter (sold separately or included with the camera) when using the camera with your printer. If you wish to run the camera on battery power, be sure that batteries are fresh (fully charged). • When connecting the cable, be sure that the connectors on the cable match up correctly with the connectors on the camera and printer. • Use an easily accessible power outlet for the printer’s AC cable, so that you can unplug the printer cable quickly in the event of a problem. • Please also refer to the Usage Location section of Proper Usage and Handling for information about printer usage location. p. 14 • Some camera models do not come with a compact power adapter. For details, please see the System Map that came with your camera. 27 Printing This section explains the flow of printing operations. For more details, refer to your Camera User Guide. 1 Turn the camera’s power on and display the images. 2 3 Display the images to be printed and press the SET button. • Check that the (Direct Print) mark is displayed in the upper left corner of the LCD monitor. • Some camera models automatically power up when the cable is connected to the printer. The (Direct Print) mark then displays on the LCD monitor. Select [Print] and press the SET button. • Printing starts. The camera returns to the replay screen once printing is successfully completed. If does not display in step 1, check the following: • Is the cable correctly connected? • Is the printer’s power on? p. 26 p. 26 • Is your camera’s firmware compatible with this printer? p. 34 If printing does not start, check the following: • Does the camera’s LCD monitor display a message? 28 p. 36 Battery Usage Using the Battery Pack (CP-300 Only) With the CP-300, you can use the rechargeable battery pack (Battery Pack NBCP1L) to print. The battery pack can either be charged in the printer or with the separately sold battery charger (included with the Battery/Charge Adapter Kit BCA-CP100). Charging the Battery Pack in the Printer Attach the battery pack NB-CP1L to the printer to charge it. 1 Remove the battery pack’s terminal cover. • When the battery pack is not in use, always store it with its terminal cover on. Terminal Cover 2 Press the battery cover lever down and remove the battery cover. 3 Install the battery pack. 4 Attach the AC cable to the compact power adapter CACP100 and plug it into a power outlet. • Slide the battery pack into place, in the direction of the arrow, and push it in until it clicks into place. • To remove the battery pack, push the battery cover lever down and pull the battery pack out. Replace the battery cover afterwards. To Power Outlet Compact Power Adapter AC Cable 29 5 Connect the compact power adapter cable to the printer. • The indicator lights orange while charging and turns off once the battery pack is fully charged. Indicator 6 Compact Power Adapter Cable Disconnect the compact power adapter cable from the printer once charging is complete. Charging the Battery Pack with the Battery Charger Use the separately sold battery charger (included with the Battery/Charge Adapter Kit BCA-CP100) to charge the battery pack NB-CP1L before attaching it to the printer. 1 2 Remove the battery pack’s terminal cover. • Refer to step 1 of the Charging the Battery Pack in the Printer section. p. 29 Attach the battery pack to the charge adapter. • Attach it firmly in the direction of the arrow. Charge Adapter 3 30 Attach the AC cable to the compact power adapter CACP100 and plug it into a power outlet. • Refer to step 4 of the Charging the Battery Pack in the Printer section. p. 29 4 Compact Power Adapter Cable Charge Indicator 5 Connect the compact power adapter cable to the charge adapter. • The charge indicator lights orange while charging and turns green once the battery pack is fully charged. • Disconnect the cable from the charge adapter once charging is complete and detach the battery pack from the charge adapter. Remove the battery cover and install the battery pack. • Refer to step 2 and 3 of the Charging the Battery Pack in the Printer section. p. 29 • If the ON/OFF button is pressed and the printer’s power turns on while charging the battery pack, charging will stop. Pressing the ON/OFF button again will turn off the printer and charging will resume. • Do not charge this battery pack with charge adapters other than those recommended by Canon. • Do not use the battery pack in products other than those recommended by Canon. • Do not charge battery packs other than the battery pack NB-CP1L. • Do not carry or store the battery pack with metal objects with sharp edges, such as paper clips and pins. Always put the terminal cover on the battery pack’s terminal when carrying it or before storing it. • Avoid dropping or subjecting the battery pack to severe impact. • Do not apply heat or expose the battery pack to open flame. • Do not cover the compact power adapter with anything, such as a tablecloth, cushion or blanket, when it is charging. Heat will build up internally and possibly lead to fire. • Immediately flush water over parts of the body or clothing that come into contact with the inner contents of a battery if the outer casing incurs damage. If any of these substances should contact internal tissues, such as eyes or the mouth, immediately flush with water and seek medical assistance. 31 • When the battery pack is used to power the printer, the printer will automatically turn off if it is idle for 5 minutes or more. • This is a lithium ion battery pack so there is no need to completely use or discharge it before recharging. It can be charged at any charge state. • It takes approximately 150 minutes to bring a fully discharged battery pack to a full charge state (based on standard Canon testing criteria). • Charge it within a temperature range of 5 to 40oC (41 to 104oF). • The charge adapter may emit noises while charging. This is not a malfunction. • Do not charge the battery pack for more than 24 continuous hours to avoid performance loss. • When the printer is not in use, remove the battery pack, replace its terminal cover and store it in a cool place (30oC/86oF or less).Charge it before using it again. • Even charged battery packs continue to discharge naturally. You are advised to charge the battery on the day of use, or one day before, to ensure a full charge. • Since storing a fully charged battery pack for long periods of time (about 1 year) can shorten its lifecycle or affect performance, you are recommended to discharge the battery pack fully in the printer before storing it in a cool place (30oC/86oF or less). If you do not use the battery pack for long periods of time, charge it fully and discharge it fully in the printer at least once a year before returning it to storage. • The printer consumes the battery charge when the power is on even when a function is not being used. To conserve the battery charge, be particularly attentive in turning the power off. • Although the battery pack’s maximum operating range is 5 to 40oC (41 to 104oF), the optimal range is 10 to 30oC (50 to 86oF). At cold temperatures, such as those experienced on ski hills, performance will temporarily decline, reducing the usable time. • If the usable time of a battery pack diminishes substantially even when fully charged, it should be replaced. • Remove the battery pack when the printer is not in use. The battery pack continues to discharge a small amount when left in the printer or charge adapter even with the power turned off. This shortens the battery life. 32 Battery Status If battery status is running down while the printer is connected to the camera, the camera’s LCD monitor may display the following message. Error Message Recharge the printer battery Solution The battery pack’s power is too low to operate the printer. Switch the battery pack for a fully charged one or recharge the battery pack. Battery Performance Number of prints Postcard size paper: Approximately 36 sheets L size paper: Approximately 36 sheets card size paper: Approximately 72 sheets Test conditions: Normal temperature (23oC/73oF), Canon images, continuous print. * The above data may vary according to the printing environment and the image to be printed. * At low temperatures, the battery pack performance may diminish and the low battery icon may appear very rapidly. In these circumstances, the performance can be improved by warming the battery pack in a pocket before use. Using the Car Battery Adapter (CP-300/CP-200) Car Battery Adapter CBA-CP100 (sold separately) can be used to power the printer or charge the battery pack from a car’s cigarette lighter socket. Please refer to the Car Battery Adapter User Guide for advice about proper handling. 33 Troubleshooting If the printer does not seem to be working properly, run through the checks below to see if you can identify and correct the problem. If you are not able to solve the problem, please call your dealer or contact a Canon Customer Support help desk for assistance. Problem The printer has no power. Cause Solution The compact power adapter or AC Be sure that the compact power cable is not correctly connected. adapter and AC cable are connected correctly. Be sure that the AC cable is plugged into a standard power outlet. The printer’s indicator is blinking There is a malfunction in the red. printer. Turn the printer’s power off and turn it on again. The (Direct Print) mark does not display in the upper left corner of the LCD monitor. The cable is not correctly connected. Connect the cable correctly ( 26). p. The printer’s power is off. Turn the printer’s power on ( 26). p. Your camera’s firmware is incompatible with this printer. Please check the Canon BeBit website or your regional Canon website. The printer is connected to a computer and printing is in progress. Wait until the print outputted by the computer is complete. The printer is not correctly connected to the camera. Connect the cable correctly ( p. 26). If the connection is correct, the icon will appear on the camera’s LCD monitor. The camera’s batteries are depleted. Replace with fully charged (fresh) batteries, or plug the camera into a power outlet (using the camera’s optional compact power adapter). The printer’s battery pack is depleted. (CP-300 only) Use a fully charged battery pack or use the printer’s compact power adapter. The ink cassette is not loaded correctly. Load the ink cassette correctly. ( p. 22) Too muck slack in the ink cassette’s ink sheet. Take up the slack. The printer does not print. The paper cassette is not pushed Load the paper cassette correctly. all the way in. ( p. 25) Printing stopped midway. 34 The printer has overheated. Wait for the printer to cool down. The printer is not correctly connected to the camera. Connect the cable correctly. ( p. 26) Problem Cause Solution The printer’s indicator lights red without the camera’s LCD monitor displaying any error message. There is a malfunction in the printer. Remove the paper from the paper-handling slot and take up any slack in the ink sheet. Turn the printer’s power off and turn it on again. Print quality is not good. You are not using the correct paper type. Use the designated paper type. Paper is loaded with the wrong side up. Load the paper correctly (glossy side up). The ink sheet or paper is dirty. Use a clean ink sheet and clean paper. Condensation has formed inside the printer. Wait for condensation to evaporate. Faint stripes appear in the print. Dust has accumulated inside the printer. Remove the ink cassette and insert the cleaner stick in the direction of the arrow and with the arrow on the cleaner stick facing up. Push it in completely as shown in figure A and slide it in and out of the printer 2 or 3 times. Printed images are distorted. The printer is too close to a TV, video game machine, or other electromagnetic source. Move the printer so that it is at least one meter (3.3 ft.) away from the electromagnetic source. The printer is too close to a stereo Move the printer away from the speaker, large motor, or other strong magnetic source. strong magnetic source. Nothing happens when the camera’s SET button is pressed. The printer has overheated. Wait for the printer to cool down. Printing is in progress. Wait for the printer to finish printing. Frequent paper jams. The paper cassette is overloaded. Do not load more than 18 sheets of paper into the cassette. The print output receptacle is too Do not allow more than 9 sheets full. to accumulate in the receptacle. Paper is creased or curled. Do not use paper that is creased or curled. Figure A 35 Error Messages If a problem occurs while the printer is connected to the camera, the printer’s indicator will light or blink red and the camera’s LCD monitor may display one of the messages indicated below. (If the camera is connected to a TV, the message will appear on the TV screen.) Error Message No paper No Ink 36 Cause Solution Paper cassette is incorrectly installed. Load the paper cassette correctly. Paper is not loaded correctly in the paper cassette. Load paper into the cassette correctly. No paper in the paper cassette. Load paper into the cassette. Paper is not feeding correctly. Take out the paper cassette, and then manually remove any paper remaining in the printer. No ink cassette in the printer. Load an ink cassette. The ink cassette is out of ink. Load a new ink cassette. Incompatible paper size Wrong paper size is loaded in the Use the designated paper size. printer. Incompatible ink size Wrong ink cassette size is loaded Use the designated ink cassette in the printer. size. Ink Cassette Error The ink cassette is not working correctly. Remove the ink cassette from the printer, take up the slack in the ink sheet, and then reload the cassette. If this does not solve the problem, replace with a new ink cassette. If the ink cassette is stuck in the printer, contact a Canon Customer Support help desk for assistance. Paper and ink do not match The paper and ink are from different sets. Check the ink/paper sets. Paper Jam Paper jammed during printing. Turn the printer’s power off and turn it on again. If the printer fails to eject the paper, contact a Canon Customer Support help desk for assistance. Paper has been changed. Paper was changed after the print Change back to the original paper menu was displayed. size or change the print settings. Recharge the printer battery (CP-300 only) The printer’s battery pack is depleted. Change it with a fully charged battery pack or recharge the battery pack. You can also use the printer’s compact power adapter. Error Message Cause Solution Communication Error Error in communication between Turn the printer’s power off and printer and camera. turn it on again. If the error message does not clear, contact a Canon Customer Support help desk for assistance. Cannot Print! The image was taken with a different camera, recorded in a different format, or has been altered by a computer. Check whether the image’s size matches the camera’s pixel capacity. If the size is not appropriate, resize the image and convert as necessary so that the image is in a JPEG format that the camera can display. Could not print xx images You have selected a number of images for DPOF printing, but some of these images cannot be printed because they were taken with a different camera, recorded in a different format, or have been altered by a computer. (Where xx indicates the number of unprintable images from among those selected) Check whether the image size matches the camera’s pixel capacity. If sizes are not appropriate, resize the images and convert as necessary so that images are in a JPEG format that the camera can display. 37 Specifications Card Photo Printer CP-300/CP-200 General Specifications Printer Type Full-color direct digital printer Print Method Dye-sublimation thermal transfer (with overcoating) Resolution Reproduction 300 × 300 dpi Gradation 256 gradations/color Ink Dedicated ink cassette for each paper size (Y/M/C/overcoating) Paper Postcard size (standard sheets) L size (standard sheets) Card size (standard sheets, full-sized label and 8-label sticker) Paper-Feed Method Automatic feed from paper cassette Paper-Eject Method Sheets eject onto top of paper cassette Print Modes Standard (1-screen) print (bordered or borderless) Multiple (8-screen) print (for use with labels) Print Sizes Postcard size print (borderless): 100 × 148 mm (4 × 6 in.) Postcard size print (bordered): 91.4 × 121.9 mm (3.6 × 4.8 in.) L size print (borderless): 89 × 119 mm (3.5 × 4.7 in.) L size print (bordered): 79.2 × 105.3 mm (3.1 × 4.2 in.) Card size print (full-sized, borderless): 54 × 86 mm (2.1 × 3.4 in.) Card size print (full-sized, bordered): 50 × 66.7 mm (2.0 × 2.6 in.) Card size multiple print (8 stickers per label): 17.3 × 22 mm (0.7 × 0.9 in.) (per sticker) Print Speeds* Postcard size print (bordered/borderless): L size print (bordered/borderless): Card size print (full-sized, bordered/borderless): Card size multiple print (8 stickers): Approx. 85 sec. Approx. 70 sec. Approx. 40 sec. Approx. 40 sec. Interface Signal Transfer Proprietary protocol for Canon cameras Connection Method Camera/Printer connection USB cable included with the camera Computer/Printer connection Commercially available USB cable Recommended printer cable Material: AWG 28 or better Type: Twisted-pair, sealed cable (compatible with high-speed mode) Length: max. 5.0 m (16.4 ft.) Device Specifications Operating Environment 5 - 40oC (41 - 104oF), 20% to 80% RH (when running) Power Source AC 100 - 240 V (50/60 Hz) Power consumption AC 50 W or less (4 W or less when idle) Dimensions CP-300: 170.0 (W) × 55.0 (H) × 123.0 (D) mm (6.70 × 2.17 × 4.84 in.) CP-200: 170.0 (W) × 54.8 (H) × 119.0 (D) mm (6.70 × 2.16 × 4.69 in.) Weight CP-300: Approx. 860 g (30.3 oz.) (excluding ink and paper cassettes) CP-200: Approx. 820 g (28.9 oz.) (excluding ink and paper cassettes) * Test Conditions: Normal temperature (23oC/73oF), Canon standard images. 38 Compact Power Adapter CA-CP100 Input voltage AC 100-240 V (50/60 Hz) 95 VA (100 V) - 120 VA (240 V) Rated output DC 24 V, 2 A Operating temperatures 0 - 40oC (32 - 104oF) Dimensions 100 × 50 × 24 mm (3.9 × 2.0 × 0.9 in.) (excluding cable) Weight Approx. 200 g (7.1 oz.) Battery Pack NB-CP1L Supplied with the CP-300, supplied with the separately sold Battery/Charge Adapter Kit BCACP100, or sold separately. Type Lithium ion battery Nominal voltage DC 22.2 V Nominal capacity 1200 mAh Charge cycles Approx. 300 Operating temperatures 5 - 40oC (41 - 104oF) Dimensions 110.0 × 40.7 × 37.5 mm (4.3 × 1.6 × 1.5 in.) Weight Approx. 230 g (8.1 oz.) Charge Adapter CG-CP100 Supplied with the separately sold Battery/charge Adapter Kit BCA-CP100 Input voltage DC 24 V, 2 A Rated output DC 24 V, 0.7 A Charging time 2.5 hours Operating temperatures 0 - 40oC (32 - 104oF) Dimensions 136.7 × 46.5 × 41.1 mm (5.4 × 1.8 × 1.6 in.) Weight Approx. 120 g (4.2 oz.) Car Battery Adapter CBA-CP100 (Sold separately) Input voltage DC 12 V, 90 W Rated output DC 24 V, 3.2 A Operating temperatures 0 - 40o (32 - 104o) Dimensions 89.4 × 63.3 × 40.0 mm (3.5 × 2.5 × 1.6 in.) (excluding cable) Weight Approx. 370 g (13.1 oz.) (including cable) * The specifications and appearance are subject to change without notice. 39 Connecting the Printer to a Computer and Printing Safety Precautions The precautions noted within this guide are intended to instruct you in the safe and correct use of the products and to prevent injuries or damage to yourself, other persons and property. Please read and ensure that you understand them before proceeding to other sections of the guide. Warning This symbol indicates topics that could lead to death or serious injury if ignored or handled incorrectly. Warning Do not play the supplied CD-ROM(s) in any CD player that does not support data CD-ROMs. Playing the CD-ROM(s) in an audio CD player (music player) could damage the speakers. It is also possible to suffer from hearing loss from listening with headphones to the loud sounds of a CD-ROM played on a music CD player. Disclaimer • While every effort has been made to ensure that the information contained in this guide is accurate and complete, no liability can be accepted for any errors or omissions. Canon reserves the right to change the specifications of the hardware and software described herein at any time without prior notice. • No part of this guide may be reproduced, transmitted, transcribed, stored in a retrieval system, or translated into any language in any form, by any means, without the prior written permission of Canon. • Canon makes no warranties for damages resulting from corrupted or lost data due to a mistaken operation or malfunction of the camera, the software, the CompactFlashTM cards (CF cards), personal computers, peripheral devices, or use of non-Canon CF cards. Trademark Acknowledgments • • • • • Canon and PowerShot are trademarks of Canon Inc. Adobe is a trademark of Adobe Systems Incorporated. CompactFlash is a trademark of SanDisk Corporation. iBook and iMac are trademarks of Apple Computer, Inc. Macintosh, PowerBook, Power Macintosh and QuickTime are trademarks of Apple Computer Inc., registered in the United States and other countries. • Microsoft and Windows are either registered trademarks or trademarks of Microsoft Corporation in the United States and/or other countries. • Other names and products not mentioned above may be registered trademarks or trademarks of their respective companies. 40 Read Carefully Before Using! CANON SOFTWARE LICENSE AGREEMENT IMPORTANT - READ THIS AGREEMENT BEFORE USING THE SOFTWARE ON THE CD-ROM IN THIS BOX. BY USING THE SOFTWARE, YOU AGREE TO BE BOUND BY THE TERMS OF THIS AGREEMENT. This is a license agreement (the “Agreement”) between you and Canon Inc. (“Canon”). IF YOU DO NOT AGREE TO THE TERMS AND CONDITIONS OF THIS AGREEMENT, DO NOT USE THE SOFTWARE PROGRAM ON THE CD-ROM (INCLUDING ALL SOUND AND IMAGE DATA) AND THE USER MANUAL IN THIS BOX (COLLECTIVELY, THE “SOFTWARE”) AND PROMPTLY RETURN THE SOFTWARE TO YOUR POINT OF PURCHASE FOR A REFUND. In consideration of the right to use the SOFTWARE, you agree to abide by the terms and conditions of this Agreement. 1. LICENSE: Canon grants you the personal, non-exclusive right to use the SOFTWARE only on a single computer. You may physically transfer the SOFTWARE from one computer to another provided that the SOFTWARE is used on only one computer at a time. You shall not install or use the SOFTWARE on a network, multiple CPU, multiple site arrangement, or any other hardware configuration where the SOFTWARE is accessible to more than one CPU or to more than one user. With respect to the sound and image data (“Data”) contained in the Software, which are to be downloaded to the applicable Canon digital camera product, Canon grants you a personal, nonexclusive license to use the Data on a single Canon digital camera product only. YOU SHALL NOT ASSIGN, SUBLICENSE, RENT, LEASE, LOAN, CONVEY OR OTHERWISE USE, TRANSFER, COPY, TRANSLATE, CONVERT TO ANOTHER PROGRAMMING LANGUAGE, ALTER, MODIFY, DECOMPILE OR DISASSEMBLE THE SOFTWARE, IN WHOLE OR IN PART, EXCEPT AS EXPRESSLY PROVIDED IN THIS AGREEMENT. 2. BACK-UP COPY: You may make one copy of the SOFTWARE solely for back-up purposes, or copy the SOFTWARE onto the permanent storage device (e.g. a hard disk) of your computer and retain the original for back-up purposes. Any other copying of the SOFTWARE is a violation of this Agreement. You must reproduce and include the copyright notice on the back-up copy. 3. SUPPORT AND UPDATES: Neither Canon, nor its subsidiaries, dealers or distributors will be responsible for providing maintenance or support for use of the SOFTWARE. No updates, fixes or support will be made available for the SOFTWARE. 4. LIMITED WARRANTY AND LIMITATION OF LIABILITY: It is your responsibility to choose, maintain and match the hardware and software components of your computer system. Thus Canon does not guarantee uninterrupted service or correction of errors or that the functions or performance of the SOFTWARE will meet your requirements. THE SOFTWARE IS LICENSED ON AN “AS IS” BASIS AND WITHOUT WARRANTY OR CONDITION OF ANY KIND. The CD-ROM storing the SOFTWARE is warranted only against defective material under normal use for a period of ninety (90) days after purchase from an authorized Canon dealer as evidenced by your sales receipt. Your sole remedy for a defective CD-ROM shall be replacement of the same without charge when returned by you at your expense to your point of purchase and proven to be defective upon inspection. The Replacement CDROM will be warranted for the remainder of the original ninety (90) day warranty period of the defective CD-ROM. The limited warranty does not apply if the failure of the CD-ROM resulted from accident, abuse or misapplication of the SOFTWARE and shall not extend to anyone other than the original user of the SOFTWARE. EXCEPT AS SPECIFICALLY SET FORTH IN THIS PARAGRAPH 4, CANON, CANON’S SUBSIDIARIES, DISTRIBUTORS AND DEALERS DISCLAIM ALL WARRANTIES, OR CONDITIONS, EXPRESS OR IMPLIED, INCLUDING ANY WARRANTY OR CONDITION OF MERCHANTABILITY OR FITNESS FOR A PARTICULAR PURPOSE, WITH RESPECT TO THE SOFTWARE. NEITHER CANON NOR ANY OF CANON’S SUBSIDIARIES, DISTRIBUTORS OR DEALERS IS LIABLE FOR ANY DAMAGES HOWSOEVER CAUSED, INCLUDING WITHOUT LIMITATION, DIRECT, CONSEQUENTIAL OR INCIDENTAL LOSS OR DAMAGE INCLUDING LOSS OF PROFITS, EXPENSE OR INCONVENIENCE HOWSOEVER CAUSED OR ARISING OUT OF THE SOFTWARE OR THE USE THEREOF. NEITHER CANON, NOR ANY OF CANON’S SUBSIDIARIES, DISTRIBUTORS OR DEALERS SHALL HAVE ANY OBLIGATION TO INDEMNIFY YOU AGAINST ANY CLAIM OR SUIT BROUGHT BY A THIRD PARTY ALLEGING THAT THE SOFTWARE OR THE USE THEREOF INFRINGES ANY INTELLECTUAL PROPERTY OF SUCH THIRD PARTY. 41 SOME STATES, PROVINCES OR LEGAL JURISDICTIONS DO NOT ALLOW THE EXCLUSION OF IMPLIED WARRANTIES, OR THE LIMITATION OR EXCLUSION OF LIABILITY FOR INCIDENTAL OR CONSEQUENTIAL DAMAGES, OR PERSONAL INJURY OR DEATH RESULTING FROM NEGLIGENCE ON THE PART OF THE SELLER, SO THE ABOVE DISCLAIMERS AND EXCLUSIONS MAY NOT APPLY TO YOU. 5. TERM: This Agreement is effective upon your using the SOFTWARE and remains in effect until expiration of all copyright interests in the SOFTWARE unless earlier terminated. You may terminate this Agreement by destroying the SOFTWARE. This Agreement will also terminate without notice to you if you fail to comply with any of the terms of this Agreement and you must then promptly return the SOFTWARE. In addition, Canon may enforce its other legal rights. 6. U.S. GOVERNMENT RESTRICTED RIGHTS NOTICE: The SOFTWARE is a “commercial item,” as that term is defined at 48 C.F.R. 2.101 (Oct 1995), consisting of “commercial computer software” and “commercial computer software documentation,” as such terms are used in 48 C.F.R. 12.212 (Sept 1995). Consistent with 48 C.F.R. 12.212 and 48 C.F.R. 227.7202-1 through 227.72024 (June 1995), all U.S. Government End Users shall acquire the SOFTWARE with only those rights set forth herein. Manufacturer is Canon Inc./30-2, Shimomaruko 3chome, Ohta-ku, Tokyo 146-8501, Japan. 7. EXPORT RESTRICTIONS: You agree to comply with all export laws and restrictions and regulations of the country involved, and not to export or re-export, directly or indirectly, the SOFTWARE in violation of any such laws and restrictions and regulations, or without all necessary approvals. 8. SEVERABILITY: In the event that any provision of this Agreement is declared or found to be illegal by any court or tribunal of competent jurisdiction, such provision shall be null and void with respect to the jurisdiction of that court or tribunal and all the remaining provisions of this Agreement shall remain in full force and effect. 9. CONTROLLING LAW: The terms of this Agreement as it relates to purchases of the Software in the United States of America shall be governed and construed in all respects in accordance with the laws and regulations of the State of New York, without reference to choice of law principles. The terms of this Agreement as it relates to purchases of the Software in Canada shall be governed by the laws of the province of Ontario. 10. OWNERSHIP: All rights, including but not limited to copyrights and trade secret rights, to the SOFTWARE belong to Canon, its affiliated corporations and third party licensors. Your use of the SOFTWARE is subject to the laws of the United States, and Canada, and other applicable copyright and trademark laws, and nothing in this Agreement constitutes a waiver of the rights of Canon, its affiliated corporations and third party licensors under such laws. You only own the CD-ROM media in which the Software is stored. Except as expressly provided herein, no license or right, express or implied, is hereby conveyed or granted by Canon to you for any intellectual property of Canon. Nothing contained in Paragraph 1 shall be construed to give Canon any ownership rights in any images, graphics or textual material that you save in connection with the Software. You may not modify, remove or delete any or all copyright notices (i) which are contained in the Software, including any copy thereof, and (ii) which are on the original CD-ROM and on the medium of a back-up copy made pursuant to Section 2 above. 11. ACKNOWLEDGEMENT: BY USING THE SOFTWARE, YOU ACKNOWLEDGE THAT YOU HAVE READ THIS AGREEMENT, UNDERSTOOD IT, AND AGREE TO BE BOUND BY ITS TERMS AND CONDITIONS. YOU ALSO AGREE THAT THIS AGREEMENT IS THE COMPLETE AND EXCLUSIVE STATEMENT OF AGREEMENT BETWEEN YOU AND CANON CONCERNING THE SUBJECT MATTER HEREOF AND SUPERSEDES ALL PROPOSALS OR PRIOR AGREEMENTS, VERBAL OR WRITTEN, AND ANY OTHER COMMUNICATIONS BETWEEN THE PARTIES RELATING TO THE SUBJECT MATTER HEREOF. NO AMENDMENT TO THIS AGREEMENT SHALL BE EFFECTIVE UNLESS SIGNED BY A DULY AUTHORIZED OFFICER OF CANON. 42 System Requirements Please install the software on a computer meeting the following minimum requirements. Windows OS Windows 98 (First or Second Edition), Windows Millennium Edition (Windows Me), Windows 2000, Windows XP (Home Edition, Professional) Computer Model The above OS should be pre-installed on computers with built-in USB ports. CPU Windows 98/Windows Me/Windows 2000: Pentium 150 MHz or better Windows XP: Pentium 300 MHz or better RAM Windows 98/Windows Me/Windows 2000: 64 MB or more Windows XP: 128 MB or more Interface USB Free Hard Disk Space • Canon Utilities - ZoomBrowser EX: 120 MB or more (including the PhotoRecord printing program) • Canon CP-300/CP-200 Printer Driver: 1 MB or more (the amount of free space required for installation) Display 800 × 600 pixels/High Color (16 bit) or better is required 1,024 × 768 pixels or better is recommended • A CD-ROM drive is required to install the software. • All procedures performed with a connection to a USB 2.0 compliant board are not guaranteed. 43 Macintosh OS Mac OS 9.0 - 9.2, Mac OS X (Version 10.1/10.2) Computer Model The above OS should be pre-Installed on computers with built-in USB ports. CPU PowerPC RAM Mac OS 9.0-9.2: 20 MB or more of application memory Mac OS X (Version 10.1/10.2): 128 MB or more Interface USB Free Hard Disk Space • Canon Utilities - ImageBrowser: 50 MB or more • Canon CP-300/CP-200 Printer Driver: 3.8 MB or more (the amount of free space required for installation) Display 800 × 600 pixels/32,000 colors or better is required 1,024 × 768 pixels or better is recommended • A CD-ROM drive is required to install the software. • ImageBrowser is compatible with Mac OS X (v10.1/10.2). However, it is not compatible with disks formatted with the Unix File System (UFS). • All procedures performed with a connection to a USB 2.0 compliant board are not guaranteed. 44 Printing Operations Overview Follow the steps outlined below to prepare the printer and install the necessary software to enable printing. Install the software onto the computer. Place the supplied Canon CP Printer Solution Disk in the computer’s CD-ROM drive and install the printer driver and ZoomBrowser EX (Windows) or ImageBrowser (Macintosh). See the Printer Driver User Guide bundled on the CP Printer Solution Disk. Connect the printer to the computer. Load the paper and ink cassettes in the printer, turn the printer’s power on and connect it to the computer using a commercially available USB cable. See the Printer Driver User Guide and this guide. Select an image to print. Start ZoomBrowser EX (Windows) or ImageBrowser (Macintosh) and select an image to print. See the Printer Driver User Guide. Print the image. See the Printer Driver User Guide. • Please refer to the specifications on page 38 and to the Printer Driver User Guide for detailed information about USB cables. 45 Viewing the Printer Driver User Guide (Windows/Macintosh) The Printer Driver User Guide (Windows/Macintosh) manuals are bundled on the Canon CP Printer Solution Disk CD-ROM. • Adobe Acrobat Reader must be installed to view the Printer Driver User Guide (Windows/Macintosh). If it is not installed on your computer, refer to the Installing p. 47 Adobe Acrobat Reader section. Windows 1 2 Place the Solution Disk in your computer’s CD-ROM drive. • The installer panel appears. In the installer panel, click on the CP Printer Driver User Guide. • The Printer Driver User Guide appears. • If the installer panel does not appear automatically, open the [Readme] and [English] folders on the CD-ROM and double-click the [CP.PDF] ( ) file. Macintosh 1 2 3 4 46 Place the Solution Disk in your computer’s CD-ROM drive. Double-click on the CD-ROM icon on the desktop, and with Mac OS 9.0 - 9.2, double-click the [Mac OS 9] folder and with Mac OS X, double-click the [Mac OS X] folder. Double-click the [Canon CP Printer Installer] icon. • The installer panel appears. In the installer panel, click [Using the Software] and [ CP Printer Driver User Guide]. • The Printer Driver User Guide appears. • You can also display the Printer Driver User Guide by double-clicking on the CDROM’s folders [Mac OS 9], [Readme], [English] and [CP.PDF] ( ). Viewing the ZoomBrowser EX Software User Guide (Windows)/ImageBrowser Software User Guide (Macintosh) PDF Manuals These PDF format manuals are available on the Canon Inc. website, from the following URL address: http://www.canon.co.jp/Imaging/information-e.html • Adobe Acrobat Reader must be installed on your computer to view the ZoomBrowser EX Software User Guide (Windows) or ImageBrowser Software User Guide (Macintosh). If it is not installed on your computer, install it using the following procedures. Installing Adobe Acrobat Reader If Adobe Acrobat Reader is not installed on your computer, use the following procedures to install it. Windows 1 2 3 4 5 6 Close any programs that are running. Place the Solution Disk in the computer’s CD-ROM drive. • The installer panel automatically displays. Click [Exit] to close the installer panel. In the [Start] menu, click [My Computer]. • With Windows 2000, Windows Me and Windows 98, double-click on the [My Computer] icon on the desktop. Right-click on the Solution Disk icon and select [Explorer]. Double click the [Readme], [English], [Acrobat] and [Ar405eng.exe] ( ) icons, then follow the onscreen instructions to install Adobe Acrobat reader. 47 Macintosh 1 2 3 48 Close any programs that are running. Place the Solution Disk in the computer’s CD-ROM drive. Double-click on the CD-ROM icon on the desktop and double click the [Mac OS 9], [Readme], [English], [Acrobat] and [Reader Installer] ( ) icons, then follow the onscreen instructions to install Adobe Acrobat reader. MEMO 49 MEMO 50 FCC Notice (Printer, Model CD1006/CD1005) This device complies with Part 15 of the FCC Rules. Operation is subject to the following two conditions; (1) this device may not cause harmful interference, and (2) this device must accept any interference received, including interference that may cause undesired operation. Note: This equipment has been tested and found to comply with the limits for Class B digital devices, pursuant to Part 15 of the FCC rules. These limits are designed to provide reasonable protection against harmful interference in a residential installation. This equipment generates, uses and can radiate radio frequency energy and, if not installed and used in accordance with the instructions, may cause harmful interference to radio communications. However, there is no guarantee that interference will not occur in a particular installation. If this equipment does cause harmful interference to radio or television reception, which can be determined by turning the equipment off and on, the user is encouraged to try to correct the interference by one or more of the following measures: • Reorient or relocate the receiving antenna. • Increase the separation between the equipment and receiver. • Connect the equipment into an outlet on a circuit different from that to which the receiver is connected. • Consult the dealer or an experienced radio/TV technician for help. Use of shielded cable with the ferrite core provided with the Printer is required to comply with Class B limits in Subpart B of Part 15 of the FCC rules. Do not make any changes or modifications to the equipment unless otherwise specified in the manual. If such changes or modifications should be made, you could be required to stop operation of the equipment. Canon U.S.A. Inc. One Canon Plaza, Lake Success, NY 11042, U.S.A. Tel No. (516) 328-5600 Canadian Radio Interference Regulations THIS CLASS B DIGITAL APPARATUS MEETS ALL REQUIREMENTS OF THE CANADIAN INTERFERENCE CAUSING EQUIPMENT REGULATIONS. Réglementation canadienne sur les interférences radio CET APPAREIL NUMERIQUE DE LA CLASSE B RESPECTE TOUTES LES EXIGENCES DU REGLEMENT SUR LE MATERIEL BROUILLEUR DU CANADA. CDI-M073-010 XXXXX © 2003 CANON INC. PRINTED IN JAPAN