1
INSTRUCTION MANUAL
D25980-XE
HEAVY-DUTY PAVEMENT BREAKER
c. Keep children and bystanders away while operating a power tool.
Distractions can cause you to lose control.
2. ELECTRICAL SAFETY
a. Power tool plugs must match the outlet. Never modify the plug in any
way. Do not use any adapter plugs with earthed (grounded) power tools.
Unmodified plugs and matching outlets will reduce risk of electric shock.
b. Avoid body contact with earthed or grounded surfaces such as pipes,
radiators, ranges and refrigerators. There is an increased risk of electric
shock if your body is earthed or grounded.
c. Do not expose power tools to rain or wet conditions. Water entering a
power tool will increase the risk of electric shock.
d. Do not abuse the cord. Never use the cord for carrying, pulling or
unplugging the power tool. Keep cord away from heat, oil, sharp edges
or moving parts. Damaged or entangled cords increase the risk of electric
shock.
e. When operating a power tool outdoors, use an extension cord suitable
for outdoor use. Use of a cord suitable for outdoor use reduces the risk of
electric shock.
MINIMUM GAGE FOR CORD SETS
For Cable length (m): 7.5
15
25
30
45
60
Use Cable with minimum rating (Amperes)
Tool Amperes
0 - 3.4
7.5
7.5
7.5
7.5
7.5
7.5
3.5 - 5.0
7.5
7.5
7.5
7.5
10
15
5.1 - 7.0
10
10
10
10
15
15
7.1 - 12.0
15
15
15
15
20
20
12.1 - 20.0
20
20
20
20
25
–
Definitions: Safety Guidelines
The definitions below describe the level of severity for each
signal word. Please read the manual and pay attention to
these symbols.
DANGER: Indicates an imminently hazardous situation
which, if not avoided, will result in death or serious injury.
WARNING: Indicates a potentially hazardous situation
which, if not avoided, could result in death or serious injury.
CAUTION: Indicates a potentially hazardous situation
which, if not avoided, may result in minor or moderate
injury.
CAUTION: Used without the safety alert symbol indicates a
potentially hazardous situation which, if not avoided, may
result in property damage.
IF YOU HAVE ANY QUESTIONS OR COMMENTS ABOUT THIS OR ANY DEWALT
TOOL, CALL US AT: 1800 654 155 (Aust) or 02 259 1111 (NZ).
SAFETY INSTRUCTIONS FOR POWER TOOLS
When using power tools, always observe the safety regulations applicable in your
country to reduce the risk of fire, electric shock and personal injury. Read the
following safety instructions before attempting to operate this product. Keep these
instructions in a safe place.
General Safety Rules
WARNING! Read all instructions. Failure to follow all instructions listed below
may result in electric shock, fire and/or serious injury. The term “power tool” in all
of the warnings listed below refers to your mains operated (corded) power tool or
battery operated (cordless) power tool.
3. PERSONAL SAFETY
a. Stay alert, watch what you are doing and use common sense when
operating a power tool. Do not use a power tool while you are tired
or under the influence of drugs, alcohol or medication. A moment of
inattention while operating power tools may result in serious personal
injury.
b. Use safety equipment. Always wear eye protection. Safety equipment
such as dust mask, non-skid safety shoes, hard hat, or hearing protection
used for appropriate conditions will reduce personal injuries.
SAVE THESE INSTRUCTIONS
1. WORK AREA
a. Keep work area clean and well lit. Cluttered and dark areas invite accidents.
b. Do not operate power tools in explosive atmospheres, such as in the
presence of flammable liquids, gases or dust. Power tools create sparks
which may ignite the dust or fumes.
1
performed. Use of the power tool for operations different from those intended
could result in a hazardous situation.
5. SERVICE
a. Have your power tool serviced by a qualified repair person using only
identical replacement parts. This will ensure that the safety of the power
tool is maintained.
c. Avoid accidental starting. Ensure the switch is in the off position
before plugging in. Carrying power tools with your finger on the switch or
plugging in power tools that have the switch on invites accidents.
d. Remove any adjusting key or wrench before turning the power tool on. A
wrench or a key left attached to a rotating part of the power tool may result
in personal injury.
e. Do not overreach. Keep proper footing and balance at all times. This
enables better control of the power tool in unexpected situations.
f. Dress properly. Do not wear loose clothing or jewellery. Keep your hair,
clothing and gloves away from moving parts. Loose clothes, jewellery or
long hair can be caught in moving parts.
g. If devices are provided for the connection of dust extraction and
collection facilities, ensure these are connected and properly used. Use
of these devices can reduce dust related hazards.
4. POWER TOOL USE AND CARE
a. Do not force the power tool. Use the correct power tool for your
application. The correct power tool will do the job better and safer at the
rate for which it was designed.
b. Do not use the power tool if the switch does not turn it on and off. Any
power tool that cannot be controlled with the switch is dangerous and must
be repaired.
c. Disconnect the plug from the power source before making any
adjustments, changing accessories, or storing power tools. Such
preventive safety measures reduce the risk of starting the power tool
accidentally.
d. Store idle power tools out of the reach of children and do not allow
persons unfamiliar with the power tool or these instructions to operate
the power tool. Power tools are dangerous in the hands of untrained users.
e. Maintain power tools. Check for misalignment or binding of moving
parts, breakage of parts and any other condition that may affect the
power tools operation. If damaged, have the power tool repaired before
use. Many accidents are caused by poorly maintained power tools.
f. Keep cutting tools sharp and clean. Properly maintained cutting tools with
sharp cutting edges are less likely to bind and are easier to control.
g. Use the power tool, accessories and tool bits etc., in accordance with
these instructions and in the manner intended for the particular type of
power tool, taking into account the working conditions and the work to be
Electrical Safety
The electric motor has been designed for one voltage only. Always check that the
power supply corresponds to the voltage on the rating plate. 240 V AC means your
tool will operate on alternating current. As little as 10% lower voltage can cause
loss of power and can result in overheating. All DEWALT tools are factory tested;
if this tool does not operate, check the power supply. Your DEWALT tool is double
insulated, therefore no earth wire is required.
• Young children and the infirm. This appliance is not intended for use by
young children or infirm persons without supervision. Young children should be
supervised to ensure that they do not play with this appliance.
• Replacement of the supply cord. If the supply cord is damaged, it must be
replaced by the manufacturer or an authorised DEWALT Service Centre in order
to avoid a hazard.
Extension Cords
CAUTION: Use only extension cords that are approved by the country’s
Electrical Authority. Before using extension cords, inspect them for loose or
exposed wires, damaged insulation and defective fittings. Replace the cord if
necessary.
Additional Safety Instructions for Pavement Breakers
• Hold power tools by insulated gripping surfaces when performing an
operation where the cutting tool may contact hidden wiring or its own cord.
Contact with a “live” wire will make exposed metal parts of the tool “live” and
shock the operator.
Be certain that the material being worked does not conceal electric or gas
service and that their locations have been verified with the utility companies.
• Wear ear protectors. Exposure to noise can cause hearing loss.
• Use auxiliary handles supplied with the tool. Loss of control can cause
personal injury.
2
• crystalline silica from bricks and cement and other masonry products, and
• arsenic and chromium from chemically-treated lumber (CCA).
Your risk from these exposures varies, depending on how often you do this type
of work. To reduce your exposure to these chemicals: work in a well ventilated
area, and work with approved safety equipment, such as those dust masks that are
specially designed to filter out microscopic particles.
• Avoid prolonged contact with dust from power sanding, sawing, grinding,
drilling, and other construction activities. Wear protective clothing and
wash exposed areas with soap and water. Allowing dust to get into your
mouth, eyes, or lay on the skin may promote absorption of harmful chemicals.
WARNING: Use of this tool can generate and/or disburse dust, which may cause
serious and permanent respiratory or other injury. Always use NIOSH/OSHA
approved respiratory protection appropriate for the dust exposure. Direct particles
away from face and body.
WARNING: ALWAYS use respiratory protection. All users and bystanders must
wear respiratory protection that conforms to NIOSH/OSHA/MSHA standards.
WARNING: ALWAYS use eye protection. All users and bystanders must wear
eye protection that conforms to ANSI Z87.1.
WARNING: ALWAYS wear proper personal hearing protection that conforms
to ANSI S12.6 (S3.19) during use. Under some conditions and duration of use,
noise from this product may contribute to hearing loss..
• The label on your tool may include the following symbols. The symbols and
their definitions are as follows:
V ................. volts
A ...............amperes
Hz ............... hertz
W ..............watts
min ............. minutes
...........alternating current
no ..............no load speed
.......... direct current
.............earthing terminal
.............. Class I Construction
................... (grounded)
.............safety alert symbol
............... Class II Construction
…/min .......revolutions per minute
................... (double insulated)
BPM ..........beats per minute
Keep a firm grip on the tool at all times. Do not attempt to operate this tool
without holding it with both hands. Operating this tool with one hand will
result in loss of control. Breaking through or encountering hard materials such
as re-bar may be hazardous as well. Tighten the side handle securely before
use.
• Wear safety goggles or other eye protection. Hammering operations cause
chips to fly. Flying particles can cause permanent eye damage. Wear a dust
mask or respirator for applications that generate dust. Ear protection may be
required for most applications.
• Do not operate this tool for long periods of time. Vibration caused by
hammer action may be harmful to your hands and arms. Use gloves to provide
extra cushion and limit exposure by taking frequent rest periods.
• Do not recondition bits yourself. Chisel reconditioning should be done by an
authorized specialist. Improperly reconditioned chisels could cause injury.
• Wear gloves when operating tool or changing bits. Accessible metal parts
on the tool and bits may get extremely hot during operation. Small bits of
broken material may damage bare hands.
• Never lay the tool down until the bit has come to a complete stop. Moving
bits could cause injury.
• Do not strike jammed bits with a hammer to dislodge them. Fragments of
metal or material chips could dislodge and cause injury.
• Slightly worn chisels can be resharpened by grinding.
• Keep the power cord away from the bit. Do not wrap the cord around any
part of your body. An electric cord wrapped around a bit may cause electric
shock.
WARNING: ALWAYS use safety glasses. Everyday eyeglasses are NOT safety
glasses. Also use face or dust mask if cutting operation is dusty. ALWAYS WEAR
CERTIFIED SAFETY EQUIPMENT:
• ANSI Z87.1 eye protection (CAN/CSA Z94.3),
• ANSI S12.6 (S3.19) hearing protection,
• NIOSH/OSHA/MSHA respiratory protection.
WARNING: Some dust created by power sanding, sawing, grinding, drilling, and
other construction activities contains chemicals known to cause cancer, birth
defects or other reproductive harm. Some examples of these chemicals are:
• lead from lead-based paints,
3
FIG. 1
A
G
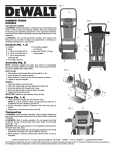
FEATURES (FIG. 1)
I
The D25980 Pavement Breaker has been designed for professional heavy-duty
demolition, applications in concrete, brick, stone and other masonry materials.
B
ON/OFF Switch
The weight of the hand will active/deactivate the ON/OFF switch. Firmly grasp
pavement breaker while applying pressure with the right hand to turn the pavement
breaker on. To turn the tool off, remove the right hand to relieve pressure from the
switch.
D
Soft Start
Holding tool by both handles depress the ON/OFF switch (A). The Soft Start feature
allows the impact rate to build up more slowly preventing the bit or point from
bouncing around on the surface. To stop the pavement breaker pull up on hand to
relieve pressure from the switch to turn the tool OFF.
H
F
C
SHOCKS™ – Active Vibration Control
The active vibration control (F) helps absorb the vibration transmitted to the user.
This improves user comfort and safety during operation.
Hold the tool firmly with one hand on the left side handle (C) and the other hand on
the right side handle (B). Using the right hand apply weight to the ON/OFF switch
(A) to turn on. Apply only enough pressure to the work area to engage the active
vibration control. Applying too much pressure will not make the pavement breaker
chisel faster and the active vibration control will not engage.
E
COMPONENTS (FIG. 1)
NOTE: Left and right describes the location of the part with the operator standing
behind the pavement breaker with the front of the tool facing away.
A. ON/OFF switch
F. Active vibration control
B. Right side handle
G. Front of tool
C. Left side handle
H. Hex head screws
D. Bit retainer
I. Air vents
E. Bit holder
OPERATION
CAUTION: Always hold tool with both hands to maximize control. Allow the
hammer to do the work. Excessive added force shortens the life of the hammer and the
accessory.
ASSEMBLY
Bits
Side Handle (Fig. 1)
WARNING: ALWAYS turn off tool and disconnect the tool from the power
source before making any adjustments or removing or installing attachments or
accessories. Such preventative safety measures reduce the risk of starting the tool
accidentally.
WARNING: ALWAYS wear gloves when you change bits. Accessible metal parts
on the tool and bits may get extremely hot during operation.
CAUTION: Always operate the tool with the side handle properly assembled.
Hold tool with both hands to maximize control.
Attach left side handle (C) with four hex head screws (H, supplied). Tighten with
hex wrench supplied.
4
To Operate
WARNING: To reduce the risk of injury, only DEWALT recommended
accessories should be used with this product. A variety of bits are available from
your local retailer.
NOTE: Insert bits with the front of tool (G) facing up.
FIG. 2A
NOTE: Use sharp drill bits only.
1. Insert bit as described in Bits.
2. Standing behind the tool with both hands on the handles, depress the ON/OFF
switch to start the tool. Hold handles firmly to control tool.
3. Remove hand to relieve pressure from the ON/OFF switch to turn the tool OFF.
4. Place hands under handles and lift up to move tool.
FIG. 2B
MAINTENANCE
WARNING: Shock Hazard. To reduce the risk of serious personal injury, turn tool
off and disconnect tool from power source before making any adjustments or
removing/installing attachments or accessories.
D
Cleaning
D
WARNING: When cleaning, use only a damp cloth on plastic parts. Many
household cleaners contain chemicals which could seriously damage plastic. Also,
do not use gasoline, turpentine, lacquer or paint thinner, dry cleaning fluids or
similar products which may seriously damage plastic parts. Never let any liquid get
inside the tool; never immerse any part of the tool into a liquid. Keep the air vents
(I) clear and regularly clean the housing with a soft cloth
TO INSERT AIR STEEL BITS (RING-ONLY BIT)
1. Pull bit retainer (D) open as shown in Figure 2a.
2. Insert bit into bit holder (E) and close bit retainer onto bit as shown in Figure 2b.
TO INSERT TOOL STEEL BITS (NOTCH-ONLY BIT)
1. Pull bit retainer (D) open as shown in Figure 3a.
2. Insert bit with notch (J) facing up into bit holder (E).
3. Pull bit retainer up to lock into position as shown in Figure 3b.
Use either of the above methods to insert combination steel (notch and ring bit).
FIG. 3A
Lubrication
The tool requires no additional lubrication.
Repairs
To assure product SAFETY and RELIABILITY, repairs, maintenance and adjustment
(including brush inspection and replacement) should be performed by certified
service centers or other qualified service organizations, always using identical
replacement parts.
FIG. 3B
ACCESSORIES
WARNING: Since accessories, other than those offered by DEWALT, have not
been tested with this product, use of such accessories with this tool could be
hazardous. To reduce the risk of injury, only DEWALT, recommended accessories
should be used with this product.
D
D
J
5
Recommended accessories for use with your tool are available at extra cost from
your local service center. If you need any assistance in locating any accessory,
please contact DEWALT Industrial Tool Co., 20 Fletcher Road, Mooroolbark, VIC
3138 Australia or call 1800 654 155 or (NZ) 02 259 1111.
FREE WARNING LABEL REPLACEMENT: If your warning labels become illegible or
are missing, call (AUS) 1800 654 155 or (NZ) 02 259 1111 for a free replacement.
Guarantee
Applicable to hand held Power Tools, Lasers and Nailers.
Three Year Limited Warranty
DEWALT will repair, without charge, any defects due to faulty materials or
workmanship for three years from the date of purchase. Please return the complete
unit, transportation prepaid, to any DEWALT Service Centre, or any authorised
service station.
For warranty repair information, call (AUS) 1800 654 155 or (NZ) 02 259 1111.
This warranty does not apply to
• Accessories
• Damage caused where repairs have been made or attempted by others.
• Damage due to misuse, neglect, wear and tear, alteration or modification.
This warranty gives you specific legal rights and you may have other rights under
the provisions of the Consumer Guarantee Act 1993 (New Zealand only), Trade
Practices Act 1974 and State Legislation (Australia only).
In addition to the warranty, DEWALT tools are covered by our:
FREE ONE YEAR SERVICE CONTRACT
DEWALT will also maintain the tool for free at any time during the first year of
purchase. This includes labour, parts and lubrication required to restore the product
to sound mechanical and/or electrical condition. Normal wear parts are not covered
in this service. Carbon brushes worn more then 50% will be replaced.
NOTE: Three Year Warranty is not applicable to items deemed as consumables.
Radial arm saws are covered by a one (1) year warranty only. DEWALT Reserves
the right to review its warranty policy prior to launch of any new business
development products.
30 DAY NO SATISFACTION GUARANTEE
If you are dissatisfied with any DEWALT power tool, laser or nailer, for any reason,
simply return it to the point of purchase with your sales receipt within 30 days for a
replacement unit or a full refund.
Specifications
Voltage .................................. 230 V~
Current .................................. 8.7 A
Frequency ............................. 50 Hz
Power input ........................... 2000 W
Beats per minute ................... 870
Tool holder ............................ 28 mm
Weight................................... 31 kg
6
DEWALT Industrial Tool Co.,
20 Fletcher Road, Mooroolbark, VIC 3138 Australia (03 8720 5100) • 5 Te Apunga Place, Mt Wellington, New Zealand (09 259 1111)
(APR07)
Form No. 496158-00
D25980-XE
Copyright © 2007 DEWALT
The following are trademarks for one or more DEWALT power tools: the yellow and black color scheme; the “D” shaped air intake grill; the array of pyramids on the handgrip;
the kit box configuration; and the array of lozenge-shaped humps on the surface of the tool.