1
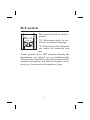
User’s instructions
The SENSO System
P7
Behind-The-Ear
User's Instructions
Volume control . . . . . . . . . . . . . . . . . . . . . . . . . . . 5
M-T switch . . . . . . . . . . . . . . . . . . . . . . . . . . . . . . 7
Change/insertion of battery . . . . . . . . . . . . . . . . 8
Recommended energy source:
Zinc Air battery type 13 . . . . . . . . . . . . . . . . . . 10
Important
National Battery Button Ingestion Hotline . . . 11
Storing the hearing instrument . . . . . . . . . . . . 12
In case of malfunction . . . . . . . . . . . . . . . . . . . . 13
Audio input . . . . . . . . . . . . . . . . . . . . . . . . . . . . 14
Caring for your hearing aid . . . . . . . . . . . . . . . 17
The earmold . . . . . . . . . . . . . . . . . . . . . . . . . . . . 19
There’s only one way . . . . . . . . . . . . . . . . . . . . . 20
Troubleshooting guide . . . . . . . . . . . . . . . . . . . . 21
2
Your Widex SENSO hearing aid is a very intricate,
high precision electronic unit. It has been carefully designed to withstand years of wear, under
the varying conditions the typical user finds themselves in each day. However, your hearing aid may
be damaged if exposed to extreme conditions, severe blows, or general neglect.
To get full satisfaction from the quality and the
performance we have built into your new Widex
hearing aid, please handle it with care, and read
and follow the instructions carefully.
Volume control
M
MT
T
M-T switch
On/Off switch
and battery drawer
3
On-Off switch
M
MT
T
OFF
Your SENSO hearing instrument has an On-Off switch
built into the battery drawer.
The hearing instrument is
turned ON when the battery
drawer is pushed upwards, and
OFF when the battery drawer
is pulled downwards.
The OFF switch is clearly
marked with the letters OFF
on the back of the battery
drawer.
Please remember always to switch the aid off
when it is not in use for a lengthy period, or to remove the battery.
4
Volume control
M
MT
T
Your P7 hearing aid has a digital volume control, shaped like
a small lever. Push the lever upwards for more volume. Push
the lever downwards for lower
volume. Use short touches for
minor corrections of the volume.
More rapid adjustment is obtained by keeping the lever
pressed for several seconds.
When you raise the volume, you will hear a beeptone for each step the volume is raised. When the
maximum adjustment level is reached, a steady
tone will sound until you release the lever.
When you lower the volume, you will hear a special
beep-tone for each step the volume is lowered.
When the minimum adjustment level is reached, a
steady tone will sound until you release the lever.
5
SENSO P7 is equipped with a computer which has
been designed to adjust its sound automatically in
accordance with the sound environment around
you. Several thousand times per second, SENSO
analyzes the surroundings and tailors its sound
accordingly. Therefore, with this digital instrument you only need to adjust the volume to obtain
as natural and comfortable a sound as possible.
Every time you turn your hearing aid on, the volume will be at a pre-set “normal” setting. This
means that any volume adjustments you might
have made before turning the hearing aid off, will
no longer be in effect. Adjust the volume to the desired setting, if necessary, each time you turn the
aid on.
Important: If the volume in your hearing aid is
too loud, or if you wish any further information,
consult the Hearing Healthcare Professional where
you received your hearing aid.
6
M-T switch
M
MT
T
This switch has three click positions:
“M” (Microphone only) for normal use or normal listening.
“T” (Telecoil only) for telephone
use and/or for induction loop
use.
Center position is an “MT” position whereby the
microphone and telecoil are on simultaneously.
This position is useful for situations where simultaneous microphone and telecoil reception is desired e.g., classrooms with inductive loops.
7
Change/insertion of battery
The battery drawer swings out
on the opposite side of the
On-Off switch.
Clean the new battery carefully with a dry cloth to remove
any sticky residue before inserting.
The battery must be placed
with the + sign visible, in accordance with the + sign on the
battery drawer.
If the battery drawer does not
close easily, the battery is incorrectly inserted.
8
Exhausted batteries: If you hear four rapid
beep-tones while wearing your hearing aid, it is an
indication that you should exchange the batteries
as soon as possible, as the batteries are nearly exhausted. Once the batteries are totally exhausted,
the hearing aid will be totally silent.
Never let an exhausted battery remain in the
hearing aid. Exhausted batteries may leak, which
could damage your hearing aid.
9
Recommended energy source:
Zinc Air battery type 13
This environmentally friendly type of battery has
about twice the lifetime of a mercury battery when
treated correctly. It can be stored up to two years,
as long as the sealing label is not removed. Therefore, do not remove the label until just before inserting the battery in the instrument.
Once inserted, the battery will start functioning
after a few seconds.
Operate your hearing aid with the same battery
until it is exhausted (see p. 9).
On occasions, a new battery may be exhausted because it was not sealed properly. If your hearing
aid does not work after you have replaced the battery, try inserting a different new battery.
10
Important
National Battery Button Ingestion Hotline
Care must be taken so that your hearing aid or any
of its accessory items are not accessible to children
who may place them in their mouths. Also, keep
batteries out of children’s reach and discard used
batteries carefully. Do not change batteries in
front of children or let them see where you keep
your supply.
Never put batteries in your mouth for any reason
and never let a child obtain a battery or place it in
his or her mouth. In case of ingestion, contact your
physician immediately and
The National Battery Button Ingestion
Hotline at: (202) 625-3333.
11
Storing the hearing
instrument
Please do not expose the hearing aid to excessive
heat, such as leaving it on a window sill, near a radiator, or on the dashboard of your car, as this may
damage your hearing aid.
Please make sure to remove the hearing aid before
taking a shower as the moisture will damage the
instrument. Also remember to remove the hearing
aid before using hairspray which can damage the
hearing aid microphone and may discolor the
hearing aid.
12
In case of malfunction
Should your hearing aid be completely or periodically dead, try the following before consulting your
Hearing Healthcare Professional:
•
Make sure the hearing aid is switched on to
the “M” position.
•
Check that the earmold is not blocked by
wax. Remove the earmold from the tubing
and try to blow air through the earmold with
a small blower.
•
Disconnect the tubing from the hook of the
hearing aid and check if there is moisture in
the tubing.
•
Change the battery and make sure the new
battery is correctly inserted.
•
See the Troubleshooting guide p. 22-23.
Never try to open or repair
the hearing aid yourself
as it may void the warranty.
13
Audio input
SENSO can be furnished with
an audio shoe. This allows direct connection to CROS systems as well as assistive listening devices such as FM equipment, hand-held microphones,
TVs, and cassette players.
A Europlug is used for connection.
Insert the plug into the socket on
the base of the audio shoe. Please
note that the plug will only connect one way, as one of the three
pins is thicker than the other two.
Make sure that the MT switch is
set on the M position.
14
Slide the audio shoe
onto the hearing aid,
as shown. Press the
shoe gently onto the
aid until you feel a
click.
2
1
Remove the audio
shoe by gently pulling
it away from the hearing aid, as shown.
15
CROS with an audio
shoe and a CROS
dummy
The audio shoe can also
be used together with
BiCROS. For this, a
CROS dummy and a cord
with a Europlug at both
ends are used.
Attention! If the hearing aid is
connected to equipment which
has an electrical plug, this equipment must meet the safety requirements stated in the international standard IEC 65.
Do not connect the hearing aid to plugs that are
labeled with one or more of the following symbols:
16
Caring for your hearing aid
With proper care, your hearing aid will give you
years of reliable service. Here are some things you
can do to prolong the life of your aid:
•
Treat your hearing aid as the valuable it is:
with care!
•
Keep it in its storage case in a cool, dry location where it cannot be reached by children
or pets.
•
Never expose it to extremes of temperature
or high humidity.
•
Do not wear your aid during rehab treatment
with ultrasonic devices.
•
Do not wear your aid in the shower or when
using a hair dryer or hair spray.
•
Switch your hearing aid off when it is not in
use. Should you not use it for a day or more,
take out the battery to avoid battery leakage.
17
•
Always insert the battery with the plus (+)
side facing you in accordance with the plus
(+) sign on the battery drawer. If you feel the
battery needs to be forced into the compartment, then check to see if it’s upside down.
18
The earmold
Make sure your earmold is clean and free of earwax and moisture. If it is plugged, clear the opening with a wax removing tool, a toothpick or pipe
cleaner.
If this is not sufficient, disconnect the plastic tube
from the hook of the hearing aid and wash the
mold in lukewarm water with a mild dishwashing
soap.
Rinse in cold water and allow the mold to dry overnight. If there is still moisture in the mold or tube,
use a small air blower to blow it dry.
Do not use alcohol to clean your earmold!
If your earmold tubing becomes stiff, yellow or
cracked, contact your Hearing Healthcare Professional for a replacement.
19
There’s only one way
Your hearing aid does not restore normal hearing,
but it will help you to hear and understand what
other people are saying - and to enjoy many other
sounds. So don’t give up. The learning process will
take time, but millions of experienced users can
testify that the results are worth the effort.
There are no short cuts by which you can obtain
immediate and full benefit from your hearing aid.
Consistent and determined practice every day will
give you the maximum results with your SENSO
hearing instrument.
20
Troubleshooting guide
Symptom Cause
Dead
Intermittent
Not Loud
Enough
Possible Remedy
Not turned on
Battery low/dead
Battery incorrectly
inserted
Poor battery
contacts
Turn on
Replace battery
Insert battey
correctly
See your Hearing
Healthcare
Professional
Blocked earmold
Clear earmold
blockage
Hearing instruSwitch to “M”
ment in the “T”
(Microphone)
(Telecoil) position
position for normal
listening
Battery contacts
See your Hearing
dirty
Healthcare
Professional
On-Off switch dirty Move On-Off switch
several times
Battery low
Replace battery
Perceive change in See your Hearing
hearing
Healthcare
Professional
Blocked earmold
Clear earmold
blockage
Earwax blockage in See your physician
your ear
21
Symptom Cause
Possible Remedy
Whistles
Remove and
reinsert
New earmold
required
See your Hearing
Healthcare
Professional
See your Hearing
Healthcare
Professional
Switch to “M”
position and
resume telephone
conversation
See your Hearing
Healthcare
Professional for
telecoil repair
Earmold loose
Earmold too small
Crack in tubing
Crack in
hook/elbow
Telecoil
Does Not
Function
Telephone not
hearing aid
compatible
Possible broken
telecoil
22
23
0301
WIDEX
T&W, DK-3500 Vaerloese
(P!P07!0501!2U1TX)
Printed by FB / 8-99
P P07 0501 2U1