1
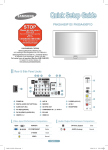
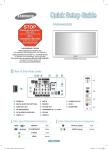
PN42A400C2D/ PN50A400C2D 1-800-SAMSUNG (7267864) Samsung Electronics America, Inc. 105 Challenger Road Ridgefield Park, NJ 07660-0511 Samsung Electronics Canada Inc., Customer Service 55 Standish Court Mississauga, Ontario L5R 4B2 Call center hours of operation (Mon-Sun 9AM-12AM EST). To register this product please visit www.samsung.com/global/register. Rear & Side Panel Jacks 1 POWER IN 7 ANT IN 2 DIGITAL AUDIO OUT (OPTICAL) 8 SERVICE 3 AUDIO OUT (R/L) 9 COMPONENT IN 1, 2 / AV IN 1 4 PC IN[PC]/[AUDIO] 0 EX-LINK 5 DVI IN (HDMI 2) (AUDIO-R/L) 6 HDMI IN 1, 2 Video Input Performance Comparison / / Audio Output Performance Comparison HDMI/DVI Best OPTICAL (Digital) Best PC/COMPONENT Better AUDIO (Analog) Normal VIDEO Normal English - BN68-01822A-00Eng.indd 1 2008-08-12 오후 5:44:31 Remote Control Buttons You can use the remote control up to a distance of about 23 feet from the TV. 1 POWER Turns the TV on and off. 2 TV Selects the TV mode directly. 3 NUMERIC BUTTONS Press to directly select a channel. 4 – Press to select additional channels (digital and analog) being broadcast by the same station. ForW.LINK example, to select channel “54-3”, W.LINK press “54”, then press “–” and “3”. 5 MUTE Press to temporarily cut off the sound. W.LINK 6 VOL W.LINK Press to increase or decrease the volume. 7 TOOLS Use to quickly select frequently used functions. 8 UP▲/DOWN▼/LEFT◄/ RIGHT►/ ENTER Use to select on-screen menu items and change menu values. @ MTS Press to choose stereo, mono or Separate Audio Program (SAP broadcast). # SOURCE Press to display all of the available video sources. $ PRE-CH Tunes to the previous channel. % CH Press to change channels. 1 2 13 3 ^ RETURN Returns to the previous menu. & EXIT Press to exit the menu. * MENU Displays the main on-screen menu. ( SRS Selects SRS TruSurround XT mode. ) FAV.CH Press to switch to your favorite channels. a P.SIZE Press to change the screen size. 9 INFO Press to display information on the TV screen. 4 5 6 16 8 9 17 10 0 COLOR BUTTONS Use these buttons in the Channel list. 11 12 ! CC Controls the caption decoder. 20 21 ➢ The performance of the remote control may be affected by bright light.. English - BN68-01822A-00Eng.indd 2 2008-08-12 오후 5:44:32 Connecting a DVD Player or Cable Box / Satellite receiver (Set-Top Box) via HDMI Connecting to HDMI (High Definition Multimedia Interface) TV Rear Panel DVD Player or Cable Box / Satellite receiver (Set-Top Box) HDMI Cable (Not supplied) 1 Connect an HDMI Cable between the HDMI IN(1 or 2) jack on the TV and the HDMI jack on the DVD Player or Cable Box / Satellite receiver (Set-Top Box). 2 Press the SOURCE button on the remote control until you see the DVD Player or Cable Box/Satellite receiver (Set- Top Box) signal (see “To Select the Source” on page 10) What is HDMI? • HDMI, or high-definition multimedia interface, is an interface that enables the transmission of digital audio and video signals using a single cable. • The difference between HDMI and DVI is that the HDMI device is smaller in size and has the HDCP (High Bandwidth Digital Copy Protection) coding feature installed. ➢ Each DVD Player or Cable Box / Satellite receiver (Set-Top Box) has a different back panel configuration. ➢ When connecting a DVD Player or Cable Box / Satellite receiver (SetTop Box), match the color of the connection terminal to the cable. Connecting to DVI (Digital Visual Interface) DVD Player or Cable Box / Satellite receiver (Set-Top Box) TV Rear Panel 1 2 Audio Cable (Not supplied) 3 2 HDMI/DVI Cable (Not supplied) Connect a HDMI/DVI Cable or DVIHDMI Adapter between the HDMI IN 2 jack on the TV and the DVI jack on the DVD Player or Cable Box/ Satellite receiver (Set- Top Box). Connect Audio Cables between the DVI IN (HDMI 2) [R-AUDIO-L] jack on the TV and the AUDIO OUT jacks on the DVD Player or Cable Box/Satellite receiver (Set-Top Box). Press the SOURCE button on the remote control until you see the DVD Player or Cable Box/Satellite receiver (Set- Top Box) signal (see “To Select the Source” on page 10) ➢ Each DVD Player or Cable Box / Satellite receiver (Set-Top Box) has a different back panel configuration. ➢ When connecting a DVD Player or Cable Box / Satellite receiver (SetTop Box), match the color of the connection terminal to the cable. ➢ When using an HDMI / DVI cable connection, you must use the HDMI IN 2 jack. English - 3 BN68-01822A-00Eng.indd 3 2008-08-12 오후 5:44:35 Connecting a DVD Player or Cable Box / Satellite receiver (Set-Top Box) Connecting to Y, PB, PR TV Rear Panel 1 Connect Component Cables between the COMPONENT IN (1 or 2) [Y, PB, PR] jacks on the TV and the COMPONENT [Y, PB, PR] jacks on the DVD Player or Cable Box / Satellite receiver(Set-Top Box). 2 Connect Audio Cables between the COMPONENT IN (1 or 2) [RAUDIO-L] jacks on the TV and the AUDIO OUT jacks on the DVD Player or Cable Box / Satellite receiver (Set-Top Box). Press the SOURCE button on the remote control until you see the DVD Player or Cable Box/Satellite receiver (Set- Top Box) signal (see “To Select the Source” on page 10) DVD Player or Cable Box/ Satellite receiver (Set-Top Box) 2 3 Audio Cable (Not supplied) Component Cable (Not supplied) ➢ Component video separates the video into Y (Luminance (brightness)), PB (Blue) and PR (Red) for enhanced video quality. Be sure to match the component video and audio connections. For example, if connecting the video cable to COMPONENT IN 1, connect the audio cable to COMPONENT IN 1 also. ➢ Each DVD Player or Cable Box / Satellite receiver (Set-Top Box) has a different back panel configuration. ➢ When connecting a DVD Player or Cable Box / Satellite receiver (SetTop Box), match the color of the connection terminal to the cable. Connecting a Camcorder Video Cable (Not supplied) Audio Cable (Not supplied) Camcorder 2 1 Connect a Video Cable between the AV IN 1 [VIDEO] jack on the TV and the VIDEO OUT jack on the Camcorder. 2 Connect Audio Cables between the AV IN 1 [L-AUDIO-R] jacks on the TV and the AUDIO OUT jacks on the Camcorder. Press the SOURCE button on the remote control until you see the Camcorder signal (see “To Select the Source” on page 10) 3 ➢ Each Camcorder has a different back panel configuration. ➢ When connecting a Camcorder, match TV Rear Panel the color of the connection terminal to the cable. English - 4 BN68-01822A-00Eng.indd 4 2008-08-12 오후 5:44:41 Connecting a VCR 1 2 3 4 TV Rear Panel VCR Rear Panel Audio Cable (Not supplied) 2 Video Cable (Not supplied) 5 6 Antenna Cable (Not supplied) Unplug the cable or antenna from the back of the TV. Connect the cable or antenna to the ANT IN terminal on the back of the VCR. Connect an Antenna Cable between the ANT OUT terminal on the VCR and the ANT IN terminal on the TV. Connect a Video Cable between the VIDEO OUT jack on the VCR and the AV IN 1 [Y/VIDEO] jack on the TV. Connect Audio cables between the AV IN 1 [R-AUDIO-L] jacks on the TV and the AUDIO OUT jacks on the VCR. Press the SOURCE button on the remote control until you see the VCR signal (see “To Select the Source” on page 10). ➢ If you have a “mono” (non-stereo) VCR, use a Y-connector (not supplied) to connect to the right and left audio input jacks of the TV. Alternatively, connect the cable to the “R” jack. If your VCR is stereo, you must connect two cables. ➢ Each VCR has a different back panel configuration. ➢ When connecting a VCR, match the color of the connection terminal to the cable. ➢ When connecting to AV IN 1, the color of the AV IN 1 [Y/VIDEO] jack (Green) does not match the color of the video cable (Yellow). English - 5 BN68-01822A-00Eng.indd 5 2008-08-12 오후 5:44:43 Connecting a Digital Audio System TV Rear Panel 1 Digital Audio System Connect an Optical Cable between the DIGITAL AUDIO OUT (OPTICAL) jacks on the TV and the Digital Audio Input (OPTICAL) jacks on the Digital Audio System. When a Digital Audio System is connected to the DIGITAL AUDIO OUT (OPTICAL) terminal: Decrease the volume of the TV, and adjust the volume level with the system’s volume control. Optical Cable (Not supplied) ➢ What is OPTICAL? • Converts the electric signal into an optical light signal, and transmits it through glass fibers. S/PDIF is a transmission system of digital audio in the form of a light wave that uses a glass conductor. ➢ 5.1CH audio is possible when the TV is connected to an external device supporting 5.1CH. ➢ Each external input source device has a different back panel configuration. ➢ When the receiver (home theater) is set to On, you can hear sound output from the TV’s Optical jack. When the TV is displaying a DTV(air) signal, the TV will send out 5.1 channel sound to the Home theater receiver. When the source is a digital component such as a DVD and is connected to the TV via HDMI, only 2 channel sound will be heard from the Home Theater receiver. Connecting an Analog Amplifier / DVD Home Theater TV Rear Panel Amplifier / DVD Home Theater 1 Connect Audio Cables between the AUDIO OUT [R-AUDIO-L] on the TV and AUDIO IN [L-AUDIO-R] on the Amplifier / DVD Home Theater. When an audio amplifier is connected to the AUDIO OUT [RAUDIO-L] jacks terminals: Decrease the volume of the TV, and adjust the volume level with the Amplifier’s volume control. ➢ Each Amplifier / DVD Home Theater has a different back panel configuration. ➢ When connecting an Amplifier / DVD Audio Cable (Not supplied) Home Theater, match the color of the connection terminal to the cable. English - 6 BN68-01822A-00Eng.indd 6 2008-08-12 오후 5:44:46 Connecting a PC Using the D-Sub Cable Using the D-Sub Cable TV Rear Panel PC 1 Connect a D-Sub Cable between PC IN [PC] jack on the TV and the PC output jack on your computer. 2 Connect a PC Audio Cable between PC IN [AUDIO] jack on the TV and the Audio Out jack of the sound card on your computer. Press the SOURCE button on the remote control until you see the PC signal (see “To Select the Source” on page 10) 3 PC Audio Cable (Not supplied) 2 D-Sub Cable (Not supplied) Using the HDMI/DVI Cable Using the HDMI/DVI Cable TV Rear Panel PC 3.5 mm Stereo plug to 2 RCA Cable (Not supplied) 1 Connect a HDMI/DVI cable between the HDMI IN 2 jack on the TV and the PC output jack on your computer. 2 Connect a 3.5mm Stereo/2RCA Cable cable between the DVI IN (HDMI 2) [R-AUDIO-L] jack on the TV and the Audio Out jack of the sound card on your computer. Press the SOURCE button on the remote control until you see the PC signal (see To Select the Source” on page 10) 3 2 HDMI/DVI Cable (Not supplied) ➢ Each PC has a different back panel configuration. ➢ When connecting a PC, match the color of the connection terminal to the cable. ➢ When using an HDMI/DVI cable connection, you must use the HDMI IN 2 terminal. English - 7 BN68-01822A-00Eng.indd 7 2008-08-12 오후 5:44:51 Turning the TV On and Off 2 Press the POWER button on the remote control. You can also use the POWER button on the TV. Press the ENTER button to select Antenna. Press the ▲ or ▼ button to select Air or Cable, then press the ENTER button. Press the EXIT button to exit. TV ➢ It may take a while for the picture to appear. Viewing the Menus 1 With the power on, press the MENU button. The main menu appears on the screen. Its left side has five icons: Picture, Sound, Channel, Setup, Input. 2 P ress the ▲ or ▼ button to select one of the icons. Then press the ENTER button to access the icon’s sub-menu. 3 Press the EXIT button to exit. Move about one minute until the on-screen menu disappears. Mode Cell Light Contrast Brightness Sharpness Color Tint G 50 ▼ More Move Picture : Standard Enter ► 10 100 45 75 55 R 50 Move Before your television can begin memorizing the available channels, you must specify the type of signal source that is connected to the TV (i.e. an Air or a Cable system). Return ● Air: Air antenna signal. ● Cable: Cable antenna signal. ● Auto: Air and Cable antenna signals. Auto Program Select the antenna to execute the Auto Program function. Air Start Cable Start Auto Start Move 3 Enter Return Press the ▲ or ▼ button to select the antenna connection, then press the ENTER button. TV Auto Program Selects a cable signal type for your location. Analog STD Start HRC IRC Press the MENU button. Press the ▲ or ▼ button to select Channel, then press the ENTER button. Digital STD HRC IRC Move Channel Enter Enter Press the ▲ or ▼ button to select Auto Program, then press the ENTER button. TV Selecting the Video Signal-source Move ► ► ► ► ► ► ► Exit Your TV can memorize and store all of the available channels for both “off-air” (air) and cable channels. After the available channels are memorized, use theW.LINK CH or CH button to scan through the channels. This eliminates the need to change channels by entering the channel digits. There are W.LINK three steps for memorizing channels: selecting a broadcast source, memorizing the channels (automatic) and adding and deleting channels (Channel Lists). Antenna : Air Auto Program Clear Scrambled Channel Channel List Name Fine Tune Signal Strength Channel Antenna : Air Auto Program Clear Scrambled Channel Channel List Name Fine Tune Signal Strength Memorizing the Channels TV Return Press the MENU button to display the menu. Press the ▲ or ▼ button to select Channel, then press the ENTER button. TV 2 1 Enter Storing Channels in Memory (Automatic Method) 1 ➢ If you do not press the EXIT button, it takes TV Channel Air Antenna : Air Cable Auto Program Clear Scrambled Channel Channel List Name Fine Tune Signal Strength Enter Return ► ► ► ► ► ► ► Return English - BN68-01822A-00Eng.indd 8 2008-08-12 오후 5:44:53 4 When selecting the Cable TV system: Press the ENTER button to start the auto program. Press the ▲ or ▼ to select the correct analog signal cable system source from among STD, HRC, and IRC, then press the ENTER button. If you have Digital cable TV, select the cable system signal source for both Analog and Digital. ● STD, HRC, and IRC identify various types of cable TV systems. Contact your local cable company to identify the type of cable system that exists in your particular area. At this point the signal source has been selected. Auto Program Auto Program in progress. DTV Air : 5 Air : 3 DTV Cable : -- Cable : -- Viewing the Channel Lists You can display a list of all channels, added channels or your favorite channels. 1 Press the MENU button to display the menu. Press the ▲ or ▼ button to select Channel, then press the ENTER button. TV Channel Antenna : Air Auto Program Clear Scrambled Channel Channel List Name Fine Tune Signal Strength Air 67 68 % Stop 5 Move Return Enter 2 The TV begins memorizing all available stations. ● If you want to stop Auto Programming, press the ENTER button. The Stop Auto Program? message will be displayed. Select Yes by pressing the ◄ or ► button. Press the EXIT button to exit. Auto Program Stop Auto Program? DTV Air : 5 Air : 3 DTV Cable : -- Cable : -Yes Move ► ► ► ► ► ► ► Return Enter Press the ▲ or ▼ button to select Channel List, then press the ENTER button. TV Channel List All Added Favorite Move ► ► ► Return Enter 68 % No Enter Return 3 Press the ▲ or ▼ button to select All, Added or Favorite, then press the ENTER button. To toggle between your all channels, add channels, or favorite channels, use the red button on the remote control. ● Red button: Press repeatedly to select All, Added, or Favorite. ● Green button: Press to add all channels deleted. ● Yellow button: Press to delete all channels memorized. Added DTV Air 2 DTV Air 2 Air 3 Air 4 Air 5 Air 6 Air 7 DTV Air 7-1 Air 9 List Mode Move DTV Air 9-1 Air 10 Air 11 DTV Air 11-1 Air 12 Air 13 Air 14 Air 15 Add All Enter Air 16 Delete All Return English - BN68-01822A-00Eng.indd 9 2008-08-12 오후 5:44:54 3 Picture Control Changing the Picture Standard Press the ◄ or ► button to decrease or increase the value of a particular item. Press the ENTER button. Press the EXIT button to exit. Cell Light You can select the type of picture which best corresponds to your viewing requirements. 1 Press the MENU button to display the menu. Press the ENTER button to select Picture. 2 Press the ENTER button to select Mode. Press the ▲ or ▼ button to select Dynamic, Standard, or Movie. Press the ENTER button. ● Dynamic: Select the picture for high-definition in a bright room. ● Standard: Select the picture for the optimum display in a normal environment. ● Movie: Select the picture for viewing movies in a dark room. TV Picture Mode : Dynamic Standard Cell Light Movie Contrast Brightness Sharpness Color Tint(G/R) G 50 ▼ More Move Enter Move 10 Adjust Return Contrast Move 100 Adjust Return ➢ When you make changes to Cell Light, Contrast, Brightness, Sharpness, Color, or Tint(G/R) the OSD will be adjusted accordingly. ➢ When in PC mode, Tint(G/R), Sharpness and Color are not available. ➢ Each adjusted setting will be stored separately according to its input mode. To Select the Source 7 95 45 50 50 R 50 Use to select TV or other external input sources such as DVD players or Set-top/Cable boxes connected to the TV. Use to select the input source of your choice. 1 Return Press the MENU button. Press the ▲ or ▼ button to select Input, then press the ENTER button. TV Customizing the Picture Settings Input Source List : TV Edit Name ► ► Your television has several setting options that allow you to control the picture quality. 1 To select the desired picture mode, follow the “Changing the Picture Standard” instructions number 1 to 2. 2 Press the ▲ or ▼ button to select Cell Light, Contrast, Brightness, Sharpness, Color, or Tint, then press the ENTER button. 2 ● Cell Light: Selects the brightness of PDP Cell Light. ● Contrast: Adjusts the contrast level of the picture. ● Brightness: Adjusts the brightness level of the picture. ● Sharpness: Adjusts the edge definition of the picture. ● Color: Adjusts color saturation of the picture. ● Tint(G/R): Adjusts the color tint of the picture by compensating the red and green color. TV Mode Cell Light Contrast Brightness Sharpness Color Tint(G/R) G 50 ▼ More Move Picture : Standard Enter Move ► 7 95 45 50 50 R 50 Enter Return Press the ENTER button again to select Source List. Press the ▲ or ▼ button to select signal source, then press the ENTER button. TV Source List TV AV1 : - - - - Component1 : - - - - Component2 : - - - - PC :---HDMI1 : - - - - HDMI2 : - - - - Move Enter Return ➢ Available signal sources: TV,AV1, Component1, Component2, PC, HDMI1, HDMI2. Return ➢ You can choose only those external devices that are connected to the TV. English - 10 BN68-01822A-00Eng.indd 10 2008-08-12 오후 5:44:56 Troubleshooting If the TV seems to have a problem, first try this list of possible problems and solutions. If none of these troubleshooting tips apply, call Samsung customer service at 1-800-SAMSUNG. Problem Possible Solution Poor picture quality. - Try another channel. - Adjust the antenna. - Check all wire connections. Poor sound quality. - Try another channel. - Adjust the antenna. No picture or sound. - - - - - No sound or sound is too low at maximum volume. First, check the volume of units connected to your TV (digital broadcasting receiver, DVD, cable broadcasting receiver, VCR, etc.). Then, adjust the TV volume accordingly. Picture rolls vertically. Check all connections. The TV operates erratically. Unplug the TV for 30 seconds, then try operating it again. The TV won’t turn on. Make sure the wall outlet is working. Remote control malfunctions - - - - - Digital broadcasting screen problem. Please check the digital signal strength and input antenna. The image is too light or too dark. - Adjust the Brightness and Contrast. - Adjust the Fine tuning. The image is too large or too small. Adjust the Size settings. The visual qualities of digital channels vary. The visual qualities of digital channels may vary depending on the original production method(analog or digital). - If the original production method is digital: High visual quality. - If the original production method is analog: The digital program displayed on the screen is originally an analog program which has been converted to digital. The visual quality is of an SD(Standard Definition) grade. Screen is black and power indicator light blinks steadily. On your computer check; Power and Signal Cable. The TV is using its power management system. Move the computer’s mouse or press any key on the keyboard. Try another channel. Press the SOURCE button. Make sure the TV is plugged in. Check the antenna connections. Make sure the MUTE button is off. Replace the remote control batteries. Clean the upper edge of the remote control(transmission window). Check the battery terminals. Make sure the remote has batteries. Check that the “+” and “-” ends of the batteries are inserted correctly. On your equipment check (STB, DVD, etc) ; Power and Signal Cable. The TV is using its power management system. Press the Source button on the panel or remote control. Turn the TV off and on. Although the TV caption shows HD, the visual quality is not satisfactory. The HD(High Definition) caption that appears when switching channels or when pressing the Information button on the remote control means the selected channel is a digital channel. If the broadcasting station converts an analog signal into digital and transmits the signal, the visual quality may not be perfect. A distorted picture appears in the corner of the screen. If Just Scan is selected in some external devices, a distorted picture may appear in the corner of the screen. This symptom is caused by external devices, not the TV. A Strange sound is heard. This is caused by minor systems operation and is not a defect. The “Resets all settings to the default values” message appears. This appears when you press and hold the EXIT button for a while. The product settings are reset to the factory defaults. ➢ This Plasma panel uses a panel consisting of sub pixels (2,359,296 (42inch)/3,147,264 (50inch)) which require sophisticated technology to produce. However, there may be few bright or dark pixels on the screen. These pixels will have no impact on the performance of the product. English - 11 BN68-01822A-00Eng.indd 11 2008-08-12 오후 5:44:56 Contact SAMSUNG WORLD-WIDE If you have any questions or comments relating to Samsung products, please contact the SAMSUNG customer care center. Country Customer Care Center Web Site CANADA 1-800-SAMSUNG (7267864) www.samsung.com/ca U.S.A 1-800-SAMSUNG (7267864) www.samsung.com BN68-01822A-00Eng.indd 12 Address Samsung Electronics Canada Inc., Customer Service 55 Standish Court Mississauga, Ontario L5R 4B2 Canada Samsung Electronique Canada Inc., Service à la Clientèle 55 Standish Court Mississauga, Ontario L5R 4B2 Canada Samsung Electronics America, Inc. 105 Challenger Road Ridgefield Park, NJ 07660-0511 2008-08-12 오후 5:44:56 PN42A400C2D/ PN50A400C2D 1-800-SAMSUNG (7267864) Samsung Electronics America, Inc. 105 Challenger Road Ridgefield Park (New Jersey) 07660-0511 Samsung Electronics Canada Inc., Customer Service 55 Standish Court Mississauga (Ontario) L5R 4B2 Centre d’appel – heures de service (du lundi au dimanche, de 9 h à 12 h (HNE)) www.samsung.com/global/register. Prises des panneaux latéraux 1 ENTRÉE DE L’ALIMENTATION 7 ANT IN 2 DIGITAL AUDIO OUT (OPTICAL) 8 SERVICE 3 AUDIO OUT (R/L) 9 ENTRÉE COMPOSANT (COMPONENT) IN 1, 2 / AV IN 1 4 PC IN[PC]/[AUDIO] 5 DVI IN (HDMI 2) (AUDIO-R/L) 0 EX-LINK 6 HDMI IN 1, 2 Entrée vidéo – tableau comparatif des Performances / / Sortie audio – tableau comparatif des performances HDMI/DVI La meilleure OPTICAL (Digital) La meilleure PC/COMPONENT Excellente AUDIO (Analog) Normale VIDEO Normale English - BN68-01822A-00CF.indd 1 2008-08-12 오후 6:04:21 Touches de la télécommande La télécommande peut être utilisée jusqu’à une distance d’environ 7 mètres (23 pieds) du téléviseur. 1 POWER Permet d’allumer et d’éteindre le téléviseur. 2 TV Pour sélectionner directement le mode TV. 3 TOUCHES NUMÉRIQUES Sélectionner directement un canal. 4 – Appuyer sur cette touche pour choisir des canaux W.LINK supplémentaires (numériques et analogiques) diffusés par laW.LINK même station. Par exemple, pour choisir le canal “54-3”, appuyer sur “54”, puis sur - et sur “–” et “3”. 5 MUTE Couper le son temporairement. 6 VOL W.LINK Augmenter ou diminuer le volume. W.LINK 7 TOOLS Permettent de sélectionner les fonctions fréquemment utilisées. 8 HAUT▲/BAS▼/GAUCHE◄/ DROITE►/ENTER Pour sélectionner des options de menu et modifier leur valeur. 9 INFO Appuyer sur cette touche pour afficher de l’information à l’écran. @ MTS Pour sélectionner le son stéréo, mono ou SAP (Separate Audio Program). # SOURCE Appuyer sur cette touche pour afficher toutes les sources vidéo accessibles. 1 2 13 $ PRE-CH Syntoniser le canal précédent. % CH Permet de changer le canal. ^ RETURN Retourner au menu précédent. & EXIT Appuyer sur cette touche pour quitter le menu. * MENU Afficher le menu principal à l’écran. ( SRS Sélectionner le mode SRS TruSurround XT. ) FAV.CH Appuyer sur cette touche pour passer aux canaux favoris. a P.SIZE Pour changer de format d’affichage. 3 4 5 6 16 8 9 17 10 11 0 TOUCHES DE COULEUR Utiliser ces touches à partir de la liste des canaux. 12 20 21 ! CC Permet de commander la fonction de sous-titrage. ➢ Un éclairage ambiant intense peut nuire à l’efficacité de la télécommande. English - BN68-01822A-00CF.indd 2 2008-08-12 오후 6:04:23 Branchement d’un lecteur DVD ou d'un câblosélecteur ou récepteur (décodeur) Raccordement aux prises HDMI (High Definition Multimedia Interface) Panneau arrière du téléviseur Lecteur DVD ou câblosélecteur/ Récepteur (décodeur) 1 Brancher un câble HDMI entre la prise d’entrée HDMI IN (1 ou 2) du téléviseur et la prise HDMI du lecteur DVD ou du câblosélecteur ou récepteur (décodeur). 2 Appuyer sur la touche SOURCE. (voir page 10 “Pour choisir la source”). Qu’est-ce que la HDMI? Câble HDMI (non fourni) • La HDMI est une interface multimédia à haute définition qui permet la transmission de signaux numériques audio et vidéo à l’aide d’un seul câble. • La différence entre les interfaces HDMI et DVI réside dans le fait que la HDMI est de plus petites dimensions, qu’elle est dotée du composant de codage HDCP (protection contre la copie numérique à large bande passante). ➢ La configuration du panneau arrière de chaque lecteur DVD ou câblosélecteur ou récepteur (décodeur) est différente. ➢ Au moment de brancher un lecteur DVD ou câblosélecteur ou récepteur (décodeur), les couleurs du câble et de la borne de raccordement doivent correspondre. Connexion à l'entrée d'interface vidéo numérique (DVI) Lecteur DVD ou câblosélecteur/ Récepteur (décodeur) Panneau arrière du téléviseur 1 2 CâbleAudio (non fourni) 2 3 Câble HDMI/DVI(non fourni) Brancher un câble de raccordement HDMI/DVI ou un adaptateur DVIHDMI entre la prise d’entrée HDMI IN 2 du téléviseur et la prise DVI du lecteur DVD, câblosélecteur ou récepteur (décodeur). Brancher les câbles audio entre la prise d’entrée DVI IN (HDMI 2) [R-AUDIO-L] du téléviseur et les prises de sortie AUDIO OUT du lecteur DVD ou du câblosélecteur ou récepteur (décodeur). Appuyer sur la touche SOURCE. (voir page 10 “Pour choisir la source”). ➢ La configuration du panneau arrière de chaque lecteur DVD ou câblosélecteur ou récepteur (décodeur) est différente. ➢ Au moment de brancher un lecteur DVD ou câblosélecteur ou récepteur (décodeur), les couleurs du câble et de la borne de raccordement doivent correspondre. ➢ Dans le cas d’une connexion de câble HDMI/DVI, il faut utiliser la prise d’ entrée HDMI IN 2. English - 3 BN68-01822A-00CF.indd 3 2008-08-12 오후 6:04:26 Branchement d’un lecteur DVD ou d'un câblosélecteur ou récepteur (décodeur) Branchement à Y, PB, PR Panneau arrière du téléviseur 1 Brancher un câble de composant entre les prises d’entrée COMPONENT IN (1 ou 2) [Y, PB, PR] du téléviseur et les prises COMPONENT [Y, PB, PR] du lecteur DVD ou du câblosélecteur ou récepteur (décodeur). 2 Brancher les câbles audio entre la prise d’entrée COMPONENT IN (1 ou 2) [R-AUDIO-L] du téléviseur et les prises de sortie AUDIO OUT du lecteur DVD ou du câblosélecteur ou récepteur (décodeur). Appuyer sur la touche SOURCE. (voir page 10 “Pour choisir la source”). Lecteur DVD ou câblosélecteur/ Récepteur (décodeur) 2 3 Câble Audio (non fourni) Câble de composant(non fourni) ➢ Le composant vidéo sépare le vidéo en Y (luminance (luminosité)), PB (bleu) et PR (rouge) pour une qualité d’image supérieure. S’assurer que les branchements audio et vidéo correspondent. Par exemple, si le câble vidéo est branché à la prise d’ entrée COMPONENT IN 1, le câble audio doit être branché à la prise d’ entrée COMPONENT IN 1. ➢ La configuration du panneau arrière de chaque lecteur DVD ou récepteur est différente. ➢ Au moment de brancher un lecteur DVD ou câblosélecteur ou récepteur (décodeur), les couleurs du câble et de la borne de raccordement doivent correspondre. Branchement d’un caméscope 1 Câble vidéo (non fourni) Câble Audio (non fourni) Caméscope 2 2 3 Raccorder un câble vidéo entre la prise d’entrée vidéo AV IN 1 [VIDEO] du téléviseur et la prise de sortie VIDEO OUT du caméscope. Raccorder les câbles audio entre les prises d’entrée AV IN 1 [L-AUDIO-R] du téléviseur et les prises de sortie AUDIO OUT du caméscope. Appuyer sur la touche SOURCE. (voir page 10 “Pour choisir la source”). ➢ Chaque caméscope possède une configuration de panneau arrière différente. ➢ Lors du branchement d'un caméscope, Panneau arrière du téléviseur les couleurs du câble et de la borne de branchement doivent correspondre. English - 4 BN68-01822A-00CF.indd 4 2008-08-12 오후 6:04:29 Branchement d’un magnétoscope Panneau arrière du téléviseur Panneau arrière du magnétoscope Câble audio (non fourni) 2 Câble vidéo (non fourni) Câble d’antenne (non fourni) 1 2 3 4 5 6 Débrancher le câble ou l’antenne à l’arrière du téléviseur. Brancher le câble ou l’antenne à l’entrée ANT IN à l’arrière du magnétoscope. Reliez au moyen d’un câble d’antenne la borne ANT OUT du magnétoscope et la borne ANT IN du téléviseur. Relier au moyen d’un câble vidéo la prise de sortie vidéo du magnétoscope et la prise AV IN 1 [Y/VIDEO] du téléviseur. Raccorder les câbles audio entre les sorties AUDIO OUT du magnétoscope et les entrées AV IN 1 [R-AUDIO-L] du téléviseur. Appuyer sur la touche SOURCE. (voir page 10 “Pour choisir la source”). ➢ Si le magnétoscope est un modèle “mono” (non stéréo), relier les prises d’entrée audio droite et gauche du téléviseur au moyen d’ un connecteur en Y (non fourni). Il est également possible de brancher le câble à la prise “R”. Si le magnétoscope fonctionne en stéréo, deux câbles distincts doivent être branchés. ➢ Le panneau arrière de chaque magnétoscope est différent. ➢ Lors du branchement d’un magnétoscope, les couleurs du câble et de la borne de branchement doivent correspondre. ➢ La couleur de la prise d’entrée AV IN 1 [Y/VIDEO] (vert) ne correspond pas à la couleur du câble vidéo (jaune). English - 5 BN68-01822A-00CF.indd 5 2008-08-12 오후 6:04:31 Branchement d’un système audionumérique Panneau arrière du téléviseur Système audionumérique 1 Brancher un câble optique entre les prises de sortie numérique optique DIGITAL AUDIO OUT (OPTICAL) du téléviseur et les prises d’entrée audionumérique du système audionumérique. Lorsqu’un système audionumérique est branché à la prise “DIGITAL AUDIO OUT (OPTICAL)” : Réduire le volume du téléviseur et régler ensuite le niveau du volume à l’aide du contrôle de volume du système. Câble optique (non fourni) ➢ Que signifie OPTIQUE? • Un câble optique convertit un signal électrique en un signal lumineux optique et le transmet par des fibres de verre. Un système transmet des signaux audionumériques sous forme d’ondes lumineuses, le format S/PDIF, par le biais d’un conducteur en verre. ➢ La diffusion audio en 5.1 canaux est possible lorsque le téléviseur est raccordé à un appareil externe doté de cette fonction audio. ➢ La configuration du panneau arrière de chaque système audionumérique est différente. ➢ Lorsque le récepteur (cinéma maison) est réglé sur “On”, vous pouvez entendre du son provenant de la prise optique du téléviseur. Lorsque le téléviseur émet des signaux numériques (antenne), il transmet le son en 5.1 canaux au récepteur du cinéma maison. Lorsque la source est un composant numérique, comme un lecteur DVD, et que ce dernier est branché au téléviseur à l’aide d’un câble HDMI, seul un son deux canaux sera émis par le récepteur du cinéma maison. Branchement d’un amplificateur ou d’un système de cinéma maison à DVD Panneau arrière du téléviseur 1 Amplificateur ou d’un système de cinéma maison à DVD Brancher les câbles audio entre les prises de sortie AUDIO OUT [RAUDIO-L] du téléviseur et les prises d’entrée AUDIO IN [L-AUDIOR] de l’amplificateur ou du système de cinéma maison à DVD. Lorsqu’un amplificateur audio est branché aux sorties AUDIO OUT [R-AUDIOL]: Réduire le volume du téléviseur et régler ensuite le niveau du volume à l’aide du contrôle de volume de l’amplificateur. ➢ Chaque amplificateur/système de cinéma maison à DVD possède une configuration de panneau arrière différente. CâbleAudio (non fourni) ➢ Lors du branchement d’un amplificateur ou système de cinéma maison à DVD, les couleurs du câble et de la borne de branchement doivent correspondre. English - 6 BN68-01822A-00CF.indd 6 2008-08-12 오후 6:04:34 Branchement d’un ordinateur À l’aide du câble D-Sub À l’aide du câble D-Sub Panneau latéral du téléviseur PC 1 Brancher un câble D-Sub entre la prise d’entrée PC IN [PC] du téléviseur et la prise de sortie PC de l’ordinateur. 2 Brancher un câble audio PC entre la prise d’entrée PC IN [AUDIO] du téléviseur et la prise de sortie audio de la carte son de l’ordinateur. Appuyer sur la touche SOURCE. (voir page 10 “Pour choisir la source”). 3 CâbleAudio (non fourni) 2 Câble D-Sub (non fourni) À l’aide du câble HDMI/DVI À l’aide du câble HDMI/DVI Panneau latéral du téléviseur PC 2 Câble pourvu d’une fiche stéréo de 3,5 mm et de deux fiches RCA (non fourni) Câble HDMI/DVI (non fourni) 1 Brancher un câble HDMI/DVI entre la prise d’entrée [HDMI IN 2] du téléviseur et la prise de sortie PC de l’ordinateur. 2 Brancher un câble pourvu d’une fiche stéréo de 3,5 mm et de deux fiches RCA entre la prise d’entrée DVI IN (HDMI 1) [R-AUDIO-L] du téléviseur et la prise de sortie audio de la carte son de l’ordinateur.. Appuyer sur la touche SOURCE. (voir page 10 “Pour choisir la source”). 3 ➢ La configuration du panneau arrière de chaque ordinateur est différente. ➢ Lors du branchement d’un ordinateur, les couleurs du câble et de la borne de branchement doivent correspondre. ➢ Il faut brancher un câble HDMI/DVI dans la prise HDMI IN 2. English - 7 BN68-01822A-00CF.indd 7 2008-08-12 오후 6:04:39 Mise sous tension/hors tension du téléviseur 2 Press the POWER button on the remote control. You can also use the POWER button on the TV. ➢ It may take a while for the picture to appear. Appuyer sur ENTER pour choisir Antenne. Appuyer sur la touche ▲ ou ▼ pour sélectionner Air ou Câble, suivie de la touche ENTER. Appuyer sur la touche EXIT pour quitter le menu. TV Affichage des paramètres et menus 1 With the power on, press the MENU button. The main menu appears on the screen. Its left side has five icons: Picture, Sound, Channel, Setup, Input. 2 P ress the ▲ or ▼ button to select one of the icons. Then press the ENTER button to access the icon’s sub-menu. 3 Press the EXIT button to exit. Dépl. about one minute until the on-screen menu disappears. TV Mode Lumière cellule Contraste Luminosité Netteté Couleur Teinte V 50 ▼ Plus Dépl. Image : Standard Intro. ► 7 80 45 50 50 R 50 Dépl. Pour que le téléviseur puisse mémoriser les canaux disponibles, il faut préciser la source de signal à laquelle il est raccordé (air ou câble). Appuyer sur la touche MENU pour afficher le menu. Appuyer sur la touche ▲ ou ▼ pour sélectionner Chaîne, suivie de la touche ENTER. Chaîne Intro. Intro. Retour Appuyer sur la touche ▲ ou ▼ pour sélectionner Prog. auto, suivie de la touche ENTER. ● Air: Signal d’antenne Air. ● Câble: Signal d’antenne Câble. ● Auto: Signaux d’antenne Air et Câble. TV Sélection de la source de diffusion Dépl. ► ► ► ► ► ► ► Sortie Prog. Auto Choisir les antennes à mettre en mémoire. Le téléviseur peut mémoriser tous les canaux captés par l’antenne (air) ou sur le câble. Une fois les chaînes mémorisées, les touchesW.LINK CH ou CH permettent de les parcourir successivement, ce qui évite de syntoniser chaque canal W.LINK manuellement avec les touches numériques. La mémorisation des canaux s’effectue en trois étapes : sélection de la source de transmission, mémorisation automatique des canaux et ajout ou suppression manuelle de canaux (listes des canaux). Antenne : Air Prog. Auto Effacer les canaux brouillés Liste des canaux Nom Syn. Précise Puissance signal Chaîne Antenne : Air Prog. Auto Effacer les canaux brouillés Liste des canaux Nom Syn. Précise Puissance signal Mémorisation des canaux TV Retour Appuyer sur la touche MENU pour afficher le menu. Appuyer sur la touche ▲ ou ▼ pour sélectionner Canal, suivie de la touche ENTER. TV 2 1 Intro. Mémorisation des chaînes (méthode automatique) 1 ➢ If you do not press the EXIT button, it takes Chaîne Air Antenne : Air Câble Prog. Auto Effacer les canaux brouillés Liste des canaux Nom Syn. Précise Puissance signal Air Démarrer Câble Démarrer Auto Démarrer Dépl. 3 Retour Appuyer sur la touche ▲ ou ▼ pour sélectionner le branchement d’antenne, suivie de la touche ENTER. TV Prog. Auto Choisit un type de signal de câble pour votre emplacement. Analogique STD Démarrer HRC IRC Numérique STD HRC IRC Dépl. ► ► ► ► ► ► ► Intro. Intro. Retour Retour English - BN68-01822A-00CF.indd 8 2008-08-12 오후 6:04:40 4 Visualisation des listes de canaux Au moment de la sélection du système de télévision par câble : Appuyer sur ENTER pour amorcer la programmation automatique. Appuyer sur les touches ▲ ou ▼ pour choisir la source du signal analogique appropriée (STD, HRC ou IRC), puis sur ENTER. Si le câble est numérique, sélectionner la source de signal pour une diffusion analogique et numérique. ● STD, HRC et IRC désignent différents systèmes de câblodistribution. Pour connaître le système utilisé dans un secteur particulier, communiquer avec le câblodistributeur. La sélection de la source de signal est maintenant terminée. Prog. Auto Prog. Aut. en cours. DTV Air : 5 Air : 3 DTV Câble : -- Câble : -- Il est possible d’afficher une liste de tous les canaux, des canaux ajoutés ou des canaux préférés. 1 Appuyer sur la touche MENU pour afficher le menu. Appuyer sur la touche ▲ ou ▼ pour sélectionner Chaîne, suivie de la touche ENTER. TV Chaîne Antenne : Air Prog. Auto Effacer les canaux brouillés Liste des canaux Nom Syn. Précise Puissance signal Dépl. Air 67 68 % ► ► ► ► ► ► ► Retour Intro. Arrêt Retour Intro. 2 5 Appuyer sur la touche ▲ ou ▼ pour sélectionner Liste des canaux, suivie de la touche ENTER. TV Le téléviseur commence alors à mémoriser tous les canaux disponibles. ● Si vous voulez arrêter la programmation automatique, appuyez sur ENTER. le message Arrêter la programmation automatique? s’affiche. Sélectionner Oui en appuyant sur la touche ◄ ou ►. Appuyer sur la touche EXIT pour quitter le menu. Liste des canaux Tout Ajouté Favorite Dépl. ► ► ► Retour Intro. Prog. Auto Supprime les canaux brouillés. DTV Cable 41 68 % Arrêt Intro. 3 Retour Appuyer sur la touche ▲ ou ▼ pour sélectionner Tout, Ajouté ou Favorite, suivie de la touche ENTER. Pour naviguer entre tous les canaux, les canaux ajoutés ou entre les canaux favoris, appuyer sur la touche rouge (P.MODE) de la télécommande. ● Touche rouge (P.MODE) : Appuyer plusieurs fois sur cette touche pour sélectionner Tout, Ajouté ou Favorite. ● Touche vert : Appuyer pour ajouter tous les canaux supprimés. ● Touche jaune (STILL) : Appuyer pour supprimer tous les canaux en mémoire. Liste des canaux / Ajouté DTV Air 2 DTV Air 2 Air 3 Air 4 Air 5 Air 6 Air 7 DTV Air 7-1 Air 9 Mode liste Dépl. DTV Air 9-1 Air 10 Air 11 DTV Air 11-1 Air 12 Air 13 Air 14 Air 15 Ajout. tout Intro. Air 16 Supp. tout Retour English - BN68-01822A-00CF.indd 9 2008-08-12 오후 6:04:42 3 Réglage de l’image Changement du format normal de l'image Appuyer sur la touche ◄ ou ► pour augmenter ou réduire la valeur d’un élément particulier. Appuyer sur la touche ENTER. Appuyer sur la touche EXIT pour quitter le menu. Lumière cellule Il est possible de choisir le type d’image qui correspond le plus à ses exigences. Dépl. 1 Appuyer sur la touche MENU pour afficher le menu. Appuyer sur la touche ▲ ou ▼ pour sélectionner Picture, suivie de la touche ENTER. 2 Appuyer sur ENTER pour choisir Mode. Appuyer sur la touche ▲ ou ▼ pour sélectionner le réglage d’image Dynamique, Standard ou Cinéma, suivie de la touche ENTER. Appuyer sur la touche EXIT pour quitter le menu. ● Dynamique : Choisit l’image pour la haute définition dans une pièce claire. ● Standard: Choisit la meilleure image possible dans un environnement normal. ● Cinéma : Choisit la meilleure image pour regarder des films dans une pièce sombre. TV Mode Lumière cellule Contraste Luminosité Netteté Couleur Teinte V 50 ▼ Plus Dépl. Image : Dynamique Standard Cinéma Intro. 7 Réglage Retour Réglage Retour Contraste Dépl. 80 ➢ Lorsque des modifications sont apportées au Contraste, à la Luminosité, à la Précision, à la Couleur ou à la Teinte, la couleur affichée à l’ écran est modifiée en conséquence. ➢ En mode PC, Teinte (V/R), Netteté et Couleur ne sont pas accessibles. ➢ Chaque paramètre configuré est enregistré séparément en fonction du mode d’entrée. Pour choisir la source Sélectionner le téléviseur ou une autre source d’entrée externe branchée au téléviseur, comme un lecteur DVD, un récepteur ou un câblosélecteur. Sélectionner pour choisir la source d’entrée désirée. 7 95 45 50 50 R 50 1 Retour Appuyer sur la touche MENU pour afficher le menu. Appuyer sur la touche ▲ ou ▼ pour sélectionner Entrée, suivie de la touche ENTER. TV Input Source List : TV Edit Name ► ► Personnalisation des réglages de l’image Le téléviseur offre plusieurs options de réglage de la qualité de l’image. 1 Pour sélectionner le mode d’image désiré, suivre les instructions “Modifier l’image standard” numéros 1 à 2. 2 Appuyer sur la touche ▲ ou ▼ pour sélectionner Contraste, Luminosité, Précision, Couleur ou Teinte, suivie de la touche ENTER. Mode Lumière cellule Contraste Luminosité Netteté Couleur Teinte V 50 ▼ Plus Dépl. Image : Standard Intro. 2 Enter Return Appuyer sur ENTER pour choisir Liste des sources. Appuyer sur la touche ▲ ou ▼ pour sélectionner la source du signal, suivie de la touche ENTER. TV ● Lumière cellule : Règle la luminosité des pixels (10 étant le réglage le plus élevé). ● Contraste : Règle le niveau de contraste de l’image. ● Luminosité : Règle le niveau de luminosité de l’image. ● Netteté : Règle la définition des contours de l’image. ● Couleur : Règle la saturation des couleurs de l’image. ● Teinte : Règle la teinte des couleurs de l’image en compensant le rouge et le vert. TV Move Source List TV AV1 : - - - - Component1 : - - - - Component2 : - - - - PC :---- Move Enter Return ➢ Il est possible de choisir entre les jeux de prises suivants : TV, AV1, Component1, Component2, PC, HDMI1, HDMI2. ➢ Seuls les appareils externes branchés au téléviseur peuvent être sélectionnés. ► 7 95 45 50 50 R 50 Retour English - 10 BN68-01822A-00CF.indd 10 2008-08-12 오후 6:04:43 Dépannage Si le téléviseur semble éprouver un problème, consulter d’abord cette liste des problèmes et solutions possibles. Si aucun de ces conseils ne permet de corriger le problème, communiquer avec le service à la clientèle de Samsung en composant le 1-800-SAMSUNG. Problème Solution possible Image de mauvaise qualité. - Essayer un autre canal. - Réorienter l’antenne. - Vérifier toutes les branchements de câbles. Son de mauvaise qualité. - Essayer un autre canal. - Réorienter l’antenne. Pas d’image ni de son. - - - - - Aucun son ou le son est trop faible au volume maximum. En premier lieu, vérifier le volume des appareils branchés au téléviseur (récepteur numérique, lecteur DVD, câblosélecteur, magnétoscope, etc.). Régler ensuite le volume du téléviseur en conséquence. Défilement vertical de l’image. Vérifier toutes les branchements de câbles. Fonctionnement anormal du téléviseur. Débrancher le téléviseur pendant 30 secondes, le rebrancher et le rallumer. Le téléviseur ne s’allume pas. Vérifier que la prise murale fonctionne. La télécommande fonctionne mal. - - - - - - Problème d’écran en diffusion numérique. Vérifier la puissance du signal numérique et l’entrée de l’antenne. L’image est trop pâle ou trop foncée. - Régler la luminosité et le contraste. - Utiliser le réglage de précision. L’image est trop grande ou trop petite. Redimensionner l’image. La qualité visuelle des canaux numériques varie. La qualité visuelle des canaux numériques peut varier selon la méthode de production d’origine (analogue ou numérique). - Si la méthode de production d’origine est numérique : Une émission de haute qualité visuelle. - Si la méthode de production d’origine est analogue : Le programme numérique affiché à l’écran est un programme analogue à l’origine, mais converti au format numérique. La qualité visuelle est de calibre SD (définition standard). L’écran est noir et le témoin d’alimentation clignote. Sur l’ordinateur, Sur l’ordinateur, vérifier l’alimentation et le câble de signal. Le téléviseur est en mode d’économie d’énergie. Déplacer la souris de l’ordinateur ou appuyer sur une touche du clavier. Essayer un autre canal. Appuyer sur la touche SOURCE. Vérifier si le téléviseur est branché. Vérifier les branchements de l’antenne. Vérifier que la touche MUTE n’est pas enfoncée. Remplacer les piles de la télécommande. Nettoyer l’extrémité supérieure de la télécommande (hublot de transmission). Vérifier les bornes des piles. Appuyer sur la touche TV pour régler la télécommande au mode TV. Vérifier s’il y a des piles dans la télécommande. Vérifier si les bornes “ + ” et “ - ” des batteries sont insérées correctement. Sur le matériel, vérifier le mode (STB, DVD, etc.), l’alimentation et le câble de signal. Le téléviseur est en mode d’économie d’énergie. Appuyer sur la touche Source du panneau ou de la télécommande. Éteindre le téléviseur et le rallumer. Même si le téléviseur indique HD, la qualité visuelle n’est pas satisfaisante. L’indication HD (haute définition) affichée lors d’un changement de poste ou lorsque la touche Information de la télécommande est enfoncée signifie que le canal sélectionné est un canal numérique. Si le diffuseur convertit un signal analogue au format numérique et transmet ce signal, il est possible que la qualité visuelle ne soit pas parfaite. L’image détériorée apparaît dans un angle de l’écran. Si la fonction Numérisation seulement est sélectionnée sur un appareil externe, l’image détériorée peut apparaître dans un angle de l’écran. Ce dommage est causé par les appareils externes et non par le téléviseur. Un son étrange se fait entendre. Cela est causé par le fonctionnement des appareils; il ne s’agit pas d’une défectuosité. Le message “rétablit tous les paramètres aux réglages prédéfinis” s’affiche. Ce message s’affiche lorsque vous appuyez et maintenez la touche EXIT enfoncée pendant un moment. Les valeurs par défaut du produit sont rétablies selon les paramètres prédéfinis à l’usine. ➢ Cet écran à plasma comporte des sous-pixels (2,359,296 pixels (pour les modèles de 42 po) / 3,147,264 pixels (pour les modèles de 50 po)) dont la production exige une technologie de pointe. Toutefois, il peut y avoir des pixels plus lumineux ou plus sombres à l’écran. Ces derniers n’ont aucune incidence sur le rendement du produit. English - 11 BN68-01822A-00CF.indd 11 2008-08-12 오후 6:04:43 Contact SAMSUNG WORLD-WIDE If you have any questions or comments relating to Samsung products, please contact the SAMSUNG customer care center. Comment contacter Samsung dans le monde Si vous avez des suggestions ou des questions concernant les produits Samsung, veuillez contacter le Service Consommateurs Samsung. Country Customer Care Center Web Site CANADA 1-800-SAMSUNG (7267864) www.samsung.com/ca U.S.A 1-800-SAMSUNG (7267864) www.samsung.com Address Samsung Electronics Canada Inc., Customer Service 55 Standish Court Mississauga, Ontario L5R 4B2 Canada Samsung Electronique Canada Inc., Service à la Clientèle 55 Standish Court Mississauga, Ontario L5R 4B2 Canada Samsung Electronics America, Inc. 105 Challenger Road Ridgefield Park, NJ 07660-0511 BN68-01822A-00 BN68-01822A-00CF.indd 12 2008-08-12 오후 6:04:43