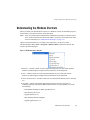
1
BEA Products
Installation Guide
BEA WebLogic Server® Version 9.2
BEA WebLogic Integration™ Version 9.2
BEA Workshop for WebLogic Platform™ Version 9.2
BEA WebLogic Portal® Version 9.2
Revised: January 2007
Copyright
Copyright © 1995-2007 BEA Systems, Inc. All Rights Reserved.
Restricted Rights Legend
This software is protected by copyright, and may be protected by patent laws. No copying or other use of this software is
permitted unless you have entered into a license agreement with BEA authorizing such use. This document is protected
by copyright and may not be copied photocopied, reproduced, translated, or reduced to any electronic medium or machine
readable form, in whole or in part, without prior consent, in writing, from BEA Systems, Inc.
Information in this document is subject to change without notice and does not represent a commitment on the part of BEA
Systems. THE DOCUMENTATION IS PROVIDED “AS IS” WITHOUT WARRANTY OF ANY KIND INCLUDING
WITHOUT LIMITATION, ANY WARRANTY OF MERCHANTABILITY OR FITNESS FOR A PARTICULAR
PURPOSE. FURTHER, BEA SYSTEMS DOES NOT WARRANT, GUARANTEE, OR MAKE ANY
REPRESENTATIONS REGARDING THE USE, OR THE RESULTS OF THE USE, OF THE DOCUMENT IN
TERMS OF CORRECTNESS, ACCURACY, RELIABILITY, OR OTHERWISE.
Trademarks and Service Marks
Copyright © 1995-2007 BEA Systems, Inc. All Rights Reserved. BEA, BEA JRockit, BEA WebLogic Portal, BEA
WebLogic Server, BEA WebLogic Workshop, Built on BEA, Jolt, JoltBeans, SteelThread, Top End, Tuxedo, and
WebLogic are registered trademarks of BEA Systems, Inc. BEA AquaLogic, BEA AquaLogic Data Services Platform,
BEA AquaLogic Enterprise Security, BEA AquaLogic Interaction, BEA AquaLogic Interaction Analytics, BEA
AquaLogic Interaction Collaboration, BEA AquaLogic Interaction Content Services, BEA AquaLogic Interaction Data
Services, BEA AquaLogic Interaction Integration Services, BEA AquaLogic Interaction Process, BEA AquaLogic
Interaction Publisher, BEA AquaLogic Interaction Studio, BEA AquaLogic Service Bus, BEA AquaLogic Service
Registry, BEA Builder, BEA Campaign Manager for WebLogic, BEA eLink, BEA Kodo, BEA Liquid Data for
WebLogic, BEA Manager, BEA MessageQ, BEA SALT, BEA Service Architecture Leveraging Tuxedo, BEA WebLogic
Commerce Server, BEA WebLogic Communications Platform, BEA WebLogic Enterprise, BEA WebLogic Enterprise
Platform, BEA WebLogic Enterprise Security, BEA WebLogic Express, BEA WebLogic Integration, BEA WebLogic
Java Adapter for Mainframe, BEA WebLogic JDriver, BEA WebLogic Log Central, BEA WebLogic Mobility Server,
BEA WebLogic Network Gatekeeper, BEA WebLogic Personalization Server, BEA WebLogic Personal Messaging API,
BEA WebLogic Platform, BEA WebLogic Portlets for Groupware Integration, BEA WebLogic Real Time, BEA
WebLogic RFID Compliance Express, BEA WebLogic RFID Edge Server, BEA WebLogic RFID Enterprise Server,
BEA WebLogic Server Process Edition, BEA WebLogic SIP Server, BEA WebLogic WorkGroup Edition, BEA
Workshop for WebLogic Platform, BEA Workshop JSP, BEA Workshop JSP Editor, BEA Workshop Struts, BEA
Workshop Studio, Dev2Dev, Liquid Computing, and Think Liquid are trademarks of BEA Systems, Inc. Accelerated
Knowledge Transfer, AKT, BEA Mission Critical Support, BEA Mission Critical Support Continuum, and BEA SOA
Self Assessment are service marks of BEA Systems, Inc.
All other names and marks are property of their respective owners.
Contents
Preface: About This Document
What You Need to Know . . . . . . . . . . . . . . . . . . . . . . . . . . . . . . . . . . . . . . . . . . . . . . . -viii
Product Documentation on the e-docs Web Site. . . . . . . . . . . . . . . . . . . . . . . . . . . . . . -viii
Related Information . . . . . . . . . . . . . . . . . . . . . . . . . . . . . . . . . . . . . . . . . . . . . . . . . . . -viii
Contact Us! . . . . . . . . . . . . . . . . . . . . . . . . . . . . . . . . . . . . . . . . . . . . . . . . . . . . . . . . . . -viii
Documentation Conventions. . . . . . . . . . . . . . . . . . . . . . . . . . . . . . . . . . . . . . . . . . . . . . -ix
1. Preparing for the Installation
Installation Overview . . . . . . . . . . . . . . . . . . . . . . . . . . . . . . . . . . . . . . . . . . . . . . . . . . . 1-1
WebLogic Express Support . . . . . . . . . . . . . . . . . . . . . . . . . . . . . . . . . . . . . . . . . . . 1-2
Installation Modes . . . . . . . . . . . . . . . . . . . . . . . . . . . . . . . . . . . . . . . . . . . . . . . . . . 1-2
Installable Product Components . . . . . . . . . . . . . . . . . . . . . . . . . . . . . . . . . . . . . . . . . . . 1-3
WebLogic Server . . . . . . . . . . . . . . . . . . . . . . . . . . . . . . . . . . . . . . . . . . . . . . . . . . . 1-4
WebLogic Integration . . . . . . . . . . . . . . . . . . . . . . . . . . . . . . . . . . . . . . . . . . . . . . . 1-4
Workshop for WebLogic Platform . . . . . . . . . . . . . . . . . . . . . . . . . . . . . . . . . . . . . . 1-5
BEA WebLogic Portal . . . . . . . . . . . . . . . . . . . . . . . . . . . . . . . . . . . . . . . . . . . . . . . 1-6
BEA JRockit JDK . . . . . . . . . . . . . . . . . . . . . . . . . . . . . . . . . . . . . . . . . . . . . . . . . . 1-6
BEA JRockit Mission Control . . . . . . . . . . . . . . . . . . . . . . . . . . . . . . . . . . . . . 1-7
Mercury Profiling Tools . . . . . . . . . . . . . . . . . . . . . . . . . . . . . . . . . . . . . . . . . . 1-7
Product Distribution Methods . . . . . . . . . . . . . . . . . . . . . . . . . . . . . . . . . . . . . . . . . . . . . 1-8
Web Distribution . . . . . . . . . . . . . . . . . . . . . . . . . . . . . . . . . . . . . . . . . . . . . . . . . . . 1-8
DVD Distribution. . . . . . . . . . . . . . . . . . . . . . . . . . . . . . . . . . . . . . . . . . . . . . . . . . . 1-8
BEA Products Installation Guide
iii
Installation Prerequisites . . . . . . . . . . . . . . . . . . . . . . . . . . . . . . . . . . . . . . . . . . . . . . . . 1-8
System Requirements . . . . . . . . . . . . . . . . . . . . . . . . . . . . . . . . . . . . . . . . . . . . . . . 1-9
Temporary Disk Space Requirements . . . . . . . . . . . . . . . . . . . . . . . . . . . . . . . . . . . 1-9
Administrator Privileges . . . . . . . . . . . . . . . . . . . . . . . . . . . . . . . . . . . . . . . . . . . . 1-10
Licensing . . . . . . . . . . . . . . . . . . . . . . . . . . . . . . . . . . . . . . . . . . . . . . . . . . . . . . . . 1-11
Selecting Directories for Your Installation . . . . . . . . . . . . . . . . . . . . . . . . . . . . . . . . . 1-12
Choosing a BEA Home Directory. . . . . . . . . . . . . . . . . . . . . . . . . . . . . . . . . . . . . 1-12
Understanding the Functions of the BEA Home Directory . . . . . . . . . . . . . . 1-14
Creating Multiple BEA Home Directories . . . . . . . . . . . . . . . . . . . . . . . . . . 1-16
Choosing a Product Installation Directory . . . . . . . . . . . . . . . . . . . . . . . . . . . . . . 1-16
Choosing the Type of Installation . . . . . . . . . . . . . . . . . . . . . . . . . . . . . . . . . . . . . . . . 1-17
Complete Installation . . . . . . . . . . . . . . . . . . . . . . . . . . . . . . . . . . . . . . . . . . . . . . 1-18
Custom Installation . . . . . . . . . . . . . . . . . . . . . . . . . . . . . . . . . . . . . . . . . . . . . . . . 1-19
About Installing Node Manager as a Windows Service. . . . . . . . . . . . . . . . . . . . . . . . 1-19
Additional Considerations for Node Manager Installation . . . . . . . . . . . . . . . . . . 1-20
Generating a Verbose Installation Log. . . . . . . . . . . . . . . . . . . . . . . . . . . . . . . . . . . . . 1-21
Syntax . . . . . . . . . . . . . . . . . . . . . . . . . . . . . . . . . . . . . . . . . . . . . . . . . . . . . . . . . . 1-21
Where to Find Upgrade Information . . . . . . . . . . . . . . . . . . . . . . . . . . . . . . . . . . . . . . 1-21
Maintenance Pack Release Using an Upgrade Installer . . . . . . . . . . . . . . . . . . . . 1-22
2. Starting the Installation Program
Before You Start. . . . . . . . . . . . . . . . . . . . . . . . . . . . . . . . . . . . . . . . . . . . . . . . . . . . . . . 2-1
Starting the Installation Program on Windows Platforms . . . . . . . . . . . . . . . . . . . . . . . 2-2
Starting in Graphical Mode . . . . . . . . . . . . . . . . . . . . . . . . . . . . . . . . . . . . . . . . . . . 2-2
Starting in Console Mode . . . . . . . . . . . . . . . . . . . . . . . . . . . . . . . . . . . . . . . . . . . . 2-3
Starting in Silent Mode . . . . . . . . . . . . . . . . . . . . . . . . . . . . . . . . . . . . . . . . . . . . . . 2-4
Starting the Installation Program on UNIX Platforms . . . . . . . . . . . . . . . . . . . . . . . . . . 2-5
Using Installers with Filenames Ending in .bin . . . . . . . . . . . . . . . . . . . . . . . . . . . 2-6
iv
BEA Products Installation Guide
Starting Graphical-Mode Installation . . . . . . . . . . . . . . . . . . . . . . . . . . . . . . . . 2-6
Starting Console-Mode Installation . . . . . . . . . . . . . . . . . . . . . . . . . . . . . . . . . 2-7
Starting Silent-Mode Installation . . . . . . . . . . . . . . . . . . . . . . . . . . . . . . . . . . . 2-8
Using Installers with Filenames Ending in .jar . . . . . . . . . . . . . . . . . . . . . . . . . . . . 2-9
Starting Graphical-Mode Installation . . . . . . . . . . . . . . . . . . . . . . . . . . . . . . . 2-10
Starting Console-Mode Installation . . . . . . . . . . . . . . . . . . . . . . . . . . . . . . . . 2-10
Starting Silent-Mode Installation . . . . . . . . . . . . . . . . . . . . . . . . . . . . . . . . . . 2-11
What’s Next? . . . . . . . . . . . . . . . . . . . . . . . . . . . . . . . . . . . . . . . . . . . . . . . . . . . . . . . . 2-12
3. Running the Installation Program in Graphical Mode
Running the Installation Program . . . . . . . . . . . . . . . . . . . . . . . . . . . . . . . . . . . . . . . . . . 3-1
Using the Upgrade Installer in Graphical Mode. . . . . . . . . . . . . . . . . . . . . . . . . . . . . . . 3-5
What’s Next? . . . . . . . . . . . . . . . . . . . . . . . . . . . . . . . . . . . . . . . . . . . . . . . . . . . . . . . . . 3-8
4. Running the Installation Program in Console Mode
Running Console-Mode Installation. . . . . . . . . . . . . . . . . . . . . . . . . . . . . . . . . . . . . . . . 4-1
Using the Upgrade Installer in Console Mode . . . . . . . . . . . . . . . . . . . . . . . . . . . . . . . . 4-9
What’s Next? . . . . . . . . . . . . . . . . . . . . . . . . . . . . . . . . . . . . . . . . . . . . . . . . . . . . . . . . 4-13
5. Running the Installation Program in Silent Mode
What Is Silent-Mode Installation? . . . . . . . . . . . . . . . . . . . . . . . . . . . . . . . . . . . . . . . . . 5-1
Using Silent-Mode Installation: Main Steps. . . . . . . . . . . . . . . . . . . . . . . . . . . . . . . . . . 5-2
Important Considerations for Silent-Mode Installation. . . . . . . . . . . . . . . . . . . . . . 5-2
Creating a silent.xml File for Silent-Mode Installation . . . . . . . . . . . . . . . . . . . . . . . . . 5-3
Guidelines for Component Selection. . . . . . . . . . . . . . . . . . . . . . . . . . . . . . . . . . . . 5-6
Sample silent.xml file for Silent-Mode Installation . . . . . . . . . . . . . . . . . . . . . . . . . . . . 5-7
Returning Exit Codes to the Console . . . . . . . . . . . . . . . . . . . . . . . . . . . . . . . . . . 5-7
Using the Upgrade Installer in Silent Mode . . . . . . . . . . . . . . . . . . . . . . . . . . . . . . . . . . 5-8
Creating a Silent-Mode Upgrade Installation XML File. . . . . . . . . . . . . . . . . . . . 5-13
BEA Products Installation Guide
v
Sample Template File for Silent-Mode Upgrade Installation . . . . . . . . . . . . 5-14
What’s Next? . . . . . . . . . . . . . . . . . . . . . . . . . . . . . . . . . . . . . . . . . . . . . . . . . . . . . . . . 5-14
6. Installing and Updating License Files
About BEA Product Licenses. . . . . . . . . . . . . . . . . . . . . . . . . . . . . . . . . . . . . . . . . . . . . 6-1
Updating Your license.bea File . . . . . . . . . . . . . . . . . . . . . . . . . . . . . . . . . . . . . . . . . . . 6-3
Important Considerations for Updating Your license.bea File . . . . . . . . . . . . . . . . 6-4
Updating license.bea Using the UpdateLicense Utility . . . . . . . . . . . . . . . . . . . . . 6-4
Upgrading Licenses from Previous Software Releases . . . . . . . . . . . . . . . . . . . . . . . . . 6-6
Installing Licenses for Use with Promotional DVD Distributions. . . . . . . . . . . . . . . . . 6-6
7. Post-Installation Information
Using QuickStart . . . . . . . . . . . . . . . . . . . . . . . . . . . . . . . . . . . . . . . . . . . . . . . . . . . . . . 7-1
Determining Which JDK Version You Are Using. . . . . . . . . . . . . . . . . . . . . . . . . . . . . 7-2
Understanding the Windows Shortcuts . . . . . . . . . . . . . . . . . . . . . . . . . . . . . . . . . . . . . 7-3
Understanding the Product Directory Structure . . . . . . . . . . . . . . . . . . . . . . . . . . . . . . . 7-4
8. Uninstalling the Software
About the Uninstallation Program . . . . . . . . . . . . . . . . . . . . . . . . . . . . . . . . . . . . . . . . . 8-1
Uninstalling Your Software in Graphical Mode . . . . . . . . . . . . . . . . . . . . . . . . . . . . . . 8-2
Uninstalling Your Software in Console Mode . . . . . . . . . . . . . . . . . . . . . . . . . . . . . . . . 8-3
Uninstalling Your Software in Silent Mode. . . . . . . . . . . . . . . . . . . . . . . . . . . . . . . . . . 8-5
Reinstalling Your Software . . . . . . . . . . . . . . . . . . . . . . . . . . . . . . . . . . . . . . . . . . . . . . 8-7
Index
vi
BEA Products Installation Guide
Preface: About This Document
This document explains how to use the BEA Products installation program on both Windows and
UNIX platforms.
It is organized as follows:
z
Chapter 1, “Preparing for the Installation,” provides the basic information you need to
know before installing your BEA software.
z
Chapter 2, “Starting the Installation Program,” describes how to start the installation
program in graphical, console, and silent modes on Windows and UNIX platforms.
z
Chapter 3, “Running the Installation Program in Graphical Mode,” describes how to install
your BEA software on Windows and UNIX platforms using a Java-based graphical user
interface (GUI).
z
Chapter 4, “Running the Installation Program in Console Mode,” discusses how to install
your BEA software on Windows and UNIX platforms using a text-based interface.
z
Chapter 5, “Running the Installation Program in Silent Mode,” describes how to install
your BEA software without user intervention by using an XML properties file to specify
the installation options.
z
Chapter 6, “Installing and Updating License Files,” describes the license types available
and explains how to update your license file.
BEA Products Installation Guide
vii
z
Chapter 7, “Post-Installation Information,” explains what you should do after you install
the software.
z
Chapter 8, “Uninstalling the Software,” provides procedures for uninstalling your BEA
software in graphical, console, and silent modes.
What You Need to Know
This document is intended for system administrators or application developers who are installing
BEA Products software. It is assumed that readers are familiar with Web technologies and have
a general understanding of Windows and UNIX platforms.
Product Documentation on the e-docs Web Site
BEA product documentation is available from the BEA e-docs Web site at
http://e-docs.bea.com.
To view the documentation for a particular product, select that product from the list on the e-docs
page; the home page for the specified product is displayed. From the menu on the left side of the
screen, select Documentation for the appropriate release. The home page for the complete
documentation set for the product and release you have selected is displayed.
Related Information
Other BEA documents that you may find helpful when installing the software are:
z
Introduction to WebLogic Server and WebLogic Express
z
Creating WebLogic Domains Using the Configuration Wizard
z
WebLogic Platform Online Documentation
z
Workshop for WebLogic Platform online Documentation
z
WebLogic Portal Documentation
Contact Us!
Your feedback on the BEA Products documentation is important to us. Send us e-mail at
[email protected] if you have questions or comments. Your comments will be reviewed
directly by the BEA professionals who create and update the BEA Products documentation.
viii
BEA Products Installation Guide
Docu ment at io n Co nve nt ion s
In your e-mail message, please indicate which release of the BEA Products documentation you
are using.
If you have any questions about these versions of the BEA software, or if you have problems
installing and running the software, contact BEA Customer Support at
http://support.bea.com. You can also contact Customer Support by using the contact
information provided on the quick reference sheet titled “BEA Customer Support,” which is
included in the product package.
When contacting Customer Support, be prepared to provide the following information:
z
Your name, e-mail address, phone number, and fax number
z
Your company name and company address
z
Your machine type and authorization codes
z
The name and version of the product you are using
z
A description of the problem and the content of pertinent error messages
Documentation Conventions
The following documentation conventions are used throughout this document.
Convention
Item
Ctrl+Tab
Indicates that you must press two or more keys simultaneously.
italics
Indicates emphasis or book titles.
monospace
text
Indicates user input, as shown in the following examples:
Filenames: config.xml
Pathnames: BEAHOME/config/examples
Commands: java -Dbea.home=BEA_HOME
Code: public TextMsg createTextMsg(
Indicates computer output, such as error messages, as shown in the following example:
Exception occurred during event
dispatching:java.lang.ArrayIndexOutOfBoundsException: No
such child: 0
BEA Products Installation Guide
ix
Convention
Item
monospace
boldface
text
Identifies significant words in code.
Example:
void commit ( )
monospace
italic
text
Identifies variables in code.
Example:
String expr
{ }
Indicates a set of choices in a syntax line. The braces themselves should never be typed.
[ ]
Indicates optional items in a syntax line. The brackets themselves should never be
typed.
Example:
java utils.MulticastTest -n name [-p portnumber]
|
Separates mutually exclusive choices in a syntax line. The symbol itself should never
be typed.
Example:
java weblogic.deploy [list|deploy|update]
...
Indicates one of the following in a command line:
That an argument can be repeated several times in a command line
That the statement omits additional optional arguments
That you can enter additional parameters, values, or other information
The ellipsis itself should never be typed.
Example:
buildobjclient [-v] [-o name] [-f "file1.cpp file2.cpp
file3.cpp . . ."
.
.
.
x
Indicates the omission of items from a code example or from a syntax line. The vertical
ellipsis itself should never be typed.
BEA Products Installation Guide
CHAPTER
1
Preparing for the Installation
The following sections provide information that you need to know before installing your BEA
software:
z
Installation Overview
z
Installable Product Components
z
Product Distribution Methods
z
Installation Prerequisites
z
Selecting Directories for Your Installation
z
Choosing the Type of Installation
z
About Installing Node Manager as a Windows Service
z
Generating a Verbose Installation Log
z
Where to Find Upgrade Information
Installation Overview
The BEA Products installation program provides a complete framework for the installation and
uninstallation of your entire BEA software product, or individual components, as desired.
Two versions of the installation program are available:
BEA Products Installation Guide
1-1
z
BEA Products installation program for BEA WebLogic Server, BEA Workshop for
Weblogic Platform™, BEA WebLogic Integration, and WebLogic Portal.
z
BEA Products installation program for BEA WebLogic Server, which includes BEA
WebLogic Server, BEA Workshop for Weblogic Platform™.
Both programs provide the same functionality; all installation procedures described in this
document apply to both versions of the installation program.
WebLogic Express Support
You can use either of the two BEA Products installation programs to install BEA WebLogic
Express™. WebLogic Express is a cost-effective entry point to the WebLogic product family,
creating a productive ramp for you to begin using BEAs market-leading application server
technology. From WebLogic Express, you can easily upgrade to other products in the WebLogic
family, which allows you to take advantage of a wide variety of enterprise-level functionality.
To install WebLogic Express, you install WebLogic Server and then install a WebLogic Express
license. The WebLogic Express license activates WebLogic Express features. For additional
information about WebLogic Express, see the WebLogic Express documentation at the following
URL:
http://e-docs.bea.com/wls/docs92/wlx.html
Note: BEA WebLogic Express is not available in the 9.2 BETA release.
Installation Modes
The BEA Products installation program can be used in the following modes:
z
Graphical mode
Graphical-mode installation is an interactive, GUI-based method for installing your
software. It can be run on both Windows and UNIX systems. For installation procedures,
see Chapter 3, “Running the Installation Program in Graphical Mode.”
Note: If you want to run graphical-mode installation, the console attached to the machine
on which you are installing the software must support a Java-based GUI. All consoles
for Windows systems support Java-based GUIs, but not all consoles for UNIX
systems do. If you attempt to start the installation program in graphical mode on a
system that cannot support a graphical display, the installation program automatically
starts console-mode installation.
1-2
BEA Products Installation Guide
Install able Product Compone nts
z
Console mode
Console-mode installation is an interactive, text-based method for installing your software
from the command line, on either a UNIX system or a Windows system. For instructions
for using this method, see Chapter 4, “Running the Installation Program in Console Mode.”
z
Silent mode
Silent-mode installation is a noninteractive method of installing your software that requires
the use of an XML properties file for selecting installation options. You can run
silent-mode installation in either of two ways: as part of a script or from the command line.
Silent-mode installation is a way of setting installation configurations only once and then
using those configurations to duplicate the installation on many machines. For instructions,
see Chapter 5, “Running the Installation Program in Silent Mode.”
Installable Product Components
There are two types of BEA Products installation programs to install:
z
WebLogic Server and BEA Workshop for WebLogic Platform using which you can install
the following software on your system:
– WebLogic Server
– Workshop for WebLogic Platform
– BEA JRockit JDK
z
WebLogic Server, WebLogic Integration, BEA Workshop for WebLogic Platform, and
WebLogic Portal using which you can install the following software on your system:
– WebLogic Server
– WebLogic Integration
– Workshop for WebLogic Platform
– BEA WebLogic Portal
– BEA JRockit JDK
Note: If you are using the BEA Products installation program for BEA WebLogic Server, only
the WebLogic Server components are available for installation.
For additional information about:
z
The features and capabilities of WebLogic Server, see Introduction to WebLogic Server and
WebLogic Express at http://e-docs.bea.com/wls/docs92/intro/index.html.
BEA Products Installation Guide
1-3
z
The features and capabilities of BEA JRockit, see Introduction to JRockit JDK at
http://e-docs.bea.com/jrockit/geninfo/genintro/index.html.
z
Operating systems and hardware supported by your software, see BEA Products Supported
Configurations at http://e-docs.bea.com/platform/suppconfigs/index.html
WebLogic Server
BEA WebLogic Server® provides the core services that ensure a reliable, available, scalable, and
high-performing execution environment for your application. It includes Apache Beehive, a
cross-container framework that provides a consistent, abstract, and easily toolable programming
model, providing a way for developers to build applications more productively.
WebLogic Server consists of the following subcomponents that can be installed on your system:
z
Server—WebLogic Server program files that contain the core Java 2 Enterprise Edition
(J2EE) features and Apache Beehive.
z
Server Examples—WebLogic Server and MedRec examples servers and sample
applications. These servers and sample applications demonstrate a variety of J2EE features.
Resources are provided to help you build, configure, and run each of the sample
applications. You must install the Server subcomponent to install and use the Server
Examples.
z
Web Server Plug-ins—Modules used to enable WebLogic Server to communicate with
applications deployed on Apache HTTP Server, Netscape Enterprise Server, or Microsoft
Internet Information Server (IIS).
Note: You must choose Custom installation to install the Web Server plug-ins. They are not
installed by default in a complete installation.
WebLogic Integration
BEA WebLogic Integration 9.2 is a unified solution to integrating business systems within an
enterprise. WebLogic Integration provides a development and run-time framework that unifies
the following components of business integration into a single flexible environment:
1-4
z
Business Process Management
z
Data Transformation
z
Trading Partner Integration
z
Connectivity
BEA Products Installation Guide
Install able Product Compone nts
z
Message Brokering
z
Application Monitoring
z
User Interaction
z
Event Generation
WebLogic Integration 9.2 is an Integrated Development Environment based on Eclipse platform,
which aims at reducing the cost of management and operations by providing highly reliable,
stable, scalable, and mission critical integration solutions.
WebLogic Integration combines the divergent pieces of the business integration picture,
including ERP, CRM, legacy applications, business users, supply chains, and trading partners, by
providing a versatile development environment to deliver rapid business integration with
simplified production and management.
WebLogic Integration comprises the following subcomponents that can be installed on your
system:
z
Integration Server
z
WebLogic Workshop Integration Extension
z
Integration Examples
Workshop for WebLogic Platform
BEA Workshop for WebLogic Platform provides a unified development environment that
enables you to develop web applications and Web services regardless of your experience in
developing applications using J2EE. It provides you with a suite of tools for developing,
debugging, and deploying sophisticated enterprise applications.
BEA Workshop for WebLogic Platform is an integrated development environment for building
enterprise-class J2EE applications on the WebLogic Platform. BEA Workshop for WebLogic
Platform provides an intuitive programming model that enables you to focus on building the
business logic of your application rather than on complex implementation details. Whether you
are an application developer with a business problem to solve or a J2EE expert building business
infrastructure, BEA Workshop for WebLogic Platform makes it easy to design, test, and deploy
enterprise-class applications.
BEA Workshop for WebLogic Platform consists of two parts: an Integrated Development
Environment (IDE) and a standards-based runtime environment. The purpose of the IDE is to
remove the complexity in building applications for the entire WebLogic platform. Applications
BEA Products Installation Guide
1-5
you build in the IDE are constructed from high-level components rather than low-level API calls.
Best practices and productivity are built into both the IDE and runtime. BEA Workshop for
WebLogic Platform also includes the workshop examples to help you to get acquainted with the
product.
You can use BEA Workshop for WebLogic Platform to:
z
Develop Web applications.
z
Create sophisticated business processes.
z
Present new functionality in user portals.
z
Make services available within a global Web community via Web services.
z
Create custom combinations of Web applications, Web services, and Portal services
BEA WebLogic Portal
WebLogic Portal's flexible, powerful framework enables you to create portal interfaces
independent of your application logic or Web pages. In addition to this, WebLogic Portal's
framework, lifecycle management tools, and business services enable you build and assemble
portals quickly. You can also simultaneously enforce business policies, processes, and security
requirements.
WebLogic Portal's framework and tools are powerful and easy to use that you can create a
sophisticated, fully functional portal in minutes. You can also develop the individual components
such as look and feel elements, pages, portlets quickly and independently. They can be combined
dynamically, and reused, giving portal developers, portal administrators, and end users the power
to create and aggregate customized audience-specific portals.
BEA JRockit JDK
The BEA JRockit® JDK provides tools, utilities, and a complete runtime environment for
developing and running applications using the Java programming language. The BEA JRockit
JDK includes the BEA JRockit Java Virtual Machine (JVM) and BEA JRockit Mission Control.
The BEA JRockit JVM is developed uniquely for server-side applications and optimized for Intel
architectures to ensure reliability, scalability, and manageability for Java applications. BEA
JRockit Mission Control is a tool set developed to monitor, manage, profile, and eliminate
memory leaks in your Java applications.
1-6
BEA Products Installation Guide
Install able Product Compone nts
The BEA JRockit JDK is fully integrated into the BEA Products installation program, in addition
to being available as a standalone JDK. BEA JRockit is installed automatically when you use the
BEA Products installation program to install your software on Windows and Linux 32-bit
platforms. On Windows platforms only, two JDKs are installed on your system: the BEA JRockit
JDK, optimized for server-side applications, and the Sun JDK, provided for optional use by both
client-side and server-side applications.
For more information about the BEA JRockit JDK, see the JRockit documentation at
http://e-docs.bea.com/jrockit/webdocs/index.html.
Note: The BEA JRockit 1.5.0 JDK is certified to be compatible with Sun Java 2 Standard
Edition (J2SE) version 1.5.0.
BEA JRockit Mission Control
The BEA JRockit Mission Control tools suite consists of the following components:
z
BEA JRockit Management Console—used to monitor and manage multiple JRockit
instances.
z
BEA JRockit Runtime Analyzer—an on-demand ‘flight recorder’ that produces detailed
recordings about the JVM and the application it is running.
z
BEA JRockit Memory Leak Detector—used to discover, and find the cause for memory
leaks.
A separate license is required to enable the JRockit Mission Control tools. For more information
about the JRockit Mission Control license types, see “BEA JRockit 1.5.0 JDK License Package
Offerings” on the Licensing page at the following URLs:
z
http://e-docs.bea.com/common/docs92/interm/license.html (WebLogic Server)
For more information about BEA JRockit Mission Control, see “BEA JRockit Mission Control”
in “Understanding BEA JRockit” in Introduction to JRockit JDK at the following URL:
http://e-docs.bea.com/jrockit/geninfo/genintro/understa.html
Mercury Profiling Tools
The Mercury profiling tools, which are provided as part of this JRockit installation, can be used
by Java and J2EE developers in a development environment to profile application performance.
During the installation process, you are presented with the option to install the Mercury profiling
tools. If you do so, you are prompted to accept the Mercury Tools license agreement. You must
BEA Products Installation Guide
1-7
accept the license agreement to install the tools. For more information about these tools, see
http://www.mercury.com/us/products/diagnostics/.
Product Distribution Methods
Your BEA software is distributed on both the BEA Web site and DVD.
Web Distribution
You can download your software from the BEA Web site at http://commerce.bea.com.
Two installation programs are available for download:
z
BEA Products installation program for WebLogic Server, BEA Workshop for WebLogic
Platform, WebLogic Portal which includes all of the software described in “Installable
Product Components” on page 1-3.
z
BEA Products installation program for WebLogic Server, which includes only the
WebLogic Server, Apache Beehive, and samples software, as described in “WebLogic
Server” on page 1-4.
DVD Distribution
If you purchased your software from your local sales representative, you will find the following
items in the product box:
z
DVDs containing the product software for Windows, Solaris, HP-UX, and Linux
z
The following printed documents:
– BEA Software License and Limited Warranty pamphlet
– Customer Support Quick Reference and Other Important Information card
– A flyer that provides a list of URLs for the online documentation for each product
Installation Prerequisites
The following sections specify the installation prerequisites:
1-8
z
System Requirements
z
Temporary Disk Space Requirements
BEA Products Installation Guide
Ins tallati on Prerequis ites
z
Administrator Privileges
z
Licensing
System Requirements
The system requirements for your installation are given in the following table.
Table 1-1 System Requirements
Component
Requirement
Platform configuration
A supported configuration of hardware, operating system, JDK, and database is
required. See Supported Configurations at
http://e-docs.bea.com/platform/suppconfigs/index.html.
The Supported Configurations documentation specifies other prerequisites and
recommendations, such as recommended versions of the JDK.
Processor
1-GHz CPU recommended
Hard disk drive
A complete installation requires approximately 1.80 GB of disk space.
Memory
1 GB of RAM minimum although BEA recommends 2GB of RAM.
Color bit depth display
and size
For graphical user interface (GUI) mode installation, 8-bit color depth (256 colors) is
required.
For console-mode and silent-mode installation, there is no color bit depth requirement.
JDK
The BEA Products installation program requires a Java run-time environment (JRE) to
run. A JRE is bundled in the Windows installation program and in some UNIX
installation programs (those with filenames ending in .bin). For other UNIX
platforms, the installation program does not install a JDK. Filenames for these
installation programs end in .jar. To run the .jar installation programs, you must
have the appropriate version of the JDK installed on your system, and include the bin
directory of the JDK at the beginning of the PATH variable definition. It is important
that you use a JDK because the installation process assigns values to JAVA_HOME and
related variables to point to the JDK directory.
Temporary Disk Space Requirements
The BEA installation program uses a temporary directory into which it extracts the files necessary
to install the software on the target system. During the installation process, your temporary
directory must contain sufficient space to accommodate the compressed Java run-time
BEA Products Installation Guide
1-9
environment (JRE) bundled with the installation program and an uncompressed copy of the JRE
that is expanded into the temporary directory. The extracted files are deleted from the temporary
directory at the end of the installation process. As a general rule, installation programs require
approximately 2.5 times the amount of temporary space that is ultimately required by the installed
files.
By default, the installation program uses the following temporary directories:
z
Windows platforms—directory referenced by the TMP system variable
z
UNIX platforms—system-dependent temporary directory
Note: If you do not have enough temporary space to run the installation program, you are
prompted to specify an alternate directory or exit the installation program.
To make sure that you have adequate temporary space, you may want to allocate an alternate
directory for this purpose. To do so, follow the instructions provided in the following table.
Table 1-2 Setting Up Disk Space
Platform
Perform this step . . .
Windows
Do one of the following:
UNIX
•
Set the TMP system variable to a directory of your choice.
•
If starting the installation program from the command line, include the
-Djava.io.tmpdir=tmpdirpath option, replacing tmpdirpath
with the full path of the directory that you want to designate as a
temporary storage area for the BEA Products installation program. For
example:
platform920_win32.exe -mode=console
-Djava.io.tmpdir=D:\Temp
Enter the following option on the command line when you start the
installation program:
-Djava.io.tmpdir=tmpdirpath
Here, tmpdirpath is the full path of the directory that you want to
designate as a temporary storage area for the BEA Products installation
program.
Administrator Privileges
On Windows systems, Administrator privileges are required in the following circumstances:
1-10
BEA Products Installation Guide
Ins tallati on Prerequis ites
z
To install the Node Manager as a Windows service.
You must have Administrator privileges to install the Node Manager as a Windows service.
When the Node Manager is installed as a Windows service, it starts at the completion of
the installation process, and again, automatically, each time you boot your Windows
system.
For more information, see “About Installing Node Manager as a Windows Service” on
page 1-19.
z
To create Start menu shortcuts in the All Users folder.
When you are installing the software as a user with Administrator privileges, you are
presented with the option to create the Start menu shortcuts in the All Users folder, or in
the Local user’s Start menu folder. The following table describes the options available.
If you select . . .
The following occurs . . .
All Users
All users registered on the machine are provided with access to
the installed software. Subsequently, if users without
Administrator privileges use the Configuration Wizard from this
installation to create domains, Start menu shortcuts to the
domains are not created. In this case, users can manually create
shortcuts in their local Start menu folders, if desired.
Local user
Other users registered on this machine will not have access to
the Start menu entries for this installation.
If a user without Administrator privileges installs the software, the Start menu entries are created
in the user’s local Start menu folder.
Licensing
Your BEA software cannot be used without a valid license. When you install your software, the
installation program installs a development license (license.bea) into the BEA Home
directory, to allow you to start using the product immediately.
To use your software in a full-scale production environment, you must purchase a production
license. To find out how to do so, contact your sales representative or visit the BEA corporate
Web site at http://www.bea.com.
For more information about development and production licenses, see “About BEA Product
Licenses” on page 6-1.
BEA Products Installation Guide
1-11
Development and production licenses for pre-9.2 versions of WebLogic Server do not work with
WebLogic Server 9.2; any such license must be upgraded to 9.2. Procedures for upgrading a
license file and installing permanent licenses are provided in “Upgrading Licenses from Previous
Software Releases” on page 6-6.
Selecting Directories for Your Installation
During the installation process, you need to specify locations for the following directories:
z
BEA Home directory
z
Product installation directory
Choosing a BEA Home Directory
When you install your BEA software, you are prompted to specify a BEA Home directory. This
directory serves as a repository for common files that are used by multiple BEA products installed
on the same machine. For this reason, the BEA Home directory can be considered a central
support directory for all the BEA products installed on your system.
The files in the BEA Home directory are essential to ensuring that BEA software operates
correctly on your system. They perform the following types of functions:
z
Ensure that licensing works correctly for the installed BEA products
z
Facilitate checking of cross-product dependencies during installation
z
Facilitate Service Pack installation
The following illustration shows the structure of a sample BEA Home directory, on a Windows
platform, which includes both the Sun and BEA JRockit JDKs.
1-12
BEA Products Installation Guide
Sel ecting Direc to rie s for Your Instal latio n
Figure 1-1 BEA Home Directory
It depicts only the files and directories required in the BEA Home directory. If you choose to
install the product in the BEA Home directory, you will see additional directories such as
weblogic92. For more information on product directories, see “Understanding the Product
Directory Structure” on page 7-4.
Note: On some UNIX platforms, the installation program does not install the JDK.
During installation of your BEA software, you are prompted to choose an existing BEA Home
directory or specify a path to create a new BEA Home directory. If you choose to create a new
directory, the installation program automatically creates it for you.
Notes: BEA recommends that you do not exceed a maximum of 12 characters when naming
your BEA Home directory. If the name of this directory has more than 12 characters, or
if the directory name is too long and if there are spaces in the directory name, the
CLASSPATH may not be resolved properly.
You can install only one instance of each version of a BEA product in a single BEA
Home directory. For example, you can install only one instance of WebLogic Server 9.2
in a BEA Home directory, but that BEA Home directory may also contain an instance of
WebLogic Server 9.0.
If the BEA Home directory is not empty and it does not contain registry.xml, or if any
of installation directories are not empty, the following messages will be displayed about
it with the option to continue installation, or return to the directory selection task:
z
For BEA Home directory selection task: BEA_HOME directory is not empty. Proceed
with installation?
z
For product installation directory(ies) selection task: One or more installation
directories are not empty. Proceed with installation?
BEA Products Installation Guide
1-13
Understanding the Functions of the BEA Home Directory
The files and directories in the BEA Home directory are described in the following table.
Table 1-3 BEA Home Directory Description
Component
Description
jdkxxx directory
Contains the software for the Sun JDK if it is installed with your software.
The JDK provides the Java run-time environment (JRE) and tools for
compiling and debugging Java applications. In this directory name, xxx
indicates the version of the Sun JDK installed on your system, for example
jdk150_06.
jrockit90_xxx directory
Contains the software for the BEA JRockit JDK installed with your
software. The JDK provides the Java run-time environment (JRE) and tools
for compiling and debugging Java applications. In this directory name, xxx
indicates the version of the JRockit JDK installed on your system, such as
jrockit90_150_06.
(Windows and Linux only)
logs directory
Contains a history file of installation and uninstallation for the BEA Home
directory.
utils directory
Contains utilities that are used to support the installation of all BEA
products installed in this BEA Home directory. The utils.jar file
contains code that supports the UpdateLicense utility.
weblogic92
This directory contains the following directories:
• beehive
• common
• integration
• javelin
• platform
• portal
• samples
• server
• uninstall
• workshop
workshop92
This directory contains the following:
•
1-14
BEA Products Installation Guide
Eclipse v 3.1.2 to ensure the tight coupling between workshop and
Eclipse. Eclipse is not an IDE version’.
Sel ecting Direc to rie s for Your Instal latio n
Table 1-3 BEA Home Directory Description (Continued)
Component
Description
license.bea file
An XML file that contains the license keys for all the BEA products
installed in the BEA Home directory.
Licenses are release specific. For example, you cannot use a license from a
previous release with WebLogic Server 9.2. To convert a pre-9.2
license.bea file to a WebLogic Server 9.2 license.bea file, see
“Upgrading Licenses from Previous Software Releases” on page 6-6.
To update your license.bea file for additional functionality, see
“Updating Your license.bea File” on page 6-3.
Note: Do not edit the license.bea file manually. Doing so may cause
operating problems for the currently installed BEA products, or
result in problems later when BEA products are installed for
maintenance upgrades.
registry.xml file
A registry file that contains a persistent record of all BEA products installed
on the target system. This registry contains product-related information,
such as version number, service pack number, and location of the
installation directory.
Note: Do not edit this file manually. Doing so may cause operating
problems for the currently installed BEA products, or result in
installation problems when future BEA products or maintenance
upgrades are installed.
For more information about the BEA registry file, see “Using the BEA
Registry API” in ISV Partners’ Guide at the following URL:
http://e-docs.bea.com/common/docs92/isv/detect.html
UpdateLicense (.cmd/.sh)
A command file (Windows) or a shell script (UNIX) that updates the current
license.bea file with new license sections. The result is a merged
license that contains both the existing and new license sections. For details
about using the UpdateLicense utility, see “Updating Your license.bea
File” on page 6-3.
patch_weblogic920
This directory contains the following directories:
•
backup
•
patch_jars
•
•
profiles
registry
BEA Products Installation Guide
1-15
Note: The directory user_projects does not contain anything when the product is installed
on the disk. It is used as the default location for your files when you create domains at
the location.
Creating Multiple BEA Home Directories
Although it is possible to create more than one BEA Home directory, we recommend that you
avoid doing so. In almost all situations, a single BEA Home directory is sufficient. There may be
circumstances, however, in which you prefer to maintain separate development and production
environments, with a separate product stack for each. With two directories, you can update your
development environment (in a BEA Home directory) without modifying the production
environment until you are ready to do so.
Choosing a Product Installation Directory
The product installation directory contains all the software components that you choose to install
on your system, including program files and examples. You are prompted during your initial
installation to choose a product installation directory. Table gives information about the product
install directories for different products if you accept default on windows:
Table 1-4 Default Product Installation Directories for BEA Products
Product
Product Installation Directory
BEA WebLogic Server
<BEA_HOME>\weblogic92
BEA Workshop for WebLogic Platform
<BEA_HOME>\workshop92
The Figure 1-2 illustrates the window for choosing different directories for WebLogic Server and
BEA Workshop for WebLogic Workshop.
1-16
BEA Products Installation Guide
Choos ing the Type of Instal latio n
Figure 1-2 Product Installation Directories window
Here, C:\bea_dijon is the BEA Home directory and weblogic92 is the product installation
directory for the WebLogic Server 9.2 software. However, you can specify any name and location
on your system for your product installation directory; there is no requirement that you name the
directory weblogic92 or create it under the BEA Home directory.
The installation program installs the software components in a product installation directory
represented by the WL_HOME variable. If, during your initial installation, you choose to install
WebLogic Server only, and not all of the products available for installation, and you later decide
to install additional products, such as Workshop for WebLogic Platform (using the same BEA
Home directory), you are not prompted, during the subsequent installations, to specify a product
installation directory. The installation program detects the WL_HOME directory and installs the
additional products under it.
A description of the BEA Products directory structure is provided in “Understanding the Product
Directory Structure” on page 7-4.
Choosing the Type of Installation
Each BEA Products installation program provides two types of installation: Complete and
Custom.
BEA Products Installation Guide
1-17
Complete Installation
In a complete installation for WebLogic Server and BEA Workshop for WebLogic Platform,
following components of BEA products are installed:
z
WebLogic Server program files and related sample files
z
Workshop for WebLogic Platform
z
WebLogic Integration
z
WebLogic Portal
In a complete installation for WebLogic Server, BEA Workshop for WebLogic Platform,
WebLogic Integration, and WebLogic Portal, the following components of BEA products are
installed:
z
WebLogic Server program files and related sample files
z
Workshop for WebLogic Platform
z
Workshop examples
z
WebLogic Integration files and Integration examples
z
Weblogic Workshop Integration Extension
z
WebLogic Portal Server
z
WebLogic Portal (WebLogic Workshop Portal Extension)
z
GroupSpace Sample Application (Portal Examples)
z
Sample domains, preconfigured for use with the PointBase database, which allow you to
start running the samples as soon as the installation is complete.
On Windows systems, two JDKs are installed: BEA JRockit 1.5.0 JDK and the Sun JDK 1.5.0.
For more information, see “BEA JRockit JDK” on page 1-6.
You cannot install the following sub-components if you choose complete installation
1-18
z
Web Server plug-ins
z
WebLogic Server Node Manager as a Windows service
BEA Products Installation Guide
A bo u t I n s ta l l i ng N o d e M an ag e r as a Win do ws Ser v i c e
Custom Installation
In a custom installation, you have the following options:
z
You can choose which software components to install on your system. For a description of
the software components provided with your product distribution, see “Installable Product
Components” on page 1-3. Sample domains preconfigured to use the PointBase database
are created only for the installed components.
Note: You must choose Custom installation to install the Web Server Plug-ins.
z
You can choose whether to install the WebLogic Server Node Manager as a Windows
Service. See “About Installing Node Manager as a Windows Service” on page 1-19.
On Windows systems only, two JDKs are installed: the BEA JRockit 1.5.0 JDK and the Sun JDK
1.5.0. For more information, see “BEA JRockit JDK” on page 1-6.
About Installing Node Manager as a Windows Service
When installing your software on a Windows platform, you can optionally install WebLogic
Server Node Manager as a Windows service. The WebLogic Server Node Manager is used to:
z
Start and stop server instances—both Administration Servers and Managed Servers—
remotely.
z
Monitor the self-reported health of servers and automatically kill server instances whose
health state is “failed.”
z
Migrate servers in a WebLogic Server cluster.
z
Automatically restart servers that have the “failed” health state, or have shut down
unexpectedly due to a system crash or reboot.
In a multi-machine environment, you must install Node Manager on each machine that hosts
Managed Server and Administration Server instances of WebLogic Server.
Note: You must have Administrator privileges to install Node Manager as a Windows service.
In a custom installation, you can optionally install Node Manager as a Windows service. If you
select Yes, Node Manager is installed as a Windows service to Listen Port 5556. To avoid port
contention, you can specify an alternate Listen Port if desired. If the Listen Port number you
specify is currently being used by a running application, the installation program prompts you to
enter a different Node Manager Listen Port number. At the completion of the installation process,
Node Manager is started using the port specified.
BEA Products Installation Guide
1-19
Note: You are prompted to install Node Manager as a Windows service only during an initial
installation. If you install additional product components during a subsequent
installation, you are not prompted to install Node Manager as a Windows service.
To install Node Manager as a Windows service in silent mode, you need to specify the
appropriate values in the silent.xml file. For more information, see “Creating a silent.xml File
for Silent-Mode Installation” on page 5-3.
You can also install and uninstall Node Manager as a Windows service using the following
scripts that are provided when you install WebLogic Server:
z
WL_HOME\server\bin\installNodeMgrSvc.cmd
z
WL_HOME\server\bin\uninstallNodeMgrSvc.cmd
In these pathnames, WL_HOME is the product installation directory in which you installed
WebLogic Server, typically C:\bea\weblogic92.
Note: To perform Server migration and other tasks, the user ID that execute scripts such as
wlscontrol.sh must have enough sufficient security permissions. This includes being
able to bring an IP address online or take an IP address offline via a network interface.
The commands required to perform server migration are ifconfig and arping. Since
these scripts require elevated OS privileges, it is important to note that this can prevent a
potential security vulnerability.
Additional Considerations for Node Manager Installation
z
When you install Node Manager as a Windows service, it is registered with the product
installation directory in which you are installing the software, for example,
C:\bea\weblogic92. Node Manager can be used to manage communication with all
domains associated with that installation directory.
If you install additional instances of WebLogic Server 9.2 on a machine, in different BEA
Home directories, you can install a Node Manager instance as a Windows service for each
installation. Each Node Manager instance will manage the domains associated with the
relevant installation.
z
When you install Node Manager as a Windows service during the installation process, the
Node Manager listen port is specified in the BEA registry file, registry.xml, located in
the BEA Home directory associated with the installation, typically c:\bea.
Note: Do not edit this file manually. Doing so may cause operating problems for the
currently installed BEA products, or result in installation problems when future BEA
products or maintenance upgrades are installed. Changing the Node Manager listen
port value in the registry.xml does not change the port for the installed service.
1-20
BEA Products Installation Guide
Genera ting a Ve rb ose Install ation Lo g
z
When you uninstall WebLogic Server, the Node Manager service registered with the
product installation directory from which, you are uninstalling the product is uninstalled
also. For more information about the product installation directory, see “Choosing a
Product Installation Directory” on page 1-16.
For more information about Node Manager, including instructions for installing it on a UNIX
system, see “Using Node Manager to Control Servers” in Managing Server Startup and
Shutdown at http://e-docs.bea.com/wls/docs92/server_start/nodemgr.html.
Generating a Verbose Installation Log
If you launch the installation from the command line or from a script, you can specify the -log
option to generate a verbose installation log. The installation log stores messages about events
that occur during the installation process, including informational, warning, error, and fatal
messages. This type of file can be especially useful for silent installations.
Note: You may see some warning messages in the installation log. However, unless a fatal error
occurs, the installation program completes the installation successfully. The installation
user interface indicates the success or failure of each installation attempt, and the
installation log file includes an entry indicating that the installation was successful.
Syntax
To create a verbose log file during installation, include the -log=full_path_to_log_file
option in the command line. For example:
platform920_win32.exe -log=C:\logs\server_install.log
The path must specify a file. You cannot create a folder simply by including a name for it in a
pathname; your path should specify only existing folders. If your path includes a nonexistent
folder when you execute the command, the installation program does not create the log file.
Where to Find Upgrade Information
For information about upgrading your software with maintenance patches and service packs, if
available, see Installing Maintenance Updates and Service Packs at
http://e-docs.bea.com/common/docs92/smart_update/index.html
Note: If you are installing WebLogic Server 9.2 into an existing BEA Home directory that
contains an installation of WebLogic Server 7.0 or 8.1, all custom security providers that
reside in the default location, WL_HOME\server\lib\mbeantypes, where WL_HOME
specifies the root directory of the pre-9.2 installation, are upgraded automatically. If all
BEA Products Installation Guide
1-21
of your custom security providers reside in the default location, then the security provider
upgrade step is complete, and you do not have to perform any of the additional steps in
“Upgrading a Security Provider” in Upgrading WebLogic Application Environments at
http://e-docs.bea.com/common/docs92/upgrade/upgrade_sp.html.
You can verify that a custom security provider has been upgraded by locating the
upgraded security provider, security_provider_name_Upgraded, in the
WL_HOME\server\lib\mbeantypes directory, where WL_HOME specifies the root
directory of the 9.2 installation and security_provider_name specifies the name of
the security provider.
Maintenance Pack Release Using an Upgrade Installer
You can upgrade your WebLogic Platform installation by using the downloadable upgrade
installer.
When a maintenance release is available, you can download a package upgrade installer from the
BEA Customer Support Web site at http://support.bea.com.
Two package upgrade installers are available: a WebLogic Platform upgrade installer for all
components of WebLogic Platform, and a WebLogic Server upgrade installer, which includes
WebLogic Server and WebLogic Workshop only. Both programs provide the same functionality,
the procedures provided in this section apply to both installers.
These installers upgrade only those components that are already installed on your system. For
example, if your installation consists of the WebLogic Server, WebLogic Workshop and
WebLogic Portal components of WebLogic Platform 9.2, the upgrade installer upgrades only
those components.
The upgrade installer can be run in the following modes on both UNIX and Windows platforms:
Graphical mode: For instructions, see “Using the Upgrade Installer in Graphical Mode” on
page 3-5.
Console mode: For instructions, see “Using the Upgrade Installer in Console Mode” on page 4-9.
Silent mode: For instructions, see “Using the Upgrade Installer in Silent Mode” on page 5-8.
To run graphical-mode installation, your console must support a Java-based GUI. If the
installation program determines that your system cannot support a Java-based GUI, it
automatically starts running in console-mode.
The upgrade installation programs require a Java run-time environment (JRE) to run. A JRE is
bundled in the Windows installation program, and in some UNIX installation programs (those
1-22
BEA Products Installation Guide
Where to Find Upgrade Informatio n
with filenames ending in .bin). For other UNIX platforms, the WebLogic Platform installation
program does not include the Java 2 SDK. Filenames for these installation programs end in .jar.
To run the .jar installation programs, you must have an appropriate version of a Java 2 SDK
installed on your system, and include the bin directory of the Java 2 SDK at the beginning of your
PATH system variable.
Note: It is important that you use an SDK because the installation process resets the
JAVA_HOME, and related variables to point to this directory. All scripts installed with
WebLogic Platform use this SDK by default, including scripts to start sample
applications, the Configuration Wizard, and other WebLogic development tools.
BEA Products Installation Guide
1-23
1-24
BEA Products Installation Guide
CHAPTER
2
Starting the Installation Program
The following sections describe how to start the installation program on Windows and UNIX
platforms:
z
Before You Start
z
Starting the Installation Program on Windows Platforms
z
Starting the Installation Program on UNIX Platforms
z
What’s Next?
z
What’s Next?
Before You Start
Before you start installing the software, please review the following information:
z
Make sure that you are installing your software on a hardware/software configuration that
is supported by your BEA Products software. A complete list of documents that describe
the configurations supported by BEA can be found at
http://e-docs.bea.com/platform/suppconfigs/index.html.
z
Read Chapter 1, “Preparing for the Installation.”
z
You cannot reinstall any BEA product on top of a previously installed version of the same
product—in the same BEA Home directory or in the same file location. You can, however,
add products and product components to an existing installation. For example, you can
install WebLogic Server during one installation, and Workshop for WebLogic Platform
BEA Products Installation Guide
2-1
during a separate installation. However, to reinstall the same version of one of the
products, you must first uninstall the previous installation, as described in Chapter 8,
“Uninstalling the Software.”
z
If you are adding components to an existing installation of WebLogic Server, you should
shut down any running servers before starting the installation.
Starting the Installation Program on Windows Platforms
The following sections describe how to start the installation program on a Windows platform:
z
Starting in Graphical Mode
z
Starting in Console Mode
z
Starting in Silent Mode
Notes: If you are installing the software on a Windows system that supports more than one
monitor, you must disable all but one monitor before starting the installation program.
If you want to install Node Manager as a Windows service, you must have Administrator
privileges. For more information, see “About Installing Node Manager as a Windows
Service” on page 1-19.
Starting in Graphical Mode
To start the graphical-mode installation process on a Windows platform, follow these steps:
1. Log in to the Windows system.
2. Go to the directory where you have downloaded the installation program.
3. Complete the appropriate procedure in the following table.
2-2
BEA Products Installation Guide
St a rt i n g t h e I n s t al l at i o n P ro gr am o n Win do ws P l a tf o r m s
If you are installing
from . . .
Perform the following action . . .
Web download
Go to the directory where you downloaded the installation program.
DVD
1. Insert the software DVD into the DVD drive.
2. If the installation program does not start automatically, open
Windows Explorer and double-click the DVD icon.
3. Navigate to the folder for the Windows installation.
4. Double-click the installation file:
– platform920_win32.exe (BEA Products installation program for WebLogic Server,
Workshop for WebLogic Platform, and WebLogic Portal)
The installation program begins to install the software.
5. Proceed to Chapter 3, “Running the Installation Program in Graphical Mode.”
Starting in Console Mode
To start the console-mode installation process on a Windows platform, follow these steps:
1. Log in to the target Windows system.
2. Complete the appropriate procedure in the following table:
BEA Products Installation Guide
2-3
If you are installing
from . . .
Web download
Perform the following action . . .
1. Open a command prompt window.
2. Go to the directory where you downloaded the installation program.
DVD
1. Insert the software DVD into the DVD drive.
Note: If autorun is enabled, the installation program may start
automatically in graphical mode. You must exit the installation
program to use console-mode installation.
2. Open a command prompt window.
3. Go to the DVD directory and navigate to the folder for the Windows
installation program.
3. Launch the installation by entering one of the following commands:
– platform920_win32.exe (BEA Products installation program for WebLogic Server,
WebLogic Integration, Workshop for WebLogic Platform, and WebLogic Portal)
Note: You can also include the -log=full_path_to_log_file option in the command
line to create a verbose installation log. For example:
platform920_win32.exe -mode=console
-log=C:\logs\server_install.log
For more information, see “Generating a Verbose Installation Log” on page 1-21.
After a few moments, a BEA Installer window opens and the installation program begins
to install the software.
4. Proceed to Chapter 4, “Running the Installation Program in Console Mode.”
Starting in Silent Mode
For details about silent-mode installation, see “What Is Silent-Mode Installation?” on page 5-1.
To start the silent-mode installation process on a Windows platform, follow these steps:
1. Log in to the Windows system.
2. Create a silent.xml file that defines the configuration settings normally entered by a user
during an interactive installation process, such as graphical-mode or console-mode
2-4
BEA Products Installation Guide
S ta rt i n g th e I n s t al l at i o n P ro gr am o n UNI X P l a tf o r m s
installation. For information about creating a silent.xml file, see “Creating a silent.xml File
for Silent-Mode Installation” on page 5-3.
Note: Incorrect entries in the silent.xml file can cause installation failures. To help you
determine the cause of a failure, we recommend that you create a log file when you
start the installation.
3. Complete the appropriate procedure in the following table.
If you are installing
from . . .
Perform the following action . . .
Web download
1. Open a command prompt window.
2. Go to the directory where you downloaded the installation program.
DVD
1. Insert the software DVD into the DVD drive.
2. Open a command prompt window.
3. Go to the DVD directory and navigate to the folder for the Windows
installation program.
4. Launch the installation by entering the following command:
filename.exe -mode=silent -silent_xml=path_to_silent.xml
Here, filename.exe is the name of the BEA software installation file, and
path_to_silent.xml is the full pathname of the silent.xml file.
Note: You can also include the -log=full_path_to_log_file option in the command
line to create a verbose installation log. For example:
platform920_win32.exe -mode=silent -silent_xml=C:\silent.xml
-log=C:\logs\server_install.log
For more information, see “Generating a Verbose Installation Log” on page 1-21.
A BEA Installer window is displayed, indicating that the files are being extracted. No other
prompt or text is displayed.
For more information, see Chapter 5, “Running the Installation Program in Silent Mode.”
Starting the Installation Program on UNIX Platforms
The BEA Products installation program requires a Java run-time environment (JRE) to run. A
JRE is bundled in the Windows installation program, and in some UNIX installation programs
BEA Products Installation Guide
2-5
(those with filenames ending in .bin). For other UNIX platforms, the installation program does
not include a JRE. Filenames for these installation programs end in .jar. To run the .jar
installation programs, you must have an appropriate version of a JDK installed on your system,
and include the bin directory of the JDK at the beginning of your PATH system variable.
Notes: It is important that you use a JDK because the installation process assigns values to
JAVA_HOME and related variables to point to this directory. All scripts installed by your
installation program use this JDK by default, including scripts to start sample
applications, the Configuration Wizard, and other development tools.
To run graphical-mode installation, your console must support a Java-based GUI. If the
installation program determines that your system cannot support a Java-based GUI, it
automatically starts running in console mode. For details, see Chapter 4, “Running the
Installation Program in Console Mode.”
Using Installers with Filenames Ending in .bin
The following sections describe how to start the installation program on UNIX platforms using
filenames that end in .bin:
z
Starting Graphical-Mode Installation
z
Starting Console-Mode Installation
z
Starting Silent-Mode Installation
Starting Graphical-Mode Installation
To start the graphical-mode installation process for installation files with names ending in .bin,
follow these steps:
1. Log in to the target UNIX system.
2. Complete the appropriate procedure in the following table.
2-6
BEA Products Installation Guide
S ta rt i n g th e I n s t al l at i o n P ro gr am o n UNI X P l a tf o r m s
If you are installing
from . . .
Perform the following action . . .
Web download
Go to the directory where you downloaded the installation program.
DVD
1. Insert the software DVD into the DVD drive and go to the DVD
directory.
2. Navigate to the directory that contains the installation program for
your platform.
3. Launch the installation by entering the following commands:
chmod a+x <filename.bin>
./<filename.bin>
In these commands, filename.bin is the name of the installation program specific to your
platform, for example, platform920_solaris32.bin.
Note: You can also include the -log=full_path_to_log_file option in the command
line to create a verbose installation log. For example:
platform920_solaris32.bin -log=/home/logs/BEA_install.log
For more information, see “Generating a Verbose Installation Log” on page 1-21.
The installation program begins to install the software.
4. Proceed to Chapter 3, “Running the Installation Program in Graphical Mode.”
Starting Console-Mode Installation
To start the console-mode installation process for installation files with names ending in .bin,
follow these steps:
1. Log in to the target UNIX system.
2. Complete the appropriate procedure in the following table.
BEA Products Installation Guide
2-7
If you are installing
from . . .
Perform the following action . . .
Web download
Go to the directory where you downloaded the installation program.
DVD
1. Insert the software DVD into the DVD drive and go to the DVD
directory.
2. Navigate to the directory that contains the installation program for
your platform.
3. Launch the installation by entering the following commands:
chmod a+x <filename.bin>
./<filename.bin> -mode=console
Here filename.bin is the name of the installation program specific to your platform, for
example, platform920_solaris32.bin.
Note: You can also include the -log=full_path_to_log_file option in the command
line to create a verbose installation log. For example:
platform920_solaris32.bin -mode=console
-log=/home/logs/BEA_install.log
For more information, see “Generating a Verbose Installation Log” on page 1-21.
4. Proceed to Chapter 4, “Running the Installation Program in Console Mode.”
Starting Silent-Mode Installation
For details about silent-mode installation, see “What Is Silent-Mode Installation?” on page 5-1.
To start the silent-mode installation process for installation files with names ending in .bin,
follow these steps:
1. Log in to the target UNIX system.
2. Create a silent.xml file that defines the configuration settings normally entered by a user
during an interactive installation process, such as graphical-mode or console-mode
installation. For information about creating a silent.xml file, see “Creating a silent.xml File
for Silent-Mode Installation” on page 5-3.
2-8
BEA Products Installation Guide
S ta rt i n g th e I n s t al l at i o n P ro gr am o n UNI X P l a tf o r m s
Note: Incorrect entries in the silent.xml file can cause installation failures. To help you
determine the cause of a failure, we recommend that you create a log file when you
start the installation.
3. Complete the appropriate procedure in the following table.
If you are installing
from . . .
Perform the following action . . .
Web download
Go to the directory where you downloaded the installation program.
DVD
1. Insert the software DVD into the DVD drive and go to the DVD
directory.
2. Navigate to the directory that contains the installation program for
your platform.
4. Launch the installation program by entering the following command:
chmod a+x filename
./<filename.bin> -mode=silent -silent_xml=/path_to_silent.xml
Here filename.bin is the name of the installation file, for example,
platform920_solaris32.bin, and path_to_silent.xml is the full pathname of the
silent.xml template file.
Note: You can also include the -log=full_path_to_log_file option in the command
line to create a verbose installation log. For example:
platform920_solaris32.bin -mode=silent
-silent_xml=/home/silent.xml -log=/home/logs/BEA_install.log
For more information, see “Generating a Verbose Installation Log” on page 1-21.
A BEA Installer window is displayed, indicating that the files are being extracted. No other
prompt or text is displayed.
For more information, see Chapter 5, “Running the Installation Program in Silent Mode.”
Using Installers with Filenames Ending in .jar
The following sections describe how to start the installation program on UNIX platforms using
filenames that end in .jar:
z
Starting Graphical-Mode Installation
BEA Products Installation Guide
2-9
z
Starting Console-Mode Installation
z
Starting Silent-Mode Installation
Starting Graphical-Mode Installation
To start the graphical-mode installation process for installation files with names ending in .jar,
follow these steps:
1. Log in to the target UNIX system.
2. Add the bin directory of the appropriate JDK to the beginning of the PATH variable definition
on the target system. For example:
PATH=JAVA_HOME/bin:$PATH
export PATH
Here JAVA_HOME represents the full path to the JDK directory.
3. Go to the directory where you downloaded the installation program.
4. Launch the installation program by entering the following command:
java -jar server920_generic.jar
Note: You can also include the -log=full_path_to_log_file option in the command
line to create a verbose installation log. For example:
server920_generic.jar -log=/home/logs/BEA_install.log
For more information, see “Generating a Verbose Installation Log” on page 1-21.
The installation program begins to install the software.
5. Proceed to Chapter 3, “Running the Installation Program in Graphical Mode.”
Starting Console-Mode Installation
To start the console-mode installation process for installation files with names ending in .jar,
follow these steps:
1. Log in to the target UNIX system.
2. Add the bin directory of the appropriate JDK to the beginning of the PATH variable definition
on the target system. For example:
PATH=JAVA_HOME/bin:$PATH
export PATH
2-10
BEA Products Installation Guide
S ta rt i n g th e I n s t al l at i o n P ro gr am o n UNI X P l a tf o r m s
Here, JAVA_HOME represents the full path to the JDK directory.
3. Go to the directory where you downloaded the installation program.
4. Launch the installation by entering the following command:
java -jar <filename.jar> -mode=console
Here, filename.jar is the name of the BEA Products installation file, for example,
server920_generic.jar.
Note: You can also include the -log=full_path_to_log_file option in the command
line to create a verbose installation log. For example:
java -jar server920_generic.jar -mode=console
-log=/home/logs/BEA_install.log
For more information, see “Generating a Verbose Installation Log” on page 1-21.
5. Proceed to Chapter 4, “Running the Installation Program in Console Mode.”
Starting Silent-Mode Installation
For details about silent-mode installation, see “What Is Silent-Mode Installation?” on page 5-1.
To start the silent-mode installation process for installation files with names ending in .jar,
follow these steps:
1. Log in to the target UNIX system.
2. Create a silent.xml file that defines the configuration settings normally entered by a user
during an interactive installation process, such as graphical-mode or console-mode
installation. For information about creating a silent.xml file, see “Creating a silent.xml File
for Silent-Mode Installation” on page 5-3.
Note: Incorrect entries in the silent.xml file can cause installation failures. To help you
determine the cause of a failure, we recommend that you create a log file when you
start the installation.
3. Add the bin directory of the appropriate JDK to the beginning of the PATH variable definition
on the target system. For example:
PATH=JAVA_HOME/bin:$PATH
export PATH
Here, JAVA_HOME is the full path of the JDK directory.
4. Go to the directory that contains the installation file.
BEA Products Installation Guide
2-11
5. Launch the installation by entering the following command:
java -jar <filename.jar> -mode=silent
-silent_xml=/path_to_silent.xml
Here, filename.jar is the name of the BEA Products installation file (for example,
serverXXX_generic.jar, where XXX represents the version number of the software you
are installing) and path_to_silent.xml is the full path to the silent.xml file.
Note: You can also include the -log=full_path_to_log_file option in the command
line to create a verbose installation log. For example:
server920_generic.jar -mode=silent -silent_xml=/home/silent.xml
-log=/home/logs/BEA_install.log
For more information, see “Generating a Verbose Installation Log” on page 1-21.
A BEA Installer window is displayed, indicating that the files are being extracted. No other
prompt or text is displayed.
For more information, see Chapter 5, “Running the Installation Program in Silent Mode.”
What’s Next?
For details about running the installation program, see one of the following, depending on your
selected installation mode:
2-12
z
Chapter 3, “Running the Installation Program in Graphical Mode”
z
Chapter 4, “Running the Installation Program in Console Mode”
z
Chapter 5, “Running the Installation Program in Silent Mode”
BEA Products Installation Guide
CHAPTER
3
Running the Installation Program in
Graphical Mode
The following sections describe how to run the installation program in graphical mode:
z
Running the Installation Program
z
Using the Upgrade Installer in Graphical Mode
z
What’s Next?
Running the Installation Program
Start the installation program as described in Chapter 2, “Starting the Installation Program.”
The installation program prompts you to enter specific information about your system and
configuration. For instructions on responding to the prompts during installation, see the following
table.
In this window . . .
Perform the following action . . .
Welcome
Click Next to proceed with the installation. You may cancel the installation
at any time by clicking Exit.
BEA License Agreement
Read the BEA Software License Agreement and indicate your acceptance of
the terms of the agreement by selecting Yes. To continue with the installation,
you must accept the terms of the license agreement and then click Next.
BEA Products Installation Guide
3-1
In this window . . .
Perform the following action . . .
Choose BEA Home Directory
Specify the BEA Home directory that will serve as the central support
directory for all BEA products installed on the target system. If you already
have a BEA Home directory on your system, you can select that directory
(recommended) or create a new BEA Home directory. If you choose to create
a new directory by typing a new directory name in the BEA Home Directory
field, the installation program automatically creates one for you. You can also
click Browse and select a directory from the BEA Home Directory
Selection window. For details about the BEA Home directory, see “Choosing
a BEA Home Directory” on page 1-12.
Choose Install Type
Select the option button for the type of installation you want to perform:
This window is displayed only
during an initial installation.
•
Complete—All the software components included in your installation
program, except the WebLogic Server Plug-ins, are installed on your
system. Sample domains are preconfigured for use with the PointBase
database during installation, allowing you to execute the samples when
the installation is complete.
•
Custom—You select the software components to be installed. On
Windows systems, you also have the option to install WebLogic Server
Node Manager as a Windows service.
Note: You must select Custom installation to install the Web Server
Plug-ins.
For more information, see “Choosing the Type of Installation” on page 1-17.
3-2
BEA Products Installation Guide
Running the Install ation Program
In this window . . .
Perform the following action . . .
Choose Components
Specify the components to be installed by selecting or clearing the
appropriate check boxes.
This window is displayed only
under the following conditions:
•
•
You selected Custom
installation in the Choose
Install Type window.
You are adding components
to an existing installation.
This window displays a tree-view of all the components available for
installation.
Note: In an initial installation, only the Web Server Plug-ins are not
selected; all other components are selected by default. You must
select the Web Server Plug-ins check box if you want the plug-ins to
be installed on your system.
When you select or clear a component at the folder level, all subcomponents
are selected or cleared accordingly.
If any components are already installed on your system, the check boxes for
them are grayed out.
Note: When you select or deselect components to install, the installation
program checks for dependencies between components and
automatically modifies the list of selected components accordingly.
For example, if you clear the WebLogic Server component check
box, the boxes for the remaining components are cleared because the
other components cannot be run without WebLogic Server.
For details about the components available for installation on your system,
see “Installable Product Components” on page 1-3.
Optional Tools
This window is displayed only
on platforms that support BEA
JRockit.
Mercury Tools License
Agreement
This window is displayed only if
you selected to install the
Mercury profiling tools in the
Optional Tools window.
Specify whether or not you want to install the Mercury profiling tools. Clear
the check box for this option if you do not want to install these tools.
For more information about the Mercury profiling tools, see “BEA JRockit
JDK” on page 1-6.
Read the Mercury Tools License Agreement and indicate your acceptance of
the terms of the agreement by selecting Yes. To continue with the installation,
you must accept the terms of the license agreement and then click Next.
If you do not agree with the terms of the license agreement and you do not
want to install the tools, click Previous to return to the Optional Tools
window and clear the check box for the Mercury profiling tools.
BEA Products Installation Guide
3-3
In this window . . .
Perform the following action . . .
Choose Product Installation
Directory
Specify the directory in which you want to install the software and click Next.
You can accept the default product directory (weblogic92) or create a new
product directory.
This window is not displayed if
you are adding components to
an existing installation. Instead,
you are prompted to confirm the
product installation directory. If
you do so, the selected
components are installed in the
product installation directory
you specified during the initial
installation.
For additional information, see “Choosing a Product Installation Directory”
on page 1-16.
If you choose to create a new directory, the installation program
automatically creates one for you.
If you go back to the Choose BEA Home Directory window to change the
BEA Home Selection, the following changes occur based on the type of
changes you make to the home directory:
– If you accept the default product installation directory in the
Choose Product Installation Directory window, in the
Choose BEA Home Directory window, the old installation
directory will be retained.
– If you enter a new product installation directory in the
Choose Product Installation Directory window, the
directory name is modified to this new name in the Choose
BEA Home Directory window.
– If you specify the installation directory in the Choose
Product Installation Directory window, and if it is outside
of old BEA Home, if installation directory value was
provided and installation directory resided outside of old
BEA Home, installation directory will retain the old value.
Install Windows Service
This window is displayed only
under the following conditions:
Choose whether you want to install the Windows services indicated,
specifically the WebLogic Server Node Manager service. Node Manager is
used to monitor, start, and stop server instances in a domain.
•
You have Administrator
privileges.
If you select Yes, enter the Node Manager Listen Port in the appropriate field.
The default is 5556.
•
You are performing an
initial installation.
•
You are installing on a
Windows platform.
Note: If the Listen Port number you specify is currently being used by a
running application, the installation program prompts you to enter a
different Node Manager Listen Port number.
•
You selected Custom
installation in the Choose
Install Type window.
3-4
For more information, see “About Installing Node Manager as a Windows
Service” on page 1-19.
BEA Products Installation Guide
Us i ng t he U pg ra de I n s t all e r i n G ra ph i c a l M o d e
In this window . . .
Perform the following action . . .
Choose Shortcut Location
Specify the Start menu folder in which you want the Start menu shortcuts
created. You can select from the following options:
This window is displayed only
under the following conditions:
•
You have Administrator
privileges.
•
You are performing an
initial installation.
•
You are installing on a
Windows platform.
•
All Users Start menu folder
Selecting this option provides all users registered on the machine with
access to the installed software. However, only users with Administrator
privileges can create shortcuts in the All Users folder. Therefore, if a user
without Administrator privileges uses the Configuration Wizard to create
domains, Start menu shortcuts to the domains are not created. In this case,
users can manually create shortcuts in their local Start menu folders, if
desired. Press ALT+Y on the keyboard to select the All Users Start Menu.
•
Local user’s Start menu folder
Selecting this option ensures that other users registered on this machine
will not have access to the Start menu entries for this installation. Press
ALT+N on the keyboard to select the Local User’s start menu.
Status
Read the information displayed about BEA products and services. When the
installation program has finished copying the specified files to your system,
click Next.
Installation Complete
Specify whether you want to run the QuickStart application. QuickStart,
designed to assist first-time users in evaluating, learning, and using the
software, provides quick access to the sample domains, information for
upgrading your applications, and the online documentation. Clear the check
box for this option if you do not want to launch QuickStart.
Using the Upgrade Installer in Graphical Mode
To complete the upgrade installation in graphical mode on UNIX and Windows systems, perform
the following steps:
Note: Verify if the install directory entry for Workshop for WebLogic Platform in
registry.xml points to the correct location before upgrading. If not, correct it by
manually editing the registry.xml.
1. Make backup copies of any files or applications that you have created in WL_HOME. (As
part of the upgrade procedure, the installation program automatically overwrites any files,
including applications, that you have created in this directory.) For a description of the
WL_HOME directory, see “Choosing a Product Installation Directory” on page 1-16.
BEA Products Installation Guide
3-5
Note: In some cases, changes are made in the config.xml file between service packs. You
may want to make backup copies of the config.xml file in any user-created domains
also, in case you later want to roll back or uninstall an upgrade installation.
2. Download the upgrade installer specific to your platform from the BEA Customer Support
Web site at http://support.bea.com.
Note: To download updates, you will need to log in using your eSupport username and
password. If you do not have an eSupport account, you can register for one on the
BEA Customer Support Web site.
3. Shut down any servers that are running.
4. Start the upgrade installer as described in the following table.
To start the upgrade installer on
this platform . . .
Perform the following steps...
Windows
1. Go to the directory in which you downloaded the installation program and
double-click <filename.exe>, where filename.exe is the name of the
installation file you downloaded from the BEA Customer Support Web site,
for example, platformXXX_upgrade_win32.exe. In this filename,
XXX represents the version number of the software you are installing.
The installation program begins to install the upgrade.
2. Proceed to step 5.
3-6
BEA Products Installation Guide
Us i ng t he U pg ra de I n s t all e r i n G ra ph i c a l M o d e
To start the upgrade installer on
this platform . . .
UNIX
Perform the following steps...
For installers with filenames ending in .bin:
1. Go to the directory in which you downloaded the installation program,
and invoke the installation procedure by entering the following
commands:
chmod a+x filename.bin
./filename.bin
Here <filename.bin> is the name of the upgrade installation program you
downloaded from the BEA Customer Support Web site, for example
platformXXX_upgrade_solaris.bin. In this filename, XXX
represents the version number of the software you are installing.
The installation program begins to install the upgrade.
2. Proceed to step 5.
For installers with filenames ending in .jar:
1. Include the bin directory of the appropriate Java 2 SDK at the beginning
of the PATH variable definition on the target system. For example:
PATH=JAVA_HOME/bin:$PATH
export PATH
Here JAVA_HOME is the full path of the Java 2 SDK directory.
2. Go to the directory in which you downloaded the installation file and
invoke the installation procedure by entering the following command:
java -jar filename.jar
where filename.jar is the name of the upgrade installation program you
downloaded from the BEA Customer Support Web site, for example
pj_platformXXX_upgrade_generic.jar. In this filename, XXX
represents the version number of the software you are installing.
The installation program begins to install the upgrade.
3. Proceed to step 5.
5. Review the text in the Welcome window and click Next.
The Choose BEA Home Directory window is displayed.
6. Select the BEA Home directory containing the release of WebLogic Platform you want to
upgrade, and click Next.
The Confirm Product Directory window is displayed, which contains the path to the BEA
BEA Products Installation Guide
3-7
home directory and to the product directory in which the WebLogic Platform software will be
updated.
7. Click Next.
A progress window is displayed during the upgrade installation. When the installation is
finished, the Installation Complete window is displayed.
8. Click Done on the Installation Complete window to exit the installation program.
What’s Next?
By default, your BEA software uses the development license file installed in the BEA Home
directory so that you can start using the product immediately. It is recommended that you run the
QuickStart application to familiarize with the software, and execute the samples provided. For
additional information, see Chapter 7, “Post-Installation Information.”
For specific information about your software release, see the appropriate release notes:
z
BEA WebLogic Server® and WebLogic Express™ Release Notes at
http://e-docs.bea.com/wls/docs92/notes/index.html.
z
BEA Workshop for WebLogic Platform™ Release Notes at
http://e-docs.bea.com/workshop/docs92/relnotes/index.html
z
WebLogic Integration Release Notes at
http://e-docs/wli/docs92/relnotes/index.html
z
BEA Products Installation and Configuration Release Notes at
http://e-docs.bea.com/common/docs92/relnotes/index.html
3-8
BEA Products Installation Guide
C H A P T E R 4‘
Running the Installation Program in
Console Mode
The following sections describe how to run the installation program in console mode:
z
Running Console-Mode Installation
z
Using the Upgrade Installer in Console Mode
z
What’s Next?
Running Console-Mode Installation
Start the installation program in console mode as described in Chapter 2, “Starting the Installation
Program.”
To complete the console-mode installation process, respond to the prompts in each section by
entering the number associated with your choice or by pressing Enter to accept the default. To
exit the installation process, enter exit (or x, for short) in response to any prompt. To review or
change your selection, enter previous (or p, for short) at the prompt. To proceed to the following
window, enter next (or n, for short).
Note: In the sample console text and directory pathnames provided in this section, Windows
conventions (such as backslashes in pathnames) are used, for example,
C:\bea\weblogic92. When entering pathnames on a UNIX system, be sure to use
UNIX conventions, instead. For example, use forward slashes in pathnames, such as
/home/bea/weblogic92.
BEA Products Installation Guide
4-1
The following procedure steps you through the installation program. Use this procedure after you
have started the installation program in console mode, as described in Chapter 2, “Starting the
Installation Program.”
1. At the Welcome prompt, type next (or n for short) or press Enter to continue with the
installation process.
The BEA Systems License Agreement prompt is displayed.
2. Read the Agreement and indicate your acceptance or rejection of its terms by doing one of the
following at the prompt:
– Type 1 to indicate your agreement with the terms of the license and proceed with the
installation. To review the entire agreement, press Enter or type Down several times.
Type Up to scroll back through sections previously displayed.
– Type 2 if you do not agree with the terms of the license. If you type 2, the installation
process terminates.
The Choose BEA Home directory prompt is displayed.
3. Specify the BEA Home directory that will serve as the central support directory for all BEA
products installed on the target system. For details about the BEA Home directory, see
“Choosing a BEA Home Directory” on page 1-12.
One of the following is displayed on your system:
– If you have existing BEA Home directories on your system, a list of the directories is
displayed, as shown in the following example:
Choose BEA Home Directory:
-------------------------->1¦* Create a new BEA Home
2¦C:\bea
3¦C:\bea_prod
4¦C:\bea_qa
Enter index number to select OR [Exit][Previous][Next]>
To use an existing BEA Home directory, type the number associated with the desired
BEA Home directory.
To create a new BEA Home directory, type 1 or press Enter.
– If there are no BEA Home directories on your system, or you have selected to create a
new BEA Home, the installation program displays the following prompt:
4-2
BEA Products Installation Guide
Running Cons ole-Mode Instal latio n
Choose BEA Home Directory:
-------------------------"BEA Home" = [Use default "C:\bea
Input BEA Home OR [Exit][Previous][Next]>
Do one of the following:
– To use the default BEA Home directory, type next (or n for short), or press Enter.
– To create a new BEA Home directory, enter the full path of the BEA Home directory,
for example C:\beahome2. If you specify a directory that does not exist, the
installation program creates it for you.
The installation program displays the BEA Home directory you have specified, as shown
in the following example:
Choose BEA Home Directory:
-------------------------"BEA Home" = [C:\beahome2]
Select Option:
1 - Input BEA Home
2 - Use default [C:\bea]
Enter option number to select OR [Exit][Previous][Next]>
On the command line, press Enter to accept your selection. Otherwise, type 1 or 2 to return
to the Choose BEA Home Directory panel, where you can modify your entry.
After you have selected your BEA Home directory and confirmed your selection, type
Next or press Enter. One of the following occurs:
– If you are adding components to an existing installation, the Choose Components to
install panel is displayed. Go to step 5.
– If you are performing an initial installation, the Choose Install Type prompt is
displayed.
4. Specify the type of installation you want to perform by entering the number associated with
the install type, as shown in the following text:
Choose Install Type for WebLogic Server, WebLogic Portal, and Workshop
for WebLogic:
--------------------
BEA Products Installation Guide
4-3
->1|Complete
|Install the following software components and examples:
• WebLogic Server
• Workshop for WebLogic Platform
• WebLogic Portal
2|Custom Installation
|Choose software components to install and perform optional
configuration.
Enter index number to select OR [Exit][Previous][Next]>
Do one of the following:
– Type 1 or press Enter to choose a Complete installation. Proceed to step 6.
– Type 2 to choose a Custom installation. The Choose Components to install
prompt is displayed.
Choose Install Type for WebLogic Server, and Workshop for WebLogic:
• WebLogic Server
• Workshop for WebLogic Platform
For more information about complete and custom installations, see “Choosing the Type of
Installation” on page 1-17.
5. Select the components you want to install. The available components are displayed as
follows:
Note: If you are using the BEA Products installation program for WebLogic Server,
Workshop for WebLogic Platform, the following components are displayed.
Choose Components to install:
----------------------------Release 9.2.0.0
+----WebLogic Server [1] v
|
+----Server [1.1] v
|
+----Server Examples [1.2] v
|
+----Web Server Plug-Ins [1.3]
+----Workshop for WebLogic Platform [2] v
|
+----Workshop [2.1] v
|
+----Workshop Examples [2.2] v
+----WebLogic Integration [3] v
|
+----Integration Server [3.1] v
|
+----WebLogic Workshop Integration Extension [3.2] v
4-4
BEA Products Installation Guide
Running Cons ole-Mode Instal latio n
|
+----Integration Examples [3.3] v
+----WebLogic Portal [4] v
¦
+----Portal Server [4.1] v
¦
+----WebLogic Workshop Portal Extension [4.2] v
¦
+----Portal Examples [4.3] v
Enter number exactly as it appears in brackets to toggle selection OR
[Exit][Previous][Next]>
In an initial installation, only the Web Server Plug-ins are not selected; all other
components are selected by default as indicated by the x (UNIX systems) or check mark
(Windows systems) at the end of each line. Selected components will be installed on your
system. If, however, you want Web Server Plug-ins installed on your system, you must
manually enter the appropriate numeric code for them. To deselect a component, type the
numeric code for it on the command line, exactly as it appears within the brackets. For
example, if you do not want to install the Server Examples, type 1.2 on the command line.
The word Installed is shown in brackets for any components you have already installed
on your system.
When you are finished selecting components, press Enter or type next (or n for short).
Note: When you select or deselect components to install, the installation program checks
for dependencies between components and automatically modifies the list of selected
components. For example, if you deselect the WebLogic Server component, the
remaining components are also deselected, since they require WebLogic Server to
run.
The Optional Tools prompt is displayed.
6. Specify whether you want to install the Mercury profiling tools, as shown in the following
display:
Optional Tools
Do you want to install Mercury profiling tools (development
environment only)?
1 - Yes, install Mercury profiling tools.
2 - No, do not install.
Enter a number or [Exit][Previous][Next]>
Note: This panel is displayed only on platforms that support BEA JRockit.
Do one of the following:
BEA Products Installation Guide
4-5
– Type 1 if you want to install the Mercury profiling tools. In the next panel you are
prompted to read and accept the Mercury Tools license agreement.
– Type 2 if you do not want to install the Mercury profiling tools. The Choose Product
Directory prompt is displayed. Proceed to step 8.
Note: For more information about the Mercury profiling tools, see “BEA JRockit JDK” on
page 1-6.
7. Read the License Agreement and indicate your acceptance or rejection of its terms. To review
the entire agreement, press Enter or type Down several times. Type Up to scroll back through
sections previously displayed. Do one of the following:
– If you agree with the terms of the license agreement, type 1 at the prompt to proceed
with the installation. The Choose Product Directory prompt is displayed.
– If you do not agree with the terms of the license, you can either type p (for previous) to
return to the Optional Tools panel where you can choose not to install the Mercury
profiling tools, or you can type 2. If you type 2, the installation process terminates.
8. Specify the directory in which you want to install the software. You can accept the default
product directory (bea_home\weblogic92) or create a new product directory.
Note: If you are adding components to an existing installation, you are prompted to confirm
the product installation directory.
If you specify a new directory, the installation program automatically creates it for you.
The following example shows the choices displayed in this section:
Choose Product Directory:
------------------------Product Installation Directory= [Use default C:\beahome2\weblogic92]
Product Installation Directory = [Use C:\beahome2\workshop92]
OR
Input Product Installation Directory OR [Exit][Previous][Next]>
Do one of the following:
• Press Enter or type next (or n for short) to accept the current selection.
• Enter the full path to the directory in which you want to install the software, and
press Enter.
You are prompted to confirm your selection as shown in the following text:
Choose Product Directory:
-------------------------
4-6
BEA Products Installation Guide
Running Cons ole-Mode Instal latio n
->1| Yes, use this product directory [C:\beahome2\weblogic92]
2| No, select another product directory
Enter index number to select OR [Exit][Previous][Next]>
Verify that your entry is correct, then type 1 or press Enter to proceed with the
installation. Otherwise, type 2 to return to the Choose Product Directory panel,
where you can modify your entry.
One of the following occurs:
– If you are performing an initial, custom installation on a Windows platform, and you
have Administrator privileges, the Install Node Manager as a Windows Service panel is
displayed. Proceed to step 9.
Node Manager is used to monitor, start, and stop server instances in a domain. See
“About Installing Node Manager as a Windows Service” on page 1-19 for more
information.
– If you are performing a complete installation on a Windows platform, you are installing
on a Windows platform and you do not have Administrator privileges, you are
installing on a UNIX platform, or you are adding components to an existing
installation, the installation program begins copying the components you specified to
your system. Proceed to step 11.
Note: It is normal for the installation program to pause for a fairly long time, especially
toward the end. The installation program is still working when this occurs.
9. Specify whether you want to install Node Manager as a Windows service, as shown in the
following text:
Install Node Manager as a Windows Service
1 - Yes, install now.
2 - No, do not install now. See product documentation for
post-install registration of Node Manager as a Windows
Service.
Enter a number or [Exit][Previous][Next]>
Do one of the following:
– Enter 1 to install Node Manager as a Windows Service. Then, at the prompt, enter the
Node Manager Listen Port, or press Enter to accept the default (5556). If the Listen
Port number you specify is currently being used by a running application, the
installation program prompts you to enter a different Node Manager Listen Port
number. You are prompted to confirm your selection.
BEA Products Installation Guide
4-7
– Enter 2 if you do not want to install Node Manager as a Windows service.
The Choose Shortcut Location prompt is displayed.
10. Specify the folder in which you want to create the Start menu shortcuts. Select the All Users
folder or the local user’s folder, as shown in the following sample text:
Choose Shortcut Location:
------------------------*The installer creates shortcuts to BEA components, samples, and tools.
*As a user with administrative privileges, you can specify where these
*shortcuts are created.
->1¦"All Users" Start menu folder> (recommended)
¦If a user without administrative privileges uses the BEA
¦Configuration Wizard in this installation to create domains, the user
¦may have to create Start menu shortcuts manually. Refer to the
¦documentation for more information.
2¦Local user's Start Menu folder
¦Select this option if you need to ensure that other profiles
¦registered on this machine will not have access to these shortcuts.
Enter index number to select OR [Exit][Previous][Next]>
Do one of the following:
– Type 1 or press Enter to create Start menu shortcuts in the All Users folder. This
provides all users registered on the machine with access to the installed software.
However, only users with Administrator privileges can create shortcuts in the All Users
folder. Therefore, if a user without Administrator privileges uses the Configuration
Wizard to create domains, Start menu shortcuts to the domains are not created. In this
case, users can manually create shortcuts in their local Start menu folders, if desired.
– Type 2 to create shortcuts in your local user’s Start menu folder. If you do so, other
users registered on this machine will not have access to the Start menu entries for this
installation.
You are prompted to confirm your selection, as shown in the following text:
Choose Shortcut Location:
------------------------*The installer creates shortcuts to BEA components, samples, and tools.
*As a user with administrative privileges, you can specify where these
*shortcuts are created.
->1¦"All Users" Start menu folder> (recommended)
¦If a user without administrative privileges uses the BEA
¦Configuration Wizard in this installation to create domains, the
4-8
BEA Products Installation Guide
U s i ng th e Up gr a de I ns ta l l e r i n C o nso l e M o d e
¦user may have to create Start menu shortcuts manually. Refer to
¦the documentation for more information.
2¦Go back to the previous screen and make another choice.
Enter index number to select OR [Exit][Previous][Next]>
Verify that your entry is correct, then type 1 or press Enter to proceed with the installation.
Otherwise, type 2 to return to the previous panel, where you can modify your entry.
After you have verified your selection, the installation program begins copying the
components you specified to your system.
Note: It is normal for the installation program to pause for a fairly long time, especially
toward the end. The installation program is still working when this occurs.
Using the Upgrade Installer in Console Mode
To complete the upgrade installation in console mode on UNIX and Windows systems, perform
the following steps:
In this section, the UNIX delimiter, a slash (/), is used in pathnames, such as
/home1/bea/weblogic92. When entering pathnames on a Windows system, remember to replace
such slashes with backslashes (\), the Windows delimiter for pathnames. Thus, for example,
instead of /home1/bea/weblogic92, on a Windows system you would enter C:\bea\weblogic92.
Note: Verify if the install directory entry for Workshop for WebLogic Platform in
registry.xml points to the correct location before upgrading. If not, correct it by
manually editing the registry.xml.
1. Make backup copies of any files or applications that you have created in WL_HOME. (As
part of the upgrade procedure, the installation program automatically overwrites any files,
including applications, that you have created in this directory.)
Note: In some cases, changes are made in the config.xml file between service packs. You
may want to make backup copies of the config.xml file in any user-created domains
also, in case you later want to roll back or uninstall an upgrade installation.
2. Download the upgrade installer specific to your platform from the BEA Customer Support
Web site at http://support.bea.com.
Note: To download updates, you will need to log in using your eSupport username and
password. If you do not have an eSupport account, you can register for one on the
BEA Customer Support Web site.
BEA Products Installation Guide
4-9
3. Shut down any servers that are running. Hot installation of a service pack or rolling patch is
not supported.
4. Start the upgrade installer as described in the following table.
To start the upgrade installer on
this platform . . .
Perform the following steps...
Windows
1.Open an MS-DOS command prompt window.
Go to the directory in which you downloaded the installation program, and
invoke the installation procedure by entering the following command:
filename.exe -mode=console
Here filename.exe is the name of the upgrade installer you downloaded from
the BEA Customer Support Web site, for example
platformXXX_upgrade_win32.exe. In this filename, XXX represents the
version number of the software you are installing.
The upgrade installer begins to install the WebLogic Platform maintenance
release.
2. Proceed to step 5.
4-10
BEA Products Installation Guide
U s i ng th e Up gr a de I ns ta l l e r i n C o nso l e M o d e
To start the upgrade installer on
this platform . . .
UNIX
Perform the following steps...
For installers with filenames ending in .bin:
1. Go to the directory in which you downloaded the installation program,
and invoke the installation procedure by entering the following
commands:
chmod a+x filename.bin
./filename.bin
Here <filename.bin> is the name of the upgrade installation program you
downloaded from the BEA Customer Support Web site, for example
platformXXX_upgrade_solaris.bin. In this filename, XXX
represents the version number of the software you are installing.
The installation program begins to install the upgrade.
2. Proceed to step 5.
For installers with filenames ending in .jar:
1. Include the bin directory of the appropriate Java 2 SDK at the beginning
of the PATH variable definition on the target system. For example:
PATH=JAVA_HOME/bin:$PATH
export PATH
Here JAVA_HOME is the full path of the Java 2 SDK directory.
2. Go to the directory in which you downloaded the installation file and
invoke the installation procedure by entering the following command:
java -jar filename.jar
where filename.jar is the name of the upgrade installation program you
downloaded from the BEA Customer Support Web site, for example
pj_platformXXX_upgrade_generic.jar. In this filename, XXX
represents the version number of the software you are installing.
The installation program begins to install the upgrade.
3. Proceed to step 5.
5. At the Welcome prompt, type next or press Enter to continue with the installation process.
The Choose BEA Home directory prompt is displayed.
6. Select the BEA Home directory associated with the particular installation of WebLogic
Platform that you want to update. If you have only one installation of WebLogic Platform on
the current machine, only one BEA Home directory is listed. For details about the BEA Home
BEA Products Installation Guide
4-11
directory, see “Choosing a BEA Home Directory” on page 1-12.
The installation program displays the following prompt:
Choose BEA Home Directory:
1| /home/bea
2| /home1/beahome2Enter index number to select OR [Exit][Previous][Next]
Press Enter to use the selected BEA Home directory or type the number of the BEA Home
directory that you want to select.
Whether you accept the selected BEA Home directory or specify a different BEA Home
directory, you are prompted to confirm your selection, as shown in the following sample:
Choose BEA Home Directory:
->1¦ Yes, Use this BEA home directory [/home/bea]
2¦ No, return to BEA home directory selection
Enter index number to select OR [Exit][Previous][Next]>
Type 1 or press Enter to accept your selection. Otherwise, type 2 to return to the Choose
BEA Home Directory panel where you can modify your entry.
After you select the appropriate BEA Home directory and confirm your selection, the
Confirm Product Directory panel is displayed.
7. The Confirm Product Directory panel indicates the folder in which the WebLogic Platform
software will be updated. For example:
Confirm Product Directory:
Product Installation Directory: [home/bea/weblogic92]
Files in /home/bea/weblogic92 will now be upgraded to the 9.2.x.0
maintenance level.
Enter [Exit][Previous][Next]>Press Enter or type next to continue. The
following text is displayed:
8. After you confirm the product directory, the installation program makes a backup copy of
specific files from the previous installation and then installs new versions of those files.
When the installation is complete, the following prompt is displayed:
Install CompleteCongratulations! WebLogic Platform 9.2.x.0 has been
successfully installed to/home/bea/weblogic92
Press any key to continue OR [Exit]>
9. Press any key to exit the installation program.
4-12
BEA Products Installation Guide
W ha t’ s N e x t ?
What’s Next?
By default, your BEA software uses the development license file installed in the BEA Home
directory so that you can start using the product immediately. We recommend that you run the
QuickStart application to familiarize yourself with the software, and execute the samples
provided. For additional information, see Chapter 7, “Post-Installation Information.”
Note: QuickStart is not invoked automatically for console-mode or silent-mode installations.
You can launch QuickStart from the Start Menu (Windows) or from the command line
(Windows and UNIX). For instructions, see “Using QuickStart” on page 7-1.
For specific information about your software release, see the appropriate release notes:
z
BEA WebLogic Server® and WebLogic Express™ Release Notes at
http://e-docs.bea.com/wls/docs92/notes/index.html.
z
WebLogic Integration Release Notes at
http://e-docs/wli/docs92/relnotes/index.html
z
BEA Products Installation and Configuration Release Notes at
http://e-docs.bea.com/common/docs92/relnotes/index.html.
BEA Products Installation Guide
4-13
4-14
BEA Products Installation Guide
CHAPTER
5
Running the Installation Program in
Silent Mode
The following sections describe how to run the installation program in silent mode:
z
What Is Silent-Mode Installation?
z
Using Silent-Mode Installation: Main Steps
z
Creating a silent.xml File for Silent-Mode Installation
z
Sample silent.xml file for Silent-Mode Installation
z
Returning Exit Codes to the Console
z
Using the Upgrade Installer in Silent Mode
z
What’s Next?
What Is Silent-Mode Installation?
Silent-mode installation is a way of setting installation configurations only once and then using
those configurations to duplicate the installation on many machines. During installation in silent
mode, the installation program reads the settings for your configuration from an XML file that
you create prior to beginning the installation. The installation program does not display any
configuration options during the installation process. Silent-mode installation works on both
Windows and UNIX systems. Using silent-mode installation implies that you consent to the BEA
License Agreement. You neither see a copy of the BEA Software License Agreement nor have
any means of accepting the terms of the agreement.
BEA Products Installation Guide
5-1
The instructions in this section are based on the assumption that you have already acquired the
installation program either on DVD or from the BEA Web site. For more information, see
“Product Distribution Methods” on page 1-8.
Using Silent-Mode Installation: Main Steps
The silent-mode installation process has two primary steps:
1. Create a silent.xml file that defines the configuration settings normally entered by a user
during an interactive installation process, such as graphical-mode or console-mode
installation. For example, values for the BEA Home directory, the product directory, and the
components to be installed are supplied in a silent.xml file.
For a detailed procedure, see “Creating a silent.xml File for Silent-Mode Installation” on
page 5-3. For a sample silent.xml file, see “Sample silent.xml file for Silent-Mode
Installation” on page 5-7.
2. Start the silent-mode installation process using the values specified in the silent.xml file.
For details on starting the installation in silent mode, see Chapter 2, “Starting the
Installation Program.”
Important Considerations for Silent-Mode Installation
When you are performing an installation in silent mode, keep in mind the following
considerations:
5-2
z
Silent-mode installation requires the same amount of temporary disk space and uses the
same temporary storage directories as a standard installation. For more information, see
“Temporary Disk Space Requirements” on page 1-9. The installation program does not
alert you if there is not enough space in the temporary directory.
z
A silent-mode installation takes the same amount of time as a standard installation. At the
beginning of a silent-mode installation, an initial installation program window or message
is displayed briefly, indicating that the installation has started. No messages are displayed
to indicate that the installation is in progress or has completed successfully.
z
Incorrect entries in the silent.xml file can cause installation failures. To help you
determine the cause of a failure, we recommend that you create a log file when you start
the installation. For more information, see “Generating a Verbose Installation Log” on
page 1-21.
BEA Products Installation Guide
C re at i n g a s i l e n t. x ml F i l e for Silent-Mode Instal latio n
z
The XML definition (<?xml version="1.0" encoding="ISO-8859-1"?>) must be at
the very beginning of the silent.xml file. There cannot be any spaces or line breaks
before the XML definition.
z
You cannot reinstall any BEA product on top of a previously installed version of the same
product—in the same BEA Home directory or in the same file location. You can, however,
add products and product components to an existing installation. For example, you can
install WebLogic Server during one installation, and Workshop for WebLogic Platform
during a separate installation.Also to reinstall the same version of one of the products, you
must first uninstall the previously installed instance of it, as described in Chapter 8,
“Uninstalling the Software,” or install the new instance in another location.
Creating a silent.xml File for Silent-Mode Installation
When you install your BEA software in silent mode, the installation program uses an XML file
(silent.xml) to determine which installation options should be implemented. Therefore, before
you can run the installation program in silent mode, you must first create a silent.xml file in
which you specify the installation options that you want to have invoked.
Note: Incorrect entries in the silent.xml file can cause installation failures. To help you
determine the cause of a failure, we recommend that you create a log file when you start
the installation.
To create a silent.xml file for use in the silent-mode installation process, follow these steps:
1. In a supported browser, display the sample silent.xml file for silent-mode installation. The
sample file is available at
http://e-docs.bea.com/common/docs92/install/scripts/silent.xml.
2. Save the sample XML file, with the name silent.xml, in the same directory that contains
the installation program.
Note: The XML definition (<?xml version="1.0" encoding="ISO-8859-1"?>) must
be at the very beginning of the silent.xml file. There cannot be any spaces or line
breaks before the XML definition.
3. In the silent.xml file that you saved on your system, edit the values for the keywords shown
in Table 5-1 to reflect your configuration.
Note: You must follow XML guidelines for characters when modifying values. That is, you
cannot use characters reserved for use in XML, such as <, >, [, and ].
BEA Products Installation Guide
5-3
Table 5-1 Values for the silent.xml File
For this data-value name . . .
Enter the following value . . .
BEAHOME
The full path name for the BEA Home directory of your choice. For details
about the BEA Home directory, see “Choosing a BEA Home Directory” on
page 1-12.
USER_INSTALL_DIR
The full path name for the directory where you want install BEA WebLogic
Server. For details, see “Choosing a Product Installation Directory” on
page 1-16.
WLW_INSTALL_DIR
The full path name for the directory where you want to install BEA Workshop
for WebLogic Platform. For details, see “Choosing a Product Installation
Directory” on page 1-16.
INSTALL_NODE_MANAGER
_SERVICE
•
yes to install the WebLogic Server Node Manager as a Windows service.
See “About Installing Node Manager as a Windows Service” on page 1-19.
(Windows platforms only)
•
no to skip the installation of the WebLogic Server Node Manager as a
Windows service. The default is no.
Note: You must have Administrator privileges to install Node Manager as a
Windows service.
NODEMGR_PORT
The Node Manager listen port.
If you do not specify a port number, the installer uses the default port 5556.
If the port number is in use, the installer scans for the next available port and
assigns it to the Node Manager.
Note: The INSTALL_NODE_MANAGER_SERVICE option must be set to
yes.
At the completion of the installation process, the Node Manager is started using
the port specified.
INSTALL_MERCURY_PROF
ILING_TOOLS
•
true, or yes, to install the Mercury profiling tools. The default is true.
•
false, or no, to skip the installation of the tools.
Selecting true or yes implies that you consent to the Mercury Tools License
Agreement.
Note: For more information about the Mercury profiling tools, see “BEA
JRockit JDK” on page 1-6.
5-4
BEA Products Installation Guide
C re at i n g a s i l e n t. x ml F i l e for Silent-Mode Instal latio n
Table 5-1 Values for the silent.xml File (Continued)
For this data-value name . . .
Enter the following value . . .
INSTALL_SHORTCUT_IN_
ALL_USERS_FOLDER
•
true, or yes, to create the shortcuts in the All Users folder. The default is
true.
•
false, or no, to create the shortcuts in the local users folder.
The user performing the installation must have Administrator privileges to
install the Start menu shortcuts in the All Users folder. For more information,
see “Administrator Privileges” on page 1-10.
COMPONENT_PATHS
Specify the components and subcomponents you want to install on your
system:
•
To install WebLogic Server, use the following values:
WebLogic Server/Server
|WebLogic Server/Server Examples
|WebLogic Server/Web Server Plug-Ins
Note: The Web Server Plug-Ins subcomponent is not installed by default
with WebLogic Server. You must specify the
component/subcomponent combination to install them.
•
To install Workshop for WebLogic Platform use the following values:
Workshop for Weblogic Platform
|Workshop for Weblogic Platform/Workshop Examples
To Install WebLogic Portal use the following values:
WebLogic Portal/Portal Server
|WebLogic Portal/WebLogic Workshop Portal Extension
|WebLogic Portal/Portal Examples
•
To install WebLogic Integration use the following values:
WebLogic Integration/Integration Server
WebLogic Integration/Weblogic Workshop Integration
Extension
WebLogic Integration/Integration Examples
For additional information about entering these values, see “Guidelines for
Component Selection” on page 5-6.
Note: If you are using the BEA Products installation program for WebLogic
Server, you can specify the WebLogic Server components only.
BEA Products Installation Guide
5-5
Guidelines for Component Selection
Use the following guidelines when you specify values for the COMPONENT_PATHS data-value
name:
z
When you specify a product component to be installed, all subcomponents that are
installed by default in a complete installation are also installed. For example, the following
entry installs both WebLogic Server and the examples:
<data-value name="COMPONENT_PATHS" value="WebLogic Server" />
Note: The Web Server Plug-Ins subcomponent is not installed by default. You must specify
the component/subcomponent combination to install them.
z
To install multiple components, separate the components with a bar (|). Do not leave a
space before or after the bar. For example, to install WebLogic Server, Workshop for
WebLogic Platform, and the subcomponents that are installed by default, enter the
following line in the file:
<data-value name="COMPONENT_PATHS" value="WebLogic Server|Workshop for
WebLogic Platform" />
z
To specify subcomponents, you must specify a component/subcomponent combination for
each entry. For example, to install WebLogic Server and BEA WebLogic Platform and the
subcomponents that are installed by default, enter the following line in the file:
<data-value name="COMPONENT_PATHS" value="WebLogic Server/Server|
WebLogic Server/Server Examples|WebLogic Server/Workshop for WebLogic
Platform" />
z
If you do not include the COMPONENT_PATHS data-value name in the silent.xml file, the
complete WebLogic Server, Workshop for WebLogic Platform, WebLogic Integration, and
WebLogic Portal products are installed. The Web Server Plug-ins subcomponent of
WebLogic Server is not installed by default.
Note: The installation program performs dependency checking to ensure that all components
that provide functionality on which other components depend for proper operation are
installed. These dependencies are visible during graphical and console mode
installations. The same dependencies are enforced during silent installation: components
on which other components depend are installed even if they are not explicitly referenced
in a silent script.
5-6
BEA Products Installation Guide
Sample sil ent.xml fil e for Silent-Mode Instal latio n
Sample silent.xml file for Silent-Mode Installation
When you install your BEA software in silent mode, the installation program uses an XML file
(silent.xml) to determine which installation options should be implemented. For details about
creating the silent.xml file, see “Creating a silent.xml File for Silent-Mode Installation” on
page 5-3. The sample file is available at
http://e-docs.bea.com/common/docs92/install/scripts/silent.xml.
Returning Exit Codes to the Console
When run in silent mode, the installation program generates exit codes that indicate the success
or failure of the installation. These exit codes are shown in the following table.
Code
Description
0
Installation completed successfully
-1
Installation failed due to a fatal error
-2
Installation failed due to an internal XML parsing error
If you are launching the silent-mode installation process from a script, you can choose to have
these exit codes displayed on the console. Listing 5-1 provides a sample command file that
invokes the installation program in silent mode and echoes the exit codes to the console from
which the script is executed.
Listing 5-1 Sample Command File Displaying Silent-Mode Exit Codes
rem Execute the installer in silent mode
@echo off
platform920_win32.exe -mode=silent -silent_xml=C:\downloads\silent.xml
-log=C:\logs\products_silent.log
@rem Return an exit code to indicate success or failure of installation
set exit_code=%ERRORLEVEL%
@echo.
@echo Exitcode=%exit_code%
BEA Products Installation Guide
5-7
@echo.
@echo Exit Code Key
@echo --------------@echo
0=Installation completed successfully
@echo -1=Installation failed due to a fatal error
@echo -2=Installation failed due to an internal XML parsing error
@echo.
Using the Upgrade Installer in Silent Mode
When you upgrade your installation in silent mode, you define the settings in an XML file that
you create prior to beginning the upgrade installation. During the silent upgrade installation
process, the installation program reads the settings for your configuration from the XML file. The
installation program does not display any configuration options during the installation process.
Silent-mode upgrade installation works on both Windows and UNIX systems.
The process for upgrading your installation in silent mode is similar to that used for silent-mode
installation. For information about silent-mode installation, see “Using Silent-Mode Installation:
Main Steps” on page 5-2.
To complete an upgrade installation in silent mode on UNIX and Windows systems, perform the
following steps:
Note: Verify if the install directory entry for Workshop for WebLogic Platform in
registry.xml points to the correct location before upgrading. If not, correct it by
manually editing the registry.xml.
1. Create a silent-mode XML file as described in “Creating a Silent-Mode Upgrade Installation
XML File” on page 5-13.
2. Make backup copies of any files or applications that you have created in WL_HOME. (As
part of the upgrade procedure, the installation program automatically overwrites any files,
including applications, that you have created in this directory.) For a description of the
WL_HOME directory, see Choosing a Product Installation Directory.
Note: In some cases, changes are made in the config.xml file between service packs. You
may want to make backup copies of the config.xml file in any user-created
domains also, in case you later want to roll back or uninstall an upgrade installation.
3. Download the upgrade installer specific to your platform from the BEA Customer Support
Web site at http://support.bea.com.
5-8
BEA Products Installation Guide
U s i ng t he U pg ra de I n s t all er in Si lent Mode
Note: To download updates, you will need to log in using your eSupport username and
password. If you do not have an eSupport account, you can register for one on the
BEA Customer Support Web site.
4. Shut down any servers that are running.
5. Invoke the silent-mode upgrade installation process as described in the following table.
Note: Incorrect entries in the silent.xml file can cause installation failures. To help you
determine the cause of a failure, we recommend that you create a log file when you
start the installation.
BEA Products Installation Guide
5-9
5-10
BEA Products Installation Guide
U s i ng t he U pg ra de I n s t all er in Si lent Mode
To start the upgrade installer on this
platform . . .
Windows
Perform the following steps...
1. Open an MS-DOS command prompt window.
2. Go to the directory in which you downloaded the
installation program, and invoke the installation
procedure by entering the following command:
filename.exe -mode=silent
-silent_xml=path_to_silent_xml
Here filename.exe is the name of the upgrade installer you
downloaded from the BEA Customer Support Web site,
and path_to_silent.xml is the full pathname of the
silent.xml template file.
Note: You can also include the
-log=full_path_to_log_file option in the
command line to create a verbose installation log. For
example:
platformXXX_upgrade_win32.exe
-mode=silent -silent_xml=C:\silent.xml
-log=C:\logs\platform_install.log
In this example, XXX represents the version number of
the software you are installing. For more information, see
Generating a Verbose Installation Log.
3. Proceed to step 5.
BEA Products Installation Guide
5-11
To start the upgrade installer on this
platform . . .
UNIX
Perform the following steps...
For installers with filenames ending in .bin:
1. Go to the directory that contains the installation file.
2. Launch the upgrade installation by entering the following
command: chmod a+x filename.bin
./filename.bin -mode=silent
-silent_xml=/path_to_silent.xml
Here <filename.bin> is the name of the upgrade
installation program you downloaded from the BEA
Customer Support Web site, and path_to_silent.xml is
the full pathname of the silent.xml template file.
Note: You can also include the
-log=full_path_to_log_file option in the
command line to create a verbose installation log. For
example:
platformXXX_upgrade_solaris.bin
-mode=silent
-silent_xml=/home/silent.xml
-log=/home/logs/platform_install.log
.
In this filename, XXX represents the version
number of the software you are installing. For
more information on creating a log file, see
Generating a Verbose Installation Log
The installation program begins to install the upgrade.
For installers with filenames ending in .jar:
1. Include the bin directory of the appropriate Java 2 SDK at
the beginning of the PATH variable definition on the
target system. For example:
PATH=JAVA_HOME/bin:$PATH
export PATH
Here JAVA_HOME is the full path of the Java 2 SDK directory.
2. Go to the directory in which you downloaded the
installation file and invoke the installation procedure by
entering the following command:
5-12
BEA Products Installation Guide
U s i ng t he U pg ra de I n s t all er in Si lent Mode
To start the upgrade installer on this
platform . . .
Perform the following steps...
java -jar filename.jar -mode=silent
-silent_xml=/path_to_silent.xml
where filename.jar is the name of the upgrade
installation program you downloaded from the BEA
Customer Support Web site, (for example filename,
pj_platformXXX_upgrade_generic.jar, in this,
XXX represents the version number of the software you are
installing), and path_to_silent.xml is the full path to
the silent.xml template file.
Note: You can also include the
-log=full_path_to_log_file option in the
command line to create a verbose installation log. For
example:
pj_platformXXX_upgrade_generic.jar
-mode=silent
-silent_xml=/home/silent.xml
-log=/home/logs/platform_install.log
For more information, see Generating a Verbose
Installation Log.
Creating a Silent-Mode Upgrade Installation XML File
When you upgrade WebLogic Platform in silent mode, the installation program uses an XML file
(silent.xml) to determine which BEA Home directory contains the installation to be upgraded.
Therefore, before you can run the upgrade installation program in silent mode, you must first
create a silent.xml file.
Note: If you created a silent.xml file when you initially installed WebLogic Platform, you
should store it in a safe location or make a backup copy of it so that you do not
accidentally overwrite it with the silent.xml file you are creating for your upgrade
installation. Alternatively, you can name your upgrade file using a different file name,
for example silent_upgrade.xml.
Incorrect entries in the silent.xml file can cause installation failures. To help you
determine the cause of a failure, we recommend that you create a log file when you start
the installation.
BEA Products Installation Guide
5-13
Do the following to create a silent.xml file for use in the silent-mode upgrade
installation process:
1. In a supported browser, display the XML template file for silent-mode upgrade installation.
The sample template file, silent_upgrade.xml, is available at Sample Template File for
Silent-Mode Upgrade Installation.
2. In the popup window that is displayed, choose File—> Save As...
3. Specify the file name silent_upgrade.xml and save it in the directory containing the
upgrade installation program that you downloaded from the BEA Customer Support Web site.
Note: The XML definition (<?xml version="1.0" encoding="ISO-8859-1"?>) must
be at the very beginning of the template file. There cannot be any spaces or line breaks
before the XML definition.
4. In the silent_upgrade.xml file, replace the value for the BEAHOME keyword with the full
pathname of the BEA Home directory associated with the particular installation of WebLogic
Platform that you want to update and save the file.
Note: You must follow XML guidelines for characters when modifying values. That is, you
cannot use characters reserved for use in XML, such as <, >, [, and ].
Sample Template File for Silent-Mode Upgrade Installation
<?xml version="1.0" encoding="ISO-8859-1" ?>
<domain-template-descriptor>
<input-fields>
<data-value name="BEAHOME" value="c:\bea" />
</input-fields>
</domain-template-descriptor>
What’s Next?
By default, your BEA software uses the development license file installed in the BEA Home
directory so that you can start using the product immediately. We recommend that you run the
QuickStart application to familiarize yourself with the software and execute the samples
provided. For additional information, see Chapter 7, “Post-Installation Information.”
Note: QuickStart is not invoked automatically for console-mode or silent-mode installations.
You can launch QuickStart from the Start Menu (Windows), or from the command line
(Windows and UNIX). For instructions, see “Using QuickStart” on page 7-1.
5-14
BEA Products Installation Guide
W ha t’ s N e x t ?
For specific information about your software release, see the appropriate release notes:
z
BEA WebLogic Server® and WebLogic Express™ Release Notes at
http://e-docs.bea.com/wls/docs92/notes/index.html.
z
BEA Products Installation and Configuration Release Notes at
http://e-docs.bea.com/common/docs92/relnotes/index.html.
BEA Products Installation Guide
5-15
5-16
BEA Products Installation Guide
CHAPTER
6
Installing and Updating License Files
Your BEA software requires a valid product license to run. The following sections explain how
to acquire, install, and update your product license:
z
About BEA Product Licenses
z
Updating Your license.bea File
z
Upgrading Licenses from Previous Software Releases
z
Installing Licenses for Use with Promotional DVD Distributions
About BEA Product Licenses
BEA products use an XML-format license file called license.bea. This license file, stored in
the BEA Home directory, is used for the BEA products installed in that directory. Your BEA
software checks this file at run time to determine which product components you are authorized
to use.
Note: If you have multiple BEA Home directories on your system, each BEA Home must have
a license.bea file that authorizes use of the products associated with that directory.
Licenses are release specific. For example, to use WebLogic Server 9.2, you must have a 9.2
license file. To convert a pre-9.2 license.bea file to a WebLogic Server 9.2 license.bea file,
see “Upgrading Licenses from Previous Software Releases” on page 6-6.
The types of license files that can be used as the license.bea file and the technical restrictions
that they impose are described in the following table.
BEA Products Installation Guide
6-1
Note: See the End User License Agreement for specific license terms and conditions.
Table 6-1 BEA Products License File Types
License Type
Description
Development
•
Used in a development environment where a developer is preparing an application to run
on top of your BEA Products software; a production license is required for deployment.
•
Enables all component products provided in your product distribution.
•
Enables you to run your software on a single machine, even if it is running multiple
instances of WebLogic Server
•
Permits client connections from a maximum of five IP addresses. IP addresses are tracked
from the time the server is started. When you restart the server, the count is reset.
•
Is installed in the BEA Home directory as license.bea.
•
Is not tied to the IP address of a machine.
•
Used in full-scale production environments.
•
May restrict functionality to the software components that you have purchased.
•
Enables you to run your software on a single machine, even if it is running multiple
instances of WebLogic Server
•
Permits client connections from an unlimited number of IP addresses.
•
Must be purchased separately. For information about purchasing a production license,
contact your sales representative or visit the BEA corporate Web site at
http://www.bea.com.
•
Is tied to the IP address of the machine. A production license can be used only on a machine
with the same IP address that is specified in the license file.
Production
When you install your software, a non-expiring development license file (license.bea) is
installed on your system. By default, your software uses the development license installed with
the product so that you can start using it immediately. Subsequently, when you install additional
BEA products that include a license.bea file, the installation program automatically adds the
new product licenses to the license.bea file.
Note: The license.bea file conforms to the XML grammar definition. The XML definition
(<?xml version="1.0" encoding="ISO-8859-1"?>) must be at the very beginning
of the license.bea file. There cannot be any spaces or line breaks before the XML
definition.
6-2
BEA Products Installation Guide
Up da ti ng Yo ur li cen se.b ea Fi le
For a description of the product offerings supported by the BEA Products license files, see the
Licensing page at the following URLs:
z
http://e-docs.bea.com/common/docs92/interm/license.html (WebLogic Server)
Updating Your license.bea File
When you install your BEA software, the installation program generates a development
license.bea file for use with the software and installs it in the BEA Home directory. If you are
installing your software in an existing BEA Home, the installation program automatically adds
the development license included with your product distribution to the existing license.bea
file.
In some cases, however, you must update the license.bea file separately, independent of the
installation process. For example, you must update your license file if at least one of the following
is true:
z
You purchase a product for production use and you receive a production license to replace
your development license.
z
You want to upgrade production systems to a new release of the software. After installing
the current release of the software, you must upgrade your license to the current version.
To do so, see “Upgrading Licenses from Previous Software Releases” on page 6-6.
z
You purchase a new release of a product you are already using in production and you want
to use both the old and the new releases in production on the same system. For example,
you are currently using WebLogic Server 8.1, you purchase WebLogic Server 9.2, and you
want to use both releases on the same system.
z
You purchase additional BEA software with production licenses, and you want to add the
production licenses for the new software to the production licenses for software already in
production use on your system.
z
You want to consolidate existing production licenses for different component products onto
a single machine.
z
You want to transfer existing production licenses from one machine to another machine
with a different IP address.
In each of these cases, you will receive a new license file from BEA, the contents of which must
be included in the license.bea file in the target BEA Home directory. To facilitate the license
update process, BEA provides an UpdateLicense utility that merges the new license into the
existing license in the BEA Home directory, and deletes any expired or duplicate entries.
BEA Products Installation Guide
6-3
The UpdateLicense merge process is not intended to modify the license attributes for any
component or feature in the license files being merged. For example:
z
If you merge a WebLogic Server 8.1 production license with a WebLogic Server 9.2
development license, the development and production rights associated with the different
WebLogic Server license versions are retained. The merge process creates a single license
file which can be used for both WebLogic Server 8.1 production and WebLogic Server 9.2
development. The merge process does not change the development and production rights
associated with either the WebLogic Server 8.1 or WebLogic Server 9.2 entry. If you want
to upgrade the WebLogic Server 8.1 production license to WebLogic Server 9.2, see
“Upgrading Licenses from Previous Software Releases” on page 6-6.
z
If you merge a WebLogic Server 8.1 license for IP address A with a WebLogic Server 9.2
license for IP address B, the IP addresses for both WebLogic Server license versions are
retained. The merge process creates a single license file that can be used to run WebLogic
Server 8.1 on IP address A and WebLogic Server 9.2 on IP address B. The merge process
does not change the IP address associated with either the WebLogic Server 8.1 or
WebLogic Server 9.2 entry. If you want to change the IP address for a given license file,
you must use the BEA eLicense system at http://elicense.bea.com.
Important Considerations for Updating Your license.bea
File
When determining how to update your license.bea file, you should consider the following:
z
If you want to merge the functionality enabled by both your new license and your existing
license, you must use the UpdateLicense utility. For instructions, see “Updating
license.bea Using the UpdateLicense Utility” on page 6-4.
z
You may choose to replace an existing license.bea file with a new license.bea file,
but if you do so, you run the risk of losing the product usage rights enabled by your
existing license file.
Note: Do not edit the license.bea file manually. Doing so may cause operating problems for
the currently installed BEA products, or result in problems later when BEA products are
installed for maintenance upgrades.
Updating license.bea Using the UpdateLicense Utility
To update your license.bea file, perform the following procedure:
6-4
BEA Products Installation Guide
Up da ti ng Yo ur li cen se.b ea Fi le
1. Save the license update file that you received through e-mail, with a name other than
license.bea, in the target BEA Home directory. For example, save the file as
new_license.bea. Use this file as the license_update_file in step 4 of this procedure.
WARNING: Do not overwrite or change the name of the existing license.bea file.
2. Perform the step appropriate for your platform:
– On a Windows system, open an MS-DOS command window and go to the target BEA
Home directory.
– On a UNIX system, go to the target BEA Home directory.
3. If it is not already included, add the JDK to your PATH variable by entering the following
commands:
– On a Windows system:
set PATH=BEA_HOME\JDK\bin;%PATH%
– On a UNIX system:
PATH=BEA_HOME/JDK/bin:$PATH
export PATH
In this command, JDK represents the directory that contains the JDK being used for this
installation, for example, jdk150_06 or jrockit90_150_06.
4. Merge the license update file into your existing license by entering one of the following
commands:
– On a Windows system:
UpdateLicense license_update_file
– On a UNIX system:
sh UpdateLicense.sh license_update_file
license_update_file represents the name to which you saved the license update file in
step 1.
5. Save a copy of your updated license.bea file in a safe place outside your BEA software and
application installation directories.
Although no one else can use your license file, you should save a copy of it in a place that
is protected from both malicious and innocent tampering.
BEA Products Installation Guide
6-5
Upgrading Licenses from Previous Software Releases
The format of the license.bea file changes with each release of BEA Products software. To
upgrade a license.bea file from a previous release to a license for the current release, complete
the following steps:
1. Log in to the BEA eLicense Web site at http://elicense.bea.com.
Note: You need a BEA eLicense account to log in to this Web site. If you do not have a BEA
eLicense account, click the Register link on the Customer Support site to register for
one.
2. In the left navigation area of the Web page, click Upgrade/Downgrade and follow the
instructions on the page. If the license you want to upgrade is not listed, click the Add a
Missing License link. The BEA Licensing team will research the missing license for you.
You will receive an upgraded license file through e-mail. To update the license.bea file
on your system, see “Updating license.bea Using the UpdateLicense Utility” on page 6-4.
Installing Licenses for Use with Promotional DVD
Distributions
In some cases, BEA distributes software for promotional purposes on DVD. Such DVDs include
installers that do not automatically generate a development license key. Instead, the DVD folio
directs you to a BEA Web site, where you can obtain a development license file after you supply
a code from the DVD folio. The license file you obtain allows you to begin using the software
immediately, and entitles you to the same usage rights described for the development license in
Table 6-1, “BEA Products License File Types,” on page 6-2.
When you receive this license file from BEA, complete the following steps:
1. Save the license file using the name license.bea. Make sure that the filename does not
include a suffix, such as .txt.
2. Copy the license.bea file into the BEA Home directory in which your BEA Products
software was installed. For example, c:\bea.
6-6
BEA Products Installation Guide
CHAPTER
7
Post-Installation Information
This section covers the following topics:
z
Using QuickStart
z
Determining Which JDK Version You Are Using
z
Understanding the Windows Shortcuts
z
Understanding the Product Directory Structure
Using QuickStart
When the product installation is completed using graphical-mode installation, the QuickStart
application is launched automatically, by default. If you do not want to run QuickStart at the
completion of the installation process, you can clear the Run QuickStart check box in the Install
Complete window. QuickStart is not invoked for console-mode or silent-mode installations.
QuickStart is designed to help first-time users evaluate, learn, and use BEA Products software. If
you installed your software using a complete installation, or if you used a custom installation to
install the examples, the sample domains that are installed are automatically configured to run
with the PointBase database, a database that is installed with WebLogic Server. QuickStart
provides quick access to the following:
z
Launch BEA Workshop for WebLogic Platform 9.2
z
Start WebLogic Server 9.2
z
Upgrade domains to 9.2
BEA Products Installation Guide
7-1
z
Start WebLogic Portal GroupSpace
z
Upgrade applications to 9.2
z
Access documentation online
After installation, you can launch QuickStart as follows:
z
On Window systems, choose Start→ Programs→ BEA Products→ QuickStart.
z
On UNIX systems, perform the following steps:
a. Log in to the target UNIX system.
b. Go to the /common/bin subdirectory of your BEA Products installation. For example:
cd /home/bea/weblogic92/common/bin
c. Enter the following command:
sh quickstart.sh
Determining Which JDK Version You Are Using
You can determine which version of the JDK you are using by issuing a command, as follows:
1. Open a command prompt window and go to the appropriate directory:
WL_HOME\server\bin (Windows)
WL_HOME/server/bin (UNIX)
In both pathnames, WL_HOME represents the directory in which you installed your BEA
software.
2. Make sure that your environment is set up properly by entering the following command at the
prompt:
setWLSenv.cmd (Windows)
setWLSenv.sh (UNIX)
3. Enter the following command at the prompt:
java -version
If you are using BEA JRockit, BEA JRockit(R) is displayed in the output.
7-2
BEA Products Installation Guide
Un de rs ta nd ing t he Wi nd ows Sh or tc ut s
Understanding the Windows Shortcuts
When you install your BEA Products software on a Windows system, the installation program
automatically creates shortcut entries on the Start Menu.
Note: If the user performing the installation has Administrator privileges, the shortcut entries
can be created in the All Users Start menu folder or in the user’s local Start menu folder.
For more information, see “Administrator Privileges” on page 1-10.
Options on the Start Menu vary, according to the components you choose to install.
The BEA Products folder (Start→ Programs→ BEA Products) contains the shortcut files
shown in the following figure:
Figure 7-1 Windows Directory Structure
z
Examples—contains a folder for each component installed on your system that contains
shortcuts for launching the examples and associated tools for the component.
z
Tools—contains a folder for each component installed on your system that contains
shortcuts for launching the examples and associated tools for the component.
z
Online Documentation—provides a link to the 9.2 online documentation on the e-docs Web
site.
z
QuickStart—starts the QuickStart application designed to assist first-time users in
evaluating, learning, and using the BEA Products software. Using QuickStart you can do
the following:
– Launch BEA Workshop for WebLogic Platform 9.2
– Start WebLogic Server 9.2
– Upgrade domains to 9.2
– Start WebLogic Portal GroupSpace
– Upgrade applications to 9.2
BEA Products Installation Guide
7-3
– Access documentation online
z
Smart Update—launches the Smart Update program, which checks for any updates
available for installed BEA products, and installs the updates as required.
z
Uninstall BEA Products—launches the uninstallation program. For more information, see
Chapter 8, “Uninstalling the Software.”
z
WebLogic Server 9.2—contains a shortcut for launching the default WebLogic Server
domain. This domain allows you to run pre-built WebLogic Server code samples, deploy
J2EE applications, and quickly serve JSPs or HTML pages. You can also use this domain
as a place to test your applications during development.
z
Workshop for WebLogic Platform--launches Workshop for Weblogic Platform
Understanding the Product Directory Structure
During the product installation, you are asked to select or create a BEA Home directory and a
product installation directory. For information about the BEA Home directory, see “Choosing a
BEA Home Directory” on page 1-12. For a complete installation, the installation program creates
a dedicated directory structure for the BEA Products software. It may or may not reside in the
BEA Home directory. Figure 7-2 shows the directory tree structure for a complete product
installation.
Figure 7-2 Product Directory Structure
Table 7-1 describes the contents of each directory.
Note: The installation program does not create directories for components that are not installed.
For example, if you performed a complete installation using the BEA Products
installation program for BEA WebLogic Server, the integration and servicebus
directories are not created.
7-4
BEA Products Installation Guide
Un de rst a nd ing t he Pr od uc t Di rec to ry S t ru ct ur e
Table 7-1 Product Installation Directory Structure
This directory . . .
Contains . . .
weblogic92
Folders for files shared by all product components.
common
Files shared by product components, including scripts used for
setting environment attributes common to all WebLogic domains
running on the machine, template JAR files used by the
Configuration Wizard and WLST offline when creating domains,
and evaluation software from third-party vendors.
Integration
WebLogic Integration program files.
javelin
A 100% Java/JSP compiler that is used by the component products
for compiling.java and other source files generated by
development tools.
platform
WebLogic Platform program files.
portal
WebLogic Portal program files.
samples
Sample code, resources, and preconfigured sample domains
designed to help you learn how to develop your own applications
using the product software. Sample domains are organized by
components installed on the system. For example, the server
folder contains the source code for examples and medrec
sample applications.
server
WebLogic Server program files.
uninstall
Code required to uninstall the BEA Products software
workshop
WebLogic Workshop program files.
BEA Products Installation Guide
7-5
7-6
BEA Products Installation Guide
CHAPTER
8
Uninstalling the Software
The following sections provide procedures for uninstalling the software:
z
About the Uninstallation Program
z
Uninstalling Your Software in Graphical Mode
z
Uninstalling Your Software in Console Mode
z
Uninstalling Your Software in Silent Mode
z
Reinstalling Your Software
About the Uninstallation Program
The following sections describe how to uninstall your BEA software on Windows and UNIX
systems. You can uninstall the software using graphical, console, or silent mode. To run the
graphical-mode uninstallation program, your console must support a Java-based GUI. If the
uninstallation program determines that your system cannot support a Java-based GUI, it
automatically starts running in console mode.
You can uninstall individual components of your product distribution, or the entire installation.
Dependency checking in the uninstaller ensures that the appropriate components are uninstalled.
The uninstallation program does not remove the BEA Home directory associated with the
installation, the JDK, or any user-created domains. Only the components that were installed by
the installation program can be removed. If you choose to uninstall the entire installation, the
BEA Products Installation Guide
8-1
uninstallation program also removes the product directory associated with the installation unless
one of the following is true:
z
The product directory contains user-created configuration or application files—the
uninstallation program does not delete user-created configuration files, application files,
or domains.
z
The complete installation was not uninstalled. If an individual component is uninstalled,
only the installation directory for that component is removed; the installation directories for
other components are unaffected.
z
The uninstallation program was invoked from within the product directory structure—
specifically, from within the uninstaller directory.
Uninstalling Your Software in Graphical Mode
Use the following procedure to uninstall the complete product installation, or individual
components, in graphical mode:
1. Shut down any servers that are running. If any of these servers is configured as a Windows
service, you should stop the service(s) before uninstalling the software.
2. Start the uninstallation program as described in Table 8-1.
8-2
BEA Products Installation Guide
U ni n s t all i n g Y o u r S o f t war e i n C o nso l e M o d e
Table 8-1 Starting the Uninstallation Program in Graphical Mode
To start the uninstallation
program on this platform . . .
Perform the following steps . . .
Windows
1. From the Windows Start menu, choose Start→ Programs→ BEA
Products→ Uninstall BEA Products.
The BEA Products Uninstaller Welcome window is displayed.
2. Proceed to step 3.
UNIX
1. Go to the following directory:
WL_HOME/uninstall
Here WL_HOME represents the directory in which you installed your
WebLogic Server software.
2. Enter uninstall.sh at the prompt.
The BEA Products Uninstaller Welcome window is displayed.
Note: If your system supports a graphical user interface, the
uninstallation program starts in graphical mode. If your system
does not support a graphical user interface, the uninstallation
program starts in console mode. If console mode is started, see
“Uninstalling Your Software in Console Mode” on page 8-3 for
instructions.
3. Click Next to start the uninstall program.
The Choose Components window is displayed.
4. Select the components to uninstall by selecting or clearing the appropriate check boxes. Then
click Next. By default, all installed components are selected, indicating that they will be
removed.
5. Optionally, click Details to view the log file that lists the uninstalled components.
6. Click Done in the Uninstalling BEA Products window to exit the uninstallation program.
Uninstalling Your Software in Console Mode
Use the following procedure to uninstall the complete product installation, or individual
components, using the command-line interface:
BEA Products Installation Guide
8-3
1. Shut down any servers that are running. If any of these servers is configured as a Windows
service, you should stop the service(s) before uninstalling the software.
2. Start the uninstallation program as described in Table 8-2.
Table 8-2 Starting the Uninstallation Program in Console Mode
To start the uninstallation
program on this platform . . .
Perform the following steps . . .
Windows
1. Open a Command Prompt window and go to the following
directory:
WL_HOME\uninstall
Here WL_HOME represents the directory in which you installed your
WebLogic Server software, typically C:\bea\weblogic92.
2. Enter the following command at the prompt:
uninstall -mode=console
The Welcome text is displayed.
UNIX
1. Go to the following directory:
WL_HOME/uninstall
Here WL_HOME represents the directory in which you installed
WebLogic Server.
2. At the prompt, enter the following command:
sh uninstall.sh -mode=console
The Welcome text is displayed.
3. Press Enter or type next to proceed to the next panel of the uninstallation program.
Note: Instead of typing complete words when you want to enter [Exit], [Previous], and
[Next], you can use the following one-letter shortcuts: x, p, and n, respectively.
The Choose Components to uninstall panel is displayed.
4. Select the components you want to uninstall. The available components are displayed as
follows:
Check the BEA Products components you want to uninstall.
Release 9.2.0.0
+----WebLogic Server [1] v
|
+----Server [1.1] v
|
+----Server Examples [1.2] v
8-4
BEA Products Installation Guide
Uni nstalling Your So ft ware in Si lent Mode
|
+----Web Server Plug-Ins [1.3]
+----Workshop for WebLogic Platform [2] v
|
+----Workshop [2.1] v
|
+----Workshop Examples [2.2] v
+----WebLogic Integration [3] v
|
+----Integration Server [3.1] v
|
+----WebLogic Workshop Integration Extension [3.2] v
|
+----Integration Examples [3.3] v
+----WebLogic Portal [4] v
¦
+----Portal Server [4.1] v
¦
+----WebLogic Workshop Portal Extension [4.2] v
¦
+----Portal Examples [4.3] v
Enter number exactly as it appears in brackets to toggle selection OR
[Exit][Previous][Next]>
By default, all installed components are selected, indicating that they will be removed.
Note: If you installed your software using the BEA Products installation program for BEA
WebLogic Server, only the WebLogic Server components are displayed.
To leave a component installed on your system, type the numeric code for that component
on the command line, exactly as it appears within the brackets. For example, to uninstall
only the Server Examples and the Web Server Plug-ins, and keep the Server installed on
your system, enter 1.1 on the command line. The check mark (Windows systems) or x
(UNIX systems) beside the entry for Server is cleared, indicating that it will not be
uninstalled. The Server Examples and the Web Server Plug-ins will be uninstalled.
Dependency checking is performed to ensure that you do not uninstall a component that is
required by another component.
5. Press Enter or type next to proceed with the uninstallation process.
6. When the uninstallation process is complete, press Enter or type exit to complete the
uninstallation and exit the uninstallation program.
Uninstalling Your Software in Silent Mode
When you uninstall your BEA Products software in silent mode, the complete installation of your
software is uninstalled.
When you run the uninstallation program in silent mode, it leaves behind the same files and
directories as when you run the uninstallation program in graphical and console modes,
including:
z
The BEA Home directory, including the logs and utils subdirectories
BEA Products Installation Guide
8-5
z
The JDK, if it was installed with your BEA product installation
z
Domain directories, including those in user_projects
z
Any other file created or modified after your BEA software was installed
You can manually delete these files.
Although you can use silent-mode uninstallation to manually uninstall your software,
silent-mode uninstall is intended for use in scripts. You can adapt the steps in Table 8-3 for use
in scripts.
Use the following procedure to uninstall your BEA Products software in silent mode:
1. Shut down any servers that are running. If you configured any of the servers as a Windows
service, you must stop the service(s) before uninstalling the software.
2. Start the uninstallation program as described in Table 8-3.
Table 8-3 Starting the Uninstallation Program in Silent Mode
To start the uninstallation
program on this platform . . .
Perform the following steps . . .
Windows
1. Open a Command Prompt window and go to the following
directory:
WL_HOME\uninstall
Here WL_HOME represents the directory in which you installed
your WebLogic Server software, typically
C:\bea\weblogic92.
2. Enter the following command at the prompt:
uninstall -mode=silent
UNIX
1. Go to the following directory:
WL_HOME/uninstall
Here WL_HOME represents the directory in which you installed
WebLogic Server.
2. At the prompt, enter the following command:
sh uninstall.sh -mode=silent
8-6
BEA Products Installation Guide
Rein st all ing Y our S of tw ar e
Notes: When you run the uninstallation program in silent mode, no messages are displayed
indicating the uninstallation is in progress or has completed successfully, even if errors
are encountered.
You can also include the -log=full_path_to_log_file option in the command line
to create a verbose installation log. For example:
uninstall -mode=silent -log=C:\logs\weblogic_uninstall.log
For more information, see “Generating a Verbose Installation Log” on page 1-21.
Reinstalling Your Software
You cannot reinstall the same version of any BEA product on top of a previously installed version
of the same product—in the same BEA Home directory or in the same file location. You can,
however, add products and product components to an existing installation. For example, you can
install WebLogic Server during one installation, and Workshop for WebLogic Platform during a
separate installation.
To reinstall the same version of one of the product components or the entire BEA Products
distribution in the same location, you must first uninstall the previous installation.
If you try to install a complete copy of the BEA Products software in a BEA Home directory that
already contains a complete installation, an error message is displayed. Click or type OK to return
to the Choose BEA Home directory prompt.
At the prompt, choose one of the following options:
z
To continue installing the software using a different BEA Home directory, select an
existing BEA Home directory that does not contain a previous installation, or create a new
BEA Home directory.
z
Exit the installation program. If you want to reinstall your BEA Products software in the
same BEA Home, you must uninstall the previous installation. You can invoke the
uninstall program appropriate for your platform, as described in one of the following
sections:
– “Uninstalling Your Software in Graphical Mode” on page 8-2
– “Uninstalling Your Software in Console Mode” on page 8-3
– “Uninstalling Your Software in Silent Mode” on page 8-5
Then reinstall the software as described in Chapter 2, “Starting the Installation Program.”
BEA Products Installation Guide
8-7
8-8
BEA Products Installation Guide
Index
A
starting on UNIX platforms
.bin installers 2-6
.jar installers 2-10
starting on Windows platforms 2-2
administrator privileges 1-10
B
BEA Home directory
about 1-12
component descriptions 1-14
sample structure 1-12
C
complete installation 1-18
console-mode installation 4-1
starting on UNIX platforms
.bin installers 2-7
.jar installers 2-10
starting on Windows platforms 2-3
custom installation 1-19
customer support contact information viii
D
directory structure
BEA Home 1-12
product 7-4
distribution
DVD 1-8
Web download 1-8
documentation, where to find it viii
I
installation log, verbose 1-21
installation modes 1-2
installation program
about 1-1
console-mode description 4-1
graphical-mode description 3-1
silent-mode description 5-1
starting on UNIX platforms 2-5
starting on Windows platforms 2-2
J
jdk directory 1-14
JRockit JDK 1-6
L
license
about 6-1
development 6-2
production 6-2
updating 6-3
license.bea 1-15
log, verbose 1-21
G
graphical-mode installation 3-1
BEA Products Installation Guide
Index-1
M
Mercury profiling tools 1-7
N
node manager
installation considerations 1-20
installing as Windows service 1-19
P
product components 1-3
product installation directory
about 1-16
structure 7-4
Q
QuickStart, using 7-1
R
registry.xml 1-15
reinstallation 8-7
requirements
system 1-9
temporary disk space 1-9
U
uninstall
about 8-1
console mode 8-3
graphical mode 8-2
silent mode 8-5
UNIX installation
starting in console mode
.bin installers 2-7
.jar installers 2-10
starting in graphical mode
.bin installers 2-6
.jar installers 2-10
starting in silent mode
.bin installers 2-8
.jar installers 2-11
UpdateLicense utility 1-15
upgrade 1-21
W
WebLogic Express 1-2
WebLogic Server 1-4
S
shortcuts, Windows 7-3
silent.xml
creating 5-3
data values 5-4
silent-mode installation
about 5-1
main steps 5-2
starting on UNIX platforms
.bin installers 2-8
.jar installers 2-11
starting on Windows platforms 2-4
software components
Index-2
BEA JRockit JDK 1-6
WebLogic Server 1-4
Start menu 7-3
system requirements 1-9
BEA Products Installation Guide
BEA Products Installation Guide
Index-3
Index-4
BEA Products Installation Guide