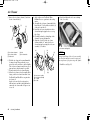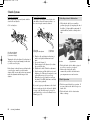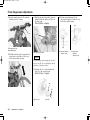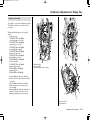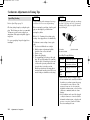
1
Contents.qxd 06.5.11 11:51 ページ1
2007
Honda CRF450R
OWNER’S MANUAL & COMPETITION HANDBOOK
Contents.qxd 06.5.11 11:51 ページ2
Introduction
Congratulations on choosing your Honda CRF
motocross motorcycle.
When you own a Honda, you’re part of a
worldwide family of satisfied customers – people
who appreciate Honda’s reputation for building
quality into every product.
Your CRF is a high performance racing
motorcycle that utilizes the latest motocross
technology and is intended for competition use in
sanctioned, closed-course events by experienced
riders only.
Be aware that motocross is a physically
demanding sport that requires more than just a
fine motorcycle. To do well, you must be in
excellent physical condition and be a skillful
rider. For the best results, work diligently on
your physical conditioning and practice
frequently.
Before riding, take time to get acquainted with
your CRF and how it works. To protect your
investment, we urge you to take responsibility for
keeping your CRF well maintained. Scheduled
service is a must, of course. But it’s just as
important to observe the break-in guidelines, and
perform all the pre-ride and other periodic checks
detailed in this manual.
You should also read the owner’s manual before
you ride. It’s full of facts, instructions, safety
information, and helpful tips. To make it easy to
use, the manual contains a table of contents, a
detailed list of topics at the beginning of each
section, and an index at the back of the book.
Introduction
As you read this manual, you will find
information that is preceded by a NOTICE
symbol. This information is intended to help you
avoid damage to your Honda, other property, or
the environment.
Unless you are mechanically qualified and have
the proper tools, you should see your Honda
dealer for the service and adjustment procedures
discussed in this manual.
The official Honda Service Manual for your CRF
is available (page 152). It is the same manual
your dealer uses. If you plan to do any service
on your CRF beyond the standard maintenance
procedures in this manual, you will find the
Service Manual a valuable reference.
If you have any questions, or if you ever need a
special service or repairs, remember that your
Honda dealer knows your CRF best and is
dedicated to your complete satisfaction.
Please report any change of address or ownership
to your Honda dealer so we will be able to
contact you concerning important production
information.
You may also want to visit our website at
www.honda.com
Happy riding!
California Proposition 65 Warning
WARNING: This product contains or emits
chemicals known to the State of California to
cause cancer and birth defects or other
reproductive harm.
Contents.qxd 06.5.11 11:51 ページ3
A Few Words About Safety
Your safety, and the safety of others, is very important. And operating this motorcycle safely is an important responsibility.
To help you make informed decisions about safety, this manual contains a section devoted to Motorcycle Safety, as well as a number of Safety Messages
throughout the manual.
Safety Messages are preceded by a safety alert symbol
and one of three signal words: DANGER, WARNING, or CAUTION.
These signal words mean:
DANGER
You WILL be KILLED or SERIOUSLY HURT if you don’t follow instructions.
WARNING
You CAN be KILLED or SERIOUSLY HURT if you don’t follow instructions.
CAUTION
You CAN be HURT if you don’t follow instructions.
Of course, it is not practical or possible to warn you about all hazards associated with operating or maintaining a motorcycle. You must use your own good
judgement.
Safety Messages
Contents.qxd 06.5.11 11:51 ページ4
Contents
MOTORCYCLE SAFETY...............................1
Important Safety Information..............................2
Important Safety Precautions..........................2
Accessories & Modifications ..............................3
Safety Labels.......................................................4
OPERATING CONTROLS .............................5
Operation Component Locations ........................6
BEFORE RIDING ............................................7
Are You Ready to Ride? .....................................8
Is Your Motorcycle Ready to Ride?....................9
Pre-ride Inspection..........................................9
BASIC OPERATING INSTRUCTIONS ......11
Safe Riding Precautions................................12
Starting & Stopping the Engine ........................13
Break-in Guidelines ..........................................15
SERVICING YOUR HONDA........................17
Before You Service Your Honda
The Importance of Maintenance .......................18
Maintenance Safety...........................................19
Important Safety Precautions........................19
Maintenance Schedule ......................................20
General Competition Maintenance ...................22
Before & After Competition Maintenance........26
Between Motos & Practice Maintenance .....26
After Competition Maintenance ...................26
Service Preparations
Maintenance Component Locations..................28
Seat Removal ....................................................29
Fuel Tank Removal ...........................................30
Subframe Removal............................................32
Contents
Service Procedures
Fluids & Filters
Fuel System.......................................................34
Engine Oil .........................................................36
Transmission Oil ...............................................39
Coolant ..............................................................41
Air Cleaner ........................................................43
Crankcase Breather ...........................................45
Engine
Throttle ..............................................................46
Engine Idle Speed .............................................48
Clutch System ...................................................49
Hot Start Lever..................................................53
Spark Plug .........................................................54
Valve Clearance.................................................55
Piston/Piston Rings/Piston Pin..........................65
Chassis
Suspension.........................................................73
Brakes................................................................77
Wheels...............................................................81
Tires & Tubes ....................................................82
Drive Chain .......................................................84
Exhaust Pipe/Muffler ........................................87
Additional Maintenance Procedures .................90
Appearance Care ...............................................92
ADJUSTMENTS FOR COMPETITION .....95
Front Suspension Adjustments..........................96
Rear Suspension Adjustments.........................109
Suspension Adjustments for Track
Conditions ...................................................113
Suspension Adjustment Guidelines.................114
Carburetor Adjustments & Tuning Tips ..........117
Chassis Adjustments........................................129
Gearing ............................................................130
Tire Selection for Track Conditions................131
Personal Fit Adjustments ................................132
TIPS ................................................................133
Transporting Your Motorcycle ........................134
Storing Your Honda.........................................135
You & the Environment ..................................136
Troubleshooting...............................................137
TECHNICAL INFORMATION ..................139
Vehicle Identification ......................................140
Specifications ..................................................141
Torque Specifications......................................142
Oxygenated Fuels............................................145
Competition Logbook .....................................146
Optional Parts List ..........................................148
Spare Parts & Equipment................................149
Wiring Diagram...............................................150
CONSUMER INFORMATION ...................151
Authorized Manuals ........................................152
Contacting Honda............................................153
Your Honda Dealer..........................................154
The Honda Rider’s Club .................................155
TABLE OF CONTENTS ..............................156
INDEX ............................................................158
QUICK REFERENCE
001-023.qxd 06.5.11 11:53 ページ1
Motorcycle Safety
This section presents some of the most important
information and recommendations to help you
ride your CRF safely. Please take a few
moments to read these pages. This section also
includes information about the location of the
safety labels on your CRF.
Important Safety Information...............................2
Important Safety Precautions..........................2
Accessories & Modifications ...............................3
Safety Labels ........................................................4
Motorcycle Safety
1
001-023.qxd 06.5.11 11:53 ページ2
Important Safety Information
Important Safety Precautions
Your CRF can provide many years of pleasure, if
you take responsibility for your own safety and
understand the challenges you can meet in
competitive racing.
As an experienced rider, you know there is much
you can do to protect yourself when you ride.
The following are a few precautions we consider
most important.
Never Carry a Passenger.
Your CRF is designed for one operator only.
Carrying a passenger can cause an accident in
which you and others can be hurt.
Wear Protective Gear.
Whether you’re practicing to improve your skills,
or riding in competition, always wear an
approved helmet, eye protection, and proper
protective gear.
Take Time to Get to Know Your CRF.
Because every motorcycle is unique, take time to
become thoroughly familiar with how this one
operates and responds to your commands before
placing your machine, and yourself, in
competition.
Learn and Respect Your Limits.
Never ride beyond your personal abilites or faster
than conditions warrant. Remember that alcohol,
drugs, illness and fatigue can reduce your ability
to perform well and ride safety.
2
Motorcycle Safety
Don’t Drink and Ride.
Alcohol and riding don’t mix. Even one drink
can reduce your ability to respond to changing
conditions, and your reaction time gets worse
with every additional drink. So don’t drink and
ride, and don’t let your friends drink and ride
either.
Keep your Honda in Safe Condition.
Maintaining your CRF properly is critical to your
safety. A loose bolt, for example, can cause a
breakdown in which you can be seriously
injured.
001-023.qxd 06.5.11 11:53 ページ3
Accessories & Modifications
Accessories & Modifications
Installing non-Honda accessories, removing
original equipment, or modifying your CRF in
any way that would change its design or
operation, could seriously impair your CRF’s
handling, stability, and braking, making it unsafe
to ride.
WARNING
Improper accessories or modifications
can cause a crash in which you can be
seriously hurt or killed.
Follow all instructions in this owner’s
manual regarding modifications and
accessories.
Motorcycle Safety
3
001-023.qxd 06.5.11 11:53 ページ4
Safety Labels
Read this label carefully and don’t remove it.
If the label comes off or becomes hard to read, contact your Honda dealer for replacement.
4
Motorcycle Safety
001-023.qxd 06.5.11 11:53 ページ5
Operating Controls
Read this section carefully before you ride. It
presents the location of the basic controls on your
CRF.
Operation Component Locations .........................6
Operating Controls
5
001-023.qxd 06.5.11 11:53 ページ6
Operation Component Locations
hot start lever
clutch lever
engine stop button
choke knob
fuel valve
6
Operating Controls
shift lever
front brake lever
throttle grip
kickstarter
rear brake pedal
001-023.qxd 06.5.11 11:53 ページ7
Before Riding
Before each ride, you need to make sure you and
your Honda are both ready to ride. To help get
you prepared, this section discusses how to
evaluate your riding readiness, and what items
you should check on your CRF.
Are You Ready to Ride?.......................................8
Is Your Motorcycle Ready to Ride?.....................9
Pre-ride Inspection .............................................9
For information about suspension, carburetor,
and other adjustment, see page 95.
Before Riding
7
001-023.qxd 06.5.11 11:53 ページ8
Are You Ready to Ride?
Before riding your CRF for the first time, we
strongly recommend that you read this owner’s
manual, make sure you understand the safety
messages, and know how to operate the controls.
Before each ride, it’s also important to make sure
you and your CRF are both ready to ride.
For information about suspension, carburetor,
and other adjustments, see page 95.
Whether you’re preparing for competition or for
practice, always make sure you are:
• In good physical and mental condition
• Free of alcohol and drugs
• Wearing an approved helmet, eye protection,
and other appropriate riding gear
Although complete protection is not possible,
wearing the proper gear can reduce the chance or
severity of injury when you ride.
8
Before Riding
WARNING
Not wearing a helmet increases the
chance of serious injury or death in a
crash.
Be sure you always wear a helmet, eye
protection and other protective apparel
when you ride.
001-023.qxd 06.5.11 11:53 ページ9
Is Your Motorcycle Ready to Ride?
Competitive riding can be tough on a motorcycle,
so it’s important to inspect your CRF and correct
any problems you find before each ride. Check
the following items (page numbers are at the
right):
WARNING
Improperly maintaining this motorcycle or
failing to correct a problem before riding
can cause a crash in which you can be
seriously hurt or killed.
Always perform a pre-ride inspection
before every ride and correct any
problems.
Pre-ride Inspection
Check the following before each ride:
• Engine oil level .............................................37
• Transmission oil level...................................40
• Coolant for proper level............................... 41
• Cooling system and hoses for condition.......42
• Spark plug for proper heat range, carbon
fouling and high tension cord terminal for
looseness .......................................................54
• Air cleaner for condition and
contamination................................................43
• Clutch lever adjustment and freeplay ...........49
• Hot starter operation and freeplay ................53
• Breather drain for cleaning ...........................45
• Steering head bearing and related parts
for condition..................................................90
• Carburetor throttle operation ........................46
• Tires for damage or improper inflation
pressure ........................................................82
• Spokes for looseness.....................................81
• Rim locks for looseness................................81
• Front and rear suspension for proper
operation ..................................................73,74
• Front and rear brakes, check operation ........77
• Drive chain for correct slack and adequate
lubrication ................................................84,85
• Drive chain guide, sliders and guide rollers
for damage or wear ..................................84,85
• Exhaust pipe/Muffler inspection...................87
• Every possible part for looseness (such as
cylinder head nuts, engine mounting bolts,
axle nuts, handlebar holder bolts, fork bridge
pinch bolts, drive chain adjuster, drive chain
guide, wire harness connectors, kickstarter
mounting bolt) .....................................142-144
Before Riding
9
001-023.qxd 06.5.11 11:53 ページ10
10
Before Riding
001-023.qxd 06.5.11 11:53 ページ11
Basic Operating Instructions
This section gives basic information on how to
start and stop your engine as well as break-in
guidelines.
Safe Riding Precautions .....................................12
Starting & Stopping the Engine .........................13
Preparation ....................................................13
Starting Procedure ........................................13
Flooded Engine .............................................13
How to Stop the Engine................................14
Break-in Guidelines ...........................................15
Basic Operating Instructions
11
001-023.qxd 06.5.11 11:53 ページ12
Basic Operating Instructions
Safe Riding Precautions
Before riding your CRF for the first time, please
review the Important Safety Precautions
beginning on page 2 and the previous section,
titled Before Riding.
For your safety, avoid starting or operating the
engine in an enclosed area such as a garage.
Your CRF’s exhaust contains poisonous carbon
monoxide gas which can collect rapidly in an
enclosed area and cause illness or death.
12
Basic Operating Instructions
001-023.qxd 06.5.11 11:53 ページ13
Starting & Stopping the Engine
Always follow the proper starting procedure
described below.
Check the engine oil, transmission oil and coolant
levels before starting the engine (pages 37,40,41).
Your CRF can be kickstarted with the
transmission in gear by pulling in the clutch lever
before operating the kickstarter.
Cold Engine Starting
1. Turn the fuel valve (1) ON.
2. Shift the transmission into neutral.
3. If the temperature is 95°F (35°C) or below,
pull the choke knob (2) fully out.
4. If the temperature is below 32°F (0°C), open
the throttle two or three times. (The engine
requires a richer mixture for starting in cold
weather. When the throttle is so opened, the
accelerator pump will feed extra fuel to the
cylinder, thereby facilitating starting in cold
weather.)
5. With the throttle closed, operate the
kickstarter starting from the top of the
kickstarter stroke, kick through to the bottom
with a rapid, continuous motion. (Do not open
the throttle, As the carburetor is equipped with
an accelerator pump, excessive fuel will be
charged into the engine, and the spark plug
will be fouled if the throttle is opened and
closed repeatedly. Excessive fuel in the engine
makes kickstarting difficult.)
6. About a minute after the engine starts, push
the choke knob all the way to fully OFF.
If idling is unstable, open the throttle slightly.
Preparation
Make sure that the transmission is in neutral.
Turn the fuel valve ON.
Starting Procedure
Always follow the proper starting procedure
described as follow.
ON
OFF
Warm Engine Starting
1. Turn the fuel valve ON.
2. Shift the transmission into neutral.
3. Pull the hot start lever (3) and kick-start the
engine. (Do not open the throttle.)
4. As soon as the engine starts, release the hot
start lever.
(3)
(3) hot start lever
Starting the engine after a stall during riding or
after a fall:
1. Shift the transmission into neutral.
2. Pull the hot start lever and kick-start the
engine. (Do not open the throttle).
3. As soon as the engine starts, release the hot
start lever.
Flooded Engine
(2)
(1)
(1) fuel valve
(2) choke knob
If the engine fails to start after repeated attempts,
it may be flooded with excess fuel. To clear a
flooded engine:
1. Shift the transmission into neutral.
2. With the throttle fully opened, repeat
kickstarter operation approximately ten times
very slowly to discharge excessive fuel from
the engine.
3. With the throttle closed, pull the hot start
lever and kick-start the engine (Do not open
the throttle.)
4. As soon as the engine starts, release the hot
start lever.
Basic Operating Instructions
13
001-023.qxd 06.5.11 11:53 ページ14
Starting & Stopping the Engine
How to Stop the Engine
(1)
(2)
(1) throttle
(2) engine stop button
Normal Engine Stop
1. Shift the transmission into neutral.
2. Turn the fuel valve OFF.
3. Lightly open the throttle (1) two or three
times, and then close it.
4. Depress and hold the engine stop button (2)
until the engine stops completely.
Failure to close the fuel valve may cause the
carburetor to overflow, result in hard starting.
Emergency Engine Stop
To stop the engine in an emergency, press the
engine stop button.
14
Basic Operating Instructions
001-023.qxd 06.5.11 11:53 ページ15
Break-in Guidelines
Help assure your CRF’s future reliability and
performance by paying extra attention to how
you ride during the first operating day or 15
miles (25 km).
During this period, avoid full-throttle starts and
rapid acceleration.
This same procedure should be followed each
time when:
•
•
•
•
piston is replaced
piston rings are replaced
cylinder is replaced
crankshaft or crank bearings are replaced
Basic Operating Instructions
15
001-023.qxd 06.5.11 11:53 ページ16
16
Basic Operating Instructions
001-023.qxd 06.5.11 11:53 ページ17
Servicing Your Honda
Keeping your CRF well maintained is absolutely
essential to your safety. It’s also a good way to
protect your investment, get maximum
performance, avoid breakdowns, and have more
fun.
To help keep your CRF in good shape, this
section includes a Maintenance Schedule for
required servicing and step-by-step instructions
for specific maintenance tasks. You’ll also find
important safety precautions, information on oils,
and tips for keeping your Honda looking good.
An ICM (Ignition Control Module) system is
used on this motorcycle; consequently, routine
ignition timing adjustment is unnecessary. If you
want to check the ignition timing, refer to the
Honda Service Manual (page 152).
An optional tool kit may be available. Check
with your Honda dealer’s parts department.
Before You Service Your Honda
The Importance of Maintenance ........................18
Maintenance Safety ............................................19
Important Safety Precautions........................19
Maintenance Schedule .......................................20
General Competition Maintenance ....................22
Before & After Competition Maintenance.........26
Between Motos & Practice Maintenance .....26
After Competition Maintenance ...................26
Service Preparations
Maintenance Component Locations...................28
Seat Removal .....................................................29
Fuel Tank Removal ............................................30
Subframe Removal.............................................32
Chassis
Suspension..........................................................73
Front Suspension Inspection........................73
Rear Suspension Inspection.........................74
Recommended Fork Oil ..............................75
Fork Oil Change ..........................................75
Brakes.................................................................77
Wheels ................................................................81
Tires & Tubes .....................................................82
Drive Chain ........................................................84
Exhaust Pipe/Muffler .........................................87
Additional Maintenance Procedures ..................90
Appearance Care ................................................92
Service Procedures
Fluids & Filters
Fuel System ........................................................34
Engine Oil ..........................................................36
Transmission Oil ................................................39
Coolant ...............................................................41
Air Cleaner .........................................................43
Crankcase Breather ............................................45
Engine
Throttle ...............................................................46
Engine Idle Speed ..............................................48
Clutch System ....................................................49
Hot Start Lever...................................................53
Spark Plug ..........................................................54
Valve Clearance..................................................55
Piston/Piston Rings/Piston Pin...........................65
Servicing Your Honda
17
001-023.qxd 06.5.11 11:53 ページ18
The Importance of Maintenance
Keeping your CRF well-maintained is absolutely
essential to your safety. It’s also a good way to
get maximum performance during each moto.
Careful pre-ride inspections and good
maintenance are especially important because
your CRF is designed to be ridden in off-road
competition.
Remember, proper maintenance is your
responsibility. Be sure to inspect your CRF
before each ride and follow the Maintenance
Schedule in this section.
WARNING
Improperly maintaining this motorcycle or
failing to correct a problem before you
ride can cause a crash in which you can
be seriously hurt or killed.
Always follow the inspection and
maintenance recommendations and
schedules in this owner’s manual.
18
Servicing Your Honda
001-023.qxd 06.5.11 11:53 ページ19
Maintenance Safety
This section includes instructions on how to
perform some important maintenance tasks.
Some of the most important safety precautions
follow. However, we cannot warn you of every
conceivable hazard that can arise in performing
maintenance. Only you can decide whether or
not you should perform a given task.
WARNING
Failure to properly follow maintenance
instructions and precautions can cause
you to be seriously hurt or killed.
Always follow the procedures and
precautions in this owner’s manual.
• Read the instructions before you begin, and
make sure you have the tools and skills
required.
• To help prevent the motorcycle from falling
over, park it on a firm, level surface, using an
optional workstand or a maintenance stand to
provide support.
• To reduce the possibility of a fire or
explosion, be careful when working around
gasoline. Use only a non-flammable (high
flash point) solvent such as kerosene —not
gasoline— to clean parts. Keep cigarettes,
sparks, and flames away from all fuel-related
parts.
Important Safety Precautions
• Make sure the engine is off before you begin
any maintenance or repairs.
This will help eliminate several potential
hazards:
Carbon monoxide poisoning from engine
exhaust. Be sure there is adequate ventilation
whenever you operate the engine.
Burns from hot motorcycle parts. Let the
engine and exhaust system cool before
touching.
Injury from moving parts. Do not run the
engine unless instructed to do so.
Servicing Your Honda
19
001-023.qxd 06.5.11 11:53 ページ20
Maintenance Schedule
To maintain the safety and reliability of your
CRF, regular inspection and service is required as
shown in the Maintenance Schedule that follows.
The Maintenance Schedule lists items that can be
performed with basic mechanical skills and hand
tools. Procedures for these items are provided in
this manual.
The Maintenance Schedule also includes items
that involve more extensive procedures and may
require special training, tools, and equipment.
Therefore, we recommend that you have your
Honda dealer perform these tasks unless you
have advanced mechanical skills and the required
tools. Procedures for items in this schedule are
provided in a service manual available for
purchase from your Honda dealer (page 152).
Service intervals in the maintenance schedule are
expressed in terms of races and riding hours. To
avoid overlooking required service, we urge you
to develop a convenient way to record the
number of races and/or hours you ride.
If you do not feel capable of performing a given
task or need assistance, remember that your
Honda dealer knows your CRF best and is fully
equipped to maintain and repair it. If you decide
to do your own maintenance, use only genuine
Honda parts or their equivalents for repair or
replacement to ensure the best quality and
reliability.
20
Servicing Your Honda
Perform the pre-ride inspection (page 9) at each
scheduled maintenance period.
Summary of Maintenance Schedule Notes and
Procedures:
Notes:
1. Clean after every moto for dusty riding
conditions.
2. Replace every 2 years. Replacement requires
mechanical skill.
3. Replace after the first break-in ride.
4. Inspect after the first break-in ride.
Maintenance Procedures:
I: inspect and clean, adjust, lubricate, or replace,
if necessary
C: clean
L: lubricate
R: replace
001-023.qxd 06.5.11 11:53 ページ21
Maintenance Schedule
Perform the Pre-ride Inspection (page 9) at each scheduled maintenance period.
I: Inspect and Clean, Adjust, Lubricate or Replace if necessary. C: Clean. L: Lubricate. R: Replace.
FREQUENCY
NOTE
ITEMS
THROTTLE OPERATION
HOT START SYSTEM
AIR FILTER
CRANKCASE BREATHER
SPARK PLUG
RADIATOR COOLANT
VALVE CLEARANCE / DECOMPRESSOR SYSTEM
ENGINE OIL
ENGINE OIL FILTER
ENGINE IDLE SPEED
PISTON AND PISTON RINGS
PISTON PIN
TRANSMISSION OIL
COOLING SYSTEM
DRIVE CHAIN
DRIVE CHAIN SLIDER
DRIVE CHAIN ROLLER
DRIVE SPROCKET
DRIVEN SPROCKET
BRAKE FLUID
BRAKE PADS WEAR
BRAKE SYSTEM
CLUTCH SYSTEM
CONTROL CABLES
EXHAUST PIPE/MUFFLER
SUSPENSION
SWINGARM/SHOCK LINKAGE
FORK TUBE/SLIDER
FORK OIL
DAMPER
NUTS, BOLTS, FASTENERS
WHEELS/TIRES
STEERING HEAD BEARINGS
(NOTE 1)
(NOTE 2)
(NOTE 4)
(NOTE 3)
(NOTE 3)
Each race
or about
2.5 hours
Every 3 races
or about
7.5 hours
Every 6 races
or about
15.0 hours
Every 9 races
or about
22.5 hours
Every 12 races
or about
30.0 hours
I
I
C
I
I
I
I
R
R
I
R
R
R
(NOTE 2)
I
I,L
I
I
I
I
I
I
I
I
I,L
I
I
R
L
R
(NOTE 3)
R
I
I
I
Ref. Page
47
53
43
45
54
41
55/62
36
37
48
68
68
39
41
84
84
85
86
86
78
80
77
49
90
87
73,74
25,74
75
101
91,142-144
81-83
90
This maintenance schedule is based upon average riding condition. Machine subjected to severe use require more frequent servicing.
NOTE: 1.Clean after every moto for dusty riding condition.
2.Replace every 2 years. Replacement requires mechanical skill.
3.Replace after the first break-in ride.
4.Inspect after the first break-in ride.
Servicing Your Honda
21
001-023.qxd 06.5.11 11:53 ページ22
General Competition Maintenance
Perform maintenance on firm, level ground using
optional workstand, or equivalent support.
When tightening bolts, nuts or screws, start with
the larger diameter or inner fasteners, and tighten
them to the specified torque using a crisscross
pattern.
Use genuine Honda parts or their equivalent
when servicing your CRF.
Clean parts in non-flammable (high flash point)
cleaning solvent (such as kerosene) when
disassembling. Lubricate any sliding surface,
O-rings, and seals before reassembling. Grease
parts by coating or filling where specified.
After any engine disassembly, always install new
gaskets, O-rings, cotter pins, piston pin clips,
snap rings, etc. when reassembling. After
reassembly, check all parts for proper installation
and operation.
All Pre-ride Inspection Items
Refer to Pre-ride Inspection page 9.
22
Servicing Your Honda
001-023.qxd 06.5.11 11:53 ページ23
General Competition Maintenance
Spark Plug
Some non-resistor plugs may cause ignition problems. Refer
to the recommendations elsewhere in this manual for specific
types so you will be sure to use the proper reach and heat
range. Replace periodically as specified in the Maintenance
Schedule. (page 21).
Spark Plug Cap
Install a small plastic tie-wrap around the spark plug cap to
reduce any possibility of it loosening or of water
penetration.
Air Cleaner
Clean and oil your air cleaner regularly because the volume
of air able to pass through it has a great effect on
performance. Both engine performance and long term
durability may be affected by an air cleaner that has
deteriorated and allows dirt to pass. Inspect the air cleaner
closely each time it’s serviced for evidence of small tears or
seam separation. Keep a spare air cleaner oiled and ready to
install, sealed in a plastic bag. Riding in dusty conditions
may require servicing the air cleaner or replacing it with a
pre-serviced air cleaner between motos. Be careful not to
over oil the air cleaner. While it is important to oil the air
cleaner thoroughly, over oiling will cause an overall rich
running condition, probably more noticeable off idle and in
low rpm performance. Follow the servicing instructions in
the Maintenance section. Use Pro Honda Foam Filter Oil or
an equivalent. Be sure to grease the air cleaner flange where
it contacts the air cleaner housing. Pro Honda White
Lithium Grease, or an equivalent, is handy for this because
any dirt that penetrates this sealing area will show up clearly
(page 43).
Use the Honda genuine air cleaner or an equivalent air
cleaner specified for your model.
Using the wrong Honda air cleaner or a non-Honda air
cleaner which is not of equivalent quality may cause
premature engine wear or performance problems.
Transmission Oil
Drain and replace transmission oil often to ensure the
greatest service life of the transmission and clutch. Frequent
changes will also assure consistent performance of both
shifting and clutch action (page 40).
Air Cleaner Housing Sealing
Remove and reseal the air cleaner housing boot where it
connects to the air cleaner housing with Pro Honda Handgrip
Cement or equivalent there is any doubt to its sealing
integrity. Inspect the air cleaner and air intake tract regularly
for signs of deterioration or dirt penetration.
Engine Oil and Filter
Drain and replace engine oil often to ensure the greatest
service life of the piston, cylinder and crankshaft.
Also replace engine oil filter often to ensure the greatest
service life. Frequent changes will also assure consistent
performance of power and response. (page 37).
Servicing Your Honda
23
024-053.qxd 06.5.11 11:58 ページ24
General Competition Maintenance
Handgrips
Always use Pro Honda Handgrip Cement when replacing
handgrips.
Refer to the Service Manual for installation
instructions.
Throttle Grip
Align the index mark on the throttle grip with the index mark
of the throttle cable guide. Left handlebar grip: Align the “∆”
mark on the left handlebar grip with the paint mark on the
handlebar.
Gaskets
Always use new gaskets when reassembling components.
Cylinder Removal
Put a little grease on the cylinder mounting dowels to
prevent corrosion from dissimilar metals. The tolerances are
quite tight, so it’s important to keep these dowels absolutely
clean (page 67).
Fuel Filter
Periodically drain the fuel from the fuel tank, remove and
clean the fuel valve/filter. Replace the fuel valve O-ring if
there are any signs of damage or deterioration (page 35).
Fuel Contamination
Refer to Fuel System in your Owner’s Manual, page 34.
Check the fuel lines for deterioration, damage, or leakage.
Replace the fuel lines, if necessary.
Periodically drain the fuel from the tank, remove and clean
the fuel valve and fuel filter. Replace the fuel valve O-ring if
there are any signs of damage or deterioration (page 35).
Loosen the carburetor drain screw and examine the fuel that
flows out of the float bowl. If you notice anything in the fuel,
such as water or dirt, remove the float bowl and inspect its
contents (page 119).
For maximum efficiency, drain and replace fuel that has
remained in your fuel tank for more than a month.
For added security, you may choose to bind the hand grips to
the handlebar and throttle pipe with safety wires to prevent
the possibility of them loosening. Position the twisted wire
ends away from your palms and be sure to bend the wire
ends well into the handgrip rubber so they will not snag your
glove.
Electrical Connectors
Clean electrical connectors and wrap them with electrical
tape to reduce the possibility of unwanted disconnections,
water shorts or corrosion. Additional corrosion protection is
offered by using Pro Honda Dielectric Grease on all
electrical connections.
Throttle Control
Remove the throttle control every few rides, clean the inside
of the throttle pipe and handlebar thoroughly, and apply a
light coating of oil. Inspect the cable carefully for kinks or
other damage that may restrict throttle control in anyway.
Move the handlebar from lock to lock to be sure there is no
cable interference. Make certain the throttle operation is
perfect after servicing and inspecting.
24
Servicing Your Honda
Engine Mounting Bolts and Nuts
Make sure the engine mounting bolts and nuts are tightened
to the proper torque specification. For added peace of mind,
remove the nuts, clean the threads, and apply Pro Honda
Hondalock or an equivalent prior to torquing the nuts.
024-053.qxd 06.5.11 11:58 ページ25
General Competition Maintenance
Suspension Linkage Lubrication
Disassemble, clean, inspect and lubricate all suspension
linkage pivots with grease after each 7.5 hours of running
time in order to maintain proper suspension performance and
minimize component wear.
Brake Fluid Replacement
Refer to Brake Pad Wear in your Owner’s Manual, page 80.
Brake Caliper Inspection: Be sure both the front and rear
calipers are able to move freely on the caliper pin and caliper
bracket pins. Check pad thickness periodically and replace
the pads when minimum thickness is reached. If the brakes
fade when they are hot, inspect the pads for glazing or
damage, and replace if necessary.
Brake Fluid Replacement: Replace the hydraulic fluid in the
brake system every 2 years. Replace the fluid more
frequently if you subject your brakes to severe use. Heavy
braking heats the brake fluid and it may deteriorate sooner
than expected. Any type of riding, that requires frequent use
of the brakes, such as in tight woods, can shorten the service
life of brake fluid.
Fork Oil/Performance
Disassemble, clean and inspect the fork and replace the oil
regularly. Contamination due to the tiny metal particles
produced from the normal action of the fork, as well as
normal oil breakdown, will deteriorate the performance of
the suspension. Refer to the Honda Service Manual. Use
only Pro Honda HP Fork Oil 5W or equivalent which
contains special additives to assure maximum performance
of your CRF’s front suspension.
Swingarm Pivot Lubrication
Clean, inspect and lubricate the swingarm and suspension
linkage pivots with gease. Be sure all of the dust seals are in
good condition.
Frame
Because your CRF is a high-performance machine, the frame
should not be overlooked as part of your overall competition
maintenance program. Periodically inspect the frame
closely for possible cracking or other damage. It makes
good racing sense.
Swingarm
Do not attempt to weld or otherwise repair a damaged
swingarm. Welding will weaken the swingarm.
Footpegs
Worn footpeg teeth can be repaired by filing the grooves
between the teeth with a triangular shaped file.
Be aware that filing them too sharp will reduce boot sole
lifespan. Sharpen only the points of the teeth. Filing the
grooves deeper will weaken the footpegs. Be sure the pegs
are free to pivot freely and that the pivot pin retaining cotter
pins are in good condition.
Steering Head Bearings
Periodically clean, inspect and regrease the steering head
bearings — especially if wet, muddy or extremely dusty
courses are encountered often.
Use urea based multi-purpose grease designed for high
temperature, high pressure performance (example: EXELITE
EP2 manufactured by KYODO YUSHI, Japan or Shell
Stamina EP2 or equivalent)
Water Leakage Check Hole
After every race, check the leakage check hole, located just
below the water pump cover on the right crankcase cover.
Clean away any clogged dirt or sand, if necessary. Look for
coolant or oil leakage. Leaking coolant indicates a worn or
damaged water seal. Leaking oil indicates a bad
transmission oil seal. If replacement is necessary, both seals
should be replaced.
Spokes
Check spoke tension frequently between the first few rides.
As the spokes, spoke nuts and rim contact points seat-in, the
spokes may need to be retightened. Once past this initial
seating-in period, the spokes should hold their tension. Still,
be sure your race maintenance program includes checking
spoke tension and overall wheel condition on a regular basis
(page 81).
Nuts, Bolts, Etc
Application of a thread locking agent to essential fasteners
offers added assurance and security. Remove the nuts, clean
the threads of both the nuts and bolts, apply Pro Honda
Hondalock or an equivalent and tighten to the specified
torque.
Servicing Your Honda
25
024-053.qxd 06.5.11 11:58 ページ26
Before & After Competition Maintenance
Between Motos & Practice Maintenance
After Competition Maintenance
After practice or between motos you have a
chance to make additional checks and
adjustments.
• Clean accumulated dirt from under the
fenders and off the wheels, suspension
components, handgrips, controls, and
footpegs. A stiff, nylon parts cleaning brush
works well.
• Check tire air pressure.
• Check spoke tension and rim lock nut security.
(1)
(1) chain adjuster index marks
• Suspend the front wheel above the ground and
use the pressure release screws (2) to release
the built-up pressure (in excess of normal
atmospheric pressure: 0 psi (0 kPa, 0 kgf/cm2))
in the fork tubes. This pressure is caused by
normal fork action while riding. (If you are
riding at altitude, remember that fork pressure
of 0 at sea level will increase as elevation
increases.)
(2)
• Check sprocket bolt and nut security.
• Clean the sides of the drive chain with a stiff,
nylon parts-cleaning brush. Lubricate and
adjust the chain as necessary.
Do not perform maintenance while engine is
running. Injury to your fingers or hands may
result.
• After adjustment, check that the chain adjuster
index marks (1) are in the same position on
each side. This will ensure that the rear wheel
is in proper alignment and allow maximum
performance from the rear disc brake.
Maintaining proper wheel alignment will also
extend brake pad wear.
26
Servicing Your Honda
(2) pressure release screws
It is important to the long term performance of
your CRF to practice a consistent maintenance
program. Right after the event is a good time to
begin your next maintenance cycle.
After Race Lubrication
Apply a light coating of rust-inhibiting oil to the
drive sprocket and any steel portions of the
chassis or engine where the paint has worn away.
This will prevent rusting of the exposed metal.
Apply rust-inhibiting oil more heavily if the
event was particularly wet or muddy. Take care
to avoid spraying any oil near the brake pads or
the brake discs.
Take care to prevent catching your fingers
between the chain and sprocket.
Remove the drive chain, clean and lubricate it
(page 85). Be sure the chain is wiped clean and
is dry before lubricating the chain.
024-053.qxd 06.5.11 11:58 ページ27
Before & After Competition Maintenance
Routine Cleaning
If your CRF is only slightly dirty, it is best to
clean it by hand with the aid of a stiff bristled
nylon brush and some clean rags.
Take care to prevent catching your fingers
between the chain and sprocket.
A variety of reasonably priced cleaning brushes
are available from variety, drug, food, and
hardware stores. Some of these brushes are
extremely useful in removing dirt from the many
tight contours of the metal pieces of your CRF.
Avoid using stiff, abrasive brushes on the plastic
or rubber parts.
If your CRF was exposed to sea air or salt water,
rinse it as soon as possible after the event, dry it,
and apply a spray lubricant to all metal parts.
If you decide to wash your CRF or use cleaners,
refer to Appearance Care (page 92).
Servicing Your Honda
27
024-053.qxd 06.5.11 11:58 ページ28
Maintenance Component Locations
hot start lever
clutch lever
front brake fluid reservoir
front brake lever
throttle grip
radiator cap
fuel fill cap
spark plug
engine oil
filler cap
choke knob
rear suspension
air cleaner spring pre-load
engine idle
adjuster
speed
28
front suspension compression
damping adjuster
crankcase
breather
tube
front brake
caliper
engine oil
filter
· rear suspension high speed
damping adjuster
· rear suspension low speed
damping adjuster
rear suspension
rebound damping
adjuster
engine oil
transmission oil
inspection
window engine oil drain bolt
Servicing Your Honda
drain bolt
drive chain
rear brake
caliper
rear brake
pedal
rear brake
transmission oil
fluid reservoir
transmission
check bolt
oil filler cap
front suspension
rebound damping
adjuster
024-053.qxd 06.5.11 11:58 ページ29
Seat Removal
Refer to Safety Precautions on page 19.
Removal
1. Remove the seat mounting bolts (1).
2. Remove the seat (2) by sliding it backward.
(2)
Installation
1. Install the seat while aligning the seat front
prong (3) with the seat bracket (4) and seat
rear prong (5) with the frame (6).
2. Install and tighten the seat mounting bolts to
the specified torque:
19 lbf·ft (26 N·m, 2.7 kgf·m)
(5)
(3)
(4)
(1)
(1) seat mounting bolts
(2) seat
(6)
(3)
(4)
(5)
(6)
seat front prong
seat bracket
seat rear prong
frame
Servicing Your Honda
29
024-053.qxd 06.5.11 11:58 ページ30
Fuel Tank Removal
Refer to Safety Precautions on page 19.
Removal
1. Turn the fuel valve OFF.
2. Remove the seat (page 29).
3. Remove the shroud A bolts/collars (1).
4. Remove the shroud B bolts (2) and shrouds
(3).
5. Pull the breather tube (4) out of steering stem
nut.
6. Unhook the fuel tank band (5).
7. Unhook the air cleaner case cover (6) and
remove the fuel tank band.
8. Remove the fuel tank bolt/collar (7).
WARNING
(4)
(2)
(3)
9. Disconnect the fuel line (8) from the fuel
valve (9). The fuel line leading to the
carburetor must be disconnected, not the fuel
line leading to the fuel tank.
10. Remove the fuel valve bolt (10) and fuel
valve.
11. Remove the fuel tank.
(7)
(5)
(6)
Gasoline is highly flammable and
explosive. You can be burned or
seriously injured when handling fuel.
• Stop the engine and keep heat, sparks
and flame away.
• Handle fuel only outdoors.
• Wipe up spills immediately.
(1)
(1) shroud A bolts/collars
(2) shroud B bolts
(3) shrouds
(4)
(5)
(6)
(7)
(10)
breather tube
fuel tank band
air cleaner case cover
fuel tank bolt/collar
(8)
(9)
(8) fuel line
(9) fuel valve
30
Servicing Your Honda
(10) fuel valve bolt
024-053.qxd 06.5.11 11:58 ページ31
Fuel Tank Removal
Installation
1. Install the fuel tank on the frame.
2. Install the fuel valve (1) and tighten the fuel
valve bolt (2).
3. Connect the fuel line (3) to the fuel valve.
7. Put the breather tube (7) in the steering stem
nut.
9. Install the shroud B bolts (11) and A bolts/
collars (12).
(11)
(7)
(2)
(3)
(12)
(7) breather tube
(1)
(1) fuel valve
(2) fuel valve bolt
(11) shroud B bolts
(12) shroud A bolts/collars
8. Install the shrouds (8) by aligning it’s tab (9)
with subframe (10).
(3) fuel line
10. Install the seat (page 29).
(9)
4. Install and tighten the fuel tank bolt/collar (4).
5. Install and hook the fuel tank band (5).
6. Hook the air cleaner case cover (6).
(4)
(5)
(8)
(10)
(6)
(8) shrouds
(9) tab
(10) subframe
(4) fuel tank bolt/collar
(5) fuel tank band
(6) air cleaner case cover
Servicing Your Honda
31
024-053.qxd 06.5.11 11:58 ページ32
Subframe Removal
Refer to Safety Precautions on page 19.
Removal
1. Remove the seat (page 29).
2. Remove the side covers (1) by removing the
bolts (2).
5.
6.
7.
8.
Disconnect the crankcase breather tube (7).
Unhook the air cleaner case cover (8).
Unhook the fuel tank band (9), and remove it.
Loosen the screw (10) on the air cleaner
connecting tube clamp (11).
(8)
(9)
(1)
(11)
Installation
1. Loosely attach the upper and lower ends of
the subframe (1) to the mainframe while
connecting the air cleaner connecting tube to
the carburetor. Then align the subframe with
the rear wheel and tighten the subframe
mounting upper bolts (2) and subframe
mounting lower bolts (3) to the specified
torque:
upper bolts: 22 lbf·ft (30 N·m, 3.1 kgf·m)
lower bolts: 36 lbf·ft (49 N·m, 5.0 kgf·m)
(2)
(7)
(2)
(1)
(7) crankcase breather tube
(8) air cleaner case cover
(9) fuel tank band
(10) screw
(11) air cleaner connecting tube clamp
(1) side covers
(2) bolts
3. Loosen the muffler clamp bolt (3).
4. Remove the muffler A bolt (4), muffler B
bolt/washers (5) and muffler (6).
(5)
(10)
(4)
(3)
9. Remove the subframe mounting lower bolts
(12) and subframe mounting upper bolts (13).
Then remove the subframe (14) by pulling it
straight backward.
(13)
(14)
(6)
(3)
(4)
(5)
(6)
32
muffler clamp bolt
muffler A bolt
muffler B bolt/washers
muffler
Servicing Your Honda
(12)
(12) subframe mounting lower bolts
(13) subframe mounting upper bolts
(14) subframe
(3)
(1) subframe
(2) subframe mounting upper bolts
(3) subframe mounting lower bolts
024-053.qxd 06.5.11 11:58 ページ33
Subframe Removal
2. Make sure the carburetor lug (4) align with
the air cleaner connecting tube slot (5).
3. Tighten the screw (6) on the air cleaner
connecting tube clamp (7).
4. Install and hook the fuel tank band (8).
5. Hook the air cleaner case cover (9).
6. Connect the crankcase breather tube (10).
(9)
(5)
9. Install the muffler (13).
10. Install the muffler clamp (14) by aligning the
tab (15) of the muffler clamp with the cut-out
(16) of the muffler.
(13)
13. Install the side covers (20) and bolts (21).
14. Install the seat (page 29).
(20)
(14)
(8)
(16)
(7)
(21)
(4)
(20) side covers
(21) bolts
(15)
(6)
(13) muffler
(14) muffler clamp
(10)
(4) lug
(5) slot
(6) screw
(7) air cleaner connecting tube clamp
(8) fuel tank band
(9) air cleaner case cover
(10) crankcase breather tube
11. Tighten the muffler B bolt/washers (17) and
muffler A bolt (18) to the specified torque:
15 lbf·ft (21 N·m, 2.1 kgf·m)
12. Tighten the muffler clamp bolt (19) to the
specified torque:
15 lbf·ft (21 N·m, 2.1 kgf·m)
7. Remove the old gasket from exhaust pipe.
8. Install the muffler clamp (11) and new gasket
(12) to the exhaust pipe.
(12)
(15) tub
(16) cut-out
(17)
(18)
(19)
(11)
(17) muffler B bolt/washers
(18) muffler A bolt
(19) muffler clamp bolt
(11) muffler clamp
(12) gasket
Servicing Your Honda
33
024-053.qxd 06.5.11 11:58 ページ34
Fuel System
Refer to Safety Precautions on page 19.
Fuel Recommendation
Type
Pump Octane Number
Refueling Procedure
Fuel Valve and Hose
Fuel Tank Capacity: 1.90 US gal (7.2R)
Unleaded
(3)
91 (or higher)
(2)
We recommend that you use unleaded fuel
because it produces fewer engine deposits and
extends the life of exhaust system components.
Your engine is designed to use any gasoline that
has a pump octane number of 91 or higher.
Gasoline pumps at service stations normally
display the pump octane number. For
information on the use of oxygenated fuels, see
page 145.
Use of lower octane gasoline can cause persistent
“pinging” or “spark knock” (a louder rapping
noise) which, if severe, can lead to engine
damage. (Light pinging experienced while
operating under a heavy load, such as climbing a
hill, is no cause for concern.)
If pinging or spark knock occurs at a steady
engine speed under normal load, change brands
of gasoline. If pinging or spark knock persists,
consult your Honda dealer.
Never use stale or contaminated gasoline. Avoid
getting dirt, dust or water in the fuel tank.
(1)
(1)
(1) fuel fill cap
(2) breather tube
(3) steering stem nut
(1)
1. To open the fuel fill cap (1), pull the breather
tube (2) out of the steering stem nut (3). Turn
the fuel fill cap counterclockwise and remove
it.
2. Add fuel until the level reaches the bottom of
the filler neck. Avoid overfilling the tank.
There should be no fuel in the filler neck.
3. Close the fuel fill cap and insert the breather
tube in the steering stem nut.
WARNING
Gasoline is highly flammable and
explosive. You can be burned or
seriously injured when handling fuel.
• Stop the engine and keep heat, sparks
and flame away.
• Handle fuel only outdoors.
• Wipe up spills immediately.
34
Servicing Your Honda
(1) fuel line
1. Check for leaks.
2. Check the fuel line (1) for cracks,
deterioration, damage or leakage. Replace the
fuel line, if necessary.
3. Check for interference between the frame and
tank and adjust if necessary.
024-053.qxd 06.5.11 11:58 ページ35
Fuel System
Fuel Filter
The fuel filter is mounted on the bottom the fuel
tank. Dirt accumulated in the filter will restrict
the flow of the fuel to the carburetor.
Therefore, the fuel filter should be serviced
frequently.
4. Wash the fuel filter (3) in high flash-point
cleaning solvent.
5. Check that the O-ring (4) is in good condition.
Install the fuel joint in the fuel tank by
tightening the bolts securely.
Refill the fuel tank.
Attach the fuel valve and fuel line, and turn
the fuel valve to ON; check for fuel leaks.
To service the fuel filter:
1. Remove the fuel tank (page 30).
2. Drain the fuel from the fuel tank into an
approved gasoline container. Disconnect the
fuel valve and fuel line.
3. Remove the fuel joint (1) from fuel tank by
removing the bolts (2).
(4)
(3)
(1)
(3) fuel filter
(4) O-ring
(2)
(1) fuel joint
(2) bolts
Servicing Your Honda
35
024-053.qxd 06.5.11 11:58 ページ36
Engine Oil
Refer to Safety Precautions on page 19.
Using the proper oil, and regularly checking,
adding, and changing oil will help extend the
service life of the engine. Even the best oil wears
out. Changing oil helps get rid of dirt and
deposits. Operating the engine with old or dirty
oil can damage your engine. Running the engine
with insufficient oil can cause serious damage to
the engine.
Oil Recommendation
API
classification
SG or higher except oils
labeled as energy conserving
on the circular API service
label
viscosity
(weight)
SAE 10W-30
JASO T 903 standard MA
suggested oil*
Pro Honda GN4 4-stroke oil
or an equivalent motorcycle
oil*
* Suggested 4-stroke engine oils are equal
performance to SJ oils that are not labeled as
energy conserving on the circular API service
label.
36
Servicing Your Honda
• Your CRF does not need oil additives.
Use the recommended oil.
• Do not use API SH or higher 4-stroke engine
oils displaying a circular API “energy
conserving” service label on the container. They
may affect lubrication.
NOT RECOMMENDED
OK
Other viscosities shown in the following chart
may be used when the average temperature in
your riding area is within the indicated range.
024-053.qxd 06.5.11 11:58 ページ37
Engine Oil
JASO T 903 standard
The JASO T 903 standard is an index for engine
oils for 4-stroke motorcycle engines.
There are two classes: MA and MB.
Oil conforming to the standard is labeled on the
oil container. For example, the following label
shows the MA classification.
(1)
Checking & Adding Oil
Changing Engine Oil & Filter
(1)
(2)
(3)
(2)
(1) code number of the sales company of the oil
(2) oil classification
(1) engine oil filler cap
(2) upper level (H) mark
(3) lower level (L) mark
1. Run the engine for 3 minutes, then shut it off.
2. Wait 3 minutes after shutting off the engine to
allow the oil to properly distribute itself in the
engine.
3. Support the CRF in an upright position on a
level surface.
4. Remove the engine oil filler cap (1).
5. Check that the oil level is between the upper
(2) and lower (3) level marks in the inspection
window.
• If the oil is at or near the upper level mark,
you do not have to add oil.
• If the oil is below or near the lower level
mark, add the recommended oil until the
upper level mark. (Do not overfill)
Reinstall the engine oil filler cap.
Repeat steps 1–4.
6. Reinsert the engine oil filler cap.
7. Check for oil leaks.
1. Run the engine for 3 minutes, then shut it off.
2. Support the CRF in an upright position on a
level surface.
3. Remove the engine oil filler cap (1) from the
left crankcase cover.
4. Place an oil drain pan under the engine to
catch the oil. Then remove the engine oil
drain bolt (2) and sealing washer (3).
5. With the engine stop button pushed, repeat
kickstarter operation approximately 5 times to
drain the engine oil completely.
6. After the oil has drained, apply engine oil to
the drain bolt threads and tighten it with a
new sealing washer to the specified torque:
12 lbf·ft (16 N·m, 1.6 kgf·m)
(1)
(3)
(2)
(1) engine oil filler cap
(2) engine oil drain bolt
(3) sealing washer
7. It is recommended to replace the oil and filter
every 6 races or about every 15.0 hours.
However, if you replace only the oil before
the recommended interval, see page 21.
(cont’d)
Servicing Your Honda
37
024-053.qxd 06.5.11 11:58 ページ38
Engine Oil
8. Remove the left engine guard bolt (4) and left
engine guard (5).
(4)
NOTICE
(5)
If the oil filter is not installed properly, it will
cause serious engine damage.
(4) left engine guard bolt
(5) left engine guard
9. Remove the oil filter cover bolts (6) and oil
filter cover (7).
10. Remove the oil filter (8) from the oil filter cover.
11. Check that the oil filter cover O-ring (9) is in
good condition. Replace it if necessary.
(8)
(11)
(9)
(7)
(10)
(12)
(6)
(6) oil filter cover bolts
(7) oil filter cover
(8) oil filter
(9) oil filter cover O-ring
(10) spring
(11) rubber seal
(12) “OUT-SIDE” mark
38
12. Apply grease to the filter side of the spring
end, then install the spring (10) into the new
oil filter.
13. Position the spring against the engine
crankcase and install a new oil filter with the
rubber seal (11) facing out, away from the
engine. You should see the “OUT-SIDE” mark
(12) on the filter body, near the seal.
Use a new genuine Honda oil filter or a filter
of equal quality specified for your model.
Servicing Your Honda
14. Apply engine oil to the O-ring and install it to
the oil filter cover.
15. Install the oil filter cover being careful not to
damage the O-ring, then tighten the oil filter
cover bolts to the specified torque:
9 lbf·ft (12 N·m, 1.2 kgf·m)
16. Install the left engine guard and tighten the
left engine guard bolt.
17. Fill the crankcase with the recommended oil.
Capacity: 0.73 US qt (0.69R)
at oil and filter change
0.70 US qt (0.66R)
at oil change
18. Install the engine oil filler cap.
19. Check the engine oil level by following the
steps in Checking & Adding Oil (page 37).
024-053.qxd 06.5.11 11:58 ページ39
Transmission Oil
Refer to Safety Precautions on page 19.
Using the proper oil, and regularly checking,
adding, and changing oil will help extend the
service life of the transmission and clutch. Even
the best oil wears out. Changing oil helps get rid
of dirt and deposits. Operating the engine with
old or dirty oil can damage your engine.
Running the engine with insufficient oil can
cause serious damage to the engine and
transmission.
Oil Recommendation
API classification
(4-stroke engine oil
only)
SG or higher except oils
labeled as energy
conserving on the circular
API service label
viscosity
(weight)
SAE 10W-30
JASO T903
standard
MA
others
without friction modifiers as
molybdenum additives
suggested oil*
Pro Honda GN4 4-stroke oil
or an equivalent motorcycle
oil*
• Your CRF does not need oil additives. Use the
recommended oil.
• Do not use oils with graphite or molybdenum
additives. They may adversely affect clutch
operation.
• Do not use API SH or higher 4-stroke engine
oils displaying a circular API “energy
conserving” service label on the container. They
may affect lubrication and clutch performance.
NOT RECOMMENDED
* Suggested 4-stroke engine oils are equal
performance to SJ oils that are not labeled as
energy conserving on the circular API service
label.
OK
Other viscosities shown in the following chart
may be used when the average temperature in
your riding area is within the indicated range.
Servicing Your Honda
39
024-053.qxd 06.5.11 11:58 ページ40
Transmission Oil
JASO T 903 standard
The JASO T 903 standard is an index for engine
oils for 4-stroke motorcycle engines.
There are two classes: MA and MB.
Oil conforming to the standard is labeled on the
oil container. For example, the following label
shows the MA classification.
Checking & Adding Oil
Replacing Transmission Oil
(2)
(1)
(2)
(1)
(3)
(1) transmission oil filler cap (3) sealing washer
(2) oil check bolt
(1) code number of the sales company of the oil
(2) oil classification
40
Servicing Your Honda
1. Run the engine for 3 minutes, then shut it off.
2. Wait 3 minutes after shutting off the engine to
allow the oil to properly distribute itself in the
clutch and transmission.
3. Support the CRF in an upright position on a
level surface.
4. Remove the transmission oil filler cap (1) and
oil check bolt (2) and sealing washer (3) from
the right crankcase cover. A small amount of
oil should flow out of the oil check bolt hole.
Allow any excess oil to flow out of the oil
check bolt hole.
If no oil flows out of the oil check bolt hole,
add oil slowly through the transmission oil
filler hole until oil starts to flow out of the oil
check bolt hole.
Tighten the oil check bolt with a new sealing
washer and transmission oil filler cap. Repeat
steps 1–4.
5. After inspecting the oil level or adding oil,
tighten the oil check bolt to the specified
torque:
7 lbf·ft (10 N·m, 1.0 kgf·m)
1. Run the engine for 3 minutes, then shut it off.
2. Support the CRF in an upright position on a
level surface.
3. Remove the transmission oil filler cap (1)
from the right crankcase cover.
4. Place an oil drain pan under the engine to
catch the oil. Then remove the transmission
oil drain bolt (2) and sealing washer (3).
5. After the oil has drained, apply engine oil to
the drain bolt threads and tighten it with a
new sealing washer to the specified torque:
12 lbf·ft (16 N·m, 1.6 kgf·m)
6. Fill the crankcase with recommended oil.
Capacity: 0.62 US qt (0.59R) at oil change.
7. Check the transmission oil level by following
the steps in Checking & Adding Oil (this
page).
(2)
(1)
(1) transmission oil filler cap
(2) transmission oil drain bolt
(3) sealing washer
(3)
024-053.qxd 06.5.11 11:58 ページ41
Coolant
Your CRF’s liquid cooling system dissipates
engine heat through the coolant jacket that
surrounds the cylinder and cylinder head.
Maintaining the coolant will allow the cooling
system to work properly and prevent freezing,
overheating, and corrosion.
Coolant Recommendation
Use Pro Honda HP Coolant or an equivalent high
quality ethylene glycol antifreeze containing
corrosion protection inhibitors specifically
recommended for use in aluminum engines.
Check the antifreeze container label.
Increasing the concentration of antifreeze is not
recommended because it decreases cooling
system performance. Higher concentrations of
antifreeze (up to 60%) should only be used to
provide additional protection against freezing.
Check the cooling system frequently during
freezing weather.
Checking & Adding Coolant
Refer to Safety Precautions on page 19.
1. With the engine cold, remove the radiator cap
(1) and check coolant level. The coolant level
is correct when it is at the bottom of the
radiator filler neck (2).
Use only distilled water as a part of the coolant
solution. Water that is high in mineral content or
salt may be harmful to the aluminum engine.
(1)
NOTICE
Removing the radiator cap while the
engine is hot can cause the coolant to
spray out, seriously scalding you.
Always let the engine and radiator cool
down before removing the radiator cap.
2. Add coolant up to the filler neck if the level is
low.
Inspect the coolant level before each outing.
A coolant loss of 0.7 - 2.0 US oz (20 - 60
cm3) through the over flow tube is normal. If
coolant loss is more than this, inspect the
cooling system.
Capacity:
1.18 US qt (1.12R) at disassembly
1.09 US qt (1.03R) at coolant change
3. Install the radiator cap securely.
NOTICE
Using coolant with silicate inhibitors may cause
premature wear of water seals or blockage of
radiator passages. Using tap water may cause
engine damage.
The factory provides a 50/50 solution of
antifreeze and water in this motorcycle. This
coolant solution is recommended for most
operating temperatures and provides good
corrosion protection.
WARNING
(2)
If the radiator cap is not installed properly, it
will cause excessive coolant loss and may result
in overheating and engine damage.
(1) radiator cap
(2) filler neck
Decreasing the concentration of antifreeze to less
than 40% will not provide proper corrosion
protection.
Servicing Your Honda
41
024-053.qxd 06.5.11 11:58 ページ42
Coolant
Cooling System Inspection
Coolant Replacement
1. Check the cooling system for leaks (see the
Honda Service Manual for troubleshooting of
leaks).
2. Check the water hoses (1) for cracks,
deterioration, and radiator hose clamp for
looseness.
3. Check the radiator mount for looseness.
4. Make sure the overflow tube (2) is connected
and not clogged.
5. Check the radiator fins for clogging.
6. Check the water leakage check hole (3) below
the water pump cover (4) for leakage. Make
sure the hole remains open. If water leaks
through the check hole, the water seal is
damaged. If oil leaks through the check hole,
the transmission oil seal is damaged. See the
Honda Service Manual or consult your Honda
dealer for replacing the water seal or the
transmission oil seal. Both seals should be
replaced at the same time.
Refer to Safety Precautions on page 19.
(2)
Coolant should be replaced by your Honda
dealer, unless you have the proper tools and
service data and are mechanically qualified.
Refer to the Honda Service Manual
(page 152).
WARNING
(1)
Removing the radiator cap while the
engine is hot can cause the coolant to
spray out, seriously scalding you.
(1)
Always let the engine and radiator cool
down before removing the radiator cap.
To properly dispose of drained coolant, refer to
You & the Environment, page 136.
(3)
NOTICE
Improper disposal of drained fluids is harmful to
the environment.
(4)
(1)
(2)
(3)
(4)
42
Servicing Your Honda
water hoses
overflow tube
water leakage check hole
water pump cover
024-053.qxd 06.5.11 11:58 ページ43
Air Cleaner
Refer to Safety Precautions on page 19.
The air cleaner uses polyurethane inner and outer
pieces which can’t be separated.
A dirty air cleaner will reduce engine power.
Proper air cleaner maintenance is very important
for off-road vehicles. A dirty, water-soaked,
worn-out, or defective air cleaner will allow dirt,
dust, mud, and other impurities to pass into the
engine.
Proper air cleaner maintenance can prevent
premature engine wear or damage, expensive
repairs, low engine power, poor gas mileage, and
spark plug fouling.
Cleaning
1. Remove the seat (page 29).
2. Remove the air cleaner retaining bolt (1).
NOTICE
Improper or lack of proper air cleaner
maintenance can cause poor performance and
premature engine wear.
Service the air cleaner more frequently if you
ride in unusually wet or dusty areas. Your Honda
dealer can help you determine the correct service
interval for your riding conditions.
Your CRF’s air cleaner has very specific
performance requirements. Use a new genuine
Honda air cleaner specified for your model or an
air cleaner of equal quality.
(1)
(1) air cleaner retaining bolt
3. Align the two access top tabs (2) of the air
cleaner assembly (3) and “∆” mark (4) of the
air cleaner housing by rotating the air cleaner
counterclockwise.
4. Remove the air cleaner assembly keeping the
two access top tabs up.
(4)
(3)
(2)
(3)
(2) two access top tabs
(3) air cleaner assembly
(4) “∆” mark
(cont’d)
Servicing Your Honda
43
024-053.qxd 06.5.11 11:58 ページ44
Air Cleaner
5. Remove the air cleaner element (5) out from
the air cleaner holder (6).
(7)
(8)
(5)
(9)
(6)
9. Apply a thin coat of Pro Honda White
Lithium Grease or equivalent to the sealing
surface.
10. Assemble the air cleaner element and holder.
Install the tab (7) of the holder in the hole (8)
of the air cleaner tab (9).
11. Install the air cleaner assembly into the air
cleaner housing keeping the two access top
tabs (2) up.
12. Carefully position the sealing flange of the
element to prevent dirt intrusion.
13. Align the set tab (10) of the air cleaner
element with the “∆” mark (4) of the air
cleaner housing by rotating the air cleaner
assembly (3) clockwise.
(2)
(5) air cleaner element
(6) air cleaner holder
(7) holder tab
(8) hole
(9) air cleaner tab
6. Wash the air cleaner in clean non-flammable
cleaning solvent. Then wash in hot, soapy
water, rinse well, and allow to dry thoroughly.
The air cleaner element is made in two pieces:
inner and outer, which cannot be separated.
7. Clean the inside of the air cleaner housing.
8. Allow the air cleaner to dry thoroughly. After
drying, soak the air cleaner element in clean
Pro Honda Foam Filter Oil or an equivalent
air cleaner oil.
Apply air cleaner oil to the entire surface,
inner and outer, and rub it with both hands to
saturate the air cleaner with oil. Squeeze out
excess oil.
44
(4)
Servicing Your Honda
(3)
14. Install and tighten the air cleaner retaining
bolt (1) securely.
(1)
(1) air cleaner retaining bolt
NOTICE
Improper installation of the air cleaner assembly
may allow dirt and dust to enter the engine and
cause rapid wear of the piston rings and cylinder.
15. Install the seat (Page 29)
(10)
(2) two access top tabs
(3) air cleaner assembly
(4) “∆” mark
(10) set tab
024-053.qxd 06.5.11 11:58 ページ45
Crankcase Breather
Refer to Safety Precautions on page 19.
Service more frequently if your CRF is ridden in
the rain or often at full throttle.
Service the breather if you can see deposits in the
transparent section of the drain tube.
Draining
1. Remove the crankcase breather tube plug (1)
from the tube (2) and drain deposits.
2. Reinstall the crankcase breather tube plug.
(1)
(2)
(1) crankcase breather tube plug
(2) tube
Servicing Your Honda
45
024-053.qxd 06.5.11 11:58 ページ46
Throttle
Refer to Safety Precautions on page 19.
Throttle Freeplay
(1)
(1) freeplay
Inspection
Check freeplay (1).
Freeplay: 1/8 - 3/16 in (3 - 5 mm)
If necessary, adjust to the specified range.
Upper Adjustment
Minor adjustments are generally made with the
upper adjuster.
(2)
(3)
(+)
(–)
(4)
(2) dust cover
(3) lock nut
(4) adjuster
46
Servicing Your Honda
(+) increase
(–) decrease
1. Pull the dust cover (2) back.
2. Loosen the lock nut (3).
3. Turn the adjuster (4).
Turning the adjuster in direction (–) will
decrease freeplay and turning it in direction
(+) will increase freeplay.
4. Tighten the lock nut to the specifiel torque:
Return the dust cover to its normal position.
3.0 lbf·ft (4 N·m, 0.4 kgf·m)
5. After adjustment, check for smooth rotation of
the throttle grip from fully closed to fully
open in all steering positions.
If the adjuster is threaded out near its limit or
the correct freeplay cannot be reached, turn
the adjuster all the way in and back out one
turn. Tighten the lock nut, install the dust
cover and make the adjustment with the
lower adjuster.
Lower Adjustment
The lower adjuster is used for major freeplay
adjustment, such as after replacing the throttle
cables or removing the carburetor. It is also used
if you can not get the proper adjustment with the
upper adjuster.
(–)
(+)
(5)
(5) lock nut
(6) adjuster
(6)
(+) increase
(–) decrease
1. Remove the fuel tank (page 30).
2. Loosen the lock nut (5).
3. Turn the adjuster (6) in direction (–) to
decrease freeplay, and in direction (+) to
increase freeplay.
4. Tighten the lock nut to the specified torque:
3.0 lbf·ft (4 N·m, 0.4 kgf·m)
5. Operate the throttle grip to ensure that it
functions smoothly and returns completely.
6. Install the fuel tank (page 31).
If you can’t get the freeplay within the specified
range, contact your Honda dealer.
024-053.qxd 06.5.11 11:58 ページ47
Throttle
Throttle Inspection
(1)
(1) throttle
1. Check that the throttle assembly is positioned
properly and the securing bolts are tight.
2. Check for smooth rotation of the throttle (1)
from fully open to fully closed in all steering
positions. If there is a problem, see your
Honda dealer.
3. Inspect the condition of the throttle cables
from the throttle grip down to the carburetor.
If the cable is kinked or chafed, have it
replaced.
4. Check the cables for tension or stress in all
steering positions.
5. Lubricate the cables with a
commercially-available cable lubricant to
prevent premature rust and corrosion.
Servicing Your Honda
47
024-053.qxd 06.5.11 11:58 ページ48
Engine Idle Speed
Refer to Safety Precautions on page 19.
Remember, idle speed adjustment in not a
“cure-all” for other problems in your engine’s
fuel-delivery system. Adjusting the idle will not
compensate for a fault elsewhere.
The engine must be at normal operating
temperature for accurate idle speed adjustment.
Idle Speed Adjustment
1. If the engine is cold, start it and warm it up 3
minutes. Then shut it off.
2. Connect a tachometer to the engine.
3. Shift the transmission into neutral. Start the
engine.
4. Keep the motorcycle in an upright position.
5. Adjust idle speed with the throttle stop screw
(1).
Idle speed: 1,700 ± 100 rpm
(1)
(1) throttle stop screw
48
Servicing Your Honda
024-053.qxd 06.5.11 11:58 ページ49
Clutch System
Refer to Safety Precautions on page 19.
Clutch Lever Adjustment
4. Turn the cable end adjuster (3) in direction (+)
until it seats lightly and then turn it out 5
turns.
Clutch Lever Freeplay
(1)
Cable end adjuster:
The distance between the tip of the clutch lever
and the grip may be adjusted.
(–)
Make sure to adjust the clutch lever freeplay after
the clutch lever position adjustment or clutch
cable disconnected.
(+)
(3)
(1)
(3) cable end adjuster
(+) increase freeplay
(–) decrease freeplay
(2)
(1) lock nut
(2) adjuster
1. Loosen the lock nut (1).
2. To position the clutch lever farther away from
the handgrip, turn the adjuster (2)
counterclockwise. To position the brake lever
closer to the handgrip, turn the adjuster
clockwise.
3. Tighten the lock nut.
5. Loosen the lock nut (4) and turn the integral
cable adjuster (5) to adjust the clutch lever
freeplay 3/8 – 13/16 in (10 – 20 mm) at the
tip of lever. Tighten the lock nut.
(1) clutch lever
Inspection
Check freeplay.
Freeplay: 3/8 – 13/16 in (10 – 20 mm)
If necessary, adjust to the specified range.
Improper freeplay adjustment can cause
premature clutch wear.
Make sure to adjust the clutch lever freeplay after
the clutch cable is disconnected.
(5)
(–)
(+)
(4)
(4) lock nut
(5) integral cable adjuster
(+) increase freeplay
(–) decrease freeplay
6. Adjust the cable end adjuster for minor
adjustement.
Servicing Your Honda
49
024-053.qxd 06.5.11 11:58 ページ50
Clutch System
Cable End Adjustment
Minor adjustments are generally made with the
clutch cable end adjuster.
Integral Cable Adjustment
The integral cable adjuster is used if the cable
end adjuster is threaded out near its limit — or
the correct freeplay cannot be obtained.
Cable end adjuster:
(4)
(–)
(–)
Other Inspections & Lubrication
• Check that the clutch lever assembly is
positioned properly (by inspecting the end of
the holder (1) aligns with the paint mark (2)
on the handlebar) and the securing bolts are
tight.
(3)
(+)
(1)
(2)
(+)
(2) cable end adjuster
(+) increase freeplay
(–) decrease freeplay
Turning the cable end adjuster (2) in direction (+)
will increase freeplay and turning it in direction
(–) will decrease freeplay.
If the adjuster is threaded out near its limit or the
correct freeplay cannot be reached, turn the
adjuster all the way in and back out one turn and
make the adjustment with the integral cable
adjuster.
(3) lock nut
(4) integral cable adjuster
(+) increase
(–) decrease
1. Turn the cable end adjuster in direction (+)
until it seats lightly and then turn it out 5
turns.
2. Loosen the lock nut (3).
3. Turn the integral cable adjuster (4) to obtain
the specified freeplay.
4. Tighten the lock nut. Check the adjustment.
5. Start the engine, pull the clutch lever in, and
shift into gear. Make sure the engine does not
stall and the motorcycle does not creep.
Gradually release the clutch lever and open
the throttle. Your CRF should move smoothly
and accelerate gradually.
If you can’t get proper adjustment, or the clutch
does not work properly, the cable may be kinked
or worn, or the clutch discs may be worn. See
your Honda dealer or refer to the Honda Service
Manual (page 152).
50
Servicing Your Honda
(2)
(1) holder
(2) paint mark
• Check the clutch cable for kinks or signs of
wear. If necessary, have it replaced.
• Lubricate the clutch cable with a
commercially-available cable lubricant to
prevent premature wear and corrosion.
Clutch Operation
1. Check for smooth clutch lever operation. If
necessary, lubricate the clutch lever pivot or
clutch cable.
2. Check the clutch cable for deterioration,
kinks, or damage.
024-053.qxd 06.5.11 11:58 ページ51
Clutch System
5. Remove the clutch pressure plate (6).
Clutch Cover/Disc/Plate Removal
Clutch Disc/Plate Inspection
(5)
1. Drain the transmission oil (page 40).
2. Remove the rear brake pedal (1) by removing
its pivot bolt (2).
Replace the clutch discs (1) if they show signs of
scoring or discoloration.
Measure the thickness of each clutch disc.
Service Limit: 0.112 in (2.85 mm)
(2)
Replace the clutch discs and clutch plates as an
assembly.
(1)
(6)
(1)
(5) clutch spring bolts/springs
(6) clutch pressure plate
(1) rear brake pedal
(2) pivot bolt
3. Remove the six clutch cover bolts (3) and
clutch cover (4).
(3)
6. Remove the washer (7), needle bearing (8),
clutch lifter (9) and clutch lifter rod (10).
7. Remove the eight clutch discs and seven
clutch plates (11).
Assemble the clutch lifter, needle bearing and
washer. Turn the needle bearing with your
finger. The needle bearing should turn
smoothly and quietly. Replace the needle
bearing and washer if the needle bearing does
not turn smoothly.
(1) clutch disc
Check the clutch plate (2) for excessive warpage
or discoloration.
Check the plate warpage on a surface plate using
a feeler gauge.
Measure the thickness of the clutch plates.
Service Limit: 0.006 in (0.15 mm)
Replace the clutch discs and plates as a set.
(11)
(4)
(3) clutch cover bolts
(4) clutch cover
4. Remove the six clutch spring bolts and
springs (5).
Loosen the bolts in a crisscross pattern in 2 or 3
progressive steps.
(2)
(9)
(7)
(7) washer
(8) needle bearing
(9) clutch lifter
(8)
(10)
(10) clutch lifter rod
(11) clutch discs and plates
(2) clutch plate
Servicing Your Honda
51
024-053.qxd 06.5.11 11:58 ページ52
Clutch System
Clutch Spring Inspection
(1)
3. Apply grease to the clutch lifter rod (3).
4. Insert the clutch lifter rod into the mainshaft.
5. Apply engine oil to the needle bearing (4) and
washer (5) and install them onto the clutch
lifter (6).
6. Install the clutch lifter onto the rod.
10. Install a new O-ring (9) in the groove of the
clutch cover (10).
11. Install the clutch cover by tightening the six
cover bolts to the specified torque:
7 lbf·ft (10 N·m, 1.0 kgf·m)
(9)
(3)
(1) clutch spring
Measure the free length of each spring.
Service Limit: 1.72 in (43.7 mm)
Replace the clutch springs as a set if any one of
them is below the service limit or if the clutch
plates have been burnt/heat discolored.
Clutch Disc/Plate Installation
1. Coat the clutch plates (1) with engine oil.
2. Install the eight clutch discs (2) and seven
clutch plates (1) alternately, starting with a disc.
(10)
(5)
(3) clutch lifter rod
(4) needle bearing
(6)
(4)
(5) washer
(6) clutch lifter
7. Install the clutch pressure plate (7).
8. Install the six clutch springs and bolts (8).
9. Tighten the bolts in a crisscross pattern in 2
or 3 steps, to the specified torque:
9 lbf·ft (12 N·m, 1.2 kgf·m)
(9) O-ring
(10) clutch cover
12. Apply grease to the rear brake pedal pivot bolt
(11) sliding surface.
13. Install the dust seals (12) into the rear brake
pedal (13).
14. Apply locking agent to the brake pedal pivot
bolt threads and tighten it to the specified
torque:
27 lbf·ft (36 N·m, 3.7 kgf·m)
Connect the brake pedal return spring (14) if
it was removed.
(7)
(2)
(13)
(11)
(8)
(1)
(1) seven clutch plates
(2) eight clutch discs
(7) clutch pressure plate
(8) clutch springs and bolts
(14)
(11) pivot bolt
(12) dust seals
(12)
(13) rear brake pedal
(14) return spring
15. Add the transmission oil (page 40).
52
Servicing Your Honda
024-053.qxd 06.5.11 11:58 ページ53
Hot Start Lever
Refer to Safety Precautions on page 19.
Hot Start Lever Freeplay
left handlebar
(1)
(2)
Adjustment
Adjustments can be made with the cable end
adjuster.
Loosen the lock nut (3) and turn the adjuster (4).
Turning the adjuster clockwise (+) will increase
freeplay and turning it counterclockwise (–) will
decrease freeplay. After adjustment, tighten the
lock nut.
(3)
(–)
(1) hot start lever
(2) hot start lever freeplay
Inspection
Check freeplay:
1/16 – 1/8 in (2 – 3 mm)
If necessary, adjust to the specified range.
(4)
(+)
(3) lock nut
(4) adjuster
(+) increase
(–) decrease
Servicing Your Honda
53
054-075.qxd 06.5.11 13:02 ページ54
Spark Plug
Refer to Safety Precautions on page 19.
Spark Plug Recommendation
The recommended standard spark plug is
satisfactory for most racing conditions.
Standard
IFR8H11
(NGK) or
VK24PRZ11 (DENSO)
Optional
IFR9H11
(NGK) or
VK27PRZ11 (DENSO)
Spark Plug Replacement & Inspection
1.
2.
3.
4.
Remove the seat and fuel tank (pages 29,30).
Disconnect the spark plug cap (1).
Clean any dirt from around the spark plug base.
Remove the spark plug (2).
If you're using a new plug, ride for at least 10
minutes before taking a plug reading; a brand-new
plug will not color initially.
(1)
(2)
If the electrodes appear burnt, or the insulator is
white or light gray (lean) or the electrodes and
insulator are black or fouled (rich), there is a
problem elsewhere (page 128).
Check the carburetor, fuel system and ignition
timing.
Use only the recommended type of spark plugs in
the recommended heat range.
NOTICE
Using a spark plug with an improper heat range
or incorrect reach can cause engine damage.
Using a non-resistor spark plug may cause
ignition problems.
This motorcycle uses spark plug that have an
iridium tip in the center electrode and a platinum
tip in the side electrode.
Be sure to observe the following when servicing
the spark plug.
• Do not clean the spark plug. If an electrode is
contaminated with accumulated objects or
dirt, replace the spark plug with a new one.
• To check the spark plug gap, use only a
“wire-type feeler gauge” To prevent damaging
the iridium tip of the center electrode and
platinum tip of the side electrode, never use a
“leaf-type feeler gauge’’.
• Do not adjust the spark plug gap. If the gap is
out of specification, replace the spark plug
with a new one.
(1) spark plug cap
(2) spark plug
5. Check the electrodes for wear or deposits, the
sealing gasket (3) for damage, and the
insulator for cracks. Replace if you detect
them.
6. Check the spark plug gap (4), using a wiretype feeler gauge. If the gap is out of
specifications, replace the plug with a new
one.
The recommended spark plug gap is:
0.039 – 0.043 in (1.0 – 1.1 mm)
(4)
(3)
(3) sealing gasket
(4) spark plug gap
54
Servicing Your Honda
7. To obtain accurate spark plug readings,
accelerate up to speed on a straightaway. Push
the engine stop button and disengage the
clutch by pulling the lever in.
Coast to a stop, then remove and inspect the spark
plug. The porcelain insulator around the center
electrode should appear tan or medium gray.
8. Tighten the spark plug.
• If the old plug is good:
1/8 turn after it seats.
• If installing a new plug, tighten it twice to
prevent loosening:
a) First, tighten the plug:
NGK: 3/4 turn after it seats.
DENSO: 1/2 turn after it seats.
b) Then loosen the plug.
c) Next, tighten the plug again:
1/8 turn after it seats.
NOTICE
An improperly tightened spark plug can damage
the engine. If a plug is too loose, a piston may be
damaged. If a plug is too tight, the threads may
be damaged.
9. Connect the spark plug cap. Take care to
avoid pinching any cables or wires.
10. Install the fuel tank and seat (pages 29, 31).
054-075.qxd 06.5.11 13:03 ページ55
Valve Clearance
Refer to Safety Precautions on page 19.
Excessive valve clearance will cause noise and
eventual engine damage. Little or no clearance
will prevent the valve from closing and cause
valve damage and power loss. Check valve
clearance when the engine is cold at the intervals
specified in the Maintenance Schedule (page 21).
The checking or adjusting of the valve clearance
should be performed while the engine is cold.
The valve clearance will change as engine
temperature rises.
Cylinder Head Cover Removal
Before inspection, clean the engine thoroughly to
keep dirt from entering the engine.
Positioning At Top Dead Center On The
Compression Stroke
1. Remove the crankshaft hole cap (1).
1. Remove the seat (page 29).
2. Remove the fuel tank (page 30).
3. Disconnect the breather tube (1) and spark
plug cap (2).
(2)
(1)
(1)
(1) crankshaft hole cap
2. Remove the spark plug (2).
(1) breather tube
(2) spark plug cap
(2)
4. Remove the cylinder head cover A bolt/rubber
seal (3), cylinder head cover B bolts/rubber
seals (4) and cylinder head cover (5).
(4)
(5)
(2) spark plug
(3)
(3) cylinder head cover A bolt/rubber seal
(4) cylinder head cover B bolts/rubber seals
(5) cylinder head cover
(cont’d)
Servicing Your Honda
55
054-075.qxd 06.5.11 13:03 ページ56
Valve Clearance
3. Rotate the crankshaft by turning the primary
drive gear bolt (3) clockwise until aligning the
punch mark (4) on the primary drive gear with
the “∆” mark (5) on the right crankcase cover.
In this position, the piston may either be on the
compression or exhaust stroke.
If the crankshaft passed the punch mark,
rotate the primary drive gear bolt clockwise
again and align the punch mark with the “∆”
mark.
The inspection must be made when the piston
is at the top of the compression stroke when
both the intake and exhaust valves are closed.
This condition can be determined by moving
the exhaust rocker arm (6). If it is free, it is an
indication that the valves are closed and that
the piston is on the compression stroke. If it is
tight and the valves are open, rotate the
primary drive gear bolt 360° and realign the
punch mark to the “∆” mark.
(5)
(3)
2. Measure the exhaust valve clearance by
inserting a feeler gauge (1) between the
exhaust rocker arm (4) and shims (5).
Valve Clearance Inspection
1. Measure the intake valve clearance by
inserting a feeler gauge (1) between the valve
lifters (2) and cam lobe (3).
(5)
(1)
(1)
(2)
(4)
(3)
(1) feeler gauge
(2) valve lifters
(3) cam lobe
(1) feeler gauge
(4) exhaust rocker arm
(5) exhaust valve shims
Valve Clearances:
IN: 0.006 ± 0.001 in (0.16 ± 0.03 mm)
EX: 0.011 ± 0.001 in (0.28 ± 0.03 mm)
If intake valve clearance and exhaust valve
clearance need adjustment, see Camshaft Holder
Assembly Removal (page 57) and select the
correct shim for each valve.
(4)
(3) primary drive gear bolt
(4) punch mark
(5) “∆” mark
(6)
(6) exhaust rocker arm
56
Servicing Your Honda
054-075.qxd 06.5.11 13:03 ページ57
Valve Clearance
Camshaft Holder Assembly Removal
1. Record the intake valve and exhaust valve
clearances.
Make sure the piston is at TDC (Top Dead
Center) on the compression stroke (page 55).
2. Remove the cam chain tensioner lifter cover
bolt (1) and sealing washer (2).
Use the tensioner stopper tool.
• Tensioner stopper
070MG-0010100
3. Turn the tensioner shaft clockwise with the
stopper tool (3) until it stops, in order to
retract the tensioner fully.
Then insert the stopper tool fully to hold the
stopper in the fully retracted position.
4. Loosen the cam sprocket bolt (4).
Rotate the primary drive gear bolt (crankshaft)
clockwise one turn and remove the other
sprocket bolt. Rotate the primary drive gear
bolt (crankshaft) clockwise one turn again and
remove the other sprocket bolt.
5. Remove the cam sprocket (5) and then attach
a piece of wire to the cam chain (6) to prevent
it from falling into the crankcase.
NOTICE
(3)
(1)
Do not let the bolts, sprocket and cam chain fall
into the crankcase.
(6)
(3)
(2)
(1) cam chain tensioner lifter cover bolt
(2) sealing washer
(3) stopper tool
(5)
(4)
(4) cam sprocket bolts
(5) cam sprocket
(6) cam chain
(cont’d)
Servicing Your Honda
57
054-075.qxd 06.5.11 13:03 ページ58
Valve Clearance
6. Make sure the piston is at TDC (Top Dead
Center) on the compression stroke.
Loosen the camshaft holder assembly bolts (7)
in a crisscross pattern in two or three steps.
Remove the camshaft holder assembly bolts,
camshaft holder assembly (8), intake valve
lifters (9) and shims.
7. Remove the valve lifters (9), decompressor
shaft (10) and plunger (11).
(9)
• As you remove the camshaft holder
assembly, the intake valve lifters and intake
valve shims may be sticking in the camshaft
holder assembly.
• Keep the intake valve lifters and the shims
so as to allow identification of the originally
installed location such as intake or exhaust,
right or left.
(12)
(12) valve shims
(11)
(7)
(10)
(8)
(7) camshaft holder assembly bolts
(8) camshaft holder assembly
NOTICE
Do not let the valve lifters, shims, decompressor
shaft (10) and plunger (11) fall into the
crankcase.
58
Servicing Your Honda
8. Remove the valve shims (12).
(9) intake valve lifters
(10) decompressor shaft
(11) plunger
054-075.qxd 06.5.11 13:03 ページ59
Valve Clearance
Shim Selection
1. Clean the valve shim contact area in the valve
lifter (1) with compressed air.
2. Measure the shim thickness with a micrometer
and record it.
Seventy-three different thickness shims (2) are
available from the thinnest (1.200 mm
thickness) shim to the thickest (3.000 mm
thickness) in intervals of 0.025 mm.
(1)
(2)
3. Calculate the new shim thickness using the
equation below.
A = (B – C) + D
A: New shim thickness
B: Recorded valve clearance
C: Specified valve clearance
D: Old shim thickness
• Make sure of the correct shim thickness by
measuring the shim with a micrometer.
• Reface the intake valve seat if carbon deposits
result in a calculated dimension of over 2.450
mm.
Reface the exhaust valve seat if carbon
deposits result in a calculated dimension of
over 3.000 mm.
(1) valve lifter
(2) shim
Servicing Your Honda
59
054-075.qxd 06.5.11 13:03 ページ60
Valve Clearance
Camshaft Holder Assembly
1. Install the newly selected shims (1) on the
valve spring retainers (2).
NOTICE
Do not let the shims fall into the crankcase.
3. Install the plunger (3) into the camshaft (4)
with its rounded surface facing up and groove
(5) side toward the decompressor shaft (6).
Install the decompressor shaft while aligning
its tab (7) with the groove of the plunger
shown.
Check the operation of the plunger by turning
the decompressor shaft with your finger, then
pushing down and pull up the plunger smoothly.
(5)
5. Install the camshaft holder assembly (9) onto
the cylinder head with the intake cam lobes
(10) facing up as illustrated below.
Apply engine oil to the camshaft holder
assembly bolt threads and seating surface.
Tighen the camshaft holder assembly bolts
(11) to the specified torque:
10 lbf·ft (14 N·m, 1.4 kgf·m)
NOTICE
(3)
Align
Do not let the decompressor shaft and pluger fall
into the crankcase.
(4)
(7)
(2)
(2)
(6)
Tighten the camshaft holder assembly bolts in a
criss-cross pattern in two or three steps.
(9)
(1)
(1) shims
(2) valve spring retainers
2. Apply molybdenum disulfide oil (a mixture of
1/2 engine oil and 1/2 molybdenum disulfide
grease containing more than 3% molybdenum
disulfide additive) to the following parts.
– camshaft cam lobes
– each valve lifter outer surface
– plunger whole surface
– decompressor shaft sliding area
(6)
(3) plunger
(4) camshaft
(5) groove
(6) decompressor shaft
(7) tab
4. Install the each valve lifter (8) in their original
location into the camshaft holder assembly (9).
Exhaust side
(8)
Servicing Your Honda
(10)
(9)
(8) valve lifters
(9) camshaft holder assembly
60
(11)
(9) camshaft holder assembly
(10) intake cam lobes
(11) camshaft holder assembly bolts
054-075.qxd 06.5.11 13:03 ページ61
Valve Clearance
6. While holding the cam chain, rotate the
primary drive gear bolt (12) (crankshaft)
clockwise and align the punch mark (13) with
the “∆” mark (14).
Make sure the piston is at TDC (Top Dead
Center) on the compression stroke.
8. Set the decompressor weight (20) by aligning
its hole (21) with out side weight pin (22) as
shown.
(15)
(19)
(22)
(14)
(21)
(12)
(20)
(17)
(13)
(12) primary drive gear bolt
(13) punch mark
(14) “∆” mark
7. Install the cam chain (15) over the sprocket
without rotating the sprocket.
Place the cam sprocket (16) and align the
timing mark (17) on the cam sprocket with the
“∆” mark (18) on the camshaft holder
assembly.
When installing the cam sprocket with
decompressor weight pin (19) toward the front
side.
(15)
(16)
(17)
(18)
(16)
(18)
cam chain
cam sprocket
timing mark
“∆” mark
(19)
(20)
(21)
(22)
decompressor weight pin
decompressor weight
hole
out side weight pin
10. Temporarily install the cam sprocket bolt (25)
by aligning the bolt holes of the cam sprocket
and camshaft.
Rotate the primary drive gear bolt (crankshaft)
clockwise one turn and tighten the sprocket
bolt to the specified torque:
15 lbf·ft (20 N·m, 2.0 kgf·m)
Rotate the primary drive gear bolt (crankshaft)
clockwise one turn again and tighten the other
sprocket bolt to the specified torque (see
above).
NOTICE
Do not let the bolts fall into the crankcase.
(16)
9. Clean and apply a locking agent to the cam
sprocket bolt (25) threads (coating width as
shown).
(23) 0.26 ± 0.04 in
(6.5 ± 1.0 mm)
(24) 0.04 – 0.08 in
(1.0 – 2.0 mm)
(25)
(16) cam sprocket
(25) cam sprocket bolts
(25)
(23) coating width
(24) no coating width
(25) cam sprocket bolt
(cont’d)
Servicing Your Honda
61
054-075.qxd 06.5.11 13:03 ページ62
Valve Clearance
11.Check the operation of the plunger (3) by
pushing the decompressor weight (20) with
your finger and then pushing the plunger
down. Release the decompressor weight and
pull up the plunger.
13.Rotate the primary drive gear bolt (crankshaft)
clockwise two turns and align the punch mark
(13) with the index mark (14). Make sure that
the timing mark (17) on the sprocket align
with the “∆” mark (18) on the camshaft holder
assembly.
If the timing mark doesn’t align with the “∆”
mark, remove the cam sprocket.
Then realign the valve timing.
(13)
(20)
(14)
14.Measure the intake valve and exhaust valve
clearances.
Valve Clearance:
IN:0.006 ± 0.001 in (0.16 ± 0.03 mm)
EX: 0.011 ± 0.001 in (0.28 ± 0.03 mm)
(27)
(27)
(17)
(3)
(3) plunger
(20) decompressor weight
(27) feeler gauge
12.Remove the stopper tool (26) from the cam
chain tensioner lifter.
(18)
(13)
(14)
(17)
(18)
15.Install a new sealing washer (28) and tighten
the cam chain tensioner lifter cover bolt (29).
punch mark
index mark
timing mark
“∆” mark
(29)
(26)
(26) stopper tool
62
Servicing Your Honda
(28)
(28) sealing washer
(29) cam chain tensioner lifter cover bolt
054-075.qxd 06.5.11 13:03 ページ63
Valve Clearance
Spark Plug Installation
Tighten the spark plug (1):
• If the old plug is good:
1/8 turn after it seats.
• If installing a new plug, tighten it twice to
prevent loosening:
a) First, tighten the plug:
NGK: 3/4 turn after it seats.
DENSO: 1/2 turn after it seats.
b) Then loosen the plug.
c) Next, tighten the plug again:
1/8 turn after it seats.
Crankshaft Hole Cap Installation
Coat a new O-ring (1) with engine oil and install
it onto the crankshaft hole cap (2).
Apply grease to the crankshaft hole cap threads.
Install and tighten the crankshaft hole cap to the
specified torque:
11 lbf·ft (15 N·m, 1.5 kgf·m)
Cylinder Head Cover Installation
1. Remove the spark plug hole packing (1) from
the cylinder head cover.
Apply engine oil to the spark plug hole
packing and install it to the spark plug hole
(2).
(2)
(1)
(1)
(1)
(2)
(1) O-ring
(2) crankshaft hole cap
(1) spark plug hole packing
(2) spark plug hole
2. Install the cylinder head cover packing (3)
into the groove of the cylinder head cover (4).
(1) spark plug
(3)
(4)
(3) cylinder head cover packing
(4) cylinder head cover
(cont’d)
Servicing Your Honda
63
054-075.qxd 06.5.11 13:03 ページ64
Valve Clearance
3. Check the rubber seals (5) are in good
condition, replace them if necessary.
Install the rubber seals onto the cylinder head
cover with the “UP” marks (7) facing up.
6. Connect the spark plug cap (10) and breather
tube (11).
(10)
(7)
(5)
(11)
(7)
(10) spark plug cap
(11) breather tube
(5) rubber seal
(7) “UP” marks
7. Install the fuel tank and seat (page 29, 31).
4. Install the cylinder head cover (6).
5. Tighten the cylinder head cover A bolt (8) and
cylinder head cover B bolts (9) to the
specified torque:
7 lbf·ft (10 N·m, 1.0 kgf·m)
(9)
(6)
(8)
(6) cylinder head cover
(8) cylinder head cover A bolt
(9) cylinder head cover B bolts
64
Servicing Your Honda
054-075.qxd 06.5.11 13:03 ページ65
Piston/Piston Rings/Piston Pin
Cylinder Head Removal
1. Clean the area above the engine before
disassembly to prevent dirt falling into the
engine.
2. Drain the radiator coolant after cooling the
motorcycle (page 42).
3. Remove the seat and fuel tank (page 29, 30).
4. Remove the muffler (page 87) and subframe
(page 32).
5. Remove the carburetor (page 119).
6. Remove the exhaust pipe (page 89).
7. Disconnect the spark plug cap (1) and remove
any dirt from around the spark plug base.
8. Disconnect the primary wire connector (2).
Remove the bolts (3), nut (4) and ignition coil
(5).
(4)
(2)
11. Position the piston at top dead center on the
compression stroke (page 55).
Remove the camshaft holder assembly (page
57).
12. Loosen the radiator hose clamp screw (7) and
disconnect the radiator hose (8).
(8)
(5)
(3)
(2) primary wire connector
(3) bolts
(4) nut
(5) ignition coil
9. Remove the cylinder head cover (page 55).
10. Remove the spark plug (6).
(7)
(7) radiator hose clamp screw
(8) radiator hose
(6)
(1)
(1) spark plug cap
(6) spark plug
(cont’d)
Servicing Your Honda
65
054-075.qxd 06.5.11 13:03 ページ66
Piston/Piston Rings/Piston Pin
13.Remove the engine hanger nut (9), engine
hanger A bolt (10) and fuel hose guide (11).
Remove the engine hanger B bolts (12), left
engine hanger plate (13) and right engine
hanger plate (14).
14.Remove the cylinder head bolts (15).
15.Loosen the cylinder bolt (16).
17.Remove the dowel pins (19), cylinder head
gasket (20) and cam chain guide (21).
NOTICE
(15)
Do not let the dowel pins and cam chain fall into
the crankcase.
(12)
(16)
(20)
(21)
(14)
(9)
(15) cylinder head bolts
(16) cylinder bolt
16.Remove the cylinder head nuts/washers (17)
and the cylinder head (18).
(12)
Loosen the nuts in a criss-cross pattern in two or
three steps.
(11)
NOTICE
Do not let the nuts, washers and cam chain fall
into the crankcase.
(13)
(10)
(9) engine hanger nut
(10) engine hanger A bolt
(11) fuel hose guide
(12) engine hanger B bolts
(13) left engine hanger plate
(14) right engine hanger plate
(17)
(17)
(18)
(17) cylinder head nuts/washers
(18) cylinder head
66
Servicing Your Honda
(19)
(19) dowel pins
(20) cylinder head gasket
(21) cam chain guide
054-075.qxd 06.5.11 13:03 ページ67
Piston/Piston Rings/Piston Pin
Cylinder Removal
4. Spread each piston ring (4) and remove by
lifting it up at a point just opposite the gap.
Piston Removal
1. Remove the cylinder bolt (1) and cylinder (2).
NOTICE
Do not let the cam chain fall into the crankcase.
Do not pry on or strike the cylinder.
1. Place clean shop towels in the crankcase to
keep the piston pin clips, or other parts, from
falling into the crankcase.
2. Remove the piston pin clips (1) using a pair of
needle-nose pliers.
3. Press the piston pin (2) out of the piston (3),
and remove the piston.
NOTICE
Do not damage the piston ring by spreading the
ends too far.
(2)
Under racing conditions, the piston and rings
should be replaced after 15.0 hours of running.
Replace the piston pin after 30.0 hours of running.
(3)
(2)
(4)
(1)
(1) cylinder bolt
(4) piston ring
(2) cylinder
2. Remove the A dowel pins (3), B dowel pin (4)
and cylinder gasket (5).
(1)
NOTICE
Do not let the dowel pins fall into the crankcase.
(1) piston pin clips
(2) piston pin
(3) piston
(3)
(5)
(3) A dowel pins
(4) B dowel pin
(4)
(5) cylinder gasket
Servicing Your Honda
67
054-075.qxd 06.5.11 13:03 ページ68
Piston/Piston Rings/Piston Pin
Piston/Piston Pin/
Piston Ring Inspection
We recommend you consult the Service Manual
or your authorized Honda dealer for correct
Service Limit measurements.
Piston Ring Installation
1. Remove the carbon deposits from the piston
head and piston ring grooves with the
removed ring (1).
• To install the oil ring, install the spacer first,
then install the side rails.
• Install the top ring on the piston with the
marking side facing up.
3. After installing the rings they should rotate
freely, without sticking.
Space the ring end gaps 180 degrees apart
between top ring and upper side rail.
Space the ring end gaps 90 degrees apart
between upper side rail, spacer and lower side
rail.
top ring
oil ring
(1)
(1) removed ring
2. Apply engine oil to each piston ring whole
surfce and install them to the piston.
NOTICE
Do not damage the piston ring by spreading the
ends too far.
Do not damage the piston during piston ring
installation.
mark
top ring
side rail
spacer
side rail
piston
68
Servicing Your Honda
oil
ring
054-075.qxd 06.5.11 13:03 ページ69
Piston/Piston Rings/Piston Pin
Piston Installation
1. Place clean shop towels over the crankcase
opening to keep the piston pin clips from
falling into the crankcase.
2. Apply molybdenum disulfide oil (a mixture of
1/2 engine oil and 1/2 molybdenum disulfide
grease containing more than 3% molybdenum
disulfide additive) to the connecting rod small
end inner surface.
3. Install the piston (1) with the “IN” mark (2)
and/or the large valve recesses (3) facing the
intake side of the engine.
4. Apply engine oil to the piston pin (4) outer
surface.
Apply engine oil to the piston outer surface
and piston pin hole inner surface.
Install the piston pin and new piston pin clips
(5).
(2)
(1)
Cylinder Installation
1. Clean off any gasket material from the gasket
surface of the crankcase, being careful not to
let any material fall into the crankcase.
Be careful not to remove any metal from the
gasket surface.
2. Remove the shop towel. Do not let any gasket
debris fall into the crankcase.
3. Install a new cylinder gasket (1), A dowel pins
(2) and B a new dowel pin (3).
(3)
(1)
(2)
NOTICE
Do not let the dowel pins fall into the crankcase.
(2)
NOTICE
(5)
(4)
Use new pin clips. Never reuse old clips.
Do not let the clips fall into the crankcase.
Do not align the piston pin clip end gap with the
piston cut-out (6).
(1)
(3)
(5)
(1) cylinder gasket
(2) A dowel pins
(3) B dowel pin
4. Clean any gasket material off the cylinder.
(6)
(1) piston
(2) “IN” mark
(3) large valve recesses
(4) piston pin
(5) piston pin clips
(6) cut-out
(cont’d)
Servicing Your Honda
69
054-075.qxd 06.5.11 13:03 ページ70
Piston/Piston Rings/Piston Pin
5. Apply engine oil to the cylinder wall, piston
outer surface and piston rings.
Route the cam chain (4) through the cylinder
(5).
Install the cylinder over the piston rings by
hand while compressing the piston rings (6).
6. Install the cam chain guide (7) and fit the cam
chain guide tabs (8) in the cylinder cut-outs
(9).
Push the guide until it bottoms in the
crankcase guide hole.
Cylinder Head Installation
1. Install the dowel pins (1) and a new cylinder
head gasket (2).
NOTICE
(7)
NOTICE
Do not let the dowel pins fall into the crankcase.
Do not damage the piston rings and cylinder
walls.
(8)
(2)
(4)
(5)
(9)
(7) cam chain guide
(8) cam chain guide tabs
(9) cylinder cut-outs
(1)
(6)
(4) cam chain
(5) cylinder
70
(6) piston rings
Servicing Your Honda
(1) dowel pins
(2) cylinder head gasket
054-075.qxd 06.5.11 13:03 ページ71
Piston/Piston Rings/Piston Pin
2. Route the cam chain through the cylinder
head (3).
Install the cylinder head.
4. Install the cylinder bolt (5), cylinder head bolts
(6) and tighten them to the specified torque:
7 lbf·ft (10 N·m, 1.0 kgf·m)
NOTICE
(9)
(6)
Do not damage mating surfaces when installing
the cylinder head.
(11)
(7)
3. Apply engine oil to all cylinder head nut (4)
threads and seating surface.
Install the washers and cylinder head nuts and
tighten them to the specified torque:
44 lbf·ft (59 N·m, 6.0 kgf·m)
(10)
(5)
(9)
NOTICE
(5) cylinder bolt
(6) cylinder head bolts
Do not let the washers and nuts fall into the
crankcase.
Tighten the cylinder head nuts in a criss-cross
pattern in two or three steps.
(4)
(4)
5. Install the left engine hanger plate (7), right
engine hanger plate (8) and engine hanger B
bolts (9), them tighten the engine hanger B
bolts until lightly contact the frame.
Install the engine hanger A bolt (10), fuel hose
guide (11) and engine hanger nut (12), them
tighten the engine hanger nut until it lightly
contacts the engine hanger plates.
Tighten the engine hanger B bolts to the
specified torque:
19 lbf·ft (26 N·m, 2.7 kgf·m)
Tighten the engine hanger nut to the specified
torque:
40 lbf·ft (54 N·m, 5.5 kgf·m)
(8)
(12)
(7) left engine hanger plate
(8) right engine hanger plate
(9) engine hanger B bolts
(10) engine hanger A bolt
(11) fuel hose guide
(12) engine hanger nut
(3)
(3) cylinder head
(4) cylinder head nuts/washers
(cont’d)
Servicing Your Honda
71
054-075.qxd 06.5.11 13:03 ページ72
Piston/Piston Rings/Piston Pin
6. Connect the radiator hose (13) to the cylinder
head.
(13)
10.Install the crankshaft hole cap (page 63).
11.Install the cylinder head cover (page 63).
12.Install the ignition coil (15), ground terminal
(16), bolts (17) and nut (18).
Connect the primary wire connector (19).
(16)
(19)
(17)
(18)
(15)
(13) radiator hose
7. Tighten the radiator hose clamp screw (14) as
illustrated below.
(14)
(15)
(16)
(17)
(18)
(19)
ignition coil
ground terminal
bolts
nut
primary wire connector
13.Install the spark plug cap (20).
(20)
0 – 0.04 in
(0 – 1.0 mm)
(14) radiator hose clamp screw
8. Install the camshaft holder assembly (page
60).
9. Install the spark plug (page 63).
(20) spark plug cap
72
Servicing Your Honda
14.Install the exhaust pipe (page 89).
15.Install the carburetor (page 123).
16.Install the subframe (page 32) and muffler
(page 88).
17.Install the fuel tank and the seat (pages 29,
31).
18.Fill and bleed the cooling system (page 41).
054-075.qxd 06.5.11 13:03 ページ73
Suspension
Refer to Safety Precautions on page 19.
Loose, worn, or damaged suspension components
may adversely affect the handling and stability of
your CRF. If any suspension components appear
worn or damaged, see your Honda dealer for
further inspection. Your dealer is qualified to
determine whether or not replacement parts or
repairs are needed.
Front Suspension Inspection
• When your CRF is new, break it in for
approximately one hour to ensure that the
suspension has worked in (page 15).
• After break-in, test run your CRF with the
front suspension at the standard setting before
attempting any adjustments.
• For optimum fork performance, we
recommend that you disassemble and clean
the fork after riding your CRF for three hours.
See page 97 for fork disassembly.
• Replace the fork oil every 3 races or 7.5 hours
of running. See page 76 for oil level
adjustment after changing the fork oil.
• Replace the damper oil every 9 races or 22.5
hours of running. See page 100 for damper
fork oil replacement.
• Use Pro Honda HP Fork Oil 5W or an
equivalent which contains special additives to
assure maximum performance of your CRF's
front suspension.
• Periodically check and clean all front
suspension parts to assure top performance.
Check the dust seals for dust, dirt, and foreign
materials. Check the oil for any
contamination.
• Refer to Suspension Adjustment Guidelines
(page 114). Make all rebound and
compression damping adjustments in oneclick increments. (Adjusting two or more
clicks at a time may cause you to pass over
the best adjustment.) Test ride after each
adjustment.
• If you become confused about adjustment
settings, return to the standard position and
start over.
• If the fork is still too stiff/soft after adjusting
compression damping, determine which
portion of the travel is still too stiff/soft. This
is an important step that will help you solve
suspension problems.
(4)
(3)
(3) wear ring
(3)
(4) outer tube
(3)
1. Make sure that the fork protectors (1) and dust
seals (2) are clean and not packed with mud
and dirt.
2. Check for signs of oil leakage. Damaged or
leaking fork seals should be replaced before
your CRF is ridden.
(5)
(1)
(3) wear rings
(5) end gaps
4. Make a quick check of fork operation by
locking the front brake and pushing down on
the handlebar several times.
(2)
(1) fork protector
(2) dust seal
3. Inspect the wear rings (3) for wear or damage.
Replace the wear ring if it is 0.06 in (1.5 mm)
or flat with the outer tube (4).
Install the wear ring with its end gap (5) facing
rearward.
Servicing Your Honda
73
054-075.qxd 06.5.11 13:03 ページ74
Suspension
Rear Suspension Inspection
1. Bounce the rear of the motorcycle up and down
and check for smooth suspension action.
The swingarm is controlled by one hydraulic
shock absorber with an aluminum reservoir for
oil and nitrogen gas pressure. The gas pressure
in the reservoir is contained within a rubber
bladder.
The shock absorber’s spring pre-load and
damping adjustments (compression and rebound)
should be adjusted for the rider’s weight and
track conditions (pages 109-113).
Do not attempt to disassemble, service, or
dispose of the damper; see your Honda dealer.
The instructions found in this owner’s manual are
limited to adjustments of the shock assembly only.
• When your CRF is new, break it in for
approximately one hour with the standard
suspension settings before attempting to
adjust the rear suspension.
• Make all compression and rebound damping
adjustments in the specified increment or
turns described in page 110. (Adjusting two or
more increments or turns at a time may cause
you to pass over the best adjustment.) Test
ride after each adjustment.
• If the rear suspension is too stiff/soft, adjust it
by turning all the compression and rebound
adjusters according to the procedures
described in page 110. After adjusting the
adjusters simultaneously, suspension may be
fine-tuned by turning one of the compression
and rebound damping adjusters in one click or
in 1/12 turn increments.
• If you have a problem finding an acceptable
adjustment, return to the standard position and
begin again.
74
Servicing Your Honda
2. Remove the subframe (page 32).
3. Check for a broken or collapsed spring.
4. Check the rear shock absorber (1) for a bent
rod or oil leaks.
(1)
(1) rear shock absorber
5. Push the rear wheel sideways to check for
worn or loose swingarm bearings. There
should be no movement. If there is, have the
bearings replaced by your Honda dealer.
054-075.qxd 06.5.11 13:03 ページ75
Suspension
NOTICE
Recommended Fork Oil
viscosity (weight) 5 W
suggested oil
Pro Honda HP Fork Oil or
equivalent
The outer tube (1) can drop on the slider (7) and
damage the fork dust seal (5) and guide bushing
(6) when the fork damper is removed. To avoid
damage hold both the outer tube and slider when
removing the fork damper.
Fork Oil Change
(5)
5. Drain the fork oil by turning the outer tube (1)
upside down. (About 12 cc of fork oil will be
left in the outer tube when it is left inverted
for about 20 minutes at 20 °C/68°F.)
(1)
(6)
Refer to Front Suspension Disassembly on page
97.
1. Clean the fork assembly, especially the sliding
surface of the slider and dust seal.
2. Record the rebound damping adjuster position
and turn the adjuster counterclockwise until it
stops.
3. Hold the outer tube (1), then remove the fork
damper (2) from the outer tube using the lock
nut wrench (3). Gently slide the outer tube
down onto the lower end of the slider (4).
(7)
(1)
(1) outer tube
(5) dust seal
(6) guide bushing
(7) slider
4. Drain the fork oil from the outer tube (1).
Drain the fork oil from the oil hole (9) of the
fork damper.
(1) outer tube
Amount of fork oil left in the fork
(within damper and spring)
°C/°F
(1)
(9)
5
10
20
27
35
55
85
145
15.3
10.6
9.4
8.3
7.9
7.9
20/68 29.4
16.5
11.8
10.6
9.4
8.2
8.2
10/50 28.2
21.2
16.5
15.3
12.9
11.8
11.8
30.6
22.4
18.8
16.5
16.5
15.3
14.1
30/86
(1)
(2)
unit: cc
minute
0/32
(1)
(3)
(4)
(1) outer tube
(2) fork damper
(3) lock nut wrench
(4) slider, lower end
(1) outer tube
(9) oil hole
(cont’d)
Servicing Your Honda
75
076-093.qxd 06.5.11 13:07 ページ76
Suspension
6. Pour the recommended fork oil into the outer
tube.
Fork Oil Capacity:
Optional Stiffer (0.48 kgf/mm) Fork Spring
Standard (0.46 kgf/mm) Fork Spring
No mark
(factory products)
4 scribe marks
2 scribe marks
(aftermarket parts)
Standard oil
capacity
13.0 US oz
(384 cm3)
Maximum oil
capacity
13.8 US oz
(407 cm3)
Slightly stiffer as
it nears full
compression.
Minimum oil
capacity
10.5 US oz
(311 cm3)
Slightly softer as
it nears full
compression.
Optional Softer (0.44 kgf/mm) Fork Spring
3 scribe marks
Standard oil
capacity
13.2 US oz
(389 cm3)
Maximum oil
capacity
13.9 US oz
(412 cm3)
Slightly stiffer as
it nears full
compression.
Minimum oil
capacity
10.7 US oz
(316 cm3)
Slightly softer as
it nears full
compression.
Standard oil
capacity
12.8 US oz
(378 cm3)
Maximum oil
capacity
13.6 US oz
(401 cm3)
Slightly stiffer as
it nears full
compression.
Minimum oil
capacity
10.3 US oz
(305 cm3)
Slightly softer as
it nears full
compression.
Be sure the oil capacity is the same in both fork
legs.
7. Check that the O-ring (10) on the fork damper
(2) is in good condition. Apply the
recommended fork oil to the O-ring.
Temporarily install the fork damper to the
outer tube (1).
After installing the fork leg (page 106),
tighten the fork damper to the specified
torque:
25 lbf·ft (34 N·m, 3.5 kgf·m)
(10)
(1)
(1) outer tube
(2) fork damper
(10) O-ring
76
Servicing Your Honda
(2)
076-093.qxd 06.5.11 13:07 ページ77
Brakes
Refer to Safety Precautions on page 19.
Both the front and rear brakes are the hydraulic
disc type. As the brake pads wear, the brake
fluid level will drop. A leak in the system will
also cause the level to drop.
Front Brake Lever Adjustment
(3)
The rear brake pedal height should be
approximately level with the right footpeg.
(2)
Frequently inspect the system to ensure there are
no fluid leaks. Periodically inspect the brake
fluid level and the brake pads for wear.
If the front brake lever or rear brake pedal
freeplay does not feel within the normal range
while riding, check the brake pads. If they are
not worn beyond the recommended limit (page
80), there is probably air in the brake system.
Refer to the Honda Service Manual or see your
Honda dealer to have the air bled from the
system.
Rear Brake Pedal Height
3/8 – 13/16 in
(10 – 20 mm)
(1)
(1) lock nut
(2) adjuster
1. Loosen the adjuster lock nut (1) and turn the
adjusting bolt (2) in direction (+) to raise the
rear brake pedal (3) or in direction (–) to
lower it.
2. Tighten the adjuster lock nut to the specified
torque at the desired pedal height.
4.4 lbf·ft (5.9 N·m, 0.6 kgf·m)
(3) knocker arm
1. Loosen the lock nut (1).
2. To position the front brake lever farther away
from the handgrip, turn the adjuster (2)
clockwise.
To position the front brake lever closer to the
handgrip, turn the adjuster counterclockwise.
3. While holding the adjuster, tighten the lock
nut.
4. Apply the brake, release it, then spin the
wheel and check that it rotates freely. Repeat
this procedure several times.
5. Check freeplay by pulling in slowly on the
front brake lever until the brake starts to
engage.
Freeplay: 3/8 – 13/16 in (10 – 20 mm)
6. Apply silicone grease to the contacting faces
of the adjuster and knocker arm (3).
(3)
(–)
(+)
(1)
(2)
(1) lock nut
(2) adjusting bolt
(3) rear brake pedal
(+) raise the pedal height
(–) lower the pedal height
Servicing Your Honda
77
076-093.qxd 06.5.11 13:07 ページ78
Brakes
Rear Brake Fluid Level Check
Fluid Level Inspection
Front Brake Fluid Level Check
(2)
(1)
(1) LWR mark
With the motorcycle in an upright position, check
the fluid level.
It should be above the LWR mark (1). If the level
is at or below the LWR mark, check the brake
pads for wear (page 80).
Worn brake pads should be replaced. If the pads
are not worn, have your brake system inspected
for leaks.
If the front brake lever freeplay exceeds 13/16 in
(20 mm), there is probably air in the brake
system and it must be bled. Refer to the Honda
Service Manual or see your Honda motorcycle
dealer for brake bleeding.
78
Servicing Your Honda
(2) LOWER mark
With the motorcycle in an upright position, check
the fluid level.
It should be above the LOWER mark (2). If the
level is at or below the LOWER mark, check the
brake pads for wear (page 80).
Worn brake pads should be replaced. If the pads
are not worn, have your brake system inspected
for leaks.
If the rear brake pedal freeplay exceeds 0.8 in
(20 mm), there is probably air in the brake
system and it must be bled. Refer to the Honda
Service Manual or see your Honda motorcycle
dealer for brake bleeding.
076-093.qxd 06.5.11 13:07 ページ79
Brakes
Adding Front Brake Fluid
Adding Rear Brake Fluid
NOTICE
NOTICE
Spilled brake fluid will severely damage
instrument lenses and painted surfaces. It is also
harmful to some rubber parts. Be careful
whenever you remove the reservoir cap; make
sure the reservoir is horizontal first.
Spilled brake fluid will severely damage
instrument lenses and painted surfaces. It is also
harmful to some rubber parts. Be careful
whenever you remove the reservoir cap; make
sure the reservoir is horizontal first.
• Always use fresh DOT 4 brake fluid from a
sealed container when servicing the system. Do
not mix different types of fluid, they may not
be compatible.
• The recommended brake fluid is Pro Honda
DOT 4 brake fluid or an equivalent.
• Always use fresh DOT 4 brake fluid from a
sealed container when servicing the system. Do
not mix different types of fluid, they may not
be compatible.
• The recommended brake fluid is Pro Honda
DOT 4 brake fluid or an equivalent.
(1)
(9)
(5)
(2)
(4)
(3)
(7)
(6)
(1) screws
(2) reservoir cap
(3) diaphragm
(4) upper level mark
1. Remove the screws (1), reservoir cap (2) and
diaphragm (3).
2. Fill the reservoir with DOT 4 brake fluid to
the upper level mark (4). Do not overfill.
3. Reinstall the diaphragm and reservoir cap.
4. Tighten the screws to the specified torque:
0.7 lbf·ft (1.0 N·m, 0.1 kgf·m)
(5)
(6)
(7)
(8)
(9)
(8)
bolts
reservoir cap
set plate
diaphragm
upper level mark
1. Remove the bolts (5), reservoir cap (6), set
plate (7) and diaphragm (8).
2. Fill the reservoir with DOT 4 brake fluid to
the upper level mark (9). Do not overfill.
3. Reinstall the diaphragm, set plate and
reservoir cap.
4. Tighten the bolts to the specified torque:
0.7 lbf·ft (1.0 N·m, 0.1 kgf·m)
Servicing Your Honda
79
076-093.qxd 06.5.11 13:07 ページ80
Brakes
Brake Pad Wear
Brake pad wear depends on the severity of usage
and track conditions. (Generally, the pads will
wear faster on wet and dirty tracks) Inspect the
pads at each regular maintenance interval (page
21).
Rear Brake Pads
Inspect the brake pads (4) from the rear side of
the caliper to determine the pad wear. If either
pad is worn anywhere to a thickness of 0.04 in
(1 mm), both pads must be replaced.
(5)
minimum thickness
indicator
Front Brake Pads
Inspect the brake pads (1) through the front
wheel to determine the pad wear. If either pad is
worn anywhere to a thickness of 0.04 in (1 mm),
both pads must be replaced.
(2)
minimum thickness
indicator
(3)
(1)
0.04 in
(1 mm)
0.04 in
(1 mm)
(4)
replace
(6)
(4) brake pads
(5) rear brake caliper
(6) brake disc
replace
(1)
0.04 in
(1 mm)
wear indicator
grooves
(1) brake pads
(2) front brake caliper
80
(3) brake disc
Servicing Your Honda
Other Inspections
Check that the front brake lever and rear brake
pedal assemblies are positioned properly and the
securing bolts are tight.
Make sure there are no fluid leaks. Check for
deterioration or cracks in the hoses and fittings.
076-093.qxd 06.5.11 13:07 ページ81
Wheels
Refer to Safety Precautions on page 19.
Maintenance of spoke tension and wheel trueness
(roundness) is critical to safe motorcycle
operation. During the first few rides, spokes will
loosen more rapidly due to the initial seating of
the parts. Excessively loose spokes may result in
instability at high speeds and the possible loss of
control. It’s also important that the rim locks are
secure to prevent tire slippage.
It is not necessary to remove the wheels to
perform the recommended service in the
Maintenance Schedule (page 21). However,
information for wheel removal is provided for
emergency situations.
2. Tighten, any loose spokes and rim locks (3) to
the specified torque:
Spoke :
(front) 2.7 lbf·ft (3.68 N·m, 0.4 kgf·m)
(rear) 2.7 lbf·ft (3.7 N·m, 0.4 kgf·m)
Rim Lock : 9 lbf·ft (12 N·m, 1.2 kgf·m)
3. Check wheel rim runout. If runout is
noticeable, see the Honda Service Manual for
inspection instructions.
Axles & Wheel Bearings
See the Honda Service Manual for inspection
information:
1. Check the axle shaft for runout.
2. Check the condition of the wheel bearings.
Wheel Rims & Spokes
(3)
(2)
(1)
(1) wheel rim
(2) spoke
(3) rim lock
1. Inspect the wheel rims (1) and spokes (2) for
damages.
Servicing Your Honda
81
076-093.qxd 06.5.11 13:07 ページ82
Tires & Tubes
Refer to Safety Precautions on page 19.
To safely operate your CRF, the tires must be the
proper type (off-road) and size, in good condition
with adequate tread, and correctly inflated.
WARNING
Using tires that are excessively worn or
improperly inflated can cause a crash in
which you can be seriously hurt or killed.
Follow all instructions in this owner’s
manual regarding tire inflation and
maintenance.
The following pages give detailed information on
how and when to check your air pressure, how to
inspect your tires for wear and damage, and our
recommendations on tire repair and replacement.
Always check air pressure when your tires are
“cold.” If you check air pressure when your tires
are “warm” — even if your CRF has only been
ridden for a few miles — the readings will be
higher. If you let air out of warm tires to match
the recommended cold pressures, the tires will be
underinflated.
The correct “cold” tire pressures are:
Front
15 psi (100 kPa, 1.0 kgf/cm2)
Rear
15 psi (100 kPa, 1.0 kgf/cm2)
If you decide to adjust tire pressures for a
particular riding condition, make changes a little
at a time.
Inspection
Take time to inspect your tires and wheels before
you ride.
Air Pressure
(1)
Properly inflated tires provide the best
combination of handling, tread life, and riding
comfort. Generally, underinflated tires wear
unevenly, adversely affect handling, and are more
likely to fail from being overheated.
Underinflated tires can also cause wheel damage
on hard terrain. Overinflated tires make your
CRF ride harshly, are more prone to damage
from surface hazards, and wear unevenly.
Make sure the valve stem caps are secure. If
necessary, install a new cap.
82
Servicing Your Honda
(1) tire tread depth
• Inspect carefully for bumps or bulges in the
side of the tire or the tread. Replace any tire
that has a bump or bulge.
• Look closely for cuts, slits, or cracks in the
tires. Replace a tire if you can see fabric or
cord.
• Check for rocks or other objects embedded in
the tire or tread. Remove any objects.
• Measure tread depth (1). Replace the tire
before depth at the center reaches 0.12 in (3
mm), or any time you notice a reduction in
traction.
• Check the position of both valve stems. A
tilted valve stem indicates the tube is slipping
inside the tire or the tire is slipping on the
rim.
Tube Replacement
If a tube is punctured or damaged, you should
replace it as soon as possible. A repaired tube
may not have the same reliability as a new one,
and it may fail while you are riding.
Use a replacement tube equivalent to the original.
076-093.qxd 06.5.11 13:07 ページ83
Tires & Tubes
Tire Replacement
The tires that came on your CRF were designed
to provide a good combination of handling,
braking, durability, and comfort across a broad
range of riding conditions.
WARNING
Installing improper tires on your
motorcycle can affect handling and
stability. This can cause a crash in which
you can be seriously hurt or killed.
Always use the size and type of tires
recommended in this owner’s manual.
Front
Rear
Type
80/100 – 21 51M
DUNLOP
D742FA
110/90 – 19 62M
DUNLOP
D756
bias-ply, tube
• Use a replacement tire equivalent to the
original.
• Replace the tube any time you replace a tire.
The old tube will probably be stretched and, if
installed in a new tire, could fail.
Servicing Your Honda
83
076-093.qxd 06.5.11 13:07 ページ84
Drive Chain
Refer to Safety Precautions on page 19.
The service life of the chain depends on proper
lubrication and adjustment. Poor maintenance
can cause premature wear or damage to the drive
chain or sprockets.
(4)
(1)
When the motorcycle is ridden on unusually
dusty or muddy tracks, more frequent
maintenance will be necessary.
(3)
(2)
Before servicing your drive chain, turn the
engine OFF and check that your transmission is
in neutral.
(1) drive chain slack
(2) drive sprocket
(3) driven sprocket
(4) chain slider
Drive Chain Inspection
1. Turn the engine off, raise the rear wheel off
the ground by placing the optional workstand
or equivalent support under the engine and
shift the transmission into neutral.
2. Check slack (1) in the upper drive chain run
midway between the sprockets (2)(3). Drive
chain slack should allow the following
vertical movement by hand:
1 – 1 3/8 in (25 – 35 mm)
3. Check drive chain slack at several points
along the chain. The slack should remain
constant. If it isn’t, some links may be kinked
and binding. Lubricating the chain will often
eliminate binding and kinking.
NOTICE
4.
•
•
•
•
•
Inspect the drive chain for:
damaged rollers
loose pins
dry or rusted links
kinked or binding links
excessive wear
5. Check the chain slider (4) for wear.
If the wear is 0.2 in (5 mm) or more, replace it.
Servicing Your Honda
(5)
Excessive chain slack may allow the drive chain
to damage the engine cases.
Replace the drive chain (page 85) if it has
damaged rollers, loose pins, or kinks that cannot
be free. Lubricate the drive chain (page 85) if it
appears dry or shows signs of rust. Lubricate
any kinked or binding links and work them free.
Adjust chain slack if needed.
84
6. Check the chain guide slider (5) for wear.
Replace the guide slider if it is worn to the
bottom of the wear limit (6).
(6)
(5) chain guide slider
(6) wear limit
7. Measure the diameter of the upper (7) and
lower drive chain rollers (8). Replace them if
below the service limit.
SERVICE LIMIT:
upper roller: 1.5 in (39 mm)
lower roller: 1.4 in (35 mm)
076-093.qxd 06.5.11 13:07 ページ85
Drive Chain
Replace the roller if necessary as follows.
Install the upper drive chain roller (Green) with
the “/” mark (9) facing toward the frame and
lower drive chain rollar (Black) with the “/”
mark (9) side facing out.
(7)
(9)
(5)
(2)
(4)
For maximum service life, the drive chain should
be cleaned, lubricated, and adjusted before each
outing.
(3)
(6)
(1)
(1) rear axle nut
(2) lock nut
(3) adjusting bolt
(8)
(9)
(7) upper drive chain roller
(8) lower drive chain roller
/” mark
(9) “/
8. Check the driven sprocket nut torque values
after each race.
24 lbf·ft (32 N·m, 3.3 kgf·m)
1. Remove the master link retaining clip (1) with
pliers. Do not bend or twist the clip.
Remove the master link (2). Remove the
drive chain.
(4) index mark
(5) axle plate
(6) reference marks
3. Tighten the rear axle nut to the specified
torque:
94 lbf·ft (128 N·m, 13.1 kgf·m)
4. Recheck chain slack and adjust as necessary.
5. Loosen the adjusting bolt counterclockwise
lightly until it touches the axle plate. Then,
while holding the adjusting bolt with a wrench,
tighten the lock nut to the specified torque:
20 lbf·ft (27 N·m, 2.8 kgf·m)
Adjustment
Lubrication
1. Loosen the rear axle nut (1).
2. Loosen the lock nuts (2) and turn the
adjusting bolts (3) counterclockwise to
decrease slack or clockwise to increase slack.
Align the index marks (4) of the axle plates
(5) with the same reference marks (6) on both
sides of the swingarm.
Removal, Cleaning & Replacement
Commercially prepared drive chain lubricants
may be purchased at most motorcycle shops and
should be used in preference to motor oil. Pro
Honda Chain Lube or an equivalent, or SAE 80
or 90 gear oil is recommended.
(2)
(1)
(1) retaining clip
(2) master link
2. Clean the drive chain in high flash-point
solvent and allow it to dry.
3. Inspect the drive chain for possible wear or
damage. Replace the drive chain if it has
damaged rollers, loose fitting links, or
otherwise appears unserviceable.
Saturate each chain joint so that the lubricant
penetrates the space between adjacent surfaces of
the link plates and rollers.
(cont’d)
Servicing Your Honda
85
076-093.qxd 06.5.11 13:07 ページ86
Drive Chain
4. Inspect the sprocket teeth for wear or damage.
We recommend replacing the sprocket
whenever a new chain is installed.
Both chain and sprockets must be in good
condition, or the new replacement chain or
sprocket(s) will wear rapidly.
Excessively worn sprocket teeth have a
hooked, worn appearance. Replace any
sprocket which is damaged or excessively
worn.
5. Measure a section of the drive chain to
determine whether the chain is worn beyond
its service limit. Put the transmission in gear,
and then turn the rear wheel forward until the
lower section of the chain is pulled taut. With
the chain held taut and any kinked joints
straightened, measure the distance between a
span of 17 pins, from pin center to pin center.
If the measurement exceeds the service limit,
replace the chain. After the chain is
measured, shift the transmission into neutral
again before proceeding with inspection and
service.
Replacement chain:
Size/link: D.I.D 520DMA2/114
Service limit: 10.20 in (259.0 mm)
MEASURE A SPAN OF 17 PINS (16 PITCHES)
NOTICE
Use of a new chain with worn sprockets will
cause rapid chain wear.
86
Servicing Your Honda
6. Lubricate the drive chain (page 85).
7. Pass the chain over the sprockets and join the
ends of the chain with the master link. For
ease of assembly, hold the chain ends against
adjacent rear sprocket teeth while inserting
the master link. Install the master link
retaining clip so that the closed end of the clip
will face the direction of forward wheel
rotation.
8. Recheck chain slack and adjust as necessary.
More About Drive Chain
• The master link is the most critical element of
drive chain security. Master links are
reusable, as long as they remain in excellent
condition. We recommend installing a new
master link retaining clip when the drive
chain is reassembled.
• You may find it easier to install a new chain
by connecting it to the old chain with a
master link and pulling the old chain to
position the new chain on the sprockets.
076-093.qxd 06.5.11 13:07 ページ87
Exhaust Pipe/Muffler
Exhaust Pipe/Muffler Inspection
1. Check the flange bolts and exhaust pipe joint
nuts for tightness.
2. Check the exhaust pipe and muffler for cracks
or deformation.
A damaged exhaust pipe and muffler may reduce
engine performance.
2. Loosen the muffler clamp bolt (4).
3. Remove the muffler A bolt (5), muffler B
bolt/washers (6) and muffler (7).
(6)
(5)
(4)
Muffler Removal
1. Remove the seat mounting bolt (1), side cover
bolt (2) and right side cover (3).
(7)
(4) muffler clamp bolt
(5) muffler A bolt
(1)
(6) muffler B bolt/washers
(7) muffler
(3)
(2)
(1) seat mounting bolt
(2) side cover bolt
(3) right side cover
Servicing Your Honda
87
076-093.qxd 06.5.11 13:07 ページ88
Exhaust Pipe/Muffler
Muffler Installation
1. Remove the gasket (1).
2. Install the muffler clamp (2) and new gasket
onto the exhaust pipe (3).
5. Tighten the muffler B bolt/washers (8) and
muffler A bolt (9) to the specified torque:
15 lbf·ft (21 N·m, 2.1 kgf·m)
6. Tighten the muffler clamp bolt (10) to the
specified torque:
15 lbf·ft (21 N·m, 2.1 kgf·m)
7. Install the right side cover (11) and side cover
bolt (12).
8. Install the seat mounting bolt (13) and tighten
it to the specified torque:
19 lbf·ft (26 N·m, 2.7 kgf·m)
(13)
(1)
(8)
(10)
(2)
(11)
(3)
(1) gasket
(2) muffler clamp
(3) exhaust pipe
3. Install the muffler (4).
4. Install the muffler clamp (5) by aligning the
tab (6) of the muffler clamp with the cut-out
(7) of the muffler.
(4)
(5)
(7)
(6)
(4) muffler
(5) muffler clamp
88
(6) tab
(7) cut-out
Servicing Your Honda
(9)
(8) muffler B bolt/washers
(9) muffler A bolt
(12)
(10) muffler clamp bolt
(11) right side cover
(12) side cover bolt
(13) seat mounting bolt
076-093.qxd 06.5.11 13:07 ページ89
Exhaust Pipe/Muffler
Exhaust Pipe Removal
Exhaust Pipe Installation
1. Remove the muffler (page 87).
2. Remove the exhaust pipe joint nuts (1),
exhaust pipe (2) and exhaust pipe gasket (3).
(2)
1. Install a new exhaust pipe gasket (1), exhaust
pipe (2) and exhaust pipe joint nuts (3) and
tighten to the specified torque:
15 lbf·ft (21 N·m, 2.1 kgf·m)
(1)
(2)
(3)
(3)
(1)
(1) exhaust pipe joint nuts
(2) exhaust pipe
(3) exhaust pipe gasket
(1) exhaust pipe gasket
(2) exhaust pipe
(3) exhaust pipe joint nuts
2. Install the muffler (page 88).
Servicing Your Honda
89
076-093.qxd 06.5.11 13:07 ページ90
Additional Maintenance Procedures
Refer to Safety Precautions on page 19.
Steering Head Bearing Inspection
1. With your CRF on a box or workstand (front
wheel elevated), turn the handlebar to the
right and left to check for roughness in the
steering head bearings.
Handlebar Inspection
1. Check the handlebar (1) for bends or cracks.
2. Check that the handlebar has not moved from
its proper position (by inspecting the paint
mark (2)).
3. Check the torque of the upper holder (3) bolts:
16 lbf·ft (22 N·m, 2.2 kgf·m)
Tighten the front bolts first.
(1)
2. Stand in front of your CRF, grab the fork (at
the axle), look at the steering head, and push
the fork in and out (toward the engine) to
check for play in the steering head bearings.
If any roughness or play is felt, but you do
not see any movement in the steering head,
the fork bushings may be worn. Refer to the
Honda Service Manual for replacement or
adjustment procedures, or see your Honda
dealer.
90
Servicing Your Honda
(3)
(1) handlebar
(2) paint mark
(2)
(3) handlebar upper holders
Control Cables
Periodically, disconnect the throttle, clutch and
hot start cables at their upper ends. Thoroughly
lubricate the cable pivot points with a
commercially-available cable lubricant. If the
clutch lever, hot start lever and throttle operation
is not smooth, replace the cable.
Be sure the throttle returns freely from fully open
to fully closed automatically, in all steering
positions.
076-093.qxd 06.5.11 13:07 ページ91
Additional Maintenance Procedures
LEFT SIDE
Nuts, Bolts, Fasteners
(1)
(8)
Check and tighten nuts, bolts, and fasteners
before every outing.
ENGINE
Torque
Item
1
2
3
4
5
6
7
8
9
10
Cylinder head cover bolts
Clutch cover bolts
Water pump cover bolts
Transmission oil check
bolt
Crankshaft hole cap
Oil filter cover bolts
Cylinder bolt
Cylinder head bolts
Exhaust pipe joint nuts
Drive sprocket bolt
lbf•ft
7
7
7
N•m
10
10
10
kgf•m
1.0
1.0
1.0
7
11
9
7
7
15
23
10
15
12
10
10
21
31
1.0
1.5
1.2
1.0
1.0
2.1
3.2
(7)
(6)
RIGHT SIDE
(10)
(1) cylinder head cover bolts
(6) oil filter cover bolts
(7) cylinder bolt
(8) cylinder head bolts
(10) drive sprocket bolt
(1)
(9)
(3)
(2)
(1)
(2)
(3)
(4)
(5)
(9)
(4)
(5)
cylinder head cover bolts
clutch cover bolts
water pump cover bolts
transmission oil check bolt
crankshaft hole cap
exhaust pipe joint nuts
Servicing Your Honda
91
076-093.qxd 06.5.11 13:07 ページ92
Appearance Care
Refer to Safety Precautions on page 19.
Frequent cleaning and polishing will keep your
Honda looking newer longer. Frequent cleaning
also identifies you as an owner who values his
motorcycle. A clean CRF is also easier to inspect
and service.
While you’re cleaning, be sure to look for
damage, wear, and gasoline or oil leaks.
General Recommendations
• To clean your CRF you may use:
– water
– a mild, neutral detergent and water
– a mild spray and wipe cleaner/polisher
– a mild spray and rinse cleaner/degreaser and
water
• Avoid products that contain harsh detergents
or chemical solvents that could damage the
metal, paint, and plastic on your CRF or
discolor the seat and decals.
• If your CRF is still warm from recent
operation, give the engine and exhaust system
time to cool off.
• We recommend the use of a garden hose to
wash your CRF. High pressure washers (like
those at coin-operated car washes) can
damage certain parts of your CRF. The force
of water under extreme pressure can penetrate
the dust seals of the suspension pivot points
and steering head bearings-driving dirt inside
and needed lubrication out.
92
Servicing Your Honda
If you use a high pressure washer, avoid spraying
the following areas:
wheel hubs
muffler outlet
under seat
engine stop button
brake master cylinders
under fuel tank
drive chain
carburetor
steering head bearings
suspension pivot points
(1)
Washing Your Motorcycle with a Mild
Detergent
1. Rinse your CRF thoroughly with cool water to
remove loose dirt.
2. Fill a bucket with cool water. Mix in a mild,
neutral detergent, such as dish washing
liquid or a product made especially for
washing motorcycles or automobiles.
3. Wash your CRF with a sponge or a soft towel.
As you wash, check for heavy grime. If
necessary, use a mild cleaner/degreaser to
remove the grime.
Do not use steel wool to clean the frame as it
could damage or discolor the frame surface.
Muffler stain remover is for removing stains on
the non-coated aluminum frame only.
(2)
(1) steering head bearings
(2) suspension pivot points
NOTICE
High pressure water (or air) can damage
certain parts of your motorcycle.
You may use Pro Honda Hondabrite, a
multi-surface cleaner/degreaser, to remove both
dirt and petroleum-based grime from paint, alloy,
plastic, and rubber surfaces. Wet any heavy
deposits with water first. Then spray on the Pro
Honda Hondabrite and rinse with a garden hose
at full pressure. Stubborn deposits may require a
quick wipe with a sponge.
4. After washing, rinse your CRF thoroughly
with plenty of clean water to remove any
residue.
5. Dry your CRF with a chamois or a soft towel.
6. Lubricate the drive chain to prevent rusting.
7. Start the engine and let it idle for several
minutes. The engine heat will help dry moist
areas.
8. As a precaution, ride at a slow speed and
apply the brakes several times. This will help
dry the brakes and restore normal braking
performance.
076-093.qxd 06.5.11 13:07 ページ93
Appearance Care
Condensation Control
Some condensation can form within the
transmission cavity as well. This is natural and
just one more reason you should change the
engine and transmission oil often.
After Cleaning Lubrication
There are some things you should do just after
washing your CRF to help prevent rust and
corrosion.
Once your CRF is clean and dry, you should
protect any bare steel from rusting by applying a
light coating of a rust-inhibitor. Lubricate the
drive chain and drive sprocket after removing
and thoroughly cleaning in solvent. Be sure the
chain is wiped clean and is dry before applying
the chain lube.
Aluminum Frame Maintenance
Exhaust Pipe Maintenance
Aluminum corrodes when it comes in contact
with dust, mud and road salt.
The exhaust pipe is stainless steel, but may
became stained by oil or mud.
To remove stains, use Scotch Brite Hand Pad
#7447 (maroon) or an equivalent.
Wet the pad and polish the surface using strokes
parallel to the length of the frame.
Remove heat stains with a liquid kitchen
abrasive.
Clean the frame using a wet sponge and a mild
detergent, then rinse well with clean water. Dry
the frame with a soft clean cloth, using strokes
parallel to the length of the frame.
NOTICE
Do not use steel wool to clean the frame as it
could damage or discolor the frame surface.
Muffler stain remover (Scotch Brite Hand Pad
#7447-maroon) is for removing stains on the
non-coated aluminum frame only.
Follow the suggestions given in the pages of this
manual for lubricating items such as the brake
and clutch lever pivot points and footpeg pivot
pins.
Servicing Your Honda
93
094-117.qxd 06.5.11 13:09 ページ94
94
Servicing Your Honda
094-117.qxd 06.5.11 13:09 ページ95
Adjustments for Competition
This section tells you how to fine tune your CRF
for maximum competition performance.
Initial suspension adjustments should be
performed after a minimum of two hours of easy
break-in time.
Optional front and rear suspension springs are
available in both stiffer and softer than standard
rates, in order to tailor your CRF specifically for
your weight, riding style and course conditions.
Follow the instructions given in the rear
suspension sag setting section of Rear
Suspension Adjustments to determine if your
combined rider and sprung machine weight (rider
fully dressed for competition and machine
coolant, oil and fuel levels ready for competition)
requires an optional stiffer or softer rear spring.
The need for either optional rear spring may need
to be balanced by installing the optional fork
springs of a similar rate.
Front Suspension Adjustments...........................96
Front Suspension Air Pressure......................96
Front Suspension Damping ..........................96
Fork Springs..................................................97
Front Suspension Disassembly .....................97
Damper Oil Change ....................................100
Fork Assembly ............................................103
Rear Suspension Adjustments ..........................109
Rear Suspension Spring Pre-Load..............109
Rear Suspension Damping..........................110
Rear Suspension Race Sag..........................111
Suspension Adjustments for Track
Conditions ........................................................113
Suspension Adjustment Guidelines..................114
Carburetor Adjustments & Tuning Tips ...........117
Carburetor Components ..............................117
Carburetor Circuit Functions ......................119
Carburetor Removal....................................119
Carburetor Disassembly..............................121
Carburetor Assembly ..................................123
Standard Tuning Recommendations ...........124
Adjustments for Altitude & Temperature ...124
Special Tuning Conditions..........................125
Pre-Adjustment Checks ..............................125
Carburetor Minor Adjustments ...................126
Spark Plug Reading ....................................128
Chassis Adjustments.........................................129
Rear End .....................................................129
Fork Height/Angle ......................................129
Wheelbase ...................................................129
Gearing .............................................................130
Tire Selection for Track Conditions.................131
Personal Fit Adjustments .................................132
Control Positioning .....................................132
Handlebar Position, Width & Shape...........132
Adjustments for Competition
95
094-117.qxd 06.5.11 13:09 ページ96
Front Suspension Adjustments
The front suspension can be adjusted for the
rider’s weight and riding conditions by using one
or more of the following methods:
• Oil volume — The effects of higher or lower
fork oil level are only felt during the final 3.9
in (100 mm) of fork travel.
• Compression damping — Turning the
compression damping screw adjusts how
quickly the fork compresses.
• Rebound damping — Turning the rebound
damping screw adjusts how quickly the fork
extends.
• Fork springs — Optional springs are
available in softer and stiffer types than the
standard rate. (page 148)
The inverted fork on your CRF features sealed
damper cartridges with dual (separate air and oil)
chambers to prevent aeration. The design also
isolates the oil in each fork tube/slider, which
may contain air bubbles and/or metal particles,
from the sealed cartridge to provide more
consistent damping.
(1)
Front Suspension Air Pressure
Air is an unstable gas which builds up pressure
as it is worked (such as in a fork). Air pressure
acts as a progressive spring and affects the entire
range of fork travel. This means the fork action
on your CRF will get stiffer during a race. For
this reason, release built-up air pressure in the
fork legs between motos. Be sure the fork is
fully extended with the front tire off the ground
when you release the pressure.
The standard air pressure is 0 psi (0 kPa, 0
kgf/cm2). You may relieve accumulated air
pressure in the fork legs by using the pressure
release screws. The front wheel should be off the
ground before you release the pressure. The air
pressure should be adjusted according to the
altitude and outside temperature.
1. Place an optional workstand under the engine,
so that the front wheel is off the ground.
Do not adjust air pressure with the front wheel
on the ground as this will give false pressure
readings.
2. Remove the pressure release screw (1).
3. Check that the O-ring (2) is in good condition.
4. Install and tighten the pressure release screw
to the specified torque:
0.9 lbf·ft (1.2 N·m, 0.1 kgf·m)
(2)
(1)
(2)
(1) compression damping adjuster
(2) rebound damping adjuster
96
Adjustments for Competition
(1) pressure release screw
(2) O-ring
Front Suspension Damping
Rebound Damping Adjustment
The fork rebound damping adjuster screw (1) has
16 positions or more. Turning the adjuster screw
one full turn clockwise advances the adjuster four
positions. To adjust the rebound damping to the
standard setting, proceed as follows:
Turn the adjuster clockwise until it will no longer
turn (lightly seats). This is the full hard position.
The adjuster is set in the standard position when
the adjuster is turned counterclockwise 9 clicks.
Make sure that both fork legs are adjusted to the
same position.
Compression Damping Adjustment
This adjustment affects how quickly the fork
compresses. The fork compression damping
adjuster screw (2) has 16 positions or more.
Turning the adjuster screw one full turn changes
the adjuster four positions. To adjust the adjuster
to the standard position, proceed as follows:
Turn the adjuster clockwise until it will no longer
turn (lightly seats). This is the full hard position.
The adjuster is set in the standard position when
the adjuster is turned counterclockwise 7 clicks.
Make sure that both fork legs are adjusted to the
same position.
094-117.qxd 06.5.11 13:09 ページ97
Front Suspension Adjustments
Both compression and rebound damping can be
increased by turning the adjuster clockwise.
NOTICE
Always start with full hard when adjusting
damping.
Do not turn the adjuster screw more than the
given positions or the adjuster may be damaged.
Be sure that the rebound and compression
adjusters are firmly located in a detent, and not
between positions.
(2)
Fork Springs
Front Suspension Disassembly
The fork springs in CRF’s are about right for
riders weighing between 150 and 160 lbs (less
riding gear). So if you're a heavier rider, you
have to go up on the oil level or get a stiffer
spring. Do not use less oil than the minimum
specified for each spring or there will be a loss of
rebound damping control near full extension. If
the fork is too hard on big bumps, turn the
damping adjuster counterclockwise 1-turn and
lower the oil level in increments of 0.2 oz (5 cc)
in both fork legs until the desired performance is
obtained. Do not, however, lower the oil level
below the minimum oil level.
• If your CRF is brand-new, put enough partthrottle break-in time (about one hour) on it to
ensure that the suspension has worked in.
• For optimum performance, and extended fork
life, the fork should be completely
disassembled and cleaned after the first three
hours of riding. See the Service Manual or
your Honda dealer for this service.
• When disassembling the fork, turn the
rebound (1) and compression (2) adjusters
counterclockwise to the softest position to
prevent damaging the adjustment needle (be
sure to record the number of turns from the
starting position).
Minimum oil capacity:
Standard spring: 10.5 US oz (311 cm3)
Softer spring: 10.7 US oz (316 cm3)
Stiffer spring: 10.3 US oz (305 cm3)
(1) rebound damping
adjuster screw
(2) compression
damping
adjuster screw
When adjusting oil levels, bear in mind that the
air in the fork will increase in pressure while
riding; therefore, the higher the oil level, the
higher the eventual pressure of any air in the
fork.
Oil capacity 13.8 US oz (407 cm3)
(MAX)
Oil capacity 13.0 US oz (384 cm3)
(STANDARD)
Force (N)
(1)
(2)
(1)
(1) rebound damping
adjuster screw
(2) compression
damping
adjuster screw
Oil capacity 10.5 US oz (311 cm3)
(MIN)
Stroke (mm)
Adjustments for Competition
97
094-117.qxd 06.5.11 13:09 ページ98
Front Suspension Adjustments
1. Place your CRF on the optional workstand or
equivalent support with the front wheel off the
ground.
2. Unlock the number plate tab (3) from the
handlebar pad (4).
3. Remove the handlebar pad.
(4)
5. Loosen the upper pinch bolts (8).
6. Loosen the fork damper (7), but do not
remove them yet.
NOTICE
8. Remove the front axle nut (11) and loosen the
front axle pinch bolts (12) on both forks.
Pull the front axle shaft (13) out of the wheel
hub and remove the front wheel.
(12)
(12)
Do not use an adjustable wrench to loosen the
fork damper: it may damage them.
(7)
(8)
(13)
(11)
(11) front axle nut
(12) axle pinch bolts
(3)
(3) number plate tab
(4) handlebar pad
(7) fork damper
4. Remove the handlebar holder nuts, washers,
mounting rubbers (5) and handlebar (6).
(8) upper pinch bolts
7. Remove the disc cover (9) by removing the
two bolts (10).
NOTICE
Keep the master cylinder upright to prevent air
from entering system.
(9)
(13) front axle shaft
9. Remove the fork protector bolts (14), brake
hose clamp bolts (15) and fork protectors
(16).
10. Remove the brake caliper bolts (17) and brake
caliper (18).
Do not support the brake caliper by the brake
hose. Do not operate the brake lever after the
front wheel is removed. To do so will cause
difficulty in fitting the brake disc between the
brake pads.
(16)
(10)
(14)
(6)
(9) disc cover
(15)
(10) bolts
(17)
(5)
(14)
(5) handlebar holder nuts/washers/mounting rubbers
(6) handlebar
98
Adjustments for Competition
(18)
(14) fork protector bolts
(17) brake caliper bolts
(15) brake hose clamp bolts (18) brake caliper
(16) fork protectors
094-117.qxd 06.5.11 13:09 ページ99
Front Suspension Adjustments
11.Loosen the fork leg lower pinch bolts (19),
then pull the fork legs down and out.
15.Hold the outer tube, then remove the fork
damper (23) from the outer tube using a lock
nut wrench (24). Gently slide the outer tube
down onto the lower end (axle holder) (25).
16.Drain the fork oil from the outer tube (28).
Drain the fork oil from the oil hole (29) of the
fork damper.
(28)
(23)
(29)
(25)
(24)
(19)
(28) outer tube
(19) lower pinch bolts
12.Clean the fork assembly, especially the
sliding surface (20) of the slider and dust seal
(21).
13.Record the rebound damping adjuster position
and turn the adjuster counterclockwise until it
stops.
14.Measure the length (22) between the axle
holder and outer tube and record it before
disassembling the fork.
(21)
(23) fork damper
(24) lock nut wrench
(25) axle holder
NOTICE
The outer tube (28) can drop on the slider (26)
and damage the fork dust seal (21) and guide
bushing (27) when the fork damper is removed.
To avoid damage hold both the outer tube and
slider when removing the fork damper.
(29) oil hole
17.Temporarily install the fork damper to the
outer tube.
18.Place the lower end (axle holder) (25) of the
slider in a vise with a piece of wood or soft
jaws to avoid to damage.
NOTICE
Overtightening the vice can damage the axle
holder.
(20)
(21)
19.Loosen the fork center bolt (30).
(27)
(25)
(22)
(20) sliding surface
(21) dust seal
(26)
(22) length
(21) dust seal
(26) slider
(28)
(27) guide bushing
(28) outer tube
(30)
(25) axle holder
(30) fork center bolt
(cont’d)
Adjustments for Competition
99
094-117.qxd 06.5.11 13:09 ページ100
Front Suspension Adjustments
20.Push out the fork center bolt from the axle
holder of the slider by pushing the fork
damper.
21.Make the mechanic's stopper tool out of a thin
piece of steel (1.0 mm thick) as shown if you
do not have the special tool.
24.Remove the push rod (33) from the fork
damper.
25.Remove the special tool or mechanic's stopper
tool (31) between the axle holder (25) and
lock nut (32) while applying pressure to the
fork cap.
Be careful not to damage the lock nut and fork
center bolt hole.
12.2 mm
33 mm
NOTICE
1. Place the fork damper (1) in a vise with a
piece of wood or soft jaws to avoid damage.
2. Loosen the fork cap assembly (2) while
holding the fork damper using the lock nut
wrench (3).
(1)
(2)
(25)
(31)
22.Apply pressure to the fork damper and insert a
special tool or mechanic's stopper tool (31)
(see below) between the axle holder (25) and
lock nut (32).
23.Hold the lock nut and remove the fork center
bolt (30) from the fork damper.
(32)
Do not remove the lock nut from the fork damper
piston rod. If the lock nut is removed, the piston
rod will fall in the fork damper and you cannot
reassemble the fork damper.
(1) fork damper
(2) fork cap assembly
(32) lock nut
(33) push rod
26.Remove the fork damper assembly (34) from
the fork assembly (35).
Remove the fork from the vise.
Remove the fork spring (36) from the fork.
(31)
(25)
(34)
(36)
(32)
(25) axle holder
(30) fork center bolt
(30)
(31) stopper tool
(32) lock nut
Adjustments for Competition
(3)
(33)
(25) axle holder
(31) stopper tool
NOTICE
100
Damper Oil Change
(35)
(34) fork damper assembly
(35) fork assembly
(36) fork spring
(3) lock nut wrench
094-117.qxd 06.5.11 13:09 ページ101
Front Suspension Adjustments
3. Remove the fork cap assembly (2) from the
fork damper (1).
Be careful not to damage the fork cap bushing.
Do not disassemble the fork cap assembly.
Replace the fork cap as an assembly if it is
damaged.
6. Extend the fork damper piston rod to maximum.
Pour the recommended fork oil into the fork
damper.
Recommended Oil:
Pro Honda HP Fork Oil 5 W or equivalent
Recommended Amount:
6.5 US oz (192 cc, 6.8 Imp oz)
8. Extend the fork damper piston rod to
maximum. Adjust the oil level of the fork
damper as shown.
Oil Level: 1.65 – 1.85 in (42 – 47 mm)
(1)
(2)
(1)
1.65 – 1.85 in
(42 – 47 mm)
(1)
(1) fork damper
(1) fork damper
(1) fork damper
(2) fork cap assembly
4. Empty the fork oil from the oil hole (4) of the
fork damper (1) by pumping the damper rod
several times.
(1)
7. Pump the fork damper piston rod (5) slowly
several times to bleed the air from the fork
damper (1).
9. Apply fork oil to the bushing (6) and new
O-ring (7) on the fork cap assembly.
Extend the fork damper piston rod to
maximum, holding it, install the fork cap
assembly to the fork damper (1).
Be careful not to damage the fork cap bushing.
If it is difficult to install the fork cap assembly,
the fork damper oil level might be higher than
standard oil level. Inspect the fork damper oil
level again.
(1)
(4)
(7)
(2)
(5)
(1) fork damper
(5) fork damper piston rod
(1)
(6)
(1) fork damper
(4) oil hole
5. Clean the fork cap and fork damper threads.
(1) fork damper
(2) fork cap assembly
(6) bushing
(7) O-ring
(cont’d)
Adjustments for Competition
101
094-117.qxd 06.5.11 13:09 ページ102
Front Suspension Adjustments
10. Tighten the fork cap assembly (2) while
holding the cut out of the fork damper (1)
using the lock nut wrench (3) to the specified
torque:
22 Ibf·ft (30 N·m, 3.1 kgf·m)
12. Screw in the lock nut (8) to the fork damper
piston rod (5) fully.
(5)
(8)
(2)
(1)
14. Drain the extra oil from the oil hole (5) of the
fork damper (1).
By doing this procedure, about 0.6 US oz (17
cm3) of fork fluid will be drained from the
damper spring chamber through the oil hole and
cause 5.9 US oz (175 cm3) of fork fluid to be left
in the chamber.
(1)
(5) fork damper piston rod
(3)
(1) fork damper
(2) fork cap assembly
(3) lock nut wrench
11. Hold the fork damper (1) in an upright
position and pump the fork damper piston rod
(5) to 3.9 in (100 mm) slowly several times.
(1)
(5)
(8) lock nut
Turn the rebound adjuster and compression
adjuster counterclockwise to the softest position.
Check the fork damper piston rod sliding surface
for damage.
Apply fork oil to the fork damper piston rod
sliding surface.
Cover the fork damper piston rod end with soft
jaws (9) to prevent fork damage.
NOTICE
Be careful not to bend or damage the fork
damper piston rod when the piston rod is stroked.
13. Blow the extra oil off to the fork damper (1)
spring chamber (10) by pumping the fork
damper piston rod to full stroke.
(5)
(1) fork damper
(5) oil hole
15. Blow out the oil from the fork damper spring
chamber using compressed air to the oil hole.
Wipe the oil completely off the fork damper.
16. If you can not use compressed air, remove the
pressure release screw (11) on the fork cap (12).
Hold the fork damper up side down for 10
minutes and drain the oil from the fork
damper spring chamber.
(10)
(11)
(1)
(1) fork damper
(5) fork damper piston rod
(9)
(1) fork damper
(9) soft jaws
102
Adjustments for Competition
(10) spring chamber
(12)
(11) pressure release screw
(12) fork cap
094-117.qxd 06.5.11 13:09 ページ103
Front Suspension Adjustments
Fork Assembly
1. Drain the fork oil from the outer tube/slider
(1) by placing it upside down.
(About 7 cc of fork oil will be left in the outer
tube/slider when it is left inverted for about 20
minutes at 20°C)
2. Tighten the lock nut (2) fully and measure the
thread length (A) as shown.
Standard: 0.43 – 0.51 in (11 – 13 mm)
Wipe the oil completely off the fork damper.
(2)
(1)
(A)
(2) lock nut
(1) outer tube/slider
(A) thread length
3. Blow out the oil completely off the fork
spring (3) using the compressed air.
Install the fork spring.
Install the fork damper assembly (4) to the
outer tube/slider (1).
(4)
(3)
(1)
(1) outer tube/slider
(3) fork spring
(4) fork damper assembly
(cont’d)
Adjustments for Competition
103
094-117.qxd 06.5.11 13:09 ページ104
Front Suspension Adjustments
4. Place the lower end (axle holder) of the slider
in a vise with a piece of wood or soft jaws to
avoid to damage.
NOTICE
Overtightening the vise can damage the axle
holder.
5. Temporarily install the fork damper to the fork.
Push out the fork damper piston rod from the
axle holder of the slider by pushing the fork
damper.
Apply pressure to the fork damper and insert
the special tool or mechanic's stopper tool (5)
between the axle holder and lock nut (2).
Measure the thread length again.
Standard: 0.43 – 0.51 in (11 – 13 mm)
6. Install the push rod (6) into the fork damper
piston rod until it stops.
Check the push rod installation by turning the
push rod right and left.
7. Apply fork oil to a new O-ring (7) and install
it to the fork center bolt (8).
Apply locking agent to the fork center bolt
threads.
Install the fork center bolt to the fork damper
piston rod aligning the fork center bolt
adjusting rod (9) to the push rod. Tighten the
fork center bolt fully by hand.
8. Measure the length of the lock nut (2) and
fork center bolt (8) clearance.
Standard: 0.06 – 0.08 in (1.5 – 2.0 mm)
If the clearance is out of specification, check the
lock nut and center bolt installation.
10. Remove the special tool or mechanic's stopper
tool while applying pressure to the fork
damper.
Install the fork center bolt (8) to the axle
holder and tighten it to the specified torque:
51 Ibf·ft (69 N·m, 7.0 kgf·m)
(2)
(8)
(8)
(2) lock nut
(8) fork center bolt
9. Tighten the lock nut (2) to the fork center bolt
(8) closely by hand. Tighten the lock nut to
the specified torque:
16 Ibf·ft (22 N·m, 2.2 kgf·m)
(8) fork center bolt
11. Measure the length between the axle holder
and outer tube.
Standard: 12.5 ± 0.1 in (317 ± 2 mm)
12. Compare the length (10) at assembly and at
disassembly. They should be the same length.
If the length at assembly is longer than at
disassembly, check the fork center bolt and lock
nut installation.
(5)
(9)
(8)
(2)
(8)
(2)
(6)
(2) lock nut
(5) stopper tool
(6) push rod
104
(7)
(7) O-ring
(8) fork center bolt
(9) adjusting rod
Adjustments for Competition
(10)
(2) lock nut
(8) fork center bolt
(10) length
094-117.qxd 06.5.11 13:09 ページ105
Front Suspension Adjustments
13.Pour the recommended fork oil (11) into the
outer tube/slider (1).
Optional Stiffer (0.48 kgf/mm) Fork Spring
Fork Oil Capacity:
Standard (0.46 kgf/mm) Fork Spring
No mark
(factory products)
Recommended Oil:
Pro Honda HP Fork Oil 5 W or equivalent.
4 scribe marks
2 scribe marks
(aftermarket parts)
(11)
(1)
Standard oil
capacity
13.0 US oz
(384 cm3)
Maximum oil
capacity
13.8 US oz
(407 cm3)
Slightly stiffer as
it nears full
compression.
Minimum oil
capacity
10.5 US oz
(311 cm3)
Slightly softer as
it nears full
compression.
Optional Softer (0.44 kgf/mm) Fork Spring
(1) outer tube/slider
Standard oil
capacity
12.8 US oz
(378 cm3)
Maximum oil
capacity
13.6 US oz
(401 cm3)
Slightly stiffer as
it nears full
compression.
Minimum oil
capacity
10.3 US oz
(305 cm3)
Slightly softer as
it nears full
compression.
Be sure the oil capacity is the same in both fork
legs.
(11) fork oil
3 scribe marks
Standard oil
capacity
13.2 US oz
(389 cm3)
Maximum oil
capacity
13.9 US oz
(412 cm3)
Slightly stiffer as
it nears full
compression.
Minimum oil
capacity
10.7 US oz
(316 cm3)
Slightly softer as
it nears full
compression.
(cont’d)
Adjustments for Competition
105
094-117.qxd 06.5.11 13:09 ページ106
Front Suspension Adjustments
14.Check that the O-ring (12) on the fork damper
assembly (4) is in good condition. Apply the
recommended fork oil to the O-ring.
15.Pull up the outer tube/slider (1) slowly and
install the fork damper assembly (4) into the
outer tube.
(4)
(12)
17.Tighten the fork damper assembly (4) to the
specified torque using the lock nut wrench
(14).
Actual:
25 lbf·ft (34 N·m, 3.5 kgf·m)
Torque wrench scale reading:
23 Ibf·ft (31 N·m, 3.2 kgf·m), using a 20 in
(50 cm) long torque wrench.
When using the lock nut wrench, use a 20-inches
long deflecting beam type torque wrench. The
lock nut wrench increases the torque wrench’s
leverage, so the torque wrench reading will be
less than the torque actually applied to the fork
damper.
(1)
(4)
(1) outer tube/slider
(4) fork damper assembly
(12) O-ring
16.Insert both fork legs into the fork clamps.
Tighten the fork lower pinch bolts (13) to the
specified torque:
15 Ibf·ft (20 N·m, 2.0 kgf·m)
(16)
(1) outer tube/slider
(15) align
(16) upper fork clamp
19.Tighten the fork lower pinch bolts (13) to the
specified torque:
15 Ibf·ft (20 N·m, 2.0 kgf·m)
20.Tighten the fork upper pinch bolts (17) to the
specified torque:
16 Ibf·ft (22 N·m, 2.2 kgf·m)
NOTICE
Over-tightening the pinch bolts can deform the
outer tubes. Deformed outer tubes must be
replaced.
(14)
(4) fork damper
(14) lock nut wrench
(13)
(13)
(15)
(1)
(17)
18.For ease of releasing air pressure after the
forks are installed, loosen the lower pinch
bolts and position the outer tubes so that the
pressure release screws are in front of the
rebound damping adjusters.
Align (15) the top of the outer tube/slider (1)
with the top surface of the upper fork clamp
(16).
(13) lower pinch bolts
(13) lower pinch bolts
106
Adjustments for Competition
(17) upper pinch bolts
094-117.qxd 06.5.11 13:09 ページ107
Front Suspension Adjustments
21.Clean the threads of the fork protector bolts
(18) and axle holder thoroughly.
Apply locking agent to the bolt threads.
Install the fork protectors (19), fork protector
bolts and brake hose clamp bolts (20).
Tighten the fork protector bolts to the
specified torque:
5.2 Ibf·ft (7 N·m, 0.7 kgf·m)
22.Align the brake caliper (22) and hose with the
left fork leg, making sure that the brake hose
is not twisted. An improperly routed brake
hose may rupture and cause a loss of braking
efficiency.
23.Clean the threads of the caliper mounting
bolts (21) and brake caliper thoroughly.
Apply locking agent to the bolt threads.
Install the brake caliper (22) on the slider and
tighten the caliper mounting bolts to the
specified torque:
22 Ibf·ft (30 N·m, 3.1 kgf·m)
24.Clean the surfaces where the axle and axle
clamps contact each other.
Install the left and right side collars into the
wheel hub. Insert the front axle shaft through
the wheel hub from the right side. Make sure
the front axle shaft is seated firmly onto the
left fork leg clamp inner surface. Tighten the
front axle nut (23) to the specified torque:
65 Ibf·ft (88 N·m, 9.0 kgf·m)
25.Install the handlebar (25), mounting rubbers
washers and handlebar holder nuts (26) and
tighten the handlebar holder nuts to the
specified torque:
32 Ibf·ft (44 N·m, 4.5 kgf·m)
Tighten the left axle pinch bolts (24) to the
specified torque:
15 Ibf·ft (20 N·m, 2.0 kgf·m)
(25)
(24)
(26)
(25) handlebar
(26) mounting rubbers/washers/handlebar holder nuts
(19)
(23)
(18)
(20)
(23) front axle nut
(24) left axle pinch bolts
(21)
(18)
(18)
(19)
(20)
(21)
(22)
(22)
fork protector bolts
fork protectors
brake hose clamp bolts
caliper mounting bolts
brake caliper
(cont’d)
Adjustments for Competition
107
094-117.qxd 06.5.11 13:09 ページ108
Front Suspension Adjustments
26.Route the number plate tab (27) around the
handlebar pad (28) as shown.
28.While keeping the forks parallel, alternately
tighten the right axle pinch bolts (29) to the
specified torque:
15 Ibf·ft (20 N·m, 2.0 kgf·m)
30.Turn the rebound damping (32) and
compression damping (33) adjuster screws
back to their original settings.
(33)
(28)
(29)
(27)
(32)
(27) number plate tab
(28) handlebar pad
(32) rebound damping
adjuster screw
(29) right axle pinch bolts
27.With the front brake applied, pump the fork
up and down several times to seat the axle
and check front brake operation.
NOTICE
To avoid damage when torquing the axle pinch
bolts, be sure the axle is seated firmly onto the
left fork leg clamp inner surface.
29. Install the disc cover (30) and tighten the
bolts (31) to the specified torque:
10 Ibf·ft (13 N·m, 1.3 kgf·m)
(30)
(31)
(30) disc cover
108
Adjustments for Competition
(31) bolts
(33) compression
damping
adjuster screw
094-117.qxd 06.5.11 13:09 ページ109
Rear Suspension Adjustments
The rear suspension can be adjusted for the
rider’s weight and riding conditions by changing
the spring pre-load and the rebound and
compression damping.
The rear shock absorber assembly includes a
damper unit that contains high pressure nitrogen
gas. Do not attempt to disassemble, service, or
dispose of the damper; see your Honda dealer.
The instructions found in this owner’s manual are
limited to adjustments of the shock assembly
only.
Puncture or exposure to flame may also result in
an explosion, causing serious injury.
Service or disposal should only be done by your
Honda dealer or a qualified mechanic, equipped
with the proper tools, safety equipment and the
official Honda Service Manual.
If your CRF is new, put enough part-throttle
break-in time (about one hour) on it to ensure
that the suspension has worked in.
Rear Suspension Spring Pre-Load
Pre-load should be adjusted when the engine is
cold because it is necessary to remove the
muffler (page 87).
An optional pin spanner is available for turning
the lock nut and adjusting nut to adjust spring
pre-load.
1. Place your CRF on an optional workstand or
equivalent support with the rear wheel off the
ground.
2. Loosen the connecting tube clamp screw and
remove the rear subframe’s three mounting
bolts, then remove the subframe. See page
32.
3. Check that the spring pre-load is adjusted to
the standard length. Adjust as necessary by
loosening the lock nut (1) and turning the
adjusting nut (2).
Each complete turn of the adjuster nut
changes the spring length by 1/16 in (1.5
mm).
4. After adjustment, hold the adjusting nut and
tighten the lock nut to the specified torque:
32 lbf·ft (44 N·m, 4.5 kgf·m)
Pin spanners should be used for turning the lock
nut and adjusting nut. See page 148 for optional
pin spanners.
Spring pre-load length (Standard spring)
Standard: 10.11 in (256.7 mm)
Min.
: 9.80 in (249.0 mm)
Spring pre-load length (Optional spring)
Min. (Softer, 5.3 kgf/mm): 9.9 in (251 mm)
Min. (Stiffer, 5.7 kgf/mm): 9.9 in (251 mm)
Min. (Stiffer, 5.9 kgf/mm): 9.8 in (250 mm)
(1)
(3)
(4)
(2)
(1) lock nut
(2) adjusting nut
(3) pin spanners
(4) spring length
To increase spring pre-load:
Loosen the lock nut with the optional pin
spanners (3) and turn the adjusting nut to shorten
the spring length (4). Do not shorten to less
than:
9.80 in (249.0 mm)
To decrease spring pre-load:
Loosen the lock nut with the optional pin
spanners (3) and turn the adjusting nut to
increase the spring length (4). Do not increase to
more than:
10.15 in (257.7 mm)
Each turn of the adjuster changes spring length
and spring pre-load. One turn equals: spring
length:
1/16 in (1.5 mm)
Adjustments for Competition
109
094-117.qxd 06.5.11 13:09 ページ110
Rear Suspension Adjustments
Rear Suspension Damping
Compression Damping
Compression damping may be adjusted in two
stages with separate adjusters.
The high speed damping adjuster (1) is effective
when damping adjustment is desired for high
speed operation. The low speed damping
adjuster (2) should be used when damping
adjustment is desired at relatively low speeds.
• Both the high and low speed compression
damping can be increased by turning the
appropriate adjuster clockwise.
• Adjust the high speed compression adjuster in
1/12 turn increments.
• Be sure the low speed compression adjuster is
firmly located in a detent, and not between
positions.
(1)
(2)
High Speed Damping:
The high speed damping can be adjusted by
turning the hexagonal portion of the compression
adjuster.
To adjust to the standard position:
1. Turn the adjuster clockwise until it will no
longer turn (lightly seats). This is the full hard
setting.
2. Turn the adjuster counterclockwise 1 1/2 – 2
turns and the punch marks are aligned.
Low Speed Damping:
The low speed damping can be adjusted by
turning the center screw of the compression
adjuster.
The low speed compression adjuster has 13
positions or more.
Turning the adjuster one full turn clockwise
advances the adjuster 4 positions.
To adjust to the standard position:
1. Turn the adjuster clockwise until it will no
longer turn (lightly seat). This is the full hard
setting.
2. Turn the adjuster counterclockwise 9 clicks
and the punch marks are aligned.
Rebound Damping
The rebound damping adjuster (3) is located at
the lower end of the shock absorber.
(1) high speed damping adjuster
(2) low speed damping adjuster
It has 17 positions or more. Turning the adjuster
one full turn advances the adjuster 4 positions.
• Rebound damping can be increased by turning
the adjuster clockwise.
• Be sure that the rebound adjuster is firmly
located in a detent, and not between positions.
110
Adjustments for Competition
(3)
(3) rebound damping adjuster
To adjust to the standard position:
1. Turn the adjuster clockwise until it will no
longer turn (lightly seat). This is the full hard
position.
2. Turn the adjuster counterclockwise 5 – 8
clicks with the punch marks on the adjuster
and the shock absorber aligned.
094-117.qxd 06.5.11 13:09 ページ111
Rear Suspension Adjustments
REAR FENDER MOUNTING BOLT
Rear Suspension Race Sag
Setting the proper race sag (ride height) is very
important for competition use.
UNLOADED MEASUREMENT
(without rider)
EXAMPLE: 23.6 in (600 mm)
Race sag refers to the amount of rear wheel
travel used by your CRF at rest, ready to ride,
with you on the seat. As a general rule of thumb,
the race sag dimension should be about one-third
of the maximum travel.
On your CRF, ride height is changed by
adjusting the rear suspension spring pre-load.
Spring Pre-load & Race Sag Adjustment
The following adjustment procedure establishes
the correct starting point for any suspension
tuning — the proper rear spring pre-load
adjustment for your specific needs.
Your CRF should be at normal racing weight,
including fuel and transmission oil. You should
be wearing all your normal protective apparel.
You will need two helpers.
CHAIN ADJUSTER LOCK NUT
3. Measure the loaded with rider dimension.
Remove the workstand. With two helpers
available, sit as far forward as possible on
your CRF’s seat, wearing your riding apparel.
Ask one helper to steady your CRF perfectly
upright so you can put both feet on the pegs.
Bounce your weight on the seat a couple of
times to help the suspension overcome any
situation and settle to a good reference point.
Ask the other helper to measure the loaded
with rider dimension.
To calculate the proper adjustment, it is necessary
to measure between two fixed points — from the
center of the rear fender mounting bolt to the
center of the chain adjuster lock nut as illustrated
here — for three different situations:
unloaded: motorcycle on workstand with rear
suspension fully extended, no rider.
loaded with rider: motorcycle on ground, with
rider.
loaded without rider: motorcycle on ground,
without rider
1. Support your CRF on a workstand with the
rear wheel off the ground.
2. Measure the unloaded dimension.
4. Calculate the race sag dimension.
To do this, subtract the loaded with rider
dimension (step 3) from the unloaded
dimension (step 2).
Standard Race Sag: 3.9 in (100 mm)
Adjust spring pre-load as necessary to obtain
the desired handling results.
Decreasing the race sag dimension (example:
3.5 in, 90 mm) improves turning ability for
tight terrain at the cost of slightly reduced
straight line stability.
Increasing the race sag dimension (example:
4.3 in, 110 mm) may improve stability on
faster terrain with less turns, but will reduce
turning performance slightly and may upset
the balance between the front and rear
suspension, producing a harsher ride. This
will happen if the adjustment shifts the
effective wheel travel toward the more
progressive end of its range.
5. Measure the loaded without rider dimension.
Do this with your CRF set at the standard race
sag.
REAR FENDER MOUNTING BOLT
LOADED
(with rider)
EXAMPLE: 19.7 in (500 mm)
CHAIN ADJUSTER LOCK NUT
Example:
Unloaded
– Loaded
Race Sag
= 23.6 in (600 mm)
= 19.7 in (500 mm)
= 3.9 in (100 mm)
BIKE LOADED
(without rider)
EXAMPLE: 21.7 in (550 mm)
Example:
Unloaded
= 23.6 in (600 mm)
– Loaded
= 21.7 in (550 mm)
Sag
= 2.0 in (50 mm)
(Without Rider)
(cont’d)
Adjustments for Competition
111
094-117.qxd 06.5.11 13:09 ページ112
Rear Suspension Adjustments
6. Calculate the free sag dimension.
To do this, subtract the loaded without rider
dimension (step 5) from the unloaded
dimension (step 2).
Free sag indicates the distance your rear
suspension should sag from the weight of the
sprung portion of your CRF.
With the spring pre-load set to obtain the
proper race sag, the rear suspension should
sag 0.4 to 1.0 in (10 to 25 mm).
If the rear of your CRF sags less than 0.4 in
(10 mm) from its own weight, the spring is
too stiff for your weight. It is not compressed
enough, even though you have the proper race
sag adjustment. As a result, the rear
suspension will not extend as far as it should.
Spring Rates
If you are lighter or heavier than the average
rider and cannot set the proper ride height
without altering the correct spring pre-load,
consider an aftermarket shock absorber spring.
A spring that is too soft for your weight forces
you to add excessive spring pre-load to get the
right race sag and, as a result, the rear end of the
motorcycle is raised. This can cause the rear
wheel to unload too much in the air and top out
as travel rebounds. The rear end may top out
from light braking, or kick sideways over lips
and square-edged terrain. It may even top-out
when you dismount your CRF.
112
Adjustments for Competition
Because of the great absorption quality of the
shock bumper rubber, it may be difficult for you
to notice when your CRF’s suspension is
bottoming. Some riders may think the damping
or perhaps the leverage ratio is too harsh. In
reality, the problem is most likely insufficient
spring pre-load or a spring that is too soft. Either
situation prevents utilizing the full travel.
Keep in mind that a properly adjusted suspension
system may bottom slightly every few minutes at
full speed. Adjusting the suspension to avoid this
occasional bottoming may cost more in overall
suspension performance than it is worth.
A spring that is too stiff for your weight will not
allow the rear tire to hook up under acceleration
and will pass more bumps on to you.
094-117.qxd 06.5.11 13:09 ページ113
Suspension Adjustments for Track Conditions
Soft Surface
On soft ground, sand, and especially mud,
consider increasing compression damping front
and rear.
Sand often requires a bit more rebound damping
to minimize rear end kick. Although sand bumps
are usually larger, there’s more distance between
them, giving the shock more time to recover.
You may want a little bit stiffer front suspension
for sand tracks to help keep the front end up and
improve straight-line stability.
In a muddy event, stiffer aftermarket springs
front and rear may help, especially if you are
heavier than the average rider. Your CRF may be
undersprung because of the added weight of the
clinging mud. This additional weight may
compress the suspension too much and affect
traction.
Hard Surface
For a fast, hard track with no large jumps, you
can probably run the same spring as normal, but
run softer damping both ways-compression and
rebound. If you run softer rebound damping, the
wheel will follow the rough ground and small
bumps much better, and you will hook up better.
With a lot of rebound damping, the wheel returns
very slowly and doesn’t contact the ground
quickly enough after each bump. The result is a
loss of traction and slower lap times.
Adjustments for Competition
113
094-117.qxd 06.5.11 13:09 ページ114
Suspension Adjustment Guidelines
Follow the procedures described below to accurately adjust your CRF, using the methods described on pages 96 – 113. Remember to make all adjustments in
one-click increments. Test ride after each adjustment.
Front Suspension Adjustment
Adjustments for Type of Track
Hard-surfaced track
Begin with the standard setting. If the suspension is too stiff/soft, adjust according to the chart below.
Sand track
Adjust to a stiffer position.
Example: – Turn the compression damping adjuster to a stiffer position.
– Install the optional stiff spring. (Adjust compression damping to a softer position and rebound damping to a stiffer position at
this time.)
Mud track
Adjust to a stiffer position because mud build-up increases your CRF’s weight.
Example: – Turn the compression damping adjuster to a stiffer setting.
– Install the optional stiff spring.
Adjustments for Too Soft/Stiff Damping
Symptom
Soft
suspension
114
Action
Initial travel too soft:
• Steering is too quick.
• Front end darts while cornering or riding in a straight line.
– Test stiffer compression damping adjustments in one-click increments.
– Test stiffer rebound damping in one-click increments.
Middle travel too soft:
• Front end dives when cornering.
If suspension isn’t stiff in initial travel:
– Test stiffer compression damping adjustments in one-click increments.
If initial travel becomes stiff because of the above adjustment:
– Reduce the rebound damping in one-click increments.
– Test softer compression damping adjustments in one-click increments.
If that doesn’t solve the problem, install the optional stiff spring.
Final travel too soft:
• Bottoms on landings.
• Bottoms on large bumps, especially downhill bumps.
If initial and middle travel aren’t stiff:
– Test stiffer compression damping adjustments in one-click increments.
If initial and middle travel are stiff:
– Install the optional stiff spring.
If initial travel is stiff after installing the optional stiff spring:
– Test softer compression damping adjustments in one-click increments.
If initial travel is still soft after installing the optional stiff spring:
– Test stiffer compression damping adjustments in one-click increments.
If final travel is still soft after installing the optional stiff spring:
– Increase the fork oil level in increments of 0.2 oz (5 cc).
Entire travel too soft:
• Front end shakes.
• Fork bottoms over any type of terrain.
– Install the optional stiff spring.
– Test stiffer compression damping adjustments in one-click increments.
– Increase rebound damping in one-click increments.
Adjustments for Competition
094-117.qxd 06.5.11 13:09 ページ115
Suspension Adjustment Guidelines
Symptom
Stiff
suspension
Action
Initial travel too stiff:
• Stiff on small bumps while riding at full throttle in a straight line.
• Stiff on small cornering bumps.
• Front end wanders while riding at full throttle in a straight line.
– Test softer compression damping adjustments in one-click increments.
– Reduce the rebound damping adjustments in one-click increments.
– Check for dirt in the dust seals. Check the fork oil for any contamination.
If the front end dives while cornering, reduce the rebound damping in one click
increments. If that doesn’t solve the problem, install the optional stiff spring.
If the stiff spring makes the suspension too stiff over the full range of travel:
test softer compression damping adjustments in one-click increments until the
desired compression damping for initial travel is obtained.
Middle travel too stiff:
• Stiff on bumps when cornering.
• Front end wanders when cornering.
• Stiff suspension on bumps, especially downhill bumps.
• While braking, front end dives during initial travel, then feels stiff.
If initial travel isn’t stiff:
– Test stiffer compression damping adjustments in one-click increments. (This
should produce smooth fork action from initial to middle travel.)
If initial and middle travel is stiff:
– Test softer compression damping adjustments in one-click increments.
– Reduce the rebound damping in one-click increments.
Final travel too stiff:
• Doesn’t bottom on landings, but feels stiff.
• Stiff on large bumps, especially downhill bumps.
• Stiff on large bumps when cornering.
If initial and middle travel aren’t stiff:
– Test stiffer compression damping adjustments in one-click increments. (This
should produce smooth fork action from initial to middle travel.)
If final travel is still stiff after the above adjustment, or
If initial and middle travel becomes stiff:
– Install the optional soft spring.
– Test softer compression damping adjustments in one-click increments.
If the entire travel feels stiff after the above adjustment:
– Test softer compression damping adjustments in one-click increments until the
desired initial travel compression damping is obtained.
– Lower the oil level by 0.2 oz (5 cc).
Entire travel too stiff:
• Stiff suspension on any type of terrain.
– Test softer compression damping adjustments in one-click increments.
– Reduce the rebound damping in one-click increments.
– Lower the oil level by 0.2 oz (5 cc).
Adjustments for Competition
115
094-117.qxd 06.5.11 13:09 ページ116
Suspension Adjustment Guidelines
Rear Suspension Adjustment
Adjustments for Type of Track
Hard-surfaced track
Begin with the standard settings. If the suspension is too stiff/soft, adjust according to the chart below.
Sand track
Lower the rear end (to improve front wheel stability) by increasing Race Sag (reduce spring pre-load).
Example: – Turn the compression damping adjuster and, especially, rebound damping adjuster to a stiffer setting.
– Increase standard Race Sag (+0.2 to 0.4 in/5 to 10 mm).
Mud track
Adjust to a stiffer position because mud build-up increases your CRF’s weight.
Example: – Adjust the compression and rebound damping adjusters to stiffer settings.
– Install the optional stiff spring.
– Reduce standard Race Sag (–0.2 to 0.4 in/5 to 10 mm).
Symptoms and Adjustment
• Always begin with the standard settings.
• Turn the low speed compression and rebound adjusters in one-click increments, and the high speed compression adjuster in 1/6 turn increments at a time. Adjusting two or
more clicks or turns at a time may cause you to pass over the best adjustment. Test ride after each adjustment.
• If, after setting, the suspension feels unusual, find the corresponding symptom in the table and test stiffer or softer compression and/or rebound damping adjustments until
the correct settings are obtained as described.
Symptom
Stiff suspension
Soft suspension
Suspension bottoms
116
Action
Suspension feels stiff on small
bumps
1. Test softer low speed compression adjustment.
2. If it still feels stiff, further test softer low and high speed compression adjustments simultaneously.
Suspension feels stiff on large
bumps
1. Test softer high speed compression adjustment.
2. If it still feels stiff, further test softer low and high speed compression adjustments simultaneously.
Entire travel too stiff
1. Test softer high and low speed compression adjustments and rebound adjustment simultaneously.
2. If it still feels stiff, replace the spring with a softer spring (optional) and begin with the standard settings to
softer settings.
Entire travel too soft
1. Test stiffer high and low speed compression adjustments simultaneously.
2. If it still feels soft, replace the spring with a stiffer spring (optional) and begin with the standard settings to
stiffer setting.
Rear end sways
1. Test stiffer high and low speed compression adjustments and rebound adjustment to stiffer settings
simultaneously.
Suspension bottoms at landing
after jumping
1. Test stiffer high speed compression adjustment.
2. If it still bottoms, test stiffer high and low speed compression adjustments, and replace the spring with a
stiffer spring (optional) if necessary.
Suspension bottoms after landing
1. Test stiffer low speed compression adjustment.
2. If it still bottoms, test stiffer high and low speed compression adjustments, and replace the spring with a
stiffer spring (optional) if necessary.
Suspension bottoms after end of
continuous bumps
1. Test softer rebound dumping adjustment.
2. If it still bottoms, test stiffer high and low speed compression adjustments and softer rebound damping
adjustment, and replace the spring with a stiffer spring (optional) if necessary.
Adjustments for Competition
094-117.qxd 06.5.11 13:09 ページ117
Carburetor Adjustments & Tuning Tips
The carburetor on your CRF should perform
suitably with the standard recommended settings
under average load, climatic, and barometric
conditions. However, to fine tune the engine’s
power output, the carburetor may require
adjustments for specific competition needs.
Optional main jets, slow jets and leak jets are
available for your CRF. See your Honda dealer.
Any engine or air cleaner modifications or the
use of an aftermarket exhaust system may require
jetting changes.
Carburetor Components
Cold Start Circuit
A very rich mixture must be delivered to the
cylinder when a cold engine is being started.
When the choke knob (1) is pulled out, fuel is
metered by the starter jet (2) and is mixed with
air from the air passage (3) (located above the
throttle valve (4)) to provide a rich mixture for
starting. The mixture discharges through the
orifice (5) into the cylinder.
Hot Start Circuit
A lean mixture must be delivered to the cylinder
when a hot engine is being started. When the hot
start lever is pulled back, the hot start valve (1)
opens, allowing air to be supplied to the main
bore (2) through the hot start air passage (3). This
extra air enters the air-fuel mixture from the slow
circuit resulting in a lean condition.
(1)
(3)
(1)
(3)
(2)
(5)
(4)
(1) hot start valve
(2) main bore
(3) hot start air passage
(2)
(1) choke knob
(2) starter jet
(3) air passage
(4) throttle valve
(5) orifice
Adjustments for Competition
117
118-133.qxd 06.5.11 13:13 ページ118
Carburetor Adjustments & Tuning Tips
Accelerator Pump Circuit
The accelerator pump circuit operates when the
throttle is opened. As the throttle valve (1) opens,
the pump rod (2) depresses the diaphragm (3). At
this time, the inlet check valve (4) is shut
resulting in a sharp increase in pressure in the
pump chamber (5). The outlet check valve (6)
then opens, supplying fuel to the main bore via
the accelerator nozzle (7). Leak jet (8) operation
is related to both the length of time before the
fuel starts flowing after the opening of the
throttle (time lag) and the flow amount.
Slow Circuit
Fuel is metered by the slow jet (1) and mixed
with air from the air passage (2). The mixture
enters the venturi through the bypass (3) and
pilot outlet (4) that has been metered by the pilot
screw (5).
Main Circuit
Fuel is metered by the main jet (1), jet needle (2)
and needle jet (3). It is then mixed with air
coming from the air jet (4) and enters the venturi
past the needle jet.
Baffle Plate
The baffle plate (5) prevents foaming of fuel or
abnormal fuel level around the main jet.
(3)
Float Bowl
The float (6) and float valve (7) operate to
maintain a constant level of fuel in the float
bowl.
(4)
(2)
(1)
(2)
(7)
(4)
(5)
(1)
(6)
(2)
(8)
(3)
(1) slow jet
(2) air passage
(3) bypass
(4) pilot outlet
(5) pilot screw
(7)
(5)
(6)
(4)
(1)
(2)
(3)
(4)
throttle valve
pump rod
diaphragm
inlet check valve
118
(5)
(6)
(7)
(8)
pump chamber
outlet check valve
accelerator nozzle
leak jet
Adjustments for Competition
(3)
(5)
(1)
(1)
(2)
(3)
(4)
main jet
jet needle
needle jet
air jet
(5) baffle plate
(6) float
(7) float valve
118-133.qxd 06.5.11 13:13 ページ119
Carburetor Adjustments & Tuning Tips
Carburetor Circuit Functions
The carburetor has several major circuits, each
providing the fuel/air mixture over a given
portion of throttle valve opening.
Jet Needle
The jet needle controls fuel/air mixture over fully
closed to 3/4 throttle. The straight section (1)
affects throttle response at smaller throttle
openings. By changing the position of the clip
(2) in its groove, you can improve acceleration at
medium low and medium speed.
These major circuits overlap as shown below.
Leak jet
The smaller the number, the smaller the jet bore
diameter. This controls the amount of fuel
returned to the float chamber under pressure,
there fore the flow amount is incleased or
decreased. With a small jet, pressure is raised
faster and the elapsed time before the fuel starts
flowing is shorten.
Carburetor Removal
1st
2nd
3rd
4th
5th
(1) straght section
Main jet
The main jet affects fuel/air ratio from half (1/2)
to full throttle (4/4). The size should be reduced
at higher altitudes.
Honda carburetor jet sizes are numbered in
increments of 2 or 3. When changing the main jet
size, increase or decrease it gradually until the
desired jetting is obtained. Because Honda jet
size numbers do not correspond with other
carburetor manufacturer’s jet size numbers, use
only Honda jets.
(2)
(1)
1. Turn the fuel valve OFF.
2. Drain the remaining fuel in the float bowl by
loosening the drain screw (1).
WARNING
(2) clip
Slow Jet and Pilot Screw
The slow jet and pilot screw affects fuel/air ratio
over fully closed to 1/4 throttle.
Adjust the pilot screw to obtain the best off-idle
performance.
• If the engine blubbers (rich) exiting a corner,
turn the pilot screw clockwise to lean the
mixture.
• If the engine surges (lean) exiting a corner,
turn the pilot screw counterclockwise to
richen the mixture.
The minimum to maximum range of pilot screw
adjustment is 1 1/4 to 2 turns out from the lightly
seated position.
If you exceed 2 turns out, the next larger slow jet
is needed.
If you are under 1 1/4 turns out, the next smaller
slow jet is needed.
Gasoline is highly flammable and
explosive. You can be burned or
seriously injured when handling fuel.
• Stop the engine and keep heat, sparks
and flame away.
• Handle fuel only outdoors.
• Wipe up spills immediately.
(1)
(1) drain screw
3. Tighten the drain screw.
(cont’d)
Adjustments for Competition
119
118-133.qxd 06.5.11 13:13 ページ120
Carburetor Adjustments & Tuning Tips
4. Remove the fuel tank (page 30).
5. Remove the subframe (page 32).
6. Remove the fuel hose (2) from the fuel hose
guide (3).
7. Loosen the insulator band screw (4).
10. Remove the hot start cable holder (6).
(6)
12. Loosen the throttle cable lock nut (9), adjuster
(10), throttle cable bolt (11) and disconnect
the throttle cables (12) from the throttle drum
(13).
(9)
(10)
(2)
(13)
(4)
(11)
(6) hot start cable holder
(3)
11. Remove the throttle drum cover bolt (7) and
throttle drum cover (8).
(2) fuel hose
(3) fuel hose guide
(4) insulator band screw
(7)
8. Disconnect the throttle position sensor
connector (5).
9. Remove the carburetor.
(5)
(8)
(7) throttle drum cover bolt
(8) throttle drum cover
(5) throttle position sensor connector
120
Adjustments for Competition
(12)
(9) throttle cable lock nut
(10) adjuster
(11) throttle cable bolt
(12) throttle cables
(13) throttle drum
118-133.qxd 06.5.11 13:13 ページ121
Carburetor Adjustments & Tuning Tips
Carburetor Disassembly
1. Remove the carbretor top cover bolts (1)
clamp (2) and carburetor top cover (3).
(2)
3. Remove the link arm set torx screw (6).
When installing the link arm set torx screw,
apply a locking agent to the link arm set torx
screw threads.
4. Remove the throttle valve (5), throttle valve
roller (7) and floating valve (8).
When installing the floating valve (8) onto the
throttle valve (5) make sure the floating
valve’s flat side faces out and the hole (9)
faces down.
(5)
(1)
(5)
(8)
(9)
(3)
(6)
(1) carburetor top cover bolts
(2) clamp
(3) carburetor top cover
(5) throttle valve
(8) floating valve
(9) hole
(8)
2. Remove the jet needle/holder assembly (4)
from the throttle valve (5).
(4)
(5)
(7)
(5)
(5) throttle valve
(6) link arm set torx screw
(7) throttle valve roller
(8) floating valve
(4) jet needle/holder assembly
(5) throttle valve
(cont’d)
Adjustments for Competition
121
118-133.qxd 06.5.11 13:13 ページ122
Carburetor Adjustments & Tuning Tips
5. Remove the accelerator pump cover screws
(10) and accelerator pump cover (11).
7. Remove the holder screw (17), throttle stop
screw holder (18), float bowl screws (19),
tube guides (20) and float bowl (16).
(10)
(17)
(19)
(18)
9. Measure the float level (24) with the float
level gauge (25) while the float tab is just
contacting the float valve with the carburetor
intake (26) is facing up. The float level should
be 0.24 in (6.0 mm).
If the float level is out of specification, adjust
it by bending the float tab carefully.
(16)
(26)
(24)
(11)
(20)
(10) accelerator pump cover screws
(11) accelerator pump cover
6. Remove the U-ring (12), O-ring (13), spring
(14) and diaphragm (15).
Clean the diaphragm.
When installing the U-ring into the accelerator
pump cover (11) make sure the U-ring flatside
faces the accelerator pump cover, away from
the float bowl (16).
(12)
(16)
(13)
(16)
(17)
(18)
(19)
(20)
float bowl
holder screw
throttle stop screw holder
float bowl screws
tube guides
(25)
8. Remove the pump rod (21).
Clean the pump rod and rod passage (22).
Install the pump rod into the link lever (23).
Push the rod forcibly into the link lever until
it snaps into place.
(23)
(24) float level
(25) float level gauge
(26) carburetor intake
10. Remove the leak jet (27) from the float bowl
(16).
Clean the leak jet.
(27)
(22)
(16)
(21)
(21)
(12)
(14)
(11)
(15)
(11) accelerator pump cover
(12) U-ring
(13) O-ring
122
(14) spring
(15) diaphragm
(16) float bowl
Adjustments for Competition
(23)
(21) pump rod
(22) rod passage
(23) link lever
(16) float bowl
(27) leak jet
118-133.qxd 06.5.11 13:13 ページ123
Carburetor Adjustments & Tuning Tips
Carburetor Assembly
To assemble, reverse the disassembly procedures.
To install the carburetor, reverse the removal
procedures.
(4)
Tighten the following parts to the specified
torque.
float bowl screws:
1.5 lbf·ft (2.1 N·m, 0.2 kgf·m)
accelerator pump cover screws:
1.5 lbf·ft (2.1 N·m, 0.2 kgf·m)
carburetor top cover bolts:
1.5 lbf·ft (2.1 N·m, 0.2 kgf·m)
jet needle/holder assembly:
1.5 lbf·ft (2.1 N·m, 0.2 kgf·m)
rink arm set torx screw:
1.5 lbf·ft (2.1 N·m, 0.2 kgf·m)
throttle drum cover bolt:
2.5 lbf·ft (3.4 N·m, 0.3 kgf·m)
hot start cable nut:
1.5 lbf·ft (2.1 N·m, 0.2 kgf·m)
throttle cable lock nut:
3.0 lbf·ft (4 N·m, 0.4 kgf·m)
throttle cable bolt:
3.0 lbf·ft (4 N·m, 0.4 kgf·m)
• After installing the carburetor, adjust the
throttle cable (1) freeplay and hot start cable
(2) freeplay.
• After installing the carburetor, check the
throttle position sensor connector (3) for
correct routing.
• After installing the carburetor, check the air
vent hoses (4) and overflow hose (5) for
kinking or pinching and correct routing.
(4)
(2)
(1)
(5)
(3)
(1) throttle cables
(2) hot start cable
(3) throttle position sensor connector
(4)
(5)
(4)
(4) air vent hoses
(5) overflow hose
Adjustments for Competition
123
118-133.qxd 06.5.11 13:13 ページ124
Carburetor Adjustments & Tuning Tips
Standard Tuning Recommendations
For the following recommendations to be
accurate, you must use the standard settings as a
baseline. Also, don’t change any of the settings
until you’ve determined what changes are
necessary.
Adjustment
Standard settings
Pilot screw opening
1 3/4 turns out
Slow jet
#42
Jet needle
NJYR
Needle clip position
3rd groove
Main jet
#178
Float level
0.24 in (6.0 mm)
Identification number
FCR00F
Adjustments for Altitude & Temperature
All jetting recommendations are based on
standard jetting with an unmodified engine. The
following conditions can affect the fuel mixture.
Mixture will be:
Adjust to:
cold temperature
lean
richer
warm temperature
rich
leaner
dry air
lean
richer
high humidity
rich
leaner
high altitude
rich
leaner
Condition
124
Adjustments for Competition
118-133.qxd 06.5.11 13:13 ページ125
Carburetor Adjustments & Tuning Tips
Special Tuning Conditions
There are some unique atmospheric conditions or
situations that may require additional
adjustments.
It should not be necessary to go more than one
jet size richer or leaner to fine tune your CRF. If
larger jetting changes are necessary, check for air
leaks, blocked or restricted exhaust or fuel
systems, or a dirty air cleaner.
Condition
long straights
Main Jet Adjustment
next larger
uphill sections
sand
mud
high humidity
raining
hotter than 113 °F (45 °C)
next smaller
Once you’ve adjusted the carburetor for
temperature and altitude, it shouldn’t need major
readjustment unless race conditions change
drastically. However, there are some unique
atmospheric conditions or race day situations that
may require additional adjustments. They are as
follows.
To prevent engine damage, always adjust the
main jet before adjusting the jet needle. Always
choose the next richer jet if there is any doubt so
there is a margin for safety.
Main Jet • Go richer on the main jet, by one
size, when: the track has a very
long straightaway or uphill section,
a high percentage of sand, or the
track is muddy.
• Go leaner on the main jet, by one
size, when: it is very humid or
raining, or it is hotter than 113
degrees F.
After using the chart, and making any
adjustments for special conditions, it shouldn’t be
necessary to go more than one jet size richer or
leaner to fine tune your CRF. If larger jetting
changes are necessary, check for worn crankshaft
seals, air leaks, blocked or restricted exhaust or
fuel systems, or a dirty air cleaner.
Pre-Adjustment Checks
Before adjusting carburetor settings, check the
following:
• air cleaner
• air leaks
• float level
• clogged carburetor jets
• spark plug fouling (improper heat range or
other cause)
• freshness of fuel
• owner modifications (such as exhaust system,
holes in the air cleaner, etc.)
• ignition timing
• compression
If the above check out, then, adjust the carburetor
for your specific racing conditions. Engine
response and appearance of the firing end of a
spark plug are highly indicative of the engine
condition.
Refer to the list on page 148 for the optional
carburetor parts.
To prevent engine damage, always adjust the
main jet before adjusting the jet needle. If there
is any doubt — always choose the next richer jet
so there is a margin for safety.
Adjustments for Competition
125
118-133.qxd 06.5.11 13:13 ページ126
Carburetor Adjustments & Tuning Tips
WARNING
Carburetor Minor Adjustments
The standard carburetor settings are ideal for the
following conditions: sea level altitude, and 68°F
(20°C ) air temperature. If your conditions are
different, you may need to adjust the carburetor
settings, using the tuning information on pages
124 and 125. Confirm your settings are correct
before proceeding.
Minor Adjustments
1. Adjust the carburetor setting using the tuning
information on pages 124 and 125.
2. When the engine is warm enough to run
without the choke, push the choke knob in to
its off position.
3. Adjust the pilot screw (1) to obtain the best
off-idle performance.
– If the engine blubbers (rich) exiting a
corner, turn the pilot screw clockwise to
lean the mixture.
– If the engine surges (lean) exiting a corner,
turn the pilot screw counter clockwise to
richen the mixture.
Gasoline is highly flammable and
explosive. You can be burned or
seriously injured when handling fuel.
(1)
(1)
• Stop the engine and keep heat, sparks
and flame away.
• Handle fuel only outdoors.
• Wipe up spills immediately.
4. Turn the fuel valve OFF.
5. Drain the remaining fuel in the float bowl by
loosening the drain screw (2) and disconnect
the fuel line from the fuel valve.
6. Loosen the connecting and insulator band
screws. Rotate the carburetor. Remove the
float bowl plug (3).
Make sure the float bowl plug O-ring (4) is in
good condition, and replace it if necessary.
(2)
(1) pilot screw
The minimum to maximum range of pilot screw
adjustments is 1 1/4 to 2 turns out from the
lightly seated position. If you exceed 2 turns out,
the next larger slow jet is needed. If you are
under 1 1/4 turn out, the next smaller slow jet is
needed.
126
Adjustments for Competition
Adjustment Procedure
1. Warm up the engine.
2. Make two or three laps of a course with the
standard setting or corrected jetting (page
124). and spark plug. Note engine
acceleration and other engine conditions in
relation to throttle opening. Verify
carburetion by removing the spark plug and
reading its firing end (page 128). It may take
more than two or three laps to get a good
spark plug reading with a new spark plug.
3. Change carburetor settings or select suitable
carburetor jets, taking into consideration the
engine conditions and factors for temperature
and altitude (page 124).
(3)
(4)
(2) drain screw
(3) float bowl plug
(4) O-ring
118-133.qxd 06.5.11 13:13 ページ127
Carburetor Adjustments & Tuning Tips
7. Change the main jet (4) and slow jet (5) as
required.
10. Remove the fuel tank (page 30).
11. Remove the carburetor top cover bolts (9),
clamp (10) and carburetor top cover (11).
12. Remove the jet needle/holder assembly (12).
(4)
(11)
(10)
(12)
(5)
(9)
(4) main jet
(5) slow jet
8. Reinstall the float bowl plug.
9. Rotate the carburetor and align the lugs (6) on
the carburetor with the slots (7) on the
insulator and connecting tube.
Tighten the connecting tube and insulator
band screws (8).
(9) carburetor top cover bolts
(10) clamp
(11) carburetor top cover
(12) jet needle/holder assembly
14. Change the clip position of jet needle or jet
needle as required.
15. Reinstall the jet needle/holder assembly,
carburetor top, clamp and carburetor top
cover.
16. Tighten the carburetor top cover bolts to the
specified torque:
1.5 lbf·ft (2.1 N·m, 0.2kgf·m)
17. Install the fuel tank (page 31).
18. Start the engine.
If the engine idle speed is too high or too low
or engine is not idling, adjust the engine idle
speed (page 48).
19. Repeat steps 4 – 17 until the engine gives
maximum power with the correct spark plug
reading. It is always better to jet a little rich
than a little lean. It is advisable to record the
settings, course conditions, lap times, and
climatic and barometric conditions for future
reference.
13. Remove the clip (13) and jet needle (14)
from the jet needle holder (15).
(6)
(14)
(15)
(8)
(13)
(8)
(7)
(6) lugs
(7) slots
(8) screws
(13) clip
(14) jet needle
(15) jet needle holder
Adjustments for Competition
127
118-133.qxd 06.5.11 13:13 ページ128
Carburetor Adjustments & Tuning Tips
Spark Plug Reading
Refer to Spark Plug on page 54.
Check any jetting change by reading the spark
plug. The following procedure is recommended.
You may not get an accurate reading if you
simply turn off the engine and pull the plug for
inspection.
Use a new spark plug. Inspect the plug before
installing it.
NOTICE
Using spark plugs with an improper heat range
or incorrect reach can cause engine damage.
Before removing the spark plug, clean the spark
plug area thoroughly to prevent dirt from
entering the cylinder.
NOTICE
An improperly tightened spark plug can damage
the engine. If a plug is too loose, a piston may
be damaged. If a plug is too tight, the threads
may be damaged.
Ride for 10 – 15 minutes before taking a plug
reading. A new plug will not color immediately.
To obtain an accurate reading of a new spark
plug:
1. Accelerate at full throttle on a straight.
2. Push the engine stop button and pull the
clutch lever in to release the clutch.
3. Coast to a stop.
4. Remove the spark plug.
5. Use a magnifying glass to inspect the spark
plug. The porcelain insulator (1) around the
center electrode (2) should appear clean and
colorless with a gray ring around the center
electrode where it exits the porcelain.
Metallic specks indicate lean jetting that is
removing metal from the piston. Black sooty
streaks on the porcelain indicate rich jetting.
(2)
(3)
(1)
(1) insulator
(2) center electrode
(3) side electrode
Spark Plug Coloring Guidelines
Condition
Spark Plug Appearance
Mixture
Normal
Dark brown to light tan
color with dry electrode
correct
Overheating
(Lean)
Light gray or white color
lean
Wet
(Rich)
Wet or sooty
rich
Remember that in addition to improper jetting:
• A lean condition can be caused by air leaks in
the inlet tract or exhaust system, the passage
of too much air because of the use of the
wrong air cleaner, use of a less-restrictive
aftermarket exhaust system, or a hole or holes
(deliberate or uninterna) in the air cleaner
housing.
• A rich condition can be caused by a plugged
or dirty air cleaner, use of a more-restrictive
aftermarket exhaust system, a clogged spark
arrester, or excessive oil on the air cleaner.
Excessive smoking will occur.
128
Adjustments for Competition
118-133.qxd 06.5.11 13:13 ページ129
Chassis Adjustments
The following suggestions may improve a
specific concern. Subtle changes in overall
handling may also be noted.
Rear End
If you have a problem with rear wheel traction,
raise the rear end of your CRF by increasing the
rear spring pre-load. Instead of running 3.9 in
(100 mm) of sag, you can run 3.5 in (90 mm) so
the rear of the bike will sit a little higher. This
should produce more traction because of the
change to the swingarm and the location of your
CRF’s center of gravity.
If you have a problem with the steering head
shaking when you use the front brake hard or if
your CRF wants to turn too quickly, lower the
rear of the motorcycle by reducing the rear spring
pre-load. This will increase fork rake and trail
and should improve stability in a straight line.
The effective suspension travel will be
transferred toward the firmer end of wheel travel.
Keep the race sag adjustment (page 111) in the
3.5 – 4.3 in (90 – 110 mm) range.
Fork Height/Angle
Wheelbase
The position of the fork tubes in the clamps is
adjustable.
Standard Position
The standard position (1) align the top of the
outer tube (2) (not the top of the fork cap) with
the top of the upper fork clamp (3).
(1) standard position
0 in (0 mm)
(2) top of outer tube
(3) upper fork clamp
(2)
(1)
(3)
Adjusting your CRF’s wheelbase can offer subtle
changes in overall handling. You may adjust
wheelbase by adding or removing links on the
drive chain. If you change the wheelbase, be
sure to re-check race sag and adjust, if necessary.
In the past, a general rule was lengthen the
wheelbase to add straight line stability, shorten
the wheelbase to improve turning. However, we
suggest you do not lengthen the wheelbase of
your CRF unless you are racing on a track with
more fast sections than normal.
As a general recommendation, keep the
wheelbase as short as possible. This positions
the wheels closer together, improves turning
response, increases weighting (traction) on the
rear wheel, and lightens weighting on the front
wheel.
With your CRF, you will probably find that the
standard setting or a shorter wheelbase will offer
more overall benefits.
Adjustments for Competition
129
118-133.qxd 06.5.11 13:13 ページ130
Gearing
You can “adjust” the power delivery of the
standard engine to suit track conditions by
changing gearing. This allows you to utilize a
different portion of the engine’s power range at a
given throttle setting. New gearing may provide
the change you are looking for without the need
to consider further modifications.
The portion of your engine’s power range you
use can be adjusted by changing the final drive
ratio with different sized rear sprockets. Gearing
changes allow you to more closely match the
type of terrain and the available traction.
Normally, a change of one tooth on the rear
sprocket will be sufficient.
There is a choice of both higher and lower final
drive ratios with two optional driven sprockets.
Like the optional springs, these sprockets are
listed in the Optional Parts List section of this
manual (page 148).
Unless you have the required mechanical
knowhow, tools, and an official Honda Service
Manual, sprocket changing should be done by
your Honda dealer.
Higher Gearing (less driven sprocket teeth)
• increases top speed in each gear (provided the
engine will pull the higher gearing)
• reduces frequency of shifting (wider gear
ratios)
• reduces engine rpm at a given throttle setting
or ground speed (which may allow better rear
wheel traction on slippery or loose terrain)
However:
• the engine may not pull the higher gearing
• the spacing between gears may be too wide
• engine rpm may be too low
130
Adjustments for Competition
Lower Gearing (more rear sprocket teeth)
• decrease top speed in each gear
• increases frequency of shifting (narrower gear
ratios)
• increases engine rpm at a given throttle
setting or ground speed (which may provide
more power-to-the-ground on good traction
surfaces)
However:
• spacing between gears may be too narrow
• engine rpm may be too high
Some tracks may be watered heavily prior to the
first race, then lightly or not at all during the day.
This results in a track surface that is slippery
during the first few races, then changes from
good to great and back to good and possibly ends
the day with a slick rock-hard consistency.
Ideally, your gearing should be adjusted to suit
all these conditions.
• Wet and slippery or sandy conditions: use a
higher gear (less teeth) to keep engine rpm
down, and avoid unwanted wheelspin. The
engine may bog in certain corners so you’ll
need to slip the clutch to compensate;
downshifting may be too drastic a change in
speed.
• Average conditions: use the standard sprocket.
• Hard (but not slippery) track conditions: use
lower gearing (more teeth) to keep the engine
rpm high where the engine produces the most
power. This may require an extra upshift on
certain sections or perhaps you can just rev it
out a bit longer.
For tight tracks, consider lower gearing to avoid
having to slip the clutch frequently. Repeated
fanning or pulling of the clutch lever in a turn to
raise engine rpm may eventually damage the
clutch system.
A gearing change may help for riding in sand,
where you want to keep the front end light so it
can float from the peak of one sand whoop to the
next. Generally, with higher gearing, it is easier
to maintain that perfect attitude (maximum rear
wheel traction and a light front end) because you
remain in the powerband longer in each gear.
The higher gearing allows you to steer more
efficiently with throttle control and body English.
If you are riding a track with sections where you
choose to over-rev the engine temporarily rather
than shifting up, higher gearing might help.
Sometimes you have to sacrifice performance on
one section of the track to gain a better overall
time. Your goal is the fastest overall lap time,
even if the cost is some sections where the
gearing feels wrong.
If you decide to try a gearing change, have
someone check your times with a stopwatch
(before and after the change) to get an accurate
appraisal of the change. “Seat-of-the-pants”
feelings can’t be trusted. Eliminating wheelspin
with a gearing change can make you feel like
you’re going slower when, in reality, you’ve
decreased your time by increasing your speed
with better traction.
These gearing recommendations should be
evaluated by considering your ability, your riding
style, and the track.
118-133.qxd 06.5.11 13:13 ページ131
Tire Selection for Track Conditions
Choosing the correct tire tread pattern and rubber
compound can affect your placing in competition.
The tires on your CRF offer a “happy medium”
for the variety of soil conditions the majority of
riders are likely to encounter.
Experienced competitors often switch to tires
developed for specific terrain conditions. If you
do switch, stay with the factory recommended
sizes. Other tires may affect handling or
acceleration.
Be aware that tire sizes (width and aspect ratio)
do vary from manufacturer to manufacturer or
even among tires made by the same
manufacturer. Variations in tires, especially the
sidewall profile, can change the attitude of your
CRF and its handling. Tire variations that raise
or lower the rear of your CRF have a more
significant effect on handling than variations in
front tires which, generally, don’t vary as much.
Often, you can see or feel the change in tire size.
Another way to check is to measure the rolling
circumference of the old and new tires. A higher
profile tire will have a larger rolling
circumference.
If you do switch to tires designed for special
terrain use, remember they will be less
acceptable in other circumstances. For example,
an aggressive mud tire will give excellent grip on
wet, loamy terrain, but less impressive grip on a
hard surface.
If you choose a tire with a sticky compound for
added traction, remember that it may transfer
additional loads to the transmission because it
grips so well, especially when riding in situations
that normally place unusual demands on the
transmission.
Complete consumer information can be obtained
from the various tire manufacturer
representatives and dealers.
Some general recommendations for specific
terrain follow:
Hard, Slick Soil
Use tires with many relatively short knobs that
are close together in order to obtain the largest
possible contact patch on the surface. The rubber
compound needs to be softer for hard ground in
order to hook up, but not so soft that the knobs
roll over easily and affect holding a straight line.
These tires tend to wear more quickly than
standard tires because of the combination of soft
rubber and hard terrain.
Muddy Soil
Use a more open tread pattern to avoid clogging.
For these conditions, the relatively long knobs
will probably be made from a harder rubber
compound to reduce any tendency to bend back
under acceleration or wear quickly.
Loose, Sandy Soil
Use a tire that is similar in construction to those
needed for tacky soil and mud, but with a few
more knobs.
Adjustments for Competition
131
118-133.qxd 06.5.11 13:13 ページ132
Personal Fit Adjustments
The following suggestions may make your ride
both more comfortable and more responsive to
your control input.
• Position the shift lever and rear brake pedal so
they are close to your boot for rapid access,
but not so close that either is depressed when
sitting or standing comfortably on your CRF.
Control Positioning
• Handlebar width can be trimmed with a
hacksaw to better suit your particular shoulder
width and riding preference. Think this
through carefully and cut off just a small
amount at a time from both sides equally. It is
obviously much easier to make the handlebar
narrower than it is to add material.
• Position the control levers so that you can use
them comfortably when seated and standing.
• Adjust the mounting bolt torque of the clutch
and front brake lever assemblies so that they
can rotate on the handlebar in a fall. If an
assembly does not rotate, it may bend or
break a control lever. Make sure that the
bolts are torqued securely enough to prevent
slippage during normal operation.
Apply Pro Honda Hondalock or an equivalent to
the threads of these bolts prior to adjustment to
help ensure the correct torque is retained.
Tighten the top bolts first.
(1)
(1)
(1) control lever mounting bolts
As an alternative, consider wrapping the
handlebar area under the control assemblies with
teflon tape. Then tighten the assemblies to their
normal torque. Upon impact, the fully-tightened
assemblies should rotate on the Teflon tape.
132
Adjustments for Competition
Handlebar Position, Width & Shape
• Position the handlebar so that both gripping
the bar and operating the controls is
comfortable while both seated and standing,
while riding straight ahead and turning.
Tighten the forward bolts first.
• The handlebar position may be moved
forward either 3 mm (using optional
handlebar lower holders) or 6 mm (by rotating
the standard holders 180 degrees). Refer to
the Service Manual for installation
instructions. Be sure to check control cable
and wiring harness routing after the
adjustment.
• Chamfer the edges to remove burrs and other
irregularities or roughness after sawing the
handlebar.
• An alternate handlebar shape, through varying
rise or rearward sweep dimensions, will
provide further adjustment to riding position
and may better suit your particular body size
or riding style. Each of the ergonomic
dimensions of the machine were determined
to suit the greatest possible number of riders
based on an average size rider.
118-133.qxd 06.5.11 13:13 ページ133
Tips
Here’s helpful advice on how to transport and
store your Honda, as well as three
troubleshooting flow charts.
Transporting Your Motorcycle .........................134
Storing Your Honda..........................................135
Preparation for Storage ................................135
Removal from Storage.................................135
You & the Environment ...................................136
Troubleshooting................................................137
Tips
133
134-164.qxd 06.5.11 13:15 ページ134
Transporting Your Motorcycle
If you use a truck or motorcycle trailer to
transport your Honda, we recommend that
you follow these guidelines:
• Use a loading ramp.
• Make sure the fuel valve is off.
• Secure the motorcycle in an upright position,
using motorcycle tie-down straps. Avoid
using rope, which can loosen and allow the
motorcycle to fall over.
To secure your CRF, brace the front wheel
against the front of the truck bed or trailer rail.
Attach the lower ends of two straps to the tie-down
hooks on your vehicle. Attach the upper ends of
the straps to the handlebar (one on the right side,
the other on the left), close to the fork.
Check that the tie-down straps do not contact any
control cables or electrical wiring.
Tighten both straps until the front suspension is
compressed about half-way. Too much pressure
is unnecessary and could damage the fork seals.
Use another tie-down strap to keep the rear of the
motorcycle from moving.
We recommend that you do not transport your
CRF on its side. This can damage the
motorcycle, and leaking gasoline could be a
hazard.
134
Tips
134-164.qxd 06.5.11 13:15 ページ135
Storing Your Honda
If you won’t be riding for an extended period,
such as during the winter, thoroughly inspect
your Honda and correct any problem before
storing it. That way, needed repairs won’t be
forgotten and it will be easier to get your CRF
running again.
To reduce or prevent deterioration that can occur
during storage, also follow the following
procedures.
6. Remove the radiator cap and coolant drain bolt
(3) at the water pump (4) to drain coolant.
After the coolant has been completely
drained, reinstall the drain bolt with a new
sealing washer and radiator cap.
(2)
(4)
Preparation for Storage
1. Completely clean all parts of your CRF. If
your CRF has been exposed to sea air or salt
water, wash it down with fresh water and
wipe dry.
2. Change the engine oil and filter (page 37).
3. Change the transmission oil (page 40).
4. Drain the fuel tank and carburetor into an
approved gasoline container.
Turn the fuel valve OFF and loosen the drain
screw. Drain gasoline into an approved
container. Retighten the drain screw.
WARNING
Gasoline is highly flammable and
explosive. You can be burned or
seriously injured when handling fuel.
• Stop the engine and keep heat, sparks
and flame away.
• Handle fuel only outdoors.
• Wipe up spills immediately.
(3)
(1)
(1) bolt
(2) right engine guard
(3) coolant drain bolt
(4) water pump
7. Lubricate the drive chain.
8. Inflate the tires to their recommended
pressures.
9. Place your CRF on the optional Honda
workstand or equivalent to raise both tires off
the ground.
10. Stuff a rag into the silencer outlet. Then tie a
plastic bag over the end of the silencer to
prevent moisture from entering.
11. Store your CRF in an unheated area, free of
dampness, away from sunlight, with a
minimum of daily temperature variation.
12. Cover your CRF with a porous material.
Avoid using plastic or similar non-breathing,
coated materials that restrict air flow and
allow heat and moisture to accumulate.
Removal from Storage
1. Uncover and clean your CRF.
Change the engine and transmission oil if
more than 4 months have passed since the
start of storage.
2. Uncover the end of the muffler and remove
the rag from the muffler outlet.
3. Fill the fuel tank with the recommended fuel
(page 34).
4. Pour a fresh recommended coolant mixture
(page 41) slowly into the radiator filler hole
up to the filler neck.
Capacity:
1.18 US qt (1.12R)
at disassembly
1.09 US qt (1.03R)
at draining
Lean your CRF slightly right and left several
times to bleed trapped air in the cooling
system.
If the coolant level lowers, add coolant and
repeat the above procedure.
Install the radiator cap securely.
5. Perform all maintenance checks (page 9).
5. Remove the bolt (1) and right engine guard (2).
Tips
135
134-164.qxd 06.5.11 13:15 ページ136
You & the Environment
Owning and riding a motorcycle can be
enjoyable, but you must do your part to protect
nature. When you show respect for the land,
wildlife, and other people, you also help preserve
the sport of off-road riding.
Following are tips on how you can be an
environmentally-responsible motorcycle owner.
• Choose Sensible Cleaners. Use a
biodegradable detergent when you wash your
CRF. Avoid aerosol spray cleaners that
contain chlorofluorocarbons (CFCs) which
damage the atmosphere’s protective ozone
layer. Don’t throw cleaning solvents away;
see the following guidelines for proper
disposal.
• Recycle Wastes. It’s illegal and thoughtless to
put used engine oil in the trash, down a drain,
or on the ground. Used oil, gasoline, and
cleaning solvents contain poisons that can hurt
refuse workers and contaminate our drinking
water, lakes, rivers, and oceans.
Before changing your oil, make sure you have
the proper containers. Put oil and other toxic
wastes in separate sealed containers and take
them to a recycling center. Call your local or
state office of public works or environmental
services to find a recycling center in your area
and get instructions on how to dispose of non
recyclable wastes.
136
Tips
NOTICE
Improper disposal of drained fluids is harmful to
the environment.
134-164.qxd 06.5.11 13:15 ページ137
Troubleshooting
The items that are serviceable using this Manual
are followed by the page number reference in
parenthesis. The items that require use of the
Honda Service Manual are followed by an
asterisk.
ENGINE DOES NOT START OR IS HAND TO START
CHECK
1. Check the fuel
flow to carburetor
GOOD SPARK
3. Test cylinder
compression*
WEAK OR NO
SPARK
LOW
CORRECT
4. Start by following
normal starting
procedure
ENGINE STARTS
BUT SOON
STOPS
ENGINE DOES
NOT FIRE
5. Removed and
inspect spark plug
POOR PERFORMANCE AT HIGH SPEED
CHECK
1. Disconnect fuel
line at carburetor
and check for
clogging (P.34)
1. Check if air
cleaner is overoiled (P.44)
POSSIBLE CAUSES
INCORRECT
• Over-oiled air cleaner.
CHECK
POSSIBLE CAUSES
FUEL FLOW
RESTRICTED
• Lack of fuel in tank
(P.34)
• Clogged fuel line
(P.34)
• Clogged fuel fill
cap breather tube
(P.34)
• Clogged fuel valve
(P.34)
• Clogged fuel filter
(P.35)
DIRTY
• Not cleaned
frequently enough
(P.43)
CONDITION
WORSE
• Jet size wrong, rejet
in the opposite
direction (P.126)
CLOGGED
• Contaminants in
the fuel
INCORRECT
• Cam sprocket not
installed properly
UNRESTRICTED
FUEL FLOW
CORRECT
POSSIBLE CAUSES
NOT REACHING
CARBURETOR
REACHING
CARBURETOR
2. Try spark test*
POOR PERFORMANCE AT LOW AND UNSTABLE
IDLE SPEED
WET PLUG
DRY
6. START WITH CHOKE ON
• No fuel in fuel tank
• Clogged fuel tube or
fuel strainer screen
(p.34)
• Sticking float valve*
• Clogged fuel fill cap
breather tube (p.34)
• Faulty spark plug (p.54)
• Fouled spark plug (p.54)
• Faulty ignition control
module*
• Broken or shorted spark
plug wire
• Faulty exciter coil
• Broken or shorted ignition
coil
• Faulty engine stop button
• Loose or disconnected
ignition system wires
• Faulty ignition pulse
generator*
• Valve stuck open
• Worn cylinder and piston
ring*
• Leaking/damaged
cylinder head gasket
• Improper valve timing*
• Seized valve
• Improper choke operation
• Pilot screw incorrectly
adjusted*
• Insulator leaking
• Improper ignition timing
(Faulty ignition coil or
ignition pulse generator)*
• Fuel contaminated
• Improper hot start
operation (p. 53)
• Carburetor flooded
• Choke closed
• Throttle valve open
• Air cleaner dirty (p. 43)
2. Check if the insulator
is leaking
LEAKING
• Loose insulator clamp
• Damaged insulator
NOT LEAKING
2. Remove air
cleaner (P.43)
3. Check carburetor
pilot screw
adjustment (P.126)
INCORRECT
CORRECT
4. Check carburetor
jets and accelerator
pump for clogs
CLOGGED
NOT CLOGGED
• Fuel-air mixture too
lean (Turn the pilot
screw out) (P.126)
• Fuel-air mixture too rich
(Turn the pilot screw in)
(P.126)
• Contaminants in the
fuel
• Not cleaned frequently
enough (P.121)
AIR CLEANER
NOT DIRTY
3. Install a larger
carburetor main
jet (P.124)
CORRECT
4. Check carbureator
jets for clogging
NOT CLOGGED
5. Try spark test
GOOD SPARK
6. Check the throttle
position sensor*
WAKE OR
INTERMITTENT
SPARK
• Faulty, carbon or wet
fouled spark pulg (P.128)
• Faulty ignition control
module*
• Faulty alternator*
• Faulty ignition coil*
• Broken or shorted
spark plug wire.
• Faulty ignition pulse
generator*.
• Loose or disconnected
ignition system wires
• Faulty engine stop button
INCORRECT
• Faulty throttle position
sensor*
LOW
• Ring worn
• Cylinder worn or
damaged*
• Piston worn or
damaged*
• Head gasket not
sealing
• Valve stick open
5. Check valve
timing
CORRECT
6. Try spark test
GOOD SPARK
WEAK OR
INTERMITTENT
SPARK
• Faulty, carbon or wet
fouled spark pulg
(P.128)
• Faulty ignition control
module*
• Faulty alternator*
• Faulty ignition coil*
• Broken or shorted
spark plug wire.
• Faulty ignition pulse
generator*.
• Loose or disconnected
ignition system wires
• Faulty engine stop button
LOW
• Ring worn
• Cylinder worn or
damaged
• Piston worn or damaged
• Head gasket not sealing
• Improper valve timing
• Valve stick open
CORRECT
7. Test cylinder
compression.
CORRECT
7. Test cylinder
compression.
CORRECT
Tips
137
134-164.qxd 06.5.11 13:15 ページ138
138
Tips
134-164.qxd 06.5.11 13:15 ページ139
Technical Information
This section contains dimensions, capacities, and
other technical data.
Vehicle Identification .......................................140
Specifications ...................................................141
Torque Specifications.......................................142
Oxygenated Fuels.............................................145
Competition Logbook ......................................146
Optional Parts List ...........................................148
Spare Parts & Equipment.................................149
Wiring Diagram................................................150
Technical Information
139
134-164.qxd 06.5.11 13:15 ページ140
Vehicle Identification
The engine number (2) is stamped on the left
crankcase.
Serial Numbers
The VIN and engine serial numbers are required
when you register your CRF. They may also be
required when ordering replacement parts. You
may record these numbers in the Quick
Reference section at the rear of this manual.
The VIN (vehicle identification number) (1) is
stamped on the right side of the streering head.
(2)
(2) engine number
(1)
(1) VIN
140
Technical Information
134-164.qxd 06.5.11 13:15 ページ141
Specifications
Item
English
86.3 in
Overall width
32.5 in
825 mm
Overall height
49.7 in
1,262 mm
2,191 mm
Wheelbase
58.9 in
1,495 mm
Seat height
37.6 in
955 mm
Footpeg height
17.0 in
432 mm
Ground clearance
13.3 in
339 mm
F. suspension
R. suspension
Tire size, front
Tire size, rear
Twin tube
Telescopic fork,
travel 11.0 in (280 mm)
stroke 12.4 in (315 mm)
Pro-link,
travel 12.6 in (320 mm)
80/100 – 21 51M
DUNLOP
D742FA
110/90 – 19 62M
DUNLOP
D756
Tire type
bias-ply, tube type
Tire pressure, front (cold)
15 psi (100 kPa, 1.0 kgf/cm2)
Tire pressure, rear (cold)
F. brake, swept area
R. brake, swept area
Fuel recommendation
Fuel tank capacity
Metric
1.90 US gal
4.30 in
7.2R
26˚47’
109.3 mm
13.0 US oz
384 cm3
Item
Type
Liquid cooled, 4-stroke
Clutch type
Cylinder arrangement
Single 8˚ inclined from
vertical
Transmission
Bore and stroke
Displacement
Engine oil capacity
at draining
at draining and
oil filter change
at disassembly
Transmission oil
capacity
at draining
at disassembly
Type
Identification number
2.739
Gear ratio I
1.800
449.4 cm3
Gear ratio II
1.470
Gear ratio III
1.235
Gear ratio IV
1.050
Gear ratio V
0.909
Final reduction
3.692
27.41 cu-in
12.0 : 1
0.006 ± 0.001 in
(0.16 ± 0.03 mm)
Exhaust: 0.011 ± 0.001 in
(0.28 ± 0.03 mm)
Intake:
Gear shift pattern
0.70 US qt
0.66R
0.73 US qt
0.69R
Ignition
0.90 US qt
0.85R
Starting system
Spark plug :
Standard
0.62 US qt
0.59R
0.71 US qt
0.67R
Piston valve
For extended high
speed riding
NJYR
3rd groove
Slow jet (standard)
# 42
Kickstarter
NGK
IFR8H11
NGK
IFR9H11
DENSO
VK27PRZ11
Spark plug gap
Needle clip position
(standard)
ICM
DENSO
VK24PRZ11
FCR00F
Jet needle (standard)
Idle speed
Left foot-operated return
system 1-N-2-3-4-5
Electrical
# 178
Float level
Wet, multi-plate type
5-speed, constant mesh
Primary reduction
Main jet (standard)
Pilot screw opening
Metric
3.78 x 2.44 in 96.0 x 62.1
mm
Compression ratio
Valve clearance
(cold)
English
Drive train
Carburetor
15 psi (100 kPa, 1.0 kgf/cm2)
Single disc brake
51.8 in2 (334.5 cm2)
Single disc brake
60.6 in2 (391.1 cm2)
unleaded gasoline, pump
octane number of 91 or
higher
Caster angle
Trail length
Fork oil capacity
(except fork damper
per leg)
English
Engine
Overall length
Frame
Type
Item
Metric
Dimension
0.039 – 0.043 in
(1.0 – 1.1 mm)
1 3/4 turns out
0.24 in
6.0 mm
1,700 ± 100 rpm
Cooling system
Cooling capacity
at draining
at disassembly
1.09 US qt
1.03R
1.18 US qt
1.12R
Technical Information
141
134-164.qxd 06.5.11 13:15 ページ142
Torque Specifications
Nuts, Bolts, Fasteners
Check and tighten nuts, bolts, and fasteners before every outing.
ENGINE
Torque
Item
Engine
(1)
(8)
(7)
(10)
(6)
(1)
(9)
(3)
(2)
142
Technical Information
(4)
(5)
1
2
3
Cylinder head cover bolts
Clutch cover bolts
Water pump cover bolts
4
Transmission oil check
bolt
5
6
7
8
9
10
Crankshaft hole cap
Oil filter cover bolts
Cylinder bolt
Cylinder head bolts
Exhaust pipe joint nuts
Drive sprocket bolt
lbf•ft
7
7
7
7
N•m
10
10
10
10
kgf•m
1.0
1.0
1.0
1.0
11
9
7
7
15
23
15
12
10
10
21
31
1.5
1.2
1.0
1.0
2.1
3.2
NOTE: 1. Apply grease to the threads.
Remarks
NOTE 1
134-164.qxd 06.5.11 13:15 ページ143
Torque Specifications
Frame
FRAME
Torque
(2)
Item
(4)
1
2
3
4
(1)
(5)
(12)
(3)
(13)
(6)
(9)
5
6
7
8
9
10
11
12
(10)
(14)
(13)
13
(16)
14
15
(15)
(16)
(12)
(18)
16
(15)
17
(8)
(7)
(9)
18
19
Steering stem nut
Fork upper pinch bolts
Fork lower pinch bolts
Handlebar upper
holder bolts
Handlebar holder nuts
Front axle nut
Front axle pinch bolts
Rear axle nut
Chain adjuster lock nuts
Front engine mounting
bolt
Engine mounting nut
Upper engine hanger
plate bolts
(engine side)
(frame side)
Shock absorber (upper)
(lower)
Swingarm pivot nut
Fork
(fork damper)
(fork cap)
Rear shock arm nuts
(swingarm side)
(shock link side)
Rear shock link nuts
(Frame side)
Shock spring lock nut
Kickstarter arm bolt
NOTES:
(16)
1.
2.
3.
4.
5.
6.
lbf•ft
80
16
15
N•m
108
22
20
kgf•m
11.0
2.2
2.0
16
32
65
15
94
20
22
44
88
20
128
27
2.2
4.5
9.0
2.0
13.1
2.8
47
47
64
64
6.5
6.5
40
19
32
32
65
25
22
54
26
44
44
88
34
30
5.5
2.7
4.5
4.5
9.0
3.5
3.1
39
39
53
53
5.4
5.4
39
32
28
53
44
38
5.4
4.5
3.9
Remarks
NOTE 1
NOTE 2
NOTE 1
NOTE 1
NOTE 1
NOTE 1, 3
U-nut.
UBS nut.
Apply oil to the threads and flange surface.
Apply locking agent to the threads.
SH bolt
Alock bolt: replace with a new one
(17) (19) (11)
Technical Information
143
134-164.qxd 06.5.11 13:15 ページ144
Torque Specifications
Frame
FRAME
Torque
Item
(39)
20
(36)
21
22
(29)
(32)
23
24
25
26
(35)
(23)
27
28
29
(26)
(28)
(22)
(26)
(30) (31)
(37)
(20)
(40)
(36)
(40)
(21)
(29)
(39)
30
31
32
33
34
35
36
37
(33)
38
39
40
(24)
Front brake master
cylinder holder bolts
Brake hose bolts
Front brake caliper
mounting bolts
Front brake disc nuts
Rear brake disc nuts
Brake pedal pivot bolt
Spokes
(front)
(rear)
Rim locks
Drive chain roller (upper)
(Iower)
Subframe
(upper)
mounting bolts (Iower)
Fork center bolt
Fork center bolt lock nut
Disc cover bolts
Fork protector bolts
Muffler clamp bolt
Driven sprocket nuts
Seat mounting bolts
Front brake reservoir
cap screws
Rear brake reservoir
cap bolts
Fork air pressure release
screw
Muffler mounting
(A)
bolts
(B)
NOTES:
(34)
(29)
(38)
(25)
(27)
(31)
(30)
(27)
144
Technical Information
1.
2.
3.
4.
5.
6.
lbf•ft
N•m
kgf•m
7.3
25
9.9
34
1.0
3.5
22
12
12
27
2.7
2.7
9
9
9
22
36
51
16
10
5.2
15
24
19
30
16
16
36
3.68
3.7
12
12
12
30
49
69
22
13
7
21
32
26
3.1
1.6
1.6
3.7
0.4
0.4
1.2
1.2
1.2
3.1
5.0
7.0
2.2
1.3
0.7
2.1
3.3
2.7
0.7
1.0
0.1
0.7
1.0
0.1
0.9
15
15
1.2
21
21
0.1
2.1
2.1
U-nut.
UBS nut.
Apply oil to the threads and flange surface.
Apply a locking agent to the threads.
SH bolt
Alock bolt: replace with a new one
Remarks
NOTE 6
NOTE 1
NOTE 1
NOTE 5
NOTE 1
NOTE 4
NOTE 6
NOTE 1
134-164.qxd 06.5.11 13:15 ページ145
Oxygenated Fuels
Some conventional gasolines are being blended
with alcohol or an ether compound. These
gasolines are collectively referred to as
oxygenated fuels. To meet clean air standards,
some areas of the United States use oxygenated
fuels to help reduce emissions.
If you use an oxygenated fuel, be sure it is
unleaded and meets the minimum octane rating
requirement.
Before using an oxygenated fuel, try to confirm
the fuel’s contents. Some states/provinces
require this information to be posted on the
pump.
The following are the EPA-approved percentages
of oxygenates:
If you notice any undesirable operating
symptoms, try another service station or switch
to another brand of gasoline.
Fuel system damage or performance problems
resulting from the use of an oxygenated fuel
containing more than the percentages of
oxygenates mentioned above are not covered
under warranty.
Oxygenated the fuels can damage paint and
plastic. Be careful not to spill fuel when filling
the fuel tank. Wipe up any spills immediately.
NOTICE
Oxygenated fuels can damage paint and plastic.
ETHANOL (ethyl or grain alcohol) 10% by
Volume
You may use gasoline containing up to 10%
ethanol by volume. Gasoline containing ethanol
may be marketed under the name “Gasohol”.
MTBE (Methyl Tertiary Butyl Ether) 15% by
Volume
You may use gasoline containing up to 15%
MTBE by volume.
METHANOL (methyl or wood alcohol) 5% by
Volume
You may use gasoline containing methanol
containing up to 15% methanol by volume as
long as it contains cosolvents and corrosion
inhibitors to protect the fuel system. Gasoline
containing more than 5% methanol by volume
may cause starting and/or performance problems.
It may also damage metal, rubber, and plastic
parts of your fuel system.
Technical Information
145
134-164.qxd 06.5.11 13:15 ページ146
Competition Logbook
Any serious competition effort relies heavily on
the knowledge gained and compiled from
previous racing events. The best way to organize
the many bits of information is to record them in
a logbook.
Your logbook can include such information as
suspension adjustments, carburetor adjustments,
gearing, and tire selection. This detailed
information, along with your comments, can
prove valuable when you compete at the same
track or on similar terrain.
Your logbook can also tell you when
maintenance was performed and when it will be
necessary again. Your logbook also lets you
record any repairs and lets you keep track of the
running time on the engine and suspension
components.
If you choose to sell your CRF, the accurate
maintenance records in your logbook might be
the deciding deal-maker for a potential buyer.
Consider using different color pens or pencils to
record important information on specific
subjects. For example, record results in black,
jetting changes in red, suspension/chassis settings
in blue, and gearing selections in green. Color
codes will help you identify the information you
want with a glance.
Tuning & Adjustment Records
Keep track of the settings and adjustments that
worked best at a particular location. These items
include:
• basic track conditions, altitude, and
temperature
• carburetion changes
• suspension settings
• chassis adjustments tested and selected
• gearing
• tire selection
• air pressure
Competition Records
• your placings
• thoughts to improve performance next time:
both yours and your CRF’s
• strategy notes
Maintenance Records
• regular interval maintenance
• repairs
• running time on engine
• running time on suspension components
Timekeeping
This Manual lists maintenance intervals for
every-so-many races or every-so-many hours of
running.
Because all races are not the same, the most
effective way to schedule maintenance is by the
hours you have run your CRF.
An official “guestimate” is close enough for our
timekeeping purposes. You may choose to record
your time the same way aircraft operators do (but
without the benefit of an electrical hourmeter).
All running time is broken down into hours and
tenths of an hour (each six minutes represents
one tenth of an hour).
146
Technical Information
Racing Records
Information worth recording for this section of
your logbook may include:
• Your placing in each moto and overall
finishing position.
• Thoughts on what you could do to improve
your performance next time.
• Notes on any patterns noted in choice of
starting gate positions or in riding portions of
the course as the day progressed that may
prove helpful in future events.
• Any places on the course where you chose the
wrong line and were passed too easily.
• Notes on strategy used by your competition or
by riders in another event that are worth
remembering.
Maintenance Records
Regular maintenance items you’ll want to record
in your logbook should include:
• Dates and results of cylinder, piston and ring
examinations
• Patterns for frequency of need for
decarbonization with a particular oil
• When you last performed shock linkage and
swingarm pivot bearing maintenance
• Engine, transmission, and suspension oil
changes
• Chain, sprocket, chain guide and slider
replacements
• Coolant changes and related component
replacements
• Spark plug, brake pad and control cable
replacements
In addition, you should record any irregularities
noted in component wear so you’ll remember to
keep a close eye on these areas in the future.
134-164.qxd 06.5.11 13:15 ページ147
Competition Logbook
Date
Running
Time
Location/Event
Comments (Jetting, Suspension Settings, Gearing, Chassis Adjustments, Maintenance
Performed, etc.)
(Make several photocopies of this page for future use)
Technical Information
147
134-164.qxd 06.5.11 13:15 ページ148
Optional Parts List
These parts and tools may be ordered from your
authorized Honda dealer.
CARBURETOR
Main jet
(Standard: #178)
Remarks
#168 – #188 (in increments of
2 or 3)
FRAME
Driven sprocket
Standard
Optional
168
Size
Slow jet
(Standard: #42)
#38 – #48
(in increments of 2 or 3)
Jet Needles
Standard needle: NJYR
Straight diameter: ø2.755 mm
Drive chain
size/link
Handlebar
lower holder
Optional
Remarks
< >: Drive chain links
48 Teeth, Aluminum.
<114>
47 Teeth, Aluminum
<114>
49 Teeth, Aluminum
<114>
D.I.D 520 DMA2/120RB
3 mm offset
no offset
FRAME
Shock spring
Standard
No mark
(factory products)
or
296.8 lbf/in (5.30 kgf/mm)
Stiffer
319.2 lbf/in (5.70 kgf/mm)
Pink
Straight diameter (ø2.755 mm)
(at 1/16 to 1/4 throttle)
General flow characteristics
Leaner
Richer
Jet needle number
(standard series)
To adjust spring preload.
(two spanners required)
Workstand
For maintenance
Air gauge
For checking tire air pressure
Blue
330.4 lbf/in (5.90 kgf/mm)
Silver
Fork spring
Standard
25.76 lbf/in (0.46 kgf/mm)
2 scribe marks
(aftermarket parts)
NJYP
Ø2.735 mm
NKPP
Ø2.735 mm
NJYQ
Ø2.745 mm
NKPQ
Ø2.745 mm
Optional
Softer
24.64 lbf/in (0.44 kgf/mm)
(standard needle)
NJYR
Ø2.755 mm
NKPR
Ø2.755 mm
Stiffer
26.88 lbf/in (0.48 kgf/mm)
NJYS
Ø2.765 mm
NKPS
Ø2.765 mm
NJYT
Ø2.775 mm
NKPT
Ø2.775 mm
Leak jet
(Standard: #50)
148
Jet needle number
(1/2 clip position
leaner than
standard series,
leaner only at 1/8
to 3/4 throttle)
Remarks
Pin spanner A
Red
Red
paint
(aftermarket parts)
Optional
Softer
Jet needle number
TOOLS
Remarks
308.0 lbf/in (5.50 kgf/mm)
#40 – #60
Technical Information
3 scribe marks
4 scribe marks
The standard fork spring and shock spring
mounted on the motorcycle when it leaves the
factory are not marked. Before replacing the
springs, be sure to mark them so they can be
distinguished from other optional springs.
134-164.qxd 06.5.11 13:15 ページ149
Spare Parts & Equipment
There are numerous spare parts you can take to
an event to help ensure you get in a full day of
riding. In addition to the usual nuts and bolts,
consider the following:
Spare Parts
spark plugs
air cleaner (clean & oiled, sealed in a plastic bag)
optional carburetor jets/needles
chain & masterlinks
chain guide slider
chain guide
chain rollers
inner tubes (front & rear)
fenders
footpegs
front visor & covers
handlebar
grips
levers (brake, clutch & hot start)
clutch lever handlebar mount
clutch cable
hot start cable
throttle assembly
throttle cable
shift lever
rear brake pedal
spokes (front & rear, each side)
sprockets (larger & smaller than standard, for
gearing changes & collision damage
replacement)
assorted nuts, bolts, washers, screws, cotter pins
Additional Spares
front brake master cylinder
rear brake assembly
wheels & tires (front & rear, mounted)
clutch discs and plates
engine & transmission oil
seat
ignition components
radiator hoses
radiator shrouds (L & R)
brake hoses (front & rear)
General Tools
sockets (3/8 in drive)
screwdrivers: blade & Phillips No. 1, 2, 3
wrench, large adjustable
wrenches: open end & box
wrenches: hex (Allen)
wrench, spoke
torque wrench (metric scale, click-stop style)
pliers: standard, needle-nose, channel-lock set
hammer, plastic head
syringe with adjustable stop
tire pressure gauge
tire irons
tire pump or air tank
feeler gauge set
Vernier caliper (metric)
pressure/vacuum testing equipment
Honda Special Tools
Any special tools for your CRF purchased from
your Honda dealer.
• Tensioner stopper
070MG-0010100
• Lock Nut Wrench
07WMA-KZ30100
• Spoke Wrench
07JMA-MR60100
• Spoke Wrench
070MA-KZ30100
Pro Honda DOT 4 Brake Fluid
Pro Honda Chain Lube
Pro Honda Foam Filter Oil
Pro Honda Hondabrite cleaner
Pro Honda Dielectric Grease
Pro Honda Handgrip Cement
Pro Honda Hondalock
Molybdenum disulfide grease (containing more
than 30% molybdenum disulfide additive)
Pro Honda White Lithium Grease
Multi-Purpose Grease
Rust-inhibiting oil
Cable lubricant
Pro Honda HP Coolant
Urea based multi-purpose grease designed for
high temperature, high pressure performance
(example: EXELITE EP2 manufactured by
KYODO YUSHI, Japan or Shell stamina EP2 or
equivalent)
Other Products
pliers-safety wire
safety wire
mechanic’s wire
duct tape
plastic tie-wraps
hose clamps
drop light
electrical tape
Scotch-Brite Hand Pad #7447 (maroon) Teflon
tape
Chemical Products
Pro Honda GN4 4-stroke Oil
(Engine and Transmission Oil)
SAE 80 or 90 gear oil
Pro Honda HP Fork Oil 5W
Technical Information
149
134-164.qxd 06.5.11 13:15 ページ150
Wiring Diagram
150
Technical Information
134-164.qxd 06.5.11 13:15 ページ151
Consumer Information
This section contains information about
contacting Honda and how to get an official
Honda service manual.
Authorized Manuals .........................................152
Contacting Honda.............................................153
Your Honda Dealer...........................................154
The Honda Rider’s Club ..................................155
Consumer Information
151
134-164.qxd 06.5.11 13:15 ページ152
Authorized Manuals
The Service Manual used by your authorized Honda dealer is available from
Helm, Inc.
Also available but not necessary to service your model is the Honda Common
Service Manual which explains theory of operation and basic service
information for various systems common to all Honda motorcycles, motor
scooters and ATVs.
These Honda manuals are written for the professional technician, but most
mechanically-capable owners should find them helpful if they have the proper
tools and skills. Special Honda tools are necessary for some procedures.
Publication Item No.
61MEN60
Description
NOTE: Dealers and Companies, please provide dealer or company name, and also
the name of the person to whose attention the shipment should be sent. For
purchases outside U.S.A., please write to the address shown below for a quotation.
S
H
I
P
T
O
Customer Name
Attention
Street Address-No P.O. Box Number
Apt. #
City
State
Zip Code
Price Each*
2007 CRF450R Service Manual
Daytime Telephone Number (
$48.00
61CM002
Common Manual
$48.00
31MEN630
2007 CRF450R Owner’s Manual
$16.00
)
*Prices are subject to change without notice and without incurring obligation.
Order On-Line: www.helminc.com
Order Toll Free: 1-888-CYCLE93 (1-888-292-5393)
Check or money order enclosed payable to Helm, Inc. U.S. funds only. Do not
send cash.
(NOTE: For Credit Card Orders Only)
Monday - Friday 8:00 AM - 6:00 PM EST
OR
By completing this form you can order the materials desired. You can pay by
check or money order, or charge to your credit card. Mail to Helm,
Incorporated, at the address shown on this order form.
Publication
Item No.
Item Description
Qty.
Price
Each*
Total
Price
P
A
Y
M
E
N
T
Master
Card
*Prices are subject to change without notice and
without incurring obligation.
Orders are mailed within 10 days. Please allow
adequate time for delivery.
152
Consumer Information
Discover
Check here if your billing
address is different from the
shipping address shown above.
Account Number
Expiration Date: Mo. Yr
—
Customer Signature
Sub Total
Purchaser’s Sales
Tax
Mich. Add 6%
Calif. Add 8.25%
Handling
Charge
Grand Total
VISA
Date
These Publications cannot be returned for credit without receiving advance authorization within
14 days of delivery. On returns, a restocking fee may be applied against the original order.
$5.00
HELM P.O. BOX 07280, DETROIT, MICHIGAN 48207
134-164.qxd 06.5.11 13:15 ページ153
Contacting Honda
Your owner’s manual was written to cover most
of the questions you might ask about your
Honda. Any questions not answered in the
owner’s manual can be answered by your Honda
dealer. If he doesn’t have the answer right away,
he will get it for you.
If you have a difference of opinion with your
dealer, please remember that each dealership is
independently owned and operated. That’s why
it’s important to work to resolve any differences
at the dealership level.
If you wish to comment on your experiences with
your Honda or with your dealer, please send your
comments to the following address:
Motorcycle Division, American Honda Motor
Co., Inc., P.O. Box 2220, Torrance CA 905092220, mailstop: 100-4C-7B,
telephone: (866) 784-1870.
Please include the following information in your
letter:
•
•
•
•
name, address, and telephone number
product model, year, and VIN
date of purchase
dealer name and address
We will likely ask your Honda dealer to respond,
or possibly acknowledge your comments directly.
Consumer Information
153
134-164.qxd 06.5.11 13:15 ページ154
Your Honda Dealer
Once you purchase your new Honda, get familiar
with the organization of your Honda dealer so
you can utilize the full range of services
available.
Your dealer can inform you about competition
events in your area. You’ll also find that your
dealer is a source of information the Honda
Rider’s Club of America.
The service department is there to perform
regular maintenance and unexpected repairs. It
has the latest available service information from
Honda.
We’re sure you’ll be as pleased with the service
your Honda dealer continues to provide after the
sale as you are with the quality and dependability
of your Honda.
The parts department offers Genuine Honda
parts, Pro Honda products and Hondaline
accessories. The same quality that went into
your Honda can be found in Genuine Honda
replacement parts. You’ll also find comparable
quality in the accessories and products available
from the parts department.
154
Consumer Information
134-164.qxd 06.5.11 13:15 ページ155
The Honda Rider’s Club
One of the best ways to get the most enjoyment
from owning and riding your Honda is through
the Honda Rider’s Club of America. Your
purchase of a new motorcycle, scooter, ATV or
PWC from a participating U.S. Honda dealer
entitles you to a complimentary one-year
membership in the Club. There are hundreds of
HRCA Chapter-sponsoring dealers across the
USA with events and activities almost every
weekend. Membership benefits include:
• 24-hour, toll-free roadside assistance for your
new Honda (includes roadside assistance for
your transport vehicle [up to one ton] as long
as your Honda is aboard or in tow). For
street-legal motrcycles and scooters only.
• An exclusive HRCA website complete with
access to the official Honda Common Service
Manual, contests, insider information and
more.
• Reimbursement (up to $75) for successful
completion of a Motorcycle Safety
Foundation training course. Separate,
complimentary training from the Specialty
Vehicle Institute of America for purchasers of
new ATVs.
• One full year of Honda Red Rider magazine
(six issues).
• Discounts from HRCA partners for
experienced rider courses.
• Discounted vehicle insurance from the
HRCA’s insurance partner.
• Racing contingency programs and assistance
at selected dual-sport, off-road and motocross
events for off-road motorcycles and selected
ATVs.
If you purchased an off-road motorcycle, ATV or
PWC, your benefits do not include roadside
assistance or trip interruption protection.
Contact your Honda dealer for more information
or call: 1-800-847-4722 or log on to
www.hrca.honda.com.
Consumer Information
155
134-164.qxd 06.5.11 13:15 ページ156
Table of Contents
The following presents the contents of each
section of your owner’s manual.
MOTORCYCLE SAFETY...............................1
Important Safety Information..............................2
Important Safety Precautions..........................2
Accessories & Modifications ..............................3
Safety Labels.......................................................4
OPERATING CONTROLS .............................5
Operation Component Locations ........................6
BEFORE RIDING ............................................7
Are You Ready to Ride? .....................................8
Is Your Motorcycle Ready to Ride?....................9
Pre-ride Inspection..........................................9
BASIC OPERATING INSTRUCTIONS ......11
Safe Riding Precautions ....................................12
Starting & Stopping the Engine ........................13
Preparation ....................................................13
Starting Procedure ........................................13
Flooded Engine .............................................13
How to Stop the Engine................................14
Break-in Guidelines ..........................................15
SERVICING YOUR HONDA........................17
Before You Service Your Honda
The Importance of Maintenance .......................18
Maintenance Safety...........................................19
Important Safety Precautions........................19
Maintenance Schedule ......................................20
General Competition Maintenance ...................22
Before & After Competition Maintenance........26
Between Motos & Practice Maintenance .....26
After Competition Maintenance ...................26
Service Preparations
Maintenance Component Locations..................28
Seat Removal ....................................................29
Fuel Tank Removal ...........................................30
Subframe Removal............................................32
Service Procedures
Fluids & Filters
Fuel System.......................................................34
Engine Oil .........................................................36
Transmission Oil ...............................................39
Coolant ..............................................................41
Air Cleaner ........................................................43
Crankcase Breather ...........................................45
Engine
Throttle ..............................................................46
Engine Idle Speed .............................................48
Clutch System ...................................................49
Hot Start Lever..................................................53
Spark Plug .........................................................54
Valve Clearance.................................................55
Piston/Piston Rings/Piston Pin..........................65
156
Table of contents
Chassis
Suspension.........................................................73
Front Suspension Inspection.........................73
Rear Suspension Inspection..........................74
Brakes................................................................77
Wheels...............................................................81
Tires & Tubes ....................................................82
Drive Chain .......................................................84
Exhaust Pipe/Muffler ........................................87
Additional Maintenance Procedures .................90
Appearance Care ...............................................92
134-164.qxd 06.5.11 13:15 ページ157
Table of Contents
ADJUSTMENTS FOR COMPETITION .....95
Front Suspension Adjustments..........................96
Front Suspension Air Pressure......................96
Front Suspension Damping ..........................96
Fork Springs..................................................97
Front Suspension Disassembly .....................97
Damper Oil Change ....................................100
Fork Assembly ............................................103
Rear Suspension Adjustments.........................109
Rear Suspension Spring Pre-Load..............109
Rear Suspension Damping..........................110
Rear Suspension Race Sag..........................111
Suspension Adjustments for Track
Conditions ...................................................113
Suspension Adjustment Guidelines.................114
Carburetor Adjustments & Tuning Tips ..........117
Carburetor Components ..............................117
Carburetor Circuit Functions ......................119
Carburetor Removal....................................119
Carburetor Disassembly..............................121
Carburetor Assembly ..................................123
Standard Tuning Recommendations ...........124
Adjustments for Altitude & Temperature ...124
Special Tuning Conditions..........................125
Pre-Adjustment Checks ..............................125
Carburetor Minor Adjustments ...................126
Spark Plug Reading ....................................128
Chassis Adjustments........................................129
Rear End .....................................................129
Fork Height/Angle ......................................129
Wheelbase ...................................................129
Gearing ............................................................130
Tire Selection for Track Conditions................131
Personal Fit Adjustments ................................132
Control Positioning .....................................132
Handlebar Position, Width & Shape...........132
TIPS ................................................................133
Transporting Your Motorcycle ........................134
Storing Your Honda.........................................135
Preparation for Storage ...............................135
Removal frrom Storage...............................135
You & the Environment ..................................136
Troubleshooting...............................................137
TECHNICAL INFORMATION ..................139
Vehicle Identification ......................................140
Specifications ..................................................141
Torque Specifications......................................142
Oxygenated Fuels............................................145
Competition Logbook .....................................146
Optional Parts List ..........................................148
Spare Parts & Equipment................................149
Wiring Diagram...............................................150
CONSUMER INFORMATION ...................151
Authorized Manuals ........................................152
Contacting Honda............................................153
Your Honda Dealer..........................................154
The Honda Rider’s Club .................................155
Table of contents
157
134-164.qxd 06.5.11 13:15 ページ158
Index
A
C
accessories...........................................................3
adjustments,
altitude and temperature.............................124
carburetor ...................................................126
chassis ........................................................129
control freeplay .............................44,49,53,77
for competition.............................................95
gearing........................................................130
personal fit .................................................132
suspension, front ..........................................96
suspension, rear..........................................109
suspension, track conditions ......................113
tire selection .................................................83
after competition maintenance ..........................26
air cleaner ..........................................................43
air pressure,
front suspension ...........................................96
tires...............................................................82
apparel, protective ...............................................2
appearance care .................................................92
authorized manuals..........................................152
B
basic operation...................................................11
before riding ........................................................7
between motos & practice maintenance ...........26
brakes,
fluid level .....................................................78
lever, front adjustment .................................77
pad wear .......................................................80
pedal height ..................................................77
break-in guidelines ............................................15
158
Index
capacity, fuel .....................................................34
carburetor,
adjustment ..................................................124
circuit functions..........................................119
components.................................................117
disassembly/assembly ................................121
idle speed .....................................................48
minor adjustments ......................................126
removal.......................................................119
care, appearance ................................................92
chain drive.........................................................84
chassis adjustments .........................................129
choke knob ........................................................13
cleaner, air .........................................................43
cleaning, appearance care .................................92
clutch system, adjustment .................................49
consumer information .....................................151
competition logbook........................................146
contacting Honda ............................................153
controls, operating...............................................5
coolant ...............................................................41
customer service..............................................154
cylinder system..................................................67
D
damping adjustments,
front ..............................................................96
rear..............................................................110
dealer, your Honda ..........................................154
diagram, wiring ...............................................150
drive chain.........................................................84
E
engine,
flooded .........................................................13
idle speed......................................................48
number .......................................................140
pinging .........................................................34
starting..........................................................13
stop button....................................................14
stopping ........................................................14
won’t start ..................................................137
environment, protecting ..................................136
F
filter,
air .................................................................43
oil .................................................................37
flooded engine, starting.....................................13
fork,
front suspension adjustment.........................96
front suspension inspection..........................73
oil recommendation......................................75
front brake lever adjustment .............................77
front suspension maintenance ...........................96
fuel,
line................................................................34
filter ..............................................................35
recommendation...........................................34
refueling .......................................................34
system...........................................................34
oxygenated .................................................145
tank capacity ................................................34
valve .............................................................13
134-164.qxd 06.5.11 13:15 ページ159
Index
G
gap, spark plug ..................................................54
gasohol ............................................................145
gasoline..............................................................34
gearing.............................................................130
guidelines, suspension adjustment ..................114
H
handlebar inspection..........................................90
Honda,
contacting ...................................................153
Rider’s Club ...............................................155
service manual............................................152
your dealer..................................................154
I
identification, vehicle......................................140
idle speed, engine ..............................................48
inspection, pre-ride..............................................9
L
labels, safety........................................................4
logbook, competition.......................................146
M
maintenance,
after competition ..........................................26
before & after competition...........................26
between motos & practice............................26
component locations ....................................28
general competition......................................22
importance....................................................18
safety ............................................................19
schedule........................................................20
manual, service................................................152
modifications.......................................................3
O
oil,
engine ...........................................................36
fork ...............................................................75
transmission .................................................39
operating,
controls...........................................................5
instructions ...................................................11
operation component locations ...........................6
optional,
parts list ......................................................148
sprockets.....................................................130
oxygenated fuels..............................................145
P
pads, brake.........................................................80
parts, optional..................................................148
personal fit adjustments ..................................132
pinging, engine..................................................34
plug, spark .........................................................54
pre-load, rear suspension.................................109
pre-ride inspection...............................................9
protective apparel ................................................2
R
rear suspension maintenance...........................109
Rider’s Club Honda.........................................155
riding,
apparel ............................................................2
basic operation .............................................11
before..............................................................7
important safety information..........................2
safety precautions...........................................2
S
safety,
a few words about .................Safety Messages
important information ....................................2
important precautions.....................................2
labels ..............................................................4
maintenance..................................................19
riding precautions.........................................12
schedule, maintenance.......................................20
serial numbers .................................................140
service,
customer .....................................................154
manuals ......................................................152
spare parts........................................................149
spark knock .......................................................34
spark plug,
maintenance..................................................54
reading........................................................128
specifications...................................................141
spring pre-load, rear suspension .....................109
starting,
engine ...........................................................13
troubleshooting...........................................137
steering stem inspection ....................................90
stopping engine .................................................14
storage .............................................................135
subframe ............................................................32
(cont’d)
Index
159
134-164.qxd 06.5.11 13:15 ページ160
Index
suspension,
front ..............................................................73
rear................................................................74
suspension adjustment,
front ..............................................................96
rear..............................................................109
for track conditions ....................................113
guidelines ...................................................114
T
transmission oil .................................................39
tuning tips ........................................................117
throttle,
freeplay.........................................................46
inspection .....................................................47
tires,
air pressure ...................................................82
flat ................................................................82
selection........................................................83
tools ...............................................................149
torque specifications ................................142-144
transporting......................................................134
troubleshooting................................................137
tubes, replacing .................................................82
V
valve, fuel..........................................................13
vehicle identification no. (VIN) ......................140
W
washing your motorcycle ..................................92
wheels................................................................81
wiring diagram ................................................150
160
Index
134-164.qxd 06.5.11 13:15 ページ161
Memo
161
134-164.qxd 06.5.11 13:15 ページ162
162
Memo
134-164.qxd 06.5.11 13:15 ページ163
Memo
163
134-164.qxd 06.5.11 13:15 ページ164
Quick Reference
The following is a brief, but important collection
of information you need to know about your
Honda. You’ll also find space to record
important notes.
Record important information here:
VIN
Engine No.
Owner’s:
Name
How To Avoid Costly Repairs
Address
City/State
The engine of your Honda can be the most
expensive component to repair. Proper
maintenance, especially the use of the
recommended fluids and filters, prevents
premature wear and damage.
Phone
Dealer’s:
Name
Address
City/State
Frequent causes of costly engine repairs are:
• Transmission oil & engine oil: insufficient
quantity, improper oil.
• Air cleaner: dirty, leaking because of
Phone
Service Mgr.
Maintenance
The maintenance schedule (page 21) lists service frequencies for:
each race or about 2.5 hours,
every 3 races or about 7.5 hours, every 6 races or about 15.0 hours,
every 9 races or about 22.5 hours and every 12 races or about 30.0 hours
Pre-ride Inspection
Check the items listed on the Pre-ride Inspection checklist each time before you ride
(page 9):
Fuel/Tank Capacity
unleaded gasoline, pump octane number of 91 or higher
tank: 1.90 US gal (7.2R)
Engine oil
Pro Honda GN4 4-stroke oil or an equivalent motorcycle oil.
Transmission oil
Pro Honda GN4 4-stroke oil or an equivalent motorcycle oil.
Tires
Tire Pressure (cold)
80/100 – 21 51M
DUNLOP
D742FA
Rear
110/90 – 19 62M
DUNLOP
D756
Type
bias-ply, tube
Front: 15 psi (100 kPa, 1.0kgf/cm2)
Rear: 15 psi (100 kPa, 1.0kgf/cm2)
Spark Plug
standard: IFR8H11 (NGK) or VK24PRZ11 (DENSO)
optional: IFR9H11 (NGK) or VK27PRZ11 (DENSO)
Coolant
ethylene glycol antifreeze (silicate-free) for aluminum engines in 50/50 solution with
Pro Honda HP Coolant or equivalent distilled water.
D.I.D 520DMA2/114
Drive Chain Size/Link
Quick Reference
Front