1
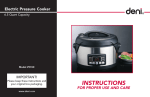
Pressure Cooker
®
Model #9700
IMPORTANT!
Please keep these instructions and
your original box packaging.
www.deni.com
INSTRUCTIONS
FOR PROPER USE AND CARE
IMPORTANT SAFEGUARDS
When using this electrical appliance, safety precautions
should always be observed, including the following:
n
n
n
n
n
n
n
n
n
n
n
n
1
Read all of the instructions before using.
Close adult supervision must be provided when this
appliance is used by or near children.
Keep pressure cooker out of the reach of children.
Do not touch hot surfaces. Use handles or knobs.
Using attachments not recommended or sold by
Keystone Manufacturing Co., Inc. may cause hazards.
Do not operate with a damaged cord or plug. If the
appliance is not working as it should, has been
dropped or damaged, left outdoors or dropped into
water, do not use it and return it to the manufacturer
for proper service and replacement or repair.
Do not let cord hang over the edge of the table or
counter, or touch hot surfaces.
Make sure appliance is off before unplugging from
wall outlet.
Always unplug before cleaning and removing parts.
For indoor use only.
Do not place near hot gas or electric burner.
Do not cover the appliance or have it near flammable
material including curtains, draperies, walls, and the
like when in operation.
n
n
n
n
n
n
n
n
n
n
n
n
Always use in a well ventilated area.
To protect against electrical shock, do not immerse
plug, cord or housing in water or any other liquid.
Keep hands and face away from pressure regulator
knob when releasing pressure.
After cooking, use extreme caution when removing the
lid. Serious burns can result from steam inside the unit.
While the unit is in operation, never remove the lid.
Do not use without the removable cooking pot in place.
Do not cover the pressure valves with anything. An
explosion may occur.
Keep Pressure Cooker out of the reach of children.
Do not attempt to dislodge food when the appliance is
plugged in.
Do not fill the Pressure Cooker more than 1/2 full with
food or 2/3 full with liquid. When cooking foods that
expand during cooking do not fill the unit over 1/2 full.
Foods such as applesauce, cranberries, pearl barley,
oatmeal or other cereals, split peas, noodles,
macaroni, rhubarb, or spaghetti should not be cooked
under pressure in the pressure cooker. These foods tend
to foam, froth and sputter, and may block the floating
valve.
To reduce the risk of electrical shock, cook only in the
removable cooking pot.
®
n
n
n
n
n
n
n
Do not use an extension cord with this Pressure Cooker.
However, if one is used, it must have a rating equal to
or exceeding the rating of this appliance.
The Pressure Cooker is for household use only.
The Pressure Cooker should not be used for other than
the intended use.
Extreme caution should be used when moving any
appliance containing hot food or liquid.
Servicing or repair should only be completed by a
qualified technician.
The Pressure Cooker has a polarized AC (Alternating
Current) plug (one blade is wider than the other). This
plug will fit in a polarized outlet only one way, as a
safety feature. Reverse the plug if the plug does not fit
fully in the outlet. Contact a qualified electrician if it still
does not fit. Do not attempt to defeat this safety feature.
WARNING: Never deep fry or pressure fry in the
pressure cooker. It is dangerous and may cause a fire
and serious damage.
SAVE THESE INSTRUCTIONS
Additional Safety Features
Your Deni Pressure Cooker has four safety features.
1. The locking pin will prevent the lid from being opened
when the pressure inside is over .725 psi (pounds per
square inch).
2. When cooking under low pressure, the unit will
automatically shut off if the pressure exceeds 5 psi.
3. When cooking under high pressure, the unit will
automatically shut off if the pressure exceeds 10 psi.
4. The pressure regulator knob will be forced upward to
release steam/pressure when the unit reaches 13 psi.
If this function fails, and the unit reaches 18 psi, the
floating valve will be forced to release steam/pressure.
Note: If the two safety valves fail, and the pressure
continues to build up to 27.5 psi, the inner cooking
pot will be forced down, creating a gap between the
lip of the inner pot and the rubber gasket, allowing
the steam/pressure to escape.
2
FEATURES
Cool Touch Handle
Pressure Regulator Knob
Floating Valve
Rubber Gasket
Floating Valve
Locking Pin
Pressure
Safety Valve
Self Locking Lid
Stationary Pot
Anti-Blocking Case
(Pull up to remove)
Condensation Reservoir
Cool Touch Handle
Cool Touch Housing
Temperature Sensor
Heating Plate
Removable Cooking Pot
3
Control Panel
®
Functions
Pressure Regulator Knob:
In down position when cooking under pressure, up position when steaming.
Floating Valve:
Safety valve allows excess pressure to escape if to much pressure is building up.
Self Locking Lid:
Safety feature that does not let you open the lid until the pressure has dropped to zero.
Removable Cooking Pot:
5 qt. capacity non-stick removable pot provides even heat distribution.
Water Collector:
Collects excess condensation during cooking.
Rubber Gasket:
Creates an air tight seal that is needed for the Pressure Cooker to operate.
Pressure Safety Valve:
Allows excess pressure to escape if too much pressure is building up.
Anti-Blocking Case:
Pull up to release the pressure regulator knob for cleaning.
Control Panel Functions:
Warm function reheats or keeps cooked food warm for a long period of time.
Brown function allows you to braise your food before cooking it under pressure.
Steam function quickly brings cooking liquid to a boil for steaming food or cooking rice.
Slow Cook function cooks your food slowly to retain flavor and tenderness (9 1/2 hour timer).
NOTE: 180°F is the lowest setting on a traditional slow cooker. Most recipes using a
slow cooker require 8-9 hours.
Delay Time feature allows you to begin cooking food up to 8 hours later.
4
Before First Use
1. Remove all packing materials and literature.
2. Wash all removable parts in warm soapy water. Rinse
and dry all parts thoroughly. Wipe the outer housing
with a clean damp cloth. NEVER immerse the housing
in water or any other liquid. NEVER clean any parts in
a dishwasher.
3. Make sure the rubber gasket is seated properly inside
the lid. To ensure the correct fitting, fill the removable
cooking pot with two-thirds water and run on HIGH
PRESSURE for 15 minutes.
4. Release the pressure by turning the pressure regulator
knob to STEAM. The floating valve will drop.
5. Let the appliance cool to room temperature and then
empty and clean.
How To Operate Using Pressure Setting
Before using the pressure cooker each time, check to be sure that the
rubber gasket and the pressure regulator valve are clean and positioned
properly. (See pages 8 and 9.)
5
1. Plug the cord into a wall outlet.
2. Position the removable cooking pot in the appliance.
3. Place food in the cooking pot according to the recipe
or chart. NOTE: When cooking most foods under
pressure, 1 cup (8 oz) of liquid should be added.
4. Place the lid on the Pressure Cooker and turn it counterclockwise until it locks into place. (The locking pin will click
into place.)
5. Turn the pressure regulator knob to PRESSURE.
6. Choose the desired cooking mode by pressing either the
HIGH or LOW pressure button on the control panel. The
light on the button will flash and the digital display will
show 1. (This equals 1 minute cooking time.)
7. Set the desired time by pressing the button once for each
additional minute or by continuously holding the button
down. The longest cooking time is 99 minutes.
8. Press the START/STOP button to begin cooking. The
indicator light will stop flashing.
9. If you forget to select a desired cooking time or forget to
press the START/STOP button, the unit will beep twice
and the digital display will read 0.0 after 30 seconds.
10. The unit will begin to count down in minutes, after the
appropriate pressure has been reached. (The floating valve
will rise when the pressure is reached.) The pressure cooker
will beep three times at the end of the cooking time.
11. When cooking is finished, let the pressure drop on its
own (also called the natural release feature), or release
immediately by turning the pressure regulator knob towards
STEAM in short bursts (also called the quick release
method) until the pressure is reduced.
®
NOTE: Press the START/STOP button when cooking time is
complete, or to cancel and reset. Otherwise, the
pressure cooker will beep periodically as a reminder
that the cooking time is complete.
WARNING: Do not hold the pressure regulator knob. Hot
steam/liquid may be ejected. Keep hands and face
away from steam vents, use pot holders when removing
the inner pot or touching any hot items, and never force
the lid open. The lid will only open once the pressure is
released. Remove the lid by lifting it away from you to
avoid being burned by the steam.
Warm Setting
This program reheats or keeps cooked food warm for a
long period of time.
1.
2.
3.
2.
Place cooked food in removable cooking pot.
Place lid on pressure cooker.
Turn the pressure regulator knob to STEAM.
Press the WARM button. The light on the button will
flash and the digital display will read 0.0.
3. Press the START/STOP button to begin the program.
The indicator light will stop flashing.
Brown Setting
This program allows you to braise your food before
cooking it in under pressure. Brown your meat or poultry for
the best flavor and texture, unless otherwise indicated in the
recipe. Food should be patted dry with a paper towel before
browning. For best results, make sure the oil is hot before
adding your meat or poultry. Brown in batches to keep the
correct temperature.
1. Position the removable cooking pot in the pressure
cooker.
2. Add the appropriate amount of oil as per recipe.
3. Press the BROWN button. The light on the button will
flash and the display will read 0.0. The lid should
remain off.
4. Press the START/STOP button. The indicator light will
stop flashing.
5. After about one minute of preheating, add food and
begin browning.
6. During this mode, the pressure cooker will beep 3 times
every 10 minutes as a warning that this is a high
temperature setting. NOTE: Do not leave pressure
cooker unattended while browning foods.
6
Steam Setting
This program quickly brings cooking liquid to a boil for
steaming food or cooking rice.
7
1. Position the removable cooking pot in the pressure
cooker.
2. Place a small, heat-resistant rack or basket (not
included) in the bottom of the removable cooking pot.
3. Add at least 8 oz. of water so that the bottom of the
rack is above the liquid.
4. Add the food. Do not fill the pot more than two-thirds
full. Note: If steaming rice, put the rice in a 8” or
smaller bowl and place on the rack.
5. Place the self-locking lid onto the removable cooking
pot and turn the pressure regulator knob to STEAM.
6. Press the STEAM button. The light on the button will
flash and the digital display will read 1. (This equals 1
minute cooking time.)
7. Set the desired time by pressing the button once for
each additional minute or by continuously holding the
button down. The longest cooking time is 99 minutes.
8. Press the START/STOP button to begin cooking. The
indicator light will stop flashing.
9. If you forget to select a desired cooking time or forget
to press the START/STOP button, the unit will beep
twice and the digital display will read 0.0 after 30
seconds.
NOTE: The lid can be opened while cooking to check the
food. Use caution when removing the lid. Never place
your face over the pressure cooker when removing the
lid. Steam escapes as soon as the lid is opened and can
cause serious burns.
Slow Cook Setting
1. Place the removable cooking pot in the pressure cooker.
2. Place the food to be slow cooked in the cooking pot.
3. Place the self-locking lid onto the removable cooking pot
and turn the pressure regulator knob to STEAM.
4. Press the SLOW COOK button. The light on the button
will flash and the digital display will read .5. (This
equals a half hour of cooking time.)
5. Set the desired time by pressing the button once for
each additional half hour or by continuously holding
the button down. The longest cooking time is 9 1/2 hours
with a temperature of 180°F. Note: 180°F is the lowest
setting on a traditional slow cooker.
6. Press the START/STOP button to begin cooking. The
indicator light will stop flashing.
7. If you forget to select a desired cooking time or forget
to press the START/STOP button, the unit will beep twice
and the digital display will read 0.0 after 30 seconds.
8. The unit will begin to count down in half hour
increments, when the temperature reaches about 200
degrees.
9. When the cooking time is up the unit will beep.
®
Delay Time Setting
This function allows you to begin cooking food up to 8
hours later in half hour increments. You can use the delayed
time setting with slow cook, steam,high and low pressure.
1. Press the DELAY TIME button for the delayed time
setting.
2. Select the desired cooking mode and time by pressing
the delay button until you reach the appropriate time.
3. Press the START/STOP button. The appliance will begin
cooking after the set time has elapsed.
NOTE: Do not use the delayed time function when cooking
foods that might spoil if left out at room temperature.
Cleaning/Maintenance
Do not wash any parts of the pressure cooker in the
dishwasher. Always wash the pressure cooker thoroughly
after every use, or if it has not been used for an extended
period of time.
1. Unplug and let the unit cool before cleaning.
2. Wash the removable cooking pot with warm soapy
water. Rinse and dry thoroughly.
3. Wipe the outer housing with a clean damp cloth.
Do not submerge in water.
4. Remove the condensation reservoir by pulling down.
Clean with warm, soapy water. Rinse and dry
thoroughly. Replace by pushing up.
5. Turn the lid upside down, grasp the rubber gasket on
either side and pull up. Clean the rubber gasket in warm
soapy water. Rinse and dry thoroughly. Replace the
gasket by pushing it down inside the edge of the lid.
Make sure the groove in the center of the gasket is
positioned around the metal ring on the inside edge of
the lid. Note: If the gasket is not positioned properly, the
unit will not work.
NOTE: The rubber gasket must always be properly
positioned on the underside of the lid. Check
periodically to make sure that it is clean, flexible, and
not cracked or torn. (See pg. 5 “Before First Use”, #3.)
6. If the rubber gasket is damaged, do not use the
appliance and contact the customer service department
at 1-800-DENI-VAC.
7. In order to maintain good performance of your
pressure cooker, the bottom of the removable cooking
pot, in the area of the sensor pad, must be cleaned
after each use. Wipe with a soft damp cloth and be
sure to dry thoroughly.
8. Never use abrasive cleaners or scouring pads to clean
any of the parts.
8
9
NOTE: Store the pressure cooker with the lid resting upside
down on the removable cooking pot. This will protect
the valves, knobs and pressure regulator on the top of
the lid. If the pressure cooker is stored with the lid
sealed, stale odors may form inside.
Recommended Cooking Times
Vegetables
High Pressure
Cleaning the Pressure Regular Knob
Apples, chunks (low pressure)
2 mins
Check that the pressure regulator knob and the pressure
safety valves are in good working order before each use.
Artichokes, whole
8-10 mins
Asparagus, whole
1-2 mins
1. After the unit has cooled, remove the lid.
2. Press down and turn the pressure regulator knob
counter clockwise past the STEAM setting and carefully
remove.
3. Turn the lid over and place on a table top. Pull out the
anti-locking case. Using a brush, check and remove
any food or foreign particles that may be lodged in the
floating valve. Replace the anti-locking case.
4. Replace the pressure regulator knob by lining the
notches up to the inside wall of the pressure regulator
chamber in the lid and turn clockwise.
Beans
fresh green or wax
shelled lima
2-3 mins
2-3 mins
Cooking times are approximate times. Use these as general
guidelines. Size and variety will alter cooking times.
Beets
1/4”
slices
whole, peeled
Broccoli, florets or spears
3-4 mins
12-15 mins
2-3 mins
Brussel sprouts, whole
3-4 mins
Cabbage, quartered
3-4 mins
Carrots, 1/4” slices
1-2 mins
®
Meat and Poultry
High Pressure
High Pressure
Beef, Pork, Lamb (1-2” cubes)
15-20 mins
Cauliflower, florets
2-4 mins
Corn on the cob
3-5 mins
Eggplant, 11/4”
2-3 mins
Beef/Veal
Roast, brisket
Shank 11/2” thick
50-60 mins
25-35 mins
Peas, shelled
1-11/2 mins
Meatballs, browned
8-10 mins
Lamb, boneless roast
45-55 mins
40-50 mins
20-25 mins
30-40 mins
Potatoes
Pieces, slices
Whole, small
Whole, medium
5-8 mins
5-8 mins
10-12 mins
Rice
Brown
White
Pork
Loin roast
Smoked butt
Ham shank
15-20 mins
5-7 mins
Spinach, fresh
2-3 mins
Squash
Fall, 1” chunks
Summer, sliced
Chicken
Boneless breast, thigh
Pieces
Whole
8-10 mins
10-12 mins
15-20 mins
4-6 mins
1-2 mins
Turkey breast, whole
30-40 mins
Fish
High Pressure
Steaks, fillets
3/4”
4 mins
1”
5 mins
11/4”
6 mins
11/2”
7 mins
10
Hints and Tips
n
n
n
n
n
n
n
11 n
To ensure the best cooking performance when cooking
under pressure, always use at least 8 oz. of water or
liquid in your recipes to enable enough steam to be
created to produce pressure.
When using the high and low pressure settings, the
timer should not begin counting down until there
is enough pressure.
When cooking under pressure, if you are unsure of the
cooking time, it is better to under cook and use the
quick release method and check for doneness. If not
done, continue cooking under pressure.
Never fill the Pressure Cooker more than half full with
food or 2/3 full with liquid. The pressure cooker must
have enough liquid to steam or the food will not cook
properly.
If the electric circuit is overloaded with other
appliances, your appliance may not operate. The
pressure cooker should be operated on a separate
electrical circuit.
Tougher, less expensive cuts of meat are better suited
for the pressure cooker because cooking under
pressure breaks the fibers down for tender results.
Fresh fruit should be cooked on low pressure.
Add a tablespoon of oil to the water to reduce the
amount of foaming that beans produce.
Troubleshooting
If you have not added sufficient liquid and you notice that
the floating valve has not risen, but the timer is counting
down, perform the following steps:
1.
2.
3.
4.
5.
6.
Stop the pressure cooker by pressing the START/STOP
button.
Turn the pressure regulator knob to STEAM, using
short bursts, until the pressure is fully released.
Remove the lid and add approximately 1 cup of
water/stock or any liquid. Stir food to disperse liquid.
Replace the lid and lock into position.
Press the LOW or HIGH PRESSURE button and set the
desired time.
Press the START/STOP button to begin cooking again.
If steam is leaking from under the cover because the cover
is not properly closed, the gasket isn’t positioned properly
or is damaged, or the pressure cooker is over filled,
follow these steps:
1.
2.
3.
4.
Release any pressure using the quick release method.
Remove the gasket and check for tears or cracks.
Check to be sure the gasket is positioned properly.
If too full, remove excess liquid and continue cooking.
®
If you can’t open or remove the cover:
1.
2.
3.
4.
Be sure all of the pressure has been released.
If you still cannot open it, bring the contents of the cooker
up to pressure again.
Release the pressure completely.
If the cover still won’t come off, call Keystone Manufacturing
Company, Inc. customer service at 1-800-DENI-VAC.
Recipes
Arroz con Pollo (Chicken and Rice)
Servings: 4-6
Prep Time: 15 minutes
Cooking Time: 7 minutes under pressure
Ingredients
Salt and pepper
One 3 lb. chicken, cut into eighths with the skin removed
3 tbsp. olive oil
1 chorizo sausage
1/2 cup white wine
1 cup chopped onion
2 cloves garlic, peeled and minced
11/2 cups red bell pepper, cored, seeded, and diced
2 cups canned plum tomatoes, seeded and chopped coarsely
1 cup long-grain white rice, uncooked
1/2 cup frozen peas
3 cups chicken broth or stock
1tsp. salt
Method
1. Liberally salt and pepper the chicken.
2. Heat 2 tbsp. of olive oil in the pressure cooker, using the
BROWN setting. In batches, brown the chicken. Set
aside. Add the chorizo and cook for 1 minute. Add
the browned chicken to the pressure cooker. Pour in the
wine and cook for 2 minutes. Remove contents with all
juices and set aside.
3. Heat the remaining 1 tbsp. of olive oil in the pressure
cooker. Add onion, garlic, and red bell pepper. Heat
until the onion is soft. Add tomato and rice and cook for
1 minute. Add peas, stock, salt, chicken, and chorizo,
with all juices. Mix well.
4. Cover and set to high pressure. Cook for 7 minutes.
5. Release the pressure using the quick-release method.
6. Remove lid.
7. Fluff rice and serve.
12
Bar-B-Q Beef
Servings: 6-8
Prep Time: 20 minutes
Cooking Time: 60 minutes under pressure
Ingredients
1 tbsp. vegetable oil
4 lbs. boneless, rump roast or trimmed chuck
11/2 cups onion, sliced
11/2 cups celery, finely chopped
11/2 cups prepared barbecue sauce
2 bay leaves
Dash of tabasco to taste
2 tbsp. brown sugar
1 can (12 oz) beer
11/2 tsp. chili powder
Method
1. Heat oil in the pressure cooker using the BROWN
setting. Add the roast and evenly brown all sides.
2. Add onions and celery and cook for 1 minute. Take out
the roast. Put in the barbecue sauce, beer, and chili
powder. Mix well. Place the roast back in the pressure
cooker.
3. Cover and set to high pressure. Cook for 60 minutes.
4. Release the pressure using the quick-release method.
When the pressure has dropped, unlock and remove
cover. Test the roast for tenderness with a fork. If not
tender, cover and cook under pressure for an
13
additional 10 minutes.
5. Remove the roast and let sit for at least 15 minutes.
Slice thin against the grain. Serve with barbecue sauce.
Golden Turkey Breast
Servings: 6
Prep Time: 15 minutes
Cooking Time: 40 minutes under pressure
Ingredients
Salt and pepper
4-5 lb. whole turkey breast, wings removed, rinsed under
cold water and patted dry
2 tbsp. vegetable oil
1 cup onion, thinly sliced
2 garlic cloves, crushed
11/2 cups carrots, peeled and thinly sliced
11/2 cups celery, sliced thin
1 cup chicken broth
1 cup dry white wine
2 tsp. dried thyme
1 bay leaf
1 tbsp. cornstarch
2 tbsp. water
®
Method
1. Liberally salt and pepper the turkey breast.
2. Heat oil in the pressure cooker using the BROWN
setting. Insert the turkey breast and brown on all sides.
Remove and set aside. Add onion, garlic, carrots, and
celery. Brown until the onion is soft. Add broth, wine,
thyme, and bay leaf, cooking for 2 minutes. Place the
turkey breast back in the pressure cooker.
3. Cover and set to high pressure. Cook for 40 minutes.
4. Release the pressure using the quick-release method.
5. Unlock and remove lid. Carefully remove turkey and
place on large plate. Cover with foil.
6. Filter the cooking liquid. Pour it back into the pressure
cooker with the cornstarch and water. Whisk until thick.
Season to taste with salt and pepper.
7. Slice the turkey. Serve with gravy.
Easy Corn Chowder
Servings: 4-6
Prep Time: 10 minutes
Cooking Time: 8 minutes under pressure
Ingredients
2 tbsp. vegetable oil
1 cup onion, chopped
1 cup red bell pepper, cored, seeded and diced
1 cup carrots, peeled and cut into 1/4 inch rounds
1 cup celery, cut into 1/4 inch slices
11/2 cups potatoes, peeled and diced
2 cups frozen corn kernels
1 cup frozen green peas
6 cups chicken or vegetable broth or stock
Salt and pepper to taste
2 cups wide egg noodles
1 tbsp. chopped fresh parsley or snipped dill
2 cups cooked diced chicken (optional)
Method
1. Heat oil in pressure cooker, using the BROWN setting.
Add onions, peppers, carrots, celery, and potatoes.
Brown until soft. Add corn and peas.
2. Cover, set to high pressure, set time for 8 minutes.
3. Let the pressure drop using the quick-release method.
4. Unlock and remove lid.
5. Season with salt and pepper.
6. Heat the chowder until it boils, using the STEAM
setting. Add noodles and cook until al dente. Stir in
parsley and chicken. Serve hot.
14
Rich Cauliflower Soup
Servings: 4-6
Prep Time: 15 minutes
Cooking Time: 10 minutes under pressure
Ingredients
2 tbsp. olive oil
11/2 cups onion, chopped
1 large head cauliflower, trimmed, broken into small florets
2 cups half and half
4 cups chicken or vegetable broth or stock
Salt and pepper to taste
2 tbsp. fresh parsley, chopped
1 tsp. fresh mint
Method
1. Heat olive oil in the pressure cooker, using the BROWN
setting. Add onion and brown until soft. Add cauliflower,
stock, and half and half.
2. Cover, set to high pressure, and set timer for 10 minutes.
3. Let the pressure drop using the quick-release method.
4. Unlock and remove lid. The cauliflower should be very
soft. If it’s still hard, cook under pressure for an additional
2-3 minutes, or until tender.
5. Puree the soup in batches in a blender until smooth. Pour
back in the pressure cooker. Season with salt and pepper.
Stir in parsley and mint.
15
Double-Up Chocolate Cheesecake
Servings: 6
Prep Time: 15 minutes
Cooking Time: 20 minutes under pressure
Ingredients
3/4 cup chocolate wafer cookie crumbs
2 tbsp. butter, melted
2 packages (8 oz each) cream cheese, softened
1/2 cup sweetened condensed milk
3 eggs
2 cups semisweet chocolate chips, melted
1 tsp. vanilla
21/2 cups water
Method
1. Lightly grease a 7 or 8 inch spring form pan. Cover the
outside of the pan with aluminum foil.
2. Combine cookie crumbs and butter. Press into bottom of
pan and up the sides about 1 inch.
3. In a large bowl, mix cream cheese and condensed milk,
with a mixer on medium speed, until fluffy. On low
speed, add eggs one at a time. Insert melted chocolate
and vanilla. Mix until well blended. Pour into crust.
Cover tightly with aluminum foil.
4. Place a metal rack in the removable cooking pot of the
pressure cooker. Pour in water.
®
5. Fold a 24 inch length of foil in half lengthwise, making
it narrow. Center the pan on the foil and lower into the
pressure cooker. (The foil is used as a swing to lower
the pan.) Crease the ends of the foil down on top of
the pan.
6. Cover, set to high pressure, and set time for 20
minutes.
7. Let it sit for an undisturbed 10 minutes after cooking
time has elapsed. Release any left over pressure using
the quick-release method.
8. Unlock and remove the lid. Remove cheesecake
from the pressure cooker by pulling up the ends of the
foil swing. Remove and discard foil. Let cool to room
temperature before refrigerating overnight.
Dijon Pork Stew
Servings: 6-8
Prep Time: 20 minutes
Cooking Time: 14 minutes
Ingredients
Salt and pepper
2 lbs. pork shoulder, cut into 1” cubes
2 tbsp. olive oil
2 cups onion, chopped
2 cloves garlic, chopped
1 tbsp. all-purpose flour
3/4
cup dry red wine
chicken or beef broth
5 fresh sage leaves, chopped
8 small red potatoes, scrubbed, peeled, quartered
1 large carrot, thinly sliced
11/2 tbsp. dijon or whole-seed mustard
2 tbsp. minced flat-leaf Italian parsley
3/4
Method
1. Liberally salt and pepper the pork shoulder. Set aside.
2. Heat olive oil in the pressure cooker, using the BROWN
setting. Add onions and garlic, browning until onion is
soft. Add the pork and cook until golden brown. Dust
with flour. Stir well. Add red wine, broth, and sage.
3. Cover and set to high pressure for 10 minutes.
4. Let the pressure drop using the quick-release method.
5. Unlock and remove lid.
6. Add potatoes and carrots.
7. Cover and set to high pressure for 8 minutes.
8. Let the pressure drop using the quick-release method.
9. Unlock and remove cover.
10. Season to taste with salt and pepper. Stir in
dijon/mustard and parsley before serving.
16
Ratatouille (Vegetable Stew)
Servings: 4-6
Prep Time: 20 minutes
Cooking Time: 5 minutes under pressure
Ingredients
3 tbsp. olive oil
1 cup onions, chopped
2 cloves garlic, peeled and thinly sliced
11/2 cups green bell pepper, cored, seeded, diced
11/2 cups red bell pepper, cored, seeded, diced
2 cups zucchini, trimmed, quartered lengthwise, diced
2 cups eggplant, peeled and cut into 1/2 inch cubes
1 can (141/2 oz) diced tomatoes in puree
1/4 cup water
1/2 tsp. dried thyme
11/2 tsp. salt
1/4 tsp. black pepper
2 tbsp. shredded basil
2 tbsp. minced flat-leaf Italian parsley
Salt and pepper to taste
2 tbsp. balsamic vinegar
Method
1. Heat olive oil in the pressure cooker, using the BROWN
setting. Add onions, garlic, green and red bell
peppers, browning until onion is soft.
2. Add zucchini, tomatoes, eggplant, water, thyme,
11/2 tsp. salt and 1/4 tsp. pepper. Brown for 4 minutes.
17
3.
4.
5.
Cover and set to high pressure for 5 minutes.
Release the pressure using the quick-release method.
Unlock and remove lid. Add basil and parsley.
Season with salt and pepper. Add the vinegar. Serve hot.
Steamed Lemon Artichokes
Servings: 4
Prep Time: 15 minutes
Cooking Time: 7 minutes under pressure
Ingredients
1 cup water
2 juiced lemons, rinds reserved
1 tsp. salt
1 bay leaf
4 large artichokes, trimmed as per step 2
1 cup mayonnaise
1 clove garlic, peeled and minced
Dash of tabasco sauce
2 tbsp. minced flat-leaf Italian parsley or snipped dill
Method
1. Add water to the pressure cooker. Add all but 3
tbsp. of lemon juice, salt, and bay leaf. Mix until the
salt dissolves. Place reserved lemon rinds in water.
®
2.
3.
4.
5.
6.
7.
Trimming the artichokes: Cut off the stems. Tear off and
discard top 2-3 layers of tough leaves. From the top of the
artichoke, cut off 1-11/2 inches. Carefully expose inner
leaves and choke. Pull out and discard any thorny leaves.
Scoop out any fuzzy matter from center of choke. Dampen
artichokes in the lemon water in the pressure cooker. Place
artichokes upside down.
Cover and set to high pressure for 7 minutes.
Release the pressure using the quick-release method.
Unlock and remove lid. Carefully remove artichokes from
pressure cooker using a slotted spoon. Cool to room
temperature.
Mix mayonnaise, the rest of the lemon juice, garlic, and
tabasco to taste.
Carefully open the center of each artichoke. Fill with 1/4
of lemon mayonnaise. Sprinkle top with parsley or dill.
Favorite Pot Roast
Servings: 6-8
Prep Time: 20 minutes
Cooking Time: 60 minutes under pressure
Ingredients
2 tbsp. all-purpose flour
2 tsp. salt
1/2 tsp. pepper
3-4 lb. boneless, trimmed chuck
1 tbsp. olive oil
1 small onion, sliced
11/2 cups fresh rosemary or 2 tsp. chopped bay leaf
11/2 cups beef broth or red wine
Salt and pepper to taste
Method
1. Mix the flour, salt and pepper. Rub all over the roast.
2. Heat olive oil in the pressure cooker using the BROWN
setting. Add the roast and brown equally on all sides.
3. Add onions and brown for 1 minute. Add bay leaf or
rosemary and beef broth.
4. Cover and set to high pressure for 60 minutes.
5. Release the pressure using the quick-release method.
Unlock and remove lid. Test the roast with a fork.
The fork should go through easily. If it is not to your
desired doneness, cover and cook under pressure for
an additional 10 minutes.
6. Remove the roast. Cover and let stand for 10 minutes
before slicing.
7. If the gravy isn’t thick enough, bring to a boil, and
cook until thick. Season with salt and pepper. Remove
and discard bay leaf. Slice the roast against the grain
and serve with gravy.
18
Sweet & Sour Chicken
Servings: 4-6
Prep Time: 15 minutes
Cooking Time: 10 minutes under pressure
Ingredients
1 tbsp. vegetable oil
11/2 cups onion, chopped
11/2 cups green bell pepper, cored, seeded, diced
11/2 cups red bell pepper, cored, seeded, diced
21/2 lbs. boneless chicken thighs, trimmed of fat,
cut into 1” pieces
3 tbsp. soy sauce
11/2 cups prepared sweet-n-sour or duck sauce
1 tbsp. apple-cider vinegar
3 tbsp. water
1 tsp. garlic powder
2 scallions, white and green parts, thinly sliced
1 tbsp. fresh ginger, finely minced
2 cups cooked white rice
19
Method
1. Heat oil in the pressure cooker using the BROWN
setting. Add onions, red and green bell peppers,
browning for 2 minutes. Add chicken and soy sauce,
cooking for 3 more minutes. Add sweet-n-sour sauce,
vinegar, water, and garlic powder. Stir well.
2. Cover and set to high pressure for 10 minutes.
3. Let the pressure drop using the quick-release method.
4. Unlock and remove lid.
5. Place on a serving dish. Garnish with scallions,
serving over rice.
®
Stadium Chili
Servings: 8-10
Prep Time: 25 minutes, plus bean presoaking time
Cooking Time: 15 minutes under pressure
Ingredients
2 cups (1 lb.) pinto beans, picked over
3 tbsp. olive oil
11/2 cups onion, chopped
2 cloves garlic, minced
11/2 cups green bell pepper, cored, seeded and chopped
11/2 cups red bell pepper, cored, seeded and chopped
1 jalapeno pepper, cored, seeded and chopped
(adjust as needed)
11/2 cups carrots, peeled and chopped
1 cup celery, chopped
2 tbsp. chili powder
4 tsp. ground cumin
1 tsp. ground oregano
11/2 lbs. lean ground beef
1 can (28 oz) crushed tomatoes
2 large bay leaves
13/4 cups water
Salt to taste
3 cups cooked white rice for serving
Shredded cheddar cheese for serving
Method
1. Under cold water, rinse beans in a colander. Soak
them overnight.
2. Heat olive oil in pressure cooker using the BROWN
setting. Add onion; garlic; green, red and jalapeno
peppers; carrots; and celery. Brown until onion is soft.
Stir in chili powder, cumin, and oregano. Mix and
brown for 1 minute. Add ground beef and brown until
no longer pink. Add tomatoes, beans, bay leaves, and
water. Mix to combine.
3. Cover and set to high pressure for 15 minutes.
4. Release the pressure using the quick-release method.
5. Unlock and remove lid. Sample the beans. If still hard,
cook under pressure for an additional 2-3 minutes.
6. Season with salt, serving over white rice. Garnish
with cheddar cheese on top.
20
®
CUSTOMER SERVICE
If you have any questions or
problems regarding the operation of
your Deni Pressure Cooker, call our
customer service department toll
free:
Monday through Friday
8:30 a.m. to 5:00 p.m.
(Eastern Standard Time)
1-800-DENI-VAC
1-800-3364-822
or E-mail us at
[email protected]
www.deni.com
ONE-YEAR LIMITED WARRANTY
Your Deni Pressure Cooker is warranted for one year from date of purchase or
receipt against all defects in material and workmanship. Should your appliance prove
defective within one year from date of purchase or receipt, return the unit, freight prepaid, along with an explanation of the claim. If purchased in the U.S.A. or other country, please send to: Keystone Manufacturing Company, Inc. 33 Norris Street, Buffalo, NY
14207. If purchased in Canada, please send to: Keystone Manufacturing Company,
Inc., 151 Cushman Road, St. Catherines, Ontario L2M 6T4. (Please package your
appliance carefully in its original box and packing material to avoid damage in transit.
Keystone is not responsible for any damage caused to the appliance in return shipment.)
Under this warranty, Keystone Manufacturing Company, Inc. undertakes to repair or
replace any parts found to be defective.
This warranty is only valid if the appliance is used solely for household purposes in
accordance with the instructions. This warranty is invalid if the unit is connected to an
unsuitable electrical supply, or dismantled or interfered with in any way or damaged
through misuse.
We ask that you fill in the details on your warranty card and return it within one
week from date of purchase or receipt.
This warranty gives you specific legal rights. You may also have other rights which
vary from state/province to state/province.
Deni by Keystone Manufacturing Company, Inc.®
©2005 Keystone Manufacturing Company, Inc.
All rights reserved.