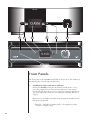
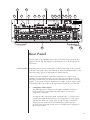
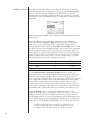
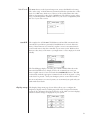
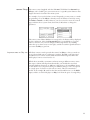
1
Owner’s Manual
SSP-800/CT-SSP
Surround Sound Processor
NOTICE
All of us at Classé take extreme care to ensure that your purchase will remain a prized investment. We are proud to inform you
that all Classé components have been officially approved for the European Community (CE) mark.
This means that your Classé product was subjected to the most rigorous manufacturing and safety tests in the world. The CE
mark certifies that your purchase meets or exceeds all European Community requirements for manufacturing consistency and
consumer safety.
This equipment has been tested and found to comply with the limits for a Class B digital device, pursuant to Part 15 of the
FCC Rules. Operation is subject to the following two conditions: (1) This device may not cause harmful interference, and (2)
This device must accept any interference received, including interference that may cause undesired operation. These limits are
designed to provide reasonable protection against harmful interference in a residential installation. This equipment generates,
uses and can radiate radio frequency energy and, if not installed and used in accordance with the instructions, may cause
harmful interference to radio communications. However, there is no guarantee that interference will not occur in a particular
installation. If this equipment does cause interference to radio or television reception, which can be determined by turning the
equipment on and off, the user is encouraged to try to correct the interference by one or more of the following measures:
•
•
•
•
Reorient or relocate the receiving antenna;
Increase the separation between the equipment and the receiver;
Connect the equipment into an outlet on a circuit different from that to which the receiver is connected;
Consult the dealer or an experienced radio/TV technician for help.
CAUTION: Changes or modifications to this equipment not expressly approved by the manufacturer could void the user’s
authority to operate the equipment.
This product incorporates copyright protection technology that is protected by U.S. patents ad other intellectual property
rights. Use of this copyright protection technology must be authorized by Macrovision, and is intended for home and other
limited viewing uses otherwise authorized by Macrovision. Reverse engineering or disassembly is prohibited.
The information contained in the manual is subject to change without notice. The most current version of this manual will be
posted on our web site at http://www.classeaudio.com.
Classé marks the “CE” symbol indicating compliance of this device with the EMC (Electromagnetic
Compatibility) and LVD (Low Voltage Directive) standards of the European Community.
Classé complies with the European Parliament and Council Directive 2002/96/EC concerning Waste Electrical
and Electronic Equipment (WEEE). This product must be appropriately recycled or processed in accordance with
these directives. Consult your local waste disposal authority for guidance.
Classé products are designed and manufactured to comply with the Restriction of Hazardous Substances (RoHS)
as stated in the European Parliament and Council Directive 2002/95/EC.
2
Important Safety Instructions
1. Read these instructions.
2. Keep these instructions.
3. Heed all warnings.
4. Follow all instructions.
5. Do not use this apparatus near water.
6. Clean only with dry cloth.
7. Do not block any ventilation openings. Install in accordance with the manufacturer’s instructions.
8. Do not install near any heat sources such as radiators, heat registers, stoves, or other apparatus (including amplifiers)
that produce heat.
9. Do not defeat the safety purpose of the polarized or grounding-type plug. A polarized plug has two blades with one
wider than the other. A grounding type plug has two blades and a third grounding prong. The wide blade or the
third prong are provided for your safety. If the provided plug does not fit into your outlet, consult an electrician for
replacement of the obsolete outlet.
10. Protect the power cord from being walked on or pinched particularly at plugs, convenience receptacles, and the point
where they exit from the apparatus.
11. Only use attachments/accessories specified by the manufacturer.
12.
Use only with the cart, stand, tripod, bracket, or table specified by the manufacturer, or sold with the
apparatus. When a cart is used, use caution when moving the cart/apparatus combination to avoid injury
from tip-over.
13. Unplug this apparatus during lightning storms or when unused for long periods of time.
14. Refer all servicing to qualified service personnel. Servicing is required when the apparatus has been damaged in any
way, such as power-supply cord or plug is damaged, liquid has been spilled or objects have fallen into the apparatus, the
apparatus has been exposed to rain or moisture, does not operate normally, or has been dropped.
15. Do not expose this apparatus to dripping or splashing and ensure that no objects filled with liquids, such as vases, are
placed on the apparatus.
16. To completely disconnect this apparatus from the AC Mains, disconnect the power supply cord plug from the AC receptacle.
17. The mains plug of the power supply cord shall remain readily operable.
18. Do not expose batteries to excessive heat such as sunshine, fire or the like.
WARNING: TO REDUCE THE RISK OF FIRE OR ELECTRIC SHOCK,
DO NOT EXPOSE THIS APPLIANCE TO RAIN OR MOISTURE.
CAUTION
RISK OF ELECTRIC SHOCK
DO NOT OPEN
CAUTION: TO REDUCE THE RISK OF ELECTRICAL SHOCK, DO NOT
REMOVE COVER. NO USER-SERVICEABLE PARTS INSIDE. REFER
SERVICING TO QUALIFIED PERSONNEL.
The lightning flash with arrowhead symbol within an equilateral triangle is intended to alert the user to the
presence of uninsulated “dangerous voltage “ within the product’s enclosure that may be of sufficient magnitude
to constitute a risk of electric shock to persons.
The exclamation point within an equilateral triangle is intended to alert the user to the presence of important
operating and maintenance (servicing) instructions in the literature accompanying the product.
3
Contents
Introduction......................................................................................................6
Exceptional Design Features.............................................................................7
custom theatre............................................................................................7
versatile connectivity..................................................................................7
superior performance.................................................................................7
clean, dedicated power..............................................................................7
high fidelity audio......................................................................................7
professional grade video.............................................................................7
room equalization and speaker control......................................................8
flexible GUI................................................................................................8
video preview.............................................................................................8
refined circuit design..................................................................................8
extensive listening tests...............................................................................8
extraordinary longevity...............................................................................8
Unpacking and Placement................................................................................9
unpacking your SSP....................................................................................9
SSP-800 placement considerations.............................................................9
CT-SSP rack-mount installation................................................................ 10
CT-SSP stand-alone installation instructions............................................. 10
warm-up/break-in period......................................................................... 12
operating voltage..................................................................................... 12
voltage protection............................................................................. 13
Front Panels....................................................................................................14
Rear Panel.......................................................................................................17
serial number.......................................................................................... 17
The Remote Control........................................................................................24
Initial Setup.....................................................................................................26
Step 1: AC......................................................................................... 26
Step 2: cables.................................................................................... 26
Step 3: sources.................................................................................. 27
Step 4: amplifiers.............................................................................. 27
Step 5: loudspeakers......................................................................... 28
Step 6: power up . ............................................................................ 29
Understanding Surround Sound......................................................................30
how many channels?............................................................................... 30
matrix or discrete?................................................................................... 30
post-processing........................................................................................ 32
Using the SSP-800/CT-SSP...............................................................................33
source selection....................................................................................... 33
mode selection........................................................................................ 34
video preview......................................................................................... 35
controls................................................................................................... 36
system trims...................................................................................... 36
configuration select........................................................................... 37
The Menu System...........................................................................................38
system setup............................................................................................ 39
volume setup........................................................................................... 39
max volume...................................................................................... 40
startup volume.................................................................................. 40
IR setup............................................................................................. 40
automation....................................................................................... 41
mute setup........................................................................................ 41
input setup.............................................................................................. 42
4
name................................................................................................. 42
audio................................................................................................ 43
configuration.................................................................................... 43
in use................................................................................................ 44
video................................................................................................. 44
next input.......................................................................................... 44
triggers..................................................................................................... 44
profiles.................................................................................................... 45
room EQ.................................................................................................. 46
configuration........................................................................................... 46
name................................................................................................. 47
distances........................................................................................... 47
levels................................................................................................ 48
in use................................................................................................ 48
speakers............................................................................................ 48
auxiliary channels............................................................................. 50
black level............................................................................................... 51
teach IR................................................................................................... 51
display setup........................................................................................... 51
brightness.......................................................................................... 52
timeout............................................................................................. 52
language........................................................................................... 52
OSD (on screen display)................................................................... 52
colors................................................................................................ 53
volume.............................................................................................. 53
Dolby/DTS.............................................................................................. 53
Dolby Pro Logic IIx........................................................................... 54
DTS Neo:6........................................................................................ 54
remote Fkeys........................................................................................... 55
important note on Fkey use............................................................... 55
status....................................................................................................... 56
version info....................................................................................... 56
sensors.............................................................................................. 56
CAN-Bus................................................................................................. 56
features . ....................................................................................... 56
hardware setup .......................................................................... 57
using CAN-Bus................................................................................. 58
CAN-Bus shared features ............................................................... 59
configuration.................................................................................... 59
operate.............................................................................................. 59
AC status........................................................................................... 59
status................................................................................................. 59
CAN-Bus model specific features............................................................ 60
PlayLink............................................................................................ 60
amp info........................................................................................... 61
event log........................................................................................... 61
Troubleshooting..............................................................................................62
Care & Maintenance.......................................................................................65
Specifications..................................................................................................66
SSP-800 Dimensions.......................................................................................67
CT-SSP Dimensions.........................................................................................67
Installation Worksheet....................................................................................69
5
Introduction
Welcome to the Classé family!
Congratulations on your purchase of the Classé SSP-800/CT-SSP Surround
Sound Processor, a next generation processor with reference-quality
performance. We are sure that you will enjoy it for many years to come.
Classé values the relationships with our customers and intend on supplying
the highest level of support along with our product. Registering your product
will allow us to keep in touch and will ensure that you are notified regarding
any future updates or options which become available. Furthermore, in the
unlikely event that your product needs service support, a product that is already
registered doesn’t need your original sales slip for proof of warranty.
You can register online at www.classeaudio.com or complete and mail the
registration card located in the separate warranty booklet.
Please take a few moments now to register your new Classé
processor and record your serial number here for future
reference.
Serial #: ____________________________________________
6
Exceptional Design Features
The SSP-800 is a next-generation surround sound preamp/processor, conceived
with pure performance as its raison d’être. It seamlessly unites a multitude of
disparate audio and video signal formats to faithfully reproduce your music and
movies as the artist intended.
custom theater The SSP-800 is also available in a Custom Theater chassis (CT-SSP), specially
designed to facilitate rack mount installations. The CT series offers an alternative
to the Delta series industrial design and may also be used on a shelf or in a
traditional cabinet by installing the supplied feet and front panel security tabs.
versatile connectivity The SSP-800/CT-SSP is a ten-channel preamp/processor with both balanced
and single-ended connections for all channels. A comprehensive set of analog
and digital inputs and control interfaces enable compatibility with most
contemporary AV system equipment.
superior performance Advanced circuit topologies, component parts, and circuit layout techniques
combine for superior audio performance. Opto-couplers and low voltage
differential signal (LVDS) pathways thoroughly isolate audio, video, and control
circuits.
clean, dedicated power Analog audio circuits benefit from a dedicated linear power supply based on a
low noise toroidal transformer. Digital and control circuits draw from a separate
low-noise, high current switching supply.
high fidelity audio Custom-configured digital-to-analog converters and output stage components
ensure exceptional dynamic range and resolution.
professional grade video The SSP-800/CT-SSP incorporates professional grade video circuitry that has
extraordinary bandwidth and dynamic range. Due to this, it can handle even the
most demanding video signals specified in the HDTV standard. Whether the
video is carried on HDMI, high definition component, or standard definition
cables, it is decoded and made available for display and preview. Reference
quality circuitry is used throughout the video path, delivering uncompromised
picture quality.
7
room equalization All home theater sound systems are affected by room characteristics. Sound
and speaker control reflections and sound absorption can create dramatic variations in the
performance of your system, particularly in the lower frequencies. The
SSP-800/CT-SSP features a system of filters which, in the hands of an
experienced acoustician, can help optimize the performance of your system.
flexible GUI The front panel’s LCD touchscreen supports an extremely flexible and
versatile graphical user interface (GUI) while maintaining a clean, uncluttered
appearance. The SSP-800/CT-SSP provides a range of controls that might
otherwise require dozens of buttons and knobs on the front panel. Despite this
power and flexibility, it remains simple to operate in day-to-day use.
video preview The front panel touchscreen lets you view any selected video source in your
system. The source’s resolution can be down-converted for the LCD panel,
giving you total flexibility to view any video source regardless of its resolution.
refined circuit design Only the top performing audio components were designed into your
SSP. The converter chips, passive components, op-amps, and analog power
supply are all best-in-class parts. Furthermore, the PCB (printed circuit board),
and pad material has been specifically chosen to provide the best performance.
Even the routing of the traces is optimized to get the best performance out of the
circuit. Every detail is tested, every possibility exhausted, until we are content
with the results.
extensive listening tests Our experience has shown that great measurements alone do not guarantee
superb audio or video performance. For this reason, all Classé products are
laboriously fine-tuned during the development process by carefully controlled
usage tests. Every individual stage is evaluated and adjusted before the product
is released for production. As in the case with measured performance, actual
performance of every unit is verified as part of our production standard.
extraordinary longevity Because Classé has developed highly refined circuits over many years, we have
vast experience in what works well over the long term. Using this knowledge
base, along with quantitative results derived from highly accelerated life testing
(H.A.L.T.) allows us to select only the most reliable parts. This attention to
detail and design allows us to manufacture products which stand the ultimate
test. Time.
Just as past Classé products have done for their owners, we are certain that
your new Surround Sound Processor will give you many years of continuous
enjoyment.
8
Unpacking and Placement
We have taken all precautions, and made every effort to make the SSP simple
and straightforward to install and use. Still, we recommend that you take
a few minutes to review this manual. Even if you are having the processor
professionally installed, you will want to know how to efficiently operate it to its
potential.
The SSP menu system includes features that provide you with a great deal
of fine-tuning. Still, we have no way to evaluate outside variables such as the
acoustical characteristics of your listening space and the associated equipment
of your home theater system. Therefore, it is up to you to make the final audio
adjustments for the optimum performance of your system.
For this reason, we strongly encourage you to have your processor
installed and calibrated by your dealer. The experience, training, and
specialized equipment they have can make a profound difference in
the final performance of your system.
unpacking your SSP Carefully unpack the SSP-800/CT-SSP Surround Sound Processor according
to the supplied instruction sheet. Do not forget to remove all accessories from the
carton.
Important!
Keep all packing materials. Transporting the SSP without using
the packaging specifically designed for it may result in damage
that is not covered under the warranty.
SSP-800 placement Before installing your SSP-800 into the system, be sure to read the following
considerations placement suggestions.
• Do not place the SSP-800 directly on the top surface of a
conventional power amplifier or any other heat source. Also keep the
processor out of direct sunlight.
• Place the SSP-800 so that the IR window on the front panel is clearly
visible and not blocked.
• Position the SSP-800 in a central and convenient location for both
visibility and use. The processor is the hub for all other component
connections and generally your primary interaction point. In addition,
by placing the processor close to the other system components, you’re
minimizing the cable lengths and hence reducing the amount of noise
that’s introduced into the system through the cabling.
• Leave adequate clearance behind the SSP-800 for the AC cord and
connecting cables. We suggest six inches (15 cm) of free space to allow
cables sufficient room to bend without crimping or undue strain.
9
• Allow at least three inches (7.5 cm) of clearance above and to each
side of the processor for ventilation. Do not obstruct the area around
the processor so that excess heat can dissipate through normal air
circulation. Avoid placing the processor on a soft surface, such as
plush carpeting, that may restrict airflow.
Important!
Obey all placement considerations. Not obeying the
placement considerations may result in damage that is not
covered under the warranty.
CT-SSP rack-mount FOR RACK MOUNTING INSTALLATION CONTACT YOUR CLASSÉ
installation PROFESSIONAL.
CT-SSP stand-alone
installation instructions
NON-RACK-MOUNT INSTALLATION FOR SSP:
1a. Install (4) feet and secure with (4) #6 flat washers and
(4) 6-32 X 9/16 philips pan head screws.
Tighten to
5.0 in-lbs (0.56 N-m)
Optional accessory feet can be purchased and installed as below.
10
1b. Install (4) accessory feet (FC90895) and secure with
(8) 6-32 X3/4 screws.
Tighten to
8.5 in-lbs (0.96 N-m)
Important!
Install (2) securing brackets when using the CT-SSP in a standalone (non-rack-mount) installation.
Important!
For stand-alone CT-SSP installations, follow the same
placement considerations as outlined for the SSP-800.
2. Install left and right faceplate securing brackets (L7326 for CT-SSP and
CT-AMPS, and L7907 for CT-5300) secure with (4) 8-32 X 3/8 philips
pan head screws.
Tighten to
5.0 in-lbs (0.56 N-m)
11
warm-up/break-in period Your new Classé processor delivers outstanding performance immediately.
However, you can expect to hear subtle improvements as it reaches normal
operating temperatures and breaks-in.
In our experience, you can expect the greatest changes within the first 300 hours.
After initial break-in, you’ll enjoy consistent performance levels for years to
come.
The only exception is if the unit is unplugged for an extended period of time,
during which the processor will cool down. Depending on the degree of cooling
involved, you should expect a brief warm-up period before the Surround Sound
Processor’s sound quality is at its best.
operating voltage The operating voltage of your SSP has been factory configured to 100V, 120V,
220V, 230V, or 240V AC, depending on the country in which you purchased it
(in European Union countries, CE regulations specify 230V).
This voltage setting is not user selectable. Ensure that the voltage
rating on the rear panel of the SSP-800/CT-SSP Surround Sound
Processor matches the AC voltage rating of your electrical outlet. If the
AC voltage is incorrect, please contact your local authorized Classé
dealer or distributor.
Important!
Attempting to operate your SSP from an incorrect AC voltage
rating may cause irreparable damage to your processor,
which may not be covered by your warranty.
If you are not planning to use the Surround Sound Processor for an extended
period of time, for example due to vacation or other travel, we suggest that you
disconnect it from AC power.
Make certain that the Surround Sound Processor is in Standby prior
to disconnecting it.
Physically disconnect any and all valuable electronics from AC power during
electrical storms. A lightning strike anywhere near your home can generate a
tremendous surge on the AC mains that can jump across a simple power switch.
A surge from a lightning strike, which may be many thousands of volts, can
cause serious damage to any piece of electronics, no matter how well designed
and protected.
12
voltage protection The SSP-800/CT-SSP Surround Sound Processor contains protection features
that prevent the processor from operating at dangerously high or low voltages.
These features are incorporated to help protect the processor from dangerous
power surges and other power irregularities that could cause extensive damage
to the processor. This circuitry guards against the following irregular supplied
power conditions.
• Startup Voltage: If the AC mains voltage is NOT within a range of
approximately –15% to +10% of its nominal value, the SSP does not
turn on. For example, a 120V AC service generally requires the AC
mains voltage to be no lower than 95V and no higher than 135V in
order for the processor to turn on and operate normally.
• Over-voltage Condition during Operation: If the AC mains voltage
surges by roughly 10% or more during operation, the Surround
Sound Processor enters a protection mode and shuts down. The
Standby LED flashes to indicate that the protection mode has been
engaged. An error message also displays on the LCD touch screen.
• Under-voltage Condition during Operation: If the AC mains voltage
sags by 15% or more, the Surround Sound Processor does continue
to play since the voltage irregularity won’t harm the processor, but
the sound quality may be degraded due to the compromised power
conditions. The Standby LED flashes to indicate an irregular power
condition exists.
In such cases, normal operation can only resume when the following conditions
are met:
• The irregularity in the power input is no longer present.
• The SSP is power cycled, to clear the protection mode.
Refer to the Troubleshooting section found later in this manual for more
information.
13
MUTE
MENU
SSP-800
1
2
3
5
4
MENU
6
MUTE
Front Panels
The front panels of the SSP-800 and CT-SSP are shown above. The numbers in
the drawing refer to the descriptions that follow.
1
Standby/On Button and Status Indicator
Pressing the Standby button puts the SSP into standby mode – a lowpower state which leaves the Surround Sound Processor and outputs
inactive but still allows the processor to respond to system commands via
any of the supported control protocols (IR input, CAN-Bus, RS-232, or
triggers).
If the processor is already in Standby mode, pressing the Standby button
fully powers up the SSP.
• LED On – the SSP is in Standby mode, or the display has timed
out due to a display setting.
14
• LED flashes (at power-up) – the SSP is in the process of powerup initialization.
• LED Off – the SSP is powered on, fully operational, and the display
active.
• LED flashes rapidly (after power-up) – the AC mains voltage is
out of range.
2
Menu On/Off Button
Press once to call up the main page of the menu system, which replaces the
normal front page or Home page of the Touchscreen and OSD (On-Screen
Display). Press the Menu button again to revert to the Home page.
The menu system gives you control over operational details including:
system setup options, various display options (including the language used
by the menu system), and custom installation capabilities so that the SSP
integrates smoothly into the most complex systems. For more information,
see the Menu System later in this manual.
3
Touchscreen
The front panel touchscreen has two main functions:
• Navigation of the SSP menus and controls by simply touching
the screen to make your selections.
• Viewing incoming video from the selected source.
4
Audio Mute Control
The Mute button reduces the SSP volume by a pre-determined amount.
Pressing it a second time restores the volume to its previous level. This
behavior can be easily customized for very specific user requirements. (See
the section on Volume Setup for more information.)
NOTE: If you increase the volume using either the front panel
volume knob or the remote control while Mute is engaged, the
mute control disengages, and audio adjustments are executed
starting from the muted level. This is a safety measure to prevent
accidentally restoring the volume at unexpectedly high levels.
5
IR window
The location of the IR (infrared) sensor for the remote control is behind
this window. In most cases, there must be a clear path between the IR
window and the remote control in order for the SSP to acknowledge the
remote control commands.
If the IR window is not in view, for example if it’s placed in a cabinet or
closet, then the rear panel IR input can be utilized for remote control use.
For more details about this option, see the IR input description in the Rear
Panel section found later in this manual.
In addition to receiving IR commands, the SSP can also transmit IR
commands to third-party learning remote controls. For more details about
this option, refer to the Teach IR description in the Menu Tree section
found later in this manual.
15
6
Volume Control Knob
The large rotary knob on the right side of the front panel controls the
system volume level.
The volume knob increases and decreases volume in precise 0.5dB
increments throughout most of the volume range. At extremely low
volume, the step size is increased somewhat to facilitate moving between
extremely low and normal listening levels. The volume range is from
–99.0dB to +14.0dB.
You can also change the volume control display to suit your preferences.
For more information, refer to the Volume description in the Display Setup
section found later in this manual.
16
2
1
3
7
6
8
10
9
4
11
5
12 13 14
15 16
THIS DEVICE COMPLIES WITH PART 15 OF THE FCC RULES.
OPERATION IS SUBJECT TO THE FOLLOWING TWO CONDITIONS:
(1) THIS DEVICE MAY NOT CAUSE HARMFUL INTERFERENCE, AND
(2) THIS DEVICE MUST ACCEPT ANY INTERFERENCE RECEIVED,
INCLUDING INTERFERENCE THAT MAY CAUSE UNDESIRED OPERATION.
MOD SSP-800
~
120 V
1
1
Pr
2
Pb
COMPONENT IN
Y
Pr
2
HDMI IN
Pb
Pr
OPT1
COAX2
DIGITAL
OUTPUT
DIGITAL INPUT
COAX3
OPT2
OPT3
OPT4
COAX
COAX4
FL
2
7.1 AUDIO IN
SL
CEN
3
RL
4
ANALOG AUDIO IN
R1
OPT
FR
SR
SUB
5
L2
1
RR
IR
IN
R2
W
CAUTION! TO REDUCE THE RISK OF ELECTRIC SHOCK, GROUNDING
OF THE CENTER PIN OF THIS PLUG MUST BE MAINTAINED
AVIS! POUR RÉDUIRE LE RISQUE DE CHOC ÉLECTRIQUE
LA FICHE CENTRALE DE LA PRISE DOIT ÊTRE
BRANCHÉE POUR MAINTENIR LA MISE À LA TERRE
Pb
Y
2
L3
L1
70
CANADA
COMPONENT OUT
Y
1
COAX1
HDMI OUT
18
SER XXXXXXX
50/60 Hz
Fabriqué au
Made in
VIDEO IN
17
TRIGGER
OUT
OUT1
OUT2
CAN IN
USB
CAN OUT
RS-232
R3
CONTROL
AUX 2
AUX 1
FRONT R
ANALOG AUDIO OUT
FRONT L
CENTER
SUB
SURR R
SURR L
REAR R
A1
L
S
SL
RL
A2
R
C
SR
RR
19
REAR L
100-120V~
T800mAL250V
220-240V~
T500mAE250V
20
21
Rear Panel
The rear panel of the SSP-800 is shown above. The same rear panel layout also
applies to the CT-SSP. The numbers in the drawing refer to the descriptions in
this section.
serial number You’ll find your processor’s serial number on the top right edge of the rear panel,
as shown in the graphic above (the black label). Please record this number on the
Introduction Page (page 6) of this manual for future reference.
And since you have found the serial number, please use it to register your
purchase, if you haven’t done so yet. As we’ve said, your registration is our way
of keeping in touch with you. We will use the information to advise you of any
updates or other items of interest. Registration is simple, so please register online
at www.classeaudio.com or fill out the registration card and drop it in the mail.
1
Composite Video Inputs
The SSP supports two composite video inputs, with RCA connectors
labeled 1 and 2. Use these inputs when the output of your source
component is composite.
A composite video signal (also called “baseband video” or “NTSC video”)
combines the black & white and the color components of a video signal
and transmits them over a single cable. Composite video transmission
always generates interference between luminance and chrominance
portions of the signal and, for that reason, is usually inferior in quality to
the S-Video format.
17
2
Component Video Inputs
The SSP supports two component video inputs, each with three RCA
connectors labeled 1 and 2 – the component video format requires three
separate cables labeled Pr, Pb, and Y. Use these inputs when the output of
your source is component.
Although still analog, a component video signal provides a much sharper
image than S-Video or composite formats. The component video delivers
color video signals by maintaining the three YUV signal segments in three
separate channels. YUV is a video format definition which defines the
“color space”, a mathematical model of the color within an image, of a
video signal. Y stands for luma (brightness), U for a color difference signal
(blue minus luma or B-Y), and V for second color difference signal (red
minus luma or R-Y). Therefore, the three sections of the component signal
are Y (luminance – the black & white portion of the video), Pb (Blue
Color Difference), and Pr (Red Color Difference).
To connect the source component video output cables to the SSP
component video input rear panel connectors:
• Use the red cable for the Pr (Red Color Difference) connectors.
• Use the blue cable for the Pb (Blue Color Difference) connectors.
• Use the green cable for the Y (Luminance) connectors.
The SSP accepts component video at either standard definition (SD) or
high definition (HD) video rates. Component video is NOT accepted at
1080p via analog component connections.
NOTE: Although the SSP component inputs support all resolutions
except 1080p, some source material will be restricted to 480p at the
source.
3
HDMI Inputs
The SSP supports five HDMI inputs, labeled 1 to 5. Whenever possible,
we recommend the use of HDMI for all audio and video source input
connections. The SSP is HDMI v.1.4 enabled, supporting 2D video at
resolutions up to 1080p @ 24/50/60 fps, standard 3D video formats with
resolutions up to 1080p @ 24 fps, Audio Return Channel (ARC), HDMI
Ethernet Channel (HEC), Deep Color and x.v.Color(xvYCC).
The HDMI (High Definition Multimedia Interface) format is the only
available single-cable digital pathway for both video and audio signals,
providing higher performance levels and simplifying component-tocomponent connections. HDMI is backwards compatible with the
earlier video-only DVI (Digital Video Interface) standard. Adaptors
to convert a DVI cable connector to HDMI and vice-versa are readily
available. The HDMI standard also incorporates HDCP (High Definition
Content Protection); a separate content-protection technology to prevent
unauthorized distribution or duplication of copyrighted material.
18
4
HDMI Outputs
The SSP supports two HDMI outputs, labeled 1 and 2. The
SSP HDMI outputs support HDMI v1.4a featuring 2D video at
resolutions up to 1080p @ 24/50/60 fps, standard 3D video formats with
resolutions up to 1080p @ 24 fps, Audio Return Channel (ARC), HDMI
Ethernet Channel (HEC), Deep Colour, x.v.Color(xvYCC) and provides a
2-channel SPDIF downmix of the source material.
Non-HDMI source material is encoded for an HDMI display at the
source’s native video rate. By HDCP license agreement, HDMI input
signals can NOT be converted to analog format, and are only output via
HDMI at the incoming resolution.When an analog video input signal is
output via HDMI to the display, the video input is converted to digital
format and output at its native rate. The two HDMI outputs are NOT
independent.
NOTE: HDMI is an interactive format, which can occasionally
cause format errors between the source devices and the output
display. If you connect the SSP HDMI outputs to two different
displays, the HDMI source automatically provides a signal
compatible for both displays. In some cases, this response can result
in less-than-optimal resolutions for one or both displays.
5
Component Video Output
The SSP is equipped with component video output via 3 RCA connectors
labeled Pr, Pb, and Y. Use this connection to connect to non-HDMI
displays. The component output does not support output of 1080p signals.
NOTE: Due to HDCP licensing restrictions the component video
output will not work with most source material input via HDMI.
6
Digital Audio Inputs - Coaxial
The SSP supports four digital audio inputs, with SPDIF connectors labeled
COAX1 to COAX4. These inputs accept PCM data streams up to
24-bits long and up to 192kHz sampling frequency. We recommend using
cables that are optimized for digital audio signal transfer and that carry a
75Ω impedance rating. Your Classé dealer can help you with proper cable
selections.
7
Digital Audio Inputs - Optical
The SSP supports four digital audio inputs, with optical TOSlink
connectors labeled OPT1 to OPT4. These inputs accept PCM data
streams up to 24-bits long and up to 192kHz sampling frequency. We
recommend using cables that are optimized for digital audio signal transfer.
Your Classé dealer can help you with proper cable selections.
TM
NOTE: The bandwidth limits of TOSlink™ components are very
much strained at a 192kHz sampling frequency. For that reason we
recommend keeping the TOSlink™ connections at a maximum rate
of 96kHz.
19
8
Digital Audio Output - Coaxial
The SSP supports one digital audio coaxial output, with SPDIF connector
labeled COAX. This output can pass PCM data streams up to 24-bits long
and up to 96kHz sampling frequency.
9
Digital Audio Output - Optical
These digital outputs carry only digital audio data, excluding any subcode information which some recorders might use to extract CD track
information.
10 7.1-Channel Analog Audio Inputs
These inputs are designed for any multi-channel source with analog
outputs, such as SACD players. When connecting the analog audio inputs,
make sure to attach each cable from the source component output to the
appropriate SSP input.
Starting from the source, connect the Front Left output to the FL (Front
Left) input of the SSP, then the source center output to the CEN (center)
input of the SSP, and so on.
These analog audio input signals are passed through the SSP and to the
speakers with no processing. When these inputs are selected, only volume
control is enabled.
11 2-Channel Balanced Analog Audio Inputs
The SSP-800/CT-SSP was designed with a 2-channel balanced analog
audio input, using a pair of balanced XLR connectors labeled R1 and L1.
Use this input with any 2-channel analog source component with balanced
outputs.
NOTE: This input conforms to the AES (Audio Engineering
Society) “pin 2 = hot” convention. The pin assignments of these
XLR-type female output connectors are:
Pin 1: Signal ground
Pin 2: Signal + (non-inverting)
Pin 3: Signal – (inverting)
Connector ground lug: chassis ground
Verify that the source components are compliant with this
convention (Classé components are compliant). If not compliant,
contact your Classé dealer for assistance.
12 2-Channel Single-Ended Analog Audio Inputs
The SSP-800/CT-SSP was designed with a pair of 2-channel singleended analog audio inputs using the RCA connectors, labeled L2/R2 and
L3/R3. Use these inputs with any 2-channel single-ended analog source
component.
NOTE: The Balanced and Single Ended 2-channel analog audio
inputs can be set for either bypass mode (no DSP processing) or
converted to digital format to allow bass management, surround
mode processing, and/or equalization.
20
13 IR Input
Use the IR input when the front panel IR window does not have a clear
line-of-sight with the remote control, for instance, when the SSP is
installed in a cabinet or closet. Attach this input to an infrared repeater
system to route signals from the remote control to the SSP via a mono
mini-jack (3.5mm phono).
The list of available IR command codes can also be used in macros for
sophisticated remote control systems, facilitating the control of the
SSP in the larger context of the complete system.
14 IR Output
Use the IR output to pass IR commands from an external IR transmitter
through the SSP to another component, when necessary. The output uses a
mono mini-jack (3.5mm phono) with the same properties as the diagram
in the previous section.
15 Trigger Outputs
The SSP supports two trigger outputs, with mono mini-jacks (3.5mm
phono) labeled OUT1 and OUT2. Each trigger outputs a 12V DC signal
at 100mA and each can be controlled individually. Use these outputs to
control other system components such as amplifiers, screens, and window
blinds. Refer to the Triggers description in the Menu System section for
more details.
16 USB Port
The USB port is for downloading future system software updates. The
latest system software is posted on the Classé website (www.classeaudio.com)
and may be downloaded/installed by you or your Classé dealer simply
following the step-by-step instructions.
17 RS-232 Port
The primary purpose of the RS-232 port is to support the use of external
commands to allow remote control of the SSP by such systems as AMX
and Creston . For more information about these systems, contact your
Classé dealer.
TM
®
The RS-232 port can also be used to download the operating software
for the SSP, when updates are released. As in the case of the USB, the
latest system software is posted on the Classé website (www.classeaudio.com)
and may be downloaded/installed by you or your Classé dealer simply
following the step-by-step instructions.
NOTE: The RS-232 connector is inactive when a USB device is
connected.
21
18 CAN-Bus Input and Output
CAN-Bus (Controller Area Network) allows several Classé components to
be connected together for simultaneous operation, such as switching from
On to Standby. Using the CAN-Bus Input and Output connectors, the
Classé components can be daisy chained together and controlled via the
CAN-Bus interface.
NOTE: The final component in the daisy chain MUST have a
termination plug inserted into the CAN-Bus output.
For more information, refer to the CAN-Bus section found later in this
manual.
19 10-Channel Analog Outputs
The SSP supports ten analog audio outputs, with both balanced (XLR)
and single-ended (RCA) connections. Connect the appropriate Front
L/R, Sub, Surr L/R, and Rear L/R connectors to the appropriate power
amplifiers.
NOTE: The Rear L/R connectors are only active when the
SSP output is setup for a 7.1-channel surround system and the
audio stream or the selected surround processing mode are providing
rear channel signals.
The Aux 1 and 2 outputs are programmable and can be used for the
following purposes:
• Assigned as a 2-channel down-mix of the selected multi-channel
signal for either an analog recorder or a separate listening area.
• Assigned to follow the main Front L/R speakers for use in a
biamplification arrangement.
• One or both may be assigned as additional subwoofers with the
ability to select between mono, and stereo modes.
Refer to the Menu System section for more details regarding optional uses
for the auxiliary analog output channels.
NOTE: The Balanced (XLR) Output pin assignments adhere to
the AES (Audio Engineering Society) “Pin 2 = hot” standard. The
XLR male outputs carry the following pin assignments:
Pin 1: Signal ground
Pin 2: Signal + (non-inverting)
Pin 3: Signal – (inverting)
Connector ground lug: chassis ground
Refer to the operating manuals of your balanced-input power
amplifiers to verify that the pin assignments of their input
connectors adhere to this standard (Classé power amplifiers are
compliant). If your amplifiers are not compliant, ask your Classé
dealer for assistance.
22
20 Main Power On/Off Switch
This switch connects and disconnects the SSP from AC.
NOTE: Changes to settings are stored whenever the SSP is put into Standby.
Turning off power to the unit before first entering Standby mode erases any
setting changes that have been made since the unit was last placed in Standby
mode.
21 AC Power Cord Input
The detachable three-conductor AC power cord and the socket into
which it connects conform to rigorous standards developed by the IEC
(International Electrotechnical Commission).
Danger!
Your SSP contains potentially dangerous voltages and current
capabilities. Do not attempt to open it! There are no userserviceable parts inside. All service must be referred to a
qualified authorized Classé dealer or distributor.
23
The Remote Control
1
LIPSYNC
2
1
3
4
5
Your SSP-800/CT-SSP Surround Sound Processor includes a versatile remote
control for both the processor itself and several aspects of the rest of a Classébased system. The buttons are arranged in logical groups according to their
functions. The remote control of the SSP is shown on the left. The numbers in
the drawing refer to the descriptions that follow.
PRESET
CONFIG
Basic Functions
The four buttons along the top of the remote control groups the following
basic control functions:
• Light turns on the backlighting of the remote control for better
visibility under low-light conditions. After a few moments of
inactivity, the backlight switches off automatically.
• Info opens the Status display on the SSP front panel
touchscreen. See the Menu System section found later in the
manual for details about the Status display.
• Display cycles through the three brightness levels of the front
panel touchscreen display.
• Standby switches the SSP between the Standby and Operate
states.
6
PROFILE
7
2
Audio Processing Functions
The next three buttons offer the following processing controls for the audio
signal:
• Lipsync is an audio-only function that delays the arrival time of
the audio portion of an A/V (Audio/Video) source. If the audio
and video portions of the source do not reach the speakers and
the display simultaneously, the resulting material appears to be
out-of-sync. Video processing often delays video signals relative
to the audio, with the result being that the audio track is played
too early. The Lipsync function allows you to delay the audio
until it is correctly synced to the video track. The adjustment
range is 0 to 150 ms. Lipsync affects all channels equally.
• Night engages or disengages the Night mode for Dolby Digital
soundtracks. The Night mode is a dynamic range compressor
that reduces peaks and increases low-level passages so you can
still enjoy the full range of movie soundtracks but with less
chance of disturbing others.
• Mode displays the available surround modes on the front panel
touchscreen. Press the navigation arrow keys to move up and
down the list, then press Enter to make your selection. For
additional information about the surround modes, refer to the
Using the SSP-800/CT-SSP section found later in this manual.
3
Input Sel (Selection) Button
To change inputs, simply use the Input Selection arrow buttons to step
through the inputs.
You can deactivate unused inputs to keep your input selection list smaller
and easier to navigate. Refer to the Menu System section found later in the
manual for further instructions.
24
4
Preset Config (Configuration) Button
This button steps through the configurations set to “in use”. If there is
already a configuration active (due to being a default) for a particular input
it will be overridden until the input is selected again, or the user selects
that default configuration.
5
Volume Control & Mute Buttons
The Volume Up and Down arrow buttons increase or reduce the overall
volume level of the audio output. The Mute button controls the system
volume level. Pressing the Mute button reduces the audio output volume
level by a pre-determined amount. You can customize selected features of
both the Mute button and volume level. Refer to the Volume description in
the Menu System section found later in the manual for further instructions.
6
Navigation & Menu Buttons
The central section of the remote control contains the navigation buttons
and the menu access buttons. This array of buttons is used for navigating
the menu system on the SSP. Each of the buttons performs the following
function(s):
• Menu accesses the main screen for the menu system, in the same
fashion as the front panel Menu button.
• Home returns the touchscreen display to the Home page, which
presents the normal operation options – Source, Mode, Video
Preview, and Controls. The Home button essentially acts like a
“back to start” button – no matter how deeply you’ve navigated
into the menu system, a simple button push returns you to the
front page.
• Navigation Arrows are the Up (p), Down (q), Left (t),
and Right (u) arrow buttons, which allow you to select, by
highlighting, the different menu options with the menu system.
• Enter selects options. Pressing the Enter button selects the
highlighted menu item in any menu screen.
• Profile button accesses the Profile page(s). Profiles are customized
versions of the system’s Home screen. You can name these profiles
and pre-program them so you have direct access to frequently
used controls. See the Profiles description in the Menu System
section found later in the manual for more details.
• Trim button accesses the System Trims menu screen, which allows
you to make temporary adjustments to speaker levels and the lip
sync feature. These temporary trims do not override the settings
you made through the Setup menu and are discarded when you
select a new source. See the Menu System section found later in
the manual for more details.
7
Function Keys (F1 to F4)
The last four buttons on the remote control are the Function buttons,
or FKeys, which provide additional flexibility to the SSP remote control.
Think of them as “favorite” buttons that provide direct access to a specific
function or command not covered by the other buttons. Refer to the
Remote Function Buttons description in the Menu System section found
later in the manual for more information.
25
Initial Setup
Your SSP-800/CT-SSP Surround Sound Processor is delivered with default
factory settings to facilitate initial setup. But we highly recommend that you
work with your Classé dealer for the final setup of the processor. Your dealer’s
knowledge and experience with Classé products will ensure that your surround
system is optimized for your listening space.
However, if you can’t wait to get started, this section is designed to assist you in
setting up and becoming familiar with the SSP hardware. Once the initial setup
is complete, be sure to read the rest of this manual to familiarize yourself with
the daily operation and customizable features of your Surround Sound Processor.
Step 1 Connect the SSP and all system components to AC power.
Important!
Make sure everything – especially your power amplifier(s) –
is turned off before connecting power!
Connecting all system components to AC power, before making any
interconnections between components, ensures that every component has a solid
connection to ground. This lessens the chances of a static discharge that may
damage delicate electronics or your loudspeakers.
Step 2 Choose the appropriate cables.
Before you start connecting components together, let’s take a minute to discuss
the cables you will be using. The audio outputs available on the rear panel
include both balanced XLR connectors and unbalanced, or single-ended, RCA
connectors.
Single-ended RCA audio connections are the most popular means of
transmitting audio in consumer electronics. As long as you use high quality, low
capacitance cables, single-ended connections provide very satisfactory results.
However, balanced audio connections between components provide the best
analog signal connection because they effectively double the signal strength.
More importantly, as compared to single-ended connections, they significantly
improve resistance to common noise, therefore enhancing audio transparency,
detail, and dynamics.
Please consult your local Classé dealer for advice on which cables are best suited
for your system.
26
Step 3 Connect all source components to the SSP rear panel.
Source devices that you may want to integrate into your surround system might
include audio and video devices, such as CD and DVD players, and your main
display, such as a flat-panel display or projection system. If necessary, refer to the
Rear Panel section in this manual for a detailed description of each connector
found on the rear panel. Your local Classé dealer can also provide useful
suggestions for what source components you should add to your system and
guidance in setting them up.
Make sure you keep a detailed record of the rear panel
connectors that you used while connecting the source
components!
To help keep track of the different sources, we recommend keeping a penciland-paper record while you set-up the surround system. You’ll need to know
what connectors each source is attached to when you enter the setup menus. An
Installation Worksheet is included at the end of this manual to assist you.
NOTE: In the SSP default settings, each rear panel input is
associated with an input selection within the Setup menu. A
complete list of the factory default input settings is available at the
end of this manual.
Step 4 Connect the power amplifiers to the SSP rear panel.
Important!
Verify that the power amplifier(s) is plugged in but powered
OFF before connecting to the SSP!
We recommend using high quality cables with XLR connectors. Connect
the cables to the Main Analog Audio outputs on the SSP rear panel, using the
balanced XLR connection options.
NOTE: These pin assignments are consistent with the standards
adopted by the Audio Engineering Society. Refer to the operating
manuals of your balanced-input power amplifiers to verify that the
pin assignments of their input connectors correspond to the SSP. If
you are using Classé amplifiers, this note does not apply.
If needed, the pin assignments of the XLR-type male output
connectors are:
Pin 1: Signal ground
Pin 2: Signal + (non-inverting)
Pin 3: Signal – (inverting)
Connector ground lug: chassis ground
27
Connect the Main Analog Audio Outputs, either RCA or XLR, from the rear
panel of the SSP to the corresponding inputs on your amplifier(s) as follows:
• Connect the SSP Front Left and Front Right outputs to the inputs
of the amplifier(s) designated for the Front Left and Front Right
speakers, respectively.
• Connect the SSP center output to the input of the amplifier
designated for the center channel speaker.
• Connect the SSP Left Surround and Right Surround outputs to the
inputs of the amplifier(s) designated for the Left Surround and Right
Surround speakers, respectively.
• If you are setting up a 7.1-channel system, then also connect the SSP
Left Rear and Right Rear outputs to the inputs of the amplifier(s)
designated for the Left Rear and Right Rear speakers, respectively.
• If you are using a subwoofer, connect the SSP subwoofer output to
the input of the designated amplifier or powered subwoofer.
NOTE: Make sure connections from the subwoofer output go only to an
amplifier connected to a subwoofer, as low frequency signals can damage a
small full-range speaker not designed for high output bass reproduction.
Verify that each cable is clearly labeled so that you don’t mix them up. When
connecting a cable, make sure the cable has a good connection and is firmly
attached to the rear panel connectors on both the amplifier and the SSP.
The SSP-800/CT-SSP also provides two Auxiliary analog audio outputs. See the
Rear Panel section for more details about the Auxiliary outputs.
Step 5 Connect the loudspeakers to the amplifiers.
Important!
Verify that the power amplifier(s) is plugged in but powered
OFF before connecting to the SSP!
Connect each loudspeaker to its designated amplifier(s) channel. Pay close
attention to the phase of the speaker connections – always connect an amplifier’s
red (+) terminals to the red (+) terminals of the loudspeaker. Likewise, connect black
(–) terminals to black (–) terminals.
28
Step 6 Power up the system!
Now you are ready to power up your SSP and your surround system.
• Turn the rear panel power switch of the SSP to ON.
• The initial power-up cycle of the SSP takes approximately 90 seconds.
During this time, the blue LED on the standby button flashes. (For the
CT-SSP, the standby button itself will flash blue.)
• When the power-up cycle is complete, the SSP enters Standby mode.
The LED (or standby button) stops flashing but remains illuminated,
indicating that the SSP is in Standby mode. Refer to the Front Panel
section, for more details about Standby mode.
• Press the Standby button or the front panel touchscreen to bring the
SSP to its fully ON mode. The front panel touch screen displays a
blue screen with an “initializing” message and then switches to the
home page of the menu system. Refer to the Menu System section
found later in the manual for more information.
The physical setup of the SSP and system components is complete.
29
Understanding Surround Sound
Today’s sophisticated surround sound systems have spawned a bewildering
array of technologies and acronyms. In this section, we’ll give you a basic
understanding of what all that jargon means. As a result, you’ll be better
equipped to take advantage of the best that home entertainment has to offer.
how many channels? Today’s home entertainment systems reproduce soundtracks that include
anything from one to eight separate channels of information. Examples include:
• Watching mono movies, such as Casablanca or The Wizard of
Oz, having only a single channel of audio information in the
soundtrack.
• Listening to a musical CD, which is typically stereo or 2-channel
sound.
• Watching the original Star Wars in the original Dolby Surround
Pro Logic format, which is four channels of information derived
from two channels.
• Watching a recent movie or T.V. show in a 5.1-channel or
7.1-channel surround format, which identifies that the source
material has either five or seven full-range signals for the front,
surround, and rear speakers plus the .1 signal for the Low
Frequency Effects (LFE), also referred to as the LFE channel, for
the subwoofer.
Your SSP handles all of these tasks with ease, switching to an appropriate
processing mode automatically upon sensing the nature of the incoming signal.
However, you may still have to select from the available choices. For example,
disc-based media often contains multiple soundtracks with varying numbers of
channels and even different languages. Because you may have to choose the one
you want to hear using the menu of the media itself, you should know what
jargon you’ll likely see.
matrix or discrete? When movie-makers first wanted to expand beyond simple stereo (left and right
audio channels), they had a problem - the entire infrastructure on which they
depended was stereo.
®
Dolby Laboratories solved that problem with a system called Dolby Surround
that embedded two extra channels of audio sound into the existing stereo pair
so that specialized circuitry could retrieve the extra information with reasonable
accuracy. This technique, whereby channels are mixed together with the
intention of separating them later, is called matrix encoding and decoding.
The disadvantage, as you might expect, is that it is difficult to completely and
perfectly separate two channels that have been mixed together.
30
By contrast, modern soundtracks use discrete channels of information. That is,
each speaker has a distinct signal that is completely independent of every other
channel. This approach is clearly more desirable, since it gives the movie-makers
more creative control over the quality of your experience. Musicians also prefer
discrete formats, since it allows them to place their instruments and voices with
greater precision, to create the musical effects they desire.
There are many multi-channel formats available. Table1, below, identifies
the most common multi-channel formats to help you sort out some of the
possibilities.
Table 1: Common multichannel modes
Name
# Chs
Matrix/Discrete
Comments
analog stereo
2
Discrete
Found on almost all sources, including
tape decks, tuners, and CD players.
analog multichannel input
6-8
Discrete
A multi-channel analog input used
mostly for SACD & DVD-Audio.
4
Matrix
The original matrix decoding system
designed to squeeze four channels into
two and then retrieve them.
Dolby Pro
Logic II
Up to 5.1
Matrix
An improvement of Dolby’s original
Pro Logic matrix decoder, Dolby PLII
is designed for 5.1 surround systems.
Dolby Pro
Logic IIx
Up to 7.1
Matrix
An improvement of Dolby PLII, this
version uses the 2ch or 5.1channel
source audio to create as many as 7.1
channels (depending on speaker setup)
of surround sound.
1.0-5.1
Discrete
The most common modern digital
source, used in HDTV, DVD, etc.
6.1
Discrete
A 7th channel of discrete information
was recorded during filming and
is encoded into the media. This
information is used to create a single
rear center, or two mono rear centers
depending on the speaker setup (6.1
or 7.1).
1.0-5.1
Discrete
Similar to Dolby Digital in practice,
though it uses a different technology.
Dolby Surround
Pro Logic
Dolby Digital
(formerly AC-3)
Dolby
Digital EX
DTS
DTS-ES Matrix
6.1
Mostly Discrete The center rear channel is a matrix
channel encoded into the left and
right surround channels. The
processor reads flags and “unfolds”
the center rear channel information;
all other channels are discrete.
DTS-ES Discrete
6.1
Discrete
All 6.1 channels are discrete
DTS Neo:6
5-6
Matrix
Designed for the playback of film or
music sources and can derive 5 or 6
channels with surround and/or rear
speakers
31
Dolby Digital
Plus
1.0 - 7.1+
Discrete
Audio codec which allows for higher
bitrates, 7.1 channels or more
(currently limited by HD DVD,
Blu-ray disc™ standards), while still
remaining compatible with older
5.1 systems. The codec was designed
based on Dolby Digital but provides
the necessary versatility going into the
future.
Dolby TrueHD
1.0 - 7.1+
Discrete
This is a true next-generation
surround mode where the audio
is bit-for-bit identical to the highresolution studio master audio.
Similarly to Dolby Digital Plus
the track contains a 5.1 core for
backwards compatibility.
DTS-HD
Master Audio
5.1 - 7.1
Discrete
This is the DTS flavour of a bit-forbit identical copy of the studio master
track on your media, and therefore
delivers the best possible resolution.
Master Audio still contains the DTS
core to remain backwards compatible
with older DTS systems.
DTS-HD
High Resolution
Audio
5.1 - 7.1
Discrete
This is used when there is not enough
space on the disc to hold the complete
Master Audio track. Though not
a bit-for-bit representation, High
Resolution Audio provides increased
bitrates while still providing the DTS
core for backwards compatibility with
older systems.
LPCM
2.0 - 7.1
Discrete
This uncompressed digital
representation of analog audio was
initially developed as the Redbook
standard format for stereo CD audio
and DVD-A 5.1 multichannel audio.
Depending on the source material,
this high resolution format is capable
of outputting sample rate resolutions
of up to 24 bit/192kHz.
post-processing The first thing the SSP Surround Sound Processor does is recover the various
channels delivered by your source with accuracy and fidelity. This might be a
single-channel mono signal, a Dolby True HD soundtrack with 7.1 channels, or
anything in between. The signal may have been delivered via satellite receiver,
cable set-top box, DVD, or even downloaded from the Internet.
Once the SSP has decoded the selected signal, you can then choose to send it
to the output unchanged, or you can add further processing, often called postprocessing. This kind of processing is particularly useful for utilizing additional
surround speakers with limited audio track sources. For instance, processing a
2-channel stereo source with Dolby Pro Logic IIx generates a 7.1-channel output
so that you can enjoy the audio source in full surround sound.
32
Using the SSP-800/CT-SSP
Your SSP’s versatile touchscreen LCD supports most of your day-to-day
operations and provides access to a flexible menu system for setup functions
that aren’t accessed as often as others. Although using the touchscreen is quite
intuitive, the menu system is extensive. This section of the owner’s manual
outlines the use of this touchscreen in day-to-day operation of the system.
When you bring the SSP out of its Standby mode, the touchscreen displays an
“initializing” message and then switches to the Home page of the menu system,
as shown below.
The Home page displays four options – Source, Video Preview, Mode, and
Controls – on the top half of the screen. The bottom half of the screen displays
the active input, surround processing mode, plus the current volume level (in
both a graphical bar across the bottom of the screen and as a large numeric
decibel value). This is the starting page for all of the day-to-day operations of
the SSP and can be quickly accessed at any time by pressing the Home button
on the remote control.
source selection
Touching the Source option opens the Source Select page. The SSP has a total
of 20 selectable inputs, which are all interchangeable.
Touch any input button on the touchscreen to select it as the current input.
If the input you want to activate is not on this screen, press the More button
for the next page of input options. Or, press the Back button to return to the
previous page.
Continue to press the More button to scroll through the available active inputs.
When the screen with the last input is selected, the More button changes to a
Home button.
If you don’t have this many sources in your system, you can deactivate any
unused inputs. When an input is deactivated, that input button is removed
from the Source selection menu. This can be useful as it reduces the number of
input options, making navigation and selection faster. See the Menu System for
details on deactivating unused inputs.
33
mode selection
While you can specify default surround processing modes for each input,
there are times when you may wish to select a different mode for a particular
recording. For example, when watching a classic movie from the 1940s, you
may prefer to hear it in mono using only the center channel speaker.
Touch the Mode option on the Home page to open the Mode Select menu,
which displays a complete list of processing modes. Modes that are grayed out
cannot be applied to the current audio source. For instance, a mode designed for
a stereo signal is not available while listening to a multi-channel Dolby Digital
audio track.
Touching the up or down arrows scrolls through the list of modes. Touch any
mode (that isn’t grayed out) to select it. The SSP processing changes to the
newly-selected mode. Press the Back button to return to the Home page. The
available modes are described in Table 2.
Table 2: SSP-800/CT-SSP available surround processing modes
Name
Description
Mono
Outputs sound to the center channel only. Use it
for mono sources such as classic movies, mono TV
broadcasts, etc.
Stereo
Outputs to the Front Left and Front Right channels only.
This is the preferred mode for music reproduction.
Music Mode Party
Produces mono output at the same level from all available
speakers.
Mono Plus
Uses the mono input to output mono signals on the L,
R, SR, SL, and RR, RL if they are active.
Movie Plus
Produces stereo output in all available speakers. The
output is proportioned with a 60% center width and a
50/50 front-to-surround distribution. Approximately
15% of the total output is directed to the rear channels
(if used).
Music Plus
Produces stereo output in all available speakers with
a 25% center width, a 70/30 front-to-surround
distribution and 15% to the rear channels.
Dolby PLII
Provides audio signals for a 5-channel surround sound
field from matrix-encoded stereo sources. Spatial
qualities vary for non-encoded sources.
Dolby PLIIx Music
An extension of the Dolby Pro Logic mode, Dolby PLIIx
expands existing stereo or 5.1-channel matrix-encoded
audio signals for 6.1- or 7.1-channel discrete playback.
The Music mode features three additional user controls:
Center Width (for adjusting balance to favor the Center
or Left and Right front channels), Panorama (for wrapa-round surround effects), and Dimension (to adjust the
depth of the surround sound field).
34
Dolby PLIIx Movie
Dolby PLIIx Matrix
Dolby PLIIx Game
DTS Neo:6
DTS Neo:6 Cinema
DTS Neo:6 Music
Discrete
DTS Neo:6 Cinema ES
DTS Neo:6 Music ES
Dolby Surround EX
Dolby Digital EX
The Movie mode routes the special effects signals to the
surround channels for a fuller, dramatic impact while
viewing movies and films.
The Matrix mode provides a sound field similar to the
Music mode, but does not have the additional adjustment
options.
The Game mode also routes the special effects signals to
the surround channels.
Expands existing stereo or 5.1-channel audio signals for
playback with 6.1- or 7.1-channel systems. Use with
matrix-encoded digital stereo sources.
The Cinema mode emphasizes front information and
processes surround effects to reproduce a very diffuse rear
sound field.
Use the Music mode when playing non-encoded stereo
audio tracks. Also includes a Centre Width adjustment.
Provides a “native” format mode where no surround
processing is performed. For example, when HD Audio
codecs such as Dolby TrueHD and DTS-HD Master
Audio are decoded in a Blu-ray player, they may be
transferred as Discrete multi-channel LPCM signals
to the SSP. Note: In this mode, sound is sent to all active
speakers with data in the soundtrack.
Provides the DTS Neo:6 mode with the addition of
discrete- or matrix-encoding to the surround back
channels.
Provides the DTS Neo:6 mode with the addition of
discrete- or matrix-encoding to the surround back
channels.
Derives matrix-encoded rear channel audio signals from
5.1-channel audio signal sources. Only available for input
sources flagged with Surround EX encoding.
A 7th channel of discrete information was recorded
during filming and is encoded into the media. This
extra channel of information is used to create a single
rear center, or two mono rear centers depending on the
speaker setup (6.1 or 7.1).
video preview The Video Preview option allows you to select and view the video source on the
front panel touchscreen, so you see what is being output to the main display.
This is useful in installations where the SSP is located out of direct line-of-sight
to the display. Only the currently active video input can be previewed.
Touch the Preview option from the Home page. The touchscreen now displays
the selected video source. To return to the home page, simply touch the display
again. If the current input has no video source assigned, touching the Preview
option displays a message stating that the Preview option is unavailable for the
selected input.
35
controls Touching the Controls option opens a new page, as shown below. The Controls
page allows you to adjust a variety of processor functions, such as audio levels
and delays, as well as selecting listening/speaker configurations.
These adjustments are temporary; when a new input is selected, the adjustments
are deleted and replaced with the saved values. If you want to recalibrate the
audio levels because of an equipment change, use the Speaker Setup menu, not
the Controls menu. Similarly, use the Input Setup menu to save a permanent
change to an audio delay or configuration preference.
system trims The System Trims page controls several parameters of the SSP’s operation that
may occasionally need adjustment to suit a particular recording. Touching the
System Trims option opens the System Trims menu page, as shown below.
The available adjustments are:
• level trims - provides Left/Right Balance, Center, Surround, Rear,
Subwoofer, and Aux1/2 level adjustments. As an example, you might want
to raise the level of the Center channel speaker by 2 or 3 dB if the dialog
in a particular movie is difficult to understand. In addition to the normal
subwoofer trims, two additional buttons (LFE 0dB, and LFE -10dB) offer
an extra -10dB of trim. You may find certain older DTS Music discs with
the LFE channel recorded 10dB higher than normal. The LFE -10dB
button allows you to quickly adjust for this scenario.
• audio delay - provides an overall delay, called Lipsync, to adjust for cases
where the timing of the video signal seems to trail the audio. You may run
into this problem with the occasional DVD, due to inattentive mastering
of the disc itself. If you find this problem most of the time, then adjust
the delay setting for the input in the Setup menu. Remember that these
are only temporary trims, so use this system trim only for the occasional
adjustment needed for a specific disc or program.
• Dolby late night - this mode offers intelligent moderation of the dynamic
range in Dolby Digital recordings. This is especially useful when you want
to watch a movie in the evening, but are concerned about disturbing the
36
neighbors or others in the household who might prefer to be sleeping during
your action movie. This feature is specific to Dolby Digital soundtracks and is
grayed out, or unavailable, when listening to other surround formats. If turned
on, it will remain on until either being turned off or the input is changed.
It de-activates for non-Dolby Digital sources (such as may happen during a
commercial) and re-activates when the Dolby Digital signal reappears..
• reset trims - allows you to reset the system trims back to the values
reflected in the Setup menu for that input. NOTE: This is NOT a factory
default command.
configuration select Touching the Configuration option opens the Configuration Select page, which
allows you to select the current configuration you want to activate.
Configurations, which reflect the speaker setup of your system, are defined and
may be renamed in the Setup Menu. The Configuration Selection page allows
you to choose from the up to six different system configurations available with
the SSP.
For example, you might use different configurations that you call stereo and
movies for configuring the system for full-range two-channel versus multichannel with subwoofer(s). Conveniently you may even use configurations to
optimize levels and distances for different listening positions.
For more information regarding the Configuration setup, refer to the Menu
System section.
37
The Menu System
The comprehensive menu system provides setup and configuration controls
for the Surround Sound Processor. These installation-specific features let you
customize how the SSP works within the context of your particular system.
Pressing the Menu button on the front panel opens the main Menu page, which
is divided into six sections as shown below. The menu screens are always shown
on the front panel touchscreen and can also be viewed as an OSD (On Screen
Display) on the main video display.
The button on the top right of the menu pages provides a “More” button, when
additional menu options are available, or a Home button for returning to the
Home page. Pressing the Menu button again either returns to the Home page,
or returns to the Main Menu page, depending upon your location in the menu
system.
38
system setup Touching the System Setup option from the main Menu page opens the System
Setup page, which contains six setup options as shown below.
From the System Setup menu, you can:
• tailor your inputs to your particular source components
• configure and calibrate the system to take best advantage of your
loudspeakers
• create shortcuts through the “profile function” to access your preferred or
most frequently used functions
• program the behavior of the SSP’s DC triggers
volume setup Touching the Volume option from the System Setup menu opens the Volume
Setup page, as shown below.
The options on this menu page allow you to:
•
•
•
•
set a maximum volume level
control the volume level of the system when it is turned on
customize the behavior of the mute control
adjust IR and automation volume command speeds
39
max volume The Max Volume page allows you to establish a maximum volume setting
for your system. This scale runs from 0 to 100, with 100 indicating that you
do not want any artificial limit placed on the maximum gain your Surround
Sound Processor can provide. This setting is interactive. You can set the value
to something less than 100, and then adjust the volume to see whether it is
appropriate.
NOTE: The volume knob itself does not set the maximum volume; you
must set the maximum volume level in this Max Volume setup menu.
startup volume Touching the Startup Volume option allows you to set up a preferred volume
level for when the SSP wakes out of standby. This starting volume level can be
configured in two ways:
• the Last Volume option sets the starting volume to the last level selected
before the unit was powered down. The mute setting is also remembered.
• the Specific option allows you to set a specific volume level with the mute
control on or off.
IR setup Touching the IR option displays the IR volume speed setup page, shown below.
Similar to the rotary knob setup, the IR volume speed controls the degree at
which the volume is stepped through when the remote control volume button
is pressed. Three settings are available – Fast, Normal, and Slow. The default
setting is Normal.
40
automation Touching the Automation option displays the Automation volume speed setup
page, shown below.
This volume control is specifically for use with automation control systems. Such
control systems can vary in how quickly they repeat ramped volume commands.
By first selecting a suitable volume control speed on the SSP-800/CT-SSP
Surround Sound Processor, the programming required to tailor the speed from
the control interface is simplified.
mute setup The Mute Setup page allows you to choose how the mute button functions. The
options for mute control are:
• classic - completely mutes all audio so that when the Mute button is
pressed, no audio is heard.
• specific - allows you to select the exact value to which the volume is
attenuated. If the current volume is already below that level when muting
is engaged, the volume remains unchanged.
• damping - reduces the current listening level by a specified amount.
The Specific and Damping options are especially useful in situations where
you still want to hear the audio source but need to reduce the volume level
temporarily. For example, let’s say you are watching a football game and the
phone rings. You need to take the call but would still like to monitor the
progress of the game. Pressing the Mute button, while it’s set for specific and
damping, provides a simple solution.
41
input setup Each of the 20 inputs supported by your Surround Sound Processor can be
customized in several ways to enhance system performance or to simplify
controls. The Input Setup menu always opens to the setup page for Input 1. The
menu contains six buttons that completely define each input – Name, Audio,
Configuration, In use, Video, and Next input, as shown below. The same
menu is used to set up each input:
name The Name button provides a way to customize the names of the inputs as
displayed on the input selection screens. For example, if you have the Classé
DVD transport connected to Input 6, you may want to rename the input
to “CDT-300” to make it easier to remember. Each name can be up to 14
characters long.
To change an input name to something more specific to your system, use the
four buttons along the bottom of the Input Name menu, shown in the Input
Setup diagram above. The buttons provide the following functions:
• The left arrow button acts like the backspace key on a computer keyboard.
Touch this button to delete characters by moving the cursor to the left.
• The right arrow button adds characters by moving the cursor to the right.
• The + and – buttons allow you to change the current character by scrolling
through the available list of characters. This list includes all upper- and
lower-case letters of the alphabet, the numbers 0 to 9, and a variety of
punctuation.
When you’ve completed modifying the input name, touch the Back button to
return to the Input Setup menu.
42
audio The Audio Input menu allows you to select the offset, delay, and favorite
processing settings, affecting how the audio from this input source is handled.
• offset is used to ensure that all analog source playback is at comparable
levels. There can be significant differences in output levels among analog
sources (this is not a problem with digital sources), which can lead to
unexpected changes in volume when switching among multiple sources.
The SSP provides an offset adjustment range from -5 to +10 dB.
• delay introduces an audio delay to compensate for a delayed video signal.
The delay is added to all channels and addresses the “lip sync” problems often
found with modern digital televisions using sophisticated video processing.
NOTE: If you see a consistent “lip sync” problem with all materials played by
this input source, then adjust the delay parameter to compensate for the issue.
However, if you only notice problems with a few specific materials, then leave
the input delay at its default value and make temporary adjustments to the
System Trims menu, available from the Home page, while playing the problem
source materials.
• favorite processing determines the default surround mode that the
SSP initially uses when it receives either a two channel (“stereo”) or a
multi-channel signal from the selected input source. For example, you may
want to use Dolby Pro Logic II Music as the default mode for stereo signals
from your CD player, while preferring plain two-channel reproduction
for the signal from your FM tuner. Touching either the 2-channel or the
multi-channel buttons displays a list of the available surround processing
modes for the chosen signal type, from which you may select your
preferred default setting for this source.
• connector identifies which rear panel connection the input should use.
Any of the rear panel audio inputs are assignable to any of the input setups.
• HDMI audio can only be assigned once an HDMI video connector has
been assigned to the input.
• bypass select determines if the incoming analog signal is converted to
digital format or left in an analog format. If the Bypass Select is NOT
highlighted then the SSP converts all of the incoming analog signals to
digital for further processing. If you prefer to pass your signals through the
SSP unaltered, except for volume control, then touch the Bypass Select
button to make it active. NOTE: This option is automatically selected when
the Connector parameter is set to 7.1-bypass.
configuration The Configuration button allows you to assign one of the six configuration
options as the default for the input being set up. If you don’t want a specific
configuration assigned to this input, select the No Default option. In this
case, the last used configuration is maintained when the input is selected.
Configurations are speaker setups, and are discussed in more detail later in this
section.
NOTE: The default Configuration assignment can be temporarily
overridden from the controls button on the Home page. See the section,
Using the SSP-800/CT-SSP, for more details.
43
in use This button identifies active inputs. If the In Use button is highlighted, then
the Input is active. If the In Use button is NOT highlighted, then the input is
considered inactive and is removed from the source selection list.
Deselecting the In Use button for unused inputs is a good way to simplify
source selection. The Source menu on the Home page only lists active inputs so,
if the In Use button is NOT highlighted in the input setup menu, that input
does NOT appear in the Source menu.
video The Video button should be used when setting up video sources. It opens the
Input Video Connector menu which lists the available video connections on
the rear panel, allowing you to identify which rear panel connection the input
should use. Any of the rear panel video inputs are assignable to any of the input
setups.
next input The Next Input button scrolls through the inputs from Input 1 to Input 20. So,
once you’ve completed the Input 1 setup, click the Next Input button to access
the Input 2 setup controls, and so on through Input 20.
NOTE: The Back button returns to the previously viewed menu.
triggers The SSP has two available trigger controls. Each may be programmed to either
“logic” (12V) or “inverse logic” (0V) settings. The ability to change the way the
trigger operates can solve installation-specific problems that otherwise require
external devices that add to both the cost and complexity of your system.
The Event button is used to assign the trigger activation to a specific event. The
triggers can be associated with the Standby mode, a specific input, configuration,
surround processing mode activation, or even a combination of these. To use the
Inverse Logic option, simply highlight the Inverse Logic button on the Triggers
setup page.
For more information on the use of DC triggers, we recommend you speak with
your authorized Classé dealer.
44
profiles A Profile allows you to create a number of shortcuts to various functions of your
Surround Sound Processor.
Two separate profiles can be customized with up to six commands each. Any
defined profile has a named button available on the home page, as shown above.
NOTE: By default both profiles are inactive, therefore the profiles button
does not appear on the home screen.
• To modify a profile name touch the Name button. A profile name can be
up to 14 characters long.
• Touch the Commands button to select the functions that are displayed
in the profile. Under Commands is a list of up to 6 command buttons.
For each button, you may assign a function from the list of operations.
Effectively you are creating a customized page of the operations you might
use the most.
• Select the OSD button to show the profile control page on the video
display when that profile is selected. Otherwise, selection of the profile
commands is seen only on the front panel LCD.
• Select the In Use button to add this profile to the Home page menu.
Profiles give you the ability to directly access functions without having to
remember how to navigate to their location in the menu structure. These are
especially useful if you frequently find yourself navigating to the same set of
commands.
45
room EQ The SSP-800/CT-SSP Room EQ capability allows you to build very precise
digital audio filters to help compensate for fixed sonic irregularities in your
room. These filters should be constructed based upon audio measurements made
by a well-qualified acoustical engineer. These powerful filters are made available
in a completely manual fashion to help your professional installer give you the
best listening experience possible.
As many as five filters can be built for each speaker channel, except the Aux
channels defined for Bi-Amp or downmix. A Bi-Amp channel assumes the same
filters as defined for the Front Left and Right partner channels.
In order to define the Room EQ filters, select Room EQ from the Setup Menu.
Choose which channel(s) you wish to adjust. Individually select and activate a
band, then tune it with the appropriate center frequency, Q, and gain. Once the
appropriate number of bands have been activated and tuned, use the Activate
Group button to turn the filters on and off as a before/after check on your
progress for the channel.
You do not need to have filters defined for every channel. The installer need
only make the adjustments to the channels necessary to correct for the room’s
interaction. We encourage you to consult with your authorized Classé dealer to
properly calibrate the SSP Room EQ function.
configuration Your SSP has default settings for each speaker, but these settings should be
adjusted to match your system for optimal results. You may want to consult
your authorized Classé dealer to precisely adjust the settings to match your room
environment. On your own, you can identify each speaker’s distance from your
seating position, but it’s impossible to make accurate speaker level corrections by
ear. Your dealer’s technician uses an SPL meter or specialized room measurement
software to optimize levels and adjust speaker equalization, a powerful tool to
help optimize your room’s interaction with your speakers.
The Configuration Setup menu allows you to define up to six different
speaker configurations. Touch the button for the specific configuration you
want to set up to open the configuration setup menu, shown on the right.
The menu contains four buttons that completely define the configuration
– Name, Distance, Levels, and Speakers – plus a fifth button that activates the
configuration. The same menu is used to set up each configuration.
46
name The Name button provides a way to customize the names of the speaker
configurations. Each name can be up to 14 characters long.
To change a configuration name to something more specific to your system,
use the four buttons along the bottom of the Configuration Name menu. The
buttons provide the following functions:
• The left arrow button acts like the backspace key on a computer keyboard.
Touch this button to delete characters by moving the cursor to the left.
• The right arrow button adds characters by moving the cursor to the right.
• The + and – buttons allow you to change the current character by scrolling
through the available list of characters. This list includes all upper- and
lower-case letters of the alphabet, the numbers 0 to 9, and a variety of
punctuation.
When you’ve completed modifying the configuration name, touch the Back
button to return to the Configuration Setup menu.
distances The Distances setup page allows you to adjust the speaker distances to accurately
reflect the actual placement of your speakers. Touch the speaker location you
wish to adjust and then measure the distance between each speaker and the
primary listening place with a tape measure or equivalent. You can then enter
the resulting distance value into the menu by touching the decrease or increase
buttons, shown below.
NOTE: You may find that some speaker options are not available for
selection. Those speakers do not currently exist in that specific configuration.
The speaker selections for each configuration are made on the Speakers page,
which will be discussed in the sections which follow.
47
levels The Levels menu allows you to adjust the output levels of the speakers. An SPL
meter should be used from the primary seating position to ensure that each
speaker delivers the same sound pressure from a given test noise audio signal.
Touch the Noise Seq button to activate the noise generator; the top of the menu
now states “Levels Noise: L” – indicating that the test noise is being generated
on the front left speaker. The test noise automatically moves to each of the
available speakers, as indicated by the menu title, and continues to rotate around
the room until the Noise Seq button is touched again.
NOTE: You may find that some speaker options are not available for
selection. Those speakers do not currently exist in that specific configuration.
The speaker selections for each configuration are made on the Speakers page,
which hasn’t been discussed yet.
To modify the actual levels, touch the speaker you want to update and then
adjust the level using the increase and decrease buttons. Set the SPL meter to
“C” weighting and Slow response. Each speaker level should be adjusted until
the SPL meter reads 75dB at your main listening position.
in use This button identifies active configuration. If the In Use button is highlighted,
then the Configuration is active. If the In Use button is NOT highlighted, then
the configuration is considered inactive and is not available for selection in the
Input Setup menu or in the Home page Control section.
speakers The Speakers configuration page identifies which speakers are active for each
configuration, as well as the crossover level for each speaker. The Auxiliary
channels can also be configured through this menu.
First, touch the Speaker Config button to set up the 7.1-channel speaker
configurations. Then we will discuss the Auxiliary channel setups.
48
Each speaker opens the same menu with two buttons – size and crossover. To
modify the crossover for the selected speaker, touch the Crossover button and
then adjust the setting using the increase and decrease buttons. The crossover
setting applies a high pass filter to the speakers set on crossed over, and a low
pass filter to route bass information to the sub (if enabled). When the speaker
is set to large, and e-bass is enabled the crossover determines which low
frequencies will simultaneously get routed to the sub(s).
The Size option allows you to pick either Full Range or Crossed Over for each
speaker. The None option is available on the surround, center, or rears. Selecting
None disables the channel(s) output. If None is highlighted then that speaker
location is not available for selection in other menus.
NOTE: You cannot disable the Front L/R. If you disable the surround
speakers, then the rear speakers are not available for selection.
The Subwoofer configuration page, shown above, has two buttons available –
Sub Enabled and e-bass. If the Sub Enabled button is highlighted, then the
configuration includes an active subwoofer and the LFE (Low Frequency Effects)
information is routed to it as well as any low pass energy from the crossed
over channels. If you do not enable a subwoofer for the system, then the LFE
information will be routed to any full range speakers in the configuration. When
a subwoofer is enabled and the e-bass option selected, the low frequency signals
from all speakers (both crossed and full range) are passed to the subwoofer along
with the LFE (if available from a discrete stream). This effectively duplicates the
bass energy present in full range speakers.
NOTE: If the Sub is not enabled e-bass will be grayed out and not selectable
as the LFE is already being distributed to any full range
speakers available.
The Crossover Slope button enables you to select the preferred crossover slope,
either 12dB/octave or a steeper 24dB/octave. Touch the desired value so that it is
highlighted.
49
auxiliary channels Now that the main speakers have been configured, we’ll discuss the Auxiliary
Channel configurations. On the Speaker setup page, touch the Aux Channels
button to open the Auxiliary Channels menu. The SSP has two auxiliary
channels that can be utilized as additional subwoofers, assigned as a 2-channel
down-mix of a selected multichannel signal, or configured to bi-amped left and
right audio.
Alternatively, touch the None option to disable the auxiliary channels and leave
them unused.
Touch the Subs button to configure the auxiliary channels as additional
subwoofers. Touch the Mono2 or Mono3 buttons to put two or three mono
subwoofers in your sound system. In this configuration all subwoofers are
receiving identical signals. Touch the Stereo LR or Stereo LCR buttons to make
the subwoofers stereo Left and Right channels, or stereo Left, Center, and Right
channels, respectively. Please refer to the table below to determine which rear
panel outputs are associated with a particular channel. To avoid inundating the
room with bass by adding a second subwoofer (or third), this does not simply
double or triple the bass energy in the room. The total bass energy is properly
distributed among the subwoofers defined in the system.
Output Connector
LR configuration
LCR configuration
S
L Sub
L Sub
Aux 1
X
C Sub
Aux 2
R Sub
R Sub
Use the Downmix–fixed or Downmix–variable options to provide a twochannel down-mix of the selected multichannel signal, which then follows the
Main Front Left and Right speakers. The Downmix–fixed option sends the
stereo output with a fixed volume level. The Downmix–variable option sends the
stereo output with a variable volume control that duplicates the main volume
settings. The Downmix option is very useful in situations where you want
to monitor the main zone audio from another room. For instance, if you are
watching the football game and need to leave to make dinner, you can feed the
down-mixed audio to the kitchen and keep up with the game while you cook.
Touch the Bi-Amp button to configure the auxiliary channels for a biamplification mode, where a single speaker is driven by a stereo, or two mono,
amplifiers. In this mode, the two auxiliary channels exactly follow the Front
Left and Right channels. To use the bi-amplification option, the Bi-Amp button
on the Aux Bi-Amp page must be highlighted. This page also provides the level
offset controls. Use the increase and decrease buttons to adjust the offset level.
NOTE: For a Bi-Amp system, the Speaker Level adjustments for
the left and right channels also simultaneously affect the Aux Left
and Right, since the Bi-Amp channels now operate in tandem.
50
black level
The more button on the System Setup screen accesses the Black Level setting.
The “video setup” in North America assumes that black is reproduced at a video
level of 7.5 IRE units, while most of the rest of the world assumes that video
black is represented by a video level of 0 IRE units. The SSP can operate either
way; you should pick the standard common to your area for compatibility with
the rest of your video sources.
teach IR
The complete list of SSP-800/CT-SSP discrete infrared (IR) command codes
extends far beyond what is practical for handheld remote controls. However,
many of these functions are critical if you plan to create a customized remote
control with macros that take command of your entire system. Without these
discrete codes, many of the macros you might want to create simply won’t work
reliably.
The Teach IR page displays a scrolling list of all the available IR codes in the
Surround Sound Processor. Simply scroll to the command you want your
macro-capable remote to learn and touch the Send IR Code button. The SSP
continuously sends the appropriate command code via the front panel - as long
as the button is pressed – until your third-party remote control has learned it.
For more information on control systems, we recommend you speak with your
authorized Classé dealer.
display setup
The Display Setup menu page, shown below, allows you to configure the
brightness, display timeout, and language used in the front panel and menu
system. It also determines the format and color of the OSD (on-screen display),
and how volume settings are displayed on your system.
51
brightness
The Brightness setting of the SSP front panel touchscreen has three possible
values: low, medium, and high. Select the appropriate setting based on the level
of ambient light typically found in your listening room while using the system.
A high brightness setting usually works best in brightly-lit rooms; you may
find that a lower setting is less visually intrusive under more subdued lighting
conditions.
timeout
If you prefer listening to music in a dimly-lit or darkened room, you may
find even the low brightness setting of the display somewhat distracting. You
can essentially turn off the touchscreen by reducing the timeout value of the
backlighting so as to turn it off entirely after a period of inactivity you select. In
this context, activity refers to any use of the user interface. This includes hard
buttons, the LCD touchscreen, and the remote control.
For example, if you reduce the timeout to its minimum setting, the backlighting
illuminates the display as soon as you interact with any of the SSP controls, and
remains lit for only three seconds – just long enough for you to check a setting.
If you continue to use any of the controls (at least once every three seconds), the
display remains lit. After three seconds of inactivity on your part, the backlight
extinguishes itself, essentially turning off the touchscreen. Or, if you prefer
to have the active source preview, instead of a black screen, you can select the
timeout value of the touchscreen and then highlight video on timeout. When
the touchscreen timeout value is reached, the active video source is shown on
the touchscreen.
If you prefer the display of the SSP to remain on whenever not in Standby
mode, select the Never option. The lamp in the touchscreen display is
designed for harsh automotive environments and will give you many years of
reliable operation. If you plan to leave the unit on continuously, however, we
recommend that you keep the timeout delay set to less than one minute.
NOTE: setting the brightness to a lower setting does not increase
the life of the lamp.
language
OSD (on screen display)
52
The Language menu offers a choice between six different languages
supported by the SSP-800/CT-SSP. The language selected is then used for all
touchscreen and menu system text. Classé has also provided our international
distributors with a software tool that makes it possible for them to customize
the translations to suit their local customs and terminology. This allows us
to be sure operation of the SSP is just as intuitive in countries other than its
birthplace, Canada.
The SSP can report changes to its status via the On Screen Display. Selecting
Duration from the OSD menu allows you to define the amount of time events
are displayed, up to a maximum of 5 seconds. The Events screen allows you
to select which individual events you want displayed. To make your selection,
scroll through the list using the arrow keys on the right of the screen, then
highlight the desired events. The default is for all events in the list to generate an
OSD message.
colors The Colors menu page gives you the ability to customize the color of the OSD
and touchscreen. Besides the default blue, the screen may be shown in silver, red,
or green. If a different color is chosen, the change takes place immediately so you
can view the colors before leaving the menu page.
volume There are two common ways of displaying the volume information in a multichannel system: absolute and relative.
The absolute system refers to the notion that most people think of the number
0 as meaning nothing, e.g., no sound at all. In this system, 0 means “sound off ”
and larger numbers indicate high volumes. While this method is intuitive, there’s
really no reference for how loud a particular setting is except through prior
experience.
In the relative system, the volume referred to as 0dB indicates that no
attenuation or gain is added to the signal. This setting is referred to as unity
gain (a one-to-one relationship between the size of signals coming in vs. going
out). This reference volume is the same level at which movies are played in
theaters. Changes from this volume level are shown as either positive (louder) or
negative (quieter). Showing volume in relative dB tells you precisely how much
attenuation or amplification you are employing.
In any event, the SSP offers both systems so that you may choose what makes
the most sense to you personally.
Dolby/DTS The SSP-800/CT-SSP incorporates both Dolby Pro Logic II and DTS Neo:6
technologies for converting a two-channel signal into an enjoyable multi-channel
listening experience. The Dolby/DTS Setup menu allows you to modify the
Dolby PLIIx Music or DTS Neo:6 Music processing settings to best suit your
personal preferences.
While they differ in the details of their implementation and in the subjective
result, on a conceptual level they do the same thing: they analyze the
information embedded in two-channel recordings, looking for clues that can
indicate how the sound in those recordings might best be redistributed to the
various speakers in a multi-channel system, simulating a discrete multi-channel
recording.
53
Dolby Pro Logic IIx Dolby Pro Logic IIx Music mode has three user-adjustable parameters:
• Panorama presents a wider, deeper front soundstage. The effect is
somewhat signal-dependant, meaning that it is more pronounced with
some recordings and less so with others. With a good recording, however,
the effect can be quite dramatic. Panorama is active when the button is
highlighted.
• Center Width determines how much of the center-channel information
is allowed to remain in the left and right speakers. A low setting places all
of the information that creates a phantom center image in a normal stereo
system into the center channel speaker instead (sometimes referred to as a
“hard” center channel). A high setting leaves this information in the left
and right speakers, fading out the center channel speaker. Intermediate
settings provide a great compromise between the seamless spaciousness of
a great stereo system and the wide listening area of a multi-channel system,
where you don’t need to be in the “sweet spot” to hear a center image.
• Dimension shifts the overall balance of the processing towards the back
of the room. In very “dry” recordings lacking recorded ambience, a higher
dimension setting helps to restore a sense of space to the reproduced
sound. In extremely “wet” recordings with lots of ambience, you may
want to reduce the dimension setting to avoid excessive or distracting
spaciousness.
DTS Neo:6 The only user-adjustable parameter for DTS Neo:6 Music mode and ES Music
mode is the center width control. It functions in a similar manner to the center
width control for Dolby Pro Logic IIx.
54
remote Fkeys The remote control supplied with the SSP-800/CT-SSP has four function keys
(Fkeys), each of which gives you instant access to a specific system function that
might otherwise be buried in the menu system.
For example, if you use the balance control frequently, you may want to consider
programming one of the Fkeys to directly access the balance control. By saving
the balance control as an Fkey function, you do not need to access the controls
page and then choose system trims, level trims, L/R balance to change the
parameter.
The remote control F1 to F4 buttons correspond to the Function Keys displayed
on the touchscreen. Select the Function Key that you would like to program,
Then to select the one you want simply scroll through the list (by touching
either the up or down arrows on the right), and then touch the specific function
you want that Fkey to perform.
important note on Fkey use All Classé remote controls provide these same four Fkeys, so that you need not
worry about which remote you happen to pick up. Thus F1 on the Surround
Sound Processor’s remote control sends the same infrared signal as F1 on the
DVD player’s remote control and so on.
While this is intended to minimize confusion amongst different remotes (since
this aspect of them will all perform identically), you should take care when
assigning different functions on different components to the same Fkey. Doing
so can result in two components doing two different things at once, in response
to a single press of a button on the remote control. This can sometimes be
useful. As an example, F1 could set the Surround Sound Processor to the DVD
input, and also set the DVD player to Play, both from the press of a single Fkey.
55
status The Status screen provides several items of information on the currently playing
disc, as well as access to information on the software used in and the internal
sensors of the SSP. While on this page, pressing the more key will access the
CAN-Bus features.
version info The version info button on the status screen takes you to the Version
Information screen, which displays information on various pieces of software
used by your SSP. If you ever have occasion to call our technical support people
to ask a question not covered in this manual, they may want to know precisely
what version of software your unit is running. Having this information available
will help enable them to give you the best possible service.
sensors The sensors button on the status screen takes you to the Sensors screen, which
displays information about several internal sensors within the SSP. It is unlikely
you might ever need the sensor information, unless directed to do so by a
customer service representative at Classé in order to help troubleshoot some
unexpected problem.
CAN-Bus Classé’s Controller Area Network, or CAN-Bus, opens the way to a new level
of interaction between our Delta range of amplifiers, preamps, processors and
source components. When the SSP is connected with CAN-Bus, the different
elements of a Delta or CT series system are in constant communication, creating
a “global” network that delivers system wide status information and shared
operational features, all through the touchscreen display.
features CAN-Bus will allow a single touchscreen to:
• Display status information for every connected unit, including amplifiers
which do not have a touchscreen display.
• Create a “PlayLink” that allows an SSP or Preamp to automatically switch
to the correct input when a Delta series source component starts playback.
• Adjust the global system brightness.
• Configure the entire system to go in and out of standby at the touch of a
button and also bring individual components in and out of standby.
• Mute any connected unit.
56
hardware setup 1
Classé Delta Series Products
Two or more Classé Delta and/or CT series products are required, at least one
of which must have a touchscreen display.
2
Category 5 Network Cables
These are ordinary network cables, commonly used for broadband Internet
connections. They should be typical “straight through” cables not the “crossed
over” type, and the total required will be one less than the total number of
Delta and/or CT series components in your system.
3
CAN-Bus Terminator
A CAN-Bus Terminator will be required. It is inserted into the CAN-Bus
OUT connector of the last component in the CAN-Bus daisy chain. One
is included in the box with your SSP. They are also available free of charge
from your nearest Classé Customer Support Center
http://www.Classeaudio.com/support/service.htm
The diagram below illustrates how to connect the CAN-Bus hardware.
Any combination of models in any order.
CAN-BUS
IN
OUT
CAN-BUS
IN
OUT
CAN-BUS
IN
OUT
CAN-BUS
IN
OUT
NOTE: Daisy chain must be terminated with CAN-Bus Terminator.
57
using CAN-Bus CAN-Bus is controlled via the touchscreen of any Delta or CT series
component. There is no master component, so Delta/CT series systems where
two or more units have a touchscreen can be controlled through any of the
touchscreens. However, it is probably easiest to start using CAN-Bus through
just one.
CAN-Bus is accessed by pressing the menu button on the face of the unit or
remote, then the status button, followed by the more button.
The touchscreen will then display the CAN-Bus devices screen, which lists
connected Delta/CT series components by model & serial number.
Highlighting a unit on the CAN-Bus devices screen identifies it as the target
unit. The front panel LEDs of the target unit will start flashing (unless you
highlight the unit that you are using to access CAN-Bus).
Once you have chosen the target unit press select. The target unit’s LEDs will
stop flashing and the touch screen will list the CAN-Bus features available to it.
Some CAN-Bus features are shared by all models, some are specific to individual
models.
58
CAN-Bus shared features The following CAN-Bus features are shared by all models.
configuration
Selecting configuration will present the CAN-Bus configuration screen
allowing access to name, global brightness, and global standby features..
• name enables you to set the name that this component will be listed under
in the CAN-Bus devices screen. The name will appear next to the unit
model and serial number, and facilitate the identification of units in large
systems.
• global brightness enables you to adjust the touchscreen and LED
brightness of all the components in your system by changing the
brightness of a single touchscreen. All CAN-Bus software updates
automatically set the updated unit to global brightness. If you want a
particular unit to be excluded from global brightness, deselect global
brightness for that unit.
• global standby enables you to bring your entire system in and out of
standby by pressing the standby button of any unit or remote. All
CAN-Bus software updates automatically set the updated unit to global
standby. If you want a particular unit to be excluded from global standby,
deselect global standby for that unit.
operate
AC status
status
The operate settings allow you to bring the target unit in and out of standby, or
mute. This key will be disabled for the unit whose touchscreen you are using to
access CAN-Bus.
The AC status screen displays information from the target unit’s electrical
supply sensors. Two screens are available, with the second accessed by selecting
more.
The status screen is the simplest way to access essential information about
the target unit. It displays the target unit’s model number, software version,
operational status and serial number.
59
CAN-Bus model The following CAN-Bus features are model specific.
specific features
PlayLink This feature is exclusive to Delta series disc players and will only function if
the disc player is connected to a CAN-Bus enabled preamp or surround sound
processor.
When PlayLink is active, pressing play on the disc player will also automatically
switch the preamp/processor to a specified input. This means that you can listen
to a CD or watch a DVD literally at the touch of a button.
The first step in using PlayLink is to choose the input you wish to be selected
when play is pressed on the disc player. Press the PlayLink icon, then select the
correct input from the list.
Once you have selected the input press back, then select configuration.
PlayLink is activated and disabled through the PlayLink icon on the CAN-Bus
configuration screen.
PlayLink is automatically active after a software update, and the PlayLink icon
will only appear on the CAN-Bus configuration screen of a Delta series disc
player.
PlayLink can only select a single input per disc player. It is therefore
not designed for users who regularly play both CDs and DVDs
through different inputs from a single disc player. When PlayLink is
active the disc player will default to the same input every time play
is pressed, regardless of whether it is playing CD or DVD.
60
amp info Available for amplifiers only, this screen displays the data provided by the
heatsink and AC Module temperature sensors.
NOTE: This feature is only accessible when the target amplifier is on.
event log
Reserved for amplifiers, this feature is a protection circuitry event log which can
only be accessed when the target amplifier is in standby. The protection circuit
shuts down the amplifier or channel if it overheats or if its output could damage
your speakers. The event log details the circumstances surrounding the amp
going into protection and should be referred to in situations that require the
intervention of your dealer or Classé customer support.
The log can report the following events interpreted as follows:
• +ve slow blo trip & -ve slow blo trip — The average current has reached
the safe operating limit.
• +ve fast blo trip & -ve fast blo trip — The peak current has reached the
safe operating limit.
• over temperature trip — The unit temperature has reached the safe
operating limit.
• DC protection trip — The DC output level has reached the safe operating limit.
• Communication failure — There has been a loss of communication
between the amp’s system monitoring sensors.
• AC line trip — The power supply has reached the limits of the amp’s safe
operating range.
These events are rare and generally occur due to issues that are external to the
amp. They should be interpreted positively. The amp is doing what it’s designed
to do.
61
Troubleshooting
Always refer any service problems to your Classé dealer. However, if you run into
a problem, we recommend referring to this section first as sometimes an error is
not a malfunctioning product, but simply an oversight in the proper setup of the
component. This section provides suggested solutions to potential problems.
If none of these solutions work, please consult your Classé dealer for assistance.
There are no user-serviceable parts inside the Surround Sound Processor.
Important!
Verify that the power amplifier(s) connected to the SSP is
powered off before checking any cable connections and
before power cycling the Surround Sound Processor.
62
1
Everything appears to be powered on, but there is no sound.
PAdjust the volume control to a moderate level - audible but not
excessive.
PMake sure that the selected source component is powered on,
not in Standby mode, playing an audio track, and not in pause
mode.
PEnsure that the proper input has been selected for the current
source.
PVerify that the Mute control is NOT active.
PEnsure that the amplifier is powered up and not in Standby
mode.
PCheck the Menu -> System Status information to verify an audio
signal is being received.
PVerify that all cables are securely connected to the proper inputs
and outputs, with no kinks or stress points.
2
There is no sound and the Standby LED is not lit.
PEnsure that the SSP is properly connected to the electrical outlet
- the AC cord is positioned firmly in the AC mains receptacle in
the rear panel and the power switch is in the On position.
PVerify that the power from the electrical outlet is within 15% of
its specified line voltage. If the power fluctuates outside of this
range, then the SSP has switched to protection mode, which
requires a power cycle to reset the Surround Sound Processor to
its normal operating mode.
PIf the SSP is properly plugged in and the power from the
electrical outlet is at the proper level, try the following: Put the
SSP in Standby mode, switch off the main power switch on the
rear panel, and unplug the Surround Sound Processor for at least
thirty seconds. Then plug the cord back in and trying powering
up again. Sometimes, a brown-out (short-term power loss) can
activate the protection mode, which requires a power cycle to
reset the SSP to its normal operating mode.
PRemove the AC cord from the unit, and open the fuse holder
immediately above the AC cord inlet. If the fuse is blown,
contact your qualified Classé dealer immediately.
3
Only one speaker seems to be playing.
PIf the problem occurs with all inputs, check the interconnecting
cables between the preamp and the power amp. Also check the
speaker wires for secure connections.
PIf the problem occurs with only one input, check the input
balance control setting of that input: select the problem input,
then access the input balance control by touching Controls from
the Home page of the front panel touchscreen, then select System
Trims -> Level Trims, and then verify the balance control for
the speakers. Check the speakers are active on the configuration
assigned to this input.
PCheck that the speakers are active on the configuration assigned
to this input.
PCheck the interconnect cables between the source component
and the SSP.
4
The IR remote control does not seem to function.
PEnsure that there are no obstacles between the IR remote and
the IR sensor, located to the right of the Mute button.
PReplace the batteries in the remote control.
5
There is a hum coming out of the speakers.
PIf you are using single-ended interconnects, make sure they are
not placed alongside any AC power cords. Also make sure that
they are not too long – long single-ended interconnecting cables
have a natural tendency to pick up noise even when shielded.
PIf any source components are connected to cable TV, try
disconnecting the cable television line from the source
component. If the hum goes away, you need an isolation device
between your cable TV converter and the source component. Your Classé dealer can help you obtain one of these inexpensive
devices.
6
There is a hum coming from the SSP.
PThis symptom suggests that there are a lot of DC offset or other
artifacts on your AC mains line. Try connecting to another AC
circuit – not merely a different plug, but a completely different
outlet.
PCheck to see if you have any halogen lighting or dimmers on the
same AC circuit as the SSP as they can cause the power supply
transformers to hum.
7
If there is no video or bad video displayed on a display
device.
PCheck the Menu -> Status information on the front panel
touchscreen to verify the status of the incoming video. If no
video signal is present, recheck the listed video input connection
and the video source. Note that for 3D sources a 3D-capable
display device is required.
PIf a valid video signal is present, press the Preview button on
the Home page. The preview should show the incoming video
signal. If the touchscreen is blank, verify the incoming source is
in fact transmitting the desired video program.
PIf the preview image has improper colors from a component
source, either the component source is transmitting an RGB
signal (unsupported) or the Pr and Pb wires are crossed.
63
PIf there is no output on component video from an HDMI
source, the signal is likely HDCP encrypted. Try setting the
source up with an analog cable and select an analog video input
path.
PIf there is a preview image but no output image, check the
display connection. Ensure the YPrPb cables are properly
connected if using a component video TV. Some display devices
may not display the source’s output resolution (for example,
component 720p going into a standard definition display or an
HDMI source which is preset to an unsupported resolution for a
particular HDMI display.
PIf the preview image looks good but the colors are wrong on the
component video display then check that the component cables
are properly connected. NOTE: Only a non-copy protected YCrCb
HDMI source can be viewed on a component display. Other types of
HDMI sources show either no picture or improper colors.
8
Voltage Protection Circuit
When the SSP is connected to AC power, the AC input enters
the component through a Voltage Sensing Circuit, which checks
the voltage level every 25 milliseconds. Power can only reach the
component once it has passed the Voltage Sensing Circuit. The circuit
verifies that the power is within tolerable operating levels:
P of ±10% of its AC line voltage setting.
P between ± 11% and 15% of its AC line voltage setting.
The following behavior of the SSP is the result of the Voltage Sensing
Circuit:
P If the external voltage is within the performance range, the
product functions normally.
P If the external voltage enters the range of the safe operating
limit, the standby LED flashes every half-second but the product
otherwise continues to function normally.
P If the external voltage exceeds the safe operating limit for
10 consecutive seconds, the protection circuitry engages and
an error message appears on the touchscreen.
P If the external voltage falls below its performance range, the
standby LED flashes indefinitely every half-second until the
voltage is insufficient to sustain normal operation.
P You have to cycle power to reset the protection circuitry. If you
attempt to reset the SSP while the external power supply remains
outside the safe operating limit, the protection circuit reengages, putting the SSP back into Standby mode. We therefore
recommend that you wait until the standby LED stops flashing
before cycling power and resetting the protection circuitry.
64
Care & Maintenance
To remove dust from the cabinet of your Surround Sound Processor, use a
feather duster or a lint-free soft cloth. To remove dirt and fingerprints, we
recommend isopropyl alcohol and a soft cloth.
Dampen the cloth with alcohol first and then lightly clean the surface of the
Surround Sound Processor with the cloth. Do not use excessive amounts of
alcohol that might drip off the cloth and into the Surround Sound Processor.
Caution!
input factory defaults
Power down and remove the AC power cord from the
SSP before performing maintenance. At no time should
liquid cleaners be applied directly to the Surround Sound
Processor, as direct application of liquids may result in
damage to electronic components within the unit.
For your convenience, here are the factory default settings for the
SSP-800/CT-SSP Surround Sound Processor.
Input #
Default Audio Connector
Default Video Connector
1
Coaxial Digital 1
None
2
Coaxial Digital 2
None
3
Coaxial Digital 3
None
4
Coaxial Digital 4
None
5
Optical Digital 1
None
6
Optical Digital 2
None
7
Optical Digital 3
None
8
Optical Digital 4
None
9
XLR Analog 1
None
10
RCA Analog 2
None
11
RCA Analog 3
None
12
Coaxial Digital 1
None
13
Coaxial Digital 2
None
14
Coaxial Digital 3
None
15
Optical Digital 1
None
16
Optical Digital 2
None
17
Optical Digital 3
None
18
XLR Analog 1
None
19
RCA Analog 2
None
20
RCA Analog 3
None
65
Specifications
All specifications are accurate at the time of printing. Classé reserves the right to
make improvements without notice.
nFrequency response
20Hz - 200kHz < 0.1dB, stereo analog bypass
20Hz - 20kHz < 0.2dB, all other sources
nDistortion (THD+noise) 0.001%, digital source/bypassed analog source
.002%, processed analog source
nMaximum input level (single-ended)
2Vrms (DSP), 6Vrms (bypass)
nMaximum input level (balanced)
4Vrms (DSP), 12Vrms (bypass)
nMaximum output level (single-ended)
8Vrms
nMaximum output level (balanced)
15Vrms
nGain Range
-100dB to +14dB
nInput impedance
100kΩ
nOutput impedance (main output)
56Ω
nSignal-to-noise ratio (ref. 10Vrms input) 102dB, bypassed analog source
100dB, processed analog source
105dB, digital source
nChannel separation
better than 100dB
nCrosstalk (any input to any output)
better than -120dB @ 1kHz
nVideo input impedance
75Ω
nVideo output impedance
75Ω
nHDMI
v.1.4a supporting 2D video at resolutions up to 1080p
@ 24/50/60 fps, standard 3D video formats with resolutions
up to 1080p @ 24 fps, Audio Return Channel (ARC),
HDMI Ethernet Channel (HEC), Deep Color and x.v.Color(xvYCC)
nRated power consumption
75W
nMains voltage determined by the needs of country for which the unit
was manufactured; cannot be reset by dealer or user
nOverall dimensions
SSP-800 width: 17.5” (445mm)
CT-SSP width: 19” (482mm)
SSP-800 depth (excluding connectors): 16.5” (419mm)
CT-SSP depth (excluding connectors): 14.91” (378.71mm)
SSP-800 Height: 6.75” (172mm)
CT-SSP Height: 6.97” (177mm)
nNet weight
SSP-800: 29 lbs (13 kg) CT-SSP: 33 lbs (15 kg)
nShipping weight
SSP-800: 38 lbs (17 kg) CT-SSP: 49 lbs (22 kg)
For more information, see your Classé dealer, or contact:
Classé Audio
5070 François Cusson, Lachine, Quebec, Canada H8T 1B3
Telephone +1 (514) 636-6384
FAX +1 (514) 636-1428
Internet: http://www.classeaudio.com
email:
[email protected]
Classé and the Classé logo are trademarks of Classé Audio Inc. of Lachine, Canada. All rights reserved.
AMX® is a registered trademark of AMX Corporation of Richardson, TX. All rights reserved.
Crestron™ is a trademark of Crestron Electronics, Inc. of Rockleigh, NJ. All rights reserved.
Control 4™ is a trademark of Control 4 Corporation of Saltlake City UT. All rights reserved.
HDMI, the HDMI Logo and High-Definition Multimedia Interface are trademarks or registered trademarks of HDMI
Licensing LLC.
Dolby, Pro Logic, and the double-D symbol are trademarks of Dolby Laboratories.
Manufactured under license under U.S. Patent #’s: 5,451,942; 5,956,674; 5,974,380; 5,978,762; 6,226,616; 6,487,535; 7,212,872;
7,333,929; 7,392,195; 7,272,567 & other U.S. and worldwide patents issued & pending. DTS and the Symbol are registered
trademarks, & DTS-HD, DTS-HD Master Audio and the DTS logos are trademarks of DTS, Inc. Product includes software.
© DTS, Inc. All Rights Reserved.
66
SSP-800 Dimensions
17.50"
[ 444.5mm ]
6.00"
[ 152.4mm ]
6.78"
[ 172.1mm ]
MENU
MUTE
SSP-800
.78"
[ 19.7mm ]
2.42"
[ 61.5mm ]
12.66"
[ 321.6mm ]
2.42"
[ 61.5mm ]
16.48"
[ 418.5mm ]
12.40"
[ 315.1mm ]
17.30"
[ 439.3mm ]
1.65"
[ 41.9mm ]
2.20"
[ 55.9mm ]
13.09"
[ 332.6mm ]
17.50"
[ 444.5mm ]
67
CT-SSP Dimensions
19.00"
[ 483mm ]
MENU
6.97"
[ 177mm ]
MUTE
16.39"
[ 416mm ]
14.91"
[ 379mm ]
17.00"
[ 432mm ]
68
Installation Worksheet
Source:.______________________________________________________________
Audio Connector:______________________________________________________
Video Connector:______________________________________________________
Input:_______________________________________________________________
Source:.______________________________________________________________
Audio Connector:______________________________________________________
Video Connector:______________________________________________________
Input:_______________________________________________________________
Source:.______________________________________________________________
Audio Connector:______________________________________________________
Video Connector:______________________________________________________
Input:_______________________________________________________________
Source:.______________________________________________________________
Audio Connector:______________________________________________________
Video Connector:______________________________________________________
Input:_______________________________________________________________
Source:.______________________________________________________________
Audio Connector:______________________________________________________
Video Connector:______________________________________________________
Input:_______________________________________________________________
Source:.______________________________________________________________
Audio Connector:______________________________________________________
Video Connector:______________________________________________________
Input:_______________________________________________________________
69
Classé Audio
5070 François Cusson
Lachine, Quebec
Canada H8T 1B3
+1 (514) 636-6384
+1 (514) 636-1428 (fax)
http://www.classeaudio.com
email: [email protected]
North America: 1 800 370 3740
email: [email protected]
Europe: 44 (0) 1903 221 700
email: [email protected]
Asia: (852) 2790 8903
email: [email protected]
All Others: +1 514 636 6384
email: [email protected]
Copyright © 2009 Classé Audio, Inc. Printed in Canada.
V 2.0
011211