1
OVER THE RANGE
MICROWAVE OVEN / HOOD SYSTEM
INSTALLATION INSTRUCTIONS
Please read all instructions thoroughly before installing the Over the Range Microwave Oven/Hood System. Two
people are recommended to install this product.
If a new electrical outlet is required, its installation should be completed by a qualified electrician before the
Microwave Oven/Hood is installed. See 3 ELECTRICAL GROUNDING INSTRUCTIONS on page 2.
Figure 1
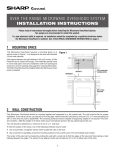
1 MOUNTING SPACE
12"
30"
This Microwave Oven/Hood requires a mounting space on
a wall as shown in Figure 1. It is designed to be used with
standard 12-inch wall cabinets.
15.5"
Backsplash
At least 2"
Epicure range - 36" or
more from cooking
surface with deflector.
Preference range - 36" or
more without deflector
and 34" with deflector.
Epicure range - 72" or
more from the floor
with deflector.
Preference range - 72"
or more without
deflector and 70" with
deflector.
2 WALL CONSTRUCTION
This Microwave Oven/Hood should be mounted against and supported by a flat vertical wall. The wall must be flat for proper
installation. If the wall is not flat, use spacers to fill in the gaps. Wall construction should be a minimum of 2” x 4” wood studding and
3/8” or more thick dry wall or plaster/lath. The mounting surfaces must be capable of supporting weight of 110 pounds—the oven
and contents—AND the weight of all items which would normally be stored in the top cabinet above the unit.
The unit should be attached to a minimum of one 2” x 4” wall stud.
To find the location of the studs, one of the following methods may be used:
A. Use a stud finder, a magnetic device which locates the nails in the stud.
B. Use a hammer to tap lightly across the mounting surface to find a solid sound. This will indicate stud location.
The center of the stud can be located by probing the wall with a small nail to find the edges of the stud and then placing a mark
halfway between the edges. The center of any adjacent studs will normally be 16” or 24” to either side of this mark.
1
3 ELECTRICAL GROUNDING INSTRUCTIONS
This appliance must be grounded. This oven is equipped with a cord having a grounding wire with a grounding plug. It must be
plugged into a wall receptacle that is properly installed and grounded in accordance with the National Electrical Code and local
codes and ordinances. In the event of an electrical short circuit, grounding reduces risk of electric shock by providing an escape
wire for the electric current.
WARNING - Improper use of the grounding plug can result in a risk of electric shock.
Electrical Requirements
The oven is equipped with a 3-prong grounding plug. DO NOT UNDER
ANY CIRCUMSTANCES CUT OR REMOVE THE GROUNDING PIN
FROM THE PLUG.
The Power Supply Cord and plug must be connected to a separate
120 Volt AC, 60 Hz, 15 Amp, or more branch circuit, single grounded
receptacle. The receptacle should be located inside the cabinet directly
above the Microwave Oven mounting location as shown in Figure 2.
NOTE:
1. If you have any questions about the grounding or electrical instructions, consult a qualified electrician or serviceperson.
Figure 2
Ground
Receptacle
Opening for
Power Cord
2. Neither Dacor nor the dealer can accept any liability for damage to
the oven or personal injury resulting from failure to observe the correct electrical connection procedures.
4 HOOD EXHAUST DUCT
When the hood is vented to the outside, a hood exhaust duct is required. All ductwork must be metal; absolutely do not use
plastic duct. Check that all connections are made securely. Please read the following carefully:
Exhaust connection: The hood exhaust has been designed to connect to a standard 3-1/4” X 10” rectangular duct. If round
duct is required, a rectangular-to-round adapter must be used.
Rear exhaust: If a rear or horizontal exhaust is to be used, care should be taken to align the exhaust with the space between the
studs, or wall should be prepared at the time it is constructed by leaving enough space between wall studs to accommodate
exhaust.
Figure 3
Maximum duct length: For satisfactory air movement, the
total duct length of 3-1/4” X 10” rectangular or 6” diameter
round duct should not exceed 140 feet.
Elbows, adapters, wall caps, roof caps, etc. present additional
resistance to air flow and are equivalent to a section of straight
duct which is longer than their actual physical size. When
calculating the total length, add the equivalent lengths of all
transitions and adapters plus the length of all straight duct
sections. Figure 3 shows the approximate feet of equivalent
length of some typical ductwork parts. Use the values in
parentheses for calculating air flow resistance equivalent,
which should total less than 140 feet.
2
5 TOOLS RECOMMENDED FOR INSTALLATION
• Phillips Screwdriver
• Saw to cut exhaust opening
(if needed)
• Electric Drill
• Pencil
• Measure
• Protective Drop Cloth for product and
range - you may also use carton for
protection
• 1/2”, 5/8” and 3/32” Drill Bits
• 1-1/2” Wood Bit or Metal Hole Cutter (if
metal cabinet is used)
• Scissors
6 INSTALLATION HARDWARE
The INSTALLATION HARDWARE (items 1 - 8) packed with the oven should contain the following:
ITEM
NAME
QUANTITY
PART CODE
1
Wood Screw 5 X 30 mm
6
XTSSD50P35000
2
Toggle Bolt 3/16 inch
4
LX-BZ0195WRE0
3
Top Cabinet Screw 5 X 60 mm
2
XBRSD50P60000
4
Flat Washer 30 mm diameter
2
XWHSD50-16300
5
Power Cord Hanger
1
LX-MZB001MRE0
6
Grommet
1
LBSHC0040MRE0
7
Tapping Screw 4 x 12 mm
4
XOTSD40P12000
8
Exhaust Damper Assembly
1
FFTA-B002MRK0
Figure 4
Parts shown not to common scale.
3
• Tape
7 VENTILATION SYSTEM (PREPARING OVEN FOR INSTALLATION)
This Microwave Oven/Hood is designed for adaptation to three types of hood ventilation systems. Select the type required for your
installation.
Vertical Exhaust — outside ventilation. Follow installation procedure (A).
Horizontal Exhaust — outside ventilation. Follow installation procedure (B).
Recirculating — non-vented, ductless. Follow installation procedure (C). Recirculating requires the use of the Charcoal Filter.
Figure 5
(A) VERTICAL EXHAUST: OUTSIDE VENTILATION
Exhaust Damper Assembly
The unit is shipped assembled for vertical exhaust. Attach the Exhaust
Damper Assembly to the fan cover on the top of the outercase cabinet by
sliding it into the slits in the same direction as the arrow mark. Using
Tapping Screw 4x12 from the INSTALLATION HARDWARE, tighten into
place. See Fig 5.
(B) HORIZONTAL EXHAUST: OUTSIDE VENTILATION
1. Remove and save 6 screws. Remove fan cover bracket as shown in Fig 6.
2. Withdrawn hood fan unit carefully and slip wires out of wire box. Rotate hood fan unit 90˚ so that exhaust ports are facing rear
of oven unit. See Fig 7.
CAUTION: Do not pull or stretch hood fan wiring.
3. Replace hood fan unit into the oven unit. Be careful not to pinch the lead wire between the inner bracket and the hood fan unit.
See Fig 8.
4. Put the lead wire into wire box.
5. Replace the fan cover bracket. Make sure the fan blades are visible through the rear openings in the oven before proceeding.
Attach fan cover bracket to unit with 6 screws. See Fig 9. The hood fan unit is now rotated for horizontal exhaust operation.
6. Attach the Exhaust Damper Assembly to the back of the mounting plate by sliding it into the slits in the same direction as the
arrow. See Fig 10. Using Tapping Screw 4x12 from the INSTALLATION HARDWARE, tighten into place.
Figure 6
Figure 7
Fan cover bracket
4
Figure 8
Figure 9
Figure 10
Exhaust Damper Assembly
(C) RECIRCULATING: Non-Vented, Ductless Operation
1. Remove and save 6 screws and fan cover bracket as shown in
Fig. 6.
2. Withdrawn hood fan unit. See Fig. 7.
3. Rotate hood fan unit/end-over-end, then rotate it 90˚ (1/4 turn)
so that exhaust ports faces toward front of oven unit. The fan
blades should be visible through the openings facing toward
the front of the oven.
4. Replace hood fan unit into oven unit as shown in Fig. 11.
5. Put the lead wire into the box.
6. Replace the fan cover bracket. If the cover does not fit properly, the hood fan unit is improperly placed. Check steps 3 and
4 again.
7. Attach the fan cover bracket to the oven unit with 6 screws as
shown in Fig. 9.
NOTE: 1. The Exhaust Damper Assembly is not required for
recirculating exhaust.
2. Charcoal Filter sold as an accessory, is required for
recirculating exhaust.
5
Figure 11
8 OVEN INSTALLATION
THIS OVEN CANNOT BE PROPERLY INSTALLED WITHOUT REFERRING TO THE MOUNTING INSTRUCTIONS FOUND
ON WALL AND TOP CABINET TEMPLATES.
MOUNTING PLATE
1. Separate 4 Toggle Bolts, packed in the INSTALLATION HARDWARE, from the Toggle Nuts.
2. Use wood screws to attach mounting plate to the stud or studs. Use Toggle Bolts to attach mounting plate through the holes at
A, B, C and D UNLESS THOSE HOLES ARE LOCATED ON THE STUD. Insert one Toggle Bolt into A, B, C and D where
appropriate (these correspond to holes of the Wall Template) and put the Toggle Nuts onto the Toggle Bolts. Figure 12.
Refer to instructions in Wall Template.
3. Position the Mounting Plate with the Toggle Bolts attached at the wall location and insert Toggle Nuts and Bolts through the
holes in the wall with the Toggle Nuts closed. Figure 13. Use Wood Screws to attach the Mounting Plate to studs.
NOTE: Before insertion, be sure you leave a space more than the thickness of the wall between the Mounting Plate and the
end of each of the Toggle Nuts (in the closed position). If you do not leave enough space, the Toggle Nut will not be able to
open on the other side of the wall. Also, once a Toggle Nut opens, it cannot be withdrawn from the hole; therefore make
sure all of the Toggles are in the correct position before insertion.
4. Align the Mounting Plate carefully and hold in position while tightening Toggle Bolts. Pull Toggle Bolt toward you and turn
clockwise to tighten. Figure 14.
Figure 12
Figure 14
Figure 13
Space more than
wall thickness
Mounting
Plate
Wall
MOUNTING OVEN TO THE WALL
Utilization of the carton may make installation easier.
1. Place carton upside down. See Figure 15.
2. Using cutting line around the carton, cut into two pieces (A) and (B). See Figure 16.
Figure 15
Figure 16
(A)
Top Side
Cutting Line
(B)
6
3. Place the oven and the carton portions together on the top of the range. See Fig. 17. Slide carton toward backsplash until it
stops. Align the lower back edge of the oven with the mounting plate.
4. Thread the power supply cord through the hole made in the bottom of the top cabinet.
5. Hang the oven on the lower edge of the mounting plate. See Fig. 18. Take care that the power cord is able to clear the edge of
the hole as the oven is rotated upward. (In the case of a non-recessed bottom in the top cabinet, the hole for the cord may need
to be enlarged.) Remove the carton portions.
6. Tighten the two unit mounting screws located in the grease filter openings. See Fig.19.
7. Install grease filters by fitting into the opening. Push back and up into place. See Fig.20.
8. Use the two Top Cabinet Screws (C) and two Flat Washers (D), supplied in the INSTALLATION HARDWARE, to attach the unit
to the top cabinet. See Fig.21.
9. Make a bundle of the power supply cord and attach it to the inside of the cabinet using the Power Cord Hanger.
Figure 17
Figure 18
(B)
Figure 19
Figure 20
Figure 21
C
D
7
MOUNTING DEFLECTOR
Secure the deflector with 3 Tapping screws 4 x 12mm, packed in the Installation Hardware.
DEFLECTOR
OPTIONAL ACCESSORIES
CHECKLIST FOR INSTALLATION
1. Make sure the unit has been installed according to all of the Installation Instructions and the Wall and Top Cabinet Templates.
2. Plug in the power cord.
3. Keep the Operation Manual.
DACOR INC.
1440 Bridge Gate Drive, Diamond Bar, CA 91765
1-800-793-0093 • www.dacor.com
REGISTERED CORPORATION
TINSEB319MRR0
8