1
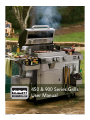
TM January 1, 2008 450 & 900 Series Grills User Manual www.KalamazooGourmet.com TABLE OF CONTENTS INFORMATION FOR THE NEW OWNER 2 GENERAL SAFETY PRECAUTIONS 3 GENERAL INSTRUCTIONS OPERATING AREA SAFE HANDLING TIPS FOR LP GAS REFILLING THE LP TANK CONNECTING LP TANK/ LEAK TESTING 4 5 6 7-8 GENERAL MAINTENANCE PERIODIC CLEANING SPIDER ALERT MAINTENANCE TROUBLESHOOTING STORAGE 9 10 11 12 THE KALAMAZOO 450 SERIES 13 THE KALAMAZOO 900 SERIES 14 OPERATING INSTRUCTIONS SETTING UP CONTROL KNOBS LIGHTING INSTRUCTIONS MAIN / ROTISSERIE / SEARING BURNERS MAIN BURNER (MANUAL LIGHTING) SIDE BURNER SIDE BURNER (MANUAL LIGHTING) HYBRID MODELS (WOOD / CHARCOAL & GAS) ADJUSTING THE AIRFLOW TURN OFF INSTRUCTIONS INSTRUCTIONS AND WARNINGS FOR OPTIONAL SMOKER BOX SMOKER TRAY INSTRUCTIONS ROTISSERIE INSTRUCTIONS SEARING BURNER INSTRUCTIONS 15-19 20 21-23 21 22 22 22 23 24 25 26-27 28 29-31 32 COOKING WITH YOUR KALAMAZOO OUTDOOR GOURMET GRILL 33-34 OPTIONS 35-37 SAMPLE RECIPE 38 A NOTE FROM THE DESIGNER 39 KALAMAZOO OUTDOOR GOURMET LIMITED WARRANTY 40 PRODUCT REGISTRATION INFORMATION 41 FOR YOUR SAFETY If you smell gas: 1. Shut off gas to the appliance. 2. Extinguish any open flame. 3. Open lid. 4. If odor continues, immediately call your gas supplier or fire department. FOR YOUR SAFETY 1. Do not store or use gasoline or other flammable vapors or liquids in the vicinity of this or any other appliance. 2. An LP cylinder not connected for use should not be stored in the vicinity of this or any other appliance. V080130 INFORMATION FOR THE NEW OWNER Thank you for choosing Kalamazoo Outdoor Gourmet™. We recommend that you read this manual thoroughly before operation and retain it for future reference. This will help you to enjoy the maximum in outdoor grilling pleasure. WARNING: Read manual thoroughly before attempting to operate your Kalamazoo Outdoor Gourmet product. WARNING: Kalamazoo Outdoor Gourmet products are designed for outdoor use only. FOR YOUR SAFETY 1. Read the "Lighting Instructions" section of this manual before attempting to light the Kalamazoo Outdoor Gourmet™ grill. 2. Follow all leak check procedures in this manual carefully prior to operation of the Kalamazoo Outdoor Gourmet™ grill. 3. Read the installation, operation & maintenance instructions in this manual thoroughly before installing or servicing the Kalamazoo Outdoor Gourmet™ grill. When properly cared for, Kalamazoo Outdoor Gourmet products will give safe, reliable service for many years. However, extreme care must be used since the grill produces intense heat and can increase accident potential. When using this grill, basic safety practices must be followed. These general safety precautions are listed below. 2 Kalamazoo Outdoor Gourmet™ 1.800.868.1699 www.KalamazooGourmet.com GENERAL SAFETY PRECAUTIONS • • • • • • • • • • • • • • • • • • • • • Do not try lighting this appliance without reading the “Lighting Instructions” section of this manual. Do not store a spare or disconnected LP tank under or near this grill. You should inspect the burner venturi tubes for spider webs and other obstructions periodically. Clean the tubes completely if you find any such obstructions. Do not operate the Kalamazoo Outdoor Gourmet grill if there is a gas leak present. Do not use a flame to check for gas leaks. Do not store cover or anything flammable on or in the storage area under the grill. Cover the Kalamazoo Outdoor Gourmet grill with a cover when not in use. Only cover the Kalamazoo Outdoor Gourmet grill when unit is completely cool. Do not use rotisserie motor unit when it is raining. Remove motor and store out of rain. If burners go out during operation, turn off all gas valves. Open lid and check that tank is not empty. Wait five minutes and reattempt to light using the lighting instructions. If condition persists, contact gas supplier or Kalamazoo Outdoor Gourmet, Customer Service Department at (800) 868-1699. Never lean over open grill or place hands or fingers on the front edge of the cooking box. Should a grease fire occur, turn off all burners, and the tank or natural gas line, and leave lid closed until fire is out. Do not attempt to use water to extinguish flames. Do not alter valve orifices or burner ports or attempt to convert LP or natural gas fitting. The Kalamazoo Outdoor Gourmet grill should be thoroughly cleaned on a regular basis. Do not attempt to disconnect any gas fitting while your grill is in operation. Use the regulator that is supplied with the Kalamazoo Outdoor Gourmet grill for LP gas. Do not use a dented, rusted, or damaged LP tank. Have tank inspected by gas supplier or dealer. Never operate or install your outdoor cooking gas appliance in a confined area, including inside your home, in or on recreational vehicles and/or boats or any enclosed area. A minimum of 24 inches to any combustible surface is required. Use protective hand covering in and around grill while grill is in use. Keep any electrical supply cord and fuel supply hose away from any heated surfaces. Keep the ventilation opening(s) of the cylinder enclosure free and clear from debris 3 Kalamazoo Outdoor Gourmet™ 1.800.868.1699 www.KalamazooGourmet.com GENERAL INSTRUCTIONS The Kalamazoo Outdoor Gourmet grill is not for use by children. For propane use: you must adhere to all local codes that apply to portable gas grills, both in the USA and abroad. If there are no local codes, you must conform to the latest edition of the National Fuel Gas Code: ANSI Z 223.1, or CAN/CGA-B149.1, National Gas Installation Code or CAN/CGA-B149.2, Propane Installation Code. The regulator supplied with the Kalamazoo Outdoor Gourmet grill must be used. This regulator is set for 11 inches of water column (pressure). If an external electrical source is utilized, the Kalamazoo Outdoor Gourmet grill, when installed, must be electrically grounded in accordance with local codes or, in the absence of local codes, with the National electrical Code, ANSI/NFPA 70, or the Canadian Electrical Code, CSA C22.1. These instructions, while generally accepted, do not necessarily comply with the Canadian Installation codes, particularly with piping above and below ground. In Canada, the installation of this appliance must comply with local codes and/or Standard CA/CGA-B149.2 (Installation Code for Propane Burning Appliances and Equipment). OPERATING AREA WARNING: Only use Kalamazoo Outdoor Gourmet grill products outdoors in a well-ventilated area. • • • • • • • • Do not use in a garage, building, breezeway or any other enclosed area. Never use the Kalamazoo Outdoor Gourmet grill under an unprotected combustible roof, overhang, or any unprotected combustible construction. Kalamazoo Outdoor Gourmet grills are not intended to be installed in or on recreational vehicles and/or boats. Do not use combustible materials within 24 inches of the top, bottom, back, or sides of the grill. Do not leave the Kalamazoo Outdoor Gourmet grill unattended while in use. Do not lean over cooking surface or place your hands in or near the cooking surface, as the entire cooking box gets hot when in use. Keep any electrical supply cord and the fuel supply hose away from any heated surfaces. Keep the cooking area clear of combustible materials and flammable vapors and liquids, such as gasoline, alcohol, etc. 4 Kalamazoo Outdoor Gourmet™ 1.800.868.1699 www.KalamazooGourmet.com SAFE HANDLING TIPS FOR LP GAS • • • • • • • • • • • • • • • Liquid Propane (LP) gas is a petroleum product, as are gasoline and natural gas. LP gas is a gas at regular temperatures and pressures. Under moderate pressure, inside a cylinder, LP gas is a liquid. As the pressure is released, the liquid readily vaporizes and becomes gas. You should be able to recognize the odor of LP gas, as it smells much like natural gas. Leaking LP gas may collect in low areas that prevent dispersion, as it is heavier than air. Air must be removed from a new LP tank before the initial filling. Your LP dealer is equipped to do this. LP tanks should not be dropped or handled roughly. The LP tank must be installed, transported, and stored in an upright position. Never store or transport the LP tank where temperatures can reach 125 degrees F (too hot to hold by the hand; for example: do not leave the LP tank in a car on a hot day). The Kalamazoo Outdoor Gourmet grill requires that the LP cylinder be 20-lb. Size (18 ¼ inches high, 12 ¼ inches in diameter). The LP cylinder used with the Kalamazoo Outdoor Gourmet grill must be: o Constructed and marked in accordance with the Specifications for LP-Gas Cylinders of the U.S. Department of Transportation (D.O.T.) or the National Standard of Canada, CAN/CSA-B339, Cylinders, Spheres and Tubes for Transportation of Dangerous Goods; and Commission, as applicable; o Provided with a listed overfilling prevention device. o Provided with a cylinder connection device compatible with the connection for outdoor cooking appliances. o Provided with a collar to protect the cylinder valve. o Arranged for vapor withdrawal. A refill will last about 20 hours of cooking time at normal use. The tank does not need to be empty before it is refilled. Treat “empty” LP tanks with the same care as full tanks. Even when the LP tank is empty of liquid there still may be gas pressure in the cylinder. Always close the tank valve before disconnecting. Do not use a damaged LP tank. Dented or rusty LP tanks or LP tanks with a damaged valve may be hazardous and should be replaced with a new one immediately. The joint where the hose connects to the LP tank must be leak tested each time the LP tank is reconnected. The LP connections supplied with the Kalamazoo Outdoor Gourmet grill have been designed and tested to meet government, American Gas Association, and Underwriters Laboratories requirements. Replacement LP tanks supplied by Kalamazoo Outdoor Gourmet satisfy these requirements. If you have questions about spare LP tanks, please call Kalamazoo Outdoor Gourmet’s Customer Service Department at (800) 868-1699. 5 Kalamazoo Outdoor Gourmet™ 1.800.868.1699 www.KalamazooGourmet.com REFILLING THE LP TANK Removal of the LP tank 1. 2. 3. 4. 5. Open the door. Close tank valve (turn clockwise). Unscrew counter clockwise brass fitting on regulator. Lift tank out. Take LP tank to a “Gas Propane” dealer. ALWAYS CHECK FOR LEAKS AFTER EVERY LP TANK CHANGE IMPORTANT: • Do not store a spare LP-gas cylinder under or near this appliance. • Never fill the cylinder beyond 80 percent full. • If the above information is not followed exactly, a fire causing death or serious injury may occur. WARNING: We recommend that a qualified attendant at an authorized LP gas dealer fill your LP tank. CAUTION: If you exchange your LP tank, make sure you get a similar tank in return. Verify that the new tank has a similar valve connection. 6 Kalamazoo Outdoor Gourmet™ 1.800.868.1699 www.KalamazooGourmet.com CONNECTING THE LP TANK / LEAK TESTING WARNING: Make sure that the LP tank valve is closed by turning it clockwise. DANGER: Do not use an open flame to check for gas leaks. Be sure there are no sparks or open flames in the area while you check for leaks. This will result in a fire or explosion, which can cause serious bodily injury or death and damage to property. Bubble Test: You will need an LP tank, a soap and water solution, and a rag or brush to apply it. NOTE: Since some leak test solutions, including soap and water, may be slightly corrosive, all connections should be rinsed with water after checking for leaks. 1. 2. 3. 4. 5. 1. For free-standing models, open right end door, and set the tank on bottom shelf. Kalamazoo 450 Series Grills provide two slots to hold the tank in place. See first diagram below. Kalamazoo 900 Series Grills provide a cutout in the floor for the tank to rest. Connect the hose to the cylinder. (Screw the regulator coupling onto the tank valve, clockwise, or to the right. Hand-tighten only). See second diagram below. Mix soap and water 50/50 . Open the tank valve. Make sure grill knobs are in the “OFF” position. Check for leaks by wetting the fitting with the soap and water solution and watching for bubbles. If bubbles form or if a bubble grows, there is a leak. When leak checks are complete, turn gas supply OFF and rinse connections with water. If leak does not stop, turn off the gas and contact us at (800) 868-1699. Do not use the grill. 7 Kalamazoo Outdoor Gourmet™ 1.800.868.1699 www.KalamazooGourmet.com Sniff test: Since Propane is heavier than air; it tends to collect in lower lying areas first. Get down on your hands and knees and sniff close to the floor to smell for Propane. If you smell Propane DO NOT light a match. Gas Detector: The National Fire Protection Association and other regulating agencies acknowledge that odorants added to Propane do not provide 100% effective leak protection. On rare occasions, a leak may not be detected by smell. Gas Detectors that sound an alarm are available for a reasonable price (make sure it is UL listed). The outdoor cooking gas appliance and its individual shutoff valve must be disconnected from the gas supply piping system during any pressure testing of that system at test pressures in excess of 1/2 psi (3.5 kPa). The outdoor cooking gas appliance must be isolated from the gas supply piping system by closing its individual manual shutoff valve during any pressure testing of the gas supply piping system at test pressures equal to or less than 1/2 psi (3.5 kPa). NOTE: Kalamazoo Outdoor Gourmet is not responsible for improper tank hookup. 8 Kalamazoo Outdoor Gourmet™ 1.800.868.1699 www.KalamazooGourmet.com GENERAL MAINTENANCE DANGER: Failure to correct these symptoms may result in a fire, which can cause serious bodily injury or death and cause damage to property. Keep outdoor cooking gas appliance area clear and free from combustible material, gasoline and other flammable vapors and liquids. Do not obstruct the flow of combustion and ventilation air. Keep the ventilation openings on back panel of the LP Tank enclosure free and clear from debris at all times. PERIODIC CLEANING CAUTION: Turn the Kalamazoo Outdoor Gourmet grill OFF and wait for it to cool before cleaning. Every Kalamazoo Outdoor Gourmet grill has all stainless steel surfaces, inside and out. It is non-rusting and non-magnetic. After the initial grilling use, certain areas of the grill may discolor. This is a normal discoloration caused by the intense heat given off by the burners. Use a warm soap water solution or very mild cleaners. Always rub or scrub in the direction of the grain. Do not use oven cleaner, steel wool, abrasive cleaners, or abrasive cleaning pads on any grill surfaces. We recommended cleaners that contain citrus products. Ceramic tiles These are self-cleaning by turning over periodically. Replacements are available from Kalamazoo Outdoor Gourmet’s Customer Service Department (800-868-1699) or your retailer. Inside cooking box Brush any debris off Dragon burner tubes. DO NOT ENLARGE BURNER PORTS (OPENINGS). Wash inside of cooking box with warm soapy water. Inside lid While lid is warm, wipe inside with a paper towel to prevent flaking due to grease buildup. Grill Surface Clean with suitable grill bristle brush only. Do not clean with soap. Main Burner Cleaning Procedure Turn off the gas supply. Use a brass bristle brush to clean outside of burners. This is to make sure all burner ports are fully open. CAUTION: Do not enlarge the burner ports when cleaning. 9 Kalamazoo Outdoor Gourmet™ 1.800.868.1699 www.KalamazooGourmet.com 10 Kalamazoo Outdoor Gourmet™ 1.800.868.1699 www.KalamazooGourmet.com MAINTENANCE TROUBLESHOOTING CHECK RESOLUTION Is LP fuel low? Refill LP tank. Is fuel hose bent or kinked? Straighten fuel hose and check for leaks (see page 7). Is burner clean? Burner ports are clogged or blocked. Clean thoroughly (see “Periodic Cleaning”). Is grill on level ground? Turn off all burners. Shut off gas supply. Move grill to level ground. Is flow-limiting device activated? See “Lighting Instructions” Are you preheating barbecue in the prescribed manner? Turn main burners on high for 10 minutes for preheating. Are the ceramic tiles coated with burned on grease? See “Periodic Cleaning.” Are the ceramic tiles positioned over the burner? When grill is turned off and cooled, move ceramic tile brackets over burner(s). Inside of lid appears to be “peeling.” The lid is stainless steel, not paint. It cannot “peel.” What you are seeing is baked on grease that has turned to carbon and is flaking off. THIS IS NOT A DEFECT. Clean thoroughly (see “Periodic Cleaning”). Igniters are not working. Is there no clicking noise when the igniter button is pressed? PROBLEM Burner does not light. Flame is low when burner is on HIGH. Burner flame pattern is erratic. Flame is low when burner is on HIGH. Flames do not run the whole length of the tube. Experiencing Flare-Ups. FIRST CHECK: Wire connections to igniter modules (inside grill cabinet) and igniter button (underneath grill control panel) are firmly in place. SECOND CHECK: Replace the 9-volt battery(s) in the igniter module(s) inside the grill cabinet. Igniters click, but the igniter probes are not sparking. FIRST CHECK: Wire connections to igniter modules (inside grill cabinet) are firmly in place. SECOND CHECK: Igniter probe (at the burner) may have shifted. WITH GAS SUPPLY TURNED OFF, gently adjust or bend probe closer to burner to gain spark. THIRD CHECK: Gas collection box (at burner) filled with water or grease. Gently wipe collection box out with paper towel. If problems cannot be corrected by using these methods, please contact Kalamazoo Outdoor Gourmet Customer Service at 800-868-1699. 11 Kalamazoo Outdoor Gourmet™ 1.800.868.1699 www.KalamazooGourmet.com IMPORTANT NOTE ON GAS HOSE: If it is evident there is excessive abrasion or wear, or the hose is cut, it must be replaced prior to the outdoor cooking gas appliance being put into operation. The replacement hose assembly must be obtained from Kalamazoo Outdoor Gourmet™. STORAGE • • • • • When the Kalamazoo Outdoor Gourmet grill is not in use, the gas must be turned “OFF” at the LP tank. When the Kalamazoo Outdoor Gourmet grill is stored indoors, the gas supply must be disconnected and the LP tank stored outdoors in a well-ventilated space, out of the reach of children. Never store a spare LP tank under or near the Kalamazoo Outdoor Gourmet grill. If the Kalamazoo Outdoor Gourmet grill is stored for a long period of time it should be checked for gas leaks and obstructions in the burner tubes before using. (See Section “General Maintenance”) Check that the areas under the control panel and the bottom tray are free from debris that might obstruct the flow of combustion or ventilation air. 12 Kalamazoo Outdoor Gourmet™ 1.800.868.1699 www.KalamazooGourmet.com KALAMAZOO OUTDOOR GOURMET PRESENTS THE KALAMAZOO 450 SERIES The Kalamazoo 450 series grills are the ideal grills for family grilling as well as dinner parties. Our design engineers were given the mission to build a grill, which held our commitment to simplicity in design and durability in construction while also providing an intimate relationship between chef and fire. A serious grill with style and value is at the heart of the Kalamazoo 450 Series. • • • • • • • • • • • • • 304 Food grade Stainless frame, body, fittings Built on a 12 Gauge formed-angle stainless steel frame 24”x18” (432 sq. inch) cooking surface Cast stainless steel 50,000 BTU main burner Two separately controlled cooking areas 11,000 BTU ceramic rotisserie burner (on gas-only models) All Stainless Steel cabinetry & hardware, including knobs, hinges & handles Warming Rack Precision thermometer Built-In wood chip smoker tray (on gas-only models) Available Hybrid (Charcoal/chunk wood & gas) application Fully assembled Designed and manufactured in Kalamazoo, MI, USA! 13 Kalamazoo Outdoor Gourmet™ 1.800.868.1699 www.KalamazooGourmet.com KALAMAZOO OUTDOOR GOURMET PRESENTS THE KALAMAZOO 900 SERIES The Kalamazoo 900 Series are grills for those who entertain medium to large groups but who cook for the family as well. The Kalamazoo 900 Series grill is three times the size of the Kalamazoo 450 Series. We offer the Kalamazoo 900 Series with our patented hybrid cooking system, which offers gas and charcoal barbecuing all on the same grill for absolute flexibility! See our website www.kalamazoogourmet.com for more details. The Kalamazoo 900 Series destroys all obstacles between human and fire allowing the most intimate relationship with the barbecue ever. • • • • • • • • • • • • • • 304 Food grade Stainless frame, body, fittings Built on a 12 Gauge formed-angle Stainless frame 24”x36” (864 sq. inch) cooking surface Two cast stainless steel 50,000 BTU main burners Four separately controlled cooking areas Two 11,000 BTU ceramic rotisserie burners 20,000 BTU Searing Burner (on gas-only models) All Stainless Steel cabinetry & hardware, including knobs, hinges & handles Warming Rack Precision thermometer Built-In wood chip smoker tray (on gas-only models) Available Hybrid (Charcoal/chunk wood & gas) application Fully assembled Designed and manufactured in Kalamazoo, MI, USA! 14 Kalamazoo Outdoor Gourmet™ 1.800.868.1699 www.KalamazooGourmet.com OPERATING INSTRUCTIONS SETTING UP The Kalamazoo Outdoor Gourmet grill comes fully assembled, however there are some items wrapped for shipment that need to be installed. CERAMIC TILES AND CERAMIC TILE BRACKETS (For gas models only) Place ceramic holders and ceramic tiles into grill hopper as shown below. Three sets are included with the Kalamazoo 450 Series Gas Grills. Six sets are included with the Kalamazoo 900 Series Gas Grills. Shown in a Kalamazoo 450 Series Grill Shown in a Kalamazoo 900 Series Grill NOTE: The ceramic holders may be positioned to “personalize” the grill performance. When placed tightly together, the bulk of direct flame will be subdued by the ceramics providing a more subtle heat distribution. If the ceramic holders are spread apart, approximately ½ inch, the direct flame will have more contact will the food and provide a slightly more aggressive fire that will cause a few “flare-ups” if that type of performance is desired… chef’s choice. PLACEMENT OF CERAMIC TILES (See photos above.) a. Install the ceramic tile brackets (provided), peaks up, on the lower frame just above the burner unit. b. Place the ceramic tiles (provided) edge to edge along peaks leaving 1/4” gap between. You need not cover the entire flare-up guard area. c. Install the grilling surface on the upper frame. NOTE: When ceramic tiles become built up with grease, simply turn them over. Tiles are self-cleaning. 15 Kalamazoo Outdoor Gourmet™ 1.800.868.1699 www.KalamazooGourmet.com COOKING SURFACE Kalamazoo Outdoor Gourmet grills come with either a stainless steel wire grill grate, a 3/16” stainless steel grilling surface, or a ¼” stainless steel grilling surface (shown above). Seasoning Your Grill Surface Extreme care must be taken when seasoning your grill surface. This must be done before using your grill for the first time. Turn both the left and right sides of burner to “High.” Let grill surface heat up between five and ten minutes. Turn off the burners. Using a clean rag or cooking brush, spread cooking oil on grill surface several times to seal it. This procedure needs to be done only once. Again, use extreme care while seasoning the grill. WARNING: Do not use spray can with aerosol to season your cooking surface. COOKING SURFACE TOOL A cooking surface tool is included with all Kalamazoo Outdoor Gourmet grills that include either a 3/16” or 1/4” stainless steel cooking surface. Use the tool to lift your cooking surface off the grill as pictured above. The small end of the tool has been specially designed for getting food debris out of small openings in your cooking surface, especially the exclusive fish surface. 16 Kalamazoo Outdoor Gourmet™ 1.800.868.1699 www.KalamazooGourmet.com WARMING RACK All Kalamazoo 450 and Kalamazoo 900 Series models include a warming rack. The warming rack can be used to keep cooked foods warm or to gently warm foods that you do not want placed onto the cooking surface. Remove the warming rack when using the rotisserie. MAIN BURNER DRIP PAN Each Kalamazoo Outdoor Gourmet grill comes with a disposable Main Burner Drip Pan to be placed inside the grill to collect drippings. See diagram above for placement. Check the Drip Pan before each use. Remove excess grease to avoid a grease fire in the Drip Pan. There is one foil tray provided which should be replaced as needed. Replacements can be found in most grocery stores or by contacting our Customer Service Department: • 1-800-868-1699 • [email protected] • www.kalamazoogourmet.com 17 Kalamazoo Outdoor Gourmet™ 1.800.868.1699 www.KalamazooGourmet.com SIDE BURNER DRIP PAN (Side Burner Models Only) Every Kalamazoo Outdoor Gourmet grill that comes equipped with a side burner has a drip pan that must be installed underneath. The Drip Pan is easily removed for quick clean up. Check the Drip Pan before each use. Remove excess grease to avoid a grease fire in the Drip Pan. Remove and clean as needed. WARNING: When operating the grill with a LP tank, the side burner drip pan must be in place when using the side burner. The LP tank must be protected from the drippings and flames of the side burner. Insert Drip Pan Here SIDE BURNER COVER (Side Burner Models Only) A side burner cover is supplied with all Kalamazoo Outdoor Gourmet grills that include a side burner. Place side burner cover over side burner when not in use. NEVER LIGHT THE SIDE BURNER WHEN THE COVER IS IN PLACE. When the side burner is in use, the cover may be stored in the grill main cabinet (underneath the cook box). 18 Kalamazoo Outdoor Gourmet™ 1.800.868.1699 www.KalamazooGourmet.com ASH GUARD (Hybrid Models Only) Ash Guard Clean Out Bin A modular Ash Guard tray accessorizes the Hybrid Grills. The modular tabs fit into the slots in the front panel of your grill, just above the control panel. Note: tabs fit into the slots with the large flange facing up. The Ash Guard is intended to protect the control panel from loose ashes and embers when the Hybrid Drawer is opened. The Clean Out Bin attaches to the left end of the Ash Guard. Ashes from the Ash Guard may be swept into the Clean Out Bin for easy cleanup. Ash Guard and Clean Out Bin may be stored in main cabinet when not in use. ROTISSERIE KIT The Rotisserie Kit consists of a powerful rotisserie motor and a rotisserie basket with food clamps. When not in use, the Rotisserie Kit should be stored indoors or inside the grill cabinet. 19 Kalamazoo Outdoor Gourmet™ 1.800.868.1699 www.KalamazooGourmet.com CONTROL KNOBS All Kalamazoo Outdoor Gourmet grills feature our cast stainless steel control knobs. One knob is provided for each independently controlled burner. To install knobs, simply line up the flat edge of the knob base with the flat edge of the valve stem and gently push into place. (Valve stems are located on the grill control panel.) CONTROL KNOBS INSTRUCTIONS NOTE: To turn knobs you must push in first 1. OFF position - Knob fully rotated clockwise so that knob arrow points to “OFF.” 2. ON (HIGH) position - Knob rotated 90° counterclockwise from OFF position so that knob arrow points to “HIGH/START.” 3. ON (LOW) position/ Ignite - Knob rotated 180° counterclockwise from OFF position so that knob arrow points to “LOW.” NOTE: Do not rotate knob more than 180° (i.e. below “LOW” setting). Flame may be off, but gas will continue to flow. 20 Kalamazoo Outdoor Gourmet™ 1.800.868.1699 www.KalamazooGourmet.com LIGHTING INSTRUCTIONS WARNING: Always stand back when lighting grill. Always have hood open when lighting. Always turn off gas and wait five (5) minutes if grill does not light before attempting to light again. DANGER: Explosive flame-up can be caused by failure to open lid while igniting the burner, or not waiting five (5) minutes to allow the gas to clear. Such a flame-up can cause serious bodily injury or death. WARNING: Check hose before each use of grill for wear, nicks, cracking, abrasions or cuts. If the hose is found to be damaged in any way, do not use the Kalamazoo Outdoor Gourmet grill. Replace using only the Kalamazoo Outdoor Gourmet authorized replacement manifold assembly. WARNING: Gas supply should be turned off at source/cylinder when appliance is not in use. Main Burner, Rotisserie Burner, and Searing Burner Lighting Instructions: • • • • • • • • Turn all knobs to off. Open grill hood. Turn main gas supply on. If you smell gas, turn main gas supply to “OFF” and call for service. Turn control knob for burner you wish to light to “HIGH/START” position. Push primary igniter button and hold until burner ignites. If burner fails to light in 3-5 seconds, wait five (5) minutes for gas to clear and try again. If burner fails to light after second attempt, turn knob to “OFF” and see “Manual lighting” instructions. 21 Kalamazoo Outdoor Gourmet™ 1.800.868.1699 www.KalamazooGourmet.com Manual Lighting (Main Burner): Open grill hood. Remove smoker tray drawer (gas grills only) or open Hybrid Drawer (Hybrid models only) allowing for manual lighting directly to burner. Insert needle nose lighter through smoker tray drawer opening or through drawer opening. AT THE SAME TIME, turn left burner knob only to “ON” position while igniting needle nose lighter. If burner does not ignite right away, turn off knob, wait five minutes for gas to clear and repeat process. Side Burner Lighting Instructions (and operating instructions): CAUTION: Do not attempt to light side burner using ignition buttons on grill control panel. The side burner on all Kalamazoo Outdoor Gourmet grills has an independent ignition system. • • • • With the control knob in the “OFF” position. Turn gas on at source (LP tank or other). • Rotate control knob counter clockwise ¼ turn “HIGH/IGNITE” until you hear the igniter click. This should ignite both of the burner rings on high. To reduce heat, continue to rotate knob counter clockwise. The flame of the outer burner ring will lower and ultimately go out. With continued counter clockwise rotation the flame of the inner ring will lower to the lowest simmer setting. To turn unit off, turn the control knob fully clockwise to “OFF” position. Turn the gas off at the gas source Manual Lighting (Side Burner): Hold needle nose lighter so that end is pointed at gas ports (holes) on the inner burner ring. AT THE SAME TIME, turn left burner knob only to “ON” position while igniting needle nose lighter. If burner does not ignite right away, turn off knob, wait five minutes for gas to clear and repeat process. 22 Kalamazoo Outdoor Gourmet™ 1.800.868.1699 www.KalamazooGourmet.com Lighting Instructions for Hybrid Models: When cooking with gas follow the instructions above. When cooking with charcoal or wood: • Load drawers with charcoal or wood (drawer does not need to be full!) • Too much charcoal will burn too hot – use little until you know your grill! • Push drawers in completely • *Funnel and hood gates must be completely open* • Place foil drip pan underneath funnel to catch charcoal and drippings • Hood must be open • Turn all knobs to “OFF” • Turn main gas supply on. If you smell gas, turn main gas supply to off and call for service • Turn left knob only to “ON” position • Push igniter button and hold until first burner ignites • If burner does not light in 3-5 seconds, turn knob off, wait 30 seconds and repeat • If first burner does light, then repeat for the second. Use gas as needed until charcoal reaches desired temperature • Once Charcoal is clearly burning TURN OFF GAS • Use hood vents to manage burn rate of charcoal and thus temperature 23 Kalamazoo Outdoor Gourmet™ 1.800.868.1699 www.KalamazooGourmet.com ADJUSTING THE AIRFLOW Main Burner adjustment: Main Burner Flame Pattern The Kalamazoo Outdoor Gourmet burners have been factory set for the correct air and gas mixture. Airflow adjust is not necessary for the main burner. The correct flame pattern is shown. If the flames do not appear to be uniform in length on the burner tube, follow the burner cleaning procedures. NOTE: If it is necessary to remove the burner for any reason, care must be taken when reinstalling. The stainless steel flexible gas tubes must be firmly secured to both the valve and the burner venturi. See photos diagram. All gas work must completed by a professional gas technician. Contact Customer Service at 1-800-868-1699 for complete instructions 24 Kalamazoo Outdoor Gourmet™ 1.800.868.1699 www.KalamazooGourmet.com TURN OFF INSTRUCTIONS GAS: Turn gas supply off at the source, then push down and turn each burner control knob clockwise to the “OFF” position. CHARCOAL: Leave hood open and let charcoal burn out. If temperature is below 800 degrees then close hood and “snuff” fire from oxygen and it will slowly go out. Do not do this if temperature is above 800 degrees – too much heat will build up below the hood causing possible damage to your grill. 25 Kalamazoo Outdoor Gourmet™ 1.800.868.1699 www.KalamazooGourmet.com INSTRUCTIONS AND WARNINGS FOR OPTIONAL SMOKER BOX Your Kalamazoo Outdoor Gourmet grill Smoker Box is a great cooking tool that gives you full command of the smoking process. Rear Smoke Diversion Pipe Cook Box Smoke Diversion Pipe Rear Slide Gate Cook Box Slide Gate Water Tray Wood Tray Ash Tray Lighting Instructions Set electric charcoal starter into the wood tray (center tray- see diagram above). Organize charcoal into a pyramid on top of the charcoal starter. Remove ash tray (bottom tray- see diagram) and water tray (top tray- see diagram) so that air can fully circulate through Smoker Box. Open the rear slide gate fully. If you DO NOT have food on the grill yet then open the cook box slide gate as well. This will allow for plenty of oxygen to circulate allowing the fire to start more efficiently. If you do have food on the grill then CLOSE the slide gate leading to the cook box so the charcoal smoke does not taint your food. Leave the door open fully until the charcoal has turned ash gray. Once charcoal has burned down, replace ash tray and remove charcoal starter. 26 Kalamazoo Outdoor Gourmet™ 1.800.868.1699 www.KalamazooGourmet.com Smoking Instructions Soak wood chips in water for at least three hours prior to smoking. Once the charcoal has burned down to an ash gray, place soaked wood smoking chips onto fire (in wood tray) and shut the door to the smoker box. Shut both slide gates to snuff the fire for one to three minutes. Smoke will be created dramatically. Then, divert the smoke with the slide gates either out the back exhaust or into the cooking box to smoke your food. It is possible to smoke for long periods of time by continuing to build and snuff, build and snuff, etc… the smoking fire as long as you desire. A special feature of the Kalamazoo Outdoor Gourmet Smoker Box is the water reservoir tray. By filling this tray with water you can smoke your food with “wet smoke” creating a finished product that is both smoky and juicy. You can also use ice to help cool the smoke while smoking. This helps to cold smoke the food so that it does not cook too quickly during the smoking process. Controlling the Heat of the Fire To increase heat, open both exhaust gates fully. This increased airflow will stoke the smoldering wood chips, increasing temperature. To cool down, close rear exhaust gate fully, and close cook box exhaust gate halfway. This decreased airflow will partially snuff the smoldering chips, decreasing temperature. When the desired temperature is reached, fully open the cook box exhaust gate so that the fire is not snuffed completely. Utilizing the water tray will also keep the smoker box temperature down. Putting Out the Fire To put out the fire, simply close both gates. Please check out our website at www.kalamazoogourmet.com for recipes and other ideas on how to use this great tool. 27 Kalamazoo Outdoor Gourmet™ 1.800.868.1699 www.KalamazooGourmet.com SMOKER TRAY INSTRUCTIONS Shown with no covers Shown with slotted cover Shown with slots covered A smoker tray comes standard on all Kalamazoo 450 and Kalamazoo 900 Series gas grills. When not in use, the Smoker Tray should remain in place while cooking. The Smoker Tray may be removed will grilling to allow for more even heat distribution. To use: • Soak wood chips in water for at least three hours prior to smoking. • Remove covers • Place wood chips inside Smoker Tray bin. • Gently slide Smoker Tray into opening in control panel. Pushing the Smoker Tray into the grill too fast may cause the covers to slide out of place. WARNING: Smoker Tray assembly will be extremely hot if the burners are lit. Use heavy-duty oven mitts to manipulate covers if hot! The two covers on the Smoker Tray bin have been especially designed to allow the maximum control over the smoking process. There are four major positions to arrange the covers: 1. No covers: High smoke output; fast burn cycle. 2. Slotted cover only: Medium smoke output; medium burn cycle. 3. Slotted cover with solid cover partially covering slots: lower smoke output; slow burn cycle. 4. Slotted cover with solid cover completely covering slots: will snuff smoldering wood chips. Use to stop smoking food. Because the Smoker Tray partially covers the main burner, the back of the Smoker Tray bin will become hotter than the front. This allows you to control the rate that you smoke your wood chips. To add additional wood chips, or to move smoldering wood chips around, carefully remove Smoker Tray, remove covers, adjust woodchips, and replace. Smoker Tray Tip #1- Fill Smoker Tray with water. By filling this tray with water you can smoke your food with “wet smoke” creating a finished product that is both smoky and juicy. Smoker Tray Tip #2- Place your favorite fresh herbs in the Smoker Tray with the wood chips. The smoke will become infused with the herbal aroma, giving your food extra flavor. 28 Kalamazoo Outdoor Gourmet™ 1.800.868.1699 www.KalamazooGourmet.com ROTISSERIE INSTRUCTIONS The location of the rotisserie burner makes it susceptible to strong wind conditions, more so that the protected main grill burners. For this reason you should avoid operating the rotisserie during windy conditions. When using the rotisserie, the hood must be closed except when basting. Do not cook with the rotisserie burner (available on most models) and the main grill burner or the searing burner at the same time, as the grill will get too hot. A single one of those burners should produce sufficient heat to cook the food on the spit rod. To install the rotisserie motor, assemble the motor bracket assembly (located directly to the left of the grilling surface), instructions on page 31. Plug the power cord supplied with the rotisserie motor into the motor. The power cord has an AC/DC adapter. For your convenience, Velcro has been attached to the adapter so that you may hold the cord in place when the motor is in use. Adhere the Velcro to the place that is most convenient to you, however DO NOT place it directly on the cooking surface, the grill hood, or the shroud that surrounds the rear of the cooking surface. All 450 and 900 Series grills now come with our cradle rotisserie system. Assembly directions are listed on the following page. Remove the warming rack and, if necessary, the cooking surface for clearance. Place a basting pan beneath the food for basting, to avoid flare-ups, and to ease cleaning. CAUTION: Always light rotisserie burner with the hood in the full open position. NOTE: The rotisserie motor must be stored indoors or in grill cabinet when not in use. Do not leave it mounted on the grill. 29 Kalamazoo Outdoor Gourmet™ 1.800.868.1699 www.KalamazooGourmet.com 30 Kalamazoo Outdoor Gourmet™ 1.800.868.1699 www.KalamazooGourmet.com Rotisserie motor bracket Rotisserie motor drive shaft Push motor onto shaft to motor bracket Rotisserie motor assembly complete Insert shaft in square behind motor bracket Rotisserie motor clip Press clip down to hold motor onto bracket Plug AC adapter into motor Square end of rotisserie basket this end Square rotisserie slot inside grill Curved groove end rests on rollers opposite side Completed rotisserie system 31 Kalamazoo Outdoor Gourmet™ 1.800.868.1699 www.KalamazooGourmet.com SEARING BURNER INSTRUCTIONS (Available on Kalamazoo 900 Series gas models only) Searing Burner One of the most important factors in serious grilling is serious heat. The 20,000 BTU infrared searing burner produces intense heat that immediately sears the food, locking in moisture and flavor. Heats up in only 3 minutes. Cooks food quickly. Ceramic tiles do not need to be place over searing burner. It generates a consistent, uniform heat over its entire surface. Use alone to cook food directly or use in conjunction with main burners for direct/indirect grilling. CAUTION: Leave your grill hood open when operating your searing burner except in cases of inclement weather or in high wind conditions. Do not leave the grill unattended when using your searing burner. Do not allow the internal temperature of the grill to exceed 900 degrees. Leaving the hood closed with the searing burner lit for extended periods of time may cause damage to your ignition system and other components. 32 Kalamazoo Outdoor Gourmet™ 1.800.868.1699 www.KalamazooGourmet.com COOKING WITH YOUR KALAMAZOO OUTDOOR GOURMET GRILL The Kalamazoo Outdoor Gourmet grill should not be moved when operating or when hot. You can adjust flame for left and right burners individually as desired. Preheating Gas Models After lighting, close lid and turn all burners to “High.” Preheating to between 500 and 550°F (260 and 290°C) will take 5 to 10 minutes depending on conditions such as air temperature and wind. Hybrid Models Leaving the grill hood open, light hard wood or charcoal. The charcoal has reached cooking temperature when it is coated in gray ash. Drippings and grease The ceramic tile brackets are designed to “smoke” the right amount of drippings for flavorful cooking. Excess drippings and grease accumulate in the Drip Pan under the funnel. Direct Cooking Position food directly over a hot to moderately hot fire to sear and crisp the surface. This method is popular for searing steaks and tuna steaks and for “flash” cooking shrimp. Indirect Cooking Position food away from the fire. This can be accomplished by turning the burner on one side of the grill on high and placing food on the other side. For indirect cooking using charcoal, arrange charcoal so that one area has less charcoal than the rest of the grill (or none at all). When grill is preheated, place food over the low area. This is the preferred method for grilling vegetables and fish fillets. Combination Direct/Indirect Cooking Follow directions above for Direct Cooking to sear the food. Then move food away from the fire to slowly cook the food through. This is the most popular method for cooking large cuts of meat. Smoking Either by cooking with wood or by smoldering soaked wood chips, smoking is a popular method of producing distinctive, flavorful food. There are several ways to smoke food using a Kalamazoo Outdoor Gourmet grill: • Most effective is the Kalamazoo Outdoor Gourmet’s™ exclusive smoker box (not available on all models). Utilization of the smoker box will have the most impact on the flavor of the food. See instructions above. • On Hybrid models, cook using wood or a charcoal/wood combination. The results will be a distinctive smoked flavor. • Place water soaked wood chips into the smoker tray (available on all gas models). Utilization of the smoker tray will lend a moderate smoked flavor • Plank cooking. Food cooked on a plank is moist (because of the damp smoke from the wood). The smoldering plank gives a subtle smoky tone to the food. Soak wooden planks (Alder, Cedar, Maple, Oak, etc…) in water for at least one hour. 33 Kalamazoo Outdoor Gourmet™ 1.800.868.1699 www.KalamazooGourmet.com Grill plank over high heat until it begins to char and smoke. Turn plank over and place food onto charred surface. Grilling planks are widely available where barbeque supplies are sold. (In all cases, cook with the grill lid closed so that smoke surrounds the food and infuses flavor.) HOW TO TELL WHEN MEAT IS GRILLED THOROUGHLY • • • • • • Meat and poultry cooked on a grill often browns very quickly on the outside. Use a meat thermometer to be sure the food has reached a safe internal temperature. Whole poultry should reach 180°F; breasts 170°F. Hamburgers should reach 160°F. Beef, veal, lamb steaks, roasts, and chops should be cooked to 145°F. All pork cuts should reach 160°F. Never partially grill meat or poultry and finish cooking later. Cook food completely to destroy harmful bacteria. When reheating fully cooked meats like hot dogs, grill them to 165°F, or until steaming hot. After cooking meat and poultry on the grill, at home or on a picnic, keep it hot until served. Outdoors, keep the meats hot by setting them to the side of the grill rack or on the warming rack, not directly over the coals where they would eventually overcook. Cooked meat should be kept at 140°F or warmer. Reference: Food Safety and Inspection Service United States Department of Agriculture Consumer Education and Information Grilling and Smoking Food Safely 34 Kalamazoo Outdoor Gourmet™ 1.800.868.1699 www.KalamazooGourmet.com OPTIONS There are many accessories available for your Kalamazoo Outdoor Gourmet grill. Mix and match any or all of these to customize your grill. To view these items visit our website at www.kalamazoogourmet.com. GRILL COVER Most Kalamazoo Outdoor Gourmet grill models have a custom grill cover available to protect your grill from the elements. HIBACHI / GRIDDLE The hibachi consists of a heavy duty, ¼” thick cooking surface. It is for use on grills with a side burner. To use: Lightly grease Hibachi with cooking oil. Position Hibachi over side burner, and gently lower onto grate, being careful not to scratch the grill. To preheat, turn side burner on med to med-high heat. Hibachi is ready to use when water dripped onto surface “jumps” and sizzles. Add more cooking oil if needed. Cook away! DO NOT REMOVE HIBACHI FROM GRILL UNTIL COMPLETELY COOL. Season and clean your Hibachi just as you would your grill cooking surface. 35 Kalamazoo Outdoor Gourmet™ 1.800.868.1699 www.KalamazooGourmet.com UTENSIL RACK This is a versatile stainless steel rack perfect for hanging all your barbecuing implements. The Utensil Rack utilizes the Kalamazoo Outdoor Gourmet grill’s exclusive modular system. WASTEBASKET This beautiful stainless steel wastebasket utilizes the Kalamazoo Outdoor Gourmet grill’s exclusive modular system. ICE/WINE BUCKET This stainless steel bucket is the perfect size for keeping your favorite vintage on ice. The Ice/Wine Bucket utilizes the Kalamazoo Outdoor Gourmet grill’s exclusive modular system. 36 Kalamazoo Outdoor Gourmet™ 1.800.868.1699 www.KalamazooGourmet.com SAUCE TRAY This handy stainless steel tray keeps your BBQ sauces and condiments handy while you grill. The sauce tray utilizes the Kalamazoo Outdoor Gourmet grill’s exclusive modular system. CUSTOM GRILL SURFACE Available in either 3/16” or ¼” stainless steel. Have your initials, business logo, even your family crest cut into your cooking surface. Be sure to season your grill surface before using. See instructions on seasoning and cleaning grill surfaces in the “Setting Up” section. There are 4 different patterns to choose from: MEAT, with wide slots to allow more heat to come through searing your steak to perfection; VEGETABLE, with slightly narrower slots to moderate the heat and also to keep smaller cuts of vegetables from falling through the grill surface; FISH, with very narrow curves that allow just enough heat to come through to cook your fish without allowing your fillet to break apart and fall through the grill surface; GRIDDLE, a solid surface perfect for cooking bacon, eggs, vegetables…anything. 37 Kalamazoo Outdoor Gourmet™ 1.800.868.1699 www.KalamazooGourmet.com SAMPLE RECIPE Habanero Mustard Venison Chops This recipe has some real kick to it, perfect for a fall day. Try the same marinade on chicken or even quail. For less spicy palates, substitute 1 teaspoon of fennel seed for the habaneros. Serves: 4 Ingredients: 4 venison rib chops, about 4 ounces each, frenched 4 tablespoons dried garlic flakes 2 tablespoons mustard seed 2 habanero peppers, seeds and stems removed 1 teaspoon coarse sea salt 1 teaspoon freshly ground black pepper 2-3 handfuls apple or cherry wood chips Cooking Directions: Soak half of the wood chips for one hour. Finely chop the habaneros (use surgical gloves while chopping peppers to keep your fingers free of oils). Mix in a bowl with the garlic flakes, mustard seed, sea salt and pepper. Preheat grill to 500°F (prepared for indirect cooking at 500°F). Place dry wood chips in the bottom of your grill's smoking tray and then layer the soaked chips on top of the dry chips. Put the smoker tray in the grill about 15 minutes before you will begin grilling the venison, as the grill heats up. If you do not have a smoking tray on your grill, you can make a smoking pouch. Wrap the wood chips (layered dry under wet) in a long, flat foil pouch. Pierce the top of the pouch with a fork to create vent holes. Make a lot of vent holes, piercing the foil pouch all over the top side. Place the foil pouch directly on your grilling surface about 15 minutes before you begin grilling the venison. Rinse and thoroughly dry the venison rib chops. Coat generously on all sides with the habanero spice mixture, and let rise to room temperature while the grill warms. Seasoned chops should sit for at least 15 minutes, but not more than 20 minutes. Sear chops for one minute on each side directly over the hottest flame. Move chops away from the flame for indirect grilling. For one inch thick chops, grill at 500 degrees over indirect heat for about 4 minutes per side, turning once and keeping the grill hood closed. We suggest service with wild rice and steamed fresh green beans. For more recipes visit our website: www.KalamazooGourmet.com. While there, you can also sign up to automatically receive the latest Kalamazoo Outdoor Gourmet recipes via our electronic newsletter, Hot Off The Grill! 38 Kalamazoo Outdoor Gourmet™ 1.800.868.1699 www.KalamazooGourmet.com A PERSONAL NOTE FROM THE DESIGNER Dear Fellow Grilling Enthusiast, Thank you for choosing a Kalamazoo Outdoor Gourmet product. We work hard to produce the highest quality products for your satisfaction. Our product designs have been applauded by the likes of Time Magazine, The New York Times, and NBC’s Weekend Today. Despite all these accolades, it gives me even more pleasure to know that you, the customer, are thrilled with the look and performance of your new grill. Since 1906 my family has taken pride in our attention to detail through the process of blending design and function in all of our products. Please feel free to share your thoughts, recipes and grilling experiences with us so we may have ongoing input to continually enhance our products to bring you the best in gourmet grilling. On behalf of the entire Kalamazoo Outdoor Gourmet team, I wish you and your family the very best in backyard entertaining. Great food…family… & friends to share it with… Happy Grilling, Geoffrey Bullard – Chief Designer Kalamazoo Outdoor Gourmet Bringing Gourmet Lifestyles Outdoors Since 1906™ 39 Kalamazoo Outdoor Gourmet™ 1.800.868.1699 www.KalamazooGourmet.com KALAMAZOO OUTDOOR GOURMET LIMITED WARRANTY The Kalamazoo Outdoor Gourmet Stainless Steel Products Warranty covers the replacement of parts for grills, custom outdoor kitchen components, martini bars and dock boxes under the terms and limitations listed below (items I through IV). This warranty covers the listed parts against defects or failure under normal usage. In limited situations, and only at the discretion of Kalamazoo Outdoor Gourmet, repair labor or grill replacement may be included under warranty. I. Limited Lifetime Warranty All fabricated stainless steel components, including grill frame, hood, panels and burner box are warranted against structural deterioration and corrosion due to defects in materials and workmanship. Discoloration is a natural reaction of stainless steel to heat and is not covered. Cast stainless steel Dragon Burners™ and other stainless steel burner system components are warranted against structural deterioration. Surface rust, oxidation and discoloration are not covered. II. Limited Five-Year Warranty All valves and non-stainless steel burners. III. Limited One-Year Warranty All other parts, including igniters, rotisserie motors, refrigerators, ice makers, wine coolers, plumbing fixtures and electronics. IV. Limitations & Exclusions The Kalamazoo Grill Stainless Steel Products Warranty applies only to the original, registered owner and may not be transferred. This warranty shall not apply to damage resulting from abuse, accident, natural disaster, power surges or loss of electrical power to the product for any reason, alteration, improper installation, improper operation, or improper repair or service of the product. This warranty does not apply to commercial usage. Warrantor is not responsible for consequential or incidental damage whether arising out of breach of warranty, breach of contract, or otherwise. This warranty is in lieu of all other warranties, expressed or implied, and all other obligations or liabilities related to the sale or use of Kalamazoo Outdoor Gourmet products. Some jurisdictions do not allow the exclusion or limitation of incidental or consequential damages, so the above limitations or exclusions may not apply to you. Damaged/defective parts or products covered under warranty must be returned to Kalamazoo Outdoor Gourmet at our request. You have the option to complete the parts exchange in one of two ways: You may request that we ship you the replacement part, for which you will be charged and then refunded once we receive the old part from you. Or you may ship us the old part, and we will then ship the replacement part at no Shipping charge. Charges for the old/replaced part are refunded to you at the same rate as is calculated for Kalamazoo Outdoor Gourmet to ship the new part. WARRANTY SERVICE If your grill is not working properly for any reason, call or e-mail us at [email protected]. Do not attempt to repair the grill yourself. This will void your warranty. Kalamazoo Outdoor Gourmet may require reasonable proof of your date of purchase. YOU SHOULD RETAIN YOUR SALES SLIP OR INVOICE AND REGISTER YOUR PRODUCT WITH KALAMAZOO OUTDOOR GOURMET. 40 Kalamazoo Outdoor Gourmet™ 1.800.868.1699 www.KalamazooGourmet.com PRODUCT REGISTRATION IMPORTANT: YOU MUST REGISTER YOUR PRODUCT WITH KALAMAZOO OUTDOOR GOURMET IN ORDER TO ACTIVATE YOUR WARRANTY. YOU MAY DO SO BY CALLING 1-800-868-1699 AND GIVING US THE INFORMATION BELOW OR EMAILING THE INFORMATION TO [email protected]. Please keep a copy of this information along with your purchase receipt for your records. Product Information Serial Number: Model Number: Model Name: Purchase Date: Dealer Information Dealer Name: Dealer Address: Dealer Phone: Dealer Email: Dealer Website: Kalamazoo Outdoor Gourmet 2415 N. Burdick Street Kalamazoo, MI 49007 1-800-868-1699 [email protected] www.KalamazooGourmet.com 41 Kalamazoo Outdoor Gourmet™ 1.800.868.1699 www.KalamazooGourmet.com NOTES 42 Kalamazoo Outdoor Gourmet™ 1.800.868.1699 www.KalamazooGourmet.com