1
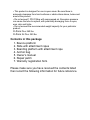
O-Zone™ Plus Series
Owner’s Manual
(O-Zone Plus , O-Zone XL Plus)
O-Zone Plus Shown
Thank you for purchasing the O-Zone Plus. Your new play
platform has been designed and constructed to provide you, your
family and friends lasting memories and hours of exciting fun on
the water.
We at RAVE Sports want your experience with the O-Zone Plus
to be the best it can be. Therefore, please take a few minutes to
read the information contained in this manual before inflating and
using your new O-Zone Plus. Although the product is simple to
use, this manual contains important safety information that you
and others must understand to safely enjoy the O-Zone Plus.
WARNING
Using the O-Zone Plus – like any action sports or
recreational activity involving motion – involves a risk of
injury. Improper use of the O-Zone Plus, including
reckless or careless behavior, neglect or misuse of the
equipment, or inadequate supervision of children and
others using the O-Zone Plus, can result in serious
personal injury or death.
Read all instructions and warnings provided to you in this
owner’s manual and printed on the O-Zone Plus. Always
act responsibly, provide proper supervision for children
and others, and make sure that you and all other persons
using the O-Zone Plus are in good physical condition.
It is the owner’s responsibility to inform all users of the
product safety rules and warnings contained herein.
Do not use the O-Zone Plus unless you are fully aware of
and willing to accept these risks and responsibilities.
• This product is designed for use in open areas. Be sure there is
adequate clearance from hard surfaces or obstructions above, below and
around the product.
• Do not exceed 1 PSI if filling with compressed air. Excessive pressure
can cause the tube to rupture, with potentially damaging force to eyes,
ears, skin and limbs.
• Do not exceed the recommended weight capacity for your particular
product:
O-Zone Plus: 240 lbs.
O-Zone XL Plus: 350 lbs.
Contents in this package
1. Bounce platform
2. Slide with attachment ropes
3. Boarding platform with attachment rope
4. Anchor bag
5. Owner’s manual
6. Repair patch
7. Warranty registration form
Please make sure you have received the contents listed
then record the following information for future reference.
Set Up
1. Locate a clean, flat area of approximately 15 ft. in diameter
that is free of hard obstructions, abrasive materials, and
sharp objects. Carefully spread out the tube so the graphics
and mesh surface are facing up.
2. For quick inflation, unscrew the valve body from the base.
3. Using an 110V inflator/deflator or large volume hand pump,
inflate until yellow indicator is between the A and B marks on
the inflation gauge. Quickly screw in valve body. To top off,
unscrew top valve cap only and add air. To reduce the
amount of air in the tube, turn the lower main valve body
approximately 1 full turn counter clockwise or until you hear
air escaping. Note: refer to step 4 if the tube feels too soft or
you are unsure whether the gauge is working properly.
4. DO NOT OVERINFLATE! Inflate only until the jump surface
is taut and the bouncer tube reaches a vertical height of
approximately 28” high for the O-Zone Plus and 36” high for
the O-Zone XL Plus.
5. Inflate boarding platform until it becomes firm. Do not over
inflate by continuing to inflate beyond this point. Note: a firm
platform will be easier to board than a soft one.
Note: Some wrinkles may remain in the tube at this proper
pressure and will lessen over time. It is normal for the air
pressure within the tube to fluctuate depending on air and
water temperatures. It may be necessary to check and
release some air pressure from your product throughout the
day.
6. Although the O-Zone Plus is not intended to be anchored
continuously for any length of time, a day-use anchor bag is
included. Simply fill the anchor bag with sand from the lake
shore or lake bottom. This will create a 40-lb. anchor that
can be emptied and rinsed after each use.
7. Carry (DO NOT DRAG) your O-Zone product to the water.
Flip bouncer upside down in shallow water. Tie a knot in one
end of lacing rope. Align large grommet holes of apron over
the three rope holders on the underside of the boarding
platform. Starting at the outermost rope holder on the bottom
of the bouncer, lace alternately between bouncer and
boarding platform. Loosely tie other end of rope.
Flip entire unit face up in the water. Pull rope until the
platform is snug against side of bouncer and there is no gap.
Check to make sure rope is spread evenly between rope
holders. Tie off rope to keep the boarding platform snug to
the bouncer.
Periodically check to ensure the protective apron is laying
flat over the ropes and the ropes are not exposed between
the boarding platform and the bouncer.
Inflating and connecting the slide
1. Inflate the main body chamber of the slide. DO NOT OVER
INFLATE. Inflate until firm and the slide stands upright.
2. Inflate both side rails on top of slide until firm. DO NOT
OVER INFLATE as the heat of the sun will cause the air to
expand. Release air throughout day if necessary.
Note: Moisten the plug of the clear stem valve prior to
inserting it into the valve and push plug into the valve body
fully.
3. Carry slide to the water and position next to the O-Zone
directly opposite from the boarding platform.
4. Tie a knot at one end of each slide attachment rope.
5. Working from the top down, feed the rope through mounts A
through F as shown. Loop twice through point E and finish
by tying at point F.
6. Lace other side of slide in the same fashion.
7. Adjust connection lacing, if necessary, to provide equal
tension on both sides and to ensure the slide is squarely and
securely fastened to the O-Zone.
8. Move to proper water depth and attach anchor bag rope to
the single rope holder located low on the outside of the tube,
opposite the boarding platform. Adjust anchor line to a length
slightly greater than the water depth and tie off rope. Leave a
little slack in the anchor line to accommodate the vertical
motion of the O-Zone when in use.
Before using your O-Zone, please read and follow all warnings
and safety instructions.
WARNING
• This product is intended for use on large bodies of water only.
• Anchor in at least 8 feet of water and in an area that is most
protected from wind. Do not use in swimming pools or within 15
feet of boats, docks or other hard obstructions.
• Not recommended for children under six years of age. Use
only with mature, knowledgeable supervision.
• Do not attempt or allow somersaults or other acrobatic
maneuvers. Improper landing during these maneuvers can
produce serious risk of broken bones, cuts, nerve damage,
spinal cord or brain injury, or death.
• Do not dive off or swim under this product. If you choose to
jump off the product, always enter the water feet first.
• This is not a personal flotation device. Always wear a U.S.
Coast Guard approved Type III PFD vest.
• Never tow this product behind a boat or other watercraft.
• Inspect the area beneath and around the product before each
use to ensure adequate clearance from obstructions. Ask about
local water conditions before using the O-Zone Plus in
unfamiliar water.
• Secure access. Deflate and store when not in use.
• Never use the product under the influence of alcohol or drugs.
• Do not attempt to climb on board or stand on the grab lines
around the perimeter of the tube.
• Never use the product after sunset, before dawn, or any other
time when lighting conditions are poor.
WARNING
• Never use the product in rough surface water conditions,
during storms, or when there is lightning. If an unexpected
storm arises while using the O-Zone Plus, seek shelter on
shore. Do not stay on the product.
• Always stay under control while using the product.
• Inspect the O-Zone Plus before each use for worn or
damaged parts.
• Never use product while tired or fatigued. Use extreme
caution while swimming between the shore and the O-Zone
Plus. Do not attempt to swim this distance if you are tired or
fatigued.
Troubleshooting
Won’t hold air:
• Check main valve to insure plastic ring is not caught under
the seal or cap.
• Be sure the valve and cap is screwed in straight and tight. A
cross threaded valve can cause leakage.
• Check stem valves to insure plugs are fully seated down into
valve body.
• Check for holes in product following the procedures in the
“Repairs” section.
Repairs
• Inflate the tube firmly and locate the leak by spraying the tube
with soapy water. Bubbles will appear where there is a leak.
• Determine the hole size and cut a circular patch ½ - 1 inch
wider than the hole.
• Remove air from the tube and dry tube completely where the
patch is to be applied.
• Peel off paper back from patch, apply repair patch to area and
work out any air bubbles from beneath the patch.
• Apply weight to the patched area for one hour before reinflating.
Storage
• Clean the tube and surface with mild soap and water and
allow to dry completely before folding and storing.
• Deflate bouncer, slide, and boarding platform completely by
removing main valve bodies from the valves bases and
opening the plugs.
• Consider packing mothballs for maximum protection from
mice and insects.
• Do not store directly on concrete.
RAVE Sports Raft
Water Sports