1
International Electronics, Inc.
Hub Manager Professional 7
Access Control Software
User Manual
This equipment is designed to be installed and serviced by
security and lock industry professionals.
For Support Please Contact:
Company Name: ________________________________
Phone: _______________________________________
Copyright 2005
International Electronics, Inc.
Hub Manager Professional 7
Software User Manual \ Help File
6045011, Rev 7.1, D1
Hub Manager Professional 7
Contents
I
Table of Contents
Chapter 1: Using Online Help
1 Using Help
....................................................................................... 1
Chapter 2: Foreword
Chapter 3: Installation
1 Installation
....................................................................................... 7
Chapter 4: Overview
1 General Overview ....................................................................................... 11
2 Initial Set Up
....................................................................................... 19
3 Menu System
....................................................................................... 22
4 Running the software
....................................................................................... 24
5 System Setup Tasklist
....................................................................................... 26
6 PDA Software
....................................................................................... 28
7 Uninstall
....................................................................................... 38
Chapter 5: System
1 System Menu
....................................................................................... 40
2 System Manager
....................................................................................... 40
3 Login
....................................................................................... 55
4 Logout
....................................................................................... 56
5 Change Login Password
....................................................................................... 56
6 Exit
....................................................................................... 56
Chapter 6: Database
1 Database Menu
....................................................................................... 58
2 Operators
....................................................................................... 58
3 Operator Wizard
....................................................................................... 60
4 Sites
....................................................................................... 61
Site Wizard
....................................................................................... 63
Serial Connection ....................................................................................... 64
PDA Connection ....................................................................................... 64
LAN/WAN Connection
....................................................................................... 64
Dynamic IP Address
....................................................................................... 70
Dynamic IP Address,
.......................................................................................
non-expiring lease
73
Static IP Address....................................................................................... 73
Modem Connection....................................................................................... 79
Managing Stand-Alone
.......................................................................................
Controllers
81
5 TimeZones
....................................................................................... 82
IEI Hub Manager Professional 7
II
6 Doors
....................................................................................... 86
Hub Controllers
....................................................................................... 93
prox.pad plus
....................................................................................... 93
LS2\P
....................................................................................... 94
Door Wizard
....................................................................................... 95
7 Access Levels
....................................................................................... 96
8 Access Level Wizard
....................................................................................... 102
9 Users
....................................................................................... 103
User List Import Wizard
....................................................................................... 114
Add User Group ....................................................................................... 117
10 Holidays
....................................................................................... 119
Chapter 7: Communications
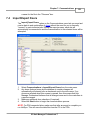
1 Security Chip
....................................................................................... 122
2 Communications Menu
....................................................................................... 122
3 Import Door Settings
....................................................................................... 122
4 Import\Export Doors
....................................................................................... 123
5 Network Query
....................................................................................... 125
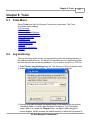
Chapter 8: Tools
1 Tools Menu
....................................................................................... 127
2 Log Archiving
....................................................................................... 127
3 Audit Archiving
....................................................................................... 128
4 Database Backup/Restore
....................................................................................... 129
5 Database Conversion
.......................................................................................
Utility
130
6 Run Com Port Test ....................................................................................... 133
7 External Tools
....................................................................................... 134
8 Scheduled Log Import
....................................................................................... 134
9 Scheduled Log Import
.......................................................................................
Reminder
136
10 Table Initialization ....................................................................................... 136
11 Application Initialization
....................................................................................... 138
12 Indexing
....................................................................................... 138
13 Options
....................................................................................... 139
Chapter 9: Reports
1 Reports Menu
....................................................................................... 144
2 Log Filter
....................................................................................... 144
3 Time Management ....................................................................................... 148
4 Misc. Log Reports ....................................................................................... 149
5 Assignment Reports
....................................................................................... 150
6 Database Printing ....................................................................................... 159
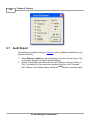
7 Audit Report
....................................................................................... 160
IEI Hub Manager Professional 7
Contents
III
8 Archive Viewer
....................................................................................... 161
9 Generate Data for External
.......................................................................................
Report Writer
162
10 Scheduled Log Imort
.......................................................................................
Errors
162
Chapter 10: Help
1 Error Messages
....................................................................................... 164
2 Glossary
....................................................................................... 164
3 Help
....................................................................................... 166
4 Check for Updates ....................................................................................... 166
5 Check for Custom Updates
....................................................................................... 170
6 About
....................................................................................... 171
Chapter 11: Obtaining Technical Support
1 Obtaining Technical.......................................................................................
Support
173
Chapter 12: Copyright Information
1 Copyright Information
....................................................................................... 174
Index
175
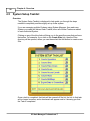
Chapter 1: Using Online Help
1
Chapter 1: Using Online Help
1.1
Using Help
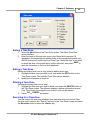
Hardcopy Version
Some references in this manual are designed for use with the electronic version.
The electronic PDF version can be found in the following folder:
C:\Program Files\IEI\HubManagerPro7\Program\HubManagerPro7\Manual.pdf
Electronic Version
An electronic help system such as this one for Hub Manager Professional quickly
displays advice and instructions about the Hub Manager Professional software
when you select the Help item in your menu bar or by pressing F1 when any form
is open. You can obtain this online help without interrupting the work you are doing
and without looking through a paper manual.
IEI Hub Manager Professional 7
2
Chapter 1: Using Online Help
This help system is context sensitive, meaning that if you press F1 while the User
Edit form of the program is open, then the help file will open to the topic that
describes editing users.
After the Hub Manager Professional Online Help window opens, you'll see a
choice of tabs: Contents, Index, Search and Favorites
· Select the Contents tab to browse through topics by category, much like the
Table of Contents to a book.
· Select the Index tab to see a list of index entries: either type the word you're
looking for or scroll through the list.
· Select the Find tab to search for words or phrases that may be contained in a
Help topic.
· Select the Favorites tab to save a bookmark to certain Help topics for quick
reference at a later time.
IEI Hub Manager Professional 7
Chapter 2: Foreword
3
Chapter 2: Foreword
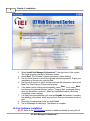
About This Manual
This manual is designed for users of IEI Hub Manager Professional 7 software
in conjunction with HC500, Hub+\Max, MaxII v1, MaxII v2, LS2\P, and prox.pad
plus controllers. All installation, setup, operational information and procedures,
accompanying screen captures and other relevant material is contained in this
manual.
Safety Warnings and Cautions
When handling a printed circuit board, to guard against possible static discharges,
touch a grounded object BEFORE touching the board. Static shock can render the
product unusable.
Design Change Disclaimer
Due to design changes and product improvements, information in this manual is
subject to change without notice. IEI assumes no responsibility for any errors that
may appear in this manual.
Reproduction Disclaimer
Neither this manual nor any part of it may be reproduced, photocopied, or
electronically transmitted in any way without the written permission of IEI.
Technical Support
Should you experience any difficulty installing or operating the Hub Manager
Professional software, please contact your installation/service company or IEI at
800-343-9502.
Using this Manual
This manual, your reference to the Hub Manager Professional software,
accompanies the Hub Manager Professional software installed with your access
control system. This manual contains the following topic sections, along with
others:
Overview
Provides a description of this softwares functionality
System
Explains the menu choices available on the System menu
Database
Describes the various program databases
Communications
Details how to use the Database, Time and Date, and Log Retrieval functions
Tools
IEI Hub Manager Professional 7
4
Chapter 2: Foreword
Details the Tools menu options.
Reports
Supplies procedure for selecting the various types of available reports and shows
examples of each
LS Link PDA Software
Describes IEI's LS Link PDA software and explains how to install it
Obtaining Technical Support
Describes how to obtain technical support for this software, and how to prepare to
make a technical support request
Glossary
Contains commonly used terms and definitions.
Manual Conventions: Keys, Selections, and Commands
The type style, terminology, and references to important information used in this
manual are intended to make the manual easy to use. The following sections
describe these conventions.
The following terms are used to indicate commands, which you must execute, or
selections you must make, using the mouse or keyboard:
Bold Face Type
All keyboard keys you must press or menu items you must select are highlighted
in bold face type.
<F7>
Keyboard keys you must press are contained within carets.
<Alt> <F>
Represents a Windows accelerator key or combination key you must press. Hold
down the <Alt> key, then press the indicated key.
Click
The Click command means you must click the LEFT mouse button once, unless
the right mouse button is indicated (as in Right-Click). [For command buttons, you
can also use the Windows accelerator key (<Alt> plus the underlined character)
associated with the item to activate the item. For example, the accelerator key for
the Start menu's Run... command is <Alt>+R.]
Double-Click
Indicates two rapid clicks of the left mouse button. [You can also select the
specified item by highlighting it (using the arrow keys or <Tab> key), pressing the
space bar to select it, then pressing the <Enter> key.]
IEI Hub Manager Professional 7
Chapter 2: Foreword
5
Select or Highlight
Select or highlight an item by clicking on it or by using the TAB key to bring focus
to a component and then acting upon that component by pressing the <ENTER>
key or the SPACEBAR.
Press
Press the specified key or keys on the keyboard.
Drag
The Drag command follows standard Windows usage: select the desired item,
click and hold down the left mouse button, move the mouse pointer to the desired
location, then release the mouse button.
Menu Selections
When a series of two or more menu choices is presented, the menu commands
are separated by a vertical bar like this: System > Login. A menu choice is always
specified by its complete choice path. That is, the Main menu selection is given
first, along with any subsequent menu selections needed to get to the final menu
choice. For example, Database > Doors means first choose Database from the
Main menu, then choose Doors.
Save, Cancel, and Done Commands
Most screens and\or dialog contain two command buttons that are used to close
the dialog box: Save and Cancel.
When you select the Save button, the program saves the current data or settings
and returns to the previous screen.
When you select the Cancel button, the program discards any and all edits and
then returns you to the previous screen.
A Done button will be displayed when no data is being edited, such as when you
are viewing one of the directories: Sites, Time Zones, Doors, Access Levels,
Users, Holidays or Operators. When you select the Done button, the program will
simply close the current screen (window) and return you to the main screen of
Hub Manager Professional.
Window Types
This software uses Microsoft Windows conventions and terminology regarding
how information is presented on screen. In general, information is displayed in
bordered windows called dialog boxes, or windows, or screens , or forms. For
further information, refer to the Microsoft Windows documentation. The table on
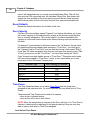
the next page lists the four dialog or window types used in this manual.
Window or Dialog Type Description
Application dialog Used for operator data entry, or to present information for
operator selection; usually referenced by the title of the application dialog, such as
Password dialog.
IEI Hub Manager Professional 7
6
Chapter 2: Foreword
Confirmation dialog
Presents the OK or Cancel command button choices to accept or reject an
action.
Main window
Displays initially whenever the software starts up; contains a menu and command
buttons that provide access to program functions.
Message box
Presents information that the operator must acknowledge.
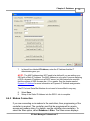
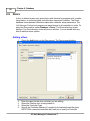
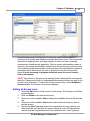
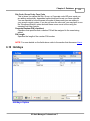
Dialog Tabs
Some dialog windows or boxes use a tabbed display to categorize information.
See the example below. Selecting a tab displays the information or data entry
items associated with that tab. The location of such information is referred to by
the name of the tab, such as the Door Settings tab or the Time Zones tab.
IEI Hub Manager Professional 7
Chapter 3: Installation
7
Chapter 3: Installation
3.1
Installation
This section provides a general description of the IEI Hub Manager Professional 7
software. It also supplies procedures for installing or using various Hub Manager
Professional 7 software components. Hub Manager Professional is an access control
management program for Microsoft Windows operating systems (2000/XP) used in
conjunction with IEI's access control equipment.
Operating Systems
Hub Manager Professional is qualified to work on Windows 2000, XP Home, and
XP Professional.
All software must be installed using an Windows Administrator password, but the
program can be used by a standard Windows logon. Failure to install the
applications may result in error messages and an incomplete installation.
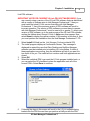
Installing the Hub Manager Professional software onto the PC
1.
Insert the installation CD.
NOTE: On most computers, the Autorun program launches automatically. If it
does not, select Start > Run, browse to the CD-ROM drive, select the
Autorun.exe file, then select Open and OK.
IEI Hub Manager Professional 7
8
Chapter 3: Installation
2.
3.
4.
5.
6.
7.
8.
9.
Select Install Hub Manager Professional 7, the top choice in the screen.
The Install program displays a Welcome screen.
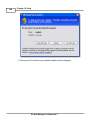
Select Next. The Software License Agreement screen displays.
Use the scroll buttons to scroll through and read the agreement. Signal your
acceptance of its terms by selecting Yes.
Use the scroll buttons to scroll through and read the information, then select
Next. The Start Copying Files screen displays.
If the listed current settings are acceptable, select Next. If not, select Back
and change the desired settings. Various "Copying files" messages display
while the installation continues. When the installation finishes, the Setup
Completed screen displays.
It is highly recommended that you view the ReadMe file because it contains
late breaking information, which may not be in this documentation at time of
print.
Select the corresponding check box and Finish.
The Hub Manager Professional 7installation is complete.
LS Link Software Installation
NOTE: Refer to the PDA Software section for additional details on using the LS
IEI Hub Manager Professional 7
Chapter 3: Installation
9
Link PDA software.
IMPORTANT NOTE FOR CURRENT LS Link PDA SOFTWARE USERS: If you
are currently using a version of the LS Link PDA software that was distributed
with a version of software prior to Hub Manager Professional 7, then you
must install the latest LS Link version that ships with Hub Manager
Professional 7. Use of the previous version of PDA software will result in
incorrect operation. The version of PDA software you must have to operate
with Hub Manager Professional 7 must be version 4 or greater. To check your
version of PDA software, go to the main screen of the LS Link PDA software,
and tap the titlebar where it says LS Link. A Help menu then appear. Now
select About to display the version number. If this number is less than 4, then
you must perform the installation from the Hub Manager Professional 7 CD.
1.
2.
3.
4.
5.
Select Install LS Link (on the Hub Manager Professionalinstall CD)
The install program displays a Confirmation Screen. This message is
displayed to remind the user that Palm Desktop and HotSync Manager
software must be installed prior to installing LS Link software. If either of
these applications are running, then the installation will ask if you want it to
turn them off for you. The install will not continue until both applications are
closed.
Select OK.
Select the individual PDA's you want the LS Link program installed onto, or
you can select the 'All' checkbox to place the application onto all of the
current PDA's. Select Done to continue.
Following the steps in this screen will result in the LS Link software being
loaded onto the PDA the next time you perform a HotSync with the PDA.
IEI Hub Manager Professional 7
10
Chapter 3: Installation
6. Now perform a HotSync with each of the PDA's that you decided to install
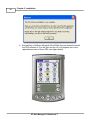
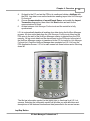
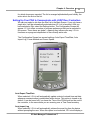
the PDA software to. You will then see the LS Link program icon in the
applications screen of those PDA (see figure below).
IEI Hub Manager Professional 7
Chapter 4: Overview
11
Chapter 4: Overview
4.1
General Overview
Additional information not contained in this manual may be found in the
ReadMe.txt file located at:
Start > Programs > Hub Manager Professional 7 > ReadMe
Operating Systems
Hub Manager Professional is qualified to work on Windows 2000, XP Home, and
XP Professional.
All software must be installed using a Windows Administrator password, but the
program can be used by a standard Windows logon.
Starting Hub Manager Professional
Once the Hub Manager Professional program is installed successfully, you can
start it in two ways.
1.
2.
Double-click the Hub Manager Professional shortcut icon that the install
program placed on your computer desktop.
Select Start > Programs and double-click on the Hub Manager
Professional 7 shortcut. The Hub Manager Professional Main window
displays. (The first time you start the program, you are prompted to enter
Contact information in a small dialog box. Enter this information and select
Save to save it.
Entering Your Login
The default login name is "HUBMAN" and the default password is "HUBMAN"
(upper case for both).
Changing Initial Login Name and Password
IEI strongly recommends that you change the factory-default initial Password of "
HUBMAN" (and write it down and store in a safe location) as soon as possible
after installing your Hub Manager Professional software successfully.
Go directly to Database > Operators and edit the operator in the system. This
default operator can not be removed, and none of the associated options can be
disabled. The "name" and "password," however, can be changed. You also use
this special operator to change the Contact information in the Help > About box. If
you forget the login name and password, please contact your installer. If you ever
choose initialize to the "operator" database, the default of "HUBMAN" and "
HUBMAN" will once again work.
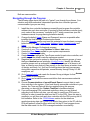
Major Features in Hub Manager Professional 7
IEI Hub Manager Professional 7
12
Chapter 4: Overview
Password Security
This feature requires password entry before allowing an operator access to Hub
Manager Professional software functions. A 2-part login is used. This password
should be changed after initial installation, periodically thereafter, and whenever
the list of personnel who use the software changes. The factory default login is
name: HUBMAN password : HUBMAN. (Names and Passwords are case
sensitive)
Main Screen
This dialog box provides organized access to the setup information used to
configure your Access Control System. "Power" software users can employ the
toolbar buttons for fast access to all functions, without having to use menu
commands for navigation. New and occasional software users can access the
same functions via the Hub Manager Professional menu system, eliminating the
need to rely on the user's memory for the location of each function in the software.
User List
The Hub Manager Professional user list provides a convenient means of
specifying the access credentials of users in the system. An available wizard lets
you import names from a CSV (comma separated value) file when creating users.
A CSV file is a simple text file that separates the fields with commas.
Transaction Logs
The Hub Manager Professional software can be used to retrieve the transaction
logs from controllers, save the transactions into the database, and view and print
the reports based on the data. Transaction Logs can be exported in a
comma-delimited format, which is the default format for data import used by
Microsoft Excel.
Operator Logon
Unlimited operators can be created; each operator can be assigned permissions
to any combination of screens; each operator can be assigned "Read" or "Write"
access to certain areas. Name and password are case sensitive. Operators can
be established without a password by not enabling the password for that operator.
Time Zones
An unlimited number of Time Zones can be created; each controller can choose
up to 8 time zones from that list. Each Time Zone must be named uniquely.
Auto Unlock Time Zones
Of the 8 Time Zones that can be assigned to most controller types, each one can
be designated as an Auto Unlock, which works as an auto unlock for that door
controller only, as long as that particular door controller has the Auto Unlock
system option available and that option is enabled.
Sites
Up to 1,000 Sites can be created using Hub Manager Professional. Each site can
consist of any device type and connection type These sites share users from the
IEI Hub Manager Professional 7
Chapter 4: Overview
13
same list of 20,000 users. There is a limit of how many doors can be included in
each site type, but that number is based on the controller type. If you have more
doors than is allowed in a site, then you must create another site and add the
overflow to that second site.
HC500
Hub+\Max
MaxII v1
MaxII v2
LS2\P
prox.pad plus
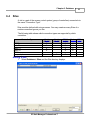
Maximum Doors Allowed Per Site
64
64
64
64
300
32
Door Time Zones
Only Time Zone names are shown on the screen when a certain door is selected
in the Access Levels screen. You can select on any of the Time Zones to see the
detail of that Time Zone.
Door Controller Type Selection
Enables features supported for that door controller type.
Access Levels
Virtually unlimited access levels can be created. Each must be named uniquely
(example, "Manager") and can be assigned access to any combination of doors
with in that "Customer's" system. Access levels also maintain some settings that a
user has when trying to access those doors selected in that access level, such as
"User Type" (standard, toggle, log dump, or relock). Access level also specifies
the "Time Zones" applied to a user. The time zones can be different for each
door.
Users
20,000 users total. A subset of users from the list of 20,000 users can be stored in
each of the controllers in the system based upon the user capacity of the door
controller type. Users are not added to doors directly, but are assigned to an
Access Level that has doors assigned to it.
An available wizard lets you import names from a CSV file when creating users.
Users Not Assigned to Doors Directly
Only the name, access level, and access credentials are set up on the user
screen. Users are not directly assigned to door controllers, but instead are
assigned to an Access Level. The access level has doors, user types, card/code
types, and time zones assigned to it. Making changes to the access settings for all
users that are part of the same access level, is quick and easy. Plus, adding a
user to be part of a pre-existing access level only requires the new user's name
and credentials to be defined.
IEI Hub Manager Professional 7
14
Chapter 4: Overview
Add User Group
You can add a group of users with common settings such as access level,
sequential card numbers, and random generation of code.
Holidays
16 single date holidays per system. Single date Holidays are sent to all doors
(controllers) in all sites.
16 block holidays per system. Block holidays are sent to all controllers in the
system, which support block holidays. LS2\P controllers support Block Holidays.
'Connect To' Sites
Each individual site must be 'connected to' before performing either a Network
Query or an Import Door Settings. It is not necessary when performing any of the
options in the 'Import\Export Doors' screen. Connecting to a site is the software's
process of deciding which method is used when communicating with a particular
controller type, and then performing all communications initializations for that
communication method. Once 'connected to' a site, you can choose to export to
all doors in that site or any combination of the doors in that site.
Exporting to Doors
An operator can export all settings or just the changes made to a site to a single
door or any combination of doors. The software tracks the doors to which changes
are made. Exporting just the changes to a door is less time consuming if only
minimal changes were made, such as adding a new user. The initial export to a
door takes the most time because all of the data is new.
When exporting with Hub Manager Professional software for the first time, IEI
recommends that you uncheck the "export changes only" option. This
recommendation applies to existing devices as well as new devices. This ensures
that all the data in this controller is over written with data that has been created by
Hub Manager Professional.
Importing of Door Data
Allows you to print the imported hardware settings and re-enter the data manually
into the program. This feature may not be available with controllers that are
managed via PDA software. Access Level relationships are not stored in the
controllers. In the case of a hard drive crash, all access levels are lost and cannot
be imported from the hardware, making a rebuild of the system is extremely
difficult if not impossible for complex system setups. Restoring from the database
backup that was stored on removable media is the best way to recover from a
system crash, because all data including the Access Levels are also restored.
Export Time/Date
Allows you to set the time/date in the controllers. You cannot export the time or
date directly to a PDA connected controller from the PC software. For PDA
connected controllers the PDA software has the ability to send the time to the
IEI Hub Manager Professional 7
Chapter 4: Overview
15
controller using the time and date of the PDA itself.
For directly connected controllers (if available), the PC's clock is used. Before
performing this function, verify that the Time and Date on the PC are correct.
Importing Transaction Logs
You can choose any combination of the doors within a site to import the
transaction log from and then press Start to start the import process. All new
transaction log data is appended to the existing transaction log data.
Scheduled-Import of Transaction Logs
You can specify the time that an Automatic Log Import is to occur. You can also
set the delay (in days) between Auto-Imports. Auto-Import attempts to import from
each door in each site. It will attempt to connect to each of the other sites
automatically, dependant upon the connection type of that site. It attempts an
import in this fashion for each site in that system. All new transaction log data is
appended to the existing data.
NOTE: You must log out, but not exit, for 'Scheduled Log Import' to work properly.
If an operator is logged in to Hub Manager Professional, the log retrieve will not
start automatically.
Opening Saved Transaction Logs or Reports for Viewing
The Operator can open the current transaction log file (containing the log
information for all doors that were imported from) for viewing as well as opening
archived transaction logs. If a log is saved to an archive file, it can be opened in a
program such as Microsoft Excel. Most reports are stored in comma-delimited
format, but some are stored in space delimited format.
Archiving Transaction Logs
The current Transaction Log, which can consist of data from any combination of
doors, can be moved into an Archive file if you no longer wish to use it in the new
reports of Hub Manager Professional. If you perform Archiving, the Transaction
Log data is now available in this Archive file. The Archive file is in CSV format,
which means that you can easily open it in a CSV viewer such as Microsoft Excel.
Open an Archived Transaction Log
This option lets you load an archived transaction log file into the current
transaction log file for viewing.
Network Query
Network Query reports Online\Offline, and Controller Type. Pictograms are used
to display this information. This feature will only query the site that you are
currently connected to via the Sites directory, and it attempts to query all the
possible doors that could be at that site, one door at a time.
If you are performing a network Query on an PDA connected site, then the
Network Query cannot speak directly to the controller. In this case the Time and
IEI Hub Manager Professional 7
16
Chapter 4: Overview
Date of the last imported Log Event will be displayed, which is useful if you would
like to know the last time this device was communicated with using the PDA
software.
Operator Audit Trail
The software maintains a time/date-stamped trail of which operator logged in, a
brief description of the screens that operator accessed, and a brief description of
what was done in each screen. Exact details telling exactly what was changed are
not given. (Example: operator John Smith logged in; Door 1 was added or
modified). No filtering of the audit trail is possible to produce a customized report
within Hub Manager Professional, but it can be printed to a file and opened in
another program such as Microsoft Excel or Crystal Reports.
Operator Audit Trail Archiving
Provides the ability to move the operator audit trail to an archive database.
Database Initialization
WARNING: Performing this operation will result in a loss of data. Please
perform a backup first. All existing data will be lost.
The operator can select to initialize the database, just the Transaction Log, or just
the Operator Audit Trail. Initializing removes all data that was entered or stored in
a particular database. This is a quick way to clear all data from a certain database
type. It does bring the selected databases back to a default state.
Database Backup
Allows you to create a backup of the existing databases. These backup files can
then be copied to a removable media. If the computer's hard drive crashes, you
could reinstall Hub Manager Professional and then copy the backup files back to
the Backup folder and then Restore these files.
Database Restore
Allows you to restore Hub Manager Professional data from the backup files stored
in the backup folder. This would allow you to recover from a hard drive crash or to
go back to the settings stored in the backup folder. If a backup was placed onto
removable media, you must first copy the files back into the backup folder and
then perform the database restore routine.
Database Conversion\Migration (if available)
A utility may be available that allows you to migrate your data from a previous
version of Hub Manager Professional or another access control program into Hub
Manager Professional 7. This utility (if it exists, named "Conversion.exe," may be
located in C:\Program Files\IEI\HubManagerPro7\Program
Transaction Log Report Filter
Allows you to customize the transaction log report to show only those items that
meet the filter criteria, such as a date range, a specific user, a specific access
level, any combination of doors, or any combination of events.
IEI Hub Manager Professional 7
Chapter 4: Overview
17
Time Management Report
This report tallies the total time in the building for each user per day as well as
subtracting break time from the total time and gives that number also. This report
requires controllers that can produce both "User IN" and "User OUT" events. If the
controllers in the system do not have both User IN and User OUT events, this
report can not calculate the amount of time a user was "IN" the building. See Time
Management for more details.
Misc. Log Reports
Three types of canned reports are available. The first report type lets you see the
very first and very last events on a particular day for each door controller. The
second report type allows you to see a list of the different days that a particular
user had used the access control system. And the last report type shows all the
users that used the access control system on a particular day.
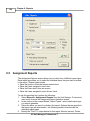
Assignment Reports
A collection of reports that allow you to see which items are assigned to other
items. Such as: "Show me all the Doors that are assigned to the selected Access
Level"
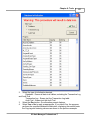
Database Report
This report shows all programmed items within a certain database.
Help File
Help file is included, you are now reading it, either electronically or in hardcopy
format.
Electronic Version: pressing F1 on any form will bring up a help topic relevant to
the form you are currently viewing.
Printing to Monitor (screen), Printer, or File
Every place that printing is available, a standard screen prompts the user where to
print the data: monitor , printer, or to a space delimited file. This is a default format
for importing text files into Microsoft Excel.
NOTE: To use this feature, a printer driver must be installed. If you are not using a
printer for your personal computer and have no printer drivers installed, add an
ASCII printer driver from your Windows CD-ROM, you can typically use the
Generic / Text Only printer driver installed on most PC's.
IEI Hub Manager Professional 7
18
Chapter 4: Overview
Default Time Zones
One Time Zone 12:00 AM-11:59 PM, including all days of the week and holidays.
This can be used for 24-hour users, that you want to give 24 / 7 / 365 access to.
Default Users
Master Code with a code of 1234, and a Supervisor User with no code defined.
For a complete listing of all user types and the devices that support the different
user types, see the Access Levels topic.
Default Holidays
No default holidays are defined.
Default Operator
One default operator is set up (which is case sensitive, all upper case for both)
with the name "HUBMAN" and password "HUBMAN" This operator can not be
deleted nor can any option be disabled. This default operators name and
password, however, can and should be changed soon after installing this
software, for security reasons.
IEI Hub Manager Professional 7
Chapter 4: Overview
4.2
19
Initial Set Up
Organizing for Hub Manager Professional Access Control
Getting ready for programming your access control system is a simple matter, as
the software employs the concept of "facility work groups-schedules" for access
control. This section describes the concepts involved and provides relevant
procedures.
Facility Work Groups
To create and control electronic access for each door in your facility, the Hub
Manager Professional software uses facility work groups; examples include office
workers, supervisors, or work shifts combined with their corresponding normal
work times, days, and the doors they can access normally. This latter idea is
known as "Access Levels." It minimizes required software programming to a
simple action of transferring a mirror image of the existing facility's employee work
groups and schedules into the corresponding Hub Manager Professional software
screens. Access is granted by issuing each person access credentials such as a
card, RF Fob, Personal Identification Number (PIN), or other form of credential,
and then assigning that person to an identified facility work group called Access
Level (an Access Level is a combination of each person's work group, doors,
times, and days), and then downloading this access level data to the controllers.
Creating Access Levels
1.
2.
3.
Create Access Levels by first identifying and grouping employees according
to the following parameters:
· logical work groups such as office, factory, supervisors, and marketing for
the employees assigned to each work group
· the normal group work schedule for each work group
· the doors that each work group can access
· the times that each work group can access the specified doors
Once you finish identifying and grouping employees, transfer this access level
information into the corresponding software screens ("forms") used to
program facility access control parameters into the Hub Manager
Professional software.
When you finish transferring access level information into the software
screens, download each completed software screen ("form") into the
system's controllers, to control specified door access with Readers and
Keypads.
Database Programming Screens ("forms")
The major Hub Manager Professional database programming screens (a.k.a.
forms) include:
Sites
If more than one location is involved, input and identify the additional sites in this
form
IEI Hub Manager Professional 7
20
Chapter 4: Overview
Time Zones
Input logical facility work group schedules by days and times
Holidays
Dates when access can be denied to some and granted to others, based upon the
setup of the Time Zones
Doors
Identify each controlled door by name and specify a few basic monitoring
parameters here
Access Levels
Combines the doors and times into an assignable access control structure that
can be assigned to each user
Users
Assign each employee or visitor an access credential combined with an Access
Level that can control employee or visitor access by door, time, day of week and
even holiday automatically
Preparing for Access Control Programming
Use normal employee work times to create logical automated access control by
group and doors as follows:
1. For each site in your facility, identify and list all doors to be controlled by
name and location.
2. Example: Lobby, Computer Room, Accounting, Manufacturing, etc.
3. List the groups of people who work at or regularly visit the facility, their normal
work schedules, and the doors they can access.
Examples:
General Office Workers
8 AM through 6 PM. M-F
Lobby, Employee Entrance, Computer Room
Names: (List them here)
(first and last names)
General Supervisors
24 hours a day, 7 days and holidays
All doors
Names:(List them here)
(first and last names)
Marketing
7 AM through 7 PM M-F
All but Accounting
Names: (List them here)
(first and last names)
Tech Support
7 AM through 7 PM, M-F
Lobby
Names: (List them here)
(first and last names).
IEI Hub Manager Professional 7
Chapter 4: Overview
4.
5.
21
Transfer the information into the Hub Manager Professional software as
described in the Transferring Work Schedule section.
Download the access control information to the controllers as described in
the export to doors section.
Preparing Work Schedule
To transfer your current facility's work schedule into the Hub Manager
Professional software, follow subsections below.
Preparing Sites
If your system controls more than one site, use the Sites screen in the Hub
Manager Professional software to identify each site, identify its controllers, and
establish the necessary information for communications. Programming, reporting,
and communication routes with each site are then linked automatically into the
Hub Manager Professional software.
Preparing Time Zones
In the Hub Manager Professional Time Zone programming screen, transfer the
times that reflect the various schedules identified in the previous section.
Example: For Time Zone, fill in each line to reflect each separate possibility of
times, days, and holidays applicable to your employee work schedules.
General Office Workers: 8 AM through 6 PM. M-F
General Supervisors: 24 hours a day, 7 days and holidays
Marketing: 7 AM through 7 PM M-F
Tech Support: 7 AM through 7 PM, M-F
Preparing Doors
In the Hub Manager Professional Door programming screen, transfer each door's
identification into the system, by entering the door name and Time zones that are
active for the door. In this screen, enter the activities to be monitored and
reported, such as electric lock timer for ADA, auto unlock-relock, forced door, and
door ajar (propped door) events.
Preparing Access Levels
As noted earlier, the Access Level concept allows a single-phase entry method for
assigning employees and visitors to the appropriate door and time access control.
1. Using the Hub Manager Professional Access Levels programming screen,
transfer the identified work groups from your list.
2. Assign logical titles for each group's access level by their type of employee
work group.
3. Select appropriate time zones and doors.
Example:
Marketing: 7 AM through 7 PM M-F
All doors but Accounting
4. Create an Access Level titled "Marketing," and then select the appropriate
IEI Hub Manager Professional 7
22
Chapter 4: Overview
time zone number(s) and doors that reflect the Marketing" group.
Preparing Users
Using the Hub Manager Professional User screen, fill in the names, access
credentials and select the Access Level (for example, marketing, supervisor). This
single step directs the software to create each employee's access privileges
automatically.
Managing and Programming System Alarms
Door Contacts can be monitored, and door ajar (propped door), forced door
events annunciated for response.
1. Define how long each door can remain open before the door open event is
annunciated.
2. Transfer the identified times for each door's information to the Doors screen
in the Hub Manager Professional software.
3. To annunciate a held open or a forced door event, first define the action to be
taken. Examples include "report the event" or "close a relay"; then add this
desired action to the door information.
Providing for a Secure System
This procedure involves defining operators and the respective privileges for each.
1. Define which operators are allowed to program the Hub Manager
Professional system and exactly which programming actions each is
permitted.
2. Using the Operator screen, specify all tasks/parameters that each operator is
allowed to control, change, report on, or save. Each operator has his/her own
password for logon and then can access only their assigned tasks.
4.3
Menu System
Describing the Menu System
The menu system of the software includes the following commands:
SYSTEM
System Manager
Login
Logout
Change Password
Exit
DATABASE
Operators
Sites
Time Zones
Doors
Access Levels
Users
IEI Hub Manager Professional 7
Chapter 4: Overview
23
Holidays
COMMUNICATIONS
Import Door Settings
Import\Export Doors
Network Query
TOOLS
Log Archiving
Audit Archiving
Database Backup/Restore
Database Conversion Utility
Run Com Port Test
External Tools
Scheduled Log Import
Table Initialization
Indexing
Application Initialization
Options
REPORTS
Log Filter
Time Management
Misc Log Reports
Assignment Reports
Database
Audit
Archive Viewer
Generate Data for External Report Writer
Scheduled Log Import Errors
HELP
Help (you're reading it right now)
Check for Updates
Check for Custom Updates
About
System Main Menu Commands
The System main menu commands provide access to functions that are used for
system configuration or maintenance.
System
Provides a means of:
- launching the System Manager feature which allows you to create, delete, and
switch between other Hub Manager Professional databases you have created
- "logging into" the program
- "logging out of" the program
IEI Hub Manager Professional 7
24
Chapter 4: Overview
- modifying current login password for the currently logged in operator
- exiting the program
Database
Contains options necessary for setting required system parameters to operate the
door controllers, according to rules established for secure access to protected
areas.
Communications
Allows you to import the transaction log, which documents user activity from
individual door controllers to the personal computer database.
Tools
Permit you to maintain the program's databases, back up the databases, ensure
proper communications with door controllers, as well as gain access to other
utilities.
Reports
Supplies tools for processing and extracting of data from the program's
databases, such as summary forms, user lists, user activity lists, forms, etc.
Help
Supplies access to online help information.
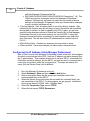
Selecting the System Menu Item
The System option contains menu choices that allow you to log into the system,
log out of the system, change your password, and exit from the program. Select
System from the main menu. The System drop-down menu displays.
4.4
Running the software
Once the Hub Manager Professional program is installed successfully, you can
start it in two ways.
1.
2.
Double-click the Hub Manager Professional 7 shortcut icon that the install
program placed on your computer desktop or on the shortcut on the Start
Menu.
Select Start > Programs and double-click on the Hub Manager Professional
7 shortcut. The Main window displays, with the Login form.
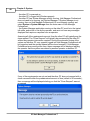
NOTE: The first time you start the program, you are prompted to enter support
contact information in a small dialog box. Enter the contact information and select
Save to save it. This information can be changed by going to Help > About while
the administrator operator is logged in.
Entering Your Login
The default login name is "HUBMAN" and the default password is "HUBMAN".
IEI Hub Manager Professional 7
Chapter 4: Overview
25
Both are case sensitive.
Navigating through the Program
The following steps depict the path of a "typical" user through the software. Your
situation may differ somewhat, dependant upon the door controller type and
communication type you are using.
1.
2.
3.
4.
5.
6.
7.
8.
9.
10.
11.
12.
13.
Install the door controller hardware successfully and program the controller
address into each door controller (if required by that particular controller type);
next, make all the necessary "controller-to-PC" wiring connections (see the
hardware manual for programming/installation details).
Change the default Login (Name and Password) as soon as possible after
installing the Hub Manager Professional software.
Go to the Overview section and read this material to learn the basic concepts
behind setting up Sites, Time Zones, Holidays, Doors, Access Levels, and
Users.
Run the Hub Manager Professional program.
Create all of your Sites using Database > Sites > Add button.
Create the Time Zones needed for your system requirements.
Create Holidays as applicable.
Create Doors and assign the Time-Zones needed in each door controller, and
modify any of the default controller options as needed.
Diagnose the customer's system by identifying the common groups of users
that have identical access privileges (Access Levels). Identify the different
possible groups such as managers having 24 hour access to all doors in all
sites, a cleaning crew that only has access on the front doors at certain times
of the day and week, 1st, 2nd, and 3rd shift workers that only have access
during their respective shift periods, normal Monday through Friday 9-5 AM
employees, etc.
Go to Access Levels and create the Access Group privileges for that Access
Level based on the diagnosis.
Go to Users and create the names and define that users access credential
fields.12.
Choose Communications > Import\Export Doors to export data to each
door controller in the system. If you have directly connected controllers in your
system, the Time and Date will also be updated during this process,
assuming you have left the 'Update Time\Date' checkbox enabled.
If you are managing PDA connected controllers, when you are finished
exporting to all doors in all sites, you will need to cradle your PDA and run
HotSync in order to send the data from the PC to the PDA. Once this step is
complete, you will then visit each door controller with the PDA running the LS
Link software. Refer to the PDA Software section for the details on
sending\receiving data via LS Link. You should then return to the PC with the
PDA and perform a final HotSync which will let the PC host program know
that the data made it to the PDA managed controllers successfully.
IEI Hub Manager Professional 7
26
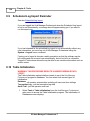
4.5
Chapter 4: Overview
System Setup Tasklist
Overview
The System Setup Tasklist is displayed to help guide you through the steps
needed to completely and thoroughly set up a new system.
If you are managing multiple Systems using System Manager, then each new
System you create will have a fresh Tasklist, since all of these Tasks are related
to each individual System.
Clicking on any of the blue links will bring you to the specific screen that performs
that action. For example: if you click on the Create Sites link, then the Sites
directory will be opened, where you can then select the Add button to create a new
Site.
Once a task is completed, that task will be crossed off the list, the link to that task
will no longer be active, and a checkmark will appear next to it showing you that
the Task is completed.
IEI Hub Manager Professional 7
Chapter 4: Overview
27
Inactive links will become active again, if the action that removed that link is no
longer true. For example: if you delete a Site and there are no longer any Sites left
in the System then the Create Sites link will once again become active.
There are some Tasks that do not require that you actually Add an item, but it is
required that you at least visit that screen in order to have that Task seen as
completed. The Tasks that you are required to at least visit are: Create Time
Zones, Create Holidays, and Create Operators. The other Task that is not actually
monitored for success is Export Data to Controllers. Just the act of opening the
Export screen is enough to complete this particular Task.
It is recommended that the Tasks be performed starting with the first Task and
ending with the last Task. Several Tasks require that other Tasks be completed
first. In these cases, you will be brought to the Task that is required. For example:
if the very first Task you select is Create Doors, you will receive a message
saying that you must create a Site before you can add a door, and you will then be
brought to the Sites directory where you should then add a Site.
Once all of the items in the System Setup Tasklist are complete, the list will be
removed from sight. Once the Tasklist is removed, certain action you perform may
bring make the Tasklist visible again. These actions include:
· performing a Database Restore from a dataset that does not have all of the
IEI Hub Manager Professional 7
28
Chapter 4: Overview
required Tasks completed (Tools > Database Restore)
· performing a Tools > Database Initialization
· enabling the option that says to display the Tasklist even if all tasks are
completed
4.6
PDA Software
LS Link PDA SW
LS Link is IEI's PDA software designed for communication between Hub Manager
Professional and LS2\P controllers. IEI's LS2\P controllers are standalone fully
integrated electronic access control door locks that communicate via infrared to a
Palm OS PDA. These controllers have two way infrared communications
capability. By employing a PDA and the LS Link PDA software, IEI's controllers
can be part of an overall access control system all managed by Hub Manager
Professional.
NOTE: Refer to the section titled Installation for details on installing the LS Link
PDA software.
LS Link System Requirements
The following are a list of required equipment in order to use LS Link PDA
software
· IEI's Hub Manager Professional 7 software
· PDA with Palm OS 3.5, 4.x, or 5.x
· HotSync software (provided by PDA vendor)
· 250KB of available memory on the PDA for each controller you are managing.
· See the ReadMe file for the most recent list of known compatible PDA models.
the ReadMe is located in Start > Programs > Hub Manager Professional7 >
ReadMe
PDA Data Transfers
The PDA acts as the "connection" between Hub Manager Professional and the
door controllers. Data transfers in either direction must occur in a series of
operations, involving the intermediate HotSync step.
Exporting From Hub Manager Professional to the PDA
When exporting to a PDA connected site, Hub Manager Professional creates data
files that will be transferred to the PDA the next time a HotSync Manager session
is executed. Refer to the Export to Doors section for details on exporting data.
1.
2.
3.
Choose Communications > Export to Doors, and enable the Export
Changes Only option, then select the Start button and wait for the
communications to finish.
Set the PDA in its cradle and initiate HotSync with the PDA.
Take the PDA to the controllers and export to each door using the Imp/Exp
button in LS Link, and follow the prompts
IEI Hub Manager Professional 7
Chapter 4: Overview
4.
5.
6.
29
Go back to the PC and set the PDA in its cradle and initiate a HotSync with
the PDA. Log data is now on the hard drive awaiting import into Hub Manager
Professional.
Choose Communications > Import\Export Doors, and enable the Import
Transaction Log option, then select the Start button and wait for the
communications to finish.
All data between Hub Manager Professional and the controller is fully
synchronized.
LS Link automatically handles all existing door data during the HotSync Manager
process. All door export data from the Hub Manager Professional stored on the
PDA prior to the start of the HotSync Manager session is deleted from the PDA
memory. All log event data from the doors stored on the PDA prior to the start of
the HotSync Manager session is transferred to the PC for import by Hub Manager
Professional. Once the HotSync Manager has completed run LS Link from the
PDA Application Screen. LS Link's main screen has three buttons and a Site drop
down list.
The title bar information symbol (in the upper right) is functional in all LS Link
screens. Selecting the information symbol will provide you with definitions and
descriptions of the features/functions and data presented in the current screen.
Imp/Exp Button
IEI Hub Manager Professional 7
30
Chapter 4: Overview
Initiates communication services. Communication services are: door identification,
download of event data from a controller, and upload of new configuration data to
a controller.
Files Button
· Displays the door management screen and provides access to advanced
functionality.
· Any door controller with a checkmark in the C column denotes that
configuration data is stored on the PDA that has not been sent to the relative
controller. This is useful to know what doors you still need to visit.
· Any door controller with a checkmark in the L column denotes that transaction
log data is on the PDA that has not been transferred to the PC via a HotSync
operation.
Settings Button
Displays settings for the LS Link program itself.
Site Drop Down List
Contains an alphabetical list of the Sites that door data exists for in the PDA's
memory. The Site shown in the Main Screen is the currently active site. All
operations within LS Link are performed on the currently active site. When LS Link
is launched, the Site Drop Down List will now contain a single entry for each site
IEI Hub Manager Professional 7
Chapter 4: Overview
31
for which doors were exported. The list is arranged alphabetically and initially, the
active site is the first on the list.
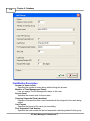
Setting Up Your PDA to Communicate with LS2\P Door Controllers
We can now select a site from the Site List in the Main Screen. If you only have a
single site, it will be automatically selected when LS Link is launched. After you
have selected a Site, select the Settings button. The Configuration Screen will
appear. LS Link offers a number of program preferences that can be selected in
this screen. These items are global – meaning they influence the way LS Link
functions as a program independent of the currently active site.
The Configuration Screen has several settings: Auto Export Time/Date, Auto
Import Log, Comm Method and Comm Speed.
Auto Export Time/Date
When selected, LS Link will automatically update a device's stored time and date
whenever communication is established with a device. This option is turned on by
default. It can be turned off if you know the Time of the PDA should not be sent to
the controller, in the case where you are crossing over a Time Zone boundary.
Auto Import Log
When selected, LS Link will automatically retrieve the event log from the device
without prompting the user. When this option is not selected, LS Link will display a
IEI Hub Manager Professional 7
32
Chapter 4: Overview
message box letting the user know how many events the device contains and
prompt them to choose to retrieve the log if they desire. This option is turned off
by default.
Comm Method
Because there are differences in the way the different models of the Palm PDA
hardware access and use the infrared outputs of the PDA, there is a drop-down
list allowing selection of what 'IR Channel' (infrared) LS Link is going to use.
Here is a list of known compatible PDA's and the 'IR Channel' (infrared) setting
that should be set in the LS Link PDA application.
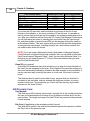
Make
Aceeca
Handspring
Kyocera
Palm
Palm
Palm
Palm
Palm
Palm
Palm
Palm
Palm
Palm
Palm
Palm
Palm
Palm
Palm
Palm
Palm
Palm
Palm
Palm
Palm
Palm
Palm
Palm
Sony
Model
'IR Channel' Setting (infrared)
Meazura
2
Visor
2
7135 Smart Phone
2
IIIc
1
IIIx
1
IIIxe
1
m105
2
m125
2
m130
2
m500
2
m505
2
m515
2
V
1
Vx
1
VIIx
1
Tungsten E
3
Tungsten E2
5
Tungsten T
3
TX
5
Tungsten T2
3
Tungsten W
2
Tungsten C
4
Zire
2
Zire 21
3
Zire 71
3
Zire 72
5
Zire 31
5
Clie SJ20
2
Models with known problems:
Palm Tungsten T3
An updated list of known compatible PDA's may also be available at www.ieib.com
IEI Hub Manager Professional 7
Chapter 4: Overview
33
or in the ReadMe file located at:
Start > Programs > Hub Manager Professional 7 > ReadMe
If your PDA is not in the known compatible PDA list then there is still a chance that
it may work, but there is no guarantee. You may also use the following PDA
descriptions to help you choose the best IR Channel setting:
· IR Channel 1 (infrared) - Older PDA's, such as the Palm IIIxe require this
setting
· IR Channel 2 (infrared) - This setting is used for PDA's running Palm OS 4.x or
5.x and the PDA does not have an OMAP logo on the back of the PDA
· IR Channel 3 (infrared) - Select this setting for PDA's that display an 'OMAP'
logo on the back of the PDA, see the OMAP logo below.
· IR Channel 4 (infrared) - See the list above for PDA models that use this setting
· IR Channel 5 (infrared) - See the list above for PDA models that use this setting
· Emulator - This setting should never be selected
Comm Speed
Drop-down list allowing selection of the baud rate to communicate to the device.
The default setting is 19200 and should not be changed.
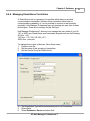
Exporting and Importing Data Between the PDA and the Door
· To find out which doors have new Configuration data to be delivered, select the
Files button on the Main Screen. The Door Management Screen will appear.
IEI Hub Manager Professional 7
34
Chapter 4: Overview
· The Door Management Screen displays a list of each of the door controllers
within the selected site. The table is made up of 3 columns: 'Door Name', 'C L',
and Action.
Door Name
The text ID given by the user to the PC software to identify the particular device.
C/L
Indicates what operations are pending for the door. A checkmark gets placed in
column C when LS Link has new configuration data available to upload to the
device. A checkmark gets placed in column L when LS Link has received new
event log data from the controller that has not yet been returned to the PC via a
HotSync.
NOTE: Some doors on the PDA may not have new configuration data.
Action
The Action list is a drop-down list of advanced functions that can be invoked to act
on the door. These actions include checking the current Time/Date on the
controller, or looking at the current configuration details. Some actions such as
the 'Remove' option should not be performed unless you are asked to do so by a
Technical Support representative.
IEI Hub Manager Professional 7
Chapter 4: Overview
35
Communicating with a Door
1. Select the Imp/Exp button of the LS Link main screen and point the infrared
port of the PDA at the infrared port of the controller as shown in the following
diagrams. See the installation manual for further details on the infrared ports of
the controllers.
NOTE: The optimal distance between the PDA and the controller is approximately
3" to 10". Some PDA's perform better at the shorter range and some perform
better at the longer range due to the variations in the infrared lens of the PDA
hardware. Longer export and import times will result from putting the PDA either
too close or too far away from the infrared receiver of the controller. This extra
time is due to retries that may result from communication errors.
2. The PDA application will now prompt you to "Please enter your communications
code at the door". The process of unlocking communications is required in
order to communicate with the controller.
3. Enter a valid "Communications Unlock" user credential at the controller. See
The Access Levels section for more details on using 'Comm Unlock' codes.
The Master Code can always be used to unlock communications (the factory
default Master Code is 1-2-3-4-*).
4. If this is the first visit to this door, LS Linkprompts you to select the door from
the list. When you visit this door again, LS Link will automatically recognize that
you have communicated with this door before and will only prompt you to
confirm the door name as noted in the next step.
IEI Hub Manager Professional 7
36
Chapter 4: Overview
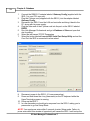
5. If you have communicated with this controller hardware before, or you just
selected the door from the list in the step above, then LS Link will ask you to
verify the door controller you are communicating with.
IEI Hub Manager Professional 7
Chapter 4: Overview
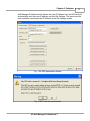
37
6. LS Link will then query the controller to find out how many events it has stored
and prompt you with a choice to retrieve them or not. For demonstration, select
'Yes'. LS Link now displays a status bar and retrieves the events from the door,
and displays how many events were retrieved from this controller.
IEI Hub Manager Professional 7
38
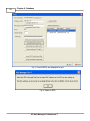
Chapter 4: Overview
7. LS Link then determines whether the configuration data stored on the PDA is
'newer' than that in the device. If the data is newer, you will be prompted with a
choice to send the data to the device or not.
8. Upon selecting 'Yes', LS Link displays a status bar and transmits all new data to
the device.
NOTE: An export of 2000 users may take about 1.5 minutes. For security
reasons, a full export will occur if you have entered programming mode on the
controller, or if you have changed the door or site name in Hub Manager
Professional. Normally, only changes are sent, taking only a few seconds if only a
few changes were made.
9. When finished, LS Link displays a Complete message (shown above).
4.7
Uninstall
Uninstalling Hub Manager Professional
WARNING: Uninstalling Hub Manager Professional will result in a loss of all
database data that you have created.
To uninstall Hub Manager Professional you can simply use the "Add or Remove
Programs" feature of Windows, and choose the application named Hub Manager
Professional 7.
IEI Hub Manager Professional 7
Chapter 4: Overview
39
NOTE: Any files that you created while using Hub Manager Professional, such as
reports, backups, or other files that were created by the program itself, will not be
removed from the hard drive. Those files will need to be removed manually. Only
files that were placed onto the hard drive by the installation program will be
removed, including the entire database.
Uninstalling LS Link
The LS Link software is uninstalled using the installation CD that came with the
product. When the Autorun.exe program is run, you will see an option labeled
"Uninstall LS Link". Simply select that option to remove the PDA associated files
from Palm Desktop.
NOTE: You will have to manually remove the LS LinkPDA application from the
PDA itself. Please refer to the PDA's documentation for instructions on removing
applications from the PDA.
IEI Hub Manager Professional 7
40
Chapter 5: System
Chapter 5: System
5.1
System Menu
Standard program functions can be accessed via the System menu.
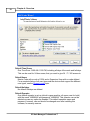
System Manager
Login
Logout
Change Login Password
Exit
5.2
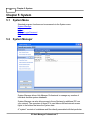
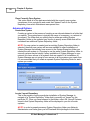
System Manager
System Manager allows Hub Manager Professional to manage any number of
individual discrete system databases.
System Manager can also allow access to those Systems by additional PC's on
your network. The operators of those PC's must have sufficient network access
rights to the folders that store the System data.
A "system" consists of a database and files directly associated with that particular
IEI Hub Manager Professional 7
Chapter 5: System
41
database. Each System is data independent of the other "Systems" you have
created.
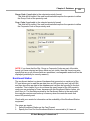
When a system is created it is stored in a folder that you specify. That folder is
called a "System Repository". System Repository folders can be created in any
network location which the creating PC has access to. Any number of System
Repositories can be created, and a System Repository can store any number of
Systems.
Applications
One operator manages one system
System Manager allows a single operator to manage a single System database.
This is nothing new and was always the case in prior versions of Hub Manager
Professional. But now the added advantage is that the system dataset can be
stored remotely on a server in a folder that is included in automatic backups. That
folder is the "System Repository" folder.
NOTE: The act of backing up in this scenario is not performed by System
Manager or Hub Manager Professional, but would be performed by the backup
program running on your server.
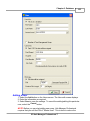
Application Example: A single person within a company is responsible for
managing the access control system in that company. Hub Manager Professional
and System Manager is installed on that persons PC. The System may be stored
on that PC or somewhere else on the network.
One Operator Manages One System
One operator manages many systems
IEI Hub Manager Professional 7
42
Chapter 5: System
System Manager allows a single operator to manage multiple discrete system
databases, such as those of multiple independent customers. In this scenario, it is
likely that all data is stored on the operators PC (or in a folder on a server that only
that operator has access to) and this operator can communicate to the access
control hardware via modem, network, or other communication type that applies to
the hardware. The operator can also visit the hardware and connect to it
physically.
Application Example: A dealer acts as a central station and manages the
databases for several customers. He can either connect to the hardware via
modems, PDA's, or network connection, dependent upon which communication
types the access control hardware supports.
One Operator Manages Many Systems
Many operators manage one system
System Manager can be used to allow multiple operators on different computers
to manage a single database that is stored on the network and is accessible by all
of the operators that wish to manage the data. This is helpful if a company has
several people responsible for adding, deleting, and editing users within their own
department.
Application Example: A company with several departments manages it's own
system. Each department head is responsible for managing the users in their own
department. Hub Manager Professional and System Manager is installed on each
department heads PC. The Network Administrator creates a new folder on a
server somewhere on the network and grants each department head access to
that new System Repository folder.
IEI Hub Manager Professional 7
Chapter 5: System
43
System Manager is then run on any of the PC's. The operator then selects "Create
New System", at which point the operator will select to create the new system in
the new System Repository folder that the network administrator had created.
Each department head can then run System Manager and attempt to open that
System dataset stored in the System Repository. After all changes are made and
exported to the controllers, the department head will then close the System, at
which point the system dataset is sent back to the System Repository folder on
the network and is ready for access by another department head.
NOTE: If a department head in attempting to open a system that is already in use
by another department head, access will be denied. A "Close System Request"
can be issued at that point. Please see the section in this topic labeled "Open
Selected System (while that system is already opened on another PC)" for more
details.
Many Operators Manage One System
Many operators manage many systems
System Manager was designed to be used to maintain multiple individual
databases across a network, by multiple operators.
Application Example #1 - Central Station: You're a dealer who manages the
access control systems for several of your "end user" customers, and you have
multiple employees at your central station who are allowed to modify the data of
those customers.
Hub Manager Professional and System Manager is installed on each employee
IEI Hub Manager Professional 7
44
Chapter 5: System
PC that may be managing a customer system. System Manager is run on any of
those PC's, and is used to create a new System for each customer. Those
systems can be stored in a folder anywhere on the network, as long as that folder
is accessible to the other employees that may also be managing that customer's
system. All systems can be stored in one System Repository folder or each
system can be stored in it's own System Repository folder, thereby allowing it to
be completely separate. This could be helpful if you do not want to give certain
employees access to a particular system. You could simply have the network
administrator create a folder on the network that is inaccessible to a particular
employee, and then store that customers system in that folder.
Many Operators Manage Many Systems - Central Station Example
Application Example #2 - Multiple Bank Branches: A Corporate Security
Officer wants to be able to manage the access control for all branches of a bank,
and also allow each Branch Manager to manage the data of their own branch. All
bank branches are on the corporate network.
The Corporate Security Officer would instruct the Network Administrator to create
a separate System Repository folder on a server for each of the bank branches
(as shown in Server #1 in the following diagram). The Network Administrator will
also set the network access privileges of each folder to only allow the Corporate
Security Officer and the Branch Manager of that particular branch. System
Manager is then used to create a system in each of those System Repository
folders.
IEI Hub Manager Professional 7
Chapter 5: System
45
Many Operators Manage Many Systems - Multiple Bank Branches Example
Terms
System Manager
System Manager is a program that is responsible for accessing the System
Repository and loading System datasets onto the local PC. System Manager also
sends that same dataset back to the System Repository.
System Repository (aka Repository, or Repository folder)
A 'System Repository' is a folder that can store any number of System Datasets.
Any number of System Repository folders can be created based upon your
security needs. All systems stored in that repository can be accessed by any
installation of System Manager that has network privileges to see that particular
System Repository folder.
System Dataset (aka Dataset or System)
A 'System Dataset' is a compressed zip file that stores all the data that is related
to that particular System, currently including (but not limited to) the complete
contents of the following folders: Archive, Backup, Database, Gateway, Maps,
PDAFiles, Print, and ReportDB.
Operator
Person who is using the Hub Manager Professional and System Manager
IEI Hub Manager Professional 7
46
Chapter 5: System
software.
Overview of System Manager
Security
System Manager does not restrict access to any of the System Repository folders
in any way. Access to the repository folders is based on the network privileges you
were given by the network administrator.
A System Repository may be located either on the local PC or in any folder on the
network. The security of the stored data is only as good as the security of folder
that stores the data. System Manager uses the security infrastructure of the PC as
set up by the Network Administrator.
The software will use whatever means of network connectivity are provided by the
client PC. (This may be a shared folder, network folder, mapped folder, VPN,
etc..).
Launching and Closing System Manager
System Manager can be seen running in the System Tray (typically in the lower
right corner of your screen, see below)
System Manager is automatically launched when Hub Manager Professional is
launched, but System Manager is not automatically closed when Hub Manager
Professional is closed. This allows System Manager to be able to process
messages from other installations of System Manager running on other PC's. One
type of request could be that the other PC needs to access to the dataset that is
open on your PC, and that other PC will perform a 'Request to Close'.
Basics of Operation
When a System is opened, System Manager program will actually make a local
copy of the data for use during program operation and will store the data back to
the System Repository folder upon selecting to close the system. This copy is also
created even if the data repository folder is on the local PC.
Standard Options
Open Selected System (while the system is not opened on another PC)
This option is used to open the system that is selected in the list. If this option is
selected and a different system is already open, then the open system will be
closed first, and then the selected system will be opened.
IEI Hub Manager Professional 7
Chapter 5: System
47
Open Selected System (while that system is already opened on another PC)
· If a system is already open when you select this option, then that system will be
closed prior to opening the new system.
· After selecting the "Open" option, System Manager must check to see that the
selected system is not currently open on another PC running System Manager.
If the system you selected to open is already open on another PC, a message
will be displayed showing information relative to the PC that has the system
open: the name of the computer, the name of the person logged in when the
system was opened, and the time\date when the system was opened by that
operator.
Upon selecting OK, you will then be asked if you want to send a "Close System"
request to the PC that has that system open. Selecting OK, will start the "Close
System" process.
At this time the PC requesting the close will send a "Close Request" and will
continuously waits for a "Close Successful" response from the PC that is closing
the system dataset.
NOTE: In order for the close request to be processed by the PC that has the
system open, ALL of the following MUST be true:
IEI Hub Manager Professional 7
48
Chapter 5: System
- the other PC is powered up
- the other PC is logged into Windows properly
- the other PC has System Manager actively running. Hub Manager Professional
does not need to be running, just System Manager. If System Manager is not
running, then run Hub Manager Professional (if it is not already running) and
select System > System Manager from the main menu of Hub Manager
Professional.
- the System Manager application running on the other PC must be in the typical
idle state, and not be in use by the operator, and must not have any messages
displayed that require a response from an operator.
Assuming all of the requirements are met, then the other PC will typically see the
close request. The "Close Request" will typically be processed by the other PC
without any operator intervention required. During the automatic closing of the
system on the other PC, any operator logged into Hub Manager Professional will
be logged out and the system dataset will be closed normally. If Hub Manager
Professional was running at the time, then a message will be displayed alerting
the operator that the system was closed by another operator on another PC.
If any of the requirements are not met and the other PC does not respond with a
close successful within the predetermined amount of time (default is 30 seconds) ,
then a message will be displayed alerting you that the "Close Request" was not
processed.
IEI Hub Manager Professional 7
Chapter 5: System
49
At this point you have 2 options:
· Select OK and wait another 30 seconds for the close successful response from
the other PC. You may want to do this if you knew you were having network
connection problems, or you contacted the owner of the other PC and had that
operator put the PC into the required state as noted above.
· Select Cancel, which will cancel any further waiting, but will then display another
message asking if you want to force an "emergency override".
An "emergency override" is NOT recommended and should only be used in rare
cases. The reason an emergency override is not recommended is because any
changes made to the dataset while that dataset was open on the other PC will be
discarded when the other PC gets around to closing the dataset.
If an "emergency override" is executed, then the PC requesting the close simply
opens the copy of the system dataset that is stored in the System Repository.
That copy of the dataset will not contain any of the modifications made by the
other operator who had it open. After the dataset is opened on your PC, a
message will be displayed to the other operator that will inform the other operator
that their data was overridden and that the dataset they currently have open will be
abandoned when that system is eventually closed.
NOTE: In all cases, any changes made to a System dataset while it was open on
the other PC will need to be reentered if that System was overridden.
An "emergency override" is known to be helpful in the following situations:
· The other PC, that had the system dataset you need, has crashed and the
data on the hard drive can't be recovered. The override will simply cause
System Manager to abandon the dataset that was open by that operator, and
allow you to open the last saved dataset.
· You need to make a critical change to the system such as deleting a disgruntled
employee and you need to delete that user and get the data exported to the
controllers immediately.
IEI Hub Manager Professional 7
50
Chapter 5: System
Close Currently Open System
This option takes all of the data associated with the currently open system,
compresses it into a single file and sends that "dataset" back to the System
Repository from which that dataset was opened from.
Advanced Options
Create New System
Creating a system is the process of creating a new discrete dataset in a folder that
you specify. The system name is typically the name of a company, or a subset of
a company. The folder that you specify may be either an existing System
Repository folder or the operator may choose to specify a new folder that will be
considered an additional System Repository folder.
NOTE: If a new system is created, and an existing System Repository folder is
selected, then that new system will become available to other installations of
System Manager that already have access to the System Repository folder you
created the new system in. Choosing to use the same System Repository folder to
store all systems may be helpful if every installation of System Manager on your
network is to have access to all systems that are created. If all installations of
System Manager are not going to have access to all the systems you create, then
it is recommended that you create a separate System Repository folder for each
system you create.
Locate / Import Repository
This is the process of using a particular installation of System Manager to
navigate to a "System Repository" folder that is currently not "known" by this
particular PC. Once you have browsed to that folder, select OK. Now all Systems
stored in that System Repository folder will be displayed in your list of known
systems.
NOTE: In order to properly access a System Repository folder your Network
Administrator must have given you full Read and Write privileges to that folder.
IEI Hub Manager Professional 7
Chapter 5: System
51
Rename Selected System
This option changes the name of the selected system. Once a system is renamed,
the next time an operator runs System Manager the new system name will be
displayed in the list of known systems.
A system should be closed before it is renamed.
Delete Selected System
WARNING: This option will result in the permanent loss of the selected
system data.
This option will completely remove all data associated with the selected system.
A system must be closed before it is deleted.
IEI Hub Manager Professional 7
52
Chapter 5: System
Clear List of Known Systems
This option clears the list of known System Repository folders which are stored
locally on this particular PC. This will in turn remove all system names from the list
of known systems. This is helpful if you have previously browsed to a System
Repository that you no longer want to see the contents of, then this option will
clear the entire list and start from scratch.
Refresh List
Forces an update of the "Known Systems List". This option is rarely required.
Show Selected System Info
This option will collect some information on the selected System and display that
information in the status messages below the system list. Status message are not
displayed by default, but you can simply resize the status message section of
System Manager by dragging the resize splitter at the bottom of the Known
System list.
IEI Hub Manager Professional 7
Chapter 5: System
53
Exit
Selecting Exit will not close the System Manager program, but will simply minimize
the program to the Windows System tray (typically in the lower right corner of the
screen). If you want to completely close System Manager then you must right click
on the System Manager program icon in the system tray (see below) and select
'Exit System Manager'.
System Manager Related Options Selectable in Hub Manager
Professional
IEI Hub Manager Professional 7
54
Chapter 5: System
Enable System Manager - multiple discrete databases can be created
When enabled, this option will enable the System Manager feature. If you are not
using any of the features of System Manager as described is this section, you can
disable this option. Disabling this option will remove System Manager from the
System menu of Hub Manager Professional and any opening and closing of
system datasets from a system repository folder will cease.
Disabling System Manager will cause Hub Manager Professional to handle a
database as it has in previous versions of Hub Manager Professional, whereas
only one system exists and the system is always open.
NOTE: Disabling System Manager is recommended only if the following are true:
- you have only one system
- the dataset to reside on the local PC
- the only operator that is going access the data is an operator of that particular
PC
Auto open the most recently used system when the program starts
NOTE: This option requires that the 'Enable System Manager' option above is
enabled.
Enabling this option will cause System Manager to automatically open the System
that was most recently used, without the need to intentionally run System
Manager. The opening of that system will automatically occur when Hub Manager
Professional is launched. Enabling this option is helpful if you are typically using
Hub Manager Professional to edit the same System over and over again.
Enabling this option is helpful if you have installed Hub Manager Professional on
and operators PC and you feel that operator would had no need to know about or
reason to deal with System Manager. If this is your reason for enabling this option
then you will also want to enable the 'Auto Close' option below.
Auto close any currently open system when this program closes
NOTE: This option requires that the Enable System Manager option is enabled.
Enabling this option will cause System Manager to automatically close the
currently open system when the Hub Manager Professional program is closed.
This is useful if you have multiple operators that access a particular database,
because it increases the chances that when an operator is done exporting
changes and closes Hub Manager Professional that the System Dataset will be
sent back to the System Repository and made available to other operators on
other PC's running System Manager.
Automatically return control after a system is open
NOTE: This option requires that the Enable System Manager option is enabled.
Enabling this option will cause System Manager to give control back to Hub
Manager Professional directly after a system is loaded, without giving a 'System
IEI Hub Manager Professional 7
Chapter 5: System
55
opened successfully' message or requiring that you close System Manager. Once
you have an understanding of how System Manager works, enabling this option
can help speed up the System Open process a little.
5.3
Login
To obtain access to the Hub Manager Professional program's features, you must
enter the pre-designated login, which consists of two entries, Name and
Password,into the Login dialog box. [The factory-default Name is "HUBMAN" (all
upper case letters); the default Password is also "HUBMAN" (all upper case
letters). IEI recommends that you change the default operator name and
password immediately after initial installation.
NOTE: The login feature is case sensitive. If the Name portion is "HUBMAN"
followed by a Password portion of "HUBMAN" for example, both must be typed
exactly as shown: in all upper case.
1.
Select System > Login from the main menu. The Login dialog box displays.
2.
Enter your Name on the first line of the Login dialog box (for example, the
factory-default of "system"), press <Tab> to move to the second line, enter
your Password on the second line (for example, the factory-default of
"startup"), and select OK (or press <Enter> on the keyboard). If you enter a
valid 2-part login, the Hub Manager Professional program activates, giving
you access to program options (they are no longer grayed out). If the login is
not valid, an "Incorrect login entered" message appears.
If the "Incorrect login entered" message appears, check your login and then
re-enter it. After you log on to the system successfully, you can access the
specific data and functions assigned to your specific user name by the
system administrator.
3.
IEI Hub Manager Professional 7
56
5.4
Chapter 5: System
Logout
The Logout option permits an individual system user to "Logout" or quit the Hub
Manager Professional program without actually exiting the program. Whenever
this option is chosen, to access the program's features once more, a new operator
must log into the system again.
Select System > Logout from the main menu. For example, a reason to Logout
and not exit the program is if you enable "Schedule Log Import" under the Tools
menu; you must log out but not exit the program completely before the automatic
importing of transaction logs can occur.
In a PDA connected system, when a HotSync is performed, transaction logs are
retrieved from the PDA and placed onto the PC, but are not sent to the Hub
Manager Professional database. By using the scheduled Log Import feature, you
can have those transaction log events imported into the database on a schedule.
This is helpful if you want to have someone responsible for using the PDA to
retrieve transaction logs from the door controllers, but not give them access to
the Hub Manager Professional program itself. Now that person can simply visit
each door controller and then HotSync the PDA afterwards, the log import to the
database will then be performed automatically.
5.5
Change Login Password
This option lets you change the Password portion of your system login. IEI
strongly recommends that you edit the default operator using Database >
Operators as soon as possible after installing your Hub Manager Professional
software successfully. Make sure to write down the name and password and
store them in a safe location.
1.
2.
3.
5.6
Select System > Change Password from the main menu. The Change
Password dialog box displays.
Enter the current password on the first line, the new password on the second
line, re-enter the new password on the "Verification" line for confirmation, and
then press Save.
If you have changed the initial Password and do not remember your current
Password, contact IEI technical support.
Exit
The Exit option exits you from the Hub Manager Professional program. Once
selected, the Hub Manager Professional main window closes, and you must
restart the program to access its features. Select System > Exit from the main
menu.
Upon exiting, the program may prompt you that changes to some number of doors
have occurred but these changes have not been exported to those door
IEI Hub Manager Professional 7
Chapter 5: System
57
controllers yet.
In addition, a prompt may display stating that Scheduled Importing of transaction
logs is enabled. Scheduled Importing can not occur if you exit. For the automatic
import to work properly, you must log out of but not exit Hub Manager Professional
.
IEI Hub Manager Professional 7
58
Chapter 6: Database
Chapter 6: Database
6.1
Database Menu
All data types can be accessed via the Database menu system.
Operators
Sites
Time Zones
Doors
Access Levels
Users
Holidays
6.2
Operators
Operators Option
The Operators option lets you assign to unlimited operators the ability to create,
view, and manipulate data in the Hub Manager Professional databases. Detailed
screens allow you to specify which activities a particular operator can perform. All
operators having any type of access to Hub Manager Professional databases are
listed. To select the Operators option, select Database > Operators. The
Operators screen displays. The information on this screen is almost the same as
described in Table 4-1. (Instead of remote site information being listed, operators
information is shown.) An operator is a combination of NAME and PASSWORD
that is used to login to Hub Manager Professional.
Adding an Operator
1. Select the Add button on the Operators screen.
IEI Hub Manager Professional 7
Chapter 6: Database
59
2. Enter the information in the operator detail fields as required.
3. Select Save to save the operator data to the operator database.
Field/Button Description
Name
Specifies the name of the operator.
Password
Specifies the password for this operator.
Validation
Text box used to re-enter the password for this operator.
Access
Lists the authorization required, if any, for all parts and databases of the Hub
Manager Professional program.
Full: operators with this authorization can view records, add new records, and
modify or delete existing records.
None: operator with this authorization cannot modify records, or view data or
records.
Read only: operators with this authorization can view records, but cannot add new
records, or modify or delete existing records.
Toggle
IEI Hub Manager Professional 7
60
Chapter 6: Database
Cycles through the available options for a particular feature. Or you can
double-click the feature to cycle.
Enable All
Enables all authorizations. Toggles between Full and None.
Disable All
Disables all authorizations. Toggles between Full and None.
Save
Saves the current operator data to the operator database.
Cancel
Discards all changes to this operator and returns you to the previous screen.
6.3
Operator Wizard
The Operator Wizard presents you with a step-by-step process to creating an
Operator that can log into Hub Manager Professional. This wizard was created to
allow you to create an operator with the least amount of effort (mouse clicks)
required, as well as allowing you to select from a number of 'canned' operator
types. It will also help you to create multiple operators with consistent access
privileges you have selected.
Initial option
The initial option asks you to specify whether you want to add a single operator or
multiple operators with the same privileges.
Step 1 of 1 - SINGLE OPERATOR
· Simply define the name and login password.
· When assigning privileges you can either choose from a predefined 'canned'
profile, with the respective options enabled, or you can choose to copy the
privileges from an existing operator.
· Regardless of which option you choose, the privileges can always be
customized before the operator is created.
Step 1 of 2 - MULTIPLE OPERATORS
· Specify the number of operators you want to create.
· When assigning privileges you can either choose from a predefined 'canned'
profile, with the respective options enabled, or you can choose to copy the
privileges from an existing operator.
· Regardless of which option you choose, the privileges can always be
customized before the operator is created.
Step 2 of 2 - MULTIPLE OPERATORS
· This is where you specify how you want to define the multiple operators login
name and password.
· You can either let the wizard create the names for you, or you can tell the
wizard to prompt you for each operators name and password.
· You can always edit any of the operator settings after the operator is created.
IEI Hub Manager Professional 7
Chapter 6: Database
6.4
61
Sites
A site is a part of the access control system (group of controllers) connected via
the same "Connection Type".
Sites must be defined with unique names. You may create as many Sites of a
certain connection type as you like.
The following table shows which connection types are supported by which
controllers.
Controller Type
HC500
Hub+\Max
MaxII v1
MaxII v2
LS2\P
prox.pad plus
Serial
(RS-232)
X
X
X
X
Serial
(RS-485)
SEG-1
(LAN)
X
X
X
X
X
X
X
X
X
X
X
Adding a Site
1.
Modem PDA
Select Database > Sites and the Site directory displays.
IEI Hub Manager Professional 7
62
Chapter 6: Database
2.
Select the Add button on the Sites screen. The Site edit screen displays.
3. Enter the Name.
4. Select the Device Group that contains the controller type to be used in this site.
Only one "Device Group" may be chosen.
5. Select the Connection Type that is going to be used to connect to the
controllers of this site.
6. Select Save to save the information to the database.
Field/Button Description (Site Directory)
Search Text box
Into which you enter name of specific site record you wish to find in the site
database.
Binoculars
Button that initiates the record search, based on the "Search" text.
Sort
Lets you specify the sort criterion to use for this database; available options are in
the drop-down list (name, coexisting group, connection type).
IEI Hub Manager Professional 7
Chapter 6: Database
63
Connection progress
Shows the connection progress while attempting to connect to this site.
Add
Button that initiates the ADD a site function.
Edit
Button that initiates the EDIT a site function.
Delete
Button that initiates the DELETE a site function.
Connect/Disconnect
Button that initiates the 'communications path' of the highlighted site. The label of
this button changes to 'Disconnect' after a successful connection.
Each individual site must be 'connected to' before performing a Network Query of
that site, but is not required when using the 'Import\Export Doors' option since the
program will automatically connect to each site, one after another, dependant
upon which doors are selected, and then perform the enabled actions.
Done
Closes the Site directory and goes back to the main screen.
Field/Button Description (Site Add\Edit))
Name
Shows the name of the site.
Device Group
Allows selection of the controller type that will be used on this Site
Connection Type
Allows selection of the method of communication to this site.
Assigned Doors
Displays the doors that are currently assigned to this site.
Save
Save all edits to this particular site being added\edited.
Cancel
Discards all edits of this particular site being added\edited and displays the site
directory.
6.4.1 Site Wizard
The Sites Wizard presents you with a step-by-step process to creating a Site(s). This
wizard was created to allow you to create the Site with the least amount of effort
required. The option to create a single site is almost identical as just using Hub Manager
Professional to create a single site. The real benefit of the wizard comes when creating
many sites at once, because once the settings are specified, they are copied to each of
the multiple sites created.
Step 1 of 1 - SINGLE SITE
Simply specify the name, device group, and connection type being used. You can
also copy the settings from an existing site.
IEI Hub Manager Professional 7
64
Chapter 6: Database
Step 2 of 2 - SINGLE SITE
Here is where you will specify the "Connection Type" parameters. The settings
may be different dependant upon what connection type was selected.
Step 1 of 2 - MULTIPLE SITES
Simply specify the number of sites you want to add, the modem's com port, and
the modem settings.
Step 2 of 2 - MULTIPLE SITES
This is where you specify how you want to name these new sites as well as assign
the phone number to these sites.
If you do not know the name or phone numbers of each site when you are setting
up the system, you can choose to have the wizard create the sites but not add any
name or phone number information.
You can also have the wizard prompt you for each sites name and phone number.
6.4.2 Serial Connection
A serial connected site is connected using the PC's RS232 serial communications
port (a.k.a. Comm Port).
Controllers such as a prox.pad plus that communicate via RS485 will require an
RS232 to RS485 converter to be installed between the first controller of the
controller network and the PC's comm port.
6.4.3 PDA Connection
A PDA connected site is defined if you are using your PDA as a transport device
between Hub Manager Professional and your LS2\P controllers. The are no
additional settings to define for this connection type.
See PDA Software for more details on using the PDA software.
6.4.4 LAN/WAN Connection
SEG-1 Connected Site via LAN/WAN
The SEG-1 is a device created for the purpose of allowing data to be exported
from your PC over a LAN/WAN to either MaxII v2 controllers or to prox.pad plus
controllers. A minimal amount of setup must be performed on the SEG-1 in order
for it to be properly addressed on the LAN.
These instructions will explain how to configure your SEG-1 TCP/IP to serial
adapter.
IEI Hub Manager Professional 7
Chapter 6: Database
65
NOTE: There are 3 methods that can be used to configure the IP Address of the
SEG-1:
- Dynamic IP Addressing via DHCP server with an IP that can change (this is
the recommended method but it requires SEG-1 firmware v1.3 or greater)
- Dynamic IP Addressing via DHCP server with non-expiring lease (can be
performed on any version of SEG-1)
- Static IP Address (can be performed on any version of SEG-1)
NOTE: If your SEG has a firmware version of 1.3 or higher and there is a DHCP
server on the network, which is typical, then it is recommended that you refer to
the chapter named Setting up a SEG-1 that is assigned an IP Address by DHCP
server.
Setup Method Definitions
Dynamic IP Address via DHCP server, IP Address in SEG-1 can change
This is the recommended method but it requires SEG-1 v1.3 or greater firmware.
The firmware label is located on top of the SEG-1.
NOTE: The SEG-1 units that shipped prior to v1.3 did not have a version label on
them. If the SEG-1 you are setting up does not have a version label, then the
firmware is prior to v1.3 and you cannot use this method and you MUST use one
of the other 2 methods to assign an IP Address to that particular SEG-1.
Using this method, no manual setup of the SEG-1 IP Address via the SEG-1 serial
port is required.
If there is only one SEG-1 installed on the LAN, you can now go to the chapter
named Setting up a SEG-1 that is assigned an IP Address by DHCP server.
If you are installing more than one SEG-1 on your LAN you just need to write
down the 12 digit MAC Address located on the label of the SEG-1 and write down
which controller group that SEG-1 is connected to for reference. For example:
00-20-4A-52-F2-84 Building 1, Floor 2, HubMaxII
00-20-4A-52-8B-89 Building 1, Floor 7, HubMaxII
00-20-4A-52-F4-12 Building 2, Floor 1, prox.pad plus
You can now go to the chapter named Setting up a SEG-1 that is assigned an IP
Address by DHCP server.
Dynamic IP Addressing via DHCP server with non-expiring lease, IP Address in
SEG-1 does not change
No setup of the SEG-1 via it's serial port is required. Just supply the SEG-1's MAC
address to the IT department and ask them to assign this particular piece of
ethernet equipment to be assigned an IP Address with a 'non-expiring lease', and
get back from the the IP Address that will be assigned the SEG-1. The MAC
address you will supply to IT is the 12 digit number located on the label of the
SEG-1. Once you have the IP address that will be assigned to this SEG-1, you
IEI Hub Manager Professional 7
66
Chapter 6: Database
can then go to the chapter named Dynamic IP Address, non-expiring lease.
NOTE: Each SEG-1 is shipped from the factory with an IP Address of 0.0.0.0.
When the SEG-1 is initially powered up (or rebooted) and it has an IP address of
all 0's, it will look for a DHCP server on the network and if one is found the SEG-1
will be assigned an IP Address.
Static IP Address, IP Address in SEG-1 does not change
The static IP address is set through the serial port of the SEG-1 using the PC's
serial communications port (or through the USB port using a USB to RS232
adapter). This method allows you to configure the IP address of the SEG-1 without
any network devices such as a router or a network switch interfering. Refer to the
section in this chapter named Static IP Address
SEG-1 Site Parameters
IP Address
The IP address that was assigned to the SEG-1.
IP Port
The IP Port is a 'channel' that the SEG-1 is configured to listen on for
communications from Hub Manager Professional. This is set to 9997 by default,
but can be changed both in Hub Manager Professional and in the SEG-1, if
necessary. But unless the IT Administrator requests the IP Port be changed, this
parameter should be left with the default value.
SEG-1 Serial Net Number
This corresponds to the serial port located on the SEG-1 device itself. The SEG-1
is capable of connecting to both RS232 and RS485 products, which are Serial Net
Numbers 1 and 2 respectively. This parameter should not be changed.
Security Key
All communication and data exchanged between the PC and the SEG-1 are sent
using 128 bit AES encryption. The encryption key that is used to encrypt the data
can be changed anytime by the operator as long as Hub Manager Professional
has same key that is currently stored in the SEG-1.
WARNING: It is highly recommended that you change the encryption security key
during the initial SEG-1 setup. All new SEG-1 devices are shipped with the same
initial security key, and Hub Manager Professional is also shipped with this same
security key. By not changing the security key, anyone running Hub Manager
Professional on their PC somewhere else on your LAN would be able to
communicate with your door controllers. But once this security key is changed to a
new 128 bit number, then all the data that is passed out the ethernet port of your
PC is then encrypted with that key and decrypted by the SEG-1 using that same
key.
IEI Hub Manager Professional 7
Chapter 6: Database
67
Generate Random Security Key
This button will generate a new 128 bit security key and will then display the
hexadecimal representation in the 'Current Security Key' field
If you wish to send this new encryption key to the SEG-1, choose the button
labeled 'Set This Security Key into the SEG-1'. Hub Manager Professional will
then attempt to communicate with the SEG-1 and change the Encryption Key
stored in the SEG-1. Once this new key is successfully set into the SEG-1, you will
receive a confirmation message.
Generate Default Security Key
This option should be used if you are installing a new SEG-1 to replace an existing
SEG-1, or if you were instructed to default the SEG-1 back to factory defaults.
This option will erase the existing security encryption key for this particular SEG-1
stored in Hub Manager Professional and replace it with the known default security
key of a brand new (or defaulted) SEG-1.
After selecting this option, you will receive a warning message explaining that
setting the security key back to defaults should only be done if you are installing a
new SEG-1 or if you have defaulted an existing SEG-1. Once you agree to this,
you must then choose the button labeled Set the Above Security Key into the
SEG1. You will then receive a confirmation message that explains that this option
will just save the defaulted security key into the Hub Manager Professional
database. You can now install your new or defaulted SEG-1 onto the LAN and
attempt to communicate with it. Don't forget to change the security key once you
have established communications with the new (or defaulted) SEG-1.
Set the Above Security Key into the SEG
Use this option if you wish to set a new random security key into the SEG-1. The
encryption key displayed in the Current Security Key field is what is sent during
this procedure.
NOTE: In order to change a security key in a SEG-1, Hub Manager Professional
must already know the existing security key that is stored in the SEG-1. If you
think there has been a mix up, and you think Hub Manager Professional may not
know the SEG-1's security key, then you should perform the steps to 'Default the
SEG-1 to Factory Settings' noted below, and when that process is complete, you
can then attempt to change the security key.
Reset the Security Key in the SEG to all 0's (can be used with any version of
SEG firmware)
Encryption Security
IEI Hub Manager Professional 7
68
Chapter 6: Database
For security reasons, the SEG-1 must be removed from the LAN and brought
back to the PC in order to Reset the Security Key. You will then enter the
configuration menu through the serial connection. The configuration utility cannot
be entered into thought the ethernet port. This is done so that not just anyone on
the LAN can change the settings of the SEG-1.
NOTE: This process may also be necessary if you have used the Restore
Database function of Hub Manager Professional and the Security Key stored in
the database that you just restored does not match the security key currently
stored in the SEG-1.
To default the encryption security key in the SEG-1, you must perform the
following in order:
1. Connect the supplied DB9 adapter labeled Gateway Config to your PC's
com port.
2. Remove the SEG-1 from the LAN (and power supply) and bring it back to the
PC.
3. Use the 6' phone cord (supplied with the SEG-1) and plug it into the port on
the SEG-1 labeled RS232.
4. Run Hub Manager Professional and go to Database > Sites and open that
site for editing.
5. Select the tab named TCP/IP Parameters
6. Select the button labeled Launch SEG Serial Port Setup Utility and enter
the PC Com Port the SEG is connected to.
7. Disconnect power to the SEG-1.
8. Press and hold down the x key (lowercase) on the PC keyboard, while the
HyperTerminal program is running.
9. Power up the SEG-1.
10. In a few seconds you should get a response from the SEG-1 and a menu will
be displayed.
11. Within 5 seconds you must choose the option labeled Reset to Factory
Defaults. The SEG-1 will then be set back to Out-Of-Box factory defaults.
You can now configure the SEG-1 as if you are installing it for the first time.
12. In order to speak to this SEG-1 again, you will now need follow the directions
above to Default the Security Key in Hub Manager Professional. Be sure to
set a new security key into the SEG-1 before you attempt to send sensitive
user data to the door controllers.
Reset the Security Key in the SEG to all 0's (requires SEG firmware v1.3 or
higher)
This feature is provided that will allow you to reset the Security Key in the SEG
back to all 0's, which is the default out-of-box state. Resetting the Security Key in
the SEG would be required if you are replacing a SEG with a previously used SEG
that already has a Security Key set into it and you don't know what the Security
Key is, or if you are setting up a new site and want to communicate with an
existing SEG that is already installed and already has a Security Key set.
NOTE: This feature can only be used with SEG devices with v1.3 or greater
IEI Hub Manager Professional 7
Chapter 6: Database
69
firmware.
1. Go to the SEG and either cycle power to it or press the little black reset button
on the SEG.
2. Within 10 minutes, go back to the PC and select the button in the Site Edit
screen that is labeled 'Reset the Security Key in the SEG to all 0's'.
3. You will see a warning message specifying the requirements of using this
feature. If you have met all the requirements then press the OK button.
4. If the Key was reset properly then you will see a confirmation message (Fig. 8).
5. As a security measure, you must now go back to the SEG and once again cycle
power or press the reset button on the SEG. This will set the new Security Key
into non-volatile memory. Failure to reset the SEG after the Security Key is
reset using this method will result in not being able to communicate with the
SEG.
6. Reset Complete. The Security Key has now been reset to all 0's in both the
SEG and PC. Communications with this SEG should now be possible.
Fig. 7 Security Key
Fig. 8 Reset Confirmation
Reset the Security Key in the PC to all 0's
This feature is typically used if you have replaced an existing SEG with a new
SEG or a SEG that has a Security of all 0's.
NOTE: If you use this feature and the SEG does not have a Security Key of all 0's
then you will have to set the Security Key back to all 0's also.
IEI Hub Manager Professional 7
70
Chapter 6: Database
6.4.4.1 Dynamic IP Address
Dynamic IP Address via DHCP server, IP Address in SEG-1 can change
This is the recommended method but it requires SEG-1 v1.3 or greater firmware.
The firmware label is located on top of the SEG-1.
NOTE: The SEG-1 units that shipped prior to v1.3 did not have a version label on
them. If the SEG-1 you are setting up does not have a version label, then the
firmware is prior to v1.3 and you cannot use this method and you MUST use one
of the other 2 methods to assign an IP Address to that particular SEG-1.
Using this method, no manual setup of the SEG-1 IP Address via the SEG-1 serial
port is required.
If you are installing more than one SEG-1 on your LAN you just need to write
down the 12 digit MAC Address located on the label of the SEG-1 and write down
which controller group that SEG-1 is connected to for reference. For example:
MAC Address
00-20-4A-52-F2-84
00-20-4A-52-8B-89
00-20-4A-52-F4-12
Description
Building 1, Floor 2, HubMaxII
Building 1, Floor 7, HubMaxII
Building 2, Floor 1, prox.pad plus
1. Press the button on the SEG setup screen (Fig. 1) labeled Search for SEG
Devices to start the process.
2. A warning will be displayed (Fig. 2) reminding you what the firmware
requirements are. Select Yes to continue the search.
3. In approximately 5-10 seconds a grid will be filled with any SEG-1 devices that
were found (Fig. 3) and a message will be displayed asking you to select a SEG
in the grid (Fig. 4).
4. If you are only installing one SEG and it was found during the search simply
select the item in the grid. If you have installed more than one SEG then select
the SEG that has the same MAC Address as the SEG you are setting up for
this site.
5. Now a message will be displayed asking you to generate a new Security Key
(Fig. 5)
6. If you don't want to set the Security Key at this time then setup is complete,
select save to Save and Close the Site Settings screen.
7. If you want to change the Security Key, then select the button labeled 'Generate
Random Security Key.
8. A message will then tell you to select the button labeled 'Set the Above Security
Key into the SEG. (Fig. 6). Select that button to send the new Security Key to
the selected SEG.
9. Setup Complete
Now that the MAC address is known by Hub Manager Professional, if the DHCP
server were to assign a new IP Address to this particular SEG, then the next time
you attempt to communicate with any of the controllers connected to this SEG,
IEI Hub Manager Professional 7
Chapter 6: Database
71
Hub Manager Professional will retrieve the new IP Address from the SEG and will
automatically save this new IP address into the Site Settings. This saves you the
time needed to reconfigure the IP Address in the Site settings screen.
Fig. 1 No SEG parameters defined
Fig. 2 SEG firmware requirements
IEI Hub Manager Professional 7
72
Chapter 6: Database
Fig. 3 Found SEG's are displayed in grid
Fig. 4 Select a SEG
IEI Hub Manager Professional 7
Chapter 6: Database
73
Fig. 5 Generate Security Key
Fig. 6 Generate Security Key
6.4.4.2 Dynamic IP Address, non-expiring lease
No setup of the SEG-1 via it's serial port is required. Just supply the SEG-1's MAC
address to the IT department and ask them to assign this particular piece of
ethernet equipment to be assigned an IP Address with a 'non-expiring lease', and
get back from the the IP Address that will be assigned the SEG-1. The MAC
address you will supply to IT is the 12 digit number located on the label of the
SEG-1. Once you have the IP address that will be assigned to this SEG-1, you
can then simply enter that IP address into the Site Settings screen, and change
the IP address if necessary, and Save the site.
NOTE: Each SEG-1 is shipped from the factory with an IP Address of 0.0.0.0.
When the SEG-1 is initially powered up (or rebooted) and it has an IP address of
all 0's, it will look for a DHCP server on the network and if one is found the SEG-1
will be assigned an IP Address.
6.4.4.3 Static IP Address
Setting a Static IP Address of a SEG-1 through a serial connection
(via PC com port)
This is the method for configuring the IP address of the SEG-1 if it is going to be
assigned a static IP address.
To enter the configuration menu of the SEG-1, you must perform the following in
order:
IEI Hub Manager Professional 7
74
Chapter 6: Database
1.
2.
3.
4.
5.
6.
7.
Connect the DB9-RJ11 adapter labeled Gateway Config (supplied with the
SEG-1) to your PC's com port.
Plug the 6' phone cord (supplied with the SEG-1) into the adapter labeled
Gateway Config.
Disconnect the SEG-1 from the LAN and controller and bring it back to the
PC, along with its power supply.
Plug the other end of the 6' phone cord into the port on the SEG-1 labeled
RS232.
Run Hub Manager Professional and go to Database > Sites and open that
site for editing.
Select the tab named TCP/IP Parameters
Select the button labeled Launch SEG Serial Port Setup Utility and set the
Com Port the SEG is connected to when asked.
8.
9.
Disconnect power to the SEG-1 (if it was powered up).
Press and hold down the x key (lowercase) on the PC keyboard while the
HyperTerminal program is running.
10. Power up the SEG-1.
11. In a few seconds you should get a response from the SEG-1 asking you to
press enter to go into Setup Mode.
NOTE: You must press enter within 5 seconds to enter Setup mode. Failure to
press enter within this window of opportunity will cause the SEG-1 unit to stop the
IEI Hub Manager Professional 7
Chapter 6: Database
75
ability to enter setup mode, and you will see '?!?' displayed on the screen. If this
happens go back to step 7 and start from there again.
12. Release the x key.
13. After pressing ENTER to go into setup mode, you will be given a menu
system displaying the current settings and also some menu items to choose
from (see image below).
IEI Hub Manager Professional 7
76
Chapter 6: Database
14. To change the IP address you should select option 0 server Configuration.
A 3 digit number will be displayed in brackets. This is the first 'octet' of the
current IP address of this IEI SEG-1 device. You will either enter a new 3 digit
number and then press enter to accept it, or you can accept this number by
pressing enter. You will do this for all 4 octets.
15. You must now press <ENTER> for the rest of the options to accept the
default settings.
16. There is no need to change any other settings within this setup menu.
17. From the main menu, select 9 save and exit.
18. When you receive the Parameters stored ... message you can exit this utility
by selecting File > Exit. You will select Yes if you are asked if you want to
IEI Hub Manager Professional 7
Chapter 6: Database
77
disconnect.
NOTE: Default values in all other menu systems should. The default value is kept
by pressing the <ENTER> key when that setting is displayed.
Here is a brief description of each menu and sub option, and what the default
values should be. The SEG-1 device is factory set to have the highest security
possible. Changing any options, especially in the 'Security' menu could result in
not having a completely secure environment.
· 0 Server Configuration :
· IP Address : (XXX).(XXX).(XXX).(XXX) Allows you to set the IP address
of the IEI SEG-1 directly. You can set it to 0.0.0.0 to allow it to be served
a dynamic IP address each time it boots up. The IP address should only
be set to 0.0.0.0 if the DHCP server is assigning the same IP address to
this SEG-1 device every time, by way of using a non-expiring IP address
lease that is assigned to the MAC address of the device.
· Set Gateway IP Address : N : (do not change) The term 'Gateway' here
refers to a network router on the LAN not the device you are configuring
here.
· Netmask : 0 (do not change)
· Change telnet config password : N (do not change)
· 1 Channel 1 Configuration : Settings of the RS232 port.
· Baud Rate: 1200 (do not change)
· I/F mode: 4C (do not change)
· Flow: 00 (do not change)
· Use UDP : Y (do not change)
· Source Port = 09997 (If there is a need to change this then make sure to
change the site settings within Hub Manager Professional to match)
· Destination Port : 00000 (do not change)
· Destination IP: 0.0.0.0 (do not change)
· 2 Channel 2 Configuration : Settings of the RS485 port.
· Baud Rate: 19200 (do not change)
· I/F mode: 4C (do not change)
· Flow: 00 (do not change)
· 6 Security : Here you can change the Encryption key manually to match the
encryption key Hub Manager Professional is using. This is normally not
necessary because Hub Manager Professional normally performs this function.
After going through this menu item completely, the encryption settings will
automatically be saved and the session will be closed.
· Disable Telnet setup : (Y)
· Disable TFTP firmware upgrade : (Y)
· Disable port 77FE? : (Y)
· Disable web setup? (Y)
· Enable encryption? (Y) Encryption must always be enabled, because all
data sent to the SEG-1 is encrypted. Do not disable or communications
IEI Hub Manager Professional 7
78
Chapter 6: Database
with Hub Manager Professional will fail.
· XXXXXXXXXXXXXXXXXXXXXXXXXXXXXXXX Change key? (N) This
128 bit security key is changed via the Hub Manager Professional
software. If this security key does not match the key stored in the site
settings in Hub Manager Professional, then any communication attempts
to your controller hardware will fail.
· 7 Factory Defaults : Sets all options back to out-of-box factory defaults. After
performing this function, any security key you had in this device will be deleted
and set back to default. In order to speak to this SEG-1 again, you will now
need follow the directions above to Default the Security Key in Hub Manager
Professional. Be sure to set a new security key into the SEG-1, using Hub
Manager Professional before you attempt to send sensitive user data to the
door controllers. This will also set the IP address back to a default value of
0.0.0.0.
· 8 Exit Without Save : Cancels any changes you have made in setup.
· 9 Save and Exit : Saves any changes you have made in setup and exits
Configuring the IP Address in Hub Manager Professional
Now it is time to open Hub Manager Professional, create a new site, and configure
this site to communicate to the SEG-1 with the IP address you have received from
the IT administrator. This example shows how to set up a SEG-1 connected Hub
Controllers controller network, but the SEG-1 can also be used to communicate to
a new type of controller called the "prox.pad plus". The steps are exactly the
same, just the 'Device Group' will be different.
1.
2.
3.
4.
5.
6.
Run Hub Manager Professional and login.
Select Database > Sites and then select the Add button.
Enter a descriptive Name for this grouping of controllers that will be
communicated with via the SEG-1.
Select the Device Group drop down list and select the controller family you
are connecting to the SEG-1. For this example, we are going to choose the
device group named 'HC500, Hub+, HubMax, MaxII'.
Select the Connection Type named TCP/IP.
Select the tab named TCP/IP Parameters.
IEI Hub Manager Professional 7
Chapter 6: Database
7.
79
In the edit box labeled IP Address, enter the IP Address that the IT
Administrator gave you.
NOTE: The MAC Address does NOT need to be defined if you are setting up a
SEG with a Static IP Address. The MAC Address is only used if you are assigning
a SEG a dynamic IP address via a DHCP server, but that feature also requires
that the version of SEG firmware be v1.3 or greater. See the chapter named
Dynamic IP Address for more information on Dynamic IP Address assignments.
The IP Port and Serial Net Number do not need to be modified in any way.
8.
9.
Select Save.
Setup of the Static IP Address into the SEG-1 site is complete.
6.4.5 Modem Connection
If you are connecting a via modem to the controllers, then programming of the
controller is required. The controller must first be programmed for remote
access and modem string. For details, see the controller documentation. To
select the Sites option, select Database > Sites. The Sites screen displays.
IEI Hub Manager Professional 7
80
Chapter 6: Database
Field/Button Description
Port
Communications port to use for the site being added; selected from a
drop-down list.
Phone Number
Phone number for the site being added. To access an outside line, dial
Optional digit to dial, if necessary, to get an outside line.
Predefined Modem
Drop-down list that allows you to select the type of modem being used for
this site. Choosing a predefined modem automatically loads the Init, Dial,
and Hangup strings for that particular modem. Installation of modem
drivers is not necessary.
Currently four (4) modems are qualified for the personal computer side.
Installation of a modem driver is not necessary. Available modems are:
Boca Modem 14.4K
Boca Modem 33.6K
U.S. Robotics Modem 33.6K
U.S. Robotics Modem 56K
Init String
Specifies the communications initialization string for the site being added.
Dial String
Specifies the communications dial string for the site being added.
Hangup string
Specifies the communications hangup string for the site being added.
Number of Redials
Specifies the number of redials for the site being added.
Seconds between Redials
Specifies the number of seconds to wait between redial attempts.
Check modem before dialing
Specifies that the program check the modem to ensure it is online before
dialing.
IEI Hub Manager Professional 7
Chapter 6: Database
81
6.4.6 Managing Stand-Alone Controllers
A 'Stand-Alone' site is a grouping of controllers which have no physical
communications connection, because those controllers either have no
communications capability, or it is not possible to connect to that controller
physically. Hub Manager Professional can only manage the user lists of these
device types. There are no settings for this Site type.
Hub Manager Professional 7 allows you to manage the user codes of your 60,
120, or 2000 user Stand-Alone (non-networked) keypads such as the following:
60 User: 234
120 User: 212, 232, 233, 242, LS1
2000 User: prox.pad
To manage these types of devices, follow these steps:
1. Create a new site
2. Set the name of this grouping of controllers.
3. Set the Device Group as 'Stand-Alone'
4.
5.
6.
The Connection Type will be automatically set to 'No Connection'.
Select Save.
Select Database > Doors and select Add
IEI Hub Manager Professional 7
82
Chapter 6: Database
7.
8.
Select the Stand-Alone site you just created.
Set the Device Type to the capacity of that Stand-Alone keypad you want to
manage. For example, if you are going to manage a 212i, you would select
the '120 User' option as the device type. Hub Manager Professional 7 will not
allow any management of System Options or System Parameters for
Stand-Alone devices.
Now you can manage the system just as you would with networked devices. If you
wish to get a printout of the User locations and the Codes or Cards for those
locations, in order to help you program the controller, just go to Reports >
Database and select the Doors report. You can now print this report to a hardcopy
and use it as a guide to manually program the user codes into the controller using
that devices manual programming commands.
6.5
TimeZones
Time Zones are used for two purposes:
(1) to specify the days and times when a users access credentials are valid
(2) to specify the auto-unlock schedules of the door controllers The auto-unlock
settings are established in the door settings for each door controller.
Time Zone is defined by its beginning and end times and days of the week when
this Time Zone is valid. Hub Manager Professional also lets you specify whether
holidays defined in the Holiday Database should be included in the particular
Time-zone. Enabling Holidays means that this Time Zone is provided access on
defined holidays. To select the Time Zones option, select Database > Time
Zones. The Time Zones screen displays.
The "Sort" field lists the sort criterion for this option. Time Zones can be sorted by
Name, Type, Start and Stop.
IEI Hub Manager Professional 7
Chapter 6: Database
83
Defining Time Zones
You can define unlimited Time Zones. Each door can select up to eight (8) Time
Zones from that defined list. A Time Zone consists of a start time, a stop time, the
Time Zone Type, and the days of the week during which the Time Zone is in
effect. Here is an example Time Zone definition:
Start Time
Stop Time
Type
Days of the Week
07:00 AM
06:00 PM
Single Day
Mon, Tue, Wed, Thu,
Fri
NOTE: AM/PM is used in defining a Time Zone. The example Time Zone above
starts at 7:00 AM and ends at 6:00 PM. It is in effect Monday through Friday, not
including holidays. When defining Time Zones, ensure that Door 1 is selected in
the Door Settings tab. Also, only eight time-zones are operable on a single piece
of hardware. The example Time Zone above starts at 7:00 AM and ends at 6:00
PM. It is in effect Monday through Friday, not including holidays.
Single Day Time Zones can not cross the midnight time line (12:00 AM); they
define only start and stop times within one day. Example: 7:00 PM - 8:00 AM, two
Time Zones are needed—(TZ1) 7:00 PM - 11:59 PM, and (TZ2) 12:00 AM - 8:00
AM.
Midnight Crossing Time Zones can cross the midnight time line (12:00 AM); they
define only start and stop times within a 24 hour period. Example: 7:00 PM - 8:00
AM (crossing midnight).
Defining Holiday Time Zones
IEI Hub Manager Professional 7
84
Chapter 6: Database
When you define a Time Zone, you can specify whether or not it is to be in effect
on holidays by using the "Holiday" checkbox. The Door Setup Holidays List is used
to specify the dates that are to be considered holidays by the system. Placing a
checkmark next to "Holidays" directs the program to grant access on defined
holidays.
Printing Time Zone Definitions
To print the Time Zone definitions, select Reports > Database from the main
menu and then check the Time Zones box in the Printing of Databases screen.
Single-Day Time Zone
Midnight-Crossing Time Zone
IEI Hub Manager Professional 7
Chapter 6: Database
85
Adding a Time Zone
1.
2.
Select the Add button on the Time Zone screen. The Add a Time Zone
screen displays.
Enter the name of this new time zone in the Name field (maximum 18
characters), the beginning and ending times in the corresponding fields (use
AM/PM time format), select the Time Zone Type, check the days of the week
to which this time zone should apply (on the right side), and select SAVE to
save the information to the time zone database.
Editing a Time Zone
Editing an existing time zone is very similar to adding a new one.
1. Highlight the time zone you wish to edit, and select the EDIT button on the
Time Zone screen. The specified Time Zone screen displays.
2. Modify the information as required.
Deleting a Time Zone
Deleting an existing time zone is easy.
1. Highlight the time zone you wish to delete, and select the DELETE button on
the Time Zone screen. The software displays a delete confirmation prompt.
Only Time Zones not assigned to an Access Level can be deleted.
2. Select OK or CANCEL as desired.
Searching for a Time Zone
You can search the time zone database for a particular time zone record. Enter
the time zone's name in the "Search" text box on the Time Zone screen and select
the Binocular button or press the <Enter> key.
IEI Hub Manager Professional 7
86
6.6
Chapter 6: Database
Doors
A door is defined as any entry point (doors with electrical or magnetic lock, turnstile,
rising barrier, or motorized gate) controlled by a supported Controller. The Doors
database stores detailed information about door controller setup parameters. The
Hub Manager Professional program can export/import to all controllers in a site. To
select the Doors option, select Database > Doors. The Doors directory screen
displays. The Door directory shows all doors in all sites. You can double-click any
door to edit that doors options.
Adding a Door
1.
Select the Add button on the Door screen. The Door screen displays.
2.
3.
4.
5.
Enter the name for the door controller you are adding.
Select the Site this door is being added to.
Select the Controller Type.
Specify the Controller Address (if required by the selected controller type).
NOTE: PDA connected controllers don't ask you to specify a Controller
IEI Hub Manager Professional 7
Chapter 6: Database
6.
7.
8.
9.
87
Address.
Modify any of the System Parameters. Parameters are typically timer values.
Select the Options tab and modify any of the Options as required. Options are
typically features that can be either enabled or disabled.
Disable any of the Log Events from being recorded. Clearing a checkbox next
to a particular event means that event will not be recorded in the controller
when that event occurs. This can be helpful if you find that a particular event
is occurring too often and is filling up the transaction log buffer, is therefore
and causing other important events to be discarded, since the buffer is
first-in, first-out. Common events that are typically disabled for this purpose
are: Access Denied and Request to Exit.
Select the Time Zones tab to view the time zones assigned to the door you
are adding. Available Time Zones are listed on the left. Selecting one of these
displays the details at the bottom of the screen. Selecting the right arrow or
double-clicking the Time Zone on the left causes this Time Zone to move to
the right side which means this Time Zone is assigned to this controller. Up to
eight (8) Time Zones can be selected for any one door controller. Placing a
check mark into the checkbox of a selected Time Zone makes that Time
Zone an auto-unlock Time Zone.
IEI Hub Manager Professional 7
88
Chapter 6: Database
10. Select Save to save the information to the doors database, or select Cancel
to discard all changes and return to the Doors directory.
Common Door Settings
Name
Name of the door.
Site
Identifies the site to which door is being added. A site is more or less a group of
devices that share a common connection type and a common communications
protocol.
Controller Type
Specifies the type of controller you have controlling this door.
Controller Address
Two-digit number that corresponds to the actual address programmed in this
particular door controller.
NOTE: The Controller Address field is not visible when a PDA connected
controller type is selected, such as the LS2\P.
IEI Hub Manager Professional 7
Chapter 6: Database
89
System Options
"Options" usually have an ON/OFF value. Placing a checkmark in the box next to
the options typically enables this feature. But there are some options that toggle
between 2 choices.
System Parameters
"Parameters" usually have an integer value denoting a count or a timer value. But
some values may reference a single value of several options.
Here is a chart showing what features and options are supported by each device
type. The ranges are listed in seconds.
Feature
HC500 Hub+\Max MaxII v1 MaxII
v2
1-90 sec 1-90 sec 1-90 sec 1-90
sec
0-990 0-990 sec 0-990 sec 0-990
sec
sec
1-990 1-990 sec 1-990 sec 1-990
sec
sec
X
X
X
Lock Timer
Forced Door
Timer
Door Ajar Timer
(Propped Door)
Log Event Mask
Error Lockout
Count
Error Lockout
Duration
Audio Alerts
Keypress
Feedback
-Audible
Keypress
Feedback - Visual
First In Auto
Unlock Time
Zones
Auto Unlock Time
Zones
Auto-Entry Count
Daylight Savings
Time Auto Adjust
Daylight Savings
Time Date Format
Lock Prior to
Sleep
Card AND Code
Programming
LS2\P
1-255 sec
prox.pad
plus
1-255 sec
0-990 sec
0-990 sec
1-990 sec
1-990 sec
X
1-50
incorrect
tries
1-255 sec
X
1-50
incorrect
tries
1-255 sec
X
X
X
X
X
X
X
X
X
X
X
X
X
X
X
X
X
8
8
8
8
X
X
X
X
X
X
X
X
1
8
IEI Hub Manager Professional 7
X
X
X
90
Chapter 6: Database
Feature and Parameter Descriptions
Lock Timer
Amount of time in seconds that the Lock output is activated after a valid trigger
occurs. Value in seconds.
Forced Door Timer
This parameter specifies the amount that the Forced Door output is activated after
a forced door condition is seen. If set to 0, the output activates and remains that
way until it is reset using a valid credential. Value in seconds.
Door Ajar Timer (Propped Door)
This parameter specifies the amount of time that the door contacts can remain
open after the door has been unlocked for a valid reason before the Door Ajar
output\sounder is triggered. This timer starts after the door contacts are opened.
Value in seconds.
Log Event Mask
Displays a list of events that can be recorded in the transaction log buffer of the
controller hardware when that type of event occurs. Deselect events you do not
wish to record.
Error Lockout Count
This parameter specifies how many incorrect keypad PIN attempts are allowed
before the keypad will lock up and deny access to anyone for a specified amount
of time.
Error Lockout Duration
This parameter specifies how long a controller will stay in Error Lockout before
coming back to normal. Value in seconds.
Audio Alerts
Parameter that let's you specify which local audio alerts are enabled. Enter one of
the following values to set the desired functionality.
0 = Propped Door and Forced Door audio alerts are both disabled
1 = Forced Door audio alert is enabled, Propped Door audio alert is disabled
2 = Propped Door audio alert is enabled, Forced Door audio alert is disabled
3 = Propped Door and Forced Door audio alerts are both enabled
Keypress Feedback Audible
Short audible tone generated each time a controller key is pressed.
Keypress Feedback Visual
Short LED flash generated each time a controller key is pressed.
First In Auto Unlock
Sets the controller to hold the door locked until the first person is granted access
during an auto-unlock time zone.
IEI Hub Manager Professional 7
Chapter 6: Database
91
Auto Entry Count
Auto entry means that no * (asterisk) is required after the keypad PIN is entered.
This count specifies the number of digits that will be buffered before a PIN lookup
is performed. If a value of 4 is entered, then after 4 digits on the keypad are
pressed, the controller will look to see if that 4 digit code is valid. When this option
is enabled it is required that all PIN numbers be the same number of digits in
length.
Holiday Timezone Midnight Crossing
In regards to User functionality, if this option is enabled, then users assigned to a
TimeZone that has 11PM to 4AM Monday thru Friday access, will be allowed to
access even if a Saturday is specified as a Holiday. If this feature is disabled, then
the user assigned to that TimeZone, would not be granted access after 12:00 AM
on the Saturday Holiday.
In regards to Auto Unlock Time Zone functionality, with this option enabled, then if
an TimeZone that has 11PM to 4AM Monday thru Friday access becomes an
active Auto Unlock, then if Saturday is specified as a Holiday, the Auto Unlock will
will remain active. If the option is disabled, then at 12:00 AM on that Saturday
Holiday, the door will automatically relock.
Daylight Savings Time Auto Adjust
This option lets the hardware auto adjust to Daylight Savings Time (dates are
based on DST Date Format Option)
Daylight Savings Time Format
Selects the Date Format that DST will follow. US format will "Spring Forward" on
2:00 AM the 1st Sunday in April and "Fall Back" the last Sunday in October. Euro
format will "Spring Forward" the last Sunday in March and "Fall Back" the last
Sunday in October.
Lock Prior to Sleep
Warning: Enabling this feature will result in a shorter battery life. Enabling this
feature will cause the controller to send an 'extra' lock pulse to the lock (if the
controller is in a locked state) just before the controller goes to sleep (battery
reserve mode). This feature should only be enabled at the request of a Technical
Support representative.
Card AND Code Required for Programming at the Controller
This option specifies whether both Card AND code credentials are required to
enter programming mode manually via the controller.
Query Door Now
This feature cannot be performed on PDA connected controllers.
A quick way to check the online status of this individual door controller. Works '
IEI Hub Manager Professional 7
92
Chapter 6: Database
online' with hardwired sites or currently connected Modem Sites. With 'off-line'
sites such as PDA connected sites, the individual 'Query Door Now feature will
display the time and date of the most recent log event that you have imported,
which can be useful to find out the last time this door was communicated with.
Reset Defaults
Resets the default information for all fields of this door.
Door Capacity
The tab of the door settings named "Capacity" is a feature that allows you to see
the current capacity of this selected door, as well as the Access Levels that this
door is currently assigned to. This can be helpful if you have reached the full
capacity of a door and need to know which Access Level groups have access to
this door.
For example: if you intended to add some users to the "All Access" Access Level
but determined the user capacity was reached on "Front Door," you could go to
the "Capacity" tab for "Front Door" and see that the Access Level named "Shift 3
Crew" has 245 users assigned to this door and you know that workers in the "Shift
3 Crew" group never use the "Front Door." You could then modify the "Shift 3
Crew" Access Level and disable access to "Front Door." This action would make
245 user slots available in "Front Door," which, in turn, would allow you to add
more users to the "All Access" Access Level.
Controller Type
HC500
Hub+\Max
MaxII v1
MaxII v2
LS2\P
prox.pad plus
User Capacity of Controller
500
500
1000
2000
2000
2000
Time Zones
The Time Zones tab allows you to select Time Zones that are going to be
assigned to this particular door. On most controllers you can select up to 8 Time
Zones.
These selected Time Zones can be used for 2 reasons:
- when a user is allowed access
- when a door will be set to Auto Unlock
NOTE: When the save button is selected on the Door edit form, if no Time Zone is
selected, a warning will be displayed to the operator asking if they are sure they
want to save a door with no Time Zone assigned.
Auto Unlock Time Zones
IEI Hub Manager Professional 7
Chapter 6: Database
1.
2.
3.
93
To specify that a Time Zone is to be used for the doors auto-unlock schedule,
you first add Time Zones to the Time Zone directory,
you then edit the door, select the Time Zones tab, and select the Time Zones
on the left that you want to be assigned to that door.
Now place a checkmark next to the Time Zone on the right to specify that
you want the door to unlock automatically at this time.
NOTE: If you have enabled 'First In Auto-Unlock' for this door, then every Time
Zone that is setup as Auto-Unlock will function as a First In Auto Unlock Time
Zone. This means that a valid user must enter during that Time Zone before the
controller will allow the door to remain unlocked for that specified time zone
period. First In Auto Unlock is enabled by default, in order to create a more secure
environment. If you want the doors to Auto Unlock without the need for a user to
come in first, then you can simply disable the 'First In Auto Unlock' in the doors
options screen.
Any number of the selected Time Zones can be set to Auto Unlock by placing a
checkmark next to it.
6.6.1 Hub Controllers
Here is a chart to help identify which Hub Controllers type you have, based on the
information that appears on the Hub controllers firmware label and any physical
traits it may have.
Controller
Info on the
Physical
Type
firmware label
Identities
HC500
v2.x or greater
Comes in a plastic single
gang box
Hub+/Max v1.x P or greater
Comes in a plastic single
gang box, or Hub Max can
Max II v1
v2.0 or v2.1
Comes in a Hub Max or
Mini Max can
Max II v2
v2.2 or greater
Comes in a Hub Max or
Mini Max can
6.6.2 prox.pad plus
The prox.pad plus controllers work on a RS-485 network bus and cannot be
placed on the same network bus as the HC500, Hub+, HubMax, Max II v1 or Max
II v2 controllers. If you want to use both Hubs and prox.pad plus in the same
access control system, then a separate Site must be created for the prox.pad plus
controllers, and a separate 485 multi drop wire run must be made for the prox.pad
plus controllers.
Basic Characteristics: (subject to change, for a full up-to-date list of all prox.pad plus
features and specifications, contact your Access Control / Alarm Dealer)
IEI Hub Manager Professional 7
94
Chapter 6: Database
·
·
·
·
·
·
·
·
·
·
·
·
·
·
·
·
·
·
·
·
·
2000 Users
16 Single Date Holidays
16 Block Holidays
8 Time Zones
Up to 8 Auto Unlock Time Zones
2000 Event Transaction Log Buffer
1 Lock Relay
1 Auxiliary Relay, which can be assigned to one of the following functions:
Alarm Shunt, Forced Door, Door Ajar, Panic, or Duress.
Invalid Code Lockout Count
Invalid Code Lockout Duration
Daylight Savings Time (DST) Auto Adjust
Option to require "Card AND Code" to Enter Programming Mode
Timed Anti-Passback
1st In Auto Unlock
Prox Antenna can be remoted from the controller, up to 10' away.
User Types including: Emergency, Extended Unlock (for slower moving
people), Lockout, Single-Use, and others
Only new events are imported from the controller, which reduces the log import
time.
During communications with the controller, such as exporting data or importing
event logs, the controller continues to allow access through the door
Option to use the Local Sounder for Forced Door or Door Ajar
Up to 32 controllers may be networked on a single 485 loop, additional prox.pad
plus networks (Sites) may be added to the software as needed
This controller can be communicated with over a TCP/IP LAN/WAN network
using IEI SEG-1 device
Communicating with a Door
Communications with prox.pad plus controllers is the same process as
communicating with Hub controllers. You will select that Site from the Site
directory, then select connect, and now you can perform any exports or imports
with the doors of that site.
6.6.3 LS2\P
The LS2\P controllers work in conjunction with the LS Link.
Basic Characteristics: (for a full up-to-date list of all LS2\P features and
specifications, contact your Access Control / Alarm Dealer)
·
·
·
·
2000 Users
16 Single Date Holidays
16 Block Holidays
8 Time Zones
IEI Hub Manager Professional 7
Chapter 6: Database
·
·
·
·
·
·
·
·
95
Up to 8 Auto Unlock Time Zones
2000 Event Transaction Log Buffer
Invalid Code Lockout Count
Invalid Code Lockout Duration
Daylight Savings Time (DST) Auto Adjust
Option to require "Card AND Code" to Enter Programming Mode
Auto Unlock as well as First In Auto Unlock
User Types including: Emergency, Extended Unlock (for slower moving
people), Lockout, Single-Use, Panic, Passage and others.
6.6.4 Door Wizard
The Door Level Wizard presents you with a step-by-step process for adding door
to the system. This wizard was created to allow you to create doors with the least
amount of effort required. It will also help you to assign consistent settings to the
doors you are creating.
Although this wizard may make it easier to add a single door to the system,
because of the step by step nature of the wizard, the true benefits will be seen if,
for example, you are adding 10 doors to 2 different sites (20 doors total). Adding
20 doors and setting up the options and Time Zones without the wizard takes
approximately 240 mouse clicks, but with the Wizard it may only take 12 clicks,
because what you are setting up for one door is only done once for all doors being
created.
Initial Step - How many doors to add where to add them
· The initial choice you must make is whether or not you want to use the wizard to
add multiple doors, and also if you want to add these doors to multiple sites.
This Wizard was designed to allow a fast and efficient setup of many types of
systems for different applications.
· Some of the content in the following steps may change due to the initial option
you selected but the concept of that step is still the same.
Step 1 of 3 - Door Settings
Step 1 is where you specify the number of doors (if applicable), and the site(s) to
which the doors(s) are being added to.
Step 2 of 3 - Door Options
· This step is where you select which door options and log event masks to enable
or disable. Any selections you make here will be applied to all the doors
currently being added with the wizard.
· Any of the options of a door can be customized after the doors have been
created.
Step 3 of 3 - Time Zone Selection
IEI Hub Manager Professional 7
96
Chapter 6: Database
· This is where you specify what Time Zones will be assigned to these doors you
are adding.
· Time Zones can be assigned, by placing a checkmark in the column labeled
'Selected' .
· Auto-unlock Time Zones can be specified, by placing a checkmark in the
column labeled 'Auto Unlock'.
· Any of the Time Zone assignments of a door can be customized after the doors
have been created.
Final Option For Multiple Doors
· If you chose to add multiple doors, the last option will ask how you want to
name and number these doors.
· You can choose to let the wizard add all the doors now and give them names
like 'Door 1' , 'Door 2', etc...
· You can also have the Wizard prompt you for the names (and possibly the
controller addresses) one after the other.
6.7
Access Levels
The Access Levels option completes the access control definition of where and
when a user can go within the system by associating the users access credentials
with one or more doors (where), one or more time zones (when), and a user type (
how), which defines what action is to be performed when a user presents a valid
credential to that controller. Access levels defines where and when a users' users
credential is valid within the entire access control system.
Users can be assigned to an Access Level that has no doors assigned to it. A
warning message will appear, asking if you are sure you want to do this, but the
operator can choose to override the warning. This allows the operator to create an
Access Level called "NONE" (for example) that has no doors assigned to it, and
then simply re-assign users to that Access Level. That user is now, in effect,
disabled, because he has access to no doors. Make sure you export after
reassigning a user like this, this will ensure that the user has been removed from
the controllers.
IEI Hub Manager Professional 7
Chapter 6: Database
97
Access levels provide Hub Manager Professional system administrators a
powerful tool to quickly and efficiently maintain the system users. This is especially
important for large systems, with large number of users and various security
requirements (zoned security approach). When a system administrator creates a
new user, the system administrator allocates only an access level to the new user.
This simplifies system administration as the access level automatically contains all
information about which doors this user is allowed to enter and during which
times. It is not necessary to program individual users for access to each
door in the system.
NOTE: This section on Access Levels and the System Administrator merit special
attention. Please ensure that you understand these sections before you add or edit
Access Level information. To select the Access Levels option, select Database >
Access Levels. The Access Levels screen displays.
Adding an Access Level
1.
2.
3.
4.
5.
Select the Add button on the Access Levels screen. The Access Level Detail
screen displays.
Enter the Name for the new access level.
Select one of the available sites to display the available doors at the selected
site.
Select one of the available doors at the selected site to which you wish to
provide access.
Expand the User Type drop down list to display the user type options, and
then select the user type that you want to assign to a user of this particular
access level that is granted access to this particular door. User Types are
IEI Hub Manager Professional 7
98
Chapter 6: Database
6.
7.
8.
9.
explained in more detail below.
Expand the Access Condition drop down list to display the access condition
options, and then select which combination of keypad code and access card
credential is necessary to perform the action of the user type, such as grant
access to this door. Specifying Card AND Code requires that both credentials
be entered to perform the action of this user type, whereas Card OR Code
just requires that one or the other be entered.
Place a checkmark in the checkbox next to a Time Zone to indicate the times
at which users assigned this access level will be granted access to the
selected door. Any combination of the Time Zones can be selected for that
particular door.
Repeat steps 3-7 for each door to which you wish to provide access.
Select Save to save the data to database. To discard all edits and cancel the
addition of an access level, select the Cancel button.
Field/Button Description
Name
Text box that you use to specify the name of the access level.
Site Name, Door Name, User Type, Access Condition
Specifies the site name, door name, user type, and the access condition required
to access the selected door.
Selected, Time Zone Name, Start, Stop, Days
Specifies whether or not the time zone is "selected" to operate on this door for this
particular Access Level.
Deny access to the selected door
Selecting this button removes the selected door from this access level's
privileges.
Notify me when I attempt to add users to this particular Access Level
Enabling this option will cause a notification message to appear any time the
Operator attempts to add a user and tries to assign that new user to this Access
Level. This can be useful if you want to be warned anytime you grant assign a
user to an Access Level you have given full access privileges to.
Save
Saves current door data to Access Levels database.
Cancel
Discards all edits and returns to previous screen without saving data.
User Types
Comm Unlock - Import \ Export
Presentation of a valid credential by this user type unlocks communications on
devices that support this user type, and allows both Log imports and Data exports.
This user type does not unlock the door.
Emergency
This user type cannot be locked out or disabled. Presentation of a valid credential
by this user type will override any locked condition and will unlock the door,
including User Lockout and Panic (lockdown) states. This user type will unlock the
IEI Hub Manager Professional 7
Chapter 6: Database
99
door for the time specified in the Door Settings screen under "Lock Timer Extended Users".
Extended Time
Presentation of a valid credential by this user type unlocks the door for a longer
period than a standard user would unlock the door for. A good use is for physically
impaired users that require more time to get to the door after their credential has
used to unlock the door. The 'Extended Unlock' timer is specified in the door
settings of that individual door.
Lockout
Presentation of a valid credential by a Lockout user type will cause all users in that
controller to not be able to gain access until another valid lockout code is entered
again.
The state of the lock does not change when a Lockout code is entered. Lockout
users cannot be used to gain access.
Enabling Lockout is useful if there has been a danger identified in a particular
room or area and you do not want anyone to enter until the danger is cleared. To
clear the Lockout condition you must enter a Lockout code again. During the
lockout condition the following users types are still allowed to gain access: Master,
Supervisor, and Emergency.
Master
The User List contains, as its first user on the list, the Master Code. This user has
a special function. Its access credential is equivalent to the Master Code in a
controller.
The factory-default access code for this user is "1234." This code is sent to every
controller in the system and is placed into user location 1.
This user is not assigned to an Access Level, because it is not possible to edit
which doors this user will go to.
Any time a new door controller is added to the system, it will automatically receive
the "Master Code" when data is exported to this controller.
This user can be used as a "communications unlock" code, which is required for
PDA communications with the LS2\P controllers.
Panic
Presentation of a valid credential by this user type will lock the controller no matter
what unlock state it is in (much like the Relock user type) and it will also will
lockout all other users from using the controller (much like the Lockout user type).
This is useful if there has been a crisis scenario identified outside of a secured
area and you do not want the crisis to move into the secured area. By entering this
type of user code, you will lock the door and no one else will be allowed to unlock
IEI Hub Manager Professional 7
100
Chapter 6: Database
the door using a standard unlock code. Only the Master Code, Supervisor Code,
or Emergency codes can be entered to gain access and clear the Panic (lock
down) condition.
Passage
Presentation of a valid credential by this user type causes the following to occur: If
the door is locked, it is unlocked and latched in the unlock state. If the door is
unlocked due to a previous Passage code, it is relocked.
NOTE: Passage users are inoperative during an active auto-unlock time zone.
Relock
This user type locks the door if the door is in an unlocked state. This function is
useful when a door is unlocked by an Auto-Unlock Time Zone and you wish to
relock the door before the scheduled lock time. Relock users lock a door unlocked
for any reason. Relock users can't unlock a door.
Single Use (One Time Use)
Presentation of a valid credential by this user type will unlock the door as a
Standard User will, but the code is accepted by that particular controller only once.
A Single Use code is only exported to a device one time, to make sure that the
code does not get sent again after it is used.
NOTE: If the only change you made in the software was to enable a Single Use
user, and then you choose to export, you may receive a message of 'No changes
since the last export', but don't be alarmed, you can be assured that the Single
Use codes were actually exported as enabled. This message is just a side effect
caused by the way Hub Manager Professional processes Single Use codes
separate from the rest of the other data. If you are using a PDA connected
controller, then a HotSync is still required after enabling the Single Use User.
Standard Access
Presentation of a valid credential by this user type unlocks the door for the
pre-determined Lock Timer specified in the Door Settings.
NOTE: The users named 'Master User' and 'Supervisor User' are special users
and are described in the Users section. The Master User is sent to user location 1
in all controllers and the Supervisor User is sent to user location 2 in all controllers
that support that user type. Some controllers allow you to define any number of
Supervisor Users.
Supervisor
Presentation of a valid credential by this user type unlocks the door for the
pre-determined Lock Timer value (1-255 seconds) as set in the Door Settings
screen. Presentation of a valid credential by this user type also unlocks
communications, so that the controller can be programmed with a PDA running
LS Link.
IEI Hub Manager Professional 7
Chapter 6: Database
101
In LS2\P and prox.pad plus controllers, the user named 'Supervisor User' in the
user directory will be sent to user location 2 of each LS2\P controller.
NOTE: Supervisor Users should normally not be used to gain access to battery
powered controllers. Using this User Type on a regular basis to gain access will
unnecessarily reduce battery life, since this User Type unlocks communications
and keeps the controller powered up for up to 60 seconds.
Supported User Types
Here's a chart to show the user types supported by each controller type, and how
many of each User Type are allowed in a particular controller type (up to the user
capacity of that specific controller type).
User Type
Com Unlock Import \
Export
Emergency
Extended
Time
Lockout
Master
Panic
Passage
Relock
Single Use
Standard
Supervisor
HC500,
Hub+\Max
MaxII v1,
MaxII v2
1 (required)
1 (required)
No Limit
No Limit
No Limit
No Limit
No Limit
LS2\P
prox.pad plus
No Limit
No Limit
No Limit
No Limit
No Limit
No Limit
No Limit
1 (required)
No Limit
No Limit
No Limit
No Limit
No Limit
1 (required)
No Limit
1 (required)
No Limit
No Limit
No Limit
No Limit
1 (required)
Printing Access Levels
Select Reports > Database from the main menu and then select the Access
Level checkbox on the subsequent screen, and specify the desired output device.
IEI Hub Manager Professional 7
102
6.8
Chapter 6: Database
Access Level Wizard
The Access Level Wizard presents you with a step-by-step process to creating an
Access Level that can be assigned to users. This wizard was created to allow you
to create an access level with the least amount of effort (mouse clicks) required.
The wizard will also help you to create consistent access privileges to the doors
you have selected. If you choose to apply all the settings you specify to every
selected door by leaving the default 'YES' option selected in steps 3, 4, and 5,
every door you selected in step 2 will be setup the exact same way in only 3 or 4
clicks of the mouse.
Step 1 of 5 - Name the Access Level
· It is recommended that you chose a name that describes the type of people that
will be assigned to this Access Level, such as 'Accounting Manager',
'Accounting Staff', 'Production Manager', 'Production Staff', 'All Access', or even
'Relock All'
· Anyone assigned to this Access Level will have the exact same access
privileges as every other member of this Access Level.
· The name you assign can be changed at any time after the Access Level is
created.
Step 2 of 5 - Door Selection
· This step is where you are going to select which doors members of this Access
Level will have access to.
· If this Access Level will have access to any door in the system, just leave the
'YES' selected, otherwise choose 'NO' and select the appropriate doors.
Step 3 of 5 - User Type Selection
· This is where you specify what action will occur when users assigned to this
Access Level enter their valid credential.
IEI Hub Manager Professional 7
Chapter 6: Database
103
· If you want to assign the same User Type to all selected doors leave the 'YES'
option selected, otherwise select 'NO' and use the combo box in the right most
column to make the appropriate user type selection for each door.
Step 4 of 5 - Access Condition Selection
· This is where you specify what type of code or card combination is required of
users assigned to this Access Level.
· If you know you have front ends/controllers that support only one type of code
input, you should select 'PIN OR Card'.
· If you know you have front ends/controllers that support and require that both a
code and card to be presented before access is granted, then you should select
'PIN AND Card'.
· Only those Access Conditions that are supported by all device types will be
displayed.
· If you want to assign the same Access Type to all selected doors leave the
'YES' option selected, otherwise select 'NO' and use the combo box in the right
most column to make the appropriate access condition selection for each door.
Step 5 of 5 - Time Zone Assignments
· This is where you specify what Time Zones users assigned to this Access Level
will be granted access during.
· By default, the 'YES' option is selected, and in the bottom grid, the wizard will
only show Time Zones that appear in every one of the selected doors from step
2. If this grid is empty, that means there isn't a common Time Zone that
appears in every door, and you must now select 'NO' because the Time Zone
selections must be made for each individual door.
· Select (click on) one of the doors and the Time Zones assigned to that doors
will appear at the bottom. If no Time Zones appear at the bottom that means a
Time Zone was never assigned to that door when it was created. You must now
decide what you want to do. You can either go back to step 2 and deselect that
door, and then finish creating this access level, and add that door afterwards.
· You could also decide to cancel adding this Access Level and go back and add
the Time Zone to that door and come back to the Wizard to re-create the
Access Level. Either way, you will need to go to that door and assign a Time
Zone to it.
· Every selected door from step 2 must have a time Zone selection made in Step
5.
6.9
Users
The Users option lets you add new users to the system and specify the access
credentials for each user. You can also edit existing user records, delete them,
search for particular user records, and print all user records in the user database.
To select the Users option, select Database > Users. The Users screen displays.
User information is shown and an "Add Group" button is added to facilitate the
creation of a batch of users at one time. Available sort criteria is listed in the "Sort"
IEI Hub Manager Professional 7
104
Chapter 6: Database
drop-down list [First Name, Last Name, Card, PIN, RF Fob, Raw Data, Visual ID,
or Access Level].
The User List Import Wizard option lets you create users and import the user
names from an external list in a simple step-by-step procedure.
IEI Hub Manager Professional 7
Chapter 6: Database
105
Adding a User
1. Select the Add button on the Users screen. The User edit screen displays.
2. Enter the information as required.
3. Select Save to save the settings. To cancel the adding\editing this particular
user, select the Cancel button.
NOTE: Before you can start adding new users, Hub Manager Professional
requires that you edit the PIN of "Master User". This is done to reduce the
IEI Hub Manager Professional 7
106
Chapter 6: Database
chances that you unknowingly send the default Master Code of "1234" to the
controllers.
Field/Button Description
This User is Enabled (checkbox)
This checkbox is used to either Enable or Disable this particular User. Disabling a
User means that this User will still be exported to the controller, but will not be
able to gain access. An attempt to gain access by a disabled user will result in a
Transaction Log event of "User - Access Denied - User Disabled" in LS2\P and
prox.pad plus controllers and an event of "User - Access Denied - Bad Time
Zone" in Hub Controllers controllers.
First Name
Specifies the first name of the user. (30 character max)
Last Name
Specifies the last name of the user. (30 character max)
Access Level
Specifies the Access Level this user will be assigned to.
This User can Trigger First In Auto Unlock Time Zones (checkbox)
Enabling this option means that this User will cause a door to Auto Unlock (if that
particular Door has a Time Zone specified as Auto Unlock and the First In Auto
Unlock option is enabled in the Doors settings) If this option is disabled, then this
User will simply gain access but the door will not go into a First In Auto Unlock
state. This option is will have no effect on Hub Controllers, LS2\P, or prox.pad
pluscontrollers.
NOTE: This option will have no effect on Master, Supervisor or Emergency user
types. Those User types will not trigger First In Auto Unlock Time Zones.
Member of Time Management Group (checkbox)
Enabling this option will cause this user to be included in the Time Management
report.
Card \ RF Fob data will be assigned (checkbox)
Enabling this option will display the options related to Card data entry. Disabling
this option will clear all data and hide all the options related to this type of
credential.
PIN data will be assigned (checkbox)
Enabling this option will display the options related to PIN data. Disabling this
option will clear all data and hide all the options.
Save
Saves the current user data to the user database.
IEI Hub Manager Professional 7
Chapter 6: Database
107
Cancel
Discards all edits, and returns you to the user directory
Card Format
NOTE: When adding a new user, you may notice the card format and supporting
data fields may be pre-filled with default data. This occurs because an Operator
was previously asked if they wanted to set a specific card format to be used as the
default format for all future user additions, as seen in the following screen shot
that appears when saving the first user added to the system. Directly after
installation, no format is set to be the default format yet, so the first user you add,
you will need to select a Card format. After that point, if you chose to set that
format as the default format, it will no longer be necessary to select a card format
when adding new users, since it will already be selected for you. This is simply a
time saver for you since you will no longer need to select a format, nor will you
need to remember which format to select. Since most systems use the same
format card for every user added, you will typically need to enter only the card
number.
When an HID format is selected, the operator will need to enter the site code
before this user can be saved. If the operator decides to save this card format and
site code as the new default, then the operator will not need to enter the site code
again.
Card Format
Here you must specify what type of 'card' criteria you will be assigning to this user.
The term 'card' is used to represent the type of data entered into this field for this
user. It can be data of a known HID proximity card format, or the data for an RF
Fob (radio frequency fob) supplied by IEI. Some card formats explained in this
manual may not be available in all controllers supported by this software. It will be
dependant upon the capabilities of the particular controller hardware.
IEI Hub Manager Professional 7
108
Chapter 6: Database
Card Format Name
IEI 26-Bit
HID 26-Bit
HID 34-Bit
Magnetic Stripe (ABA Track II)
Dallas Touch Chip
Enrollment Station (HID)
Default Site Code
11
EMPTY
EMPTY
n/a
n/a
n/a
Site Code Editable?
YES
YES
YES
n/a
n/a
n/a
If you have an HID proximity card format that is not shown in the list of card
formats in the software, or you have a custom HID card format, it is possible to
have a custom card format add-on file created by the software vendor and sent to
you. After you install this add-on file on the PC running Hub Manager Professional,
you will then have the option of selecting this new format from the 'card format'
list, and then be able to enter the card PIN into the program without the need for
an Enrollment Station. This does require that you know the exact bit designations
of that particular card format, including all parity bits, card number location and
site code location within the format.
NOTE: If you are using a Motorola Proximity Card reader or Wiegand Keypad
Front-Ends with a Secured Series Hub controller, then you will need to select the
Card Format named "Magnetic Stripe". And if you are using Motorola Cards, it is
likely that you will need to place a "7" in front of the card number that you enter
into the Card Number field.
Visual ID (not required)
A text field (50 characters max.) that will allow you to enter the visual identifier of
the 'card' you are assigning to this user. This is helpful if the card has printing on it
that is not necessarily information related to the data encoded on the credential. It
can be used as a way to identify the owner of a lost card, if the card is lost and
found.
This field can also be used to store data for any purpose that you wish that is
unrelated to the card data, such as entering the employee number, or license
number of that user. This could help you to sort the User directory by the data
entered into the Visual ID field.
HID Proximity Card
Card Number
This field stores HID proximity card number, typically this is the number printed on
the card, but sometimes the hot stamp is just a reference number and is not the
card number. The length and range of a card PIN will vary based on the particular
format selected
Site Code (if applicable to the selected proximity format)
This field will be visible if the card format selected requires the operator to define
the Site Code of the proximity card.
IEI Hub Manager Professional 7
Chapter 6: Database
109
Group Code (if applicable to the selected proximity format)
This field will be visible if the card format selected requires the operator to define
the Group Code of the proximity card.
Corp. Code (if applicable to the selected proximity format)
This field will be visible if the card format selected requires the operator to define
the Corporate Code of the proximity card.
NOTE: If you know that the Site, Group or Corporate Codes are part of the data
format you have selected and these fields are not visible, then this format may also
specify that any or all of these fields are predefined, unchangeable and should not be
displayed (potentially for security reasons).
Enrollment Station
The enrollment station is a piece of hardware that connects to a serial port of the
PC and allows you to read the raw data from an HID proximity card (up to 40 Bit)
and then store this raw data in the database and can then be exported to the door
controller. This is helpful if you do not know the exact format of the HID proximity
cards you are assigning to Users, because with this Enrollment Station option, you
don't have to. The raw data received by the Enrollment Station is the same data
the controller receives and looks up in memory when the controller reads that
same HID proximity card.
Check with your vendor for information on the availability of the Enrollment Station
equipment.
The steps are simple:
1. Select Enrollment Station as the Card Format.
2. Specify the Com Port the Enrollment Station is connected to (if it was not
IEI Hub Manager Professional 7
110
Chapter 6: Database
previously defined)
3. Select the 'Get Card Data From Enrollment Station' button.
4. Present the card to the enrollment stations proximity antenna.
5. The card will be read, and raw data will be imported and displayed. You will
notice that the first few digits of the raw data is masked with asterisks (*). This is
done as a security precaution. Enrollment successful. This user can now be saved.
Raw Data
Raw data is the actual data that is stored in the controller. This raw data has no
particular format. It can be comprised of HID proximity card data, RF Fob Data,
enrollment station data or some other type of input device, but none of the
parameters of those formats are specified in the raw data. It is up to the controller to
capture the data that it received and see if a match can be found. Since the controller
does not know the origin of the card data, it is able to store card data for any 40 bit (or
less) HID card format. Because the controller does not 'know' the format of the data it
has no way to perform Site Code, Group Code, Corporate Code verification.
You will notice that the first few digits of the raw data is masked with asterisks (*).
This is done as a security precaution.
PIN Data (a.k.a. Keypad Code data)
PIN
Specifies the keypad PIN code for this user. Selecting the Random button
generates the code.
Random PIN Length
Specifies the length of the random PIN number, when you select the Random
button. This can be between 4 and 6 digits.
Member of Time Management Group
IEI Hub Manager Professional 7
Chapter 6: Database
111
Lets you assign Time Management status to this user, meaning that this user will
be included in the Time Management Report. Time Management is an entry level
Time + Attendance report. For more information see Time Management.
NOTE: The Time Management Report requires that both 'User IN' and 'User OUT'
events must be generated for the report to calculate how long the user was 'IN'
the building. Not all controllers generate 'User OUT' events, especially self
contained locks. Without the OUT events, you would only be able to calculate the
'gross' time between the first 'IN' event and the last 'IN' event.
Printing User Records
Select Reports > Database from the main menu and then select the Users
checkbox and specify the desired output device.
Master Code
· The User List contains, as its first user on the list, the Master Code. This user
has a special function. Its access code is equivalent to the Master Code in a
controller. The factory-default access code for this user is "1234." This code is
sent to every controller in the system and is placed into user location 1.
· This user is not assigned to an Access Level, because it is not possible to edit
which doors this code will go to.
· Any time a new controller (door) is added to the system, it will automatically
receive the "Master Code" when data is exported to this controller.
· This user can be used as a "communications unlock" code, which is required
for PDA communications with the LS2\P controllers.
NOTE: The Master Code should normally not be used to gain access to any
battery powered controllers. Using this code type to gain access will reduce
battery life, since it unlocks communications and keeps the controller powered up
for up to 60 seconds.
IEI Hub Manager Professional 7
112
Chapter 6: Database
Supervisor Code
· The User List contains, as its second user on the list, the Supervisor Code. This
user has a special function. Its access code is equivalent to the Supervisor
Code in a controller. The default access code for this user is empty. If you
define this code in Hub Manager Professional, then this code will be sent to
every controller in the system that supports this user type, and this code is
placed into user location 2 of the controller.
· This user is not assigned to an Access Level, because it is not possible to edit
which doors this code will go to.
· Any time a new controller (door) is added to the system and it supports this user
type, it will automatically receive the "Supervisor Code" when data is exported to
this controller.
· Other user types are described in the Access Level section.
· The Profile Series G2 does not support the 'fixed' Supervisor User type, but
instead allows you to assign the Supervisor User type in the Access Level
definition. This means you can have any number of Supervisor Users in an
Profile Series G2 controller, simply by assigning multiple users to the Access
Level that is setup with the Supervisor User type (see following image).
Disabling a User
You may find that you have a user going on an extended vacation or leave of
absence and you want to disable this user so that their criteria can't be used to
gain access. Simply edit that user and deselect the checkbox labeled This User
is Enabled, and select Save. Now export to all the doors that this user has
access to. When it's time to grant this user access again in the future, simply
select the This User is Enabled checkbox and export to the controllers again.
IEI Hub Manager Professional 7
Chapter 6: Database
113
Another way to disable a user is to create an Access Level
called "NO ACCESS" that has access to no doors in the
system. Now you can simply move users you want to
disable to this particular Access Level, perform all data
exports, which will cause this user to not be granted
access. And when the user starts work again, you can
simply change the Access Level for that user to the
original Access Level he was assigned to and then export
again.
If you find that you also want to see events that record that this particular user was
trying to gain access when they should have been on vacation, you can simply
create an access level that mirrors that access level this user was originally
assigned to, but you will not assign any Time Zones to the doors. Now when this
user attempts to access the building, an event will be generated and stored in the
IEI Hub Manager Professional 7
114
Chapter 6: Database
controller that says 'Access Denied - Bad Time Zone'.
6.9.1 User List Import Wizard
The User List Import Wizard is a lot like the Add User Group function but with the
added capability to import a user's First Name, Last Name, Keypad PIN, Card
Number, and a Custom text field from a CSV file. This is useful if you have an
existing list of names located in another system such as a Human Resources
personnel file, and you wish to save time when adding a large group of users
without having to type the names of each user that is added to the Hub Manager
Professional database.
If the user names and data you have are in a third party database system such as
a Human Resources database, then review the documentation or help file of that
program for information referring to 'Exporting Data to a CSV file'.
This wizard will allow you to import up to 20,000 names from a CSV file.
Required CSV File Format
· The CSV name file that you are importing must be in the following format:
Field 1: First Name
Field 2: Last Name
Field 3: Keypad PIN
Field 4: Card Number programmed onto card
Field 5: Visual ID (typically refers to the hot stamp number printed on an
access card, but can be any text you want to import)
· The CSV file shouldn't have a header row.
· The CSV file shouldn't have any carriage returns.
· If a field such as "Keypad PIN" is being imported, then that field must be filled
for each and every user being imported using the CSV file.
· Each field shouldn't be more than 30 characters long. If any field is more than
30 characters, that field will be truncated to the first 30 characters.
· Any apostrophes will be removed.
· Here is a sample of the required CSV file format:
John,Smith,827163,23862,License Plate - LA-647
Jim,Jones,291737,295,License Plate - 28W-E59
Recommended Preparation of the Hub Manager Professional
database before CSV File Import
Although it is possible to import a name list of up to 20,000 and create these users
without assigning them to an Access Level, it is highly recommended that you
assign an Access Level to each of the users you are adding. This will save you a
very large amount of time later.
IEI Hub Manager Professional 7
Chapter 6: Database
115
If you are importing 1000's of names and do not assign an access level,
afterwards you will have to edit each of these users individually, requiring 1000's
of keystrokes. But this may be the option you want if you prefer to bring in the
entire list and then assign the Access Level to the users as you see fit.
The wizard will warn you to not create users without an Access Level assigned.
If you do not know for sure where each and every user will be granted access, you
can always create an empty Access Level that has access to no doors assigned
initially. You can then add the group of people that will most likely have the exact
same access privileges, and modify the Access Levels privileges afterwards.
Try not to add groups of users larger than 1,998 in this manner (1,998 users + 1
Master Code + 1 Supervisor Code).
Step 1 - Open CSV File
Step 1 of the wizard prompts you to specify the CSV file where the names are
located.
1.
2.
Select the Open CSV File button and browse to where you have stored the
CSV file containing the user names. If the list is Imported successfully you will
receive a message 'File Read OK'.
Select Next to continue.
The import function will check for and announce to you any duplicate first and last
name combinations within the CSV file as they are being imported.
Step 2 - Add Users
Step 2 is where the users are actually added to the database
You may select: a block of names, individual names one at a time, or all names in
the list. You may use any combination of these selection tools, but once a name is
selected, you can deselect it by removing the check in the checkbox next to the
name, or by clicking the 'Uncheck All' button and starting again.
Editing User Names
You can double-click a user name to edit the First Name or Last Name text.
Selecting a Block of Names by Selecting One from the List
To select a block of names using the list, first select the name at the top of the
block to be selected, then hold down Shift and select the bottom name of the
block. This will select all names in between the top and bottom names you
selected.
Selecting a Block of Names by Specifying the Number of Names to Select
To select a specified number of names, first select the starting user in the list.
IEI Hub Manager Professional 7
116
Chapter 6: Database
Then enter the number of names you want to select in the edit box labeled 'Select
X Users' (where x is the number you want to select).
Now select the button labeled 'Select X Users'.
The Wizard will now select the specified number of users starting at the top of the
list.
This is useful if you have imported 1,000 names and you only want to select the
first 300 names, or some subset of names in the middle of the list.
Selecting a Block of Names by Selecting the Individual Names
If you only have a small number of names to select, you can simply select the
individual names from the list.
Assigning Card Data
During the add sequence you may either: auto generate and assign sequential
card numbers or not assign card data at all. If there was data in the Card data field
of the CSV file, then that data will be assigned to the user being added.
If you are using the Card data in the CSV file, then you must not specify a starting
sequential card number.
Assigning Code PIN Data
During the add sequence you may either: auto generate and assign random 4, 5,
or 6 digit PIN numbers or not assign PIN data at all. If there was data in the
Keypad PIN data field of the CSV file, then that data will be assigned to the user
being added.
Assigning Visual ID Data
If data is found in the Visual ID field of the CSV file then that data will be used
during the import process. The Visual ID field is nothing more than a custom text
field and can be used for any data you may have, such as the Hot Stamp of the
access card, license plate number, employee ID number, etc.
Card Formats
See Users for an explanation of the different card formats and card format
options available.
Assigning Access Levels
Choose the Access Level you want to add the users to. You can also choose to
not assign the users to an Access Level at this time.
NOTE: If you choose to not assign users to an Access Level, you will need to edit
each user individually afterwards.
Adding Users
IEI Hub Manager Professional 7
Chapter 6: Database
117
After you have specified the Card Format, Card data, PIN data, and the Access
Level to be assigned to the selected users, you can now select the Add button to
start adding these users to the system.
Before attempting to add any users, the wizard will analyze the selected Access
Level to make sure you are not trying to exceed the capacity of any door assigned
to that Access Level. For example: if you have an Access Level named "All Doors"
that has access to a controller with a capacity of 2,000 users and 1,800 users are
already assigned to this controller and you attempt to add 700 more users, you will
get a warning that the capacity of this door has been exceeded by a certain
number of users, in this case 500.
Cancel the addition, and go back and edit the list to remove those 500 people that
do not need access to this particular door. You will have to decide which of these
700 users have the greatest priority on getting access to this door. If you require
that ALL of the 700 people have access, you may be able to upgrade to a door
controller that has a higher user capacity if one is available or you may have to
exit the Wizard and go back into the main program and go to that door and select
the 'Capacity' tab and see the breakdown of how users are assigned to this door,
and make some changes.
Refer to the Doors section for details.
6.9.2 Add User Group
This feature allows you to add a batch of users with common traits and/or
sequential card numbers.
1.
2.
3.
Select the Add Group button on the Users screen. The Add Users Group
screen displays.
Enter the information in the add group fields as required.
Select Add to save the user data to the user database. To cancel the addition
of a card group, select the Cancel button.
NOTE: Before you can start adding new users, Hub Manager Professional
requires that you edit the PIN of "Master User". This is done to reduce the
chances that you unknowingly send the default Master Code of "1234" to the
controllers.
IEI Hub Manager Professional 7
118
Chapter 6: Database
Field/Button Description
Number of Users to Add
Specifies the number of users being added during this process
Member of Time Management Group
Lets you assign Time & Management status to this user.
Access Level
Specifies the access level for these users.
Generate Sequential Card (checkbox)
Checkbox that specifies that a card credential will be assigned to the users being
added
Card Format
Specifies the format of the cards you are adding
First Sequential Card Number
Specifies the card number for the first sequential card being added for this group
IEI Hub Manager Professional 7
Chapter 6: Database
119
Site Code, Group Code, Corp Code
This is where you define the Site, Group, or Corporate code HID prox cards you
are adding sequentially, dependant upon which card format you have selected.
You are required to know the exact site code of these cards you are adding in
your access control system. If you do not know the site code, you may have to use
the 'Enrollment Station' option and add these users one at a time using the
standard Add User feature.
Generate Random PIN (checkbox)
Checkbox that specifies that a random PIN will be assigned to the users being
added
PIN Length
Specifies the length of the random PIN number
NOTE: For more details on the fields above refer to the section that discusses Users.
6.10 Holidays
Holidays Option
IEI Hub Manager Professional 7
120
Chapter 6: Database
· Holidays are used in Time Zone definitions, by specifying whether or not a Time
Zone definition should apply on a holiday. A holiday is defined by specifying the
month and day of the holiday, but not the year. This makes the holiday
definitions year-independent, always applying to the current year. Floating
holidays must be edited on a yearly basis, such as Thanksgiving, which falls on
a different date (Thursday) each year. Up to (16) Single Date holidays and (16)
Block Holidays can be defined.
· All Single Date Holidays that are defined are sent to all controllers in the
system. All Block Holidays that are defined are only sent to controllers in the
system that support Block Holidays. Hub Controllers controllers do not support
Block Holidays. LS2\P and prox.pad plus controllers do support Block Holidays.
· The Holidays database can be sorted by Name, Date or Type. To select the
Holidays option, select Database > Holidays. The Holidays directory screen
displays.
Adding a Holiday
1.
Select the Add button on the Holidays screen. The Holiday Definition screen
displays. The two fields on this screen are self-explanatory.
IEI Hub Manager Professional 7
Chapter 6: Database
2.
3.
4.
121
To define a holiday, select an undefined holiday and type in the name for it, in
the "Name" field.
Select the desired "Type." For Single day start, enter the first day and month
fields; for Block, enter both the first day and month and the last day and
month. Because year information is not specified, the start date has to
precede the end date in the single calendar year.
Select Save to save the holiday definition.
Printing Holidays
Select Reports > Database from the main menu and then select the Holidays
checkbox and specify the desired output device.
IEI Hub Manager Professional 7
122
Chapter 7: Communications
Chapter 7: Communications
7.1
Security Chip
A "Security Chip" is a small microchip that must be installed into the controller that
has a Controller Address of 1 in Hub Controllers hardware networks so that
exporting and/or importing from the PC software can be performed. Each
separate network of Hub Controllers controllers must have a controller with an
address of "1" and that controller must contain a security chip.
Those controller types that require a security chip are: HC500, Hub+\Max, MaxII
v1 and MaxII v2.
7.2
Communications Menu
The Communications menu contains most of the options that allow you to send
data to a controller or import data from a controller.
Select Communications from the main menu. The Communications drop-down
menu displays.
Import Door Settings
Import\Export Doors
Network Query
7.3
Import Door Settings
NOTE: The Import Door Settings can not be performed on PDA connected
controllers.
The Import Door Settings option imports and displays the complete user data and
door settings of any physically connected (com port, modem, or TCP/IP) door
controller to the Hub Manager Professional computer. This is useful if the contents
were modified from the local keypad, or in case of unknown diagnostic problems
with a controller. You can then view, print, or save this information to a .CSV file.
This imported information is stored separately from the central Hub Manager
Professional databases in a text file, and cannot overwrite any data in the
database.
1.
2.
3.
Ensure that the desired site is connected and then select Communications >
Import Door Settings from the Hub Manager Professional main menu to
access the Import Door Settings option.
Select the door controller you wish to import the settings from. To begin the
import, select Import. The program displays the progress of the import at the
bottom left of the screen.
To print, view, or save the door configuration import information, select Print
and then select your choice of output device. If you select File, you must enter
IEI Hub Manager Professional 7
Chapter 7: Communications
123
a name for the file in the "Filename" box.
7.4
Import\Export Doors
The Import\Export Doors option on the Communications menu lets you send and
receive data to and combination of doors without the need for you to manually
"connect" to each individual site. During the export process, each site will
automatically be connected to and the communication to the selected doors will be
attempted.
1.
2.
3.
4.
Select Communications > Import\Export Doors from the main menu.
Any doors that are known by the database to contain changes will
automatically will already have a checkmark next to the door name. If no
doors are selected when this screen is opened, then this means that Hub
Manager Professional believes that all changes were sent to the controllers in
a previous export.
Make any additional door selections (if required).
Select the Start button to begin the communications process.
NOTE: For PDA connected sites, make sure that after an export is complete you
run HotSync. This will move the data files from the PC to the PDA.
IEI Hub Manager Professional 7
124
Chapter 7: Communications
Field/Button Description
Working (Progress Bar)
Shows detailed progress for the current door
Door (Progress Bar)
Shows the progress of the individual door currently being communicated with.
Total (Progress Bar)
Shows the total progress for all selected doors
Update Time/Date (checkbox)
If this option is enabled, then the current time and date of the PC will be sent to
the selected controllers. If you have a PDA connected controller, then this option
will have no effect, since that controller type will get it's clock update from the PDA
itself.
NOTE: With the LS2\Pand MaxII v2 controllers, there is no need to update the
new time and date when Daylight savings takes place. The time in the door
controller will automatically change, as long as the 'Daylight Savings Time' option
is enabled in the Door options screen for those particular doors.
Import Transaction Log (checkbox)
If this option is enabled, then the Transaction Log of the selected Door controllers
will be imported and placed into the Hub Manager Professional database.
Export Changes Only (checkbox)
If this option is enabled, then just changes since the last successful export will be
sent to the selected Door controllers. Enabling this option results in a faster export
time.
Export ALL the data (Full Export) (checkbox)
If this option is enabled, this will result in the longest possible export time, but this
will guarantee that all data in the Door controller will be overwritten and will match
the data in the software exactly.
NOTE: If you have replaced the controller hardware for a particular door, or if you
have erased (defaulted) the memory of a controller, it is required that you enable
this option and only select those doors that had a controller replaced or were
defaulted, then perform an export. This will result in all data in the controller being
completely synchronized with the database on the PC.
Door Selection List (checkboxes)
Placing a checkmark next to a door name will include that door in the
communication process. If a door already has a checkmark next to it when you
enter this screen, this means that changes have been made to the data contained
in that door since the last successful export. For this reason, it is typically not
necessary for you to select the doors to export to, since the program will
IEI Hub Manager Professional 7
Chapter 7: Communications
125
automatically select for you the doors that are known to contain changes. Upon
entering the Import\Export Doors screen, you typically only need to select the Start
button to start the export process, unless there are other functions you would like
to perform.
Select All Doors
Selects all doors in the door selection list
Select No Doors
Deselects all doors in the door selection list
Start\Stop
Starts\Stops the export process
Done
Closes the Import\Export Doors screen and returns you to the main screen
7.5
Network Query
NOTE: If the site you are trying to Network Query are PDA connected controllers,
then the program will simply look for the most recent event in the transaction log
and will display that time and date. This is helpful if you want to know the last time
the PDA connected controller was communicated with.
The Network Query option scans the controller addresses of the currently
connected site and displays the online\offline status of the controllers. After the
option is activated, the program searches the network of controllers for each
"Controller Address" starting at door 1 and incrementing each time.
NOTE: If you want to query just a single door, go Database > Doors, open that
door for editing and select the 'Query Now' button.
1. Select Communications > Network Query from the Hub Manager Professional
main menu to access the Network Query option. The initial Network Query
screen displays.
2. Place a checkmark in the "Add new found doors" box to specify that if the
program finds any new controllers that are not currently in the system, the
program will add these new controllers to the system. Each time the program
finds a new door controller, it prompts you with a door settings screen to confirm
the name and door settings being assigned before adding it to the Doors
database.
3. Press Start to begin the network scan.
4. The program polls each of the networked door controllers on the site. Each
controller's network status starts with a Blue Question Mark in each door
location, which indicates an UNTESTED location. As the operation continues
and each door controller location is polled, the Door Status is reflected by an
icon that represents one of the device types.
IEI Hub Manager Professional 7
126
Chapter 7: Communications
Network Query Process
1.
2.
3.
4.
5.
Start the Hub Manager Professional program.
Select Database > Sites. The Sites window displays.
Select the site to which you wish to connect and then select the Connect button.
After the connection is made, select the Cancel button.
Select Communications > Network Query from the Hub Manager Professional
main menu to access the Network Query option. The initial Network Query
window displays.
6. Press Start to begin the network scan.
Field/Button Description
Current Site
Identifies the current site being tested.
Add new found doors box
Selecting this box directs that, if the program finds any new, unexpected
controllers, Hub Manager Professional is to add these new controllers to the
system.
Start\Stop
Starts\Stops the network query of the currently connected site.
Done
Closes the Network Query screen, and returns to the main screen.
Found, Name, Expected
Displays the network status of the controllers.
Description of Network Query Icons
Black Checkmark
Controller event data was found
Red "X"
No door controller event data was found
Blue Question Mark
UNTESTED door location
The software only queries the site to which you are currently connected; it
attempts to query the maximum doors permitted at any site, one at a time.
IEI Hub Manager Professional 7
Chapter 8: Tools
127
Chapter 8: Tools
8.1
Tools Menu
Select Tools from the Hub Manager Professional main menu. The Tools
drop-down menu displays.
Log Archiving
Audit Archiving
Database Backup/Restore
Database Conversion Utility
Run Com Port Test
External Tools
Scheduled Log Import
Table Initialization
Indexing
Application Initialization
Options
8.2
Log Archiving
The Log Archiving option moves the transaction log from the working directory to
the default archive directory. You should run this when you no longer need to filter
the data stored in the current log database, or if you wish to move it to a .CSV file.
1. Select Tools > Log Archiving from the Hub Manager Professionalmain menu
to access the Log Archiving option. The Log Archive screen displays.
2. Decide if you wish to change the default folder or file name for the log archive.
The default folder is "Archive and the default file name is "Log" followed by
today's date. If so, select the Change button. An 'Open Folder' navigation
screen displays, initially showing the default directory to which the log archive is
IEI Hub Manager Professional 7
128
Chapter 8: Tools
to be backed up.
3. Highlight the desired log archive file you wish to archive; next, if the default
directory or file name is not correct, navigate to the desired directory using
standard Windows techniques, and/or change the file name, and then select
the Open button. You return to the Log Archive screen.
4. Select the Archive Now button. A message displays informing you of the status
of the archive.
Log Archives can be opened later using the Reports > Archive Viewer option,
but once a Log is archived it can no longer be filtered in Hub Manager
Professional.
8.3
Audit Archiving
The Audit Archiving option permits you to archive (move) the Hub Manager
Professional Audit file from the default directory to a directory and filename you
specify; the archive file is stored in .CSV format. An Audit file records which
actions the operator performed using the Hub Manager Professional software.
1. Select Tools > Audit Archiving from the Hub Manager Professional main
menu to access the Audit Archiving option. The Audit Archive screen displays.
2. Decide if you wish to change the default folder or file name for the audit
archive. The default folder is "Archive" and the default file name is "Audit"
followed by today's date. If so, select the Change button. An 'Open Folder'
navigation screen displays, initially showing the default directory to which the
audit archive is to be archived.
3. Highlight the desired audit archive file you wish to archive; next, if the default
directory or file name is not correct, navigate to the desired directory using
standard Windows techniques, and/or change the file name, and then select
the Open button. You return to the Audit Log Archive screen.
4. Select the Archive Now button. A message displays informing you of the
status of the archive. Audit archives can be opened for viewing using the
Reports > Archive Viewer option.
IEI Hub Manager Professional 7
Chapter 8: Tools
8.4
129
Database Backup/Restore
The Database Backup/Restore option permits you to backup (copy) the Hub
Manager Professional databases from the default database directory to the
\backup directory. The Restore button in this option, in contrast, lets you restore
the backed up Hub Manager Professional databases from the \backup directory to
the default database directory, which overwrites (and deletes) the current Hub
Manager Professional databases.
1.
2.
Select Tools > Database Backup/Restore from the Hub Manager
Professional main menu to access the Database Backup/Restore option. The
Database/Restore screen displays.
Select the Backup button to begin the backup. Alternatively, select the
Restore button to begin the restore. The program displays messages to keep
you informed of the status of the backup or restore.
NOTE: If you attempt to restore a database backup created from a database prior
to Hub Manager Professional 7, or from any other incompatible source, the
program will instruct you to perform the data conversion (check with your software
vendor for data conversion utility availability).
IEI Hub Manager Professional 7
130
8.5
Chapter 8: Tools
Database Conversion Utility
WARNING: Performing this data migration function will overwrite any
existing data you may have stored in Hub Manager Professional 7. If
you have any data in Hub Manager Professional 7 that you need to save,
perform the "Backup" function under the Tools menu, and select a
folder that is outside the Hub Manager Professional 7 folder structure.
A utility is provided to allow you to migrate an existing Hub Manager Professional
database into Hub Manager Professional 7. This utility is located in the following
folder:
C:\Program Files\IEI\HubManagerPro7\Program\Conversion.exe
You may launch the utility by inserting the CD ROM (or running the file
downloaded from the web) and choosing the Conversion option. The Hub
Manager Professional 7software must be installed on that PC before running the
conversion option from the CD.
You may launch the utility by using the shortcut located at:
Start > Programs > Hub Manager Professional 7 > Conversion Utility
1.
2.
Run the Conversion.exe utility any location noted above.
If you are running from the desktop (Main PC) then double click the following
in this order:
'My Computer' icon on the desktop
IEI Hub Manager Professional 7
Chapter 8: Tools
3.
4.
131
Local Disk C:
'Program Files' folder
'IEI' folder
'HubManagerPro7' folder
'Program' folder
Conversion.exe file
A screen will appear (see image below) that allows you to select which
source data you would like to migrate from, and also which product that the
data will be migrated into. The options in the "Source" drop down list let you
specify which databases can be used as a source database, and the options
in the "Destination" drop down list specify what Hub Manager Professional
database will receive the converted data.
Hub Manager Professional source data is not modified in any way; it is merely
IEI Hub Manager Professional 7
132
Chapter 8: Tools
5.
6.
copied and re-formatted appropriately into the destination database.
At the end of the data migration, run the destination Hub Manager
Professional 7 program and run the Import\Export Doors option with the
Export ALL the data option enabled, and have selected all the doors, in
order to properly synchronize the software and hardware.
Do not perform a transaction log import until you have successfully performed
an export to all the doors.
Converting a Database From a Custom Folder
There is an option to let you browse to a custom Source folder and
convert/migrate that Hub Manager Professional database into the destination
folder. This is useful if you are installing a newer version of Hub Manager
Professional on a new PC and you want to migrate data from an older version of
Hub Manager Professional that you copied from an older PC to a folder on this
new PC.
1.
2.
3.
4.
5.
You first specify which version of Hub Manager Professionaldatabase source
you are converting by selecting the database type from the 'Source' drop
down list.
You then select the check box labeled 'Let me specify the source folder'.
You then browse to the folder where those database files are located.
You then select the Destination Hub Manager Professionaldatabase you are
converting to.
Finally select the 'Convert Now' button to start the conversion process.
Converting a data when you are using System Manager
If you used System Manager to create multiple systems, then you must follow
these instructions in order to convert the databases of those Systems.
1. Use System Manager that came with Hub Manager Professional 7 to create
one NEW System for each of the prior version Systems you want to convert to
Hub Manager Professional 7. These new systems can be created in the same
System Repository folder you used, but you will need to use a new name for the
system. Placing a " 7 " at the end of the new System name will help you to
identify the old and new systems more easily.
2. Open Hub Manager Professional 6 and open the system you want to convert.
Now open Hub Manager Professional 7 and open one of the NEW systems
you want to convert the old data into.
3. Now launch the Conversion utility by going to Tools > Database Conversion
Utility in Hub Manager Professional 7.
4. Make sure the Source and Destination selections are correct and select
Convert Now.
5. Repeat Steps 2-4 as needed.
IEI Hub Manager Professional 7
Chapter 8: Tools
8.6
133
Run Com Port Test
NOTE: If you are using PDA connected controllers, it will not be necessary to
perform the Com Port Test.
About the Com Port Test Program
The Run Com Port Test option, once selected, runs a standard Com Port test.
This program tests the availability of your computer's Com ports 1 - 4, and also
determines if these ports can be used for communications via the supplied
connectors.
You can run it as necessary from the Tools menu, and can specify a different
directory in which to store the Com test program using the Tools > External
Tools option.
The name and path of the program that is run when the Run Com Port Test item
is selected from the Tools menu can be modified using the Tools > External
Tools form. See External Tools
Running the Com Port Test
1.
2.
3.
4.
5.
6.
7.
8.
This program tests the availability of your computer's Com ports (serial
communications ports), and also determines if these ports can be used for
communications via the supplied connectors. IEI recommends that you run
this program; it can also be selected and run separately. There are two parts
to this procedure (testing without the loopback connector and testing with it),
and both parts must be performed.
Start the COM Test program in one of two ways: (a) by selecting Finish on the
Setup Complete screen at the end of the Install program, or (b) from the Hub
Manager Professional Main Menu, Tools > Run Com Port Test. The
"Launching Com Port Test" message displays followed by the Initial COM
Port Test screen.
To start the first part of the Com test, disconnect all devices from the Com
port on your computer designated for Hub Manager Professional controller
communications, then select Start Test.
This message then displays: Please make sure the loopback connector is
NOT installed and select OK to continue or CANCEL to stop testing.
Ensure that the supplied Loopback connector is Not connected to any of the
Com ports on your computer. Then select OK. The program conducts the first
part of the Com test by looking for all available Com ports. A message then
displays, indicating part one is over.
Please connect the loopback connector to your computer's COM port.
Select OK to continue or cancel to stop testing.
Connect the Loopback connector to the computer Com port designated for
Hub Manager Professional controller communications. One side of the
Loopback connector has a female DB9-pin connector, the other side a
DB25-pin connector; connect using the appropriate side, then select OK, to
begin the second part of the Com test. If part two of the Com test is
IEI Hub Manager Professional 7
134
Chapter 8: Tools
successful, this or a similar message displays overlayed on the Test Results
screen.
9. The test connector has been found at COM Port: x. Please record this
information and select the same COM port for use with the Hub Manager
Professional program.
10. If the test is not successful, there can be several problems: no Com ports are
available, available Com ports are being shared with other devices, or
available Com ports are not working correctly. Contact your computer dealer
as you may need to add another Com port.
11. Record the Com port information safely as instructed and then select OK.
12. Review the information on the Com Port Test Results screen as necessary
and then select Close.
8.7
External Tools
The External Tools option permits you to specify the directory and file to use for
the Com Port Test program, in the case where you want to use a different Com
Port Test Program. The path to the com port test supplied with Hub Manager
Professional is already defined.
1.
2.
Select Tools > External Tools from the Hub Manager Professionalmain
menu to access the External Tools program settings. The External Tools
screen displays, showing the default path and parameters.
Enter the desired path and parameters, if the defaults are not correct and
select the Save button.
To navigate to a different path, select the Find button and then use standard
Windows navigation techniques to specify the desired path on the Open screen
(not shown). The Com Port Test program is located in the Hub Manager
Professional 7folder in the \program folder at the following path: C:\Program Files\
IEI \HubManagerPro7\Program\COM TEST.exe
These settings do not normally need to be changed.
See also: Run Com Port Test
8.8
Scheduled Log Import
The Scheduled Log Import option lets you specify the time of day the import will
be performed, the number of days between the automatic imports, and start date
parameters. The automatic importing of the Transaction Log data will be
performed on all door controllers in all sites.
NOTE: You must log out from but NOT exit the Hub Manager Professional
program for the automatic importing of transaction logs to occur. If an operator is
logged in when the scheduled import is set to start, then a prompt displays asking
the Operator if the import should be performed. The Operator must select YES for
IEI Hub Manager Professional 7
Chapter 8: Tools
135
the import to be performed, otherwise the import will not start.
NOTE: The delay period is how many days you want to lapse before another
scheduled log import will occur.
NOTE: With PDA connected controllers such as the LS2\P, the Scheduled Log
Import feature will simply attempt to import any new Transaction Log data that
may have already been placed onto the PC during a HotSync with a PDA running
LS Link. This can be helpful if you have a person, such as a tour guard, that is
responsible for regularly visiting the door controllers with the PDA and collecting
the Transaction Logs, and only HotSync's the PDA with the managers PC and
leaves. With Scheduled Log Import enabled, Hub Manager Professional will
automatically import those new transaction events into the database, without the
need for the manager to remember to perform that action before generating a
Transaction Log report. This helps keep newly generated reports, that the
manager creates, as up to date as possible.
1.
2.
3.
Select Tools > Scheduled Log Import from the Hub Manager Professional
main menu to access the Scheduled Log Import program. The Scheduled
Log Import screen displays.
Enable the 'Use scheduled log import' checkbox to enable this feature.
Enter the desired parameters and select the OK button.
See also : Logout, Scheduled Log Import Errors, Scheduled Log Import Reminder
IEI Hub Manager Professional 7
136
8.9
Chapter 8: Tools
Scheduled Log Import Reminder
See also Scheduled Log Import
If you are logged into Hub Manager Professional when the Scheduled Log Import
is set to run automatically, a message box will appear asking you if you want to
run the import now.
If you had intended for the scheduled log import to run automatically without any
user intervention, you must log out of Hub Manager Professional using the
System > Logout menu command.
Forcing you to logout is done as a safety precaution so that the software can be
left running and set to import logs automatically, but not be left in a vulnerable
"logged in" state where someone may be able to see sensitive information such as
access codes.
8.10 Table Initialization
WARNING: THIS PROCEDURE RESULTS IN UNRECOVERABLE DATA
LOSS!!!
The Table Initialization option initializes (resets to zero) the Hub Manager
Professional program's databases. You can select from several types of
initialization:
Database - all operator entered data, including all users and door settings
Transaction Log - just the transaction log data
Audit Trail - just the operator audit trail
1.
Select Tools > Table Initialization from the Hub Manager Professional
main menu to access the Table Initialization program. The Initialization of
Databases screen displays.
IEI Hub Manager Professional 7
Chapter 8: Tools
2.
137
Select the type of initialization desired,
Database - Erases all data in all tables, excluding the Transaction Log
and Audit Trail
Transaction Log - Erases just the Transaction Log table
Audit Trail - Erases just the Audit Trail
3. Select the Run button. A confirmation prompt displays.
4. Select Yes or No to reply as appropriate. If you select Yes, the program
performs the specified database initialization, displaying the results under
the Copying and Indexing columns as shown in the previous example.
IEI Hub Manager Professional 7
138
Chapter 8: Tools
8.11 Application Initialization
The Application Initialization option defaults the program's parameters back to an
"Out of Box" state. Using this option in conjunction with the "Total Database
Initialization mode returns all databases and programs settings to the default "Out
Of Box" settings. It would be the equivalent of deleting all databases and
reinstalling the Hub Manager Professional software.
The parameters and settings that are reset include, but are not limited to:
· disables the "Scheduled Log Import" feature and settings
· disables System Manager and associated settings
· defaults the Report Writer path, password, and options
· disables Auto Login
· removes custom Support contact info
· removes the default card format setting
· removes all memory of custom screen size and position of the screens opened
in Hub Manager Professional
1.
2.
3.
Select Tools > Application Initialization from the Hub Manager
Professional main menu to access the Application Initialization program. A
confirmation prompt displays.
Select OK or Cancel to reply as appropriate. If you select OK, the program
resets all application settings to the default values and then displays a prompt
at the end (not shown).
Select OK.
8.12 Indexing
The Indexing option indexes the Hub Manager Professional program's databases.
Indexing reorganizes all the records in each database so that user access is faster
and more efficient. Running this option is not usually necessary. No data is
modified during this process.
1.
2.
3.
Select Tools > Indexing from the Hub Manager Professional main menu to
access the Indexing program. The Indexing screen displays.
Select the Run button to continue indexing or the Cancel button to return to
the main menu. A confirmation prompt displays. If you select Run, the
program performs the indexing, displaying the results under the right hand
"Results" column.
Select the Cancel button to return to the main menu.
NOTE: If you ever receive an Indexing error within Hub Manager Professional,
perform the Indexing option to resolve.
IEI Hub Manager Professional 7
Chapter 8: Tools
139
8.13 Options
Report Writer
These options regard the creation of the Report Writer database.
The 'Report Writer Database Copy' feature creates an exact copy of the current
database that Hub Manager Professional is working from. The copy is made in
order to allow a 3rd party report writing program such as Crystal Reports to
access the data for the purpose of creating custom reports. This allows the Hub
IEI Hub Manager Professional 7
140
Chapter 8: Tools
Manager Professional database to maintain data integrity, by not allowing access
to the actual data, and at the same time, give the data to an outside source.
Report Writer Database Path
This is where the database copy will be stored.
Report Writer Database Password
This is the password that will be required to open the database copy within the 3rd
party report writer.
Auto-Update Options
Specifies when the database copy will be updated. Selecting all 3 will keep the
database copy up to date.
Silent Report Database Copy
Enabling this option stops any messages from prompting the operator to select
OK or Cancel to the copying procedure.
IEI Hub Manager Professional 7
Chapter 8: Tools
141
System Manager
See section System Manager for a detailed description of the System Manager
options
Backup Alert
The Backup Alert is a feature that will prompt you to perform a backup of the data
if you have not performed a backup in the time period that you specify. The
backup alert will occur at the time you log into a system. If on a given day, you
choose to decline backing up, you will not receive any more prompts that day, but
you will receive the backup alert prompt each time you log into that particular
system on each subsequent day until a backup is performed.
The delay period can be set from 1 - 365 days.
IEI Hub Manager Professional 7
142
Chapter 8: Tools
General Options
Auto Login
Enabling this option will cause the program to automatically attempt to log you in
using a name and password you specify, whenever the login is displayed.
NOTE: This option should only be used if you are not worried that an unauthorized
person will sit at your computer and attempt to access the Hub Manager
Professional database and access codes. If you think there is a chance of this,
then this option should be disabled immediately.
Show Splash screen at program startup
Disabling this option not show the splash screen when the program is launched,
thereby creating a slightly faster startup.
Continue displaying the System Startup Tasklist even when all items are
completed
Enabling this option will cause the cause the Tasklist to always remain visible,
even when completed.
IEI Hub Manager Professional 7
Chapter 8: Tools
IEI Hub Manager Professional 7
143
144
Chapter 9: Reports
Chapter 9: Reports
9.1
Reports Menu
Select Reports from the Hub Manager Professional menu. The Reports
drop-down menu displays.
Once you select the specific type of report, the software displays prompts to
engage you in the print reports dialog. The first prompt requests that you specify
the information you wish to see in the report, the second lets you specify the
output device. You can print reports to the Monitor (screen), the Printer, or a File;
if you select File, you must enter a name for the file in the "Filename" field. You
direct the software to print the report by selecting the Print button.
see also:
Log Filter
Time Management
Misc. Log Reports
Assignment Reports
Database Printing
Audit Report
Archive Viewer
Generate Report Writer Database
Scheduled Log Import Errors
9.2
Log Filter
The Log Filter reports contains details of the transaction logs from the controllers
connected to the system. You can modify the contents by selecting different
parameters.
Only those events that are supported by the selected door types will be displayed
on the right.
1.
Select Reports > Log Filter from the Hub Manager Professionalmain menu.
The Filtered Log screen displays (see the following screen shot).
IEI Hub Manager Professional 7
Chapter 9: Reports
2.
3.
145
Specify the information to appear on the report on the Filtered Log screen.
Enter the Users to be included in the report, specify the "From" and "To" date
range, select the door to be included in the report; and check the desired
events on the right-hand side (or use the "All" buttons). Only the events that
match al the criteria will be displayed in the report.
Specify the desired output device for the report (on the bottom left of the
screen): Monitor (screen), Printer, or File; if you select File, you must enter a
name for the file in the "Filename" field. "Monitor" is the default choice. Select
the Print button to print the report.
IEI Hub Manager Professional 7
146
Chapter 9: Reports
NOTE: The Log Filter report is best printed in landscape format so that all the data
in all columns will fit.
No date filtering
Enabling this option will cause the report to disregard any date filter you may have
entered. This will allow you to see the entire contents of the transaction log, and
can be helpful if events were imported with wrong time\date data that may have
accidentally been outside the range of the date range criteria, and therefore
causing those events to not be displayed in the report. The report will be sorted by
date and time.
No filtering at all, display the entire log
IEI Hub Manager Professional 7
Chapter 9: Reports
147
Enabling this option will cause the report to disregard any filter you may have
entered, including users, access levels, doors, events, or date range. This will
allow you to see the entire contents of the transaction log, and can be helpful if
events were imported with data that may have accidentally been outside the range
of the filter criteria. The report will be sorted by date and time.
First Record \ Last Record
These buttons will search the Log Table for the oldest or newest events and set
the From and To filters to those respective dates.
If the operator selects the 'First Record' or 'Last Record' buttons and there are no
records in the Log table at all then a message will be displayed 'There are no
records in the log table to sort. You must import a log first.'
"Unknown User ID"
There is an event that may appear in your Log Filter Report that says 'Unknown
User ID: X' (where X is a user location reference). There are a few reasons that
this event will be generated by Hub Manager Professional.
1.
Regardless of the controller type, this event will be generated if someone
were to go into programming mode manually at the controller and try to add a
user code for the purpose of 'hiding' it because they are trying to breach the
security system. The reference number that is assigned to this event in this
case will be the user location that the code was assigned to during manual
programming. For example if someone tried to hide a code in user location
2000 of the controller, if someone attempted to use this user code to gain
access, after the log was imported, an event would be displayed as 'Unknown
User ID: 2000 Access Granted - IN'. If you see this 'Unknown User' event
and your system has been up and running for some time, and you know you
have imported logs from this door previously, then the chances are good that
someone has manually programmed a user into the controller. To remove
this user, you should perform a full export to this controller, by enabling the
Export ALL the data checkbox in the Import\Export Doors screen.
2.
Regardless of the controller type, any user generated events that occurred
before Hub Manager Professional had exported user data to this controller
will cause 'Unknown User ID' events to occur. This is because all user
created events of these device types are tagged with an ID of the user that
was used to trigger that event. When Hub Manager Professional exports user
data to the controllers, it assigns a unique 'User ID' that it knows and is not
present on new or defaulted controllers. If you see one of these 'Unknown
User ID' events during your initial Log Import from either of these device
types, you can dismiss it. Because these events occurred before the program
and controller were synchronized. If you have already exported to this
controller, then any subsequent Log Imports will not generate this 'Unknown
User ID' event, except for the other reasons that this event may be generated
as noted in this section.
IEI Hub Manager Professional 7
148
Chapter 9: Reports
3.
9.3
This 'Unknown User ID' can also occur if you were to install a controller that
had previous transaction log event data in the controllers event buffer
memory. To stop this event from occurring on newly installed controllers,
whether it be new or used, erase all system data as well as defaulting the log
data. The programming commands for most of your controllers would be to
enter programming mode and enter 46# 00000# 00000# * * to delete system
data and also 76# 00000# 00000# * * to delete transaction log data. Always
refer to the programming manual that came with the controller for the
commands.
Time Management
NOTE: The Time Management Report requires controllers that can record both
'User IN' and 'User OUT' events. All controllers can generate 'User IN' events but
not all controllers can generate an 'OUT' event, especially self contained locks. To
find if a specific controller can generate an 'OUT' event, go to the 'Options' tab of
the door settings screen, and look in the 'Log Events' list for an entry labeled 'User
- Access Granted OUT'. If this entry can not be found, then this particular
controller type can not be set to record 'OUT' events.
The Time Management report prints details of the transaction logs from the
controllers managed by the system. You can modify the contents by selecting
different parameters.
This report calculates how long a user was "IN" on a particular day. It gives both
the "gross time" and the "clear time."
'Gross Time' is the time between the first and last recorded events of that single
day. This feature is not designed to work with 3rd Shift Workers that cross over
the midnight boundary.
'Clear time' is the gross time minus the time that the user clocked out for breaks.
A requirement for calculating 'clear time' is that users must come "IN" on a
controller set to Log as "IN" and users must exit using a controller set to "OUT",
then enter again using a controller set to record as "IN", in that order. If the
program does not see an opposing "IN" or "OUT" event for that user, an
appropriate error will be printed on the report for that day, such as the term
"Missing" in the 'OUT' event column, and the clear time calculation will not be
calculated properly.
1.
2.
Select Reports > Time Management from the main menu. The Time
Management screen displays.
Specify the desired "User Selection" choice, the desired "Date Range," select
the desired doors, and select "Print To" output device for the report: Monitor
(screen), Printer, or File. If you select File, you must enter a name for the file
in the "File name" field. "Monitor" is the default choice. Select the Print button
to print the report.
IEI Hub Manager Professional 7
Chapter 9: Reports
9.4
149
Misc. Log Reports
The Misc. Log Reports can show:
· the first and last event that occurred each day
· what days a particular User was granted access
· who was granted access on a particular day
1.
2.
3.
Select Reports > Misc. Log Reports from the Hub Manager Professional
main menu. If data is present, the Misc. Log Reports screen displays.
Specify the information to appear on the report on the Misc. Log Reports
screen. Enter your "User Selection" choice, the appropriate "Date Range,"
"Report Type," and the "Print To" output device for the report: Monitor
(screen), Printer, or File. If you select File, you must enter a name for the file
in the "Filename" field. "Monitor" is the default choice.
Select the Print button to print the report.
IEI Hub Manager Professional 7
150
9.5
Chapter 9: Reports
Assignment Reports
The Assignment Reports screen allows you to select from 4 different report types.
Each report type allows you to select the individual items that you want to include
in the report. Report types include:
· Show the Access Levels that contain select doors
· Show the Users assigned to each door
· Show the Doors each User can access
· Show the Users assigned to each Access Level
To use this reporting tool, perform the following:
1. Select Reports > Assignment Reports from the Hub Manager Professional
main menu to show the Assignment Report selection screen.
2. In the section of the screen labeled "Report Types", select which report type
you want to generate.
3. Select the items you want to include in the report. Options that are specific to
that report type are discussed in the following sections that describe the
individual report types.
4. Specify the "Print To" output device for this report: Monitor (screen), Printer,
IEI Hub Manager Professional 7
Chapter 9: Reports
5.
151
or File.
Select the Print button to print the report to the selected output. If you
selected File, you will be prompted to enter a name for the file in the "File
name" field.
"Show the Access Levels that contain select doors"
This report type can be helpful when you are adding users, and you have a large
number of Access Levels. Simply select the doors on the left that you wish to add
a user to. Each time you select or deselect a door on the left, Access Levels that
contain all the selected doors will be displayed on the right.
Door Selection
Select the doors you want to filter Access Levels by
Matching Access Levels
Displays the Access Levels that contain all the selected doors and also comply
with the "Access Level Filtering" selection
Access Level Filtering
Exclusive
Displays matching Access Levels that grant access to ONLY the selected doors
and no other doors
Inclusive
Displays matching Access Levels that grant access to all the selected doors, but
may also grant access to other doors.
IEI Hub Manager Professional 7
152
Chapter 9: Reports
Door Selection Screen
IEI Hub Manager Professional 7
Chapter 9: Reports
153
Print Report to Monitor
"Show the Users assigned to each door"
This report will display the users that are assigned to each of the selected doors.
You have the option to not display particular data in the report, which can help you
to distribute this report but still maintain security.
Door Selection
Select the doors you want to include in the report
Show these items in the user report
PIN Data
Disabling this option, will cause the PIN field to be replaced with an "X" (if that field
contains data). In the previous sample report PIN data was disabled, so you will
notice that all the data in the PIN fields are replaced by an X.
Card Data
Disabling this option, will cause the Card data fields to be replaced with an "X" (if
any of those fields contain data).
NOTE: If you include either PIN data or Card Data in this report, and the report is
printed to a hard copy or saved to a file, be sure to keep the report in a secure
location, since data in that report could potentially be used to gain access.
Master User
Disabling this option will cause the PIN and Card data fields of the Master User to
be replaced by an "X" (if any of those fields contain data). This can be helpful if
you want to distribute this report to someone but you do not want that person to be
able to enter programming mode manually.
Supervisor User
Disabling this option will cause the PIN and Card data fields of the Supervisor
User to be replaced by an "X" (if any of those fields contain data). This can be
helpful if you want to distribute this report to someone but you do not want that
person to be able to enter programming mode manually.
IEI Hub Manager Professional 7
154
Chapter 9: Reports
Door Selection Screen
IEI Hub Manager Professional 7
Chapter 9: Reports
155
Print Report to Monitor
"Show the Doors each User can access"
This report will display the Doors and Time Zones that each of the selected users
can access. This report can help you decide if the Access Level you have
assigned to this user is the best choice, based upon the doors that user has
access to.
User Selection
Select the Users you want to include in this report
IEI Hub Manager Professional 7
156
Chapter 9: Reports
User Selection Screen
IEI Hub Manager Professional 7
Chapter 9: Reports
157
Print Report to Monitor
"Show the Users assigned to each Access Level"
This report will display all the Users that are assigned to each of the selected
Access Levels.
Access Level Selection
Select the Access Levels you want included in the report
IEI Hub Manager Professional 7
158
Chapter 9: Reports
Access Level Selection Screen
IEI Hub Manager Professional 7
Chapter 9: Reports
159
Print Report to Monitor
9.6
Database Printing
The Database report shows all programmed items within a certain database.
Simply select the type of Database report you would like to generate.
1.
2.
3.
Select Reports > Database from the Hub Manager Professionalmain menu.
The Database screen displays.
Specify the information to appear on the report on the Database screen. You
can select the contents of these databases: Time Zones, sites, doors, access
levels, users, and holidays.
Specify the desired output device for the report: Monitor (screen), Printer, or
File; if you select File, you must enter a name for the file in the "Filename"
field. "Monitor" is the default choice. Select the Print button to print the report.
IEI Hub Manager Professional 7
160
9.7
Chapter 9: Reports
Audit Report
The Audit report contains a listing of operator activity, database modifications, and
times of the activity.
1.
2.
Select Reports > Audit from the Hub Manager Professional main menu. The
Audit screen displays. All Audit Trail data displays.
Specify the desired output device for the report: Monitor (screen), Printer, or
File; if you select File, you must enter a name for the file in the "Filename"
field. "Monitor" is the default choice. Select the Print button to print the report.
IEI Hub Manager Professional 7
Chapter 9: Reports
9.8
161
Archive Viewer
The Archive Viewer report permits you to open either Log or Audit archives for
viewing. For more information on archiving, see Log Archiving and Audit Archiving
.
1.
Select Reports > Archive Viewer from the Hub Manager Professional main
menu. The Archive Viewer screen displays.
IEI Hub Manager Professional 7
162
Chapter 9: Reports
2.
3.
9.9
Specify the desired type of Archive report, "Log" or "Audit" and select the
Open button. A Select Archive screen displays, with which you select the Log
or Audit file you wish to view. You can navigate to the desired directory using
standard Windows techniques.
To print these files, open them in another program that can read .CSV files
such as Microsoft Excel.
Generate Data for External Report Writer
This option will start the Report Writer Database Copy.
See Tools > Options for details on the 'Generate Report Database' option.
9.10 Scheduled Log Imort Errors
The Schedule Log Import Errors report presents a list of recorded error events
with a description for each. These are errors that occur either during the
scheduled importing of transaction logs. The program operates in this fashion
because both of these options import the logs even if an operator is not present,
and some method is required to determine if any errors occurred during the
automated process.
Select Reports > Scheduled Log Import Errors from the main menu. The
system processes your request for this report and then displays the results. After
viewing the errors, the errors are moved into the Audit Trail log.
IEI Hub Manager Professional 7
Chapter 9: Reports
IEI Hub Manager Professional 7
163
164
Chapter 10: Help
Chapter 10: Help
10.1 Error Messages
Here are some error messages and potential resolutions:
When I run Hub Manager Professional I receive an error of:
Network Initialization Failed.
Permission Denied.
File C:\PDOXUSRS.NET
Directory C:\
This error is commonly seen on Win 2000 or Win XP and is normally caused by
restrictive permissions of the Windows login user name that is currently logged in.
The database engine may require a system drive to store temporary files. System
drive access may require Administrator rights.
RESOLUTION: Have the administrator change the permissions of this Windows
login to have access to the C:\ drive, or give this user full administrator privileges.
When I install Hub Manager Professional I receive an error of "Insufficient
Disk space".
This error is commonly seen on Win 2000 or Win XP and is normally caused by
restrictive permissions of the Windows login user name that is currently logged in.
RESOLUTION: Have the administrator change the permissions of this Windows
login to give this user full administrator privileges.
When I try to save a record I receive an error of "Saving error".
This error is commonly seen on Win 2000 or Win XP and is normally caused by
restrictive permissions of the Windows login user name that is currently logged in.
RESOLUTION: Have the administrator change the permissions of this Windows
login to give this user full administrator privileges.
10.2 Glossary
Auto Unlock When this feature is enabled the Time Zones specified as
Auto-Unlock Time Zones will be used to automatically unlock at the Time Zone
start time and re-lock at the Time Zone stop time.
Card Number The card number is the electronic code contained in an access
card or other access credential stored in the card field that is used to perform an
action on a door controller. The card number is read electronically by a card
reader. (This definition also applies to Magnetic (ABA Track II) cards, Proximity
cards, RF Fobs and Dallas Touch Chips.)
IEI Hub Manager Professional 7
Chapter 10: Help
165
Code Number The access number that the user enters on a keypad to gain
access to a door. It can be 1 to 6 digits in length. The longer the code, the greater
the security. It only takes 9 attempts to find a 1-digit code.
Code PIN See Code Number.
Com Port This is the serial communication port on a personal computer through
which the Hub Manager Professional software communicates with the
hardwired controller network.
DB9 This is a 9-pin connector that is shaped like an elongated "D"; it can be found
on the back of a computer. A typical IBM compatible PC has a DB9 connector for
the COM1 and COM3 com ports.
DB25 This is a 25-pin connector that is shaped like an elongated "D"; it can be
found on the back of a computer. A typical IBM compatible PC has a DB25
connector for the COM2 and COM4 com ports.
Door In this manual, the term door is used synonymously with the term controller,
Door Controller, or Door Control Module. When referring to "Door Status"what is
really being said is "Controller Status."
Export The action of sending Door Settings information from the Hub Manager
Professional software to the controllers.
Forced Door Alarm This is the programmable feature in a controller whereby the
Forced Door relay located in the controller is activated for a specified time when
the controller detects that a locked door has been forced open. NOTE: This
requires that a door position detection device has been properly installed.
Import The action of retrieving information from the controller network into the
Hub Manager Professional software.
Keypress Feedback This is a feature of the controller whereby a yellow LED light
is flashed or a sonalert device is beeped (depending on installed equipment) with
each keypress on a keypad.
Log Short for Transaction Log. The log is a list of recorded events for a particular
door.
Master Code This code is used to enter programming mode on a controller. It is
located in User #1. The name of User #1 is defaulted to "Master User".
Operator Person who is using the Hub Manager Professional and System
Manager software.
IEI Hub Manager Professional 7
166
Chapter 10: Help
PIN Acronym for Personal Identification Number. See Code Number.
System Administrator Operator responsible for managing the access control
system.
System Dataset (aka Dataset or System) A 'System Dataset' is a compressed
zip file that stores all the data that is related to that particular System, currently
including (but not limited to) the complete contents of the following folders:
Archive, Backup, Database, Gateway, Maps, PDAFiles, Print, and ReportDB.
System Manager System Manager is a program that is responsible for accessing
the System Repository and loading System datasets onto the local PC. System
Manager also sends that same dataset back to the System Repository.
System Repository (aka Repository, or Repository folder) A 'System
Repository' is a folder that can store any number of System Datasets. Any number
of System Repository folders can be created based upon your security needs. All
systems stored in that repository can be accessed by any installation of System
Manager that has network privileges to see that particular System Repository
folder.
10.3 Help
The electronic Help file is context sensitive. This means, for example, that if you
press F1 while the Access Levels Edit screen is open in Hub Manager
Professional, the Help file opens to the topic that describes Access Levels.
10.4 Check for Updates
iUpdate is a feature that checks for and installs any updates that are found for the
Hub Manager Professional software. No sensitive information is sent during this
process.
NOTE: This feature requires an active internet connection.
1. Upon selecting this option from the Hub Manager Professional main menu Help
> Check for Updates, the program will attempt to establish a connection with
an update server located on the internet.
NOTE: When Hub Manager Professional is run, you will also be prompted to
check for updates, but you will only be prompted once per day. If you do not want
to be prompted you can have Hub Manager Professional automatically check for
available updates and only alert you if an update was found. Or you can turn off
the auto checking completely (not recommended). These options are located in
Tools > Options > General Options.
IEI Hub Manager Professional 7
Chapter 10: Help
167
NOTE: If a Windows Security Alert is displayed, choose 'Unblock' to allow the
update program access to the update server located on the internet.
IEI Hub Manager Professional 7
168
Chapter 10: Help
2. If the server is found then any available updates will be displayed.
IEI Hub Manager Professional 7
Chapter 10: Help
169
3. Select Next to start downloading and installing the updates. You may be
required to run the update again, depending upon which pieces needed to be
updated.
4. When all updates are complete you will receive a final message stating that all
components are up to date, and Hub Manager Professional will be restarted.
IEI Hub Manager Professional 7
170
Chapter 10: Help
10.5 Check for Custom Updates
This option will check for special updates that are distributed on an individual
basis. In order to use this feature you will need the Custom Update Information
provided to you. This information includes the iUpdate server, login name and
password.
No sensitive information is sent during this process.
NOTE: This feature requires an active internet connection.
1. Upon selecting this option from the Hub Manager Professional main menu Help
> Check for Custom Updates, the program will ask you for the Server IP
Address, Login Name, and Login Password.
2. iUpdate will then attempt to establish a connection with the specified update
server located on the internet.
3. Any available updates will be displayed. Select Next to start the download
IEI Hub Manager Professional 7
Chapter 10: Help
171
process.
4. Hub Manager Professional will be restarted when the download and installation
process is complete.
10.6 About
This screen contains information about the Hub Manager Professional program.
This is also the screen where you can edit the support contact information that
appears in the lower right of the main screen. In order to edit these fields, you
must log in to the program using the Administrator login name and password. This
login was initially named HUBMAN, but may have been changed. If you have
more than one login operator in the system and you are not sure which one is the
Administrator, it is easy to recognize. Assuming your login has full access rights to
the operator database, if you open each operator in the list for editing, the
Administrator operator will have the Toggle, Enable All and the Disable All buttons
disabled (the text will appear gray, see below).
If you now log in with this operator and go to Help > About, you can now edit the
Support Contact Information.
The Administrator Operator always has FULL access to all areas of the program.
IEI Hub Manager Professional 7
172
Chapter 10: Help
The options can not be edited, and this operator can never be deleted.
see also:
Obtaining Technical Support
IEI Hub Manager Professional 7
Chapter 11: Obtaining Technical Support
173
Chapter 11: Obtaining Technical Support
11.1 Obtaining Technical Support
Should you experience any difficulty installing or operating the Hub Manager
Professional software, please contact your installer or contact IEI at 800-343-9502
.
The installer information can be found in the bottom right corner of the Hub
Manager Professional main screen, or go to Help > About.
IEI Hub Manager Professional 7
174
Chapter 12: Copyright Information
Chapter 12: Copyright Information
12.1 Copyright Information
Copyright © 2005 by International Electronics, Inc.. All Rights Reserved. Hub
Manager Professional, LS2\P are trademarks of International Electronics, Inc..
Microsoft®, Microsoft Excel®, Windows 2000®, and Windows XP® are
registered trademarks of Microsoft Corporation. OMAP™ is a trademark of Texas
Instruments. Other company or product names mentioned herein may be
trademarks or registered trademarks of their respective companies.
IEI Hub Manager Professional 7
Index
Index
-224 Hours
82
-AAbout 171
Access Condition 96
Access Level Setup 96
Access Levels 96
Add User Group 117
Administrator 11
Application Initialization 138
Archive Viewer 161
Archiving 127
Assigned Doors 61
Assignment Reports 150
Audit Archiving 128
Audit Trail Report 160
Auto Configuration 125
Auto Unlock Time Zone 86
Autorun 7
-BBackup Alert 139
Batch Load Users 117
Block Holiday 119
-CCapacity 86
Card 103
Card Format 103
Change Login Password 56
Check for Custom Updates 170
Check for Updates 166
Com Port 64
Com Port Test 133
Communications
Export Data to Doors 123
Import Door Settings 122
Import Transaction Log 123
Network Query 125
Update Time/Date 123
Connect 61
Connection
LAN 64
Modem 79
PDA 64
Serial 64
Connection Type 61
Parameters 61
Contact Information 171
Controller Status 125
Conversion Utility 130
Copyright Information 174
Corporate Code 103
Crystal Reports 162
Crystal Reports Compatibility 139
-DData Conversion 130
Database 58
Access Levels 96
Doors 86
Holidays 119
Menu 58
Operators 58
Sites 61
Time Zones 82
Users 103
IEI Hub Manager Professional 7
175
176
Index
Database Backup\Restore 129
Database Printing 159
Date Setting 123
Days Allowed after First Use 103
Deselect Door 96
Device Group 61
Device Type
Hub Controllers 93
LS2\P 94
prox.pad plus 93
DHCP 64, 70, 73
Disconnect 61
Door
Address 86
Device Type 86
Log Event Mask 86
Name 86
Site 86
System Options 86
System Parameters 86
Time Zones 86
Door Settings 86
Doors
Door Type 86
Type 86
Dynamic IP Address 64, 70, 73
-EEmergency User 96
Enrollment Station 103
Error Messages
Insuffiecient Disk Space 164
Network Initialization Failed 164
Saving Error 164
Event
Unknown User ID 144
Event Log 123
Events 123
Exit 56
Export data to Doors 123
Export Time/Date 123
Extended Unlock User 96
External Tools 133, 134
-FFob Button 103
Foreword 3
-GGenerate Data for External Report Writer
Glossary 164
Group 117
Group Code 103
162
-HHelp 1
About 171
Check for Custom Updates 170
Check for Updates 166
Help 166
HID Cards 103
HID Prox Cards 103
Holidays 119
Hub Manager Professional Installation
-IImport Door Settings
Import Log 123
Indexing 138
Indexing error 138
Initial Setup 19
Installation
IEI Hub Manager Professional 7
122
7
Index
Installation
PC Software 7
PDA Software 7
IP Address 64, 70, 73
-NName List Import 114
Navigating through the Program
Network Query 125
Number of Total Uses 103
-LLAN 64
Lockdown User (Panic)
Lockout User 96
Log 123
Log Archiving 127
Log Filter 144
Log Importing 123
Login 11, 55
Logout 55
LS Link 28, 64, 94
LS Link Installation 7
LS2\P 94
-MMain Menu 22
Manual Conventions 3
Master Code 103
Master User 96
Menu
Database 58
Tools 127
Menu System 22
Midnight Crossing 82
Migrating Data 130
Misc. Log Reports 149
Multiple databases 40
Multiple Systems 40
177
96
-OOnline Updates 166, 170
Operator 55, 56
Audit Trail Report 160
Operator Wizard 60
Operators 58
Options 139
Overview
Converting data 130
General Overview 11
Initial Setup 19
Menu System 22
PDA Software 28
Running the software 24
Uninstall 38
-PPalm OS Software 7, 28
Panic User 96
Passage User 96
Password 55
PDA 61
PDA Application 64
PDA Software 7, 28
PIN 103
prox.pad plus 93
IEI Hub Manager Professional 7
22
178
Index
-QQuery Now
125
-RRandom PIN 103
Raw Data 103
Relock 96
Report Writer 139
Reports
Archive Viewer 161
Assignment Reports 150
Audit 160
Database Printing 159
Generate Data for External Report Writer
Log Filter 144
Misc. Log Reports 149
Scheduled Log Import Errors 162
Time Management 148
RF Fob 103
RS232 - RS485 Converter 64
Run Com Port Test 133
Running the software 24
-SScheduled Log Import 56, 134
Scheduled Log Import Errors 162
Security chip 122
SEG 64, 70, 73
Sending Data to a Door 123
Serial 64
Serial Converter 64
Settings
Door 86
Setup 19
Setup Wizards 95, 102, 114
Single Use 96
Site Code 103
Site Wizard 63
Sites 61
Start/Stop 103
Static IP Address 64, 73
Supervisor Code 103
Supervisor User 96
System 40
Change Password 56
Exit 56
Login 55
Logout 56
System Manager 40
System Dataset 40
System Manager 139
162 Clear System List 40
Close System 40
Create System 40
Define Existing Repository
Delete System 40
Emergency Override 40
Open System 40
Rename System 40
System Repository 40
Systems
Multiple 40
-TTable Initialization 136
Tecnincal Support 173
Temporary Users 103
Time Management 103, 148
Time Setting 123
Time Zone Selections 96
Time Zones 86
TimeZones 82
IEI Hub Manager Professional 7
40
Index
Tools
Application Initialization 127, 138
Audit Archiving 127, 128
Backup Alert 139
Database Backup/Restore 127
Database Backup\Restore 129
External Tools 127, 134
Indexing 127, 138
Log Archiving 127
Options 139
Report Writer 139
Run Com Port Test 127, 133
Scheduled Log Import 127, 134
Scheduled Log Import Reminder 136
System Manager 139
Table Initialization 127, 136
Transaction Log 123
Transaction Log Importing 123
Type 96
-VVisual ID
103
-WWalkthrough 24
Warning Messages
User Capacity Exceeded 114
Warranty 3
Windows Logon 11
Wizards 63, 95, 102, 114
Access Level 102
Door 95
Site Wizard 63
User List Import Wizard 114
-UUninstall 38
Unknown User ID Event 144
Updates 166, 170
User Name List Import 114
User Type 96
Extended Unlock 96
Lockdown (Panic) 96
Lockout 96
Master 96
Passage (Toggle) 96
Standard 96
Supervisor 96
Toggle (Passage) 96
Users 103
Add Batch of Users 117
Add Group of Users 117
IEI Hub Manager Professional 7
179