1
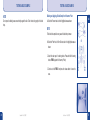
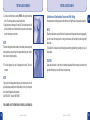
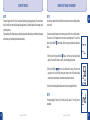
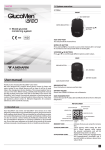
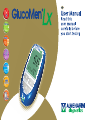
Menarini Helpline THANK YOU Menarini Helpline: (UK) 0800 243667 - (Ireland) 1800 709903 Email: [email protected] UK A. Menarini Diagnostics thanks you for choosing the GlucoMen® LX blood glucose meter. This User Manual contains important information on the meter and how it works. Please read it carefully before us ing your new meter. The GlucoMen® LX blood glucose meter is designed to be convenient and easy to use. It gives accurate results in just 4 seconds using a very small blood sample. This small sample allows you to use a thinner lancet because not as much blood is needed to do a blood sugar test. The meter also has memory that stores your blood sugar test results to help you and your healthcare professional manage your diabetes care. Before you get started, it is important to complete the Warranty Registration Card included in your kit and return it back to A. Menarini Diagnostics. Doing this will help us better serve your needs. If you need to contact us, please call A. Menarini Diagnostics for assistance: (UK) 0800 243667 - (Ireland) 1800 709903. The GlucoMen® LX blood glucose meter is an in vitro diagnostic medical device intended for blood glucose self-testing. The product conforms to the requirements of the Directive 98/79/EC on in vitro diagnostic medical devices. Date of issue September 2007 GlucoMen® LX - 38973 - 09/07 GlucoMen® LX - 38973 - 09/07 IMPORTANT INFORMATION! • • • • • • For correct use refer to GlucoMen® LX sensor instructions for use. Before you begin using your new blood glucose meter, please read all of the instructions provided in this User Manual. Your meter uses a CR2450 3-volt coin cell battery. To begin using your meter, you need to install the enclosed battery. See Battery Replacement (page 35) to install a new battery. Perform all quality control checks recommended in your User Manual. Consult with your diabetes healthcare professional and follow his/her guidance for your blood glucose monitoring routine. These recommendations apply to all blood glucose monitors and are supported by the American Association of Diabetes Educators (AADE), the American Diabetes Association (ADA), the US Food and Drug Administration (FDA), and the Advanced Medical Technology Association (AdvMed). Notes, Cautions, and Warnings: NOTES Provide helpful operating information. CAUTIONS Provide information that is important for instrument protection. WARNINGS Provide information that is important for user protection or about risk of inaccurate results. GlucoMen® LX - 38973 - 09/07 CONTENTS� Intended Use Symbols Introduction Meter Components Meter Display The GLUCOMEN® LX Blood Glucose Meter Overview Kit Contents Environmental conditions Before Testing Reasons to Check for Low Blood Glucose Important Health Related Information Test Strips Important GLUCOMEN® LX SENSOR Test Strip Information Lancing Device Setting the Time, Date, and Beeper Running Control Solution Control Solution PerformING a Control Solution Test Important Information for Control Solution Testing a Quality Control Solution Running a Test GlucoMen® LX - 38973 - 09/07 7 8 9 9 10 11 11 12 12 13 13 13 14 14 15 16 18 18 18 19 20 23 UK CONTENTS TESTING A BLOOD SAMPLE obtaining and Applying a Blood Sample from Forearm or PalM Limitations and Considerations: Forearm and Palm Testing Your Test Result Review Test Results in Memory DATA REVIEW IN MEMORY DATA MANAGEMENT SOFTWARE Basic Upkeep Battery Check Battery Replacement Cleaning and Care Displays, Meanings, Actions Appendix Specifications Chemistry Measurement Limitations Instructional Notes Warranty GlucoMen® LX - 38973 - 09/07 INTENDED USE 24 27 29 31 33 34 35 36 36 37 38 39 46 46 46 47 48 50 • To be used by people with diabetes mellitus at home as an aid to measure the effectiveness of diabetes control. It is not intended for use in the diagnosis of, or screening for diabetes mellitus and is not intended for use on neonates. It can also be used by healthcare professionals. • The GlucoMen® LX blood glucose meter is intended for use outside the body (in vitro diagnostic use). • It should only be used with GlucoMen® LX Sensor test strips and GlucoMen® LX Control solution. • It should be used for testing glucose (sugar) and only with fresh capillary whole blood samples. • It should NOT be stored in the refrigerator or in the car. UK WARNING The GlucoMen® LX blood glucose meter contains small parts. Keep the meter out of reach of small children and pets. If you have hypoglycaemia unawareness, a blood glucose meter is critical to your care. Since any meter may fail, break, or be misplaced, you should always have a backup meter. This product may become infectious in the course of use. Discard the product in accordance with local regulations for biohazardous waste. WARNING Blood samples and blood products are potential sources of hepatitis and other infectious agents. Handle all blood products with care. Wear gloves when performing measurements on another person. Items that are used to measure glucose, e.g., test strips, lancets, and alcohol swabs, must be disposed of in accordance to local regulations to avoid risk to anyone. GlucoMen® LX - 38973 - 09/07 SYMBOLS INTRODUCTION The following are symbols that are used in this manual, on insert sheets, and on the GlucoMen® LX blood glucose meter. Manufacturer Contents of Set Attention, read user manual before use This product fulfills the requirements of the Directive 98/79/EC on in vitro diagnostic medical devices SN Serial number In Vitro Diagnostic Medical Device Direct Current (Voltage) In vitro device for self testing Catalogue number Batch code Meter Components UK Test Strip Goes Here LCD Display Blood glucose meter Blood glucose meter Biohazard - This meter could be potentially contaminated due to the blood samples used Significant additions or changes from previous user Store at manual revision Contents sufficient for (n) tests Use by Left Arrow Button Right Arrow Button Mode Button GlucoMen® LX blood glucose meter n GlucoMen® LX - 38973 - 09/07 GlucoMen® LX - 38973 - 09/07 INTRODUCTION INTRODUCTION Meter Display The GlucoMen® LX blood glucose meter When you turn the GlucoMen® LX blood glucose meter on, the all segments display appears briefly. This tells you that all the display segments are working properly. Control Low Battery Indicator Marked Test Results Glucose Test Memory Result Blood or Control Drop Indicator Date/Day Hour/Minute UK CAUTION Results mg/dL The meter should be handled with care. Dropping, rough handling, etc. may damage the meter. If the meter is not to be used for an extended period of time, remove the batteries to eliminate the risk of battery leakage. Also, protect the meter from moisture, prolonged direct sunlight, and extreme temperatures. Results mmol/L Overview AM or PM Indicator Average Test Results The meter is a hand-held testing device that measures glucose (sugar) in capillary blood. The test strip is touched to a drop of blood to initiate the test process. • A simple one-step process provides a blood glucose result. • Test results are available in 4 seconds. • There is memory for one user’s set of test results (400). • The meter is powered by a battery that can perform approximately 1000 tests. To perform a test, the operator simply inserts a test strip; waits for the blood drop symbol to appear on the screen; brings the test strip to the drop of blood; and obtains a glucose test result in 4 seconds. The test result is automatically stored into the meter’s memory. The operator can recall, delete, and review test data stored in the meter, including the average result. GlucoMen® LX meter Screen 10 GlucoMen® LX - 38973 - 09/07 GlucoMen® LX - 38973 - 09/07 11 INTRODUCTION Kit Contents Before Testing • • • • • • Before testing and to ensure accurate glucose results, wash your hands and the testing site then thoroughly dry these areas. The GlucoMen® LX blood glucose meter can test your blood glucose on the fingers, forearm, or palm. The sample size is just 0.3 μL of blood. GlucoMen® LX blood glucose meter. Battery (CR2450, 3V). User Manual. Warranty Card. Depending on the version, your Set may include additional items. Please refer to the box label for the list of contents of your Set. Environmental conditions • • • • 12 INTRODUCTION The storage temperature range for the meter: -25°C to 46°C (-13°F to 115°F). The storage temperature range for the Test Strips: 4°C to 30°C (39.2°F to 86°F). The meter operational temperature range: 5°C to 45°C (41°F to 113°F). The relative humidity range: 10% to 90% non-condensing. GlucoMen® LX - 38973 - 09/07 UK Reasons to Check for Low Blood Glucose • You have symptoms such as weakness, sweating, nervousness, headache, or confusion. • You took insulin, but have delayed eating. • Your doctor or healthcare professional advises you to do so. Important Health Related Information If you are experiencing symptoms that are not consistent with your blood glucose test results and you have followed all instructions described in the User Manual, call your doctor or healthcare professional. GlucoMen® LX - 38973 - 09/07 13 INTRODUCTION INTRODUCTION Test Strips The GlucoMen® LX������� Sensor test strips are designed for use with your GlucoMen® LX blood glucose meter only. Use each test strip only once, then discard. DO NOT reapply blood to the test strip. • Requires a very small blood volume: 0.3 μL. • Automatically draws blood into the test area of the strip. • Can be handled with clean, dry hands without affecting glucose readings. • Test strips should only be stored for 9 months after opening the vial. When first opening a new vial of test strips, count forward 9 months and write that date on the vial. Discard any remaining test strips after the date you have written on the vial. • Do not tamper with the test strip. UK WARNING The test strip vial contains small parts. Keep the test strip vial away from children and pets. Apply Blood Drop to Front Edge Insert This End Into meter Important GlucoMen® LX Test Strip Information • Use only GlucoMen® LX Sensor test strips when testing. • Remove the test strip from the vial only when ready to test. • Store the test strip package in a cool, dry place below 30°C (86°F). Do not refrigerate or freeze. • Do not store near heat or moisture. • Store the test strips in their original vial only. • After removing a test strip from the vial, immediately replace the vial cap and close tightly. • Do not use test strips beyond the expiration date printed on the package as this may cause inaccurate results. 14 GlucoMen® LX - 38973 - 09/07 Lancing Device The diagram below shows the components of the Lancing Device. Depth Adjustment Force Adjustment Release Button GlucoMen® LX - 38973 - 09/07 15 SETTING THE TIME, DATE, AND BEEPER Having the correct time and date of each blood glucose test result helps you and your healthcare professional track changes in your therapy. It is important to set the correct time and date so you have records of when you tested. If you do not set the time and date, all blood glucose monitoring results will be marked and will not be included in averages. Your GlucoMen® LX blood glucose meter offers a beeper function that is preset “On”. This tells you when enough blood is applied to the test strip, when test is completed, and prompts you through other steps in using your meter. NOTE: Remember to adjust time and date settings as needed to match the local time or daylight savings time and after you replace the battery. Once you have completed a blood glucose or control solution test, the last result will appear the next time your meter is turned on. The date and time displayed is the date and time of your previous blood sugar or control solution test result, not the current date and time. 1.Press the MODE button for longer than 3 seconds. The meter, if in Sleep Mode, wakes up, displays all segments for 3 seconds, and enters the SETUP Mode. SETTING THE TIME, DATE, AND BEEPER This brings the meter display to the first setup screen: time. Modes Screen Display Hour (Flashing) Minutes (Flashing) Day (Flashing) Month (Flashing) Year (Flashing) Sample Marking 3 (ON or OFF) Beep (ON or OFF) END (End of Setup Mode) 2.Repeatedly press the MODE 3.Press the left/right arrow 4.Press the MODE 16 GlucoMen® LX - 38973 - 09/07 UK “14”: 00 14 :“55” “28”- 12 - 2006 28 -“12”- 2006 28 - 12 -“2006” “ON” “ON” “END” button to find the MODE you want to change. buttons to choose a new setting for that MODE. button to select the new settings or to skip to the next MODE. GlucoMen® LX - 38973 - 09/07 17 RUNNING CONTROL SOLUTION Control Solution Important Information for Control Solution Control solution is a liquid that contains a fixed amount of glucose. • Use this control solution to test that your meter is working properly with the test strip. • Use this solution to practice or to check that you are following the correct testing procedure without using your own blood. • If the meter reading is within the control solution’s acceptable range, the meter is working properly. • • • Performing a Control Solution Test The control solution test confirms that your meter and test strips are working correctly. A control solution test is similar to a blood glucose test, except you use GlucoMen® LX Control solution and not a blood sample. You should run a control solution test: • When you first get your meter. • Each time you open and begin using a new vial of test strips. • If you leave the test strip vial cap open for any length of time. • If the meter is dropped, damaged, or exposed to liquids. • If you think your test results are not accurate, or if your test results are not consistent with how you feel. • To check the performance of the meter and test strips. 18 RUNNING CONTROL SOLUTION GlucoMen® LX - 38973 - 09/07 Use only the GlucoMen® LX Control solution for the test. Check the expiration date on the control solution vial. Do not use control solution past the expiration date or you may get inaccurate results. Store only for 3 months after first opening. When you open a new vial of control solution, count forward 3 months and write that date on the label of the control solution vial. Discard any remaining solution after the date you have written on the vial. • Store the control solution tightly closed at room temperature below 30°C (86°F). Do not refrigerate or freeze. • Shake the control solution well before using. UK Caution The GlucoMen® LX Control solution range printed on the test strip vial is for control solution only. It is used to test the performance of the meter and test strip. It is not a recommended range for your blood glucose level. If your control solution test results continue to fall outside the range printed on the test strip vial: • The GlucoMen® LX blood glucose meter may not be working properly. • Do not use the meter to test your blood. • Call A. Menarini Diagnostics for assistance: (UK) 0800 243667 - (Ireland) 1800 709903. GlucoMen® LX - 38973 - 09/07 19 RUNNING CONTROL SOLUTION RUNNING CONTROL SOLUTION Testing a Quality Control Solution NOTE 1.Insert a test strip into the meter. If meter was off, the screen displays all segments for 2 seconds then the blinking blood drop symbol appears. The on-screen Control Symbol flashes on and off repeatedly until sufficient control solution has been added to the test strip. (Beeper sounds if enabled). 5.A glucose quality control test result is available on-screen in 4 seconds. The display does a countdown from 4 to 1. 6.Compare the result on the display with the range printed on the test strip vial. If the result falls within the range, your meter and test strips are working correctly. 7.The result is automatically stored into memory. 8.If test result is above 33.3 mmol/L, the screen displays HI; test result cannot be stored. If test result is below 1.1 mmol/L, the screen displays LO; test result cannot be stored. NOTE If the strip is removed before you start the test, the screen goes blank. 2.Press the left/right buttons to move between unmarked sample or marked control sample (CTL); select control. NOTE It is important to select control solution test so the test result does not appear to be one of your blood glucose test results. UK NOTE If a test is not performed within 2 minutes from the insertion of the test strip, the screen goes blank. To perform a test, take out then replace the test strip starting from Step 1. 3.Shake the control solution vial. Discard a drop before use. Squeeze a drop of control solution onto a clean, hard, dry surface, e.g. control cap. 4.Pick up the meter with test strip inserted and touch the test strip to the control solution drop. NOTE Control solution should be applied to a clean, hard and dry surface. 20 GlucoMen® LX - 38973 - 09/07 GlucoMen® LX - 38973 - 09/07 21 RUNNING CONTROL SOLUTION RUNNING A TEST Out-of-range results may be caused by the following: • An error in performing the control test. Retest and follow the instructions carefully. • The control solution may have expired or have been contaminated. Check the expiration date on the control solution vial. Control solution is good for only 3 months after opening. Make sure the control solution vial is closed when not in use. • Expired test strip. Check the expiration date on the test strip vial. • The test strip may have been damaged. This can be caused by extreme temperature or by leaving the test strip vial cap open. Retest using a new test strip. • Meter malfunction. The meter may not be working properly. 1. Insert a test strip into the meter. If the meter was switched off, the screen displays all segments for 2 seconds. NOTE If the control solution test result is outside the range (is either higher or lower), your meter or test strip may not be working properly. Repeat the process using a new test strip. Do not use the meter until test results fall within the appropriate range. If the problem continues, call A. Menarini Diagnostics for assistance: (UK) 0800 243667 - (Ireland) 1800 709903. UK NOTE If the strip is removed before you start the test, the screen goes blank. Apply Blood Drop Here Insert this End Into meter 2.After 3 seconds, the blinking blood drop symbol appears. NOTE If a test is not performed within 2 minutes from the insertion of the test strip, the screen goes blank. To perform a test, take out then replace the test strip starting from Step 1. 3.Wash hands with soap and warm water then dry thoroughly. NOTE Cleaning of the puncture site is important. 4.Holding hand downward, massage finger with thumb toward tip to stimulate blood flow. 22 GlucoMen® LX - 38973 - 09/07 GlucoMen® LX - 38973 - 09/07 23 TESTING A BLOOD SAMPLE 5. 6. 7. Use the lancing device, loaded with a new lancet, to puncture the finger. (See lancing device instructions for use.) Gently squeeze your finger to help form a drop of blood. Touch the end of the test strip to the blood drop until the test strip is full and the on-screen countdown timer begins. (Beeper sounds if enabled.) NOTE The meter will time out after 2 minutes of non-use or if the strip is removed. The keys are disabled until a strip is inserted. Results and marking status are saved if the meter times out, the strip is removed, or the meter is turned off. UK NOTE NOTE The Blood Drop symbol flashes on and off repeatedly until sufficient blood has been added to the test strip. 8. A countdown on screen appears while test is in progress. Glucose result is available on-screen in 4 seconds. 9. The result is automatically stored into memory. 10.Press the Left/Right buttons to move between marked (√) or unmarked results. Marked results are not included in the average test results. HI, LO, and Control results are not included in the average. 11.Press the Mode button to save the Marking Status: Marked (√) or Unmarked. 12.If test result is above 33.3 mmol/L, the screen displays HI; test result cannot be stored. If test result is below 1.1 mmol/L, the screen displays LO; test result cannot be stored. 24 TESTING A BLOOD SAMPLE GlucoMen® LX - 38973 - 09/07 You must apply the sample to the GlucoMen® LX Sensor test strip while the blood drop symbol is flashing in the display. If the meter turns off before sample application, remove the GlucoMen® LX Sensor test strip and insert again. NOTE If blood is not applied within 2 minutes, the meter will go into “sleep mode” to conserve the battery life. NOTE Lancets are for one-time use only. Use a new, sterile lancet each time you test. Test different areas on your fingertips to avoid developing calluses. Remove the used lancet from the lancing device. Follow your local disposal regulations where applicable. WARNING Your lancing device is for your personal use only. DO NOT share with others. Sharing the lancing device or lancets can transmit very serious infections. To avoid accidental fingersticks injuries, do not store used lancets in the device after testing or arm the lancing device with a new sterile lancet unless ready to use. GlucoMen® LX - 38973 - 09/07 25 TESTING A BLOOD SAMPLE NOTE Do not press the blood glucose sensor directly against the skin. Touch the test strip gently to the blood drop. TESTING A BLOOD SAMPLE Obtaining and Applying a Blood Sample from Forearm or Palm 1a.Select the Forearm test site in the highlighted areas as shown. UK NOTE Thick hair at the sample site may cause the blood drop to smear. 1b.Select the Palm Heel or Palm Side test site in the highlighted areas as shown. 2. Attach the clear cap to the lancing device. Press and hold the lancing device FIRMLY against the Forearm (or Palm). 3. Continue to hold FIRMLY and press the release button to lance the area. 26 GlucoMen® LX - 38973 - 09/07 GlucoMen® LX - 38973 - 09/07 27 TESTING A BLOOD SAMPLE 4. Continue to hold the device, pressing FIRMLY until a proper blood drop forms. The clear cap allows you to see the blood drop. 5. Apply blood drop to the edge of the test strip. The blood is drawn into the test strip. Hold the meter to the blood drop until you hear a short beep or see the meter begin to count down. NOTE The blood in the strip should look similar to the red blood you are accustomed to seeing when you test your finger. If the sample looks clear, pink, or light in color, retest with a fingertip sample. TESTING A BLOOD SAMPLE Limitations and Considerations: Forearm and Palm Testing Some patients test their blood glucose at sites other than the finger because it is generally less painful. UK NOTE Results from the forearm may be different from fingertip results when glucose levels are changing rapidly, e.g. after a meal, after taking insulin, or during or after exercise. Only use finger or palm testing during these times. The GlucoMen® LX reduces the pain of blood glucose monitoring significantly by requiring only 0.3 μL of blood sample. CAUTION 6. The blood glucose test result is displayed and stored. The test is complete. Always seek the advice of your doctor or healthcare professional before choosing to use forearm and palm sites. Bruising may occur with forearm and palm testing. NOTE If you get an error message when testing on your forearm or palm or do not get a blood glucose reading after multiple attempts, test on your finger and call A. Menarini Diagnostics for assistance: (UK) 0800 243667 - (Ireland) 1800 709903. THIS NUMBER IS NOT FOR EMERGENCY OR MEDICAL INFORMATION. 28 GlucoMen® LX - 38973 - 09/07 GlucoMen® LX - 38973 - 09/07 29 TESTING A BLOOD SAMPLE Do not use forearm testing: • For at least 2 hours after you have eaten or injected insulin. • If you have recently exercised. • If you think that your blood glucose is low. • If you think that your blood glucose may be changing rapidly (e.g., after a meal, after taking insulin, or during or after exercise). • If you are not aware of symptoms when your blood glucose is low (hypoglycaemic). • If your forearm test results do not match the way you feel, retest using your finger or palm. • • • Consider NOT using forearm testing if you: Are ill. Are under extra stress. Routinely have widely fluctuating blood glucose values that are often low (hypoglycaemic). Values from the palm sample were shown to be equivalent to values from the finger samples. 30 GlucoMen® LX - 38973 - 09/07 YOUR TEST RESULT Your blood glucose test result is displayed on the meter. UK If your test result is higher than 33.3 mmol/L, the meter displays “HI.” You may have a high blood sugar. Retest your blood glucose immediately using a new test strip. If your reading is still high, you should treat yourself as advised by your healthcare professional and/or contact your healthcare professional immediately. If your test result is lower than 1.1 mmol/L, the meter displays “LO.” You may have a low blood sugar. Retest your blood glucose immediately using a new test strip. If your reading is still low, you should treat yourself as advised by your healthcare professional and/or contact your healthcare professional immediately. If you receive an Error Message, see page 38 of this user manual, displays, meaning, actions. GlucoMen® LX - 38973 - 09/07 31 YOUR TEST RESULT REVIEW TEST RESULTS IN MEMORY NOTE NOTE Test results greater than 13.3 mmol/L may mean high blood sugar (hyperglycaemia). Test results lower than 3.3 mmol/L may mean low blood sugar (hypoglycaemia). If you obtain results in these ranges, retest your blood glucose. If your reading is still in these ranges, you should treat yourself as advised by your healthcare professional and/or contact your healthcare professional immediately. If a test strip is inserted while in the Data Review mode, the meter immediately switches to test mode. UK To review test results that are stored in memory, start with the meter in the off position. The meter is in the off position when the screen is completely blank. To turn off the meter, hold the Mode button down until the screen goes blank then release the button. 1.With the meter off, press the Mode button. The most recent test result should display. If there are NO results in memory, the screen displays 3 dashes. 2.Press the Left/Right button to view all the data in memory. The Left arrow goes back in time and the Right arrow goes forward in time. All results including control results, marked results, and unmarked results can be viewed. 3.At the end of reviewing individual test results, the screen displays End Mem. NOTE For data averaging, HI results (>33.3 mmol/L) and LO results (<1.1 mmol/L) are not considered. 32 GlucoMen® LX - 38973 - 09/07 GlucoMen® LX - 38973 - 09/07 33 DATA REVIEW IN MEMORY DATA MANAGEMENT SOFTWARE 4.To review 1 day, 7 day, 14 day, and 30 day average results, press the Mode button. 5.If there are less than 2 test results in memory, the screen displays 000, if no results the screen displays 3 dashes. Glucose results stored in the GlucoMen® LX meter’s memory can be also downloaded using a dedicated cable and filed by using Dialogue® software.These are supplied separately. UK The Dialogue® software minimum requirements are shown on the software packaging. For further information on these products or ordering information call the Menarini Helpline: (UK) 0800 243667 - (Ireland) 1800 709903. 6.After reviewing the 30 day average, press the Mode button to shut off the meter, or press no buttons and the meter will turn off automatically after 30 seconds. NOTE When the meter memory is full (400 test results), each new test result stored in memory will remove the oldest test result stored in memory. 34 GlucoMen® LX - 38973 - 09/07 GlucoMen® LX - 38973 - 09/07 35 BASIC UPKEEP BASIC UPKEEP Battery Check Battery Replacement The meter is powered by a single coin cell battery, CR2450 (3V). The first time you see the battery icon in the upper right corner of the screen and the blood drop at the lower left corner of the screen, the meter has sufficient charge for 20 more tests. Continue with testing as usual; the battery indicator will remain on-screen. Please contact the Menarini Helpline immediately on 0800 243 667 for a free replacement battery. Replace the battery as follows: 1.Remove the battery cover on the back of the meter. 2.Remove the battery and replace with a new one with the + side facing towards you. 3.Replace the cover. UK NOTE After 20, more tests have been performed, there will be insufficient battery charge to continue testing, and the meter will no longer operate until the battery is replaced. The battery icon will only appear when a strip is inserted and the icon will disappear when the strip is removed. If you have forgotten to order a new battery when the battery icon first displayed please call Menarini Helpline on 0800 243 667 for a free replacement battery. 36 After the battery is replaced, the meter displays the “all segments” screen. Then, the meter displays the time set up. Reset to the current time and date. If needed, go to page 16 in this guide to review set up. Battery low GlucoMen® LX - 38973 - 09/07 GlucoMen® LX - 38973 - 09/07 37 BASIC UPKEEP Cleaning and Care Displays, Meanings, Actions The exterior of the GlucoMen® LX blood glucose meter should only be cleaned with alcohol wipes/swabs. Keep liquids from entering the test strip port or the Left/Right Arrow buttons, and the Mode button. This section addresses the messages that appear on your displays, what they mean and what action you need to take. Display CAUTION DO NOT attempt to open the meter to make any repairs. Your warranty and all claims will be void! Only authorized service person may repair the meter. Call A. Menarini Diagnostics if the meter needs to be repaired or replaced. 38 DISPLAYS, MEANINGS, ACTIONS GlucoMen® LX - 38973 - 09/07 What it Means� What to Do System Check. Verifies that all segments are working. Appears when: • Meter is turned on for Setup and Memory Review. • Test strip is inserted into the meter. No action required. If all segments are not displayed on meter, call A.Menarini Diagnostics for assistance: (UK) 0800 243667 (Ireland) 1800 709903. Blood Drop Symbol: meter is ready to accept blood. Apply a blood sample to the test strip. Refer to how to run a blood sample. Countdown screen: 4-second countdown as meter calculates the blood glucose test result. No action required. A blood glucose test result in mmol/L. No action required. Result is automatically stored into memory. GlucoMen® LX - 38973 - 09/07 UK 39 DISPLAYS, MEANINGS, ACTIONS Display 40 What it Means� What to Do Your blood glucose reading is higher than 33.3 mmol/L. You may have high blood sugar. Retest your blood glucose immediately. If your reading is still HI, you should treat yourself as advised by your healthcare professional and/or contact your healthcare professional immediately. Your blood glucose reading is lower than 1.1 mmol/L. You may have low blood sugar. Retest your blood glucose immediately. If your reading is still LO, treat as prescribed by your healthcare professional and/or contact your healthcare professional immediately. A blood glucose test result in mmol/L stored in the meter’s memory with date/ time. No action required. End of Setup or Memory Review. No action required. GlucoMen® LX - 38973 - 09/07 DISPLAYS, MEANINGS, ACTIONS Display What it Means� What to Do The average of all blood glucose test results taken in the last 24 hours. No action required. No test results in the last 24 hours. No action required. The average of all blood glucose test results taken in the last 7 days. No action required. No test results in the last 7 days. No action required. The average of all blood glucose test results taken in the last 14 days. No action required. GlucoMen® LX - 38973 - 09/07 UK 41 DISPLAYS, MEANINGS, ACTIONS Display 42 DISPLAYS, MEANINGS, ACTIONS What it Means What to Do What it Means� What to Do No test results in the last 14 days. No action required. A control solution test result. No action required. The average of all blood glucose test results taken in the last 30 days. No action required. A marked sample test result. No action required. No test results in the last 30 days. No action required. Software Error. Call A. Menarini Diagnostics for assistance: (UK) 0800 243667 (Ireland) 1800 709903. There are NO results in memory. No action required. System Hardware Error. Call A. Menarini Diagnostics for assistance: (UK) 0800 243667 (Ireland) 1800 709903. Battery is getting low, but you can still perform a test. Battery will appear on all screens. We suggest that you replace the battery immediately. There is only enough power to perform 20 tests. Operating temperature. Meter is outside the required testing temperature range of 5° to 45°C (41° to 113°F). Move the meter to a warmer or cooler area as appropriate and wait a few minutes. GlucoMen® LX - 38973 - 09/07 Display GlucoMen® LX - 38973 - 09/07 UK 43 DISPLAYS, MEANINGS, ACTIONS Display Meter does not turn on after inserting a test strip. 44 DISPLAYS, MEANINGS, ACTIONS What it Means� What to Do Display What it Means What to Do Used Strip Error: Used or damaged strip. Retest with a new strip. Blood Sample Error. Incorrect application of blood sample or control solution onto the test strip, or the test strip may be damaged. Review your sampling technique. The blood sample quantity may be incorrect or hematocrit may be out of the allowed range for glucose measurement. Meter does not begin test countdown after applying a blood sample. •Not enough blood sample. •Sample applied after meter automatically turned off. •Meter may not be working properly. •Test strip may be damaged. Repeat the test with a new test strip again. After 3 attempts, call A. Menarini Diagnostics for assistance: (UK) 0800 243667 (Ireland) 1800 709903. No test results in the last 30 days. No action required. •Battery is dead. •Battery is installed incorrectly or there is no battery in the meter. •Test strip is inserted upside down or not completely in. Replace the battery. Check that the battery is correctly installed with the “+” sign facing you. Insert the test strip correctly with the GlucoMen name and white tip facing up and out. Call A. Menarini Diagnostics for assistance: (UK) 0800 243667 - (Ireland) 1800 709903. GlucoMen® LX - 38973 - 09/07 GlucoMen® LX - 38973 - 09/07 UK 45 APPENDIX Specifications Test Measured Glucose Methodology Glucose Test Results Sample type Glucose Test range Length of Test Test Strip Volumes Battery Life (nominal) Low Battery Life Data Output Port Operating Ranges: Temperature Operating Ranges: Humidity Weight Size Meter data storage APPENDIX Limitations Blood Glucose Glucose oxidase biosensor mmol/L (Plasma values) Fresh Capillary Whole Blood 1.1 to 33.3 mmol/L 4 seconds 0.3 μL 1000 Tests About 20 Tests Serial, USB 5° to 45°C (41° to 113°F) 10% to 90% relative humidity 75 g 96 x 51 x 20 mm 400 Results UK The GlucoMen LX Sensor test strips give accurate results when the following limitations are observed: • The test strips should not be used to diagnose diabetes or to test newborns. • Each test strip is for single use only. Do not reuse. Use a new sterile GlucoMen® LX Sensor Test Strip each time you test. • Your test strips are for personal use only. DO NOT share with others. • Use only fresh capillary whole blood. DO NOT USE SERUM OR PLASMA. • There is no effect on blood glucose values for altitudes up to 3000 meters (10000 feet ) above sea level. • Refer to the User Manual for operating temperature range for the meter. • Extremes in humidity (higher than 90% and lower than 10%) may affect results. • The GlucoMen® LX Sensor test strips are calibrated against plasma. • The anticoagulant sodium heparin may be used. EDTA is not recommended for use with GlucoMen® LX Sensor test strips. • Interferences from elevated levels of Acetaminophen, Tolazamide, Uric Acid, Bilirubin, Ephedrine, and Methyldopa may affect results. • Test results may be falsely low if the patient is severely dehydrated. • Critically ill patients should not be tested with home blood glucose meters. ® Chemistry Measurement Glucose test imprecision 46 Refer to GlucoMen® LX Sensor insert GlucoMen® LX - 38973 - 09/07 GlucoMen® LX - 38973 - 09/07 47 APPENDIX Instructional Notes 1.If in setup mode when the test strip is inserted, the meter saves all the values entered up to that point and immediately switches to test mode. Upon exiting test mode the meter screen goes blank and does not return to setup mode. 2.If in Data Review mode when the test strip is inserted, the meter immediately switches to test mode. Upon exiting test mode the meter screen goes blank and does not return to Data review mode. 3.Battery low icon is displayed in every mode except setup. 4.Once battery level goes below the threshold that triggers the “low battery” warning, it continues to give the warning until the meter becomes unusable due to low battery. 5.The meter responds to the pressing and the holding of keys: Left/Right buttons -The Left/Right button moves forward/backward through a series of stored test result screens or increments of value. -Hold down the Left/Right button to speed up screen change process. MODE button -When the MODE button is pressed for less than 1.5 seconds to advance to the next function, the meter advances to the next screen immediately when the button is pressed. -While the meter is in sleep mode (OFF), pressing the MODE button for less than 1.5 seconds wakes up the meter and enters data review mode. -While the meter is in sleep mode (OFF), pressing the MODE button for longer than 3 seconds wakes up the meter and enters setup mode. 48 GlucoMen® LX - 38973 - 09/07 APPENDIX -While the meter is awake (ON), pressing the MODE button for longer than 1.5 seconds manually turns off the meter (sleep mode). 6.With no activity, time-out occurs after the following times: -1 minute for all screens. -2 minutes during test mode. -3 minutes when download connector inserted. GlucoMen® LX - 38973 - 09/07 UK 49 WARRANTY Your GlucoMen® LX blood glucose meter is warranted to be free of material and workmanship defects for life. If at any time your GlucoMen® LX blood glucose meter does not work for any reason (other than as described below), it will be replaced with a new meter, or a substantial equivalent, free of charge. UK Limitations on Warranty This warranty is subject to the following exceptions and limitations: 1.This warranty is applicable only to the original purchaser. 2.This warranty does not apply to units which malfunction or are damaged due to obvious abuse, misuse, alteration, neglect, unauthorized maintenance or failure to operate meter in accordance with instructions. 3.We have no knowledge of the performance of the GlucoMen® LX blood glucose meter when used with test strips other than GlucoMen® LX Sensor test strips. Therefore, we make no warranty as to the performance of the GlucoMen® LX blood glucose meter when used with any test strips other than GlucoMen® LX Sensor test strips. 4.There is no other express warranty for this product. The option of replacement, described above, is the warrantor’s only obligation under this warranty. For warranty service The original purchaser must contact A. Menarini Diagnostics: (UK) 0800 243667 - (Ireland) 1800 709903. Privacy Policy A. Menarini Diagnostics is committed to using your personal information responsibly and in compliance with the law. You have our pledge that we will not share or sell your personal information with marketers or third-parties. The information you voluntarily share with us will be used to help us serve you better in the future. 50 GlucoMen® LX - 38973 - 09/07 GlucoMen® LX - 38973 - 09/07 51