1
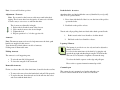
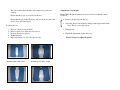
Introduction
We thank you very much for purchasing our product and hope that
the following notes will assist you in obtaining maximum benefit
from it.
The chair is designed to be used as a self-propelling, attendant
operated or a transit chair. All the parts being interchangeable to
facilitate simple change of operation should this be required. .
However the chair is only supplied in one configuration, depending
on your initial assessment, with the additional parts being
purchased separately.
Before each use inspect the chair to ensure it is free from defects.
Ensure the seat is set correctly for the user, refer to the Remove /
adjust flexi-seat section of this manual.
We advise that vulnerable service users are not left unattended to
use this equipment.
Model Type
Ref:
7700
7710
7712
Description
Osprey Options Stainless Steel Shower/Sani Chair – Self
Propelled
Osprey Options Stainless Steel Shower/Sani Chair –
Attendant Operated
Osprey Options Stainless Steel Shower/Sani Chair –
Transit
Safe Working Load (SWL)
The standard range / model types are tested to a SWL of 150Kgs (330lbs).
Please note that “special” custom built chairs may vary according to
individual service user requirements.
The SWL is marked on each chair as part of the product labelling
information.
Warranty
We are pleased to offer a standard warranty of 5 years on stainless steel
frames (with 2 years on all other components) from the date of purchase. It
is subject to the following general terms and conditions:
1. Should problems be experienced with any workmanship or
materials within the first 5 years on the stainless steel frame (and
the first 2 years on all other components) please contact your point
of purchase or Aidservice Ltd within normal working hours 9am –
5pm Monday to Friday)
2. Please quote the serial number of the product (where applicable),
which will be found on the front cover on this user guide or on the
product itself.
3. The product will be repaired free of charge provided that it has
been used in accordance with the guidelines and recommendations
set out in this user guide, and serviced and / or maintained by
Aidservice Ltd or a competent person(s) authorised by Aidservice
Ltd.
4. The warranty does not cover replacements; adjustments of repairs
arising from a
consequence of normal wear & tear, wilful damage of accidental
damage,
misuse, neglect or any cause, which is beyond the manufacturers
control.
5. The warranty also does not cover modifications or repairs made to
the product by unauthorised persons or the use of unauthorised
parts or any failure or malfunction due to incorrect and / or poor
workmanship on the part of any person, other than Aidservice Ltd
or a competent person(s) authorised by Aidservice Ltd.
6. This warranty does not affect your statutory consumer rights.
Adjustment – Transit wheels
Cleaning / General maintenance
To change / adjust the size, height or position of the transit wheels, a
19mm spanner, socket and ratchet are required.
1. Remove the covers from the axel bolts and wheel centre.
2. Remove the locking nut & washer from the axel bolt.
3. Select the position for the wheel and insert the axel bolt through
the mounting plate.
4. Re-fit the washer and locking nut (locking nut should be replaced
by a new nut)
1. Clean seat, back and frame with a mild soap solution / cleaning
agent and a damp cloth.
2. “Towel” dry after use.
3. Regularly inspect all parts for defects
4. Keep castors / wheels free from lime-scale, soap, hairs and fibres.
In Multi-user situations, please be aware of any infection control
policies that may be in force or appropriate.
The chair may be fitted with one or more of the following options:
Repeat the processes for the opposite wheel, Ensuring that the axel bolt in
positioned in the same hole on the mounting plate. You will need to adjust
the front castors to match the rear wheels as explained in section –
Adjustment – seat height.
For note on use, please see appropriate section of this manual.
Servicing
We recommend that your shower/sani chair be serviced annually. All
stainless steel models carry a 5-year warranty on the frame (2 years on all
other components) and is subject to the product being serviced annually by
Aidservice Ltd or competent person(s) authorised by Aidservice Ltd. Full
Warranty details are shown on the back of this user guide.
Service & Maintenance record
Date
a) Adjustable footrests
b) Foldaway arms
c) Adjustable height
d) Braked wheels / castors e) Lapstrap / harness f) Commode pan
g) Removable FLEXI-SEAT
Nature of call
Reported
problem
Product Labelling
The product label shall show the following information, as a minimum:
Description of the product
Serial Number of the Product
Safe working load
Removal / Swing away Footrest
Parts replaced
Engineer
Signature
The footrest is designed to be swing away, detachable by a simple
single-handed operation.
The footrest will automatically lock in place.
Squeeze the footrest mountings together and swing away
Lift up to detach
Re-fitting to chair, locate the footrest onto the pins on the mounting plates
and swing into the locked position.
Note: footrest will lock into position.
Braked wheels & castors
Adjustment – Footrests
Attendant chairs are fitted with brake castors [identified by a red pedal].
This is a foot-operated brake.
Note: Do not stand on the footrests as this may result in the chair
tipping. The footrests have been designed to be removed or fold the
footrests away to ease access to and from the chair.
The footrests are adjustable in length.
1. Release the bolt at the bottom of the footrest.
2. Slide out the footrest to the desired length.
3. Tighten the bolt.
4. Repeat operations 1 to 3 for the opposite side.
1. Press down with the ball of the foot onto the front of the pedal to
operate the brake.
2. Push back on the pedal to release.
Transit and self-propelling chairs are fitted with a hand-operated brake.
1.
Push forward on the lever / handle to lock the wheels
2.
Pull back on the lever / handle to release.
Armrests
Note: The armrests must not be used to help manoeuvre the chair, push
handles are supplied for this reason.
Your chair may be fitted with two models of armrests;
Folding arms or Removable arms.
Folding Armrests
The armrest is a self supporting arm,.
•
•
To raise the arm lift / fold upwards
To lower the arm pull / fold downwards
Lapstrap / Harness
The lapstrap is provide in one size only and can be adjusted to
suit the service user.
It is fixed to the main frame of the chair by looping the end
around the up-right and threading it trough a Tri-slide buckle.
This can also be adjusted to lengthen or shorten the strap.
To release the buckle squeeze on the edge and pull apart.
Please refer to separate instruction manual provided.
Removable Armrests.
Commode pan
Fit into a socket on the side of the chair frame, located below the seat line.
• To remove the arm, release the hand wheel and pull / lift upwards.
• To replace the arm, Insert the tube end of the arm into the socket
and secure with the hand wheel.
The commode pan is mounted on a bracket under the seat.
It can be removed from the front or the rear of the chair.
Adjustment – Self Propelling Wheels
Seat Type, Removal, Cleaning, Adjustment and Re-fitting.
To change / adjust the size, height or position of the self-propelling
wheels, a 19mm spanner, socket and ratchet are required.
Your chair is available with a choice of seat configurations and has been
provided with the seat type and style agreed during the initial assessment.
1. Remove the covers from the axel bolts and wheel centre.
2. Remove the locking nut & washer from the axel bolt.
3. Select the position for the wheel and insert the axel bolt through
the mounting plate.
4. Re-fit the washer and locking nut (locking nut should be replaced
by a new nut)
Repeat the processes for the opposite wheel, Ensuring that the axel bolt in
positioned in the same hole on the mounting plate. You will need to adjust
the front castors to match the rear wheels as explained in section –
Adjustment – seat height.
Choice of seats are.
Gap Fronted / Horseshoe
Toilet / Aperture seat
Full seat – no hole used for showering only.
Flexi seat – two part split seat.
Removable / Adjustable FLEXI-SEAT
The brakes will also need adjustment and a suitably sized allen key
wrench will be required.
1. Release the allen key bolt on the brake-mounting block.
2. With the brake in the fully released position slide the brake to the
required position (leaving a gap of approx. 15mm between the
bake and the tyre)
3. Re-tighten the allen key bolt
4. Repeat operations 1 to 3 for the opposite side.
The rubber moulded FLEXI-SEAT prevents water ingress,
minimising the risk of cross contamination.
The seat is secured by 4 bolts on the base of the seat and it can be
removed for easy cleaning.
When removing the seat for maintenance or cleaning we suggest
that you note the dimensions of the aperture and gap at the front of
the chair to ensure it is re-fitted in the correct position.
Width of aperture
Width of Gap
The seat is adjustable in width to allow improved posture and
comfort.
Ensure that the seat is set correctly for the user.
Ensure that the gap in the “Flexiseat” will not allow any part of the
users body to become trapped.
Please Note: Height adjustment can only be achieved when the chair is
not in use.
1. Remove the pin clip from the leg.
2. Select the desired seat height by sliding out the leg from the frame.
Note: This is a telescopic action.
To adjust the seat:
1.
2.
3.
4.
5.
Adjustment – Seat height.
Remove commode pan [if fitted]
Release each bolt, to allow the seat to move
Position the seat as required.
Tighten the bolt.
Repeat operations 1 to 4 for the opposite side.
Minimum Gap at front width – 25mm
Maximum gap at front width – 115mm
Minimum aperture width – 75mm
Maximum aperture width – 165mm
3. Refit pin clip.
4. Repeat the adjustment for the other legs.
Ensure all legs are adjusted equally.
Returning Products
In order to minimise infection risk, the Medicines & Healthcare products
Regulatory Agency (MHRA) suggests that items being returned to a
manufacturer should be decontaminated appropriately before return. (See
MHRA DB 2003 (OX)). A certificate of decontamination may therefore
be required before goods can be returned. Please contact the company or
your supplier for further details.
Aidservice Limited is committed to a policy of continued product
development, consequently we reserve the right to change or alter any
specifications without prior notice.
USER GUIDE & PRODUCT
INFORMATION FOR THE STAINLESS
STEEL OSPREY OPTIONS SHOWER/
SANI CHAIR
Aidservice Limited
Bradley Hall Trading Estate, Standish, Wigan, WN6 OXQ
Tel: 01257 425538 Fax: 01257 472181
E-mail: [email protected]
www.disability equipment.com
MODEL NO:
TYPE:
SERIAL NO: