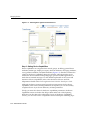
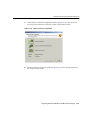
1
Oracle® Application Server Wireless Administrator’s Guide 10g (9.0.4) Part No. B10188-01 September 2003 Oracle Application Server Wireless Administrator’s Guide, 10g (9.0.4) Part No. B10188-01 Copyright © 2003 Oracle Corporation. All rights reserved. The Programs (which include both the software and documentation) contain proprietary information of Oracle Corporation; they are provided under a license agreement containing restrictions on use and disclosure and are also protected by copyright, patent and other intellectual and industrial property laws. Reverse engineering, disassembly or decompilation of the Programs, except to the extent required to obtain interoperability with other independently created software or as specified by law, is prohibited. The information contained in this document is subject to change without notice. If you find any problems in the documentation, please report them to us in writing. Oracle Corporation does not warrant that this document is error-free. Except as may be expressly permitted in your license agreement for these Programs, no part of these Programs may be reproduced or transmitted in any form or by any means, electronic or mechanical, for any purpose, without the express written permission of Oracle Corporation. If the Programs are delivered to the U.S. Government or anyone licensing or using the programs on behalf of the U.S. Government, the following notice is applicable: Restricted Rights Notice Programs delivered subject to the DOD FAR Supplement are "commercial computer software" and use, duplication, and disclosure of the Programs, including documentation, shall be subject to the licensing restrictions set forth in the applicable Oracle license agreement. Otherwise, Programs delivered subject to the Federal Acquisition Regulations are "restricted computer software" and use, duplication, and disclosure of the Programs shall be subject to the restrictions in FAR 52.227-19, Commercial Computer Software - Restricted Rights (June, 1987). Oracle Corporation, 500 Oracle Parkway, Redwood City, CA 94065. The Programs are not intended for use in any nuclear, aviation, mass transit, medical, or other inherently dangerous applications. It shall be the licensee's responsibility to take all appropriate fail-safe, backup, redundancy, and other measures to ensure the safe use of such applications if the Programs are used for such purposes, and Oracle Corporation disclaims liability for any damages caused by such use of the Programs. Oracle is a registered trademark, and Oracle9i, PL/SQL, OracleMobile and SQL*Plus are trademarks or registered trademarks of Oracle Corporation. Other names may be trademarks of their respective owners. Contents Send Us Your Comments .................................................................................................................. xiii Preface........................................................................................................................................................... xv Documentation Accessibility ............................................................................................................ More Information................................................................................................................................ Part I 1 Overview Introducing Oracle Application Server Wireless 1.1 1.2 1.3 1.4 2 xvii xvii Overview ................................................................................................................................ Using the Wireless Tools ...................................................................................................... Wireless Module Applications ............................................................................................ Using This Guide................................................................................................................... 1-1 1-3 1-7 1-7 Verifying the Wireless Installation 2.1 2.1.1 2.2 2.3 Part II Starting the Oracle Application Server Wireless Server .................................................. Configuring the Wireless Server.................................................................................. Accessing the Wireless Customization Portal................................................................... Accessing the Wireless Tools............................................................................................... 2-1 2-3 2-4 2-5 System Administration iii 3 Managing the Wireless Server 3.1 3.1.1 3.2 3.2.1 3.2.2 3.3 3.3.1 3.3.2 3.3.3 3.3.4 3.4 3.5 3.6 3.6.1 3.6.2 3.6.3 4 3-1 3-2 3-3 3-3 3-4 3-5 3-7 3-9 3-11 3-14 3-20 3-21 3-26 3-27 3-37 3-54 Managing Users 4.1 4.1.1 4.1.2 4.2 4.3 4.3.1 4.4 4.4.1 4.5 4.5.1 4.5.2 4.5.3 4.6 4.7 4.8 4.8.1 iv Overview................................................................................................................................. Refreshing the System Manager Screens .................................................................... Logging Into the System Manager ...................................................................................... Accessing the System Manager in Standalone Mode ............................................... Accessing the System Manager through OEM .......................................................... The Home Page...................................................................................................................... Basic Site Configuration ................................................................................................ System Logging .............................................................................................................. Configuring the URLs of the Current Wireless Instance........................................ Process Management ................................................................................................... Wireless Server Performance ............................................................................................. Site Performance .................................................................................................................. Site Administration ............................................................................................................. General Configuration ................................................................................................. Component Configuration.......................................................................................... Utilities........................................................................................................................... Overview................................................................................................................................. Assigning User Roles ..................................................................................................... Enabling Users to Access the Wireless Tools ............................................................. Logging into the User Manager........................................................................................... Using the User Manager....................................................................................................... User Overview ................................................................................................................ Searching for Users................................................................................................................ Finding Users with Quick Search ................................................................................ Creating Users........................................................................................................................ Editing User Profiles .................................................................................................... Resetting the Password ............................................................................................... Deleting a User ............................................................................................................. Viewing Application Links ................................................................................................ Viewing Devices .................................................................................................................. Viewing Logs........................................................................................................................ Selecting a Time Frame................................................................................................ 4-1 4-2 4-5 4-5 4-6 4-6 4-7 4-8 4-9 4-13 4-14 4-15 4-15 4-16 4-17 4-20 5 Managing Content 5.1 5.2 5.3 5.3.1 5.3.2 5.3.3 5.3.4 5.3.5 5.3.6 5.3.7 5.3.8 5.3.9 5.3.10 5.4 5.4.1 5.4.2 5.5 5.5.1 5.5.2 5.6 5.6.1 5.6.2 5.6.3 5.7 5.7.1 5.7.2 5.7.3 5.7.4 5.7.5 5.7.6 5.7.7 5.7.8 5.7.9 Overview of the Content Manager ..................................................................................... Accessing the Content Manager.......................................................................................... Managing Application Links ............................................................................................... Searching for Repository Objects................................................................................. Creating a Folder............................................................................................................ Editing A Folder ........................................................................................................... Creating an Application Link..................................................................................... Editing an Application Link ....................................................................................... Testing an Application Link ....................................................................................... Debugging an Application Link ................................................................................ Creating User Bookmarks .......................................................................................... Editing a Bookmark ..................................................................................................... Moving Folders, Application Links, and Bookmarks............................................. Defining Access Control..................................................................................................... Managing a User Group.............................................................................................. Managing the Contents of a User Group.................................................................. Creating User Home Root Folders.................................................................................... Editing a User Home Root Folder ............................................................................. Deleting a User Home Root Folder ........................................................................... Categorizing Content.......................................................................................................... Creating an Application Link Category.................................................................... Assigning Applications to an Application Link Category..................................... Adding SMS Routing Information ............................................................................ Managing Alerts (Deprecated) .......................................................................................... Searching for Topics and Alerts (Deprecated) ......................................................... Creating an Alert (Deprecated) .................................................................................. Editing an Alert ............................................................................................................ Deleting Topics and Alerts ......................................................................................... Moving Alerts ............................................................................................................... Creating a Topic ........................................................................................................... Editing a Topic.............................................................................................................. Assigning Alerts and Topics to a User Group ......................................................... Removing Alerts and Topics from User Groups ..................................................... 5-1 5-3 5-4 5-5 5-6 5-10 5-10 5-15 5-16 5-16 5-17 5-19 5-19 5-20 5-20 5-21 5-22 5-25 5-25 5-25 5-26 5-26 5-27 5-28 5-28 5-30 5-32 5-32 5-32 5-33 5-33 5-33 5-33 v 6 Administering Mobile Studio 6.1 6.2 6.3 6.4 6.4.1 6.4.2 6.4.3 6.4.4 6.4.5 6.4.6 6.5 6.5.1 6.5.2 6.5.3 7 6-1 6-2 6-3 6-4 6-5 6-5 6-5 6-5 6-5 6-7 6-8 6-8 6-10 6-10 Managing Foundation Services 7.1 7.2 7.3 7.3.1 7.3.2 7.3.3 7.4 7.4.1 7.4.2 7.4.3 7.5 7.5.1 7.5.2 7.5.3 7.5.4 7.6 7.7 7.7.1 vi Overview................................................................................................................................. Configuring Mobile Studio .................................................................................................. Accessing Mobile Studio Administration .......................................................................... Managing Locales.................................................................................................................. Finding a Locale.............................................................................................................. Adding a Locale.............................................................................................................. Editing a Locale .............................................................................................................. Deleting a Locale ............................................................................................................ Enabling the Default Locales ........................................................................................ Resolving Locales ........................................................................................................... Managing Sample Services.................................................................................................. Adding a Sample Application ...................................................................................... Editing a Sample Service ............................................................................................. Deleting a Sample Service ........................................................................................... Overview................................................................................................................................. Logging into the Foundation Manager .............................................................................. Managing Devices ................................................................................................................. Searching for a Device ................................................................................................... Creating a Device ........................................................................................................... Cloning a Device........................................................................................................... Managing Transformers ..................................................................................................... Creating a New Transformer...................................................................................... Editing a Transformer.................................................................................................. Deleting a Transformer................................................................................................ Managing Adapters............................................................................................................. Creating an Adapter .................................................................................................... Editing an Adapter....................................................................................................... Deleting an Adapter..................................................................................................... Setting Adapter Parameters........................................................................................ Managing Regions............................................................................................................... Managing Digital Rights Policies ...................................................................................... Creating a Digital Rights Policy ................................................................................. 7-1 7-3 7-4 7-5 7-5 7-11 7-12 7-12 7-13 7-14 7-14 7-14 7-15 7-15 7-15 7-24 7-25 7-26 7.7.2 7.7.3 7.7.4 7.8 7.8.1 Part III 8 Editing a Digital Rights Policy ................................................................................... Deleting a Digital Rights Policy ................................................................................. Enabling or Disabling a Digital Rights Policy.......................................................... Managing API Scan Policies .............................................................................................. Creating an API Scan Policy ....................................................................................... 7-29 7-30 7-30 7-30 7-30 Configuration and Integration Configuring the Out-of-the-Box Applications 8.1 8.2 8.2.1 8.3 8.3.1 8.3.2 8.3.3 8.3.4 8.3.5 8.3.6 8.3.7 8.3.8 8.3.9 8.3.10 8.4 8.4.1 8.4.2 8.4.3 8.4.4 8.5 8.5.1 8.5.2 8.5.3 8.5.4 Configuring the Voice and Wireless Applications Using the Content Manager......... 8-1 Wireless Application Configuration Parameters.............................................................. 8-2 Applications Setup......................................................................................................... 8-3 PIM and Mail ......................................................................................................................... 8-7 Address Book.................................................................................................................. 8-7 Calendar ........................................................................................................................ 8-19 Directory........................................................................................................................ 8-25 Fax .................................................................................................................................. 8-32 Oracle Internet File System......................................................................................... 8-39 Instant Messaging ........................................................................................................ 8-44 Mail................................................................................................................................. 8-47 Short Messaging ........................................................................................................... 8-53 Tasks............................................................................................................................... 8-57 Connecting PIM Applications to Non-Oracle Servers............................................ 8-59 Location ................................................................................................................................ 8-62 Biz Directory ................................................................................................................. 8-62 Driving Directions........................................................................................................ 8-65 Location Picker ............................................................................................................. 8-68 Maps............................................................................................................................... 8-73 m-Commerce Applications ............................................................................................... 8-75 Form Filler ..................................................................................................................... 8-75 Payment Application ................................................................................................... 8-84 Wallet Application ....................................................................................................... 8-90 Transcoder................................................................................................................... 8-102 vii 9 Wireless Gateway Configuration 9.1 9.1.1 9.1.2 9.1.3 9.2 9.2.1 9.2.2 9.2.3 9.2.4 9.3 9.3.1 9.3.2 9.4 9.4.1 9.4.2 9.4.3 10 9-1 9-1 9-2 9-4 9-6 9-6 9-6 9-8 9-13 9-19 9-20 9-20 9-21 9-21 9-21 9-22 Wireless Security 10.1 10.1.1 10.1.2 10.2 10.2.1 10.2.2 10.2.3 10.2.4 10.2.5 10.3 10.4 10.4.1 10.4.2 10.4.3 viii Configuring Wireless for Browser-Based Applications................................................... Configuring Wireless for PocketPCs ........................................................................... Configuring Wireless for PALM .................................................................................. Configuring Wireless for WAP ................................................................................... Configuring Wireless for Voice Applications ................................................................... Prerequisites .................................................................................................................... Configuring and Testing Voice-Enabled Applications............................................. Provisioning Voice Access ............................................................................................ Testing the Voice Portal............................................................................................... Configuring Wireless for Async-Enabled Applications ................................................ Configuring Email-based (Two-Way Pager) Access ............................................... Enabling SMS Phone Access ....................................................................................... Configuring Wireless for Notifications ............................................................................ Configuring Wireless for Messaging......................................................................... Oracle-hosted Messaging Delivery............................................................................ Non Oracle-hosted Messaging Delivery ................................................................... Overview............................................................................................................................... Wireless Security and Wired Security: A Comparison ........................................... Classes of Users and Their Privileges........................................................................ Resources Protected by Oracle Application Server Wireless ........................................ Authorization and Access Enforcement ................................................................... Authentication Through User Names and Passwords ........................................... Device-Based Authentication Mechanisms .............................................................. How Oracle Application Server Wireless Leverages AS Security Services ....... Component Extensibility and Security ................................................................... Configuring the Security Infrastructure to Support Wireless..................................... Installing and Configuring Oracle Application Server Wireless Security ................ Communication Data Privacy .................................................................................. Data Privacy Deployment Solutions ....................................................................... Non-Repudiation........................................................................................................ 10-1 10-3 10-5 10-6 10-6 10-9 10-9 10-10 10-11 10-11 10-13 10-13 10-13 10-21 11 Mobile Single Sign-On 11.1 11.1.1 11.2 11.2.1 11.2.2 11.2.3 11.2.4 11.3 11.3.1 11.3.2 11.3.3 11.4 12 Overview .............................................................................................................................. Oracle Application Server Wireless Concepts and Architecture .......................... Wireless Single Sign-On ..................................................................................................... Authenticating Through Wireless and Voice Portal ............................................... Authenticating by Requesting a Partner Application............................................. Authenticating by mod_osso...................................................................................... Authenticating through Voice.................................................................................... Wireless Single Sign-Off ..................................................................................................... Logging Out from Oracle Application Server Wireless ......................................... Logging Out from a Partner Application ................................................................. Logging Out from a Web-based Oracle Application Server Application............ The Wireless Change Password Page............................................................................... 11-1 11-2 11-2 11-3 11-5 11-7 11-8 11-8 11-8 11-9 11-9 11-9 Activity Logging 12.1 Activity Logging Overview ............................................................................................... 12-1 12.1.1 Overview of Activity Logger Internals ..................................................................... 12-1 12.1.2 Activity Log Table Description ................................................................................. 12-2 13 Optimizing Oracle Application Server Wireless 13.1 13.2 13.2.1 13.3 13.3.1 13.4 13.5 13.5.1 13.5.2 13.5.3 13.5.4 13.5.5 13.5.6 13.6 Overview .............................................................................................................................. Transport Performance Monitoring.................................................................................. Factors Affecting Transport Performance ................................................................ Optimizing the Async Listener Performance.................................................................. Tuning the Performance of the Async Listener ....................................................... Optimizing Data Feeder Performance ............................................................................. Optimizing the Oracle HTTP Server ................................................................................ Max Clients ................................................................................................................... MaxRequestsPerChild ................................................................................................. MaxSpareServers.......................................................................................................... MinSpareServers ........................................................................................................ Start Servers ................................................................................................................ Timeout........................................................................................................................ Optimizing opmn .............................................................................................................. 13-1 13-2 13-4 13-6 13-7 13-8 13-9 13-9 13-9 13-9 13-10 13-10 13-10 13-10 ix 13.7 13.8 13.9 13.10 14 Overview............................................................................................................................... Clustering Architecture ...................................................................................................... Clustering Configuration ................................................................................................... Configuring Oracle Http Server (OHS)..................................................................... Configuring Oracle Process Management and Notification (OPMN).................. Configuring OC4J......................................................................................................... Configuring Wireless for High-Availability Deployment............................................. 14-1 14-1 14-2 14-2 14-2 14-3 14-4 Globalization 15.1 15.2 15.2.1 15.2.2 15.2.3 15.2.4 15.3 15.3.1 15.4 15.5 16 13-10 13-10 13-11 13-13 Load Balancing and Failover 14.1 14.2 14.3 14.3.1 14.3.2 14.3.3 14.4 15 Optimizing Database Connections ................................................................................. Optimizing WebCache...................................................................................................... Optimizing JVM Performance ......................................................................................... Tuning Operating System Performance......................................................................... Overview............................................................................................................................... Determining a User’s Locale .............................................................................................. After Login .................................................................................................................... Before Login .................................................................................................................. Setting the Locale for a User Profile .......................................................................... Setting the Site Locale .................................................................................................. Determining the Encoding of a Device ............................................................................ HttpAdapter – Based Service...................................................................................... Languages Available for On-Line Help ........................................................................... Driver Encoding................................................................................................................... 15-1 15-1 15-2 15-2 15-3 15-3 15-4 15-5 15-6 15-6 Integrating Wireless with Other Components 16.1 Overview............................................................................................................................... 16-1 16.1.1 Repository Synchronization after User Authentication ......................................... 16-2 16.1.2 PL/SQL-Based Asynchronous Synchronization ..................................................... 16-4 16.1.3 Oracle Application Server Wireless Programmatic Model API Interface............ 16-5 16.1.4 Wireless User Management Integrated with DAS .................................................. 16-5 16.2 Integrating Wireless with WebCache ............................................................................... 16-5 16.2.1 Configuring Caching for Wireless ............................................................................. 16-8 x 16.3 Integrating Wireless with Oracle Application Server Portal ...................................... 16.3.1 OracleAS Portal as a Wireless Application ............................................................ 16.3.2 Developing Wireless Portlets ................................................................................... 16.3.3 Oracle Portal, Wireless and Single Sign-On (SSO) ................................................ 16.3.4 Portlets for Applications Deployed on Wireless Server ....................................... 16.4 Notification Engine Integration....................................................................................... 16.4.1 Integrating Wireless with Oracle Workflow .......................................................... 17 16-16 16-16 16-17 16-19 16-19 16-20 16-22 Integrating Wireless Notification with Microsoft Exchange 17.1 17.2 17.3 17.3.1 17.3.2 17.3.3 17.4 17.4.1 17.4.2 17.4.3 Overview .............................................................................................................................. Wireless Notification Architecture ................................................................................... Configuring the Microsoft Exchange 2000 Server .......................................................... Configuration Overview ............................................................................................. Creating an Exchange Notification Account.......................................................... Configuring the Notification Setting ASP .............................................................. Exchange Notification Administration in Oracle Application Server Wireless....... Site-Level Configuration ........................................................................................... Configuring the Microsoft Exchange Notification Event Settings...................... Configuration and Running Notification Related Processes............................... 17-1 17-1 17-2 17-2 17-13 17-13 17-18 17-19 17-19 17-21 Glossary Index xi xii Send Us Your Comments Oracle Application Server Wireless Administrator’s Guide, 10g (9.0.4) Part No. B10188-01 Oracle Corporation welcomes your comments and suggestions on the quality and usefulness of this document. Your input is an important part of the information used for revision. ■ ■ ■ ■ ■ Did you find any errors? Is the information clearly presented? Do you need more information? If so, where? Are the examples correct? Do you need more examples? What features did you like most? If you find any errors or have any other suggestions for improvement, please indicate the document title and part number, and the chapter, section, and page number (if available). You can send comments to us in the following ways: ■ ■ Electronic mail: [email protected] Postal service: Oracle Corporation Oracle Mobile and Wireless Products 500 Oracle Parkway, Mailstop 4OP6 Redwood Shores, California 94065 USA If you would like a reply, please give your name, address, telephone number, and (optionally) electronic mail address. If you have problems with the software, please contact your local Oracle Support Services. xiii xiv Preface The Administrator’s Guide discusses how you can use Oracle Application Server Wireless to develop and deliver mobile applications. The guide includes these chapters: ■ Chapter 1, "Introducing Oracle Application Server Wireless" Describes the Oracle Application Server Wireless Architecture, developement tools, and the Wireless users. ■ Chapter 2, "Verifying the Wireless Installation" Describes how to access the Wireless development and administrations tools. ■ Chapter 3, "Managing the Wireless Server" Provides an overview of the System Manager and of Wireless system management. ■ Chapter 4, "Managing Users" Provides information on using the User Manager tool to create users and provide help desk support to Wireless users. ■ Chapter 5, "Managing Content" Describes how to use the Content Manager to publish applications and create user groups. ■ Chapter 6, "Administering Mobile Studio" Describes how to configure the Mobile Studio and use its administrative functions to manage locales and applications. ■ Chapter 7, "Managing Foundation Services" xv Describes how to use the Foundation Manager to create such objects as adapters, transformers, digital rights management polices, and API scan policies. ■ Chapter 8, "Configuring the Out-of-the-Box Applications" Describes how to configure the input parameters for Wireless and Voice applications using the Content Manager. ■ Chapter 9, "Wireless Gateway Configuration" Describes how to configure Wireless for voice and messaging communications for Async, messaging, and voice. ■ Chapter 10, "Wireless Security" Describes the principles of security in Wireless. ■ Chapter 11, "Mobile Single Sign-On" Describes how mobile users authenticate when signing into Wireless ■ Chapter 12, "Activity Logging" Describes the system logging. ■ Chapter 13, "Optimizing Oracle Application Server Wireless" Describes how to tune Wireless to optimize messaging transport. ■ Chapter 14, "Load Balancing and Failover" Describes how Wireless determines load balancing. ■ Chapter 15, "Globalization" Describes how Wireless determines locales and device encoding. ■ Chapter 16, "Integrating Wireless with Other Components" Describes how to integrate Wireless with such Oracle components as SSO (single sign-on), OID (Oracle Internet Directory), and WebCache. ■ Chapter 17, "Integrating Wireless Notification with Microsoft Exchange" Describes how to integrate Wireless notification with the Mircrosoft Exchange Server. xvi Documentation Accessibility Our goal is to make Oracle products, services, and supporting documentation accessible, with good usability, to the disabled community. To that end, our documentation includes features that make information available to users of assistive technology. This documentation is available in HTML format, and contains markup to facilitate access by the disabled community. Standards will continue to evolve over time, and Oracle Corporation is actively engaged with other market-leading technology vendors to address technical obstacles so that our documentation can be accessible to all of our customers. For additional information, visit the Oracle Accessibility Program Web site at http://www.oracle.com/accessibility/. Accessibility of Code Examples in Documentation JAWS, a Windows screen reader, may not always correctly read the code examples in this document. The conventions for writing code require that closing braces should appear on an otherwise empty line; however, JAWS may not always read a line of text that consists solely of a bracket or brace. This documentation may contain links to Web sites of other companies or organizations that Oracle Corporation does not own or control. Oracle Corporation neither evaluates nor makes any representations regarding the accessibility of these Web sites. Accessibility of Links to External Web Sites in Documentation More Information You can also find information on Oracle Application Server Wireless through these resources: ■ ■ ■ Oracle Technology Network—Oracle Technology Network is dedicated to providing developers the best information on Oracle’s products and technologies. Visit: http://otn.oracle.com/mobile javadoc—. . . /wireless/doc/javadoc/ Studio—OracleMobile Online Studio is a 100% online environment for quickly building, testing, and deploying wireless applications. It enables any developer, systems integrator, or independent software vendor to quickly develop a mobile application that is immediately accessible from all devices. The Online Studio site includes technical papers and a FAQ. Visit: http://studio.oraclemobile.com Support—Visit: http://www.oracle.com/support/ xvii xviii Part I Overview This section includes the following chapters: ■ Chapter 1, "Introducing Oracle Application Server Wireless" ■ Chapter 2, "Verifying the Wireless Installation" 1 Introducing Oracle Application Server Wireless 1.1 Overview Oracle Application Server Wireless (Wireless) is the wireless and voice platform of Oracle Application Server (OracleAS), which enables enterprises to realize their mobile strategy through the development and deployment of wireless browsing applications, voice applications, asynchronous applications, J2ME applications, and notifications. Wireless is also the voice and wireless platform for the mobile extensions of the Oracle E-Business Suite, the wireless and voice components of the Oracle Collaboration Suite, and the foundation for custom and partner wireless and voice solutions. Through the Oracle Application Server Wireless platform, devices can use any protocol to receive and deliver requests as well as and deliver content to any device. The request types handled by Wireless include: ■ HTTP ■ Async ■ Messaging Handing HTTP Requests Many devices with gateway support request applications through the HTTP protocol. These devices include WAP phones with WAP gateways and fixed voice lines with VoiceXML gateways. Wireless executes this request as follows: 1. The Load Balancer dispatches a request sent from the external gateways to Oracle HTTP Server. Generally, the Load Balancer supports a "sticky" session, Introducing Oracle Application Server Wireless 1-1 Overview meaning that the Load Balancer only handles requests from a new session; otherwise, the requests of an existing session are delivered to the same Oracle HTTP Server. The Load Balancer provides the hardware load-balancing solution. 2. The Oracle HTTP Server dispatches the received request to the OPMN Worker, or to the Multi-Channel Server directly (based on the configuration). Requests are routed to OPMN worker for OC4J-based software load balancing). Otherwise, the request is dispatched directly to the Wireless Web Server 3. The OPMN worker dispatches the request to the appropriate process based on the process load (if the request is the first one of the current session). Otherwise, the OPMN worker dispatches the request to the Wireless Web server process to which the request session has been assigned. 4. The Multi-Channel Server processes receive the request. If the response for the request from this particular requesting device is cached by the WebCache, then the response is returned immediately. If the request is to access a privileged service, then the Wireless Web Server redirects the request to SSO (Single Sign-On). Otherwise, it proceeds to step b below. a. SSO performs the sign-on process using the Wireless Web Server process. After the sign-on succeeds, the original request resumes. b. The Multi-Channel Server dispatches the original request to the mobile application provider to request the mobile content in mobile XML. 5. The mobile application provider (which are the external mobile applications) processes the request and returns the mobile XML to the Wireless Web Server process. Oracle Portal is another mobile application provider. 6. Multi-Channel Server adapts the received content to the network and device and returns to the request device. 7. The mobile content is visible on the requesting mobile device in its native form. Handing an Async Request The Wireless server can also process requests from non-HTTP based devices, such as SMS device, Pager, or Email. The request is handled as follows: 1-2 1. The Messaging Server receives an application invocation request message and dispatches it to the Async Listener, which runs inside the Wireless Runtime Server process. 2. The Async Listener preprocesses the request. The response is returned immediately. If the request is to access a privileged application, then the Administrator’s Guide Using the Wireless Tools Multi-Channel Server will redirect the request to SSO. Otherwise, it proceeds to step b below. a. SSO performs the sign-on process using the Wireless Web Server process. After the sign-on succeeds, the original request resumes. b. The Wireless Web Server dispatches the original request to the mobile application provider to request the mobile content in mobile XML. 3. The Async Listener adapts the received response into the native format of the requesting device and sends the adapted response to the Messaging Server. 4. The Messaging Server dispatches the response to the requesting device. Handling a Messaging Request The Wireless platform can also push any message to any device using different protocols. Out-of-the-box, any message can be pushed out as an SMS message, an email, a voice mail, a fax, or it can be pushed to the Oracle Mobile Message Gateway. The request is handled as follows: 1. Messaging applications, including the XMS Server, Notification Engine, or external applications, compose a message and send it by calling push APIs. 2. The Messaging Server asynchronously delivers the received message to the delivery provider through the specified protocol. 3. The Messaging Server also asynchronously queries the delivery status (if supported by the provider). 4. The messaging applications can either pull the delivery status or be notified. 1.2 Using the Wireless Tools Wireless provides a complete set of Web-based tools, which provide functions for developing and publishing mobile applications, creating mobile users, providing help desk support to mobile users, and managing the Wireless server. These tools each include step-by-step wizards, which enable users to quickly accomplish any task. The wizard pages include inline hints and tips which provide information for new users to quickly learn the tools. In addition, the online help enables experienced users to utilize the advanced features. Out of the box, Wireless provides the following tools: ■ Service Manager ■ System Manager Introducing Oracle Application Server Wireless 1-3 Using the Wireless Tools ■ Content Manager ■ Foundation Manager ■ User Manager Wireless also provides the Wireless Customization Portal, which enables end-users to personalize Wireless applications and manage their personal profiles, including their devices and Location Marks. The Customization Portal can be used as the out-of-box Web-based portal along with the device-based portal. The Wireless Tools are role-specific;Wireless users can only access the tool which corresponds to the role or roles that they have been granted. These user roles, which are described in Table 1–1, span all of the Wireless resources, from server management, application development, application publishing, and help desk to subscription to the Wireless applications. Because these tools are Web-based, they require no client-side installation. After installing and starting the Wireless server, multiple users can access the Wireless tools through normal desktop browsers. You do not need to manually configure any server files or code with APIs to access the out-of-box features of the Wireless server, unless you want to expand the Wireless server functions. 1-4 Administrator’s Guide Using the Wireless Tools Table 1–1 Wireless User Roles User Role Description Available Tools Application Developer Users assigned the Application Developer role perform the following functions: Service Manager ■ ■ Foundation Developer Content Manager Create, modify, delete and test applications. Publish applications to the Application Developer’s folder. ■ Create, modify, and delete notifications. ■ Create, modify, and delete data feeders. ■ Register and delete J2ME Web services. ■ Develop preset definitions. Users assigned the Foundation Developer role perform the following functions: ■ Create, modify, and delete devices. ■ Create, modify, and delete transformers. ■ Create, modify, and delete regions. ■ Create, modify, and delete digital rights policies. ■ Create, modify, and delete API scan policies. Users assigned the Content Manager role perform the following functions: ■ ■ ■ ■ ■ Foundation Manager Content Manager Manage application folders and bookmarks. Create application links based on Application Developer-created applications. Create notifications based on alerts (deprecated in this release). Create application categories and associate access points with them. Create a user-home folder rendering scheme, such as setting the sorting order for applications. Introducing Oracle Application Server Wireless 1-5 Using the Wireless Tools Table 1–1 Wireless User Roles User Role Description Available Tools System Administrator Users assigned the System Administrator perform System Manager. This tool configuration management and performance is packaged with Oracle monitoring for various Wireless servers. The Wireless Enterprise Manager and is servers are deployed both as OC4J (Oracle accessed through the Containers for Java) applications and as standalone Application Server Control. Java applications. User Manager Users assigned the User Manager role perform the following functions: ■ End User Manage users by providing such Help Desk functions as editing a user profile, resetting passwords and PINs, and creating or deleting users. ■ Manage user access privileges. ■ View application links assigned to users. ■ Manage user devices. ■ Search for users. ■ View overview information of users. Users assigned the end user role are the consumers of Wireless services. End-users create their own accounts when they register with Wireless using the Wireless Customization. End users can also customize their own applications either from a desktop or from a device. Customization for end-users includes: ■ Customize applications, download J2ME applications, subscribe to notifications. ■ Manage devices. ■ Manage location marks and location settings. ■ Manage contact rules. Mobile studio users also have the end user role; a user belonging to the StudioUser group can access the Mobile Studio. Every Wireless user is granted the Mobile Customer Role by default. This role is implicit to all users. 1-6 User Manager Administrator’s Guide Wireless Customization Portal Mobile Studio (for users assigned to the StudioUser group) Using This Guide 1.3 Wireless Module Applications OracleAS Wireless includes pre-built Wireless module applications. These are applications which you configure using the Content Manager, include the following: PIM Applications The PIM (Personal Information Management) applications (also known as Collaboration Applications) enable customers to integrate corporate email, directory, address book, calendaring and instant messaging applications into their mobile enterprise portals. Location-Based Applications There are Location Based applications include the Location Picker, Driving Directions, Maps, and Biz Directory (business directory). The Location Picker application enables users to pick and manage their frequently-accessed locations. Other pre-configured applications, such as Driving Directions and Maps applications, use the Location Picker to acquire a location from the user. Oracle m-Commerce The Oracle m-Commerce applications securely store user profiles, and supply information authorized by users of third-party applications. These applications communicate with on-line payment mechanisms to complete transactions. 1.4 Using This Guide This guide describes how to get Wireless running by using the Wireless tools to configure the underlying Wireless stack and the module applications. Introducing Oracle Application Server Wireless 1-7 Using This Guide 1-8 Administrator’s Guide 2 Verifying the Wireless Installation This chapter describes how to access the Webtools and the Device Customization portal to verify the proper installment and functioning of these applications. See the Oracle Application Server Wireless Developer’s Guide for information on installing Wireless. This chapter includes the following sections: ■ Section 2.1, "Starting the Oracle Application Server Wireless Server" ■ Section 2.2, "Accessing the Wireless Customization Portal" ■ Section 2.3, "Accessing the Wireless Tools" 2.1 Starting the Oracle Application Server Wireless Server Before Wireless users can access the Wireless development tools, the administrator must start the server using the Wireless system management page access through the Oracle Enterprise Manager Application Server Control. To log into the Application Server Control and access the management functions for Wireless: 1. Enter the following URL into a browser: http://Server:1810 Verifying the Wireless Installation 2-1 Starting the Oracle Application Server Wireless Server Note: The default ports are 1810 and 1811. The port number range is 1812 to 1820. To ensure that you are using the correct port number, check the port number for Oracle Application Server Wireless stored in [Oracle home]/install/portlist.ini. For more information on port usage, see the Oracle Application Server Installation Guide and the Oracle Application Server Administrator’s Guide. 2. Enter the administrator user name and password. The Oracle Enterprise Manager Home Page appears (Figure 2–1). Figure 2–1 The OracleAS Enterprise Manager Home Page (Partial View) 3. 2-2 From the System Components table, select Wireless. The Wireless home page appears (Figure 2–2). Administrator’s Guide Starting the Oracle Application Server Wireless Server Figure 2–2 The System Manager Home Page (Partial View) 2.1.1 Configuring the Wireless Server If the Configuration Status displays Not Configured (as it would, for example, during the initial session after the Wireless repository has been installed), an administrator can configure the Wireless server within minutes using a two-step configuration wizard accessed through the Basic Site Configuration link. The Wireless administrator need only add the name and port values for the HTTP and HTTPS proxy server, the address for the Wireless access points for the Async, SMS and IM servers, and then set the correct time zone for the server. For more information, see Section 3.3.1 in Chapter 3, "Managing the Wireless Server". Note: If the Configuration Status indicates that the Wireless sever has not been configured, then the administrator must configure the server before starting the processes. Verifying the Wireless Installation 2-3 Accessing the Wireless Customization Portal 2.2 Accessing the Wireless Customization Portal This section describes how to log into the Wireless Customization Portal. Before using the Wireless Customization Portal, you must access the login page by entering the following URL in a browser: http://<host>:<port>/mobile/Login.uix For example, you access the login page through the following URL: http://hostname:7777/mobile/Login.uix Note: 7777 is the default port number for Oracle Application Server Wireless. The port number range is 7777 to 7877. To ensure that you are using the correct port number, check the port number for Oracle Application Server Wireless stored in [Oracle home]/install/portlist.ini. For more information on port usage, see Oracle Application Server Installation Guide and the Oracle Application Server Administrator’s Guide. After you enter the URL, the login page for the Wireless Customization Portal appears. This page includes the following buttons: Table 2–1 Login Screen Buttons 2-4 Button Description Login Clicking this button logs you in after you have entered the correct user name and password. Help Clicking this button displays a list of help topics. Page Help Clicking this button displays help topics specific to this screen. 4. Enter your user name and then enter your password. If you are an administrator, enter orcladmin as your user name. (The password is set during installation, but can be changed with the User Manager.) 5. Click Login. Administrator’s Guide Accessing the Wireless Tools After you successfully log in, the Welcome screen appears (Figure 2–3), which includes your addresses for accessing Oracle Application Server Wireless applications. Figure 2–3 The Welcome Screen of Wireless Customization (Partial View) 2.3 Accessing the Wireless Tools This section describes how to log into the Oracle Application Server Wireless Tools to access the User Manager, Service Designer, Foundation Manager, and Content Manager. If you access the Oracle Application Server Wireless Tools in standalone mode, then you can also access the System Manager. Access the login page for the Oracle Application Server Wireless Tools through the following URL: http://<host>:<port>/webtool/login.uix Verifying the Wireless Installation 2-5 Accessing the Wireless Tools For example, you access the login page through the following URL: http://hostname:7777/webtool/login.uix Note: 7777 is the default port number for Oracle Application Server Wireless. The port number range is 7777 to 7877. To ensure that you are using the correct port number, check the port number for Oracle Application Server Wireless stored in [Oracle home]/install/portlist.ini. For more information on port usage, see Oracle Application Server Installation Guide and the Oracle Application Server Administrator’s Guide. Enter your user name and then enter your password. If you are an administrator, enter orcladmin as your user name. (The password is set during installation, but can be changed with the User Manager.) The Oracle Application Server Wireless Tools appears, with the User Manager displaying by default (as displayed in Figure 2–4). Figure 2–4 The Oracle Application Server Wireless Tools (with User Manager Displayed) 2-6 Administrator’s Guide Accessing the Wireless Tools Verifying the Wireless Installation 2-7 Accessing the Wireless Tools 2-8 Administrator’s Guide Part II System Administration This section includes the following chapters: ■ Chapter 3, "Managing the Wireless Server" ■ Chapter 4, "Managing Users" ■ Chapter 5, "Managing Content" ■ Chapter 6, "Administering Mobile Studio" ■ Chapter 7, "Managing Foundation Services" 3 Managing the Wireless Server This chapter includes the following sections: ■ Section 3.1, "Overview" ■ Section 3.2, "Logging Into the System Manager" ■ Section 3.3, "The Home Page" ■ Section 3.4, "Wireless Server Performance" ■ Section 3.5, "Site Performance" ■ Section 3.6, "Site Administration" 3.1 Overview System Administrators use the System Manager to manage the Wireless site and server as well as to manage and configure processes and monitor system performance data to assess system health, and centrally manage and configure Wireless. All configuration data is stored in the database. In addition, the System Manager enables users to upload and download repository objects. The System Manager, which is part of Oracle Enterprise Manager in integrated mode, provides you with two views to manage the Wireless system: the Wireless Server view and the Site view. The Wireless Server view enables you to monitor and manage system performance for each server and to start and stop the server processes. From the Site view, you create a common configuration for the Wireless servers, and monitor the performance data for the entire site. You access these views (and the functions they provide) through the three subtabs of the System Manager: Home, Site Performance and Site Administration. Table 3–1 Managing the Wireless Server 3-1 Overview describes these tab and their functions. Figure 3–1 depicts a partial view of the System Manager’s Home page, which appears by default when you access the tool. Table 3–1 The Service Manager Tabs Tab Description Home Provides a view of the Wireless Server. The status, processes, performance data and system logging are for the current middle tier of the Wireless server. The only non-server specific function is the Basic Site Configuration link, which enables minimal configuration required for the Wireless Site (after the Wireless Server is first installed). Site Performance The performance data of the Site. Site Administration From this page, you can configure the entire Site, such as the JDBC connection pool, system logging (mainly log level), locale, and URLs, as well as configuration specific to site components. In addition, this page includes utilities for uploading and downloading repository objects and for refreshing the WebCache.The Figure 3–1 The System Manager (Partial View) 3.1.1 Refreshing the System Manager Screens The Home, Site Performance and Administration pages each have a timestamp that indicates the status of the data displayed on the page. To update this data, click the the Refresh icon. Refreshing the Home and Site Performance pages reloads the 3-2 Administrator’s Guide Logging Into the System Manager performance or status information, not the configuration data. To refresh the configuration data (that is, to force the configuration data to be reloaded from the database), click the refresh icon on the Site Administration page. The timestamp on the Home and Site Performance pages displays the current time, because the data is retrieved in real-time; the timestamp on the Site Administration page, however, displays the last time that the configuration data was loaded from the database. To refresh the page, you must either click the Refresh icon or update some configuration data. Figure 3–2 The Refresh Icon on the Home Page 3.2 Logging Into the System Manager You can log into the System Manager through the standalone mode or through the Oracle Enterprise Manager Application Server Control. 3.2.1 Accessing the System Manager in Standalone Mode To access the login page for the System Manager in standalone mode, enter the following URL into a browser: http://9iASWEServer.domain:port/webtool/login.uix For example, enter: http://9iASWEServer.domain:7777/webtool/login.uix After you enter your user name and password, the System Manager appears, defaulting to the Home subtab. Note: You must have the System or Administrator role to access the System Manager. Managing the Wireless Server 3-3 Logging Into the System Manager 3.2.2 Accessing the System Manager through OEM To access the System Manager from the standalone version of the Oracle Enterprise Manager Application Server Control, you must first enter the following URL into a browser: http://Server:1810/emd/console Note: The default port is 1810. After you log into the OEM, select the Wireless component from the System Components table. The System Manager appears and defaults to the Home page (Figure 3–3). 3-4 Administrator’s Guide The Home Page Figure 3–3 The Home Page of System Manager (Partial View) 3.3 The Home Page After you access the System Manager, the tool defaults to the Home page. The page’s General section displays current status of the Wireless server (Up, Down, or Unavailable), the name of the current host, the version number of Oracle Application Server Wireless and the configuration status of the site. The timestamp on the Home page reflects the current status of the data displayed on the page. You can refresh (reload) the Home page by clicking the Refresh icon. The Home page is divided into the following sections: Managing the Wireless Server 3-5 The Home Page General The General section lists the current status of the Wireless server, the name of the current host, and if the server has been configured. Response and Load The Response and Load section displays the following Wireless runtime instance statistics for the last ten minutes. Web-Based Applications This section lists the OC4J (Oracle Containers for Java) applications in the Wireless OC4J instance. These application types vary according to the installation. The System Manager displays each of the applications as a hyperlink; by clicking one, you access pages for viewing performance statistics. You can refresh the performance data displayed on these paged by clicking the Refresh icon. These applications, which are started or stopped using the Start OC4J Instance and Stop OC4J Instance buttons, are started as stopped as a group; these applications cannot be started or stopped individually. Standalone Processes This section lists the Wireless process types, which vary according to the installation. The System Manager displays each of the processes as a hyperlink; by clicking one, you access detail pages that enable you to start and stop the process, view its performance statistics, and configure it. You can refresh data on the detail pages by clicking the Refresh icon. Instance Configuration From this section (pictured in Figure 3–4), you can configure the logging directory, view the log file, and configure the URLs for the current Wireless instance or middle tier. Figure 3–4 The Instance Configuration Section of the Home Page 3-6 Administrator’s Guide The Home Page 3.3.1 Basic Site Configuration The General section includes a link called Basic Site Configuration, which enables you to quickly configure the entire Oracle Application Server Wireless site by providing a minimum of information. Note: The site needs only to be configured once after the installation of the first Wireless middle tier. Clicking the link invokes a two-page wizard that guides you through the configuration of the Wireless site. The pages are as follows: ■ The Proxy Server page (Figure 3–5): On this page, you define such proxy server-related information as proxy server host name and port number. Note: The Proxy Server page enables you to configure the proxy properties used by Wireless when HTTP is required. If your installation of Wireless does not use an HTTP proxy server, then you do not have to define the parameters for this page. Figure 3–5 Configuring the Proxy Ports for Basic Site Configuration Managing the Wireless Server 3-7 The Home Page ■ The Entry Points page (Figure 3–6): This page contains fields in which you define the entry points, which include the access point addresses used by different delivery channels to access the Async Listener as well as the voice access phone number that displays in the Customization Portal. You configure the site’s locale and time zone using the drop-down lists in the Site Locale section. Figure 3–6 Configuring the Entry Points for Basic Site Configuration After you complete this wizard, the configuration status in General section displays as Configured. Note: For the Messaging Server function properly (that is, to send many messages), you must also configure such messaging driver instance class parameters as username and password within a messaging server. 3-8 Administrator’s Guide The Home Page 3.3.2 System Logging From the System Logging section on Home page (pictured in Figure 3–7), you can designate the location for the system logging and view the system log file. Figure 3–7 The System Logging Section of the Home Page 3.3.2.1 Configuring the Logging Directory To configure the logging directory: 1. Click the Logging Directory link. The logging page appears. 2. Enter the name of the logging directory. 3. Click OK. Note: For the log directory change to take effect, you must restart all of the Wireless processes, including Wireless OC4J Instance and all the standalone processes. 3.3.2.2 Viewing a Log File You can view a log file by clicking the View Log File link. Depending on the log level specified at Site level, you can view error messages, warning messages and notify messages. Wireless provides extensive runtime exception logging. When fatal exceptions occur, Wireless logs the exceptions and stack traces in the system log file. Using the View Log File page (Figure 3–8), you specify the number of lines from the end of the log file that the System Manager displays. You can also print a selected segment of the file as a text file by clicking Printable Page. The page displays the segment of the log file to be printed. Use the browser's back button to navigate from this page. Managing the Wireless Server 3-9 The Home Page Figure 3–8 The View Log File Page (Partial View) 3.3.2.3 Configuring the Site System Logging From the General Configuration section (Figure 3–9) on the Site Administration page, you can change the log level for the whole using the configuration page accessed by clicking System Logging. 3-10 Administrator’s Guide The Home Page Figure 3–9 Accessing the System Logging from the Site Administration Page From the System Logging page (Figure 3–10), you specify the log file size in bytes, and the log levels: Error, Warning, and Notify. By default, error and warning messages will be logged in the system log file. Figure 3–10 The System Logging Page 3.3.3 Configuring the URLs of the Current Wireless Instance From the Instance URLs page (depicted in Figure 3–11), you to specify the URLs used by a Wireless middle-tier server as entry points to the Wireless services. This page enables you to define the instance URLs (that is, the local URLs) for a middle-tier server, or direct a middle-tier server to use the URLs defined for the entire Wireless site. Managing the Wireless Server 3-11 The Home Page Figure 3–11 Configuring the Instance URLs for a Wireless Server 3.3.3.1 Defining the Instance URLs in Integrated Mode If you access the System Manager in the integrated mode (that is, through the Oracle Enterprise Manager Application Server Control as described in Section 3.2.2), then the Use the Wireless Instance URLs option is selected by default. With this option selected, the Wireless server uses the URLs defined on this page, which are populated by the post-installer to enable Wireless to work out of the box. After completing the installations for each Wireless server on the Wireless site, you then configure the URLs for the Wireless site as virtual URLs and then select the Use the Wireless Site URLs option for each of the Wireless servers. When upgrading the Wireless site, you select Use the Wireless Instance option for each server until all of the servers on the Wireless site have been upgraded. See Section 3.6.1.1 for information on setting the URLs for the Wireless site. 3.3.3.2 Defining the Instance URLs in Standalone Mode As in the integrated mode, the Use the Wireless Instance URLs option is selected by default if you access the System Manager in the standalone mode (as described in Section 3.2.1). After completing the standalone installation, you define the local URLs for all the Wireless services. The instance URLs include those described in Table 3–2. 3-12 Administrator’s Guide The Home Page Table 3–2 The Instance URLs Parameter Value Multi-Channel Server HTTP URL The Multi-Channel Server URL in HTTP mode. This URL is used when the Wireless server uses the Multi-Channel server entry point for URL re-writing. The default URL format is: http://<server>:<http port>/mcs/remote Multi-Channel Server HTTPS URL The Multi-Channel Server URL in HTTPS mode. The default URL format is: https://<server>:<https port>/mcs/remote Wireless and Voice Portal HTTP URL The Wireless and Voice Portal URL in HTTP mode. The default URL format is: http://<server>:<http port>/ptg/rm Wireless and Voice Portal HTTPS URL The Wireless and Voice Portal URL in HTTPs mode. The default URL format is: https://<server>:<https port>/ptg/rm HTTP Adapter HTTP URL Prefix The URL prefix for the remote JSP page that is invoked by the HTTP Adapter in HTTP mode. Entering the URL prefix enables the Wireless server to automatically attach this prefix to a JSP entered in the Input Parameters page of the Service Manager’s Master Application Creation Wizard. When entering a JSP value in this wizard, you need only enter the JSP. For example, if you enter a remote JSP called myApp.jsp, into the wizard, the Wireless server attaches the URL prefix, making this value into http://remote_host:port/apps/myApp.jsp. The default format is: http://<server>:<http port> HTTP Adapter HTTPS URL Prefix The URL prefix for the remote JSP page that is invoked by the HTTP Adapter in HTTPS mode. The default URL format is: https://<server>:<https port> Wireless Tools URL The URL for the Wireless Tools, which must be configured to enable the functioning of the utilities on the Site Administration page of the System Manager (that is, the WebCache refresh for master applications and devices and the repository upload and download). The default URL is: http://<server>:<port>/webtool Wireless Customization Portal URL The URL for the Wireless Customization Portal. The default URL format is: http://<server>:<port>/mobile Managing the Wireless Server 3-13 The Home Page Table 3–2 The Instance URLs Parameter Value J2ME Provisioning Server URL A user’s device is redirected to this URL when the user opts to download a J2ME application. The default URL format is: http://<server>:<port>/provisioning/sun-ota J2ME Web Service Proxy Server URL The URL to the proxy server that makes the Web services available to the J2ME applications built using the J2ME Web Services Client Library. The default URL format is: http://<server>:<port>/mcs/wsproxy/proxy XMS Center Base URL The URL to the MM1 entry point for the XMS Center. The default URL format is: http://<server>:<port>/xms/mm1 Audio Library URL Prefix The HTTP root to the audio files for catspeech (concatenated speech). For example, if you set this to http://localhost:7777/audio/catspeech, then the catspeech server expects all audio files associated with its libraries to originate from that location. If this is set incorrectly, then no audio associated with catspeech plays; only TTS (text-to-speech) plays back. The default URL format is: http://<server>:<port>/audio/catspeech Image Server HTTP URL The URL to the Multimedia Adaptation service’s image adaptation servlet (in HTTP mode). http://<server>:<http port>/mcs/media/image Image Server HTTPS URL The URL to the Multimedia Adaptation service’s secure image adaptation servlet (in HTTPS mode). http://<server>:<https port>/mcs/media/image Voice Grammar Server URL The URL to the Multimedia Adaptation service’s voice grammar adaptation servlet. The default URL format is: http://<server>:<port>/mcs/media/vgrammar 3.3.4 Process Management From the Home page of the System Manager, you can manage the wireless processes on the local middle tier. There are two types of wireless processes: ■ 3-14 Web-based - The Wireless OC4J (Oracle Containers for Java) instance is the Web-based Wireless process. Many types of wireless OC4J applications run in this process. Administrator’s Guide The Home Page ■ Standalone - The standalone Java processes can be started or stopped individually. 3.3.4.1 Web-Based Applications When you access the Home subtab, the Web-based applications display the following types of OC4J applications running in Wireless OC4J instance, with name and status information: ■ Multi-Channel Server ■ Async Listener ■ J2ME Web Service Proxy Server ■ Multimedia Adaptation Server ■ Provisioning Server ■ Wireless Tools ■ Customization Portal If the application name appears as a link, then you can access a detail page that displays the application’s performance information. You can start or stop all the Web-based applications by clicking the Start OC4J Instance or Stop OC4J Instance buttons. 3.3.4.2 Standalone Processes The standalone processes display the following types of Wireless processes by name, status and enabled flag: ■ Notification Engine ■ Notification Event Collector ■ Data Feeder ■ Messaging Server ■ Performance Monitor ■ Location Event Server By selecting a process, you can start or stop it as well as enable or disable it. Clicking Add Process invokes a two-step wizard that enables you to create a new process by first selecting the process type and entering the basic information about Managing the Wireless Server 3-15 The Home Page the process (such as the name) and then entering information specific to the process type. You can also select an existing process and delete it. Note: You can only stop (and start) a process that has been enabled. From the detail page, which you access by clicking the process name link, you can configure, or view the detail status and performance information of a standalone process. You can also start or stop the process at the process from this page. By default, the timeout to start or stop a standalone process is 420 seconds. You can adjust this value by updating opmn.xml directly by using the Process Management page. You invoke this page (Figure 3–12) from the Process Management link on the application server page in the Enterprise Manager in integrated mode. All of the Wireless standalone processes are listed under the Wireless component in opmn.xml. 3-16 Administrator’s Guide The Home Page Figure 3–12 Accessing ompn.xml Through the Process Management Page Notification Engine You configure the notification applications running in the process, and view their performance regarding notifications that are processed and sent, subscribers to the notifications, and errors. Notification Event Collector You specify the components which process the notification events. Data Feeder You configure the data feeders running in the process. Managing the Wireless Server 3-17 The Home Page Messaging Server You configure the driver instances running in the process, which determine what messaging services are provided. You can also view the server performance, such as the sending processing time, receiving response time, number of messages sent, for each delivery type. For the messaging server to function, you must configure the messaging server drivers at the site level and the driver instances at the server process level. Site-Level Configuration Drivers are defined at site level under the Messaging process type. Each driver configuration includes category, capability (Send, Receive or Both), and driver class. For more information, see Section 3.6.2.5. Process-Level Configuration You specify the driver instances at Messaging Server process level. Each driver instance is based on a site driver. Because you add the values for the driver class parameters, you can create multiple driver instances based on the same driver; different driver instances can use the same class to send and receive messages, even though they have different parameter values. For example, two email driver instances can use different email servers. The attributes of a driver instance are as follows: ■ ■ ■ ■ ■ 3-18 Driver Instance Name - The driver instance name. Driver Name - The site level driver on which this driver is based. You can select from any of the drivers defined at the site level. Number of Sending Threads - The number of sending threads used by this driver. This field only displays for drivers with either the SEND or BOTH capability. If you leave this field blank, then the default value specified in Messaging Server Configuration at Site Administration page is used. Number of Receiving Threads - The number of receiving threads used by this driver. This field only displays for drivers with either the RECEIVE or BOTH capability. If you leave this field blank, then default value specified in Messaging Server Configuration at Site Administration page is used. Enabled - By selecting this flag, you enable the driver instance; otherwise, the instance is disabled if you do not set this flag. For a driver instance to run, both the site and process levels must be enabled. At the process level, Wireless displays both site level Enable/Disable flag and the process level flag. Administrator’s Guide The Home Page ■ ■ Site Enabled - The value displayed (which is read-only from the driver instance page), states whether the site driver has been enabled for the site. Driver class parameters - You define these parameters to specify the driver class parameter values. Each parameter has multiple attributes which are defined at the site level, such as parameter name, description, mandatory flag (displayed as True or False) and parameter value. Although the driver table in this page displays all of the driver’s site-defined attributes, you can only specify the parameters values at the process level (their default values are set at the site level). For a mandatory parameter, you must provide a value to successfully create or update a driver instance. If you do not define a mandatory parameter, then Wireless generates an error. Updating a Driver Instance To update the driver instance, you select the driver instance from the Messaging Server process detail page and then click Edit. Creating a New Driver Instance To create a driver instance, you use the Add Driver Instance page (Figure 3–13), which is invoked by clicking the Add Driver Instance button in the process detail page. You then select the site driver on which to base the new driver instance. Wireless retrieves the class parameter list from the site driver and populates the values for the new instance, which you can update. In addition to the class parameter values, Wireless also retrieves the site-enabled flag information as well as the number of sending and receiving threads which are based on the capability of the site driver. If you base a driver instance upon a driver whose parameters have changed, for example, from the addition of a new parameter with default value or the removal of an obsolete parameter, then Wireless reflects these changes in the table listing the parameters in the editing page. In such a case, the table displays added parameters with a default value, but would not display an obsolete parameter that has been removed. After you create a driver, click Apply to save the new driver instance configuration. Note: Changing the default parameter values for a messaging driver at the site level does not affect the driver instance. Managing the Wireless Server 3-19 Wireless Server Performance Figure 3–13 The Add Driver Instance Screen Performance Monitor You can configure the number of working threads. Location Event Server To configure a location event server process, you enter the number of positioning schedulers. Each location event server can have one or more positioning schedulers that process the location-based conditions. This setting specifies the number of positioning schedulers for each location event server.You base this setting on the system workload. If many location based-conditions are created and processed, then you should enter a number greater than 1 (such as 5 or 10). However, if few location based-conditions are created and processed, one positioning scheduler will suffice. You can adjust this value according to the performance of the location event server. 3.4 Wireless Server Performance The Response and Load section displays the following Wireless statistics, which are an overview of the process performance metrics based on the last 10 minutes for the local mid-tier: ■ Number of Active Sessions The number of sessions which invoked applications in the last 10 minutes. 3-20 Administrator’s Guide Site Performance ■ Average Response Time (second) The average response time for applications invoked in the last 10 minutes ■ Average Session Duration (second) The average session duration for sessions invoked applications in the last 10 minutes ■ Number of Applications Invoked The total number of applications invoked in the last 10 minutes ■ Number of J2ME Applications Downloaded The number of J2ME applications downloaded in the last 10 minutes ■ Number of Notifications Sent The number of notifications sent in the last 10 minutes ■ Number of Messages Sent The number of messages sent in the last 10 minutes ■ Number of Messages Received The number of messages received in the last 10 minutes 3.5 Site Performance On the Site Performance page (Figure 3–14), the Response and Load section displays the same type of performance data as the mid-tier, but the data is for the entire Wireless Site. You can also select the View Data options for the time interval of the performance data. The choices are: ■ Last 5 minutes ■ Last 10 minutes (default selection) ■ Last 30 minutes ■ Last 60 minutes ■ Last 1 day ■ Last 7 days ■ Last 31 days Managing the Wireless Server 3-21 Site Performance Note: You can select these time frame viewing options on any Wireless performance page. Figure 3–14 The Site Performance Screen (Partial View) Clicking the links in the Component Performance section of the page enables you to view performance metrics within a selected time frame. The Performance page and the individual component performance pages each have a timestamp with a Refresh button, which enables you to reload the page to update the performance or status information. Multi-Channel Server Performance The performance data over the designated time period is displayed for each process of the Wireless site: ■ Average Response Time (second) The average application response time over the specified period. ■ 3-22 Average Session Duration (second) Administrator’s Guide Site Performance The average session duration for session which invoked applications over the specified period. ■ Number of Users The number of users who invoked applications over the specified period. ■ Number of Applications Invoked The number of applications invoked over the specified period. ■ Average Number of Application Invocations per Session The average number of application invocations for each session over the specified period. ■ Average Number of Application Invocations per User The average number of application invocations for each user over the specified period. ■ Number of Errors Total number of errors for the specified period. Async Listener Performance The performance data over the designated time period displays for each process of the Wireless site: ■ Number of Messages Received The total number of messages received for the specified period. ■ Average Message Response Time (second) The average processing time per message for the specified period. ■ Average Message Queue Size The average message queue size for the specified period. ■ Application Access Count The total number of applications accessed for the specified period. ■ User Access Count The number of distinct users who accessed the site within the specified period. ■ Number of Errors The total number of errors for the specified period. Managing the Wireless Server 3-23 Site Performance Notification Engine Performance The performance data over the designated time period will be displayed for each individual process of the wireless site: ■ Number of Notifications Processed The total number of notifications processed over the specified time period. ■ Number of Notifications Sent The total number of notifications sent over the specified time period. ■ Number of Subscribers Notified The total number of users who received notifications over the specified time period. A subscriber is a user who accesses a notification (and sets trigger conditions for a notification). ■ Number of Application Invocations The total number of application invocations over the specified time period. In this version of Wireless, the notification message content is generated by invoking an application. ■ Number of Errors The total number of errors occurred over the specified time period. Messaging Server Performance The performance data are separated by client-side performance and server-side performance. The client performance is based on the designated time period for each individual delivery type of the wireless site: ■ Average Sending Response Time (ms) The average time of a sending method. On the client side, a sending method is called to send a message. This time is the period from when the method is called to the time the method returns. When the method returns, the message is saved in a database persistently, but is not delivered. ■ Total number of Sending Requests The total number of times that the sending method is called by the client process. The sending method can be called once to send a message to a set of destinations. ■ 3-24 Total Number of Sending Requests Sent Administrator’s Guide Site Performance The total number of successful calls, where a message is delivered to a proper gateway and its receipt is acknowledged. The client process can call the sending method many times to send many messages. Some of these requests fail, as in the case where a destination cannot be reached. Other requests could be undergoing processing. ■ Total Number of Sending Requests Failed The total number of all calls that are known to have failed. ■ Average Receiving Processing Time (ms) The average time taken by the messaging system to deliver a received message to the client. The server performance is based on the designated time period for each delivery type of each process of the wireless site: ■ Average Sending Processing Time (ms) The average time taken by messaging system to send a message, starting from the sending method called by the client, to the driver delivered the message to the proper gateway. ■ Average Receiving Response Time (ms) Once a transport driver receives a message, the message is passed to the transport system by an onMessage method. The response time is the time taken by the onMessage method. Once the onMessage returns, the received message is saved in a database for dispatching. ■ Total Number of Received Messages The total number of times the transport drivers call the onMessage call-back method. ■ Total Number of Received Messages Dispatched The total number of received messages which are dispatched to, and are accepted by, the listeners. Among received messages, some may be in processing. Others may not have been dispatched to the listeners, or the listeners may have failed to process the dispatched messages. ■ Total Number of Received Messages Dispatched Failed The total number of received messages which failed to dispatch to a listener. Managing the Wireless Server 3-25 Site Administration Location-Related Performance The location related performance metrics are measured by location-based service provider and by location event server. ■ Location-Based Service Provider These metrics display by Provider Name (the name of the application provider) and by Provider Type (the fully qualified class name associated with the provider) as follows: ■ Hits The number of times an attempt was made to use this provider. It includes both successful and unsuccessful attempts. ■ Average Success Rate The percentage of times that a hit resulted in a connection to the provider and the return of structurally acceptable information. ■ Average Elapsed Time (ms) The average number of milliseconds that it took for a hit to have a successful or unsuccessful result. ■ Location Event Server These metrics display by process name (the name of a location event server) process as follows: ■ Average Dequeue Time (seconds) The average number of seconds that elapsed between the time a request was ready in the queue and the time the dequeuing of the request was finished. ■ Average Evaluation Time (seconds) The average number of seconds that elapsed between the time the dequeuing of the request was finished and the time the result was generated. The result can be a determination of whether the condition is satisfied or not, or it can be an error. 3.6 Site Administration From the Site Administration page (Figure 3–15), you configure the Wireless system for the whole Wireless site; all of the Wireless servers use this common 3-26 Administrator’s Guide Site Administration configuration. Also, from this page, you access functions to download or upload repository objects, and refresh the WebCache objects. The timestamp on the Site Administration page displays the last time that the configuration data was loaded from the database. To update the data on the page, click the Refresh icon or update some configuration data. Otherwise, the timestamp the last time that the configuration data was loaded from the database. Figure 3–15 The Site Administration Screen 3.6.1 General Configuration The General Configuration section contains the configurations generic for the wireless system. 3.6.1.1 HTTP, HTTPS Configuration The HTTP, HTTPS configuration page enables you to configure theWireless site’s proxy server settings, URLs, and the Secure Socket Layer (SSL) certificates. 3.6.1.1.1 Configuring the Proxy Server for HTTP The proxy server section enables you to configure the proxy properties used by Wireless for HTTP protocol. If your network uses a proxy server, then you must set these properties to enable the proper Managing the Wireless Server 3-27 Site Administration functioning of such components as provisioning server, geocoding, and the XMS center. Note: If your Wireless system does not use an HTTP proxy server, then you do not need to configure the proxy server properties. To configure the proxy server, specify the proxy server host, port and exception addresses. If you opt to require the proxy server to require authentication, then you must also provide the user name and password. 3.6.1.1.2 Configuring the URLs for the Wireless Site This page enables you to also define the URLs for the site. These URLs, which are listed in Table 3–3, can be used as the virtual URLs for Wireless servers. To enable the URLs defined in this page, select Use the Wireless Site URLs in the Instance URLs page, located on the Home page. For more information on the Instance URLs page, see Section 3.3.3. If you do not select this option, then the Wireless servers use their local URLs instead. Table 3–3 The Instance URLs Parameter Value Multi-Channel Server HTTP URL The Multi-Channel Server URL in HTTP mode. This URL is used when the Wireless server uses the Multi-Channel server entry point for URL re-writing. The default URL format is: http://<server>:<http port>/mcs/remote Multi-Channel Server HTTPS URL The Multi-Channel Server URL in HTTPS mode. The default URL format is: https://<server>:<https port>/mcs/remote Wireless and Voice Portal HTTP URL The Wireless and Voice Portal URL in HTTP mode. The default URL format is: http://<server>:<http port>/ptg/rm Wireless and Voice Portal HTTPS URL The Wireless and Voice Portal URL in HTTPs mode. The default URL format is: https://<server>:<https port>/ptg/rm 3-28 Administrator’s Guide Site Administration Table 3–3 The Instance URLs Parameter Value HTTP Adapter HTTP URL Prefix The URL prefix for the remote JSP page that is invoked by the HTTP Adapter in HTTP mode. Entering the URL prefix enables the Wireless server to automatically attach this prefix to a JSP entered in the Input Parameters page of the Service Manager’s Master Application Creation Wizard. When entering a JSP value in this wizard, you need only enter the JSP. For example, if you enter a remote JSP called myApp.jsp, into the wizard, the Wireless server attaches the URL prefix, making this value into http://remote_host:port/apps/myApp.jsp. The default format is: http://<server>:<http port> HTTP Adapter HTTPS URL Prefix The URL prefix for the remote JSP page that is invoked by the HTTP Adapter in HTTPS mode. The default URL format is: https://<server>:<https port> Wireless Tools URL The URL for the Wireless Tools, which must be configured to enable the functioning of the utilities on the Site Administration page of the System Manager (that is, the WebCache refresh for master applications and devices and the repository upload and download). The default URL is: http://<server>:<port>/webtool Wireless Customization Portal URL The URL for the Wireless Customization Portal. The default URL format is: http://<server>:<port>/mobile J2ME Provisioning Server URL A user’s device is redirected to this URL when the user opts to download a J2ME application. The default URL format is: http://<server>:<port>/provisioning/sun-ota J2ME Web Service Proxy Server URL The URL to the proxy server that makes the Web services available to the J2ME applications built using the J2ME Web Services Client Library. The default URL format is: http://<server>:<port>/mcs/wsproxy/proxy XMS Center Base URL The URL to the MM1 entry point for the XMS Center. The default URL format is: http://<server>:<port>/xms/mm1 Managing the Wireless Server 3-29 Site Administration Table 3–3 The Instance URLs Parameter Value Audio Library URL Prefix The HTTP root to the audio files for catspeech (concatenated speech). For example, if you set this to http://localhost:7777/audio/catspeech, then the catspeech server expects all audio files associated with its libraries to originate from that location. If this is set incorrectly, then no audio associated with catspeech plays; only TTS (text-to-speech) plays back. The default URL format is: http://<server>:<port>/audio/catspeech Image Server HTTP URL The URL to the Multimedia Adaptation service’s image adaptation servlet (in HTTP mode). http://<server>:<http port>/mcs/media/image Image Server HTTPS URL The URL to the Multimedia Adaptation service’s secure image adaptation servlet (in HTTPS mode). http://<server>:<https port>/mcs/media/image Voice Grammar Server URL The URL to the Multimedia Adaptation service’s voice grammar adaptation servlet. The default URL format is: http://<server>:<port>/mcs/media/vgrammar 3.6.1.1.3 Configuring SSL Certificates The SSL section enables you to configure your security certificates as either Base64 or PKCS#7-formatted certificate files to enable use of the HTTPS protocol. You can add, delete or update the certificated file name. Use the absolute file name. A Base64 certificate file is a text file, with the certificate information bounded at the beginning by ’--BEGIN CERTIFICATE--’ and at the end by ’--END CERTIFICATE--’. A PKCS#7-formatted file is in binary code. Note: You must configure the Secure Sockets Layer to use HTTPS in the HttpAdapter. 3.6.1.2 JDBC Connection Pool Pooling for JDBC connections improves resource utilization and reduces the connection establishment overhead when you access database. The JDBC Connection Pool page, invoked by selecting the JDBC Connection Pool hyperlink in 3-30 Administrator’s Guide Site Administration the Site Administration page, enables you to configure the JBDC connection for the site, including: ■ Minimum number of connections (the default is 4) ■ Maximum number of connections (the default is 100) ■ Incremental allocation of new connections to the connection pool (the default is 1). 3.6.1.3 System Logging For information, refer to Section 3.3.2.1. 3.6.1.4 Site Locale The Site Locale page, invoked by selecting the Site Locale hyperlink in the Site Administration page, enables you to configure the locale and time zone for the site. You can specify the default site locale and time zone. The default site locale can be selected from the list of all the supported locales of Wireless.Wireless ships with 29 supported locales which enable the translation of end-user messages into 29 languages. The administrator can add new locale or delete a locale using this page. For more information, see Section 15.2.4 in Chapter 15, "Globalization". 3.6.1.5 WebCache WebCache is an component used by Wireless to accelerate site performance by caching the content transformation. Wireless performs transformations at two levels. At the first level of transformation, Wireless converts the adapter result, which is obtained as a result of the adapter pulling content from an external data source. The runtime adapters convert this into SimpleResult XML. Wireless performs a second transformation (that is, content transformation) when converting the SimpleResult XML into a device-specific markup language. The WebCache configuration page enables you to set the cache policy. Table 3–4 lists these parameters: Managing the Wireless Server 3-31 Site Administration Table 3–4 Parameters of the WebCache Configuration Screen Parameter Value Enable WebCache Selecting this check box enables caching. WebCache Server URL The URL of the WebCache server. WebCache Invalidation Port The port in the WebCache machine to which the invalidation messages are sent. WebCache Invalidation Password The invalidation password for WebCache. WebCache Timeout (second) The interval (in seconds) after which the WebCache times out. For more information on WebCache, see Section 16.2.1 in Chapter 16, "Integrating Wireless with Other Components". 3.6.1.6 User Provisioning The User Provisioning page enables you to set the properties used by the Provisioning adapter. Table 3–5 describes the properties for normal user provisioning. Table 3–5 User Provisioning Properties Property Description Parent folder The folder for the user’s home folder. A new subfolder is created for every new user. The default is /Users Home. Default groups The default group to which the user belongs. The default is Users. (You can select or clear the group selection using Control + click). Disclose User Location Selecting this option enables the users’ location to be disclosed to a third-party application. Disclose User Identity Selecting this option enables the users’ identities to be disclosed to a third party application. 3.6.1.7 Virtual Users A virtual user is a user who accesses a Wireless site, but does not register. When such a user accesses a Wireless site, Wireless detects the user and creates a virtual user account for that user. 3-32 Administrator’s Guide Site Administration Table 3–6 describes the properties for the virtual user provisioning. Table 3–6 Virtual User Properties Property Description Parent folder The parent folder for the virtual user’s home folder. A new subfolder is created for every new user. The default is /Users Home. Default groups The default groups to which the user belongs. The default is Users. (You can select or clear the group selection using Control + click). Enable Virtual User Selecting this option enables a virtual user to create an account. 3.6.1.8 WAP Provisioning You can create, edit, and delete WAP profiles using the Profile page, which you access by selecting the WAP Provisioning hyperlink. The Profile page displays a list of current WAP profiles. You can also add a WAP profile by defining the following parameters. Note: The parameters differ depending on the bearer that you select. Table 3–7 describes the WAP provisioning profile parameters. Table 3–7 WAP Provisioning Profiles Parameter Value WAP Profile Name The name of the WAP profile. You can name the profile for the WAP provider. WAP Bearers A list of the transport technologies. GSM/CSD Circuit-Switched Data (CSD) over a GSM (Global System for Mobile communication) network. This is the basic transfer protocol in GSM phones. GSM/SMS Short-Messaging Service over a GSM (Global System for Mobile communication) network. Select this store-and-forward technology to enable alphanumeric messaging between mobile phones and such other platforms as email or voice mail. GSM/USSD Unstructured Supplementary Service Data (USSD) over a GSM (Global System for Mobile communication) network. USSD is both session- and transaction-oriented. Managing the Wireless Server 3-33 Site Administration Table 3–7 WAP Provisioning Profiles Parameter Value GPRS General Packet Radio Service (GPRS). Select this bearer technology to use WAP on a per-transaction basis. GPRS enables services to be always on; a GPRS customer does not have to invoke a service to receive content. WAP Gateway Proxy The address of the WAP proxy server. For GSM/CSD, it is an IP address. For GSM/SMS, this is service or phone number. For GSM/USSD, this is either an IP address or an MSISDN number. This is a required field. Port The port number. The default port numbers are: ■ 9200 (connection-less) ■ 9201 (connection-oriented) ■ 9202 (secure and connection-less) ■ 9203 (secure and connection-oriented) Secure WAP Session Selecting this option enables WTLS (Wireless Transport Layer Security). Phone Model The brand and model of the wireless phone. Home Page The home page of the ISP provider accessed by the WAP user. GSM/CSD Parameters Call Type A drop-down list of the call types (analog or ISDN) used for the connection. Call Speed The call speed of the connection. Authentication Type Select one of the following protocols used for user authentication: ■ PAP (Password Authentication Protocol) ■ CHAP (Challenge Handshake Authentication Protocol). ISP Name The name of the Internet service provider (ISP). ISP Login Name The user name. ISP Login Password The user’s password. GSM/SMS Parameters SMSC Address The number of the SMSC (Short Message Service Center). USSD Parameters Proxy Type The phone number or IP address of the WAP provider. USSD Service Code The USSD code (for example, *555*), that precedes the destination number. Timeout The time, in seconds, after which the session expires. 3-34 Administrator’s Guide Site Administration 3.6.1.9 Performance Monitor The Performance Monitor page enables you to configure the Wireless performance monitor, including the parameters described in Table 3–8. Table 3–8 Parameters of the Performance Monitor Screen Parameter Description Enable Performance Logging Selecting this check box enables performance logging. Delimiter for logged name/value pair The delimiter for the logged name/value pairs. The default delimiter is #%=%#. This is a required parameter. Delimiter for logger records The delimiter for the logged records. The default is ~#$. This is a required parameter. Wakeup Frequency (minute) The number of minutes after which the logger thread wakes up to check for any new files in the process directory. The default is one minute. This is a required parameter. Close Frequency (second) The number of seconds to close a file. The default is 300. Batch Size for Performance logging The batch size for the performance logging. The default is 15. This is a required parameter. 3.6.1.10 Billing Framework The Billing Framework page enables you to configure the Oracle Application Server Wireless Billing Integration Framework, which provides an extensible and flexible framework to model billable services, capture billable action, and integrate with any external billing engine. To enable the billing of all services, select Enable Billing. Billing is disabled by default. To complete the billing enabling process, provide the implementation of two interfaces, the BillingDataCollector interface and the BillingDriver interface, and then configure them as the implementation classes. Note: The out-of-the-box implementation of the BillingDataCollector interface is pre-seeded in the configuration as oracle.wireless.billing.BillingDataCollectorImpl. Managing the Wireless Server 3-35 Site Administration The Billing Collector Class, fetches all of the component-specific billing attributes and then plugs them into the service detail record (SDR), which encapsulates the billable action. The Billing Collector Class considers the following components: Runtime, Notification Server, Provisioning Server, and Messaging Server. In addition, you define the Billing Provider Driver, the driver implementation provided at the customer end which communicates with the external billing system. To enter this value, you enter the full class with the package name, such as oracle.wireless.billing.SampleBillingDriver. You can select, delete, or add the driver class initialization (init) parameters. If this billing driver implementation class expects initialization properties, then you add them as name-value pairs. For more information about billing framework, refer to the Oracle Application Server Wireless Developer’s Guide. 3.6.1.11 Mobile Studio The Mobile Studio page enables you to configure Mobile Studio by defining the parameters described in Table 3–9. Note: You must restart the Wireless server for the Mobile Studio configuration settings to take effect. For more information on Mobile Studio, see Section 6.2 in Chapter 6, "Administering Mobile Studio". 3-36 Administrator’s Guide Site Administration Table 3–9 Parameters of the Mobile Studio Screen Parameter Value URL of Deploy Server The URL of the Wireless production instance. Applications created by developers in the Mobile Studio (referred to as the development instance) are deployed to this URL. For example, enter http://myserver.mycompany.com:myport/studio. If you do not enter the URL in this field, then deployment is disabled. Default Site The name of the branding (that is, the look-and-feel) which is used as the default. This is pre-seeded with the value Default. Application providers can brand the Mobile Studio (by customizing its appearance and content) and integrate it with an existing Web site. You can substitute another branding for this default by entering the name of another branding in this field. For more information on branding, refer to the Oracle Application Server Wireless Developer’s Guide. J2ME Web Services Supported? Whether the Web services feature of Mobile Studio should be enabled. By default, this option is not selected (the flag is set to false). By selecting this option, Mobile Studio’s interface displays an additional tab that includes functions that enable developers to register Web services which can be accessed from J2ME MIDlets. 3.6.2 Component Configuration The component configuration section (Figure 3–16) contains the configurations specific to different Wireless subcomponents, which are represented as links. To access these links, you expand the Component Configuration section by clicking the plus (+) sign. Figure 3–16 The Component Configuration Section of the Administration Screen 3.6.2.1 Multi-Channel Server The Multi-Channel Server component includes the following configurations: Managing the Wireless Server 3-37 Site Administration Runtime The Runtime page contains the configuration for runtime attributes, such as runtime session, and the object cache synchronization. Table 3–10 describes the runtime parameters, which you configure using this page. Table 3–10 The Runtime Parameters Parameter Description Runtime Session Life Time The life span of a session. The default is 600. (seconds) Runtime Session Check Interval (seconds) The time required for the session monitor to check an open session. The default is 60. Cache Object Life Time (seconds) The life span of a persistent object. After this time, Wireless reconstructs the object. The default is 600. Cache Object Check Interval (seconds) The time required for the cache monitor to check the cache. If the time is set to -1, Wireless does not invoke the cache monitor and the cache is not cleared. The default is 60. Maximum execution time per Request (seconds) The default is 120. Wireless interrupts the threads for the request that take longer than this allotted time and returns an error. Persistent Session Life Time (days) The life span of a persistent session. Runtime session states include the state of user authentication, credentials, cookies, URL caches, the short names for the Async applications, and the module call-back stacks. Setting the Runtime Session Persistency flag makes these session states persistent.The lifetime of persistent sessions can be several orders of magnitude longer than the session expiration time. The default lifetime for a persistent session is two days. Enable Runtime Session Persistency Setting this flag enables a persistent session. The default is false. For more information on the runtime, see the Oracle Application Server Wireless Developer’s Guide. Defining the parameters in the Object Cache Synchronization section of the page enables you to configure the thread pool, which handles the cache synchronization for messages. To configure the object cache synchronization, you define the following parameters: 3-38 ■ Minimum number of threads in the thread pool ■ Maximum number of threads in the thread pool ■ Timeout, in minutes, for the threads in the thread pool Administrator’s Guide Site Administration Device The Device Configuration page enables you to add, edit, or delete HTTP header names that contain information for the device ID. You can also configure the Multi-Channel Server setup menu, with the following attributes: ■ Enable Login ■ Enable Logout ■ Enable User Info ■ Enable Service Customization ■ Enable Global Preset ■ Enable User Profile ■ Enable Self-Registration ■ Enable Home ■ Enable Help. You must enter the URL of the help files if you select Enable Help. Folder On Folder page, you configure the folder sorting order and display by: 1. Selecting the sorting order for applications and folders on the output devices by using the arrows to select (> or >>) or remove (< or <<). The selection choices are ascending order or descending order based on name, sequence number, or date: ■ ORDER_NAME_ASC ■ ORDER_NAME_DESC ■ ORDER_SEQNO_ASC ■ ORDER_SEQNO_DESC ■ ORDER_DATE_ASC ■ ORDER_DATE_DESC Note: The ascending (ASC) or descending (DESC) sorting orders cannot be selected for the same property. For example, you cannot select both ORDER_NAME_ASC and ORDER_NAME_DESC. Managing the Wireless Server 3-39 Site Administration 2. Selecting the display application size under a folder, which is the number of applications to display in one folder. 3. Selecting from the following options for the user’s home folder sorting policy: 4. ■ USE_ORDER_SERVICES (default value) ■ USER_SERVICES_FIRST ■ GROUP_SERVICES_FIRST ■ Selecting the folder icon and audio settings Configuring the URI for the icons, images and audio for folder, including Generic Title Icon, Home Icon, Help Icon, Login Icon,Top Bar Image, and Help Audio. Event and Listener This Event and Listener page displays event options and available listeners. Using this page, you enable or disable event generation by selecting from among the event options and listeners. You also use the page to add, update or remove a listener for the request events, session events, or response events. The Event and Listener page includes the following configuration options for events. You enable these options by selecting appropriate check boxes. If you do not select a check box, then the option is disabled (the default setting). Table 3–11 describes the request, session, and response event options. Table 3–11 The Request, Session, and Response Event Options Option Definition Request Event Enable ’before request’ Event Declares a request event to be "just received". Enable ’after request’ Event Declares a request event as "request object has been released". Enable ’transform begin’ Event Declares an request event to be "before the transformation". Enable ’request begin’ Event Declares a request event to"begin being processed". Enable ’service begin’ Event Declares a request event to be "before the adapter is invoked". Enable ’transform end’ Event Declares a request event to be "transformation complete". Enable ’request end’ Event Declares a request event to be "request has been completely processed". Enable ’service end’ Event Declares a request event to be "adapter execution complete". 3-40 Administrator’s Guide Site Administration Table 3–11 The Request, Session, and Response Event Options Option Definition Enable ’request error’ Event Declares a request event to be "error occurs during request processing." Session Event Enable ’before session’ Event Declares a session event to be "before session starts". Enable ’session authentication’ Event Declares a session event to be "session has been authenticated". Enable "session begin" Event Declares a session event to be "session has been validated". Enable ’session end’ Event Declares a session event to be "session has expired (implicitly and explicitly)". Enable ’after session’ Event Declares a session event to be "session object has been released". Response Event Enable ’response error’ Event Declares a response event to be "error in response" object. See the Oracle Application Server Wireless Developer’s Guide for more information on event listeners. Hook You can change the hook implementation class for a selected hook using the Hook page. Table 3–12 describes the hooks. Table 3–12 Hooks Hook Description wireless.http.locator.signon.pages.hook.class The hook to generate the sign-on page on the device. The default is oracle.mwa.core.omap.panama.MWASignOnPage. wireless.http.locator.caller.location.hook.class Declares the hook for which acquires the user’s current location. The default is oracle.panama.rt.common.LocAcq. wireless.http.locator.service.visibility.hook.class Declares the hook to check for the show or hide status when Wireless starts. The default is oracle.panama.rt.common.ServiceVisiblity. Managing the Wireless Server 3-41 Site Administration Table 3–12 Hooks Hook Description wireless.http.locator.listener.registration.hook.class Declares the hook for the event registration listener. The default is oracle.panama.rt.common.ListenerRegistratio n. wireless.http.home.folder.sorter.hook.class Declares the hook for sorting a user home folder contact. The default is oracle.panama.rt.common.HomeFolderSorter. wireless.http.locator.mobile.id.hook.class Declares a hook to acquire a mobile ID. The default is oracle.panama.rt.common.MobileIdHookImpl . wireless.http.locator.pre.processor.hook.class Declares a hook to be invoked before device transformation. wireless.http.locator.authorization.hook.class Declares the hook for user service authorization. The default is oracle.panama.rt.common.Authorizer. wireless.http.locator.post.processor.hook.class Declares a hook to be invoked after device transformation. wireless.http.locator.device.identifcation.hook.clas Declares the hook for identifying a logical device. The s default is oracle.panama.rt.hook.DeviceModels. wireless.http.locator.location.service.visibility.hook Declares the hook to show or hide the contents of a folder .class based on its current location. The default is oracle.panama.rt.hook.Folder.RendererPolicy . wireless.http.locator.folder.render.hook.class Hook for a folder renderer. The default value is oracle.panama.rt.common.FolderRenderer. wireless.http.locator.session.id.hook.class Declares a hook for generating the session ID. The default is oracle.panama.rt.common.SessionIDGenerator. 3-42 Administrator’s Guide Site Administration Table 3–12 Hooks Hook Description wireless.http.locator.authentication.hook.class Declares the hook for user authentication. The default is oracle.mwa.core.omap.panama.OMAPAuthenticat ion. wireless.http.locator.useragent.class Default implementation of the device recognition class. The default is oracle.panama.core.xform.UserAgentImpl. wireless.http.locator.normalizeaddress.hook.class Stores the address field of the DeviceAddress in normalized form, which is used to look up objects and to send the address by the transport. For example, the normalized form of an email delivery type can be lower-case letters, making the normalized form of [email protected] into [email protected]. The normalized form of the SMS delivery type could be all non-numeric characters. For example, the normalized form for (650) 555-5000 is 6505555000. If some carriers have a space between the area code, then the normalized address logic converts the phone number to 650 555 5000. 3.6.2.2 Multimedia Adaptation Service Multimedia adaptation services provide device-specific adaptation of images, ringtones, voice grammar, as well as audio and video streams. Wireless provides the default implementation for these services. To use different implementations, change the corresponding provider class name on Multimedia Adaptation Service configuration page. Note: When changing the class name, be sure that the class is on the Wireless classpath. See Oracle Application Server Wireless Developer’s Guide for more information on multimedia adaptation. 3.6.2.3 Async Listener You configure the following for the Async Listener component. Managing the Wireless Server 3-43 Site Administration Access Points An access point is the address monitored by Async Listener is configured to listen, such as [email protected] for e-mail or 1234567 for SMS. From the Add Access Point page (accessed by clicking the Add Access Point button in the Access Point page), you can use the Allowed to Access All Applications option to create two types of access points: ■ ■ Site access point - An address that enables access to all the Async applications. Select the Allowed to Access All Applications option to create a site access point. Application category access point - An address associated with one or more application categories. Content Managers associate these access points with application categories. You create this type of access point by clearing (or by not selecting) the Allowed to Access All Applications option. The Access Point page, invoked from Access Point link, displays a list of access points.You can add, delete or update an access point. Table 3–13 describes the attributes of the access points. Table 3–13 Access Point Attributes Attribute Description Name A unique name of this access point. Delivery Type The delivery type of this access point address. There are four options: Mail, SMS, IM or Two-Way Pager. Address The address of this access point. For SMS, it is a phone number, such as 18001234567. For IM, it has the format of <network>|<User ID>, such as jabber|[email protected], yahoo|foo, msn|[email protected], aim|foo, and icq|12345.Wireless currently supports the Yahoo, MSN, AOL, ICQ, and Jabber networks. For two-way pagers, use the format 180012343567 or [email protected] or 1800123.4567. 3-44 Administrator’s Guide Site Administration Table 3–13 Access Point Attributes Attribute Description Allowed to Access All Applications Select this option to determine if this is a site access point, or an application category access point. If you do not select this option, then you can associate one or more application categories with an access point used to support PremiumSMS. If there are application categories associated with this access point and you want to select this option and create a site access point, then Wireless removes all of the application categories associated with this access point. (Wireless asks you to confirm this change). Dedicated for Actionable Message Reply Selecting this option creates an address that is dedicated for Actionable Message Reply. Once it is set, all of the actionable push messages have the From address set to the access point. The instructions for replying to an actionable message have the short name omitted. To answer these messages, users need only to reply with a transaction ID and the application parameters. Application Categories The categories associated with an application category access point. The field is read-only, and it only appears when you edit an access point. This field is populated with values only if you did not select the Allowed to Access All Applications option. See the Oracle Application Server Wireless Developer’s Guide for more information on PremiumSMS, ReverseCharge SMS and actionable message reply. Async Listener The Async Listener Configuration page enables you to configure the system settings for Async Listener, including the number of working threads, command format, application help, default application short name, and actionable message reply. See the Oracle Application Server Wireless Developer’s Guide for system configuration parameters for the Async Listener and for configuration parameters for actionable messages. Note: The short name for replying to an actionable message must be unique among all the short name for Async application links. Messaging Server Client You must specify the Messaging Server client configuration for the Async Listener, because it is a client of the Messaging Server. You can add, delete or update the Managing the Wireless Server 3-45 Site Administration hooks used before or after sending a message (the pre-send and post-send hooks) or before or after receiving a message. Table 3–14 describes the parameters of the messaging server client. Table 3–14 Parameters of the Messaging Server Client Parameter Value Thread Pool Size The total number of threads created by the transport for this client. The transport uses these threads to retrieve received messages and status reports for this client. The transport ignores this setting if the client neither receives status reports nor has any registered end-points at which to receive messages. Number of Queues The number of queues. The transport creates this value only if this client receives status reports or messages. The transport supports only one queue per client; the transport creates only one queue per client even if you specify more than one queue per client. The number set at the site-level configuration is the default value if you do nor specify any value here. The transport ignores this setting if the client neither receives status reports nor has any registered end-points at which to receive messages. Recipient Chunk Size The number of recipients that receive messages in one send call by the client. If the number of recipients is too big, then the transport may send recipients messages on a chunk-by-chunk basis. In such cases, some may receive messages while the transport processes other recipients. As a result, some recipients get messages earlier than others. Sending messages chunk-by-chunk can improve performance. The chunk size cannot be more than 500; the transport uses a 500 chunk size even if the chunk size is set at greater than 500. 3-46 Administrator’s Guide Site Administration Table 3–14 Parameters of the Messaging Server Client Parameter Value Carrier Finder Hook Class Name Wireless uses this hook to find the carrier name from a phone number. The carrier name is then used by the driver finder to find a proper driver to send a message to this phone number. Use this hook for situations where there are several carrier-specific drivers, as using a carrier’s driver with a phone number of that carrier improves performance. If you do not specify the carrier finder hook class name at the node level, then Wireless uses the one set at the site level. If you do not specify the carrier finder hook class name at the site level, then the driver finder cannot find an appropriate driver because it does not have the carrier information. If you do not specify the carrier finder driver hook class at either the site or node level, then Wireless uses the transport’s default driver finder. Driver Finder Hook Class Name The name of the hook that the transport uses to find an appropriate driver to send a message to a given destination. The driver finder hook uses such criteria as delivery type, cost, or speed to assign a driver. If you do not specify the driver finder hook class name at the node level, then Wireless uses the driver finder hook specified at the server-level configuration. ■ Pre-Send Hook ■ Post-Send Hook ■ Pre-Receive Hook ■ Post-Receive Hook These hooks can be called before or after sending a message (the pre-send and post-send hooks) or before or after receiving a message (the pre-receive and post-receive hooks). These hooks, which are in the same category, are called in the sequence in which they are specified. You can use these hooks to enable special client functions, such as checking or filtering, rather than having to implement an application on top of the transport. 3.6.2.4 Notification Engine You configure the following for the Notification Engine: Notification System You can configure reply addresses of notifications for: ■ Email ■ SMS ■ Pager ■ Voice ■ WAP Push You can also configure the runtime settings related to location: Managing the Wireless Server 3-47 Site Administration ■ ■ Number of Location Event Listener Threads - The number of threads to start for each notification process for listening to incoming location events. The default is 1. Location Condition Response Delay (seconds) - The approximate response delay for location condition processing. The default is 600. Messaging Server Client You can specify the Messaging Server client configuration for the Notification Engine, as a notification engine is one client of messaging server. Please refer to the discussion of Messaging Server Client in Section 3.6.2.3. 3.6.2.5 Messaging You configure the following for the Messaging component. Drivers The Drivers page, invoked by clicking the Drivers link under Messaging Server in the Site Administration page, enables you to define a driver and its parameters. Table 3–15 lists the current drivers. Table 3–15 Driver Parameters Parameter Description Name The name of the driver Class Name The class name (with the full package name) that implements the driver. Delivery Categories The delivery category (or categories) of this driver, such as SMS, Voice, or Email. Enabled Indicates that the driver has been enabled. From this page, you can delete, edit, or create a messaging server drivers for the site. To create a new messaging server driver, you first click Add Driver and then define parameters listed in Table 3–16 in the Add Driver page. 3-48 Administrator’s Guide Site Administration Table 3–16 Messaging Driver Parameters Attribute Description Driver Name The unique name of this driver. This is a required field. Delivery Categories The delivery categories of this driver (required field). It can be one or a combination of the following values: SMS, EMS, MMS, USSD, Voice, Email, Fax, WAP-Push, Two Way Pager, One Way Pager, or IM. Enabled Selecting this flag enables this driver. Protocols A comma-separated list of protocols. Enter an asterisk (*) for any protocol. Carriers The comma-separated list of carriers. Speed Level The speed level of the driver. It can be from 0 to 10. Cost Level The cost level of the driver. It can be from 0 to 10. Capability The driver send or receive capability. The values can be SEND, RECEIVE or BOTH. Supported Encoding The supported encoding of this driver, such as UTF-8. Supported Locales The supported locale list of this driver. You can add, remove or update the locale list. Driver Class Name The class name (with the full package name) that implements the driver (required field). Driver Parameters The driver class parameters. You can add, remove or update the parameters. Each parameter has multiple attributes, including: ■ ■ ■ ■ Name -- The parameter name used by the driver class Description -- The parameter description, such as the meaning of the parameter. Mandatory -- Setting this flag marks the parameter as mandatory; not setting the flag marks the parameter as optional. Default Value -- The default parameter value. Out of the box, Wireless provides 15 seeded drivers, which support all of the delivery categories. Each driver has a different set of class parameters. By default, all of these drivers are enabled. See the Oracle Application Server Wireless Developer’s Guide for information on details of the drivers in the discussion of the transport component. Managing the Wireless Server 3-49 Site Administration Messaging Server Configuration Clicking the Messaging Server Configuration hyperlink invokes the Messaging Server Configuration page, which enables you set the default configuration for the messaging server. Table 3–17 describes the messaging server configuration parameters. Table 3–17 Messaging Server Configuration Parameters Parameter Description GSM Smart Message Encoder Class Name The class name that encodes the GSM smart message (such as ringtone, graphics, WAP setting, and email setting) for SMS. Default Number of Sending Threads The default number of sending threads for a driver instance. If the number of sending threads is not specified for a driver instance which has SEND capability, this value will be used. Default Number of Receiving Threads The default number of receiving threads for a driver instance. If the number of receiving threads is not specified for a driver instance which has RECEIVE capability, this value will be used. Send Retry Times How many times of retry if the sending of a message failed. Send Retry Delay (second) This number represents the waiting time between a failed sending of a message and the sending the message again. XMS Configuration The XMS Configuration page enables you to configure the settings for XMS Runtime and enable the XMS Center (XMSC), which adapts the content of a message to fit a given device. In addition, this page enables you to prioritize the device types for XMS message delivery. XMS Runtime Table 3–18 lists parameters that you define to set the XMS runtime. 3-50 Administrator’s Guide Site Administration Table 3–18 XMS Runtime Parameters Parameter Value Failover Processing Interval (minutes) How often the background failover processing thread is invoked to process address failover. (default is 10). Interval to Cleanup Processed Records (hours) How often the database purges processed failover data. The default value is 48 hours. Maximum Days to Keep Request in Failover Table The maximum lifetime for a failover record in the database. All failover records, whether they have been processed or are still pending, are deleted after this period. The default value is 30 days. Maximum Levels of Failover Supported The maximum number of failover ’address-delivery types’ combinations allowed per recipient. The portion which exceeds the limit will be truncated and lost. The default value is 5 XMS Center The XMS Message Center (XMSC) supports MMS Center functionality out of the box, so that a device with MMS browser can receive notification messages and retrieve messages stored on the Wireless server through HTTP. It also supports MO (mobile-originated) messages to another phone and message storage and notifications for other delivery channels besides MMS. To configure the XMSC, you define the following two parameters: ■ ■ Enable XMSC - Selecting this option enables the XMSC. By default, XMSC is enabled (set to true). Message Life Time - The maximum amount of time that a message can be stored on the server for users to retrieve. The default period is 7 days. Delivery Channel Settings XMS supports implicit device, or user addressing, by specifying the Wireless user name. XMS selects the best device for the user to receive messages, based on such factors as messaging content, application hints, and user preferences. If Wireless cannot send a message to one device, then XMS fails over to the next device in selection order and transforms the content for that device. You define the values the Delivery Channel Settings section by specifying the priority (or failover) of the XMS message delivery types and by adding the appropriate reply addresses for the delivery types. Managing the Wireless Server 3-51 Site Administration 3.6.2.6 Location-Related The location-related configuration includes the following ■ ■ ■ ■ Location Management -- For mobile positioning configuration, mobile positioning provider information and configuration, and mobile ID names. For more information, see the Oracle Application Server Wireless Developer’s Guide. Location Services -- For configuration options relating to geocoding, routing, mapping, traffic, and business directory services. For more information see the Oracle Application Server Wireless Developer’s Guide. Location Event Server -- For options relating to the location event server. For more information, see the Oracle Application Server Wireless Developer’s Guide. Location Mark Address Format -- For specifying location mark address fields. Location Mark Address Format This page enables you to configure the format of location mark address. To do this, you select all of the attributes that you want to display for a location mark address. This configuration is used in Customization Portal. ■ Company Name ■ Address Line 1 ■ Address Line 2 ■ Address Last Line ■ Block ■ City ■ State ■ Postal Code ■ Postal Code Extension ■ County ■ Country 3.6.2.7 Notification Event Collector You configure the following for the Notification Event Collector component. 3-52 Administrator’s Guide Site Administration Microsoft Exchange Notification Event Settings For Wireless to process notification messages from Microsoft Exchange Server, accessing details to the Exchange Server needs to be configured in the system. For the details of each configuration parameter, refer to Chapter 17, "Integrating Wireless Notification with Microsoft Exchange". 3.6.2.8 Provisioning Server You configure the following for the Provisioning Server component. Provisioning Server Configuration The Wireless Provisioning Server enables application providers to create and publish applications as well as serve content to the end-users when they download a selected application. The download protocol differs based on the application type (such as a J2ME MIDlet or a ring-tone) and the line provisioning protocol. The appropriate provisioning driver, which you configure, enables the download. You can add new drivers or implement the customized functions of the existing drivers. Note: Wireless supports only J2ME application for this release. Hooks The actual upload and download processes can be monitored using hooks, which customers implement. The hooks are initialized using a singleton pattern. The hook method is given the user information, the application information and the content information. The hook implementation must provide a method such as: public static <hookclass> getInstance() In the Provisioning Server page, you define the class names for the pre-download hook, the post-download hook, and the deliverable content event listener. Pre-Download Hook Class Name: This hook is invoked just before the user downloads the application. The hooks are initialized using a singleton pattern. The return code of the hook determines if the download can proceed. The interface to be implemented is: oracle.panama.rt.hook.ProvisioningPreDownloadHook Managing the Wireless Server 3-53 Site Administration Post Download Hook Class Name: This hook is invoked once just after the user downloads the application and once after the user’s device notifies the server of the application download. The provider can embed the billing action in either of these two invocations as appropriate. The interface to be implemented is: oracle.panama.rt.hook.ProvisioningPostDownloadHook Deliverable Content Event Listener Class Name: This hook is invoked during content upload, update or delete. The interface to be implemented is: oracle.panama.rt.event.DeliverableCtntEventListener Drivers The driver implements the following interface: oracle.wireless.me.provisioning.ProvisioningDriver You can add, delete or edit a driver. To add a driver, provide the driver class name, driver description and driver parameters, if any. Out-of-the-box, Wireless provides two driver implementations: the default provisioning driver (oracle.wireless.me.provisioning.DefaultProvisioningDriver) and the default JAR provisioning driver (oracle.wireless.me.provisioning.DefaultJarProvisioningDriver) These drivers are mapped to download J2ME MIDlets and JAR files, respectively. Driver Mapping You map the driver used for the appropriate application type and protocol configuration. Out of the box, the two drivers support SUN-OTA, and SUN-OTA_ JAR protocols for J2ME applications. You can select the driver classes, which are used for the two protocols. 3.6.3 Utilities The utilities section contains the common utilities for the administrator to use. 3-54 Administrator’s Guide Site Administration Note: For the utilities to function: ■ ■ You must configure the Wireless Tools URL correctly. If you use instance URLs, then you configure this URL using the Instance URLs page accessed from the Home page. For more information, see Section 3.3.3. If you use site URLs, then you configure the Tools URL from the HTTP, HTTPS Configuration page accessed from the Site Administration subtab. For more information, see Section 3.6.1.1. The Wireless Tools must be running, because the actual functions are hosted there. 3.6.3.1 Repository Objects Download The Repository Objects Download page (Figure 3–17), invoked by selecting the Repository Objects Download hyperlink in the Utilities section of the Administration page, enables you to download repository objects. You can specify the types of repository objects to download. For example, you can download only adapters. In addition, you can download by OID, and you can download applications by folder, or by user. You can also download all objects by user. You can only download repository objects to a local file. To download repository objects: 1. Enter the location for the log files. If you use the System Manager in standalone mode, then enter the password. (This required field only appears when you use the System Manager in the standalone mode.) 2. Enter the location of the logging activity. This is a server-side generated log file. For example, enter /temp/activity.log. 3. Enter the location for logging errors. This is a server-side generated log file. For example, enter /temp/error.log. 4. Specifying the Objects for Download by entering the filter expression for the name of the objects to be extracted. For example, enter \"/home/master*\". You can include wildcards, such as [*%_]. Managing the Wireless Server 3-55 Site Administration Note: This filter expression applies only to downloading specific types of objects, such as groups, or adapters. This filter does not work if the Download All Objects or Download by Object ID, Download by Users, or Download by Folder options. 5. Select from among the following options: ■ Download All Objects ■ Download All Adapters ■ Download All Devices ■ Download All Groups ■ Download All Location Marks ■ Download All Applications ■ Download All Transformers ■ Download All Users ■ Download All Master Notifications ■ Download All Notifications (deprecated) ■ Download All Data Feeders ■ Download All Topics (deprecated) ■ Download All Subscriptions ■ Download All Application Categories ■ Download All Application Category Access Points ■ Download All Application Access Points ■ ■ ■ 3-56 Administrator’s Guide Download by Object ID (OID). You must enter a range or comma-separated list of OIDs. Use a comma (,) to separate your entries. Download Applications by Folder. For this option, you must enter the folder path or folder URL. Download Applications by User Name. You must enter the user name. You cannot enter multiple user names. Site Administration 6. Click Download. A Windows dialog appears. In the Windows dialog, specify the local XML file for the downloaded objects. Clicking Cancel after Download stops the download operation. Note: In integrated mode, if you have not yet performed the Single-Sign-On (SSO) login, then Wireless redirects you to the SSO page the first time you click the Download button. On the SSO page, you enter a valid Superuser’s user name and password. Wireless then prompts you with the download dialog to specify the file location. After that, you remain at the SSO login page. To return to the Wireless download page, click on browser's Back button. The next time you click the Download button, you will not be redirected to the SSO page because you are already logged into SSO. Figure 3–17 The Repository Download Screen (In Standalone Mode) 3.6.3.2 Repository Objects Upload The Repository Objects Upload page (Figure 3–18), invoked by selecting the Repository Objects Upload hyperlink in the Utilities section, enables you to upload repository objects. You can upload repository objects from a local file. Managing the Wireless Server 3-57 Site Administration The upload function performs the following: ■ Checks for the objects in the repository by logical unique name. ■ Loads all dependencies. ■ ■ If the objects exist in the repository, then the uploading facility updates the objects. If the objects do not exist, then the uploading creates them. After each object type is successfully loaded, the uploading facility performs a commit unless you specify a different commit frequency. The commit includes all referenced objects (dependencies). Wireless does not validate the XML file that you import into the repository using the upload facility. To avoid errors, work in an XML file that you have exported from the repository. This gives you a "known good" Repository XML framework for adding, removing, and modifying individual elements. To upload repository objects: 1. Enter the password of the currently logged in user. This is the same as the user-logon password. This field appears only in standalone mode, where it is required. 2. Enter the name and location of the file you want to upload, or select it using the Browse function. 3. Enter the location of the logging activity. This is a server-side generated log file. For example, enter /temp/activity.log. This is a required field. 4. Enter the location for logging errors. This is a server-side generated log file. For example, enter /temp/error.log. This is a required field. 5. Enter the number of objects uploaded that triggers a commit. Entering 0 causes a commit after the utility has completed the upload. Note: in integrated mode, you must be logged into SSO as a valid user with the Superuser’s role before you can upload objects successfully. 3-58 Administrator’s Guide Site Administration Figure 3–18 The Repository Objects Upload Screen (In Standalone Mode) 3.6.3.3 WebCache Refresh for Master Applications This utility enables you to explicitly purge the pages of a selected master application cached in WebCache. For example, you use this utility if you wish to clear stale content from a master application at a time other than the one set programmatically using the Service Manager. To purge and refresh the pages for a selected master application, select the master application and click the Refresh Content button. 3.6.3.4 WebCache Refresh for Devices Using this utility, you can explicitly purge the pages of a specific device from the WebCache. To purge and refresh the pages of a selected logical device, just select the device and click the Refresh Content button. See Section 16.2.1 in Chapter 16, "Integrating Wireless with Other Components" for more information on WebCache. Managing the Wireless Server 3-59 Site Administration 3-60 Administrator’s Guide 4 Managing Users This chapter includes the following sections: ■ Section 4.1, "Overview" ■ Section 4.2, "Logging into the User Manager" ■ Section 4.3, "Using the User Manager" ■ Section 4.4, "Searching for Users" ■ Section 4.5, "Creating Users" ■ Section 4.6, "Viewing Application Links" ■ Section 4.7, "Viewing Devices" ■ Section 4.8, "Viewing Logs" 4.1 Overview The User Manager is a Web-based tool used to perform such user-support tasks as creating a new user, resetting the PIN and password for a user, assigning a special role to a user, or investigating any problems that a user may encounter when using the mobile applications. In the latter case, the User Manager enables you to view a user log, view and test user applications, and user devices. The User Manager provides help desk functions for both developers and end users (Wireless customers). In addition, the User Manager supports third-party content developers using Mobile Studio. Managing Users 4-1 Overview Note: Users granted the Super User or User Manager role access the User Manager tool. For more information, see Table 4–1. 4.1.1 Assigning User Roles Wireless users are assigned according to a user’s responsibilities. These roles, which are described in Table 4–1, encompass all of the Wireless resources, from server management and configuration, application development and publishing, help desk functions to subscription management. 4-2 Administrator’s Guide Overview Table 4–1 Wireless User Roles User Role Description Available Tools Application Developer Users assigned the Application Developer role perform the following functions: Service Manager ■ ■ Foundation Developer Content Manager Create, modify, delete and test applications. Publish applications to the Application Developer’s folder. ■ Create, modify, and delete notifications. ■ Create, modify, and delete data feeders. ■ Register and delete J2ME Web services. ■ Develop preset definitions. Users assigned the Foundation Developer role perform the following functions: ■ Create, modify, and delete devices. ■ Create, modify, and delete transformers. ■ Create, modify, and delete regions. ■ Create, modify, and delete digital rights policies. ■ Create, modify, and delete API scan policies. Users assigned the Content Manager role perform the following functions: ■ ■ ■ ■ ■ Foundation Manager Content Manager Manage application folders and bookmarks. Create application links based on Application Developer-created applications. Create notifications based on alerts (deprecated in this release). Create application categories and associate access points with them. Create a user-home folder rendering scheme, such as setting the sorting order for applications. Managing Users 4-3 Overview Table 4–1 Wireless User Roles User Role Description Available Tools System Administrator Users assigned the System role centrally manage and configure Wireless. The System Manager (accessed through the Oracle Enterprise Manager Application Server Control) User Manager Users assigned the User Manager role perform the following functions: User Manager ■ End User Manage users by providing such Help Desk functions as editing a user profile, resetting passwords and PINs, and creating or deleting users. ■ Manage user access privileges. ■ View application links assigned to users. ■ Manage user devices. ■ Search for users. ■ View overview information of users. Users assigned the end user role are the consumers of Wireless applications. End-users create their own accounts when they register with Wireless using the Wireless Customization. End users can also customize their own services either from a desktop or from a device. Customization for end-users includes: ■ Wireless Customization Portal Mobile Studio (for users assigned to the StudioUser group) Customize applications, download J2ME applications, subscribe to notifications. ■ Manage devices. ■ Manage location marks and location settings. ■ Manage contact rules. Mobile studio users also have the end user role; a user belonging to the StudioUser group can access the Mobile Studio. Every Wireless user is granted the Mobile Customer Role by default. This role is implicit to all users. Wireless also allows anonymous users, the users who do not register with Wireless but want to use the applications as a guest. You can create an anonymous user account for each group. All unregistered users share the guest account to invoke applications owned by the group. A guest user cannot personalize applications. 4-4 Administrator’s Guide Logging into the User Manager 4.1.2 Enabling Users to Access the Wireless Tools You must assign roles to users from the User Manager rather than with other general-purpose user management tools, such as DAS (Oracle Delegated Administration Services). Users created using DAS or other OID (Oracle Internet Directory) tools are provisioned in Wireless only when they accesses the Wireless and Voice portal, the mobile portal, or any of the PC-based tools for the first time. These provisioned users do not have the assigned roles needed to access the Wireless tools. For example, a user must have the Application Developer role to access the Service Manager. If a user with no assigned roles tries to log into a Wireless tool in the integrated mode, then Wireless displays the following Single Sign-On (SSO) error: No privilege to access this tool. Logout and login as another user with the required role. The user can successfully log into the Wireless Tools (or other components) only after you assign that user a role. See Section 4.5 for information on creating a user and assigning user roles. 4.2 Logging into the User Manager Before using the User Manager, you must first access the login page for the Wireless Tools using the following URL: http://hostname:port/webtool/login.uix For example, you access the login page by entering following URL into your browser: http://hostname:7777/webtool/login.uix Note: 7777 is the default port number for Oracle Application Server Wireless. The port number range is 7777 to 7877. To ensure that you are using the correct port number, check the port number for Oracle Application Server Wireless stored in [Oracle home]/install/portlist.ini. For more information on port usage, see Oracle Application Server Installation Guide and the Oracle Application Server Administrator’s Guide. Managing Users 4-5 Using the User Manager Enter your user name and then enter your password. If you are an administrator, enter orcladmin as your user name. (The password is set during installation, but can be changed with the User Manager.) 4.3 Using the User Manager After you have successfully logged into the User Manager, the tool defaults to the User tab, displaying the User Overview screen. Figure 4–1 The User Overview Screen 4.3.1 User Overview The Overview subtab provides you with an overall view of Wireless users by displaying the following: 4-6 ■ Total number of users. ■ Total number of currently logged-in users. Administrator’s Guide Searching for Users ■ ■ User Roles (A displays of the current user roles available and the number of users assigned to each of these roles.) User Groups (A display of the current Wireless user groups and the number of users in each of these user groups.) The User Manager displays the number of users as a link, which has a built-in query. Clicking this link invokes the Users Search Results page subtab, which displays a table listing all of the users matching the selected link. For example, clicking 2 next to Application Developers in Figure 4–1 invokes the Users Search Results page illustrated in Figure 4–2, which displays the two Wireless users who are assigned the Application Developer role. Figure 4–2 The User Search Results Page 4.4 Searching for Users Both the Overview and Users subtabs contain a Quick Search area, in which you construct the criteria for finding current Wireless users by specifying the user’s name, display name, phone number, or email address. You can further enhance your search by using the options accessed through the Advanced Search link, which enable you to find a user by user group, user role and user type. Elements Search User Result Screen Managing Users 4-7 Searching for Users Table 4–2 Elements of the Search User Result Screen Label Definition User Name The name of the user. Display Name The display name of the user. Groups Assigned The group to which the user has been assigned. Roles Granted The role (or roles) granted to the user. For information on user roles, see Section 4.5. 4.4.1 Finding Users with Quick Search To find users using Quick Search, you first select the type of search by selecting from the following options in the drop-down list: ■ User Name ■ Display Name ■ Phone Number ■ Email Address Enter the search string in the Search By field. For example, enter the user’s display name in this field. From the drop-down list, select the match type (matches, starts with, ends with, or contains) and then click the Go button. The list of users corresponding to the search criteria appears. If you want to specify more search options, such as finding a user belonging to a specific group, or with a specific role, click Advanced Search to further define your search. 4.4.1.1 Using Advanced Search To find users in Advanced Search, you first select the type of search: ■ User Name ■ Display Name ■ Phone Number ■ Email Address. Enter the search string in the Search By field. For example, enter the user display name in this field. Use the drop-down lists to select the group to which the user 4-8 Administrator’s Guide Creating Users belongs, the role granted to the user, and the user type. There are three types of Wireless users: anonymous users who are guest users, virtual users, and registered users. When an unregistered user accesses a Wireless site, Wireless detects the user and creates a virtual user account for that user. Note: The default value of the user role, user group, and user type search options is Any. Click the Search button. The list of users corresponding to the search criteria appears in the Users subtab. 4.5 Creating Users The Create User screen contains a set of parameters that administrators set to create and configure new users. Table 4–3 describes the parameters in the Create User screen. Table 4–3 Parameters of the Create User Screen Parameter Value User Name The name of the user. This is a required field. Note: the name is case-sensitive. Display Name The display name of the user. New Password The user’s password. Note: the password is case-sensitive. This field is required when creating new user. Password Confirmation The user’s password entered again. This field is required when creating new user. Primary Phone Number The primary phone number of the user. This is a required field. When you enter the value for this parameter, Wireless creates a device for this user with this phone number. This number also serves as the user’s account number, which the user enters for login rather than entering a user name on a device.When you edit a user profile, the Account Number field in the editing screen corresponds to the Primary Phone Number field in the Create User screen. Changing the value for the Account Number, however, only changes the account number, not the value for the primary phone number. PIN The user's personal identification number (PIN) requested when the user logs in using the primary phone number (that is, the. account number). This field is required when creating new user. Managing Users 4-9 Creating Users Table 4–3 Parameters of the Create User Screen Parameter Value PIN Confirmation The confirmation for the user’s personal identification number. This field is required when creating new user. Email Address The user’s email address. This is a required field and it appears only in the Create User screen. A user device with this email address is created for the user. Mobile Station ID The user’s mobile phone number, or the MSISDN (mobile subscriber ISDN) for GSM (Global System for Mobile communication) services. Wireless uses this ID to track the position of the user. External Repository ID A mapping of a user from the Wireless schema to a unique ID of that user in another user database. Virtual User Device ID An ID generated for unregistered users who access a Wireless site. When an unregistered user accesses a Wireless site, Wireless detects the user and creates a virtual user account for that user. Wireless traces this user by phone number or by another identification number sent from the user’s device. This number is the Virtual Device ID number. You cannot create a virtual user; Wireless creates virtual users dynamically. This parameter does not apply to registered users or to anonymous users. User Type Select Registered for registered Wireless users. Select Anonymous when creating an anonymous user, an entity that Wireless automatically assigns to an unknown user. An unknown user is a user whose device does not send any identifiable numbers through the HTTP header when accessing a Wireless site. Creating an anonymous user enables unknown users to access public applications and explore the site before registering. Gender The user’s gender (select either male or female). Date of Birth The user’s date of birth. You can select this from the calendar or enter it in the field using the mm/dd/yyyy format. Enabled Selecting this check box enables users to log in. Leaving this check box clear prevents a user from logging in. By default, this option is enabled. Language A drop-down list of display languages. This is a required field. See Section 4.5.1.1. Time Zone A drop-down of time zones for the user’s locale. Note: Wireless generates and delivers notifications to the time zone selected by the user rather than by the time zone of the Wireless server itself. This is a required field. User Home Root A drop-down list of root folders, which can represent user communities or providers. The Content Manager creates these folders, which provision the home folders for users. This is a required field. 4-10 Administrator’s Guide Creating Users Table 4–3 Parameters of the Create User Screen Parameter Value Remember my last location This check box enables Wireless to ascertain the user’s current location using the signal from the user’s mobile device, and to cache the user’s current location. Wireless sends the user content specific to the current location. Caching the location can improve server performance. Allow other applications This check box enables the user identity to be disclosed to a third-party to access my identification. application. Allow other applications to access my location. This check box enables the user’s location be reported to a third-party application. Groups The groups to which you can assign the user. Using the arrow keys, you can select ( > or >>) or remove (< or <<) a user from a group. The Content Manager creates groups and assigns applications to them. For more information, see Section 5.4 in Chapter 5, "Managing Content". Roles The roles to which you can assign a user. Using the arrow keys, you can select ( > or >>) or remove (< or <<) a user from a role. If you do not select a role, then the user has end-user privileges and cannot access any Wireless tool. A User Manager user can only create other User Manager users or end users. Note: Users assigned the User Manager role only (that is, a user without the Super User privileges) can only assign the User Manager role. To create a new user, you first click Create User in the Users screen. The create screen appears (Figure 4–3), with its fields populated by such default information as the user’s status as enabled and the default language and time zone (which are based on the corresponding configuration for the Wireless Site). Enter the values as needed. The user name, password, primary phone number, PIN, email address are required, as is the user’s language, time zone and User Home Root. Managing Users 4-11 Creating Users Figure 4–3 The Create User Screen (Partial View) Click Finish to complete the creation of the user. The new user appears in the user list in the Browse User screen, along with the message User with the name of *** has been created. Figure 4–4 illustrates the Browse User screen displaying this message. Figure 4–4 The New User Message 4-12 Administrator’s Guide Creating Users Click Finish to complete the user. The new user appears in the user list in the Browse User screen, along with the message, User with the name of *** has been created. 4.5.1 Editing User Profiles From the Users screen, select the user from the Users screen and then click Edit. The Edit screen appears, displaying the current user profile information for the selected user. When you edit a user profile, the Account Number field in the editing screen corresponds to the Primary Phone Number field in the Create User screen. For example, Figure 4–5 depicts a partial view of the Editing screen in which the value for the Account Number field, 1555555000 is the same as the value entered for the user’s Primary Phone Number in Figure 4–4. Changing the value for the Account Number, however, only changes the account number, not the value for the primary phone number. You cannot edit the email address for a user. To edit the values for the Primary Phone Number and for the email address, you must edit the user’s devices. Figure 4–5 Editing a User Profile Edit the values as needed. See Section 4.5 for information on the parameters of a user’s profile. The password and PIN are not required when editing user profiles, but you can edit these values if needed. Managing Users 4-13 Creating Users Click Finish. The Users browse screen appears, displaying any changes pertinent to the labels in the Users screen (for example, the user name). Note: A user assigned to the User Manager role (but not assigned to the Super User role) can only edit his or her own user profile, the user profiles for end users, and the profiles of other users assigned only to the User Manager role. Users can view the Wireless Tools in 11 languages and the Wireless Customization in 29 languages. (The languages available for Wireless Customization include the 11 languages available to the Wireless Tools in addition to 18 more.) 4.5.1.1 Viewing UTF-8 Pages in Localized Languages with Netscape 4.7 or Lower Some languages may not display properly if you use Netscape 4.7 or a lower version. In some cases, characters may display as boxes. To fix this problem, configure the Netscape preferences as follows: From the Netscape tool bar, select Edit. 1. Select Preferences from the drop-down menu. The Preferences dialog appears. 2. From the Category tree, select Fonts to display the Fonts dialog. 3. In the Fonts dialog, select Unicode from the For the Encoding drop-down list. 4. From the Variable Width Font and Fixed Width Font drop-down lists, select the font that supports the preferred language. For example, if you select Chinese as your preferred language, you can select MS Song to view the page in Chinese. 4.5.2 Resetting the Password The User Manager enables you to reset the user password and PIN. From the Browse User screen, select a user and then click the Reset Password button. The Reset Password screen then appears, where you to enter the new password, the password confirmation, the new PIN, and the PIN confirmation. To reset the PIN only, do not enter a value Password field (leave it blank). Likewise, you can leave the PIN field blank if you need only to reset the password. In the default installation of Oracle Application Server, a Wireless application entity does not have the User Administrator privilege to change a user password, so 4-14 Administrator’s Guide Viewing Application Links saving the changed password fails with a general error message. You can identify the error by checking the Wireless log file. You can assign the User Administrator (UserSecurityAdmins) privilege by running the assignUserSecurityAdminsPrivilege.sh script, located at $ORACLE_ HOME/wireless/bin. To assign this privilege, run the following command: assignUserSecurityAdminsPrivilege.sh cn=orcladmin, welcome1 Note: orcladmin is the user name for the super user and welcome1 is the password. For more information, refer to the OracleAS Security Guide. This privilege checking applies only to password and not to PIN. 4.5.3 Deleting a User To delete a user, select a user from the Browse User screen and then click the delete user icon. After confirmation, Wireless deletes the user from the list. 4.6 Viewing Application Links The View Application Links button enables you to view the applications, bookmarks, folders, and notifications accessible by a single user, as well as use the simulator to test applications. The applications that a user can access include all those assigned to the groups that the user belongs to, as well as applications created in the selected user’s home folder using Mobile Studio, or published through the Service Manager using the Quick Publish function. Selecting a user and then clicking the View Application Links button displays the following: Table 4–4 Application Link Information Element Description Type The type of objects created by the selected user. Name The display name of the folder, application, or bookmark. Object ID The Object ID (OID) of the application or module in the database. Managing Users 4-15 Viewing Devices Table 4–4 Application Link Information Element Description Application The master application on which the invoked the user’s applications (that is, the application links published to the user’s group) are based. Test Clicking the phone icon enables you to view the application on a phone simulator. Visible If the column displays true, then the object is visible and therefore accessible to an end user. If false, then the object is not visible. Sequence The customized order in which applications and folders appear on output devices. By default, the display order of the applications is by name. Group The group to which the application is assigned. Last Modified The last time an object was modified. For detailed information on the Edit, Delete, Move and Debug buttons, refer to Section 5.3. These functions are identical to those in the Content Manager, except that the User Manager only enables you to modify the attributes of applications which belong to the selected user’s home folder; you cannot modify the applications assigned to the selected user’s group. 4.7 Viewing Devices The User Manager enables you to manage a user's devices by clicking the View Devices button from the Browse User screen. Clicking View Devices enables you to see all the devices belonging to a selected user (as illustrated in Figure 4–6). The User Manager provides the same functionality as the Wireless Customization Portal by enabling you to add, edit, delete, or validate a device, as well as set a default device. The Test button enables you to test a selected device by sending a test message to the user. If a user cannot receive subscribed notifications, then this function indicates that there are problems with sending messages. For more information on using the Wireless Customization Portal for general device management and display attributes, refer to Oracle Application Server Wireless Developer’s Guide. 4-16 Administrator’s Guide Viewing Logs Figure 4–6 Viewing User Devices 4.8 Viewing Logs The User Manager enables you to view activity logs that display the accessed Async applications, notifications, applications, and the downloaded media contents (that is, J2ME applications) for a selected user. The activity logs display the most recent activity for user, or the user’s activity within a specific time frame. In addition, these activity logs tell you if Wireless dispatched applications successfully. To view the user logs, select a user and then click the View Logs button. The summary page of activity log appears (Figure 4–7), displaying the last five logged records of the Async applications requested, notifications sent, applications accessed, and media contents downloaded. To view the detailed activity based on a specified time frame, click the Full List button of the specific log type. Managing Users 4-17 Viewing Logs Figure 4–7 The Viewing User Logs Screen (Partial View) Viewing Async Logs Table 4–5 describes the Async application statistics for a selected user. Table 4–5 Async Log Statistics Element Description Short Name The name of the Async application (for example, ST for a stock quote application). ID The OID of the Async agent application in the database. Device Address The address of the user’s device receiving the notification. Server Address The address of the Async application. Delivery Type The delivery type for the Async application (for example, SMS). Receiving Time The time that the Async server received the request. Async Status A message describing how Wireless failed to respond to the Async application. Viewing Notification Logs Table 4–6 describes the notification statistics for a selected user. 4-18 Administrator’s Guide Viewing Logs Table 4–6 Notification Log Statistics Element Description Name The name of the notification. Notification ID The OID of the notification in the database. Device Address The address of the user device receiving the notification. Device Type The type of logical device receiving the notification (for example, WAP-Push, SMS, or Email). Dispatch Time The time Wireless sent the message. Message Status The status of the sent message. Viewing Application Statistics Logs Table 4–7 describes the application statistics for a selected user. Table 4–7 Application Log Statistics Element Description Name The name of the application. Application ID The OID of the application in the database. Application Type The type of object (folder, bookmark, application, or local module) accessed by the user. Invocation Time The time the user accessed the application. Invocation Status Whether Wireless successfully executed the application. Viewing Media Download History Logs Table 4–8 describes the media download statistics for a selected user. Managing Users 4-19 Viewing Logs Table 4–8 Media Download History Statistics Element Description Application Name The name of the J2ME application. Content Version The version of the deliverable content which was downloaded. Device The name of the user device which downloaded the application. Download Time The time of the download. Download Status The status of the download. 4.8.1 Selecting a Time Frame You can view the activity log for a specific period using the From Date and To Date fields. You can set the starting and ending dates either by entering them in the fields in the mm/dd/yyyy format, or by picking them from the calendars. Click Go after you have completed entering the date range. Note: The default From date is midnight of the previous day. Both the From and To dates assume midnight of the selected day. 4.8.1.1 Printing an Activity Log You can print an activity log by clicking Printable Page. This printed page contains text only and has no headers or footers. Use the browser’s Back button to navigate from the printed page. 4-20 Administrator’s Guide 5 Managing Content This chapter describes the Content Manager. Each section describes how to use this tool. These sections include: ■ Section 5.1, "Overview of the Content Manager" ■ Section 5.2, "Accessing the Content Manager" ■ Section 5.3, "Managing Application Links" ■ Section 5.4, "Defining Access Control" ■ Section 5.5, "Creating User Home Root Folders" ■ Section 5.6, "Categorizing Content" ■ Section 5.7, "Managing Alerts (Deprecated)" 5.1 Overview of the Content Manager Using the Content Manager, you can publish Wireless applications to user groups and to manage user groups. The Content Manager’s step-by-step wizards enable you to create the following objects: Application Links The Content Manager enables you to publish the master applications as an application link. This pointer inherits the parameters of a master application, but can also be used to tailor the core application to the needs of a particular user group or situation. For example, for a master application to deliver restaurant information for an entire city, its adapter takes a single parameter (a location), and returns a list of restaurants throughout the city. While the master application can specify a broad location, such as the city itself, you can create application links based on a specific parameter, such as a district or area within that city. You can then distribute the Managing Content 5-1 Overview of the Content Manager application links, as appropriate, to user groups that you assemble based on the users’ locations. Folders Folders enable you to organize application links and bookmarks. When you assign a folder to a user group, you make its subfolders, application links and bookmarks within it accessible to that user group. Modules Modules or moduable application are reusable Wireless and Voice applications that can be invoked as a normal application, or by another application to return a result. Wireless provides several applications that are ready for deployment, including the Collaboration Applications (that is, PIM tools such as calendar, address book, fax, and mail). For more information on these pre-configured applications, see Chapter 8, "Configuring the Out-of-the-Box Applications". Bookmarks The Content Manager enables you to create a bookmark, a link enabling the user to quickly access an external resource, such as Web page. In addition to providing the user this shortcut, however, Wireless enables you to create bookmarks that render their content equally well on a variety of devices. End users can set bookmarks in the Wireless Customization Portal. The bookmark appears as a menu selection on the mobile device. Wireless does not process the content of the URL target. The format of the target content must be supported by the user’s device. Alerts and Topics (Deprecated) An alert (notification) is an application delivered to users based on the trigger conditions they set when subscribing to the alert. An alert inherits the parameters from a master alert, which is created using the Service Manager. Content Managers organize alerts by topics, containers that group alerts. The Content Manager provides you to distribute these repository objects to user groups, organize them in a business context appropriate to each user group, and assign them to different categories so that they can only be accessed through specified access points. 5-2 Administrator’s Guide Accessing the Content Manager 5.2 Accessing the Content Manager After you log in to the Wireless Tools, you select the Content Manager by clicking the Content tab. Note: You must be granted either the Superuser or Content Manager roles to access the Content Manager. The Content Manager defaults to the Publish Content tab (Figure 5–1). The Content Manager organizes the creation, distribution, and publishing of applications into the following tabs (described in Table 5–1): Table 5–1 Tabs of the Content Manager Tab Functions Publish Content This tab includes functions to create, edit and delete bookmarks, folders, and application links. Access Control Content This tab includes functions to create user groups and assign applications to groups. Render Content This tab enables you to group users’ home folders by community or by provider. Categorize Content This tab enables you to group applications by category. You can also select the access points for these categories. Each of these tabs includes a browsing screen, which enables you to create, edit, or delete an object. Managing Content 5-3 Managing Application Links Figure 5–1 The Content Manager 5.3 Managing Application Links The Publish Content tab of the Content Manager enables you to manage application links, bookmarks, and folders. Clicking the Publish Content tab displays the browsing screen for application links. When you first access the Publish Content tab after logging in, the browsing screen displays the folders and applications at the root level (Figure 5–2). Using this screen, you can search for folders, bookmarks, and application links (including applications, modules, and Async applications). Clicking the Add Application button in this screen, you can access a wizard that enables you to create an application link based on an existing master application. In addition, this screen includes buttons that enable you to add folders and bookmarks. You can also use the browsing screen to delete, debug, move, and edit these objects. For more information on developing multi-channel applications (master applications), see the Oracle Application Server Wireless Developer’s Guide. 5-4 Administrator’s Guide Managing Application Links Figure 5–2 The Browsing Screen (From the Publish Content Tab) 5.3.1 Searching for Repository Objects The browsing screen screen’s search function enables you to search for and display the following repository objects: ■ Application ■ Module ■ Async Application ■ Bookmark ■ Folder The search field, when used in conjunction with two drop-down lists, the Type and Category lists, enable you to narrow your searches to a specific type and category. The results display in the Search Result screen, which is described by Table 5–2. Managing Content 5-5 Managing Application Links Table 5–2 Elements of the Search Result Section of the Applications Screen Element Description Name The name of the folder or service. Clicking the name of a folder displays its subfolders. Object ID The Object ID stored in the database. Full Path The route to a repository object, with Applications at the root. Each node on the route is displayed as a hyperlink. Clicking a hyperlink reveals a browse screen, displaying the subfolders, applications, and bookmarks organized under the folder. Using this browse screen, you can perform such functions as creating and deleting applications, bookmarks, and folders. Visible If the column displays true, then the object is visible and therefore accessible to an end user. If false, then the object is not visible (and the user cannot access it). Test Clicking the phone icon enables you to view the application on a simulator. Sequence The order in which applications and folders appear on output devices. By default, these appear in order by sequence number and then by name. You can enter values in the sequence fields to rearrange the order in which the applications and folder appear. By default, Wireless sorts applications and folders in ascending order by sequence number, then by name. Group The user group to which the object is assigned. Last Modified The last time the object was modified. Note: In the Search field, you can find an object by entering a SQL LIKE clause pattern matching text (* or %). For example, entering Per% in the Search field returns all objects beginning with per. 5.3.2 Creating a Folder You can organize your repository objects into a hierarchy by creating subfolders. These subfolders, which can represent topic areas, can be nested into other subfolders. When you create a subfolder, the Content Manager displays it as a hyperlink in the screen, allowing you to "drill down" or traverse deeper into the hierarchy with each successive click. Wireless displays the structure of the hierarchy as a navigation path (Figure 5–3), enabling you to see the level that you currently access and move to back to any parent folder in the hierarchy. 5-6 Administrator’s Guide Managing Application Links Figure 5–3 The Navigation Path Creating a folder is a two-step process; you first define the basic parameters for a folder, such as its name, and then you assign the rendering options that dictate the display style for the folder and its contents. 5.3.2.1 Step 1: Defining the Basic Parameters for a Folder From the browsing screen, click Add Folder. The General screen appears, displaying the basic parameters of the folder. These parameters include: Table 5–3 Parameters of the Content Manager Create Folder Screen Parameter Value Folder Name The name of the folder. This is a required field. Description A description of the folder. Sequence The order in which applications and folders appear on output devices. By default, these appear in order by sequence number, then name. You can enter values in the sequence fields to rearrange the order in which the applications and folders appear. By default, Wireless sorts applications and folders in ascending order by sequence number, then by name. Language A drop-down list of display languages for the folder. Any applications or subfolders contained in this folder must have the same display language. Users cannot access these objects if their display language differs from that of the parent folder. Renderer Type A list of the renderer types for a folder.These include: ■ ■ ■ System: The default system object sorting styles. Custom: The object display and sorting styles of another folder or application that dictates the display logic. Inherited: The display style of an ancestor folder which has a custom renderer. If there is no ancestor folder or if the ancestor has a no custom rendering, then the default system sorting style is applied. This is a required field. Title Icon URI The URI of an image used as the icon that appears on top of the screen when this folder becomes the current folder. You do not need to specify the format type in this URI, as Wireless selects the image format appropriate to the user’s device. Managing Content 5-7 Managing Application Links Table 5–3 Parameters of the Content Manager Create Folder Screen Parameter Value Menu Icon URI The URI of an image used as the icon that appears next to the folder in a menu listing. You do not need to specify the format type in this URI, as Wireless selects the image format appropriate to the user’s device. Title Audio URI The URI of the audio file (for example, a .wav file) read aloud by voice-reader software when users access a folder. You do not need to specify the format type in this URI, as Wireless selects the audio file format appropriate to the user’s device. Menu Audio URI The URI of the audio file (for example, a .wav file) read aloud by voice-reader software along with a folder in a menu listing. You do not need to specify the format type in this URI, as Wireless selects the audio file format appropriate to the user’s device. Region Name The area, such as a continent, country, or city, that is associated with the folder. If you assign a region to a folder, then users can only view that folder and its contents when they are in the assigned region. Visible Selecting this check box makes the folder visible to the end user. If you do not select this option, then the folder and its contents are neither visible nor accessible to the end user. Personalizable Selecting this option enables end users to customize their user views using the Wireless Customization or on the device by reordering, hiding, or showing this folder. 5-8 Administrator’s Guide Managing Application Links Figure 5–4 The Create Folder Screen (General Parameters) 5.3.2.2 Step 2: Assigning the Rendering Options The Rendering screen displays options specific to the rendering type you selected when setting the basic parameters for the folder. Selecting the System Rendering Options If you select System as the rendering option, then you can select from among the following sorting options that include ascending and descending sorting style for folders by: ■ ID ■ Name ■ Last Modified Date ■ Sequence Number ■ Access Count By default, folders appear by sequence number, then by name. Managing Content 5-9 Managing Application Links Setting the Customized Rendering Options If you select the Custom rendering options, then you select a folder or application with the appropriate rendering style. Setting the Inherited Rendering Options If the folder is not a child of another folder (or if none of its ancestor folders have a customized renderer), then Wireless notes the inherited renderer as N/A until the folder is moved under a parent folder with a customized renderer. Use the Move function to place the folder within a folder configured with the appropriate rendering style. See Section 5.3.10 for information on moving objects. Figure 5–5 The Folder Rendering Screen 5.3.3 Editing A Folder You use the Edit button to edit the values for a selected folder. After you have modified the appropriate values, click Apply to commit your changes. Clicking Cancel sets the parameters back to their original values and returns you to the browse screen. See Section 5.3.2.1 for information on the basic folder parameters. See Section 5.3.2.2 for information on the folder rendering options. 5.3.4 Creating an Application Link You create an application link to publish a master application to users. By clicking Add Application, you create an application link using a wizard which guides you through each step of the creation process, from the first step of basing the application link on an existing master application, to the steps that follow for setting the general information for the application and editing or adding input parameters. If you base the application link on an Async-enabled application, then you assign Async Agent properties to the application link, thus enabling customers to access the application using asynchronous messaging technologies such as SMS, Email or two-way pagers. 5-10 Administrator’s Guide Managing Application Links Step 1: Selecting a Master Application You use the Master Application screen to select an existing master application or modulable application on which to create the application link. Step 2: Entering the General Information The General screen enables you to set such basic information for the application link, such as the name for the application and the short names for the application (if it is based upon an Async-enabled master application). A short name is an easily referenced name for the application entered by end users when accessing applications from asynchronous devices. Use the Up and Down arrows to prioritize the order in which these short names appear in a help message. Configuring the OMP URLs for Module Applications If you opted to create a modular application link, then you must enter the OMP URL address of the module application called in the Master Application screen (Step 1 in the application link creation sequence). All module applications are identified by the OracleMobile protocol (OMP) URL. To create a modular application link, you must define the following two parameters: ■ Configure URL -- The URL for plugging in the module configuration page. ■ Customization URL -- The URL for plugging in the module customization page. Selecting DRM Policies for a J2ME Application If this application link is based on a J2ME application, then you can also select a DRM (digital rights management) policy, which controls the digital rights of the J2ME application by defining the user access to the application. For example, a digital rights policy can restrict the user’s access to a downloaded application to a certain time period, (as in the case of a trial period), or can limit the number of times a user can download an application. The DRM policies are created by Foundation Developers using the Foundation Manager. For more information, see Section 7.7. Step 3: Entering New Input Parameters for the Application Link The Input Parameters screen enables you to set the input parameters for your application link. The input parameters for the application link are those set for the master application on which you based your application link. You can only change the parameters which the Application Developer designated as Modifiable. For more information on creating master applications, see the Oracle Application Server Wireless Developer’s Guide. Table 5–4 describes the input parameters included in the Input Parameters screen. Managing Content 5-11 Managing Application Links Table 5–4 The Input Parameters for an Application Link Parameter Value Name The name of the input parameter. The Application Link Creation Wizard sets the name of the input parameter by querying the Master Application definition. This field cannot be edited. Caption The label describing this parameter used by Wireless when prompting for user input. Comment For master applications based on the Web Integration adapter, Wireless automatically populates this field with the name of the WIDL service that uses the parameter. For application based on other adapters, you can use this column to document the parameter. The comment is only used internally. This field cannot be edited. Format This mask sets the expected data entry mode for the user device. For example, if you expect the user to enter numbers for the parameter, you use the format code N. (This works only with WML 1.1-compliant devices.) The default format is *M. Other formats include: ■ A, for entry of uppercase letters or punctuation. ■ a, for entry of lowercase letters or punctuation. ■ N, for entry of numbers. ■ X, for entry of uppercase letters. ■ x, for entry of lowercase letters. For a complete list of formats, see the Wireless Application Protocol Wireless Markup Language Specification, Version 1.1. This value cannot be edited. Mandatory If this check box has been selected, then the parameter must have a value. If the check box is clear, then parameters are optional. This cannot be edited. Customizable Specifies whether the end user using the application link can enter values from a mobile device. You can make most output parameters customizable by the user. Value The default value for the parameter set using the Service Manager. You can override these default values using the Content Manager. If you specify a default value, then Wireless does not prompt the user for a value. Step 4: Assigning the Async Application to the Application Link. You use this screen to assign the Async Agent capabilities to application. To use this screen, you must base your application link on an Async-enabled master application. Table 5–5 describes the parameters for Async Agents. 5-12 Administrator’s Guide Managing Application Links Table 5–5 Parameters of the Async Agent Screen Parameter Value Async Command Line Syntax Help The command syntax or usage text. This text is returned to the user when the user issues an application help command to the Async Server. Routing Information Select an item and click Edit to access the editing function for the routing presets. For more information, see Section 5.3.4.1. Application-Specific Address List The application-specific address to which users send the service invocation messages. Enter this address in the format appropriate to the following device types (SMS or Email). For example, enter [email protected] as the service address for email. This is an optional parameter. Async Application Argument List The default value for each argument. Use the Move Up and Move Down functions to map the Async application arguments to the input arguments. 5.3.4.1 Editing the Routing Presets Wireless includes a pre-seeded preset, _MESSAGE_ROUTE_, whose attributes set the routing information for an Async application. Routing information, along with application link categories, supports PremiumSMS and ReverseCharge. The routing information enables such information as billing (the Large Account) to be associated with the application, so that the value is returned with the result message. This information is eventually carried over to a PremiumSMS or ReverseCharge operator so that the correct account is charged for the message. For more information on application link categories, see Section 5.6.1. To edit the routing information, select the routing method (from the Async Agent Information screen) and then click Edit. Enter the values for the routing options as needed. Table 5–6 describes the routing options. Table 5–6 The Routing Options Routing Option Description CHANNEL A name of the logical channel through which the message should be sent. This field can be used to store the value of the Large Account field for PremiumSMS. REVERSE_CHANNEL The logical channel for the reverse traffic. Both PremiumSMS and ReverseCharge can use this field to store the value of the reply to the Large Account. COST_LEVEL The cost level for message delivery. Do not enter a value into this field for PremiumSMS; for ReverseCharge, enter a value that describes the tariff class. Managing Content 5-13 Managing Application Links Step 5: Entering the Additional Information for an Application Link In the final screen of the wizard, you define optional parameters for menu list configuration and user-form submission type. Table 5–7 describes the parameters for this screen. Table 5–7 The Additional Information Parameters for an Application LInk Parameter Value Description A description of the application link. Sequence The order in which application links appear on output devices. By default, these appear in order by sequence number and then by name. You can enter values in the sequence fields to rearrange the order in which the application links appear and then set parent folder renderer type as System, and the parent folder sorting option as Sequence Number. By default, Wireless sorts applications in ascending order by sequence number, then by name. See Section 5.3.2.2 for more information on setting the System folder rendering option. Cost The invocation cost to the user for accessing the application link. If the cost of the application link is not zero (0), then Wireless logs the application link cost invocation in the tx_panama.log file. Language A drop-down list of display languages for the application link. Users cannot access an application link if their display language differs from that associated with this application link. Title Icon URI The URI of an image used as the icon that appears on top of the screen when this application link becomes the current application. You do not need to specify the format type in this URI, as Wireless selects the image format appropriate to the user’s device. Menu Icon URI The URI of an image used as the icon that appears next to the application link in a menu listing. You do not need to specify the format type in this URI, as Wireless selects the image format appropriate to the user’s device. Title Audio URI The URI of the audio file (for example, a .wav file) read aloud by voice-reader software when users access a service. You do not need to specify the format type in this URI, as Wireless selects the audio file format appropriate to the user’s device. Menu Audio URI The URI of the audio file (for example, a .wav file) read aloud by voice-reader software along with the service in a menu listing. You do not need to specify the format type in this URI, as Wireless selects the audio file format appropriate to the user’s device. 5-14 Administrator’s Guide Managing Application Links Table 5–7 The Additional Information Parameters for an Application LInk Parameter Value Region Name The area, such as a continent, country, or city, that is associated with the application. If you assign a region to an application link, then users can only view that application link when they are in the assigned region. Visible Select this option to make the application link visible (and therefore accessible) to the end user. If you do not select this option, then end users cannot see (or access) this application link. You can opt not to select this option for application links which are under construction. Personalizable Selecting this option enables end users to customize their user views in the Wireless Customization Portal or on the mobile device for reordering, hiding, or showing this application link. 5.3.5 Editing an Application Link The editing screen enables you to change or update the parameter values for a selected application link. To access the editing screen, select the application link in the browsing screen and then click the Edit button. From the menu on the editing screen, you can select the values that you want to edit, such as those for the general parameters, the input parameters, the Async-agent parameters (if applicable), and the additional parameters (Step 2 through Step 4 of the wizard). Note: You can only edit the input parameters of an application link if the input parameters of the master application on which it is based have been designated as Modifiable. For more information on developing master applications, see the Oracle Application Server Wireless Developer’s Guide. 5.3.5.1 Certifying an Application Link Based on a J2ME Application When editing an application based on a J2ME (Java 2 Micro Edition) master application, the menu of the editing screen includes another option, API Scan. This option enables you to select an API scan policy that checks the application for malicious APIs calls which may damage a user’s device. These policies are defined using the Foundation Manager. For more information, see Section 7.8. To scan a policy, select API Scan and then the appropriate version of an API scan policy and then click Certify. Managing Content 5-15 Managing Application Links 5.3.5.2 Configuring a Module Application Link You can configure a modulable application link by entering the URL of its configuration page in the Module Configure URL field of the application link creation wizard’s Master Application screen (Step 1 in the wizard). To access this configuration page, select Master Application from the editing screen’s menu. From the Master Application editing screen, click Configure. The configuration screen appears. 5.3.6 Testing an Application Link The Content Manager enables you to test a service and display it on a phone simulator. To test an application link: 1. From the browsing screen, select the application link that you wish to test. 2. Click the telephone icon in the Run Application column, which is located in the same row as the selected application link. The phone simulator appears, displaying the application link. Note: To test or debug an OC4J adapter-based application, you must copy the .jsp into the web-application/modules directory. For example, if the input parameter URL is apps/myservice.jsp, then myservice.jsp must be copied to .../wireless/j2ee/applications/webtool/webtool-web/modules/apps/ 5.3.7 Debugging an Application Link The Content Manager enables you to simultaneously view an application link on a phone simulator, in Wireless XML, or device markup languages. Transformers, in the form of XSLT style sheets or Java classes, convert the content returned by Wireless adapters into the format best suited to a particular platform. To test a service: 5-16 1. On the browsing screen, select an application link. 2. Click Debug. The Debug Application Link screen appears. 3. Select from among the following output formats: Administrator’s Guide Managing Application Links ■ Adapter XML Result Selecting this result type enables you to see Wireless source content in the AdapterResult format, the intermediary format between the source and the target output device. Source content in the AdapterResult format must be converted into SimpleResult format before it can be delivered to a target device. If no text displays in the The Result panel, then no AdapterResult has been produced. ■ Wireless XML Result Selecting Wireless XML Result displays the source content in Wireless’ SimpleResult format of the output that is returned by an adapter. ■ Device Result The Device Transformer drop-down menu lists the devices in the repository. Selecting a device enables you to see the final markup language for that device. 4. Click Set Parameters. 5. Click Run Application. The application link appears on a phone simulator. The selected result appears in the Application Result window. Setting the Display Length of the Logging File The System Log section enables you to set the number of lines from the end of the server’s system log file that you want to see. To set the number of lines from the server: displays from the end of the system log. 1. Enter the number of lines from the end of the system log that you want to review: 2. Click Refresh Log. The specified number of lines from the end of the system log appear. 5.3.8 Creating User Bookmarks The Content Manager enables you to create a bookmark, a link enabling the user to quickly access an external resource, such as Web page. In addition to providing the user a this shortcut, however, Wireless enables you to create bookmarks that render their content on a variety of devices. With Wireless, a bookmark displays equally well on all of the different devices registered to a Wireless user, because you can associate multiple URLs with a single Managing Content 5-17 Managing Application Links bookmark. Each of these URLs supplies the markup suitable to the content type supported by the requesting device. For example, you create a bookmark, myoracleBK, which has the following two URLs: ■ www.oracle.com with the text/html MIME type ■ wap.oracle.com with the text/hdml MIME type Logging in through a desktop browser, a user sees myoracleBK. Clicking this bookmark reveals the page www.oracle.com. A user logging in from a device supporting the text/hdml MIME type also sees myoracleBK, but clicking this bookmark reveals the page wap.oracle.com Clicking Add Bookmark in the browsing screen invokes the New Bookmark screen, which includes the parameters described in Table 5–8. Table 5–8 Parameters of the New Bookmark Screen Parameter Value Bookmark Name The name of the bookmark. This is a required field. Description A description of the bookmark. Sequence The order, as specified by an integer value, in which the bookmarks appear on output devices. By default, these appear in order by sequence number and then by name. Cost The cost to the user for accessing the bookmark. Region Name The area, such as a continent, country, or city, that is associated with the bookmark. If you assign a region to a bookmark, then users can only view that bookmark and its contents when they are in the assigned region. Visible Selecting this check box makes the bookmark visible to the end user. Leaving this check box clear prevents end users from seeing or accessing the bookmark. Personalizable Selecting this option enables end users to customize their user views in the Wireless Customization Portal or on the mobile device by reordering or hiding and showing bookmarks. In addition to these parameters, whose values define the basic settings for the bookmark, the New Bookmark screen also includes a table listing URLs and MIME types to which you can associate with this bookmark. This table also notes the default MIME type, which you can set by selecting a MIME type and then by clicking Set Default. 5-18 Administrator’s Guide Managing Application Links Note: Only the URL for the text/vnd.wap.wml MIME type can be set as the default. You can add other URLs or MIME types to the table by clicking Add button and then by defining the values for URL and MIME type in the following page (Figure 5–6.) Figure 5–6 Adding a New MIME Type 5.3.9 Editing a Bookmark You can edit the values for a bookmark using the Edit Bookmark screen, which you access by selecting a bookmark and then by clicking Edit. 5.3.10 Moving Folders, Application Links, and Bookmarks You can organize application links, folders, and bookmarks in a business context appropriate to a user group by using the Content Manager’s Move function. To move application links, folders, or bookmarks: 1. From the browsing screen, select the folder, application link, or bookmark that you want to move. 2. Click Move. 3. Select the new folder for the object. If necessary, click the folder to drill down to the appropriate subfolder. Wireless tracks your position in the hierarchy through the navigation path. For more information on the navigation path, see Section 5.3.2. 4. Click Move Here. The Content Manager displays the selected object in its new folder. Managing Content 5-19 Defining Access Control 5.4 Defining Access Control The Content Manager enables you to create, edit, and delete user groups. Using the Content Manager, you can publish application links to users by assigning them to user groups.When an object, such as a folder, has been published to a user group, an end user belonging to that group can access the object from any device registered with Wireless. In addition to creating user groups and assigning objects to them, you can also remove objects from user groups. 5.4.1 Managing a User Group Clicking the Access Control Content tab invokes the Groups page (Figure 5–7), which includes a table listing the current user groups. From this table, you can select a user group (using the Select button) and then edit it, delete it, or manage the objects assigned to it. Figure 5–7 The Groups Page Table 5–9 describes the fields and functions of the Groups screen. 5-20 Administrator’s Guide Defining Access Control Table 5–9 Elements of the Groups Page Element Description Delete You can delete a group by selecting it from the table and then by clicking Delete. Apply After you edit the name or description of a selected group in the table, click Apply to save your changes. Assign Application Selecting a group and then clicking this button invokes the Application Content page, which enables you to manage the objects assigned to the selected group. Group Name The name for the user group. This is a required field. Description An optional description of the user group. Create Click to create a user group. The new user group appears in the table, where it can then be selected for editing, deleting, or for content management. 5.4.2 Managing the Contents of a User Group To manage the contents of a user group, select the group and then click Assign Applications. The Application Content page for the selected groups appears (Figure 5–8, displaying the objects currently associated with the groups as well as the objects which can be assigned to the group. From this page, you can assign selected application links, bookmarks, or alerts (notifications) to a user group, or remove them from a user group by clicking either the Add to Group or Remove from Group buttons. Clicking Finish saves the changes made to the contents of a user group. Managing Content 5-21 Creating User Home Root Folders Figure 5–8 The Application Content Page 5.5 Creating User Home Root Folders The Render Content tab enables you to group user home folders by user community or by provider. Users are assigned to these user home root folders in the User Manager. When a user is assigned to a user home root folder, that user’s home folder becomes the child of the user home root folder by being placed within it. In addition, user home folders inherit the folder rendering style, or display properties, of their user home root folder. For more information on assigning a user home folder, see Section 4.5. Selecting the Render Content tab displays User Home Roots screen (Figure 5–9), which includes a table listing the current root folders by name, description, object ID in the database, and by the date that the folder was last modified. From this table, you can both edit and delete selected user home root folders. 5-22 Administrator’s Guide Creating User Home Root Folders Figure 5–9 The User Home Roots Screen Clicking the Create button enables you to add a new user home root folder. Creating a user home root folder is a two-step process. Step 1: Entering the General Information After you click Create, the General screen appears. This screen includes the following parameters: Table 5–10 Parameters of the General Screen for User Home Root Folders Parameter Value User Home Root Name The name of the user home root folder. This is a required field. Description A description of the folder. Renderer Type A list of the renderer types for a folder. This is a required field. These include: ■ ■ ■ System: The default system object sorting styles. Custom: The object display and sorting styles of another folder or service that dictates the display logic. Inherited: The display style of an ancestor folder which has a custom renderer. If there is no ancestor folder or if the ancestor has a no custom rendering, then the default system sorting style is applied. Managing Content 5-23 Creating User Home Root Folders Table 5–10 Parameters of the General Screen for User Home Root Folders Parameter Value Title Icon URI The URI of an image used as the icon that appears on top of the screen when this folder becomes the current folder. You do not need to specify the format type in this URI, as Wireless selects the image format appropriate to the user’s device. Menu Icon URI The URI of an image used as the icon that appears next to the folder in a menu listing. You do not need to specify the format type in this URI, as Wireless selects the image format appropriate to the user’s device. Title Audio URI The URI of the audio file (for example, a .wav file) read aloud by voice-reader software when users access a service. You do not need to specify the format type in this URI, as Wireless selects the audio file format appropriate to the user’s device. Menu Audio URI The URI of the audio file (for example, a .wav file) read aloud by voice-reader software along with the service in a menu listing. You do not need to specify the format type in this URI, as Wireless selects the audio file format appropriate to the user’s device. Step 2: Assigning the Rendering Options Clicking Continue on the General screen invokes the second (and final) screen used to create a user home root folder, the Rendering screen. This screen contains the display options specific to the renderer type (System, Inherited, or Customized) that you selected when setting the basic parameters for the user home root folder. Because user home folders are the children of the user home root folders, each user home folder inherits the rendering style of its parent, the user home root folder. Setting the System Default Rendering Options If you select a System renderer type, then you select from among the following sorting options in the Rendering screen.These options include the ascending and descending sorting style for folders by: 5-24 ■ ID ■ Name ■ Last Modified Date ■ Sequence Number ■ Access Count Administrator’s Guide Categorizing Content By default, folders appear by sequence number and then by name. Click Finish to complete the user home root folder. Setting the Customized Rendering Options If you select the Custom renderer, then the Rendering screen displays the root-level folders and applications. Using the Select button, you choose the appropriate folder or application with the appropriate rendering style and then click Finish to complete the user home root folder. Setting the Inherited Rendering Options If you selected the Inherited renderer option, then click Finish in the Rendering screen. The inherited rendering for a user home root folder is the system default rendering. 5.5.1 Editing a User Home Root Folder You can edit both the general parameters and the rendering options for a selected user home root folder. To do this, select a folder from the table in the User Home Roots page and then click Edit. The editing screen appears and defaults to the general parameters set for the selected user home root folder. If you wish to edit the rendering options, select Rendering from the menu. Click Apply to save your changes. Clicking Cancel sets them back to their previous values. 5.5.2 Deleting a User Home Root Folder You can delete a user home root folder by first selecting from the table in the User Home Roots page and then by clicking Delete. Note: You cannot delete a User Home Root folder if it contains any user home folders; you must delete all user home folders from a User Home Root folder before you can delete it. 5.6 Categorizing Content To support PremiumSMS and ReverseCharge, the Content Manager enables you to create application link categories, which are sets of similar applications. For example, in PremiumSMS, each set of applications having the same premium level can be put into an application link category. Managing Content 5-25 Categorizing Content Each access point (for example, an Async address) can be optionally associated with one or more application link categories. Only the associated access points can gain access to applications assigned to a category. Figure 5–10 The Categorize Content Screen Clicking the Categorize Content tab invokes the Application Categories screen (Figure 5–10), which includes a table listing the current application link categories. From this table, you select an application link category for editing or for deletion. Clicking the Create button invokes the Create Application Category page, which you use to create an application category and assign access points to the category. After you create a category, you then associate application links with that category. 5.6.1 Creating an Application Link Category In the Create Application Category screen, enter a name for the application link category. For example, enter Premium. This is a required field. You can optionally enter a description. You then associate an access point with the category, thereby making all of the applications associated with this category accessible through the selected access point. (The access points are created using the System Manager. For more information, see Section 5.6.2.1). If needed, click Add to select additional access points. 5.6.2 Assigning Applications to an Application Link Category After you create an application category, you add Async applications to the application category. To do this, select an application from the browsing screen of the Publish Content tab and then click Categorize. In the following screen, use the Move arrows (> and >>) to move an application from the All Application Categories pane to the Associated Application Categories pane. To remove an application link 5-26 Administrator’s Guide Categorizing Content from an application link category, use the Remove arrows (< and <<) to move the selected application link category from the Associated Application Category pane to the All Application Categories pane. 5.6.2.1 Creating Access Points using the System Manager Access points, which display in the Content Manager, are created using the System Manager as part of the configuration of the Async Listener. A user having System Administrator privileges sets the values for an access points, which includes a name, delivery type, or site address or number. For the latter value, the address should be the Large Account provided by the Premium SMS operator. For more information on configuring the Async Listener, see Section 3.6.2.3. For an access point to display in the Content Manager (and in turn, be selected for an application category), the System Administrator cannot select the option, Allowed to Access All Applications. If this flag is set, then this access point cannot be associated with a specific application category, because users sending requests to this access point can access all applications, not just those grouped into any one application category. 5.6.2.2 Editing the Routing Definitions Optionally, you can edit the pre-seeded _MESSAGE_ROUTE_ preset definition so that each portal can customize the message headers which are sent to the SMS driver as the billing information for the result message. For example, you can change the description of ROUTE_COST_LEVEL from cost level to tariff class, or add or delete meta fields. By default, the values of the two fields, ROUTE_CHANNEL and ROUTE_REV_ CHANNEL, are set to the From and ReplyTo fields, respectively, of the result message. Because of this, a custom-built driver is not needed to pass information to the Premium SMS operator. To change these mappings, a System Administrator modifies the following attributes in the system.properties file: ■ wireless.async.routeinfo.to ■ wireless.async.routeinfo.replyto. 5.6.3 Adding SMS Routing Information You can add SMS routing information when creating (or editing) Premium SMS-enabled application links. For example, you can assign the value of the Large Account, to which the reply message should be charged, to the Channel field. For more information, see Section 5.3.4. Managing Content 5-27 Managing Alerts (Deprecated) 5.7 Managing Alerts (Deprecated) Using the Alerts browsing screen, you can search for, create, edit, move, delete, and share alerts (notifications), applications that notify users of important information or events. In addition you can add topics, which group alerts. Note: The features for alert and topic management, creation, and editing are included for backward compatibility. To access the Alerts tab, set the DeprecatedAlertSupport option to true in the System.properties file as follows: DeprecatedAlertSupport=true The default setting for this option is false. Accepting the default setting prevents the Alerts tab from appearing in the Content Manager. 5.7.1 Searching for Topics and Alerts (Deprecated) Using the topics and alerts browsing screen, you can search for a topic or an alert using a search field in conjunction with drop-down lists of search options, which enable you to either narrow or broaden your searches. The search results appear as a list on the Root Topics and Services screen (Figure 5–11). Figure 5–11 The Topics and Alerts Browsing Screen 5-28 Administrator’s Guide Managing Alerts (Deprecated) Table 5–11 describes the elements in the topics and alerts browsing screen. Table 5–11 Elements of the Browsing Screen for Topics and Alerts Element Description Type The object type. The object can be an alert, or a topic. Name The name of an alert or topic. Topics appears as hyperlinks; clicking a topic displays alerts and subtopics. Object ID The Object ID stored in the database. Master Alert The master alert, created by the Service Designer, on which this alert is based. Last Modified The last time the topic or the alert were modified. To find a topic or an alert: 1. 2. Perform one or more of the following: a. Enter the name of the alert or topic. b. From the drop-down list box, select the type of object: ■ Alert ■ Topic Select from among the following options to sort your search results: ■ ■ 3. Name -- Sorts search results by name.) Last Modified -- Sorts search results by the last time the alert, or the topic, was modified.) Click Search. The Search Result screen appears (Figure 5–12). Managing Content 5-29 Managing Alerts (Deprecated) Figure 5–12 The Search Result Screen Table 5–12 describes the elements of the Search Result screen. Table 5–12 Elements of the Search Result Screen Element Description Name The name of the alert or topic. Object ID The Object ID stored in the database. Full Path The route to a alert or topic. Each topic on the route is displayed as a hyperlink. Clicking a hyperlink reveals a browse screen showing the alerts organized under the topic. You use this browse screen for such functions as creating and deleting alerts and alert topics. Last Modified The time the alert or topic was created, or the last time the alert or topic was edited. 5.7.2 Creating an Alert (Deprecated) To create an alert, you first click the Add Alert button. The General screen of the Create Alert wizard appears. Step 1: Entering General Alert Information n the General screen, you define the name and optionally add a description for the alert. Table 5–13 describes the fields in this screen. Table 5–13 Fields of the General Screen of the Create Alert Wizard Field Description Alert Name The name of the alert. Description A description of the alert. 5-30 Administrator’s Guide Managing Alerts (Deprecated) Step 2: Basing the Alert on an Existing Master Alert In the Master Alert screen of the Alert Creation Wizard, you select a master alert on which to base your alert. This master alert serves as the template for the alert that you customize and publish to users. Step 3: Entering Alert Input Parameters The Input Parameters screen displays the input parameters for the master alert selected in Step 2. If needed, define the parameters in this screen. Table 5–14 describes the master alert input parameters: Table 5–14 The Master Alert Input Parameters Input Parameter Description Name The name of the alert. This field cannot be edited. Caption The label used by Wireless when prompting input from users while they subscribe to alerts. Data Type The table column data type format for the input parameter. For each master alert, the system generates a table in the database. The system generates a column within this table for each input or output parameter. The data type of an input or output parameter is used as the column data type when the system generates this table. This field cannot be edited. Value For most parameters, this value represents the default value for the parameter set using the Service Manager. If you specify a default value using the Content Manager, then this new default value replaces the default value set in the master alert by the service designer. If a default value exists, then a user does not have to enter any information in this field when subscribing to an alert. Step 4: Setting the Trigger Conditions for the Alert You use the Trigger Condition screen to enable the end user to set the conditions that invoke an alert on the Wireless Customization. For example, if you create an alert notifying users of a stock price, you can set the alert conditions that allow an end user to request an alert when the stock has risen above, or fallen below, a certain price. Table 5–15 describes the parameters of the Trigger Condition screen. Managing Content 5-31 Managing Alerts (Deprecated) Table 5–15 Parameters of the Trigger Condition Screen Field Description Name The name of the alert trigger for the master alert. This field cannot be edited. Caption The label describing the trigger parameter used by Wireless to prompt user input. Comment For master alerts, you can use this column to document the parameter. The comment is only used internally. This field cannot be edited. Trigger Parameter The output parameter for the alert trigger. Condition Type The condition, in relation to the value set by you or the end user, which triggers the alert. This field cannot be edited. Value The default value for the parameter set using the Service Designer. You can override this value using the Content Manager. If you specify a default value, then the user does not have to enter any information for this trigger value when subscribing to an alert. 5.7.3 Editing an Alert Use the editing screen to change or update the parameter values for a selected alert. To access the editing screen, select an alert in the browsing screen and then click the Edit button. From the menu on the editing screen, you can select the values that you want to edit, such as those for the general parameters, the input parameters, and the trigger conditions. 5.7.4 Deleting Topics and Alerts You can delete a topic or an alert by selecting a topic or an alert from the browsing screen and then by clicking Delete. 5.7.5 Moving Alerts The Content Manager enables you to move alerts and topics, allowing you to organize the wireless portal in a business context. To move alerts, select an alert from the browsing screen. In the Move Alerts screen, drill down to a destination topic for the alert. Click Move Here. The Alert-Topic browse screen reappears, showing the new destination topic as the current context topic. The alert displays in the table. Clicking the destination topic reveals the alert in its new location. Clicking 5-32 Administrator’s Guide Managing Alerts (Deprecated) Cancel while you are in the Move Alerts screen terminates the operation and returns you to the Topic-Alert browsing screen. 5.7.6 Creating a Topic You can further organize your alerts by creating Topics. To create a topic, click Add Subtopic in the browsing screen. The New Subtopic screen appears, where you enter a topic name. If you want the topic to be visible (and accessible) to an end user, select Visible. Click Add to complete the topic. 5.7.7 Editing a Topic You can edit a topic’s name and visibility by selecting it from the browsing screen and then by clicking Edit. 5.7.8 Assigning Alerts and Topics to a User Group The Group tab enables you to assign alerts and topics to user groups, making them available to several users. To make an alert or topic available to a group, you select the group to which you want to assign the objects and then click Assign Alerts. From the Assign Alerts screen, select the objects that you want to assign to the group and then click AddToGroup. 5.7.9 Removing Alerts and Topics from User Groups To remove an alert or topic from a user group, select the object that you want to remove and then click RemoveFromGroup. Managing Content 5-33 Managing Alerts (Deprecated) 5-34 Administrator’s Guide 6 Administering Mobile Studio This chapter describes the administration for Mobile Studio. Sections include: ■ Section 6.1, "Overview" ■ Section 6.3, "Accessing Mobile Studio Administration" ■ Section 6.4, "Managing Locales" ■ Section 6.5, "Managing Sample Services" 6.1 Overview Mobile Studio is the online, hosted environment for developing, testing and deploying mobile applications for the Wireless platform. Mobile Studio also serves as a Web portal, supporting the wireless developer community in the enterprise and on the Internet. Because Mobile Studio provides a Web-based interface for the configuration, testing and deployment of wireless applications, developers do not need to download or install anything on their workstations; they need only a Web browser and access to Mobile Studio. Once an application is registered with Mobile Studio, developers can test it using any mobile device or simulator (including voice) and instantly access real-time logs to troubleshoot any issues. Application providers can easily brand Mobile Studio by customizing its look-and-feel as well as its content and integrate it with their existing Web site. Mobile Studio can serve as both an interactive development tool and as a one-stop shop for up-to-date information and collateral on the Wireless server platform. Mobile Studio extends Wireless so that all Mobile Studio accounts are also Wireless accounts (and Wireless accounts are also Mobile Studio accounts). Administering Mobile Studio 6-1 Configuring Mobile Studio 6.2 Configuring Mobile Studio You use the System Manager to configure Mobile Studio. To access the configuration page: 1. Click Wireless Server Administration. The administration pages appears for the Wireless site (Figure 6–1). 2. Select Mobile Studio (located in the General Configuration section). For more information on administering the Wireless site, see Section 3.6. Figure 6–1 Mobile Studio Configuration Screen The Mobile Studio configuration screen includes the following parameters, which are described in Table 6–1: 6-2 Administrator’s Guide Accessing Mobile Studio Administration Table 6–1 Parameters of Mobile Studio Configuration Screen Parameter Value URL of Deploy Server The URL of the Wireless production instance. Applications created by developers in Mobile Studio (referred to as the development instance) are deployed to this URL. For example, enter http://myserver.mycompany.com:myport/studio. If you do not enter the URL in this field, then deployment is disabled. Default Site Name The name of the branding (that is, the look-and-feel) which is used as the default. This is pre-seeded with the value Default. Application providers can both brand Mobile Studio by customizing its appearance and content and integrate it with an existing Web site. To substitute a branding other than Default, enter the name of another branding in this field. For more information on branding, refer to the Oracle Application Server Wireless Developer’s Guide. J2ME Webservices Supported? Select this option to enable the Web services feature of Mobile Studio. By default this option is not selected (that is, the flag is set to false). By selecting this option, Mobile Studio’s interface displays an additional tab that includes functions that enable developers to register the Web services called from J2ME MIDlets. After you define Mobile Studio configuration parameters, click OK. Note: You must restart the Wireless server for Mobile Studio configuration settings to take effect. 6.3 Accessing Mobile Studio Administration Access Mobile Studio main page at the following URL: http://<studio_server>:<studio_port>/studio/admin where <studio_server> and <studio_port> are the name of the host and port number running Mobile Studio instance. These are configured in the Oracle Installer. Note: Mobile Studio has been optimized for the latest versions of the Netscape and Internet Explorer browsers. Mobile Studio is not certified for the older versions of Netscape 4.x or Internet Explorer 4.x. Enter your Administrator login information as follows: Administering Mobile Studio 6-3 Managing Locales 1. Enter your user name (for example, orcladmin). 2. Enter a password (for example, manager). 3. Click Login. If you entered your login information correctly, then the administration pages appear. For any of the changes that an administrator makes through the administration pages to be visible to end-users, you must click the Reset button (Figure 6–2), which is located on the top right-hand side of the administration pages. Figure 6–2 The Reset Button 6.4 Managing Locales The Locales page of Mobile Studio (Figure 6–3) displays the enabled locales used for branding Mobile Studio. If you have made no changes to the locales, then only the default enabled locale (English) displays on this page. This page enables you to find a locale (or locales) using a pattern. You can also add, edit, and delete locales. Figure 6–3 The Locales Page 6-4 Administrator’s Guide Managing Locales 6.4.1 Finding a Locale To find a locale, enter the name or a pattern for the locale in the Name field, and then click the Find button. A list of the locales matching the name or pattern appears. 6.4.2 Adding a Locale To add a locale, click the Add button. Mobile Studio adds a new row to the list of locales with empty Name and Description fields. To create this locale, you must enter values into these fields. For example, enter ru in the Name field and Russian in the Description field. Click Save to commit (store) the values. 6.4.3 Editing a Locale You can edit a locale by modifying the name and description values. After you have changed the appropriate value (or values), click Save to commit the changes. Note: You cannot edit the name of a default locale. 6.4.4 Deleting a Locale To delete a locale, select the locale and then click the Delete button. To commit the deletion, click the Save button. To undo the deletion, click the Undelete button. The Undelete button appears if you have just deleted any configuration parameters, but have not yet saved your changes. Note: You cannot delete a default locale. . Note Also: The change and deletions are not committed until you click the Save button. 6.4.5 Enabling the Default Locales Mobile Studio ships with default bundles for 28 different locales (listed in table Table 6–2). Administering Mobile Studio 6-5 Managing Locales . Table 6–2 The Default Locale Bundles for Mobile Studio Name Description Name Description ar Arabic ko Korean cs Czech nl Dutch da Danish no Norwegian de German pl Polish el Greek pt Portuguese es Spanish Pt_BR Portuguese (Brazil) es_ES Spanish (Spain) ro Romanian fi Finnish ru Russian fr French sk Slovak fr_CA French (Canada) sv Swedish hu Hungarian th Thai it Italian tr Turkish iw Hebrew Zh_CN Chinese (PRC) ja Japanese Zh_TW Chinese (Taiwan) You enable these locales after you have entered them as described in Section 6.4.2 and reset the system by clicking the Reset button. For example, to support users whose preferred locale is ru, you add ru and then the locale’s description (for example: Russian), and then click the Reset button to enable the locale for users. 6.4.5.1 Adding New Locales If you want to support a locale that is not among those listed in Table 6–2, or if you want to add a locale to your own branding, then you may have to create additional supporting resources, such as text translations. For more information, see the Oracle Application Server Wireless Developer’s Guide. 6-6 Administrator’s Guide Managing Locales 6.4.6 Resolving Locales The following is a description of the algorithm used by Mobile Studio to resolve which locale to use, given the list of preferred locales for the user, which can be obtained from the request: 1. Mobile Studio searches for the preferred locale (L, for example) in the list of enabled locales for Mobile Studio. If Mobile Studio finds L, then Mobile Studio returns it and stops the search. If L cannot be found, then Mobile Studio performs another search on a new L by using only the language part of L. For example, if en_US cannot be found, then Mobile Studio searches only for en instead. If the second search succeeds, then Mobile Studio returns en and stops the search. 2. If Mobile Studio finished the search without finding the locale, then Mobile Studio returns the default locale of the default site (if that default is enabled). 3. If after Step 2, Mobile Studio still cannot find the preferred locale, then it returns the locale en. Adding Additional Locales If you require a locale that is not among the default locales, then you must do the following to ensure that Mobile Studio. These instructions illustrate how to add Hindi (hi) as a locale: 1. Provide a DefaultSite_hi.properties file (or use Mobile Studio’s resource administration pages to provide a value of locale hi for each of the resources that must be changed). To add the file to the application: 2. a. From the Wireless root directory, navigate to iaswv20/wireless/lib, and find the studio.jar file. b. Unjar the file and add DefaultSite_hi.properties to the extracted files. c. Jar all the files back into studio.jar. Provide the messages_hi.properties file for messages. To add the file to the application: 3. a. From the Wireless root directory, navigate to iaswv20/wireless/server/classes/messages/oracle/panama/studio. b. Insert messages_hi.properties into that directory. Provide the ommsg_hi.js file for javascript messages. Administering Mobile Studio 6-7 Managing Sample Services To add the file to the application, follow these steps: 4. a. From the Wireless root directory, navigate to iaswv20/wireless/j2ee/applications/studio/studio-web/javascript/. b. Insert ommsg_hi.js in that directory. Restart the instance after making these changes. 6.5 Managing Sample Services The Samples Services page (Figure 6–4) of Mobile Studio enables you to manage the sample services (that is, the applications) that are available in Mobile studio. These services include Caltrain, HelloWorld, OracleCafe, and Time. From this page, you can add, edit, and delete services. Figure 6–4 The Sample Services Page 6.5.1 Adding a Sample Application You use the Add function to add a service that has already been created and hosted to a location accessible to Mobile Studio. To add a service, Click Add. The Edit Sample Service screen appears (Figure 6–5). Using this screen, you specify the name, description, the name of the service JSP and service URL of the new service. Table 6–3 lists the parameters in this screen. 6-8 Administrator’s Guide Managing Sample Services Table 6–3 Parameters of the Edit Sample Service Screen Parameter Value Name The Name of the service (application) that appears on the end-user’s device. Description A description of the service. Sample Source URL The HTML document containing the source code for the sample service. The developer of the application should provide this value. This URL must be accessible from Mobile Studio. Service URL The service used by the Wireless server at runtime for the application. This URL points to the hosting location of the sample service. This URL must be accessible from Mobile Studio. Visible The sample service can be hidden from users by setting the Visible to No; users can view (and use) the service if you set the Visibile flag to Yes. Figure 6–5 The Edit Sample Services Screen (Partial View) Click Save to commit your entries and add the service. Administering Mobile Studio 6-9 Managing Sample Services 6.5.2 Editing a Sample Service You use the Edit button to change the values for a selected service. Clicking the Edit button invokes the Edit Sample Service page, where you can change the values for the Name, Description, Sample Source URL name, the Service URL, and the visibility status of the sample service. Click the Save button to store your changes. 6.5.3 Deleting a Sample Service To delete a sample service, first select the sample service from the list of services shown then click the Delete button. Note: You must click Reset for any changes made to a sample service to take effect. 6-10 Administrator’s Guide 7 Managing Foundation Services This chapter includes the following sections ■ Section 7.1, "Overview" ■ Section 7.2, "Logging into the Foundation Manager" ■ Section 7.3, "Managing Devices" ■ Section 7.4, "Managing Transformers" ■ Section 7.5, "Managing Adapters" ■ Section 7.6, "Managing Regions" ■ Section 7.7, "Managing Digital Rights Policies" ■ Section 7.8, "Managing API Scan Policies" 7.1 Overview The Foundation Manager enables you to create and modify the such objects as devices, transformers, adapters, regions, digital rights policies, and API scan policies in the Wireless repository. Table 7–1 describes these objects. Managing Foundation Services 7-1 Overview Table 7–1 Objects Created and Managed Using the Foundation Manager Object Type Description Device A device object associates a physical device or an abstract device with a transformer through user agents and MIME types. A device object captures the device attributes, which are used by both the multi-channel server and the messaging server. Transformer A transformer converts the content returned by the Wireless adapters. Transformer types include: ■ ■ Result transformers, which convert Adapter Result content into SimpleResult content. Device transformers, which convert SimpleResult content into the final target format. A device transformer can be either the default transformer for a virtual device, or a custom transformer, which is used to render a specific application for a specific physical device. Adapter Adapter objects represent the Wireless interface to content sources. Adapter objects have an attribute called classes, which identify the archive file that contains the actual Java implementation of the adapter. Regions Wireless uses regions to enable developers to assign a location to an application, making the application location-based, unique to a specified area. Digital Rights Policy A digital rights policy specifies the execution (or usage) policy of J2ME applications (MIDlets) after users download them. For example, if a downloaded MIDlet can be executed only twice, then you package that application with a digital rights policy to assure that it is executed only twice. Other digital rights policies can be time-based, limiting the execution of MIDlets to prescribed time periods, and be of varying complexity. API Scan Policy An API scan policy specifies invalid API calls within J2ME application to the API scan process, which certifies J2ME applications (MIDlets).The invalid APIs are defined with package names, class names and method names in the API scan policy object. The Foundation Manager provides a set of wizards that enable you to create these objects quickly and with a minimum of information. Each of these wizards break down the creation process into series of steps. 7-2 Administrator’s Guide Logging into the Foundation Manager 7.2 Logging into the Foundation Manager To use the Foundation Manager, you must first access the login page to the Webtool using the following URL: http://<host>:<port>/webtool/login.uix For example, you access the login page by entering the following URL into a browser: http://hostname:7777/webtool/login.uix Note: 7777 is the default port number for Oracle Application Server Wireless.The port number range is 7777 to 7877. To ensure that you are using the correct port number, check the port number for Oracle Application Server Wireless stored in [Oracle home]/install/portlist.ini. For more information on port usage, see the Oracle Application Server Installation Guide and the Oracle Application Server Administrator’s Guide. Enter your user name and password. If you are an administrator, enter orcladmin as your user name. (The password is set during installation, but can be changed from the User Manager.) After you successfully login, select the Foundation tab, the Foundation Manager’s browsing screen appears. From the Foundation Manager, you can administer the following repository objects: ■ Devices ■ Transformers ■ Adapters ■ Regions ■ Digital Rights Policies ■ API Scan Policies The Foundation Manager provides a tab for each of these repository objects. Each has a browsing screen, which enables you to search for an object, as well as access to functions for creating, editing, deleting, and testing. Managing Foundation Services 7-3 Managing Devices 7.3 Managing Devices A device is an object in the Wireless repository that represents either a physical device, such as a Nokia mobile phone, or an abstract device, such as email, which link Wireless transformers and the runtime device by recognizing the user-agent, the MIME type, and other HTTP headers. HTTP headers enable a repository device to map to an actual device. Through the repository device, the Wireless server determines the appropriate transformer for rendering the device result for a variety of browsers, voice gateways, or message clients. For example, if the Wireless server recognizes a device with multi-media display capability, the XMS center (XMSC) renders the multi-media messages bound for the device in images rather than in plain text. Likewise, when delivering a J2ME MIDlet application to a user device, the J2ME provisioning server delivers a version the MIDlet application which is appropriate to the device. For more information on the XMSC, see Section 3.6.2.5. The Devices tab enables you to create a device in the repository. Clicking this tab invokes the device browsing page (Figure 7–1), which displays a list of devices in the repository. From this screen, you can search for, create, clone, delete, and edit a device. Figure 7–1 The Browse Devices Screen 7-4 Administrator’s Guide Managing Devices 7.3.1 Searching for a Device From the Device browsing screen, you can search for devices by keyword, name, manufacturer, model, user agent, or transformer. To search for a device: Select one of the following search options: ■ Name ■ Manufacturer ■ Model ■ Transformer ■ User Agent Enter the keyword for your search. Click Go. The Search Results screen appears (Figure 7–2). Figure 7–2 The Search Results Screen (for Devices) 7.3.2 Creating a Device The device creation wizard enables you to create a device by prompting you through each step in the creation process. The wizard dedicates a screen to each of these steps; you progress through the wizard by clicking Next after completing each step. At any point in the wizard, you can click the Back button to return to the preceding screens to change values. You can skip any of the screens in this wizard which contain parameters which do not apply to the device. After you have entered the required information, click Finish to complete the device.You can also edit the device to add, remove, or change the parameter values. Managing Foundation Services 7-5 Managing Devices To access the wizard, click Create in the device browsing screen. The wizard appears, defaulting to its first screen, where you enter the basic information for the device. Step 1: Entering the Basic Information for the Device The Basic Info. screen (Figure 7–3) enables you to define the general information of the device, such as the device name. Table 7–2 describes the parameters of the Basic Info. screen. Table 7–2 Parameters of Basic Information Screen Parameter Value Name The name of the device. This name must be unique. This is a required value. Description A description of the device. Manufacturer The manufacturer of the device. If the manufacturer does not appear on the list, then enter the name of manufacturer and then click Add. The manufacturer then appears on the list, enabling you to select it. Model The model number of the device. 7-6 Administrator’s Guide Managing Devices Figure 7–3 Entering the Basic Information for a Device Step 2: Setting the Transformers Clicking Next in the Basic Info. screen invokes the Transformer screen (Figure 7–4). Using this screen, you add the transformers and all of the appropriate user agents to the device. To add user agents, enter the user agents supported by the device and then click Add. Continue until you have added all possible user agents for the device.You then select the user agents supported by the device by using the Move or Move All functions (> and >>) to transfer the user agents from the Available pane to the Selected pane. To select transformers for the device, use the Move or Move All functions (> and >>) to shuttle the transformers from the Available List pane to the Selected List pane. Click Next after you have selected the user agents and transformers to continue to the next step of the wizard where you device capabilities. Click Finish to complete the device. Managing Foundation Services 7-7 Managing Devices Figure 7–4 Selecting User Agents and Transformers Step 3: Setting Device Capabilities Device capabilities are categorized into several groups, including general device attributes (media type, display, text input), browser attributes, messaging attributes, voice-grammar attributes, and J2ME attributes (Figure 7–5). Wireless examines the values for the device capabilities during the runtime, when the wireless server renders the device-oriented markup languages, provisions J2ME applications, or sends device-oriented messages. For the detailed explanation of the syntax and semantics of device capabilities, refer to the discussion of device network adaptation included in the Oracle Application Server Wireless Developer’s Guide. Although the device creation wizard provides separate screens for the device capabilities, none of these related parameters are required; you can successfully complete a device if you do not define any of these parameters. To help you enter the values for the device capabilities parameters, the Device Capabilities screens include in-line help as hints under each of the inputting fields.You can also refer to the online help. On any of the Device Capabilities screens, you can click Finish to complete the device and skip the remaining steps. 7-8 Administrator’s Guide Managing Devices Figure 7–5 Entering Device Capabilities -- Entering the General Device Features Step 4: Setting the Device Code Segment Using the Device Code Segment screen (Figure 7–6), you enter the device result prolog, the login page, and the error page. For the device result prolog, you enter the code segment which is added to all the rendering results for this device. Entering a login page replaces the device’s default login page. Likewise, entering an error page replaces the default error page for the device. Click Finish to complete the device Managing Foundation Services 7-9 Managing Devices Figure 7–6 Entering the Device Result Prolog, Login and Error Pages 7.3.2.1 Editing a Device The Edit button in the device browsing screen enables you to edit all of the information of a device. To edit a device, first select the device and then click the Edit button. The editing screen appears and defaults to the parameters defined for the basic information of the device (Figure 7–7). You can select other device properties by selecting the appropriate links in the menu on the left side of the editing screen. Click Apply to save any changes that you make to the parameters. Clicking Cancel returns you to the device browsing page. Refer to the steps described in Section 7.3.2 for descriptions of the parameters for creating a device. 7-10 Administrator’s Guide Managing Devices Figure 7–7 Editing a Device 7.3.2.2 Deleting a Device You delete devices from the repository by selecting a device from the browsing screen and then clicking Delete. 7.3.3 Cloning a Device The Clone function enables you to create a new device from an existing device in the repository. This function enables you to create a new device with properties similar to an existing device, as the new device inherits all of the capabilities from the existing device from which it was copied. Unlike creating a new device as described in Section 7.3.2, you need only enter a name for the device.You can later edit the parameters for the cloned device. To clone a device, you select a device from the browsing screen and then click Clone. Enter a name for the new device and then click Finish. Managing Foundation Services 7-11 Managing Transformers 7.4 Managing Transformers Clicking the Transformers tab displays the browsing screen for transformers, which includes a table that lists the current transformers in the repository by name, object ID in the repository, the MIME type supported by the transformer, and the Simple Result DTD version. Figure 7–8 illustrates this browsing screen. Figure 7–8 The Browse Transformers Screen (Partial View) From this screen you can delete, edit, and create transformers. 7.4.1 Creating a New Transformer To create a transformer, click the Create Transformer button to invoke the Create Transformer screen (Figure 7–9). To complete the transformer, you must define the following parameters, described in Table 7–3. Click Finish to complete the transformer. Table 7–3 Parameters of the Create Transformer Screen Parameter Value Name The name of the transformer. This name must be unique. MIME Type The MIME type that the transformer supports. SimpleResult DTD Version The SimpleResult DTD version, such as 1.0.0 (the default version). Java Transformer Specifies a Java class transformer implementation. Class Name The name of the class that implements the transformer. 7-12 Administrator’s Guide Managing Transformers Table 7–3 Parameters of the Create Transformer Screen Parameter Value XSL Transformer Specifies an XSLT style sheet transformer implementation. If you select an XSL transformer, you can do one of the following: ■ ■ ■ Enter the code for the XSL style sheet in the field next to the Style sheet parameter, then click Finish. Using a text editor, open an existing XSL style sheet, copy and paste the lines that you want to use, and then click Finish. Click the Import button to import an existing XSL style sheet. XSL Stylesheet The actual XSLT style sheet that implements the transformer. You can cut and paste a transformer from another editing environment into this field. Java Transformer Specifies a Java class transformer implementation. Java Class The name of the class that implements the transformer. Figure 7–9 The Create Transformer Screen 7.4.2 Editing a Transformer To edit a transformer, select a transformer from the browsing screen and then click Edit. The editing screen appears, with its fields populated with the values defined for the selected transformer. Clicking Apply saves any changes. Clicking Cancel sets the parameters back to their previous values and returns you to the browsing screen. Managing Foundation Services 7-13 Managing Adapters 7.4.3 Deleting a Transformer To delete a transformer, select a transformer from the browsing screen and then click Delete. 7.5 Managing Adapters Selecting the Adapters tab invokes the browsing screen for the adapters (Figure 7–10). This screen includes a table which lists the current adapters by their object IDs in the repository, their status as valid adapters (that is, available to master applications) and by the Java class that either implements the adapter, or serves as an entry point to the classes that implement the adapter. Figure 7–10 Partial View of the Browse Adapters Screen You use this screen to create, edit, and delete adapters. 7.5.1 Creating an Adapter To create an adapter, click Create Adapter in the browsing screen. The Create Adapter screen appears. To create an adapter, you must define the following parameters, which are described in Table 7–4. 7-14 Administrator’s Guide Managing Adapters Table 7–4 Parameters of the Create Adapter Screen Parameter Value Name The name of the adapter. The name must be unique. Valid Specifies whether the adapter is available to the master applications. If selected, the adapter is available. If this option is clear, then the adapter is invalid and therefore unavailable. As a result, all of the master applications that use the adapter are also invalid. Java Class The Java class that either implements the adapter or serves as the entry point for the classes that implement the adapter. After you enter the needed parameters, click Create. The browsing screen reappears, displaying the new adapter. Clicking Cancel clears any values entered and returns you to the browsing screen. 7.5.2 Editing an Adapter To edit an adapter, select the adapter from the browsing screen and then click Edit. The Edit Adapters screen appears, displaying the values for the selected adapter.Click Apply to commit your changes. Clicking Cancel clears any values entered and returns you to the browsing screen. 7.5.3 Deleting an Adapter To delete an adapter from the repository, select the adapter and then click Delete. 7.5.4 Setting Adapter Parameters The following sections describe the uses and parameters of the Wireless adapters. ■ Section 7.5.4.1, "Setting the Initialization (Init) Parameters for Adapters" ■ Section 7.5.4.2, "Setting the Input Parameters for Adapters" 7.5.4.1 Setting the Initialization (Init) Parameters for Adapters When you create a non-HTTP master application, the Init Parameters screen of the Master Application Creation Wizard shows the initialization (init) parameters specific to the type of adapter selected for the master application. When Wireless first invokes the adapter, it passes the values that you set in the Init Parameters screen to the adapter. Managing Foundation Services 7-15 Managing Adapters 7.5.4.1.1 Setting Init Parameters for the SQL Adapter The SQL adapter retrieves and adapts content from any JDBC-enabled data source for a master application based on the SQL adapter, the Init Parameters panel includes the following parameters, which are described in Table 7–5. Table 7–5 Init Parameters for the SQL Adapter Parameter Value JDBC Connect String The JDBC connect string for the database on which to query, as follows: jdbc:oracle:thin:@host_name:port:SID Note: Insert all colons (for example, thin:@host). JDBC Driver The Java DriverClass name (for example, Oracle thin driver, Oracle.jdbc.driver.oracle.driver) User Name The name of the database user. Password The password of the database user Type of Statement The type of SQL statement used by the master application. Allowable values include: QUERY: for a select statement. This type of statement returns a Simple Result document. You can use output filtering with QUERY statements. PLSQL: to use a PL/SQL procedure. This type of statement returns results to a database buffer. CALL: to run a stored procedure (SQL92 syntax only). This returns either a Simple Result or an Adapter Result element. The Statement The actual SQL statement that invokes the query, PL/SQL procedure, or stored procedure. Note: The SQL statement should be entered without a semicolon. You can use input variables in the SQL statement. You must indicate a variable in the statement by prefixing the variable with a colon. For example, you can specify an input variable in a PL/SQL statement as follows: begin mypackage.foo(:expr); end; Where :expr is the name of the variable. You must define the parameter manually in the input panel. Minimum DB Connection Pool Size 7-16 Administrator’s Guide The minimum number of database connections. Managing Adapters Table 7–5 Init Parameters for the SQL Adapter Parameter Value Maximum DB Connection Pool Size The maximum number of database connections. Increment Size for the Connection Pool The increment by which the database connection pool increases. Idle Timeout (In Minutes) The time (in minutes) of inactivity that Wireless allows before automatically logging the user off the system. 7.5.4.1.2 Setting Init Parameters for the Web Integration Adapter The Web Integration adapter retrieves and adapts Web content. The Web Integration adapter works with Web Interface Definition Language (WIDL) files to map source content to Wireless XML. Typically, the source format for the Web Integration adapter is HTML, but developers can also use the adapter to retrieve content in other formats, such as XML. Table 7–6 describes the initialization (init) parameters for a master application based on the Web Integration adapter. Table 7–6 Init Parameters of the Web Integration Adapter Parameter Value WebIntegrationServer The machine name and listening port of the Web Integration Server. If the Web Integration Server and the Wireless server reside on the same machine, use localhost:port. This field is required. The server you specify in this field must be running for the Content Manager to return the adapter parameters. Interface The WIDL interface name. This interface must be published to the Web Integration Server. You can publish the interface using the Web Integration Developer. You cannot currently use the WIDL_FILE parameter to identify a WIDL service. WIDL_FILE Do not enter a value for this parameter. 7.5.4.1.3 Setting Input Parameters for the Web Integration Adapter The master application determines the parameters that display in the panel by querying the adapter. Every input parameter defined in the WIDL interface appears in the Inputs panel, including parameters for other WIDL applications within the WIDL interface. In addition to the custom input parameters that you create, Web Integration applications provide these parameters: ■ OutputType Managing Foundation Services 7-17 Managing Adapters ■ PAsection ■ InputEncoding The OutputType specifies the type of XML output that the adapter should return. You can specify RawResult, to return content in Adapter Result format, or SimpleResult, to return content in Simple Result format. For returning the raw result format, you must create a result transformer that converts the result into Simple Result for the device transformer. The result transformer should have the same name as the value you use for the PAsection parameter; that is, it should have the same name as the WIDL application.You use RawResult for chained services. PAsection is the name of the WIDL application that you want the master application to invoke. A WIDL interface can include more than one WIDL application. Wireless lists the WIDL application names in a selection list in the value field. InputEncoding specifies the encoding used to encode the source document. The source document is the URL that was used to create the WIDL file for this application. The default value of this parameter is UTF-8. If the language of the source document is an Asian language, you can change the default encoding to the appropriate multi-byte encoding according to the IANA standards for the particular Asian language that is used in the source document. The InputEncoding parameter enables you to specify or change the encoding as part of the multi-byte character support. 7.5.4.2 Setting the Input Parameters for Adapters The Input Parameters screen displays the input parameters for the adapter. The Content Manager Tool queries the adapter definition to determine the parameters that appear in this panel. The master application passes the input parameter values to the adapter’s invoke method every time the adapter executes. Some parameters rely on user input for values. The values for other parameters, such as name of the WIDL application in the WIDL interface (PAsection), are set by the master application or application link. PAsection is an internal parameter, not exposed to the end user. In addition to PAsection, Wireless provides these input parameters, which are described in Table 7–7. 7-18 Administrator’s Guide Managing Adapters Table 7–7 Input Parameters for a Non-Http Master Application Variable Value PAservicepath The relative path to a Wireless application, such as /UsersFolders/joe/myChain. PAdebug The debugging option. If true (that is, set to 1), then Wireless produces verbose output to the log files. In this case, in addition to notifications and warnings, Wireless writes the results of adapter invocations to the log file. This enables you to examine application content in its internal, XML format, which can help you to create result transformers and solve application and transformer problems. PAsection The WIDL adapter uses this value to identify the application that serves as the entry point in the chained application sequence. PAuserid The user name. PApassword The user password. PAsid The Wireless session identifier. Table 7–8 describes the Wireless input parameters. Table 7–8 Input Parameters Attributes Parameter Value Name The name of the input parameter. The Service Manager sets the name of the input parameter by querying the adapter definition. Caption The caption is the label that Wireless uses for the parameter when prompting for user input. Comment In the case of master applications based on the Web Integration adapter, Wireless automatically populates this cell with the name of the WIDL application that uses the parameter. For applications based on other adapters, you can use this column to document the parameter. The comment is only used internally. User Customizable Specifies whether the end user can set a value for this parameter using Wireless Customization. You can make most input parameters customizable by the user. In particular, you should set this option for parameters that may be difficult for a user to enter from a mobile device. This includes email addresses and personal identification numbers. Managing Foundation Services 7-19 Managing Adapters Table 7–8 Input Parameters Attributes Parameter Value Format This mask sets the expected data entry mode for the user device. For example, if you expect the user to enter numbers for the parameter, you use the format code N. This works only with WML 1.1-compliant devices. The default format is *M. Other formats include: ■ A, for entry of uppercase letters or punctuation ■ a, for entry of lowercase letters or punctuation ■ N, for entry of numbers. ■ X, for entry of uppercase letters. ■ x, for entry of lowercase letters. For a complete list of formats, see the Wireless Application Protocol Wireless Markup Language Specification, Version 1.1. Mandatory Select this check box if this parameter must have a value. Remove the selection for optional parameters. Default Value For most parameters, this value represents the default value for the parameter. If you specify a default value, Wireless does not prompt the user for a value. Default values can be overridden by a value specified by an application link created by the Content Manager or, if the parameter is visible to the user in the Wireless Customization Portal. The PAsection parameter is used by the Web Integration adapter. For PAsection, this value is the name of the WIDL application that the Web application should use. You can select the names from a drop-down selection list. If you do not specify a value for PAsection, the Wireless application includes all WIDL applications in the WIDL interface. 7.5.4.3 Adding a New Input Parameter to the Adapter From the Input Screen of the Master Application Creation Wizard, click Add Another Row. A blank row appears. Define the name for the input parameter and any other needed parameters in this row, which are described in Table 7–8. 7.5.4.3.1 Setting Input Parameters for the AppsFramework Adapter The AppsFramework adapter enables the development of enterprise applications on top of Wireless. It provides system-wide standard application look and feel, enhanced application widgets support and data binding to enterprise data. The AppsFramework adapter includes the input parameter classname which must be the package and class of the implementation of the MobileApplicationHandler interface. 7-20 Administrator’s Guide Managing Adapters 7.5.4.3.2 Modifying the Style, Color, and SDU Information for the Mobile Application Framework Adapter The Mobile Application Framework adapter uses style and color mappings to provide a uniform look and feel that can be customized across all applications running on the server. In addition, carrier-specific information can be specified to the Mobile Application Framework adapter to optimize the content delivered by the adapter. The StyleColorLoader command-line utility is used to modify the style, color, and SDU size information used by the Mobile Applications Framework adapter. Downloading the Style/Color/SDU Repository To download the Style/Color/SDU Repository: 1. Change directory to ${ORACLE_HOME}/wireless/sample 2. Enter updateStyleColor.bat -D <filename>, where <filename> is the target file that receives the downloaded XML repository. For a UNIX system, enter updateStyleColor.sh -D <filename>. Uploading the Style/Color/SDU Repository To upload the Style/Color/SDU/Repository: 1. Change directory to ${ORACLE_HOME}/wireless/sample. 2. Enter updateStyleColor.bat -U <filename>, where <filename> is the file containing the Style/Color/SDU information in the specified XML format that should be uploaded into the database. On a UNIX system, enter updateStyleColor.sh -U <filename>. Modifying the Style/Color/SDU XML Repository File To modify the Style/Color/SDU XML repository file: 1. Download the file. 2. Modify this file by opening it in any text editor. The XML file contains three top-level elements: <StyleSet>, <ColorSet>, <SDUSize>. After making modifications, you then upload the file back into the repository. Defining a StyleSet The <StyleSet> elements help the renderers for a given device render application styles into markup language, as described above. For example, if you want to create a prompt- style "Prompt" and bind the style to the text of the prompt, you create a "Prompt" style in the style repository. Managing Foundation Services 7-21 Managing Adapters Each <StyleSet> element contains a number of <Style> elements. Each <Style> element contains a name, a font face, font size, font style, and font color. Table 7–9 describes the style element properties. Table 7–9 Style Element Properties Property Name Required? Multiple? Description Name Yes No The name of the Style. FontFace Yes No The name of the font face of the given style. FontSize Yes No The font size of the given style. FontColor Yes No The name of the font color of the given style. FontStyle Yes No The name of the font style of the given style, (that is, Bold, Italic, Plain). In addition to the <Style> element, the StyleSet contains elements described in Table 7–10. Table 7–10 StyleSet Element Properties Property Name Required? Multiple? Description Name Yes No The name of the StyleSet. If a StyleSet is not associated with the device, then the StyleSet named Default is assigned to the device. Inherits Yes No The parent style sheet from which style definition are inherited.Often, the administrator wants only to change a single style between two devices. In such a case, the administrator defines a single StyleSet, which has all of the style definitions for the first device. The second device then inherits this StyleSet and only overwrites the styles that are different between the two StyleSets. Style Yes No This element defines a style. Device Yes No Describes the type of devices associated with a style set. The two types of devices supported are Phone and PDA. By modifying application style definitions in a given <StyleSet>, the system administrator can control how the given application style is rendered on the device to which the style set is bound across the whole system. For example, if a PDA 7-22 Administrator’s Guide Managing Adapters device is bound to the StyleSet Default, then changing the prompt style in the default StyleSet to bold from plain results in all prompts appearing in bold rather than in plain when rendered on client devices in the PDA device grouping. Defining a ColorSet The <ColorSet> element helps the renderers for a device render application colors into markup language. For a given device, this application color is mapped to a color code, which can be modified by the system administrator to produce the optimal rendering. For example, if a PDA device is bound to the ColorSet, Default, then changing the background color in the default ColorSet to grey from white results in the background color for all applications on client devices in the PDA device grouping to be grey rather than white. A <ColorSet> element consists of multiple <Color> elements. The following table describes the propertis common to each <ColorSet>. Table 7–11 ColorSet Elements Properties Property Name Required? Multiple? Description Name Yes No The name of the ColorSet. Inherits Yes No The parent ColorSet from which color traits are inherited. Often, an administrator wants only to change a single application color between two devices. In this case, the administrator defines a single color set which has all of the color definitions for the first device.This color set is then inherited by the second device, which would only overwrite the colors that are different between the ColorSets. Color Yes Yes This element defines a color. Device Yes No Describes the type of device associated with the style set. The two types supported devices are PDA and Phone. A <ColorSet> element consists of multiple <Color> elements. The following table describes the properties common to all <Color> elements. Managing Foundation Services 7-23 Managing Regions Table 7–12 ColorSet Color Element Properties Property Name Required? Multiple? Description Name Y N The name of the Style. ColorDesc Y N The 24-bit color code of the given color, for example White = #FFFFFF. Defining SDUSize Information for a Device The <SDUSize> element enables the renderers for a given device to render an optimized amount of information on pages. For a given device, the SDUSize is the upper limit on the amount of information (in bytes) that the network can carry to this device. A <SDUSize> element consists of two child elements. The following table lists their properties. Table 7–13 SDUSize Element Properties Property Name Required? Multiple? Description Name Yes No The name of the type of device. The two types of devices supported are Phone and PDA. Value Yes No The 24-bit color code of the given color, for example White = #FFFFFF. 7.5.4.3.3 Setting Input Parameters for the SQL Adapter You can configure SQL input parameters in the same way that you configure the Web service parameters. You specify input parameters in the SQL statement you use to implement the service. 7.6 Managing Regions When you click the Regions tab in the Foundation Manager, the main display of the region modeling tool appears (Figure 7–11). 7-24 Administrator’s Guide Managing Digital Rights Policies Figure 7–11 The Main Display of the Region Modeling Tool The region modeling tool enables administrators of a wireless portals to create custom regions that can be associated with location-based applications. You create a location dependent application by specifying a region. This region can be a system-defined region (one provided out-of-the-box with Wireless) or a custom region, one created with the region modeling tool. A region is a geographic entity, or location. A region can be small (such as a street address) or large (such as a country). A region can be represented by a point, as is often done for addresses and locations of interest (such as airports and museums), or by a polygon, as is usually done for states and countries. For detailed information about using the region modeling tool, refer to the chapter on Location Services in the Oracle Application Server Wireless Developer’s Guide. 7.7 Managing Digital Rights Policies A digital rights policy restricts the execution of J2ME applications on mobile devices. Out-of-the-box, Wireless provides two types of digital rights management (DRM) policies that can be used to package J2ME applications: Count DRM policy, and Interval DRM policy. The Count DRM policy restricts the number of times that a downloaded J2ME application can be run on a device. The Interval DRM policy sets the period in which Managing Foundation Services 7-25 Managing Digital Rights Policies a downloaded J2ME application can be run on a device from the time the user downloads the application. In addition,Wireless provides a platform to create a customized digital rights policy. All digital rights policies created using the Foundation Manager can be selected from the Content Manager when creating an application link based on a J2ME application. For more information, see Section 5.3.4. You use the Digital Rights Policy subtab to manage the digital rights policies. When you click the Digital Rights Policy subtab, the browsing screen for digital rights policies appears (Figure 7–12), displaying a list policies in the repository. Figure 7–12 The Browsing Screen for Digital Rights Policies 7.7.1 Creating a Digital Rights Policy Wireless provides a two-step wizard which enables you to create a digital rights policy. To access this wizard, click Create in the browsing screen. Step 1: Selecting the Digital Rights Policy Package Type There are two types of digital rights policy packages: one is a default package provided by Wireless. The other is a customized package that you can plug into the Wireless platform. If you select this customized package, then you must specify the full class name of the packaging class, which implements the oracle.wireless.me.server.tools.drm.DRMPackager interface. To create a digital rights policy, click Create. The Digital Rights Policy detail attributes page appears (Figure 7–13). 7-26 Administrator’s Guide Managing Digital Rights Policies Figure 7–13 Entering the Attributes for a Digital Rights Policy Step 2: Entering the Digital Rights Policy Detail Attributes If you selected the Default Package, then you must specify the following attributes: ■ A name for the digital rights policy. This is a required parameter. ■ A description for this digital rights policy. This is an optional parameter. Selecting the Usage Policy You can opt to limit the number of times that a user can execute a downloaded J2ME application by defining the values for the Usage Time, or Usage Count options. For the Usage Time option, specify the number of years, months, days, hours or minutes that the user can execute the downloaded application. Define the Usage Count option by specifying the number of times that a user can execute a downloaded J2ME application. Managing Foundation Services 7-27 Managing Digital Rights Policies Entering the Initialization Properties Each time that the user executes an application, a message displays on the user’s device informing the user of the number of times, or the amount of time, that the user has to access the application. To create such a message, you define the msg.subfix, msg.expire, and msg.prefix parameters. Table 7–14 describes these parameters, which enclose the usage count display presented to the user for each download. Table 7–14 Initialization Parameters of a Digital Rights Policy Parameter Value msg.subfix The punctuation and text that follow the usage count data.For example, enter times. msg.expire The text telling the user that the application has expired, or is no longer available. For example, enter This application has expired! msg.prefix field The text that precedes the user count display. For example, enter This application expires after [times]. Click Create to complete the policy. Defining a Customized Package If you selected the Customized Package option in Step 2, then you must define a name for the digital rights policy and optionally enter a description for the policy in the New Digital Rights Policy screen (Figure 7–14). You also enter an Open Digital Rights Language (ORDL) document, an XML document which expresses the Digital Rights Policy. This ODRL document is consumed by the packaging object which implements oracle.wireless.me.server.tools.drm.DRMPackager. In addition, you enter the initialization (init) properties associated with the policy. The init property name and value pairs are passed to Custom Digital Right implementation class. This implementation class uses these value pairs. Click Finish to complete the policy. For details on implementing a customized digital rights policy, refer to the Oracle Application Server Wireless Developer’s Guide. 7-28 Administrator’s Guide Managing Digital Rights Policies Figure 7–14 Defining a Customized Package 7.7.2 Editing a Digital Rights Policy The Edit button in the digital rights policy browsing screen enables you to edit all the parameters of a selected digital rights policy. To edit a digital rights policy, select the digital rights policy from the browsing screen and the click the Edit button.Clicking Finish saves the changes to the policy. Clicking Cancel sets the parameters back to their previous values and returns you to the browsing screen. Refer to Section 7.7.1 for descriptions of the parameters that you can edit. Managing Foundation Services 7-29 Managing API Scan Policies 7.7.3 Deleting a Digital Rights Policy To delete a digital rights policy from the repository, select a policy from the browsing screen and then click Delete. 7.7.4 Enabling or Disabling a Digital Rights Policy To enable or disable a digital rights policy from the repository, select a policy from the browsing screen and then click Enable/Disable. 7.8 Managing API Scan Policies An API scan policy defines the malicious APIs which can be invoked from a J2ME application that compromise a user’s device. The API scan policy definition includes the malicious API package as well as the class and method names. During the certification process, the Wireless server references the API scan policy objects when scanning a J2ME application for the APIs defined in the API scan policies. For information on how to scan a J2ME application, refer to Section 5.3.5.1. You use the API Scan Policy subtab to manage the API scan policies. When you click the API Scan Policy subtab, the API scan policy browsing page appears (Figure 7–15), displaying a list of the API Scan Policies in the repository. Figure 7–15 The Browsing Screen for API Scan Policies 7.8.1 Creating an API Scan Policy The API scan policy creation wizard enables you to create a policy. To access this wizard, click the Create button on the browsing screen. To define a policy, you must provide a name for the policy and then optionally enter a description. 7-30 Administrator’s Guide Managing API Scan Policies Enter the XML Document which defines the malicious APIs. This XML document is based on Oracle Application Server Wireless Filter XML Schema. The text area of the Create API Scan screen displays a sample API scan document which defines the package, classes, and methods of the API that the Wireless server references when scanning the J2ME application. Click Finish to complete the API scan policy. 7.8.1.1 Editing an API Scan Policy The Edit button in the API scan policy browsing screen enables you to edit the description of an API scan policy. To edit an API scan policy, first select the policy from the browsing screen and then click Edit. 7.8.1.2 Deleting an API Scan Policy To delete an API scan policy from the repository, select the policy from the browsing screen and then click Delete. 7.8.1.3 Enabling or Disabling an API Scan Policy To enable or disable an API scan policy from the repository, select the policy and then click Enable/Disable. Managing Foundation Services 7-31 Managing API Scan Policies 7-32 Administrator’s Guide Part III Configuration and Integration This section includes the following chapters: ■ Chapter 8, "Configuring the Out-of-the-Box Applications" ■ Chapter 9, "Wireless Gateway Configuration" ■ Chapter 10, "Wireless Security" ■ Chapter 11, "Mobile Single Sign-On" ■ Chapter 12, "Activity Logging" ■ Chapter 13, "Optimizing Oracle Application Server Wireless" ■ Chapter 14, "Load Balancing and Failover" ■ Chapter 15, "Globalization" ■ Chapter 16, "Integrating Wireless with Other Components" ■ Chapter 17, "Integrating Wireless Notification with Microsoft Exchange" 8 Configuring the Out-of-the-Box Applications This document describes configuring the pre-built Wireless applications. Each section of this document presents a different topic. These sections include: ■ Section 8.1, "Configuring the Voice and Wireless Applications Using the Content Manager" ■ Section 8.2, "Wireless Application Configuration Parameters" ■ Section 8.3, "PIM and Mail" ■ Section 8.4, "Location" ■ Section 8.5, "m-Commerce Applications" 8.1 Configuring the Voice and Wireless Applications Using the Content Manager Oracle Application Server Wireless includes pre-built Wireless applications, such as PIM (Personal Information Management), mail, location-based and messaging applications (through SMS, WAP-push, fax, e-mail and voice). You use the edit functions of the Content Manager as illustrated in Figure 8–1, to configure the parameters of these wireless applications to make them ready for use. Some of the configuration parameters of a mobile application are read-only and therefore cannot be edited. For more information on editing application using the Content Manager, see Section 5.3.5 in Section 5, "Managing Content". Configuring the Out-of-the-Box Applications 8-1 Wireless Application Configuration Parameters Figure 8–1 Editing the Configuration Parameters of a Wireless Application 8.2 Wireless Application Configuration Parameters This section details the configuration parameters and related software requirements for the following Wireless Applications: ■ 8-2 Section 8.3, "PIM and Mail" ■ Section 8.3.1, "Address Book" ■ Section 8.3.2, "Calendar" ■ Section 8.3.3, "Directory" ■ Section 8.3.4, "Fax" ■ Section 8.3.5, "Oracle Internet File System" ■ Section 8.3.6, "Instant Messaging" ■ Section 8.3.7, "Mail" Administrator’s Guide Wireless Application Configuration Parameters ■ ■ ■ Section 8.3.8, "Short Messaging" ■ Section 8.3.9, "Tasks" Section 8.4, "Location" ■ Section 8.4.1, "Biz Directory" ■ Section 8.4.2, "Driving Directions" ■ Section 8.4.3, "Location Picker" ■ Section 8.4.4, "Maps" Section 8.5, "m-Commerce Applications" ■ Section 8.5.1, "Form Filler" ■ Section 8.5.2, "Payment Application" ■ Section 8.5.3, "Wallet Application" ■ Section 8.5.4, "Transcoder" In addition to the application-specific configuration parameters, this section also includes the following sections: ■ Section 8.2.1, "Applications Setup" ■ Section 8.3.10, "Connecting PIM Applications to Non-Oracle Servers" ■ Section 8.3.10.1, "Configuring the Microsoft Exchange Server for PIM Applications" 8.2.1 Applications Setup Applications Setup defines how one application calls another. All of the Wireless and Voice applications can be uniquely identified by an attribute called the OracleMobile protocol (OMP) URL. Each application uses an OMP URL to call a different application. Application Setup acts as a repository where each of the OMP URLs are registered. In turn, each application has a configuration parameter which tells the application where to find Applications Setup. You enter the OMP URLs when you create an application link using the Content Manager (Figure 8–2). For more information, see Section 5.3.4. Configuring the Out-of-the-Box Applications 8-3 Wireless Application Configuration Parameters Figure 8–2 Entering the OMP URL 8.2.1.1 Registered URLs The Application Setup includes the following OMP URLs. ■ Address Book OMP URL Defines OMP URL for the Address Book application. ■ ■ Valid Values: The OMP URL of the address book application ■ Default Value: omp://oracle/services/pim/addressbook Calendar OMP URL Defines the OMP URL for the Calendar application. ■ ■ Valid Values: The OMP URL of the calendar application ■ Default Value: omp://oracle/services/pim/calendar Contact Rules OMP URL Defines the OMP URL for the Contact Rules application. ■ ■ Valid Values: The OMP URL of the contact rules application. ■ Default Value: omp://oracle/services/presence/switcher Directions OMP URL Defines OMP URL for the Directions application. ■ 8-4 Administrator’s Guide Valid Values: The OMP URL of the driving directions application. Wireless Application Configuration Parameters ■ ■ Default Value: omp://oracle/services/location/directions Directory OMP URL Defines the directory OMP URL. ■ ■ Valid Values: The OMP URL of the directory application ■ Default Value: omp://oracle/services/pim/directory FormFiller OMP URL Defines the OMP URL of the FormFiller application. ■ ■ Valid Values: The OMP URL of the formfiller application ■ Default Value: omp://oracle/services/commerce/formfiller Email OMP URL Defines the OMP URL of the Email application. ■ ■ Valid Values: The OMP URL of the mail application Voice Main Menu OMP URL Defines the OMP URL of the Voice Main Menu application. ■ ■ Valid Values: The OMP URL of the Main Menu application ■ Default Value: omp://oracle/services/voice/mainmenu Fax OMP URL Defines the fax OMP URL. ■ ■ Valid Values: The OMP URL of the Fax application ■ Default Value: omp://oracle/services/pim/fax iFS OMP URL Defines the OMP URL for the Files (iFS) application. ■ ■ Valid Values: the OMP URL of the Files (iFS) application ■ Default Value: omp://oracle/services/pim/ifs Instant Messaging OMP URL Defines the OMP URL of the Instant Messaging application. ■ Valid Values: The OMP URL of the instant messaging application. ■ Default Value: omp://oracle/services/pim/im Configuring the Out-of-the-Box Applications 8-5 Wireless Application Configuration Parameters ■ Payment OMP URL Defines the OMP URL of the Payment application. ■ ■ Valid Values: The OMP URL of the Payment application ■ Default Value: omp://oracle/services/commerce/payment Location Picker OMP URL Defines the OMP URL of the Location Picker application. ■ ■ Valid Values: The OMP URL of the Location Picker application ■ Default Value: omp://oracle/services/location/picker Short Messaging OMP URL Defines the OMP URL of the Short Messaging application. ■ ■ Valid Values: The OMP URL of the short messaging application. ■ Default Value: omp://oracle/services/pim/sm Tasks OMP URL Defines the OMP URL of the Tasks application. ■ ■ Valid Values: The OMP URL of the Tasks application. ■ Default Value: omp://oracle/services/pim/tasks Translator OMP URL Defines the OMP URL of the Translator application. ■ ■ Valid Values: The OMP URL of the Translator application. ■ Default Value: omp://oracle/services/commerce/translator Viewer OMP URL Defines the OMP URL of the Viewer application. ■ ■ Valid Values: The OMP URL of the viewer application ■ Default Value: omp://oracle/services/pim/viewer Voice Mail OMP URL Defines the OMP URL of the Voice Mail application. 8-6 ■ Valid Values: The OMP URL of the voice mail application ■ Default Value: omp://oracle/services/voice/mail Administrator’s Guide PIM and Mail ■ Wallet OMP URL Defines the wallet OMP URL. ■ Valid Values: The OMP URL of the wallet application. ■ Default Value: omp://oracle/services/commerce/wallet 8.3 PIM and Mail Oracle Application Server Personal Information Management (PIM) Service enables customers to integrate corporate email, directory, address book, calendaring and instant messaging applications into their mobile enterprise portals. Each of these applications is built as a module that can be called either directly by mobile users from their devices, or by other applications. These mobile PIM and email applications are fully integrated within one another, enabling a user to access such features as an address book-based recipient selection or a directory when composing email messages. Oracle Application Server customers can leverage the Personal Information Management Service applications (also known as Collaboration Applications) into their own or third-party applications to add communication features to these applications, to retrieve corporate directory information, or to add and manage appointments for users, such as travel or dining reservations. 8.3.1 Address Book The Address Book enables users to manage their own address books and contacts as well as enabling call functions from wireless phones. The mobile address book integrates with the Mail application to allow users to compose a message’s recipient list from their address book. Once you find a contact, you can also edit the contact information or delete a contact. While deleting, nothing is returned to the caller. 8.3.1.1 Configuring the Address Book The Address Book application integrates with various Address Book server, such as the Oracle Collaboration Suite, the Microsoft Exchange server, and the Oracle Calendar server. This application also has a preset mode where the address book contacts are stored in the Wireless schema. The preset mode requires no third-party software. Configuring the Out-of-the-Box Applications 8-7 PIM and Mail Required Software Table 8–1 describes the third-party software required for the Address Book. Table 8–1 Required Third-Party Software for the Address Book Name From Version(s) Oracle Collaboration Suite 1 Microsoft Exchange Server 5.5 Oracle Calendar Server 5.2 Note: For the Address Book application to connect to the Microsoft Exchange Server, see Section 8.3.10.1. 8.3.1.2 Connecting the Address Book Application to the Oracle Collaboration Suite To connect the Address Book to the Oracle Collaboration Suite: Copy the following JAR files from the Oracle Collaboration Suite middle tier to $ORACLE_HOME/wireless/lib on the Wireless middle tier. ■ $ORACLE_HOME/jlib/esmail_sdk.jar ■ $ORACLE_HOME/jlib/escommon.jar ■ $ORACLE_HOME/jlib/esldap.jar Include these JAR files in the OC4J classpath by adding the following lines to $ORACLE_HOME/j2ee/OC4J_Wireless/config/application.xml: ■ <library path="../../../wireless/lib/esmail_sdk.jar"/> ■ <library path="../../../wireless/lib/escommon.jar"/> ■ <library path="../../../wireless/lib/esldap.jar"/> Configuration Parameters ■ Can a user use different server settings? Should the end user be able to edit the server configuration? ■ 8-8 Administrator’s Guide Valid Values: A boolean value (true, false) PIM and Mail ■ ■ Default Value: false ■ Examples: true, false Address Book Java Driver Class The driver class implementing the backend. ■ Valid Values: For Oracle Collaboration Suite: oracle.panama.module.pim.addressbook.oracle.UMAddressBook For Microsoft Exchange Server: oracle.panama.module.pim.addressbook.exchange.ExchangeAddressBook For Oracle Calendar Server: oracle.panama.module.pim.addressbook.oracle.OracleAddressBook For the Preset Address Book (where the data is stored in the database tables in the Wireless schema): oracle.panama.module.pim.addressbook.oracle.UMAddressBook? ■ Default Value: oracle.panama.module.pim.addressbook.oracle.UMAddressBook ■ ■ Examples: Address Book Server The server name or IP address of the Address Book server. ■ Valid Values: The name or IP of the Address Book server. When connecting to the Oracle Collaboration Suite, enter the name or IP of the Oracle Internet Directory (OID). When connecting to the Oracle Calendar Server, enter the connect string to the Oracle Calendar Server database in the following format: <username>:<password>:<hostname or IP>:<port where the database is listening>:<database SID> When connecting to the Microsoft Exchange server, enter the name or IP of the Exchange server Configuring the Out-of-the-Box Applications 8-9 PIM and Mail ■ ■ Default Value: localhost ■ Examples: oidserver.mycomp.com Address Book Server Port The port number for the Address Book server. ■ ■ Valid Values: Any integer value ■ Default Value: empty ■ Examples: 4032, 389 Oracle Internet Directory (OID) Username The user name for the administrator account in the OID server. This parameters is required only for the Oracle UM (Unified Messaging) address book in a standalone configuration. ■ ■ Valid Values: A string value ■ Default Value: orcladmin ■ Examples: orcladmin Oracle Internet Directory (OID) Administrator Password The password for the administrator’s account in the OID server. This is required only for the Oracle UM (Unified Messaging) address book in a standalone configuration. ■ ■ Valid Values: A password for the OID administrator user. ■ Default Value: empty ■ Examples: welcome1, cryptic password Account Name If sharing login authentication information with the Calendar application, specify the same string value as entered for Account Name in the Calendar and Tasks applications. ■ 8-10 ■ Valid Values: Any string value. ■ Default Value: OraAddressBookCalDomain ■ Examples: mydomain, sharedAccount Exchange Data URL Administrator’s Guide PIM and Mail This should point to the ASP page, AddressBook.asp, that fetches the data from the Exchange Server (required for MS Exchange configuration). ■ Valid Values: A URL pointing to AddressBook.asp on the MS IIS server ■ Default Value: http://localhost/oracle/AddressBook.asp ■ Examples: http://myiis.mycomp.com/oracle/AddressBook.asp http://iis-server.abc.com/oracle/AddressBook.asp ■ Path to ORACLE_HOME The complete system path to the ORACLE_HOME where the Wireless middle-tier is installed. ■ Valid Values: A fully qualified path to ORACLE_HOME ■ Default Value: empty ■ Examples: /private/home/9ias-mid C:\9iasmid ■ Async Contact Separator The valid separators entered by users when performing queries. This parameter applies only to the Async mode. ■ ■ Valid Values: Any character ■ Default Value: *;, ■ Examples: *;,.| Async Query OID If set to true, then the search queries performed in the Async mode are also attempted in the OID repository. This parameter applies only to the Async mode. ■ ■ Valid Values: A boolean value (true, false) ■ Default Value: true ■ Examples: true, false Async Max Contacts Results Configuring the Out-of-the-Box Applications 8-11 PIM and Mail This parameter indicates the maximum number of contacts results. This parameter applies only to the Async mode. ■ ■ Valid Values: Any integer value. ■ Default Value: 5 ■ Examples: 5, 2 Async Translate Commands? Specifies whether to accept localized Async commands. ■ ■ Valid Values: A boolean value (true, false) ■ Default Value: true ■ Examples: true, false Application Setup OMP URL The OMP URL of the Application Setup Modulable Application. ■ Valid Values: the OMP URL to the Application Setup ■ Default Value: omp://oracle/applications/appsetup ■ Examples: omp://oracle/applications/appsetup omp://oracle/applications/otherappsetup Note: The values set for Async Contact Separator, Async Query OID, Async Max Contacts Results, and Async Translate Commands parameters affect all of the Async-enabled mobile applications. These values do not affect the Address Book application alone, but any Async-enabled application. 8.3.1.3 Linking to the Address Book Application You can link to the address book using the following virtual URL: omp://oracle/services/pim/addressbook 8-12 Administrator’s Guide PIM and Mail Table 8–2 describes the input call parameters of the Address Book.: Table 8–2 Input Call Parameters of the Address Book Parameter Name Mandatory? Description Valid Value screen No The function performed 0 (Displays the list of contacts); by the Addressbook. 51 (Makes the Addressbook service add the contact with the provided data to this database of contacts. This parameter requires SERIALIZED_CONTACT if the value is 51.) srchstr No Makes the Addressbook The string which is the object of the search. perform a search for the Requires screen := {0 empty} specified string among all of the contacts. SERIALIZED_CONTACT The SERIALIZED_CONTACT group contains the parameters for each element of a contact, such as contact name, contact work phone, and contact work address. The elements described in this optional group are returned when the user clicks the Done button in a screen displaying a contact detail. The SERIALIZED_CONTACT group includes the following parameters, described in Table 8–3. Table 8–3 Parameters of the Serialized Contact Group for Addressbook Parameter Name Mandatory? Description Valid Value NAME Yes The name of this contact. For example, NAME=John Smith. WORKPH No The work phone number of this contact. WORKPH=650-123-4567 Restriction: white-spaces, special characters, are encoded. MOBILEPH No The mobile phone number of this contact. HOMEPH No The home phone of this contact. Restriction: white-spaces, special characters, are encoded. WORKFAX No The business fax number of this contact. Restriction: white-spaces, special characters, are encoded. Configuring the Out-of-the-Box Applications 8-13 PIM and Mail Table 8–3 Parameters of the Serialized Contact Group for Addressbook Parameter Name Mandatory? Description Valid Value EMAIL1 No The email (or the first email) address of this contact. An email address, for example, [email protected] Restriction: white-spaces, special characters, are encoded. EMAIL2 No The second email address of this contact. Restriction: white-spaces, special characters, are encoded. WADDRLINE1 WADDRCITY No No An email address, for example, [email protected] m The first (or only) line of the Work address of this contact. The first line of a street address. For example: Restriction: white-spaces, special characters, are encoded. WADDRLINE1=123 Main Street The city or Work address of this contact. A city; for example, WADDRCITY = Boston Restriction: white-spaces, special characters, are encoded. WADDRSTATE WADDRZIP No No The state (or federal region) of the WORK address of this contact. A state (or federal region); for example, WADDRSTATE = CA Restriction: white-spaces, special characters, are encoded. WADDRSTATE = Massa chusetts The ZIP or postal code of the work address of this contact. A ZIP or postal code. For example, WADDRZIP=02142 WADDRZIP=D-80333 WADDRCOUNTRY No The country of the work address of this contact. The name of a country, for example: WADDRCOUNTRY=U.S.A. HADDRLINE1 HADDRCITY 8-14 No No Administrator’s Guide The first (or only) street line of the home address of this contact. The first line of a street address, for example: Restriction: white-spaces, special characters, are encoded. HADDRLINE1 = 2901 Armstrong Dr. The city of the home address of the person in the contact. The name of a city, for example: HADDRCITY=Boston PIM and Mail Table 8–3 Parameters of the Serialized Contact Group for Addressbook Parameter Name Mandatory? Description Valid Value HADDRSTATE No The state (or federal region) of the home address of the person in this contact. The full name or abbreviation of the state. For example: HADDRSTATE=Massachusetts HADDRSTATE=CA HADDRZIP No The ZIP or postal code of this contact. The ZIP or postal code. For example: HADDRZIP=90210 HADDRZIP=D-80333 HADDRCOUNTRY NOTES No Yes The country of the home address of this contact. A name of a country, for example: Text notes describing this contact. A short description of the person in the contact, for example: Restriction: white-spaces, special characters, are encoded. HADDRCOUNTRY=U.S.A. NOTES=This the chief-of-staff in CCC Co. Output Parameters Table 8–4 describes the output parameters for the Address Book. Table 8–4 Output Parameters of the Addressbook Parameter Name Mandatory? Description mailto No. An email address of a contact. This must be an email address. For example: [email protected] smPhone smphone is a phone number of a contact, returned with additional parameters used by the Short Messaging application (usually when the user selects a phone number in the Address Book application). Table 8–5 describes the smPhone parameters. Table 8–5 Parameters of smPhone Parameter Name Mandatory? Description Valid Value type Yes The type of short messaging service desired. VOICE, FAX Configuring the Out-of-the-Box Applications 8-15 PIM and Mail Parameter Name Mandatory? Description Valid Value destinationAddress Yes The recipient number of address for the short message (usually a phone number). A phone number, for example: destinationAddress=650-555-5000. faxNumber faxNumber is the fax number of a contact, returned with additional parameters used by the FAX or Short-Messaging applications (usually when the user selects a fax number in the Address Book application). Table 8–6 describes the parameters of the faxNumber group. Table 8–6 Parameters of faxnumber Parameter Name Mandatory? Description Valid Value type Yes The type of short messaging service needed. FAX destinationAddress Yes The fax number of the recipient A fax number, for example, used in the short messaging destinationAddress=650-123-4567. module. FAXTODO Yes The function that the fax module perform. RNAME Yes The name of the recipient of the A name, for example: RNAME=Scott fax. Tiger RPHONE Yes The phone number of the recipient of the fax. A phone number, for example: RPHONE=650-555-5000. RFAX Yes The fax number to which the fax is sent. A fax number, for example, RFAX=650-555-1234 NEWFAX SERIALIZED_CONTACT The SERIALIZED_CONTACT group contains the parameters for each element of a contact, such as contact name, contact work phone, and contact work address. The elements described in this optional group are returned when the user clicks the 8-16 Administrator’s Guide PIM and Mail Done button done in a screen displaying a contact detail. Table 8–7 describes the parameters of the SERIALIZED CONTACT group. Table 8–7 Parameters of the SERIALIZED_CONTACT Group Parameter Name Mandatory? Description Valid Value NAME Yes A name. For example, NAME=John Smith. The name of this contact. Restriction: the white-spaces, special characters, are encoded. WORKPH No The work phone number of this contact. A phone number, for example: WORKPH=650-123-4567 Restriction: the white-spaces, special characters, are encoded. HOMEPH No The home phone number of this contact. A phone number, for example: HOMEPH=650-555-5000 Restriction: the white-spaces, special characters, are encoded. MOBILEPH No The mobile phone number of this contact. A phone number, for example: MOBILEPH=650-555-5000 Restriction: the white-spaces, special characters, are encoded. WORKFAX No The business fax number of this contact. Example: WORKFAX= Restriction: the white-spaces, special characters, are encoded. EMAIL1 No The e-mail (or the first email) An email address, for example, address of this contact. Restriction: [email protected] the white-spaces, special characters, are encoded. EMAIL2 No The second email address of this contact. An email address, for example, [email protected] Restriction: the white-spaces, special characters, are encoded. WADDRLINE1 No The first (or only) line of the Work address of this contact. The first line of a street address. For example: Restriction: the white-spaces, special characters, are encoded. WADDRLINE1=123 Main Street Configuring the Out-of-the-Box Applications 8-17 PIM and Mail Table 8–7 Parameters of the SERIALIZED_CONTACT Group Parameter Name Mandatory? Description Valid Value WADDRCITY No A city; for example, WADDRCITY = Boston The city or work address of this contact. Restriction: the white-spaces, special characters, are encoded. WADDRSTATE WADDRZIP No No The state (or federal region) of the WORK address of this contact. A state (or federal region); for example, WADDRSTATE = CA Restriction: the white-spaces, special characters, are encoded. WADDRSTATE = Massachusetts The ZIP or postal code of the work A ZIP or postal code. For example, address for this contact. WADDRZIP=02142 WADDRZIP=D-80333 WADDRCOUNTRY HADDRLINE1 No No The country of the work address of this contact. The name of a country, for example: The first (or only) street line of the home address of this contact. The first line of a street address, for example: Restriction: the white-spaces, special characters, are encoded. HADDRLINE1 = 2901 Armstrong Dr. WADDRCOUNTRY=U.S.A. HADDRCITY No The city of the home address of the The name of a city, for example: person in the contact. HADDRCITY=San Francisco HADDRSTATE No The state (or federal region) of the The full name or abbreviation of the home address of the person in this state. For example: contact. HADDRSTATE=California HADDRSTATE=CA HADDRZIP No The ZIP or postal code of this contact. The ZIP or postal code. For example: HADDRZIP=90210 HADDRZIP=D-80333 HADDRCOUNTRY NOTES 8-18 No Yes Administrator’s Guide The country of the home address of this contact. A name of a country, for example: Text notes describing the person this contact. A short description of the person in the contact, for example: Restriction: the white-spaces and special characters are encoded. NOTES=This the chief-of-staff in CCC Co. HADDRCOUNTRY=U.S.A. PIM and Mail 8.3.2 Calendar The Calendar application enables users to manage their schedule using mobile access to calendaring servers, such as Oracle Collaboration Suite, Oracle Calendar Server, Microsoft Exchange, and Lotus Domino. Required Software Table 8–8 lists the required third-party software for the calendar application. Table 8–8 Software Requirements for the Calendar Application Name From Version Oracle Collaboration Suite 2 Oracle Calendar Server 5.2 MS Exchange 5.5 Lotus Domino Server R5 Note: To connect applications to Microsoft Exchange and the Lotus Domino server, see Section 8.3.10.1. Connecting to the Oracle Collaboration Suite To connect to the Oracle Collaboration Suite, copy all of the native libraries from $ORACLE_HOME/ocal/sdk/lib on the middle tier of the Oracle Collaboration Suite to $ORACLE_HOME/wireless/lib on the Oracle Application Server Wireless middle tier. Configuration Parameters The Calendar application’s configuration parameters include the following: ■ Can user use different server settings? Determines if the current application settings can be edited by a user. ■ Valid Values: A boolean value (true, false) ■ Default Value: false ■ Examples: true, false Configuring the Out-of-the-Box Applications 8-19 PIM and Mail ■ Calendar Java Driver class The Java driver class implementing the calendar backend. Valid values include: For the Oracle Collaboration Server: oracle.panama.module.pim.calendar.star.StarCalendarService For the Lotus Domino Server: oracle.panama.module.pim.calendar.domino.DominoCalendarService For the Microsoft Exchange Server: oracle.panama.module.pim.calendar.exchange.ExchangeCalendarService For the Oracle Calendar Server: oracle.panama.module.pim.calendar.oracle.OracleCalendarService ■ Default Value: oracle.panama.module.pim.calendar.star.StarCalendarService ■ Calendar server Enter the calendar server and port. For example, enter calendar.mydomain.com:5730. ■ Valid Values: In the Oracle Collaboration Suite mode, enter the name and port of the Oracle Collaboration Suite Calendar server, separating each of these values with a colon (:). The port is where unieng TCP/IP service is running on the OracleAS Calendar middle tier. This is located in the /etc/services file. In Oracle Calendar mode, this value designates the connect string to Oracle Calendar Server database in the following format: <username>:<password>:<hostname or IP>:<port where the database is listening>:<database SID>. In the Exchange mode, enter the name or IP address of the Exchange server. In the Lotus Domino mode, enter the name and port of the Lotus Domino server, separating each of these values with a colon (:). The port is where the DIIOP and HTTP services are running on the Domino server. 8-20 ■ Default Value: localhost:5730 ■ Examples: Administrator’s Guide PIM and Mail cal-server.com:5730, oo_ calsched:cal:myhost.mycompany.com:1521:mySIDexchg.mycomp.com domino.abc.com ■ Account Name If this application shares login authentication information with the Address Book or Tasks applications, then you must specify the same string value as that used for the Account Name parameter of the Address Book or Tasks applications. ■ ■ Valid Values: Any string value. ■ Default Value: OraAddressBookCalDomain ■ Examples: mydomain, sharedAccount Exchange Data URL This should point to Calendar.asp, the ASP page that gets the data from the Exchange Server. This is required for MS Exchange configuration. ■ Valid Values: A URL pointing to Calendar.asp on the MS IIS server ■ Default Value: http://localhost/oracle/Calendar.asp ■ ■ Examples: http://mycomp.com/oracle/Calendar.asp, http://www.abc.com/oracle/Calendar.asp Application Setup OMP URL The OMP URL of the Application Setup modulable application. ■ Valid Values: the OMP URL to the Application Setup ■ Default Value: omp://oracle/applications/appsetup ■ Examples: omp://oracle/applications/appsetup, omp://oracle/applications/otherappsetup 8.3.2.1 Linking to the Calendar Application You can link to the calendar application using the following virtual URL: omp://oracle/services/pim/calendar Configuring the Out-of-the-Box Applications 8-21 PIM and Mail Input Call Parameters for the Calendar Application The input call parameters of the calendar application include the getApptDetails group. This optional group includes the following input call parameter, which is described in Table 8–9. Table 8–9 The ID Parameter Parameter Name Mandatory? Description Valid Value ID The input ID required to retrieve appointment details. A string. For example, ID=1324. Yes Table 8–10 describes the parameters of addAppt group. Table 8–10 Parameters of addAppt Parameter Name Mandatory? Description Valid Value TITLE Yes The title of the appointment. A string. For example, TITLE=Dinner at Joe’s. DATE Yes The date of the appointment. A string. For example, DATE=December 31, 2001 TIME Yes The time of the appointment. A string. For example, TIME= 8:00 p.m. DURATION Yes The duration of the appointment. A string. For example, DURATION=1 hour. NOTES Yes The notes for the appointment. A string. For example, NOTES=Remember the brief. TYPE Yes The type of appointment, either personal or business. A string. For example, TYPE=Business. LOCATION Yes The location of an appointment. A string. For example, LOCATION=Home. REMIND Yes The time interval before the event reminder occurs. A string. For example, REMIND=1 hour. SHARING Yes A flag that enables or disables the For example, SHARING=TRUE. sharing of an appointment. If True, the appointment is shared; if FALSE, then the appointment is not shared. 8-22 Administrator’s Guide PIM and Mail The Calendar application also includes the deleteAppt group. Table 8–11 describes the deleteAppt parameter. Table 8–11 The deleteAppt Parameter Parameter Name Mandatory? Description Valid Value ID The input ID required to select an appointment. A string. For example, ID=1324. Yes Output Parameters of the Calendar Application The Calendar application includes the following output parameters: The output parameters of the calendar application include the getApptDetailsRresponse group. This optional group includes the following parameters, which are described in Table 8–12. Table 8–12 The Output Parameters of the getApptDetailsResponse Group Parameter Name Mandatory? Description Valid Value TITLE Yes The title of the appointment. A string. For example, TITLE=Dinner at Joe’s. DATE Yes The date of the appointment. A string. For example, DATE=December 31, 2001 TIME Yes The time of the appointment. A string. For example, TIME= 8:00 p.m. DURATION Yes The duration of the appointment. A string. For example, DURATION=1 hour. NOTES Yes The notes for the appointment. A string. For example, NOTES=Remember the brief. TYPE Yes The type of appointment, either personal or business. A string. For example, TYPE=Business. LOCATION Yes The location of an appointment. A string. For example, LOCATION=Home. REMIND Yes The time interval before the event reminder occurs. A string. For example, REMIND=1 hour. SHARING Yes A flag that enables or disables For example, SHARING=TRUE. the sharing of an appointment. If True, the appointment is shared; if FALSE, then the appointment is not shared. Configuring the Out-of-the-Box Applications 8-23 PIM and Mail apptResponse Table 8–13 describes the parameters of the apptResponse group (an optional group). Table 8–13 The Output Parameters of the addApptResponse Group Parameter Name Mandatory Description Valid Value TITLE Yes The title of the appointment. A string. For example, TITLE=Dinner at Joe’s. DATE Yes The date of the appointment. A string. For example, DATE=December 31, 2001 TIME Yes The time of the appointment. A string. For example, TIME= 8:00 p.m. DURATION Yes The duration of the appointment. A string. For example, DURATION=1 hour. NOTES Yes The notes for the appointment. A string. For example, NOTES=Remember the brief! TYPE Yes The type of appointment, either A string. For example, TYPE=Business. personal or business. LOCATION Yes The location of an appointment. A string. For example, LOCATION=Home. REMIND Yes The time interval before the event reminder occurs. A string. For example, REMIND=1 hour. SHARING Yes A flag that enables or disables the sharing of an appointment. If True, the appointment is shared; if FALSE, then the appointment is not shared. For example, SHARING=TRUE. deleteApptResponse Table 8–14 describes the parameters of the deleteApptResponse group (an optional group). 8-24 Administrator’s Guide PIM and Mail Table 8–14 Parameters of the deleteApptResponse group Parameter Name Mandatory? Description Valid Value TITLE Yes The title of the appointment. A string. For example, TITLE=Dinner at Joe’s. DATE Yes The date of the appointment. A string. For example, DATE=December 31, 2001 TIME Yes The time of the appointment. A string. For example, TIME= 8:00 p.m. DURATION Yes The duration of the appointment. A string. For example, DURATION=1 hour. NOTES Yes The notes for the appointment. A string. For example, NOTES=Remember the brief. TYPE Yes The type of appointment, either personal or business. A string. For example, TYPE=Business. LOCATION Yes The location of an appointment. A string. For example, LOCATION=Home. REMIND Yes The time interval before the event reminder occurs. A string. For example, REMIND=1 hour. SHARING Yes A flag that enables or disables the sharing of an appointment. If True, the the appointment is shared; if FALSE, then the appointment is not shared. For example, SHARING=TRUE. 8.3.3 Directory The Directory application enables users to access LDAP directory servers from any mobile device. This application is integrated with the Email application, enabling users to browse their corporate directory and then send an email to a particular contact, or to compose a recipient list from the directory. 8.3.3.1 Configuring the Directory Wireless includes all of the required JAR files. This application requires no scripts. The Mobile directory application includes the following configuration parameters: 8.3.3.2 Configuration Parameters ■ LDAP Server Configuring the Out-of-the-Box Applications 8-25 PIM and Mail The name of the installed LDAP server, such as ldap.mydomain.com. ■ ■ Valid Values: Any LDAP server ■ Default Value: localhost ■ Examples: ldap.netscape.com, ldap.mydomain.com LDAP Server Port Enter the port number for the LDAP server. For example, enter 389. ■ ■ Valid Values: Any valid port. ■ Default Value: 389 ■ Examples: 389, 4130 Administrator Login Access to LDAP Server If set to false, then the LDAP server is accessed using a guest account. If set to true, then both the Internet Directory Administrator username and password must be specified. ■ ■ Valid Values: A boolean value (true, false) ■ Default Value: false LDAP Server Administrator Username The user name for the Administrator account in the Internet directory server, such as orcladmin. ■ ■ Valid Values: Any username with administrator privileges ■ Default Value: ■ Examples: administrator, orcladmin LDAP Server Administrator Password The password for the LDAP server administrator user, such as welcome1. ■ ■ Valid Values: Any valid password for the LDAP server administrator user. ■ Default Value: ■ Examples: welcome1, password123 Maximum Results Returned The maximum results returned to the user regardless of the query result set size. 8-26 Administrator’s Guide PIM and Mail ■ ■ Valid Values: any integer value ■ Default Value: 200 ■ Examples: 200, 300 Query Names A system-assigned name to the internal queries. ■ ■ Valid Values: Q1 ■ Default Value: Q1 Query Title Caption displayed when doing queries. Example: Search ■ ■ Valid Values: any caption name ■ Default Value: Search ■ Examples: Search, Search by Name LDAP Server Search Entry Point The entry point in the LDAP server that marks the starting point for queries, such as dc=oracle or dc=com. ■ ■ Valid Values: Any valid entry point into the LDAP server. ■ Default Value: ■ Example: dc=mydomain, dc=com Search Scope Defines the query search scope. The allowable scopes are BASE for a base object search, ONE for a one- level search, or SUBTREE for a subtree search. ■ ■ ■ Valid Values: BASE, ONE, SUBTREE ■ Default Value: SUBTREE Query Visibility ■ For internal use only. Defaults to true. ■ Valid Values: true, false ■ Default Value: true Query Filter Attributes Configuring the Out-of-the-Box Applications 8-27 PIM and Mail Defines the query attributes used in the filter expression, such as givenname, sn, orclmailemail, or telephonenumber. ■ ■ Valid Values: Any attribute name defined in the LDAP server. ■ Default Value: givenname, sn, cn, orclmailemail, telephonenumber ■ Example: givenname, sn, cn, orclmailemail, telephonenumber Query Filter Expression Defines the query filter expression. For example, (&(|(|(givenname=*?*)(sn=*?*))(|(orclmailemail =*?*)(telephonenumber=*?*)))(objectclass=orcluserv2)) ■ ■ ■ ■ Valid Values: Any valid filter expression. Default Value: (&(|(|(|(givenname=*?*)(sn=*?*))(cn=*?*))(|(orclmailemail=*?*)(telephone number=*?*)))(objectclass= orcluserv2)) Example: (|(|(|(givenname=*?*)(sn=*?*))(cn=*?*))(|(orclmailemail=*?*)(telephonenu mber=*?*))) Query Filter Attribute Display Names Future Use Only ■ Default Values: Enter a name for searching. Enter an email for searching. Enter telephone number for searching. ■ Query Result List Attributes Defines the query attributes for the result list. For example: givenname, sn, mail, telephonenumber. ■ ■ ■ ■ 8-28 Valid Values: Any attribute name defined in the Internet Directory server . Default Value: givenname, sn, telephonenumber, mail, title, manager, orclguid Example: givenname, sn, telephonenumber Query Result List Attribute Display Names Administrator’s Guide PIM and Mail Defines the query attributes display name that appear on the result list. Example: First Name, Last Name, Email, Work Phone ■ ■ ■ ■ Valid Values: Any caption name Default Value: First Name, Last Name, Phone, Email, Title, Manager, Oracle GUID Examples: First Name, Last Name Summary Results Attributes The attributes shown during the summary of returned results. Enter true or false for the attributes in Query Result List Attribute Display Names parameter, in the same order. For example, enter true, true, false, true. ■ ■ Valid Values:A boolean value (true, false) ■ Default Value: true, true, true, true, true, false, false ■ Example: true, true, true, true, true, false, false Query Attributes Types Specifies the applications to which the listed attributes are linked. For example, the values can be display, email, phone, fax, sms and hidden. For example, enter display, display, email, phone. ■ Valid Values: display - Display the attribute name phone - Display the attribute as a link to short messaging application or as a shortcut to a phone call on specific devices email - Display the attribute as a link to email application. link - Display the attribute as a link to another search query. hidden - Do not display the attribute. fax - Display the attribute as a link to fax. ■ ■ Default Value: display, display, phone, email, display, link, hidden ■ Example: display, display, fax, email, display, link, hidden Link Attributes on Result List Specifies attributes that are linked in result query to perform further queries. for example: no, no, no, yes, yes Configuring the Out-of-the-Box Applications 8-29 PIM and Mail ■ ■ Valid Values: yes, no ■ Default Value: no, no, no, no, no, yes, no ■ Examples: no, no, no, no, no, yes, no Query Link Names The caption for the links on the result list. Values can include LINK1 or nope. For example: nope, nope, nope, LINK1, LINK1 ■ Valid Values: nope - Do not link the attribute to any other query search. Any other query link name. ■ ■ Default Value: nope, nope, nope, nope, nope, LINK1, nope ■ Example: nope, nope, nope, nope, nope, LINK1, nope Link Names A system-assigned name to internal links. Defaults to LINK1. ■ ■ Valid Values: LINK1 ■ Default Value: LINK1 Query Link Name The query associated with current link. Defaults to Q1. ■ ■ Valid Values: Q1 ■ Default Value: Q1 Link Refer Attributes Specifies the comma-separated list of result sub-attributes used in the linked query. For example: cn, sn ■ ■ Valid Values: Any valid attribute in the LDAP server. ■ Default Value: cn ■ Example: cn, sn Link Bind Attributes Specifies a comma-separated list of filter attributes to which the Link Refer Attributes are bound. For example: givenname, sn ■ 8-30 Administrator’s Guide Valid Values: Any valid attribute in the Result List Attributes. PIM and Mail ■ ■ Default Value: cn ■ Examples: givenname, sn Link Attributes Display Name A comma-separated list of the Query Result List Attributes displayed in the link. For example: givenname, sn ■ ■ Valid Values: Any valid attribute in the query result list. ■ Default Value: givenname, sn ■ Example: givenname, sn Max Records Per Page The maximum number of results displayed per page. The default value is 10. ■ ■ Valid Values: Any integer value. ■ Default Value: 10 ■ Examples: 15 Merge Results? If set to true, then all of the other public attributes are included in the result of the query. If set to false, then only the Query Result List Attributes display. ■ ■ Valid Values: A boolean value (true, false). ■ Default Value: false Application Setup OMP URL The OMP reference to the URL group. ■ ■ Valid Values: Any valid OMP URL for application setup. ■ Default Value: omp://oracle/applications/appsetup ■ Example: omp://oracle/applications/appsetup1 Use Voice LSS This option is reserved for future use and must be set to false. ■ Valid Values: A boolean value (true, false). ■ Default Value: false Configuring the Out-of-the-Box Applications 8-31 PIM and Mail 8.3.3.3 Linking to the Directory Application You can link to the directory application through the following virtual URL: omp://oracle/services/pim/directory You can configure each element of this application; clicking any field after getting the details of a result returns the field value to the caller as the parameter mailto. Output Parameters The output parameters for the directory application include the following: mailto The value of the field that the user selects. For example: ■ [email protected] ■ mailto=John ■ mailto=Smith ■ mailto=(650)999-9999 There are no restrictions for this parameter. Examples To return a first name, configure the mailto parameter as follows: mailto=john To return an email address, configure the mailto parameter as follows: [email protected] 8.3.4 Fax The Fax application enables users to send documents, text, and Web pages to any fax machine. Required Software Table 8–15 describes the required third-party software for the Fax application. 8-32 Administrator’s Guide PIM and Mail Table 8–15 Required Software for the Fax Application Name Instructions From Version(s) RightFax Server (available from RightFax) Install the RightFax server. 7.2 RightFax Integration Module (available from RightFax) Install the Integration module on fax server. 7.2 RightFax PFD module (available from RightFax) Install the PFD module on the fax server. 7.2 RightFax Java API (available from RightFax) Copy RFJava_api.zip(Fax server’s RightFax/Production/xml/java directory) to $ORACLE_ HOME/wireless/lib on Solaris, to %ORACLE_ HOME%\wireless\lib on NT. Include this zip file in the OC4J classpath by adding the following line to %ORACLE_ HOME%\j2ee\OC4J_Wireless\config\application.xml. 7.2 <libarary path="../../../wireless/lib/RFJava_api.zip"/> Sample Cover Page Because the Fax application uses a customized cover sheet file, you should use the provided sample cover page. To use this cover page, you must have Microsoft Word 2000 installed on your RightFax server for server-side application conversion. On Solaris installations, this cover page is located at: $ORACLE_ HOME/iaswv20/wireless/j2ee/applications/modules/modules-web/images/pim /fax/FCS.doc On Windows NT installations, this cover page is located at: %ORACLE_ HOME%\iaswv20\wireless\j2ee\applications\modules\modules-web\images\pi m\fax\FCS.doc To use the provided fax cover page: 1. Copy the FCS.doc to the directory RightFax\FCS on the machine in which you installed your RightFax server. 2. Specify which cover sheet to use: a. Run Enterprise Fax Manager Configuring the Out-of-the-Box Applications 8-33 PIM and Mail b. Highlight Users under the appropriate server and double-click the user, ID Administrator. 3. Click the Default Cover Sheets tab. 4. In the Cover Sheet Defaults group box, check Send Cover Sheets and select the cover sheet file (FCS.doc) in the Cover Sheet Model field. 5. Highlight Groups under the appropriate server and double-click the group, ID Everyone. 6. Click the Basic Information tab. 7. Select the cover sheet file (FCS.doc) in the Cover Sheet Model field. Note: See the RightFax Administrator’s Guide for detailed instructions on fax cover sheets. Configuration Parameters The Fax application includes the following configuration parameters: ■ Fax server URL The fax server HTTP URL. It can be an IP Address or a domain name address. ■ ■ Valid Values: A string value ■ Default Value: http://localhost ■ Examples: http://111.11.111.11 or http://host.mydomain.com Fax sender account The name of the account used by the fax server to send faxes. ■ ■ Valid Values: A string value ■ Default Value: Administrator ■ Examples: Administrator Faxes kept per user The number of recently sent faxes that are kept in the user’s Fax History. 8-34 ■ Valid Values: A non-negative integer ■ Default Value: 20 Administrator’s Guide PIM and Mail ■ ■ Examples: 20 Fax Items per page The number of faxes sent, shown per screen in the Fax History. ■ ■ Valid Values: A non-negative integer ■ Default Value: 9 ■ Examples: 9 Query LDAP Server If set to true, it enables retrieving of recipient addresses from the LDAP server. ■ ■ ■ ■ Valid Values: A boolean value (true, false). ■ Default Value: false ■ Examples: true Download directory Directory where fax documents are temporarily stored in the Oracle Application Server Wireless server. Specify this location for attaching documents to a fax. ■ Valid Values: A path value. ■ Default Value: /tmp ■ Examples: c:\\temp or /tmp/var Cover Page The cover page used when sending faxes. The Default value is FCS.doc. The cover page document path is relative to the FCS directory on the fax server. ■ ■ Valid Values: file name ■ Default Value: FCS.doc ■ Examples: FCS2.doc, Cover.doc Debug If set to true, then the log messages are be written to the Oracle Application Server Wireless log file. ■ Valid Values: A boolean value (true, false) ■ Default Value: false Configuring the Out-of-the-Box Applications 8-35 PIM and Mail ■ ■ Examples: true Application Setup OMP URL The OMP reference use by the to the URL group. ■ Valid Values: An OMP URL ■ Default Value: omp://oracle/applications/appsetup ■ Examples: omp://oracle/applications/appsetup 8.3.4.1 Linking to the Fax Application You can link to the Fax application using the following virtual URL: omp://oracle/services/pim/fax The Fax application has one input call parameter, FAXTODO. This parameter describes the type of actions to be performed. Table 8–16 describes this mandatory input parameter. Table 8–16 Values of the FAXTODO input Parameter Value Requirement Triggers Output NEWFAX SendNewFax SendNewFaxResult. STATUS faxID CheckFaxStatusResult DELETE faxID deleteFaxResult FWD forwardFax forwardFaxResult sendNewFax The FAXTODO parameter includes sendNewFax group. This mandatory group of parameters specify the information about the fax to be sent. Table 8–17 describes the parameters of the sendNewFax group. 8-36 Administrator’s Guide PIM and Mail Table 8–17 Parameters of the sendNewFax Group Parameter Name Mandatory Description Valid Value SENDER_NAME No Sender name. A string. For example: SENDER_NAME=Joe Smith SENDER_CORP No Sender company. A string. For example: SENDER_CORP=Oracle Corp. SENDER_PHONE No Sender phone number. A string. For example: SENDER_ PHONE=1(650)123-4567 SENDER_FAX No Sender fax number. A string. For example: SENDER_ FAX=1(650)123-4567 SENDER_ADDRESS No Sender address. A string. For example: SENDER_ ADDRESS=Home address SENDER_NOTES No Other sender information not listed above. A string. For example: SENDER_NOTES=email: [email protected] RECIPIENT_NAME No Recipient name. A string. For example: RECIPIENT_NAME=John White RECIPIENT_CORP Yes Recipient company. A string. For example: RECIPIENT_ CORP=1(650)123-4567 RECIPIENT_PHONE No Recipient phone number. A string. For example: RECIPIENT_ PHONE=1(650)987-6543 RECIPIENT_FAX Yes Recipient fax number. A string. For example: RECIPIENT_ FAX=1(650)123-4567 RECIPIENT_ADDRESS No Recipient address. A string. For example: RECIPIENT_ ADDRESS=Work address MESSAGE No Short message to be written on cover page. A string. For example: MESSAGE=An awesome resume! ATTACHMENT No Attachment to be faxed. A string. For example: ATTACHMENT=mydoc/resume.pdf forwardFax Configuring the Out-of-the-Box Applications 8-37 PIM and Mail The FAXTODO parameter includes the forwardFax group. Table 8–18 describes the parameters of this mandatory group. Table 8–18 Parameters of the forwardFax Group Parameter Name Mandatory Description Valid Value FAXID Yes The unique id of the fax to be forwarded. A string. For example: FAXID=12345 RECIPIENT_FAX Yes The destination fax number. A string. For example: Example: RECIPIENT_FAX=1(650)555-4576 Output Parameters Table 8–19 describes the output parameters of the Fax application. Table 8–19 Output Parameters of the Fax Module Parameter Mandatory Description Valid Value sendNewFaxResult Yes Whether the fax was successfully sent or not. A string. For example: sendNewFaxResult=Fax has been successfully submitted for sending. checkFaxStatusResult Yes The fax status. A string. For example: checkFaxStatusResult=Sending(50%) deleteFaxResult Yes Whether the fax was successfully deleted or not. A string. For example: deleteFaxResult=Fax successfully deleted. forwardFaxResult Yes Whether the fax was A string. For example: successfully forwarded or not. forwardFaxResult=Fax has been successfully submitted for forwarding. Examples To send a fax, you configure the FAXTODO parameters as follows: FAXTODO = NEWFAX RECIPIENT_FAX = 1(650)555-5000 MESSAGE = Hello world! sendNewFaxResult = Fax has been successfully submitted for sending. To check the status of a fax you configure the FAXTODO parameters as follows: 8-38 Administrator’s Guide PIM and Mail FAXTODO = STATUS faxID = 16543 checkFaxStatusResult = OK 8.3.5 Oracle Internet File System The Oracle Internet File System application enables you to browse online files and select files for faxing or sent with email. Table 8–20 lists the required third-party software for this application. Table 8–20 Required Software for the Oracle Internet File System Application Name Instructions From Version Any WEBDAV-compliant server, such as Oracle Files. Install the server. 2.0 Configuration Parameters The Oracle Internet File System application includes the following configuration parameters: ■ Allow Navigation Whether the user is allowed to navigate to any open service URLs. ■ ■ Valid Values: A boolean value (true, false). ■ Default Value: true ■ Examples: false Service URLs The HTTP URLs to WebDav file systems where users can upload and download files. This parameter applies only if Allow Navigation has been set to false. ■ ■ Valid Values: The WEBDAV service URLs. ■ Default Value: http://webdav.mycompany.com/files ■ Examples: http://www.mywebdavdomain.com/fileuser Download Directory Specifies the directory used to hold files for download or attachment. The path is local to the server holding the Oracle Internet File System application. Configuring the Out-of-the-Box Applications 8-39 PIM and Mail ■ ■ Valid Values: A path value. ■ Default Value: /tmp ■ Examples: c:\\temp or /tmp/var Proxy Host Enter the HTTP Proxy Host. ■ ■ Valid Values: URLs ■ Default Value: ■ Examples: proxy.mydomain.com Proxy Port Enter the HTTP Proxy Port. ■ ■ Valid Values: A port number. ■ Default Value: ■ Examples: 80 Authorization Realms The HTTP authorization realms associated with each of the preceding Service URLs. For multiple realms, separate these values with comma (,). ■ ■ Valid Values: A string value ■ Default Value: Authorized_Users ■ Examples: Authorized_Users Show Service URL? This parameter enables the server name to be either hidden or displayed on the Oracle Internet File System application. ■ ■ Valid Values: yes, no ■ Default Value: yes ■ Examples: no JDBC IFS Service Names A parameter used by the JDBC version of the Oracle Internet File System. ■ 8-40 Administrator’s Guide Valid Values: A string value. PIM and Mail ■ ■ Default Value: Ifs1 ■ Examples: Ifs1 JDBC IFS Service Passwords A parameter used by the JDBC version of the Oracle Internet File System ■ ■ Valid Values: A string value. ■ Default Value: ifspassword1, ifspassword2 ■ Examples: ifspassword1 JDBC IFS Services Parameter used by the JDBC version of the IFS ■ ■ Valid Values: A string value. ■ Default Value: ifsserver1, ifsserver2 ■ Examples: ifsserver1 Application Setup OMP URL OMP reference to the group of URLs to use. ■ Valid Values: OMP URLs ■ Default Value: omp://oracle/applications/appsetup ■ Examples: omp://oracle/applications/appsetup 8.3.5.1 Linking to the Oracle Internet File System Application You can link to the Oracle Internet File System application using the following virtual URL: omp://oracle/services/pim/ifs Input Call Parameters The Oracle Internet File System application includes the following call parameters and parameter groups, which are described in Table 8–21. Configuring the Out-of-the-Box Applications 8-41 PIM and Mail Table 8–21 The IFSAction Input Parameter Parameter Name Mandatory Description IFSAction Yes Valid Value The type of action to UPLOAD (for uploading a file to the Oracle Internet File be performed. System server.) DOWNLOAD (for downloading a file to the Oracle Internet File System server.) If the value is UPLOAD, then IFSAction requires uploadIfsRequest. If the value is DOWNLOAD, then the downloadIfsRequest output is triggered. uploadIfsRequest Table 8–22 describes the parameters of the uploadifsRequest group. This is an optional group. Table 8–22 Parameters of the uploadIfsRequest Group Parameter Name Mandatory Description Valid Value LOCALPATH A string. For example: Yes The absolute local path of the file to be uploaded to the Oracle Internet File System Server. ■ ■ OBJNAME No LOCALPATH=/private/joe d ocs/file.doc LOCALPATH=c:\TEMP\RES UME.PDF Enables the user to rename the uploaded A string. For example, file rather than keeping the file name given OBJNAME=Renamed File.doc in LOCALPATH. Note: This name must conform to the UNIX file system convention. For example, it cannot contain the back-slash (\). Output Parameters The Oracle Internet File System application includes the following output parameters: downloadIfsInfo This optional group specifies such information about the downloaded file as the size of the downloaded file, its location, and its original name. Table 8–23 describes the parameters of the downloadIFsInfo group. 8-42 Administrator’s Guide PIM and Mail Table 8–23 Parameters of the IFsInfo Group Parameter Name Mandatory Description Valid Value IFSPATH A string, for example: IFSORIGPATH IFSNAME IFSSIZE Yes The absolute path of the downloaded file. Yes Yes Yes ■ IFSPATH=/private/joe/download/file.doc ■ IFSPATH=C:\TEMP\RESUME.PDF The original IFS path of the downloaded file. A string, for example: The original name of the downloaded filed. This name is provided for display in the user interface. A string, for example: The size (in kilobytes) of the downloaded file. Double. For example: IFSORIGPATH=/ifshome/joe/file.doc ■ IFSNAME=file.doc ■ IFSNAME=RESUME.PDF IFSSIZE=12.4 Examples To upload files.doc from the directory/private/joe/docs and save it as newfile.doc, you must configure the parameters as follows: IFSACTION=UPLOAD LOCALPATH=/private/joe/docs/file.doc OBJNAME=newfile.doc To download files.doc from the Oracle Internet Files System server, configure the parameters as follows: IFSACTION=DOWNLOAD IFSPATH=/private/joe/download/file.doc IFSNAME=file.doc Output Parameter: IFSORIGPATH=ifshome/joe/file.doc Output Parameter: IFSSIZE=15.0 Configuring the Out-of-the-Box Applications 8-43 PIM and Mail 8.3.6 Instant Messaging The Instant Messaging application provides presence management, enabling employees to exchange instant messages from their mobile devices. This application is integrated with Jabber Instant Messaging server and the MSN and Yahoo networks. 8.3.6.1 Configuring the Instant Messaging Application The Instant Messaging application, which uses the Jabberbeans classes to connect to a Jabber Instant Messaging Server, requires the installation of third-party software. Table 8–24 describes the required third-party software. Table 8–24 Software Required for the Instant Messaging Application Name From Version Instructions Jabber Server 1.4.1 Follow the Jabber server installation guide. Yahoo Transport Gateway 0.8.0 Optional. Follow the Jabber server installation guide. MSN Transport Gateway 1.1.0 Optional. Follow the Jabber server installation guide. Configuration Parameters The Instant Messaging application includes the following configuration parameters: ■ Jabber Server Name The host name of the machine on which the Jabber server runs, such as jabber.org. ■ ■ Valid Values: Any valid Jabber server. ■ Default Value: localhost ■ Examples: jabber.org Yahoo! Messaging Transport The Yahoo! Instant Messaging transport, if any, configured on the Jabber Server used by the service. For example: yahoo.jabber.org. ■ 8-44 ■ Valid Values: A valid value defined in the jabber.xml ■ Default Value: ■ Example: yahoo.oraclemobile.com Yahoo Group Name Administrator’s Guide PIM and Mail The initial group name to assign to Yahoo! buddies, acquired whenever the Yahoo! transport is configured. It can be any string. For example: MyYahooFriends. ■ ■ Valid Values: Any name ■ Default Value: Yahoo ■ Example: Yahoo Friends MSN Transport The MSN Instant Messaging transport, if any, configured on the Jabber Server used by the service. For example: msn.jabber.org. ■ ■ Valid Values: A valid value defined in the jabber.xml ■ Default Value: ■ Example: msn.oraclemobile.com MSN Group The initial group name to assign to MSN buddies acquired whenever the MSN transport is configured. It can be any string. Example: MyMSNFriends ■ ■ Valid Values: Any name. ■ Default Value: MSN ■ Examples: MSN Friends Refresh Timelb The refresh page timeout for some pages accessed by the service. This value is in milliseconds. ■ ■ Valid Values: Any value (in milliseconds). ■ Default Value: 20000 ■ Examples: 30000 Log Length The maximum number of messages the service will display between you and another user. ■ Valid Values: Any integer. ■ Default Value: 10 ■ Examples: 15 Configuring the Out-of-the-Box Applications 8-45 PIM and Mail ■ Use Proxy? This parameter is obsolete. It is include for backward compatibility only. ■ Proxy Host This parameter is obsolete and is included for backward compatibility only. ■ Proxy Port This parameter is now obsolete and is included for backward compatibility only. ■ Jabber Directory Service This parameter is now obsolete and is included for backward compatibility only. ■ Jabber Conference Service This parameter is now obsolete and is included for backward compatibility only. 8.3.6.2 Linking to the Instant Messaging Application You can link to the Instant Messaging application using the following virtual URL: omp://oracle/services/pim/instantmessaging Input Call Parameters of the Instant Messaging Application The input call parameters of the Instant Messaging application includes the IMMessage parameter, which is described in Table 8–25. Table 8–25 The IMMessage Parameter Parameter Name Mandatory? Description IMMessage No Valid Value The text of a message A string. For example: that is sent through the ■ IMMESSAGE=How are you doing today? service. ■ IMMESSAGE=I am sending you this message through IM. Output Parameters An example of the IMMessage output parameter is calling the module to send a simple message. For example: 8-46 Administrator’s Guide PIM and Mail Input Parameter: IMMessage=Do you want to go see a movie? 8.3.7 Mail The Mail application enables users to access their email messages from any mobile device. The Mail application integrates with any IMAP or POP3 server (including Microsoft Exchange and Lotus Domino servers). 8.3.7.1 Configuration Parameters The Mail application includes the following parameters: ■ Incoming Mail Server Name The incoming email server name. If the protocol is Esmail, then this parameter points to the Oracle Internet Directory (OID) server. ■ ■ Valid Values: A string value ■ Default Value: localhost ■ Examples: globalimap.mycomp.com, mailserver.foo.com Incoming Mail Server Port The incoming email server port. If the protocol is Esmail, then this parameter points to the Oracle Internet Directory (OID) server. ■ Valid Values: Any integer value ■ Default Value: 143 ■ ■ Examples:143, 110, 4032. Usually it is 143 for IMAP, 110 for POP3 and 4032 for Oracle Collaboration Suite. Mail protocol The mail protocol supported by the mail server. ■ Valid Values: imap, pop3, email ■ Default Value: imap ■ Examples: imap, pop3, esmail Configuring the Out-of-the-Box Applications 8-47 PIM and Mail Note: For the inbox filters for the Mail application, enter the Oracle Internet Directory (OID) server and the port as Mail Server and Mail Server Port instead of the IMAP server and port. Also select esmail as the Mail protocol. For more information about Inbox Filters, see the documentation for Oracle Unified Messaging which ships with the Oracle Collaboration Suite. Copy the following JARS from the Oracle Collaboration Suite middle tier to the $ORACLE_HOME/wireless/lib on the Oracle Application Server Wireless middle tier: ■ $ORACLE_HOME/jlib/esmail_sdk.jar ■ $ORACLE_HOME/jlib/escommon.jar ■ $ORACLE_HOME/jlib/esldap.jar Include the JAR files in the OC4J classpath on the Oracle Application Server Wireless middle tier by adding the following lines to $ORACLE_HOME/j2ee/OC4J_ Wireless/config/application.xml: ■ ■ <library path="../../../wireless/lib/esmail_sdk.jar"/> ■ <library path="../../../wireless/lib/escommon.jar"/> ■ <library path="../../../wireless/lib/esldap.jar"/> Outgoing Mail Server (SMTP) Enter the name or IP address of the outgoing mail server (SMTP). ■ ■ Valid Values: A string value. ■ Default Value: localhost ■ Examples: gsmtp.mycomp.com, 127.0.0.1 Outgoing Mail Server (SMTP) Port The port number for the Outoing Mail Server (SMTP). 8-48 ■ Valid Values: A string value. ■ Default Value: 25 ■ Examples: 25 Administrator’s Guide PIM and Mail ■ Outgoing Mail Server (SMTP) Login When required, it specifies username for the Outgoing server. ■ ■ Valid Values: A string value. ■ Default Value: empty ■ Examples: global.user, robert.smith Auto domain for email addresses Enter the domain which is used for the recipient when no domain is present in their email address. This domain is also used to construct the sender’s identity if it is not specified by the user. ■ ■ Valid Values: A string value. ■ Default Value: localhost ■ Examples: mycomp.com, xyz.com Inbox name The primary folder for the user (usually INBOX). ■ ■ Valid Values: Any valid folder name on the Mail server. ■ Default Value: INBOX ■ Examples: INBOX Sent folder name The name of the folder where the sent messages are saved. ■ ■ Valid Values: Any valid folder name on the Mail server. ■ Default Value: Sent ■ Examples: SentItems, Sent Can user use different server settings? Whether the server, domain, or settings can be edited by the user (true or false). ■ ■ Valid Values: A boolean value (true, false). ■ Default Value: false ■ Examples: true, false Max Messages Fetched Configuring the Out-of-the-Box Applications 8-49 PIM and Mail The maximum number of the messages fetched from the server per request. ■ ■ Valid Values: Any integer value ■ Default Value: 200 ■ Examples: 9, 200 Timeout Timeout connection limit to the Mail Server. It is specified in milliseconds. ■ ■ Valid Values: Any integer value ■ Default Value: 2000 ■ Examples: 2000, 5000 Email Configuration Java Driver Class This parameter is obsolete and is provided only for backward compatibility. ■ Temporary directory This parameter is obsolete and exists only for backward compatibility. The temporary directory for the current release is: $ORACLE_HOME/wireless/tmp/mail. ■ Audio Temporary Directory This parameter is now obsolete and exists only for backward compatibility. The temporary audio directory for the current release is: $ORACLE_HOME/j2ee/OC4J_ Wireless/applications/modules/modules-web/pim/mail/audiotemp ■ Audio Temporary Directory URL This parameter is now obsolete and exists only for backward compatibility. The temporary audio directory URL is: /modules/pim/mail/audiotemp ■ Encoding Enter the encoding to be used while sending an email. Use IANA character set names. The list of names is published at: http://www.iana.org/assignments/character-sets 8-50 Administrator’s Guide PIM and Mail If there is no value entered for this parameter (that is, it is left blank), then the system’s default encoding is used for the outgoing messages. The user can override this setting in the Mail application under Setup. ■ ■ Valid Values: Valid encoding ■ Default Value: UTF-8 ■ Examples: UTF-8, ISO-8859-1 OID Administrator username Username for Administrator account in the OID Server. This parameter is needed only when the Mail application is configured to connect to Oracle Internet Directory (OID) to retrieve Inbox Filters. ■ ■ Valid Values: A valid administrator account on the OID server ■ Default Value: orcladmin ■ Examples: orcladmin, administrator OID Administrator Password. The password for the OID administrator user. This parameter is only needed when the Mail application is configured to connect to Oracle Internet Directory (OID) to retrieve Inbox Filters. ■ ■ Valid Values: A password for the OID admin user ■ Default Value: An empty value ■ Examples: welcome1, password Mail JDBC Driver Type. Select the mail JDBC driver type used for connecting to the Oracle Internet Directory (OID) server. This parameter is needed only when the Mail application is configured to connect to the OID to retrieve Inbox Filters. ■ ■ Valid Values: thin, oci ■ Default Value: thin Deleted messages folder name The name of the folder where the deleted messages are saved. ■ Valid Values: Any valid folder on the mail server ■ Default Value: empty Configuring the Out-of-the-Box Applications 8-51 PIM and Mail ■ ■ Examples: DeletedItems, Wastebasket Save the contents of the audio reply? Whether the contents of the audio reply should be saved in the Sent folder. ■ ■ Valid Values: A boolean value (true, false) ■ Default Value: true Email Notification Engine Backend The Email Notification Engine in use (such as Oracle UM, Exchange, or None) ■ ■ ■ Valid Values: None, OracleUM for Oracle Collaboration Suite, Exchange for Microsoft Exchange Server Default Value: None Application Setup OMP URL The OMP URL of the Application Setup application. ■ Valid Values: The OMP URL for the Application Setup. ■ Default Value: omp://oracle/applications/appsetup ■ Examples: omp://oracle/applications/appsetup omp://oracle/applications/myappsetup 8.3.7.2 Linking to the Mail Application You can link to an email application using the following virtual URL: omp://oracle/services/pim/mail Input Call Parameters The input call parameters of the Mail application include the following: action The action that the Mail application should perform. This is a mandatory input parameter. Table 8–26 describes the input parameters of the action input call parameter. 8-52 Administrator’s Guide PIM and Mail Table 8–26 Input Parameters for Action Valid Value Description Requirement messageto Send an email message. Requires mailto. messagecc CC an email message. Requires mailto. sendasattachment Send an attachment Requires attach. mailto The email address to which the message is sent. This is an optional input parameter. The value must be a string. For example: ■ [email protected] ■ [email protected] attach The fully-qualified path of the local file that is sent as an attachment to the email. the value must be a string. For example: ■ attach=/home/9iasuser/temp/presentation.ppt ■ attach=D:\9iasuser\temp\instructions.txt Output Parameters (Examples) To send an email to Scott Tiger, you configure the action and mailto parameters as follows: ■ action=messageto ■ [email protected] To send the picture (that is, a .JPEG) of your new home, configure the action and attach parameters as follows: ■ action=sendasattachment ■ attach=/private/9iasuser/temp/my1MilDolHome.jpg 8.3.8 Short Messaging The Short Messaging application enables users to send messages through such mediums as voice, email, fax or SMS messaging. To send a short message, a user Configuring the Out-of-the-Box Applications 8-53 PIM and Mail sends the service four parameters: the type of message to be sent (email, SMS, Voice, or Fax), the destination address of the message, the subject text, and the body text of the email. The subject and body text are translated into the medium appropriate to the message type and then sent to the destination. 8.3.8.1 Configuring the Short Messaging Application This application does not require any third-party software components; it instead relies upon the Oracle Application Server Wireless transport to be configured. The short messaging application does not require scripts. Configuration Parameters The Short Messaging application includes the followoing configuration parameters: ■ Message Sender This parameter is obsolete and is included in this release for backward compatibility. ■ Default email address Specifies the default email address used in the From field if the user does not specify an email address. ■ ■ Valid Values: Any valid email address. ■ Default Value: [email protected] ■ Example: [email protected] Default fax number Specifies the default fax number to be used in the from field if none is specified by the user. ■ ■ Valid Values: Any valid number. ■ Default Value: 111-222-3333 ■ Example: 111-444-3333 Default SMS address Specifies the default SMS address to be used in the from field if none is specified by the user. 8-54 ■ Valid Values: Any valid SMS address. ■ Default Value: [email protected] Administrator’s Guide PIM and Mail ■ ■ Example: [email protected] Default phone number Specifies the default phone number to be used in the from field if none is specified by the user. ■ ■ Valid Values: Any valid phone number. ■ Default Value: 555-555-5000 ■ Examples: 555-555-5000 Display All Delivery Types Specifies whether all the delivery types (Email, Fax, SMS and Voice) display regardless of whether they are configured. If set to false, then only configured delivery types are displayed for the user. ■ ■ Valid Values: A boolean value (true, false) ■ Default Value: false Application Setup OMP URL The OMP reference to the for URL group. ■ Default Value: omp://oracle/applications/appsetup 8.3.8.2 Linking to the Short Messaging Application You can link to a Short Messaging application using the following virtual URL: omp://oracle/services/pim/sm Input Call Parameters Configuring the Out-of-the-Box Applications 8-55 PIM and Mail The short messaging application includes the following input call parameters, which are described in Table 8–27. Table 8–27 Input Call Parameters of the Short Messaging Module Parameter Name Mandatory Description Valid Value type No The values include: The type of medium through which the message is sent. ■ EMAIL (for sending email messages) ■ SMS (for sending a SMS message) ■ ■ destinationAddress subjectText No No The address to which the message is sent. sendMessage No No FAX (for sending a message through a facsimile) A string. For example: ■ destinationAddress=6505555000 ■ destinationAddress=oraclemobile @oracle.com The subject of a message A String. For example: to be sent. ■ subjectText=Hi There! ■ bodyText VOICE (for sending a message through a phone). The body text of a message to be sent. subjectText=Tomorrow Night? A String. For example: bodyText=Do not forget to pick up the children on the way home. And buy dinner, too. Specifies whether the Specify Yes if the service should send the service should attempt message. Specify No if the service should to send the message not send the message. with the given information. The service does not send the message unless it has been instructed to do so. Output Parameters (Examples) An example of the short message output parameters is sending a simple message. For example: Sending an Email To send an email configure the input parameters as follows: 8-56 Administrator’s Guide PIM and Mail type=EMAIL [email protected] subjectText=Hey there! bodyText=How’s it going? sendMessage=yes Sending a Voice Message To send a voice message, configure the input parameters as follows: type=Voice destinationAddress=6505555000 8.3.9 Tasks The Tasks application enables users to schedule and manage tasks. Required Software This application implements two distinct modes, both with the same user experience but with different back-ends. In its Lotus Domino mode, it fully integrates with a Lotus Domino server to enable mobile Domino users. In its Microsoft Exchange Mode, it fully integrates with a Microsoft Exchange server to mobile-enable Exchange users. The Tasks application requires third-party software. For more information, refer to Section 8.3.10.1 and Section 8.3.10.1.1. Configuring the Task Module The Tasks application includes the following configuration parameters: ■ Tasks Java Driver class The java driver implementing the Tasks backend. ■ Valid Values: For Microsoft Exchange Server oracle.panama.module.pim.tasks.exchange.ExchangeTaskService For the Lotus Domino Server: oracle.panama.module.pim.tasks.domino.DominoTaskService ■ Default Value: oracle.panama.module.pim.tasks.exchange.ExchangeTaskService Configuring the Out-of-the-Box Applications 8-57 PIM and Mail ■ Tasks Server The server name or IP address for the Tasks server. ■ Valid Values: In Exchange mode, enter the name or IP address of the Exchange server In Lotus Domino mode, enter the name and port of the Lotus Domino server separated by colon (:). The port is where the DIIOP and HTTP services are running on the Domino server. ■ Default Value: localhost ■ Examples: exchange.mycompany.com dominoserver.mycompany.com:82 ■ Exchange Data URL The location of the ASP page (Tasks.asp) residing on the IIS server that fetches the data from the Exchange Server. ■ Valid Values: The URL pointing to Tasks.asp. ■ Default Value: http://localhost/oracle/Tasks.asp ■ Examples: http://iisserver.mycompany.com/oracle/Tasks.asp http://iisserver.mycompany.com:8080/oracle/Tasks.asp ■ Can user use different server settings? Determines if the user can edit the current application settings. ■ ■ Valid Values: A boolean value (true, false) ■ Default Value: false Account Name If the Tasks application shares login authentication information with the Calendar or Address Book applications, then you must specify the same string value as Account Name from either the Calendar application or Address Book application. 8-58 ■ Valid Values: Any string value. ■ Default Value: ExchangeDomain Administrator’s Guide PIM and Mail ■ ■ Examples: mydomain, SharedAccount Tasks per page How many tasks should display per page? This parameter applies to both WAP and PDA ■ ■ Valid Values: Any integer value. ■ Default Value: 10 ■ Examples: 10, 15, 20 Application Setup OMP URL The OMP URL of the Application Setup Modulable Application. ■ Valid Values: The OMP URL of the Application Setup. ■ Default Value: omp://oracle/applications/appsetup ■ Examples: omp://oracle/applications/appsetup omp://oracle/applications/otherappsetup 8.3.9.1 Linking to the Tasks Application You can link to the Tasks application using the following virtual URL: omp://oracle/services/pim/tasks 8.3.10 Connecting PIM Applications to Non-Oracle Servers The Collaboration Applications (that is, the PIM applications Address Book, Calendar and Tasks applications) can connect to non-Oracle collaboration servers, such as the Microsoft Exchange and Lotus Domino server. To enable these PIM applications to run against the Exchange and Domino severs, you must configure these servers in addition to configuring the application-specific parameters. Note: The Mail application does not require additional software. Configuring the Out-of-the-Box Applications 8-59 PIM and Mail 8.3.10.1 Configuring the Microsoft Exchange Server for PIM Applications Configuring the Microsoft Exchange Server for Voice and Wireless PIM applications requires the following software, described in Table 8–28. Table 8–28 Required Software Name From Version Microsoft Exchange 5.5 Microsoft Internet Information Services (IIS) 4.0 Microsoft Collaboration Data Objects (MS CDO) 1.2.1 (Available with the Microsoft Exchange SDK). You must install the Microsoft Exchange Server and the Microsoft Internet Information Services (IIS) server. Note: You must install cdo.dll on the IIS server. This library is included with MS CDO. 8.3.10.1.1 Configuring the PIM Active Server Pages (ASPs) To configure the ASPs for the PIM applications: 1. Create a directory named oracle on the IIS server. For example, create C:\inetpub\oracle. 2. Copy the following files from Oracle Application Server Wireless middle-tier server to the oracle folder on the IIS server: ■ ■ ■ 8-60 $ORACLE_HOME/OC4J_ Wireless/j2ee/applications/modules/modules-web/pim/addressbook/asp/* $ORACLE_HOME/OC4J_ Wireless/j2ee/applications/modules/modules-web/pim/ calendar /asp/* $ORACLE_HOME/OC4J_ Wireless/j2ee/applications/modules/modules-web/pim/tasks/asp/* 3. Start the IIS manager and then right-click the default Web site. 4. Add a new virtual directory. 5. Name this virtual directory oracle. Administrator’s Guide PIM and Mail 6. Using the Properties dialog box for this folder, grant Execute Permissions for Scripts and Executables. 7. Select Directory Security, and then click Edit in the Anonymous Access pane. 8. Set the following values: ■ Do not select Anonymous Access (leave this option clear). ■ Select Basic authentication. ■ Select Integrated Windows authentication. 8.3.10.2 Configuring the Lotus Domino for PIM Applications Configuring Lotus Domino for the Collaboration Applications (that is, the PIM applications) requires the software described in Table 8–29. Table 8–29 Required Software for Configuring Lotus Domino for PIM Applications Name From Version Instructions Lotus Domino Server 5.5 Install the Lotus Domino Server, Lotus Java Toolkit for Java/COBRA 5.0.5 Install the Lotus Java Toolkit for Java/COBRA. Installing the Lotus Domino Toolkit for Java/COBRA from www.lotus.com creates a directory in the file system called DTJava. To configure the Lotus Domino Server: 1. Copy DTJava/lib/NCSO.jar to $ORACLE_HOME/wireless/lib on Solaris or %ORACLE_HOME%\wireless\lib on NT Examples of Solaris and NT values for ORACLE_HOME are as follows: 2. ■ For Solaris: ORACLE_HOME=/u01/iaswv904 ■ For Windows NT: ORACLE_HOME=d:\oracle\iaswv904 Include DTJava/lib/NCSO.jar in the OC4J classpath by adding the following line to $ORACLE_HOME/j2ee/OC4J_Wireless/config/application.xml: Configuring the Out-of-the-Box Applications 8-61 Location <library path="../../../wireless/lib/NCSO.jar"/> Note: You must download Lotus Domino Toolkit for Java/CORBA Release 5.0.8 Update or Lotus Domino Toolkit for Java/CORBA Release 5.0.5 Update Shipping. Do not use the Version 2.x toolkit. 3. Server tasks HTTP and DIIOP must both be running on the Domino server. Ensure that the Domino server’s notes.ini file contains the following line: ServerTasks=<other tasks>,http,diiop 5.0.5 8.4 Location There are four Location Based applications: Location Picker, Driving Directions, Maps, and Biz Directory (business directory). The Location Picker application enables users to pick and manage their frequently-accessed locations. Using this application, a user can specify a location that can be used by another application, such as the Diving Directions application. This location can be the user's default location, the current location (if mobile positioning is enabled), a Location Mark selected by the user, a recent location used by the user, or a new location to be entered by the user The Location Picker application is used by other applications to acquire a location from the user. When used directly by the user, Location Picker provides management of the user's Location Marks and allows the user to set a preferred location, which is either the user's current location (when the mobile positioning is available and enabled) or the user's default Location Marks. Other location applications include Driving Directions, Maps, and Biz Directory. These applications use the Location Picker to acquire locations from the user if the user does not have a preferred location or if the user specifically wants to change the location used for those applications. 8.4.1 Biz Directory The Biz Directory application provides users with a complete business directory. This application is built on the Wireless Location Application Component API. 8-62 Administrator’s Guide Location This application provides a yellow pages-type interface to search for the addresses and phone numbers of registered businesses within a given radius. The application enables searches for business names or categories and enables users to browse categories. If no location parameters are passed to this application, then the Location application is invoked to obtain location data for the search. 8.4.1.1 Configuring the Biz Directory Input Parameters This application requires a Wireless business directory provider (as described in Table 8–30). Table 8–30 Requirements for the Biz Directory Application Name External Provider(s) Instructions From Business Directory Provider otn.oracle.com See application providers 2.0 8.4.1.2 Configuring the Input Parameters The Biz Directory includes the following input parameters: ■ WEB URL Reserved for future use. ■ ■ Valid Values: Any valid URL ■ Default Value: localhost ■ Examples: localhost Records per page ■ Description: The number of items displayed per page; used to indicate how many businesses or business categories are displayed per page. ■ ■ Default Value: 9 ■ Examples: 9 Application Setup OMP URL The OMP reference to the URL group. ■ Valid Values: OMP URLs ■ Default Value: omp://oracle/applications/appsetup ■ Example: omp://oracle/applications/appsetup Configuring the Out-of-the-Box Applications 8-63 Location 8.4.1.3 Linking to the Biz Directory You link to the Biz Directory application using the following virtual URL: omp://oracle/services/location/bizdir Table 8–31 describes the input call parameters of the Biz Directory application. Table 8–31 The Input Call Parameters of the Biz Directory Application Parameter Name Mandatory Description Valid Value PH No Phrase (keywords) to search for. A string. For example: PH=Pizza PH=Restaurants PH=Oracle FC No Full category of the business. This category is defined in the YP mapping XML file, which is specified using the Oracle Application Server Wireless Tools. A string. For example: FC=/Business/Restaurant/Italian For example: FC=/Business/Automotive/Dealer/New /BMW CN No Company Name A string. For example: CN=Oracle Corp. FL No Address First Line A string. For example: FL=500 Oracle Parkway SL No Address Second Line A string. For example: SL=Redwood City, CA LL No Address Last Line A string. For example: LL=US BL No Block A string. For example: BL=Block 400 CI No City A string. For example: CI=Redwood City CT No County A string. For example: CT=San Mateo ST No State A string. For example: ST=CA PC No Postal Code A string.For example: PC=94065 PCE No Postal Code Extension A string. For example: PCE=5423 CO No Country A string. For example: CO=US LT No Latitude (Double) For example: LT=37.2433 LN No Longitude (Double) For example: LN=-122.3452 N No Name A string. For example: N=Golden Gate Park 8-64 Administrator’s Guide Location Output Parameter Table 8–32 describes the output parameter of the Biz Directory application. Table 8–32 Output Parameter of the Biz Directory Application Parameter Name Mandatory Description Valid Value STATUS No The status of a mobile call. (OK) CANCEL (Cancelled) 8.4.2 Driving Directions The Driving Directions application provides users with turn-by-turn driving directions between an originating address and a destination address. This application requires aWireless routing provider (as described in Table 8–33). Table 8–33 Required Software for the Driving Direcation Application Name External Provider(s) Instructions From Routing Provider otn.oracle.com See application providers. 2.0 8.4.2.1 Configuration Parameters The Driving Directions application includes the following input parameters: ■ Web URL Reserved for future use. ■ ■ Valid Values: Any valid URL ■ Default Value: Localhost ■ Examples: localhost Records per Page Description: Indicates how many steps are displayed per page. ■ Valid Values: A non-negative integer. ■ Default Value: 9 ■ Examples: 9 Configuring the Out-of-the-Box Applications 8-65 Location ■ Application Setup OMP URL The OMP reference to the URL group. ■ ■ Valid Values: OMP URLs ■ Default Values: OMP URLs ■ Examples: omp://oracle/applications/appsetup CatSpeech Library Code The concatenated speech library code for professional audio recordings. ■ Valid Values: A string value ■ Default Value: Location Router ■ Examples: Location 8.4.2.2 Linking to the Driving Directions Application You link to the Driving Directions application through the following virtual URL: omp://oracle/services/location/directions Input Call Parameters The Driving Directions application includes the following input call parameters, which are described in Table 8–34. Table 8–34 Input Call Parameters of the Driving Directions Application Parameter Name Mandatory Description Valid Value OCOMPANYNAME No The company name of the starting A string. For example: location. OCOMPANYNAME=Oracle Corp. OADDRESS No The first line of the address for the A string. For example: starting location. OADDRESS=500 Oracle Parkway OADDRESS2 No The second line for the address of the starting location. A string. For example: OADDRESS2=Redwood City, CA OADDRESSLL No The last line for the address of the starting location. A string. For example: OADDRESSLL=US OBLOCK No The block of the starting location. A string. For example: OBLOCK=Block 400 OCITY No The city of the starting location. A string. For example: OCITY=Redwood City 8-66 Administrator’s Guide Location Table 8–34 Input Call Parameters of the Driving Directions Application Parameter Name Mandatory Description Valid Value OCOUNTY No The county of the starting location. A string. For example: OCOUNTY=San Mateo OSTATE No The state of the starting location. A string. For example: OSTATE=CA OZIP No The postal code of the starting location. A string. For example: OZIP=94065 OZIPEXT No The postal code extension of the starting location. A string. For example: OZIPEXT=5423 OCOUNTRY No The country of the starting location. A string. For example: OCOUNTRY=US OLAT No The latitude of the starting location. (Double) For example: OLAT=37.2433 OLNG No The longitude of the starting location (Double) For example: OLNG=-122.3452 ONAME No The name of the starting location. A string. For example: ONAME=Golden Gate Park DCOMPANYNAME No The company name of the destination location A string. For example: DCOMPANYNAME=Oracle Corp. DADDRESS No The address first line of the destination location. A string. For example: DADDRESS=500 Oracle Parkway DADDRESS2 No The address second line of the destination location. A string. For example: DADDRESS2=Redwood City, CA DADDRESSLL No The address last line of the destination location. A string. For example: DADDRESSLL=US DBLOCK No The block of the destination location. A string. For example: DBLOCK=Block 400 DCITY No The city of the destination location. A string. For example: DCITY=Redwood City DCOUNTY No The county of the destination location A string. For example: DCOUNTY=San Mateo DSTATE No The state of the destination location. A string. For example: DSTATE=CA DZIP No The postal code of the destination location. A string. For example: DZIP=94065 Configuring the Out-of-the-Box Applications 8-67 Location Table 8–34 Input Call Parameters of the Driving Directions Application Parameter Name Mandatory Description Valid Value DZIPEXT No The postal code extension of the destination location. A string. For example: DZIPEXT=5423 DCOUNTRY No The country of the destination location. A string. For example: DCOUNTRY=US DLAT No The latitude of the destination location. (Double) For example: DLAT=37.2433 DLNG No The longitude of the destination location. (Double) For example: DLNG=-122.3452 DNAME No The name of the destination location. A string. For example: DNAME=Golden Gate Park Output Parameters The Driving Directions application includes the following output parameters (described in Table 8–35). Table 8–35 Output Parameter of the Driving Directions Application Parameter Name Mandatory Description Valid Value STATUS No The status of a mobile call. (OK) CANCEL (Cancelled) 8.4.3 Location Picker The Location Picker application enables users to pick and manage their frequently-accessed locations. Using this application, a user can specify a location that can be used by another application, such as the Driving Directions application. This location can be the user's default location, the current location (if mobile positioning is enabled), a Location Mark selected by the user, a recent location used by the user, or a new location to be entered by the user The Location Picker application is used by other applications to acquire a location from the user. When used directly by the user, Location Picker provides management of the user’s Location Marks and allows the user to set a preferred location, which is either the user’s current location (when mobile positioning is available and enabled) or the user’s default Location Marks. The Driving Directions, Maps, and Biz Directory applications use the Location Picker to acquire a location (or locations) from the user if the user does not have a 8-68 Administrator’s Guide Location preferred location, or if the user wants to change the location used for those applications. This application integrates with positioning servers when available and is built upon the Oracle Application Server Wireless Location Application Component API. 8.4.3.1 Configuring the Location Picker Application This application requires aWireless geocoding provider only when the geocoding of addresses is needed and requires the Wireless mobile positioning provider only when the positioning feature is needed. The geocoding and mobile positioning are optional features. Table 8–36 describes the software requirements for the Location Picker application. Table 8–36 Software Requirements for the Location Picker Application Name External Providers From Instructions Geocoding Provider otn.oracle.com 2.0 See application providers. Mobile Positioning Provider otn.oracle.com 2.0 See application providers. 8.4.3.2 Configuring the Input Parameters of the Location Picker Application The Location Picker application includes the following input parameters: ■ Web URL Reserved for Future Use ■ ■ Valid Values: ■ Default Value: localhost ■ Examples: History stack size Specifies the maximum number of locations kept in the user's Location History. ■ ■ Valid Values: non-negative integer ■ Default Value: 72 ■ Examples: 72 Records per page Configuring the Out-of-the-Box Applications 8-69 Location This parameter applies to WML devices only; it specifies the number of business categories and result items shown per WML card. ■ ■ Valid Values: A non-negative integer. ■ Default Value: 9 ■ Examples: 9 Cat Speech Library Code The concatenated speech library code for professional audio recordings. ■ Valid Values: string value ■ Default Value: Location Picker 8.4.3.3 Linking to the Location Picker Application You link to the Location Picker application using the following virtual URL: omp://oracle/services/location/picker (Invocation Interface) Input Parameters The Location Picker application includes the following input call parameters: ■ LOCATIONTITLE ■ ■ ■ Valid Value: A String. For example: * LOCATIONTITLE=Map * LOCATIONTITLE=Destination Location LOCATIONQUALITY ■ ■ ■ 8-70 Description: The name of the location to be specified. This page displays throughout the Location Picker application as the title. Administrator’s Guide Mandatory?: No Description: The quality of the location to be specified. This will be used to check if the specified location meets the required quality. Valid Values: * 1 (Address quality) * 2 (Street quality) * 3 (Intersection quality) Location ■ * 4 (Postalcode quality) * 5 (City quality) * 6 (County quality) * 7 (State quality) * 8 (Country quality) * 11 (Unknown quality) LOCATIONMASK ■ Mandatory?: No ■ Description: The mask used to specify which location fields will be available when entering a new location. ■ ■ Valid Value: An integer derived by the bitwise ORing together with the integer values for all of the desired the location fields. The values are defined as follows: * COMPANYNAME_FIELD = 1 * FIRSTLINE_FIELD = 2 * SECONDLINE_FIELD = 4 * LASTLINE_FIELD = 8 * BLOCK_FIELD = 16 * CITY_FIELD = 32 * COUNTY_FIELD = 64 * STATE_FIELD = 128 * COUNTRY_FIELD = 256 * POSTALCODE_FIELD = 512 * POSTALCODEEXT_FIELD = 1024 * LAT_FIELD = 2048 * LNG_FIELD = 4096 Examples: LOCATIONMASK=14 (address line 1, address line 2, address last line) LOCATIONMASK=162 (address line 1, city, state) Configuring the Out-of-the-Box Applications 8-71 Location ■ MOD ■ ■ ■ ■ Mandatory?: No (Optional) Description: This parameter is used to specify a condition on the returned location. For example, if the user only wants to choose among the named location (for example, Location Marks), then use MOD="LM". If unspecified, the default mode will be used (for example, all available locations will be offered as choices). Valid Value: LM (Allows to choose among existing Location Marks or create new ones.) Example: MOD=LM Output Parameters Table 8–37 describes the output parameters for the Location Picker application. Table 8–37 Output Parameters of the Location Picker Parameter Name Mandatory? Description Valid Value CN No The company name A string. For example: CN=Oracle Corp. FL No The first line of the address. A string. For example: FL=500 Oracle Parkway SL No The second line of the address. A string. For example: SL=Redwood City, CA LL No The last line of the address. A string. For example: LL=US BL No The block. A string. For example: BL=Block 400 CI No The city. A string. For example: CI=Redwood City CT No The county. A string. For example: CT=San Mateo ST No The state. A string. For example: ST=CA PC No A postal code. A string. For example: PC=94065 PCE No A postal code extension. A string. For example: PCE=5423 CO No the country. A string. For example: CO=US LT No latitude. Double. For example: LT=37.2433 LN No longitude. Double. For example: LN=-122.3452 8-72 Administrator’s Guide Location Table 8–37 Output Parameters of the Location Picker Parameter Name Mandatory? Description Valid Value N No The name. A string. For example: N=Golden Gate Park LMN No The name of the Location Mark. A string. For example: LMN=Office STATUS No The status of the application call. (OK) CANCEL (Cancelled) 8.4.4 Maps The Maps application provides broad and detailed maps for a given location, supports map tiling and image map transformation for different devices. This application integrates with the Driving Directions application and is built upon the Wireless Location Application Component API. 8.4.4.1 Configuring the Maps Input Parameters This application requires aWireless mapping provider (as described in Table 8–38). Table 8–38 Requirements for the Maps Application Name External Providers Instructions From Mapping Provider otn.oracle.com See the application providers. 2.0 8.4.4.2 Configuration Parameters The Maps application includes the following input parameter: ■ Application Setup OMP URL The OMP reference to the URL group. ■ Valid Values: OMP URLs ■ Default Values: OMP URLs ■ Examples: omp://oracle/applications/appsetup 8.4.4.3 Linking to the Maps Application You link to the Maps application using the following virtual URL: omp://oracle/services/location/maps Configuring the Out-of-the-Box Applications 8-73 Location Input Call Parameters Table 8–39 describes the input call parameters of the Maps application. Table 8–39 Input Call Parameters of the Maps Application Parameter Name Mandatory Description Valid Value CN No The company name. A string. For example: CN=Oracle Corp. FL No The first line of the address. A string. For example: FL=500 Oracle Parkway SL No The second line of the address. A string. For example: SL=Redwood City, CA LL No The last line of the address. A string. For example: LL=US BL No The block. A string. For example: BL=Block 400 CI No The city. A string. For example: CI=Redwood City CT No The county. A string. For example: CT=San Mateo ST No The state. A string. For example: ST=CA PC No The postal code. Postal Code A string. For example: PC=94065 PCE No The postal code extension. A string. For example: PCE=5423 CO No The country. A string. For example: CO=US LT No The latitude. Double. For example: LT=37.2433 LN No The longitude. Double. For example: LN=-122.3452 N No The name. A string. For example: N=Golden Gate Park LMN No The name of the Location A string. For e xample: LMN=Office Mark. STATUS No The status of the application call. 8-74 Administrator’s Guide (OK) CANCEL (Cancelled) m-Commerce Applications Output Parameter for the Maps Application Table 8–40 describes the output parameter for the Maps application. Table 8–40 Output Parameter of the Map Module Parameter Name Mandatory Description Valid Value STATUS No The status of a mobile call. (OK) CANCEL (Cancelled) 8.5 m-Commerce Applications Oracle m-Commerce applications are a set of Wireless and Voice Applications that securely store user profiles, supply information authorized by users of third-party applications, and interface with on-line payment mechanisms to complete transactions. The m-Commerce applications also translate existing WML applications into Mobile-XML, and uses Form Filler to map forms, which spares users from entering information from a mobile device. The m-Commerce applications are automatically installed along with Oracle Application Server Wireless. m-Commerce APIs You can build an m-Commerce application using Wireless XML. To incorporate any m-Commerce component into an application, you can add URL links to the moduable application that comply with its APIs. If you have already developed an m-Commerce application in WML, you can run it through the Translator Application by calling its API, and by providing the URL of the application. The URL adds links from your application to all of the m-Commerce modulable applications. 8.5.1 Form Filler The Form Filler application is a self-teaching form filler, one that maintains mappings between application form fields and wallet elements. The Form Filler accepts a URL and a list of label and variable names as input parameters, and checks if there is a stored mapping from the given labels and variables to wallet fields. If there is no such mapping, then it enables users to create a new mapping into wallet fields. Once a mapping is retrieved or created, it calls the wallet, asking it for the given mapped information. Upon successful completion, the application returns a status of Success along with the wallet values corresponding to the label-variable name list. Otherwise, a status code of Failure will be returned Configuring the Out-of-the-Box Applications 8-75 m-Commerce Applications 8.5.1.1 Configuring the Form Filler Application While you can use the out-of-the-box configuration for Form Filler application, you can enhance the application’s functionality by configuring the guessing heuristics and by approving or rejecting the mappings. 8.5.1.2 Configuring the Guessing Heuristics If an existing mapping is not available, then Form Filler enables authorized users to select given fields from the m-Wallet to populate the values for a given input field in a wireless form. When constructing a new mapping, the Form Filler uses name guessing heuristics to automatically suggest default values to the user. As a result, the mapping creation process is minimized, making it a user-approved mapping process. Name-guessing can be accomplished in two ways: you can enter rules for explicit mapping suggestions, (such as mapping Credit Card number to CreditCard:Number) or you can implement a dynamic heuristic that determines the similarities between the values in an input field and those in the fields in the m-Wallet. For example, Deluxe user home address maps automatically to Profile:Address. 8.5.1.2.1 Configuring the Mappings as Input Parameters The fixed mapping suggestions are placed as input parameters for the Form Filler application. The input parameter consists of the name ORACLE_SERVICES_COMMERCE_FORMFILLER_ SUGGESTIONS_ and the suggested key to use. For example, for ORACLE_ SERVICES_COMMERCE_FORMFILLER_SUGGESTIONS_Credit Card, Credit Card is the suggested key. The default value must contain a valid Wallet compartment and field name. (The administrator for the Form Filler knows the compartment and the field name.) For example: ■ ■ Input Parameter Name: ORACLE_SERVICES_COMMERCE_FORMFILLER_ SUGGESTIONS_Credit Card Default Value: CREDIT CARD:CC_NUMBER The dynamic mapping suggestions are controlled by a class that implements the GuessingHeuristic interface. The factory method inside the FormFillerManager to retrieve the implementation of the guessing heuristic takes the class name from the Form Filler application parameters. The key of the property is ORACLE_SERVICES_COMMERCE_FORMFILLER_HEURISTIC. 8-76 Administrator’s Guide m-Commerce Applications 8.5.1.3 Setting Up the Guessing Heuristics The guessing heuristics uses keys that are defined in the parameters for Form Filler application. The parameter, ORACLE_SERVICES_COMMERCE_FORMFILLER_ HEURISTIC, defines the property used by the GuessingHeuristic implementor of the Form Filler application. This value must be the fully qualified class name of the class implementing the GuessingHeuristic interface. This is an optional field, as the default dynamic heuristic provider is set to oracle.panama.app.services.modules.formfiller.WalletGuessingHeuristic. The following are input service parameters are examples of the configuration file: ■ ORACLE_SERVICES_COMMERCE_FORMFILLER_HEURISTIC ■ The default value for this parameter is: oracle.panama.app.services.modules.formfiller.WalletGuessingHeuristic ■ ORACLE_SERVICES_COMMERCE_FORMFILLER_SUGGESTIONS_ The Form Filler application uses this prefix to define the fixed mappings for the guessing heuristics. The key must be appended to this prefix and inserted as an input parameter for the Form Filler application to map a key to a value. The key is first matched against the label and then the variable name of the input fields for the new mapping. The administrator must enter the correct values for the keys, matching them, for example, to the Wallet fields. For example, an administrator matches the values to the keys to the wallet fields as follows: ORACLE_SERVICES_COMMERCE_FORMFILLER_SUGGESTIONS_Credit Card Default Value: CREDIT CARD:CC_NUMBER 8.5.1.4 Using the Form Filler Administration The Form Filler Administration enables you to manage settings, manipulate stored mappings, and approve pending mappings. To access the Form Filler Administration: 1. Select the Content Manager. The Content Manger defaults to the Publish tab, displaying the folders and applications at root level. The Root Folders and Services screen appears. 2. Select the Commerce folder. 3. Select Form Filler. 4. Click Edit. The Edit Application screen appears. Configuring the Out-of-the-Box Applications 8-77 m-Commerce Applications 5. From the left menu, click Configure Parameters. The Form Filler Administration appears and defaults to the Config tab (Figure 8–3). The Config tab enables you to set the submission mode for the Form Filler mappings by selecting between the following options: ■ Open -- Enables all users to submit mappings. ■ Closed -- Restricts all users from submitting mappings. ■ Restricted -- Only selected users can submit mappings. The Config tab also includes the Auto-Approve Mode. Selecting this option approves all submitted mappings immediately. (These mappings do not need approval as they become effective immediately.) Figure 8–3 The Config Tab of the Form Filler Administration The Existing Mappings tab (Figure 8–4) enables you to search for, edit, and delete existing Form Filler mappings. To retrieve a stored mapping, either search for the mapping by URL, or select Get All. The mapping appears in the pane in the Stored Maps section of the screen. To edit a mapping, click on the mapping. The mapping’s form label, variable name (Varname) and matching wallet parameters appear in the right frame. You can then modify the mapping by using the drop-down lists to select different matching 8-78 Administrator’s Guide m-Commerce Applications wallet parameters. Click Done after you have completed your changes. Clicking Delete removes the mapping. Figure 8–4 The Existing Mappings Tab of the Form Filler Administration The Pending Mappings tab (Figure 8–5) enables you to search for, edit, delete, and approve any pending (unapproved) mappings. You can retrieve a pending mapping either by searching by URL, or by user. To retrieve all the pending mappings, select Get All. The mappings appear in the pane in the Stored Maps section of the screen. To select a mapping, click on the mapping. The mapping’s form label, variable name (Varname) and matching wallet parameters appear in the right frame. You can then approve the mapping or delete it. Configuring the Out-of-the-Box Applications 8-79 m-Commerce Applications Figure 8–5 The Pending Mappings Tab of the Form Filler Administration Note: For performance reasons, (such as a database connection cache with a five-minute expiration period) it can take up to five minutes for changes made using the Form Filler Administration to be reflected in the system. 8.5.1.5 Configuring the Input Parameters for the Form Filler Module To configure the input parameters for this application: The Form Filler application includes the following optional input parameters, which do not require configuration. ■ ORACLE_SERVICES_COMMERCE_FORMFILLER_HEURISTIC ■ ■ ■ 8-80 Administrator’s Guide Description: A fully qualified classname of the Form Filler guessing heuristic class, used if a user wants to override the default guessing implementation. Valid Values: Empty - to use the default guessing heuristic class package.formfiller.myGuessingHeuristic Default Value: Empty m-Commerce Applications ■ ■ ORACLE_SERVICES_COMMERCE_FORMFILLER_SUGGESTIONS_<label_ key or variable_key>=<Wallet <compartment>:<field>> ■ ■ Customizability: Users must customize this value only if they want to override the default heuristic mechanism. Description: A suggestion that corresponds to the label or variable in the key. Whenever Form Filler receives <label_key> or <variable_key>, it automatically points to the corresponding compartment and field in Wallet. For example: ORACLE_SERVICES_COMMERCE_FORMFILLER_ SUGGESTIONS_ccnum=CREDIT_CARD:CC_NUMBER ORACLE_SERVICES_COMMERCE_FORMFILLER_SUGGESTIONS_ fn=PROFILE:FIRSTNAME ■ ■ Default Value: Null. Customizability: Users must customize these values if they want to add suggestions. ■ Application Setup OMP URL ■ Description: The OMP reference to the used URLS ■ Valid Values: ■ Default Value: omp://oracle/applications/appsetup ■ Examples: 8.5.1.6 Linking to the Form Filler Application You link to the Form Filler application using the following virtual URL: omp://oracle/services/commerce/formfiller Table 8–41 describes the input call parameters of the Form Filler application. Configuring the Out-of-the-Box Applications 8-81 m-Commerce Applications Table 8–41 Input Call Parameters of the Form Filler Application Triggers Output Parameter Name Mandatory? Description Valid Value FORMFILLURL Yes The URL of the form to be filled. Restriction: URL encoded A string. For example: FORMFILLURL=htt p://www.formfiller demo.com FORMFILLPARAMS Yes The parameters inside the form. Restriction: It should be a comma-separated, ordered list of [%label%:%variable name%] pairs.Where %label% is the label used in the form that is used for the %variable name% variable. The parameters must be URL encoded A string. For ReturnGroup example: FORMFILLPARAMS =First+Name:fname, Last+Name:lname,C redit+Card:CC_ NUMBER,Email:EM AIL,Address:Addres s APPLICATION No Specifies the application name to identify the request to the Form Filler (which in turn passes it to the m-Wallet). When it is not specified, the URL will be treated as the application name. This must be URL encoded. A string. For ReturnGroup example: APPLICATION=For m Filler Demo ReturnGroup 8.5.1.7 Output Parameters The Form Filler’s output parameters include the following: ReturnGroup This group includes the following parameters, which return the values for the Form Filler. Table 8–42 describes the parameters of the ReturnGroup. 8-82 Administrator’s Guide m-Commerce Applications Table 8–42 Parameters of the Return Group Parameter Mandatory Description Valid Values FORMFILLURL Yes The URL of the form to be filled. Restriction: URL encoded A string. For example: FORMFILLURL=http://www.form fillerdemo.com FORMFILLPARAMS Yes The parameters inside the form. A string. For example: FORMFILLPARAMS=First Name:fname:Bob,Last The parameters must be URL Name:lname:Smith,Credit encoded. Card:CC_ NUMBER:123456789,Email:EMAIL: For successful retrievals, the [email protected],Address: parameters should be a Address:SomeWhereOnEarth comma-separated ordered list Example: of [%label%:%variable FORMFILLPARAMS=First name%:%value%] pairs. Where Name:fname:,Last %label% is the label used in the Name:lname:,Credit Card:CC_ form that is used for the NUMBER:,Email:EMAIL:,Address: %variable name% variable. Address: %value% contains the result from the m-Wallet applicaiton. Restrictions: ■ ■ ■ SUCCESSCODE Yes For unsuccessful retrievals, the parameters return nothing. The success code indicates whether there was a successful request of information from the m-Wallet for the given labels and variable names. The valid values are: TRUE -- For successful data retrieval FALSE --For Unsuccessful retrieval of data from user-issued cancellations or from the inability to retrieve dynamic mapping. For example: ■ SUCCESSCODE=TRUE ■ SUCCESSCODE=FALSE 8.5.1.8 Examples To retrieve data from the Form Filler Demo application, configure the parameters as follows: ■ Input Parameters: ■ FORMFILLURL=http://www.formfillerdemo.com Configuring the Out-of-the-Box Applications 8-83 m-Commerce Applications ■ ■ ■ FORMFILLPARAMS=First+Name:fname,Last+Name:lname,Credit+Card:CC_ NUMBER,Email:EMAIL,Address:Address APPLICATION=FormFiller Demo Output Parameters: ■ ■ ■ FORMFILLURL=http://www.formfillerdemo.com FORMFILLPARAMS=First+Name:fname:Bob,Last+Name:lname:Smith,Credit +Card:CC_ NUMBER:123456789,Email:EMAIL:[email protected],Address:Add ress:Some+Street+On+Earth SUCCESSCODE=TRUE An example of the unsuccessful retrieval of data for the Form Filler Demo application is as follows: ■ Input Parameters: ■ ■ ■ ■ FORMFILLURL=http://www.formfillerdemo.com FORMFILLPARAMS=First+Name:fname,Last+Name:lname,Credit+Card:CC_ NUMBER,Email:EMAIL,Address:Address APPLICATION=FormFiller Demo Output Parameters: ■ ■ ■ FORMFILLURL=http://www.formfillerdemo.com FORMFILLPARAMS=First+Name:fname:,Last+Name:lname:,Credit+Card:CC _NUMBER:,Email:EMAIL:,Address:Address: SUCCESSCODE=FALSE 8.5.2 Payment Application The Payment Application, which integrates with Oracle iPayment, processes credit card and bank account transactions through wireless devices. Payment processing enables integration with payment mechanisms, such as Oracle’s CRM iPayment. As a result, credit card processing and bank account transactions are carried out through direct connections to financial networks. You can add other drivers that integrate payment solution providers per customer requests. 8-84 Administrator’s Guide m-Commerce Applications Through integration with Oracle CRM’s iPayment component, which implements transaction settlement support for credit cards and bank accounts, transactions are processed directly through the platform rather than through a merchant-deployed processing infrastructure. 8.5.2.1 Configuring the Payment Application You must correctly install and configure the Oracle iPayment before you use the Payment application. To do this, you must follow the instructions from Oracle Applications 11i to install Oracle iPayment. Required Software The Payment application requires the following software (as described in Table 8–43). Table 8–43 Required Software for the Payment Application Name Instructions From Versions Oracle iPayment Follow the instructions from Oracle Applications 11i to Oracle Application 11i successfully install Oracle iPayment. 8.5.2.2 Configuration Parameters ■ Default Transaction Class The default transaction processor used for such functions as creating accounts, submitting transaction requests, cancelling transactions, and querying transactions. The default class (OracleIPaymentHook) provides the driver for Oracle CRM 11i iPayment. ■ ■ ■ ■ Valid Values: any class extending oracle.panama.module.commerce.payment.PaidTransaction Default Value: oracle.panama.module.commerce.payment.OracleIPaymentHook Examples: org.company.myPaymentHook Default Currency Defines the default currency to be used for all transactions. This value can be overridden by sending the currency on the OMP call. Configuring the Out-of-the-Box Applications 8-85 m-Commerce Applications ■ ■ Valid Values: Three-letter string currency codes according to ISO 4217 (1995) ■ Default Value: USD ■ Examples: EUR, USD, BRL DBC file This value points to the location of the DBC file, used by Oracle CRM iPayment. This file has the necessary configuration for the iPayment database, such as username and password. ■ Valid Values: a path on the local host pointing to the apps.dbc file ■ Default Value: /apps.dbc ■ ■ Examples: /private/oracle/apps/ipayment/apps.dbc, C:\orant\ipayment\apps.dbc EC APP ID This value represents the Electronic Commerce Application ID (ECAPPID) within iPayment. An ECAPPId is the Id by which iPayment identifies the calling application. All applications in 11i are identified using a unique Application ID. The payment application users must register a new ECAPPID for Wireless. ■ ■ Valid Values: Any integer value representing the ECAPPID. ■ Default Value: 10000 ■ Examples: 673, 100, 123 Application Setup OMP URL OMP reference to the group of urls to use. ■ Valid Values: an OMP URL pointing to the Application Setup ■ Default Value: omp://oracle/applications/appsetup ■ Examples: 8.5.2.3 Linking to the Payment Application You link to the Payment application using the following virtual URL: omp://oracle/services/commerce/payment Table 8–44 describes the input call parameters of the Payment application. 8-86 Administrator’s Guide m-Commerce Applications Table 8–44 Input Call Parameters for the Payment Application Parameter Name Mandatory? Description Valid Value Triggers Output AMOUNT Yes Amount value for this transaction. A valid float number. For example: 100.00 TRXID MERCHANTID Yes A valid ID within Cybercash, Verisign or other valid Payment Partner, and a valid, registered user of Wireless. A valid Cybercash, TRXID CheckFree, or Verisign ID Restriction: the merchant should be a registered Wireless user. MODE Yes The transaction mode, which can be ONLINE/OFFLINE for Credit Card transaction and OFFLINE only for Bank Account transactions. ONLINE - online transaction for Credit Cards OFFLINE - offline transaction for both Credit Card and Bank Accounts. Offlline transactions will be processed by a batch job in CRM IPayment TRXID TYPE Yes The transaction type. This could be an authorization-only, capture-only, or authorization-and-capture transaction. AUTH - Authorization only TRXID CAPTURE - Capture previously authorized transactions AUTH_CAPTURE -Authorize and Capture transaction at the same time INSTRTYPE Yes This parameter informs the Wallet Application of the types of instrument allowed by the merchant: credit cards only, bank accounts only, or both. CC - When the merchant accepts only Credit Card transactions. TRXID BA - When the merchant accepts only Bank Accounts transactions. CC,BA - When the merchant accepts both Credit Cards and Bank Accounts transactions Configuring the Out-of-the-Box Applications 8-87 m-Commerce Applications Table 8–44 Input Call Parameters for the Payment Application Parameter Name Mandatory? Description Valid Value Triggers Output DESCR No The description of this transaction (if the merchant wants to save a personalized message for the particular transaction.) If the transaction receives no information, then the Payment Application generates a default description. Any string with TRXID description information. Example: DESCR=Book Shop Transaction Example: DESCR=Mobile Transaction - the default message. CURRENCY No The currency for this transaction. The default currency is defined as a application input parameter - Default Currency - and this value is used as default. If the merchant wants to use a different currency, then provide it in this request parameter. The three-letter string currency codes per ISO 4217 (1995). For example: USD, EUR, BRL. APPLICATION No Name of the application calling the Payment Application. This name is stored in the user’s transaction history. If this is not present, then the Payment Application stores the default value as ’3rd Party App. Any string with the TRXID application name. For example: APPLICATION=Book Shop Application or APPLICATION=Mobile Transaction (This is the default message) TRXID 8.5.2.4 Output Parameters The Payment application’s output parameters include the following: TRXID This group includes the following parameters, which return the values for the Payment application. Table 8–45 describes the parameters of TRXID. 8-88 Administrator’s Guide m-Commerce Applications Table 8–45 Parameters of TRXID Parameter Mandatory Description Valid Values TRXID Yes The transaction ID for a successful An integer representing the transaction. If the transaction transaction ID. Example: TRXID=1234 failed this return -1 for a successful transaction or TRXID=-1 for a failed transaction FAILCODE Yes, if TRXID=-1 The fail code for this transaction. 1 - If an ERROR occurred A transaction can be cancelled by 2 - If the end-user cancelled the the end-user or because of an error transaction. occurring during processing. FAILREASON Yes, if TRXID=-1 The backend payment system (for A string with the describing the example, Oracle CRM payment) reason for the failure. Example: which generates error messages FAILREASON=Invalid Credit Card which are useful for the end-user when an error occurs. For example, these messages can alert users to invalid, or declined credit cards. 8.5.2.5 Capturing Transactions Merchants can use a URL whenever they want to capture previously authorized transactions. This URL can be used in both secure and non-secure modes. The difference between the two modes is the HTTP and HTTPS protocols. Non-Secure Capture The http URL for the non-secure capture of a previously authorized transaction is as follows: http://myserver.com:9080/modules/commerce/payment/jsp/IPaymentProcess.js p? MERCHANTID=<merchantID>& MERCHANTPW=<merchantPWD>& TRXID=<transactionID>& CURRENCY=<currency>& AMOUNT=<amount> For a merchant called BookStore to capture transaction #1234 in the amount of US$100.00, you call the URL and then enter the parameters as follows: Configuring the Out-of-the-Box Applications 8-89 m-Commerce Applications http://myserver.com:9080/modules/commerce/payment/jsp/IPaymentProcess.js p? MERCHANTID=bookstore&MERCHANTPW=welcome&TRXID=1234&CURRENC Y=USD&AMOUNT=100 Secure Capture In order to use the secure mode for the capture URL, you must first ensure that there is HTTPS access to the server. The HTTPS URL for the secure capture of a previously authorized transaction is as follows: https://myserver.com:443/modules/commerce/payment/jsp/IPaymentProcess.js p? MERCHANTID=<merchantID>& MERCHANTPW=<merchantPWD>& TRXID=<transactionID>& CURRENCY=<currency>& AMOUNT=<amount> Note: Merchants must have an Oracle Application Server Wireless account to use the capture URL. 8.5.3 Wallet Application The Wallet application enables users to manage their profile from mobile devices as well as participate in commerce transactions and track their activity. The Wallet application securely stores user’s payment instrument information, such as credit cards, bank accounts, and shipping addresses. Upon user approval, other m-Commerce applications can retrieve this information to process payments. The Oracle Application Server Wireless administrator can configure the Credit Cards, Bank Accounts and Extended Information compartments at any time, even if they contain values that users have entered previously. The fixed compartments are profiles, shipping addresses and Internet accounts. A wallet is divided into compartments that can hold one or more instruments. For example the Credit Cards compartment holds as many credit cards as a user sees fit to enter. The Extended Information compartment, however, holds only one information set. 8-90 Administrator’s Guide m-Commerce Applications 8.5.3.1 Configuring the Wallet Application The Wallet application provides a convenient single-click commerce payment mechanism. It is a server side, encrypted entity that contains payment instrument, identification and address information for registered users. It enables users to store all the information required to fill out commerce-related forms from any application. That information is used to complete transactions, and through APIs (built and maintained by authorized third-party application providers), can be made available to authorized partners and e-merchants. It processes requests (using proxies) for personal and payment instrument information issued through HTML or WML forms by third-parties, and presents them to users, who decide explicitly what information gets sent back to the third-party. The wallet stores this information securely for users, providing them with an easy, secure shopping experience, and freeing them from repeatedly entering information. The information is encrypted in the Repository using a three-part key comprised of a combination of the following: ■ ■ ■ A system key (specific to each deployment of the product). A user-specific key (uniquely identifying users within the system, and retrieved when a function is applied to specific user information). The user’s trading password. Each portion of the three-layer key can be changed independently, but each one is required to decrypt information stored in the wallet. This combination is never stored; only an encrypted alias, assigned to each entry during its creation or modification, is sent over the wireless network. Because security is central to the Wallet application, you must configure HTTPs to access the Wireless server. 8.5.3.2 Configuration Parameters The Wallet application includes the following configuration parameters: Show Wallet Confirmation Page Whenever a third-party application requests user information from the Wallet, the user must agree to share this information. This parameter is set regardless of whether this confirmation card is presented to user. The valid values for this input parameter include: ■ Yes: Always show the confirmation card user. The user cannot override this value. Configuring the Out-of-the-Box Applications 8-91 m-Commerce Applications ■ ■ No: Never show the confirmation card to the user and automatically return the user information to the third party application. USER: Unless otherwise specified by the user, always show the confirmation card to the user. This is the default value. Wallet Security Mode Defines whether the Wallet application runs in HTTP or HTTPS. If true, the application runs in secure HTTPS. If false, then the wallet runs in non-secure HTTP. The valid values for this input parameter include the following: ■ ■ true: When accessing the Wallet application, the connection between the user device and Oracle Application Server Wireless will be secure HTTPS. This is default value. false: When accessing the Wallet application, the connection between the user device and Oracle Application Server Wireless will be non-secure HTTP. The default value is true. Note: The Wallet application can only function in secured mode (HTTPS) if Oracle Application Server Wireless is configured in secured mode. For more information on configuring Wireless in secured mode, see Section 3.6.1.1. Application Setup OMP URL This is the OMP URL reference for the URL group. This parameter includes the following values: ■ Valid Values: An OMP URL pointing to the application setup. ■ Default Value: omp//oracle/applications/appsetup ■ Examples: 8.5.3.3 Linking to the Wallet Application You can link to the Wallet application using the following virtual URL: omp://oracle/services/commerce/wallet The wallet application includes the following input call parameters: 8-92 Administrator’s Guide m-Commerce Applications Wallet_Action Wallet_Action is used to determine the type of overall action that service requests. Table 8–46 describes this mandatory parameter. Table 8–46 Input Parameters for Wallet_Action Valid Value Description Requirement GETSTRUCTURE Used to retrieve the Wallet structure definition. Triggers WALLET_STRUCTURE. . GET_FORM_DATA Used when a third -party application wants getWalletInfoRequest. to request information from the user’s mobile wallet.Triggers generateUserResponse as output. GET_INET_ACCT Used to add Internet account information in the user’s wallet. GEN_USER_PASS Used to automatically generate the username and password information. Triggers generateUserResponse as output. createInternetAccountRequest. getWalletInfoRequest Table 8–47 describes the parameters of this optional group. Configuring the Out-of-the-Box Applications 8-93 m-Commerce Applications Table 8–47 Parameters of the getWalletInfoRequest Group Parameter Name Mandatory Description Valid Value FORM_TITLE Yes This parameter is displayed as part of the Wallet application for the duration of the call. A string. For example: A comma-separated string of tokens which specify which values to retrieve from the wallet. Valid values in this string are: GET_DATA Yes FORM_TITLE=Movie Ticket Purchase. ■ ■ CC (triggers creditCardData as output) BA (triggers bankAccountData as output) ■ FN (triggers FIRSTNAME as output) ■ LN (triggers LASTNAME as output) ■ ■ ■ ■ EMAIL (triggers output EMAIL as output) PHONE (triggers phoneData as output) INT_ACC (triggers internetAccountData as output) SHIP (triggers shippingData as output) For example: APPICATION No ISEXCLUSIVE No 8-94 Administrator’s Guide The application name displayed to the user and stored in the History file, so that the user always knows which applications are requesting the user’s wallet information. ■ GET_DATA=FN,LN,SHIP ■ GET_DATA=CC, PHONE, INT_ACC A string. For example: APPLICATION=Bookshop Application. If set to True, then the user can A boolean. chose either Credit Card or Bank Account. This parameter is used only by the Payment application. m-Commerce Applications Table 8–47 Parameters of the getWalletInfoRequest Group Parameter Name Mandatory DOMAIN Yes A string. For example: DOMAIN=http:/wwww.oraclemobile.com ACCOUNT_ ID Yes A string. For example: ACCOUNT_ ID=smurgle. PASSWORD Yes A string. For example: PASSWORD=237894. Description Valid Value 8.5.3.4 Output Parameters of the Wallet Application Table 8–48 describes the output parameters of the Wallet application. Table 8–48 Output Parameters for the Wallet Application Parameter Name Mandatory Description Valid Value WALLET_SELECT Yes Indicates that the operation completed correctly. If the user cancels the wallet operation, this variable contains False. Valid values are True and False. This string specifies the wallet’s internal structure. The wallet structure is based on fixed- and user- defined compartments. The fixed compartments include the User Profile, Internet Accounts, and Shipping Addresses. The user-defined compartments include Credit Card, Bank Account, and Extended Info. A string. For example: WALLET_STRUCTURE=If the wallet has compartments CC and BA for credit card and bank account respectively, then the return string can be CC:CCNUM()CreditCard Number, CC:CCEXP()Credit Card Expiration Date, BA:BNUM() Bank Account Number... WALLET_STRUCTURE No Restriction: The return string is formatted as COMPARTMENT_NAME:FIELD_ NAME90FIELD_DESCRIPTION. Configuring the Out-of-the-Box Applications 8-95 m-Commerce Applications Table 8–48 Output Parameters for the Wallet Application Parameter Name Mandatory Description Valid Value FIRSTNAME No This variable holds its value of the user’s first name when the calling application requests the user’s name. This variable cannot be changed, as it is part of the fixed Profile compartment. A string. For example: FIRSTNAME=John LASTNAME No This variable holds the value of the user’s last name when the calling application requests the user’s last name. It cannot be changed as it is part of the fixed Profile compartment. A string. For example: LASTNAME=John EMAIL No This variable holds the value of the user’s email address when the calling application requests the user’s email. This cannot be changed, as it is part of the fixed Profile compartment. A string. For example: EMAIL=John.Doe@compa ny.com CreditCardData The Credit Cards structure held in wallet.properties. The fields are returned as request parameters. The following parameters, described in Table 8–49, are the default parameters of the CreditCardData group. CreditCardData is an optional group. Table 8–49 Parameters of the CreditCardData Group Parameter Name Mandatory Description CC Yes A short name for the A string. For example: credit card. CC=My Bank Visa Card. CC_HOLDER_NAME Yes The name of the holder of the credit card. A string. For example: CC_ HOLDER_NAME=John Doe CC_HOLDER_ADDRESS_LANDMARK Yes The billing address of the holder of the credit card. This is a link to the user’s Location Marks. A string. For Example: CC_ HOLDER_ADDRESS_ LANDMARK=Office at Oracle Restriction: this landmark must be defined in the location application. 8-96 Administrator’s Guide Valid Value m-Commerce Applications Table 8–49 Parameters of the CreditCardData Group Parameter Name Mandatory Description Valid Value CC_EXPIRATION_DATE Yes A string. For example: CC_ EXPIRATION_ DATE=04/2003 The expiration date of the credit card. Restriction: this should be in the MM/YYYY form. This also must be defined in wallet.properties. CC_LANDMARK_NAME Yes The Location Mark of the credit card. Restriction: the parameters for the street address (such as CC_ADDRESS_ LINE1)are built on-the-fly as Wallet Module ’knows’ that Billing Address is a reference to a location mark. A string. For example: CC_ LANDMARK_ NAME=Office at Oracle CC_ADDRESS_LINE1 No A string. For example: CC_ ADDRESS_LINE1=500 Oracle Pkwy CC_ADDRESS_LINE2 No A string. For example: CC_ ADDRESS_LINE2= CC_CITY No A string. For example: CC_ CITY=Redwood Shores CC_STATE No A string. For example:CC_ STATE=CA CC_COUNTRY No A string. For example: CC_ COUNTRY=USA CC_ZIPCODE No A string. For example: CC_ ZIPCODE=94065 bankAccountData The Bank Account structure defined in wallet.properties. All of the fields are returned as request parameters. Configuring the Out-of-the-Box Applications 8-97 m-Commerce Applications Table 8–50 describes the parameters of this optional group. Table 8–50 Parameters of the bankAccountData Group Parameter Name Mandatory Description Valid Value BA Yes The short name for the bank account A string. For example: BA=Checking ****-2438 BA_HOLDER_NAME Yes The name of the holder of the bank account. A string. For example: BA_ HOLDER_NAME=John Doe Statement Address this is a link to the user’s Location Marks A string. For example: BA_ HOLDER_ADDRESS_ LANDMARK=Palo Alto branch of Western Union BA_HOLDER_ADDRESS_LANDMARK Yes Restriction: This landmark must be defined in the location application. BA_ACCT_NUMBER Yes The number of the bank account. A string. For example: BA_ ACCT_NUMBER=23894592 Restriction: this can only be numbers; all other characters are ignored. BA_ACCT_TYPE Yes The type of account, such as checking or savings. Checking, Savings,Market-Rate. For example: BA_ACCT_ TYPE=Checking BA_FI_ROUTING_NUMBER Yes The routing number of the bank. A string. For example: BA_FI_ ROUTING_ NUMBER=23985002394 Restriction: this must only be numbers; all other characters are ignored. BA_FI_NAME 8-98 Administrator’s Guide Yes The name of the bank. A string. For example: BA_FI_ NAME=Bank of America m-Commerce Applications Table 8–50 Parameters of the bankAccountData Group Parameter Name Mandatory Description BA_LANDMARK_NAME Yes Valid Value The parameters for A string. For example: BA_ the bank’s street LANDMARK_NAME=Palo Alto address (such as BA_ branch of Western Union ADDRESS_LINE1) are built "on-the-fly", as the Wallet application knows that Billing Address is a reference to a Location Mark. Restriction: This landmark must be defined in the location application. BA_ADDRESS_LINE1 No A string. For example: BA_ ADDRESS_LINE1=2035 Island Parkway BA_ADDRESS_LINE2 No A string. For example: BA_ ADDRESS_LINE2=Apt. #P-24 BA_CITY No A string. For example: BA_ CITY=Menlo Park BA_STATE No A string. For example: BA_ STATE=CA BA_COUNTRY No A string. For example: BA_ COUNTRY=USA BA_ZIPCODE No A string. For example: BA_ ZIPCODE=91750 idData The Extended Information structure defined in wallet.properties. All of the fields are returned as request parameters. The idData group contains the following parameters, described in Table 8–51. This is an optional group: Configuring the Out-of-the-Box Applications 8-99 m-Commerce Applications Table 8–51 Parameters of the idData Group Parameter Name Mandatory Description Valid Value ID_SSN No The Social Security Number A string. For example: ID_SSN=298459825 ID_DL No A driver’s licence number A string. For example: ID_DL=B239922023 ID_DL_STATE No The state in which the driver’s license has been issued. A string. For example: ID_DL_STATE=CA ID_DL_EXP_DATE No The expiration date of the driver’s license. A string. For example: ID_DL_EXP_ DATE=04/27/2007 Restriction: The format (MM/DD/YYYY,) is defined in the wallet.properties. ID_PASSPORT No A passport number A string. For example: ID_ PASSPORT=B293A923CK ID_PASSPORT_ EXP_DATE No The expiration date of the passport. A string. For example: ID_PASSPORT_EXP_ DATE=04/08/1997 Restriction: The format (MM/DD/YYYY) is defined in the wallet.properties. 8.5.3.5 Extending the Wallet Structure You can configure the structure of the Wallet so that its contents can be personalized according to usage. The Wallet structure is defined in the wallet.properties file located under the following directory: $ORACLE_HOME\wireless\j2ee\applications\modules \modules-web\WEB-INF\classes\oracle\panama\module\commerce\wallet \wallet.properties This file contains the definitions for credit cards, bank accounts and extended information. In addition, this file contains the definition of the formats used for each field. The format definitions are used for internationalization purposes of the dates. 8-100 Administrator’s Guide m-Commerce Applications Defining a Compartment To define a compartment, When defining a compartment: 1. Add a reference to this compartment in the compartments key: compartments=CREDIT_CARD,BANK_ACCOUNT,ID 2. Add the total number of fields in this new compartment: CREDIT_CARD.fieldnumber=6 3. Add all the fields for this compartment and add attributes for each field. You can add up to six attributes (0 - 5) The variable is built as follows: <comparment_name>.fieldNN.itemNN=<value>, where: compartment_name = current compartment name, i.e. CREDIT_CARD fieldNN = represents the current field, starting in 1, i.e. CREDIT_ CARD.field1 itemNN = represents each attribute of this field, starting in 0, i.e. CREDIT_CARD.field1.item0 The attributes are defined as follows: – The application reads variables from the request to retrieve a value for an specific field from the wallet. This variable name is defined in the attribute #0 CREDIT_CARD.field1.item0=<request_variable_name, i.e. CC_HOLDER_NAME> – The label that appears to the end user is defined in the attribute #1. It is a key to a value defined in portal.properties (for internationalization purposes). CREDIT_CARD.field1.item1=<key.in.portal.properties, i.e. modules.commerce.wallet.creditcard.holdername – Each field can be either optional or mandatory, depending on the compartment rules. This is defined in attribute #2. CREDIT_CARD.field1.item2=<MANDATORY|OPTIONAL> – The format of this field (for display on WML and HDML WAP devices) is defined in attribute #3 and is a reference of a format previously defined in wallet.properties Configuring the Out-of-the-Box Applications 8-101 m-Commerce Applications CREDIT_CARD.field1.item3=<format, i.e. MIXED_FORMAT, NUMBER_FORMAT, DATE_FORMAT> – If the field contains a list of possible values, such as credit card types, then they are listed in attribute #4. Use a comma (,) to separate these values. CREDIT_CARD.field1.item4=<comma-separated list of values, i.e. Visa, Master, AmEx, Discover, Diners> – Attribute #5 is used if the current field stores an address by having a reference to an existing location mark. CREDIT_CARD.field1.item5=<LINK_LOC> 8.5.4 Transcoder The Transcoder application (also called WML translator) reformats WML documents and resources on the Web, making them available on any devices by translating the remote WML resource into Oracle Application Server Wireless XML. The Wireless XML is then transformed into the appropriate device-specific markup language. 8.5.4.1 Required Software The Transcoder application does not require any third-party software. 8.5.4.2 Configuration Parameters The Transcoder application includes the following configuration parameters. ■ Application Setup OMP URL The OMP reference to the group of URLs. ■ ■ Valid Values: An OMP URL pointing to the Application Setup ■ Default Value: omp://oracle/applications/appsetup ■ Examples: Navigation XML file Points to an XML file that can be accessed either through a URL or a file on server’s local file system. The XML contains the navigation specification. ■ Valid Values: ■ A URL 8-102 Administrator’s Guide m-Commerce Applications ■ A fully qualified file name ■ Default Value: ■ Example: http://localhost:7777/modules/transcoder/navitems.xml The sample Navigation XML file is as follows: <?xml version="1.0" encoding="UTF-8"?> <Navigation> <NavigationItems> <Item target="%value home.url%" label="Home" showAs="Link" preferredLocation="Header" /> <Item target="%value service.parent.url%" label_prefix="Back" showAs="Link" /> <Item target="http://www.oraclemobile.com" label="OracleMobile" showAs="Button" preferredLocation="Footer" /> </NavigationItems> </Navigation> Each navigation item has the following six attributes, which are described in Table 8–52. Configuring the Out-of-the-Box Applications 8-103 m-Commerce Applications Table 8–52 Navigation Item Attributes Mandatory Meaning target The location of the Yes resource. Either a fully-qualified URL, or a placeholder for mobile context, such as portal home, service home. N/A label The label displayed for the end user. No. This is an optional attribute. A string value. N/A label_prefix The prefix to the label. No. This is an optional attribute. This attribute is meaningful only for a mobile context, such as portal home. label_suffix The suffix of the label. No. This is an optional attribute. This attribute is meaningful only for a mobile context, such as portal home. showAs How to display the No. This is an label. optional attribute. A menu item, link, or button. A button preferredLocation Where to display the label. A header, or footer. A header No. This is an optional attribute. Accepted Values Default Values Attribute Name The schema for the navigation XML is as follows: <?xml version="1.0" encoding="UTF-8"?> <xs:schema xmlns:xs="http://www.w3.org/2001/XMLSchema" elementFormDefault="qualified" attributeFormDefault="unqualified"> <xs:element name="Navigation"> <xs:complexType> <xs:all> <xs:element ref="NavigationItems" minOccurs="0"/> </xs:all> </xs:complexType> </xs:element> <xs:element name="NavigationItems"> <xs:complexType> 8-104 Administrator’s Guide m-Commerce Applications <xs:sequence> <xs:element ref="Item" minOccurs="0" maxOccurs="unbounded"/> </xs:sequence> </xs:complexType> </xs:element> <xs:element name="Item"> <xs:complexType> <xs:attribute name="target" type="xs:string" use="required"/> <xs:attribute name="label" type="xs:string" use="optional"/> <xs:attribute name="label_prefix" type="xs:string" use="optional"/> <xs:attribute name="label_suffix" type="xs:string" use="optional"/> <xs:attribute name="showAs" type="xs:string" use="optional"/> <xs:attribute name="preferredLocation" type="xs:string" use="optional"/> </xs:complexType> </xs:element> </xs:schema> Show MyHome Link While the Show MyHome Link parameter is supported, it is ignored when the Navigation XML file is valid. ■ Show MyHome Link Controls whether to display My Home as a link or as a menu in each translated page. It is only effective for microbrowsers. ■ Valid Values: * none: Does not display additional navigation items. * link: Displays a hyperlink pointing to portal home. * menu: Displays a button or a menu item pointing to portal home. * both: Displays both a hyperlink and a button or menu item pointing to portal home. * parent_menu: Displays a button or menu item pointing to parent folder. * parent_link: Displays a link pointing to parent folder ■ Default Value: menu ■ Examples: parent_menu The following three configuration parameters are deprecated: Configuring the Out-of-the-Box Applications 8-105 m-Commerce Applications ■ WML-MXML XSL File The location to the WML-MobileXML stylesheet. A default location is used if this parameter is not defined. ■ ■ Valid Values: ■ Default Value: ■ Examples: Translator Helper Class The class implementing the WML-MXML translation. ■ ■ ■ ■ Valid Values: Default Value: oracle.panama.module.commerce.translator.WMLTransformImpl Examples: WML Connection Class The class implementing the HTTP connection to the WML site. ■ ■ ■ Valid Values: Default Value: oracle.panama.module.commerce.translator.WMLConnectionImpl Examples: 8.5.4.3 Linking to the Transcoder Application You can link to the Translator application using the following virtual URL: omp://oracle/services/commerce/translator The application can be invoked by passing the WML source URL in the request parameter, XLTORSITE. For example, to invoke www.oraclemobile.com, you can use the following URL in your Wireless XML omp://oracle/services/commerce/translator?XLTORSITE=http%3A%2F%2Fwww. oraclemobile.com 8-106 Administrator’s Guide 9 Wireless Gateway Configuration This chapter describes how to configure Wireless for voice and messaging communications through the following sections: ■ Section 9.1, "Configuring Wireless for Browser-Based Applications" ■ Section 9.2, "Configuring Wireless for Voice Applications" ■ Section 9.3, "Configuring Wireless for Async-Enabled Applications" ■ Section 9.4, "Configuring Wireless for Notifications" 9.1 Configuring Wireless for Browser-Based Applications This section describes how to configure Wireless for PocketPCS, Palm, and WAP phone applications. Topics include: ■ Section 9.1.1, "Configuring Wireless for PocketPCs" ■ Section 9.1.2, "Configuring Wireless for PALM" ■ Section 9.1.3, "Configuring Wireless for WAP" 9.1.1 Configuring Wireless for PocketPCs This section describes the procedures for configuring Oracle Application Server Wireless to PocketPCS. Topics include: ■ Section 9.1.1.1, "Connecting to the Network" ■ Section 9.1.1.2, "Accessing the Wireless Server Using Internet Explorer" ■ Section 9.1.1.3, "Setting Up the Internet Explorer Home Page" Wireless Gateway Configuration 9-1 Configuring Wireless for Browser-Based Applications 9.1.1.1 Connecting to the Network To access the Wireless server from your Pocket PC device, connect the device to the network. If the Wireless server is on your corporate Intranet, then you must connect your device to your corporate Local Area Network (LAN). If the Wireless server is on the Internet, then you must connect to your Internet Service Provider (ISP). There are different ways to connect your Pocket PC device to your corporate LAN or to your ISP, and they are all documented in the Pocket PC Connection Manager tutorial at: http://www.microsoft.com/mobile/pocketpc/tutorials/connectionmanager/defa ult.asp 9.1.1.2 Accessing the Wireless Server Using Internet Explorer To access the Wireless server using Internet Explorer: 1. Open Internet Explorer by clicking Start in the desktop, then by selecting Internet Explorer. If you are already in Internet Explorer, go to Step 2. 2. Select View, and then Address Bar to display the Internet Explorer Address Bar (If the Internet Explorer Address Bar is already shown, go to Step 3.) 3. Enter the URL to the Wireless server in the Address Bar and click the GO button (represented as a green arrow). 9.1.1.3 Setting Up the Internet Explorer Home Page Once connected to the main page on the Wireless server, you can make that page the Home Page for your Internet Explorer. Doing so saves from entering the URL every time. 1. While still displaying the Wireless server main page select Tools, then Options.... 2. Select Use Current button in the Home page section. 3. Select OK. 9.1.2 Configuring Wireless for PALM There are two types of Palm devices for connecting to the Internet and Intranet: ■ ■ 9-2 Devices with built-in wireless Internet access (Palm.Net® ready) - Palm i705 Devices that require an Internet Service Provider (ISP) account and data-enabled phone or modem to access the Internet - Palm m515, Palm m505, Palm m500, Palm m130, Palm m125 Administrator’s Guide Configuring Wireless for Browser-Based Applications If you have a device with built-in wireless Internet access, then you need only to activate your wireless service to connect your device to the Internet. Refer to http://www.palm.com/products/palmi705/wireless.html for more information about Wireless Connectivity with Palm.Net® Service. If your device does not have built-in Internet access, then you need an ISP account and either a data-enabled phone or a Palm modem. (You can use a data-enabled phone or a Palm modem with Palm i705 as well.) 9.1.2.1 Configuring the Connection Method To configure the connection method: 1. Open Preferences by clicking the Press icon. 2. Select Connection. 3. Select the connection method from the list of Available Connections. 9.1.2.2 Configuring an ISP Account To configure the ISP account. 1. Open Preferences by clicking the Press icon. 2. Select Network. 3. Select the Service value from the drop down list. 4. Enter your user name. 5. Enter your password. 6. Select the connection type from the drop down list. 7. Enter the phone number. 8. Click the Connect button to test the settings. If your handheld device supports more than one-way to connect to the Internet, you may choose your preferred method. 1. Open Preferences by clicking the Prefs icon. 2. Select Web Clipping. 3. Select the connection name from the drop down list. Wireless Gateway Configuration 9-3 Configuring Wireless for Browser-Based Applications 9.1.2.3 Accessing the Wireless Server Using MyPalm Application If you have a Palm device with built-in wireless Internet access and you have activated your wireless service, then you can use the Palm native web browser to access a wireless server. 1. Open MyPalm application by clicking the MyPalm icon. 2. Enter the URL to the wireless server and click the Go button. 9.1.2.4 Installing Blazer Web Browser To install Handspring’s Blazer browser: 1. Download the Blazer browser software from http://blazer.handspring.com 2. Follow the installation instructions provided by Handspring at: http://www.handspring.com/software/how_to.jhtml. (General instructions about installing software on Palm devices are available here: http://software.palm.com/download.jsp) 9.1.2.5 Accessing the Wireless Server Using Blazer 1. Open Blazer by clicking the Blazer icon. 2. Click the Go to Web Page icon (the opened folder icon). 3. Enter the URL to the wireless server and click the OK button. Tip: Create a bookmark so that you do not need to repeatedly enter the URL. 9.1.3 Configuring Wireless for WAP WAP devices use the WAP protocol for communication. Because the Wireless server does not support the WAP protocol directly, you need a WAP gateway to convert the WAP protocol to HTTP(S). If you connect to the Internet through your Wireless service provider, then the carrier must have already configured a WAP gateway for you. However, if you connect to the Internet or Intranet through a dial-up (PPP connection), then you must install and configure a WAP gateway. 9.1.3.1 Installing and Configuring a WAP Gateway Ensure that the WAP gateway you plan to install is a certified WAP gateway. The certified WAP gateways are listed at: 9-4 Administrator’s Guide Configuring Wireless for Browser-Based Applications http://mobile.us.oracle.com/ompm/site/product/devices/certified/certified_ gateways_wap.jsp. Follow the installation instructions provided by your WAP gateway vendor. Some gateways (WAPLite, for example) have a configuration parameter for the Default WML Home Page. Set this parameter to the Wireless server main page to save users from entering this parameter repeatedly. 9.1.3.2 Configuring a WAP Phone The WAP phone configuration is specific to the phone model and to the wireless service provider. In general, the phone must be configured for a dial-up network connection (this is not applicable to GPRS phones), the WAP gateway, and the home URL for your WAP browser. Generally, your phone is reconfigured by your wireless service provider to connect to their own WAP gateway. Some wireless service providers hide the phone settings to prevent the user from changing them. In most cases, you do not need to change the phone network settings; instead, to access the wireless server from a WAP phone, you need only enter the URL of the wireless server into the phone’s WAP browser. (See the phone’s user's manual for instructions on opening the WAP browser.) Wireless serves requests from different devices, including Palm, Pocket PC, and WAP. These devices must be configured so that they can access the Wireless server. Requests from these devices to the wireless server come through an HTTP(S) protocol Protocol transformation gateway may be used in some cases to convert the device native network protocol to HTTP(S). Note: The URL to the Wireless server must be configured for all devices. If the Wireless server is installed on host host.domain, then the default URL for HTTP and HTTPS protocols are: ■ http://host.domain:7777/ptg/rm ■ https://host.domain:4443/ptg/rm Consult with your Wireless server administrator for the exact URL to your Wireless server. Wireless Gateway Configuration 9-5 Configuring Wireless for Voice Applications 9.2 Configuring Wireless for Voice Applications After Wireless has been installed and configured, the Oracle-hosted voice gateway enables you to immediately access both out-of-the-box applications and custom-built voice applications from voice devices. For more information, go to http://mservice.oracle.com. This section provides information on configuring your own voice gateway using the VoiceGenie developer studio as an example. 9.2.1 Prerequisites To configure voice access to Wireless, you must have access to an Oracle-accepted third-party VoiceXML gateway and the Voice.ear file (included with Wireless). Wireless has been tested against a number of VoiceXML gateways. The list of accepted gateways is located at: http://otn.oracle.com/tech/wireless/integration/content.html Follow the third-party provider’s instructions to properly install and configure your VoiceXML gateway. If you do not have access to a VoiceXML gateway, a number of gateway providers have hosted gateways for developers that can be utilized, free of charge, for development and testing purposes. For example, VoiceGenie maintains a developer studio at http://developer.voicegenie.com, where users can sign up for a development account that provides them with 10 extensions into a voice gateway. From this Web site, users configure each of their extensions to point to different URLs. To configure voice access to Wireless, you must set up an extension to point to the URL outlined in Section 9.2.3. Setting up the Accounts Obtain a VoiceGenie developer account by visiting http://developer.voicegenie.com. Follow directions at that site. 9.2.2 Configuring and Testing Voice-Enabled Applications The Wireless server provides pre-configured voice portal which contains the following mobile applications. 9-6 ■ Email ■ Address Book with Voice Dialing ■ Calendar Administrator’s Guide Configuring Wireless for Voice Applications ■ Corporate Directory ■ Files These user-friendly applications have an enhanced voice user interface. The voice portal is comprised of the Main Menu master application. Table 9–1 describes the input parameters of the Main Menu master application. Table 9–1 Input Parameters of the Main Menu Master Application Parameter Default Value ORACLE_SERVICES_PIM_MESSAGE_ INPUT_ ENCODING UTF-8 ORACLE_SERVICES_PIM_MAIL_PROTOCOL IMAP ORACLE_SERVICES_PIM_MAIL_SERVER_NAME The name of your email server (localhost). ORACLE_SERVICES_PIM_MAIL_SERVER_PORT The email server port. For IMAP, the value is 143; for POP, the value is 110. ORACLE_SERVICES_PIM_MAIL_SMTP_SERVER_NAME The name of the SMTP server. ORACLE_SERVICES_PIM_MAIL_AUTODOMAIN The domain of your organization (for example, oracle.com). ORACLE_SERVICES_PIM_MAIL_FOLDER_INBOX Inbox (or the name of the folder that loads during startup). ORACLE_SERVICES_PIM_MAIL_FOLDER_SENT Sent (or the name of the folder that receives saved messages). ORACLE_SERVICES_PIM_MAIL_DEFAULT_ EMAILDOMAIN The default email domain (for example, oracle.com). ORACLE_SERVICES_PIM_MAIL_MSGFETCH_SETSIZE 200 ORACLE_SERVICES_PIM_MAIL_SERVER_CONNECT_ TIMEOUT 2000 ORACLE_SERVICES_PIM_MAIL_AUDIO_TMP_DIR The UNIX directory for the audio files. Note: This parameter must be designated as Modifiable. ORACLE_SERVICES_PIM_MAIL_AUDIO_TMP_URL The URL pointing to the UNIX directory of the audio files. ORACLE_SERVICES_PIM_MAIL_MAIL_CONFIG_ CLASS oracle.panama.module.pim.mail.util.Config ORACLE_SERVICES_PIM_CALENDAR_SERVER_NAME scheduler:cal:suncal01.us.oracle.com:1522:GMCAL :flows:oo:gmmail.oraclecorp.com:143 Wireless Gateway Configuration 9-7 Configuring Wireless for Voice Applications Table 9–1 Input Parameters of the Main Menu Master Application Parameter Default Value ORACLE_SERVICES_PIM_CALENDAR_DOMAIN OracleDomain ORACLE_SERVICES_PIM_MAIL_OID The OID (object ID) of the Mail application as displayed in the browsing screen of the Content Manager. See Section 9.2.3.2.1 for more information on retrieving this value. ORACLE_SERVICES_PIM_CALENDAR_OID The OID (object ID) of the Calendar application as displayed in the browsing screen of the Content Manager. See Section 9.2.3.2.1 for more information on retrieving this value. This application is the template for the Voice Main Menu application link (an alias to the Main Menu application, which can be customized and distributed to user groups). The Voice Main Menu application, which you access from the Content Manager (one of the Wireless Tools), also has these input values; however, the input value names and values cannot be changed unless the Application Developer designates them as Modifiable in the Main Menu master application, which is accessed through the Service Manager tool. For information about the Voice Main Menu application, see Section 9.2.3.2. For more information on application links, see Chapter 5, "Managing Content". For more information on creating a master application, see the Oracle Application Server Wireless Developer’s Guide. 9.2.3 Provisioning Voice Access To enable voice access, you provision a voice gateway phone number to the following URL: <server-name>:<port>/ptg/rm?PAlogin=true&PAlocale=<locale> Where the port is the WebCache listening port number 7777 (the default port number) and the port number range is 7777 to 7877. You must specify the locale for a language other than English; if the locale is English, however, then you do not need the PAlocale attribute. You specify the locale using the two-letter Java locale format (the two-letter Java country code is optional). For example, to define the PAlocale attribute as French-Canadian, you enter fr_CA (fr is the Java locale, CA is the country code). 9-8 Administrator’s Guide Configuring Wireless for Voice Applications This provisioning scheme contacts the voice login service for the Wireless server. After users login, a main menu displays, which lists all of the applications that they can access. Note: Users must provide their account numbers and PINs to access the portal. Use the PAoid=<oid> attribute to enable users to log into a particular application, such as the Voice Main Menu. For the Voice Main Menu to execute the playlist items (the number of new email messages and appointments), use the start=true attribute. 9.2.3.1 Provisioning Mobile Studio for Voice Access When provisioning Mobile Studio for voice access, point the VoiceXML gateway to a URL for a start or login page in the Wireless and Voice Portal in the form of http://<hostname>/ptg/rm 9.2.3.2 Setting up the Voice Main Menu Service In addition to regular voice access, Oracle Application Server Wireless also provides a voice portal that plays the number of new messages and appointments for the user and contains links to such PIM applications as mail, calendar, address book, files, and directory. Using the Content Manager This section includes a discussion on how to use the Content Manager, one of the Oracle Application Server Wireless Tools, to enable applications to return to the Voice Main Menu application and how to optimize the loading of the mail application to improve user performance. For more information on using the Content Manager, see Chapter 5, "Managing Content". To access the Content Manager, you must be granted either the Super User or Content Manager roles. For more information on user roles, see Section 4.1.1 in Chapter 4, "Managing Users". For information on logging into the Oracle Application Server Wireless Tools (including the Content Manager), see Section 2.3 in Chapter 2, "Verifying the Wireless Installation". 9.2.3.2.1 Provisioning the Voice Main Menu Application To set up the voice portal, provision a telephone number to: Wireless Gateway Configuration 9-9 Configuring Wireless for Voice Applications http://<server-name>:<server-port>/ptg/rm?PAlogin=true&PAoid=<oid of Voice Main Menu>&start=true" You define the PAOID attribute using the OID (Object ID in the Wireless Repository) of the Voice Main Menu application, which is listed in the Object OID column of the browsing and search result tables of the Content Manager. (For example, the Object ID for the Voice Main Menu application is noted as 303 in Figure 9–1.) To find this number, you first log into the Wireless Tools and then select the Content Manager (the Content tab, as illustrated in Table 9–1). The Content Manager defaults to the Publish Content subtab, displaying the browsing screen. From the table listing application links, find the Voice Main Menu application. Its OID is listed on the same row in the Object ID column. You can also use the Content Manager’s search functions to retrieve the Voice Main Menu application. For more information on searching for an application link in the Content Manager, see Section 5.3.1 in Chapter 5, "Managing Content". Figure 9–1 Getting the OID for the Voice Main Menu Application 9.2.3.2.2 Returning to the Voice Main Menu Application To ensure that applications return to the Voice Main Menu after a user says "main menu", you edit the application by entering the following Oracle Mobile Protocol (OMP) URL that points to the Voice Main Menu: omp://oracle/services/voice/mainmenu Use the Content Manager’s application link editing functions to add this URL as follows: 1. 9-10 Log into the Wireless tools. Administrator’s Guide Configuring Wireless for Voice Applications 2. Select the Content tab to access the Content Manager. The Publish Content subtab appears, displaying the current Wireless applications in the Application Links table. 3. From the table, select the Voice Main Menu application. 4. Click Edit. The Edit Application Link screen appears, defaulting to General screen. 5. Enter omp://oracle/services/voice/mainmenu in the OMP URL field. If you leave this field blank, then the applications return to the default main menu renderer. 6. Click Apply to save your changes. Figure 9–2 Entering the OMP URL for the Voice Main Menu 9.2.3.2.3 Saving Presets in the Customization Portal To use the Mail, Address Book, Voice Mail, Calendar, or Files applications, users must save their login credentials through the Wireless Customization Portal or from the Wireless and Voice Portal. For the portal, users must enter their user account credentials for the Mail, Address Book, Voice Mail, Calendar, and Files applications and click Save Password. 9.2.3.2.4 Configuring the Voice and Wireless Applications By default, the Mail, Address Book, Voice Mail, Calendar, and Files applications are configured out-of-the-box with the installation of Oracle Application Server. If you do not use Oracle Application Server, however, then you must configure the input parameters of these applications using the Content Manager as described in Steps 1 through 4 in Section 9.2.3.2.2. Wireless Gateway Configuration 9-11 Configuring Wireless for Voice Applications The online help invoked from the Content Manager provides you with instructions on editing the input parameters. When editing the input parameters of the Mail application: ■ ■ The parameter, ORACLE_SERVICES_PIM_MAIL_AUDIO_TMP_DIR, must have read and write permissions for user groups. The URL value entered for the parameter, ORACLE_SERVICES_PIM_MAIL_ AUDIO_TMP_URL, must point to the value entered for ORACLE_SERVICES_PIM_MAIL_AUDIO_MAIL_AUDIO_TMP_URL. Click Apply to save your changes. 9.2.3.2.5 Configuring the Voice Main Menu to Prefetch the Mail Application You can configure the Voice Main Menu application so that it can prefetch the mail application, enabling it to load more quickly and thus improve the user experience. To configure the Voice Main Menu application to prefetch the mail application: ■ ■ ■ The ORACLE_SERVICES_MAINMENU_PREFETCH input parameter is set to true. (Using the Content Manager, you can only edit the input parameters of an application which have been designated as Modifiable by the Service Manager. For more information, refer to the Oracle Application Server Wireless Developer’s Guide for information on developing master applications.) The parameter, ORACLE_SERVICES_PIM_MAIL_AUDIO_TMP_DIR, must have read and write permissions for user groups. The URL value entered for the parameter, ORACLE_SERVICES_PIM_MAIL_ AUDIO_TMP_URL, must point to the value entered for ORACLE_SERVICES_PIM_MAIL_AUDIO_MAIL_AUDIO_TMP_URL. Click Apply to save your changes. The mail application now loads faster. See Chapter 5, "Managing Content" for more information on editing application links. 9.2.3.3 Configuring the Voicemail Application The configuration for the Voicemail application link is the same as the configuration for the email application, except that the value for ORACLE_SERVICES_PIM_ MAIL_FILTERMODE parameter must be defined as voicemail. For example: ORACLE_SERVICES_PIM_MAIL_FILTERMODE=voicemail 9-12 Administrator’s Guide Configuring Wireless for Voice Applications The Voicemail application filters email messages based on the x-orcl-messagetype=voice-message header. 9.2.4 Testing the Voice Portal To access the voice-enabled applications for testing, you must first dial the provisioned phone number. You then create a user account with the User Manager. Once the account has been created, (that is, after you have entered both the PIN and a Primary Phone Number), the Voice Main Menu plays. For more information on creating a user account, see Section 4.5.). This section details the following ■ Section 9.2.4.1, "Testing the General Commands" ■ Section 9.2.4.2, "Testing the Email Application" ■ Section 9.2.4.3, "Testing the Calendar Application" ■ Section 9.2.4.4, "Testing the Oracle Files" ■ Section 9.2.4.5, "Testing the Directory Application" ■ Section 9.2.4.6, "Testing the Address Book Application" 9.2.4.1 Testing the General Commands The commands described in Table 9–2 must always take you to the appropriate place in the voice portal: Table 9–2 Voice Portal Commands Command Location Main Menu This command must always take users to the voice main menu. If you hear a TTS (text to speech) read-out of the main menu, then the application contains a bug. Note the place in the application where this bug occurred. Help This universal command retrieves help for the application. The help must be context-sensitive. Cancel This universal command, which takes users from their current place in the application to a previous place in the application, functions similarly to the Back command in a browser. Be sure that this command takes users back to an appropriate place. Wireless Gateway Configuration 9-13 Configuring Wireless for Voice Applications Table 9–2 Voice Portal Commands Command Location Goodbye This command takes users to an exit dialog and wait for about three seconds to allow an appropriate interval for users to say "Cancel". Noinput An action (not a command) that occurs when a user does not say a command for approximately four seconds. This dialog should inform the user to speak or it should offer appropriate help. Nomatch An action (not a command) that occurs when the system cannot recognize a user’s command. The system should ask the user to repeat the phrase, or provide help on valid utterances. Links to Other Applications Depending on the setup of the voice portal, users can access any application at any point by saying the name of the application. The following applications are available out of the box: ■ Email ■ Address Book ■ Oracle Files ■ Calendar ■ Directory Users must be able to access this applications at all times. To add more commands to the global grammar, modify the following file for links between module applications: <iasw-root>/iaswv20/wireless/j2ee/applications/modules/modules-web/common/jsp /globalGrammar.jsp Modify the following file for the My Oracle main menu, or another .JSP for a personalized menu: <iasw-root>/iaswv20/wireless/j2ee/applications/voice/voice-web/mainmenu/MOC Grammar.jsp 9.2.4.2 Testing the Email Application The Email application reads an email message on any configured IMAP or POP3 server. By default, the application begins reading the messages from the Inbox folder. The application reads a bucket of New Messages before reading from the Old 9-14 Administrator’s Guide Configuring Wireless for Voice Applications Messages bucket. The application reads the messages continually until the user commands it to stop. The application orders the New Messages from the oldest unread message to the newest unread message. The application orders the Old Messages from the newest read message to the oldest read message. The email application responds to voice commands described in Table 9–3. Table 9–3 Email Commands Command Description Skip (or Next) Takes the user to the next message. Previous Takes the user to the previous message. First Takes the user to the first message in the current bucket. Last Takes the user to the last message in the current bucket. New Messages Takes the user to the New Messages bucket and checks for any recent messages added to the server. Old Messages Takes the user to the Old Messages bucket. Delete Marks a message to be deleted and then takes the user to the next message. Repeat Repeats the current message. Reply Initiates a dialog which asks the user to record a reply message. This dialog includes the following commands: ■ ■ Send it -- Sends the message and takes the user to the next message. Cancel it -- Cancels the message and takes the user back to the original message. Folders Enables the user to select another to open (and listen to its contents). This command initiates a dialog which asks a user to select a particular folder and then press a DTMF tone which corresponds to that folder. The application reads aloud nine folders at a time. Use the More command to go to the next set of nine folders. Move Message Initiates a dialog similar to the Folders dialog, one that enables a user to move a message to a selected folder. The message is marked for deletion from the initial folder after it has been moved. Wireless Gateway Configuration 9-15 Configuring Wireless for Voice Applications Table 9–3 Email Commands Command Description Fax Message Enables users to fax the body of a message to a specified number. The application prompts the user for the number. The user can say "Cancel" to return to the message. Fax All Enables users to fax the body of a message and all of its attachments to a specified number. The application prompts the user for the number. The user can say "Cancel" to return to the message. Fax Attachment Faxes a specific attachment to the message. You must test email using different types of messages to ensure that each message type functions. Populate the Inbox with the following types of messages: ■ A message with the ampersand (&) or other escape characters in the From field, subject line, or body. ■ A message with an audio attachment from Unified Messaging. ■ A message with a regular audio attachment. ■ A message with an audio reply generated by the voice email service. ■ A message with other attachments that have various names and characters (especially space). ■ A lengthy message. ■ International messages. 9.2.4.3 Testing the Calendar Application The calendar application enables users to listen to, and create, calendar appointments. The application reads the appointments for the current day first. Table 9–4 describes the Interrupt commands, which enable a user to interrupt the playback of appointments at any point (even after the playback of an appointment has completed). 9-16 Administrator’s Guide Configuring Wireless for Voice Applications Table 9–4 Interrupt Commands Command Description Next Appointment Takes the user to the next appointment in the current day. Previous Appointment Takes the user to the previous appointment in the current day. Next Day Takes the user to the next day immediately after the current day that the user is accessing. Goto Day Presents users with a dialog that enables them to say the date (that is, the specific day) that they would like to hear. This dialog accepts natural language, such as August 9th, 2003, or tomorrow or yesterday for relative dates. Delete Appointment Deletes the current appointment. New Appointment Presents users with a dialog in which they enter a new appointment for a particular date. To enter an appointment, users must provide the following information: ■ The date of the appointment. ■ The start time of the appointment. ■ The end time of the appointment. ■ Spell Title. ■ Spell Location. ■ Appointment type. ■ Sharing? ■ All-day event? Some of these entries may differ (or may not exist) depending on the backend. 9.2.4.4 Testing the Oracle Files The voice version of the Oracle Files application enables users to browse directories, listen to the descriptions of the file names, and then either fax or delete the file. Table 9–5 describes the voice commands used when browsing folders: Wireless Gateway Configuration 9-17 Configuring Wireless for Voice Applications Table 9–5 Voice Commands for Browsing Folders Command or Name Description Foldername The filename, or DTMF equivalent in the current folder, such as Example.doc or press 1. Parent Folder Takes the user up one level. Home Folder Takes the user to the highest level. 9.2.4.5 Testing the Directory Application The Directory application enables users to search for other users in a corporate directory by spelling the name of the user. Note: Because the spelling dialog is experimental, users may experience some difficulty. In the first dialog, user select the type of search they want to perform. For example, users can select Search by Name or Search by Email. If only one type of search is available, then this dialog is skipped. The second dialog asks users to spell the name of the person they are searching for. In addition to providing letters, users can also use the commands for searching corporate directories, which are described in Table 9–6. Table 9–6 Voice Commands for Searching a Corporate Directory Command Description Complete Finishes the spelling dialog and performs the search. Delete Deletes the last letter entered by the user. String so far Pronounces the search string up to the last letter entered. More help Plays additional search string options, including special characters. In the results dialog, 9-18 Administrator’s Guide Configuring Wireless for Async-Enabled Applications 9.2.4.6 Testing the Address Book Application The Address Book application enables users to listen to the details of contact in the address book, or to call or email someone. A natural interface is also available for this application, which enables quick calling or emailing. Users retrieve the contact details by saying the name of the person, or by pressing the appropriate key tone when prompted. Users hear a list of contacts by saying "List". The contact details dialog enables The Address Book application responds to the voice commands described in Table 9–7. Table 9–7 Voice Command for the Address Book Application Command Description Call Work Calls someone at their office number. Call Home Calls someone at their home number. Call Mobile Calls someone’s mobile phone. Email Person Initiates an email composing dialog. Address Book Menu Returns the user to the main Address Book Menu. The Address Book Menu includes the following quick commands: ■ Call <person name> at work. ■ Call <person name> at home. ■ Call <person name> on the mobile phone. ■ Email <person name>. ■ Details for <person name>. 9.3 Configuring Wireless for Async-Enabled Applications Async-enabled Wireless applications can be accessed using such messaging devices as an SMS phone (two-way text message capable), two-way pagers and email. Async-related terms in Wireless include the following: ■ ■ Site address—The entry point to the Async Listener, akin to a URL to a web site. Users send messages to the address to invoke the target application. Wireless’ Async supports includes email addresses and SMS phone numbers. Service short name—A site-wide unique name that identifies a Wireless service. Device users send messages to the site address with service short names in the Wireless Gateway Configuration 9-19 Configuring Wireless for Async-Enabled Applications message body to invoke the corresponding service. For example a message is sent to site address [email protected], with the short name stk. This invokes the stock service built on top of Wireless (assuming a Wireless service was given the short name stk and [email protected] was designated as a site address for messaging devices to access Wireless services). ■ Messaging Server—Built on top of the Wireless Messaging System, Async can support multiple transport protocols. To enable Async, you must configure the messaging capability of a particular network, and a messaging driver supporting such a protocol (with two-way capability) for the underlying Messaging Server. See the Oracle Application Server Wireless Developer’s Guide for more information on Async features. 9.3.1 Configuring Email-based (Two-Way Pager) Access To configure email-based access: 1. Select one or more site-addresses as the Async email entry points to the site. 2. Add the site-addresses onto the Wireless system. For more information, see Section 3.3.1. The designated site addresses should be configured on the underlying Messaging Server. For example, to receive messages for a site-address such as [email protected], you must know the mail server which hosts the account, the protocol used (IMAP or POP3), and the user name and password. You must then create and configure an email driver instance so that messages sent to [email protected] can be retrieved. 9.3.2 Enabling SMS Phone Access 1. Acquire one or more SMS phone numbers from the SMS carrier or aggregator. They are used as the SMS entry points to the site. 2. Add the site-addresses to the Wireless system as detailed in Section 3.3.1. The designated site addresses must be configured on the underlying Messaging Server to ensure the retrieval of messages addressed to the SMS phone number can be retrieved (as is done in email). Different drivers must be configured depending on the actual protocol of the SMS connectivity. 9.3.2.1 Service Short Name Change Each pre-configured Async-enabled application is assigned a short name so the service is addressable to device users. In other words, a shortname is the keyword 9-20 Administrator’s Guide Configuring Wireless for Notifications that device users use to identify which service they intend to invoke. You use the Content Manager to create and edit short names. For more information, see Section 5.3.4. in Chapter 5, "Managing Content". 9.4 Configuring Wireless for Notifications This section discuses configuring email, SMS, pagers, fax and voice for notifications. 9.4.1 Configuring Wireless for Messaging Oracle Application Server Wireless features a messaging component that handles sending and receiving messages to and from devices. Typically, Wireless must be configured to connect to an external server to deliver messages (such as SMS or email). Wireless is pre-configured to send SMS, Voice, Email and Fax messages without configuration, by connecting to and utilizing the Oracle-hosted online Push Service. If you do not to use the Oracle-hosted online Push Service, you must set up the necessary communications channels. Wireless includes a set of drivers that you can use to configure your network capability (such as SMS, Voice, or email). This may involve working with network providers (carriers) -- depending on your network type -- to set up the kind of connection the drivers to which drivers can connect for message delivery. 9.4.2 Oracle-hosted Messaging Delivery The Wireless messaging system is pre-configured to connect to the Oracle-hosted online Push Service, which is capable of sending messages to SMS phones, pagers, voice and faxes. No configuration is required. Once the pre-seeded Messaging Sever is started, you can send messages. The PushClient driver is configured to communicate with the Oracle-hosted online Push Service running at the following URL: http://messenger.oracle.com/push/webservices Note: The Wireless PushClient driver uses the HTTP protocol to communicate with the Oracle online Push Web Service; the HTTP proxy setting is needed if you run your application behind a firewall. See this Guide for steps on proxy changes. Wireless Gateway Configuration 9-21 Configuring Wireless for Notifications 9.4.3 Non Oracle-hosted Messaging Delivery Wireless ships with pre-built network drivers that support major protocols that have been accepted as industry standards. The pre-built drivers handle communications protocols such as SMS (short message for phone), email (paging or desktop), voice and fax. To enable those network channels, you must configure the pre-built drivers to work with their corresponding network servers: 1. Identify to which external server to which Wireless connects, including acquiring such connectivity and preparing for the values needed to configure the Wireless drivers depending on their particular protocols. 2. Add the supported driver and configure its messaging properties. 3. Create a Messaging Server or select an existing one. 4. Create a driver instance and associate it with the Messaging Server on which it will run. The driver instance properties must be configured to work with its corresponding external network connectivity. 5. Start the Messaging Server. For details on driver configuration see Section 3.3.4.2. Remove the pre-configured PushClient driver and its corresponding instances if they are not used. 9.4.3.1 Configuring Email-based Message Delivery To configure the email and paging services: 1. Set up an SMTP mail server for outgoing messages. 2. Optionally, set up an IMAP or POP3 mail server if message receiving is required. 3. Configure the email driver and driver instance as described in the common tasks section. 9.4.3.2 Configuring the SMS Phone Message Delivery To deliver SMS messages to phones, you must set up a communication channel to the SMS carrier. To do this, you must contract with a carrier having a network used for sending and receiving of SMS messages through the UCP or SMPP protocols. Alternatively, you can use a network aggregator, such as Mobileway, who acts as an intermediary between the SMS carriers and the enterprise. This may be beneficial 9-22 Administrator’s Guide Configuring Wireless for Notifications when supporting messaging on which multiple carriers are required. See the following URL for vendors whose protocols are certified to work with Wireless: http://otn.oracle.com/products/iaswe/integration/content.html Configure the corresponding SMS drivers (for example: UCP, SMPP) and driver instances. 9.4.3.3 Configuring FAX Delivery For this release, RightFax (a product of Captaris, Inc.) is the supported product. Customers must acquire the RightFax product and follow its instructions to set up a fax server. The location of client API .jar files from RightFax must be added to the classpath in ORACLE_HOME/wireless/sample/runpanamaserver.sh. Configure the fax driver and driver instance as specified in the common tasks. 9.4.3.4 Configuring Voice Delivery The voice driver implements the outbound telephony calls through a VoiceGenie VoiceXML Gateway. To configure the voice driver, provide the URL to the VoiceGenie Outbound Call servlet. The remaining configuration of the voice driver and driver instance can be performed as described in the common tasks. Wireless Gateway Configuration 9-23 Configuring Wireless for Notifications 9-24 Administrator’s Guide 10 Wireless Security 10.1 Overview Oracle Application Server Wireless (Wireless) combines advanced content transformation, device adaptation and network adaptation services with end-user customization, providing provides enterprises, mobile operators, content providers, or wireless ISPs with a platform to create and deploy mobile applications. Wireless incorporates various security mechanisms that enable the deployment of end-to-end secure, unbreakable applications. To provide a clear understanding of security and its application in the wireless world, this section provides brief descriptions of the principles of security and describes common application deployment models for both the wired and wireless world, explaining their similarities and differences in regards to security. Subsequent sections describe these security principles in more detail, provide available deployment scenarios, and identify any issues that are wireless-specific and present Wireless’solution. The principles of security are: ■ Communication Data Privacy: Unintended parties cannot observe data during transmission (on the network). ■ ■ ■ Data Privacy usually denotes encryption of data, either at the transport layer or at the application layer. Technologies for communication data privacy are Virtual Private Networks (VPNs) and secure transport layer protocols (for example, WTLS, TLS). Authentication: Verifying the identity of one or more parties (that is, who is the user?). Wireless Security 10-1 Overview ■ ■ Authorization: Access control of authenticated parties (that is, what can the user do?). ■ ■ ■ ■ ■ ■ ■ 10-2 Data Integrity means protection from malicious or accidental data alteration, data omission and data replay (that is, avoid replay attacks). Several technologies provide data integrity in such forms as Message Authentication Codes (MACs), digital signatures, protection through encryption. Non-repudiation allows for digital content signing and enables contract enforcement by making transactions undeniable and openly verifiable (that is, verifiable to a third party). Non-repudiation is usually achieved using digital signatures. Storage Data Privacy: Unintended parties cannot observe sensitive data (for example, credit card numbers) during storage (on the database or file system). ■ ■ Most authorization systems involve the concepts of Users, Groups, Roles, Policies and Access Control Lists (ACLs). Non-Repudiation: Authenticated users cannot disclaim the transactions that they have made. ■ ■ Authorization involves checking bindings between user identities with user capabilities: "what is this user allowed to do?" Data Integrity: Data cannot be tampered with when in transit or in storage. ■ ■ Authentication denotes a wide range of technologies with different requirements and degrees of security, including user names and passwords, certificate-based 2- (or 3-) factor authentication. Storage Data Privacy usually denotes a combination of access controls and encryption of highly sensitive data. AES (Advanced Encryption Standard) is the new symmetric encryption algorithm approved by the U.S. Federal Information Processing Standard (FIPS). Accountability: As part of accountability, auditing enables logging of security-related traces for all other security principles. Availability: Includes attack countermeasures to protect the system from attacks such as denial of service attacks. Administrator’s Guide Overview Note: This chapter discusses the security principles which are specific to Wireless (Communication Data Privacy, Authentication, Authorization and Non-Repudiation). Beyond this overview, this chapter does not describe the non-Wireless principles, such as Storage Data Privacy. 10.1.1 Wireless Security and Wired Security: A Comparison This section describes the differences and similarities of security in both wired deployment and wireless deployment. 10.1.1.1 Wired Application Deployment Figure 10–1 depicts the basic arrangement of deployment in the wired world: a wired device, such as a PC, connects over the network to an application server. Figure 10–1 Wired Deployment The main security characteristics of the wired deployment scenario are: ■ ■ ■ Data travels across the wire. This data may be protected by a secure communication protocol, such as SSL. Encrypted communication between the device and the application server is regarded as end-to-end secure, as the communication can be carried out without intermediate nodes that intercept and modify the information. Online application access is usually controlled through user name and password authentication (traveling over the protected communication link). More secure schemes make use of digital certificate-based technology or tokens (for example, RSA SecurIDs). Access control is carried out at the application server side by checking the permissions set for the authenticated user. Wireless Security 10-3 Overview ■ ■ ■ ■ ■ Data integrity is provided along with communication data privacy through encryption. Wired applications requiring some measure of non-repudiation usually resort to using transaction logs. Strong non-repudiation can be carried out through digital signatures. Sensitive data residing at the server side in the database can be protected through encryption and access controls. Log files provide security auditing of transactions and malicious activity. Attack countermeasures, which usually include fire walls and demilitarized zones (DMZs), restrict direct application server exposure to the public network (that is, the Internet). 10.1.1.2 Wireless Application Deployment Figure 10–2 depicts the deployment scenario for wireless devices. The wireless device, a device limited in both power and bandwidth, stands at one end of the transaction. The wireless device communicates over the air through a wireless network to a gateway component which performs the translation from the wireless network protocol to the wired network protocol so that the device can contact the application server. Figure 10–2 Security Chain in Wireless Transaction Flow The wired side of the wireless network is practically the same as the wired deployment scenario explained in Section 10.1.1.1. However, because of the added components in the transaction flow, the following security considerations arise: ■ 10-4 Network protocol conversions: In contrast with the wired deployment scenario, wireless application deployment requires that the wireless gateway intervenes in the communication to perform protocol conversions from the wireless network to the wired network. The problem arises when the wireless protocol is not directly interoperable with the wired protocol (as it is in many cases), causing network level communications to no longer be end-to-end secure and thus becoming only point-to-point secure. Such "leg-based" communication may be justifiable where there is need for little or no security Administrator’s Guide Overview (for example, a public news server) but may not be acceptable for the most security-conscious applications, such as mobile banking or corporate applications. ■ ■ Limited computational power and bandwidth in the wireless network and device: The restricted power of the wireless device along with the low bandwidth of wireless networks requires the deployment of more efficient and economical encryption mechanisms such as Elliptic Curve Cryptography (ECC) in WPKI. This requires special support by the application server in terms of integration. Lack of well-defined authentication standards: While password authentication is both common and standard in the wired world, it is not perceived as being highly secure, especially in the context of mobile applications. This causes the introduction of various authentication mechanisms with tight coupling to the physical wireless device causing authentication (and other types of security such as non-repudiation) mechanisms to be dependent on the device. 10.1.2 Classes of Users and Their Privileges There are two classes of Wireless users: registered users and anonymous users. The registered users are users whose user information is registered with the Oracle Internet Directory (OID). These users can be created, modified, or deleted through the User Manger or the OID DAS tool. Anonymous users are these users that have not been registered with OID. Anonymous users can only access the wireless and voice applications assigned to the Guest group. A registered user can only access the wireless and voice applications assigned to the groups to which that user belongs. For more information on anonymous users and assigning users to groups, see Chapter 4, "Managing Users". For information on assigning applications to user groups, see Section 5.4. The Wireless Tools, such as the User Manager, are role-specific; Wireless users can only access the tool which corresponds to the role or roles that they have been granted. The User Manager assigns these roles when creating (or updating) a user. A user can have one or several roles, which include System Administrator Application Developer, Foundation Developer, Content Manager, User Administrator, and End User. These roles span all of the Wireless resources, from server management, application development, application publishing, and help desk to subscription to the Wireless applications. For more information on Wireless user roles, see Section 10.2. Wireless Security 10-5 Resources Protected by Oracle Application Server Wireless 10.2 Resources Protected by Oracle Application Server Wireless The Oracle Application Server Wireless meta data repository does not store any sensitive information. Instead, information such as the user passwords, voice-accessed PINs, and the password to the Oracle Application Server Wireless meta data schema are stored in Oracle OID. Sensitive resources (such as the Wireless Tools) are protected through access controls and various authentication mechanisms, such as user names and passwords. Service access is also protected the user names and passwords. 10.2.1 Authorization and Access Enforcement Access to the Wireless tools is controlled through user roles, which not only provide access to the tools, but define the capabilities of the Wireless user as well. Table 10–1 describes the user roles, their capabilities and the resources that these roles enable. 10-6 Administrator’s Guide Resources Protected by Oracle Application Server Wireless Table 10–1 Wireless User Roles User Role Description Available Tools Application Developer Users assigned the Application Developer role perform the following functions: Service Manager ■ ■ Foundation Developer Content Manager Create, modify, delete and test applications. Publish applications to the Application Developer’s folder. ■ Create, modify, and delete notifications. ■ Create, modify, and delete data feeders. ■ Register and delete J2ME Web services. ■ Develop preset definitions. Users assigned the Foundation Developer role perform the following functions: ■ Create, modify, and delete devices. ■ Create, modify, and delete transformers. ■ Create, modify, and delete regions. ■ Create, modify, and delete digital rights policies. ■ Create, modify, and delete API scan policies. Users assigned the Content Manager role perform the following functions: ■ ■ ■ ■ ■ Foundation Manager Content Manager Manage application folders and bookmarks. Create application links based on Application Developer-created applications. Create notifications based on alerts (deprecated in this release). Create application categories and associate access points with them. Create a user-home folder rendering scheme, such as setting the sorting order for applications. Wireless Security 10-7 Resources Protected by Oracle Application Server Wireless Table 10–1 Wireless User Roles User Role Description Available Tools System Administrator Users assigned the System role manage the system using the System Management Tool. Wireless system management functions (through the Oracle Enterprise Manager Application Server Control). User Manager Users assigned the User Manager role perform the following functions: User Manager ■ End User Manage users by providing such Help Desk functions as editing a user profile, resetting passwords and PINs, and creating or deleting users. ■ Manage user access privileges. ■ View application links assigned to users. ■ Manage user devices. ■ Search for users. ■ View overview information of users. Users assigned the end user role are the consumers of Wireless services. End-users create their own accounts when they register with Wireless using the Wireless Customization. End users can also customize their own services either from a desktop or from a device. Customization for end-users includes: ■ Wireless Customization Portal Mobile Studio (for users assigned to the StudioUser group) Customize applications, download J2ME applications, subscribe to notifications. ■ Manage devices. ■ Manage location marks and location settings. ■ Manage contact rules. Mobile studio users also have the end user role; a user belonging to the StudioUser group can access the Mobile Studio. Every Wireless user is granted the Mobile Customer Role by default. This role is implicit to all users. In Wireless, a user group is the means by which users can access any voice and wireless application; any application that has been published to a user group is available to all of that group’s members. The Content Manager can both create a user group and assign applications to a user group, which is a collection of users. The user manager assigns users to user groups. See Section 5.4 for information on 10-8 Administrator’s Guide Resources Protected by Oracle Application Server Wireless publishing an application to a user group and Section 5.4 for assigning a user to a user group. 10.2.2 Authentication Through User Names and Passwords Access Control to applications in Oracle Application Server Wireless is provided according to the channel used to connect to the server. For visual HTTP-based channels such as WAP, Oracle Application Server Wireless authenticates users through user names and passwords; for voice-accessed applications, Wireless uses account numbers and PINs; for message-related applications, Wireless checks the user account information (for example, Wireless checks the email headers). For web services related to the messaging infrastructure, Wireless authenticates users through user names and passwords. 10.2.3 Device-Based Authentication Mechanisms Besides user name and passwords, Wireless allows for other authentication mechanisms, depending on the device. However, the application developer is responsible for choosing and integrating the appropriate mechanism for the target device. The authentication mechanisms available in the various channels and how they can be used are as follows: ■ ■ ■ WAP: With WPKI, the end users can utilize their WAP device to sign a "challenge" (a randomly generated string) sent by an authentication service. The authentication service requests the signature through WMLScript’s signtext() function. Upon receiving a signature request, the WAP device prompts the user to enter his or her local PIN (which authenticates the user only to the WAP device) and then retrieves the user’s WPKI private key (stored in a SIM chip in the WAP phone) to sign the challenge. Once the authentication service receives the signed challenge, it is verified with the user’s WPKI public key (possibly stored in a user’s certificate repository such as the Oracle Wallet Manager) and notifies the requesting application of the result. WMLScript’s signtext() function is available with WAP 2.0. SMS: SMS-based authentication can occur in two ways with varying degrees of security. The most basic authentication is to reply (with a PIN) to an SMS received from the authentication service. Another SMS-based authentication mechanism relies on digital signatures; this mechanism is similar to the WAP case. Email: Authentication consists of sending a reply (with a PIN) to an email sent by the authentication service. Wireless Security 10-9 Resources Protected by Oracle Application Server Wireless ■ Voice: The authentication service calls the user and asks for a PIN. Once the user provides the PIN, the system then authenticates the user. 10.2.4 How Oracle Application Server Wireless Leverages AS Security Services The Wireless tools and the Customization Portal are protected by the Oracle HTTP Server SSO plugin module (mod_osso). The mod_sso protects all the URL access to the Wireless tools. If any part of the URL access is not authenticated, then the mod_ sso redirects the request to SSO for authentication. To further secure the communication channel between the browser and the Wireless tools, or the wireless gateway (for example, the WAP gateway, or the voice gateway), you can enable SSL on the Oracle HTTP Server. For more information, refer to the documentation for the Oracle HTTP Server on configuring SSL. In addition, you can also enable the SSL-based secured communication channel between the Wireless Multi-Channel Server and remote application server by installing either Base64 certificate or PKCS#7 formatted certificate at the Wireless Multi-Channel Server. You can install such certificate through the System Manager (accessed through Oracle Enterprise Manager). For information on using the System Manager to configure an SSL certificate, see Section 3.6.1. Single Sign-On is a feature (one not specific to Wireless) that eliminates the need for repeated authentication (within a period of time) when crossing application boundaries for the same trusted domain. It also provides for centralized user credentials, which avoids the problem of having to remember passwords for different applications, thereby increasing security for the whole system, as passwords do not need to be written down. Wireless is fully integrated with Oracle Application Server Single Sign-On, which currently supports authentication through user names and passwords over all visual HTTP-based channels and through account number and PIN for voice-based channels. Oracle Application Server Single Sign-On also integrates with the Oracle Internet Directory (OID), an LDAP server that stores, among other things, valid end-user authentication information such as passwords and digital certificates. The user information stored in OID is replicated to the Wireless meta data schema when a user logs in, or through asynchronous synchronization from OID to the Wireless schema. Table 10–2 lists the user attributes (stored in OID) that are replicated in Wireless schema. 10-10 Administrator’s Guide Configuring the Security Infrastructure to Support Wireless Table 10–2 User Attributes Stored in the Wireless Schema Attribute Name Description orclCommonNickNameAttribute The user name used for authentication for all channels, except voice. By default this is cn (as specified in OID configuration). userPassword The user password, used for authentication for all channels, except voice. orclPasswordHint The password hint orclPasswordHintAnswer The answer to the password hint orclWirelessAccountNumber The account number, used for authentication from voice channel. This must be comprised of digits only. orclPasswordVerifier; orclCommonPIN The PIN used for voice authentication. This must be comprised of digits only. displayName The display name of the user orclIsEnabled A flag whether the user is enabled preferredLanguage The Locale, such as the. language and country, for example en_US indicates English and USA orclTimeZone The user’s default time zone orclDateOfBirth The user’s date of birth orclGender The user’s gender 10.2.5 Component Extensibility and Security Applications developed and deployed in Wireless can benefit from Oracle SSO functionality through integration as an Oracle SSO partner. For more information on SSO, refer to the Oracle Application Server Wireless Developer’s Guide. 10.3 Configuring the Security Infrastructure to Support Wireless Wireless depends on the security infrastructure to be up both during installation time and runtime. Refer to the Oracle Application Server Administrator’s guide for details on the security infrastructure. Wireless relies on Directory Integration Platform (DIP) server, as one of the mechanisms, to asynchronously replicate the essential modified user information Wireless Security 10-11 Configuring the Security Infrastructure to Support Wireless from OID to the Wireless schema. For more information, refer to Oracle Internet Directory Administrator’s Guide for details on how to start the DIP server. By default, the OID server does not enforce unique constraints on account number (that is, the orclWirelessAccountNumber attribute of orclUserV2 object class). The account number is required for users accessing wireless applications from a regular voice line with the account number and PIN used for the authentication. As part of the Wireless installation, the Wireless configuration assistant enables the policy to enforce a unique constraint on the orclWirelessAccountNumber attribute of orcluserV2 object class. The OID server must be restarted after the first Wireless installation for this unique constraint policy to take effect. Refer to Oracle Internet Directory Administrator’s guide for details on how to restart the OID server. Wireless connects to the OID as a Wireless application entity after users have been authenticated through SSO. The Wireless application entity is assigned following privileges: 1. Common user attributes: privilege to read common attributes of a user. 2. OracleDASCreateUser: The privilege to create users in OID. 3. OracleDASDeleteUser: The privilege to delete users in OID. 4. OracleDASEditUser: The privilege to edit common attributes of users. 5. verifierServices: The privilege to read application verifiers (the user PIN) which are stored in the user. 6. authenticationServices: The privilege to perform compare operations on password attributes of a user. By default, the Wireless application entity does not have the privileges to change the user password. Consequently, out-of-the-box users cannot change their password from theWireless server. However you can enable the functionality to change passwords by assigning the UserSecurityAdmins privilege to the Wireless application entity. To do this, execute assignUserSecurityAdminsPrivilege.sh (or assignUserSecurityAdminsPrivilege.bat, depending on your operating system) on the machine on which Wireless is installed. The script is available in the ORACLE_ HOME/wireless/bin directory. The syntax for invoking the utility is as follows: assignUserSecurityAdminsPrivilege.sh oid_super_user_dn user_password where 10-12 Administrator’s Guide Installing and Configuring Oracle Application Server Wireless Security oid_super_user_dn is the Distinguished Name (DN) of the OID super user. The user should have privileges to grant UserSecurityAdmins privilege to application entities user_passord is the password of the OID super user For example: assignUserSecurityAdminsPrivilege.sh cn=orcladmin welcome1 10.4 Installing and Configuring Oracle Application Server Wireless Security This section describes Communication Data Privacy and Non-Repudiation principles of wireless security. In discussing these principles, this section provides alternatives available to application developers when incorporating security in Wireless. In some cases, Wireless does not provide direct support for security on a given channel, leaving the responsibility to the application developer to recognize the security needed for the application and to deploy the appropriate security mechanisms. 10.4.1 Communication Data Privacy Communication Data Privacy is the principle of security that prevents data in transit (on the network) from being partially or completely observed by unintended parties or eavesdroppers. Along with authentication, communication data privacy is one of the most important aspects of wireless application security. This section focuses on end-to-end data privacy, where no intermediate nodes (or actors) are able to understand the data that passes through them. For example, the wireless carrier’s WAP gateway should not be able to understand the sensitive information, even when all the data passes through it. End-to-end data privacy stands in contrast to point-to-point (or leg-based) data privacy, where data is secured between servers and devices but intermediate nodes can see the data in "the clear". 10.4.2 Data Privacy Deployment Solutions Given the variety of (wireless) networks and protocols, communication data privacy differs among the various communication channels. The following sections describe communication data privacy deployment solutions based on the communication channels: Wireless Security 10-13 Installing and Configuring Oracle Application Server Wireless Security ■ Section 10.4.2.1, "PC Browsers" ■ Section 10.4.2.2, "Pocket PCs" ■ Section 10.4.2.3, "Short Messaging Service" ■ Section 10.4.2.4, "Email" ■ Section 10.4.2.5, "Voice" 10.4.2.1 PC Browsers Internet Protocol (Web) communication is currently used today in the wired world with standardized security through SSL encryption. PCs connect to the application server directly with point-to-point privacy using HTTPS, which is HTTP running over an SSL-secured link (Figure 10–3). Since there are no intermediate nodes performing protocol translations at the security layer (as there are WAP 1.x), data communication is end-to-end private between the browser and the application server. Figure 10–3 PCs Browsers Because Wireless supports HTTPS connections, PC browser connections are point-to-point secure. 10.4.2.2 Pocket PCs The wireless extension to the PC browser is through the use of HTTP devices that connect to a wireless LAN gateway, as it is in the case of Pocket PCs with wireless LAN card adapter. The connection from the device to the wireless LAN gateway follows the 802.11b standard for wireless communication, which is interoperable with the wired Internet protocol since it uses the Ethernet protocol. Since both protocols (wired and wireless) are interoperable at the security layer, point-to-point secure communication is also carried out through HTTPS from the device to the Application Server (as depicted in Figure 10–4). 10-14 Administrator’s Guide Installing and Configuring Oracle Application Server Wireless Security Figure 10–4 Wireless LANs and Other HTTP-Based Devices Without HTTPS security at the application layer, wireless LANs are insecure even with the use of the Wired Equivalent Privacy (WEP) protocol, a protocol operating at the data link layer designed to protect communication but which has been shown to be insecure. Therefore, wireless networks that depend solely on WEP for privacy are found to be vulnerable to "war-driving", an attack where the eavesdropper ’drives by’ with a wireless receiver to break WEP security and decode wireless information. Figure 10–5 Wireless Application Protocol (WAP) Security in the Wireless Application Protocol (WAP) is currently specified in the WTLS (Wireless Transport Layer Security) protocol. Similar in design to SSL (TLS), but optimized for bandwidth and power, WTLS provides privacy from the wireless device to the WAP gateway, allowing for server authentication and mutual authentication modes. WAP has been widely criticized by the security sector on what is commonly called the ’WAP gap’, which breaks end-to-end communication data privacy. The WAP device communicates with the WAP gateway through WTLS (the WAP pictured in Figure 10–5) and the WAP gateway, in turn, communicates with the application Wireless Security 10-15 Installing and Configuring Oracle Application Server Wireless Security server using SSL (Internet zone.) Since WTLS is not compatible with SSL because of handshake optimizations, a protocol translation needs to occur at the WAP gateway (the Grey Zone pictured in Figure 10–5): that is, WTLS-encrypted data must be decrypted and be SSL-encrypted. The 'WAP gap' refers to this split second when the data is in the clear at the WAP gateway; this alone breaks end-to-end privacy and is a cause of concern for the banking industry and the most security-conscious. For WAP 1.x deployments, bridging the WAP gap can be accomplished by redirection to subordinate pull proxy (gateway) with WAP 1.2. If, in addition to the WAP gateway at the carrier side, there is another WAP gateway residing within the same physically secured, trusted domain as the application server (that is, both are owned by the same company), then communication can be redirected to this enterprise gateway and can thus be considered end-to-end private. In this way, the WTLS connection would be established with a gateway located at the site of the application service provider and it would also allow for WTLS class 3 (client and server authentication). Some gateways, such as the OpenWave's Mobile Gateway server, already support the deployment of proxy gateways at the premises of the content provider. In this model, after the subordinate proxy discovery process, requests will be rerouted to the proxy gateway installed within the secure premises of the provider hosting the Wireless application server. The network operator retains the control of the calls at the cost of sharing the burden of supporting the infrastructure required for end-to-end secure communications. The disadvantage of this solution is that the company hosting the application server must deploy and maintain its own WAP gateway. User Agent devices, such as Nokia Mobile Browser 3.0, already support this deployment model. In the next generation of WAP (WAP 2.0), WAP designers will eliminate WAP gap by introducing Internet Protocols. That is, WAP devices which can securely communicate using SSL. In addition, no translation will be necessary at the WAP gateway, thus providing end-to-end privacy. This is a step to ensure that WAP devices are interoperable with the wired Internet. 10.4.2.3 Short Messaging Service The Short Message Service (SMS) deployment architecture dictates that messages be routed through a Short Message Service Center (SMSC) from the application server to the wireless device (as depicted in Figure 10–6). 10-16 Administrator’s Guide Installing and Configuring Oracle Application Server Wireless Security Figure 10–6 Short Message Service (SMS) Under SMS, required security for a given deployment scenario depends largely on the business model (for example, carriers versus corporations) of the enterprise deploying the solution. Given these different business models, secure deployment alternatives are as follows: 1. No Transport Security Needed: This scenario relies on the existing security of the wireless network protocol provided from the SMSC to the wireless device (for example, GSM network security.) In this scenario, there is no secure link between the application server and the SMSC. This deployment alternative is end-to-end secure only when the application server and the SMSC reside within the same secure domain (that is, both SMSC and application server are co-located in the same physically secured zone to reduce risk from internal eavesdroppers or attackers); carriers providing applications to their subscribers benefit the most from this solution as it fits their business model. 2. Point-to-point security: Another alternative consists in securing the link between the application server and the SMSC with the use of VPN (virtual private network) or SSL-secured connections. This deployment alternative applies when the application server and the SMSC reside in different (albeit secure) domains. Unfortunately, a problem similar to the ’WAP gap’ (see Section 10.4.2.2) occurs here because there is a translation from the wireless protocol (used for communication between the wireless device and the SMSC) to the wired protocol (used for the communication between the SMSC and the application server) that leaves the data exposed at the SMSC. In other words, this deployment solution is not considered end-to-end secure. However, given current technology, this is the optimum deployment scenario for businesses that do not have a pre-existing relationship with their customers, as is the case for merchants. Wireless Security 10-17 Installing and Configuring Oracle Application Server Wireless Security 3. Application Level security with Symmetric Shared Encryption Keys: This deployment scenario provides end-to-end data privacy by performing symmetric encryption at the device and at the application server: since data is encrypted above the network protocol, no intermediate nodes can observe the data while en route. End-to-end communication data privacy under this deployment scenario requires application level encryption support through a SIM/WIM card with encryption capabilities. Wireless currently supports Triple DES symmetric key encryption at the application layer. This means that tag content information (that is, not all of the payload) is encrypted and decrypted at the device and is then decrypted and encrypted at the application server.and that there is a shared secret encryption key between each user and the Wireless application server. The encryption key is stored in the SIM card and is initially produced at time of manufacture and re-keying on a periodic (or other) basis is possible under a set of well-defined security conditions. This deployment scenario best fits corporations that want to provide applications to their mobile field forces. A more scalable and generic alternative is the use of application layer PKI encryption, which eliminates the need of a pre-existing relationship between end-consumer and the business. Unfortunately, there are currently no SIM card vendors that offer PKI encryption capabilities (only signature capabilities) as there is no standardized way for key generation and certificate provisioning for SMS. 10.4.2.4 Email Just as in SMS, end-to-end private email communication depends on the deployment scenario. Figure 10–7 10-18 Administrator’s Guide Email Installing and Configuring Oracle Application Server Wireless Security Depending on such factors as the capabilities of the email device and the location of the end-user email server in respect to the application server, several alternative solutions exist: ■ ■ ■ No Transport Security Needed: In this deployment scenario, an end-user’s email server and the application server both reside within the carrier’s secure domain. Since email communication never leaves the secure domain (that is, the only direction of communication is from within the carrier to the device), there is no need to additionally secure the communication beyond the security provided by the wireless network protocol in the "air." The disadvantage of this solution is that it applies only to carriers that offer at the same time both email and application services to their subscribers. Point-to-point security: In this deployment scenario, the email server and the application server both reside within the same secure domain at an enterprise other than the carrier. This solution secures communication from the carrier to the enterprise email server by establishing a TLS- or SSL-secured connection such as Secure SMTP. In this scenario, the wireless device uses the carrier’s system to retrieve the email message, and in turn the carrier system communicates with the email server using a TLS or SSL secured connection. Unfortunately, this solution is not end-to-end secure given the fact that the wireless carrier can "see" the email message before it is sent to the end-user. Symmetric Key encryption security: Certain devices such as RIM’s Blackberries are built-in with symmetric encryption capabilities to access corporate email. In this case, the deployment assumptions are the same as those for the ’Point-to-point security’ scenario. However, email communication is secured by encrypting the email at the enterprise side with a shared encryption key, which is also present at the wireless device. Under this solution, the link between the carrier and the email server does not have to be secured, as the payload is encrypted at the application layer. This benefit of this solution is that it is end-to-end private. The limitation of this solution is that it assumes a pre-existing relationship between the enterprise sending the email and the end-user; therefore this solution is best applied to corporate wireless applications. End-to-end data privacy over email can also be enabled with PKI, which would allow for secure email communication between parties that do not have a pre-existing relationship. Email privacy is carried out in the wired world with the use of S\MIME and PGP, a hybrid of symmetric and PKI-based encryption algorithms. Although S\MIME is supported in PC email browsers such as Outlook or Netscape, it is not supported by current Palm email applications and RIM Blackberries. Wireless Security 10-19 Installing and Configuring Oracle Application Server Wireless Security 10.4.2.5 Voice Voice communication over regular (wired or wireless) phone lines is not end-to-end secure in general. In fact, governments such as that of the United States have taken steps (through laws such as the Digital Telephony Bill or the Digital Wiretap Law) to facilitate the wiretap of phone communication systems. Figure 10–8 Voice Despite these non-technical issues, voice line security can be implemented in the data network, thus discouraging eavesdroppers on a digital network. The following secure solutions are available in the voice channel: 1. No Transport Security Needed: As in SMS and Email, this deployment scenario depicts both the voice gateway and the application server residing within the same (trusted) domain. Since no data passes through a public digital network such as the Internet, then there is no need to secure the transport communication between the application server and the voice gateway from outsider threats (however, insider threats still remain.) Therefore, communication security relies upon the phone line security itself. 2. HTTPS-secured connections between Voice Gateway and the Application Server: In this solution scenario, there is a secure HTTPS connection established between the voice gateway and the application server. This point-to-point security solution makes most sense when the voice gateway and the application server reside in different domains such as when the voice gateway is hosted by a third party. HTTPS is enabled with all major voice gateways (for example, Motorola and VoiceGenie) for SSL-secured connection between the gateway and the application server. Finally, there are phone devices and third-party mechanisms that claim to provide voice encryption technology that protects communication between two ends of the phone conversation. However, the security of these technologies is not well established and some mechanisms have been breached. In addition, these mechanisms are expensive and not scalable, as they require hardware deployment at the client side. 10-20 Administrator’s Guide Installing and Configuring Oracle Application Server Wireless Security 10.4.3 Non-Repudiation Non-Repudiation refers to the mechanism where accepted transactions cannot be disclaimed and can be openly verified as valid. For example, in the mobile commerce world, payments cannot be denied. Non-repudiation would allow for such transactions to be openly verifiable and undeniable by the parties involved. Non-repudiation mechanisms are based on digital signatures, which are analogous to regular ink signatures. Among the many digital signature schemes are DSA (Digital Signature Algorithm), Schnorr’s signature and RSA signature - DSA being the most widely used, since the U.S. government has used it as the Digital Signature Standard (FIPS 186). In the wireless world, digital signature mechanisms vary from device to device based on the device’s capabilities. Below are the different means of generating digital signatures across several devices. However, the developer must provide code integration for these non-repudiation mechanisms. ■ ■ ■ WAP: Digital signature mechanism is carried out through WMLScript’s signtext() mechanism (available with WAP 2.0.) SMS: the non-repudiation service sends an SMS to the end user GSM phone requesting a signature. The SMS device detects the signature request and asks the user to enter a PIN (to authenticate the user locally) to start the signing process. The end user, after reviewing the content to be signed, authorizes (or rejects) the signing and the encryption-enabled SIM chip on the device proceeds with the signature. Email: non-repudiation can be enabled for email clients that have signature capabilities such as SMIME enabled clients. This is currently only possible for PC email clients. Wireless Security 10-21 Installing and Configuring Oracle Application Server Wireless Security 10-22 Administrator’s Guide 11 Mobile Single Sign-On This chapter covers the following topics: ■ Section 11.1, "Overview" ■ Section 11.2, "Wireless Single Sign-On" ■ Section 11.3, "Wireless Single Sign-Off" ■ Section 11.4, "The Wireless Change Password Page" 11.1 Overview Users access the Oracle Application Server Wireless server using mobile or wireless devices, such as personal digital assistants (PDAs) and cellular phones. As in PC-based systems, the authentication mechanism is Oracle Application Server Single Sign-On (SSO). All 10g (9.0.4) components use SSO for user authentication. The Oracle Internet Directory (OID) is the single point for storing all of the user-related information.The integration of Oracle products with SSO and OID provides: ■ ■ Support for partner applications, which take full advantage of the SSO framework, as well external applications for support of legacy and third-party products. Seamless integration with Oracle’s middle-tier Web portal product, Oracle Portal ■ Management of user information in an external directory. ■ Integration with SSO technologies for other, non-Oracle applications. Users authenticate only once and can access any SSO partner application. Mobile Single Sign-On 11-1 Wireless Single Sign-On Selecting the Wireless option when installing Oracle Application Server results in the automatic registration of the Wireless and Voice Portal gateway for mobile devices with the SSO server. 11.1.1 Oracle Application Server Wireless Concepts and Architecture Wireless products communicate with Oracle Application Server using either wireless markup language (WML) or HTML. Cellular phones use WML; PDAs use HTML. Because these devices request URLs using Wireless Access Protocol (WAP) and other non-HTTP protocols, hardware gateways must be used to convert messages to HTTP and back again. The heart of Wireless is the Wireless and Voice Portal. It serves as a browser for interactions between the wireless device and the SSO server and for interactions between the wireless device and Oracle applications. The Wireless and Voice Portal server performs the following functions: ■ It authenticates the user directly to the SSO server. ■ It serves private pages of its own. ■ ■ It serves as a proxy browser for external, SSO-protected applications by passing requests to these applications, which then perform SSO authentication. It converts Oracle Application Server Wireless XML to the appropriate device markup language (either WML or HTML). In the Wireless and Voice Portal framework, external applications are partner applications that are integrated with the Oracle Application Server SSO Software Development Kit (SDK). The Wireless and Voice Portal treats these applications as public applications even if they are not. A Wireless and Voice Portal instance uses an HTTP adapter to serve as a proxy browser for such applications. 11.2 Wireless Single Sign-On The wireless user has two SSO authentication options: to authenticate directly from the Wireless and Voice Portal home page, or to request a partner application, which then performs the authentication. This section covers the following topics: 11-2 ■ Authenticating Through Wireless and Voice Portal ■ Authenticating by Requesting a Partner Application Administrator’s Guide Wireless Single Sign-On 11.2.1 Authenticating Through Wireless and Voice Portal The wireless user authenticates from the Wireless and Voice Portal public page either by requesting a private application or by an explicit login request (identified by the URL parameter, PAlogin=true) to the SSO server. Figure 11–1 Interactions Between Oracle Application Server Wireless and the Login Server Figure 11–1 depicts the events from the login request to the application result returned to the user as follows: 1. The wireless user accesses the Wireless and Voice Portal by entering a URL of the following form: http://<host>:<port>/ptg/rm The Wireless and Voice Portal public page appears, displaying links for public and private Wireless and Voice Portal applications. Mobile Single Sign-On 11-3 Wireless Single Sign-On 11-4 2. The user requests a private application or selects the key icon that invokes the SSO page. (Figure 11–2 depicts the portion of this page where users enter their names.) 3. The SSO server searches for the encrypted SSO cookie. If the cookie is present, then the server uses it to identify the user. The server then sends the single sign-on redirect form (Step 7). This occurs if the user is already authenticated by an external partner application (Section 11.2.2). If the cookie is not present, then server sends the Wireless XML login form to Wireless and Voice Portal. 4. Wireless and Voice Portal transforms the Wireless XML login form to the appropriate markup language and sends the converted form to the device browser. 5. The user submits the login form with the user name and password. 6. The Wireless and Voice Portal forwards the login form to the SSO server. 7. The SSO server authenticates the user. If authentication succeeds, then the server sends the Wireless and Voice Portal the SSO redirect form. If the authentication fails, then the SSO server sends a login form (Step 3). 8. The Wireless and Voice Portal sends the user her home page or the requested URL. Administrator’s Guide Wireless Single Sign-On Figure 11–2 The Wireless Single Sign-On Page: the User Name Field 11.2.2 Authenticating by Requesting a Partner Application Using the mobile device, the user may also authenticate to the SSO server by requesting URLs for other partner applications. In this case, the authentication redirection agent is not the Wireless and Voice Portal, but an application integrated with the single sign-on SDK. The first request to the Mobile Portal (http://<server>:<port>/ptg/rm) returns the home page of the anonymous user (a guest user), or the home page of the identified virtual user. Mobile Single Sign-On 11-5 Wireless Single Sign-On Note: A virtual user is a user who accesses a Oracle Application Server Wireless site, but does not register. When this occurs, Oracle Application Server Wireless detects the user and creates a virtual user account for that user. An anonymous user is a user who has not registered with Oracle Application Server Wireless but tries the applications as a guest user. The User Manager can create an anonymous user guest account for each user group. All of the unregistered users share this account. They cannot, however, personalize applications. From that point, the user can access public (unsecure) applications or can explicitely log in to the secure applications, which are assigned to that user. The unauthenticated user can execute HTTP Adapter-based public applications, which point to an SSO-based partner application (such as Oracle Portal). The partner application may complete the SSO-based user authentication. Figure 11–3 illustrates the authentication sequence: Figure 11–3 Authenticating by Requesting a Partner Application 11-6 Administrator’s Guide Wireless Single Sign-On The authentication sequence (as depicted in Figure 11–3) is as follows: 1. An unauthenticated user requests a partner application. 2. The Wireless and Voice Portal sends the request to the partner application, using an HTTP adapter situated on its back end. 3. If the URL requested is protected, then the partner application issues an HTTP redirect to the SSO server. 4. The Wireless and Voice Portal follows the redirected URL. 5. The SSO server looks for the encrypted SSO cookie, which is set in the Wireless and Voice Portal browser. If the cookie is present, then the server uses it to identify the user. The server then sends the SSO redirect form (Step 9). If the cookie is not present, then the server sends the mobile XML login form to Wireless and Voice Portal. 6. The Wireless and Voice Portal converts the Wireless XML login form to the appropriate markup language and delivers the converted form to the device browser. 7. The user submits the login form with the user name and password. 8. The Wireless and Voice Portal passes the login request to the single sign-on server. 9. Upon successful authentication, the SSO server sends a redirect form that points to the partner application. 10. Wireless and Voice Portal follows the redirect form. At this point, the Wireless and Voice Portal, knowing that authentication has been successful, updates the user’s session. 11. The partner application serves content in Wireless XML. 12. The Wireless and Voice Portal converts the Wireless XML content to the appropriate markup language and delivers the converted content to the device browser. 11.2.3 Authenticating by mod_osso The Wireless Tools, which are used by developer and administrators, as well as those intended for end-users (such as the Wireless Customization Portal), authenticate users with mod_osso, which is a module plugged into Oracle HTTP Server. All of the Web-based Wireless applications running behind the Oracle HTTP Mobile Single Sign-On 11-7 Wireless Single Sign-Off Server are treated as a single partner application. Users can access the applications appropriate to their roles and privileges after single sign-on. The Wireless and Voice Portal uses the value of the HTTP header OssoUser_Guid to identify the mod_osso-authenticated user. When executing HTTP Adapter-based applications pointing to external partner applications, the mod_ sso-authenticated user must be authenticated again, because the SSO cookies are stored in the PC browser for these users. Note: 11.2.4 Authenticating through Voice Voice authentication is accomplished by Oracle Application Server Wireless (locally) using the account number and the PIN of the user. Note: An authenticated user accessing external SSO partner applications from a voice device must re-authenticate (using username and password). 11.3 Wireless Single Sign-Off Oracle Application Server Wireless server participates in SSO global logout for sign off. The following steps detail the interactions between Wireless, the SSO Server and Partner Applications. 11.3.1 Logging Out from Oracle Application Server Wireless The user clicks Wireless Logout to sign off. 11-8 1. The user sends a an Wireless Logout request (identified by URL parameter PAlogoff=true). 2. The Sign Off implementation of Wireless sends an HTTP request to the SSO Sign-Off URL. 3. The SSO server returns the Wireless XML global logout page and a special HTTP header (X-Oracle-SSO-logout with value = true). The global logout page contains one image for each partner application that has the user session. Administrator’s Guide The Wireless Change Password Page 4. Wireless sends HTTP requests to each image link. This is done so that the user’s session gets cleaned up in all the partner applications. 5. Wireless terminates the user’s session. 6. If Logout is accomplished through Wireless link, then the home page of the guest user is returned. 11.3.2 Logging Out from a Partner Application The authenticated user clicks the logout link on the page returned by the SSO-based partner application. In this case, the logout link points to the SSO sign-off URL. 1. The user clicks on the logout link which points to the SSO sign-off URL. 2. The SSO server returns the Wireless XML global logout page and a special HTTP header (X-Oracle-SSO-logout with value = true). The global logout page includes one image for each partner application which was active in user session. 3. Wireless sends HTTP requests to each image link to clean up the user’s session in all the partner applications. 4. Wireless terminates the user’s session. 5. Wireless returns the user’s home page if the user has logged in through the Wireless and Voice portal. Wireless returns the done_URL of the global logout page if the user logged in by requesting a partner application. 11.3.3 Logging Out from a Web-based Oracle Application Server Application Since all Web-based Oracle Application Server applications are authenticated through mod_osso, and are treated as a single partner application, logout from any application triggers global sign-off and none of the applications will be accessible until the user signs on through mod_osso again. 11.4 The Wireless Change Password Page The Wireless user sees only two SSO pages: the Login page and the Change Password page. Unlike its PC counterpart, the Wireless Change Password page appears only when users try to log in to the SSO server with an expired password. Wireless users have no access to the Change Password link on the SSO Administration page. Mobile Single Sign-On 11-9 The Wireless Change Password Page 11-10 Administrator’s Guide 12 Activity Logging 12.1 Activity Logging Overview The Oracle Application Server Wireless Performance Manager provides system administrators with information on the running status of Multi-Channel Server, Notification Engine, messaging server, data feed engine, and the Async Listener. The Performance Manager also provides statistical information, enabling system administrators to study past performance and historical data to perform future trend analysis. Wireless integrates with the OEM (Oracle Enterprise Manager) framework to provide a Web-based monitoring tool which displays metrics for diagnosis based on the data logged. 12.1.1 Overview of Activity Logger Internals The Activity Logger provides the common logging framework used by the runtime components. Database logging is handled asynchronously because the runtime logging on the database carries a huge overhead. The runtime data is generated as files, which are less expensive. The data thus generated is picked up by the Performance Monitor framework and written onto the database. In this way, database logging is handled asynchronously without impacting the runtime performance of the respective servers. For the Multi-Channel Server, the logging process is handled in the callback of the different events, which are generated (that is, the beginning of a session and its end). These events are enabled by default for logging purposes. If the administrator chooses not to generate the logging, then there is a provision to turn off the Wireless web server logging. When this happens, the callbacks do not generate log files. For other modules, such as the Notification Engine, Async Listener, and Transport Activity Logging 12-1 Activity Logging Overview Server, logging into the files occurs when the corresponding request is fulfilled. The Data Feeder logs the runtime data directly to the database in batches. The generated log files follow a common directory structure, which can be configured using the Wireless system management functions at the node (process) level. The top level Logging Directory is specified here, the Logger Framework, which all modules use, creates sub-directories: process, status and archive. At runtime, the log files generated by the different modules have distinct file suffixes. These files are stored in the process directory and the file names and the machine name are enqueued into a SYS_LOGGER_QUEUE. The file can be made available for processing based on a configurable file size. Additionally, Wireless supports log file aging by which the log file is automatically made available for processing after a fixed time. This ensures that the skew introduced by the asynchronous nature of the logging process is reduced. The log file age (also known as close frequency) can be configured using the system management functions for the site-level configuration of the Performance Monitor. The modules (which generate these log files with distinct suffixes), provide a Database Log File Handler Class, which processes these files. The handler classes are created by extending a common abstract class, which provides the connection and directory and file information. The handler to suffix mapping is pre-seeded in Wireless during installation. Starting Performance Monitor starts up multiple threads, each containing an instance of the different handlers. Each logger thread dequeues the filenames belonging to the local machine, inspects the file suffix and delegates it to the corresponding handler class for further processing. The administrator can control the number of Performance Logger threads using the system management functions for the process-level configuration. 12.1.2 Activity Log Table Description Note: Since these tables tend to grow during the life of the servers, the administrator may choose to purge the data off these tables periodically. PTG_SERVICE_LOG Table 12–1 describes the PTG_SERVICE Log. 12-2 Administrator’s Guide Activity Logging Overview Table 12–1 Service Activity Log Column Name Description Service_id The Object Identifier for the invoked service (application). Service_name The name of the invoked service. ptg_instance_id The unique identifier identifying the instance. final_service_id The Object Identifier of the final service (that is, master service folder). final_service_name The name of the final service. session_id The Session Identifier of the Session in whose context the service is invoked. bookmark The application bookmark. service_type The type of service. invocation_hour The hour when the service was invoked. invocation_time The date when the service was invoked. response_time The response time for the service. request_status The status of the request. Non-zero values indicate the error number. error_description The error message (if there was an error while invoking the service). user_id The Object Identifier for the user. user_name The name of the user. remote_address Gateway IP address and host name. host_id Host IP address and name. logical_device The device where the application was invoked. external_user_id The external user id of the which forwarded this request. external_user_name The external user name of the which forwarded this request. adapter_type The type of the adapter which is servicing this request (not logged currently). adaptor_time Time taken by the adapter to service this request. transformation_time Time taken by the transformer to service this request. Activity Logging 12-3 Activity Logging Overview Table 12–1 Service Activity Log Column Name Description timestamp Logged event timestamp (generated by trigger). Table 12–2 describes the DATAFEEDER_METRICS activity log. Table 12–2 DATAFEEDER_METRICS Column Name Description HOST_NAME The host name of this data feeder. INSTANCE_NAME The instance name of this data feeder. FEED_NAME The name of this data feeder. UPDATE_DATE The date and time of this batch run. ACTUAL_BATCHTIME The actual time spent on this batch. DOWNLOADED_ROWS The publishing rate (data rows stored). ERROR_DESCRIPTION Errors encountered for this batch for future use. Table 12–3 describes the PTG_ALERT_ENGINE_STATS log. PTG_ALERT_ENGINE_STATS Table 12–3 12-4 Notification Engine Activity Log Column Name Description host_name The host name of the machine this alert server instance is running on. instance_name The alert instance name. malert_name The name of the master alert service which generates this alert message. malert_oid The Object Identifier of the master alert service which generates this alert message. subscriber_name The name of the subscriber to receive this alert message. device_address The device address this alert message is delivered to. Administrator’s Guide Activity Logging Overview Table 12–3 Notification Engine Activity Log Column Name Description device_oid The device address object identifier. device_type The type of the device. message_id The message id generated by the message gateway for this alert message. message_length The length of this alert message. message_status The dispatch status of this alert message. dispatch_time The time stamp of this alert message being dispatched to the message gateway. error_description The error message - if there was an error while dispatching this alert message. ASYNC_STATISTICS_LOG Table 12–4 Async Listener Activity Log Column Name Description host Name of the host where the Async server is running. instance_id The unique id to identify an instance of the Async server. source_addr The source address of the received message. dest_addr The destination address of the received message. delivery_type The network delivery type of the message. The possible values are: encoding ■ WAP-Push ■ SMS ■ Voice ■ Email ■ Fax ■ Two-Way Pager ■ One-way Pager The character encoding for the message. Activity Logging 12-5 Activity Logging Overview Table 12–4 Async Listener Activity Log Column Name Description queue_size The number of messages waiting in the queue when the message is received. msg_rcv_time The message received time. msg_rcv_hour The message received hour. start_execute_time The time to start invoking the service requested from the message. end_execute_time The time to finish the service invocation. error_description The error description on failure of the service invocation. service_id The ID of the service the user is requesting to access. async_name The Async short name of the service the user is requesting to access. message_size The size of the message. timestamp Time when the message is logged into the database TRANS_LOG Table 12–5 12-6 Message Server Activity Log Column Name Description MESSAGE_ID The message id assigned by the transport, which is unique for every message. MESSAGE_TYPE The type of the message, which can be ’R’ for received message, ’S’ for message to send. DELIVERY_TYPE The delivery type, which can be: Administrator’s Guide ■ WAP-Push ■ SMS ■ Voice ■ Email ■ Fax ■ Two-Way Pager ■ One-Way Pager Activity Logging Overview Table 12–5 Message Server Activity Log Column Name Description REQUEST_INSTANCE_ HOST The transport instance host on which the message is accepted. For a sending message, this is the host of the client; for a received message, this is the host of the driver. REQUEST_INSTANCE_ID The Wireless instance id on which the message is accepted. For a sending message, this is the instance id of the client. For a received message, this is the host of the transport server that the driver is on. REQUEST_BEGIN_TIME The time the message is to be accepted. For a sending message, it is the time the send method is called. For a received message, it is the time the onMessage method is called. All time is Java system time. REQUEST_END_TIME The time the message is accepted. For a sending message, it is the time the send method returned. For a received message, it is the time the onMessage method returned. HANDLE_INSTANCE_ HOST The host name on which the message is dequeued to a process. For a sending message, it is the host on which the driver ran. For received message, it is the host on which the driver ran. HANDLE_INSTANCE_ID The Wireless instance id on which the message is dequeued to process. HANDLE_BEGIN_TIME The time the dequeue method to be called. HANDLE_END_TIME The time the message is processed. For sending message, the message is sent. For received message, the message is processed by the listener. ENQUEUE_BEGIN_TIME The time the enqueue call started. ENQUEUE_END_TIME The time enqueue call returned. DEQUEUE_BEGIN_TIME The time the dequeue call started. DEQUEUE_END_TIME The time the dequeue call returned. PROCESS_STATUS_ CODE The status code of the message processing, which can have the values unknown, failed, succeeded, ignored. PROCESS_BEGIN_TIME The time the processing call was called. For a sending message, the driver’s send method was called. For a received message, the listener’s onMessage method was called. PROCESS_END_TIME The time the processing call returned. For a sending message, the driver’s send method returned. For a received message, the listener’s onMessage method returned. Activity Logging 12-7 Activity Logging Overview System Logging The System Logger logs the runtime debug log information generated by the runtime processes. The Wireless server generates log information, which is stored in the log file. The different levels of logging and the log file size can be configured as follows: To configure the System Log file using Wireless Management at either the site or process level: 1. Enter a name for the log file name pattern. The default is sys_panama.log. This pattern enables you to identify the log file generated by the different server processes. Currently, the only supported pattern is <filename>{0}.log. For example, sys_panama{0}.log would generate a file with a name sys_ panama<timestamp in long>.log. Using this pattern enables administrators to identify log files pertaining to the different server processes based on their start timestamp. The setting of the pattern is optional. At the Wireless server or host level, the log directory may be specified using Wireless Management. The default log directory is the default temp directory for that operating system (typically c:\temp for windows and /var/tmp on UNIX). 2. In the Maximum Log File Size field, enter the maximum number of log file size (in bytes). 3. Select a log level. The log can contain any of the following: Warning, Error, or Notify. The default is Warning, Error, and Notify. 4. Click Apply. Note: The System Log file configuration can be unique to each instance of the server. It defaults to the site level configuration if nothing is specified at the instance level. 12-8 Administrator’s Guide 13 Optimizing Oracle Application Server Wireless 13.1 Overview Oracle Application Server Wireless, when installed, initializes a default setup that is appropriate for the performance of most applications. However, you may need to use additional tuning knobs to adjust performance, since applications vary in features, hardware setup, and performance requirements. This chapter discusses the tuning options and methods available within Oracle Application Server Wireless and the performance logger utility. It also discusses JVM tuning, JDBC connection performance, and TCP/IP stack tuning. This chapter discusses factors that enable application developers to optimize the Transport system. Sections include: ■ Section 13.2, "Transport Performance Monitoring" ■ Section 13.3, "Optimizing the Async Listener Performance" ■ Section 13.4, "Optimizing Data Feeder Performance" ■ Section 13.5, "Optimizing the Oracle HTTP Server" ■ Section 13.6, "Optimizing opmn" ■ Section 13.7, "Optimizing Database Connections" ■ Section 13.8, "Optimizing WebCache" ■ Section 13.9, "Optimizing JVM Performance" ■ Section 13.10, "Tuning Operating System Performance" Optimizing Oracle Application Server Wireless 13-1 Transport Performance Monitoring 13.2 Transport Performance Monitoring To view performance statistics of the Transport system, select the Site Performance tab and then click Messaging Server. The Messaging Server performance screen appears (Figure 13–1). Figure 13–1 The Messaging Server Performance Metrics This screen displays the client side and server side Messaging Server performance metrics. For each of the Messaging Server Performance metrics, Wireless displays performance data by process name and delivery type (for example, SMS). The client side performance metrics include: Average Sending Response Time The average time of a sending method. On the client side, a sending method is called to send a message. This time is the period from when the method is called to the time the method returns. When the method returns, the message is saved in a database persistently, but is not delivered. 13-2 Administrator’s Guide Transport Performance Monitoring Total Number of Sending Requests The total time that the sending method is called by the client process. A sending method called once to send a message to a set of destinations counts as a single sending request. Total Number of Sending Requests Sent The total number of successful calls, where a message is delivered to a proper gateway and its receipt is acknowledged. The client process can call the sending method many times to send many messages. Some of these requests fail, as in the case where a destination cannot be reached. Other requests could be undergoing processing. Total Number of Sending Requests Failed The total number of all calls that are known to have failed. Average Receiving Process Time The performance of the listener in terms of the time taken by the onMessage call-back. The server-side performance metrics include: Average Sending Process Time The performance of a driver in terms of the time taken by the sending method of the driver. The driver performance is measured by delivery type (for example, SMS), process time (the time taken by a driver to send a message to the proper gateway), dequeue time, and driver process time. When you measure the performance of the transport system, you can deduct the process time, because the transport system is waiting while the driver sends a message. If the driver is fast, then the system does not wait long. Average Receiving Response Time Once a transport driver receives a message, the message is passed to the transport system by an onMessage method. The response time is the time taken by the onMessage method. Once the onMessage returns, the received message is saved in a database for dispatching. Total Number of Received Messages The total number of times the transport drivers call the onMessage call-back method. Optimizing Oracle Application Server Wireless 13-3 Transport Performance Monitoring Total Number of Received Messages Dispatched The total number of received messages which are dispatched to, and are accepted by, the listeners. Among received messages, some may be in processing. Others may not have been dispatched to listeners, or listeners may have failed to process dispatched messages. Total Number of Received Messages Dispatch Failed The total number of received messages which failed to dispatch to a listener. For more information on the Site Performance, see Section 3.5. 13.2.1 Factors Affecting Transport Performance This section describes the factors that affect transport performance. Topics include: ■ Section 13.2.1.1, "Determining the Sending and Receiving Threads of a Driver" ■ Section 13.2.1.2, "AQ Tuning" ■ Section 13.2.1.3, "Moving Transport Operations to Database Machine" 13.2.1.1 Determining the Sending and Receiving Threads of a Driver To determine the need for changing the number of sending and receiving threads, users check the number of enqueued messages in the following table. trans_t_queue_number The queue_number for the driver can be found from the table trans_driver_queue. If the number of enqueued messages is high, then increasing the number of sending threads de-queues messages more quickly. However, increasing the number of sending threads can increase the I/O wait on the database machine. An optimum number of sending threads can be found by varying the number of threads and studying the I/O on the system and the de-queing rate. 13.2.1.1.1 Increasing the Number of Sending Threads for Driver Instance Using the System Manager, you can increase the number of sending threads (and in turn hasten the dequeing of messages) by editing a driver instance. You use the System Manager’s driver properties screen to edit a driver instance (Figure 13–2). To access this screen, select a messaging server process from the Standalone Processes section of the Home screen. The detail screen for the messaging server process then appears. From the Drivers Instance table, select a driver and then click Edit. The Driver Instance 13-4 Administrator’s Guide Transport Performance Monitoring Properties screen appears, with its field populated by the values set for the selected driver. Note: All of the values for a driver instance, including the number of sending and receiving threads for a driver instance, are set at the Site level through the Messaging Server Configuration screen, accessed from the Site Administration page of the System Manager. For more information on setting the site-wide values for a driver instance, see Messaging Server Configuration in Section 3.6.2.5. From this screen, you can change the increase the number of threads set in the Sending Threads field. Figure 13–2 The Driver Instance Properties Screen 13.2.1.1.2 Increasing the Number of Receiving Threads for a Driver To increase the rate of enqueuing, you can increase the number of receiving threads. You can adjust the number of receiving threads using the method described in Section 13.2.1.1.1. For more information about driver instances, see Process Level and Site Level configuration for the Messaging Server in Section 3.3.4.2. Optimizing Oracle Application Server Wireless 13-5 Optimizing the Async Listener Performance 13.2.1.2 AQ Tuning AQ (Advanced Queuing) operations result in high number of insertions and deletions from the database. Hence, I/O values on the database will be high and will need careful tuning. Based on the volume of operations, you should consider increasing the number of I/O controllers on the machine. In the test environment, the following observations have been verified. ■ ■ With the 3 I/O controller, a throughput of 40 messages/second with 7 sending threads was achieved. With the 12 I/O controller, a throughput of 100 messages/second with 9 sending threads was achieved. 13.2.1.3 Moving Transport Operations to Database Machine Running the transport process on a machine that runs the Database and running PTG on a separate machine enables improved performance. 13.3 Optimizing the Async Listener Performance The System Manager displays the performance-related data for an Async Listener process. The performance logging framework at the Web Server level collects this data. To view this data, you first drill down from the Async Listener process (located in the Web-Based Processes section of the System Manager’s Home page) to the detail page. Clicking the Performance tab invokes the Performance page for the process. The page includes the following performance metrics: Number of Messages Received The number of messages received, grouped by process ID. Average Message Response Time (seconds) The average time a message stayed on the server. Average Message Queue Size The average size of the message queue on an hourly basis for today. Service Access Count The number of times that each application was accessed today. 13-6 Administrator’s Guide Optimizing the Async Listener Performance User Access Count The number of messages issued by each user device. Number of Errors The number of errors on an hourly basis. 13.3.1 Tuning the Performance of the Async Listener The following knobs are available in Wireless to tune Sync Server Performance. Topics include: ■ Section 13.3.1.1, "Tuning the Working Threads for the Async Listener" ■ Section 13.3.1.2, "Adjusting thitherto Pool Size of Messaging Server Client" ■ Section 13.3.1.3, "Adjusting the Sending and Receiving Threads" 13.3.1.1 Tuning the Working Threads for the Async Listener You can change the number of worker threads for the Async Listener using the System Manager’s Async Listener Configuration screen (Figure 13–3), which you access from the Administration page. By default, the value for the Working Threads parameter is 10. You can increase this parameter to a higher value to accommodate a higher request rate. Figure 13–3 Configuring the Async Worker Threads Optimizing Oracle Application Server Wireless 13-7 Optimizing Data Feeder Performance 13.3.1.2 Adjusting thitherto Pool Size of Messaging Server Client Increasing the size of the thread pool enables the Messaging Server client to handle higher loads. You can adjust the size of the thread pool from the Messaging Server Client screen of the System Manager. To access this screen (Figure 13–4), select Messaging Server Client (located under Notification Engine in the Component Configuration section) on the Administration screen. For more information on configuring the Messenger Sever client, see Section 3.6.2.3. Figure 13–4 Adjusting the Thread Pool Size 13.3.1.3 Adjusting the Sending and Receiving Threads You can also increase the sending and receiving threads for the messaging driver to speed up dequeuing and enqueuing. For more information, see Section 13.2. 13.4 Optimizing Data Feeder Performance Parsing input is a costly operation. The performance of such operations depends largely on the amount of memory available to the Java Virtual machine (JVM). To handle a high feed size, you can increase the heap size of the Data Feeder process. Normally, parsing XML feeds consume larger resources than CSV (comma-separated variable) feeds. In the test environment, the following observations have been verified. 13-8 Administrator’s Guide Optimizing the Oracle HTTP Server ■ ■ With a large XML feed of 25 MB, a throughput of 43 data rows/second was achieved by using a heap size of 512 MB. In case of CSV feed of the same volume, a throughput of 48 data rows/second was achieved. 13.5 Optimizing the Oracle HTTP Server This section discusses how to optimize performance of the Oracle HTTP Server (OHS). Each of the following section describes the directives that you can tune in the httpd.conf file in OHS to enhance performance. ■ Section 13.5.1, "Max Clients" ■ Section 13.5.2, "MaxRequestsPerChild" ■ Section 13.5.3, "MaxSpareServers" ■ Section 13.5.4, "MinSpareServers" ■ Section 13.5.5, "Start Servers" ■ Section 13.5.6, "Timeout" 13.5.1 Max Clients This is the maximum number of servers that can run. An optimum number should be used based on load. A low number causes clients to be locked out; a high number of servers consumes more resources. 13.5.2 MaxRequestsPerChild The number of requests that a child process handles before it expires and gets re-spawned. The default value 0 means that it will never expire. As as result, you should limit this value. Ideally, 10000 is sufficient. 13.5.3 MaxSpareServers This is the maximum number of pre-spawned processes that are available in the pool of the Apache process that handles connections. The suggested value may vary, as 10 will suffice for most requirements. Optimizing Oracle Application Server Wireless 13-9 Optimizing opmn 13.5.4 MinSpareServers This is the minimum number of child processes that need to be pre-spawned all the time. The value 5 will suffice for most requirements. 13.5.5 Start Servers The number of servers to start initially. If a sudden load is expected on startup, then this value should be increased. 13.5.6 Timeout The number of seconds before incoming receives, and outgoing sends the time out. The recommended value is 300 seconds. 13.6 Optimizing opmn Because the default file descriptor number per JVM is low, you should increase this number to a higher value. The number must be increased inside the following script: $ORACLE_HOME/opmn/bin/opmnctl This can be done by adding or modifying the following line. > ulimit -n 2048 13.7 Optimizing Database Connections Oracle Application Server uses database connections for Single Sign On, OID, and other connections. The default number of connections may not suffice for a high number of users. You should therefore increase this number as users increase. You can increase this number by modifying the relevant files in the database. 13.8 Optimizing WebCache The WebCache capacity should be set to a high value depending upon the load. For example, if you are hitting 50 requests per second, then you must set the capacity to 1000. Also, depending upon the size of the documents to be cached, the WebCache should be allotted space as appropriate. 13-10 Administrator’s Guide Optimizing JVM Performance 13.9 Optimizing JVM Performance Java applications run within the context of the JVM. Hence, it is important to change certain default properties of JVM to run a particular application faster and consume fewer resources. Since Garbage Collection (GC) is not a parallel process until the release of Java 1.3.1, it can become the most important performance bottleneck as the number of CPU’s increase. Java 1.3.1 implements the concept of generational garbage collections. It is based on the observation that young objects die fast. Hence, objects are put in different memory pools based on their age. As a result, there are two different GC cycles that run: Minor Collection and Major Collection. Minor Collection The Collection of young objects from the young generation pool and the copying of surviving objects to the older generation pool. (Copying). Major Collection The Collection of older generation objects. (Mark-Compact). The first step in tuning is to observe the frequency of GC by using the following command line options. > java -verbose: gc classname This command results in output similar to the following: > > > > [ GC 866K->764K(1984K), 0.0037943 secs] [GC 1796K->1568K(2112K), 0.0068823 secs] [Full GC 2080K->1846K(3136K), 0.0461094 secs] [GC 2047K->1955K(3136K), 0.0157263 secs] The following knobs are available within Java 1.3.1 to change this default behavior. -Xms, -Xmx The total size of the heap is bounded by the -Xms and -XMX values. –Xms is the minimum size of the heap and –Xmx is the maximum size to which the heap can grow. Having a larger heap will reduce the frequency of collections. You should increase the heap size as the number of processors increase, since allocation can be done in parallel. Optimizing Oracle Application Server Wireless 13-11 Optimizing JVM Performance The following list of parameters is specific to Sun’s HotSpot VM. - XX: NewSize XX: MaxNewSize The young generation size is bounded by these values. Having a smaller generation means a faster rate of collection by minor collection and lower frequency of major collections. This is ideally suited for web applications. By changing these four parameters, you can change the frequency of collections as desired by the application. Other knobs that help GC performance include: - XX: SoftRefLRUPolicyMSPerMB SoftReferences are cleared only when the need for memory is high. The rate of collection can be changed using the above parameter. The following value means 10 seconds per megabyte. -XX: SoftRefLRUPolicyMSPerMB=10000 -XX: DisableExplicitJC Having this option in the command line disables all explicit calls to GC, System.gc(). It leaves all GC operations to the JVM and reduces unnecessary collections. -XX: +UseBoundThreads Apart from GC tuning, the threading model of the JVM can be changed (in Solaris). It recommended to use the -XX:+UseBoundThreads option to enable a one-on-one binding of Java threads with kernel-level threads and provide significant performance boost. -Xss This is the size of the stack per thread. Its default value changes from platform to platform. If the number of threads running in the application is high, then you can decrease the default size. If the threads require a high stack space, for example, for 13-12 Administrator’s Guide Tuning Operating System Performance parsing operations and recursive calls, then increasing the stack size can provide significant performance increase. -Server This JIT option crashed the JVM (JDK 1.3.1_01). Avoid this knob unless a patch becomes available. You tune the value of these options according to the application type. Table 13–1 describes a typical setup for the E420/Solaris box with four 450Mhz processors and four GB RAM to support 2000 concurrent users. Table 13–1 Typical Setup for the E420/Solaris Box Attribute Recommended Value -Xms 256m -Xmx 1024m -XX: NewSize 64m -XX: MaxNewSize 128m -XX: SoftRefLRUPolicyMSPerMB 10000 -Xss 512K -XX:UseLWPSynchronization This thread model should be used 13.10 Tuning Operating System Performance This section describes tuning methods for the operating system’s performance of Oracle Application Server Wireless. 13.10.0.1 TCP/IP Tuning Correctly tuned TCP/IP settings improve performance. The indicators for changing default parameters are primarily TCP connection drops, while making the three-way handshake, and the system refusing connections at a certain load. Using the following UNIX command to check for TCP connection drops: netstat - s | grep Drop Note the following value: tcpListenDrop, tcpListenDropQ0, tcpHalfOpenDrop Optimizing Oracle Application Server Wireless 13-13 Tuning Operating System Performance Any value other than zero suggests the need for changing the tcp connection queue size. While any value for tcpListernDrop suggests a bottleneck in executing the accept() call and value for tcpListenDropQ0. It is an indication of SYN flood or denial-of-services attack. Use the following UNIX command to check if connections should be replenished more quickly: netstat | grep TIME_WAIT | wc - l You should note the number of connections in the TIME_WAIT state. If the rate of establishing connections (load) is known, then you can compute the time taken to run out of connections. To ensure that new connections are readily available, you can decrease the tcp_time_wait_interval to a low value of 10000 ms. The following is a list of TCP values recommended for Solaris. You can set most of these values using the following UNIX command. ndd Example > ndd - set /dev/tcp tcp_time_wait_interval 10000 These parameters (described in Table 13–2) , take effect after the application is restarted. They should be added to the system startup file so that they are not lost after a reboot You must change the tcp_conn_hash_size in the file /etc/system after a reboot. Table 13–2 Operating System Performance Parameters Parameter Setting Comments tcp_time_wait_interval 10000 The time out for disposing closed connection information. This makes new connections readily available. tcp_conn_hash_size 32768 Increasing this setting increases TCP Connection Table Access Speed. Be sure that there is sufficient memory when increasing this value. 13-14 Administrator’s Guide Tuning Operating System Performance Table 13–2 Operating System Performance Parameters Parameter Setting Comments tcp_xmit_hiwat 65536 The size of the TCP transfer windows for sending and receiving data determine how much data can be sent without waiting for an acknowledgment. This can speed up large data transfers significantly. tcp_conn_req_max_q 10240 The size of the complete (and incomplete connection) queue. Generally the default values are sufficient. However, it is recommended to increase these values to 10240 or they can be changed if connection drop problems are observed. 4 This setting changes the data transmission rate. Changing this value is important to workaround bugs that some operating systems have in the implementation of slow start algorithms. tcp_conn_req_max_q0 tcp_slow_start_initial Solaris Kernel Recommendations To enhance performance, you can change the Solaris Kernel performance parameters (described in Table 13–3) in the file /etc/system. Table 13–3 Solaris Kernel Performance Parameters Parameter Value Comment rlim_fd_max 8192 The hard limit for number of file descriptors rlim_fd_cur 2048 The soft limit for number of file descriptors lwp_default_stksize 0x4000 The LWP stack size rpcmod:svc_run_stksize 0x4000 The NFS stack size Sq_max_size 1600 By increasing sq_max_size, you increase the number of message blocks (mblk) that can be in any given syncq. For every 64mb, add 25 to its value. As a result, the value for 4GB is 1600. Optimizing Oracle Application Server Wireless 13-15 Tuning Operating System Performance 13-16 Administrator’s Guide 14 Load Balancing and Failover This chapter discusses Oracle Application Server Wireless load balancing and failover and includes the following sections: ■ Section 14.1, "Overview" ■ Section 14.2, "Clustering Architecture" ■ Section 14.3, "Clustering Configuration" ■ Section 14.4, "Configuring Wireless for High-Availability Deployment" 14.1 Overview Oracle Application Server Wireless offers a scalable, reliable server infrastructure through clustering and high availability. The clustering structure includes the following two features. ■ ■ Load Balance: mod_oc4j on top of Oracle Http Server (OHS) distributes the request workload among multiple Wireless server processes. Fault Tolerance (Failover): mod_oc4j on top of OHS redirects a client to another working Wireless server process if a Wireless server process failure occurs. 14.2 Clustering Architecture Each Wireless server process which runs on a single Java Virtual Machine (JVM) is referred to as a node. One or more nodes comprise an island. Nodes within an island are capable of serving the same applications, because the session for each client is replicated among all the nodes within an island in preparation of failover. One or more islands together form an OC4J (Oracle Containers for Java) instance for the purpose of load balancing. The entire OC4J instance is linked by mod_oc4j to a Load Balancing and Failover 14-1 Clustering Configuration simple front-end, Oracle Http Server (OHS). Typically, an island has two to four nodes. By default, the requests from the same client are always redirected to the same Wireless server process. If one process goes down, then the fault tolerance feature is supported for both stateful and stateless requests as follows: ■ ■ Stateless Requests – Fault tolerance is achieved by redirecting the client to another working process. Stateful Requests – The session state is propagated to the processes within the same island, which enables another process in that same island to pick up the request from a given client if a failover occurs. 14.3 Clustering Configuration This section describes how to configure the Oracle Http Server (OHS), Oracle Process Management and Notification (OPMN), and Oracle Containers for Java (OC4J). 14.3.1 Configuring Oracle Http Server (OHS) The configuration file for OHS is httpd.conf, which includes mod_oc4j.conf, located in $ORACLE_HOME/Apache/Apache/conf/ directory. The mounting point from HTTP request to the Wireless server clustering instance is specified in the mod_ oc4j.conf as follows: LoadModule oc4j_module libexec/mod_oc4j.so <IfModule mod_oc4j.c> Oc4jMount /ptg OC4J_Wireless Oc4jMount /ptg/* OC4J_Wireless Oc4jMount /modules OC4J_Wireless Oc4jMount /modules/* OC4J_Wireless </IfModule> When installing the Wireless server from Oracle Universal Installer (OUI), these lines should be automatically populated in the mod_oc4j.conf file. 14.3.2 Configuring Oracle Process Management and Notification (OPMN) The major configuration file for OPMN is opmn.xml, located in $ORACLE_ HOME/opmn/conf/directory. 14-2 Administrator’s Guide Clustering Configuration The oc4J oc4jInstanceID in opmn.xml should be the exactly same as it appears in the mounting specification of the mod_oc4j.conf. The number of islands, the number of processes, and the other configuration parameters are also defined within opmn.xml. A sample configuration is as follows: <oc4j oc4jInstanceID=”OC4J_Wireless” gid=”OC4J_Wireless”> <config-file path=”$ORACLE_HOME/j2ee/OC4J_Wireless/config/server.xml” /> <base-port ajp=”0”, jms=”2402”, rmi=”2502” /> <island id=”OC4J_WirelessIslandA” numProcs=”2” /> <island id=”OC4J_WirelessIslandB” numProcs=”3” /> </oc4j> For this OC4J_Wireless cluster, two islands (OC4J_WirelessIslandA and OC4J_ WirelessIslandB) share the request workload. OC4J_WirelessIslandA is comprised of two wireless server processes while OC4J_WirelessIslandB is comprised of three Wireless server processes. Altogether, five ports are needed for each type of protocol. The port number range is from the base-port number to the base-port number plus five. The base-port numbers are dynamically allocated during the installation time. By default, the Wireless server <oc4j> element should be populated within opmn.xml. However, the populated entry only supports single Wireless server process and thus is not suitable for load balancing and failover. The configuration for load balancing and failover must be manually added. 14.3.3 Configuring OC4J The OC4J-related configuration files are located in $ORACLE_HOME/j2ee/OC4J_ Wireless/config directory. The default configuration is set for running single Wireless server process. To support load balancing and failover features, you must modify the the OC4J configuration files orion-web.xml and /WEB-INF/web.xml as described in the following steps. 1. Modify orion-web.xml. There are two orion-web.xml files, one for Multi-Channel server and one for the wireless modulable applications. They are located in the following directories: Load Balancing and Failover 14-3 Configuring Wireless for High-Availability Deployment ■ ■ $ORACLE_HOME/j2ee/OC4J_ Wireless/application-deployments/ptg/ptg-web/ $ORACLE_HOME/j2ee/OC4J_ Wireless/application-deployments/modules/modules-web/ For both of these files, add the following to the main body of the <orion-web-app> tag: <cluster-config /> 2. Modify /WEB-INF/web.xml There are two web.xml files, one for Wireless web server and one for the Wireless modules. They are located in the following directories: ■ ■ $ORACLE_HOME/j2ee/OC4J_Wireless /applications/ptg/ptg-web/WEB-INF/ $ORACLE_HOME/j2ee/ OC4J_Wireless /applications/modules/modules-web/WEB-INF/ For both of these files, add the <distributable /> tag to the main body of <web-app> 14.4 Configuring Wireless for High-Availability Deployment In Oracle9iAS 9.0.2, wireless applications cannot be clustered using the Oracle9iAS clustering mechanism. However, you can configure Oracle9iAS 9.0.2 to achieve a high-availability deployment by completing the following steps. Note: You must back up all files before you modify them. 1. Install the Oracle9iAS 9.0.2 Infrastructure tier on one machine and install multiple middle-tiers on separate machines. Ensure that each of these middle-tier installations point to the infrastructure tier. 2. Shut down DCM and all of process by running the command [oracle home]/dcm/bin/dcmctl stop 3. Shut down Oracle Enterprise Manager (OEM) by running the command [oracle home]/bin/emctl stop 14-4 Administrator’s Guide Configuring Wireless for High-Availability Deployment 4. Verify that the file [oracle home]/opmn/conf/ons.conf exists on each of the mid-tiers. Verify that the infrastructure tier contains IP-address entries for all the other tiers. If not, file and add missing IP-address entries. 5. On each middle-tier, increase the number of processes that need to participate in the default island for the OC4J_Wireless OC4J instance to the desired number. This can be done from the Oracle Enterprise Manager Application Server Control or by modifying the file: [oracle home]/opmn/conf/opmn.xml. For details and concepts of OC4J instance and OC4J islands, refer to the OC4J Administration Guide. For instance, if you modify opmn.xml, a typical entry to start four OC4J processes in the default island would be of the form: <oc4j maxRetry="3" instanceName="OC4J_Wireless" gid="OC4J_ Wireless" numProcs="4"> 6. In the mod_oc4j configuration file for each middle-tier (that is, [oracle home]/Apache/Apache/conf/mod_oc4j.conf), modify the mount-point entries for the Wireless runtime. If two mid-tiers [M1 and M2] are used, the entries should be of the form: Oc4jMount /ptg instance://m1.c1.mysite.com:OC4J_ Wireless,m2.c2.se4637-u-sr006.us.oracle.com:OC4J_Wireless and Oc4jMount /ptg/* instance://m1.c1.mysite.com:OC4J_ Wireless,m2.c2.se4637-u-sr006.us.oracle.com:OC4J_Wireless c1 and c2 are the respective Oracle9iAS 9.0.2 instance names. You determine instance names by running the command: [oracle home]/dcm/bin/dcmctl whichInstance. These entries should be exactly the same for all middle tier machines. 7. Run [oracle home]/dcm/bin/dcmctl updateConfig to update the DCM repository with the configuration file changes. On slow machines, a DCM error (timeout) of the form ADMN-906005 may appear. If this occurs, run the command [oracle home]/dcm/bin/dcmctl getReturnStatus and wait until the command exits. This confirms that the changes have been propagated to the DCM repository. Load Balancing and Failover 14-5 Configuring Wireless for High-Availability Deployment 8. Add the tag <cluster-config/> under the <orion-web-app> tag in the file [oracle home]/j2ee/OC4J_ wireless/application-deployments/ptg/ptg-web/orion-web.xml. 9. Start DCM and all processes by running the command [oracle home]/dcm/bin/dcmctl start. 10. Start EM by running the command [oracle home]/bin/emctl start 11. Configure a hardware load-balancer to point to the middle-tiers. Currently, high-availability support is only available for the core server runtime (by default mapped to the URI /ptg/rm). For more information, refer to the OC4J documentation. 14-6 Administrator’s Guide 15 Globalization This chapter includes the following sections: ■ Section 15.1, "Overview" ■ Section 15.2, "Determining a User’s Locale" ■ Section 15.3, "Determining the Encoding of a Device" 15.1 Overview Oracle Application Server Wireless supports multi-locale and multi-encoding. The Wireless server dynamically determines locale and request and response encoding based on the runtime context. 15.2 Determining a User’s Locale The Wireless Server dynamically determines the appropriate locale of a user by using such locale information as PALocale, the user’s preferred locale, the Accept Language header, and the site locale. PAlocale is a HTTP parameter that specifies the preferred value before login. The possible value for the PAlocale parameter follows the http accept-language header format. For example, PAlocale = en-US. This format is distinct from the java locale format (en_US). The user’s preferred locale is the language preference of a Wireless user, which is set with the User Manager. For more information, see Section 4.5 in Chapter 4, "Managing Users". The Accept Language header is an HTTP protocol parameter that user agents (Web browsers) send with HTTP requests. Globalization 15-1 Determining a User’s Locale Note: For information on the HTTP accept-language header format, see the HTTP specification of the World Wide Web Consortium (W3C). The Site Locale is an instance-wide default locale of the Wireless Server. For more information, see Section 15.2.4. 15.2.1 After Login After login, the Wireless Server respects the user’s preferred locale. 15.2.2 Before Login Before login, the Wireless Web Server (ptg/rm), Async Listener, the Wireless Tools and the Customization Portal each determine the appropriate locale of a user’s device. Table 15–1 illustrates how the Async Listener, the WirelessWeb Server, the Wireless Tools and the Customization Portal determine the locale of a user. The numeric value indicates the preference for the detection methods in descending order. Table 15–1 Locale Determination Method Async Listner Wireless Web Sever (ptg/rm) Wireless Tools and Customization Portal Locale of the registered user or virtual user 1 1 1 HTTP parameter: PAlocale N/A 2 N/A Accept-language http header N/A 3 N/A Site default locale 2 4 2 15.2.2.1 Wireless Web Server The Wireless Web Server (ptg/rm) determines the locale of a user in the following order: 15-2 Administrator’s Guide Determining a User’s Locale 1. Use PAlocale (if present). 2. Use the user’s preferred locale if the connecting user can be identified through the device id. 3. Use the Accept_Language HTTP header (if present). 4. Use the site default locale. 15.2.2.2 The Wireless Tools and Customization Portal The Wireless Tools and Customization Portal determine the location of a user in the following order: 1. Use PAlocale (if present). 2. Use the site default locale. 15.2.2.3 Async Listener The Async Listner determines the location of a user in the following order: 1. Use the user’s preferred locale if the connecting user can be identified through the device ID. 2. Use the site default locale. For more information, see Section 15.2.4. 15.2.3 Setting the Locale for a User Profile You can set a preferred location for a user when you create a user or edit a user profile. If the preferred location is not specified, then the default site locale is used. For more information, see Section 4.5.1.1 in Chapter 4, "Managing Users". 15.2.4 Setting the Site Locale From the Site Administration screen of the System Manager (accessed through the Oracle Enterprise Manager Application Server Control), you can specify the default site locale and add to the list of locales that the site can support. Use a java locale (such as en_US) when adding to the list of supported locales (depicted in Figure 15–1). For more information, see Section 3.6.1.4 in Chapter 3, "Managing the Wireless Server". Globalization 15-3 Determining the Encoding of a Device Note: You can also set the site locale using the Basic Site Configuration wizard, accessed from the Home page of the System Manager. For more information, see Section 3.3.1 in Chapter 3, "Managing the Wireless Server". Figure 15–1 The Site Locale Screen of the System Manager (Partial View) 15.3 Determining the Encoding of a Device The content encoding of a logical device is used to transport of the result of the device type. The default encoding for all of the devices that ship with Wireless is set to UTF-8. The encoding format of a device is that of the Internet Assigned Numbers Authority (IANA). Using the Foundation Manager, you can edit the browser capabilities of a device in the Wireless repository to update it to the encoding appropriate to a given country or locale (Figure 15–2). For more information on creating, cloning, or editing a 15-4 Administrator’s Guide Determining the Encoding of a Device device, see Section 7.3.2, Section 7.3.3, and Section 7.3.2.1, respectively, in Chapter 7, "Managing Foundation Services". Figure 15–2 Editing the Encoding for a Device (Partial View of the Editing Function) The following table illustrates how the encoding is determined. Table 15–2 Determining the Device Encoding Component Factor Multi-Channel Server The encoding of the requesting device. Async Listener Determined by the corresponding transport driver. Wireless Tools and Customization Portal Encoding of the device called ‘PAPZ’. The default encoding is UTF-8. Module Application Use UTF-8 for reading the request and writing the response. Notification Application Determined by the corresponding transport driver. 15.3.1 HttpAdapter – Based Service This section describes the encoding for the request and response of a HTTPAdapter-based application 15.3.1.1 Encoding for the request of an HTTPAdapter-based Application When sending the HTTP request to the remote content provider, only the parameters of the HTTPAdapter application are encoded using the input_ Globalization 15-5 Languages Available for On-Line Help encoding of the application (if it is specified). Use the encoding format of the IANA (Internet Assigned Numbers Authority) when specifying the value for input_encoding. 15.3.1.2 Encoding for the response of an HTTPAdapter-based Application Wireless determines the encoding of the response of an HTTPAdapter-based application in the following order: 1. Charset as part of the content-type header on the response. 2. Input-encoding (if present) of the input parameter of the application. 3. ISO-8859-1 (the default). 15.4 Languages Available for On-Line Help Users can view the online help for the Wireless Tool and the Customization Portal in 29 languages. The site locale, configured through the System Manager, determines the display language. For more information, see Section 3.6.1.4 in Chapter 3, "Managing the Wireless Server". In this release, the built-in labels and on-line help for the Wireless Tools and System Manager display in nine languages. The Multi-Channel Server (ptg/rm) can display the built-in labels in 29 different languages. 15.5 Driver Encoding Each driver handles encoding individually . 15-6 Administrator’s Guide 16 Integrating Wireless with Other Components The chapter includes the following sections: ■ Section 16.1, "Overview" ■ Section 16.2, "Integrating Wireless with WebCache" ■ Section 16.3, "Integrating Wireless with Oracle Application Server Portal" ■ Section 16.4, "Notification Engine Integration" 16.1 Overview This chapter describes integrating Wireless with the Oracle Application Server components: Oracle Internet Directory (OID), WebCache and OracleAS Portal. In this release, user information is stored centrally in OID. The SSO (Single Sign-On) server uses an OID repository to authenticate users. Table 16–1 describes the attribute mapping between PanamaUser (stored in Oracle Application Server Wireless repository) and orclUserV2 user attributes (stored in OID). Table 16–1 Attribute Mapping between PanamaUser and orclUserV2 user PanamaUser OID User Name orclcommonnicknameattribute (by default, cn) specified in OID configuration DisplayName DisplayName Enabled orclIsEnabled PasswordHint orclPasswordHint PasswordHintAnswer orclPasswordHintAnswer Integrating Wireless with Other Components 16-1 Overview Table 16–1 Attribute Mapping between PanamaUser and orclUserV2 user PanamaUser OID User Language and Country preferredLanguage TimeZone TimeZone DateofBirth orclDateOfBirth Globaluid orclguid (the orclguid attribute uniquely identifies OID Users) Password user password Password Confirm Confirms user password. Gender orcl header Administrators use tools such as Delegated Administrative Services (DAS), to create a new User in OID or to modify attributes of an existing user. Alternatively, Wireless customers can implement their own user administrator tool to create, modify, or delete users with the Wireless model APIs. The user information is synchronized between Wireless and OID repositories using the following mechanisms: ■ Oracle Application Server Wireless repository synchronization after user authentication ■ PL/SQL based asynchronous synchronization ■ Oracle Application Server Wireless model API interface For information on authenticating users through SSO, see Chapter 11, "Mobile Single Sign-On". 16.1.1 Repository Synchronization after User Authentication Wireless synchronizes user information which is stored in the Wireless repository with OID after SSO authentication. 16-2 Administrator’s Guide Overview Figure 16–1 Interactions Between Oracle Application Server Wireless, SSO and OID The authentication sequence (as depicted in Figure 16–1) is as follows: 1. User sends an explicit login request or tries to access a private Service, or an external SSO partner application. 2. The SSO server challenges user credentials and the user is authenticated. 3. If the authenticated user does not exist in the Wireless repository, then Wireless retrieves the user information from OID and creates a new user in the Wireless repository. Otherwise, the User attributes in the local repository are synchronized with the attributes stored in the OID. Note: The user attributes must be synchronized with OID because the PL/SQL notification mechanism does not guarantee real-time notifications. Integrating Wireless with Other Components 16-3 Overview 16.1.2 PL/SQL-Based Asynchronous Synchronization The Oracle Application Server Wireless installation registers a PL/SQL procedure with OID. The PL/SQL procedure is invoked when a user is modified or deleted in OID. Figure 16–2 Interactions between PL/SQL and OID Figure 16–2 depicts the events triggered when a user is modified in OID. The sequence is as follows: 16-4 1. User attribute is modified, or the user is deleted in OID. 2. The Provisioning Synchronization agent picks up the modifications and calls the registered PL/SQL package. 3. The PL/SQL package accomplishes appropriate changes in the PanamaUser table (if required). Administrator’s Guide Integrating Wireless with WebCache 4. The trigger on the PanamaUser table broadcasts a RefreshCache message to all running instances of Wireless. 5. If the modified PanamaUser is cached by the running instances, the PanamaUser object is reloaded from the Wireless repository. 16.1.3 Oracle Application Server Wireless Programmatic Model API Interface The ModelFactory.createUser() method creates a corresponding User in the OID repository. The User.set methods update the corresponding User entry in OID for all of the attributes. The User.delete() method removes the corresponding User from the OID repository. The current semantics of commit is preserved for the User modifications. 16.1.4 Wireless User Management Integrated with DAS In Wireless integration mode, when you create a user through the User Manager, the request is first redirected to OID DAS (Delegated Administration Service), for entering Oracle Application Server User Common Attribute Values. After that, the request is redirected back to the User Manager page for entering Wireless-specific attribute values. The same applies for editing a registered Wireless user. The user is first edited through DAS and then through the User Manager. 16.2 Integrating Wireless with WebCache Oracle Application Server Wireless is integrated with Oracle WebCache to improve page rendering performance and scalability. WebCache is not deployed in the traditional sense with Oracle Application Server Wireless; WebCache is usually deployed in front of Web-servers serving HTML content, and interacting with HTML clients and the Web-server to cache dynamic content. However, with Oracle Application Server Wireless, the wireless runtime determines the content that must be inserted into WebCache and when to expire the content in the cache. WebCache, in this case, acts as a device adaptation cache rather than a reverse-proxy cache. Efficiencies Resulting from WebCache Since markup content is cached using WebCache, the performance and scalability benefits derive from two factors: reduced device adaptation costs and significantly reduced adapter invocation costs. Content, which can be shared across users and Integrating Wireless with Other Components 16-5 Integrating Wireless with WebCache sessions is essentially transformed only once (per device) from its Mobile XML format resulting in a reduction of adaptation costs. Secondly, since the content is not generated every time by an adapter, the total adapter invocation cost is significantly reduced for a site that has a large subset of cacheable pages. A Cache Miss Scenario A cache miss scenario (as depicted in Figure 16–3) is as follows: 16-6 1. An incoming request is received by the wireless runtime, which requests the cache for a page corresponding to the request and the device that made the request. 2. In this case, the page does not exist in the cache, causing WebCache to send a request back to the wireless runtime, requesting for the page. 3. The runtime recognizes this request to be from WebCache, rather than from a client. 4. The runtime processes the requests following the traditional code-path of invoking the application corresponding to the request and transforming the content. 5. The transformed content is now returned as a response to the WebCache request. 6. WebCache examines the response to determine if the page is cacheable or not, and if it is, cacheable for what period of time. 7. Assuming that this particular page is cacheable, WebCache inserts the page into the cache with an expiration limit set to the page. 8. WebCache then serves this page out as a response to the original request from the runtime, which in turn uses this page as a response to the client request. Administrator’s Guide Integrating Wireless with WebCache Figure 16–3 A Cache Miss Scenario A Cache Hit Scenario In this case, an incoming request from a client is for a page that has been cached by WebCache. This sequence (depicted in Figure 16–4) is as follows: 1. The wireless runtime sends a request to WebCache, which examines the cache to see if the page is cached or not. 2. If cached, it checks to see if the page has expired. If the page has not expired, it serves it out of the cache to the runtime, which in turn uses this page as a response to the client request. However, if the page has expired, it once again follows the same routine as it would in the event of a cache miss. Integrating Wireless with Other Components 16-7 Integrating Wireless with WebCache Figure 16–4 Cache Hit Scenario 16.2.1 Configuring Caching for Wireless This section describes how to configure caching for dynamic content for the Wireless Site using the System Manager and how to enable caching for a master application using the Service Manager. 16.2.1.1 Enabling Caching for the Site To cache dynamic content, you use the System Manager’s WebCache configuration page, which you access by clicking the WebCache link in the System Manager’s Administration page (Figure 16–5). To configure the WebCache: ■ 16-8 To enable WebCache, check the Enable WebCache checkbox. Administrator’s Guide Integrating Wireless with WebCache ■ ■ ■ ■ ■ Next, enter the complete URL that corresponds to the WebCache installation. Be sure to include the port number at which WebCache listens (default port is 1100) and the servlet path to the wireless runtime (the default is /ptg/rm). Supply an invalidation password (the default is Administrator). This password must be the same one as the WebCache invalidation password that is set from the WebCache administration console. See the WebCache Configuration Guide for details on how to perform this task. Provide an invalidation port (the default value is 4001). This should be the same as the invalidation port specified from the WebCache administration console. See the WebCache Configuration Guide for details on how to perform this task. Enter a timeout value for requests made to WebCache (the default value is 20 seconds). The timeout must be at least five seconds less than the request timeout value from the WebCache administration console. See the WebCache Configuration Guide for details on how to perform this task. Click OK after the changes have been made. Figure 16–5 The System Manager’s WebCache Configuration Screen 16.2.1.2 Creating a Cache-Enabled Master Application The steps detailed in Section 16.2.1.1 described how to enable caching for the Wireless site. For the cache to be of use, you must create master applications that can be cacheable. To do this, you use the Caching Information page of the Service Manager’s Application Creation Wizard. You access this wizard by clicking Create Application in the application browsing screen. If you opted to create an Multi-Channel application based on the HTTP Adapter, the Caching Information Integrating Wireless with Other Components 16-9 Integrating Wireless with WebCache page appears as Step 6 in the wizard; for an application that is based on another adapter (a non-HTTP Mulitchannel Application), the Caching Information page appears as Step 2 (Figure 16–6). For more information on creating applications, see the Oracle Application Server Wireless Developer’s Guide. To cache-enable an application, check the Cacheable checkbox. In the Invalidation Frequency section, specify the frequency at which pages corresponding to the application must be removed from the cache. When the Content Manager publishes a cacheable master application, the resulting application link is automatically cacheable. For more information on creating application links with the Content Manager, see Section 5.3.4. Figure 16–6 The Caching Information Page of the Application Creation Wizard 16.2.1.3 Invalidating Cache Content For any caching mechanism to be effective, The invalidation of the cached contents must be performed at appropriate intervals. The Invalidation of Wireless content residing in WebCache can be either policy-based or asynchronous. Policy-based Invalidation It is possible to specify in advance if a page should be cacheable or not. One of the ways to do this is by specifying the invalidation frequency of an application (as described in Section 16.2.1.2). When a page is inserted into the cache, the 16-10 Administrator’s Guide Integrating Wireless with WebCache invalidation frequency of the application to which it belongs is taken into account while determining how long the page should live in the cache. It is also possible to dynamically specify the cacheability of a page. This is done at the content-source. If the page is to be specified as cacheable, the SimpleResult element should have a SimpleMeta child element. This element has a required attribute cache, which when set to yes, enables caching for the page and when set to no disables caching. An optional attribute to be used in conjunction with a yes value for the cache attribute is ttl. This can be used to specify in seconds the number of seconds the page should be cached before expiring it. For example: <SimpleResult> <SimpleMeta cache=”no”/> ….. </SimpleResult> results in the page being non-cacheable, as below: <SimpleResult> <SimpleMeta cache=”yes” ttl=”300”/> …. </SimpleResult> results in the page being cached for 300 seconds. Apart from using the SimpleMeta tag to specify cacheability, it is possible to use standard HTTP cache-control headers and ESI headers to specify cacheability for a page. Refer to your documentation on WebCache on how to specify cacheability using ESI headers. The order in which cacheability for a given page is evaluated is as follows: ■ ■ ■ Check for HTTP or ESI cacheability headers. These override SimpleMeta tags if any are present. SimpleMeta tags for a given page override the invalidation frequency for the application to which it belongs. If neither the HTTP/ESI headers nor the SimpleMeta headers are present, the default cacheability policy for the application is applied to the page. Asynchronous Invalidation Despite specifying the cacheability policy for a page at the time of application creation or during the generation of the page, it may be necessary to explicitly Integrating Wireless with Other Components 16-11 Integrating Wireless with WebCache invalidate content in the cache. It is possible to invalidate and refresh content in the cache based on a master application or a device. You use the System Manager’s WebCache Refresh Utilities screens to explicitly invalidate the content in the cache. You access these screens from the Utilities section of the System Manager’s Administration page. The WebCache Utilities section contains two screens: ■ WebCache Refresh -- Master Application ■ WebCache Refresh -- Device To invalidate all pages belonging to a master application, click Refresh WebCache – Master Application. In the WebCache Refresh -- Master Application screen, select a master application in the table and then click Refresh. To invalidate all pages with a given device markup, click Refresh WebCache – Device. In the WebCache Refresh -- Device screen, select a device from the table and then click Refresh. 16.2.1.4 Administration If WebCache is reinstalled on a different machine or port, you must reconfigure the the WebCache settings as detailed in section Section 16.2.1.1. If the Wireless instance is reinstalled on a different machine, you must modify the location of the Wireless instance should be modified in the ‘Application Servers’ of WebCache’s administration console. See the WebCache Configuration Guide for details on how to perform this task. 16.2.1.5 Building a Cacheable Application In this section describes how to build a sample application that is cacheable using WebCache. This section also describes methods of controlling the cacheability of such an application dynamically. The sample application displays the current time and therefore immediately demonstrates the cached status of the page. To create the application: 1. Create an external content source that can be invoked from an HTTP adapter. (Although this example creates a cacheable application that is based on the HTTP Adapater, a cacheable application does not need to be HTTP adapter based; any adapter will suffice). Designate the content source, as a simple JSP page, which displays the current time in Mobile XML. For example: 16-12 Administrator’s Guide Integrating Wireless with WebCache <%@ page language="java" %> <%@ page import="java.text.SimpleDateFormat"%> <%@ page import="java.util.Date"%> <%@ page session="false" %> <%@ page contentType="text/html; charset=iso-8859-1" %> <SimpleResult> <SimpleContainer> <SimpleText> <SimpleTextItem> <% Date date = new Date(); SimpleDateFormat formatter = new SimpleDateFormat("yyyy.MM.dd G ’at’ hh:mm:ss a zzz"); %> <%=formatter.format(date)%> </SimpleTextItem> </SimpleText> </SimpleContainer> </SimpleResult> 2. Create a master application this jsp as the content source. ■ ■ From the Service Manager, click the Applications tab. In the browsing screen, click Create Application. In the application type screen, select either Multi-Channel Application (the default) and then click Create. The Basic Info. page appears. Complete the mandatory fields (marked by an asterisk) in the Basic Info. screen by entering the value Date Serv for the Name of application. Enter the deployment URL. For example, enter http://mycontent-server.oracle.com/dateserv.jsp. Click Next. The Caching Info page appears. Note: If you selected Multi-Channel Application (Non-HTTP), select HTTPAdapter as the Adapter and select that the Valid option. Also, you enter the URL in the Input Parameters screen (in the URL Column). Select this as a mandatory field. Integrating Wireless with Other Components 16-13 Integrating Wireless with WebCache ■ ■ Proceed to the Caching Information screen (Step 6 for HTTP-based applications, Step 2 for non-HTTP applications). In this screen, check the Cacheable checkbox and choose the Invalidation Frequency by specifying the Cardinal as 40 and Unit as Seconds, causing all pages corresponding to the application (in this case, just one page) to be cached for 40 seconds. Click Finish to complete the master application. Note: This application does not have init (initialization) parameters, so you can skip this step. 3. Next, you publish the master application as an application link using the Content Manager. ■ ■ ■ ■ ■ ■ 4. Click the Publish Content tab of the Content Manger to view all of the folders and applications at the root level. From the browsing screen of the Content Manager, click the Add Application Link button. Select Date Serv as the master application and then click Next. The General Information page appears. Enter DateService in the Name field. Skip to the Additional Information screen (the final page of the wizard). Select the Visible checkbox . Click Finish. You now publish the application link by assigning it to a user group. ■ Select the Access Control Content Tab. The Groups screen appears. ■ Select a Group, such as Guests and then click the Assign Application button. ■ ■ Select DataService from the list of Available Services and click the Add To Group button. Click Finish. You can now access the application from the device portal. The time-stamp displayed as a result of invoking DateService does not change for 40 seconds, indicating that the application has been cached for 40 seconds and invalidated after. When the page in the cache expires, content is fetched from the content source only 16-14 Administrator’s Guide Integrating Wireless with WebCache on a by-demand basis. That is, after 40 seconds elapse, WebCache does not refresh the content immediately, but will do so only after a new request for the page is received. 16.2.1.6 Dynamic Specification of Page Invalidation The time for which the cache can retain the page without refreshing it has been set to 40 seconds during the application creation. However, this value can be changed dynamically at the time of generation of the Mobile XML. This can be done in two ways: 16.2.1.7 Mobile XML Markup In this case, the generated Mobile XML can have a SimpleMeta tag to attain this. For more information, see Policy-based Invalidation described in Section 16.2.1.3. For the sample application, the JSP is as follows to ensure that the page expires after 10 seconds (rather than the default of 40 seconds): <%@ page language="java" %> <%@ page import="java.text.SimpleDateFormat"%> <%@ page import="java.util.Date"%> <%@ page session="false" %> <%@ page contentType="text/html; charset=iso-8859-1" %> <SimpleResult> <SimpleMeta cache=”yes” ttl=”300”/> <SimpleContainer> <SimpleText> <SimpleTextItem> <% Date date = new Date(); SimpleDateFormat formatter = new SimpleDateFormat("yyyy.MM.dd G ’at’ hh:mm:ss a zzz"); %> <%=formatter.format(date)%> </SimpleTextItem> </SimpleText> </SimpleContainer> </SimpleResult> 16.2.1.8 ESI Headers Responses from the content source may contain ESI headers as part of HTTP headers that can dictate cache expiration behavior. Using ESI headers entail no Integrating Wireless with Other Components 16-15 Integrating Wireless with Oracle Application Server Portal changes to the Mobile XML. The following ESI header expires the page is 30 seconds. Surrogate-Control: max-age=30+60, content="ESI/1.0" For more information on ESI headers, please refer to the WebCache Developer’s Guide. 16.3 Integrating Wireless with Oracle Application Server Portal Oracle Application Server Portal (OracleAS Portal) is a Web-based application model for building and deploying e-business portals. It provides an environment for accessing and interacting with enterprise software services and information resources. OracleAS Portal provides a framework that integrates Web-based resources such as Web pages, applications, business intelligence reports, and syndicated content feeds, within standardized, reusable information components called portlets. A portlet is an area of HTML/XML located within a defined area of a Web page. Portlets communicate with the portal through an entity called a provider. Portlets form the fundamental building blocks of an OracleAS Portal page. Each portal page consists of content presented through one or more portlets and links that allow the user to navigate to another page to take some action. Portlets summarize, promote, or provide basic access to an information resource. The portlets allow information resources to be personalized and managed as an application of OracleAS Portal. The portal framework provides additional services including single sign-on, content classification, enterprise search, directory integration, and access control. OracleAS Portal supports Desktop PC Web browsers and enables OracleAS Portal pages to be accessed from wireless devices. OraclePortal, working in conjunction with Wireless, automatically transforms the portal page structure that is appropriate for the wireless devices. OracleAS Portal generates the Page structure in Wireless XML, for all request from wireless device, and rendered to the device by Wireless. This allows portlets to provide wireless interface using OracleAS Portal through Wireless. 16.3.1 OracleAS Portal as a Wireless Application OracleAS Portal must be deployed as a Wireless application in the Wireless repository to enable Wireless access to OracleAS Portal . Each OracleAS Portal installation is deployed as an HTTP Adapter-based application in Wireless. Multiple Portals may be deployed on a single Wireless instance. The HTTP adapter application accepts a URL as a configuration parameter and must be set to the URL 16-16 Administrator’s Guide Integrating Wireless with Oracle Application Server Portal of the OracleAS Portal’s home page. To create a Wireless application, a master application definition based on an HTTP adapter must be created using the Service Manager. Also, you must create an OraclePortal Service based on the HTTP adapter master application. OracleAS Portal redirects requests from a Wireless device to an Wireless server. The Wireless Server accepts the request and invokes the OracleAS Portal home page over HTTP and accepts the response generated (in Wireless XML), from OracleAS Portal. The XML response, generated by OracleAS Portal, is then adapted to the native device markup by the Wireless server. All further requests and responses between Wireless device and OracleAS Portal is mediated by the Wireless Server. Wireless devices make the first request to OracleAS Portal server. OracleAS Portal redirects the device request to Wireless Server. The OracleAS Portal appends two parameters to the redirected URL, the two query parameters appended are PAoid and PAhome. Both PAoid and PAhome contain the value of the object id (service-id in the Wireless repository) of the Portal’s HTTP adapter service. The syntax of the redirected URL is: http://9iASWSerrver:port/ptg/rm?PAoid=<OraclePortal object id>&PAhome=<OraclePortal object id> The PAoid parameter allows the Wireless server to directly launch the Portal home page, without having to navigate through the Wireless server's folder and service hierarchy. The PAhome sets the Portals Home Page as the home page for the current wireless session. 16.3.2 Developing Wireless Portlets Portlets are owned by entities called providers. One provider can manage one or many portlets. Providers are the backbone behind the Portlets being displayed on each page. Portal supports a Web Provider framework that is written as a web application. It is installed and hosted on a web server and is remote from the Portal. A portlet exposed as a Web Provider can be developed in any web language. A Web Provider communicates with Oracle Application Server Portal using SOAP(XML). OraclePortal supports a Java based Portal Developer Kit (PDK) framework to develop portlets and services. The Java PDK Framework is a set of services that enable Java programmers to easily create portlets from existing Java-based applications (Java, Java Servlets, and JSPs). It provides an abstraction to handle communication with Oracle Application Server Portal, default classes to simplify portlet creation, and exposes APIs for end-user customization, session storage, security, and logging. Integrating Wireless with Other Components 16-17 Integrating Wireless with Oracle Application Server Portal For Wireless devices, OraclePortal supports Portlets that generate Wireless XML. To enable wireless access, Portlets must generate Wireless XML and indicate this capability using the Java PDK framework. The Java PDK framework uses a Provider.xml file to discover the capabilities of the Portlets supported by a Provider. Refer to OraclePortal’s PDK-Java User’s Guide for more information. Following is a overview of tags (in the Provider.xml file) that indicates the wireless capabilities of a Portlet. 1.<acceptContentType> Usage: <acceptContentType>text/vnd.oracle.mobilexml</acceptContentType> This value "text/vnd.oracle.mobilexml" indicates that the portlet is capable of generating Wireless XML required for Wireless access. A portlet can be enabled for both HTML (PC Desktop) and Wireless Access by indicating it can accept both the content types such as: <acceptContentType>text/vnd.oracle.mobilexml</acceptContentType> <acceptContentType>text/html</acceptContentType> If the Portlet is capable of generating only Wireless XML (text/vnd.oracle.mobilexml), then (unless otherwise indicated) the Portlet will transform the Wireless XML to HTML for PC Desktop clients. 2.<mobileFlags> Usage: <mobileFlags>MOBILE_ONLY</mobileFlags> Portlets can set this value to MOBILE_ONLY and hence indicate that this Portlet must be rendered in wireless devices only. This will prevent the default behavior of a Portal to transform Wireless XML, generated by the Portlet and rendered to PC Desktop clients. 3.<showLink> Usage:<showLink>true</showLink> Portal renders all the Portlets on Wireless devices as links. Portlets must set this value to True to be rendered on a wireless device. A value of True allows the Portal to generate a Link, pointing to the Portlet content, on the wireless device. 4.<linkPage> Usage:<linkPage class="oracle.portal.provider.v2.render.http.ResourceRenderer"> <resourcePath>/mypath/mypage.jsp</resourcePath> <contentType>text/vnd.oracle.mobilexml</contentType> </linkPage> 16-18 Administrator’s Guide Integrating Wireless with Oracle Application Server Portal This tags holds the pointer to the resource which generates the required link that is rendered on a wireless device. This resource must generate Wireless XML. Below is a sample link page implemented in JSP. <%@ page session="false" contentType="text/vnd.oracle.mobilexml" %> <SimpleHref target="/mypath/mywireless.jsp" label="Go"> Wireless HelloWorld </SimpleHref> The new version JPDK has been updated to understand these wireless properties of a Portlet. The JPDK also supports wireless specific request information like location and device information, which can be accessed by the Portlets through the JPDK APIs. 16.3.3 Oracle Portal, Wireless and Single Sign-On (SSO) Both Oracle Portal and Wireless depend on Oracle’s SSO solution for user authentication and login. This integration allows the user to invoke protected applications defined on both systems and eliminates multiple login dialog boxes for users. Wireless Server upgrades the session context of a user to an “authenticated” state when any service or application (HTTP Adapter applications) validates the user credentials with the SSO server. When Oracle Portal, a mobile application, validates the credentials of a user with the SSO Server, the session context in Wireless is also updated. This allows wireless Portlets deployed on Oracle Portal to use services such as User Location Picker, Routing, Mobile Positioning supported by the Wireless Server. 16.3.4 Portlets for Applications Deployed on Wireless Server You can use Oracle Portal’s applications to provide a PC Desktop view of your Wireless services. You can use Portal’s JPDK framework to provide a “showPage" and "editPage", for Web-based customizations. Since the Portal itself can be accessed from a wireless device, you must also provide a mobile Portlet. On a wireless device, the mobile Portlets are rendered as links and can be made to point to an application deployed on the Wireless server. You can use Portal’s JPDK framework to provide a “linkPage" that generates the appropriate link for your wireless service. To point to a wireless service from a mobile portlet you can use following URL syntax in the Wireless XML: target=“___REQUEST_NAME__?___SESSION__&PAoid=<PAoid of Wireless Service>" Integrating Wireless with Other Components 16-19 Notification Engine Integration The Wireless server will replace all “___<Name>__” to the correct values at runtime and will invoke an application defined in the Wireless repository. The following is a sample link page: <%@ page session="false" contentType="text/vnd.oracle.mobilexml" %> <SimpleHref target="/___REQUEST_NAME__?PAoid="+PAoid + "&___ SESSION__" label="Go"> My Wireless Service </SimpleHref> Mobile devices make the first request to OraclePortal server. Portal redirects the device request to Wireless Server, over HTTP, and appends two parameters to the redirected URL. The two query parameters are PAoid and PAhome. Both PAoid and PAhome contain the Portal’s object and service ID. The typical syntax of the redirected URL are: http://Oracle Application Server WirelessSerrver:port/ptg/rm?PAoid=<OraclePortalServiceid>&PAhome=<OracleP ortalService id> The PAoid parameter allows the Wireless server to directly launch the Portal home page, without having to navigate through the Wireless server's folder and service hierarchy. The PAhome sets the Portals Home Page as the home page for the current wireless session. 16.3.4.1 Wireless Tools and Customization as Portal Providers The post-installer automatically registers the Wireless Tools and Customization as two Oracle Portal Providers. Thus, if an Oracle Portal user selects the two providers, the user then sees two portlets: one for the Wireless Tools, and one for Customization. If the URL for tools or Customization is changed, the provider can be registered from Wireless System Manager, part of Oracle Enterprise Manager. 16.4 Notification Engine Integration The application event notification process uses the Wireless Notification Engine to deliver notifications to wireless devices. It adds components that collect application events, process user contact rules, and formats notification contents. Figure 16–7 presents an architectural overview of the various components of the notification process. 16-20 Administrator’s Guide Notification Engine Integration Figure 16–7 Integrated Notification Solutions Applications outside of Wireless can use two different mechanisms to interface with the Notification Engine: the push interface and the pull interface. Using the push interface, applications send notification events over HTTP to the Notification Event Collector Service, which is based on a servlet. The Notification Event Collector Service then passes the notification event data to the Notification Event Feeder, which is a customized data feeder to the Notification Engine. The pull interface enables the notification event collector process to connect to the application and retrieve the notification events. The notification event data is then passed onto the Notification Event Feeder. The notification event collector process consists of a number of different adapters; each adapter is specific for a particular application. You can enable and disable adapters by configuring the notification collector process. Using the System Manager, you can start or stop a notification event collector process. The notification event handler is a customized system-level notification application that reads data from the notification event feeder. The data indicates the target user for this notification, as well as the type of notification and other notification-specific data. The notification event handler then looks up the target user’s active contact rule to determine the user’s preferred notification device type and address. The notification event formatter is then invoked, which generates the content of the notification, customized for the user’s device type. The generated notification content is delivered to user’s devices by the notification engine. Integrating Wireless with Other Components 16-21 Notification Engine Integration The notification event handler is a system-level notification application; users do not need to explicitly create a notification subscription on this process to receive notifications. Instead, only the administrator user, ORCLADMIN, is subscribed to this process. Depending on the application, users can specify (either in the Wireless Customization Portal, or in the actual application itself), the events for which they want to receive notifications. For each notification processed, the system looks up the contact rule of the target user and make sure that the correct user receives the notification. Use the System Manager to start, stop or configure notification event process. For more information, see Section 3.3.4. Note: Only the ORCLADMIN user can subscribe to the notification event handler notification application. If there is more than one subscription, then users will receive multiple copies of each notification (as many copies as there are subscriptions to the notification event handler notification application). The notification event collector and notification event handler are two separate processes. Both of them must be running at the same time for the system to process application event notifications. 16.4.1 Integrating Wireless with Oracle Workflow Oracle Workflow integration includes two components: a notification service which receives notifications from the Oracle Workflow Notification queues and sends them to the user’s mobile device and an Oracle Workflow Notification Worklist service which can be accessed through the Wireless portal. Since Oracle Workflow and Wireless are both components of Oracle Application Server, Wireless has the ability to connect to Oracle Workflow through OID. And since Wireless connects to Oracle Workflow through OID, they share the same user repository. 16.4.1.1 Notification Service Oracle Workflow provides a queue which contains all of the outgoing notifications for that particular instance. Each message in the queue contains all of the necessary information for the notification and for the user to which it is sent. Wireless dequeues these messages and uses XMS to construct a message to be sent to the end user. The user can then respond to this notification. The response is directed to a 16-22 Administrator’s Guide Notification Engine Integration Wireless service which will then update Oracle Workflow according to the user’s response. Note: If end users cannot receive notifications during the testing of the Wireless integration with Oracle Workflow, then you must check the log file for an ORA-4031 error, which indicates that the notification service failed because of insufficient memory pool size in the database. To increase the shared memory pool: 1. Increase the value for the shared_pool_size parameter in the init.ora file. (Typically, the init.ora file is located on the infrastructure machine in the $ORACLE_HOME/dbs directory.) 2. Restart the database for the change to take effect. If end users still cannot receive notifications, then you must further increase the size of the shared memory pool. 16.4.1.2 Worklist Service This is the equivalent of the Oracle Workflow Notification Worklist through the Wireless portal. Using OID, the Worklist Service will connect to Workflow to retrieve a list of all the user’s open notifications. Each notification can be closed or responded to (depending on the type of notification). Integrating Wireless with Other Components 16-23 Notification Engine Integration 16-24 Administrator’s Guide 17 Integrating Wireless Notification with Microsoft Exchange 17.1 Overview This chapter describes how to configure Microsoft Exchange to enable Wireless notification. This chapter includes the following sections: ■ Section 17.2, "Wireless Notification Architecture" ■ Section 17.3, "Configuring the Microsoft Exchange 2000 Server" ■ Section 17.4, "Exchange Notification Administration in Oracle Application Server Wireless" 17.2 Wireless Notification Architecture Oracle Application Server Wireless supports a wireless notification architecture that sends notification messages to a user’s preferred device at the moment an event of interest to that user occurs. This architecture supports notification from several different applications, such as Oracle Unified Messaging, Oracle Calendar, and Microsoft Exchange Server. The wireless notification architecture for Microsoft Exchange uses standard Microsoft Exchange Store events. A COM object (also referred to as Event Sink) is registered to subscribe users’ email event. It forwards notification events to a special Exchange notification account. These events are then retrieved and processed by Oracle Application Server Wireless, and notification messages are sent out accordingly. Oracle Application Server Wireless users who are using Microsoft Exchange email set up their notification preferences in Oracle Application Server Wireless, which uses the Exchange Notification Setting Adapter to set up the notification criteria in the external Exchange server. The Exchange Notification Integrating Wireless Notification with Microsoft Exchange 17-1 Configuring the Microsoft Exchange 2000 Server Setting adapter communicates with Microsoft Exchange Server through ASP calls over standard HTTP protocol. 17.3 Configuring the Microsoft Exchange 2000 Server This section details the configuration tasks described in the Overview. This section includes the following: ■ Section 17.3.1, "Configuration Overview" ■ Section 17.3.1.1, "Requirements" ■ Section 17.3.1.2, "Creating A System User for Registering COM Objects" ■ Section 17.3.1.3, "Registering Event Sink and Registration COM Objects" ■ Section 17.3.1.4, "Creating Out-of-Process COM+ Components" 17.3.1 Configuration Overview To enable the wireless notification for Microsoft Exchange Email, you must perform the following configuration tasks on the machine that runs Microsoft Exchange Server: 1. Create A System User for Registering COM Objects: For the event sink and event registration to work, the corresponding COM+ objects must have access to all of the users’ inbox folders. Therefore, you must create an Exchange system user in the Exchange server domain who is given full access to the entire Microsoft Exchange Store. 2. Register the Event Sink and Registration COM Objects: Create two COM+ applications using the provided .dll files, NotificationSink.dll and RegCom.dll. 3. 17-2 a. One COM+ application is activated by notification setting ASP file to create notification event registration. The COM+ application is activated by the Exchange Server when new emails arrive in the folders. b. Create the Exchange Notification Account: A special email account needs to be created to receive notification event emails from event sink. This email account also needs to be configured in Oracle Application Server Wireless as Notification Account. Configure the Notification Setting ASP: In this task, you must create a virtual directory in the Internet Information Server web site. This virtual directory name also needs to be configured in the Oracle Application Server Wireless as Administrator’s Guide Configuring the Microsoft Exchange 2000 Server ASP Virtual Path. In addition you must enforce basic authentication on the folder, and copy the rule setting ASP file into that directory. . Note: This section describes configuration steps that are performed on the Microsoft Exchange Server Machine for information on configuring the machine running Oracle Application Server Wireless, see Section 17.4, "Exchange Notification Administration in Oracle Application Server Wireless". 17.3.1.1 Requirements You must install the following on the server machine before you can configure the Microsoft Exchange 2000 server: ■ Microsoft Windows 2000/XP/NT Server with Active Directory correctly configured. ■ Microsoft Exchange 2000 Server plus Service Pack 3. ■ Microsoft Internet Information Server with the HTTP Server enabled. Note: All of these components must run properly. 17.3.1.2 Creating A System User for Registering COM Objects The Exchange notification sink and registration COM objects need to be run as a server process by a user that has access to all of the users’ mailboxes. You must create a user and give this user full access to the entire exchange store. To create this user: 1. Logon as Administrator to the Exchange domain. 2. Click the Windows Start button 3. From the Programs menu, select Microsoft Exchange and then select Active Directory Users and Computers. 4. Create a user in the correct domain. Make sure to add the user to the Exchange Domain Servers group. The name of the system account can be any valid user name, for example, notificationreg. Integrating Wireless Notification with Microsoft Exchange 17-3 Configuring the Microsoft Exchange 2000 Server To give the user full access to the Exchange Mailbox Store: 1. Click the Windows Start button. 2. From the Programs menu, select Microsoft Exchange and then System Manager. 3. In the System Manager dialog box (Figure 17–1), expand the Servers category and then select First Storage Group. 4. Select Mailbox Store under the correct Exchange Server name. Figure 17–1 17-4 Exchange System Manager 5. Right click Mailbox Store and then select Properties. The Properties Page appears. 6. Select the Security tab (Figure 17–2). Administrator’s Guide Configuring the Microsoft Exchange 2000 Server Figure 17–2 7. Mailbox Store Properties Under the Security tab, click Add and then select the user notificationreg from the list of users, and then click OK. Note: Be sure to select Full control is selected for the notificationreg user. 8. Right-click the Mailbox Store and select Properties to go to the property page. 9. Under the Security Tab, click Add then select the user notificationreg from the list of users as depicted in Figure 17–3, and then click OK. Integrating Wireless Notification with Microsoft Exchange 17-5 Configuring the Microsoft Exchange 2000 Server Figure 17–3 Select Users, Computers, Groups In the following dialog box, make sure Full control is selected. 17.3.1.3 Registering Event Sink and Registration COM Objects This section provides you with an example of registering the event sink and the registration com objects. 1. On local drive of the Exchange Server machine, create a directory for holding the notification-related files. In this example you create a directory on the C: drive called oracle. 2. Copy files NotificationSink.dll and RegCom.dll from the Oracle Application Server Wireless installation directory, ($ORACLE_HOME/wireless/sample/exchange) to the oracle directory. 3. Open a command prompt. Change directory to c:\oracle. Use the regsvr32 tool to register the two .dll files as follows: regsvr32 NotificationSink.dll regsvr32 RegCom.dll 17-6 Administrator’s Guide Configuring the Microsoft Exchange 2000 Server 17.3.1.4 Creating Out-of-Process COM+ Components Microsoft Exchange does not allow event sinks to run in process with its Web Storage System process, yet a DLL runs in process by default. Therefore, you must create out-of-process COM+ components for the DLLs, so that the event sink methods can be called successfully during runtime. You must do the same for the notification registration DLL. To create a COM+ component: 1. Click the Windows Start button. 2. From the Programs menu, select Administrative Tools and then Component Services. 3. Expand the Component Services and then double-click the COM+ Applications folder (as depicted in Figure 17–4). This folder contains all existing COM+ applications. Figure 17–4 4. Component Services Right-click the COM+ Applications folder. Integrating Wireless Notification with Microsoft Exchange 17-7 Configuring the Microsoft Exchange 2000 Server 5. Select New and then Application. 6. Click Next on the Welcome window. The Install or Create a New Application windows appears (Figure 17–5). Figure 17–5 7. 17-8 Install or Create a New Application Select Create to create an empty application from the Install or Create a New Application Window. The Create an Empty Application window appears (Figure 17–6). Administrator’s Guide Configuring the Microsoft Exchange 2000 Server Figure 17–6 Create Empty Application 8. Enter Notification Event Sink as the name for the new application. Be sure that Server application is the Activation type. 9. Click Next. The Set Application Identity window appears (Figure 17–7). Integrating Wireless Notification with Microsoft Exchange 17-9 Configuring the Microsoft Exchange 2000 Server Figure 17–7 Set Application Identity 10. From the Set Application Identity page, perform the following: ■ ■ ■ Select This user. Click the Browse button to find and select the system user, notificationreg, that you created in Section 17.3.1.2, "Creating A System User for Registering COM Objects". Enter the correct password. 11. Click Next. The Thank you window appears. 12. Click Finish. 17.3.1.5 Adding the DLL Components to the COM+ Component Next, you add the DLL components to the COM+ application. To add the components: 1. Expand the application folder and right-click the Components folder. 2. Select New and the select Component. The Welcome window appears. 3. Click Next. 17-10 Administrator’s Guide Configuring the Microsoft Exchange 2000 Server 4. On the Import or Install a Component window (Figure 17–8), click the Install new component(s) button to create new COM+ components for DLL. Figure 17–8 5. Import or Install a Component On the Install new components window (Figure 17–9), click Add and then locate the NotificationSink.dll file. Integrating Wireless Notification with Microsoft Exchange 17-11 Configuring the Microsoft Exchange 2000 Server Figure 17–9 Install New Components 6. Click Add and locate the RegCom.dll file. 7. Click Next. 8. On the Thank you page, click Finish to close the window. Iasw.NotificationSink and Iasw.NotificationSinkReg appear under Notification Event Sink in Component Services (Figure 17–10). 17-12 Administrator’s Guide Configuring the Microsoft Exchange 2000 Server Figure 17–10 Component Services 17.3.2 Creating an Exchange Notification Account You create an Exchange notification account to hold the notification event emails sent from the event sink. The email address is configured in Oracle Application Server Wireless as Notification Account. For the examples in this section, create an exchange notification account called emailnotif. This account must receive emails and support IMAP or POP3. 17.3.3 Configuring the Notification Setting ASP When users set their notification settings, Wireless invokes an ASP residing on the Exchange Server machine using HTTP. The ASP then calls the NotificationSinkReg COM interface to register event sink for the user. For this to work, the Internet Information Server with the HTTP server must run on the same machine as Exchange server. The URL that Oracle Application Server Wireless instance uses the form of: http://exchangehost.company.com/virtualpath/regevent.asp Integrating Wireless Notification with Microsoft Exchange 17-13 Configuring the Microsoft Exchange 2000 Server The virtual path needs to be configured so that the regevent.asp can be found. Also, this URL must be password-protected. Copy the file regevent.asp from the Wireless installation, ($ORACLE_ HOME/wireless/sample/exchange) directory and put it into the oracle directory that you previously created. To configure a virtual directory that points to the c:\oracle directory: 1. Click the Windows Start button. 2. Select Programs. 3. From the Programs menu, select Administrative Tools and then Internet Service Manager. 4. Expand the right server name. 5. Right-click Default Web Site. 6. Select New and then Virtual Directory. The Welcome window appears. 7. Click Next. 8. In the Virtual Directory Alias window (Figure 17–11), enter the virtual path name, such as oracle. 9. Click Next. This virtual path name must match the URL path of the Oracle Application Server Wireless configuration Adapter URL path. 17-14 Administrator’s Guide Configuring the Microsoft Exchange 2000 Server Figure 17–11 Virtual Directory Alias 10. In the Web Site Content Directory window (Figure 17–12), click the Browse button and select the directory that contains the regevent.asp file. Figure 17–12 Web Site Creation Directory Integrating Wireless Notification with Microsoft Exchange 17-15 Configuring the Microsoft Exchange 2000 Server 11. In the Access Permissions window (Figure 17–13), select Read and Run scripts (such as ASP) and click Next. Figure 17–13 Access Permissions 12. Click Finish. 17.3.3.1 Enabling Basic Authentication After creating the virtual directory, you must enable basic authentication on the directory by performing the following: 17-16 Administrator’s Guide Configuring the Microsoft Exchange 2000 Server 1. Right click the directory name and select Properties. Figure 17–14 Oracle Properties 2. Under the Directory Security tab (Figure 17–14), click Edit (under Anonymous access and authentication control) 3. In the Authentication Methods window (Figure 17–15), do not select Anonymous access. 4. Select Basic authentication. Integrating Wireless Notification with Microsoft Exchange 17-17 Exchange Notification Administration in Oracle Application Server Wireless Figure 17–15 5. Authentication Methods Click OK. The Exchange Server is configured for wireless notification. 17.4 Exchange Notification Administration in Oracle Application Server Wireless Web-based user interfaces are used to create, delete, and modify a user’s notification settings. Underlying the notification setting interface are generic notification setting APIs that use mail system accessing adapters to enable notification for specific users in the Microsoft Exchange mail system. Another part of the notification picture is receiving notification events from Microsoft Exchange server, formatting the notification content, and delivering notification messages according to users’ preferences. A notification event collector module in the architecture contains notification processing components to handle different event delivering method and event content from each supported notification application, including Microsoft Exchange. All the notification processing components use the same notification sender component which perform contact rule look-up and the actual delivery of notification messages using the transport APIs in Wireless. Wireless communicates with Microsoft Exchange Server using standard internet protocols. The users’ notification settings are sent to the Microsoft Exchange Server host through the HTTP protocol. Exchange notification events are delivered to a 17-18 Administrator’s Guide Exchange Notification Administration in Oracle Application Server Wireless specific Exchange notification account in standard email form. The exchange notification processing component in the notification event collector retrieves those event emails through standard IMAP or POP3 protocol. 17.4.1 Site-Level Configuration For Wireless to process notification messages from Microsoft Exchange Server, you must configure the accessing details to the Exchange Server in the system. The notification setting interface uses these configurations to create custom notification criteria for individual users; the notification event collector uses these configurations to retrieve email notification messages. These parameters are unique across the whole system, despite the configurations of the individual middle-tier instances. There should be at most one Microsoft Exchange Server configured for access. You modify these Site-level configuration parameters using the System Manager, which you access through the Oracle Enterprise Manager Application Server Control. For more information on accessing Wireless through the Application Server Control, see Section 2.3. 17.4.2 Configuring the Microsoft Exchange Notification Event Settings From the Component Configuration section of the Administration page select Microsoft Exchange Notification Event Settings (located under Notification Event Collector). The Microsoft Exchange Notification Event Settings screen appears (Figure 17–16). This screen is divided into two sections: the Microsoft Exchange Server section and the Notification Event Settings section. Use the Microsoft Exchange Server section to enter accessing information to the Microsoft Exchange Server; use the Notification Event Settings section to configure the accessing information which is specific to wireless notification. Integrating Wireless Notification with Microsoft Exchange 17-19 Exchange Notification Administration in Oracle Application Server Wireless Figure 17–16 The Microsoft Exchange Notification Event Settings Screen Table 17–1 describes the parameters in the Microsoft Exchange Notification Event settings screen. Table 17–1 Parameters of the Microsoft Exchange Notification Event Settings Screen Parameter Description Hostname The name or IP address for the host that runs Microsoft A string value, such as Exchange Server. exchange.company.com (for a name) or 166.123.23.22 (for an IP address). Port The port for email retrieval from the Microsoft Exchange Server. A string value for the port number The default value for POP3 is 110; for IMAP, it is 143. Mail Protocol The name of mail protocol used to retrieve email from Microsoft Exchange Server. A string value, such POP3 or IMAP. The default value is IMAP. Email Domain The email domain name served by the Exchange server. This value can be different from the Hostname. A string value, such as mydomain.company.com. 17-20 Administrator’s Guide Possible Values Exchange Notification Administration in Oracle Application Server Wireless Table 17–1 Parameters of the Microsoft Exchange Notification Event Settings Screen Parameter Description Possible Values Notification Account The account on the Microsoft Exchange Server that is used to collect notification messages. A string value, such as emailnotif. Password The password for the notification account. A password string, such as welcome. Adapter URL Path The URL that maps to the directory on the Microsoft Exchange Server which contains the notification setting files. Oracle Application Server Wireless uses this URL to communicate with Exchange server in the following format: A string value, such as /oracle. http://hostname/adapter_url_path/regevent.asp 17.4.2.1 Email Notification Engine Backend Configuration The wireless notification architecture in Wireless supports both Microsoft Exchange mail system and Oracle Unified Messaging system. However, only one of these can be configured for each mail service. For the Wireless and Voice applications, the following configuration parameter (described in Table 17–2) is required to indicate which mail system is used for the notification backend. For more information on setting this parameter, see Section 8.3.7. Table 17–2 Parameter Configuration for the Email Notification Backend Description Email System The type of email system that is configured with the current mid-tier instance. Possible Values OrcaleUM or Exchange. 17.4.3 Configuration and Running Notification Related Processes The Wireless notification architecture requires two standalone processes to run at the same time: the Notification Event Collector process and the Notification Event Handler process. After installation, an instance of each process should be preconfigured and listed in the StandAlone Processes table on the Wireless Server home page. Integrating Wireless Notification with Microsoft Exchange 17-21 Exchange Notification Administration in Oracle Application Server Wireless Note: Each process in the Standalone Processes table is represented as a hyperlink, enabling you to drill down to a detail page where you can start and stop a process, view performance metrics, or configure the process. To turn on notification for Microsoft Exchange server, click the link for a Notification Event Collector process to drill down the detail page. From the detail page, select Administration. The administration page appears (Figure 17–17). Select the Microsoft Exchange checkbox and then click OK. After you have completed this configuration, start (or restart) the Notification Event Collector process. Figure 17–17 The Administration Page for a Notification Event Collector Process No further configuration is required for the Notification Event Handler process. Note: Be sure that the Notification Event Collector Process has been started. For more details of managing standalone processes, see Section 3.3.4.2. 17-22 Administrator’s Guide Glossary adapter A dynamically loaded Java class that acquires content from an external source, such as a Web site or a database, and converts the content into Mobile XML. Pre-built adapters include the Web Integration adapter, SQL adapter, and Strip adapter. Adapter Result format A general, user interface-independent content format. Content in Adapter Result format requires conversion to Simple Result format before it can be converted to the final target format. Application A core object used in a Wireless server to represent a unit of information requested by, and delivered to, a Wireless client. An end user typically sees an application as a menu item on a device or as a link on a Web page. Application Link A pointer to a master application. When an application link is placed in a service tree, the corresponding service becomes available to the owner or owners of the service tree. bookmark A link from a service to an external, device-compatible data source that does not require Wireless processing. Collaboration Applications A set of PIM-related, preconfigured applications, including the Address Book, Calendar, Directory, Fax, Short Messaging, Mail, and Tasks. Glossary-1 Customization Portal A Web-based interface (also referred to as the Wireless Customization Portal) that end users access to select services and configure their device portal. Users access the Customization Portal from their desktop computers. daemon A background process that performs a specified operation in response to certain events or at specified times. device An object that describes either a physical device, such as a cellular phone, or an application, such as email. There is a default device transformer for each device. device transformer A transformer that converts content from Simple Result format into the target format. DOM Interface Document Object Model. The interface that allows programs and scripts to access and transform processed XML documents. DTD Document Type Definition. A file in an XML document that defines how the application presenting the document should interpret the XML document. end user A person who accesses a Wireless service from a client device. filtering The process of transforming content by replacing existing markup tags with tags that represent another format. HDML Handheld Device Markup Language. A reduced version of HTML designed to enable wireless pagers, cellular phones, and other handheld devices to access Web page content. IMAP Interactive Mail Access Protocol. A hierarchical mail storage and retrieval structure. Glossary-2 HTML HyperText Markup Language. The document format that defines the page layout, fonts, and graphic elements, as well as the hypertext links to other documents on the Web. JNDI Java Naming and Directory Interface. A set of APIs that provide directory and naming functionality to Java applications. JSP JavaServer Pages. A technology based on Java servlets which separates the functions of Web page layout and content generation. JavaServer Pages technology enables the creation of server-generated Web pages incorporating dynamic content. LDAP Lightweight Directory Access Protocol. Protocols for accessing directories. The LDAP protocols support TCP/IP. master application The core implementation of aWirelesse application. The master application invokes a specific adapter, and identifies the transformer used to convert content for the target device. MIME Multipurpose Internet Mail Extensions. A mail type that defines the message structure for different 8-bit character sets and multi-part messages. Mobile Portal The interface where mobile device users access their Wireless applications. OracleAS Wireless XML A set of DTDs and XML document conventions used by the Wireless to define content and internal objects. PremiumSMS Billing Model The Async Listener enables users of SMS-enabled phones to access content from the Internet. To request such an application, a mobile user sends a message containing SMS keywords describing the application to an Async account using a short address (a number) known as the Large Account. The SMS keywords identify the application (for example, ST for stock quote applications.) The message goes Glossary-3 through the network of a PremiumSMS operator to retrieve the content supplied by the Content Provider, whose system listens for the SMS message sent to the Large Account. The Content Provider processes the message and returns the requested information as a message to the user, who is charged a premium on top of the standard SMS transport rate for mobile device-issued requests. The content provider and PremiumSMS operator (or carrier) both share this premium. provisioning adapter The adapter used to create, modify, and delete user objects in the Wireless repository. repository An Oracle database which stores all of the Wireless objects, such as users, groups, adapters, and applications. request A query to initiate a desired Wireless service. Requests are submitted on behalf of end-users to the Wireless server. request manager The Wireless component that processes requests for services. The request manager authenticates the user, submits the request to the Wireless core, and retrieves the device type and any presentation settings. The request manager also forwards converted content from the transformer to the user. request object An XML document representing a request for service. result transformer A transformer that converts content from Adapter Result format into Simple Result format. ReverseCharge ReverseCharge is a billing model which charges the service premium to the mobile subscriber on the result SMS message, rather than on the service request itself. Mobile users, requesting applications through multiple channels, such as IVR (interactive voice response) or the Web, receive the service result as an SMS message. For example, when a user wants to access an article on the Web, the user must first complete and submit a web form requesting his SMS address before receiving an SMS message containing the authorization code needed to access the Glossary-4 article. In this case, the user is charged a transport fee and a service premium for the SMS result message conveying the authorization code. Usually with SMS, the sender of an SMS message is charged. With ReverseCharge, however, the party receiving the message is charged a transport fee and a service premium. The amount of the service premium depends upon which service the mobile user requests; each service has its own associated tariff class. To ensure the correct billing information, the application provider supplies the ReverseCharge operator with the Large Account and the tariff class of the service upon generating the service result SMS message. RMI Remote Method Invocation. A standard for creating and calling remote objects. RMI allows Java components stored in a network to be run remotely. sample repository The initial Wireless repository, which includes pre-built objects such as transformers, adapters, and logical devices. Service Manager The visual interface for creating and managing Wireless users, user groups, adapters, transformers, and services. Simple Result format A content format that contains abstract user interface elements such as text items, menus, forms, and tables. source format The original format of content retrieved from an external data source by a Wireless adapter. For example, the source format of Web page content is HTML. Strip adapter An adapter that retrieves and adapts Web content dynamically. strip level The class used by the strip adapter to process markup tags in source content. SQL adapter An adapter that retrieves and adapts content from any JDBC-enabled data source. Glossary-5 stylesheet An XSLT (eXtensible Stylesheet Language Transformations) instance that implements content presentation for XML documents. Wireless transformers can be either XSLT stylesheets or Java programs. target format The format required to deliver data to a specific type of client device. Thin HTML A minimal version of HTML implemented by a transformer in the starter Wireless repository. Thin HTML does not include support for frames, JavaScript, or other advanced features. transformer A Wireless object that converts content returned by the Wireless adapters. Result transformers convert Adapter Result documents into Simple Result documents. Device transformers convert Simple Result documents into the target format. TTML Tagged Text Mark-up Language. A lightweight version of HTML suitable for most PDAs. user agent An object that associates an end user with a device type. user group A Wireless object that represents a set of users that are grouped together based on common criteria such as interests, subscription level, or geographic location. VoxML A markup language that enables the use of voice to interface with applications. WAP Wireless Application Protocol. A wireless standard from Motorola, Ericsson, and Nokia for providing cellular phones with access to email and text-based Web pages. WAP uses Wireless Markup Language (WML). Glossary-6 Web Integration adapter An adapter that retrieves and adapts Web content using WIDL files to map the source content to Wireless XML. WIDL Web Interface Definition Language. A meta-data language that defines interfaces to Web-based data and services. WIDL enables automatic and structured Web access by compatible applications. WIDL file A file written in Web Interface Definition Language that associates input and output parameters with the source content that you want to make available in a Wireless service. WML Wireless Markup Language. A markup language optimized for the delivery of content to wireless devices. XML eXtensible Markup Language. A flexible markup language that allows tags to be defined by the content developer. Tags for virtually any data item can be created and used in specific applications, allowing Web pages to function like database records. XSLT Extensible Stylesheet Language Transformations. A language for transforming one XML DTD into another XML DTD. Glossary-7 Glossary-8 Index A access control, 5-20, 10-6 adapters creating, 7-14 deleting, 7-15 editing, 7-15 setting init parameters, 7-15 setting input parameters, 7-18 Address Book configuration parameters, 8-8 configuring, 8-7 connecting with the Oracle Collaboration Suite, 8-8 linking to, 8-12 output parameters, 8-15 overview, 8-7 alerts basing on an existing master alert, 5-31 creating, 5-30 entering basic information, 5-30 moving, 5-32 setting trigger conditions for, 5-31 API scan policies associating with an application link, 5-15 creating, 7-30 application link categories creating, 5-26 application links certifying APIs, 5-15 creating, 5-10 debugging, 5-16 description, 5-1 editing, 5-15 moving, 5-19 testing on a phone simulator, 5-16 viewing application links from the User Manager, 4-15 Applications Setup, 8-3 AppsFramework Adapter setting input parameters, 7-20 AQ (Advanced Queuing), 13-6 ASPs creating for PIM applications, 8-60 Async applications adding to an application link category, 5-26 configuring, 9-19 Async Listener adjusting the working threads, 13-7 configuring, 3-45 configuring Messaging Server client, 3-45 authentication through email, 10-9 through SMS, 10-9 through voice, 10-10 through WAP, 10-9 authentication dynamics wireless single sign-on, 11-3 to 11-7 B Billing Integration Framework configuring, 3-35 Biz Directory application input parameters, 8-63 linking to, 8-64 overview, 8-62 bookmarks Index-1 creating, 5-17 description, 5-2 moving, 5-19 C Calendar application configuration parameters, 8-19 connecting to the Oracle Collaboration Suite, 8-19 input call parameters, 8-22 linking to, 8-21 output parameters, 8-23 overview, 8-19 required software, 8-19 clustering configuration configuring OC4J, 14-3 configuring OHS, 14-2 configuring OPMN, 14-2 Communication Data Privacy, 10-1 configuring Messaging Server client, 3-45 configuring the multimedia adaptation services, 3-43 Content Manager assigning a DRM policy to a J2ME application link, 5-11 assigning objects to a user group, 5-21 creating application link categories, 5-26 creating bookmarks, 5-17 creating folders, 5-7 debugging an application link, 5-16 editing application links, 5-15 editing folders, 5-10 publishing objects, 5-20 search functions, 5-5 testing application links, 5-16 Content Manager search functions, 5-5 D DAS user management, 16-5 Data Feeder processes, 13-8 database connections optimizing, 13-10 Index-2 device mapping, 7-4 devices cloning, 7-11 creating, 7-5 determining encoding, 15-4 searching, 7-5 viewing from User Manager, 4-16 Directory application configuration parameters, 8-25 linking to, 8-32 output parameters, 8-32 overview, 8-25 Directory Integration Platform (DIP) serve, 10-11 downloading repository objects, 3-55 Driving Directions application input call parameters, 8-66 input parameters, 8-65 linking to, 8-66 overview and required software, 8-65 Driving Directions applications output parameters, 8-68 DRM policies associating a policiy with a J2ME application, 5-11 Count DRM policy and Interval DRM policy, 7-25 creating, 7-26 creating a customized pacakage, 7-28 creating the ORDL (Open Digital Rights Language) document, 7-28 F Fax application configuration parameters, 8-34 linking to, 8-36 output parameters, 8-38 required third-party software, 8-32 sample cover page, 8-33 folders assigning rendering options to, 5-9 configuring sorting order and display, 3-39 creating, 5-7 creating with the Content Manager, 5-6 editing, 5-10 selecting sorting options, 5-9 use with application links, 5-2 Form Filler application configuring mappings, 8-77 configuring the guessing heuristics, 8-76 input call parameters, 8-81 input parameters, 8-80 linking to, 8-81 overview, 8-75 Foundation Manager accessing, 7-3 cloning a device, 7-11 creating a device, 7-5 creating a digital rights (DRM) policy, 7-26 creating adapters, 7-14 creating API scan policies, 7-30 searching for a device, 7-5 H headings H2 Head2, 13-2 Home page configuring the proxy server and entry points, 3-7 process management, 3-6 viewing log files, 3-6 HTTP adapter, in wireless single sign-on, 11-2 HTTP header names configuring, 3-39 HTTP headers device mapping, 7-4 HTTPS, 10-14 security in LAN gateway, 10-14 security in LAN gateways, 10-14 I Instant Messaging overview, 8-44 Instant Messaging application configuration parameters, 8-44 linking to, 8-46 required third-party software, 8-44 Integrating, 16-16 J J2ME applications assigning DRM policies to, 5-11 JVM optimizing performance, 13-11 L languages availablity, 4-14 setting display, 4-14 listeners configuring, 3-40 locale detection Accept Language header, 15-1 PAlocale, 15-1 localization, 4-14 Location Picker application input call parameters, 8-70 input parameters, 8-69 linking to, 8-70 output parameters, 8-72 overview, 8-68 software requirements, 8-69 M Mail application configuration parameters, 8-47 input call parameters, 8-52 linking to, 8-52 overview, 8-47 Maps application input call parameters, 8-74 input parameter, 8-73 linking to, 8-73 output parameter, 8-75 overview, 8-73 master applications input parameters, 7-18 m-Commerce applications APIs, 8-75 overview, 8-75 messaging configuration, 9-21 Index-3 Messaging Server configuring, 3-50 Messaging Server client adjusting the thread pool size, 13-8 configuring for the Async Listener, 3-45 configuring for the Notification Engine, 3-48 Mobile Application Framework Adapter modifying, 7-21 Mobile Studio accessing, 6-3 adding a locale, 6-5 adding a sample application, 6-8 adding new locales, 6-6 administration, 6-4 algorithm for resolving locales, 6-7 configuring, 3-36, 6-2 enabling default locales, 6-5 finding a locale, 6-5 locales, 6-4 Sample Services, 6-8 mod_osso, 10-10, 11-7, 11-9 modules configuring OMP URLs, 5-11 description, 5-2 moving objects with the Content Manager, 5-19 Multi-Channel Server configuring, 3-37 multimedia adaptation services configuring, 3-43 m-Wallet extending, 8-100 N non-repudiation, 10-21 Notification Engine configuring, 3-47 configuring the Messaging Server client, O OID integration with Wireless, 16-1 OMP URLs, 8-3 configuring for mobile applications, Index-4 5-11 3-48 Open Digital Rights Language (ORDL) documents, 7-28 opmn.xml updating, 3-16 optimizing performance by increaseing heap size, 13-8 Oracle HTTP Server optimizing performance, 13-9 Oracle Internet File System application configuration parameters, 8-39 input call parameters, 8-41 linking to, 8-41 output parameters, 8-42 overview and required software, 8-39 OracleAS Portal accessing Wireless, 16-16 P partner applications in wireless single sign-on, 11-5 to 11-7 PAsection parameter, 7-20 Payment application capturing transactions, 8-89 configuring, 8-85 linking to, 8-86 overview, 8-84 Performance Monitor configuring, 3-35 PIM overview, 8-7 PIM applications ASPs, 8-60 connecting to Microsoft Exchange Server and Lotus Domino Server, 8-59 PL/SQL procedures in applications, 7-16 Pocket PC devices accessing the Wireless server from, 9-2 portlets development, 16-17 PremiumSMS, 5-13, 5-25 processes managing Web-based and standalone processes on the middle tier, 3-14 standalone, 3-15 standalone processes, 3-15 Web-based applications, 3-15 Provisioning Server configuring, 3-53 Proxy Server configuring HTTP, HTTPS, 3-26, 3-27 configuring through the Home page, 3-7 publishing objects to a user group, 5-20 R redirection agent in Single Sign-On, Region Modeling Tool, 7-24 ReverseCharge, 5-13, 5-25 routing presets editing, 5-13 11-3 S security access control, 10-9 accountability, 10-2 authentication, 10-1 authorization, 10-2 availability, 10-2 communication data privacy, 10-13 data integrity, 10-2 non-repudiation, 10-2, 10-21 storage data privacy, 10-2 through email, 10-18 through SMS, 10-16 through voice, 10-20 wired deployment, 10-3 wireless deployment, 10-3 Short Messaging application configuration, 8-54 configuration parameters, 8-54 linking to, 8-55 overview, 8-53 Single Sign-Off wireless, 11-8 site administration configuring URLs, 3-28 management through the System Manager, 3-1 site administration, 3-26, 3-43, 3-45 configuring folder display, 3-39 configuring HTTP, HTTPS, 3-26, 3-27 configuring Mobile Studio, 3-36 configuring Notification Engine, 3-47 configuring the Billing Integration Framework, 3-35 configuring the device properties, 3-39 configuring the events and listeners, 3-40 configuring the JDBC connection pool, 3-31 configuring the Messaging Server, 3-50 configuring the Messaging Server client, 3-48 configuring the Multi-Channel Server, 3-37 configuring the Performance Monitor, 3-35 configuring the Provisioning Server, 3-53 configuring the site locale, 3-31 configuring the SSL certificates, 3-30 configuring the XMSC, 3-50 configuring WAP profiles, 3-33 site locale configuring, 3-31 site performance, 3-21 monitoring location-related performance, 3-26 monitoring the Async Listener, 3-23 monitoring the Messaging Server, 3-24 monitoring the Multi-Channel Server, 3-22 monitoring the Notification Engine, 3-24 SMS security through SMSC, 10-16 SQL Adapter setting init parameters, 7-16 setting input parameters, 7-24 SQL adapter input parameters, 7-24 SSL, 3-30 SSO, 16-19 global logout, 11-8 integration with Oracle9iAS Portal, 16-19 SSO Global Logout, 11-8 standalone processes adding, 3-15 system logging configuring and viewing, 3-9 System Manager accessing and logging in, 3-3 Index-5 accessing through OEM, 3-4 administering the site, 3-26 basic site configuration, 3-7 configuring Mobile Studio, 6-2 Home page, 3-5 logging in to the standalone mode, 3-3 managing Web-Based (OC4J) applications from the Home page, 3-6 monitoring site performance, 3-21 process management from Home page, 3-6 refreshing the performance data for the Web-based (OC4J) applications, 3-6 viewing log files, 3-6 views, 3-1 T Tasks application configuration parameters, 8-57 linking to, 8-59 overview, 8-57 required software, 8-57 time zone configuring, 3-31 topics creating, 5-33 editing, 5-33 topics and alerts searching for, 5-28 Transcoder application configuration parameters, 8-102 overview, 8-102 transformers deleting, 7-14 editing, 7-13 Translator application linking to, 8-106 transport performance, 13-4 tuning methods, 13-13 V virtual users provisioning, 3-32 voice access provisioning voice gateway phone numbers, 9-8 voice-enabled applications testing, 9-13 U uploading repository objects, 3-57 URLs configuring for the Wireless site, Index-6 defining for standalone mode, 3-12 defining in integrated mode, 3-12 defining in standalone mode, 3-12 specifying for middle tier, 3-11 user groups assigning alerts and topics to, 5-33 publishing objects to, 5-21 user home root folders creating, 5-22 editing, 5-25 User Manager creating a new user, 4-9 editing user profiles, 4-13 Quick Search function, 4-8 resetting user passwords, 4-14 search functions, 4-7 viewing application links, 4-15 viewing devices, 4-16 viewing user logs, 4-17 user provisioning configuring, 3-32 user roles, 4-2 users creating, 4-9 creating with DAS or OID DAS creating users, 4-5 editing user information, 4-13 logging information, 4-17 resetting password, 4-14 searching for, 4-7 UTF-8 pages adjusting display, 4-14 3-28 W Wallet application configuration parameters, 8-91 configuring, 8-91 linking to, 8-92 output parameters, 8-95 overview, 8-90 WAP security, 10-15 WAP gateways configuring, 9-4 WAP phones configuring, 9-5 WAP profiles, 3-33 Web Integration Adapter setting init parameters, 7-17 setting input parameters, 7-17 Web-based applications refreshing performance data, 3-6 WebCache, 13-10 configuring, 3-31 integration with Wireless, 16-5 optimizing, 13-10 setting the refresh, 3-59 WIDL Interface parameter, 7-17 Wireless Portlets developing, 16-17 Wireless server accessing from a pocket PC device, 9-2 accessing from Internet Explorer, 9-2 WTLS protocol security in WAP, 10-15 X XMSC configuring, 3-50 Index-7 Index-8