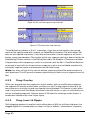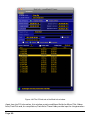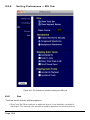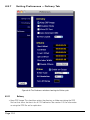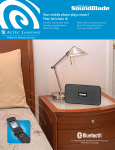
1
soundBlade LE User Manual Index
studioCare Support Program —............................................................................. 10
Why Do You Need studioCare?:..................................................................................................... 10
What Is studioCare?:....................................................................................................................... 10
Annual Support & Maintenance Programs:................................................................................. 10
On Demand Support Offerings:..................................................................................................... 11
Chapter 1Introduction............................................................................................ 12
Chapter 2Quick Start.............................................................................................. 13
2.1
Before You Begin.......................................................................................................13
2.1.1
Requirements............................................................................................. 13
2.1.2
Installation................................................................................................. 13
2.2
Creating CDs With soundBlade LE...........................................................................13
First:
Assemble your audio................................................................................. 13
Second:
Edit and process segments and tracks...................................................... 14
Third:
Adjust crossfades...................................................................................... 14
Fourth:
Burn the Project to a CD............................................................................ 14
2.3
Step By Step — Make A Quick CD........................................................................... 14
Step 1.
Open.......................................................................................................... 14
Step 2.
Drag........................................................................................................... 14
Step 3.
Check........................................................................................................ 15
Step 4.
Burn........................................................................................................... 15
Chapter 3Basic Operation...................................................................................... 16
3.1
General Workflow & Explanation of Terms Used....................................................16
3.2
Project Layout............................................................................................................17
3.3
Starting a Project: Opening Files.............................................................................18
3.3.1
Opening Projects....................................................................................... 18
3.3.2
Opening Sound Files.................................................................................. 19
3.3.3
Adding Your First Sound File...................................................................... 19
3.4
Page 2
Waveforms.................................................................................................................20
3.5
Auditioning Sound....................................................................................................21
3.5.1
Playback.................................................................................................... 21
3.5.2
Playback from the Edit Point...................................................................... 22
3.5.3
Playback from Playhead............................................................................. 22
3.5.4
Random Play.............................................................................................. 22
3.5.5
Time Displays............................................................................................. 22
3.6
Navigating the Waveform Display...........................................................................23
3.6.1
Scrolling..................................................................................................... 23
3.6.2
Zooming.................................................................................................... 23
3.7
Selections..................................................................................................................24
3.7.1
Selecting a Region..................................................................................... 24
3.7.2
Selecting Segments................................................................................... 26
3.8
Simple Editing...........................................................................................................27
3.8.1
The Fade Tool............................................................................................. 27
3.8.2
Deleting Part of a Sound File...................................................................... 29
3.8.3
Splitting a segment into new segments..................................................... 31
3.8.4
Manipulating Fades.................................................................................... 31
3.8.5
Changing the order of songs..................................................................... 31
3.8.6
Simple Track Spacing: AutoSpace.............................................................. 33
3.8.7
Exporting Selections & Segments.............................................................. 33
3.9
PQ Marks: Defining Metadata..................................................................................34
3.9.1
Inserting PQ Marks Manually..................................................................... 34
3.9.2
Moving PQ Marks...................................................................................... 34
3.9.3
Removing PQ Marks.................................................................................. 34
3.9.4
Inserting PQ Marks Automatically.............................................................. 35
3.9.5
Tracks........................................................................................................ 35
3.9.6
The Marks Button...................................................................................... 36
3.10
Delivery......................................................................................................................36
3.10.1
A Check List for Delivery........................................................................... 37
3.11.1
The Mark Info Window.............................................................................. 38
Chapter 4Advanced Editing................................................................................... 45
Page 3
4.1
Fade Tool Options......................................................................................................45
4.1.1
Changing Fade Parameters........................................................................ 45
4.1.2
Changing the shape of the Fade................................................................ 46
4.1.3
Changing the Fade Duration...................................................................... 47
4.1.4
Changing the Fade Type............................................................................. 47
4.2
Drag & Drop...............................................................................................................48
4.2.1
Resequencing............................................................................................ 48
4.2.2
Drag–Overlay.............................................................................................. 50
4.2.3
Drag–Insert & Ripple.................................................................................. 50
4.2.3
Drag–Replace............................................................................................. 51
4.3
4.3.1
Text Mode..................................................................................................................51
Gain Adjustment........................................................................................ 51
4.3.2 Combo Project Configuration............................................................................... 53
4.4
Gain Overlay Mode...................................................................................................53
4.5
SRPs...........................................................................................................................55
4.6
Edit Groups................................................................................................................56
4.7
Project Sample Rate..................................................................................................57
4.8
Advanced PQ.............................................................................................................58
4.8.1
Album Info................................................................................................. 60
4.8.2
Track Info................................................................................................... 61
4.8.3 A Word About PQ Offsets......................................................................... 62
4.8.5
PQ Delivery Tab.......................................................................................... 64
Chapter 5 Meters.................................................................................................... 69
5.1
Meters Window.........................................................................................................69
Chapter 6Menus..................................................................................................... 71
6.1
The File Menu............................................................................................................71
6.1.1
New Project............................................................................................... 72
6.1.2
Open Project…........................................................................................... 72
6.1.4
Open Sound File…...................................................................................... 72
6.1.5
Open Dual Sound File….............................................................................. 72
6.1.6
Open EDL…................................................................................................ 72
Page 4
6.1.8
Make securePlayer….................................................................................. 73
6.1.9
Close Window........................................................................................... 73
6.1.10
Save Project............................................................................................... 73
6.1.11
Save Project As…....................................................................................... 74
6.1.12
Save As Default Project............................................................................. 74
6.1.13
Reveal Sound In Finder.............................................................................. 74
6.1.14
Build Waveform…....................................................................................... 74
6.1.15
Export Sound File….................................................................................... 74
6.1.16
Export Tracks............................................................................................. 75
6.1.17
Save Reversed…......................................................................................... 75
6.1.18
System Information................................................................................... 76
6.1.19
Audio MIDI Setup….................................................................................... 78
6.1.20
Rescan IO…................................................................................................ 78
6.1.21
Quit............................................................................................................ 78
6.2
The Edit Menu...........................................................................................................79
6.2.1
Undo (action)............................................................................................. 79
6.2.2
Redo (action).............................................................................................. 80
6.2.3
Cut............................................................................................................. 80
6.2.4
Copy.......................................................................................................... 80
6.2.5
Paste (Replace / Insert / Overlay)............................................................... 80
6.2.6
Select/Deselect All..................................................................................... 80
6.2.7
Delete Selection......................................................................................... 80
6.2.8
Clear Selection........................................................................................... 81
6.2.9
Delete Selection......................................................................................... 81
6.2.10
Clear Selection........................................................................................... 81
6.2.11
Create Crossfade/Create Segment . .......................................................... 81
6.2.12
Create Crossfade from In Point/Create Segment from In & Out Point(s).... 81
6.2.13
Delete Crossfade....................................................................................... 81
6.2.14
Move Segments…...................................................................................... 82
6.2.15
Segment Gain…......................................................................................... 82
6.2.16
Reverse Polarity......................................................................................... 82
6.2.17
Nudge Segment Left/Right......................................................................... 82
Page 5
6.2.18
Edit Segment Name................................................................................... 83
6.2.19
Editing Auto Tool Override......................................................................... 83
6.2.20
Auto Space All Segments/Tracks............................................................... 83
6.3
The EDL Menu...........................................................................................................83
6.3.1
Show/Hide Text View................................................................................ 83
6.3.2
Show/Hide Gain Overlay............................................................................ 84
6.3.3
Bypass/Enable Gain Overlay...................................................................... 84
6.3.4
Create Gain Nodes..................................................................................... 84
6.3.5
Select Gain Nodes..................................................................................... 84
6.3.6
Refresh...................................................................................................... 84
6.3.7
Standard/Large Track Size......................................................................... 85
6.4
The Play Menu...........................................................................................................85
6.4.1
Play From Selection................................................................................... 85
6.4.2
(Play) Selection.......................................................................................... 86
6.4.3
(Play) From Playhead.................................................................................. 86
6.4.4
Repeat Play................................................................................................ 86
6.4.5
Stop All...................................................................................................... 86
6.4.6
Around Selection Center............................................................................ 86
6.4.7
Play from Selection.................................................................................... 87
6.4.8
Play to End of Selection............................................................................. 87
6.4.9
To In Point.................................................................................................. 88
6.4.10
From In Point............................................................................................. 88
6.4.11
To Out Point............................................................................................... 88
6.4.12
From Out Point.......................................................................................... 88
6.4.13
Play Between In and Out Points................................................................. 88
6.4.14
Move Playhead.......................................................................................... 88
6.4.15
Hide Playhead When Stopped.................................................................... 89
6.5
The Mark Menu.........................................................................................................89
6.5.1
Mark Info................................................................................................... 90
6.5.2
Track Start Mark........................................................................................ 90
6.5.3
Track End Mark.......................................................................................... 90
Page 6
6.5.4
Index Mark................................................................................................. 90
6.5.5
Delete Mark............................................................................................... 90
6.5.6
Lock Marks from Selection........................................................................ 90
6.5.7
Unlock Marks from Selection..................................................................... 90
6.5.8
Lock All Marks........................................................................................... 90
6.5.9
Unlock All Marks........................................................................................ 91
6.5.10
Analog Black to Marks............................................................................... 91
6.5.11
Edited Black to Marks................................................................................ 91
6.5.12
Edited Black to Start Marks....................................................................... 91
6.5.13
The Mark Contextual Menu....................................................................... 91
6.6.1
Set In Point................................................................................................ 93
6.6.2
Set Out Point............................................................................................. 94
6.6.3
Set In & Out Points.................................................................................... 94
6.6.4
Clear In Point............................................................................................. 94
6.6.5
Clear Out Point.......................................................................................... 94
6.6.6
Clear In & Out Points................................................................................. 94
6.6.7
Nudge Right/Left........................................................................................ 94
6.6.8
Move In Point/Out Point….......................................................................... 94
6.6.9
Move In Point to Out Point........................................................................ 95
6.6.10
Find & Set Points....................................................................................... 95
6.6.11
Select Nudge Size...................................................................................... 95
6.6.12
Set SRP..................................................................................................... 95
6.6.13
Set SRP with Text...................................................................................... 96
6.6.14
Lock SRPs from Selection.......................................................................... 96
6.6.15
Unlock SRPs from Selection...................................................................... 96
6.6.16
Clear Selected SRPs.................................................................................. 96
6.6.17
Drop Edit Point at Playhead....................................................................... 96
6.6.18
Edit Point to Playhead................................................................................ 96
6.6.19
Move Edit Point to….................................................................................. 96
6.6.20
Edit Point to Next Peak.............................................................................. 97
6.6.21
Select Start to Edit Point............................................................................ 97
6.6.22
Select Edit Point to End............................................................................. 97
Page 7
6.6.23
Selection from Selected Segments............................................................ 97
6.6.24
Select Segment to End.............................................................................. 97
6.6.25
Select Segment to Start............................................................................. 98
6.6.26
Select Segments from Selection................................................................ 98
6.7 The View Menu..........................................................................................................99
6.7.1
Move Forward/Backwards/Select Next/Previous Segment....................... 99
6.7.2 Zoom In/Out............................................................................................ 100
6.7.3
Zoom In Around In/Out Point................................................................... 100
6.7.4
Zoom In/Out around Edit Point................................................................ 100
6.7.5
Zoom In/Out around Playhead................................................................. 100
6.7.6 Zoom to Previous/Next............................................................................ 100
6.7.7 Zoom around Playhead............................................................................ 100
6.7.8
Zoom around Selection Center................................................................ 101
6.7.9
Zoom to Selection Start/End.................................................................... 101
6.7.10
Zoom to Selection.................................................................................... 101
6.7.11
Zoom to Entire Project/Track.................................................................... 101
6.8
The Windows Menu................................................................................................ 102
6.8.1
Meters..................................................................................................... 102
6.8.2
Mark Info................................................................................................. 102
6.8.3
The Preferences Window......................................................................... 102
6.9.4
Setting Preferences — Editing Tools Tab.................................................. 103
6.9.5
Setting Preferences — Time Display Tab................................................... 106
106
6.9.6
Setting Preferences — EDL Tab................................................................ 108
108
6.9.7
Setting Preferences — Delivery Tab.......................................................... 110
110
6.9.8
Setting Preferences — Desk Tab.............................................................. 113
113
Appendix 1 Best Practices & Maintenance..........................................................115
A1.1
Introduction............................................................................................................. 115
A1.2
Source Material Considerations............................................................................. 115
Page 8
A1.3
Naming Conventions.............................................................................................. 116
A1.4
Host Considerations & Routine Maintenance....................................................... 116
A1.4.1
File Systems............................................................................................ 116
A1.4.2
Storage Systems..................................................................................... 116
A1.4.3
Permissions............................................................................................. 117
A1.4.4
3rd Party Configuration Management...................................................... 117
A1.4.5
3rd Party Applications.............................................................................. 117
A1.4.6
iLoks & Your License............................................................................... 118
A1.5
Delivering DDPs...................................................................................................... 118
A1.6
Delivering CD-Rs..................................................................................................... 118
A1.7
Delivering CD Text....................................................................................................119
Appendix Keyboard Shortcuts............................................................................. 121
Windows Shortcuts......................................................................................................................121
File & Project Shortcuts................................................................................................................121
Playback Shortcuts.......................................................................................................................121
Editing Shortcuts..........................................................................................................................122
Viewing Shortcuts.........................................................................................................................123
CD Prep
124
System
124
Appendix 3 Contextual Menus............................................................................ 125
Control–Click.................................................................................................................................125
In the Waveform —...................................................................................................... 125
With Gain Overlay on —............................................................................................... 125
In the Track Bar —........................................................................................................ 126
In the waveform display —.......................................................................................... 126
On a PQ mark —.......................................................................................................... 126
Appendix 4Additional Resources......................................................................... 127
soundBlade LE 2.0 User Manual Index................................................................ 128
Page 9
studioCare Support Program —
Why Do You Need studioCare?:
Sometimes things don’t quite go as expected – usually with a deadline looming! Sonic Studio’s studioCare program gives you fast access to highly skilled and experienced engineers
with a passion for audio as well as the capability to provide a solution. studioCare compliments the 30-day tech support that’s included with your software, extending and enhancing the
value your product with high-priority response to your software and hardware questions. From
the casual home studio to the largest corporate facility, you can count on studioCare to keep
you ahead of the curve.
What Is studioCare?:
studioCare is Sonic Studio LLC’s professional priority support program. Designed with your
needs in mind, it’s like having a technician on call, reducing downtime by prioritizing your incoming support requests. As a studioCare user, you can rest assured with:
•
Priority support during regular Sonic Studio business hours.
•
Scheduled support sessions 7 days a week.
•
Access to pre-release software updates and patches
•
Remote diagnosis and problem solving
•
Getting answers - No question too simple or complex
•
Recurring billing - keeps your coverage current
Annual Support & Maintenance Programs:
studioCare Programs At a Glance
Priority
Email
studioCare LE √
Software
Telephone
Remote
Cost/Year
Updates
√
Support
1/year
Log-On
1/year
USD*
$99.00*
*studioCare will cost more in regions outside USA. Please contact [email protected]
for a quote.
Page 10
Click here to purchase studioCare LE NOW!
On Demand Support Offerings:
studioCare QuickStart for Sonic Studio products– 1 hour of remote setup assistance and training for soundBlade, NoNOISE or Series 300 Hardware. Price is per product.
$125.00 – one-time charge.
Click here to purchase studioCare QuickStart NOW!
On-Demand Support - Get help from trained Sonic Studio support techs with expert troubleshooting and usage experience. No annual contract.
$85.00/Incident
Click here to purchase On-Demand Support NOW!
©2012 Sonic Studio, LLC — All rights reserved
This manual, as well as the software described in it, is furnished under license and may only be used or copied in accordance
with the terms of such license. The information in this manual is furnished for informational use only, is subject to change without notice, and should not be construed as a commitment by Sonic Studio, LLC. Sonic Studio, LLC assumes no responsibility or
liability for any errors or inaccuracies that may appear in this book.
Except as permitted by such license, no part of this publication may be reproduced, stored in a retrieval system, or transmitted,
in any form or by any means, electronic, mechanical, recording, or otherwise, without the prior written permission of Sonic Studio, LLC.
SONIC STUDIO, LLC MAKES NO WARRANTIES, EXPRESS OR IMPLIED, INCLUDING WITHOUT LIMITATION THE IMPLIED WARRANTIES OF MERCHANTABILITY AND FITNESS FOR A PARTICULAR PURPOSE, REGARDING THE APPLE SOFTWARE. SONIC
STUDIO, LLC DOES NOT WARRANT, GUARANTEE, OR MAKE ANY REPRESENTATIONS REGARDING THE USE OR THE RESULTS
OF THE USE OF THE SONIC STUDIO, LLC SOFTWARE IN TERMS OF ITS CORRECTNESS, ACCURACY, RELIABILITY, CURRENTNESS, OR OTHERWISE. THE ENTIRE RISK AS TO THE RESULTS AND PERFORMANCE OF THE SONIC STUDIO SOFTWARE IS ASSUMED BY YOU. THE EXCLUSION OF IMPLIED WARRANTIES IS NOT PERMITTED BY SOME STATES. THE ABOVE EXCLUSION
MAY NOT APPLY TO YOU.
IN NO EVENT WILL SONIC STUDIO, LLC, ITS DIRECTORS, OFFICERS, EMPLOYEES, OR AGENTS BE LIABLE TO YOU FOR ANY
CONSEQUENTIAL, INCIDENTAL, OR INDIRECT DAMAGES (INCLUDING DAMAGES FOR LOSS OF BUSINESS PROFITS, BUSINESS INTERRUPTION, LOSS OF BUSINESS INFORMATION, AND THE LIKE) ARISING OUT OF THE USE OR INABILITY TO USE
THE SONIC STUDIO SOFTWARE EVEN IF SONIC STUDIO HAS BEEN ADVISED OF THE POSSIBILITY OF SUCH DAMAGES. BECAUSE SOME STATES DO NOT ALLOW THE EXCLUSION OR LIMITATION OF LIABILITY FOR CONSEQUENTIAL OR INCIDENTAL
DAMAGES, THE ABOVE LIMITATIONS MAY NOT APPLY TO YOU.
Sonic Studio, soundBlade LE, Sonic Clarity, SSE, NoNOISE II, Manual DeClick II, DeClick, DeCrackle, A Type, B Type, C Type, D
Type, E Type and the Sonic Studio logo are trademarks of Sonic Studio, LLC. All other company or product names are either
trademarks or registered trademarks of their respective owners.
Page 11
Chapter 1..............................................................Introduction
soundBlade LE is an easy to operate, task-specific tool for premastering on your desktop.
soundBlade LE is ideal for:
• Reference auditioning the audio prior to sequencing & restoration
• Restoring problem sections within your program material
• Sequencing your material and refining audible transitions
• Defining PQ metadata for your replication master
• Creating a reliable replication master for your title
soundBlade LE allows you to audition, repair, edit and mark up your finished mixes without
the need to tie up an expensive, DAW-based production system. Since premastering is predicated on the generation of metadata for the finished CD, PQ marks can be added, deleted or
moved in time, while ISR codes and UPC/EAN entries can be easily defined and edited. Also,
since soundBlade LE runs on any Apple Macintosh with 10.5.8 or newer, it is highly portable so
you can take it with you, whenever and wherever needed.
The soundBlade LE User Interface windows
Page 12
Chapter 2............................................................... Quick Start
2.1
2.1.1
Before You Begin
Requirements
At a minimum, soundBlade LE requires the following:
• Intel Mac, 1 GHz or faster preferred
• 13” or larger display
• 2 GB RAM minimum, 4 GB or more preferred
• OS 10.5.8 or newer
• spare USB port for iLok USB Smart Key
• FireWire Core Audio interface or optional Series 300 DSP I/O Processor
For delivery of the final DPP files for replication, a data storage device, such as a DVD-R or
data tape drive, is required as well. Since soundBlade LE uses Mac OS’s Core Audio, the quality
of audio playback will be entirely dependent on the hardware and driver(s) used.
Note that, soundBlade 2.0.2 and later is not supported on PPC (G4 or G5) hardware.
2.1.2
Installation
To install soundBlade LE, please refer to the PDF copy of the Install Guide provided with your
copy. Once you have soundBlade LE installed you should set the System Preferences > CDs &
DVDs > When you insert a blank CD: to Ignore. That way, the operating system does not “take
control” of a blank CD inserted into any drives.
2.2
Creating CDs With soundBlade LE
soundBlade LE makes it easy to quickly create professional quality, Red Book–formatted
CD-Rs. In four steps, you can make an audio CD. Here is an overview:
First:
Assemble your audio
Start by creating a new Project and adding audio files to the Project. When you command–
drag an audio file into the Project, it is imported as a segment and automatically added as a CD
track.
You can arrange and edit your audio in the Waveform View. A track is created for each new
segment, and you can edit the track order with the Track Bar or the list in the Mark Info window.
Page 13
HINT: As a general practice, if you need to perform advanced editing such as topping/tailing or Fade In/Fade Out modification to any tracks, place your Track ID marks as the last step
before making a CD.
NOTE: As a general practice, create a new folder in each project folder called Audio. Drag
all of the sound files for each project into the Audio folder.
(see Appendix for more on Project management)
Second: Edit and process segments and tracks
You can edit segments and tracks in a variety of ways, working either graphically in the Waveform View with the Track Bar, or numerically in the Text View and Mark Info window. You can
copy, reorder, trim, split, adjust gain, invert polarity and normalize segments. It’s also possible
to combine several segments into one track, or create several tracks with only one segment.
As you work, you can play all, or any part of, the Project to immediately hear the result of your
work.
Third:
Adjust crossfades
When you add a segment, soundBlade LE creates a CD track and adds track marks to define
the pause between tracks. You can create crossfades between overlapping segments, and adjust the crossfades in the Waveform View. You can also insert Index Marks to create subdivisions within a track.
Fourth: Burn the Project to a CD
When you burn your Project, soundBlade LE uses supported CD burning hardware that is connected to, or installed in, your Macintosh. The following section walks you through the creation
of a simple CD in six easy steps, using individual audio files and default settings for pauses
and crossfades.
2.3
Step By Step — Make A Quick CD
This section covers four basic steps to create a CD:
Step 1. Open
Open soundBlade LE and choose File > New to create a new Project.
Step 2. Drag
Collect the desired audio files, drag them and, holding down the command key, drop the files
onto the top Panel in the order that you want them to appear on the CD. The command key is
only needed just before you drop the files. soundBlade LE will automatically create CD Tracks,
displayed in the Track Bar, from your audio files.
Page 14
Figure 2.1: A Project showing the Track Bar and top Panel
Step 3. Check
Choose Window > Mark Info and select the PQ Delivery tab. If there is no blank disc in your CD
burner’s tray, the Status field prompts you to “Insert media for delivery.”
Step 4. Burn
Insert a blank CD-R disc, if you have not already done so. The Status field will tell you, “Media
ready for delivery.” If you have an external, FireWire burner you’d like to use, click on the white
triangle to the right of the “Device” label to switch to your external burner.
Click the Execute button in the Mark Info window to start the burn process. soundBlade LE will
ask you to “Specify Folder for DDP Image. CD will be replicated from DDP image.” Using the
Finder browser, specify a New or existing folder and click the OK button. soundBlade LE begins
delivering your Project to the blank CD. The Status field shows the progress of the burn process. When the burn process is complete, the CD is ejected from the CD burner, ready to play.
Page 15
Chapter 3...................................................... Basic Operation
3.1
General Workflow & Explanation of Terms Used
In order to prepare your finished master, soundBlade LE offers fast, simple audio editing along
with creation and modification of metadata. Though soundBlade LE is designed to primarily
create finished stereo programs, it also includes CD-R and DDP file creation as well. DDP or,
Disc Description Protocol, is the professional’s preferred method of delivery of production masters for optical disc replication.
When opening a sound file into soundBlade LE, you are creating a copy of the file in memory that you can manipulate. This copy is placed into a ‘Project,’ the workspace created by
soundBlade LE. Within the Project, you can add sound, create and edit marks that will generate
PQ codes, and place SRPs, persistant editing–related placeholders inside the Project. All this information can be saved and later recalled.
Raw sound files can be imported from various file formats, including AIFF, WAV, BWF and SD2
or Sound Designer II with regions. These files are then edited, allowing you to compile a new
program from various sources.
When you are satisfied that your Project is acceptable, you can create a Compact Disc that allows you to check the completed deliverable. These “check discs” or “refs” are perfect for approvals but not for replication. The audio data on these CD-Rs, technically CD-DA–formatted
Orange Book discs, contain error–protected metadata but not error–protected audio data. So,
errors can propagate through premastering to replication, resulting in costly rework. For disc
replication, you should save your changes to the Project and “deliver” a DDP file set, a reliable,
error–protected file format specifically designed for interchange between facilities and optical
disc replication.
Page 16
3.2
Project Layout
Figure 3.1: Main components of a Project window
In soundBlade LE, all tasks are performed in or via a Project. The bottom half of a new Project
shows two empty Panels, containers for stereo sound files and their accompanying waveform
displays or text lists. The upper Panel shows the left channel while the lower Panel represents
the right channel. A scroll bar appears at the bottom of the Project, directly beneath the lower Panel, allowing you to scroll across the time line. To the left of this scroll bar, a drop down
menu is available, where the time standard can be selected. The function of this time standard
control is discussed further in section 3.7.1 but it’s best to leave it at the default setting of 75 fps
as this is the correct settings for time code on Compact Discs.
To the left of each Panel are solo and mute buttons, labeled with an S and M respectively,
along with an amplitude meter. Also, a gain overlay button, labeled G, is available to the right
Page 17
of S and M buttons. The function of this button and the application feature it brings up will be
discussed later in section 4.4.
Immediately above the waveforms, is a black banner with time code values in yellow. At the
top of the black area is the time line for the waveforms. The bottom of the black area is reserved
for “PQ Marks” and the Track Bar, discussed in section 3.9. The data underlying the whole of
the two Panels, with marks and all data describing the audio program, is also referred to as the
‘EDL’ or Edit Decision List, and is saved as a separate file within each Project’s folder.
Figure 3.2: Waveform display with marks above the Panels
Above the time line and marks are the transport controls. They offer dedicated buttons for play,
stop, fast forward and rewind. Also along this bar are the SRP and Marks buttons. The function
of these are explained in sections 4.7, 4.10.4.7 and 3.9.6 respectively.
Figure 3.3: A Project’s Transport Controls
Finally, at the top of the main window are time displays on the left, for the Playhead, and,
on the right, for edit locations. In the middle is a display showing the current location of the
Playhead and other time information related to that Project.
3.3
3.3.1
Starting a Project: Opening Files
Opening Projects
To create a new Project, select File > New Project... from the menu bar. A blank, default Project
opens.
Page 18
You can open an existing Project by selecting File > Open Project... from the menu bar. This
brings up a standard Mac OS browser dialog for finding and selecting the desired Project file.
Confirm your selection with Choose and the Project opens into a new Project window.
Figure 3.4: Mac OS browser dialog for opening a Project
After highlighting your selection and clicking Choose, the Project will be opened, together with
any available editing and PQ metadata already saved in the Project folder.
A third way to open an existing Project is by using the Finder. Simply drag the file from any
folder onto the soundBlade LE application icon or, if the application is running, the application’s Dock icon. In the Finder, you can also double click on a Project’s file icon.
3.3.2
Opening Sound Files
Once your Project is open, you need to open your sound files into the Project. As with Projects,
using either the File menu or dragging and dropping will work. By holding down the command
key when dropping in sound files, soundBlade LE will autospace the new segment, as well as
auto–generate PQ metadata. Section 3.9.4 discusses the auto–generated PQ metadata while
section 4.2.1 below discusses autospacing functions in detail.
By selecting File > Open Sound File... from the menu bar, you will bring up a standard Mac OS
browser dialog for finding and selecting the desired audio file. soundBlade LE will open AIFF,
WAV, BWF and SD2 files with regions. Confirm your selection with Choose and the sound file
opens into your Project.
3.3.3
Adding Your First Sound File
In addition to the Open Sound File… command, you may also drag and drop sound files into
a Project. soundBlade LE makes the job of CD assembly easy by providing a special behavior
for adding your sound files to a Project. If you drag your first sound file into the top Panel of
an empty Project, soundBlade LE will automatically place it on the time line at 00:00:02:00 or 2
Page 19
seconds. An exception to the default drag and drop behavior, soundBlade LE normally uses the
time code location of your cursor to determine the address of the “head” or start of the resultant sound file, as well as the selection status of already placed sound files.
By holding down the command key before dropping sound files, soundBlade LE will also automatically create PQ metadata for all the files. We recommend you get in the habit of holding
down the command key when dropping sound files as it make performing basic pre–mastering
chores and resequencing much easier.
Note that command–dropping only applies to drag and drop, not to the Open Sound File…
command. Later in this chapter, section 3.9 discusses PQ metadata in more detail.
3.4
Waveforms
A waveform display provides visual reinforcement of audible cues when editing. Normally, the
audio file types that soundBlade LE opens contain metadata such as sample rate and related
information, but no information on visualization. Therefore, waveform display information has
to be generated by soundBlade LE itself. The application generates individual “waveform files,”
one for each channel, in order to display high resolution waveforms in the Panels at any zoom
level. The generation of wavform files is performed in the background so normal operation is
not interrupted.
Figure 3.6: Display of a sound file without waveform metadata
If waveform files are absent from one or more audio files included in the Project, soundBlade
LE will automatically start generating those files in the background. Waveform files, identified
by their “.r” extension, are placed in the same folder as the audio files and can be read by any
other Sonic Studio product.
Page 20
Figure 3.7: The building of waveform metadata in progress
Once the waveforms are visible, the arrow keys control the viewing window and a quick tap
of the E key always zooms out to view the entire Project. In section 3.6 below, navigating your
Project is discussed in more detail.
3.5
3.5.1
Auditioning Sound
Playback
When you press the keyboard’s Space Bar, the cursor changes to a “speaker & note” and playback begins. A thin vertical red line, the Playhead, spans the Panels and time line and moves
horizontally to indicate the location of playback.
Figure 3.8: The cursor changes into a speaker & note shape during playback
When you first open a sound file and begin listening, playback, once started, will begin at the
left edge of the audio. The Playhead will move to the right, across the file. When you hit the
Space Bar again, playback ends and the Playhead halts its motion. When you hit the space bar
a third time, the Playhead will jump back to the left side of the waveform display, the beginning
of the sound file, and playback will begin again.
Page 21
3.5.2
Playback from the Edit Point
When you click anywhere inside the waveform display, the entire Panel, or rectangle containing the waveform display, is selected. The selected Panel has a medium blue background and
hairline red border. Once selected, a click anywhere in that Panel produces a thin vertical red
line, with an inverted yellow triangle on top. This is the “Edit Point.”
Figure 3.9: Empty Panels with Edit Point at left and Playhead at right
When the Edit Point is present, playback will always start from the Edit Point. When you stop
playback and start again, the Playhead will jump to the Edit Point and start playback from there.
You can move the Edit Point by clicking on a new location in the waveform display. The Edit
Point will jump to the click location. Alternatively, you can click and drag the Edit Point’s yellow
triangle to move it to a new location.
3.5.3
Playback from Playhead
The Playhead itself can also be manipulated directly. By double clicking in the black time line
banner, the Playhead is moved to the click location and playback begins. You can also edit the
large, central time code address in the time display at the top of a Project, which will move the
Playhead to the specified address. Section 3.5.5 below discusses the time display.
The Transport Controls above the top Panel provide tape transport emulation, so you can
play, stop and continue playing from the current location. You can also select the Play > From
Playhead command.
3.5.4
Random Play
If you hold down the option key and move your cursor to any location in the waveform, you
can click–hold the mouse button. The Playhead will move to your click location, playback will
begin and continue as long as the mouse button is held down.
3.5.5
Time Displays
The large, central time code display in the center top of the Project window is live and
editable, as are the LEFT, RIGHT, IN, OUT and DUR fields where applicable. As mentioned
above, you can click on any subdivision or click–drag on the entire central time code display to
select and modify the current address of the Playhead.
Page 22
For all editable time code addresses, a single click in any HH:MM:SS:FF subdivision will highlight that subdivision, allowing you to type in a value. By click–holding and dragging up or
down, the cursor will change to an arrow and the numeric value displayed will increase or decrease respectively. Click–hold for more than two seconds, and the rate of change increases.
The arrow keys also let you move to a particular subdivision and increment or decrement the
current value. Option–dragging a time code address allows you to quickly “clone” that value
into another editable field.
Figure 3.10: Click–dragging down to edit a time code address
All modifiable time code fields in soundBlade LE support cut, copy and paste. Double clicking on any time field will select the entire field, allowing you to enter a complete time code address.
3.6
Navigating the Waveform Display
There are many tools for quickly moving around inside of the waveform display. This section
covers scrolling and zooming, in general and on selections.
3.6.1
Scrolling
If you are zoomed all the way out, the entire waveform will be displayed. If you are not
zoomed out entirely, some of the waveform will be invisible, off the edges of the Panel. You can
move the window view left or right by moving the scroll bar at the bottom of the waveform display. You can also move the window view left and right by using the Left and Right Arrow key
respectively.
Finally, you can drag the view left or right by simultaneously holding the control, option and
command keys. When you click–hold, the cursor changes to a hand to indicate you are in Move
View mode.
3.6.2
Zooming
You can zoom in using the Down Arrow key, and zoom out using the Up Arrow key. To zoom all
the way out, hit the E key, to see your “entire” program.
Page 23
3.6.2.1
Zoom around Edit Point
As you zoom in and out, it is likely that you will want to keep the Edit Point in view. To do this,
hold down the Apple or command key as you use the Up Arrow or Down arrow keys. This will
keep the Edit Point centered in the middle of the display.
3.6.2.2
Zoom to Selection
Clicking and dragging on the waveform itself selects a region, highlighted in yellow–orange.
Typing command-G or selecting View > Zoom to Selection... will zoom around that selected region. See section 3.7 for more information on region selection.
You can also zoom to a selection while making the selection. By holding down the command
and option keys while click–dragging on the waveform will define a selection and zoom to that
selection as well.
3.6.2.3
Zoom Around Time Selection
If you click and drag in the black time line banner above the top Panel while holding down the
Apple or command key, the Panel will zoom to display the region of the time line that your
click–drag defined.
3.7
Selections
Selections let you highlight a portion of the audio where you want to perform a desired operation.
3.7.1
Selecting a Region
To select a region, click–drag on the waveform display. At the point that you want the selection
to start, click and hold down the mouse button, then drag to complete your selection. An area
will be highlighted in yellow–orange, indicating the selected region.
Figure 3.9: A region selected, indicated by the yellow highlight
Page 24
You can click–drag either left or right to define a selection. In addition, you can fine tune the
boundaries of a selected region. Hold down the shift key and click on either side of the selected
region then, while continuing to hold the shift key, drag left or right to expand or contract the
selection.
While selecting regions, the LEFT, RIGHT and DUR fields at the top of the Project are active and
editable. See section 3.5.5 above for more information on manipulating time code addresses.
Note that the format in which all time fields are represented in soundBlade LE is user select-
able. By clicking in the time standard display to the left of the time line scroll bar, a drop down
menu offering four choices becomes available.
Figure 3.10: The time standard menu
Figure 3.10 above shows the time standard choices. 30 fps NDF is the default setting and signifies
non–drop frame time code, the default time code format typically used by DAWs to prepare
material for CD release when compact disc preparation was video tape–based. 29.97 drop and
non–drop are “pull down” rates for NTSC video while 25 fps is for PAL video. The 24 fps setting
is for general motion picture work while 75 fps CD Frames is the internal time code format for
CD-DA discs (audio CDs). When mastering for CD release, 75 fps is the best choice, providing
higher resolution and complete compatibility.
The 35 and 16 mm setting provide minutes and seconds at non-pull down and pull down (59.9
Hz) rates referenced to 60 Hz for North America and Japan. Also included are versions with a
50 Hz reference for Europe.
Page 25
The Seconds setting shows all times in multiples and fractions of seconds. Finally, Samples
displays all times in absolute samples based on the selected sample rate . These same selections appear in the Windows > Preference > Time Display tab, where the Project default is set.
See section 4.9 for more information on time standard settings.
Note that, because soundBlade LE is designed, among other functions, to create the metadata necessary for Compact Disc replication, all of your PQ marking decisions are directly tied to
the 75 frame standard. If you are using soundBlade LE for CD preparation, you should always
use the 75 fps CD Frames standard.
Note also that, when a region is selected and playback is invoked, the Playhead relocates
and playback starts at the beginning of the selection.
3.7.2
Selecting Segments
An entire sound file “segment,” the representation of contiguous samples from a single sound
file, can be chosen as a selection. Click on the white Title Bar at the top of any segment, which
displays the source sound file name.
Figure 3.11: The Title Bar
The waveform highlights yellow-orange and a bright yellow bar appears below it, running the
entire length of the segment, to indicate that the segment has been selected.
Figure 3.12: A selected segment, indicated by the yellow highlight
By holding down the shift key and simultaneously clicking in other segment’s Title Bars, a selection of contiguous segments can be made. Also, while holding down the Apple or command
Page 26
key and clicking any Title Bars, a group of non–contiguous or random segments can be selected simultaneously.
Figure 3.13: Multiple selected segments
If you have an existing selected segment, several additional segment selection choices are
available. By tapping the left or right arrow key, you can select prior or latter segments, respectively. By holding down the shift key, you can tap the left or right arrow key to contiguous select prior or latter segments, respectively.
Note that, when one or more segments are selected and playback is started, the Playhead
moves to the head of the first selected segment and playback commences from there..
3.8
Simple Editing
There will be occasions where raw sound files need modifications. soundBlade LE offers advanced editing features, as well as simple tools to change amplitude and transitions.
3.8.1
The Fade Tool
The head (start) or tail (end) of segments are represented in the display by a thin black vertical line. When zooming in, this line will reveal itself to be a curve representing a ‘fade’ or amplitude versus time “envelope.” Each segment starts with an Fade In and ends with an Fade Out.
Fade Ins and Outs are both “Black Fades” where “black” refers to “Edited Black,” the absence
of audio data in the Panel.
Figure 3.16: End of a segment with Fade Out glyph
Fades have a specific starting location and duration. Both parameters can be easily adjusted
with the “Fade Tool.”
Page 27
First, the duration or length of the fade can be changed. To do so, zoom in so you can see what
you’re doing and have reasonable control of the fade. Then, click–hold and drag on the upper
“inside” edge of the fade to the desired location.
Note that, with the cursor on the upper inside edge, the cursor changes into a cross with left,
right and up arrows indicating you can change the duration.
Figure 3.17: Fade tool symbol while moving top inside edge of the Fade
Of course, the length of a fade can also be changed by moving the lower or “outside” edge
of a fade, leaving the inside edge in place. To do so, move the cursor over the fade near the
bottom of the display until the cursor changes into the Fade Tool again. This time, the cursor
changes into a cross with left, right and down arrows.
Figure 3.18: Fade tool symbol indicating you are changing the outside edge of the fade
Click–hold and drag the bottom end of the fade to the desired position. Release the button to
confirm the change. Remember that modifying the outside edge is only possible within the limits of the actual samples of audio data represented by the segment.
If the cursor is moved over the middle portion of a fade, the Fade Tool cursor also appears but
this time as a horizontal arrow with a vertical center line. In this trim mode, you are able to
move the entire fade left or right, changing its location without changing its duration. This allows you to “hide” or “reveal” portions of the underlying segment, by shortening or lengthening the segment duration, trimming the segment as you go. Click–hold on the fade and drag
the fade left or right. Releasing the mouse button fixes the fade in that location. While you are
moving or changing a fade with the Fade Tool, the waveform is “live,” continuously changing
visually to reflect the modifications you are making.
Page 28
Figure 3.19: Dragging the inside edge to lengthen a Fade
Note that the maximum duration of a fade is equal to the underlying sound file duration. As
mentioned above, it is not possible to move a fade past the actual start or end of an underlying
sound file.
Also, moving Black Fades so more than two overlap is not allowed as well. A modal “CheckForTripleOverlap” dialog will pop up, telling you that your command would result in three
Black Fades lying on top of each other.
3.8.2
Deleting Part of a Sound File
It may be necessary to edit out some part of a sound file. soundBlade LE allows you to do so
quickly and with great precision. To easily cut out a portion of a sound file, simply select the region that you want to remove. Then, select Edit > Delete Selection or hit the delete key to remove the selected region and “slip” all downstream segments left to close the gap. More on
this later...
More precise editing can be performed with In points and Out edit points, special marks you
can place in the Panel. An In Point is shown as a vertical line with a triangle at the bottom,
pointing right, while an Out Point has the triangle pointing left.
Figure 3.20: In Point and Out Point with highlighted area in between
There can be only one In Point and one Out Point in a Panel at any time. If both an In Point and
Out Point are present, and if the In Point is to the left of the Out Point in the waveform display,
then the area between the In and Out Point will be highlighted in yellow. The Selection > Set In
Point command drops an In Point at the location of the Edit Point.
Note that the IN, OUT and DUR time fields at the top right of the main Project window are al-
ways active and fully editable. These fields allow you to precisely alter the location of, and du-
Page 29
ration between, the In and Out Points, a functionality which comes out handy when the exact
points are well known by their time value.
Once the region is defined, it can be modified in two different ways. The region can be either
deleted or cleared. To clear the defined region, leaving an empty area, select the Edit > Clear
Selection command.
Figure 3.21: A cleared selection — the circled material has not moved
The selected region now is cleared of its contents, leaving the audio before and after the selected region in the same place. The In and Out Points also stay in place. Effectively, you have
now created two new segments that can be further edited and/or moved independently.
Alternatively, the selection can be deleted. To do so, select Edit, Delete Selection from the
main menu. Hitting the delete or backspace key on the keyboard will perform the same action.
Figure 3.22: A deleted selection — the circled area has moved
As a result, the selected region will be deleted and all audio to the right of the selected region
will be moved left to the beginning of the now deleted section, closing the “hole.” Again, the In
and Out Points stay in place.
Similar to clearing the selected region, you now have two new segments. When deleting the
selection, however, the two new segments are joined together with a “Crossfade.” It is represented in the waveform display as an overlapping Fade In and Out.
The delete functions mentioned above also work with one or more selected regions. Simply
click–drag to select a region, and hit delete or option–delete.
Note that, when you have both Edit Points and region selections, soundBlade LE always defers to Edit Points rather than selections. This can easily lead to erroneous edits when IN and
OUT Points are beyond the displayed area and the selected segments or regions are visible,
leading to the user’s perception of a non performing edit, meanwhile audio out of view has
Page 30
been modified. Because of that, it is always a good idea to either choose Selection > Clear In &
Out Points or check for the presence of Edit Points by glancing at the IN and OUT fields at the
top right of the Project. Non–zero positive values indicate the location of an Edit Point.
3.8.3
Splitting a segment into new segments
Occasionally, existing segments need to be split in separate segments before further editing
can be performed. This can be achieved by manually creating a new Crossfade within a segment.
To create a new Crossfade, simply place your cursor at the desired location, and double click.
This moves the Edit Point to the click location. Then, select Edit > Create Crossfade from the
main menu. A new Crossfade is created at the location of the Edit point. Also see section 3.8.2
above for information on deleting segments.
3.8.4
Manipulating Fades
With Crossfades, the Fade Tool can also be used to modify or move the fades, either as a complete Crossfade or as individual Black Fades. When the cursor is moved over a Crossfade, it
changes into a pair of parallel horizontal arrows. The Fade Out changes to red while the Fade In
changes to green.
To move the whole Crossfade either left or right, once again hiding and revealing audio on either side, simply click and drag the Crossfade to the desired location. Release the mouse button to drop the Crossfade at a specific spot.
To modify the fades individually, press the option key while modifying the Fade Out, and the
Apple or command key while modifying the Fade In. With these modifier keys, the Fade Tool
works as if the fades were isolated, as described in section 3.8.1 above. While operating on one
fade of a Crossfade individually with modifier keys, the fade not being manipulated will deselect, indicated by its color changing to black.
If you decide that default duration of your crossfade is not right, simply hold down the shift
key and place the cursor over the center of the crossfade until the cursor changes into the pair
of parallel horizontal arrows. Click–drag up or down and the duration will increase or decrease,
respectively.
Note that, to be able to do any of the above fade manipulations with accuracy, it may be necessary to zoom in until the Crossfade extends over a significant proportion of the waveform
display. The View > Zoom To Previous command will zoom you out to your previous view quickly after such fine adjustments.
3.8.5
Changing the order of songs
It is not uncommon that the order in which tracks or songs appear on the final CD needs to
be changed. There are two scenarios that are applicable to this need. The simple case is where
PQ metadata is already present. This would apply if either the command key is held down
when audio is dragged into the top Panel of a Project, which automatically creates CD Tracks
or, PQ marks are added manually. See section 3.10.2 for more information on manually addPage 31
ing PQ metadata in order to use the Track Bar. For more information on automatically creating
CD Tracks, see section 3.9.5 below. For more information on CD Track re–ordering with the Track
Bar, the quick and easy method, see section 3.10.5.
If PQ metadata is not present, the songs or group of songs you want to move need to be present as separate segments. This can be achieved by either manually creating a new Crossfade
or by deleting the space between tracks in an existing sound file, meanwhile creating new segments that can be moved and edited independently.
To create a new Crossfade, simply move your cursor to the desired location, and double click.
This will move the Edit Point to the click location. Then, select Edit > Create Crossfade. Also see
section 3.8.2 above for information on deleting segments.
Once the material is divided in the required number of segments, the re–ordering can be done.
There are several ways this can be achieved. First, segments can be selected, then dragged and
dropped into place. This allows you to change the track order very quickly, but may be inaccurate when placing the files with precision on the time line. Section 4.3 below discusses an autospacing option that helps with precise track timings.
To drag a segment, first select the segment by clicking on the white Title Bar at the top of any
segment. See figure 3.7.2 above. Notice the bright yellow Drag Bar that appears under the Title
Bar in any selected segment.
Figure 3.23: The Drag Bar
Click–drag the Drag Bar to move the segment to the desired location. Remember that shift–
clicking or command–clicking on multiple segments will select contiguous or segments respectively.
Secondly, segments can be moved by altering their respective time line positions directly via
the Move Segments window. Select the desired segments, then select the Edit > Move Segments... command. The Move Segments modal dialog appears, showing the current position of
the first, or only, selected segment.
The desired new segment start time can now be entered directly into the time code address
shown. Once the ‘Move’ button is clicked, the segment moves to the new location.
The Move Segments dialog offers three extra options. By clicking on the ‘Where’ button, you
can select via a drop down menu the new start time for the segment:
• The current position of the Playhead
• The location of the In Point, or
Page 32
• The location of the Out Point
There is also an SRP button that provides a list of any SRPs placed in the Project. By choosing
one of these four options, the time display of the move segment window changes to the relevant time. SRPs, persistent markers you can place anywhere in time, are discussed later in section 4.7 below.
After choosing your option, clicking the ‘Move’ button will move the segment and close the dialog. Clicking ‘Cancel’ leaves the segment at its original position and closes the dialog.
3.8.6
Simple Track Spacing: AutoSpace
Once all your segments are placed in the right order, the AutoSpace function offers a simple
but effective tool to change all pauses between songs to a pre-defined value. Simply select Edit
> AutoSpace All Segments and all segments will be moved on the time line, with equal space
between according to the Preference > Editing Tools > AutoSpacing Duration setting. In Preferences, the length of the AutoSpace can be set to 1, 2 or 3 seconds.
Note that, if a song is composed of more than one segment, then the AutoSpace command
should be used with care as the command will “break apart” the song, autospacing its component segments. Also, the AutoSpace command should be used before you place PQ marks to
prevent unwanted mark (re)location.
Also Note that, if segments have had their fade durations lengthened from the default set-
ting, the AutoSpace command will not necessarily result in a desirable spacing. This is because
the fade duration at the head and/or tail of one or more segments may be longer that the minimum 1 seconds spacing that is required between PQ Marks on a CD. If you use the fade tool to
lengthen fades at the head or tail of a segment, you should manually space your segments by
using the Selection > Select Edit Point to End command and the Drag Bar.
3.8.7
Exporting Selections & Segments
Selections, including both selected segments and selected regions, can be exported as AIFF
or BWF files, with source resolution of up to 96 kHz sample rate and 16 or 24 bit word length.
To do this, use the File > Export Sound File… command. It exports the audio with amplitude
changes from segment gain, plus any Gain Overlay and plug–in processing.
To use this function, first click–drag in the top Panel to create a selected region and make sure
the top two Panels are assigned, via the first two Desk strips, to Mix1 and 2. Then choose the
destination directory with the Set file button. Finally, set the file type, word length and speed,
then click the Export button. soundBlade LE will “play” the selected region, exporting the audio
as it plays and as you hear it. The Edit After Export check box causes soundBlade LE to replace–
edit the exported segment back into the Project.
Another use for the export command is consolidation of a complex edit or processing. The export command will cleanly “freeze” or “print” to disk a collection of instantiated plug–ins that
will not play in real time due to host saturation or overload. This is because export operates out
of real time and so is not constrained by real time timing and buffering issues.
Page 33
Note that playing the material at 1x speed during export will not improve the quality so, it
is recommended that, unless real–time playback is needed, you use the highest speed setting as it has better temporal resolution. Also, during high speed exports, the time display and
Playhead do not operate in real time.
3.9
PQ Marks: Defining Metadata
While this section provides the basics on PQ and delivery, section 4.8 below delves into the
details of delivery and this aspect of soundBlade LE…Once all of your tracks for the CD are put
in the right order and spaces between the tracks are adjusted to taste, the PQ marks can be created. PQ marks generate the TOC or Table of Contents for the final replication master. PQ marks
are shown in the black banner just below the time line.
Figure 3.24: The Track Bar and its PQ marks
With the Track Bar visible, Start of Track marks are indicated by an arrow pointing to the right
while End of Track marks are indicated by a arrow pointing left. Index marks are indicated by a
yellow arrow pointing down.
3.9.1
Inserting PQ Marks Manually
To insert a new PQ mark, place the Edit Point at the location where you want the new mark to
appear. Then select Mark > Track Start Mark, which adds the new Start of Track mark.
3.9.2
Moving PQ Marks
It’s easy to relocate PQ marks. Simply click–drag on a mark to move it to the desired location.
3.9.3
Removing PQ Marks
To remove one or more PQ marks, click–drag in the waveform display to select a region that
includes the mark(s) you want to remove. Then, select Mark > Delete Mark and all marks within
the selected region will be deleted. If you are working in the Windows > Mark Info window and
have a mark selected, you can also use the Mark > Delete Mark command to remove the mark.
The Mark Info window is discussed in detail in section 3.11.1 below.
A third method is to use the contextual menu to delete or otherwise modify a mark. Simply
control–click on a mark, and make your selection from the menu.
Page 34
3.9.4
3.9.4.1
Inserting PQ Marks Automatically
Command–Dragging
The fastest and easiest way to generate PQ metadata is to simply drag and drop. By holding
down the command key before dropping one or more sound files onto the top Panel of your
Project, soundBlade LE automatically creates CD Track definitions by generating Start and End
of Track marks for each file. These Track definitions can later be rearranged or modified to taste.
See section 3.10.5 below for more information of resequencing.
3.9.4.2
Edited Black To Marks
Apart from placing PQ marks manually at the desired positions, soundBlade LE has the ability to generate PQ marks automatically. If the entire Project was created by editing each song/
segment, the most efficient way to generate PQ marks automatically is to Edit > Select All, selecting all segments, then select the Mark > Edited Black To Marks command. You can also click–
drag to select a region, then select the Mark > Edited Black To Marks command. soundBlade LE
automatically places Start and End of Track marks at the outside edges of all segments, using
the location of Black Fades. The final result is a collection of marks accurately placed at the begin or end of each Black Fade.
3.9.4.3
Analog Black To Marks
If you’ve done a fair amount of fancy editing and track timing, then Edited Black To Marks may
not be the ideal choice. Also, if you material consists of one long, consolidated file with few or
no edits, then you may want to automatically place PQ marks with the Analog Black to Marks
function instead. This function measures the amplitude of your audio and places PQ marks at
the edges of long duration quiet passages. Both amplitude and duration are user adjustable.
To use, first click–drag to select a region on which to work. Then, select the mark > Analog
Black To marks... command. In the resulting modal dialog, specify the amplitude and duration
of the selected region you want to mark.
The results of the Analog Black To marks function are not as accurate as Digital Black to marks,
but will provide quite usable PQ mark placement even with un–edited material. The placement
accuracy is dependent on the settings used, as well as the assumption that tracks always start
and end with an increase then decrease in amplitude and quiet in between. However, it is very
likely that those same criteria also apply to other moments in the course of a musical piece so,
the results of the Analog Black To marks function should always be checked for acceptable accuracy. You may also try the command, check the result and adjust the parameters prior to undoing or deleting marks and using the function again. See section 3.9.6 below for useful information on checking mark accuracy.
3.9.5
Tracks
soundBlade LE allows you to display and manipulate (CD) Tracks. The Windows > Preferences >
EDL > Show Track Bar preference enables or disables the Track Bar. Each CD Track that will result
Page 35
from your current PQ placement is shown in grey while the pause between tracks is shown in
blue.
Figure 3.25: An enlarged portion of the Track Bar and the Start of Track 1
3.9.5.1
Moving Tracks & Resequencing
A Track, always with its associated pause from the previous End of Track mark, can be selected
by clicking on its Track Bar. Selecting a Track also selects the underlying audio that is associated
with that Track. When you move a Track, you also move the associated audio. This means that
you can quickly resequence your deliverable by dragging and dropping Tracks. The Track, with
its marks, can be moved by click–holding a Track’s track Bar, dragging left or right to a new position in the Track sequence, and dropping. The Track Bar updates to graphically display the new
Track definition.
As mentioned earlier, when holding down the command key before dropping sound files,
soundBlade LE automatically creates PQ metadata for all the files. Because only Start of Track
marks are created, it makes it very easy to resequence using the Track Bar. On the other hand,
the absence of End of Track marks means that there will be no countdown on the player’s display when the resulting CD is played back.
You can also hold down the command and option keys, before dropping sound files, and
soundBlade LE will create both Start and End of Track marks, instead of the Start of Track mark–
only version that occurs with only the command key. The presence of End of Track marks makes
it a bit less predictable when using the Track Bar for resequencing but, the presence of End of
Track marks means that there will be a countdown on the player’s display when the resulting
CD is played back.
The Windows > Mark Info window is another way to move Tracks. As with the Track Bar, click–
hold a Track entry and drag it up or down on a new position and drop it to resequence.
3.9.6
The Marks Button
In the Transport Controls, the Marks Button can be seen. Clicking on it reveals a list of all PQ
marks in the Project along with their timings. Selecting one of the entries in the drop down list
moves the Edit Point to the selected PQ marks, without changing the zoom level. This allows for
a quick and accurate check of the position of all PQ marks.
3.10 Delivery
After completing the necessary editing of sound and PQ marks, the next and final step in your
production workflow is to start a “Delivery.” This process creates a new DPP image file set first,
Page 36
incorporating all edits and changes, ready to be sent to a replication service for glass mastering. The DDP file set is then used by soundBlade LE to generate your CD in the background.
DDP or Disc Description Protocol is the industry standard method for delivering all the data
and metadata needed for disc replication to a “pressing plant.” Unlike audio CDs, DDP file sets
contain error–protected audio data plus all ancillary metadata or, “data about the data.” DDP
file sets, when used for replication, avoid potential errors that can crop up between the time
you create a replication master and the moment that a “glass master” is created during replication. CD-DA discs, or audio CDs, do not protect the audio data from errors since they assume
that the CD player will hide or “conceal” any errors during playback. This situation leads to errors in replication when recordable CDs, formatted as Red Book (audio) discs, are used as replication masters.
Note that the DDP files created by soundBlade LE, always in their enclosing folder, can be
copied to any writable medium you choose, DVD-R, data tape or hard disk, for transport to the
replicator. Of course, the medium you choose must have enough space to hold the file set.
Also, always check with your replicator to determine which physical medium and format they
can handle and whether they are even capable of using DDP as an premastering format. Many
bargain companies are not ready to handle DDP deliveries so, we at Sonic Studio suggest you
find a reputable facility that does accept DDP file sets of your valuable masters. Check the Support section of the Sonic Studio web site <www.sonicstudio.com> for a list of DDP–friendly
replication facilities worldwide.
3.10.1
A Check List for Delivery
First, when burning CD-R “check discs,” always put the unwritten, blank disc in the drive before
starting the delivery process.
Second, when delivering a DDP file set, use DVD-R blanks rather than CD-R blanks to deliver
your DDP file set. That way, the replicator cannot confuse a CD-R with DDP files as a CD-ROM
job and replicate 1000 CD-ROMs of your DDP file set!
Third, when delivering a DDP file set, the entire DDP folder or directory must be sent to the
replicator. We suggest you ZIP the whole thing and generate a check sum for the resulting ZIP
file. For more information, see the Checksums for DDP section of our Knowledgebase page:
http://www.sonicstudio.com/support
Fourth, check your Mark Info window for metacharacters, such as $, & and %, as well as extended ASCII characters, like å, é, ø, ö, ü, ñ, et cetera. Mac OS, which soundBlade LE uses to
write CD-Rs, does not handle extended ASCII and metacharacters properly.
Finally, when delivering a DDP file set, we recommend that you always create a new, empty
folder to contain each DDP file set. On the Desktop is a reasonable place for that. That makes it
easier to archive and seems to prevent common problems.
Page 37
3.11.1
The Mark Info Window
To begin the PQ Delivery process, select the Windows > Mark Info command. This opens the
Mark Info window which displays all the P through W subcode metadata you have defined.
3.11.2.2
Global Metadata
At the top of the Mark Info dialog are three fields that define global information about the disc.
The Album Title and Artist generate the disc’s global information that, when placed in a transport that reads CD Text data, will appear on the transport’s display.
CD Text, a subset of the CD+G specification, provides for the embedding of textual information about the overall disc and tracks in the R through W codes of the “PQ” subcode stream of
a Compact Disc. Many portable and in–dash car players can read CD Text data off of a disc, but
few home players can.
CD Text should not be confused with network services such as Gracenote’s CDDB or FreeDB
that attempt to match CDs inserted into a computer drive with an on–line database of extant CD
titles. Such network services are used by iTunes and other applications for user convenience
but have no relationship to the possibly embedded CD Text information on individual CD’s.
Note that soundBlade LE 2.0 will produce CD-Text metadata on both the DDP image and on
CD-R media when the CD-Text (TS) is selected in the Mark Info window.
soundBlade LE’s DDP 2.0-compliant DDP image file sets contain properly formatted CD-Text information in the form of the CDTEXT.BIN file that is included in the DDP file set if the CD-Text
(TS) checkbox is enabled in the Mark Info window.
Reference discs on CD-R media created with soundBlade LE do contain the CD-Text information. However, given the loose specification for CDTEXT support, these disks may not display
the information on a CD-R properly on all players.
Note also that, due a current limitation of Mac OS, the current version of soundBlade LE
does not support open session CDs with CD Text.
3.11.2.3
Track Metadata
This section provides information about individual track attributes. The next two fields, Track Title and Track Artist, are also part of the CD Text specification, and data entered into these fields
will also appear on CD players equipped to read this metadata. soundBlade LE auto–populates
the Track Title based on the segment name and, if you have provided an Album Artist prior to
PQ creation, soundBlade LE will also auto–populate the Track Artist metadata as well.
Track Start and Track End are generated by your Mark placement. Though editable, you should
assume that they are correct. Likewise, the Copy and Emphasis buttons generate the SCMS
(Serial Copy Management Scheme) Copy flag and AES/EBU Emphasis flag in the PQ stream
and should, in general, be left turned off. Section 4.10 below discussing PQ parameters in more
detail.
Page 38
3.11.2.4
Track Listing
The next section in the Mark Info dialog provides a list of details about each defined track.
Name, start and end times, as well as duration are shown.
Double clicking on an entry in the list will start playback at that location in the Project. This
gives you a quick method for double checking Mark placement. See section 4.10.4 for details
about the Track Listing, Total Tracks and extended listing.
HINT: if you have placed your (text) insertion point in the TRACK TITLE, ARTIST and ISRC
fields, the up/down arrow keys on the keyboard will move you up and down through each entry in the list of PQ details.
3.11.2.5
PQ Status & Validation
Below the Track Details section is a single field with an indicator to its left. This is the PQ Validation field, a non–editable status field that indicates whether your metadata, as defined, is valid
and meets the Red Book specification for Compact Discs.
A green indicator means everything is valid, while a red indicator mean you should inspect
your PQ information for non–Red Book–compliant entries. The accompanying field calls out the
problem entry, making it easy to rectify the problem.
Note that you may see a “Sound begins more than 2 frames before Start Mark” message.
This a reminder to check that you are not unintentionally truncating any audio at the head of
your Project. Remember that, according to the Red Book specification for CD-DA discs, the first
2 seconds or 150 CD frames are “pregap,” and the first track start is at 2 seconds. Any audio before the 2 second mark will be replaced by 150 CD frames of digital zeroes on any CDs delivered and in DDP file sets. Pregap is a logical region of the disc reserved for mode changes and
other non–audio functions.
The “Sound begins more than 2 frames before Start Mark” message is normal when opening
a DDP file set because DDP files contain 2 seconds of pregap in the IMAGE.DAT file.
3.11.2.6
PQ Delivery Tab
The second of the two tabs in the Mark Info window is the PQ Delivery tab. This pane controls
the delivery speed and destination, as well as other options like CD Text.
Page 39
Figure 4.17: The PQ Delivery tab of the Mark Info window
3.11.2.7
Destination Device Selection & Status
The Device field provides details about your CD-R mechanism. When multiple CD-R mechanisms are connected, there is a selector, represented as a white disclosure triangle, to the right
of the Device label. This selector allows you to toggle between the available target mechanisms. soundBlade LE can only address one mechanism at a time. The Status field below the
device field provides an indication of the status of your delivery media and progress of the delivery:
Note that soundBlade LE is designed to address Apple–supplied, built–in CD-R and DVD-R
mechanisms as well as most third party, FireWire–attached drives supported by the operating
system. USB–attached products as well as some third party drives do not function with Apple’s
optical disc frameworks so, always test new mechanisms prior to use.
3.11.2.8
Delivery Options
In this section of the PQ Delivery tab, there are four buttons, a speed menu and check boxes
that control various aspects of your delivery. Let’s go over what they do.
Page 40
3.11.2.9.1
DDP Image Button
The first button, DDP Image: defines the parameters of DDP delivery. We suggest that you
write DDP images at 8x or Max from the Speed pull down menu.
Make sure that the Write PQ and Write Audio checkboxes are selected.
If you want to include CDTEXT metadata in the DDP, select CD-Text (TS). Note that this must
be selected if you want CDTEXT in your deliverables.
To deliver a DDP in soundBlade:
1
Select the EDL you want to deliver. All audio routed to Monitor Outputs 1–2 will be delivered to the DDP.
2
Select Windows > Show Mark Info or press COMMAND M.
3
soundBlade displays the Mark Info window. Click the PQ Info tab. soundBlade displays
the Delivery panel.
4
Click the DDP button.
5
Select a write speed from the Speed pop-up. 8x or Max.
6
Click Execute. Define the location to save your DDP image to.
soundBlade plays your EDL out of real time and writes the DDP image.
Abort — Click to abort the session…
3.11.2.9.2
CD-R Button
The second button, CD-R, defines the parameters of CDR delivery. We suggest that you:
•
set the Speed menu to 4x.*
• if you want to include CDTEXT metadata in your CDR, select CD-Text (TS).
• select Close Session.**
*The Speed menu that lets you select the “burn” or writing speed. Though most commodity
media is optimized for high speed writing, this is not optimal for audio disc creation. High write
speeds usually produce lowers detectable error rates but jitter performance is degraded. Since,
in a player, detectable errors are corrected, they are not an issue. However, jitter performance
affect the subjective quality of disc playback. Lower write speeds produces less jitter so, always
write at the lowest speed available for your mechanism and use blank media optimzed for low
speed audio disc creation.
**The Close Session check box controls whether is the CD-R is a TAO (Track at Once) or a DAO
(Disc at Once) disc. It is possible to create multi-session, Track At Once discs in soundBlade LE
but, this is not recommended as TAO disc are not universally interoperable. That is, they will
not play in all CD players. Again, unless you have a very good reason, you should leave Close
Session check box selected.
With a Track At Once disc, the disc’s TOC or Table of Contents is left “open” and a temporary
TOC stand-in, the Program Memory Area, is used until the TOC is “closed” and the disc is no
longer writable.
3.11.2.9.3
securePlayer Button
The third button is securePlayer. soundBlade 2.0 includes our securePlayer client approval
software which allows you to create a DDP-type master file wrapped in an encrypted version
of our Sonic Studio Engine music player. With securePlayer, you deliver a self-contained,
password protected player application that includes their finished master. It even supports
CDTEXT and allows you to burn a reference CD. And, because securePlayer is uses the Sonic
Studio Engine for playback, the client will hear their music exactly as you intended them to
hear it!
To prepare a securePlayer
1. With secure player button selected in Mark Info PQ Delivery tab, click on the Execute
button.
2. In the FInder window that appears, navigate to the DDP File set that you want to use. Click
OK.
3. A CD Delivery Dialog box may appear that says ‘ Folder contains a DDP Image. Would you
like to use this image or create a new image for delivery to CD?’ If this box appears, select
Use.
4. Enter a password and select OK. The DDP file is encrypted (this will take a few minutes).
NOTE: This is the password you will give out to authorize and decrypt the securePlayer.
5. Navigate to the Extras Folder located inside the folder that contains your soundBlade app.
Select it and click OK.
6. Specify a folder to save your securePlayer in. We recommend it be placed in your master
project folder for the project you are working on. Select OK.
A ‘YourProject’_player.app is created. ZIP that app and send to your clients that have Mac
computers. securePlayer will not open in Windows environment at this time.
3.11.2.10
The Execute Button
Once the above options are set, this button starts the process of creating a new delivery, written to the location shown in the “Path/Device” field. When you click the Execute button, a standard Mac OS file browser opens where appropriate, allowing you to specify the location that
will be used. A new or empty folder should be specified to contain the newly created or modified DDP file set. Once the destination is specified, soundBlade LE begins the delivery process,
with progress shown in the validation field at the bottom of the PQ Delivery window. During
delivery to a CD-R when no media is present in the selected drive, soundBlade LE will prompt
you to insert media and wait for a blank disc to be inserted.
Note that, once a delivery has started, the Execute button changes to an Abort button, allowing you to halt the delivery process. If a delivery is aborted, the resulting CD-R or DDP image
file set is not usable for either duplication or playback purposes. When a DDP image creation is
aborted, the resulting folder/files should be moved to the Trash and a new folder created for additional DDP deliveries of the same Project.
3.11.2.11
The Eject Button
The Eject button will cause the host to eject an inserted disc from the selected CD writer.
3.11.2.12
The Track List Button
Clicking on the Track List button saves a text document with detailed information about the
tracks in your project. This list should be included when sending your project to a replacator.
1
Click on the Track LIst button
2
soundBlade displays a Save File dialog.
3
Select a destination for the file and, if desired rename it, then click OK.
SonicStudio LE saves the Track List and opens it in SimpleText.
3.11.2.13
The Export List Button
Clicking on the Source Export List creates a tab-delimited text file suitable for importing into
third-party applications such as spreadsheets.
3.11.2.14
The PQ List Button
This button generates a Sonic Studio–standard PQ List, the industry’s standard text representation of a compact disc’s table of content. This file is typically printed and a hard copy sent,
along with the DDP data set, to your replicator.
Figure 3.26: A PQ List open in TextEdit
Chapter 4....................................................Advanced Editing
4.1
Fade Tool Options
4.1.1
Changing Fade Parameters
soundBlade LE offers a simple and intuitive tool for changing a fade’s gain characteristics: the
Fade Tool. In the previous chapter, we have seen how to use this to perform simple operations.
The Fade Tool offers additional possibilities to alter fades according to your needs and preferences.
The Fade Tool is enabled by default. By holding the control key and typing A, you can quickly disable or enable the Fade Tool. Alternately, you can force the Fade Tool off by default. In the
EDL tab of the Windows > Preferences window, the Fade Tool check box keeps the Fade Tool enabled until you choose to disable it manually.
When moving the cursor over a fade with the Fade Tool enabled, the default cursor changes
into the Fade Tool and the selected fade turns either green for an Fade In, red for an Fade Out
or both. Depending on cursor location relative to the fade, the Fade Tool modifies the start, end,
length or position of the fade. See section 3.8.1 for basic information about the Fade Tool.
If you zoom in on a Fade so that more than about 10% of the waveform display is occupied by
the fade, you will see the thin blue vertical line that represents the edit event and a diagonal
line or “curve” that represents the gain law or change in amplitude dictated by the fade. Situated in the middle of the diagonal curve and attached to that line is a square “bead,” the Control
Point for the fade curve.
1
2
Fade Tool
control point
➷
Edit Event
➷
3
Figure 4.1: Anatomy of a Fade
Figure 4.1 above shows the major parts of a Fade and the various contextual shapes that the
cursor assumes based on location. Note the Control Point and edit event, discussed in upcoming sections.
On the left, the #1 cursor is set for an “inboard” duration change. Placing the cursor at that location and click–dragging will increase or decrease the duration of the fade without changing
the edit event location or gain law. This is the preferred handle to use when changing duration.
Page 45
Next is the #2 cursor shape, displayed when the cursor is set to change the overall location of
the fade. Placing the cursor in that location and click–dragging will re–locate the fade, “sliding
it” earlier or later on the time line without changing the duration, edit event or gain law. Remember that you cannot move a fade past the head or tail of the underlying audio.
In position #3, the cursor is set for a duration change “toward the outside” of the Fade. Placing
the cursor in that location and click–dragging will increase or decrease the duration of the fade
without changing the overall location or gain law. These “outboard” handles do effect the location of the edit event, so it’s recommended that you not use the outboard handle, employing
the inboard handle instead as mentioned above. Section 4.1.4 below discusses edit events as
they relate to controlling fade parameters.
4.1.2
Changing the shape of the Fade
By clicking the Control Point “bead,” shown in Figure 4.1, and dragging it up or down, you can
adjust the rate of change setting for the fade. Specifically, for all fade types except exponential, moving the Control Point adjusts the “dB down” while, for an exponential fade, the Control
Point adjusts the “Alpha” or shape. In either case, as you make this change, the fade curve will
dynamically change in response and the underlying audio will also change since you are affecting the gain across the fade event.
When the Fade Tool is active, holding the control key brings up a contextual menu.
Figure 4.2: The Fade Tool contextual menu
The Fade Tool contextual menu offers the following choices for gain law or curve:
Page 46
• Linear — default 6 dB down in the center
• Root Linear — 3 dB down in the center
• Cosine — default 3 dB down in the center
• Root Cosine — default 6 dB down in the center
• Exponential — provides very rapid reduction in gain across the Fade
soundBlade LE provides five fade shapes to allow you to produce a pleasing edit or transition,
no matter what sort of material you have available. You can also use fades for less obvious purposes, such as applying a new Crossfade on an unwanted sound, changing the gain law to exponential, and adjusting the duration to “drop out” or suppress the unwanted sound. Though
each gain law is useful in certain situations, the linear fade shape is the most widely applicable.
4.1.3
Changing the Fade Duration
In the Fade Tool contextual menu, the Set Fade to Selection forces the fade duration to match
the duration of a selected region that encloses the fade. When a region is selected, this option
stretches or shrinks the length of the Fade to match the position and length of the selected region. The contextual menu changes to reflect the currently selected Fade Type.
The Fade Tool functions also apply to a Crossfade. Figure 4.3 below shows the Fade Tool in
Crossfade Mode. Notice that the cursor assumes a double horizontal arrow shape and both
fades are highlighted, both green and red.
Figure 4.3: The Fade Tool in Crossfade Mode
By click–dragging left or right, the overall Crossfade location can be altered. By shift–click–
dragging, notice the cursor shape changes to a vertical arrow, the Crossfade duration can be
symmetrically altered. Holding the command key allows you to override symmetrical mode
and alter duration with the left edge achored while holding the option key provides the same
override mode for the right edge.
4.1.4
Changing the Fade Type
The Fade Tool contextual menu also offers two choices for fade type. These choices, accessed
by hold the control key while using the Fade Tool, allow you to change the context in which the
fade will be used. For the purpose of CD preparation, Fade Ins and Fade Outs are fundamentally different from Crossfades. The difference is where the actual edit event occurs in the underlying audio and this subtly but profoundly effects the accuracy of your PQ marks and resulting
Page 47
metadata, since the edit event is where soundBlade LE places the PQ marks in any of the automatic modes.
With a Crossfade, the edits occur at the very center of the two Black Fades (see section 3.8.1).
Fade Ins and Fade Outs, on the other hand, are designed to be used as the transition to or from
“Edited Black,” where no audio is present on the time line. Use the Set Fade to Crossfade option when you expect to connect its associated segment to another segment for a seamless
edit between segments.
The ‘Set Fade to Default...” options force all fade parameters back to their appropriate defaults.
• Set Fade to Fade In/Out: forces parameters to the appropriate default Black Fade
• Set Fade to CrossFade: forces parameters to a default Crossfade
• Set In/Out Fade(s) to Selection: forces either a Black Fade or Crossfade to the duration and overall location of a selected region.
• Set Fade To Default...: changes the Fade(s) based on user defined pre–sets from the
EDL > Edit Fade Mode.
When the Fade Tool is active, any change you make using the tool, to a Fade or to the underlying audio is real time. The default fade shape can be selected in the Editing Tools tab in Windows > Preferences.
4.2
4.2.1
Drag & Drop
Resequencing
For rapid assembly of program material, soundBlade LE provides three easy methods for automatically snapping to either 1, 2 or 3 seconds of Edited Black between segments.
4.2.1.1
AutoSpace All Segments
The first method is the Edit > AutoSpace All Segments command discussed in section 3.8.6
above.
4.2.1.2
Drag & Drop
The second method entails manually dragging CD Tracks. Dragging Tracks requires that the
Show Track Bar preference in the EDL tab of Windows > Preferences be enabled. Once Track
Bars are visible, click–hold on any song’s Track Bar to select it, and drag it to the desired location. Existing Tracks “shuffle” into place and the dragged Track takes its place, where dropped,
in the CD track sequence. The audio associated or “attached” to the marks shuffles along with
the marks. The pause between an End of Track mark and a subsequent Start of Track mark are
always considered to be part of that Track.
Page 48
Figure 4.4: The Track Bar
This same drag–to–resequence behavior is also available in the Windows > Mark Info dialog.
Simply drag an entry in the track list to a new location to resequence Tracks.
4.2.1.3
Snap to Zone
The third method entails manually dragging and snapping segments to a pre–defined song
timing. It is best to drag segments if you have not created PQ marks to prevent unwanted mark
relocation.
This drag and snap segments method of resequencing requires that the Snap to Zone preference in the Editing Tools tab of Windows > Preferences be enabled. Once the Snap Zone preference is set, click on a segment’s Title Bar to select it. After it’s selected, all you have to do is
click–drag on its Drag Bar as you move its head close to another segment’s tail. You will see either a vertical red or blue bar appear, visually indicating you are in the snap zone.
Figure 4.5: The Title Bar and Drag Bar
Page 49
Figure 4.6: The red auto–spaced snap indicator
Figure 4.7: The blue flush snap indicator
The bold blue bar indicates a “flush” snap where, if you drop at that location, the two segments will be tightly butted with no space, no Edited Black in between. The bold red bar indicates an auto–spaced snap where, if you drop at that location, the two segments will have a
precise, preset space between. The duration of the inter–segment spacing is determined by the
AutoSpacing Duration selector in the Editing Tools tab of the Windows > Preferences window.
Drag and drop with autospacing is useful in conjunction with the Edit > Clear/Delete Selection
commands to start with one long continuous segment, such as a consolidated complete mix,
and quickly segment, space and resequence the individual songs.
Note that, when using this fully manual method, sequencing should be performed prior to
mark placement. This will prevent erroneous repositioning of marks as your segments are shuffled.
4.2.2
Drag–Overlay
When you drag and drop one segment on top of another, with no modifier keys employed,
one segment will overlay another when you drop it on top. The two segments coexist in the
same location on the time line and sum together during playback. This feature is useful when
used in conjunction with Text Mode, discussed in the next section, so you can individually control the overlapping segments. Also see section 4.3.2 below for creating a combo Project, a
combination waveform plus text Project layout.
4.2.3
Drag–Insert & Ripple
Shift–dragging segments is another useful editing feature. With the shift key held down, the
dragged segment is inserted when you drop it on top. In addition, “downstream” segments,
Page 50
those later on the time line, are pushed or “rippled” to the right, making room for the inserted
segment.
4.2.3
Drag–Replace
When you command-drag and drop one segment on top of another, then the dragged segment replaces the existing audio where it’s dropped. As with all editing in Sonic Studio’s products, this move is non–destructive.
4.3
Text Mode
Text Mode provides a playlist view of the Panel’s contents, with editable segment names along
with editable start and end times. An editable Gain value, see section below, along with a non–
editable Duration value are also shown. To view Text Mode, select the EDL > Show Text View
command. To switch back to Waveform mode, select the EDL > Hide Text View command.
4.3.1
Gain Adjustment
Compiling audio from different sources usually makes it necessary to alter the amplitude of
some of your source material. The last column in Text Mode displays the current gain of all segments. When Segments are opened or added to the EDL, the segment gain is nominally set to
zero dB. By double-clicking on the Gain value of the selected segment, the Segment Gain modal dialog opens.
The Segment Gain dialog is also available via the Edit > Segment Gain… command for selected segments, and also via a segment’s Title Bar contextual menu. Control–click on any Title Bar
to invoke the Segment Gain dialog. Other functions, like Reverse Polarity and Build Waveforms,
are also available. As with other modal dialogs in soundBlade, gain changes will not be applied
unless the OK button is clicked.
Page 51
Figure 4.8: The Segment Gain dialog
The Segment Gain dialog offers several options for altering segment gain. It also provides polarity inversion.
The large central field lets you enter gain directly. Alternatively, course and fine adjustments
are available via up/down arrows. Simply click the arrows to increment or decrement gain in
1.0 or 0.1 dB steps.
Segment Gain can be applied in two different ways. First, it can be applied as an ‘Absolute’ value, meaning that the entry in the gain field will be applied in place of any previous value. The
value entered in the gain field will replace any previous state, ignoring the existing gain of that
segment.
Alternatively, the gain can be applied as a ‘Relative’ value. In relative mode, the entry in the
gain field will be added to or subtracted from the previous value. Positive values will be added
to the previous state while negative values will be subtracted from the previous gain state.
A third ‘Normalize’ radio button is available. Choosing this option will cause the segment’s absolute sample amplitude to be evaluated, after which the amount of headroom or surplus level
below 0 dBFS will be entered in the central gain field. In other words, this function shows how
much gain can be added before digital clipping will occur. The value given is relative to the current gain state so, the normalize function is a subset of a relative gain adjustment.
Though not a gain function, a Reverse Polarity check box is available. This check box inverts
the polarity of the selected segments.
Page 52
Segment gain can be applied to multiple segments at once. Simply command–click on the desired segments in the Text View list, then open the Segment Gain window to make a change.
Changes in Segment Gain will be applied to all selected segments equally, as described above.
This implies that, in relative mode, the gain changes will retain any relative loudness differences between selected segments. In normal use, Segemnt Gain is used on individual segments to
make them play seamlessly or as desired. Once the entire show has been gain adjusted, then
all segments can be selected and normalized, thus maximizing the amplitude for the whole
program.
4.3.2 Combo Project Configuration
Note that, if you find that you use Text Mode a fair amount, you may want to create a special default Project that combines both Waveform and Text mode. To do this, open a new, empty Project. Now, click on the bottom Panel to select it and change it to Text Mode with the EDL >
Show Text View command. Finally, save it as the default Project with the File > Save As Default
Project command. Once this is set, all new Projects will have a left and right waveform with an
additional right channel Text Mode.
4.4
Gain Overlay Mode
As described in section 4.3.1 above, the gain of individual segments can be easily changed
with the Segment Gain dialog. soundBlade LE offers another, global, time line–oriented approach to changing amplitude. Gain Overlay Mode can be used to change level independent of
segments and fades and works as a master automated fader.
Gain Overlay Mode is enabled by clicking on the G button to the left of a Panel, and is available only when in Waveform Display Mode. When enabled, a red line appears superimposed
on the waveform display. The waveform display’s amplitude scale, along the left edge, switches
to a different standard that ranges from -144 to +24 dB, the range of gain change available. Initially, the Gain Overlay is flat at the 0 dB setting.
Figure 4.9: Gain Overlay function activated, showing the red Overlay and Nodes
To change gain, simply point at the desired time location and click on the Overlay. The cursor
changes to a round shape and a square Node will appear. Nodes can only be added, deleted or
modified while playback is stopped.
You can also place gain nodes with region selections or the Edit Point. To use this function, first
click–drag within the waveform display to select a region. Then, select Edit > Create Gain Nodes
Page 53
to add two nodes at the “edges” of the Gain Overlay and the selected region. Because the Edit
Point is really a zero duration selection, it can also be used to create a single gain node with the
Create Gain Nodes command.
When you add a node, a yellow highlighted Gain call–out appears in the Title Bar of the associated segment.
Figure 4.10: A newly created Gain Node with its Gain call–out
If you click–drag a Gain Node, it can be moved both horizontally and vertically. Dragging a
Gain Node horizontally moves it to a different time location while dragging it vertically changes
the gain. The current gain value of that node is continuously shown in the yellow Gain call–out.
When moving Gain Nodes vertically, the gain changes in steps of 1 dB. By holding the option
key while dragging a Gain Node, the resolution of the gain change increases to 0.1 dB to provide fine control.
Note that gain changes between Gain Nodes follows a linear gain law. By adding multiple
Nodes, other curves can be emulated. Unwanted Gain Nodes can be deleted by holding down
the option key while clicking on the Node.
You can make changes to a group of Gain Nodes simultaneously. To do so, select a region that
includes the Node on which you want to work. Then, select the EDL > Select Gain Nodes command. All selected Gain Nodes will fill with yellow to indicate their state. You can also shift–click
to “gather” a collection of grouped Nodes.
When grouped, only the gain can be modified. When changing the gain of grouped Nodes, the
Gain call–out shows both the current value and gain delta or difference from the original value.
Also, when grouped, holding the option key for fine gain adjustment is disabled.
Figure 4.11: The Gain call–out for grouped Nodes
Page 54
Once your Gain Overlay is configured according to taste, all or some Gain Nodes can be
locked against unwanted changes. To do so, first click–drag to select a region containing the
Gain Nodes you want to lock. Then, move the mouse over one of the selected Gain Nodes and
control–click to invoke a contextual menu.
Figure 4.12: The Gain Node contextual menu
By default, the Unlock Gain Node option will be checked. To lock the selected Gain Nodes, click
on the GainOverlayNode Locked option. The selected Gain Nodes will now turn red to indicate
their locked status. Unlocking the Gain Nodes simply requires selecting the GainOverlayNode
Unlocked option.
In the same contextual menu, Nodes can also be locked and unlocked for the whole Panel by
selecting the Lock/Unlock All Nodes In Track options.
Delete Nodes from Selection deletes all Gain Nodes in the current selection. If no selection is
made but one or more segments are selected, all nodes within the selected segment(s) will be
deleted.
Once Gain Overlay is used, the gain changes stay active in the output of soundBlade LE, both
during playback and Delivery. To temporarily bypass the Gain Overlay, select the EDL > Bypass Gain Overlay command. Also, the Gain Overlay can be put into bypass mode by option–
clicking the “G” or Gain button on the left side of each Panel. In both cases, the Gain Overlay
line will turn grey and the Gain button will turn yellow, both indicating the bypass state. Once
in Bypass, Gain Overlay can only be activated again by selecting the same command, which
changes to Activate Gain Overlay. When off or disabled, the Gain turns grey.
Note that, while in Gain Overlay Mode, all normal editing functions are disabled and only the
gain nodes can be manipulated. Reverting to normal Editing can only be achieved by selecting
the Hide Gain Overlay command.
4.5
SRPs
SRPs or Selection Reference Points are persistent placeholders that are saved in a Project.
SRP commands are under the Selection menu, and are placed either with the Edit Point, the
Page 55
Playhead or, at the leading edge of a selected region. They can be locked to the time line, unlocked and deleted. Option–clicking allows you to drag them to a new location on the time line.
They also carry a optional comment label that’s useful to jog yours or someone else’s memory
at a later date.
As with many objects in soundBlade LE, SRPs have their own contextual menu. Control–clicking on an SRP brings up the following menu;
Figure 4.13: The SRP contextual menu
The menu offers the following options:
• Lock SRP
• Unlock SRP
• Lock All SRPs in Track
• Unlock All SRPs in Track
Note that the last two options are global in nature and will change the state of all SRPs pres-
ent, regardless of region selection. Also note that, if an unlocked SRP is enclosed within or
touches a segment, it will become associated with that segment and will move if the segment
is moved.
4.6
Edit Groups
Sometimes a monaural edit is needed on a stereo pair. soundBlade LE provides a simple “Edit
Group” control to depart from the default behavior of performing edits on both channels of a
stereo pair when you operate on only one. The default Edit Group mode is stereo, as indicated
by the stereo Edit Group indicator.
Page 56
Figure 4.14: Stereo editing mode
The stereo editing mode selector straddles the two Panels. Above and below the stereo editing
mode selector are the two mono editing mode selectors for each channel. Click on any of the
three editing mode selectors to change mode.
Figure 4.15: Mono editing mode
Simply click on either mono selector to make changes to one channel or the other exclusively.
4.7
Project Sample Rate
To the left of a Project’s time line, a drop down menu is located for selection of the Project default sample rate. This menu has a simple function, to set the sample rate when making adPage 57
dress calculations on the time line. Since, “under the hood,” soundBlade LE uses samples per
second as the counting method for all time code, time line and address calculations, sample
rate becomes the basis on which all the above calculations are made. soundBlade LE converts
all thirteen of the alternate, non–“samples” time standard choices, discussed in section 3.7.1, to
samples when constructing a Project.
Note that the Project default sample rate has nothing to do with the sample rate of any audio
interface used, nor does it impact the clocking of your system. It is only for locating segments
on a Project’s time line.
4.8
Advanced PQ
Section 3.9 above covers the basics of PQ creation and manipulation. This section delves into
some arcana of the P through W metadata functionality in soundBlade LE.
All PQ information and additional metadata can be viewed and modified with the help of the
PQ Info tab in the Mark Info window. It can be opened by selecting the Windows > Mark Info
command.
Page 58
Figure 4.16: The PQ Info tab of the Mark Info window
Apart from the PQ information, this window contains additional fields for Album Title, Album
Artist, Track Title and, for compilations, Track Artist. These fields provide input for the generation
Page 59
of CD-Text metadata. Additionally, ISR Codes or ISRC, and a Universal Product Code/European
Article Number, or UPC/EAN, code can be entered as well.
ISRC or International Standard Recording Codes are unique, machine–readable identifiers for
each track on a disc. On the other hand, UPC/EAN identifies the entire disc. Both UPC/EAN and
ISRC are discussed in detail below.
Creation of PQ marks must follow a few simple rules, laid down in the “Red Book” or Compact
Disc–Digital Audio (CD-DA) specification. The most important of these rules are:
• There is a maximum of 99 tracks allowed on a CD
• There is a maximum of 99 indexes allowed within each track
• Index marks are not allowed between End of Track and Start of Track marks
• The minimum duration of a track, the minimum distance between Start of Track and
End of Track marks or two consecutive Start of Track marks, must be 4 seconds, including offsets.
• Two consecutive End of Track marks are not allowed but two consecutive Start of
Track marks are allowed
soundBlade LE validates the PQ marks against Red Book specifications and shows the result at
the bottom of the PQ Window.
Note that Index marks are infrequently used as most CD players available do not offer the
ability to locate to Indexes.
4.8.1
4.8.1.1
Album Info
Album Title
In this field, the title of the album can be entered.
4.8.1.2
Album Artist
In this field, the artist’s name can be entered.
4.8.1.3
UPC/EAN Code
This is the product’s Universal Product Code/European Article Number, usually displayed as
a barcode on the package. EAN barcodes are typically 13 digits and, in the United States, the
leading digit or country code should be set to zero before entering the additional 12 trailing
digits of a UPC.
Page 60
4.8.2
4.8.2.1
Track Info
Track Title and Track Artist
These text fields directly represent the title and artist of the selected track in the list below.
These fields are used to generate CD Text metadata.
soundBlade LE assigns default names to marks and the tracks they generate. The Start marks
are numbered and named based on their associated segment’s name. The End marks and Index
marks are not numbered, and are called End and Index respectively.
You can assign your own names to the marks. Just select a mark from the Track Info list, type a
new name into the Track Title field, and hit the enter key. The new name will appear in the list, in
the CD Text metadata, and also in the Track Bar, if visible. All this information is saved as part of
the Project.
Track Artist is entered in a like manner. Select a mark from the Track Info list, type an artist into
the Track Artist field, and hit the enter key. The artist’s name will appear in the list and also in
the resulting CD Text metadata. If, prior to mark generation, you enter an Album Artist, as mentioned in section 4.8.1.2 above, soundBlade LE will automatically use that text string for the
Track Artist.
Note: You should always check your Mark Info window for metacharacters, such as $, &
and %, as well as extended ASCII characters, like å, é, ø, ö, ü, ñ, et cetera. Mac OS, which
soundBlade LE uses to write CD-Rs, does not handle extended ASCII and metacharacters properly.
4.8.2.2
Track Start
This field displays the location of individual marks. The location can be edited by typing directly into this field. The corresponding PQ mark will be moved accordingly.
4.8.2.3
Track Offset
This field shows the offset, if any, that is applied to the selected mark. If the default offset is
not appropriate, you can enter a custom offset for every mark.
4.8.2.4
ISR Code (ISRC)
This field shows the International Standard Recording Code or ISRC, if any, that is associated
with the selected Start of Track mark. When a record label provides ISR Codes for a title, as is
usually the case, check the following guidelines to insure that the ISRC is valid: There must be
exactly 12 characters. The first 5 places must be numeric or uppercase letters. The 6th through
12th places must all be numeric. Although often supplied with them, dashes or hyphens should
be removed from the ISR Codes prior to entry in the Mark Info window.
Like UPC/EAN mention in section 4.8.1.3 above, ISRC cannot be self–assigned and must be created in conjunction with the IFPI <www.ifpi.org> or one of it’s local branches. See Appendix 4
for more information on the IFPI.
Page 61
4.8.2.5
Lock Check Box
The Lock check box locks the PQ times for the selected CD Track to prevent inadvertent changes. When a Track is locked, its appearance in the Track Bar changes from the normal shape and
color to a yellow, right pointing triangle.
4.8.2.6
Default Check Box
The Default check box forces an individual CD Track back to the default timings setting.
4.8.2.7
Copy Enabled Check Box
This check box displays and controls the state of the Copy Enable bit, the “flag,” of the SCMS
or Serial Copy Management Scheme. The flag is set and copying is enabled when the Copy Enable check box is selected.
The default state for this button is off. That is, copying is not allowed.
SCMS or “scums” flags, implemented for consumer digital recording devices, are generally ignored by professional audio equipment. Consumer digital audio equipment however, broadly
recognises the SCMS bit and inhibits the possibility of making digital copies from CD’s with the
SCMS flag set. Hence it is common practice to disable the SCMS on CD-Rs or DDP masters intended for duplication.
4.8.2.8
Emphasis Check Box
This check box shows and controls the state of the AES/EBU Emphasis flag or bit of the selected track. When the Emphasis flag is set, a CD player will de-emphasize the track on playback.
The Emphasis flag is set when the button is red.
Note that digital emphasis is rarely, if ever, used in modern production. This flag provides
backward compatibility with archival material that employed emphasis as a form of perceived
noise reduction at the expense of reduced high frequency headroom. Do not set the Emphasis
flag unless you are sure that emphasis was applied to the original data and that it has not been
de–emphasized prior to use in your soundBlade LE Project.
4.8.3 A Word About PQ Offsets
In the Mark Info dialog, the Track Offset field is non–editable. This because PQ Offsets are applied globally, based on your Windows > Preferences > Delivery > Offsets preferences.
PQ Offsets are correction factors, subtracted from absolute song timing, to compensate for
deficiencies in real world CD transports. They attempt to correct for the variation found with a
CD transport’s ability to locate to an address, fill its audio data buffer, unmute the audio output
and commence playback. Less expensive transports typically require back–timing, hence the
PQ Offset, to make sure the buffer is full prior to track start so audio is not cut off by the transport’s muting circuit. With Offsets enabled, the factory defaults are very conservative and will
produce satisfactory results with even the lowest quality transport but, always deliver a copy of
your CD and check a range of target transports for an optimal setting.
Page 62
Note that, as a rule, offsets are applied during the delivery of an original CD or DDP file set.
The Windows > Preferences > Delivery > Offsets > Disable Offsets check box will enable or disable offset compensation. Offsets are applied globally to an entire Project.
4.8.4
PQ Track Info
4.8.4.1
Total Tracks & Extended Listing
This field shows the total number of Start marks that will appear on the disc. To the left of the
Total Tracks field is an unmarked Extended Listing check box that, when unchecked, simplifies
the Track Listing by hiding End of Track Marks and Indexes. This mode, showing only the essential CD Track information, is designed for resequencing Tracks by dragging and dropping as discussed in section 4.8.4.3 below.
4.8.4.2
Total Duration
This field shows the total playing time of the CD. The total playing time includes all pauses between the individual tracks as well as the “pregap” mode changing pause before the start of
Track 1. The inclusion of pregap results in a different duration than would result from simply
adding the disc running times, and complies with the method CD players use to calculate and
display Total Duration as specified by the CD-DA Red Book.
4.8.4.3
Track Listing
This field shows a list of all Tracks present. For Start of Track marks, each entry shows the track
number and name, the start and end times along with the duration. If the Extended Listing
check box, mentioned in section 4.8.4.1 above, is checked, then End of Track and Indexes are
also listed along with their times.
Any individual mark can be selected by clicking on that row in the list. A selected Track is highlighted in yellow while information on the highlighted mark will appear in the fields above
within the Track Info section. See section 4.8.2 above for more information on Track Info.
If you double click on a Track Start entry in the list, soundBlade LE will automatically begin
playing that Track based on the current timings. This provides a quick way to confirm your mark
locations.
The Track Listing also provides the ability to resequence CD Tracks. If you click–hold on any
(Start of) Track entry, and drag it to a new location in the list, you can drop it and the audio implicit in the Track definition will also shuffle to the new location. This allows you to quickly resequence CD Tracks. See section 4.3 for a more general discussion of auto–snapping, including
resequencing.
4.8.4.4
PQ Validator
soundBlade LE validates your PQ entries against the Red Book specifications. If they meet the
requirements, the indicator at the lower left corner will be green and the status field will show
Page 63
“PQ Information is valid.” If the PQ marks violate the Red Book requirements, the button will be
yellow, and a message will appear describing what is wrong with the entered parameters.
Note that you may see a “Sound begins more than 2 frames before Start Mark” message.
This a reminder to check that you are not unintentionally truncating any audio at the head of
your Project. Remember that, according to the Red Book specification for CD-DA discs, the first
2 seconds or 150 CD frames are “pregap,” and the first track start is at 2 seconds. Any audio before the 2 second mark will be replaced by 150 CD frames of digital zeroes on any CDs delivered and in DDP file sets. Pregap is a logical region of the disc reserved for mode changes and
other non–audio functions.
4.8.5
PQ Delivery Tab
The second of the two tabs in the Mark Info window is the PQ Delivery tab. This pane controls
the delivery speed and destination, as well as other options like CD Text.
Figure 4.17: The PQ Delivery tab of the Mark Info window
4.8.5.1
Destination Device Selection & Status
The Device field provides details about your CD-R mechanism. When multiple CD-R mechanisms are connected, there is a selector, represented as a white disclosure triangle, to the right
of the Device label. This selector allows you to toggle between the available target mechanisms. soundBlade LE can only address one mechanism at a time. The Status field below the
Page 64
device field provides an indication of the status of your delivery media and progress of the delivery:
Note that soundBlade LE is designed to address Apple–supplied, built–in CD-R and DVD-R
mechanisms as well as most third party, FireWire–attached drives supported by the operating
system. USB–attached products as well as some third party drives do not function with Apple’s
optical disc frameworks so, always test new mechanisms prior to use.
4.8.5.2
Delivery Options
In this section of the PQ Delivery tab, there are four buttons, a speed menu and check boxes
that control various aspects of your delivery. Let’s go over what they do.
The first button, DDP Image: defines the parameters of DDP delivery. We suggest that you
write DDP images at 8x or Max in Speed pull down.
that the Write PQ and Write Audio checkboxes are selected
if you want to include CDTEXT metadata in the DDP, select CD-Text (TS). Note that this must
be selected if you want CDTEXT in your deliverables.
To deliver a DDP in soundBlade:
1
Select the EDL you want to deliver. All audio routed to Monitor Outputs 1–2 will be delivered to the DDP.
2
Select Windows > Show Mark Info or press COMMAND M.
3
soundBlade displays the Mark Info window. Click the PQ Info tab. soundBlade displays
the Delivery panel.
4
Click the DDP button.
5
Select a write speed from the Speed pop-up. 8x or Max.
8
Click Execute. Define the location to save your DDP image to.
soundBlade plays your EDL out of real time and writes the DDP image.
Abort — Click to abort the session…
The second button, CD-R, defines the parameters of CDR delivery. We suggest that you:
•
set the Speedn menu to 4x.*
• if you want to include CDTEXT metadata in your CDR, select CD-Text (TS). Note that this
must be selected if you want CDTEXT in your deliverables.
• select Close Session.**
*The Speed menu that lets you select the “burn” or writing speed. Though most commodity
media is optimized for high speed writing, this is not optimal for audio disc creation. High write
speeds usually produce lowers detectable error rates but jitter performance is degraded. Since,
Page 65
in a player, detectable errors are corrected, they are not an issue. However, jitter performance
affect the subjective quality of disc playback. Lower write speeds produces less jitter so, always
write at the lowest speed available for your mechanism and use blank media optimzed for low
speed audio disc creation.
**The Close Session check box controls whether is the CD-R is a TAO (Track at Once) or a DAO
(Disc at Once) disc. It is possible to create multi-session, Track At Once discs in soundBlade LE
but, this is not recommended as TAO disc are not universally interoperable. That is, they will
not play in all CD players. Again, unless you have a very good reason, you should leave Close
Session check box selected.
With a Track At Once disc, the disc’s TOC or Table of Contents is left “open” and a temporary
TOC stand-in, the Program Memory Area, is used until the TOC is “closed” and the disc is no
longer writable.
The third button is securePlayer. soundBlade 2.0 includes our securePlayer client approval
software which allows you to create a DDP-type master file wrapped in an encrypted version
of our Sonic Studio Engine music player. With securePlayer, you deliver a self-contained,
password protected player application that includes their finished master. It even supports
CDTEXT and allows you to burn a reference CD. And, because securePlayer is uses the Sonic
Studio Engine for playback, the client will hear their music exactly as you intended them to
hear it!
To prepare a securePlayer
1. With secure player button selected in Mark Info PQ Delivery tab, click on the Execute
button.
2. In the FInder window that appears, navigate to the DDP File set that you want to use. Click
OK.
3. A CD Delivery Dialog box may appear that says ‘ Folder contains a DDP Image. Would you
like to use this image or create a new image for delivery to CD?’ If this box appears, select
Use.
4. Enter a password and select OK. The DDP file is encrypted (this will take a few minutes).
NOTE: This is the password you will give out to authorize and decrypt the securePlayer.
5. Navigate to the Extras Folder located inside the folder that contains your soundBlade app.
Select it and click OK.
6. Specify a folder to save your securePlayer in. We recommend it be placed in your master
project folder for the project you are working on. Select OK.
A ‘YourProject’_player.app is created. ZIP that app and send to your clients that have Mac
computers. securePlayer will not open in Windows environment at this time.
4.8.5.3
The Execute Button
Once the above options are to your liking, this button starts a new delivery, writing to the location shown in the “Device” field. When you click the Execute button, a standard Mac OS file
Page 66
browser opens where appropriate, allowing you to specify the target location for a DDP file set.
A new or empty folder should be specified to contain the newly created file set that will form
the basis for your CD-R delivery. Once the destination is specified, soundBlade LE begins the
delivery process, with progress shown in the validation field at the bottom of the PQ Delivery
window. During delivery to a CD-R when no media is present in the selected drive, soundBlade
LE will prompt you to insert media and wait for a blank disc to be inserted.
Note that, once a delivery has started, the Execute button changes to an Abort button, allowing you to halt the delivery process. Aborting a delivery in the midst of the delivery process
will render the resulting disc or DDP file set unusable.
When you insert a blank CD-R into your target drive, you may see a dialog asking, “You inserted a blank CD. Choose an action…”. Clicking on the Ignore button will close this dialog and
release the mechanism for soundBlade LE’s use. This behavior results from the settings in the
CDs & DVDs pane of the Mac OS System Preferences. You may want to set your CDs & DVDs
preferences to Ignore so as to eliminate that extra step.
As a alternative to the Execute button, the Burn button is a quick route to creating a CD-R. A
functional equivalent to the Mark Info’s Execute button, simply click on the Burn button to start
a DDP and CD-R delivery.
4.8.5.4
Delivering CDs from an Existing DDP
Once you have an existing DDP file set, it’s easy to deliver one or more, identical CDs from that
DDP file set. Open a new, empty Project before “reusing” an existing DDP file set. Then, click
on Execute and, in the resulting dialog, click on the “Use” button after specifying delivery to a
folder that already contains a DDP file set. This will re–use the existing file set, “burning” another CD.
4.8.5.5
The Eject Button
The Eject button will cause the host to eject an inserted disc.
4.8.5.6
The PQ and Other List Buttons
There are three buttons that generate textual list in soundBlade LE. One is the Track List button,
which is generally not used though, because of its simplified content, can be used to deliver
CD Text metadata to replication in place of the more detailed PQ List discussed below.
The Export List button is included for completeness. It is usually used for cue spotting in motion picture work.
The third button generates a PQ List, the industry standard text representation of the current
Project’s content from a PQ perspective. Once TextEdit opens the file, you should review the
contents and add or edit the information to include any CD Text information you want to appear
on your replicated CD. The completed file is typically printed, the hard copy is sent, along with
the file and appropriate DDP data set saved to your blank medium of choice, to the replicator.
Page 67
Page 68
Chapter 5...................................................................... Meters
5.1
Meters Window
The “Meters window” provides a Master section, the final output control for your Project. The
Master section window can be opened by selecting the Windows > Meters command.
Figure 5.1: The Master section
The Master section resembles a master fader section of a typical mixing desk and features a
number of elements. Most important, at right, is a Master fader.
The Master Fader controls output amplitude across all four buses. It has a amplitude scale at
right, with three triangular hot spots, at left, for rapid gain setting. Clicking on a hot spots instantly moves the fader to the corresponding preset position. Hot spot values are not adjustable.
Page 69
Below the fader is a gain call out field where the gain setting of the fader can be manually entered as a numerical value. To alter the master fader’s position, a new value can be manually
entered in this field and, after confirming the new value with the Enter key, the fader will move
to the corresponding position.
Also, at the bottom a “dim” button is found. Clicking the dim button immediately moves the
fader to the predefined position of -20 dB, returning to it’s original position when the dim button is disengaged. When the dim button is engaged, it’s label color changes to red to indicate
that dim mode is active.
To the left of the Master fader is a section from which the window gets its name, the bus meters. Above each meter is a field showing the numerical value of the current instantaneous amplitude. When an overload occurs, these boxes turn red. To clear the overload display, click on
the indicator and the red surround will disappear.
Finally, at the top left of the Master section are four more buttons. Clicking the Clear button
clears the peak values for the numerical level indicators, as well as any overloads indicated.
Clicking Reset resets the peak-hold of the meters, as well as any peak-hold value in the Meters
Details window.
The third button, Details, opens or closes the “Meter Details” window.
Figure 5.2: The Meter Details window
The six value indicators show the current instantaneous values for Peak Power, Peak RMS and
VU (Volume Indicator scaling) for each output. With the Meter Scaling slider, the scaling of the
meters can be adjusted to provide more resolution at increasingly higher amplitudes.
Page 70
Chapter 6....................................................................... Menus
For all menus, the keyboard equivalents for all commands are listed in Appendix 1. Also note
that the word folder is used to describe disk directories, in keeping with Mac OS tradition. Finally, all edits in soundBlade LE are both instantaneous and non–destructive. The only exception is the File > Save Reversed command, which “renders” or creates a new sound file of the
reversed material.
6.1
The File Menu
Figure 6.1: The File menu
Page 71
6.1.1
New Project
Selecting New Project from the File menu will open a new, empty Project. Any currently active Projects are unaffected but moved to the background. soundBlade LE allows you to have
as many open Projects but, when the application runs out of RAM, it will begin to use virtual
memory, significantly slowing down the application.
6.1.2
Open Project…
A Project file lets you save your editing work in a set of files, along with most of the editing
metadata you added. An additional feature of a Project is that you can save your edit decisions without committing them back to a DDP file set. The Project file saves all segment names,
SRPs, marks and edits and, they are all restored upon re–opening that Project.
Selecting File > Open Project brings up a standard Mac OS file browser. Locate the requested
Project file and select it to open the Project in a new window.
6.1.3
Open Recent
With this menu, a list of recently opened Projects and sound files is shown. Selecting one of
those files will re-open it.
If you hold down the option key prior to accessing this menu command, it divides the resulting list into Project files first and sound files second, with a divider in between. The files appear
in the list with the most recently used files at the top, in the order they were opened.
Finally, if you select a sound file from this menu without any target Projects open, soundBlade
LE will create a new (default) Project and open the sound file into that Project.
6.1.4
Open Sound File…
This command opens a Mac OS file browser, allowing you to select any sound file recognized
by soundBlade LE. This includes AIFF, WAV and BWF files along with SD2 or Sound Designer II
files with region definitions. See section 6.9.4.4 for more information on importing SD2 files.
soundBlade LE is also able to open audio files by dragging and dropping the files into the top
Panel of a Project.
6.1.5
Open Dual Sound File…
This command opens a Mac OS file browser twice, allowing you to select any two sound file
recognized by soundBlade LE. This includes AIFF, WAV and BWF files along with SD2 or Sound
Designer II files with region definitions. soundBlade LE will assume the two files are a stereo
pair and open them into the top and bottom Panels, respectively, of a Project.
6.1.6
Open EDL…
This command opens a Mac OS file browser, allowing you to select any sound file recognized
by soundBlade LE. This includes AIFF, WAV and BWF files along with SD2 or Sound Designer II
Page 72
files with region definitions. See section 6.9.4.4 for more information on importing SD2 files.
soundBlade LE is also able to open audio files by dragging and dropping the files into the top
Panel of a Project.
6.1.7
Open DDP Image…
In addition to sound files, soundBlade LE can optionally open DDP file sets with the DDP
File Open option. Selecting “Open DDP Image…” from this menu invokes a standard Mac OS
browser. To open a DDP file set, select its containing folder and choose “Open” from the browser window. soundBlade LE will open the IMAGE.DAT audio file and metadata into a new Project.
The DDP metadata consists of three files, the DDPID, DDPMS and the DDPPQ or SD files.
soundBlade LE parses or reads, then validates these files and adds PQ Marks when the DDP
file set is opened.
soundBlade LE can open both consolidated and split DDP file sets. These labels refer to the audio files, with a consolidated file set employing a single audio file while the split file sets has
two or more audio files. The consolidated type is far more common and that is the type that
soundBlade LE saves.
Note that, if you enter CD Text metadata in the Mark Info window, soundBlade LE creates 2 additional file, the TS file and CDTEXT.BIN in the DDP file set. The TS file is not used by
replicators for the addition of CD Text on glass masters. It is only used by soundBlade LE to add
CD Text to CD-Rs created by soundBlade LE. The CDTEXT.BIN file is used by the replicators for
the additon of CDTEXT metadata on glass masters for replication. For more information on delivering CD Text to replication, see section A1.5 below.
6.1.8
Make securePlayer…
soundBlade LE can create securePlayer encryted files. Selecting “Make securePlayer…” from
this menu invokes a standard Mac OS browser, allowing you to create a password-protected
stand–alone Amarra Player with your DDP content securely embedded in the player.
6.1.9
Close Window
This command closes the currently active window. This can be a Project, the Mark Info window or, the Preferences window. Upon closing a Project that contains unsaved changes,
soundBlade LE will open a dialog asking for changes to be saved, discarded or offering to cancel the close window operation.
6.1.10
Save Project
This will save the current state of the active Project. It is saved with its current name and path.
This command will overwrite any previously saved Project file with that name and path.
Page 73
6.1.11
Save Project As…
This command lets you save a copy of the active Project under a new file name or different
path. soundBlade LE allows you to choose either a destination folder or, you can navigate to an
existing folder. If the destination is empty, soundBlade LE simply writes the audio and/or metadata files as directed. If, however, the destination folder is not empty, soundBlade LE alerts you
that a potential conflict exists to overwrite files and asks for more direction.
6.1.12
Save As Default Project
This command save the foreground Project as the default document layout when new Projects
are created. Since this is a literal “save as,” you should always deploy an empty Project, without any sound files opened into the Project, before you invoke this command.
6.1.13
Reveal Sound In Finder
This command requires a single selected segment. As the name implies, Reveal Sound In
Finder switches context to the Finder and opens a new window with the source sound file highlighted.
6.1.14
Build Waveform…
Files originating from a non–Sonic Studio product includes sample values but do not contain the amplitude-specific metadata needed to draw our very detailed audio time versus amplitude “waveforms.” If you would like to add waveforms while working with your sound files
and have unchecked the default Windows > Preferences > EDL > View > Background Waveforms
preference, you must select the Build Sound Waveform… command.
First, select the parent sound file by clicking on the segment’s Title Bar. The Title Bar will turn
yellow to show that it is selected. Then, select the File > Build Sound Waveform… command.
6.1.15
Export Sound File…
This command exports sound files in either AIFF or BWF format, in 16 or 24 bit word length. It
exports the audio with amplitude changes from segment gain, plus any Gain Overlay or plug–
ins.
To use this function, first click–drag in the top Panel to create a selected region and make sure
the top two Panels are assigned, on the first two Desk strips, to Mix1 and Mix2. Then choose
the destination directory with the Set file button. Finally, set the file type, word length and
speed, then click the Export button. soundBlade LE will “play” the selected region, exporting
the audio as it plays.
Note that playing material at 1x speed will not improve the quality during an export so, it is
recommended that, unless real–time playback is needed, you use the Max speed setting as it
has better temporal resolution. Also, during high speed exports, the time display and Playhead
do not operate in real time.
Page 74
6.1.16
Export Tracks
This command exports sound files in either AIFF or BWF format, in 16 or 24 bit word length
based on the Start Mark and End Mark It exports the audio with amplitude changes from segment gain, plus any Gain Overlay or plug–ins.
To use this function, create a selection by either clicking on a segment’s Title Bar or by click–
dragging in the top Panel to create a time region selection. Make sure the top two Panels are
assigned, on the first two Desk Strips, to M1-Out and M2-Out. Then choose the destination directory with the Set File button. Then, set the file type, word length and speed.
Optionally, you can specify that the newly created material replace the existing. The Edit after
Export check box performs a Replace edit, synchronously replacing the material existing prior
to the export with consolidated material created from the export function. Once all options are
set, clicking on the Export button causes soundBlade to “play” the selected region, exporting
the audio as it plays. See section 4.9.4 for more information on Replace edits.
Note that playing material at 1x speed will not improve the quality during an export so, it is
recommended that, unless real–time playback is needed, you use the Max speed setting as it
has better temporal resolution. Also, during high speed exports, the time display and Playhead
do not operate in real time and audio is not available at the outputs.
6.1.17
Save Reversed…
This command saves one or more selected segments or regions in reversed time order, creating a new sound file and segment that “plays backwards.” After invoking the command, a Mac
OS file browser appears in order to select the location and file name of the new reversed file to
be created. After the operation is complete, the reversed material will be edited back into the
Project, replacing the original segment(s) or region(s).
Note that this operation may take a lot of time, depending upon your system configuration
and the length of the selected file(s) or region, during which time soundBlade LE may appear
to be inactive.
Page 75
6.1.18
System Information
Figure 6.2: The File > System Information submenu
6.1.18.1
Show Console Log
Invoking this command launches the Console utility and opens the log associated with
soundBlade LE. Console is the central repository for reports from running processes and applications. While soundBlade LE is running, it outputs information to Console and that information, such as details on installed options, system status and actions undertaken, then appears
in the log. Also, at the command of the user, certain information regarding EDL or Projects can
be output to the log as well. See the following sections for more information on user selectable
printing to the log file.
6.1.18.2
Print EDL Sound File Paths
This commands outputs a list of all locations of all sound files in use in the current Project. The
output is written into the Console Log.
This command is useful if you work in a facility with multiple drives or network–attached storage on which some of your material resides. Printing the explicit path allows you to keep track
of the location of all source material, for both documentation and backup.
6.1.18.3
Print Segment Info
This command prints highly detailed information on all segments in the current EDL. The output is written to the Console Log.
Page 76
6.1.18.4
Print Selected Segment Info Formatted
This command prints user information on the currently selected segment(s). The output is written to the Console Log in the form of a table showing the file name, start and end time, duration and gain in dB.
6.1.18.5
Print Selected Segment Info
This command prints highly detailed information on all selected segments in the current EDL.
The output is written to the Console Log.
6.1.18.6
Print SRP Info
This command prints detailed information on all SRPs in the active Panel. The output is written
into the Console Log.
6.1.18.7
Write SRP Info to File
This command prints detailed information on all SRPs in the active Panel to a new file. The
output is formatted in a table with details on track location, ordinal number, lock status and
type, as well as any textual label added to the SRPs. Lock status is indicated by an “L” for
locked and a “U” for unlocked. Standard SRPs have a “C” type indication while Sync SRPs,
used on other Sonic Studio products, show an “S” type.
Note that, though the default name of the file created with this command has a “.srp” suffix,
you should manually remove that suffix and replace it with a “.txt” file extension.
6.1.18.8
Import 5.4 EDL…
For backwards compatibility with legacy Sonic Solutions 5.4 DAWs, soundBlade LE can import
EDLs created with version 5.4 of that software. To import a 5.4 EDL, first a new Project has to be
created by choosing File > New Project from the main menu. Then, select “Import 5.4 EDL” and
a standard Mac OS browser will appear. Navigate to the location where the 5.4 EDL is stored,
select it and open it by clicking “Open” in the browser window.
6.1.18.9
Export EDL As 5.4…
For compatibility with legacy Sonic Solutions 5.4 DAWs, soundBlade LE can export Projects in
5.4 EDL format. To import the current Project to a 5.4 EDL, select this option and a standard Mac
OS file save window will appear. Browse to the location where the 5.4 EDL must be stored and
enter the desired name for the 5.4 EDL. Select “Save” to save the Project as a 5.4 EDL.
Note that, as Sonic System 5.4 will only run on original Mac OS 9–based hard and software,
you must observe OS 9 file naming conventions.
6.1.18.10
Send Crash Report…
This command is designed to help Sonic Studio to diagnose problem you may be experiencing with your installation. It collects the most recent crash report for soundBlade LE and sends
it via your internet connection to Sonic Studio.
Page 77
6.1.18.11
Print Desk Info
This command outputs all Desk and Output Desk settings to the Console Log.
6.1.19
Audio MIDI Setup…
This command opens the Audio MIDI Setup utility from within soundBlade LE, allowing you to
configure your clock source and sample rate.
6.1.20
Rescan IO…
soundBlade LE’s sample rate reflects the settings in Audio MIDI Setup at the instant you open
the application. However, the sample rate may not dynamically update if anything in Audio
MIDI Setup is changed. To make sure the sample rate accurately reflects the current setting of
Audio MIDI Setup, select the “Re-Scan I/O” command. This updates the soundBlade LE’s I/O
settings, re-loading the current settings from Audio MIDI Setup.
6.1.21
Quit
Selecting Quit from the File menu begins the process of closing the application. Any open
Projects that have been modified will produce a modal dialog asking you to determine open
Project’s fate. See section 6.1.6 above for more information on this dialog.
Page 78
6.2
The Edit Menu
Figure 6.3: The Edit menu
6.2.1
Undo (action)
This command reverts the last command executed. For clarification, the Undo command also
appends the last action performed to the menu name.
soundBlade LE provide an almost unlimited number of undos. The only limiting factor is the
amount of RAM which, when completely used, will force the operating system to use virtual
memory. This will slow down the operation of soundBlade LE.
Page 79
Note that some individual commands actually perform several functions “behind the
scenes” though to you, the user, it appears to be only one function. For that reason, you may
have to Undo several times to recover a state that was reached with a single user command.
6.2.2
Redo (action)
This command reverts the last undo command, reinstating the last command performed. Additionally, for clarification the Undo command in this menu shows the last action undone.
6.2.3
Cut
The Cut command operates on a region within Edit Points as well as selected regions or segments, removing the defined item from the Project and placing it in soundBlade LE’s “Clipboard.” The Clipboard is a temporary memory location reserved by the operating system for
each running application.
6.2.4
Copy
The Copy command operates on a region within Edit Points as well as selected regions or segments, copying the defined item from the Project and placing it in soundBlade LE’s Clipboard.
Unlike the Cut command, the Copy command leaves the defined item intact instead of deleting
it after copying the selection to the Clipboard.
6.2.5
Paste (Replace / Insert / Overlay)
The Paste command inserts the content of the Clipboard into the Project, replacing, in order of
choice, either:
1.
A region within Edit Points
2.
Selected regions or segments
3.
From the Edit Point position
…for the duration of the audio currently of the Clipboard. The inserted content is placed between Crossfades and the Edit Point is moved, for visual reference, to the end of the inserted
material.
6.2.6
Select/Deselect All
These commands select or deselect all segments or regions in the current Project.
6.2.7
Delete Selection
If a region or segment is selected, this command will delete the defined item. It will then “slip”
or move left any audio after the deleted region or segment, filling in the space formerly occupied by the selected segment or region. A Crossfade is placed to transition across the deletion.
Page 80
Note that, as with all editing in soundBlade LE, if both an In and Out Point are present, and
the Out point is after the In Point, then they take precedents over both selected region and segments.
If only an In Point is present, then the command will not work. Finally, if both an In and Out
Point are present, the Out point is after the In Point, and the edit points are inside “Edited
Black,” the empty area between segments, then that region defined by the edit points will be
deleted and “downstream” audio will be moved left.
6.2.8
Clear Selection
Clear Selection works similarly to the Delete Selection command. The Clear Selection command clears the selected segment, region or area defined by Edit Points, but does not move
any other audio on the time line.
6.2.9
Delete Selection
This command deletes the current selection or selected segments. The outer edges of the selection are joined with a default crossfade and all subsequent audio is shifted relatively.
6.2.10
Clear Selection
This command clears the current selection or selected segments, leaving all audio in place and
replacing the audio to be cleared with digital silence. The edges of the cleared area are faded
out and in with default crossfades.
6.2.11
Create Crossfade/Create Segment
This command is context sensitive and it’s appearance in the menu will change according to
the current Panel’s state. It either creates a new crossfade from the current Cursor’s position
when no selection is made, or it creates a new segment at the place of the selection when a selection is made. This command uses crossfade defaults when creating crossfades.
6.2.12 Create Crossfade from In Point/Create Segment from
In & Out Point(s)
As with the previous commands, this command is context sensitive and it’s appearance in the
menu will change according to the current Panel’s state. It either creates a new crossfade from
the current In Points position when no Out Point is seen, or it creates a new segment at the
area included by a set In and Out Point. This command uses crossfade defaults when creating
crossfades.
6.2.13
Delete Crossfade
The Delete Crossfade command deletes all “frivolous” Crossfades, ones that cause no audible
change in the underlying audio, from the selected region. Superfluous Crossfades are usualPage 81
ly created with the Create Crossfade command, discussed in the previous section and, after an
extensive editing session, the Delete Crossfade command will clear any visual clutter, making it
easier to see the operative edits.
6.2.14
Move Segments…
The Move Segment command allows the user to move one or more segments to another location on the time line. Selecting this command opens the Move Segments modal dialog, which
shows the current position of the Playhead or start of the first selected segment.
Entering a new start time and clicking the Move button causes the head of the first selected segment to move to the new location. All selected segments will also more by the same
amount, maintaining their relative position to each other.
Additionally, this dialog offers three extra options. By clicking the Where button, you can load
either the current position of the Playhead or the location of extant In point or Out Points, all
from a drop down menu. Then, by clicking the Move button, the segment(s) shift to the new location. The SRP button lets you load the current position of any extant SRPs, also from a drop
down menu.
The Move button moves the defined item to the location shown in the dialog’s time code address. Clicking the Cancel button leaves the selected segments at their original position.
6.2.15
Segment Gain…
This command invokes the Segment Gain dialog. For more detailed information on the Segment Gain dialog, See .
6.2.16
Reverse Polarity
The Reverse Polarity command inverts the polarity of the selected segment(s) in all selected
Panels. Segments with inverted polarity acquire a small, bright red dot in the upper left corner
of their Title Bar to visually remind you of their inverted status.
Note that, to change the polarity relationship between a stereo pair, this command must be
applied to only one channel of the pair. To do this, change the Edit Group Selector of one Panel,
located on the left edge of both Panels, from the default stereo setting to mono. To read more
about Edit Group Selectors, refer to section 4.7 for more information.
6.2.17
Nudge Segment Left/Right
The Nudge Segment commands move or “nudge” the selected segment(s) left or right, earlier
or later respectively, on the time line by a predefined value. The default “Nudge B” value used
is defined in the Time Display tab of Preferences window. See section 6.9.5 for more information on the Time Display preferences.
Page 82
6.2.18
Edit Segment Name
When a segment is selected, choosing the Edit Segment Name command allows the user to
edit the name of the segment as it appears in the Title Bar, and in Text Mode view. As with all
actions in a Project, changing the Segment name has no effect on the underlying referenced
sound file. This command is equivalent to double clicking on the Title Bar to change a segment’s name.
6.2.19
Editing Auto Tool Override
This commands toggles the Editing Auto Tools state, either enabled or disabled. See section
6.9.6 for more information on the EDL preferences.
6.2.20
Auto Space All Segments/Tracks
The AutoSpace function offers a simple but effective tool to change all pauses between tracks
to a pre-defined value. Simply select Edit > AutoSpace all Segments and all segments will be
moved on the time line, with equal space between according to the Preference > Editing Tools >
AutoSpacing Duration setting.
If you have PQ marks already placed in the Project, the command name changes contextually
from Auto Space All Segments to Auto Space All Tracks. See sections 3.8.6 and 4.2.1 above for
practical discussions about the autospacing function.
6.3
The EDL Menu
Figure 6.4: The EDL menu
6.3.1
Show/Hide Text View
The Show/Hide Text View command toggles the display of the selected Panel between Text
Mode and Waveform Mode views.
Page 83
6.3.2
Show/Hide Gain Overlay
This command forces the selected Panel to show or hide the Gain Overlay feature. The Gain
Overlay is only visible in Waveform Mode, and is shown as a thin red line superimposed on the
waveform display. Projects saved with Gain Overlay will open with Gain Overlay visible upon
reopening.
Note that, although Gain Overlay may not be visible, when activated it is always active in the
audio output signal path. Only the EDL > Bypass Gain Overlay command will bypass any Gain
Overlay functionality. See section 6.3.3 below for more information on the Bypass Gain Overlay command.
6.3.3
Bypass/Enable Gain Overlay
This command bypasses or engages the Gain Overlay function. When in bypass, the Gain
Overlay line in the waveform display turns grey and the corresponding Gain Overlay Button(s)
on the left side of each Panel turn yellow.
Note that the Bypass/Enable Gain Overlay function can only be selected when Gain Overlay
is shown. Option–clicking on a Gain Overlay Button will also bypass the Gain Overlay function.
6.3.4
Create Gain Nodes
With Gain Overlay enabled and a region of the time line selected, this command creates Gain
Overlay nodes at the boundaries of the region. To use this function, first click–drag within the
waveform display to select a region. Then, select Edit > Create Gain Nodes to add two nodes at
the “edges” of the Gain Overlay and the selected region.
Because the Edit Point is really a zero duration selection, it can also be used to create a single
gain node with the Create Gain Nodes command. For more detailed information on working
with the Gain Overlay, see section 4.5 above.
6.3.5
Select Gain Nodes
This command selects all Gain Nodes contained within the currently selected segment(s) or region. Selected Gain Nodes can then be subject to simultaneous changes such as gain setting,
lock state, or deletion.
For more information on working with Gain Overlay mode, see section 4.5 above.
6.3.6
Refresh
The Refresh command redraws the current waveform display for the selected Panel. This command is especially useful after rebuilding the waveform files of one or more segments, to force
the waveform display to display the updated information.
Page 84
6.3.7
Standard/Large Track Size
The Standard and Large Track Size commands resize the selected Panel(s) to standard or large
vertical size. Large sized Panels are two times as tall as standard size, offering a better display
with larger display or desktop settings. A Large Panel also lists more segments in Text Mode.
6.4
The Play Menu
Figure 6.5: The Play menu
6.4.1
Play From Selection
This command starts playback from the beginning of a selected region. If no region is selected,
then playback starts at the Edit Point. If the Edit Point is not available, playback commences at
the start of the first segment in the Project. This command is equivalent to tapping the Spacebar on the keyboard. The Play From Selection command will continue to play until either the
Spacebar is hit again or the Playhead reaches “midnight” (23:59:59:74).
Page 85
6.4.2
(Play) Selection
This command plays a selected region or segments. Whereas the Play From Selection command mentioned in section 6.4.1 above will continue to play until stopped, the play Selection
command stops automatically at the end of the selection.
6.4.3
(Play) From Playhead
In normal operation, when you tap the Spacebar to start playback, the Playhead will jump to
the Edit Point or, the start of the file if there is no Edit Point, and begin playback. The Play From
Playhead command emulates a tape transport, with playback instead starting at the current
Playhead location.
6.4.4
Repeat Play
If there is a selected region, the Repeat Play command will repeatedly play the region until
stopped. If there is not a selected region, soundBlade LE will repeatedly play the entire Panel. Repeat playback continues until you stop play with the menu command or by hitting the
Spacebar.
6.4.5
Stop All
This command stops playback and/or recording and is equivalent to tapping the Spacebar during playback or clicking on the Stop button in the Transport Bar.
6.4.6
Around Selection Center
This command plays a section of sound centered around a selected region. When you choose
Play Around Selection Center, a submenu appears, allowing you to select the length of playback time.
Figure 6.6: Play Around Selection Center submenu
Page 86
6.4.7
Play from Selection
Like the Play Around Selection Center discussed in section 6.4.6 above, this command requires
that you first select a region. Also, this command offers a submenu with duration choices for
playback. Unlike Play Around Selection Center, this command begins playback at the left edge
of the selection and continues, for the specified duration.
Figure 6.7: Play from Selection
6.4.8
Play to End of Selection
This command is the opposite of the Play from Selection command discussed in section 6.4.7
above, except that playback ends at the trailing edge or right side of a selected region. If there
is not a selected region, playback ends at the Edit Point. This command also offers a submenu
with a number of choices for the duration of the playback.
Figure 6.8: Play to End of Selection submenu
Page 87
6.4.9
To In Point
This command plays a section of sound up to the In Point. The duration of playback is preset
by the Play Around In Point preference. See section 6.9.5 below for more information on the
Time Display preferences.
6.4.10
From In Point
This command plays a section of sound starting at the In Point. The duration of playback is preset by the Play Around In Point preference. See section 6.9.5 below for more information on
the Time Display preferences.
6.4.11
To Out Point
This command plays a section of sound up to the Out Point. The duration of playback is preset
by the Play Around Out Point preference. See section 6.9.5 below for more information on the
Time Display preferences.
6.4.12
From Out Point
This command plays a section of sound starting at the Out Point. The duration of playback is
preset by the Play Around Out Point preference. See section 6.9.5 below for more information
on the Time Display preferences.
6.4.13
Play Between In and Out Points
This command starts playback at the In Point and continues to the Out Point.
6.4.14
Move Playhead
This command lets you place the Playhead at a specific location on the time line. When you select this menu item, the Move Playhead modal dialog appears.
Figure 6.9: The Move Playhead dialog
Page 88
When you enter a new time code address in the Move Playhead dialog and click Move, the
Playhead will jump to the new location. Besides manually entering a new location, you can
also use the Where button to load the address of the In or Out Point, if present, while the SRP
button loads the locations of any existing SRPs. Clicking the Cancel button leaves the Playhead
at its original location.
Note that, when the Playhead is visible by disabling the Play > Hide Playhead When Stopped
toggle, you can hover the cursor over the Playhead’s location, either in the time line or Panels,
the cursor changes shape to a sine wave–with–vertical line. Once in that mode, you can click–
drag the Playhead to a new location.
6.4.15
Hide Playhead When Stopped
This command is somewhat of a misnomer in that it toggles, on or off, the ability to drag the
Playhead to a new location when stopped. A check mark appears next to this menu item when
this function is disabled.
This command applies to relocating the Playhead in either a Panel or on the time line, and is
useful if you find yourself grabbing the Playhead accidentally while attempting to edit or modify some other object in a Project. Even with this command enabled (checked), you can always
double click in the time line to relocate the Playhead and begin playback at that location.
6.5
The Mark Menu
Figure 6.10: The Mark menu
Page 89
6.5.1
Mark Info
The Mark Info command opens the Mark Info window. This command is equivalent to the Windows > Mark Info command. See section 3.9 for more information on the Mark Info window.
6.5.2
Track Start Mark
The Track Start Mark command inserts a Start of Track PQ mark at the location of the Edit Point.
6.5.3
Track End Mark
The Track End Mark command inserts an End of Track PQ mark at the location of the Edit Point.
6.5.4
Index Mark
The Index Mark command inserts an Index PQ mark at the location of the Edit Point.
6.5.5
Delete Mark
The Delete Mark command is used to remove existing PQ marks. If a region is selected in a
Panel, all of the PQ marks inside the selection are deleted. If no region is selected, this command will remove a PQ mark if the Edit Point is at the exact time location of that mark.
6.5.6
Lock Marks from Selection
The Lock Marks from Selection command is used to lock PQ marks to the time line. This command locks all PQ marks inside a selected region. Once locked, mark locations cannot be modified until they are unlocked. This command is equivalent to clicking the Lock button, if disabled,
in the PQ Info tab of the Windows > Mark Info window.
Note that this command does not affect the ability to change Title, emphasis state, ISRC or
SCMS metadata associated with a mark. Also note that this command does not attach marks to
audio segments. Editing any audio with locked PQ marks will change the time relationship between those marks and the associated audio.
6.5.7
Unlock Marks from Selection
The Unlock Marks from Selection command is used to unlock PQ marks within a selected region.
6.5.8
Lock All Marks
This command locks all PQ marks on the time line, regardless of selected regions or segments.
Once locked, the location of PQ marks cannot be altered until they are unlocked.
Page 90
6.5.9
Unlock All Marks
This command unlocks all PQ marks on the time line.
6.5.10
Analog Black to Marks
This function measures the amplitude and duration of the audio in a selected region, placing
End of Track and Start of Track marks in locations that approximate the end of one track and beginning of the next. Both amplitude and duration are user defined. The default amplitude is set
in the Editing Tools tab of the Windows > Preferences window.
When invoking this function, the Analog Black to Marks modal dialog appears. In the dialog,
the default parameters can be changed, after which the Analog Black to Marks function is started by selecting OK. By clicking on the Cancel button, the operation is stopped without further
action.
Note that the results of the Analog Black to Marks function is never as accurate as the Edited
Black to Marks function, discussed in section 6.5.11 below. The accuracy of the mark placement
depends entirely on the accuracy of the parameters used so, you may want to zoom in and,
with the Show Track Scale in dB preference set (Editing Tools tab of the Windows > Preferences
window), visually estimate amplitudes of your fade outs and noise floor. The result of the Analog Black to Marks function should always be checked for errors and unintended placement.
6.5.11
Edited Black to Marks
The Edited Black to Marks command automatically places Start of Track PQ marks at the beginning and end of all Fade Ins and Fade Outs respectively. To use the Edited Black to Marks command, you must first select either segments or a region. The presence of End of Track Marks
makes it a bit less predictable when using the Track Bar for resequencing but, the presence of
End of Track Marks means that there will be a countdown on the player’s display when the resulting CD is played back.
6.5.12
Edited Black to Start Marks
The Edited Black to Start Marks command automatically places Start and End of Track PQ
marks at the beginning and end of all Fade Ins and Fade Outs respectively. To use the Edited
Black to Marks command, you must first select either segments or a region.
Because only Start of Track Marks are created, it makes it very easy to resequence using the
Track Bar. On the other hand, the absence of End of Track Marks means that there will be no
countdown on the CD player’s display when the resulting disc is played back.
6.5.13
The Mark Contextual Menu
By control–clicking on a mark, a contextual menu appears. This menu provides choices similar
to the Mark main menu, and allows you to modify the bahavior of a mark.
Page 91
Figure 6.11: The Mark contextual menu
Move Edit Point To Mark: This command moves the Edit Point to the current Mark.
Lock/UnLock Mark commands: These commands are discussed above in this section.
Set/Reset Emphasis: Also available in the Mark Info window, these commands flip the state of
the AES/EBU emphasis bit for the current mark.
Delete Mark: This command deletes the current mark.
6.6The Selection Menu
Page 92
Figure 6.12: The Selection menu
6.6.1
Set In Point
The Set In Point command drops an In Point at the location of the Edit Point. There can only be
one In Point in a Panel at any time.
Note that the IN, OUT and DUR time fields at the top right of the Project window are always
active and fully editable. These fields allow you to precisely set the location of, and duration between, the In and Out Points.
Page 93
6.6.2
Set Out Point
This command places an Out Point at the location of the Edit Point. There can only be one In
Point in an EDL at any time.
6.6.3
Set In & Out Points
If there is a selected region in the Panel, then Set In & Out Points will create an In Point at the
start of the selected region and an Out Point at the end.
6.6.4
Clear In Point
Clear In Point will, if present, remove the In Point.
6.6.5
Clear Out Point
Clear Out Point will, if present, remove the Out Point.
6.6.6
Clear In & Out Points
Clear In & Out Points will, if either is present, remove both the In Point and the Out Point from
the Project.
6.6.7
Nudge Right/Left
These commands makes it easy to slightly move or “nudge” an In and/or Out Point to the right
or left. When you select this command, a submenu comes up allowing you to advance or retard an In Point, an Out Point, or both simultaneously.
Figure 6.13: The Nudge Right command and submenu
The nudge amount is set in the Time Display tab of the Windows > Preferences window. See
section 6.9.5 for more information on the Time Display preferences.
6.6.8
Move In Point/Out Point…
When you select either of these commands, this brings up the Edit In/Out Point modal dialog.
Page 94
Figure 6.14: The Edit In Point dialog
When you enter a new time code address in the Edit In/Out Point dialog and click Move, the
appropriate Edit Point will move to the new location. Besides manually entering a new location, you can also use the Where button to load the address of the Playhead or other Edit Point,
if present. The SRP button loads the locations of any existing SRP while clicking the Cancel button leaves the Edit Point at its original location.
6.6.9
Move In Point to Out Point
This command forces the In Point to replace the Out Point.
6.6.10
Find & Set Points
This command places an In Point at the beginning and an Out Point at the end of a selected
segment. More specifically, this command places Edit Points at the edit events for the black
fades defining the boundaries of the segment(s). If multiple segments are selected, the In Point
is placed at the beginning of the first selected segment, and the Out Point is placed at the end
of the last selected segment.
Note that this command does not operate on selected regions. Also note that edit event loca-
tions can affect mark placement. See section 4.1.4 above for more information on edit events
inside fades.
6.6.11
Select Nudge Size
This command allows you to select one of the three nudge presets used by the Selection >
Nudge Right/Left and Edit > Nudge Segment commands. The presets are defined in the Time
Display tab of the Windows > Preferences window. See section 6.9.5 for more information on
the Time Display preferences.
6.6.12
Set SRP
This command places an SRP or Selection Reference Point in the selected Panel at the location
of the Playhead or Edit Point, if play is stopped.
Page 95
6.6.13
Set SRP with Text
When this alternate command is selected, the SRP is placed as in section 6.6.12 above except
the text field that accompanies all SRPs is activated and the text insertion point is set, ready for
typing in a label.
6.6.14
Lock SRPs from Selection
This command locks all SRPs within a selected region.
6.6.15
Unlock SRPs from Selection
This command unlocks all SRPs within a selected region.
6.6.16
Clear Selected SRPs
This command removes all SRPs within a selected region, whether they are locked or not.
6.6.17
Drop Edit Point at Playhead
This command moves the Edit Point to the current location of the Playhead and is typically
used when the Edit Point to Playhead command, discussed in section 6.6.18 below, is disabled
(unchecked).
6.6.18
Edit Point to Playhead
This command toggles a mode on or off whereby, when playback is stopped, the Edit Point
jumps to the location of the Playhead.
6.6.19
Move Edit Point to…
This command has a submenu, with ten possible choices.
Figure 6.15: The Move Edit Point to submenu
Page 96
With this set of choices, the Edit Point can be quickly moved to a number of predefined positions:
• The next PQ mark
• The previous PQ mark
• The next Segment Edit Point
• The previous Segment Edit Point …the previous Black Fade or Crossfade
• The In Point
• The Out Point
• The next SRP
• The previous SRP
• The End of Track
…the last Fade Out of the Project
• The Start of Track
…the first Fade In of the Project
6.6.20
…the Black Fade or Crossfade
Edit Point to Next Peak
This command examines the amplitude of all audio samples in the selected region or segments, and moves the Edit Point to the location of the maximum sample within the selection.
If there are more than one equal amplitude maximum samples, then the command moves the
Edit Point to the location of the first, then next maximum samples in turn.
6.6.21
Select Start to Edit Point
This command selects a region from the first Fade In of the Project to the location of the Edit
Point.
6.6.22
Select Edit Point to End
This command selects a region from location of the Edit Point to the last Fade Out of the Project.
6.6.23
Selection from Selected Segments
This command selects a region from the first Fade In of the first selected segment to the last
Fade Out of the last selected segment.
6.6.24
Select Segment to End
This command selects all segments from the Edit Point to the last segment in the Project, including the segment in which the Edit Point is located. If the Edit Point has not been placed, the
command selects all segments from the first selected segment to the last segment in the Project.
Page 97
Note that, to quickly determine if the Edit Point is placed somewhere in the Project regard-
less of zoom level, simply check the left DUR or duration field at the top of the Project. Since
the Edit Point is really a zero duration selection, the DUR field will show a zero value whenever
the Edit Point is present, even though it may not currently be in view.
Figure 6.16: The DUR field showing the presence of the Edit Point
6.6.25
Select Segment to Start
This command selects all segments from the first segment in the Project to the Edit Point, including the segment in which the Edit Point is located. If the Edit Point has not been placed, the
command selects all segments from the first segment in the Project to the selected segment.
6.6.26
Select Segments from Selection
This command selects all segments that are part of the selected region, including the segments in which the start and end of the selection is located.
Page 98
6.7 The View Menu
Figure 6.17: The View menu
6.7.1
ment
Move Forward/Backwards/Select Next/Previous Seg-
These contextual commands change dynamically, depending on whether a segment is selected or not. When a segment is not selected, Move Forward/Backwards move the contents of the
Panel forward and backward along the time line. The zoom factor or magnification stays the
same.
When one or more segments are selected, these commands change to enable you to select
the “next” segment. If one segment is selected, the meaning and function of the commands
are clear but, if more than one segment is selected, then Select Next will select the segment after the last currently selected segment and Select Previous will select the segment just before
the first currently selected.
Page 99
6.7.2 Zoom In/Out
The zoom commands change the zoom factor or magnification, expanding or reducing the
time scale by 90%, with 10% overlap from the previous view for visual context. Zooming in
provides more detail while zooming out lets you see more of the overall program.
6.7.3
Zoom In Around In/Out Point
These commands change the magnification of the waveform display while centering the waveform display on the In Point or Out Point. The amount of time shown around the In or Out Point
is defined by the Zoom to In/Out setting in the Time Display tab of Windows > Preferences. See
section 6.9.5 for information on the Time Display tab.
6.7.4
Zoom In/Out around Edit Point
These commands change magnification while keeping the waveform display centered on either the Edit Point and is very handy for determining context. The amount of time shown
around the In or Out Point is defined by the Zoom to In/Out setting in the Time Display tab of
Windows > Preferences. See section 6.9.5 for information on the Time Display tab.
6.7.5
Zoom In/Out around Playhead
These commands combine a Zoom In/Out command while keeping the waveform display centered on the Playhead, also very handy for determining context.
6.7.6 Zoom to Previous/Next
These commands are like Undo/Redo for zoom commands. soundBlade LE remembers the
last lower resolution (out) zoom level. To return to an prior zoomed out level, choose Zoom to
Previous. To return to the more recent zoom level, choose Zoom to Next.
6.7.7 Zoom around Playhead
This command zooms with the Playhead in the center of the waveform display, and is very
handy for determining context. The level of zoom is determined by a submenu.
Page 100
Figure 6.18: The Zoom around Playhead menu
The amount of time chosen in the submenu indicates the total amount of time shown in the
display after the Zoom Around Playhead command is selected. The amount of time will be
equally divided between the area to the left and right of the Playhead position.
6.7.8
Zoom around Selection Center
This command is similar to Zoom around Playhead, except that instead the display is centered
around the centre of a selected region or selected segment(s).
6.7.9
Zoom to Selection Start/End
This command zooms the waveform display to the start or end of the current selection with
the start or end of the selection centered in the waveform display and is very handy for refining
a selection’s boundaries. The amount of time shown around the selection boundaries is defined
by the Zoom to Sel Start/ setting in the Time Display tab of Windows > Preferences. See section
6.9.5 below for information on the Time Display tab.
6.7.10
Zoom to Selection
This command zooms to the currently selected region such that the selection is centered in the
waveform display and covers a preset percentage of the waveform display area. The amount of
time shown around the selection boundaries is defined by the Zoom to Sel Start/ setting in the
Time Display tab of Windows > Preferences. See section 6.9.5 for more information on the Time
Display tab.
6.7.11
Zoom to Entire Project/Track
Under normal operation with a stereo Project, these two menu commands work identically.
These commands zoom so that the entire program is shown across the entire waveform display. However, if one of the two Panels contains more audio information, stretching over a longer duration on the time line than the other channel, the Zoom to Entire Track command will
Page 101
zoom to the length of the selected track. This situation typically occurs if the two Panels contain
dual mono material or a wildly “stereo” program created in mono editing mode.
6.8
The Windows Menu
The Windows menu provides quick access to all available windows within soundBlade LE and
an active Project.
6.8.1
Meters
This command toggles the Meters window or Master section. See section 5.1 for a detailed description of this window.
6.8.2
Mark Info
For more information on the Mark Info window, see sections 4.8 and 3.10.2. Section 6.5 discusses the Mark Menu.
6.8.3
The Preferences Window
Some of the functions and commands within soundBlade LE can be changed to adhere to your
preferred values or behavior. All of these preferences can be adjusted in the Windows > Preference Window.
The Preference window is displayed by selecting the Windows > Preferences command.
Page 102
6.9.4
Setting Preferences — Editing Tools Tab
Figure 6.19: The Preference window showing the Editing Tools tab
6.9.4.1
Editing Auto Tools
The Editing Auto Tools section has the following options:
• Fade Tool: When checked, the Fade Tool will be enabled for editing. To learn more
about the Fade Tool and its properties, see section 3.8.1 and 4.1 for a full description.
Page 103
• Snap to Edit Point ON: When checked, dragging a segment near the position
of the Edit Point will cause the segment to auto–snap. This feature is really only applicable when dragging audio into a Project from the Finder or another open Project.
• Snap To Zone: When the zone snap is checked, dragging a segment near the start
or end of another segment will cause the segment to auto–snap to the red or blue
snap locations. See section 4.3 for more information on the drag & drop, auto–snap
functions.
• AutoSpacing Duration: As described in section 4.3, AutoSpace uses a pre-selected
time value to space the segments. Here, this value can be selected between 1 and
3 seconds. Alternatively, AutoSpace can be turned off as well.
• Analog Black Threshold: This field shows the default value used by the Mark > Analog Black to Marks command for the amplitude threshold. This value, expressed as
dB below 0 dBFS, sets the loudness threshold below which a Start of Track or End
of Track mark will be placed. See section 3.9.4 for more information on automatically
placing PQ marks.
6.9.4.2
Edit with Audio
• Selection Reference Points: When editing, this setting causes SRPs to move along
with their associated segment. They are also included with the audio when it is copied to the clipboard.
• Gain Overlay: When editing, this setting causes gain nodes to move along with their
associated segment. They are also included with the audio when it is copied to the
clipboard.
6.9.4.3
Default Fade
This selector determines the default fade curve used when any new fades are created
soundBlade LE. The five curve options are:
• Cosine
• Root Cosine
• Linear
• Root Linear
• Exponential
Linear fades, the default, are the most broadly applicable choice. Section 4.1.2 briefly discusses the five curve shape options.
Page 104
6.9.4.4
Import
• SDII Regions Into Segments: When on, Sound Designer II regions, if present, will
automatically be converted to separate segments upon opening in soundBlade LE.
When off, the entire SDII image will be imported as one continuous segment.
• SDII Regions To Marks: When on, Sound Designer II regions, if present, will force
soundBlade LE to put marks at the region’s start points. When off, the entire SDII
image will be imported as one continuous segment.
Page 105
6.9.5
Setting Preferences — Time Display Tab
Figure 6.20: The Preference window showing the Time Display tab
6.9.5.1
Time Display
The Time Display time code format selector allows you to preset the display time code format
to 75 frames per second, 30 fps NDF, seconds or samples. Compact Discs use a special time
code format, 75 fps, not used elsewhere while 30 fps NDF or “30 non–drop,” 30 frames per sec-
Page 106
ond non–drop frame, is the legacy standard used by the original, 1600/1610/1630 series of video cassette–based CD preparation systems.
6.9.5.2
Nudge A/B/C
The values in these fields define the amount of time that segments will be ‘nudged’ when the
Edit > Nudge Left/Right commands are applied. For a complete description of the working of
these commands, see section 6.2.17.
6.9.5.3
Zoom to In/Out
The time value entered here defines the amount of time in the total display after a View >
Zoom Around In/Out Point command. See section 6.7 for a full description of these commands.
6.9.5.4
Zoom to Sel(ection) Start/(End)
The time value in this field defines how much time will be displayed when the View > Zoom to
Selection command is applied. For a full description of this command, see section 6.7.10.
6.9.5.5
Play Around In/Out Point
The values in these fields define how much time will be auditioned when the Play > Play To/
From In/Out Point commands are invoked. For a full description of these commands, please
see sections 6.4.10 and 6.4.11.
6.9.5.6
Show Subframes
This check box, when enabled, forces all time fields at the top of the Project display to show
additional time code subframe information.
Page 107
6.9.6
Setting Preferences — EDL Tab
Figure 6.21: The Preference window showing the EDL tab
6.9.6.1
View
The View section has the following options:
• Show Track Bar: When checked, an additional layer of visual feedback is enabled in
the Project. This alternate view provides a graphical approach to evaluating and maPage 108
nipulating your PQ metadata. Existing metadata is displayed from an object–oriented
perspective, whereby each CD Track that will result from your current PQ placement
is shown in grey while the pause between tracks is shown in blue. Section 3.9.5
above discusses the Track Bar.
• Show Segment Names: When checked, segment names will show in the Title Bar.
When unchecked, the Title Bar of segments remains empty.
• Background Waveforms: When checked, waveforms will be generated in the background upon opening sound files from other DAWs. When unchecked, no graphical
“waveform files” will be produced automatically. The File > Build Waveform… command will manually generate waveform files.
• Remove Waveforms on Close: When checked, waveform metadata will be deleted
when a Project is closed.
• Zoom Factor (%): When zooming in or out, the display will be zoomed by the factor
defined in this field. The default 90% means that 90% of the current waveform view
will be zoomed, with 10% overlap for visual context. This preference only applies to
selections.
6.9.6.2
Display Auto Tools
The Display Auto Tools has the following options:
• AutoScale On: When enabled, the display is scaled vertically so that the maximum
peak within the entire Panel becomes full scale. This preference provides overall amplitude scaling while maintaining visual context between loud and soft passages.
• Scale to View: When enabled, the display is scaled vertically so that the maximum
peak within the currently visible waveform becomes full scale. This preference provides local magnification, excellent for fine editing, but requires that you refer to the
numeric vertical scale to determine the general amplitude.
• Show Track Scale in dB: When enabled, the amplitude scale is shown in dBFS, or dB
full scale referenced to a “full” 24 bit AES/EBU data word. When off, the Panel’s amplitude scale is shown as a non–dimensional, normalized value ranging from 0 to ±1,
equating to digital silence or full scale, respectively.
6.9.6.3
Playing Auto Tools
The Playing Auto Tools section has the following settings:
• AutoScroll Playhead: When selected, the Playhead will move as normal until it
reaches the right edge of the waveform display. Then, the Move Forward command
automatically takes place, moving the waveform view to the right.
• AutoScroll Track: When selected, the Playhead stays centered in the waveform display while the underlying waveform display continuously scrolls.
Page 109
6.9.7
Setting Preferences — Delivery Tab
Figure 6.22: The Preference window showing the Delivery tab
6.9.7.1
Delivery
• Keep DDP Image: This check box retains the directory or folder containing the DDP
files set that forms that basis for all CD-R deliveries. See section A1.5 for information
on using the DDP file set for replication.
Page 110
• Emulation Mode: The Emulation Mode check box causes soundBlade LE to emulate
a CD-R “burn,” allowing you to validate your Project’s settings without writing to a
disc. While disabling writes to your optical mechanism in this mode, soundBlade LE
does write a CD’s worth of data, approximately 650 MB, to your hard disk.
• Write CD Text: This check box causes soundBlade LE to write CD Text–specific
CD+G metadata to a delivered CD-R. CD Text metadata is not included in DDP file
sets. See sections 3.10.1 and A1.5 for specifics about CD Text.
• Auto Increment ISRC: When selected, this feature automatically increments the first
trackl’s ISRC by a value of one with each press of the down arrow. This is usefull
for CDs that have a contiguous set of ISRCs - USHRS0000001, USHRS0000002,
USHRS0000003 for example. It does not create ISRCs for you, you must get your
own ISRC.
• CD (Write) Speed: The speed selector calls out the speeds that the target mechanism and host are capable of providing for your delivery. When choosing CD-R delivery speed, remember that the speed is inversely proportional to pit jitter. That is,
higher speeds will induce more jitter in the CD’s physical pit structures while lower
speeds will result in less jittery pit structures. Lower jitter is generally better in terms
of subjective audio quality, because it requires less vigorous clock regeneration in
the digital–to–analog converter or DAC to attain a reasonable amount of jitter in the
final analog output.
6.9.7.2
Offsets
• Start Offset: It takes a typical CD player about two to twenty frames to fill its buffer
and start producing valid audio data after it has located the correct Track Start location. The Start Offset back times the Track Start time that the player reads to ensure
that the beginning of the track will not be cut off by the player.
• End Offset: The End Offset prevents the player from muting too early at the end of
the track. This offset value applies to all End of Track marks, including the last.
• Track 1 Offset: This setting allows the Start of Track Mark for Track 1 to have it’s own
offset value. This is because Track 1 on a Compact Disc is different from the remaining tracks and requires an extra long offset to allow CD transports to initialize prior to
the onset of audio data recovery.
• Splice Offset: If a Start of Track mark is not preceded by an End of Track mark from
the previous track, it is considered to be a “splice” or segue. The Splice Offset applies only to the special case of splices. The Splice Offset must always be equal to
or less than the Start Offset. Splice Offsets are typically a bit more than half of the
normal Start of Track offset.
• Minimum Index Width: This field sets the minimum time between Index marks. According to the Red Book standard, Index marks should be at least 1 second apart.
End marks that are closer to the Start than the Minimum Index Width are ignored.
Page 111
• Disable Offsets: If this button is enabled, the offsets shown in the offset windows
will not be subtracted from the PQ mark times, either for display or for delivery.
6.9.7.3
Dither
• Dither Type – Shaped PDF: This radio button selects Sonic Studio’s proprietary
spectrally shaped triangular PDF (probability density function) dithering.
• Dither Type – Shaped Dither: This radio button selects Sonic’s proprietary Shaped
dithering. The Shape is preset.
• Enable Dither On Output: When on, dither will be applied to the output at all times,
redithering the output to 16 bits of resolution. When off, both the monitor and delivery
outputs will be bit transparent. The DITHER indicator in the upper right of the Project
window reflects the current state of the Dither on Output preference. Section A1.2
includes a discussion of redithering.
• Turn Off Delay: defines the time (in seconds) before dither is turned off after the last
moment audio has been played.
• Bit Resolution: this selector allows for rounding off of the output signal to either 16 or
24 bits.
Note that for CD delivery, 16 bit resolution is the only correct setting as the
program on an audio Compact Disc is stored as 16 bit data. Setting 24 bit resolution for final CD masters will result in drastic truncation of the 17th through
24th bit, resulting in audibly reduced quality and unexpected noise.
Note Dither is only applied when the file’s wordlength exceeds the bit depth
settings. For example, if you are playing back an unaltered 16-bit file, dither is
not applied, even if selected. However, if you make a change such as fade-ins
or -outs. crossfades or gain adjustments, dither will be applied if dither is enabled.
Page 112
6.9.8
Setting Preferences — Desk Tab
Figure 6.23: The Preference window showing the Desk tab
The Desk preferences has the following options:
• Extended Sample Rates: This check box causes, as the name implies, soundBlade
LE to operate at sample rates above the CD standard. As noted in the window, a restart is required to clock at extended sample rates.
Page 113
• Pure Gain: This preference alters the way soundBlade LE calculates gain coefficients
when using the volume control. Gain steps are based on one bit changes in amplitude, rather than arbitrary gain as is available when this preference is disabled.
• Hard Limit: This preference also alters how soundBlade LE handles gain, and is most
useful for music with compressed dynamic range. Specifically, it changes the way
floating point values are handled after decoding.
• Using fixed point arithmetic, the maximum 24 bit value is 0.99999989 whereas, in
Core Audio, the maximum floating point value is 1.00000000. Values in between can
cause distortion. This preference will catch any discrepancy and correct for it, improving the sound of overly compressed files.
Page 114
Appendix 1........................Best Practices & Maintenance
A1.1 Introduction
Although versatile in many ways, not every function that soundBlade LE offers is the best way
of structuring your CD creation and replication workflow. Some solutions are better than others, either for quality reasons or other reasons beyond the scope of this manual. In this appendix, we’d like to provide some guidelines in order to get the best out your software and establish a smooth and efficient production flow.
A1.2 Source Material Considerations
soundBlade LE handles a variety of source file formats. It is thereforee very tempting to ‘grab’
what you need and add it to your Project. However, some source material might be in formats
other than the final 44.1 kHz sample rate and 16 bits word length necessary for CD production.
soundBlade LE determines the characteristics of the files you import based on the metadata
they contain. It will warn you if the sample rate is not the required 44.1 kHz where necessary,
while resolutions longer than 16 bits are rounded down and redithered to 16 bits during the delivery stage. Although the word length conversion implemented by soundBlade LE is of very
high quality, you may consider modifying your audio material beforehand with your favorite
utilities.
Because all your material destined for inclusion in a final CD replication master will eventually be rounded off (where necessary) to a 16 bit word length, any material using 17 to 24 bits
must be word length–reduced to match the CD-DA standard. This is usually accomplished by
“rounding down” longer length words to 16 bits. Because the audio data is being modified, it
must also be redithered or subtly randomized with an injection of tiny amounts of “shaped”
noise in order to prevent distortion. In the Window> Preferences > Delivery pane, you will find
that soundBlade LE has a default preference to always redither the data when delivering either a CD, DDP or when simply playing back audio. This is necessary whenever any audio data
is modified, as with a fade or gain change, in order to “linearize” or reduce subtle distortion in
the resulting data. Redithering is always a trade off between lower distortion and a slightly but
audibly elevated noise floor. soundBlade LE uses an exclusive, spectrally shaped “2nd order”
or triangular PDF redithering scheme. PDF or Probability Density Function describes the amplitude versus frequency plot of the dither generator. Our shaped dither is an excellent trade off
between audibility and optimal linearity.
Important Note It’s a good practice to prepare all source material needed be-
fore moving forward with sequencing, editing and finishing a new replication master. By organizing your source material and storing all relevant data in the same
directory, your projects will be highly portable, easy to archive and you’ll avoid situations where files have “gone missing” from a job because they were not included
in the Project subfolder. See figure A1.2 below as an example.
Page 115
Figure A1.2: The Anatomy Of A soundBlade Project.
A1.3 Naming Conventions
1.Do not use different audio files with the same file name within a Project. Rename
beforehand, where necessary, with a descriptive name for later ease of archiving,
restoration and project interchange.
2.The P&E wing of the National Academy of Recording Arts & Sciences has published recommendation for naming conventions and other workflow methods
to improve project interchange and archiving. See section A4.1 below…
A1.4 Host Considerations & Routine Maintenance
In this day and age of a BSD–based operating system and a journaling, self healing file system, it still is incumbent upon the cautious and wise engineer to perform routine maintenance
and practice sensible management on your host computer. Here are some tips we recommend…
A1.4.1
File Systems
If you own a copy of DiskWarrior <www.alsoft.com>, run it monthly or when you host behaves
strangely. If you don’t own a copy, you should. Periodic maintenance is still needed with OS 10
and there is no better file system maintenance utility than DiskWarrior.
A1.4.2
Storage Systems
soundBlade is fully compliant with Mac OS 10.4.3 and higher. Therefore, sound material can
be used from any drive that your computer can access. This includes network–attached and removable drives as well near–line optical drives. That said, not all mountable storage devices
are suitable for reliable real-time or higher speed reads and writes of sound files. Always run
Page 116
soundBlade SE from the boot volume. Always store all files involved in your jobs on direct-attached, local volumes: internal ATA, FireWire, FC, SATA or SAS are acceptable. USB-attached
storage peripherals of any kind should never be used. Also, disks must have more than enough
free space, to store, record and playback all of your sound files.
1.Although you may find it will actually work, never use LAN or WAN–networked, flexible media or optical drives to record or playback sound files due to their excessive
latency. Always copy files from those storage types to a dedicated, local, direct–attached hard disk or FC–networked storage (Fibre Channel) first, then use that disk
for all soundBlade SE work.
2.When creating, copying or moving files, consider the file name and path name. Use
short path names and employ only alphanumeric characters. The only non-alphanumeric characters that should be used are the hyphen ( - ) and underscore ( _ ) characters. Other characters, such as !, @, #, $, %, ^, &, *, {, }, |, [, ], \ and / will very likely
cause problems in your work.
A1.4.3
Permissions
Check that you have read and write permissions for the entire application package. Holding
down the control key and highlighting the application will spawn a contextual menu with the
choice to “Show Package Contents.” Showing the package contents allows you to set yourself
as read/write, the group should be “admin,” also with read/write privileges.
You should also boot from the Apple-supplied install disc that came with your computer. Run
the Disk Utility application and perform a Repair Permissions pass on your host. This is a routine maintenance task that, along with DiskWarrior, should be run about once a month.
A1.4.4
3rd Party Configuration Management
As with OS 9, OS 10 employs “extensions” to the operating system that extend and sometimes complicate your life. Mac OS 9 had the Extensions Manager but, OS 10 does not ship
with such a utility.
Fortunately, several vendors provide shareware or freeware versions of an Extensions Manager equivalent for OS 10. One is White Box’s free Diablotin, available from <http://s.sudre.free.
fr/> and the other is Teng Chou Ming & Scott Mitchell’s X Overload2, a shareware utility available from <http://www.xoverload.com/>. Neither of these products can manage audio plug–ins.
A1.4.5
3rd Party Applications
We recommend that you do not run non–audio applications while performing audio production. Microsoft’s Office suite is poor at multitasking with audio applications, as is Retrospect
and other “chatty” applications that routinely scan or address volumes or network ports. Such
activity can cause drop–outs in you finished material.
Page 117
A1.4.6
iLoks & Your License
Your iLok is your soundBlade license. If it is lost, stolen or broken, your license is lost and can
only be replaced by purchasing a new copy. PACE’s “zero downtime” insurance is your best
choice for protecting your soundBlade license.
A1.5 Delivering DDPs
DDP file sets created by soundBlade, always in their enclosing folder, can be copied to any
writable medium you choose, DVD-R or hard disk, for transport to your replicator. Check that
the medium you choose has enough space to hold the file set. Also check with your replicator
to determine which medium they can handle and whether they are even capable of using DDP
as an premastering format. Many bargain companies are not ready to handle DDP deliveries
so, we at Sonic Studio suggest you find a reputable facility that does accept DDP file sets of
your valuable masters.
Here are some specific suggestions…First, use DVD-R blanks rather than CD-Rs to deliver your
DDP file set. That way, the replicator is less likely to confuse your CD-R with DDP files as a CDROM job and replicate 1000 CD-ROMs of your DDP file set!
Second, the entire DDP folder or directory is usually sent to the replicator. A few replicators expect the file set at the root level of the delivered disc. Always check with your replicator before
sending your master to make sure they receive just what they expect.
For best file integrity, we suggest you ZIP the whole thing and generate a check sum for the resulting ZIP file. For more information, see the Checksums for DDP section of our Knowledgebase page:
http://www.sonicstudio.com/support
Always check with your replicator before sending ZIP’d file sets. Also, clearly identify the master disc and jewel case as “DDP Files.”
Finally, we recommend that you always create a new, empty folder to contain each DDP file
set. On the Desktop is a reasonable location for that new folder, making it easier to archive and
helping to prevent common problems.
A1.6 Delivering CD-Rs
When delivering a CD-DA–formatted CD-R, consider these recommendations:
• Do set the System Preferences > CDs & DVDs > When you insert a blank CD: to Ignore.
• Always use a high quality burner running the latest official firmware
• Always use a high quality blank media specifically designed for “audio” CDs
• Always record at low speed for lowest jitter
• Never write on or mark up the CD blank with a hard stylus, such a ball point pen.
Page 118
• Always use a manufacturer–approved label and marker.
A1.7 Delivering CD Text
To insure a smooth replication process, we recommend that you generate a PQ List and include a printed copy with your replication master, whether your job includes CD Text or not.
Use the PQ List button in the Windows Mark Info PQ Delivery tab. This file is an essential check
list for your replicator, so their quality control can be maintained. In addition, a PQ List is a perfect way to ensure that CD Text information is delivered to replication.
Since CD Text metadata does not appear in DDP file sets generated by soundBlade, the PQ List
is the vehicle to move this information into replication. The PQ listing uses the information you
enter in the Mark Info dialog to generate a “plain text” or ASCII text file so, before you create
a PQ list and a CD-R with CD Text, double check your information in Mark Info. Remember to
avoid metacharacters in CD Text strings, like #, / and $, just as you would if you were naming
computer files. Click on the PQ List button to save and open a soundBlade PQ Log. Then, review, edit and append any information missing or in need of expansion. Fill in the Client name,
Date, Work Order (WO) number, and the UPC/EAN. Edit the Project name and disc Title to make
sure it’s correct. Add the disc Artist under disc Title. Check each track name and make any corrections necessary.
If your job is a compilation, be sure to add Track Artist to your listing, preferably after the individual track names. Finally, be sure to indicate, on both the printed soundBlade PQ Log and the
text file accompanying the DDP file set, that you want CD Text to appear on the final, replicated Compact Disc. Include your contact information right on the soundBlade PQ Log in case any
questions arise.
A1.8 Apple’s Spotlight Utility
We have found that on certain OS X systems, Apple’s Spotlight can seriously affect not only
soundBlade HD and soundBlade HD’s performance, but other audio applications as well. We
recommend disabling Spotlight as a step to resolving problems related to sound skipping on
playback, record, export and DDP/CDR delivery.
To turn off Spotlight for a specific folder, volume or drive:
• From the Apple menu in the top left corner of your screen, select System Preferences...
• In the Personal section, select Spotlight, then select the Privacy tab.
• Click the + button in the lower left corner and select the folder, volume or drive to
be
excluded.
• You can also drag the desired item to the list.
Start by preventing Spotlight from searching these locations:
• Your Home Folder
Page 119
• Your internal or external audio drives
• Any back up drives connected
While disabling Spotlight completely on your Home Folder is an effective step in troubleshooting it may not be the best permanent solution for some users. There is an excellent article from
the
folks at MacFixIt.com with more specific instructions on troubleshooting Spotlight:
http://www.macfixit.com/article.php?story=20061109235901299.
For OS 10.6 and later this text can be typed into the Terminal Application: sudo mdutil -a -i off
Page 120
Appendix 2............................................ Keyboard Shortcuts
Windows Shortcuts
Meters / Desk
Console Log
New Soundfile Parameters
Edit Fade Mode
Mark Info
Preferences
Audio I/O Preferences
Background Manager
command + 2
command + 4
command + 7
command + F
command + M
command + comma
option + A
option + B
File & Project Shortcuts
New Project
Open Project
Save Project
Close Window
Open DDP image
Open Sound File
Quit (application)
command + N
command + O
command + S
command + W
option + command + O
shift + command + O
command + Q
Playback Shortcuts
Stop/Start Playback
Play Selection
Play from Playhead
Repeat Play
Play to In Point
Play from In Point
Play to Out Point
Play from Out Point
Play between In & Out Points
Hide Playhead When Stopped
Solo Track
Mute Track
Page 121
spacebar
command + spacebar
option + spacebar
command + option + spacebar
F5
F6
F7
F8
command + control + F5
option + P
control + O
control + M
Editing Shortcuts
Undo last Edit
Redo last Undo
Select All
Deselect All
Cut
Copy
Paste (Replace)
Paste (Insert)
Paste (Constrained)
Paste (Overlay)
Select All
Deselect All
Delete Selection
Clear Selection
Create Crossfade
Create Crossfade from In/In & Out Point
Replace
Insert
Replace Left
Replace Constrained
Set In Point
Set Out Point
Set In & Out Points
Clear In Point
Clear Out Point
Clear In & Out Points
Nudge In Point Right
Nudge Out Point Right
Nudge In Point Left
Nudge Out Point Left
Nudge Selected Segment(s)
Move In Point
Move Out Point
Move In Point to Out Point
Find & Set Points
Drop Edit Point
Edit Point to Playhead
Page 122
command + Z
command + shift + Z
command + A
command + D
command + X
command + C
command + V
command + option + V
command + shift + V
option + V
command + A
command + D
delete (backspace)
option + delete (backspace)
control + G
control + option + G
F1
F2
command + F1
control + F1
left bracket
right bracket
control + option + left bracket
control + left bracket
control + right bracket
control + backslash
control + command + left bracket
control + command + right bracket
option + command + left bracket
option + command + right bracket
plus or minus (numeric keypad)
option + left bracket
option + right bracket
option + backslash
command + backslash
backslash
option + command + backslash
Move Edit Point to Next PQ Mark
shift + F6
Move Edit Point to Previous PQ Mark
shift + command + F6
Move Edit Point to Next Segment Edit Point
shift + F5
Move Edit Point to Previous Segment Edit Pointshift + command + F5
Move Edit Point To In/Out Point
shift + F7
Move Edit Point to Next SRP
shift + F10
Move Edit Point to Previous SRP
shift + command + F10
Select Start to Edit Point
option + dash
Select Edit Point to End
option + equal to
Select Segments to End
shift + command +right arrow
Select Segments To Start
shift + command + left arrow
Select between SRPs
double click at bottom of waveform display
Change Crossfade duration
shift + click/drag with Crossfade Tool
Highlight/Select (Left) Selection Start Time
asterisk
Viewing Shortcuts
Show Text View
Show Gain Overlay
Refresh
Standard Track Size
Large Track Size
Move Forward
Move Forward/Backward
Move Backward
Zoom In
Zoom Out
Zoom In Around In Point
Zoom Around Out Point
Zoom Around Edit Point
Zoom Out Around Edit Point
Zoom In Around Playhead
Zoom Out Around Playhead
Zoom to Previous
Zoom to Next
Zoom to Selection
Zoom to Selection
Zoom to Entire EDL
Zoom to (Time Line) Selection
Zoom to Waveform selection
Page 123
option + T
option + G
command + R
option + 5
option + 6
right arrow
command + option + control + click/drag on waveform
left arrow
down arrow
up arrow
command + arrow left
command + arrow right
command + arrow down
command + arrow up
option + arrow down
option + arrow up
command + P
command + option + P
command + G
command + option + click/drag on waveform
command + E
command + click/drag right on time line
command + option + click/drag on waveform
CD Prep
Create Track Start Mark
Create Track End Mark
Create Index Mark
Delete Marks
Edited Black to Marks
Mark Info (window)
F9
F10
F11
command + F12
shift + F12
command + M
System
Audio I/O Setup
Preferences
Select Nudge Size A
Select Nudge Size B
Select Nudge Size C
Page 124
option + A
command + comma
control + 1
control + 2
control + 3
Appendix 3...............................................Contextual Menus
Control–Click...
In the Waveform —
With a selection active, or on the selection’s Drag Bar:
Create Segment = Create Segment from Selection command
Zoom To Selection = Zoom To Selection command
List of available AU plug–ins = select plug–in to Event alot during selection time-period
With a segment selected, on a segment Title Bar or on a segment’s Drag Bar:
Help — not implemented
Move Segments = Move Segment command
Segment Gain — opens the Segment Gain window
Reverse Polarity = Reverse Polarity command
Set Polarity — not implemented
Reset Polarity — not implemented
Build Waveforms = Build Waveform command
Reveal Selected Segment Files in Finder — shows the location of the selected segment with Mac OS browser
Show BWF meta-data (for BWF files only) - shows the BWF metadata for files recorded in Broadcast WAV file format
List of available AU plug–ins — select plug–in for time region selection occupied by segment
With Gain Overlay on —
On a Gain Node:
Lock Gain Node — locks the selected Gain Node(s)
Unlock Gain Node — unlocks the selected Gain Node(s)
Delete Nodes From Selection — deletes all nodes within the current selection
Lock Nodes from Selection — locks all nodes within the current selection
Unlock Nodes from Selection — unlocks all nodes within the current selection
Lock All Nodes in Track — locks all nodes in the Panel
Unlock All Nodes in Track — unlocks all nodes in the Panel
Page 125
In the Track Bar —
Hovering over a PQ Start, End or Index Mark:
PQ Mark Locked — locks the selected PQ Mark
PQ Mark Unlocked — unlocks the selected PQ Mark
Lock marks From Selection — locks all PQ Marks in a selected region or segment(s)
Unlock marks From Selection — unlocks all PQ Marks in a selected region or segment(s)
Lock All Marks — locks all PQ marks in a track
Unlock All Marks — unlocks all PQ marks in a track
Set Emphasis — sets emphasis flag for the selected PQ Mark
Reset Emphasis flag — resets emphasis flag for the selected PQ mark
Delete Mark — deletes selected PQ mark
In the waveform display —
Hovering over a fade-in, fade-out or crossfade with Fade Tool enabled:
Linear — set the fade curve to be 6dB down in the center of the fade
Root-linear — set the fade curve to be 6dB down in the center of the fade
Cosine — default 3 dB down in the center
Root Cosine — default 6 dB down in the center
Exponential — provides very rapid reduction in gain across the fade
Set Fade to Fade In/Out/Crossfade — change the fade type to one of the default fade types
Set Fade To Selection — Sets the fade duration to match the current selection
Set Fade To Default Fade In/Out/Crossfade — changes all fade parameters to the Default Fade’s characteristics
On a PQ mark —
Hovering over a mark:
Move Edit Point To Mark — Moves Edit Point to this mark
Lock Mark — Locks this mark
UnLock Mark — Unlocks this mark
Lock Marks From Selection — Locks these marks
UnLock Marks From Selection — Unlocks these marks
Lock All Marks — Locks all marks
UnLock All Marks — Unlocks all marks
Set Emphasis — Sets the emphasis bit for this mark
Reset Emphasis — Disables the emphasis bit for this mark
Delete Mark — Deletes this mark
Page 126
Appendix 4.........................................Additional Resources
Below is a list of internet resources on subjects relating to soundBlade LE and it’s intended
field of use…
A4.1
Professional Organizations
International Federation of Phonographic Industries — assigns ISR codes (ISRC).
http://www.ifpi.org/
The P&E wing of the National Academy of Recording Arts & Sciences provides recommended
practices for production and interchange formats.
http://www.grammy.com/Recording_Academy/Producers_and_Engineers/
The Audio Engineering Society promotes many industry standards in the field of professional
audio, as well as providing numerous recommended practices for applications and interchange
formats.
http://www.aes.org/
A4.2
Commercial Businesses
Doug Carson Associates, creators of the DDP protocol and related industry standards.
http://www.dcainc.com/
Philips Intellectual Property & Standards is responsible for the maintenance of the Red and
Scarlet Books, along with related standards.
http://www.licensing.philips.com/
Page 127
Note that, for the PDF version of this Index, only the page numbers, not the preceding de-
scriptive subject text, are hyperlinked.
soundBlade LE 2.0 User Manual Index
Symbols
75 fps 17
A
Absolute 52
address
time code 32
AES/EBU longitudinal time code 23, 25, 32
AIFF 19, 74
AIFF export 33
Album Artist 59, 60
Album Info 60
Album Title 59, 60
Analog Black To Marks 35, 91
Around Selection Center 86
Audio MIDI Setup 78
AutoSpace All Segments 48, 83
AutoSpacing 50
Auto Space All Segments 83
B
Background Waveforms 109
Build Sound Waveform… 74
burning CDs 13, 14, 36, 67
Burn button 67
BWF 16, 19
Bypass/Activate Gain Overlay 84
C
CD
Album Artist 59
Album Title 59
ISR Codes 60
Track Artist 59
Page 128
Track Title 59
UPC/EAN 60
CD-DA discs 39
CD+G 38
CD-DA discs 25, 37, 64
CD-R delivery
DAO (Disc at Once) discs 41, 66
jitter 41, 66
Speed menu 41, 66
TAO (Track at Once) discs 41, 66
CD-R delivery 13, 14, 16, 36, 67
Burn button 67
delivering multiple CDs 67
Execute button 67
Export List button 67
from an existing DDP 67
PQ List button 67
Track List button 67
CD Text 38, 61, 73
CDTEXT.BIN 38
CD Track metadata 38
CD Write Speed 111
changing Fade parameters 45
changing Fade shape 46
changing Fade type 47
changing track order 31
Clear In & Out Points 94
Clear In Point 94
Clear Out Point 94
Clear Selected SRPs 96
Clear Selection 81
Close Session check box 41, 66
combo Text+Waveform Project 50, 53
Console Log 76, 77, 78
consolidated DDP file sets 73
Copy 80
Copy Enabled 62
cosine Fades 47
Create Crossfade 81
Create Crossfade from In Point 81
Create Gain Nodes 84
Create Segment 81
Page 129
Create Segment from In & Out Points 81
crossfade 47
Crossfades 30
deleting 81
Cut 80
D
DAO (Disc at Once) discs 41, 66
DDP 16, 39, 42, 64, 73
DDP File Open option 73
DDPID file 73
DDPMS file 73
DDPPQ file 73
Delivery 36
file sets
opening 18, 19, 73
IMAGE.DAT file 73
SD file 73
DDP 2.0 38
DDP File Open option 73
DDPID file 73
DDPMS file 73
DDPPQ file 73
Default Fade 104
default Project 74
combo Text+Waveform 53
default time code format 25
Delete Crossfade 81
Delete Mark 90
Delete Selection 80, 81
deleting part of a sound file 29
delivering multiple CDs 67
Delivery 36, 110
CD Write Speed 111
Delivering CDs from an existing DDP 67
Emulation Mode 111
Keep DDP Image 110
Use button 67
Write CD Text 111
Delivery preferences 110
Desk Menu 102
Desk Tab 113
Page 130
Details window 70
Device (CD-R/DVD-R) 40, 65
dim 70
Disable Offsets 112
disc replication 37
DiskWarrior 116
Display Auto Tools 109
dither 112
2nd order 115
dither contextual menu 112
Dither On Output 112
PDF 115
triangular 115
Turn Off Delay 112
Dither On Output 112
Drag-Insert & Ripple 50
Drag-Overlay 50
Drag-Replace 51
drag & drop 48
ReSequence 48
Drag Bar 32, 49
Drop Edit Point at Playhead 96
Dual EDL Mode 57
DUR field 22, 25, 29, 98
E
Edited Black to Marks 91
Edited Black to Start Marks 91
editing 81
Auto Space All Segments 83
Auto Tool Override 83
Clear Selection 81
Create Crossfade 81
Create Segment 81
Create Segment from In & Out Points 81
Crossfades 30
Delete Selection 81
deleting 29
Drag-Insert & Ripple 50
Drag-Overlay 50
Drag-Replace 51
drag & drop 48
DUR field 98
Page 131
Edit Groups 56, 57
Edit Point 98
placing & moving 96
Fade Tool 27
ReSequence 48
selecting Regions 24
selecting Segments 26
SRPs 55
Editing Auto Tools 103
Editing Auto Tool Override 83
Editing Tools preferences 103
edit event 45, 47, 95
Edit Groups 56
Edit menu 79
Edit Points 54, 98
Move Edit Point to submenu 96
moving 96
placing 96
Edit Point to Next Peak 97
Edit Point to Playhead 96
Edit Segment Name 83
Edit with Audio 104
EDL
backwards compatibility 77
dual EDL mode 57
EDL menu 83
EDL preferences 108
Eject 43, 67
Emphasis flag 38, 62
Emulation Mode 111
End Offset 111
Execute 42, 67
exponential Fades 47
Exporting Audio
Selections & Segments 33
Export EDL As 5.4 77
Export List button 67
extended (Track) listing 39, 63
F
Fades 27
edit events 45, 47, 95
shape
Page 132
changing 46
gain laws 47
Fade Tool 27, 45
changing parameters 45
changing the shape 46
changing the type 47
File menu 71
file systems 116
Find & Set Points 95
freezing 33
G
Gain 51
Absolute 52
changing multiple segments 53
Normalize 52
Relative 52
Segment Gain 82
Gain Adjustment 51
Gain Nodes
creating 84
locking & unlocking 55
selecting 84
Gain Overlay 53
Bypass/Activate 84
Show/Hide 84
Gain Overlay Mode 53
General practice 14
H
HH:MM:SS:FF 23
Hide Playhead When Stopped 89
host
saturation 33
hot spots 69
I
iLok 118
IMAGE.DAT 73
Import 105
importing
sound file types 16, 72
Page 133
importing SD2 files 105
Import 5.4 EDL 77
Index Mark 90
inserting PQ Marks
automatically 35
manually 34
installation 13
IN field 22, 29, 31, 93
ISRC 60, 61
Mark Info 61
the IFPI 61
J
jitter 41, 66
K
Keep DDP Image 110
L
LEFT field 22, 25
linear Fades 47
Listings 63
PQ List 67
Lock/Unlock All SRPs in Track 56
Lock All Marks 90
Lock Gain Node 55
Lock Marks from Selection 90
Lock SRP 56
M
Mac OS 116
maintenance
DiskWarrior 116
file systems 116
permissions 117
storage systems 116
Mark Info 38
PQ Delivery Tab 39
Total Tracks 39
Track Listing 39
Marks
Page 134
Analog Black to Marks 91
Delete Mark 90
Edited Black to Marks 91
Edited Black to Start Marks 91
End of Track 60, 63, 90, 91
Index 63, 90
locking Marks 90
Marks Button 18, 36
Mark Info 90
Start of Track 34, 36, 48, 60, 61, 63, 91
unlocking Marks 90
Mark Info 58, 61, 90, 102
Extended Listing 63
PQ Delivery Tab 64
PQ Info tab 58
Total Tracks 63
Mark menu 89
Master Section
dim 70
hot spots 69
metadata 115
CD Text 119
meters 102
Meters window 69
Meter Details 70
Minimum Index Width 111
Mix1-4 33, 74
mono editing mode 57, 102
Move Edit Point to submenu 96
Move In/Out Point 94
Move In Point to Out Point 95
Move Playhead 88
Move Segments 82
Move View mode 23
moving PQ Marks 34
N
New Project 72
Normalize 52
Nudge A/B/C 107
Nudge Right/Left 94
Nudge Segment 82
Page 135
O
Offsets 111
Disable Offsets 112
End Offset 111
Minimum Index Width 111
Splice Offset 111
Start Offset 111
Track 1 Offset 111
offsets 61
Open DDP Image… 73
Open Dual Sound File 72
Open EDL 72
opening DDP file sets 73
Open Project 72
Open Recent 72
Open Sound File 72
Orange Book 16
OUT field 22, 29, 31
P
Panels
Show/Hide Gain Overlay 84
Show/Hide Text 83
standard/large size 85
paste 80
permissions 117
playback 21
Around Selection Center 86
Between In and Out Points 88
From In Point 88
From Out Point 88
From Playhead 86
From Selection 85, 87
Move Playhead 88
Repeat Play 86
Selection 86
Stop All 86
to End of Selection 87
to In Point 88
to Out Point 88
Playhead 21
hiding the Playhead when stopped 89
Page 136
moving the Playhead 88
Playing Auto Tools 109
Play Around In/Out Point 107
Play Between In and Out Points 88
Play From In Point 88
Play From Out Point 88
Play From Playhead 86
Play From Selection 85
Play menu 85
Play Selection 86
Play to End of Selection 87
Play to In Point 88
Play to Out Point 88
plug-ins 33
PQ 20, 36, 108, 109
command-dragging sounds 36
command-option-dragging sounds 36
Copy Enabled 62
emphasis 62, 90, 92
Listings 63
offsets 62
PQ Delivery Tab 39, 64
PQ Info tab 58
PQ Marks 35
Analog Black To Marks 35
Edited Black To Marks 35
inserting
automatically 35
manually 34
moving 34
removing 34
P through W metadata 58
UPC/EAN Codes 60
validating 63
PQ Delivery Tab 39, 64
PQ Info tab 58
PQ List 67
PQ Listing
Listing 63
PQ Marks 60
PQ Validator 63
Preferences
Desk Tab 113
Page 137
Preferences
Default Fade 104
Delivery 110
Display Auto Tools 109
Dither 112
Editing Auto Tools 103
Edit with Audio 104
Import 105
Nudge A/B/C 107
Offsets 111
Playing Auto Tools 109
Play Around In/Out Point 107
Show Subframes 107
Time Display 106
View 108
Zoom to In/Out 107
Zoom to Sel(ection) Start/(End) 107
Preferences Window 102
Print
EDL Sound File Paths 76
Segment Info 76
SRP Info 77
printing effects 33
Project
combo Text+Waveform 50, 53
Projects
combo Text+Waveform 53
default 53, 74
layout 17
new 72
adding the 1st sound file 19
open 18, 72
opening 18
Panel 11, 17, 22
sample rate 57
Q
Quit 78
R
Red Book 39
redithering 112, 115
Page 138
Redo 80
Red Book 37, 63, 64, 111
Refresh 84
Relative 52
Remove Waveforms on Close 109
removing PQ Marks 34
Repeat Play 86
Rescan IO 78
Resequence 36, 48, 63
Reveal Sound In Finder 74
reversed sound 74
Reverse Polarity 52, 82
RIGHT field 22, 25
root cosine Fades 47
root linear Fades 47
S
Save Project 73
Save Project As... 74
Save Reversed 74, 75
SCMS 38, 62
Scrolling 23
Move View mode 23
SD2 16, 19, 72
SD file 73
securePlayer 38, 42
Segments
Auto-space 19, 33
changing order 31
deleting 29
Drag Bar 32
Move Segments 82
moving segments 83
Nudge Segment 82
nudging segments 83
Reverse Polarity 82
Segment Gain 51
segment gain 82
segment names 83
snapping 50
snap zone 49
Title Bar 26, 51
Page 139
Segment Gain 82
Absolute 52
Normalize 52
relative 52
Reverse Polarity 52
Select/Deselect 80
Clear Selection 81
Delete Selection 80
selecting a Region 24
selecting Segments 26, 98
select Regions 98
Selections 24
zooming to selections 101
Selection from Selected Segments 97
Selection menu 92
Selection Reference Points 55
Select Edit Point to End 97
Select Gain Nodes 84
Select Nudge Size 95
Select Segments from Selection 98
Select Segment to End 97
Select Segment to Start 98
Select Start to Edit Point 97
Sending a Crash Report 77
Serial Copy Management Scheme 38, 62
Series 300 DSP I/O Processors 13
Set In & Out Points 94
Set In Point 93
Set Out Point 94
Set SRP 95
Set SRP from selection 96
Set SRP from selection 96
Show/Hide Gain Overlay 84
Show/Hide Text View 51, 83
Show Segment Names 109
Show Subframes 107
Show Track Bar 48, 108
snap zone 49
Sonic Solutions 77
sound begins more than 2 frames… 39, 64
Sound Designer files 105
sound files
Page 140
adding the 1st sound file 19
importing 16
opening 16, 18, 72
opening Dual 72
Sound Designer II 105
source material 115
source material considerations 115
spacing tracks: AutoSpace 33
Speed menu 41, 66
Splice Offset 111
split DDP file sets 73
SRPs 55, 72
clearing 96
printing SRP info to a file 77
setting 95, 96
SRP Button 18
SRP contextual menu 56
SRP from Segment Edit Points 96
SRP from Selection 96
Standard/Large Track Size 85
Start Offset 111
Status (CD-R/DVD-R) 40, 65
stereo editing mode 57
Stop All 86
storage systems 116
studioCare Support Program 10
System Information
Console Log 76, 77, 78
T
TAO (Track at Once) discs 41, 66
Text Mode
Gain 51
Show/Hide Text View 51, 83
time code 17, 23, 25
time code address 23, 25, 32
time display 22
Time Display preferences 106
time line 17, 19, 22, 24, 34
Title Bar 26, 51
Total Duration 63
Total Tracks 39, 63
Page 141
Track 1 Offset 111
Track Artist 61
Track Bar 35, 48, 108
Track End Mark 90
Track List 43
Track Listing 39
Track List button 67
Track Start 61
Track Start Mark 90
TRACK TITLE 39
Track Title 59, 61
transport controls 18
triangular dither 115
Turn Off Delay 112
U
Undo 79
Universal Product Code/European Article Number 60
Unlock All Marks 91
Unlock Gain Node 55
Unlock Marks from Selection 90
Unlock SRP 56
UPC/EAN 60
Use button 67
V
View
Background Waveforms 109
Remove Waveforms on Close 109
Show Segment Names 109
Zoom Factor 109
View menu 99
W
WAV 16, 19, 72
waveforms 20, 23, 74, 100, 109
building new waveforms 74
refresh 84
scrolling 23
zooming 23, 100, 101
Waveform Mode 53, 84
Windows
Page 142
Mark Info 102
Meters 102
Write CD Text 111
Write SRP Info to File 77
Z
zooming 23, 100, 101
Zoom around Playhead 100
Zoom Factor 109
Zoom In/Out 100
Zoom In/Out around Edit Point 100
Zoom In/Out around Playhead 100
Zoom In Around In/Out Point 100
Zoom to In/Out 107
Zoom to Previous/Next 100
Zoom to Sel(ection) Start/(End) 107
Zoom to Selection 101
Zoom to Selection Start/End 101
Page 143
© 2012 Sonic Studio, LLC • 330 Sir Francis Drake Blvd. • Suite A • San Anselmo CA 94960-2552 • 1-415-944-7642
soundBlade, soundBlade LE, sonicstudio.com, the Sonic Studio logo and type are trademarks of Sonic Studio, LLC in the United States and
other countries. All other trademarks, trade names, service marks, and logos referenced herein belong to their respective companies.
Comments, corrections and suggestions regarding this manual are always welcome. Please contact us at <support@
sonicstudio.com>
soundBlade_LE_202_UMv1r03
Page 144