1
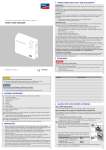
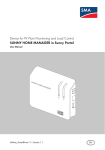
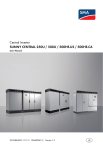
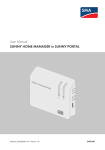
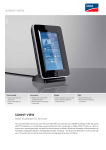
Safety Instructions
Device for PV Plant Monitoring and
Load Management
SUNNY HOME MANAGER
Risk of lethal electric shock
Lethal voltages are present in the conductive parts of the plug-in power supply and of the top-hat rail
power supply.
•Only use the Sunny Home Manager indoors and in a dry environment; keep it away from
liquids.
•Do not open the plug-in power supply.
Quick Reference Guide for Commissioning
Risk of injury due to incorrect cable routing
Incorrectly routed cables may cause a tripping hazard.
•Lay the cables in such way that no one can step on or trip over them.
Damage to the Sunny Home Manager due to moisture penetration
The Sunny Home Manager is not splash-proof.
•Only use the Sunny Home Manager indoors and in a dry environment.
Required Materials
For commissioning, you will need the following items from the packaging:
SUN
NY HOM
E MAN
AGE
R
1 x Sunny Home Manager
1 x plug-in power supply
1 x network cable
2 x screw
Contact
If you have technical problems concerning our products, contact the SMA Service Line. We require the
following information in order to provide you with the necessary assistance:
•Serial numbers and software packages of the Sunny Home Manager
and SMA radio-controlled sockets
•Energy meter type
•Reading head type
SMA Solar Technology AG
Sonnenallee 1
34266 Niestetal, Germany
www.SMA.de
SMA Service Line
Inverters:
Communication:
Fax:
E-mail:
+49 561 9522 1499
+49 561 9522 2499
+49 561 9522 4699
[email protected]
HoMan-SE-IEN114510 | 98-0048110 | Version 1.0
1 ... 3 x 4-pole plug (number depends on the quantity of ordered cables with reading head
and 4-pole plug)
or
0 ... 2 x cable with reading head and 4-pole plug (optional; number depends on ordered
quantity)
Per energy meter 1 x cable with at least 2 insulated conductors,
core cross-section: 0.2 mm² ... 1.5 mm², maximum cable length: 30 m
EN
Target Group
This manual is intended for the use of skilled workers. Only qualified personnel are allowed to perform
the tasks set forth in this manual. Skilled workers must have the following qualifications:
•Training in the installation and commissioning of electrical devices.
•Knowledge of all applicable standards and guidelines.
Intended Use
The Sunny Home Manager is a device for monitoring PV plants and planning load management in
households with PV plants. For this purpose, the Sunny Home Manager carries out the following tasks:
•Read-out of energy meter data and data from SMA inverters with Bluetooth communication
interfaces
•Transmission of data to the Sunny Portal
•Support in raising the self-consumption rate
Additional Information for France
In France, outdoor use of the Sunny Home Manager is forbidden due to the legal restrictions
regarding Bluetooth transmitting power.
The Sunny Home Manager may only be used together with supported devices (for list of supported
devices, see Sunny Home Manager installation manual on the CD provided).
No conversions of the Sunny Home Manager or installation of component parts are permitted.
Only use the Sunny Home Manager in accordance with the information provided in the enclosed
documentation. Any other use can result in personal injury or property damage.
•Do not use the Sunny Home Manager in plants which include a Sunny WebBox.
The enclosed documentation is an integral part of this product.
•Read and observe the documentation.
•Keep the documentation in a convenient place at all times.
6 x sticker
If you want to connect the Sunny Home Manager to an energy meter with S0 interface, you will
need the following additional material (not included in the scope of delivery):
Validity
This manual is valid for the device type "HM-BT-10.GR2", software package 1.00.0.R and higher.
Only use the Sunny Home Manager indoors.
2 x screw anchor
A
Preparation
•Determine the installation location for the Sunny Home Manager bearing in mind the
requirements for the installation location (see Sunny Home Manager installation manual on the
CD provided).
•Mount the Sunny Home Manager on the wall using the screws and screw anchors
(distance between drill holes: 58 mm).
•Note down the serial numbers of all SMA Bluetooth devices. For the SMA radio-controlled
sockets, also note down the load that you wish to allocate to the respective SMA radio-controlled
socket. This will facilitate the registration of your plant in Sunny Portal.
Device
Serial number
B
Connecting energy meters
You can connect up to 3 energy meters with S0 interface or D0 interface to the Sunny Home Manager.
Depending on the type of interface of each energy meter, the manner of connection to the Sunny
Home Manager may differ.
5. Plug the plug-in power supply into the socket-outlet. Tip: as an alternative to the plug-in power
supply, voltage can be supplied to the Sunny Home Manager by means of a top-hat rail power
supply (see Sunny Home Manager installation manual on the CD provided).
☑ The status LED of the Sunny Home Manager (6) first glows red, and then flashes red. After
approx. 2 minutes, the status LED intermittently flashes green and orange.
Connecting Energy Meter with D0 Interface
1. Position the magnet retainer of the reading head at the front upper righthand corner of the energy meter. The infrared interfaces on the reading
head and the energy meter must match exactly.
Eigentum
des
Messstel
ers
gentum
des
Messs
tellenb
etreib
ers
2. Connect the 4-pole plug of the reading head to the connection socket
allocated to the corresponding energy meter. For this purpose, insert the
plug into the upper pin row:
D
Energy meter
Connection socket
Consumption meter,
Bidirectional meter for grid feed-in and purchased electricity
"Meter 1"
Feed-in meter
"Meter 2"
PV generation meter
"Meter 3"
Requirements:
☐ The status LED of the Sunny Home Manager is flashing intermittently green and orange.
☐ The same NetID is configured for all SMA Bluetooth devices.
☐ The Bluetooth PV plant is commissioned.
Connecting Energy Meter with S0 Interface
1. Strip cable jacket to approx. 4 cm.
2. If applicable, shorten the cable shield to 5 mm. To do this, fold the surplus cable shield back onto
the cable sleeve.
3. Shorten unused insulated conductors flush with the cable sleeve.
4. Strip conductor insulation to 6 mm.
1
5. Release the jacks of the 4-pole plug with a screwdriver and insert the
insulated conductors into pins 1 and 2 of the plug.
For registration, you will need the following data from the type label of the Sunny Home Manager:
•Registration ID of the Sunny Home Manager ("Registration ID")
•Serial number of the Sunny Home Manager ("Serial Number")
SMA Radio-Controlled Sockets
If you are using SMA radio-controlled sockets, insert these into the socket-outlets and configure the
NetID of the PV plant (see Sunny Home Manager installation manual on the CD provided). This will
enable you to register the SMA radio-controlled socket together with the Sunny Home Manager.
Start the Plant Setup Assistant.
The Plant Setup Assistant will guide you through the registration of your Sunny Home Manager in
Sunny Portal.
1. Open www.SunnyPortal.com and select [Plant Setup Assistant].
or
Open www.SunnyPortal.com/Register.
☑ The Plant Setup Assistant opens.
2. Select [Next].
☑ The "User registration" page opens.
6. Write down the color of the insulated conductors:
3. Follow the instructions of the Plant Setup Assistant.
4-pole plug for
Consumption meter
Registering in Sunny Portal
The Sunny Portal is the user interface of the Sunny Home Manager. Therefore, you must register the
Sunny Home Manager in the Sunny Portal.
3. Use the stickers provided to mark each cable with the connection socket and energy meter to
which it is assigned.
Pin
☒ The LED keeps flashing red?
Refer to Troubleshooting (see Section "TROUBLESHOOTING")
lenbetreib
Feed-in meter
PV generation meter
1 (SO−)
2 (SO+)
7. Connect the 4-pole plug to the connection socket assigned to the
corresponding energy meter. For this purpose, insert the 4-pole plug into
the lower pin row:
4. After completion of registration, configure further settings in the Sunny Portal (see user manual of
Sunny Portal for Sunny Home Manager on the CD provided):
•Configure SMA radio-controlled socket
•Enter string properties
•Set optimization target
•Configure settings for plant monitoring
Troubleshooting
Energy meter
Connection socket
Consumption meter
"Meter 1"
Feed-in meter
"Meter 2"
PV generation meter
"Meter 3"
8. Connect the end of the cable to the energy meter. Observe the polarity of the insulated
conductors.
9. Use the stickers provided to mark each cable with the connection socket and energy meter to
which it is assigned.
10. Note down the S0 pulses per kWh and the meter reading of each energy meter. This will facilitate
the meter configuration in Sunny Portal.
C
Commissioning
Requirements:
☐ The Bluetooth PV plant is commissioned.
☐ DHCP is activated on the router (see router manual).
1. On the Sunny Home Manager, use a screwdriver to turn the arrow of the rotary switch to the
NetID of the PV plant (blade width of the screwdriver: 2.5 mm).
2. Connect the network cable to the Ethernet terminal of the Sunny Home Manager.
3. Connect the other end of the network cable to the router.
4. Connect the DC plug of the plug-in power supply to the "Power" socket of the
Sunny Home Manager.
Problem
Cause and Corrective Measures
The Plant Setup
Assistant does not
detect the Sunny Home
Manager, although
you have entered the
serial number correctly.
It is possible that the Sunny Home Manager is not properly connected to
the router.
Corrective measures:
•Ensure that the Sunny Home Manager is properly connected to the
router.
The status LED on the
Sunny Home Manager
is flashing continuously
red.
It is possible that DHCP is not activated in your router, DHCP is not
supported by the router, or there is a proxy server in your network.
Corrective measures:
•If possible, activate DHCP in the router.
•If the router does not support DHCP or there is a proxy server in your
network, use the Sunny Home Manager Assistant (see Section
"Using Sunny Home Manager Assistant").
It is possible that the Sunny Home Manager is not being supplied with
voltage. In this case, all LEDs on the Sunny Home Manager are off.
Corrective measures:
•Supply the Sunny Home Manager with voltage (see Section C).
It is possible that the registration procedure was initiated at an earlier
time but was not completed.
Corrective measures:
•Perform a complete reset of the Sunny Home Manager (see
Sunny Home Manager installation manual on the CD provided).
Using Sunny Home Manager Assistant
The Sunny Home Manager Assistant will help you to configure the Sunny Home Manager for your
network if the Sunny Home Manager does not automatically connect to the Sunny Portal.
In addition, you can use the Sunny Home Manager Assistant to display the latest connection status to
the Sunny Portal, the network settings and the connected SMA Bluetooth devices, and save as a log
file. If a service assignment should be necessary, the SMA Service Line can use this log file to analyze
the problem.
1. Using a network cable, connect the computer to the router to which the Sunny Home Manager is
also connected.
2. Insert the CD provided into the drive of your computer.
or
In the download area of www.SMA.de/en, download the Sunny Home Manager Assistant for
the operating system of your computer (for the installation file see www.SMA.de/en).
3. Start the Sunny Home Manager Assistant with a double click.
4. Follow the instruction of the Sunny Home Manager Assistant.