1
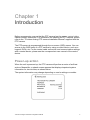
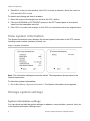
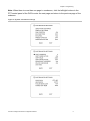
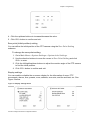
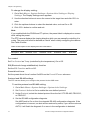
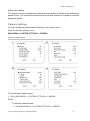
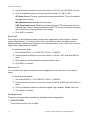
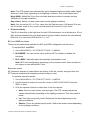
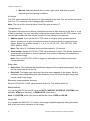
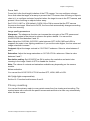
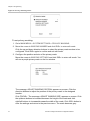
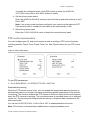
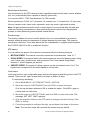
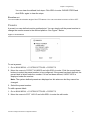
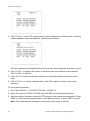
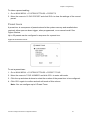
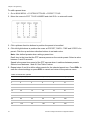
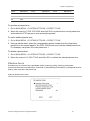
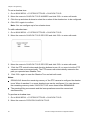
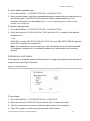
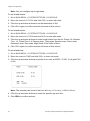
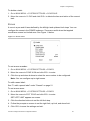
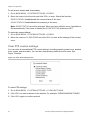
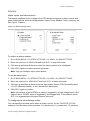
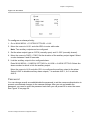
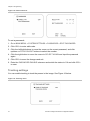
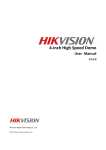
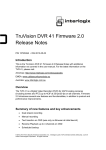
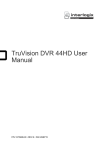
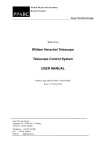
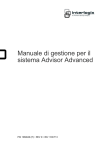
TruVision Analog PTZ Camera Configuration Manual P/N 1072658A-EN • REV 1.0 • ISS 11OCT13 Copyright © 2013 UTC Fire & Security Americas Corporation, Inc. Interlogix is part of UTC Climate Controls & Security, a unit of United Technologies Corporation. All rights reserved. Trademarks and patents The TruVision and Interlogix names and logos are trademarks of United Technologies. Other trade names used in this document may be trademarks or registered trademarks of the manufacturers or vendors of the respective products. Manufacturer UTC Fire & Security Americas Corporation, Inc. 2955 Red Hill Avenue, Costa Mesa, CA 92626-5923, USA Authorized EU manufacturing representative: UTC Fire & Security B.V. Kelvinstraat 7, 6003 DH Weert, The Netherlands Contact information For contact information, see www.interlogix.com or www.utcfssecurityproducts.eu. Customer support www.interlogix.com/customer-support Content Chapter 1 Introduction 5 Power-up action 5 System-defined presets 6 Chapter 2 Programming 7 Access the OSD menu 7 View system information 8 Change system settings 8 System information settings 8 Camera address settings 10 Soft baud rate settings 10 Pelco checksum 10 System time 10 Zero point (initial position) setting 11 Display settings 11 Fan control 12 EIS (Electronic image stabilization) function 12 Preset direct focus 12 Protocol and RS-485 settings 12 Camera settings 13 Focus 13 Zoom limit 14 Day/Night mode 14 BLC and WDR functions 15 Exposure mode 15 Iris value 16 Shutter speed 16 Gain value 16 Exposure compensation function 16 White balance 16 Image flip 16 Focus limit 17 Image quality parameters 17 Noise reduction 17 HLC (high light compensation) 17 Privacy masking 17 PTZ control parameters 19 Proportional panning 19 Dwell time and actions 20 Freeze image 20 Limit stops 20 Presets 21 Preset tours 23 TruVision Analog PTZ Camera Configuration Manual i Shadow tours 25 Schedules and tasks 27 Zones 29 Clear PTZ control settings 30 Alarms 31 Alarm inputs and linked actions 31 Alarm parameters 32 Auxiliary alarm output 32 Password 33 Tracking settings 34 Restore default camera settings 35 Reboot the camera 35 KTD-405 and DVR control feature list 36 ii TruVision Analog PTZ Camera Configuration Manual TruVision Analog PTZ Camera Configuration Manual iii Chapter 1 Introduction Before programming, ensure that the PTZ camera has the power, control, video cables correctly connected. For information on installing the PTZ camera, please refer to the “Truvision Analog PTZ camera Installation Manual” supplied with the PTZ camera. The PTZ camera is programmed through the on-screen (OSD) menus. You can access to the OSD menu of a PTZ camera by using a control device, such as a keypad, DVRs, etc. For the control cable connection and communication settings with a control device, please see the correspondent user manual of the control device. Power-up action When the unit is powered up, the PTZ camera will perform a series of self-test actions. Meanwhile, a splash screen appears that displays important system information for two minutes, as shown below. The system information may change depending on user’s settings or models. TruVision Analog PTZ Camera Configuration Manual 5 Chapter 1: Introduction System-defined presets The camera has some system-defined presets with special functions. These presets cannot be edited but can be called through a control device, such as a DVR or keypad. Please refer to below table for details. Table 1: Predefined presets Preset No. Function Preset No. Function 33 Auto-flip 93 Set manual limit stops 34 Return to home position 94 Remote reboot 35 Preset Tour 1 95 Access main menu 36 Preset Tour 2 96 Stop scanning 37 Preset Tour 3 97 Start random scanning 38 Preset Tour 4 98 Start frame scanning 39 IR cut filter in 99 Start pan scanning 40 IR cut filter out 100 Start tilt scanning 41 Shadow Tour 1 101 Start panorama scanning 42 Shadow Tour 2 102 Preset Tour 5 43 Shadow Tour 3 103 Preset Tour 6 44 Shadow Tour 4 104 Preset Tour 7 92 Enable limit stops 105 Preset Tour 8 Note: Please ensure that the baud rate, data bit, and address have been configured for the camera are the same as those in the control device. 6 TruVision Analog PTZ Camera Configuration Manual Chapter 2: Programming Chapter 2 Programming This chapter explains how to program the cameras through a control device. The connections or procedure may vary depending on the control device. The following instructions show how to program using a DVR. Access the OSD menu To enter the main menu: 1. Connect the camera’s video and RS-485 cables to a DVR. 2. Access the DVR via its web browser or OSD menu. 3. View the live video of the PTZ camera. 4. Call preset 95 from the preset list in the PTZ control panel of the DVR to access the OSD menu. To move the cursor and select an item: 1. Move the cursor up/down: In live view mode, click the UP/DOWN buttons or the FOCUS + and FOCUS- buttons in the PTZ control panel to move the cursor up and down. TruVision Analog PTZ Camera Configuration Manual 7 Chapter 2: Programming 2. Enter/Exit: In the live view window, click IRIS+ to enter a submenu. Move the cursor to Exit and click IRIS+ to exit. To select and change an item in a menu: 1. Move the cursor to the target item and click the IRIS+ button. 2. Click the UP/DOWN or LEFT/RIGHT buttons in the PTZ control panel to choose the value from the selectable value list. 3. Click IRIS+ to confirm the change, or click IRIS- to cancel and restore the original value. View system information The System Information menu displays the current system information of the PTZ camera, including model number, address, protocol, etc. Figure 1: System information Note: The information displayed cannot be edited. The temperature shown refers to the internal temperature. To view the system information: 1. Go to Main Menu >System Information. The System Information menu appears. Change system settings System information settings You can check and edit the system settings on address, communication, protocol, time, etc. in the System Information Settings menu. 8 TruVision Analog PTZ Camera Configuration Manual Chapter 2: Programming Note: When there is more than one page to a submenu, click the left/right buttons in the PTZ control panel of the DVR to enter the next page and return to the previous page of the submenu. Figure 2: System information settings TruVision Analog PTZ Camera Configuration Manual 9 Chapter 2: Programming Camera address settings To change the camera address settings: 1. Go to Main Menu >System Settings > System Infor Settings. 2. Set the soft address of the PTZ camera. If Soft Address Active is set to On, the soft address is the valid address for connecting the PTZ camera. Select a value between 1 and 255. If Soft Address Active is set as Off, the hard address set by the DIP switch is the valid address of the PTZ camera. Note: Before setting the soft address of the PTZ camera, you need to confirm that it is within the control range of the control device (e.g. the DVR). After you enable/disable the soft address, the PTZ camera reboots automatically to activate the settings. 3. Set the broadcast address of the PTZ camera. When Broadcast Address is set to On, the control device with address 0 can control all PTZ cameras connected to it. Soft baud rate settings To change the soft baud settings: 1. Go to Main Menu >System Settings > System Infor Settings. 2. Set the soft baud rate. If Soft Baud Active is set to On, there are 4 selectable baud rate: 2400, 4800, 9600 and 19200. If Soft Baud Active is set to Off, the baud rate depends on the DIP switch settings. Note: After you enable/disable the soft baud rate, the PTZ camera reboots automatically to activate the settings. Pelco checksum If the PTZ camera uses PELCO-P or PELCO-D protocol, set the Pelco Checksum to On to get better response when there is a delay in signal transmission and PTZ reaction. System time To change the system time: 1. Go to Main Menu >System Settings > System Infor Settings. 2. Use the direction buttons to move the cursor to Sys Time and click IRIS+ to enter. 3. Click the left/right buttons to move the cursor on the item (year/month/day or hour/minute/second) that you want to change. 10 TruVision Analog PTZ Camera Configuration Manual Chapter 2: Programming 4. Click the up/down buttons to increase/decrease the value. 5. Click IRIS+ button to confirm and exit. Zero point (initial position) setting You can define the initial position of the PTZ camera using the Zero Point Setting submenu. To change the zero point setting: 1. Go to Main Menu > System Settings > System Infor Settings. 2. Use the direction buttons to move the cursor to Zero Point Setting and click IRIS+ to enter. 3. Click the left/right/up/down buttons to adjust the monitor angle of the PTZ camera to find the initial position. 4. Click IRIS+ button to confirm and exit. Display settings You can enable or disable the on-screen display for the information of zoom, PTZ movements, alarms, time, presets, zone, address, error rate, and fan and heat, etc. See Figure 3 below. Figure 3: Display settings menu TruVision Analog PTZ Camera Configuration Manual 11 Chapter 2: Programming To change the display setting: 1. Go to Main Menu > System Settings > System Infor Settings > Display Settings. The Display Settings menu appears. 2. Use the direction buttons to move the cursor to the target item and click IRIS+ to enter. 3. Click the up/down buttons to select the desired value, such as On or Off. 4. Click IRIS+ button to confirm and exit. Note: If you enabled both the ZOOM and PT options, the preset label is displayed on screen while calling the preset. The PTZ camera displays the viewing direction while you are manually controlling it to rotate. The zero point must be defined as “North” when initially configuring the camera. See Table 2 below. Table 2: Description of the display direction information Display N Description North NE E Northeast East SE S Southeast South SW W Southwest West NW Northwest Fan control Set Fan Control as Temp (controlled by the temperature), On or Off. EIS (Electronic image stabilization) function Set the EIS Function as On or Off. Preset direct focus Set the preset direct focus function On/Off from the Preset DFocus submenu. Protocol and RS-485 settings The PTZ camera allows you to configure the protocol via the OSD menu. To set the protocol and RS-485 setting: 1. Go to Main Menu > System Settings > System Infor Settings. 2. Set Protocol Active to On to enable the user-defined protocol. 3. Under Protocol, select the desired protocol from the list: UTC RS-485, PELCO-D, or PELCO-P. 4. Set the RS-485 configuration diagnosis. Set 485Check to On or Auto for automatic RS-485 configuration diagnosis. If the configuration is incorrect, an alert will be received by users; if you set the value as AUTO, it will finish the diagnosis if no error in the configuration is detected 12 TruVision Analog PTZ Camera Configuration Manual Chapter 2: Programming Power off memory The camera can store configuration settings during a power off period for the predefined period of time. The camera can resume its previous lens position once power is restored during this period. Camera settings You can change the camera related settings in the Camera menu. Enter the Camera settings menu: MAIN MENU > SYSTEM SETTINGS > CAMERA Figure 4: Camera menu To access the Camera menu: 1. Go to MAIN MENU > SYSTEM SETTINGS > CAMERA. Focus To set the camera focus: 1. Go to MAIN MENU > SYSTEM SETTINGS > CAMERA. TruVision Analog PTZ Camera Configuration Manual 13 Chapter 2: Programming 2. Use the direction buttons to move the cursor to FOCUS and click IRIS+ to enter. 3. Click the up/down buttons to choose the focus mode: AF, MF or SAF. AF (Auto-focus): The lens continually focuses automatically. This is the default settings of the camera. MF (Manual focus): Manually focus the lens. SAF (Semi-auto focus): When the camera performs PTZ movements, the lens automatically focuses. When the camera stops PTZ, the focus remains fixed and does not focus on moving objects in the image. 4. Click IRIS+ to confirm. Zoom limit Zoom limit is a user-defined limitation of the zoom magnification (Zoom times = Optical zoom × Digital zoom). If the zoom limit is set to its minimum value, the digital zoom is disabled and the optical zoom function is at its maximum value. If the zoom limit is set to a larger value, digital zoom is enabled. To set the zoom limit: 1. Go to MAIN MENU > SYSTEM SETTINGS > CAMERA. 2. Use the direction buttons to move the cursor to ZOOM LIMIT and click IRIS+ to enter. 3. Click up/down direction buttons to select the limit value. 4. Click IRIS+ to confirm. Zoom speed You can define the speed at which the lens changes from full wide zoom to the optical zoom. To set the zoom speed: 1. Go to MAIN MENU > SYSTEM SETTINGS > CAMERA. 2. Use the direction buttons to move the cursor to ZOOM SPEED and click IRIS+ to enter. 3. Click the up/down buttons to select the speed: High (default), Middle, and Low. 4. Click IRIS+ to confirm. Day/Night mode There are two parameters available for day/night mode configuration. 1. IR CUT FILTER. It can be set as Auto, Day or Night. 14 TruVision Analog PTZ Camera Configuration Manual Chapter 2: Programming Auto: The PTZ camera can automatically switch between black and white mode (Night) and color mode (Day) depending on the lighting conditions. This is the default value. Night (B/W): Switch the IR cut filter into black and white mode to increase the lens sensitivity in low light conditions Day (Color): Switch it to day mode under normal lighting conditions. Note: You can set the IR Cut Filter value from the Camera menu. Call preset 39 to set the IR cut filter mode to Day mode, and call preset 40 to set it to Night mode. 2. IR cut sensitivity. The IR cut sensitivity is the light level for auto D/N mode switch. As a dividing line, IR cut filter switches between Day and Night when the light condition reaches the user-defined D/N level. You can set the D/N level to 0, 1, or 2. BLC and WDR functions There are two parameters available for BLC and WDR configuration on this menu. To set the BLC and WDR: 1. Go to MAIN MENU > SYSTEM SETTINGS > CAMERA. 2. BLC/DWDR: You can set the value as ON or OFF to enable or disable the functions. 3. BLC LEVEL: Manually adjust the backlight compensation level. Note: BLC level configuration depending on the camera model. Some models do not support a user-defined BLC level. Exposure mode AE (automatic exposure) mode defines the priority of the iris, shutter, and gain when the PTZ camera is adjusting the brightness level during live view. To set the exposure mode: 1. Go to MAIN MENU > SYSTEM SETTINGS > CAMERA. 2. Use the direction buttons to move the cursor to EXPOSURE MODE and click IRIS+ to enter. 3. Click the up/down buttons to select one of the four options: • Auto: Auto iris, auto shutter, and auto gain. The PTZ camera adjusts the values automatically depending on the lighting conditions. This is the default mode. • Iris: This is the iris-priority mode. Define the iris value depending on the lighting conditions. • Shutter: This is the shutter-priority mode. Define the shutter speed depending on the lighting conditions. TruVision Analog PTZ Camera Configuration Manual 15 Chapter 2: Programming • Manual: Manually define the iris value, gain value, and shutter speed depending on the lighting conditions. Iris value The IRIS value measures the amount of light entering to the lens. You can set the iris value from 0 to 17 in response to the changing light conditions. Note: The iris is fully closed at value 0 and fully open at value 17. Shutter speed The speed of the electronic shutter controls the amount of light entering to the lens in a unit of time (a second). You can manually configure the shutter speed for the PTZ camera, and you can also enable the slow shutter function for low lighting circumstances. 1. Shutter speed. If you set the SHUTTER value to a higher value (shutter speed is faster), the amount of light entering per second is reduced and the image becomes darker. Select one of these values: 1, 2, 4, 8, 15, 30, 50, 125, 180, 250, 500, 1000, 2000, 4000 or 10000. Note: The value of X indicates that the shutter speed is 1/X second. 2. Slow shutter. Set the SLOW SHUTTER value between 0 and 5. The shutter speed can automatically slow down to extend exposure time under low lighting circumstances to obtain clearer image. Note: Turn on INITIALIZE LENS to trigger an automatic lens initiation and ensure normal operation. Gain value • Gain value: This indicates the amplification degree of the original image signal. You can set the value between 0 and 15. • Gain limit: The higher gain value set, the more noise appears in the image. Set the maximum user configurable gain value between 0 and 15 to limit the gain range and control noise in the image. Exposure compensation function Set the EXPOSURE COMP value between 0 and 14. The default value is 7. White balance You can set WHITE BALANCE mode as AUTO, INDOOR, OUTDOOR, CUSTOM (user defined), ATW (auto-tracking), or SEMI-AUTO (Semi-auto). Note: In CUSTOM. mode you need to define the value of RED and BLUE. Image flip If you enable the IMAGE FLIP function, the image is flipped diagonally along its central axis, seen as a mirror reflection of the image. 16 TruVision Analog PTZ Camera Configuration Manual Chapter 2: Programming Focus limit Focus limit is the focal length limitation of the PTZ camera. You can configure a longer focus limit when the target is far away to prevent the PTZ camera from focusing on objects close to it; or configure a shorter focus limit when the target is near to the PTZ camera, and prevent it from focusing on objects further away. Set FOCUS LIMIT to 1CM (default), 30CM, 1M or 3M to ensure that the PTZ camera focuses on the target. When set to AUTO, the focus limit automatically changes according to the lens zooming. Image quality parameters Sharpness: The sharpness function can increase the auto-gain of the PTZ camera and sharpen the edges in the picture to enhance the picture details. You can set the SHARPNESS level between 0 and 15. Hue: Adjust the CHROMA SUPRESS value between OFF, HIGH, MID and LOW to suppress the noise in low lighting conditions. If you set the value higher, the hue value and image noise both increase. Contrast: Adjust the image contrast in CONTRAST submenu. Select a value between 0 and 7. Saturation: Adjust the image saturation on SATURATION s submenu. Select a value between 0 and 7. Resolution setting: Set HR MODE as ON to reduce the resolution and avoid color crossing in the image. Switch it OFF to disable the function. Note: The values of contrast and saturation available vary depending on the camera models. Noise reduction You can set the NOISE REDUCTION function OFF, HIGH, MID or LOW. HLC (high light compensation) Set the HLC function level between 0 and 3. Privacy masking You can set the privacy mask to cover certain areas from live viewing and recording. The masked areas can move with the pan/tilt movements and their size can vary automatically when the lens zooms. TruVision Analog PTZ Camera Configuration Manual 17 Chapter 2: Programming Figure 5: Privacy masking menu To set privacy masking: 1. Go to MAIN MENU > SYSTEM SETTINGS > PRIVACY MASKING. 2. Move the cursor to WINDOW NUMBER and click IRIS+ to enter edit mode. Click the up and down direction buttons to select the privacy mask number to be configured. Click IRIS+ again to confirm and exit edit mode. 3. Configure the position and size of the privacy mask. Move the cursor to WINDOW SETTINGS and click IRIS+ to enter edit mode. You will see a purple privacy mask on the live window. The message, ADJUST WINDOW POSTION, appears on screen. Click the direction buttons to adjust the position of the privacy mask to the designed location. Click FOCUS+. The message, ADJUST WINDOW SIZE, appears on screen. Click the up/down buttons to increase/decrease the height of the mask and click right/left buttons to increase/decrease the width of the mask. Click IRIS+ button to save the settings and return to the previous menu. The mask becomes grey. 18 TruVision Analog PTZ Camera Configuration Manual Chapter 2: Programming To modify the configured mask, click IRIS+ button to enter the WINDOW SETTINGS menu and re-click IRIS+ button to modify. 4. Set the privacy mask status. Enter the WINDOW ENABLE submenu and click the up and down buttons to set it ON or OFF. Note: If no privacy mask has been configured, you cannot set the status as OFF. If the privacy mask is configured, the status is set automatically to ON. 5. Delete the privacy mask. Enter the CLEAR WINDOW menu to delete the current privacy mask. PTZ control parameters You can configure pan, tilt, and zoom motion as well as configure PTZ control functions including presets, Preset Tours, Preset Tours, etc. See Figure 6 below for the PTZ control menu. Figure 6: PTZ control menu To set PTZ parameters: 1. Go to MAIN MENU > SYSTEM SETTINGS > MOTION. Proportional panning When the PTZ camera zooms in/out, you can enable the proportional panning function to automatically reduce or increase the panning and tilting speeds depending on the amount of zooming. This function enables the PTZ camera to follow an object at the correct speed when the PTZ camera is zooming. The monitored scene is narrowed (zoom in) or enlarged (zoom out). The panning and tilting speeds are slower in telephoto state compared to the wide zoom state. You can set PROPORTIONAL PAN to ON or OFF to enable/disable the function. Note: This function is automatically enabled when configuring shadow tours. TruVision Analog PTZ Camera Configuration Manual 19 Chapter 2: Programming Dwell time and actions Use this feature for the PTZ camera to start a predefined park action (scan, preset, shadow tour, etc.) automatically after a period of inactivity (park time). You can set DWELL TIME from between 5 to 720 seconds. Set the park action (PARK ACT) as preset 1-8, shadow tour 1-4, preset tour 1-8, pan scan, tilt scan, random scan, frame scan, panoramic scan, day mode, night mode or none. Note: No park actions are performed if a control signal is not received after the park time under the following circumstances: when performing camera actions by calling special presets; or when performing external alarm linked actions. Freeze image This feature enables live view to switch directly from one scene defined by a preset to another without showing the sequence of images between the two steps. This ensures surveillance efficiency. It can also reduce the use of bandwidth in a digital network system. Set FREEZE IMAGE to ON to enable this function. PTZ speed You can define the speed of the camera movements with the following functions • MOTION SPEED: The manual movement speed can be set between 1 and 10. T • SCAN SPEED: Scan speed defines the scan degree per second of panning scan, tilting scan, frame scan, random scan, and panoramic scan. Scan speed is adjustable between 1 and 40 degrees per second. • PRESET SPEED: The speed of calling a preset can be set between level 1 to 8. The higher level corresponds to the faster speed to call a preset. Limit stops Limit stops are the user-configurable stops that limit the panning and tilting area of the PTZ camera. There are left, right, up and down limit stops to define an area. To set privacy masking: 1. Go to MAIN MENU > SYSTEM SETTINGS > MOTION 2. Move the cursor to LIMIT ENABLE and click IRIS+ to enter edit mode. Click the up and down buttons to ON to enable this option. Click IRIS+ again to confirm and exit edit mode. 3. Move the cursor to LIMIT SETTINGS and click IRIS+ to enter edit mode. The message, SET LEFT LIMIT, appears. 4. Click the direction buttons in the PTZ panel to configure the left limit stop. Click IRIS+ to confirm. 5. Follow the prompts to configure the right, up and down limit stops on the menu. Note: The new limit stops will overwrite the existed ones by default. 20 TruVision Analog PTZ Camera Configuration Manual Chapter 2: Programming You can clear the defined limit stops. Click IRIS+ to enter CLEAR STOPS and click IRIS+ again to clear the stops. Elevation set You can enable the elevation angle of the PTZ camera. You can set ELEVATION SET to ON or OFF. Presets A preset is a user-defined monitor position/point. You can simply call the preset number to change the monitor scene to the defined position. See Figure 7 below. Figure 7: Preset menu To set a preset: 1. Go to MAIN MENU > SYSTEM SETTINGS > PRESETS 2. Move the cursor to PRESET NUMBER and click IRIS+ to enter. Click the up and down buttons to select the preset number to be configured. If the preset has been defined, the preset label is listed under the number. If it has not been defined, UNDEFINED is displayed under the number. Note: The system-defined presets are displayed on this submenu but they cannot be changed. 3. Select the preset number. To edit a preset label: 1. Go to MAIN MENU > SYSTEM SETTINGS > PRESETS 2. Move the cursor to EDIT LABLE and click IRIS+ to enter the edit mode. TruVision Analog PTZ Camera Configuration Manual 21 Chapter 2: Programming 3. Click FOCUS + in the PTZ control panel to switch between the character lists, including capital alphabet, lowercase alphabet, symbols and numbers. Click the up/down and left/right buttons to move the cursor to specific character to input. 4. Click FOCUS - to position the cursor in the label under the character to be modified. Click ZOOM + to delete it. 5. Click IRIS+ to insert the selected character from the letter/number/symbol list in the label. 6. Click FOCUS + to exit the character lists. Click IRIS+ again to confirm and exit the submenu. To set a preset position: 1. Go to MAIN MENU > SYSTEM SETTINGS > PRESETS 2. Move the cursor to PRESET SCENE and click IRIS+ to edit the preset position. 3. Use the direction buttons to move the PTZ camera to the desired scene/position. Press IRIS+ to confirm the settings and return to the previous menu, or press IRIS- to cancel. Note: The preset position settings are restricted by limit stops, if defined. 22 TruVision Analog PTZ Camera Configuration Manual Chapter 2: Programming To clear a preset setting: 1. Go to MAIN MENU > SYSTEM SETTINGS > PRESETS 2. Move the cursor to CLEAR PRESET and click IRIS+ to clear the settings of the current preset. Preset tours A preset tour is a sequence of presets stored in the system memory and recalled when required, either upon an alarm trigger, when programmed, or on manual recall. See Figure 8 below. Up to 32 presets can be configured in sequence for a preset tour. Figure 8: Preset tour menu To set a preset tour: 1. Go to MAIN MENU > SYSTEM SETTINGS > PRESET TOUR 2. Move the cursor to TOUR NUMBER and click IRIS+ to enter edit mode. 3. Click the up and down buttons to select the number of the preset tour to be configured. 4. Click IRIS+ again to confirm and exit edit mode of this column. Note: You can configure up to 8 Preset Tours. TruVision Analog PTZ Camera Configuration Manual 23 Chapter 2: Programming To edit a preset tour: 1. Go to MAIN MENU > SYSTEM SETTINGS > PRESET TOUR 2. Move the cursor to EDIT TOUR NUMBER and click IRIS+ to enter edit mode. 3. Click up/down direction buttons to position the preset to be edited. 4. Click left/right buttons to position the cursor at PRESET, DWELL TIME and SPEED of a preset. Click the up and down direction buttons to set each value. Note: Use defined presets when setting a preset tour. Dwell time is the time that the PTZ camera pauses on the certain preset. Select a value between 0 and 30 seconds. Speed is the preset tour speed of the PTZ camera when it switches between presets. Select a level between 1 and 40. See Table 3 below. 5. Repeat steps 3 and 4 to define other presets for the selected preset tour. Press IRIS+ to save the current settings or press IRIS- to cancel and return to the previous menu. Table 3: Preset tour speeds 24 Level Speed(°/s) Level Speed(°/s) Level Speed(°/s) 1 0.3 2 2 3 4 4 6 5 8 6 10 7 12 8 14 9 16 10 18 11 20 12 25 13 30 14 35 15 40 16 45 17 50 18 55 19 60 20 65 21 70 22 80 23 90 24 100 25 110 26 120 27 130 28 140 29 150 30 160 31 170 32 190 33 210 TruVision Analog PTZ Camera Configuration Manual Chapter 2: Programming Level Speed(°/s) Level Speed(°/s) Level Speed(°/s) 34 230 35 250 36 270 37 290 38 310 39 330 40 350 To preview a preset tour: 1. Go to MAIN MENU > SYSTEM SETTINGS > PRESET TOUR 2. Move the cursor to TOUR PREVIEW and click IRIS+ to preview the current preset tour and enable the PTZ camera to scan among the presets. To call a defined preset tour: 1. Go to MAIN MENU > SYSTEM SETTINGS > PRESET TOUR 2. Using a web browser, select the corresponding preset number from the drop-down preset list in the control panel of the DVR. Click the arrow to call the related preset tour. For example, call preset 35 to call preset tour 1. To delete a preset tour: 1. Go to MAIN MENU > SYSTEM SETTINGS > PRESET TOUR 2. Move the cursor to CLEAR TOUR and click IRIS+ to delete the selected preset tour. Shadow tours A shadow tour is a memorized, repeatable series of panning, tilting, zooming, and preset movements that can be recalled by a command or automatically performed by a configured function (alarm, park, time task, and power-up). Figure 9: Shadow tour menu TruVision Analog PTZ Camera Configuration Manual 25 Chapter 2: Programming To set a shadow tour: 1. Go to MAIN MENU > SYSTEM SETTINGS > SHADOW TOUR. 2. Move the cursor to SHADOW TOUR NUMBER and click IRIS+ to enter edit mode. 3. Click the up and down buttons to select the number of the shadow tour to be configured. 4. Click IRIS+ again to confirm. Note: You can configure up to four shadow tours. To edit a shadow tour: 1. Go to MAIN MENU > SYSTEM SETTINGS > SHADOW TOUR. 2. Move the cursor to SHADOW TOUR RECORD and click IRIS+ to enter edit mode. 3. Move the cursor to SHADOW TOUR RECORD and click IRIS+ to enter edit mode. 4. Click the PTZ control buttons and direction buttons to pan, tilt, or zoom in/out the PTZ camera to draw a movement path. The PTZ camera can automatically memorize the path you operated as a Shadow Tour. 5. Click IRIS+ again to save the Shadow Tour and exit edit mode. Notes: • REMAINING shows the remaining memory of the PTZ camera to configure the shadow tours. When it reaches 0, no more shadow tours can be configured. You can also see the remaining memory under SHADOW TOUR menu listed under REMAINING. • The panning/tilting movements and the lens operations cannot be memorized simultaneously. To preview a shadow tour: 1. Go to MAIN MENU > SYSTEM SETTINGS > SHADOW TOUR. 2. Move the cursor to PREVIEW SHADOW TOUR. 26 TruVision Analog PTZ Camera Configuration Manual Chapter 2: Programming To call a defined shadow tour: 1. Go to MAIN MENU > SYSTEM SETTINGS > SHADOW TOUR. 2. Using a web browser, select the corresponding preset number from the drop-down list in the control panel of the DVR. Click the arrow to call the related shadow tour. For example, call preset 41 to call shadow tour 1. The corresponding preset number for each Shadow Tour is displayed. To delete a shadow tour: 1. Go to MAIN MENU > SYSTEM SETTINGS > SHADOW TOUR. 2. Move the cursor to CLEAR SHADOW TOUR and click IRIS+ to delete all the defined shadow tours. Or Click IRIS+ to enter RECORD SHADOW TOUR. The text, DEL PATH ABOVE, appears. Click IRIS+ to delete the shadow tour. Note: If you delete the current shadow tour, the next shadow tours are also be deleted. For example, if shadow tour 2 is deleted, shadow tour 3 and shadow tour 4 are also deleted. Schedules and tasks A time task is a scheduled camera action that can be configured to perform automatically at a specific time. See Figure 10 below. Figure 10: Schedule menu To set a task: 1. Go to MAIN MENU > SYSTEM SETTINGS > SCHEDULE. 2. Move the cursor to SCHEDULE NUM and click IRIS+ to enter edit mode 3. Click the up and down buttons to select the task number to be configured. 4. Click IRIS+ again to confirm and exit edit mode of this column. TruVision Analog PTZ Camera Configuration Manual 27 Chapter 2: Programming Note: You can configure up to eight tasks. To set a task status: 1. Go to MAIN MENU > SYSTEM SETTINGS > SCHEDULE. 2. Move the cursor to STATUS and click IRIS+ to enter edit mode 3. Click the up and down buttons to set the task status to ON. 4. Click IRIS+ again to confirm and exit edit mode of this column. To set a task action: 1. Go to MAIN MENU > SYSTEM SETTINGS > SCHEDULE. 2. Move the cursor to ACTION and click IRIS+ to enter edit mode 3. Click the up and down buttons to select a task action from the list: Preset 1-8, Shadow Tour 1-4, Preset Tour 1-8, Panning scan, Tilting scan, Random scan, Frame scan, Panoramic scan, Day mode, Night mode, Zero calibr or None. 4. Click IRIS+ again to confirm and exit edit mode of this column. To set a task time: 1. Go to MAIN MENU > SYSTEM SETTINGS > SCHEDULE. 2. Move the cursor to TIME and click IRIS+ to enter edit mode 3. Click the up and down buttons to position the cursor at WEEK, START (H-M) and END (H-M). Note: The weekday can be set to be from Monday to Sunday, or Whole Week. 4. Click the up and down buttons to select the specific day and time. 5. Click IRIS+ to confirm and exit. 28 TruVision Analog PTZ Camera Configuration Manual Chapter 2: Programming To delete a task: 1. Go to MAIN MENU > SYSTEM SETTINGS > SCHEDULE. 2. Move the cursor to CLEAR and click IRIS+ to delete the time and action of the current task. Zones A zone is a pan and tilt area defined by the left/right and up/down limit stops. You can configure the zones in the ZONES submenu. Zones are useful when the targeted surveillance scene is a limited area. See Figure 11 below. Figure 11: Zones menu To set a zone number: 1. Go to MAIN MENU > SYSTEM SETTINGS > ZONES. 2. Move the cursor to ZONE NUM and click IRIS+ to enter. 3. Click the up and down buttons to select the zone number to be configured. Note: You can configure up to eight zones. To edit a zone label: See “To edit a preset label” under “Presets” on page 21 To set a zone area: 1. Go to MAIN MENU > SYSTEM SETTINGS > ZONES. 2. Move the cursor to EDIT ZONE and click IRIS+ to enter. SET LEFT LIMIT appears on screen. 3. Click the direction buttons to set the left limit stop. 4. Follow the prompts on screen to set the right limit, up limit, and down limit. 5. Click IRIS+ to save the settings and exit. TruVision Analog PTZ Camera Configuration Manual 29 Chapter 2: Programming To set a zone status and scan status: 1. Go to MAIN MENU > SYSTEM SETTINGS > ZONES. 2. Move the cursor to the function and click IRIS+ to enter. Select the function: ZONE STATUS: Enable/disable the current status of the zone. SCAN STATUS: Enable/disable the scanning in the zone. Note: ZONE STATUS cannot be changed. When you have edited a zone, it switches to ON automatically. If the zone is deleted, the ZONE STATUS switches to OFF. To clear the zone settings: 1. Go to MAIN MENU > SYSTEM SETTINGS > ZONES. 2. Move the cursor to CLEAR ZONE and click IRIS+ to clear all the settings of the current zone. Clear PTZ control settings You can clear all user-defined PTZ control settings, including presets, preset tours, shadow tours, zones, and time tasks. You can also clear privacy masks from this menu. See Figure 12 below. Figure 12: Clear PTZ settings menu To clear PTZ settings: 1. Go to MAIN MENU > SYSTEM SETTINGS > CLEAR SETTINGS. 2. Click IRIS+ on each submenu to be deleted. For example, CLEAR SHADOW TOURS. 3. Click IRIS+ again to confirm and exit. 30 TruVision Analog PTZ Camera Configuration Manual Chapter 2: Programming Alarms Alarm inputs and linked actions This section explains how to configure the PTZ camera to respond to alarm events with alarm linked actions, such as calling presets, Preset Tours, Shadow Tours, scanning, etc. See Figure 13 below. Figure 13: Alarm settings menu To select an alarm number: 1. Go to MAIN MENU > SYSTEM SETTINGS > ALARM > ALARM SETTINGS. 2. Move the cursor to ALARM NUM and click IRIS+ to enter edit mode. 3. Click the up and down buttons to select the alarm number to be configured. 4. Click IRIS+ again to confirm and exit edit mode. Note: You can configure up to seven alarms. To set an alarm input: 1. Go to MAIN MENU > SYSTEM SETTINGS > ALARM > ALARM SETTINGS. 2. Move the cursor to ALARM INPUT and click IRIS+ to enter edit mode. 3. Click the up and down buttons to set the input status. Select OPEN (Normally open), CLOSE (Normally closed), or N/O (disable the alarm input). 4. Click IRIS+ again to confirm. Note: If the status is set to OPEN, an alarm is triggered by a high voltage level. If the status is set to CLOSE, alarm is triggered by low voltage level. If the status is set to OFF, it is triggered when the input channel is shut off. To configure the alarm linkage action: You can specify the linked action when an alarm occurs. On the TRIGGER ACTION submenu, set the alarm action as preset 1-8, shadow tour 1-4, preset tour 1-8, panning TruVision Analog PTZ Camera Configuration Manual 31 Chapter 2: Programming scan, tilting scan, random scan, frame scan, panoramic scan, day mode, night mode, or none. You can also set the alarm output for the alarm. To configure an alarm priority. 1. Go to MAIN MENU > SYSTEM SETTINGS > ALARM > ALARM SETTINGS. 2. Move the cursor to PRIORITY and click IRIS+ to enter edit mode. 3. Set the alarm priority as HIGH, MIDDLE or LOW. If multiple alarms with different priorities are triggered at the same time, the PTZ camera only responds to the alarm with the highest priority. If multiple alarms with the same priority are triggered at the same time, then the PTZ camera responds to each alarm according to the defined alarm sequence. Alarm parameters Set the alarm related parameters as described below for linkage action interval, alarm duration and camera activity resumption. To configure alarm parameters: 1. Go to MAIN MENU > SYSTEM SETTINGS > ALARM. To configure the interval of the alarm sequence: When more than one alarm of the same priority occurs at the same time, the PTZ camera responds to one alarm first and then responds to the next one after the user-defined interval. Set the interval in the ALARM SEQUENCE submenu. The value can range between 1 and 200 seconds. To configure the alarm rest delay: If there a linkage action has already been triggered by an alarm input, the PTZ camera only responds to the input from the same channel again after the user-defined reset delay time. This is the rest time that the PTZ camera considers an alarm to be active when it is physically cleared. Set the interval in the ALARM DELAY submenu. The value can range between 0 and 250 seconds To resume camera activity: Set ALARM RESUME to ON to enable the PTZ camera to resume its previous activity after the triggered actions has finished. Notes: If the PTZ camera is moving when a linkage action is triggered, it stops at the current position and resumes from this position once the linkage action is finished. The PTZ camera can be configured to resume the PTZ positions, focus and iris value. Auxiliary alarm output An auxiliary output is a configurable alarm output interface on the PTZ camera back box which can connect and trigger another alarm device to operate. See 32 TruVision Analog PTZ Camera Configuration Manual Chapter 2: Programming Figure 14: Aux menu To configure an alarm priority: 1. Go to MAIN MENU > SYSTEM SETTINGS > AUX. 2. Move the cursor to AUX1 and click IRIS+ to enter edit mode. Note: Two auxiliary outputs can be configured. 3. Set the alarm output type as OPEN (normally open) and CLOSE (normally closed). 4. Move the cursor to DWELL TIME. Set the duration of the auxiliary output signal. Select a value between 0 and 60 seconds. 5. Link the auxiliary output to the configured alarm. Enter MAIN MENU > CAMERA SETTINGS > ALARM > ALARM SETTING. Select the alarm number to which to link the auxiliary output. Move the cursor to AUX and click IRIS+ to configure the auxiliary output to the alarm. Select NONE to disable auxiliary alarm outputs, 1 to activate AUX 1, or 2 to activate AUX 2. Password You can change as well as enable/disable the password to set the camera authentication to prevent unauthorized changes to the camera settings. After you set and enable the password, you need to enter the password each time you call preset 95 to enter the menu. See Figure 15 on page 34. TruVision Analog PTZ Camera Configuration Manual 33 Chapter 2: Programming Figure 15: Password menu To set a password: 1. Go to MAIN MENU > SYSTEM SETTINGS > PASSWORD > EDIT PASSWORD. 2. Click IRIS+ to enter edit mode. 3. Click the left/right buttons to move the cursor on the current password, and click up/down or FOCUS IN/OUT buttons to select the number. 4. Click the right button to move the cursor to SELECT AGAIN and input the password again. 5. Click IRIS+ to save the changes and exit. 6. Enter the PASSWORD ENABLE submenu and switch the status to ON and click IRIS+ to save. Tracking settings You can enable tracking to track the person in the image. See Figure 16 below. Figure 16: Tracking menu 34 TruVision Analog PTZ Camera Configuration Manual Chapter 2: Programming To set tracking: 1. Go to MAIN MENU > SYSTEM SETTINGS > TRACKING. 2. Click IRIS+ to enter edit mode. 3. Move the cursor on ENABLE TRACKING and click up/down buttons to enable tracking. 4. Click the right button to move the cursor to TRACKING ZOOM and click IRIS+. 5. Click ZOOM+ or ZOOM- to change the zoom you want. 6. Click IRIS+ to save the changes. Restore default camera settings You can reset all camera settings to factory default parameters. Note: Camera settings are mainly of PTZ parameters and alarm parameters, and also include some system settings, e.g. camera address. To restore default settings: 1. Go to MAIN MENU > RESET CAMERA. 2. Click IRIS+ to restore the camera settings to the default value or click IRIS- to exit. Reboot the camera Enter MAIN MENU > REBOOT SYSTEM and click IRIS+ to reboot the PTZ camera remotely. TruVision Analog PTZ Camera Configuration Manual 35 KTD-405 and DVR control feature list Features KTD-405 DVR Joystick up down left right Y Y Joystick up-left up-right down-left downright Y N/A Y Y ZOOM+/ZOOM- Y Y FOCUS+/FOCUS- Y Y IRIS+/IRIS- Y Y Auto focus Y N/A Calling presets: find Y Y Store presets: store Y Y Store shadow tour: None N/A Y Calling shadow tour: tour Y Y Joystick ZOOM+/ZOOM- Notes: 1. If the DVR’s RS-485 baud rate is 2400 or 4800, saving and calling shadow tours are not supported. 2. AUX 1 and AUX2 of KTD-405 is used to open and close the OSD menu.