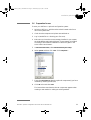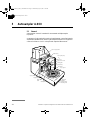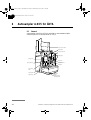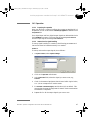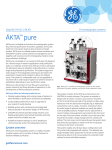
1
18117446AA_FPLC_OPTCONF.book Page 1 Wednesday, July 2, 2003 7:58 PM
Optional Configurations
ÄKTA FPLC
User Manual
18-1174-46
18117446AA_FPLC_OPTCONF.book Page 2 Wednesday, July 2, 2003 7:58 PM
18117446AA_FPLC_OPTCONF.book Page 3 Wednesday, July 2, 2003 7:58 PM
Important user information
Trademarks
All users must read this manual to fully understand the
safe use of the components.
FPLC, Superloop, UNICORN, ÄKTA, ÄKTAexplorer,
ÄKTAbasic, ÄKTApurifier, and ÄKTAFPLC are
trademarks of Amersham Biosciences Limited.
Amersham and Amersham Biosciences are trademarks
of Amersham plc.
WARNING!
The WARNING! sign highlights instructions
that must be followed to avoid personal injury.
Do not proceed until all stated conditions are
clearly understood and met.
Office Addresses
Amersham Biosciences AB
SE-751 84 Uppsala
Sweden
Caution!
The Caution! sign highlights instructions that
must be followed to avoid damage to the
product or other equipment. Do not proceed
until all stated conditions are clearly
understood and met.
Amersham Biosciences UK Limited
Amersham Place
Little Chalfont
Buckinghamshire
England HP7 9NA
Amersham Biosciences Corp.
Note
The Note sign is used to indicate information
important for trouble-free and optimal use of
the product.
800 Centennial Avenue
PO Box 1327
Piscataway NJ 08855
USA
Amersham Biosciences Europe GmbH
Terms and Conditions of Sale
Unless otherwise agreed in writing, all goods and
services are sold subject to the terms and conditions of
sale of the company within the Amersham Biosciences
group which supplies them. A copy of these terms and
conditions is available on request.
Should you have any comments on this product, we will
be pleased to receive them at:
Amersham Biosciences AB
SE-751 84 Uppsala
Sweden
Munzinger Strasse 9
D-79111 Freiburg
Germany
Amersham Biosciences K.K.
Sanken Building
3-25-1 Hyakunincho, Shinjuku-ku
Tokyo 169–0073
Japan
Amersham Biosciences Limited
13/F., Tower I
Ever Gain Plaza
88 Container Port Road
Kwai Chung, New Territories
Hong Kong
www.amershambiosciences.com
© Copyright Amersham Biosciences AB 2003
- All rights reserved
ÄKTAFPLC
User Manual 18-1174-46 Edition AA
18117446AA_FPLC_OPTCONF.book Page 4 Wednesday, July 2, 2003 7:58 PM
18117446AA_FPLC_OPTCONF.book Page 5 Wednesday, July 2, 2003 7:58 PM
Contents
1
Introduction
1.1
1.2
1.3
1.4
2
Installation guidelines
2.1
2.2
2.3
2.4
2.5
2.6
3
Generals .............................................................................. 27
Installation .......................................................................... 28
Operation ............................................................................. 29
General ................................................................................
Autosampler A-900 with Cooling ...........................................
Installation ...........................................................................
General preparation .............................................................
Operation .............................................................................
32
34
35
39
42
Autosampler A-905 for ÄKTA
6.1
6.2
6.3
6.4
7
General ................................................................................ 23
Installation ........................................................................... 23
Operation ............................................................................. 25
Autosampler A-900
5.1
5.2
5.3
5.4
5.5
6
17
17
17
18
20
21
Fraction collector Frac-950
4.1
4.2
4.3
5
General ................................................................................
Unpacking ...........................................................................
Pre-requisites .......................................................................
Principle installation of components ......................................
Components instruction overview ..........................................
Preparation for use ...............................................................
Fraction collector Frac-901
3.1
3.2
3.3
4
General .................................................................................. 9
Scope of manual .................................................................. 10
Summary of optional configurations ...................................... 11
Safety .................................................................................. 16
General ................................................................................
Installation ...........................................................................
General preparation .............................................................
Operation .............................................................................
46
47
51
53
Outlet valve
7.1
7.2
Installation ........................................................................... 54
Operation ............................................................................. 55
ÄKTAFPLC Optional Configurations User Manual 18-1174-46 Edition AA
5
18117446AA_FPLC_OPTCONF.book Page 6 Wednesday, July 2, 2003 7:58 PM
8
Column selection valves
8.1
8.2
9
Installation .......................................................................... 56
Operation ............................................................................. 57
Buffer selection valves
9.1
9.2
Installation .......................................................................... 58
Operation ............................................................................. 59
10 General function valve
10.1 Installation ........................................................................... 60
10.2 Operation ............................................................................. 61
11 pH flow cell and pH electrode mounting
11.1 General ................................................................................ 63
11.2 Installation ........................................................................... 63
11.3 Operation ............................................................................. 65
12 Sample pump P-960 and sample valve
12.1
12.2
12.3
12.4
12.5
General ................................................................................
Installing the components ....................................................
Loading a sample loop .........................................................
Direct loading onto the column .............................................
Loading a Superloop ............................................................
66
68
70
76
82
13 Air sensors
13.1 General ................................................................................ 87
13.2 Installation ........................................................................... 88
13.3 Operation ............................................................................. 92
14 Auxiliary equipment controlled via
Pump P-920 REMOTE connector
14.1 Installation ........................................................................... 96
14.2 Operation ............................................................................. 97
15 AD-900
15.1 General ................................................................................ 99
15.2 Installation ........................................................................... 99
15.3 Operation ........................................................................... 100
16 Superloop
16.1 Preparation ........................................................................ 102
16.2 Filling Superloop ................................................................ 103
6
ÄKTAFPLC Optional Configurations User Manual 18-1174-46 Edition AA
18117446AA_FPLC_OPTCONF.book Page 7 Wednesday, July 2, 2003 7:58 PM
17 Configuration dependent delay volume
17.1 Standard configuration ....................................................... 104
17.2 Optional configuration ........................................................ 104
17.3 Component and capillary volumes ...................................... 105
18 Strategies and Method Wizard
18.1 Strategies overview ............................................................. 106
18.2 Method Wizard ................................................................... 107
19 Accessories and consumables
19.1 Connections, chromatography – standard selection ............. 109
19.2 Optional components and consumables ............................ 110
Index
ÄKTAFPLC Optional Configurations User Manual 18-1174-46 Edition AA
7
18117446AA_FPLC_OPTCONF.book Page 8 Wednesday, July 2, 2003 7:58 PM
8
ÄKTAFPLC Optional Configurations User Manual 18-1174-46 Edition AA
18117446AA_FPLC_OPTCONF.book Page 9 Wednesday, July 2, 2003 7:58 PM
1
Introduction
1 Introduction
1.1 General
ÄKTA™FPLC standard system configurations can be changed to
optional configurations. This flexibility in ÄKTAFPLC™ system
strategies allows the user to enhance already used purification methods
and also to develop new, more complex methods.
3
IV/PV-908
INV-907
When optional equipment is connected to a standard chromatographic
system, new sets of instructions to control the optional equipment
become accessible for the user.
Optional configurations are selected, installed and put into operation
by the user. An optional configuration consists of both hardware
components and software instructions.
Optional configurations are monitored and controlled via methods run
by the UNICORN™ control system in the same way as ÄKTAFPLC
standard system configurations.
ÄKTAFPLC Optional Configurations User Manual 18-1174-46 Edition AA
9
18117446AA_FPLC_OPTCONF.book Page 10 Wednesday, July 2, 2003 7:58 PM
1
Introduction
Optional configurations are shown in the flow scheme displayed in the
System Control in UNICORN. Components used in an optional
configuration are highlighted in the flow scheme, whereas components
not installed are hidden. The status of the components is also shown,
e.g., valve position.
Note: The actual location of, for example, an optional valve is not
shown in its proper flow path position. This must be taken into
account by the user. However, a new flow path picture can be
ordered with the optional configuration parts included, and
installed together with the additional software to reflect the
optional system configuration.
Generally speaking, there are two types of optional configurations.
Completely user-defined configurations and dedicated configurations
partially pre-defined and prepared at the factory, requiring user actions
in their final implementation.
Components used in completely user-defined configurations are
designated with general alpha-numeric position tags. For example,
Valve8 refers to the valve corresponding to the component identity code
8 in UNICORN.
Components used in dedicated configurations are referred to in plain
language, e.g. OutletValve, which is the same designation as the actual
instruction name used in UNICORN.
1.2 Scope of manual
To support the process of implementing optional configurations,
general guidelines regarding installation and operation are given in this
manual.
For specific information regarding function, maintenance, troubleshooting and spare parts, refer to the User Manual and/or Instruction
for the respective component, as well as the System Manual for your
ÄKTAFPLC system.
This manual is divided into a number of main sections reflecting the
optional configurations available for ÄKTAFPLC system.
Select the main section describing the installation and operation of the
optional configuration you have decided to use.
On the back page, there is a short instruction giving guidelines for the
general steps in adding and removing optional configurations to your
ÄKTAFPLC system.
10
ÄKTAFPLC Optional Configurations User Manual 18-1174-46 Edition AA
18117446AA_FPLC_OPTCONF.book Page 11 Wednesday, July 2, 2003 7:58 PM
1
Introduction
1.3 Summary of optional configurations
An overview of all optional configurations available for ÄKTAFPLC is
summarized below.
Optional configurations supported by ÄKTAFPLC are:
• Connecting Fraction collector Frac-901.
• Connecting Fraction collector Frac-950.
• Connecting Autosampler A-900 (and A-900 with Cooling) and
Autosampler A-905.
•
Connecting up to 8 motorized multi-port valves. These valves can
be used to accomplish the following functions:
• Column selection.
• Outlet diversion.
• Buffer selection.
• General function. The actual use is completely user-defined. For
example, they can be used as a reversed flow valve or a sample
selection valve.
• Connecting sample pump P-960.
• Connecting up to four air sensors.
•
Connecting external equipment using digital input/output signals
through the system pump P-920 REMOTE connector.
•
Connecting AD-900.
•
Connecting a Superloop™.
•
An extra rack panel is available as an accessory to accommodate
optional equipment.
1.3.1 Fraction collector Frac-901
Fraction collector Frac-901 is an automated fraction collector for use
in ÄKTAFPLC chromatography systems under UNICORN control. The
functionality and performance is aimed for mid-range usage.
ÄKTAFPLC Optional Configurations User Manual 18-1174-46 Edition AA
11
18117446AA_FPLC_OPTCONF.book Page 12 Wednesday, July 2, 2003 7:58 PM
1
Introduction
1.3.2 Fraction collector Frac-950
Fraction collector Frac-950 is an automated fraction collector for use
in ÄKTAFPLC chromatography systems under UNICORN control. The
functionality and performance is aimed for high-end usage.
1.3.3 Autosampler A-900 and Autosampler A-905
Autosampler A-900 used in ÄKTAFPLC enables:
• Automated multiple sample injections from 1 µl to 1 ml of sample
solution.
• Sample stored in tubes in a circular, rotating rack.
• Quantification of amount, concentration and molecular size
• External standard quantification.
• Internal standard quantification.
• Standard addition.
• Recovery calculations.
• Molecule size calculations.
Quantification uses peak data from standards to produce
calibration curves which can then be used to evaluate the amount
and concentration of components in a sample. The molecular size
function determines the molecular size of components in a sample
using a molecular size curve prepared from one or more standards.
Note:
Quantification requires additional software not included in
the standard package of Autosampler A-900.
Autosampler A-900 with Cooling provides internal cooling of the
sample solutions.
Autosampler A-905 used in ÄKTAFPLC enables:
• Automated multiple sample injections from a few microliters up to
1 ml of sample solution.
• Sample stored in microplates, thus allowing samples collected in
microplates in Frac-950 to be used directly in A-905.
Autosampler A-905 also provide cooling of the sample solutions.
12
ÄKTAFPLC Optional Configurations User Manual 18-1174-46 Edition AA
18117446AA_FPLC_OPTCONF.book Page 13 Wednesday, July 2, 2003 7:58 PM
1
Introduction
1.3.4 Valves
• Five PV/IV-908 valves can be connected as dedicated function
valves. These valves are used as follows:
• Two PV-908 rotary valves used in conjunction to switch
between multiple columns. The valves are controlled
synchronously by one common instruction.
• One PV-908 rotary valve used to divert between waste and seven
positions; to collect flow-through, or to collect seven large
fractions.
• One or two IV-908 rotary valves for buffer selection. Used to
switch between different buffer solutions.
•
Three optional valves, freely selected from INV-907, a seven-port,
three way valve that can be used, for example, as a reversed flow
valve or a second injection valve, and IV/PV-908 valves, which are
eight-port rotary valves with different pressure limits and internal
flow path diameters.
1.3.5 Sample pump P-960
Sample pump P-960 is a single-channel laboratory pump which can be
connected to accomplish automatic sample application when using the
same sample several times. It can also be used to apply samples directly
on the column or for filling sample loops (including Superloop).
Pump P-960 uses plungers and check valves for transporting the liquid.
Its flow rate is controlled and the pump pressure monitored from
UNICORN.
The sample pump is commonly used in combination with a multiport
motorized valve PV-908 to enable automatic sample application of
several different samples.
ÄKTAFPLC Optional Configurations User Manual 18-1174-46 Edition AA
13
18117446AA_FPLC_OPTCONF.book Page 14 Wednesday, July 2, 2003 7:58 PM
1
Introduction
1.3.6 Air sensors
The use and location of the air sensors is user-defined. For example:
• One air cell can be used to detect air when automatic sample
application using P-960 is performed.
• One air cell can be used to detect air when applying large amounts
of sample with the system pump.
There are four types of air cells available. They are designated Air-912,
Air-912N, Air-925 and Air-925N and differ in inner diameter. This
makes them suitable to use with different sizes of capillary.
Air-912 has a smaller inner diameter and is suitable to use in the P-960
sample flow path.
Air-925 has a larger inner diameter and is suitable to use in the inlet
flow path to the system pump P-920.
Air-912N and Air-925N can be connected directly to P-960.
Up to four detection points can be used in the process flow path. The
detectors are designated AS1, AS2, AS3, and ASP960 in the flow
scheme.
1.3.7 Auxiliary equipment via Pump P-920 REMOTE connection
The system pump P-920 is provided with a digital input/output
connection comprising four output and four input channels. The
channels are opto-isolated and accept standard TTL-level signals.
Examples of use include:
• External alarm input/output.
• Start/stop of external equipment.
1.3.8 AD-900
AD-900 is an A/D-converter for connecting an external instrument to
the ÄKTAFPLC system.
The module has one high resolution analogue input for monitoring e.g.
pressure, UV monitor signals or other signals available as voltage
outputs.
1.3.9 Superloop
Superloop permits the introduction of larger volumes of sample
(1–150 ml) onto the column.
14
ÄKTAFPLC Optional Configurations User Manual 18-1174-46 Edition AA
18117446AA_FPLC_OPTCONF.book Page 15 Wednesday, July 2, 2003 7:58 PM
1
Introduction
1.3.10 Extra rack panel
The extra rack panel is positioned on the vertical rods in the free space
between the lower and upper part of the system rack when the upper
part is raised to a higher position
Locking screws
Extra rack panel
for mounting
optional equipment
ÄKTAFPLC Optional Configurations User Manual 18-1174-46 Edition AA
15
18117446AA_FPLC_OPTCONF.book Page 16 Wednesday, July 2, 2003 7:58 PM
1
Introduction
1.4 Safety
• The components are designed for indoor use only.
• Do not use in a dusty atmosphere or close to spraying water.
• Operate in accordance with local safety instructions.
WARNING! When using hazardous chemicals, all suitable protective
measures, such as protective glasses, must be taken.
WARNING! Ensure that the entire chromatographic system has been
flushed thoroughly with distilled water before removing any capillaries
or components.
WARNING! Always disconnect the power supply before attempting to
replace any item on the equipment during maintenance.
WARNING! If there is a risk that large volumes of spilt liquid may
penetrate the casing of the equipment and come into contact with the
electrical components, immediately switch off the chromatographic
system and contact an authorized service technician.
WARNING! Superloop 10 ml and Superloop 50 ml must not be used
at pressures above 4 MPa (40 bar, 580 psi). Superloop 150 ml must
not be used above 2 MPa (20 bar, 290 psi). At higher pressures, the
glass tube may shatter.
CAUTION! Make sure ÄKTAFPLC is switched off before installing the
optional components. The mains power to ÄKTAFPLC must be
switched OFF before disconnecting or connecting the UniNet-1 and
UniNet-2 cables.
16
ÄKTAFPLC Optional Configurations User Manual 18-1174-46 Edition AA
18117446AA_FPLC_OPTCONF.book Page 17 Wednesday, July 2, 2003 7:58 PM
2
Installation guidelines
2 Installation guidelines
2.1 General
To use optional equipment in a chromatographic run, suitable
instructions is selected in the Method Wizard when creating a new
method. The general procedures for creating and editing methods are
described in the UNICORN User Manuals.
Note: The system configuration delay volume must be recalculated and
reset when the standard configuration after the UV flow cell is
changed. Details are given in section 17 Configuration
dependent delay volume.
2.2 Unpacking
Unpack the optional components and check against the supplied
packing list. Inspect the items for obvious damage that may have
occurred during transportation.
CAUTION! Read the following information carefully, as well as all the
additional instructions supplied with the components, to ensure that
the ÄKTAFPLC optional equipment is installed correctly.
2.3 Pre-requisites
• UNICORN version 4.12 or higher must be installed in the
computer connected to your ÄKTAFPLC system.
• ÄKTAFPLC must be installed and fully tested before the optional
components are installed. See the Installation Guide for your
ÄKTAFPLC chromatography system.
WARNING! Ensure that the entire system has been flushed
thoroughly with distilled water before removing any capillaries or
components.
CAUTION! Make sure ÄKTAFPLC is switched off before installing the
optional components. The mains power to ÄKTAFPLC must be
switched OFF before disconnecting or connecting the UniNet-1 and
UniNet-2 cables.
ÄKTAFPLC Optional Configurations User Manual 18-1174-46 Edition AA
17
18117446AA_FPLC_OPTCONF.book Page 18 Wednesday, July 2, 2003 7:58 PM
2
Installation guidelines
2.4 Principle installation of components
CAUTION! Make sure ÄKTAFPLC is switched off before installing the
optional components. The mains power to ÄKTAFPLC must be
switched OFF before disconnecting or connecting the UniNet-1 and
UniNet-2 cables.
Optional equipment can be mounted on the system rack with the rack
door closed or open. Both the inside and the outside are provided with
mounting rails for quick mounting of components.
The upper part of the system rack can be raised and locked with screws
in optional positions along its vertical rods. This is practical when using
long columns.
When selecting mounting location for the optional equipment it is
important to choose a location which minimize the length of the
capillaries used to connect the optional components to the rest of the
system.
Many components that are attached to the mounting rails uses a snapin bracket. The bracket is supplied separately with the component and
needs to be fitted as shown below before the component can be
attached.
2. Fit the attached
mounting bracket with
the two screws
Inserting components
1. Loosen the
two screws
Removing components
Capillaries are connected using unions as specified in
chapter 19 Accessories and consumables.
18
ÄKTAFPLC Optional Configurations User Manual 18-1174-46 Edition AA
18117446AA_FPLC_OPTCONF.book Page 19 Wednesday, July 2, 2003 7:58 PM
2
Installation guidelines
All valves have a unique ID code which identifies
them to the UNICORN control system at system
start-up. This ID code should be checked before
installation.
The ID codes for the different function valves and the
corresponding instructions used in UNICORN to
control them are as follows:
Valve function
ID code
Valve type
Instruction in UNICORN
Sample injection
1
INV-907
InjectionValve
Column selection
2
PV-908
Column selection
3
PV-908
ColumnPosition
(combined instruction
controlling both valves)
Outlet fractionation
4
PV-908
OutletValve,
OutletFractions (two
instructions used for
controlling different type
of fractionation functions)
Buffer selection A
5
IV-908
BufferValveA
Buffer selection B
6
IV-908
BufferValveB
Optional function
7
INV-907,
IV/PV-908
Valve7
Optional function
8
INV-907,
IV/PV-908
Valve8
Optional function
9
INV-907,
IV/PV-908
Valve9
Components are connected to the UNICORN control system using
either UniNet-1 or UniNet-2 cables*. Both the UniNet-1 and the
UniNet-2 data communication chain in standard configuration is
routed from the rear of P-920 via their respective components to the
last component in the chain where it is terminated with a plug.
Note: When Pump P-960 is used, it is always installed as the last
component in the UniNet-2 chain. Since the pump has an
internal termination, no termination plug is needed.
*
Frac-901, Frac-950, A-900 and A-905 are connected via the UniNet-1
chain. All other optional components are connected via the UniNet-2 chain.
ÄKTAFPLC Optional Configurations User Manual 18-1174-46 Edition AA
19
18117446AA_FPLC_OPTCONF.book Page 20 Wednesday, July 2, 2003 7:58 PM
2
Installation guidelines
Both the UniNet-1 and the UniNet-2 chain can be interrupted
anywhere between P-920 and the termination plug to interconnect the
optional components in the chain. The termination plug can be moved
to the last component (furthest away from P-920), if motivated by cable
routing considerations.
Optical
Unit
Conductivity
Flow Cell
To PC
controller board
Analogue
out 0-1 V
UniNet 1
pH-GroundpH-Probe
Mains
Lamp
Voltage
Frequency Power, max
100-200 V- 50-60 Hz
30 VA
Pressure
Analogue out 0-1 V
Remote
UniNet 2
UniNet 2
chain
UniNet 1
Fraction
collector
Mains output
Leakage current, max
3,5 mA
PC running UNICORN
Mains
Voltage
Frequency Power, max Fuse
100-200 V- 50-60 Hz
600 VA
T 6,3 AL
5
4
9
3
8
2
7
1
6
WARNING! For continued protection against
risk of fire, replace only woth fuse
of the specified type and current ratings
Termination
plug
UniNet 1
2.5 Components instruction overview
UNICORN must be informed about the insertion of an optional
component. This is known as selecting the component, which makes its
corresponding instructions available.
To print a list of the general instructions, and the instructions
corresponding to the selected components:
20
1
In the Method Editor, select File:Print.
2
Check the Instruction set box and clear the other boxes.
3
Click OK to print the instructions.
ÄKTAFPLC Optional Configurations User Manual 18-1174-46 Edition AA
18117446AA_FPLC_OPTCONF.book Page 21 Wednesday, July 2, 2003 7:58 PM
2
Installation guidelines
2.6 Preparation for use
To start your ÄKTAFPLC optional configuration system:
1
Switch on ÄKTAFPLC with the mains switch located at the front
left on the system base.
2
Check that the computer and printer are switched on.
3
Log in (see ÄKTAFPLC Making your first runs).
4
Make sure you have the correct strategy installed in your system,
see 18 Strategies and Method Wizard. A new strategy is installed
according to the software installation instructions given in the
UNICORN User Manuals.
5
In UNICORN Main Menu, select Administration:System Setup.
6
Select System and then click Edit. Click Component...
7
From the Component list, select the optional component(s) you have
installed by checking the box(es).
8
Click OK twice and then Close.
The instructions associated to the new component appears when
creating a new method or editing an existing method.
ÄKTAFPLC Optional Configurations User Manual 18-1174-46 Edition AA
21
18117446AA_FPLC_OPTCONF.book Page 22 Wednesday, July 2, 2003 7:58 PM
2
Installation guidelines
9
The correct tubing dimension for the column you intend to use
must be installed. For most columns, the standard tubing
(0.50 mm i.d., PEEK, orange) can be used. In complex
configurations using high flow rates, it may be necessary to replace
the standard 0.50 mm i.d. PEEK tubing with 0.75 mm i.d. PEEK
tubing.
Note: If tubing with too large inner diameter is used, the peaks will
become broader than necessary. If tubing with too small inner
diameter is used, the back-pressure from the tubing might
become higher than the maximum pressure for the column and
the run will stop immediately after it is started.
22
ÄKTAFPLC Optional Configurations User Manual 18-1174-46 Edition AA
18117446AA_FPLC_OPTCONF.book Page 23 Wednesday, July 2, 2003 7:58 PM
3
Fraction collector Frac-901
3
Fraction collector Frac-901
3.1 General
Frac-901 can be used for both small scale and preparative scale
purifications with ÄKTAFPLC. It collects up to 175 fractions in 12 mm
diameter tubes, up to 95 fractions in 10–18 mm diameter tubes, and up
to 40 fractions in 30 mm diameter tubes.
Frac-901 allows fixed volume fractionation or automatic peak
fractionation. The latter function is based on peak detection using slope
or level sensing. Fraction marks and fraction numbers make it easy to
identify fractions and peaks. Drop synchronization eliminates sample
loss below flow rates of 3 ml/min during tube change.
3.2 Installation
1
Unpack and assemble Frac-901 according to the instructions given
in the Fraction Collector Frac-900/901 User Manual.
2
Place Frac-901 to the right of the system.
On-line filter
Injection
valve (V1)
17
2
6
34 5
Pump A Pump B
UV
COND
A
B
W2
Flow restrictor
Column
Mixer
Switch valve
W1
Fraction
collector
Frac-901
3
4
Connect a tubing from the outlet of
the flow restrictor to the IN port on
the flow diversion valve.
Connect a tubing from the NC
(normally closed) port on the flow
diversion valve to the delivery arm
on Frac-901. Follow the
instructions given in the
Frac-900/901 User Manual.
ÄKTAFPLC Optional Configurations User Manual 18-1174-46 Edition AA
W3
To delivery
arm (NC)
From flow
restrictor (IN)
To waste
(NO)
23
18117446AA_FPLC_OPTCONF.book Page 24 Wednesday, July 2, 2003 7:58 PM
3
Fraction collector Frac-901
34
5
Connect a tubing from the NO (normally open) port on the flow
diversion valve to waste.
6
Extend the drain tubing from Frac-901 (34) to a suitable waste
bottle.
7
Modify the UniNet-1 data communication chain by:
• Connecting a UniNet-1 cable between Pump P-920 and
Frac-901.
• Connecting a termination plug in the other UniNet-1 connector
in Frac-901.
Optical
Unit
Conductivity
Flow Cell
To PC
controller board
Analogue
out 0-1 V
UniNet 1
pH-GroundpH-Probe
Mains
Lamp
Voltage
Frequency Power, max
100-200 V- 50-60 Hz
30 VA
Pressure
Analogue out 0-1 V
Remote
UniNet 2
Fraction
collector
UniNet 2
chain
UniNet 1
Mains output
Leakage current, max
3,5 mA
1 2
Mains
Voltage
100-200 V-
Frequency Power, max Fuse
50-60 Hz
600 VA
T 6,3 AL
5
4
9
3
8
2
7
1
6
WARNING! For continued protection against
risk of fire, replace only woth fuse
of the specified type and current ratings
Termination
plug
UniNet 1
chain
8
Connect a mains cable supplied between Frac-901 and a mains
socket at the rear of ÄKTAFPLC.
Optical
Unit
Conductivity
Flow Cell
Analogue
out 0-1 V
UniNet 1
pH-GroundpH-Probe
Mains
Lamp
Voltage
Frequency Power, max
100-200 V- 50-60 Hz
30 VA
Pressure
Analogue out 0-1 V
To
UPC-900
Remote
UniNet 2
Free mains
outlet for
optional
equipment
UniNet 1
Mains output
Leakage current, max
3,5 mA
1 2
Mains
Voltage
100-200 V-
Frequency Power, max Fuse
50-60 Hz
600 VA
T 6,3 AL
To
Frac-901
WARNING! For continued protection against
risk of fire, replace only woth fuse
of the specified type and current ratings
From
mains
outlet
24
ÄKTAFPLC Optional Configurations User Manual 18-1174-46 Edition AA
18117446AA_FPLC_OPTCONF.book Page 25 Wednesday, July 2, 2003 7:58 PM
3
Fraction collector Frac-901
3.3 Operation
3.3.1 Preparing for operation
1 Start your ÄKTAFPLC optional configuration system as described in
2.6 Preparation for use.
2
In Method Editor, go to the Instruction field and select Frac.
3
Check out the instructions available for Frac-901 to familiarize
yourself with the new functions available. Refer also to the Fraction
collector Frac-900/901 User Manual to learn more about using
Frac-901.
3.3.2 Fractionation principles and definitions
Fraction collector Frac-901 is used for flowthrough fractionation
before the elution, and for collecting fixed volumes and/or peak
fractions during elution.
Fixed volume fractionation and peak fractionation can have different
fractionation sizes. If both are activated simultaneously, the size set for
peak fractionation is valid for collecting fractions during peaks and the
size set for fixed volume fractionation is valid for collecting fractions
during elution between peaks.
The instruction Fractionation_900 starts fixed volume fractionation. The
instruction Peak_Fractionation_900 starts peak fractionation.
Fixed volume fractionation is terminated by issuing the command
Fractionation_Stop_900 or by setting the fraction size to zero using the
parameter FracSize. This will not terminate peak fractionation if the
two are used simultaneously.
Peak fractionation is terminated by issuing the command
Peak_FracStop_900 or by setting the peak fraction size to zero using the
parameter PeakSize. This will not terminate fixed volume fractionation
if the two are used simultaneously, even if the command is issued
during a peak.
Tube change should occur (after the set delay volume) if a new
fractionation command is issued during fixed volume or peak
fractionation. The new fixed volume or peak fraction size is used
instantly.
ÄKTAFPLC Optional Configurations User Manual 18-1174-46 Edition AA
25
18117446AA_FPLC_OPTCONF.book Page 26 Wednesday, July 2, 2003 7:58 PM
3
Fraction collector Frac-901
If a new peak fractionation command is issued during fixed volume
fractionation, peak fractionation is valid during peaks, and fixed
volume fractionation before, between and after peaks.
If a new fixed volume fractionation command is issued during peak
fractionation, peak fractionation is valid during peaks and fixed
volume fractionation before, between and after peaks (this means that
the new command becomes effective when the peak is ended).
3.3.3 Using Frac-901 in a method
Set the fraction collector parameters in the Method Wizard when
creating the new method.
•
Flowthrough fractionation and the fractionation volume is
selected in the Wash Out Unbound Sample dialog. During the washout before elution fractionation, a specified volume is collected.
•
Elution fractionation (Fixed Volume Fractionation and/or Peak
Fractionation) is selected in the Elution Fractionation dialog.
If fixed volume fractionation is selected, a fixed volume size set in
this dialog is collected during the complete elution. If peak
fractionation is selected, only the peaks will be collected. If fixed
volume fractionation and peak fractionation is selected, the fixed
volumes will be collected before, between and after the detected
peaks.
•
The peak fractionation parameters are specified in the Peak
Fractionation dialog. Either the level or the slope of the UV curve,
or the signal level from AD-900 (if used) can be used for detecting
a peak.
When using the UV curve level or the AD-900 signal level, the level
for starting and finishing the fractionation, fraction size and
minimum peak width (if not specified a column) should be
specified.
When using the UV curve slope, the slope value for starting and
finishing the fractionation, fraction size and minimum peak width
(if not specified a column) should be specified.
Note: We recommend a maximum flow rate of 3.5 ml/min when using
Frac-901 with the i.d. 0.25 mm tubing kit. At higher flow rates,
the drops will turn to a continuous liquid stream.
26
ÄKTAFPLC Optional Configurations User Manual 18-1174-46 Edition AA
18117446AA_FPLC_OPTCONF.book Page 27 Wednesday, July 2, 2003 7:58 PM
4
Fraction collector Frac-950
4
Fraction collector Frac-950
4.1 Generals
FRAC 950
FRAC 950
Standard mode
Prep mode
Frac-950 can be used for both small scale (standard mode) and
preparative scale (prep mode) purifications with ÄKTAFPLC. Up to 392
fractions can be collected in time or volume base, as fixed volume and/
or peak fractionations.
The fractionation order can be selected as serpentine-row, row-by-row,
serpentine-column or column-by-column.
For standard mode, four sizes of tube racks for tube diameters of 12,
18 and 30 mm tubes, and 96-well microplates are available.
For prep mode, two sizes of racks for tube diameter of 30 mm tubes,
and 250 ml bottles are available. A Funnel-to-flask kit for transporting
the fractions to other vessels is also available. Using Frac-950 in prep
mode requires a dispenser arm specially made for the prep mode racks.
Sample loss during tube change can be eliminated by using drop
synchronisation, or by using a built-in accumulator for intermediate
liquid storage between tube change.
ÄKTAFPLC Optional Configurations User Manual 18-1174-46 Edition AA
27
18117446AA_FPLC_OPTCONF.book Page 28 Wednesday, July 2, 2003 7:58 PM
4
Fraction collector Frac-950
4.2 Installation
CAUTION! Make sure ÄKTAFPLC is switched off before installing the
optional components. The mains power to ÄKTAFPLC must be
switched OFF before disconnecting or connecting the UniNet-1 and
UniNet-2 cables.
1
Unpack and assemble Frac-950 according to the instructions given
in the Fraction Collector Frac-950 User Manual.
• If you are upgrading from Frac-901 to Frac-950,
go to step 2.
• If you are installing Frac-950 for the first time, start from step 6.
2
Disconnect the mains cable from Frac-901.
3
Disconnect the UniNet-1 cables from Frac-901.
4
Disconnect the capillary from the flow restrictor output in
ÄKTAFPLC.
5
Remove Frac-901 from the workbench.
6
Put Frac-950 on the workbench to the right of ÄKTAFPLC.
Note:
Frac-950 requires slightly more space than Frac-901.
On-line filter
Column
Mixer
Injection
valve (V1)
2
6
34 5
Pump A Pump B
UV
COND
A
B
W2
7
28
W1
Flow restrictor
17
Fraction
collector
Frac-950
W3
Locate the capillary kit included with Frac-950 and decide if you
want to include the accumulator in Frac-950 or not (in prep mode
you always use the accumulator). According to your choice,
connect a capillary from the flow restrictor output in ÄKTAFPLC to
Frac-950 as described in the Frac-950 User Manual.
ÄKTAFPLC Optional Configurations User Manual 18-1174-46 Edition AA
18117446AA_FPLC_OPTCONF.book Page 29 Wednesday, July 2, 2003 7:58 PM
4
Fraction collector Frac-950
8
Connect the supplied waste tubing to the waste outlet on Frac-950
and route it to a suitable waste container.
9
Connect the UniNet-1 cable and the termination plug to Frac-950.
10 Connect the mains cable to Frac-950.
11 Check that all capillary and electrical connections have been
carried out correctly.
4.3 Operation
4.3.1 Preparing for operation
1 Start your ÄKTAFPLC optional configuration system as described in
2.6 Preparation for use.
Note:
If you have upgraded from Frac-901, your new Frac-950 is
used in methods in very much the same way as the
previously used Frac-901. However, additional functions
in the form of new instructions and parameters are now
available in the instructions list, and all instructions/
parameters valid for Frac-901 are removed.
2
In System Control, select Manual:Frac.
3
Check out the instructions available for Frac-950 to familiarize
yourself with the new functions available. Refer also to the
Fraction collector Frac-950 User Manual to learn more about using
Frac-950.
4.3.2 Fractionation principles and definitions
Fraction collector Frac-950 is used for flowthrough fractionation
before the elution, and for collecting fixed volumes and/or peak
fractions during elution.
Fixed volume fractionation and peak fractionation can have different
fractionation sizes. If both are activated simultaneuously, the size set
for peak fractionation is valid for collecting fractions during peaks and
the size set for fixed volume fractionation is valid for collecting
fractions during elution before, between and after peaks.
The instruction Fractionation starts fixed volume fractionation. The
instruction PeakFractionation starts peak fractionation.
ÄKTAFPLC Optional Configurations User Manual 18-1174-46 Edition AA
29
18117446AA_FPLC_OPTCONF.book Page 30 Wednesday, July 2, 2003 7:58 PM
4
Fraction collector Frac-950
Fixed volume fractionation is terminated by issuing the command
FractionationStop or by setting the fraction size to zero using the
parameter FracSize. This will not terminate peak fractionation if the
two are used simultaneously.
Peak fractionation is terminated by issuing the command Peak_FracStop
or by setting the peak fraction size to zero using the parameter PeakSize.
This will not terminate fixed volume fractionation if the two are used
simultaneously, even if the command is issued during a peak.
Tube change should occur (after the set delay volume) if a new
fractionation command is issued during fixed volume or peak
fractionation. The new fixed volume or peak fraction size is used
instantly.
If a new peak fractionation command is issued during fixed volume
fractionation, peak fractionation is valid during peaks and fixed
volume fractionation before, between and after peaks.
If a new fixed volume fractionation command is issued during peak
fractionation, peak fractionation is valid during peaks and fixed
volume fractionation before, between and after peaks (this means that
the new command becomes effective when the peak is ended).
If the parameter Start_at is set to Next line or Next group for peak
fractionation and fixed volume fractionation, the fractionation during
the next elution will start at the next line or group.
If the parameter Start_at is set to Next tube, the fractionation starts in the
tube position after the previous fractionation. This is also valid when
starting a new method, i.e. the last fractionation position in the
previous run is stored and used in the next run, even if using another
method. However, if the instruction Reset_position is ordered, or if the
parameter Start_at is set to First tube, the fractionation will take place in
the first position. The position is reset when changing racks as well.
If Last Tube is defined and the fraction collector run out of tubes, an
alarm is generated and the fraction collector goes to waste. If:
•
Continue is ordered, the fraction collector remains in the waste
position.
30
•
Ignore last tube and Continue are ordered, the fraction collector
continues in next tube.
•
a new fractionation command and Continue is ordered, the
fraction collector continues with Start at tube number.
ÄKTAFPLC Optional Configurations User Manual 18-1174-46 Edition AA
18117446AA_FPLC_OPTCONF.book Page 31 Wednesday, July 2, 2003 7:58 PM
4
Fraction collector Frac-950
Note: Before executing a fractionation instruction, the outlet valve
(optional) must manually be set to the position where the
fraction collector is installed.
4.3.3 Using Frac-950 in a method
Set the fraction collector parameters in the Method Wizard when
creating the new method.
•
Flowthrough fractionation and the fractionation volume are
selected in the Frac-950 Settings / Flowthrough Fractionation dialog.
During the wash-out before elution fractionation, a specified
volume is collected.
•
Elution fractionation (Fixed Volume Fractionation and/or Peak
Fractionation) is selected in the Elution Fractionation dialog.
If fixed volume fractionation is selected, a fixed volume size set in
this dialog is collected during the complete elution. If peak
fractionation is selected, only the peaks will be collected. If fixed
volume fractionation and peak fractionation is selected, the fixed
volumes will be collected before, between and after the detected
peaks.
•
The peak fractionation parameters are specified in the Peak
Fractionation dialog. Either the level or the slope of the UV curve,
or the signal level from AD-900 (if used) can be used for detecting
a peak.
When using the UV curve level or the AD-900 signal level, the level
for starting and finishing the fractionation, fraction size and
minimum peak width (if not specified a column) should be
specified.
When using the UV curve slope, the slope value for starting and
finishing the fractionation, fraction size and minimum peak width
(if not specified a column) should be specified.
ÄKTAFPLC Optional Configurations User Manual 18-1174-46 Edition AA
31
18117446AA_FPLC_OPTCONF.book Page 32 Wednesday, July 2, 2003 7:58 PM
5
Autosampler A-900
5
Autosampler A-900
5.1 General
Autosampler A-900 is intended for automated multiple sample
injections.
A sequence of valve switching and syringe dispenser controlled sample
withdrawal enables the A-900 to inject sample volumes in a range from
a few microliters to 1 ml in a simple and reproducible manner.
Cover in open position
Buffer tubing
From system pump
High pressure valve
Tubing guide
Sample loop
Needle arm
Tray segment
Syringe waste
Syringe dispenser
Wash solvent
bottle
Wash position
32
Drain wash
position
Condensed water
and leakage drain
ÄKTAFPLC Optional Configurations User Manual 18-1174-46 Edition AA
18117446AA_FPLC_OPTCONF.book Page 33 Wednesday, July 2, 2003 7:58 PM
5
Autosampler A-900
Three different injection methods can be selected:
•
Flushed loop
The sample loop is completely (quantitatively) filled with sample
resulting in extremely good reproducibility (better than 0.3%).
•
Partial loopfill
The sample loop is partially filled with sample giving low sample
loss and allowing programmable injection volumes.
•
µl pick-up
After aspiration from the vial, the sample volume is transported
into the loop with transport liquid (mobile phase) from another
vial. This eliminates sample loss.
The A-900 uses a syringe to aspirate the sample from a vial into the
sample loop. To prevent contamination of the syringe, the A-900 is
equipped with a buffer tubing between the syringe and the injection
valve.
An integrated washing mechanism removes the sample from the buffer
tubing, and sample needle, and also rinses both components.
ÄKTAFPLC Optional Configurations User Manual 18-1174-46 Edition AA
33
18117446AA_FPLC_OPTCONF.book Page 34 Wednesday, July 2, 2003 7:58 PM
5
Autosampler A-900
5.2 Autosampler A-900 with Cooling
Autosampler A-900 with Cooling is purchased separately. It provides
internal cooling of the sample vials. This is done by a Peltier element
and a fan inside the autosampler, and a plastic hood covering the vials.
Cooling hood
34
ÄKTAFPLC Optional Configurations User Manual 18-1174-46 Edition AA
18117446AA_FPLC_OPTCONF.book Page 35 Wednesday, July 2, 2003 7:58 PM
5
Autosampler A-900
5.3 Installation
5.3.1 Preparations
A–900 needs approximately 28 cm of bench space and a mains
connection of 220-240 V or 100-120 V~, 50/60 Hz, preferably taken
from the ÄKTAFPLC base platform.
The recommended position is to the left of the separation equipment of
ÄKTAFPLC, with approximately 3 cm spacing.
Locking screw
Red cap
A-900 has two transportation safety devices which must be removed:
• Remove the locking screw holding the front cover. It is located
at the right side of the front cover. Save the locking screw.
• A red plastic cap is attached over the needle washing mechanism
below the front cover. Remove the red plastic cap and save it.
See also the installation instructions given in the Autosampler A-900
User Manual, Chapter 2.
ÄKTAFPLC Optional Configurations User Manual 18-1174-46 Edition AA
35
18117446AA_FPLC_OPTCONF.book Page 36 Wednesday, July 2, 2003 7:58 PM
5
Autosampler A-900
5.3.2
Electrical connections
WARNING! A-900 must be connected to a grounded mains socket. It
is recommended to use the mains socket in the system.
WARNING! For continued protection against risk of fire, replace
only with fuses of specified type and rating. See Technical
specifications in the A-900 User Manual for fuse data.
CAUTION! The mains power to ÄKTAFPLC must be switched OFF
before disconnecting or connecting the UniNet-1 cables.
1
Make sure that the ÄKTAFPLC chromatography system is switched
off.
2
Disconnect the UniNet-1 cable running between Monitor UPC-900
and the computer at the computer end.
3
Connect this UniNet-1 cable to any of the two UniNet-1 connectors
in A-900.
Autosampler
Optical
Unit
Conductivity
Flow Cell
Analogue
out 0-1 V
UniNet 1
pH-GroundpH-Probe
Mains
Lamp
Voltage
Frequency Power, max
100-200 V- 50-60 Hz
30 VA
Pressure
Analogue out 0-1 V
Remote
UniNet 2
!
Fraction
collector
!
UniNet 1
Mains output
Leakage current, max
3,5 mA
115 V
1
0
Mains
Voltage
100-200 V-
Frequency Power, max Fuse
50-60 Hz
600 VA
T 6,3 AL
WARNING! For continued protection against
risk of fire, replace only woth fuse
of the specified type and current ratings
Termination plug
UniNet 1 chain
36
UniNet 2
chain
To computer
ÄKTAFPLC Optional Configurations User Manual 18-1174-46 Edition AA
18117446AA_FPLC_OPTCONF.book Page 37 Wednesday, July 2, 2003 7:58 PM
5
Autosampler A-900
4
Connect a new UniNet-1 cable (supplied with the A-900) from the
other UniNet-1 connector on the A-900 to the computer. The
UniNet-1 connection to the computer must be made to the board
with four green LEDs.
Four green LEDs
UniNet-1 connection
5
Check that the voltage setting of the A-900 matches the local mains
supply voltage and main fuses. If the indicated voltage is not
correct, select the proper voltage by removing, inverting, and then
re-inserting the voltage selector cartridge. Check that the correct
fuses are installed. If not, replace them with fuses as stated below:
• For 110-120 VAC, use two 5 AT-fuses (slow).
• For 220-240 VAC, use two 2.5 AT-fuses (slow).
CAUTION! DO NOT switch on any of the equipment yet!
6
When the voltage selection and fuses are correct for the local mains
power source, plug in the supplied power cord in a free outlet in the
base platform of the ÄKTAFPLC separation unit.
ÄKTAFPLC Optional Configurations User Manual 18-1174-46 Edition AA
37
18117446AA_FPLC_OPTCONF.book Page 38 Wednesday, July 2, 2003 7:58 PM
5
Autosampler A-900
5.3.3 Capillary connections
The capillaries to be connected between A-900 and the ÄKTAFPLC
separation unit are included in ÄKTA XT Tubing kit, no. 18-1122-92.
The flow diagram below shows the location of A-900 in the ÄKTAFPLC
flow path.
Autosampler
21
3
4 5
6
Injection
valve
W4
Sample
loop
G-A1
(F-A1)
G-A2
(H-A2)
(F-A2)
For Installation test
On-line filter
Mixer
Column
Injection
Valve (V1)
17
2
6
34 5
Pump A Pump B
UV
COND
Restrictor
B
A
W2
W1
Fraction
Collector
W3
1
Remove the capillary between the injection valve V1 and the
column top inlet.
2
Select the capillaries matching the tubing kit to be used in
ÄKTAFPLC after the column. Use the capillaries marked G-A1 and
G-A2 with the i.d. 0.25 mm tubing kit, G-A1 and H-A2 with the
i.d. 0.50 mm tubing kit, and F-A1 and F-A2 with the i.d. 0.75 and
1.0 mm tubings.
Note:
38
See ÄKTAFPLC System Manual for general
recommendations on selecting column and tubing kit.
ÄKTAFPLC Optional Configurations User Manual 18-1174-46 Edition AA
18117446AA_FPLC_OPTCONF.book Page 39 Wednesday, July 2, 2003 7:58 PM
5
Autosampler A-900
3
Connect the capillary marked G-A1/ F-A1 (l = 1.3 m) from the
tubing kit between the injection valve V1 port 1 and the A-900
injection valve port 1 (marked “pump”). The end that is pre-bent is
connected to the ÄKTAFPLC injection valve V1.
4
Connect the capillary marked G-A2/ H-A2/ F-A2 (l = 1.15 m) from
the tubing kit between the A-900 injection valve port 6 (marked
“column”), and the UV flow cell inlet.
Note:
5
This connection (the dotted line) is only temporary. When
the installation test is successfully performed, G-A2/ H-A2/
F-A2) is connected to the top inlet of the column, and the
capillary connecting the column outlet and the UV flow cell
inlet is refitted.
Check additional internal and waste tubing connections on A-900
according to the A-900 User Manual instructions.
5.4 General preparation
1
Start your ÄKTAFPLC optional configuration system as described in
2.6 Preparation for use. Make sure that
AutoSampler A-900 is selected in the Component list.
2
Press the System Control button, and select System:Settings:Specials.
3
Check that the default sample loop volume (100 µl), syringe
volume (250 µl) and needle height (2 mm) are selected.
4
Manually, run the SyringeEnd instruction under System
Control:Manual:Flowpath:AutosamplerControl.
5
Remove the syringe from the syringe valve. Make sure that the Luer
connector in the valve remains in place.
6
Fill the syringe with 20% ethanol in water from a vessel.
7
Replace the filled syringe. Fully tighten the syringe so that a gap
between the plunger tip and the syringe end is obtained after having
executed the SyringeHome instruction under
System Control:Manual:Flowpath:AutosamplerControl.
Note:
If the syringe holder is not fully tightened, i.e. no gap is
obtained, the plunger tip moves forcefully into the syringe
end which can damage the syringe.
ÄKTAFPLC Optional Configurations User Manual 18-1174-46 Edition AA
39
18117446AA_FPLC_OPTCONF.book Page 40 Wednesday, July 2, 2003 7:58 PM
5
Autosampler A-900
8
Fill the wash solvent bottle with 20% ethanol in water. If the
sample contains large amounts of salt, or if the sample is very
sensitive to ethanol, use water as wash solvent instead (degas and
change the water every day!).
9
Screw the bottle into the wash solvent holder and place the holder
on the A-900.
10 Put the wash solvent tubing in the wash solvent bottle.
11 Fill the tubing using the SyringeEnd and SyringeHome instructions.
SyringeEnd draws a syringe volume of wash solvent from the wash
solvent bottle and fills the wash solvent tubing.
SyringeHome dispenses the syringe contents to the syringe waste.
Repeat this action a number of times until the wash solvent tubing
and the syringe are completely filled.
12 After the wash solvent tubing and the syringe are filled, use the
InitialWash instruction to perform a standard wash. All tubing
connected to the syringe valve will be filled and flushed with wash
solvent.
5.4.1 Purging the syringe in A-900
1 Manually, run the SyringeEnd and SyringeHome instructions
alternately.
40
2
Repeat until no more air is left in the syringe (more than 5 repeats
can be necessary).
3
Finish by performing the InitialWash instruction.
ÄKTAFPLC Optional Configurations User Manual 18-1174-46 Edition AA
18117446AA_FPLC_OPTCONF.book Page 41 Wednesday, July 2, 2003 7:58 PM
5
Autosampler A-900
5.4.2 Checking the needle height in A-900
1 Remove the tray segment next to (on the left side) the one directly
below the needle arm.
2
Put a vial with a flat bottom, filled with e.g. water, in the tray
segment directly below the needle arm. The bottom of the vial must
be clearly visible.
3
Perform a manual injection by issuing the
Manual:Flowpath:InjectionFlushed instruction in System Control.
4
Check visually that the needle stops approximately 2 mm above the
vial bottom.
5
If not, go to System:Settings:Specials to adjust the needle height. The
default setting is 2 mm.
Note:
Check the needle height with 2 mm as default setting
whenever the needle is replaced. The 2 mm setting is only a
relative measure to ensure that the needle stops above the
vial bottom regardless of which type of vial used. Adjust
the final setting in small steps until a needle height suitable
for the actual use is obtained (type of vial, sample volume
available, etc.).
ÄKTAFPLC Optional Configurations User Manual 18-1174-46 Edition AA
41
18117446AA_FPLC_OPTCONF.book Page 42 Wednesday, July 2, 2003 7:58 PM
5
Autosampler A-900
5.5 Operation
5.5.1 General
The parameters for controlling Autosampler A-900 are set in the
Sample Injection dialog in the Method Wizard when creating the
method.
The A-900 can be used for automatic sample injection from a few
microlitres to one millilitre of sample solution. To achieve optimal
performance, selection of sample loop volume, syringe size and speed,
plus the washing method between injections must be considered.
The sample injection techniques are as follows:
•
InjectionFlushed
The sample loop is completely (quantitatively) filled with sample
resulting in extremely good reproducibility.
•
InjectionPartial
The sample loop is partially filled with sample giving low sample
loss and allowing programmable injection volumes.
•
InjectionPickup
After aspiration from the vial, the sample volume is transported
into the loop with transport liquid (mobile phase) from another
vial resulting in virtually no sample loss.
Manual functions used for setting up and maintaining the A-900 are
found in System Control:Manual:Flowpath:AutosamplerControl.
Some of the available commands are as follows:
•
InitialWash
•
RotateTray
•
SyringeHome/End
•
NeedleHome/Front
The parameters for controlling Autosampler A-900 with Cooling are
set in System Control:System:Settings:Specials (desired temperature), and
in System Control:System:Settings:Alarms (alarm and warning levels).
These functions are described in the following sections.
42
ÄKTAFPLC Optional Configurations User Manual 18-1174-46 Edition AA
18117446AA_FPLC_OPTCONF.book Page 43 Wednesday, July 2, 2003 7:58 PM
5
Autosampler A-900
5.5.2 InjectionFlushed
The InjectionFlushed instruction selects the flushed loop injection mode
for A-900.
The syringe dispenser aspirates a flush volume of sample into the
sample line. The A-900 injection valve is turned to LOAD position, and
the sample loop is filled with 1.5–3 times the sample loop volume
(depending in the loop volume). The injection volume equals the loop
volume. When the sample loop size is changed, the loop volume setting
must be changed in System:Settings (100 µl is the default loop volume).
After each injection, the needle is rinsed:
•
If WashExt=NO is selected in the method, the needle is only washed
internally.
•
If WashExt=YES is selected in the method, the needle is also washed
on the outside.
In both cases, the buffer tubing is also washed.
An air segment (Air segment=Air) is recommended to reduce the amount
of the flush volume. The air segment is not injected.
5.5.3 InjectionPartial
The InjectionPartial instruction selects the partial loopfill injection mode
for A-900.
The syringe dispenser aspirates a flush volume of sample into the
sample line. The A-900 injection valve is turned to LOAD position, and
the sample loop is filled by transporting the selected injection volume
into the sample loop, which is partially filled with sample.
After each injection, the needle is rinsed:
•
If WashExt=NO is selected in the method, the needle is only washed
internally.
•
If WashExt=YES is selected in the method, the needle is also washed
on the outside.
In both cases, the buffer tubing is also washed.
An air segment (Air segment=Air) is recommended to reduce the amount
of the flush volume. The air segment is not injected.
ÄKTAFPLC Optional Configurations User Manual 18-1174-46 Edition AA
43
18117446AA_FPLC_OPTCONF.book Page 44 Wednesday, July 2, 2003 7:58 PM
5
Autosampler A-900
5.5.4 InjectionPick-up
The InjectionPickup instruction selects the µl pick-up injection mode for
A-900.
The syringe dispenser aspirates transport liquid from the transport vial
into the sample line. The A-900 injection valve is turned to LOAD
position. The needle moves from the transport vial to a sample vial and
aspirates the selected injection volume. The needle moves back to the
transport vial and the sample is quantitatively transported into the
sample loop with transport liquid.
After each injection, the needle is rinsed:
•
If WashExt=NO is selected in the method, the needle is only washed
internally.
•
If WashExt=YES is selected in the method, the needle is also washed
on the outside.
In both cases, the buffering tubing is also washed.
An air segment is not recommended for this injection mode
(Air segment=NoAir) because the air segment at the front of the
sample plug is injected.
5.5.5 InitialWash
The InitialWash instruction performs a complete wash of the needle and
the syringe.
The syringe is first washed using one syringe volume. Then the needle
is moved to its home position and washed internally.
Finally, the needle moves to its front position and is washed both
internally and externally.
5.5.6 SyringeHome/End
The SyringeHome/End instructions are used when the syringe is replaced.
They are also used for purging the syringe, i.e. to remove air.
SyringeHome empties the syringe contents to the syringe waste
container.
SyringeEnd aspirates wash solvent into the syringe from the wash bottle.
Note: When the performed action is completed, make sure the syringe
is run to the Home position before leaving the manual function.
44
ÄKTAFPLC Optional Configurations User Manual 18-1174-46 Edition AA
18117446AA_FPLC_OPTCONF.book Page 45 Wednesday, July 2, 2003 7:58 PM
5
Autosampler A-900
5.5.7 RotateTray
The RotateTray instruction is used to rotate the tray, e.g. when new vials
are loaded into the tray segments.
5.5.8 NeedleHome/Front
The NeedleHome/Front instructions are used when the sample needle is
replaced.
NeedleHome moves the needle to its normal position.
NeedleFront moves the needle closer to the front of A-900.
5.5.9 AutoSampler_Temperature
When using A-900 with cooling function, the AutoSampler_Temperature
parameter is used to enable the cooling function and to set the desired
temperature.
The cooling function is enabled by deselecting the OFF check box.
The temperature range is 4–40 °C.
The cooling starts immediately when clicking OK.
Note: To use Autosampler A-900 with Cooling, both AutoSampler
and AutoSamplerThermo should be selected in the Components
list in System Setup.
5.5.10 Alarm_AutoSampler
The Alarm_AutoSampler parameter is used to set alarm temperatures
when using the cooling function.
The upper alarm level is set by the parameter HighAlarm, and the lower
alarm level by LowAlarm.
5.5.11 Warning_AutoSampler
The Warning_AutoSampler parameter is used to set warning temperatures
when using the cooling function.
The upper alarm level is set by the parameter HighWarn, and the lower
alarm level by LowWarn.
ÄKTAFPLC Optional Configurations User Manual 18-1174-46 Edition AA
45
18117446AA_FPLC_OPTCONF.book Page 46 Wednesday, July 2, 2003 7:58 PM
6
Autosampler A-905 for ÄKTA
6
Autosampler A-905 for ÄKTA
6.1 General
Autosampler A-905 for ÄKTA is intended for automated multiple
sample injections of volumes down to 1.0 µl.
Cover in open position
Buffer tubing
High-pressure valve
Tubing guide
Syringe waste
Needle arm
Syringe dispenser
Transport solvent/
wash vial
Microplate
Wash solvent
bottle
Wash position
Support plate
Drain wash
position
Condensed water
and leakage drain
46
ÄKTAFPLC Optional Configurations User Manual 18-1174-46 Edition AA
18117446AA_FPLC_OPTCONF.book Page 47 Wednesday, July 2, 2003 7:58 PM
6
Autosampler A-905 for ÄKTA
6.2 Installation
6.2.1 Preparations
A–905 needs approximately 28 cm of bench space and a mains
connection of 220-240 V or 100-120 V~, 50/60 Hz, preferably taken
from the ÄKTAFPLC base platform.
The recommended position is to the left of the separation equipment of
ÄKTAFPLC, with approximately 3 cm spacing.
Locking screw
Red cap
A-905 has two transportation safety devices which must be removed:
• Remove the locking screw holding the front cover. It is located
at the right side of the front cover. Save the locking screw.
• A red plastic cap is attached over the needle washing mechanism
below the front cover. Remove the red plastic cap and save it.
See also the installation instructions given in the Autosampler A-905
User Manual, Chapter 2.
ÄKTAFPLC Optional Configurations User Manual 18-1174-46 Edition AA
47
18117446AA_FPLC_OPTCONF.book Page 48 Wednesday, July 2, 2003 7:58 PM
6
Autosampler A-905 for ÄKTA
6.2.2
Electrical connections
WARNING! A-905 must be connected to a grounded mains socket. It
is recommended to use the mains socket in the system.
WARNING! For continued protection against risk of fire, replace
only with fuses of specified type and rating. See Technical
specifications in the A-905 User Manual for fuse data.
CAUTION! The mains power to ÄKTAFPLC must be switched OFF
before disconnecting or connecting the UniNet-1 cables.
1
Make sure that the ÄKTAFPLC chromatography system is switched
off.
2
Disconnect the UniNet-1 cable running between Monitor UPC-900
and the computer at the computer end.
3
Connect this UniNet-1 cable to any of the two UniNet-1 connectors
in A-900.
Autosampler
Optical
Unit
Conductivity
Flow Cell
Analogue
out 0-1 V
UniNet 1
pH-GroundpH-Probe
Mains
Lamp
Voltage
Frequency Power, max
100-200 V- 50-60 Hz
30 VA
Pressure
Analogue out 0-1 V
Remote
UniNet 2
!
Fraction
collector
!
UniNet 1
Mains output
Leakage current, max
3,5 mA
115 V
1
0
Mains
Voltage
100-200 V-
Frequency Power, max Fuse
50-60 Hz
600 VA
T 6,3 AL
WARNING! For continued protection against
risk of fire, replace only woth fuse
of the specified type and current ratings
Termination plug
UniNet 1 chain
48
UniNet 2
chain
To computer
ÄKTAFPLC Optional Configurations User Manual 18-1174-46 Edition AA
18117446AA_FPLC_OPTCONF.book Page 49 Wednesday, July 2, 2003 7:58 PM
6
Autosampler A-905 for ÄKTA
4
Connect a new UniNet-1 cable (supplied with the A-900) from the
other UniNet-1 connector on the A-900 to the computer. The
UniNet-1 connection to the computer must be made to the board
with four green LEDs.
Four green LEDs
UniNet-1 connection
5
Check that the voltage setting of the A-905 matches the local mains
supply voltage and main fuses. If the indicated voltage is not
correct, select the proper voltage by removing, inverting, and then
re-inserting the voltage selector cartridge. Check that the correct
fuses are installed. If not, replace them with fuses as stated below:
• For 110–120 V~, use two 5 AT-fuses (slow).
• For 220–240 V~, use two 2.5 AT-fuses (slow).
CAUTION! DO NOT switch on any of the equipment yet!
6
When the voltage selection and fuses are correct for the local mains
power source, plug in the supplied power cord in a free outlet in the
base platform of the ÄKTAFPLC separation unit.
ÄKTAFPLC Optional Configurations User Manual 18-1174-46 Edition AA
49
18117446AA_FPLC_OPTCONF.book Page 50 Wednesday, July 2, 2003 7:58 PM
6
Autosampler A-905 for ÄKTA
6.2.3 Capillary connections
The capillaries to be connected between A-905 and the ÄKTAFPLC
separation unit are included in ÄKTA XT Tubing kit, no. 18-1122-92.
The flow diagram below shows the location of A-905 in the ÄKTAFPLC
flow path.
Autosampler
21
3
4 5
6
Injection
valve
W4
Sample
loop
G-A1
(F-A1)
G-A2
(H-A2)
(F-A2)
For Installation test
On-line filter
Mixer
Column
Injection
Valve (V1)
17
2
6
34 5
Pump A Pump B
UV
COND
Restrictor
B
A
W2
W1
Fraction
Collector
W3
1
Remove the capillary between the injection valve V1 and the
column top inlet.
2
Select the capillaries matching the tubing kit to be used in
ÄKTAFPLC after the column. Use the capillaries marked G-A1 and
G-A2 with the i.d. 0.25 mm tubing kit, G-A1 and H-A2 with the
i.d. 0.50 mm tubing kit, and F-A1 and F-A2 with the i.d. 0.75 and
1.0 mm tubings.
Note:
50
See ÄKTAFPLC System Manual for general
recommendations on selecting column and tubing kit.
ÄKTAFPLC Optional Configurations User Manual 18-1174-46 Edition AA
18117446AA_FPLC_OPTCONF.book Page 51 Wednesday, July 2, 2003 7:58 PM
6
Autosampler A-905 for ÄKTA
3
Connect the capillary marked G-A1/F-A1 (l = 1.3 m) from the
tubing kit between the injection valve V1 port 1 and the A-905
injection valve port 1 (marked “pump”). The end that is pre-bent is
connected to the ÄKTAFPLC injection valve V1.
4
Connect the capillary marked G-A2/H-A2/F-A2 (l = 1.15 m) from
the tubing kit between the A-905 injection valve port 6 (marked
“column”), and the UV flow cell inlet.
Note:
5
This connection (the dotted line) is only temporary. When
the installation test is successfully performed, G-A2/ H-A2/
F-A2) is connected to the top inlet of the column, and the
capillary connecting the column outlet and the UV flow cell
inlet is refitted.
Check additional internal and waste tubing connections on A-905
according to the A-905 User Manual instructions.
6.3 General preparation
1
Start your ÄKTAFPLC optional configuration system as described in
2.6 Preparation for use. Make sure that
AutoSampler A-905 is selected in the Component list.
2
Click the System Control button, and select System:Settings:Specials.
3
Check that the default sample loop volume (1 ml), syringe volume
(1 ml) and needle height (5 mm) are selected.
4
Run the AutosamplerControl_905:SyringeEnd_905 command in
Manual:Flowpath.
5
Remove the syringe from the syringe valve. Make sure that the Luer
connector in the valve remains in place.
6
Fill the syringe with 20% ethanol in water from a vessel.
7
Replace the filled syringe. Fully tighten the syringe so that a gap
between the plunger tip and the syringe end is obtained after having
executed the AutosamplerControl_905:SyringeHome_905 command in
Manual:Flowpath.
Note:
If the syringe holder is not fully tightened, i.e. no gap is
obtained, the plunger tip moves forcefully into the syringe
end which can damage the syringe.
ÄKTAFPLC Optional Configurations User Manual 18-1174-46 Edition AA
51
18117446AA_FPLC_OPTCONF.book Page 52 Wednesday, July 2, 2003 7:58 PM
6
Autosampler A-905 for ÄKTA
8
Fill the wash solvent bottle with 20% ethanol in water. If the
sample contains large amounts of salt, or if the sample is very
sensitive to ethanol, use water as wash solvent instead (degas and
change the water every day!).
9
Screw the bottle into the wash solvent holder and place the holder
on the A-905.
10 Put the wash solvent tubing in the wash solvent bottle.
11 Fill the tubing using the SyringeEnd_905 and SyringeHome_905
instructions.
SyringeEnd_905 draws a syringe volume of wash solvent from the
wash solvent bottle and fills the wash solvent tubing.
SyringeHome_905 dispenses the syringe contents to the syringe
waste.
Repeat this action a number of times until the wash solvent tubing
and the syringe are completely filled.
12 After the wash solvent tubing and the syringe are filled, use the
InitialWash_905 instruction to perform a standard wash. All tubing
connected to the syringe valve will be filled and flushed with wash
solvent.
6.3.1 Purging the syringe in A-905
1 Manually, run the SyringeEnd_905 and SyringeHome_905
instructions alternately.
2
Repeat until no more air is left in the syringe (more than 5 repeats
can be necessary).
3
Finish by performing the InitialWash_905 instruction.
6.3.2 Checking the needle height in A-900
Refer to the Autosampler A-905 for ÄKTA User Manual.
52
ÄKTAFPLC Optional Configurations User Manual 18-1174-46 Edition AA
18117446AA_FPLC_OPTCONF.book Page 53 Wednesday, July 2, 2003 7:58 PM
6
Autosampler A-905 for ÄKTA
6.4 Operation
The parameters for controlling Autosampler A-905 are set in the
Sample Injection dialog in the Method Wizard when creating the
method.
The A-905 can be used for automatic sample injection from 1.0 µl to
1 ml. To achieve optimal performance, selection of sample loop
volume, syringe size and speed, plus the washing method between
injections must be considered.
Three different injection methods can be selected:
•
Flushed loop
The sample loop is completely (quantitatively) filled with sample
resulting in extremely good reproducibility (better than 0.3%).
•
Partial loopfill
The sample loop is partially filled with sample giving low sample
loss and allowing programmable injection volumes.
•
µl pick-up
After aspiration from the vial, the sample volume is transported
into the loop with transport liquid (mobile phase) from another
vial. This eliminates sample loss.
The A-905 uses a syringe to aspirate the sample from a microplate into
the sample loop. To prevent contamination of the syringe, the A-905 is
equipped with a buffer tubing between the syringe and the injection
valve.
An integrated washing mechanism removes the sample from the buffer
tubing, and the sample needle, and also rinses both components.
ÄKTAFPLC Optional Configurations User Manual 18-1174-46 Edition AA
53
18117446AA_FPLC_OPTCONF.book Page 54 Wednesday, July 2, 2003 7:58 PM
7
Outlet valve
7
Outlet valve
7.1 Installation
On-line filter
Column
Mixer
Injection
Valve (V1)
17
2
6
34 5
A
B
UV
COND
W2
W1
Restrictor
Pump A Pump B
2
3
Fraction
Collector
W3
Outlet
Valve (V4)
1 8
45
7
6
F2 F3 F4 F5 F6 F7 F8
CAUTION! Make sure ÄKTAFPLC is switched off before installing the
optional components. The mains power to ÄKTAFPLC must be
switched OFF before disconnecting or connecting the UniNet-1 and
UniNet-2 cables.
54
1
Mark the PV-908 valve with 4. Check that the ID code switch is set
to 4.
2
Mount the bracket and attach the valve to the system rack.
3
Cut and mount the new i.d. 0.50 mm capillaries.
4
Use the attached UniNet-2 cable to connect the valve to the
UniNet-2 communication link. The valve can be connected
anywhere between the system pump P-920 and the termination
plug connected to the injection valve.
5
Check that all capillary and electrical connections have been
carried out correctly.
ÄKTAFPLC Optional Configurations User Manual 18-1174-46 Edition AA
18117446AA_FPLC_OPTCONF.book Page 55 Wednesday, July 2, 2003 7:58 PM
7
Outlet valve
7.2 Operation
7.2.1 Preparing for operation
1 Start your ÄKTAFPLC optional configuration system as described in
section 2.6 Preparation for use.
2
The outlet valve is automatically recognized by UNICORN at
system start-up. Check that the valve added is indicated in the flow
scheme in UNICORN.
3
Verify that the outlet valve is functioning properly by issuing
manual commands from UNICORN as follows:
• In System Control, select Manual:FlowPath.
• Select instruction OutletValve.
• Set the outlet valve to position F4.
• Manually, run Pump P-920 with distilled water at a flow rate of
approximately 2 ml/min and check that water is coming out
from port 4 of the outlet valve.
7.2.2 Using the outlet valve for fractionation
To use the outlet valve in a method, select the desired outlet valve
options in the Wash Out Unbound Sample and/or Elution Fractionation
dialogs when creating the method in the Method Wizard.
Two different fractionation instructions are available to use with the
outlet valve:
• OutletValve
This instruction parameter turns the outlet valve to one of the eight
positions available. This makes the instruction suitable for
controlling flow-through fractionation before elution starts.
The properties are designated V4_Outlet in the run data window.
• OutletFractions
This instruction has three parameters, How_many?, Volume and
Start_at. This makes the instruction suitable for controlling large
volume fractionation (min. 5 ml) during elution. Both instructions
are independent of using Fraction collector Frac-901 or Frac-950.
Note: Installing an outlet valve in the flow path affects the system delay
volume. See section 17 Configuration dependent delay volume
for instructions on how to re-calculate and change the delay
volume.
ÄKTAFPLC Optional Configurations User Manual 18-1174-46 Edition AA
55
18117446AA_FPLC_OPTCONF.book Page 56 Wednesday, July 2, 2003 7:58 PM
8
Column selection valves
8
Column selection valves
8.1 Installation
Column
Selection
Valve
(V2)
On-line filter
Mixer
2
3
18
4 5
7
6
Injection
Valve (V1)
17
B
A
Restrictor
2
6
34 5
Pump A Pump B
W2
Fraction
Collector
W1
W3
2
3
18
4 5
Column
Selection
Valve (V3)
7
6
UV
COND
CAUTION! Make sure ÄKTAFPLC is switched off before installing the
optional components. The mains power to ÄKTAFPLC must be
switched OFF before disconnecting or connecting the UniNet-1 and
UniNet-2 cables.
56
1
Mark the two PV-908 valves with 2 and 3. Check that the ID code
switch is set to 2 and 3 respectively.
2
Mount the brackets and attach the two valves to the system rack.
3
Cut and mount the new i.d. 0.50 mm capillaries. Mount one
capillary between port 1 on column valve 2 and port 1 column
valve 3. This is the column bypass position used as default position
for the valves in UNICORN.
ÄKTAFPLC Optional Configurations User Manual 18-1174-46 Edition AA
18117446AA_FPLC_OPTCONF.book Page 57 Wednesday, July 2, 2003 7:58 PM
8
Column selection valves
4
Use the attached UniNet-2 cables to connect the valves to the
UniNet-2 communication link. The valves can be connected
anywhere between the system pump P-920 and the termination
plug connected to the injection valve.
5
Check that all capillary and electrical connections are carried out
correctly.
8.2 Operation
Preparing for operation
1
Start your ÄKTAFPLC optional configuration system as described in
2.6 Preparation for use. Make sure that ColumnValve V2 and
ColumnValve V3 are selected in the Component list.
2
The column selection valves are automatically recognised by
UNICORN at system start-up. Check that the valves added are
indicated in Flow scheme in UNICORN.
3
Verify that the column selection valves are functioning properly by
issuing manual commands from UNICORN as follows:
• In System Control, select Manual:FlowPath.
• Select instruction ColumnPosition.
• Set ColumnPosition to Position4.
• Manually, run the pump P-920 with distilled water at a flow rate
of approximately 2 ml/min and check that water is coming out
from port 4 of column valve 2.
• Connect a capillary between port 4 of column valve 2 and port
4 of column valve 3 and check that water is coming out from the
center port of column valve 3.
Using the column selection function in a run
To use the column selection valves in a method, select the desired valve
option in the Method Wizard when creating the new method.
The column selection valves are designated ColumnValves in the flow
scheme and V2_ColPos and V3_ColPos in the run data window.
ÄKTAFPLC Optional Configurations User Manual 18-1174-46 Edition AA
57
18117446AA_FPLC_OPTCONF.book Page 58 Wednesday, July 2, 2003 7:58 PM
9
Buffer selection valves
9
Buffer selection valves
9.1 Installation
On-line filter
Column
Mixer
Injection
Valve (V1)
17
2
6
34 5
Buffer
Valve A (V5)
2
3
18
45
Buffer
Valve B (V6)
7
6
2
3
A1 A2 A3 A4 A5 A6 A7 A8
18
45
UV
COND
W2
W1
Restrictor
Pump A Pump B
Fraction
Collector
W3
7
6
B1 B2 B3 B4 B5 B6 B7 B8
CAUTION! Make sure ÄKTAFPLC is switched off before installing the
optional components. The mains power to ÄKTAFPLC must be
switched OFF before disconnecting or connecting the UniNet-2
cables.
58
1
Mark the IV-908 valves with A and B. Check that the ID code
switches are set to 5 and 6 respectively.
2
Mount the brackets and attach the valves to the system rack.
3
Cut and mount the required teflon tubings (i.d. 1.6 mm).
4
Use the attached UniNet-2 cables to connect the valve to the
UniNet-2 communication link. The valve can be connected
anywhere between the system pump P-920 and the termination
plug connected to the outlet valve.
5
Check that all capillary and electrical connections are carried out
correctly.
ÄKTAFPLC Optional Configurations User Manual 18-1174-46 Edition AA
18117446AA_FPLC_OPTCONF.book Page 59 Wednesday, July 2, 2003 7:58 PM
9
Buffer selection valves
9.2 Operation
9.2.1 Preparing for operation
1 Start your ÄKTAFPLC optional configuration system as described in
2.6 Preparation for use. Make sure that BufferValveA V5 and
BufferValveB V6 are selected in the Component list.
2
The buffer selection valve is automatically recognised by
UNICORN at system start-up. Check that the valve added are
indicated in the Flow scheme in UNICORN.
3
Verify that Buffer Valve A and Buffer Valve B are functioning
properly by issuing manual commands from UNICORN as
follows:
• In System Control, select Manual:FlowPath.
• Select instruction BufferValveA.
• Set BufferValveA to position A4.
• Manually, run pump P-920 with distilled water at a flow rate of
approximately 2 ml/min and check that water is drawn through
port 4 in BufferValve A.
• If applicable, repeat these steps for Buffer Valve B.
Using the buffer selection function in a run
To use the buffer selection valves in a method, select the desired valve
options in the Method Wizard when creating the method.
The buffer valve instructions are designated BufferValveA and
BufferValveB in the flow scheme. In the run data window, they are
designated V5_BuffA and V6_BuffB.
ÄKTAFPLC Optional Configurations User Manual 18-1174-46 Edition AA
59
18117446AA_FPLC_OPTCONF.book Page 60 Wednesday, July 2, 2003 7:58 PM
10
General function valve
10 General function valve
10.1 Installation
To install any optional valve, proceed as follows:
CAUTION! Make sure ÄKTAFPLC is switched off before installing the
optional components. The mains power to ÄKTAFPLC must be
switched OFF before disconnecting or connecting the UniNet-2
cables.
1
Mark the optional function valve with V7, V8 or V9 as required.
Check that the ID code switch is set to 7, 8 or 9 respectively.
2
Mount the bracket and attach the valve to the system rack. Choose
the best location to facilitate the routing of the tubing that connects
the valve to the main system flowpath.
3
Cut and mount the necessary capillaries, (PEEK i.d. 0.5 mm, see
also the Instructions of the valve). Restrict the length of the
capillaries as much as practically possible to reduce band
broadening effects.
4
Use the attached UniNet-2 cable to connect the valve to the
UniNet-2 communication link. The valve can be connected
anywhere between Pump P-920 and the termination plug.
Check that all capillary and electrical connections are carried out
correctly.The following example shows how an optional INV-907 is
connected when used as a reversed flow valve.
Reversed flow configuration
DOWNWARD FLOW, position 1
UPWARD FLOW, position 2
1
1
Pump
7
2
To monitor
To monitor
3
4
Stop plug
60
3
6
5
Pump
7
2
6
4
5
Stop plug
ÄKTAFPLC Optional Configurations User Manual 18-1174-46 Edition AA
18117446AA_FPLC_OPTCONF.book Page 61 Wednesday, July 2, 2003 7:58 PM
10
General function valve
10.2 Operation
10.2.1 Preparing for operation
1 Start your ÄKTAFPLC optional configuration system as described in
2.6 Preparation for use. Make sure that Valve V7, Valve V8 or
Valve V9 is selected in the Component list.
2
A connected valve is automatically recognised by UNICORN at
system start-up. Check that the added valve is indicated in the
flowscheme in UNICORN.
3
Verify that the valve is functioning properly by issuing manual
commands from UNICORN as follows:
• In System Control, select Manual:FlowPath.
• Select instruction Valve X, where X=ID code for the valve.
• Set the valve to position 3 (corresponds to the WASTE position
in valve INV-907).
• Manually, run Pump P-920 with distilled water at a flow rate of
approximately 2 ml/min and check that water is coming out
from port 3 on the valve (corresponds to port 5 in valve
INV-907).
10.2.2 Using the general function valve in a run
General function valve instructions are designated Valve7, Valve8 and
Valve9 in the flow scheme and run data windows.
To use a valve in a method:
1
Create a new method by selecting File:Method Wizard in the Method
Editor.
2
Select View:Text instructions to display the text instruction editor.
Double-click on the instruction block where you want to add the
general function valve instruction. Highlight the instruction below
which you want to insert the valve instruction.
3
Click the Flowpath radio button.
ÄKTAFPLC Optional Configurations User Manual 18-1174-46 Edition AA
61
18117446AA_FPLC_OPTCONF.book Page 62 Wednesday, July 2, 2003 7:58 PM
10
General function valve
4
From the Instructions list, select the valve you intend to use (Valve7,
Valve8 or Valve9). The valve instruction parameters allow you to
change the position of the valves. For INV-907, only three
positions can be selected (see the Instructions of the valve).
Click here to define a variable name for the instruction parameter
62
5
Define a variable name for the instruction parameter, e.g.
Valvex_pos, where x=7, 8 or 9 depending on the ID code for the valve
used. This variable allows you to turn the position of the valve to
the port you want.
6
Click OK. The defined variable is inserted in the method.
7
Return to the Variables page by selecting View:Run setup to set the
variable Valvex_pos to the desired position.
8
Save the method.
ÄKTAFPLC Optional Configurations User Manual 18-1174-46 Edition AA
18117446AA_FPLC_OPTCONF.book Page 63 Wednesday, July 2, 2003 7:58 PM
11
pH flow cell and pH electrode mounting
11 pH flow cell and pH electrode mounting
11.1 General
The pH electrode is to be mounted in a separate pH flow cell, housing
the pH electrode itself, as well as a dummy pH electrode. The dummy
pH electrode replaces the pH electrode whenever the pH electrode is to
be removed from the system, e.g. for storage.
The pH electrode contains a sealed Ag/AgCl reference which cannot be
refilled, an internal electrolyte bridge of 4 M KCl saturated with
Ag/AgCl, an outer electrolyte bridge of 1 M KNO3, an annular ceramic
reference junction and a low profile pH membrane. This is commonly
known as a sealed combination double junction type. The pH electrode
is delivered with a transparent cover.
Note: The flow cell should not be used with any other pH electrode.
Note: Always use the 0.50 tubing kit and flow restrictor FR-902 when
the flow cell is mounted.
11.2 Installation
CAUTION! Never use 0.25 mm i.d. tubing (blue) when the pH flow
cell is mounted in the system. The electrode may rupture due to high
backpressure.
1
Remove the flow restrictor and the male/male union from the
conductivity flow cell.
2
Install the pH flow cell and pH electrode as described in the
Monitor UPC-900 User Manual. The pH flow cell should be
mounted directly to the right of the optical unit.
ÄKTAFPLC Optional Configurations User Manual 18-1174-46 Edition AA
63
18117446AA_FPLC_OPTCONF.book Page 64 Wednesday, July 2, 2003 7:58 PM
11
pH flow cell and pH electrode mounting
On-line filter
Column
Mixer
Injection
valve (V1)
17
2
6
34 5
B
A
UV
COND
W2
Flow restrictor
Pump A Pump B
W1
Fraction
collector
pH Flow cell
New capillary of
90 mm
W3
Male/male union
3
Cut a new capillary of 90 mm (0.50 mm i.d.) and connect the outlet
(the screw head end) from the conductivity flow cell to the inlet on
the pH flow cell (lower connection marked IN).
4
Connect the outlet from the pH flow cell (marked OUT) to the inlet
on the FR-902 (marked IN) using the male/male union.
5
Connect the pH electrode BNC connector to the pH-Probe
connector on the rear of Monitor UPC-900. Should interference
from static fields occur, connect the pH flow cell to the pH-Ground
connection as well using a standard laboratory 4 mm “banana
plug” cable.
6
Check that all capillary and electrical connections have been
carried out correctly.
Note: When using the pH electrode, the flow restrictor FR-904 must be
replaced with the supplied flow restrictor FR-902. Otherwise,
the long term stability and lifetime of the pH electrode will
deteriorate.
64
ÄKTAFPLC Optional Configurations User Manual 18-1174-46 Edition AA
18117446AA_FPLC_OPTCONF.book Page 65 Wednesday, July 2, 2003 7:58 PM
pH flow cell and pH electrode mounting
11
11.3 Operation
1
Start your ÄKTA optional configuration system as described in
2.6 Preparation for use.
2
If fraction collection should be used, remember to change the delay
volume. This setting is found in System Control, in
System:Settings:Specials. See also 17 Configuration dependent delay
volume.
Calibrate the pH electrode and set up the additional monitor functions
desired for pH measurement. These procedures are described in the
Monitor UPC-900 User Manual and in the UNICORN User Manuals.
ÄKTAFPLC Optional Configurations User Manual 18-1174-46 Edition AA
65
18117446AA_FPLC_OPTCONF.book Page 66 Wednesday, July 2, 2003 7:58 PM
12
Sample pump P-960 and sample valve
12 Sample pump P-960 and sample valve
12.1 General
Pump P–960 is a laboratory pump for
use as a sample pump to apply
samples directly on the column and/
or to fill sample loops, including
Superloop. Pumping action is
provided by plungers driven by a
stepper motor. The pump is a low
pulsation pump and features a motor
speed independent of temperature
and load to give accurate and
reproducible flow rates up to
50 ml/min at a pressure up to 2 MPa.
An IV/PV–908 valve can be used as sample valve in
combination with the sample pump. It is a
motorised 8-way valve used for automatic sample
application of up to 8 samples.
PV-908
Note: The Method Wizard does not support the
sample valve function. It is added as a
general function valve to a method in the
Method Editor.
Three sample application techniques can be performed by using Pump
P–960 in the ÄKTAFPLC system:
•
Loading a sample loop.
•
Direct loading onto the column
•
Loading a Superloop.
Each technique requires a specific configuration and different
procedures to remove air from the sample flow path. This is described
in the following sections.
Control of the sample pump can be achieved automatically from a
method, or manually via the functions available in UNICORN.
Note: Make sure that any air trapped in the sample flow path is
removed before use. Presence of air in the sample pump might
cause pressure pulsation and inaccurate flow.
66
ÄKTAFPLC Optional Configurations User Manual 18-1174-46 Edition AA
18117446AA_FPLC_OPTCONF.book Page 67 Wednesday, July 2, 2003 7:58 PM
Sample pump P-960 and sample valve
12
Sample pump P-960 kit includes the items needed for upgrading an
ÄKTAFPLC system for Direct loading onto the column with Pump
P–960.
The following items are included in Sample pump P-960 kit:
•
Pump P–960
•
UniNet cable
•
Holders for ÄKTAdesign systems
•
Flow restrictor FR-902
•
Purge kit
•
Tefzel tubing i.d. 1.0 mm, 3 m
•
PEEK tubing i.d. 0.75 mm, 2 m
•
Finger-tight connectors and unions
ÄKTAFPLC Optional Configurations User Manual 18-1174-46 Edition AA
67
18117446AA_FPLC_OPTCONF.book Page 68 Wednesday, July 2, 2003 7:58 PM
12
Sample pump P-960 and sample valve
12.2 Installing the components
CAUTION! The mains power to ÄKTAFPLC must be switched OFF
before disconnecting or connecting the UniNet-2 cables.
This section describes how to install the components in the system. To
connect the capillaries, see the section describing that specific sample
application method—Loading a sample loop, Direct loading onto the
column or Loading a Superloop.
12.2.1 Installing Pump P-960
1 Assemble Pump P-960 according to the instructions given in the
Pump P-960 User Manual.
2
Attach the sample pump to the system rack.
12.2.2 Installing IV/PV-908 as sample valve (if used)
1 Assemble the sample valve (see the IV/PV-908 Instructions).
2
Install the valve as a General function valve (see chapter 10) and
attach the valve to the system rack.
12.2.3 Installing UniNet-2 cables
Connecting P-960 only
1
Remove the termination plug from the last component in the
UniNet-1 chain.
2
Connect a new cable (supplied) between this component and Pump
P-960 (the leftmost socket).
Note:
The termination plug is not required. P-960 has an internal
termination.
Connecting P-960 and valve IV/PV-908
1
Remove the termination plug from the last component in the
UniNet-1 chain.
2
Connect a new cable (supplied) between this component and valve
IV/PV-908.
3
Connect a new cable (supplied) between valve IV/PV-908 and
Pump P-960 (the leftmost socket).
Note:
68
The termination plug is not required. P-960 has an internal
termination.
ÄKTAFPLC Optional Configurations User Manual 18-1174-46 Edition AA
18117446AA_FPLC_OPTCONF.book Page 69 Wednesday, July 2, 2003 7:58 PM
12
Sample pump P-960 and sample valve
12.2.4 Installing Flowrestrictor FR-902
If the sample vessel is placed at a higher level than the end of the sample
waste tubing, sample might accidently flow through the sample flow
path to waste. Flow restrictor FR-902 supplied is used in the sample
flow path to eliminate this effect by creating a back-pressure of
0.2 MPa. Thereby, sample vessels can be placed, for example, on top of
the system.
The position of the flow restrictor in the flow path depends on how the
sample is applied with the sample pump (see Table 12-1 ). The injection
valve position refers to when sample otherwise might flow straight
through to waste.
Sample application type
Flow restrictor port IN
connected to*
Injection valve
position
Filling a sample loop
Sample pump P-960
outlet port
LOAD
Direct loading onto a column
Injection valve V1, port 4
INJECT
Loading a Superloop**
Injection valve V1, port 5
INJECT
*
Use a 10 cm long tubing between the flow restrictor and the port.
**
The flow restrictor is required only if filling the Superloop several times
during the run.
Table 12-1. Position of the flow restrictor
ÄKTAFPLC Optional Configurations User Manual 18-1174-46 Edition AA
69
18117446AA_FPLC_OPTCONF.book Page 70 Wednesday, July 2, 2003 7:58 PM
12
Sample pump P-960 and sample valve
12.3 Loading a sample loop
Automatic filling of sample loops can be useful when samples must be
applied repeatedly, for example, in scouting runs. By using sample
loops supplied by Amersham Biosciences, volumes between
0.1–2.0 ml can be applied. The sample is drawn into the sample loop
by the sample pump.
Note: The flow rate should not exceed 0.5 ml/min when filling the
sample loop. Otherwise, cavitation might occur due to the
resistance in the flow path.
12.3.1 Connecting the capillaries
1 Make sure that the sample pump and the sample valve (if included)
are properly installed according to section 12.2 Installing the
components.
2
Cut the capillaries to suitable lengths and connect them using
connectors and ferrules as indicated in the table and in the figures.
The lengths in the table are maximum lengths.
3
Check that all capillary and electrical connections have been
carried out correctly.
Fingertight connector 1/16"
Pump P-960
Outlet connection
Union fingertight female/ M6 male
Union 5/16" female/ HPLC male
Tubing connector for 1/8" o.d. tubing with
ferrule for 1/8" o.d. tubing
Inlet connection
70
ÄKTAFPLC Optional Configurations User Manual 18-1174-46 Edition AA
18117446AA_FPLC_OPTCONF.book Page 71 Wednesday, July 2, 2003 7:58 PM
12
Sample pump P-960 and sample valve
On-line filter
Column
Mixer
Injection
Valve (V1)
3
17
2
6
34 5
UV
COND
Sample
Pump
B
1
6
7
S1
4
Restrictor
A
2
W1
Restrictor
Pump A Pump B
5
Connector
1
PEEK i.d. 0.75 mm x 24 cm
(Sample inlet tubing)
Fingertight connector 1/16", 18-1112-55
3
Tefzel i.d. 1.0 mm x 130 cm
4
Tefzel i.d. 1.0 mm x 10 cm
W3
W2
Capillary (max. length)
2
Tefzel i.d. 1.0 mm x 50 cm
Fraction
Collector
Fingertight connector 1/16", 18-1112-55
Connection points
Injection valve, port 4
*
Sample valve, center port*
Fingertight connector 1/16", 18-1112-55
Injection valve, port 3
Fingertight connector 1/16", 18-1112-55.
Union fingertight female/M6 male, 18-1112-57
Sample pump, inlet
Fingertight connector 1/16", 18-1112-55
Injection valve, port 5
Fingertight connector 1/16", 18-1112-55
Sample pump, outlet
Fingertight connector 1/16", 18-1112-55
Flow restrictor, inlet port
5
Tefzel i.d. 1.0 mm x 120 cm
Fingertight connector 1/16", 18-1112-55
Flow restrictor, outlet port
6
Tefzel i.d. 1.0 mm x 32 cm
Fingertight connector 1/16", 18-1112-55
Sample valve, inlet S1-S7*
Tubing conn. 1/8" o.d. tubing, 18-1121-17
with ferrule for 1/8" o.d. tubing, 18-1121-18.
Union 5/16" female/HPLC male, 18-1142-08
Sample valve, inlet S8*
7
Teflon i.d. 1.6 mm x 130 cm
*
Only if a sample valve is installed. Connect stop plugs to the non-used ports in the sample valve.
ÄKTAFPLC Optional Configurations User Manual 18-1174-46 Edition AA
71
18117446AA_FPLC_OPTCONF.book Page 72 Wednesday, July 2, 2003 7:58 PM
12
Sample pump P-960 and sample valve
12.3.2 Preparing for operation
1 Start your ÄKTAFPLC optional configuration system as described in
2.6 Preparation for use. Make sure that Sample pump P-960 and (if
required) Valve V7 (or Valve V8 or Valve V9)* are selected in the
Component list.
2
Check that the sample pump and the sample valve (if included) are
indicated in the flow scheme window.
3
Make sure the system is connected as previously described in
section 12.3.1 Connecting the capillaries.
12.3.3 Testing the pump and the valve
Verify that the sample pump is functioning properly by issuing manual
commands from UNICORN as follows:
Note: The sample valve is designated Valve 7 in this instruction.
1
Fill a container with distilled water and submerge the sample
inlet capillary S1 (or, for example, S7 if the sample valve is
included) in the container.
2
Set the injection valve to position LOAD.
3
Remove air from the sample flow path using the purge tubing
according to section 12.3.5.
4
In System Control select Manual:Flowpath.
5
If the sample valve is included, select the instruction Valve7 in the
list and select 7.
6
Click on Execute.
7
Select Manual:Pump.
8
Select the instruction SampleFlow_960 in the instruction list.
9
Set Flowrate to 0.5 ml/min and click Execute.
10 Check that the sample pump is delivering flow through its outlet.
11 Stop the pump by clicking End in the System Control toolbar.
*
72
The sample valve is designated V7 in this instruction.
ÄKTAFPLC Optional Configurations User Manual 18-1174-46 Edition AA
18117446AA_FPLC_OPTCONF.book Page 73 Wednesday, July 2, 2003 7:58 PM
12
Sample pump P-960 and sample valve
12.3.4 Removing air by running the sample pump
If there are only small amounts of air in the sample flow path, remove
the air as follows:
1
Immerse the end of the sample inlet tubing in a suitable buffer (inlet
S8, if using a sample valve).
2
If using a sample valve, set the valve to port 8 (buffer inlet).
3
Set the injection valve to LOAD.
4
Run the pump at 5 ml/min for 1 min.
If the pump fails pumping liquid, remove the air using a purge
tubing according to section 12.3.5 Removing air by using a purge
tubing.
12.3.5 Removing air by using a purge tubing
If there is plenty of air in the sample inlet tubings or if the sample pump
is dry, use a purge tubing to fill the tubings and the pump.
Procedure for system including IV/PV-908 as sample valve
This procedure describes how to first fill the sample inlet tubings and
then the buffer inlet tubing.
To fill the sample inlet tubings in port 1–7:
1
Put the chosen sample inlet tubings from port 1–7 in the sample
valve into the sample tubes.
2
Immerse the tubing from port 8 in the valve in a buffer vessel.
3
Set the valve to any of the chosen sample inlet ports 1–7.
Note: The sample inlet tubings should be filled before filling the
buffer tubing connected to port 8.
4
Disconnect the connector fitted to the outlet port on the connection
part of Pump P-960, i.e. before the pressure sensor. Connect the
purge tubing to the same port.
Purge
tubing
5
Set the injection valve V1 to LOAD.
6
Draw sample with the syringe until the liquid level has passed
through the sample valve.
ÄKTAFPLC Optional Configurations User Manual 18-1174-46 Edition AA
73
18117446AA_FPLC_OPTCONF.book Page 74 Wednesday, July 2, 2003 7:58 PM
12
Sample pump P-960 and sample valve
7
Switch the sample valve to the next sample inlet tubing to be filled.
Note: If the syringe needs to be emptied, switch the sample valve
before removing the syringe to prevent sample from flowing
back to the vessel.
8
Repeat step 6 and 7 for the remaining sample inlet tubings.
To fill the buffer inlet tubing in port 8:
1
Set the sample valve to port 8.
2
Draw buffer with the syringe until the liquid level has passed
through the sample pump.
The check valves in the sample pump will prevent the liquid from
being withdrawn when removing the purge tubing.
3
Disconnect the purge tubing.
4
Fit the original connector to the port.
5
Flush the sample flow path tubing with buffer to remove any
trapped air bubbles according to the procedure in section 12.3.4
Removing air by running the sample pump.
Procedure for system not including IV/PV-908 as sample valve
1
Put the sample inlet tubing in a buffer vessel.
2
Disconnect the connector fitted to the outlet port on the connection
part of Pump P-960, i.e. before the pressure sensor. Connect the
purge tubing to the same port.
3
Set the injection valve V1 to LOAD.
4
Draw buffer with the syringe until the liquid level has passed
through the sample pump.
The check valves in the sample pump will prevent the liquid from
flowing back when removing the purge tubing.
74
5
Disconnect the purge tubing.
6
Fit the original connector to the port.
7
Flush the sample inlet tubing with buffer to remove any trapped air
bubbles according to the procedure in section 12.3.4.
8
Gently move the sample inlet tubing to the sample vessel.
ÄKTAFPLC Optional Configurations User Manual 18-1174-46 Edition AA
18117446AA_FPLC_OPTCONF.book Page 75 Wednesday, July 2, 2003 7:58 PM
Sample pump P-960 and sample valve
12
12.3.6 Preparing a method for filling a sample loop
To use the sample pump for filling a sample loop, select Sample Pump
Loop Filling P-960 as sample application technique in the Method
Wizard when creating the new method.
To use an additional valve as sample valve, for example, Valve 7, add
the Valve7 instruction to the method in the Method Editor. The Method
Wizard does not support the sample valve function.
The sample pump properties are designated P960_Flow and
P960_Press in the flow scheme and run data windows.
The valve properties are designated, for example, Valve7 in the flow
scheme and run data windows.
Note: When filling the sample loop, the resistance in the flowpath may
cause cavitation if the flow rate exceeds 0.5 ml/min.
Note: For complete filling, an overfill of 2-5 times the loop volume is
needed for maximum reproducibility between the runs.
12.3.7 Emptying the sample loop
When emptying the sample loop, use a buffer volume of approximately
5 times the sample loop volume to flush the loop and ensure that all
sample is injected onto the column.
ÄKTAFPLC Optional Configurations User Manual 18-1174-46 Edition AA
75
18117446AA_FPLC_OPTCONF.book Page 76 Wednesday, July 2, 2003 7:58 PM
12
Sample pump P-960 and sample valve
12.4 Direct loading onto the column
Loading sample directly onto the column is useful when large amounts
of sample is to be loaded. The sample is pushed onto the column.
Note: In this configuration, some columns generate a back-pressure
above 2.0 MPa at their recommended flow rates. If the backpressure exceeds 2.0 MPa (the upper pressure limit of Pump
P-960), the pump will stop immediately. To achieve a backpressure below 2.0 MPa when using these columns, we
recommend decreasing the flow rate.
We particularly recommend decreasing the flow rate of the
system pump during equilibration, before sample application,
and before switching the sample pump in-line. The sample pump
will not start if the back-pressure exceeds 2.0 MPa.
12.4.1 Connecting the capillaries
1 Make sure that the components are properly installed according to
section 12.2 Installing the components.
2
Cut the capillaries to suitable lengths and connect them using
connectors and ferrules as indicated in the table and in the figures.
Those lengths are maximum values.
3
Check that all capillary and electrical connections have been
carried out correctly.
Fingertight connector 1/16"
Pump P-960
Union fingertight female/ M6 male
Outlet connection
Union 5/16" female/ HPLC male
Tubing connector for 1/8" o.d. tubing with
ferrule for 1/8" o.d. tubing
Inlet connection
76
ÄKTAFPLC Optional Configurations User Manual 18-1174-46 Edition AA
18117446AA_FPLC_OPTCONF.book Page 77 Wednesday, July 2, 2003 7:58 PM
Sample pump P-960 and sample valve
12
On-line filter
2
Injection
Valve (V1)
4
Column
Mixer
17
2
6
34 5
Pump A Pump B
3
UV
COND
6
Restrictor
A
B
1
7
Sample
Pump
W2
W1
Restrictor
5
Fraction
Collector
W3
S1
Capillary (max. length)
Connector
Connection points
1
Tefzel i.d. 1.0 mm x 50 cm
(Sample inlet tubing)
Fingertight connector 1/16", 18-1112-55
Sample valve, center port*
Fingertight connector 1/16", 18-1112-55
Union fingertight female/ M6 male, 18-1112-57
Sample pump, inlet
Fingertight connector 1/16", 18-1112-55
Sample pump, outlet
Fingertight connector 1/16", 18-1112-55
Injection valve, port 2
2
Tefzel i.d. 1.0 mm x 50 cm
3
PEEK i.d. 0.75 mm x 15 cm
Fingertight connector 1/16", 18-1112-55
Injection valve, port 3
Fingertight connector 1/16", 18-1112-55
Injection valve, port 6
4
Tefzel i.d. 1.0 mm x 130 cm
Fingertight connector 1/16", 18-1112-55
Injection valve, port 5
5
Tefzel i.d. 1.0 mm x 10 cm
Fingertight connector 1/16", 18-1112-55
Injection valve, port 4
Fingertight connector 1/16", 18-1112-55
Flow restrictor, inlet
Fingertight connector 1/16", 18-1112-55
Flow restrictor, outlet
6
Tefzel i.d. 1.0 mm x 120 cm
7
Teflon i.d. 1.6 mm x 130 cm* Union 5/16" female/ HPLC male, 18-1142-08.
Tubing connector for 1/8" o.d. tubing, 18-1121-17
with ferrule for 1/8" o.d. tubing, 18-1121-18.
*
Sample valve,
ports 1–8*
Only if you have a sample valve in your configuration (not shown here).
Note! Connect stop plugs to non-used ports in the sample valve.
Note! If low sample flows are used (≤10 ml/min), sample inlet tubings connected to ports 1–7 can
be replaced with Tefzel i.d. 1.0 mm tubing together with finger-tight connectors. The sample inlet
tubing should be adjusted to a suitable length.
ÄKTAFPLC Optional Configurations User Manual 18-1174-46 Edition AA
77
18117446AA_FPLC_OPTCONF.book Page 78 Wednesday, July 2, 2003 7:58 PM
12
Sample pump P-960 and sample valve
12.4.2 Preparing for operation
1 Start your ÄKTAFPLC optional configuration system as described in
2.6 Preparation for use. Make sure that Sample pump P-960 and (if
required) Valve V7 (or Valve V8 or Valve V9)* are selected in the
Component list.
2
Check that the sample pump and the sample valve (if included) are
indicated in the flow scheme window.
3
Make sure the system is connected as previously described in
section 12.4.1 Connecting the capillaries.
12.4.3 Testing the pump and the valve
Verify that the sample pump is functioning properly by issuing manual
commands from UNICORN as follows:
Note: The sample valve is designated Valve 7 in this instruction.
1
Fill a container with distilled water and submerge the sample
inlet capillary S1 (or, for example, S7 if the sample valve is
included) in the container.
2
Set the injection valve to position WASTE.
3
Remove air from the sample flow path using the purge tubing
according to section 12.4.5.
4
In System Control select Manual:Flowpath.
5
If the sample valve is included, select the instruction Valve7 in the
list and select 7.
6
Click on Execute.
7
Select Manual:Pump.
8
Select the instruction SampleFlow_960 in the instruction list.
9
Set Flowrate to 1 ml/min and click Execute.
10 Check that the sample pump is delivering flow through port 4 (W2)
in the injection valve.
11 Stop the pump by clicking End in the System Control toolbar.
*
78
The sample valve is designated V7 in this instruction.
ÄKTAFPLC Optional Configurations User Manual 18-1174-46 Edition AA
18117446AA_FPLC_OPTCONF.book Page 79 Wednesday, July 2, 2003 7:58 PM
12
Sample pump P-960 and sample valve
12.4.4 Removing air by running the sample pump
If there are only small amounts of air in the sample flow path, remove
the air as follows:
1
Immerse the end of the sample inlet tubing in a suitable buffer
(inlet S8, if using a sample valve).
2
If using a sample valve, set the valve to port 8 (buffer inlet).
3
Set the injection valve to WASTE.
4
Run the pump at 40 ml/min for 1 min.
If the pump fails pumping liquid, remove the air using a purge
tubing according to section 12.4.5 Removing air by using a purge
tubing.
12.4.5 Removing air by using a purge tubing
If there is plenty of air in the sample inlet tubings or if the sample pump
is dry, use a purge tubing to fill the tubings and the pump.
Procedure for system including IV/PV-908 as sample valve
This procedure describes how to first fill the sample inlet tubings and
then the buffer inlet tubing.
To fill the sample inlet tubings in port 1–7:
1
Put the chosen sample inlet tubings from port 1–7 in the sample
valve into the sample tubes.
2
Immerse the tubing from port 8 in the valve in a buffer vessel.
3
Set the valve to any of the chosen sample inlet ports 1–7.
Note: The sample inlet tubings should be filled before filling the
buffer tubing connected to port 8.
4
Disconnect the connector fitted to injection valve V1, port 3.
Connect the purge tubing to the same port.
Purge
tubing
5
Set the injection valve V1 to LOAD.
6
Draw sample with the syringe until the liquid level has passed
through the sample valve.
ÄKTAFPLC Optional Configurations User Manual 18-1174-46 Edition AA
79
18117446AA_FPLC_OPTCONF.book Page 80 Wednesday, July 2, 2003 7:58 PM
12
Sample pump P-960 and sample valve
7
Switch the sample valve to the next sample inlet tubing to be filled.
Note: If the syringe needs to be emptied, switch the sample valve
before removing the syringe to prevent sample from flowing
back to the vessel.
8
Repeat step 6 and 7 for the remaining sample inlet tubings.
To fill the buffer inlet tubing in port 8:
1
Set the sample valve to port 8.
2
Draw buffer with the syringe until the liquid level has passed
through the sample pump.
The check valves in the sample pump will prevent the liquid from
being withdrawn when removing the purge tubing.
3
Disconnect the purge tubing.
4
Fit the original connector to the port.
5
Flush the sample flow path tubing with buffer to remove any
trapped air bubbles and rinse the pump according to the procedure
in section 12.4.4 Removing air by running the sample pump.
Procedure for system not including IV(PV-908 as sample valve
1
Put the sample inlet tubing in a buffer vessel.
2
Disconnect the connector fitted to injection valve V1, port 3.
Connect the purge tubing to the same port.
3
Set the injection valve V1 to LOAD.
4
Draw buffer with the syringe until the liquid level has passed
through the sample pump.
The check valves in the sample pump will prevent the liquid from
flowing back when removing the purge tubing.
80
5
Disconnect the purge tubing.
6
Fit the original connector to the port.
7
Flush the sample inlet tubing with buffer to remove any trapped air
bubbles according to the procedure in section 12.4.4 Removing air
by running the sample pump.
8
Gently move the sample inlet tubing to the sample vessel.
ÄKTAFPLC Optional Configurations User Manual 18-1174-46 Edition AA
18117446AA_FPLC_OPTCONF.book Page 81 Wednesday, July 2, 2003 7:58 PM
Sample pump P-960 and sample valve
12
12.4.6 Preparing a method for direct loading onto column
To use the sample pump for direct loading onto the column, select
Sample Pump Direct Loading P-960 as sample application technique in the
Method Wizard when creating the new method.
To use an additional valve as sample valve, for example, Valve 7, add
the Valve7 instruction to the method in the Method Editor. The Method
Wizard does not support the sample valve function.
The sample pump properties are designated P960_Flow and P960_Press
in the flow scheme and run data windows.
The valve properties are designated, for example, Valve7 in the flow
scheme and run data windows.
Note: Make sure that any air trapped in the sample flow path is
removed before use.
ÄKTAFPLC Optional Configurations User Manual 18-1174-46 Edition AA
81
18117446AA_FPLC_OPTCONF.book Page 82 Wednesday, July 2, 2003 7:58 PM
12
Sample pump P-960 and sample valve
12.5 Loading a Superloop
The sample pump can be used to fill a Superloop. The Superloop allows
introduction of larger sample volumes into a pressurized fluid system.
The sample is pushed into the Superloop by the sample pump.
ml
10
5
0
Superloop consists of a movable seal in a glass tube. The seal divides
the tube into two separate chambers. Depending on the flow direction,
the seal moves towards either end piece of the glass tube.
Superloop is available in three sizes (10, 50, 150 ml) allowing
application of 1–10, 1–50 and 1–150 ml samples respectively.
When loading a Superloop, a sample valve is usually not used.
12.5.1 Connecting the capillaries
1 Make sure that the sample pump is properly installed according to
section 12.2 Installing the components.
2
Cut the capillaries to suitable lengths and connect them using
connectors and ferrules as indicated in the table and in the figures.
The lengths are maximum values.
3
Check that all capillary and electrical connections have been
carried out correctly.
Fingertight connector 1/16"
Pump P-960
Union fingertight female/ M6 male
Outlet connection
Inlet connection
82
ÄKTAFPLC Optional Configurations User Manual 18-1174-46 Edition AA
18117446AA_FPLC_OPTCONF.book Page 83 Wednesday, July 2, 2003 7:58 PM
Sample pump P-960 and sample valve
12
On-line filter
4
Injection
Valve (V1)
2
17
2
6
34 5
UV
COND
5
3 Restrictor
Buffer
A
B
Sample
Pump
1
W2
W1
S1
Sample
Restrictor
Pump A Pump B
Column
Mixer
Fraction
Collector
W3
Superloop
Capillary (max. length)
Connector
Connection points
1
Tefzel i.d. 1.0 mm x 130 cm
(Sample inlet tubing)
Fingertight connector 1/16", 18-1112-55
Union fingertight female/ M6 male, 18-1112-57
Sample pump, inlet
2
Tefzel i.d. 1.0 mm x 50 cm
Fingertight connector 1/16", 18-1112-55
Sample pump, outlet
Fingertight connector 1/16", 18-1112-55
Injection valve, port 3
Fingertight connector 1/16", 18-1112-55
Injection valve, port 4
3
Tefzel i.d. 1.0 mm x 130 cm
4
Tefzel i.d. 1.0 mm x 10 cm
5
Tefzel i.d. 1.0 mm x 120 cm
Fingertight connector 1/16", 18-1112-55
Injection valve, port 5
Fingertight connector 1/16", 18-1112-55
Flow restrictor, inlet
Fingertight connector 1/16", 18-1112-55
Flow restrictor, outlet
ÄKTAFPLC Optional Configurations User Manual 18-1174-46 Edition AA
83
18117446AA_FPLC_OPTCONF.book Page 84 Wednesday, July 2, 2003 7:58 PM
12
Sample pump P-960 and sample valve
12.5.2 Preparing for operation
1 Start your ÄKTAFPLC optional configuration system as described in
2.6 Preparation for use. Make sure that Sample pump P-960 is
selected in the Component list.
2
Check that the sample pump is indicated in the flow scheme
window.
3
Make sure the system is connected as previously described in
section 12.5.1 Connecting the capillaries.
12.5.3 Testing the sample pump
Verify that the sample pump is functioning properly by issuing manual
commands from UNICORN as follows:
1
Fill a container with distilled water and submerge the sample
inlet capillary S1.
2
Set the injection valve to position INJECT.
WARNING! OVER-PRESSURE. The injection valve must be set to
position INJECT in the "Loading a Superloop" configuration. If not, the
Superloop might rupture due to over-pressure when running the
sample pump, resulting in injury.
84
3
Remove air from the sample flow path using the purge tubing
according to section 12.5.5.
4
In System Control select Manual:Pump.
5
Select the instruction SampleFlow_960 in the instruction list.
6
Set Flowrate to 5 ml/min and click on Execute.
7
Check that the sample pump is delivering flow.
8
Stop the pump by clicking End in the System Control toolbar.
ÄKTAFPLC Optional Configurations User Manual 18-1174-46 Edition AA
18117446AA_FPLC_OPTCONF.book Page 85 Wednesday, July 2, 2003 7:58 PM
12
Sample pump P-960 and sample valve
12.5.4 Removing air by running the sample pump
If there are only small amounts of air in the sample flow path, remove
the air as follows:
1
Immerse the end of the sample inlet tubing in a suitable buffer.
2
Set the injection valve to INJECT.
WARNING! OVER-PRESSURE. The injection valve must be set to
position INJECT in the "Loading a Superloop" configuration. If not, the
Superloop might rupture due to over-pressure when running the
sample pump, resulting in injury.
3
Run the pump at 40 ml/min for 1 min.
If the pump fails pumping liquid, remove the air using a purge
tubing according to section 12.3.5 Removing air by using a purge
tubing.
12.5.5 Removing air by using a purge tubing
If there is plenty of air in the sample inlet tubings or if the sample pump
is dry, use a purge tubing to fill the tubings and the pump.
1
Put the sample inlet tubing in a buffer vessel.
2
Disconnect the connector fitted to the injection valve, port 2.
Connect the purge tubing to the same port.
3
Set the injection valve to LOAD.
4
Draw buffer with the syringe until the liquid level has passed
through the sample pump.
The check valves in the sample pump will prevent the liquid from
flowing back when removing the purge tubing.
5
Disconnect the purge tubing.
6
Fit the original connector to the port.
7
Flush the sample inlet tubing with buffer to remove any trapped air
bubbles according to the procedure in section 12.5.4 Removing air
by running the sample pump.
8
Gently move the sample inlet tubing to the sample vessel.
ÄKTAFPLC Optional Configurations User Manual 18-1174-46 Edition AA
85
18117446AA_FPLC_OPTCONF.book Page 86 Wednesday, July 2, 2003 7:58 PM
12
Sample pump P-960 and sample valve
12.5.6 Preparing a method for loading a Superloop
To use the sample pump for loading a Superloop, select Sample Pump
Loop Filling P-960 as sample application technique in the Method
Wizard when creating the new method.
Note: Do NOT select the S8 – Prerinse Sample Loop (2 ml) check box!
The sample pump properties are designated SampleFlow_960 and
P960_Press in the flow scheme and run data windows.
WARNING! Make sure that the upper pressure limit of the system is
lower than the maximum allowed pressure of the Superloop.
86
ÄKTAFPLC Optional Configurations User Manual 18-1174-46 Edition AA
18117446AA_FPLC_OPTCONF.book Page 87 Wednesday, July 2, 2003 7:58 PM
Air sensors
13
13 Air sensors
13.1 General
Air sensors Air-912, Air-912N, Air-925 and Air-925N can be used in
the ÄKTAFPLC for detecting air in the system flow path or sample flow
path. Up to four air sensors can be used with the instruction names
AirSensor1, AirSensor2, AirSensor3, and AirSensorP960 (Air-912N
and Air-925N).
The examples below show two possible locations. Air sensors can be
fitted in other locations in the ÄKTAFPLC system flow path. The
installation procedure is similar to the ones described in the following
sections.
On-line filter
Column
Mixer
Injection
Valve (V1)
17
2
6
34 5
UV
COND
AirSensor1
B
Buffer
W2
W1
Restrictor
Pump A Pump B
Fraction
Collector
W3
A
AirSensor1 in the inlet flow of Pump P-920 for checking the buffer supply.
ÄKTAFPLC Optional Configurations User Manual 18-1174-46 Edition AA
87
18117446AA_FPLC_OPTCONF.book Page 88 Wednesday, July 2, 2003 7:58 PM
13
Air sensors
On-line filter
17
Injection
Valve (V1)
2
6
34 5
UV
COND
Restrictor
Pump A Pump B
Sample
Pump
B
A
Column
Mixer
W2
W1
Fraction
Collector
W3
AirSensorP960
Sample container
AirSensorP960 in the sample inlet flow when applying sample directly
onto the column with a sample pump.
13.2 Installation
CAUTION! Make sure ÄKTAFPLC is switched off before installing the
optional components. The mains power to ÄKTAFPLC must be switched
OFF before disconnecting or connecting the UniNet-2 cables.
13.2.1 Fitting the Air-900 control box
1 Make sure that the ÄKTAFPLC chromatography system is switched
off.
2
Check that the ID switches on the connector panel of the Air-900
control box are set to code 0 (both switches in ON position).
LED
1
88
2
3
AIR CELL
ID switch (black)
12
ID
UniNet 2
Code 0
1 2
ÄKTAFPLC Optional Configurations User Manual 18-1174-46 Edition AA
18117446AA_FPLC_OPTCONF.book Page 89 Wednesday, July 2, 2003 7:58 PM
13
Air sensors
3
Attach the Air-900 control box vertically to a suitable mounting
slot. Lock in position by pushing up the snap lock.
Release
Fasten
13.2.2 Connecting to the UniNet-2 communication network
Use the attached UniNet-2 cable to connect the Air-900 control box to
the UniNet-2 communication link. It can be connected anywhere
between the system pump P-920 and the termination plug.
To system pump inlet
13.2.3 Air sensor Air-925 (AirSensor1) in the system pump inlet
1 Remove the capillary from the switch valve inlet A1.
2
Purge
valve
Note:
L1=920 mm
Air sensor
Air-925
Cut new Teflon capillaries as shown in the figure and attach the
purge valve and the air cell using the connectors and ferrules
supplied.
3
The length of L1 is dependent on which flow, sensitivity
and type of instruction (alarm or watch) is used in
UNICORN. The optimal length of L1 must be tested in the
user configuration.
Route the signal cable from the air cell to the Air cell 1 connector on
the Air-900 control box and plug it in.
L2=300 mm
Inlet filter
ÄKTAFPLC Optional Configurations User Manual 18-1174-46 Edition AA
89
18117446AA_FPLC_OPTCONF.book Page 90 Wednesday, July 2, 2003 7:58 PM
13
Air sensors
13.2.4 Air sensor Air-912N (AirSensorP960) in the sample inlet flowpath
Air sensor Air-912N kit contains the necessary items required for this
application. Air sensor Air-912N can only be connected to Pump
P-960.
To sample pump inlet
1
2
Cut the i.d. 1.0 mm tubing supplied and
connect to Air-912N using the
fingertight connectors and union
supplied.
3
Connect the air sensor cable to the
socket underneath Pump P-960.
25 cm
Air-912N
Remove the sample inlet capillary
between the sample valve (or sample)
and the sample pump inlet connector.
Air sensor
socket
Pump P-960
Outlet connection
Inlet connection
25 cm
Inlet filter or
sample valve
Note:
90
Make sure that no air bubbles are trapped in the sample
pump flow path before using the pump (refer to section 12
Sample pump P-960 and sample valve).
ÄKTAFPLC Optional Configurations User Manual 18-1174-46 Edition AA
18117446AA_FPLC_OPTCONF.book Page 91 Wednesday, July 2, 2003 7:58 PM
13
Air sensors
13.2.5 Capillary connectors
The following capillary connectors are recommended for connecting
the liquid tubings to the air sensors:
Airsensor Air-925 and Air-925N
Connector for 3/16" o.d. tubing, no. 18-1112-49,
with ferrule, 18-1112-48
Connector for 1/8" o.d. tubing, no. 18-1121-17,
with ferrule, 18-1121-18
Connector for 1/16" o.d. tubing, no. 18-1127-07,
with ferrule, 18-1127-06
Airsensor Air-912 and Air-912N
Fingertight connector for 1/16" o.d. tubing,
no. 18-1112-55
ÄKTAFPLC Optional Configurations User Manual 18-1174-46 Edition AA
91
18117446AA_FPLC_OPTCONF.book Page 92 Wednesday, July 2, 2003 7:58 PM
13
Air sensors
13.3 Operation
13.3.1 Preparing for operation
1 Start your ÄKTAFPLC optional configuration system as described in
2.6 Preparation for use. Make sure that Airsensor 1 (and/or 2 and/
or 3) is selected in the Components list.
2
In System Control, select System:Settings.
3
Click the Monitors radio button.
4
In the Instruction field, select, e.g., AirSensor1.
5
In the Parameters field, select High_Sensitivity for the air cell(s) to be
used. Select the flow source (for AirSensor1–3), i.e. SystemPump if
the air cell is located in the main system flow path, or SamplePump
if the air cell is located in the sample injection flow path.
Note:
92
The sensitivity of the air cells can be selected at three levels;
high, medium or low sensitivity. We recommend you use
the high sensitivity setting as standard.
6
Check that the connected air cell(s) are indicated in the flow scheme
in UNICORN.
7
Verify that the air cells are functioning properly by issuing manual
commands from UNICORN as follows.
ÄKTAFPLC Optional Configurations User Manual 18-1174-46 Edition AA
18117446AA_FPLC_OPTCONF.book Page 93 Wednesday, July 2, 2003 7:58 PM
13
Air sensors
13.3.2 Testing AirSensor1 located in the main system flow path
1 Confirm that the air sensor AS1 is shown in the flow scheme.
2
Fill a sample container with distilled water
and submerge the inlet filter of the A1 tubing.
Purge the air cell using a syringe and the
purge valve mounted on the inlet capillary.
The purge valve is opened to the syringe by
turning the syringe connector a 1/2 turn
counter clockwise.
3
In System Control select Manual:Pump.
4
Select the instruction Flow in the instruction list.
5
Set Flowrate to 5 ml/min and click Execute.
6
While the system pump is running, check that the AS1 symbol in
the flow diagram is indicated with white colour.
7
Lift the inlet filter out of the flask and check that the white
indication changes to red when air enters the AS1 flow sensor.
8
Submerge the inlet filter and check that the red indication changes
back to white again. Stop the system pump by clicking End in the
System Control toolbar.
9
Set up instructions as described in 13.3.4 Setting up instructions for
the air sensor function, to monitor the AirSensor1 signal to suit
your needs.
Note: AirSensor2 and AirSensor3 are tested in a similar way.
13.3.3 Testing AirSensorP960 located in the sample flow path
1 Make sure that the sample pump is functioning properly.
2
Confirm that air sensor ASP960 is shown in the flow scheme.
3
Fill a sample container with distilled water and submerge the
sample tubing.
4
In System Control select Manual:Pump in UNICORN.
5
Select the instruction SampleFlow_960 in the instruction list.
6
Set Flowrate to 5 ml/min and click Execute.
7
While the sample pump is running, check that the ASP960 symbol
in the flow diagram is indicated with white colour.
ÄKTAFPLC Optional Configurations User Manual 18-1174-46 Edition AA
93
18117446AA_FPLC_OPTCONF.book Page 94 Wednesday, July 2, 2003 7:58 PM
13
Air sensors
8
Lift the sample tubing inlet out of the flask and check that the white
indication changes to red when air enters the ASP960 flow sensor.
9
Submerge the sample tubing inlet and check that the red indication
changes back to white again. Stop the pump by clicking End in the
System Control toolbar.
10 Set up instructions as described below to monitor the
AirSensorP960 signal to suit your needs.
13.3.4 Setting up instructions for the air sensor function
For AirSensor1-3, the presence of air in the flow path is detected by the
Air-900 control box, which reports its status to UNICORN. For
AirSensorP960, air is detected by the control software in Pump P-960.
The desired control action, based on the status report, is governed by
instructions in the method used. Instructions for handling the air
sensors must be inserted manually in a method.
Alarm_AirSensor1-3 and Alarm_AirSensorP960
Enables/disables alarm generation for the air cells. An active alarm sets
the chromatography system to Pause mode. Alarms can be activated/
deactivated in System:Settings or inserted as instructions in a method.
They can also be activated/deactivated manually in Manual:Alarms&Mon.
Stop_AirP960
When the instruction is enabled, Pump P-960 will stop when air is
detected. The method execution then continues immediately with the
next instruction, i.e. the system will not be set to Pause mode. The
instruction can be enabled/disabled in System:Settings or inserted as
instructions in a method. It can also be enabled/disabled manually in
Manual:Alarms&Mon.
94
ÄKTAFPLC Optional Configurations User Manual 18-1174-46 Edition AA
18117446AA_FPLC_OPTCONF.book Page 95 Wednesday, July 2, 2003 7:58 PM
13
Air sensors
Watch_AirSensor1-3 and Watch_AirSensorP960
Monitors the air sensor status signals from the air cells. Performs a
user-defined action if the test condition is fulfilled. Monitoring is
cancelled automatically once the condition has been fulfilled. The userdefined action can be, for example, PAUSE or a call to a block.
13.3.5 Preparing a method for using air sensors
The following two examples show how to use air sensors in a method.
Example 1
In this example, AirSensorP960 is used together with sample pump
P-960 in a configuration designed to accomplish direct sample loading
onto the column and checking the sample supply.
1
In the Method Wizard, select Sample Pump Direct Loading P-960 as
sample application technique when creating the method.
2
To enable the air sensor function, check the Inject all Sample box.
3
Type the maximum allowed sample volume in the Maximal Injection
Volume (0-20000 ml) field.
Example 2
In this example, AirSensor1 is used for checking the supply of buffer A.
1
In the Method Editor, select File:Method Wizard and create a new
method.
2
Select View:Text instructions to display the text instruction editor.
Highlight the instruction below which you want to insert the alarm
air sensor instruction.
3
Click the Alarm&Mon radio button and select Alarm_AirSensor1.
If the air sensor detects air, e.g. if the buffer vessel is empty, the
system will be paused and the system pump stops. After filling the
buffer vessel the run can be resumed.
4
Select Enabled and click Insert.
5
Save the method.
ÄKTAFPLC Optional Configurations User Manual 18-1174-46 Edition AA
95
18117446AA_FPLC_OPTCONF.book Page 96 Wednesday, July 2, 2003 7:58 PM
14
Auxiliary equipment controlled via Pump P-920 REMOTE connector
14 Auxiliary equipment controlled via
Pump P-920 REMOTE connector
14.1 Installation
CAUTION! Make sure ÄKTAFPLC is switched off before installing the
optional components.
REMOTE connector
on rear of P-920
Pressure
Analogue out 0-1 V
Remote
UniNet 2
UniNet 1
Mains output
Leakage current, max
Auxiliary equipment using digital input/output signals can be
connected to the 9-pole D-SUB female REMOTE connector on the rear
panel of Pump P-920 (5 V TTL signals only). Pins 1–4 handle digital
input signals, and pins 6–9 handle digital output signals. Pin 5 is signal
ground.
3,5 mA
Mains
Voltage
100-200 V-
Frequency Power, max Fuse
50-60 Hz
600 VA
Pin
Signal
Function
1-4
AuxIn 1-4
Active state can be selected to 0 or 1 in UNICORN.
Min. duration=50 ms. Max. frequency=1 Hz.
5
0V
Signal ground
6-9
AuxOut 1-4
Active state can be selected to 0 or 1 in UNICORN
(5 V TTL signals).
T 6,3 AL
WARNING! For continued protection against
risk of fire, replace only woth fuse
of the specified type and current ratings
5
4
9
3
8
2
7
1
6
Use a shielded cable with a 9-pin D-SUB male connector for the P-920
REMOTE connector. The other end of the cable connects to the auxiliary
equipment and must be adapted to its relevant connector.
The connection example below shows the principle for connecting
input/output signals.
P-920
Digital signal interface
Pin 1
Pin 2
Pin 3
Pin 4
AuxIn 1 AuxIn 2 AuxIn 3 AuxIn 4
From external equipment outputs
Pin 5
Pin 6
AuxOut 1
Pin 7
AuxOut 2
Pin 8
AuxOut 3
Pin 9
REMOTE
Connector
AuxOut 4
To external equipment inputs
Signal ground in external equipment
96
ÄKTAFPLC Optional Configurations User Manual 18-1174-46 Edition AA
18117446AA_FPLC_OPTCONF.book Page 97 Wednesday, July 2, 2003 7:58 PM
14
Auxiliary equipment controlled via Pump P-920 REMOTE connector
14.2 Operation
14.2.1 Preparing for operation
Start your ÄKTAFPLC optional configuration system as described in 2.6
Preparation for use. Make sure that Auxiliary Equipment is selected in the
Components list.
Four digital input and four digital output signals can be handled via the
P-920 REMOTE connector. The input signals are designated AuxIn1-4
and the output signals are designated AuxOut1-4.
14.2.2 Instructions for signal handling
To set up signal handling in a method, the following parameters and
instructions must be inserted manually in a method.
AuxOut1-4
To set up and use the output signals, do as follows:
1
In System Control, select System:Settings.
2
Click on the Specials radio button.
3
In the Instruction field, select the signal you want to use, e.g.,
AuxOut1.
4
Check in the external equipment User Manual which logical value,
0 or 1, that corresponds to inactive mode.
5
For AuxOut1 Parameters/Signal, set this value (0/1) as default. This
ensures that the external equipment is reset to inactive mode when
the method is completed.
6
Repeat this for all the output signals you want to use.
ÄKTAFPLC Optional Configurations User Manual 18-1174-46 Edition AA
97
18117446AA_FPLC_OPTCONF.book Page 98 Wednesday, July 2, 2003 7:58 PM
14
Auxiliary equipment controlled via Pump P-920 REMOTE connector
Watch_AuxIn1-4
These instructions set up the initial status of the input signals. The
status of the signals (1/0) can be shown in Run Data pane in
UNICORN.
The instructions also monitor the signal status for the input signals and
perform user-defined actions if test conditions are fulfilled. Monitoring
is cancelled automatically once a condition has been fulfilled. Preselected action can be, for example, call to a block.
Curve representation of input/output signals
The status for signals AuxIn1 and AuxOut1 can be stored as curves in the
chromatogram. This is selected in System:Settings by setting
Curves:Store ON.
The parameter Time between samples is used to set the scan cycle for
curve updating. The shortest possible interval is 1 s.
98
ÄKTAFPLC Optional Configurations User Manual 18-1174-46 Edition AA
18117446AA_FPLC_OPTCONF.book Page 99 Wednesday, July 2, 2003 7:58 PM
AD-900
15
15 AD-900
15.1 General
AD-900 is an A/D converter
for connecting an external
instrument to ÄKTAFPLC
system. The module has one
high resolution analog input
for monitoring e.g. pressure,
UV monitor signals or other
signals available as voltage
outputs.
AD-900
ID
Analog
UniNet
2
In
AD-900 communicates with the UNICORN control system via
UniNet-2.
15.2 Installation
CAUTION! Make sure ÄKTAFPLC is switched off before installing the
optional components. The mains power to ÄKTAFPLC must be
switched OFF before disconnecting or connecting the UniNet-1 and
UniNet-2 cables.
1
Connect the Mini-DIN cable connector to socket Analog In at
AD-900.
Note:
Code 0
The length of the analog cable must not exceed 3 m.
2
Remove the protection cover from the wires marked 1 and 2 at the
other end of the Mini-DIN cable.
3
Connect wire 1 (brown) to the external device high output.
4
Connect wire 2 (red) to the external device low output.
5
Set the ID switches as shown in the figure.
1 2
ÄKTAFPLC Optional Configurations User Manual 18-1174-46 Edition AA
99
18117446AA_FPLC_OPTCONF.book Page 100 Wednesday, July 2, 2003 7:58 PM
15
AD-900
6
Connect the module with two UniNet cables as a part of the
UniNet-2 chain. One UniNet cable is supplied with the module.
The valve can be connected anywhere between the system pump P920 and the termination plug connected to the injection valve.
Note:
The power on-LED on AD-900 flashes for a few seconds
when connecting the UniNet cable. The light gets steady
when the communication with UNICORN is established.
7
Attach the module to the system rack.
8
Check that all electrical connections have been made correctly.
15.3 Operation
15.3.1 Preparing for operation
1 Start your ÄKTAFPLC optional configuration system as described in
section 2.6 Preparation for use. Make sure that AD900 is selected in
the Components list.
2
Check that AD-900 is indicated in the flow scheme in UNICORN.
A steady light from the green power on-LED on AD-900 indicates
that the communication is established.
3
Verify that the module is functioning by running the system pump
manually and checking that a signal is shown in the Run Data pane.
15.3.2 Using AD-900 for monitoring an external signal
The AD-900 instructions are designated AD900 in the flow scheme.
In the run data window, they are designated AD900.
To use AD-900 for peak fractionation in a method instead of using the
UV measurement in Monitor UPC-900:
1
In the Method Wizard, select a fractionation option that includes Peak
Fractionation.
2
In the Peak Fractionation dialog, select AD900 from the Peak
Identification menu.
3
Type suitable values in AD900 Level, Peak Fractionation Volume and,
if no column is selected, Minimum Peak Width.
4
Save the method when finished.
Note: When adding the instruction in an existing method in the
Method Editor, insert it before the fractionation.
100
ÄKTAFPLC Optional Configurations User Manual 18-1174-46 Edition AA
18117446AA_FPLC_OPTCONF.book Page 101 Wednesday, July 2, 2003 7:58 PM
15
AD-900
The settings of the AD-900 filter can be changed in System:Specials.
Autozero of the AD-900 can be performed in Manual:Alarms&Mon.
To set specific filter properties in an existing method:
1
In the Method Editor, select View:Text Instructions to display the text
instructions editor. Double-click on the first block in the method
where the AD-900 instructions should be inserted. Highlight an
instruction. The instruction will be inserted below this instruction.
Note:
2
3
Make sure that the instruction is inserted before the sample
injection.
Click on the Alarm&Mon radio button.
From the Instructions list, select AD900Filter. Choose Type and
Length and click Insert.
4
From the Instructions list, select AutoZeroAD900 and click Insert. The
defined instruction is inserted in the method.
ÄKTAFPLC Optional Configurations User Manual 18-1174-46 Edition AA
101
18117446AA_FPLC_OPTCONF.book Page 102 Wednesday, July 2, 2003 7:58 PM
16
Superloop
16 Superloop
WARNING! Superloop 10 ml and Superloop 50 ml must not be used
at pressures above 4 MPa (40 bar, 580 psi). Superloop 150 ml must
not be used above 2 MPa (20 bar, 290 psi). At higher pressures, the
glass tube might shatter.
ml
10
Superloop permits the introduction of larger volumes of sample
(1–150 ml) onto the column. Superloop must not be used with columns
generating a column pressure higher than that stated in the table below.
If the column pressure is higher, the flow must be reduced in order not
to exceed the pressure limit. Set the pressure limit in the method with
the variable Pressure_limit.
5
Superloop is an accessory available in three sizes:
0
Volume
Max. allowed column pressure
Code no.
10 ml
4 MPa
18-1113-81
50 ml
4 MPa
18-1113-82
150 ml
2 MPa
18-1023-85
All the sample is applied, which gives good reproducibility and high
recovery. The sample is not diluted as the buffer pushing the movable
seal is kept separate. The loaded sample can be injected all at once or
in several smaller volumes, down to 1 ml portions, permitting
automated repetition of sample injection.
Normally, Superloop is filled manually with a syringe. However,
Superloop can also be filled automatically, refer to section 12.5
Loading a Superloop on page 82.
16.1 Preparation
Prepare the injection valve and connect Superloop as follows:
1
2
Connect the supplied
Union Luer female/1/16"
male to port 3 of the
injection valve.
Ensure that tubing for the
waste is connected to port 4
of the injection valve.
Pos. 1 LOAD
1
Column
7
2
Sample
syringe
3
6
4
5
Top
Super
loop
Bottom
Waste
102
Pump
Waste
ÄKTAFPLC Optional Configurations User Manual 18-1174-46 Edition AA
18117446AA_FPLC_OPTCONF.book Page 103 Wednesday, July 2, 2003 7:58 PM
16
Superloop
3
Ensure that Superloop is filled with liquid (see separate Superloop
Instruction).
4
Mount Superloop in a column holder as close to the injection valve
as possible.
5
Connect the bottom tubing to injection valve port 2.
6
Connect the top tubing to injection valve port 6.
7
Make sure all connections are fingertight.
16.2 Filling Superloop
Filling Superloop is achieved as follows:
1
Set the injection valve to position INJECT.
2
Start Pump P-920 and let it run until the
movable seal has reached the bottom of
Superloop.
3
Stop Pump P-920 and set the injection valve
to position LOAD.
ml
40
35
4
Load a large volume syringe with sample.
30
25
5
20
Gently load the syringe contents into
Superloop through port 3.
15
10
5
0
6
Leave the syringe in position. The loaded
sample can be injected all at once or in
several smaller volumes, down to 1 ml
portions.
7
In the Method Wizard, select Manual as sample
application technique. The volume to inject is set by parameter
Empty Loop with.
8
The sample is applied to the column when the injection valve is set
to position INJECT. When the required volume has been injected,
set the valve to LOAD.
WARNING! Make sure that the upper pressure limit of the system is
lower than the maximum allowed pressure of the Superloop.
ÄKTAFPLC Optional Configurations User Manual 18-1174-46 Edition AA
103
18117446AA_FPLC_OPTCONF.book Page 104 Wednesday, July 2, 2003 7:58 PM
17
Configuration dependent delay volume
17 Configuration dependent delay volume
The system configuration delay volume must be recalculated and
altered when standard configuration after the UV cell is changed to
optional configuration, or vice versa. This is set in parameter
System:Settings:Specials:FracParameters:DelayVol.
17.1 Standard configuration
The standard configuration of an ÄKTAFPLC system has the following
delay volumes:
ÄKTAFPLC
•
Including Frac-901:
•
Including Frac-950:
Tubing kit
375 µl
Including accumulator
with tubing
No accumulator
Standard mode
348 µl
197 µl
Prep mode
865 µl
Not applicable
17.2 Optional configuration
Calculate the contribution from each new component and capillary,
according to the table below, and add this additional volume to the
standard configuration delay volume value.
The example below shows a calculation for including a pH flow cell in
an ÄKTAFPLC system with Frac-901:
Capillary volume + flow cell volume = 90/100 x 19.6 + 100 µl=128 µl.
The length of the new 0.5 mm i.d. capillary is 90 mm,
the volume of 100 mm tubing is 19.6 µl, and
the volume of the pH flow cell 100 µl.
The new delay volume value is 375 + 128 = 403 µl.
104
ÄKTAFPLC Optional Configurations User Manual 18-1174-46 Edition AA
18117446AA_FPLC_OPTCONF.book Page 105 Wednesday, July 2, 2003 7:58 PM
Configuration dependent delay volume
17
17.3 Component and capillary volumes
The volumes are theoretical values.
Component/capillary
Volume (µl)
Valve PV-908
7
Valve IV-908
27
Valve INV-907
9
Valve FV-903
113
UV flow cell, 2 mm
15
UV flow cell, 5 mm
10
Conductivity cell
24
pH flow cell
100
Accumulator (Frac-950)
40
Union 1/16" male/ 1/16" male (0.25 mm i.d.)
1.8
Union 1/16" male/ 1/16" male (0.5 mm i.d.)
7
Flow restrictor FR-902
5
Capillary i.d. 0.25 x 100 mm
4.9
Capillary i.d. 0.50 x 100 mm
19.6
Capillary i.d. 0.75 x 100 mm
44.2
Capillary i.d. 1.0 x 100 mm
78.5
ÄKTAFPLC Optional Configurations User Manual 18-1174-46 Edition AA
105
18117446AA_FPLC_OPTCONF.book Page 106 Wednesday, July 2, 2003 7:58 PM
18
Strategies and Method Wizard
18 Strategies and Method Wizard
18.1 Strategies overview
*
106
ÄKTAFPLC system
Strategy name*
FPLC with Frac-950
FPLCF400
FPLC with Frac-901
FPLC_400
The last three digits in the strategy name is the version
number.
ÄKTAFPLC Optional Configurations User Manual 18-1174-46 Edition AA
18117446AA_FPLC_OPTCONF.book Page 107 Wednesday, July 2, 2003 7:58 PM
Strategies and Method Wizard
18
18.2 Method Wizard
Method Wizard Configuration file: version 2.0
The following components are supported by the Method Wizard:
•
Fraction collector Frac-901
•
Fraction collector Frac-950
•
Autosampler A-900
•
Autosampler A-905
•
Column valve
•
Outlet valve
•
Buffer valve A1
•
Buffer valve A2
•
Sample pump P-960
•
Superloop (partly)
•
Air sensor 1–3
•
Air sensor P-960
•
AD-900
•
Conductivity monitoring
•
pH monitoring
ÄKTAFPLC Optional Configurations User Manual 18-1174-46 Edition AA
107
18117446AA_FPLC_OPTCONF.book Page 108 Wednesday, July 2, 2003 7:58 PM
18
108
Strategies and Method Wizard
ÄKTAFPLC Optional Configurations User Manual 18-1174-46 Edition AA
18117446AA_FPLC_OPTCONF.book Page 109 Wednesday, July 2, 2003 7:58 PM
19
Accessories and consumables
19 Accessories and consumables
19.1 Connections, chromatography – standard selection
Description and design
Connector
cat. no.
Ferrule
cat. no.
Connections
5/16" female/M6 male
18-1127-76
UNF 5/16-32 /
M6
PEEK black 100
Fingertight female/M6 male
18-1112-57
UNF 10-32
/M6
PEEK black 100
Fingertight connector
1/16” male
18-1112-55
UNF 10-32
Fingertight male/M6 female
18-1112-58
UNF 10-32 /
M6
Tubing connector for
3/16” o.d. tubing
18-1112-49 18-1112-48 UNF 5/16-24
4.8 mm
(3/16”)
PEEK black 70
Tubing connector for
1/8” o.d. tubing
18-1121-17 18-1121-18 UNF 5/16-24
3.2 mm
(1/8")
PEEK black 70
Tubing connector for
1/16” o.d. tubing
18-1127-07 18-1127-06 UNF 5/16-24
1.6 mm
(1/16")
PEEK black 70
Union 5/16” female/
HPLC male
18-1142-08
UNF 5/16-32 /
UNF 10-32
ÄKTAFPLC Optional Configurations User Manual 18-1174-46 Edition AA
Tubing o.d
1.6 mm
(1/16")
Material/
colour
Pressure
limit [bar]
PEEK black 250
PEEK black 100
PEEK black 70
109
18117446AA_FPLC_OPTCONF.book Page 110 Wednesday, July 2, 2003 7:58 PM
19
Accessories and consumables
19.2 Optional components and consumables
Item
Quantity/
pack
A/C*
Code no.
Fraction collector Frac-950 complete
with 18 mm + 30 mm tube rack
1
A
18-6083-00
18 mm + 30 mm tube rack, complete
with bowl, tube support and tube holder
1
A
18-6083-11
12 mm tube rack, complete with bowl,
tube support and tube holder
1
A
18-6083-12
Microtiter plate + 30 mm tube rack,
complete with bowl, tube support and
tube holder
1
A
18-6083-13
30 mm tube rack (standard mode),
complete with bowl, tube support and
tube holder
1
A
18-6083-14
30 mm tube rack (prep mode), complete
1
A
18-6083-15
250 ml bottles rack, complete
1
A
18-6083-16
Funnel to flask kit, complete with tubing,
funnels, tubing guide and extension legs
1
A
18-6083-17
Dispenser arm kit, complete
1
A
18-6083-18
Fraction Collector Frac-901, complete
with 18 mm tube rack
1
A
18-1118-97
Tube racks, complete with bowl,
tube support, holder and guide:
12 mm
18 mm
30 mm
1
1
1
A
A
A
19-8684-03
18-3050-03
18-1124-67
Tube support
1
A
18-3054-02
Tube holder and guide:
12 mm
18 mm
30 mm
1
1
1
A
A
A
19-7242-02
19-8689-02
18-1124-68
Eppendorf tube holder for 12 mm rack
100
A
18-8522-01
Flow diversion valve, FV-903, including
mounting bracket
1
A
18-1114-50
Fraction Collector Frac-950
Fraction Collector Frac-901
110
ÄKTAFPLC Optional Configurations User Manual 18-1174-46 Edition AA
18117446AA_FPLC_OPTCONF.book Page 111 Wednesday, July 2, 2003 7:58 PM
19
Accessories and consumables
Item
Quantity/
pack
A/C*
Code no.
Autosampler A-900
1
A
18-1116-61
Autosampler A-900 with Cooling
1
A
18-1144-61
Tray segment set 1.5 ml vial
(o.d. 12 mm)
1
A
18-1119-90
Tray segment set 0.5 ml vial
(o.d. 7 mm)
1
A
18-1120-48
Sample needle, stainless steel
1
A
18-1148-15
Wash solvent bottle 250 ml
1
A
18-1120-33
Autosampler A-905 for ÄKTA complete
1
A
18-1175-93
Sample needle, fused silica, 5 µl
1
A
18-1158-68
PEEK loop 20 µl
1
A
18-1160-49
ÄKTAdesign XT upgrade kit
1
A
18-6083-19
ÄKTA XT Tubing kit
1
A
18-1122-92
Sample needle, PEEK, 15 µl
1
A
18-1119-99
Buffer tubing 500 µl
1
A
18-1120-32
Buffer tubing 2000 µl
1
A
18-1120-31
Syringe 100 µl
1
A
18-1120-34
Syringe 250 µl
1
A
18-1120-35
Syringe 500 µl
1
A
18-1120-36
Syringe 1000 µl
1
A
18-1120-37
Luer lock connection, female
1
A
18-1120-38
PEEK loop 100 µl
1
A
18-1120-40
Syringe waste tubing
1
A
18-1120-44
Syringe tubing
1
A
18-1120-45
Autosampler A-900
Autosampler A-905 for ÄKTA
Common autosampler accessories
ÄKTAFPLC Optional Configurations User Manual 18-1174-46 Edition AA
111
18117446AA_FPLC_OPTCONF.book Page 112 Wednesday, July 2, 2003 7:58 PM
19
Accessories and consumables
Item
Quantity/
pack
A/C*
Code no.
Valve INV-907 including
one UniNet cable
(fill port, needle and syringe holder
are not included)
1
A
18-1108-40
Valve IV-908 including
one UniNet cable
1
A
18-1108-42
Valve PV-908 including
one UniNet cable
1
A
18-1108-41
pH electrode, round tip, including
flow cell and holder
1
C
18-1134-84
pH electrode, round tip
1
C
18-1111-26
pH flow cell, round tip, including
dummy electrode
1
A
18-1112-92
Dummy electrode, round tip
1
A
18-1111-03
Pump P-960 kit, including Pump P-960,
UniNet cable 0.7 m
holders for ÄKTAexplorer™,
ÄKTApurifier™, ÄKTAbasic, and
ÄKTAFPLC™, flow restrictor, purge
kit, unions, connectors and tubing
1
A
18-6727-00
Sample valve kit, including
Valve PV-908, UniNet cable 0.7 m
unions, connectors and tubing
1
A
18-1175-86
1
1
1
A
A
A
18-1121-23
18-1121-24
18-1175-84
1
A
18-1174-16
Air- 900 control box including
pump tubing and one UniNet 2
cable
1
A
Purge valve
1
A
Valves
pH measurement
Pump P-960
Air sensor
Air sensors
Air-912 (1.2 mm)
Air-925 (2.5 mm)
Air sensor A-912N kit including
air sensor, holder for ÄKTAexplorer,
connectors and tubing
Air-925N
112
18-1121-22
18-1126-33
ÄKTAFPLC Optional Configurations User Manual 18-1174-46 Edition AA
18117446AA_FPLC_OPTCONF.book Page 113 Wednesday, July 2, 2003 7:58 PM
19
Accessories and consumables
Item
Quantity/
pack
A/C*
Code no.
1
A
18-1148-62
Superloop 10 ml, complete
1
A
18-1113-81
Superloop 50 ml, complete
1
A
18-1113-82
Tubing kit for Superloop (10 ml)
1
A
18-1113-83
Tubing kit for Superloop (50 ml)
1
A
18-1113-84
1
A
18-1023-85
AD-900
AD-900 Analog/Digital converter
Superloops
Superloop 10 ml, 50 ml
Superloop 150 ml
Superloop 150 ml, complete
Tubing
PEEK, blue, i.d. 0.25 mm, o.d. 1/16”
2m
18-1120-95
PEEK, orange, i.d. 0.50 mm, o.d. 1/16”
2m
18-1113-68
PEEK, green, i.d. 0.75 mm, o.d. 1/16”
2m
18-1112-53
PEEK, brown, i.d. 1.0 mm, o.d. 1/16”
2m
18-1115-83
Teflon, i.d. 1.6 mm, o.d. 1/8”
3m
18-1121-16
Teflon, i.d. 2.9 mm, o.d. 3/16”
3m
18-1112-47
Tefzel, i.d. 0.25 mm, o.d. 1/16”
2m
18-1121-36
Tefzel, i.d. 0.50 mm, o.d. 1/16”
2m
18-1120-96
Tefzel, i.d. 0.75 mm, o.d. 1/16”
2m
18-1119-74
Tefzel, i.d. 1.0 mm, o.d. 1/16”
3m
18-1142-38
Miscellaneous
Extra rack panel, ÄKTAFPLC
1
A
18-1128-64
Communication cable P-920–P-50
1
A
18-1129-60
*) A = accessory, C = consumable
ÄKTAFPLC Optional Configurations User Manual 18-1174-46 Edition AA
113
18117446AA_FPLC_OPTCONF.book Page 114 Wednesday, July 2, 2003 7:58 PM
19
114
Accessories and consumables
ÄKTAFPLC Optional Configurations User Manual 18-1174-46 Edition AA
18117446AA_FPLC_OPTCONF.book Page 115 Wednesday, July 2, 2003 7:58 PM
IX
Index
Symbols
µl pick-up
............................................................................................. 33
A
A-900
checking the needle height ............................................................ 41
electrical connections ..................................................................... 36
features ......................................................................................... 12
injection methods ........................................................................... 33
installation ..................................................................................... 35
main fuses ..................................................................................... 37
operation ....................................................................................... 42
purging the syringe ........................................................................ 40
site requirement ............................................................................. 35
unpacking ...................................................................................... 35
A-905
checking the needle height ............................................................ 52
electrical connections ..................................................................... 48
features ......................................................................................... 12
injection methods ........................................................................... 53
installation ..................................................................................... 47
main fuses ..................................................................................... 49
operation ....................................................................................... 53
purging the syringe ........................................................................ 52
site requirement ............................................................................. 47
unpacking ...................................................................................... 47
AD-900
accessories .................................................................................. 113
description ..................................................................................... 99
features ......................................................................................... 14
installation ..................................................................................... 99
preparing for operation ................................................................. 100
using for monitoring a UV signal ................................................... 100
air sensors
Air-912 .......................................................................................... 14
Air-912N ........................................................................................ 14
Air-925 .......................................................................................... 14
capillary connectors ....................................................................... 91
description ..................................................................................... 87
features ......................................................................................... 14
installation ..................................................................................... 88
preparing a method ........................................................................ 95
preparing for operation ................................................................... 92
sensitivity ....................................................................................... 92
ÄKTAFPLC Optional Configurations User Manual 18-1174-46 Edition AA
115
18117446AA_FPLC_OPTCONF.book Page 116 Wednesday, July 2, 2003 7:58 PM
IX
Index
setting up instructions for function ................................................. 94
testing ........................................................................................... 93
Air-900
accessories .................................................................................. 112
control box .................................................................................... 88
Air-912N
using in the sample inlet flowpath .................................................. 90
Air-925
using in the system pump inlet flowpath ......................................... 89
Autosampler A-900
accessories .................................................................................. 111
Autosampler A-905
accessories .................................................................................. 111
auxiliary equipment
installation ..................................................................................... 96
preparing for operation .................................................................. 97
signal handling setup ..................................................................... 97
B
buffer selection function
using in a run ................................................................................ 59
buffer selection valves
installation ..................................................................................... 58
preparing for operation .................................................................. 59
C
calculate the delay volume .................................................................. 104
capillary connections
A-900 ............................................................................................ 38
A-905 ............................................................................................ 50
checking the needle height
A-900 ............................................................................................ 41
A-905 ............................................................................................ 52
column selection valves
installation ..................................................................................... 56
operation ....................................................................................... 57
component and capillary volumes ....................................................... 105
component list ...................................................................................... 21
cooling (A-900) ..................................................................................... 34
cooling parameters ............................................................................... 42
D
delay volumes ..................................................................................... 104
direct loading onto column
preparing a method ....................................................................... 81
E
electrical connections
116
ÄKTAFPLC Optional Configurations User Manual 18-1174-46 Edition AA
18117446AA_FPLC_OPTCONF.book Page 117 Wednesday, July 2, 2003 7:58 PM
IX
Index
A-900 ............................................................................................ 36
A-905 ............................................................................................ 48
extra rack panel .................................................................................... 15
F
filling a sample loop
preparing a method ........................................................................ 75
flow path
A-900 ............................................................................................ 38
A-905 ............................................................................................ 50
Flowrestrictor FR-902 ............................................................................ 69
flushed loop ................................................................................. 33, 53
Frac-901
accessories .................................................................................. 110
features ......................................................................................... 11
installation ..................................................................................... 23
operation ....................................................................................... 25
using in a method .......................................................................... 26
Frac-950
accessories .................................................................................. 110
features ......................................................................................... 12
installation ..................................................................................... 28
operation ....................................................................................... 29
optional components and consumables ........................................ 110
prep mode ..................................................................................... 27
standard mode ............................................................................... 27
upgrading from Frac-901 ............................................................... 28
using in a method .......................................................................... 31
fractionation order (Frac-950) ................................................................ 27
fractionation principles and definitions
fixed volume fractionation (Frac-901) ............................................. 25
fixed volume fractionation (Frac-950) ............................................. 30
Frac-901 ........................................................................................ 25
Frac-950 ........................................................................................ 29
peak fractionation (Frac-901) ......................................................... 25
peak fractionation (Frac-950) ......................................................... 30
G
general function valve
installation ..................................................................................... 60
preparing for operation ................................................................... 61
using in a run ................................................................................. 61
I
ID code
valves ............................................................................................ 19
injection flushed .................................................................................... 42
injection methods
ÄKTAFPLC Optional Configurations User Manual 18-1174-46 Edition AA
117
18117446AA_FPLC_OPTCONF.book Page 118 Wednesday, July 2, 2003 7:58 PM
IX
Index
A-900 ............................................................................................ 33
A-905 ............................................................................................ 53
injection partial ..................................................................................... 42
injection pick-up .......................................................................... 42, 53
installation
general guidelines .......................................................................... 18
Installing Pump P-960 .......................................................................... 68
installing the sample valve ..................................................................... 68
INV-907
accessories .................................................................................. 112
IV-908
accessories .................................................................................. 112
features ......................................................................................... 13
M
main fuses
A-900 ............................................................................................ 37
A-905 ............................................................................................ 49
Method Wizard overview ..................................................................... 107
mounting rails ....................................................................................... 18
O
overview
components instruction ................................................................. 20
optional configurations ................................................................... 11
P
P-900
REMOTE connection ...................................................................... 14
P-960
accessories .................................................................................. 112
description .................................................................................... 66
features ......................................................................................... 13
installing ........................................................................................ 68
partial loopfill ............................................................................... 33, 53
pH electrode
installation ..................................................................................... 63
mounting ....................................................................................... 63
operation ....................................................................................... 65
pH flow cell
installation ..................................................................................... 63
mounting ....................................................................................... 63
pH measurement
accessories and consumables ...................................................... 112
pre-requisites ........................................................................................ 17
purging the syringe (A-900) .................................................................. 40
purging the syringe (A-905) .................................................................. 52
PV-908
118
ÄKTAFPLC Optional Configurations User Manual 18-1174-46 Edition AA
18117446AA_FPLC_OPTCONF.book Page 119 Wednesday, July 2, 2003 7:58 PM
IX
Index
accessories .................................................................................. 112
features ......................................................................................... 13
R
reversed flow configuration
.................................................................... 60
S
sample injection techniques .................................................................. 42
InjectionFlushed ............................................................................ 43
InjectionPartial ............................................................................... 43
InjectionPick-up ............................................................................. 44
sample loop
emptying ........................................................................................ 75
flow rate ......................................................................................... 70
loading ........................................................................................... 70
sample pump
connecting the capillaries ............................................................... 82
features ......................................................................................... 13
Sample pump P-960 kit ........................................................................ 67
sample valve
installing ........................................................................................ 68
snap-in bracket ..................................................................................... 18
strategies overview .............................................................................. 106
Superloop
accessories .................................................................................. 113
connect ....................................................................................... 102
description ................................................................................... 102
features ......................................................................................... 14
filling ............................................................................................ 103
loading ........................................................................................... 82
preparing a method for loading ....................................................... 86
T
termination plug
.................................................................................... 20
U
UniNet-1 ...............................................................................................
A-900 installation .................................................................. 36,
Frac 901 installation .......................................................................
Frac-950 installation ......................................................................
UniNet-2 ...............................................................................................
Air-900 ..........................................................................................
buffer selection valve ......................................................................
column selection valve ...................................................................
general function valve ....................................................................
sample pump and sample valve .....................................................
sample pump and sample valve installation ....................................
ÄKTAFPLC Optional Configurations User Manual 18-1174-46 Edition AA
19
48
24
28
19
89
58
57
60
68
68
119
18117446AA_FPLC_OPTCONF.book Page 120 Wednesday, July 2, 2003 7:58 PM
IX
Index
V
Valve INV-907
accessories .................................................................................. 112
valves
features ......................................................................................... 13
function ......................................................................................... 19
instruction in UNICORN ................................................................. 19
120
ÄKTAFPLC Optional Configurations User Manual 18-1174-46 Edition AA
18117446AA_FPLC_OPTCONF.book Page 121 Wednesday, July 2, 2003 7:58 PM
18117446AA_FPLC_OPTCONF.book Page 122 Wednesday, July 2, 2003 7:58 PM
Short instructions
The following short instructions are checklists for
users who are fully familiar with the safety
precautions and operating instructions described in
this manual. The instructions assume that optional
equipment is installed according to the installation
instructions.
1
Wash the ÄKTAdesign flow path with distilled
water.
Reverting to standard configuration
1
Flush ÄKTAdesign with distilled water.
2
Disconnect the system in System Control.
3
Switch off ÄKTAdesign.
4
Disconnect equipment to be removed from
the UniNet chain and reconnect the UniNet
chain for the standard configuration.
5
Remove capillaries and reconnect the system
flow path to the standard configuration.
2
Switch off ÄKTAdesign.
3
Prepare the component(s).
4
Attach the components to ÄKTAdesign.
5
Prepare the necessary capillaries and
connectors.
6
Mount the capillaries and connectors.
7
Connect the components to the UniNet chain
and if required to the mains power supply.
6
Check all connections.
7
Start up ÄKTAdesign.
8
Check all connections.
8
9
Start up ÄKTAdesign.
Select a method supporting the
standard configuration.
10
Select the component(s) in System Setup.
9
Set up parameters to suit your needs.
11
Test the function of the optional equipment
manually.
10
12
Create a new method with the Method Wizard
and make the appropriate selections to support
the optional configuration.
Perform a test run with distilled water to
verify the standard configuration in the
selected method.
If the component is not supported by the
Method Wizard, insert the required instructions
in their proper positions in a new or modified
method.
13
Set up parameters to suit your needs.
14
Perform a test run with distilled water to
verify the optional configuration in the new
or modified method.
15
Correct any faults and store the method.
TC information ab, Uppsala. Printed in Sweden by TK i Uppsala AB
Converting to optional configurations